Late summer update

toms.JPG

August is almost over! Baking continues now and again, tucked in amongst hosting out-of-state family visitors, hot/humid weather, household and outdoor projects and the occasional country drive to feel the wind in our hair. Through it all I always circle back to the kitchen and thought I’d share a few of the treats I’ve made of late.

This time of year the likes of peaches, blueberries, tart cherries, tomatoes and sweet corn enter into my baking projects.

Thinking of tarts? Grab your favorite pâte brisée, create your filling and go for it!

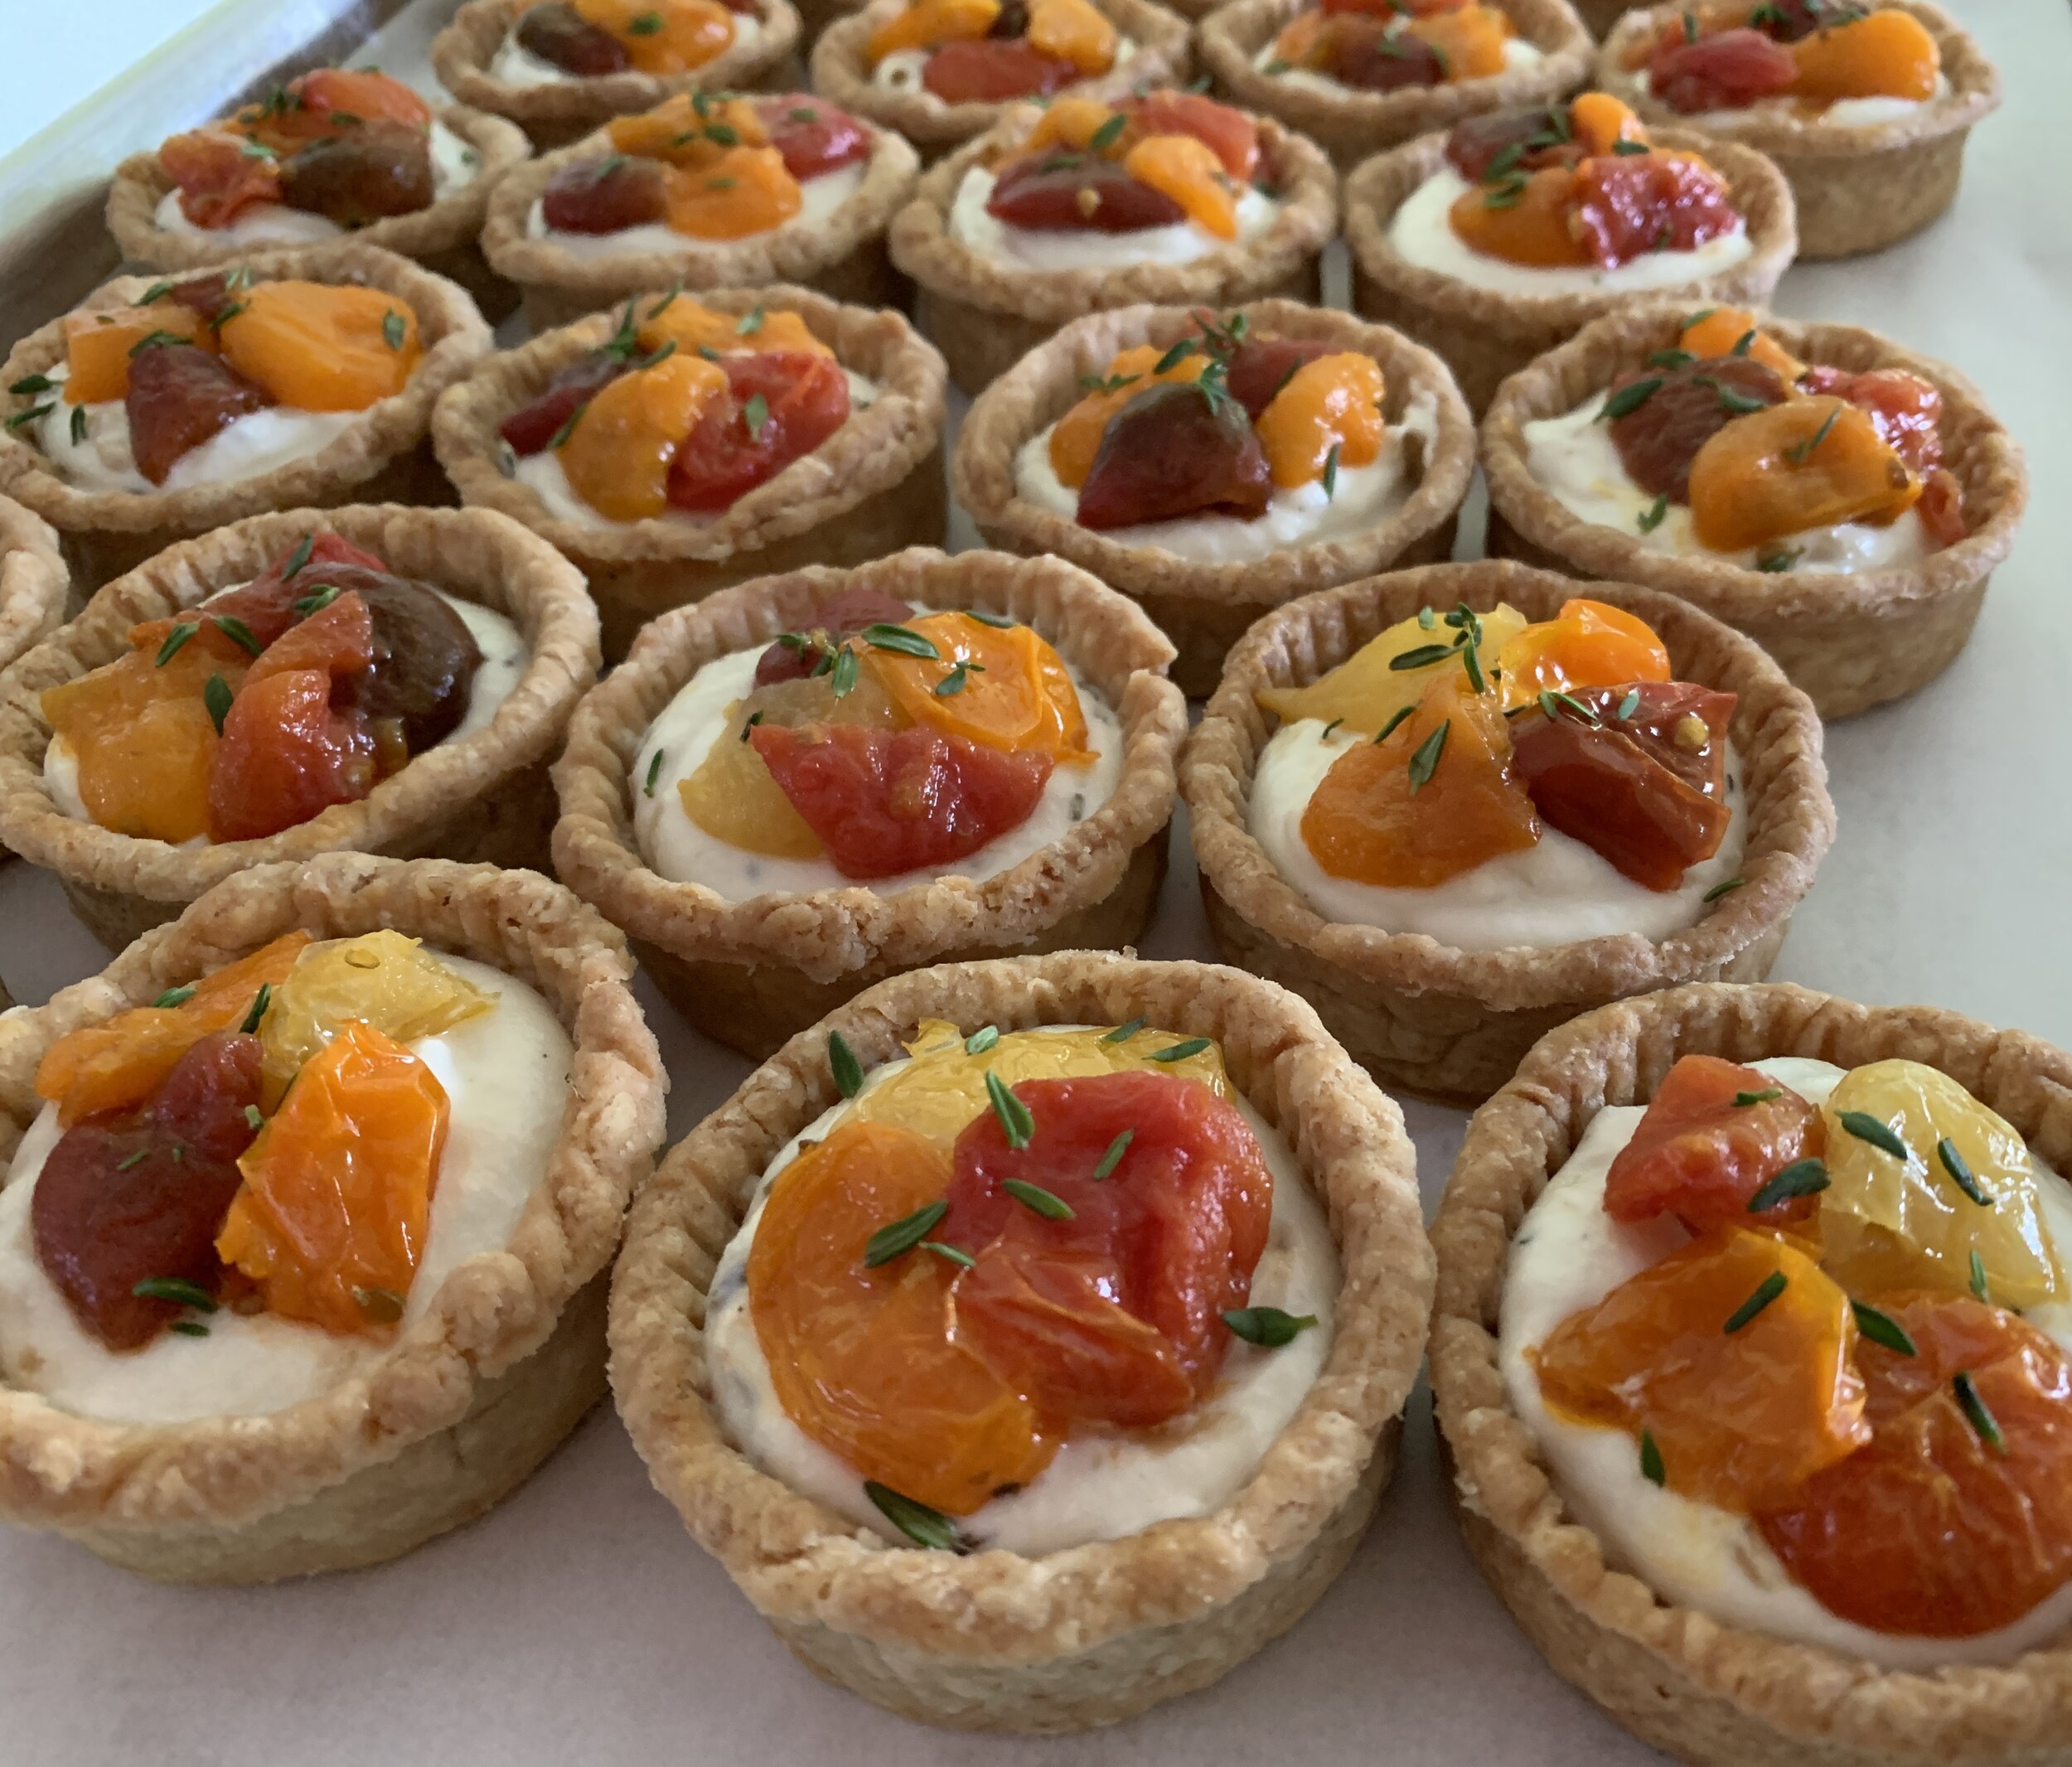
For a savory treat, blind bake the crust, let cool, fill with a whipped goat cheese/ricotta filling and top with roasted tomatoes and fresh thyme. I think you’ll like it.

Roasted tomato goat cheese tartelettes

Roasted tomato goat cheese tartelettes

Blue, blue, blueberries!! These are individual versions of the double blueberry tart I wrote about here. I tweaked my pâte brisée by replacing some of the all purpose flour with whole wheat pastry/spelt/rye flours which resulted in a delectable crust that seemed so right with the blueberries. Love it.

Fresh blueberry tartelettes

Fresh blueberry tartelettes

On another tart note, how about fresh raspberry tarts - pâte sucrée d’amandes with frangipane (blend of crème pâtissiére and crème d/amande) baked in, topped with fresh raspberries and finished off with raspberry coulis glaze - delicious!

0AA7B2F6-7CDF-4DE8-9EDC-DD867161A2AE_1_201_a.jpeg

Back to the savory side, here’s pizza topped with local fresh corn, tomatoes, broccoli, cauliflower and our go to favorite grated fontina cheese (soooo much better than traditional mozzarella in our book). Thanks Cheese Lady! TIP - pop the cheese into the freezer for 30-40 minutes then grate - it’s much easier.

0C3A3125-8F31-4850-BDEF-30AE95CF1D1C_1_201_a.jpeg

Here are individual cherry puff feuilletées, a twist (hah!) on the free form cherry tart using the same components (puff pastry and tart cherry filling) but in a different form.

Tart cherry feuilletées

Tart cherry feuilletées

My go to favorite cakes of late, based on a financier like recipe (no brown butter here) - these are blueberry lime with roasted strawberry Swiss meringue buttercream - both petite and standard versions. Change up the flavors to reflect the seasons. Mmmmm!

Petite

Petite

Standard

Standard

While these have nothing to do with fresh summer produce, you should know by now that I have to include some of my favorite laminated pastries.

Classic butter croissants can’t be beat. Pay close attention to the steps, how you handle the dough, the resting and rising times. They’re all so important in achieving the lovely airy center with crispy exterior.

0C8EC535-4E36-42BE-AB7C-6D726607D3BC.jpeg
EDB2D40A-5745-432E-97E9-D9EEAF6F0CA6_1_201_a.jpeg

Next up - maple glazed cinnamon buns made with laminated Danish dough. I’ve done versions of this sort of thing many times, yet some treats simply bear repeating (just like the croissants!).

I made the laminated dough this go around by adding 120 g butter to the dough and using 180 g for my butter block. Putting the dough through one 4-fold and one 3-fold yielded some lovely layers.

For the filling (I’m always tweaking the mixture) blend 100 g dark brown sugar, 2 tablespoons maple syrup, 42 g melted butter, 3 tablespoons flour, 4 teaspoons cinnamon (I use King Arthur’s Vietnamese version), a pinch of salt and a splash of vanilla extract. Feel free to go up to 2 tablespoons cinnamon to amp up the flavor.

Roll the finished dough into a 10” x 17”-ish rectangle with the long side parallel to the work surface. Spread the filling evenly and roll up into a log. Trim ends a tad, cut 16 one inch slices and place cut sides up/down into buttered muffin tins or open rings.

I have some 80 mm one inch high open tart rings that I love for this type of pastry. They hold the dough just right to allow for rising and preserving a pleasing round bun shape in the oven.

Bake about 18 minutes at 350ºF. Mix 3 tablespoons maple syrup with 3/4 cup confectioner’s sugar and thin with a bit of cream or milk to your desired consistency. I prefer thinner for a not too heavy coating.

Scrumptious, tender and buttery, lightly glazed - just what the doctor ordered!

EEE73D18-1EEF-4085-A779-F7A721EE1451.jpeg

Even though it’s HOT here right now, I can’t help but dream of apples, pears, nuts, pumpkins and more as the seasons continue to change.

Hang in there folks! We can do it. Here’s to a beautiful autumn.

apples.JPG

Canadian butter tart trials

Please note: when this post first published, the text mistakenly read the “left half of the pan was eliminated”. That has been corrected to “the right half”. Apologies!

7E720EA9-E600-4B82-8506-5CFE869FBB1B_1_201_a.jpeg

It’s so cool when I come across something new (for me) in the baking and pastry world and not long thereafter I receive a request to make just that very thing. The ever popular Canadian butter tart is one of those. It’s kismet!

75D12CD5-87C8-4AB1-97B9-53891244E0A0_1_201_a.jpeg

It turns out that a local Grand Rapidian has a Canadian friend who adores butter tarts, and she wanted to gift some to said friend for her birthday, a lovely gesture indeed. Being confident that I could deliver, I took to reviewing a number of recipes including one from NYT (the one I remembered reading not too long ago.)

For my money I’d call it a sugar tart since the filling and taste experience are indeed quite sweet (true confession - a bit over the top for me!).

As I reviewed the dough portion of a number of recipes, I found most of them contained whole egg or yolk in addition to the typical crust components of flour, butter and ice cold water. Some used a combo of lard and butter and some went with my preferred method - all butter.

I decided to follow the recipe from the NYT article and compare the dough with my standard pâte brisée (no egg). For the filling I made two versions of NYT’s and found another filling that spoke to me from the site Little Sweet Baker - less sugar and more butter plus a splash of cream - it’s a BUTTER tart after all!

Mine is certainly not a scientific study but simply my way of sharing my inaugural (and limited) experience with the butter tart world. The results are frankly hard to fully explain in terms of why a certain filling baked the best in a particular dough. Hmmm.
BCA2FDCE-D7CC-47AE-B473-E7B4997E938C.jpeg

I blind baked the two doughs by lining a standard muffin tin (3 wells for each dough), freezing it to firm up the dough, then lining with papers and using sugar in place of dried beans as my weight, a tip learned from Stella Parks of “Brave Tart” fame. While the sugar doesn’t toast for very long this way, you can still save the sugar and use it in your shortbread or tart dough recipes to give them a hint of toasty-ness.

Once the blind baked shells were cool, I lined the remaining empty wells, 3 with each dough and proceeded with the fillings.

When making the filling, it is suggested that one use very soft or melted/cooled butter and blend the filling by hand so as to avoid incorporating air into the mix, resulting in a final, enhanced gooey-ness. I chose to keep it simple, not adding nuts or raisins as some iterations do.

The full NYT recipe blends 200 grams brown sugar ( I used dark) with 1/2 teaspoon salt; blend in 57 g soft, unsalted butter by hand until smooth, followed by 1 large egg and a teaspoon vanilla (pretty easy, eh?). The second NYT version I made replaces the 200 g brown sugar with 150 g brown sugar and 1/4 cup maple syrup with the remaining ingredients the same (meant to result in a runnier filling that some reportedly prefer).

Little Sweet Baker’s filling blends 150 g brown sugar with 75 g melted and cooled butter; add in 1 large egg, I teaspoon vanilla and 1 tablespoon heavy cream. Again, easy-peasy.

For my testing purposes I used half recipes (for the egg, whisk up one egg then weigh out 25 g which is about half a large egg.)

05F8FDD1-B805-48C9-8C25-1618A97E8A27_1_201_a.jpeg

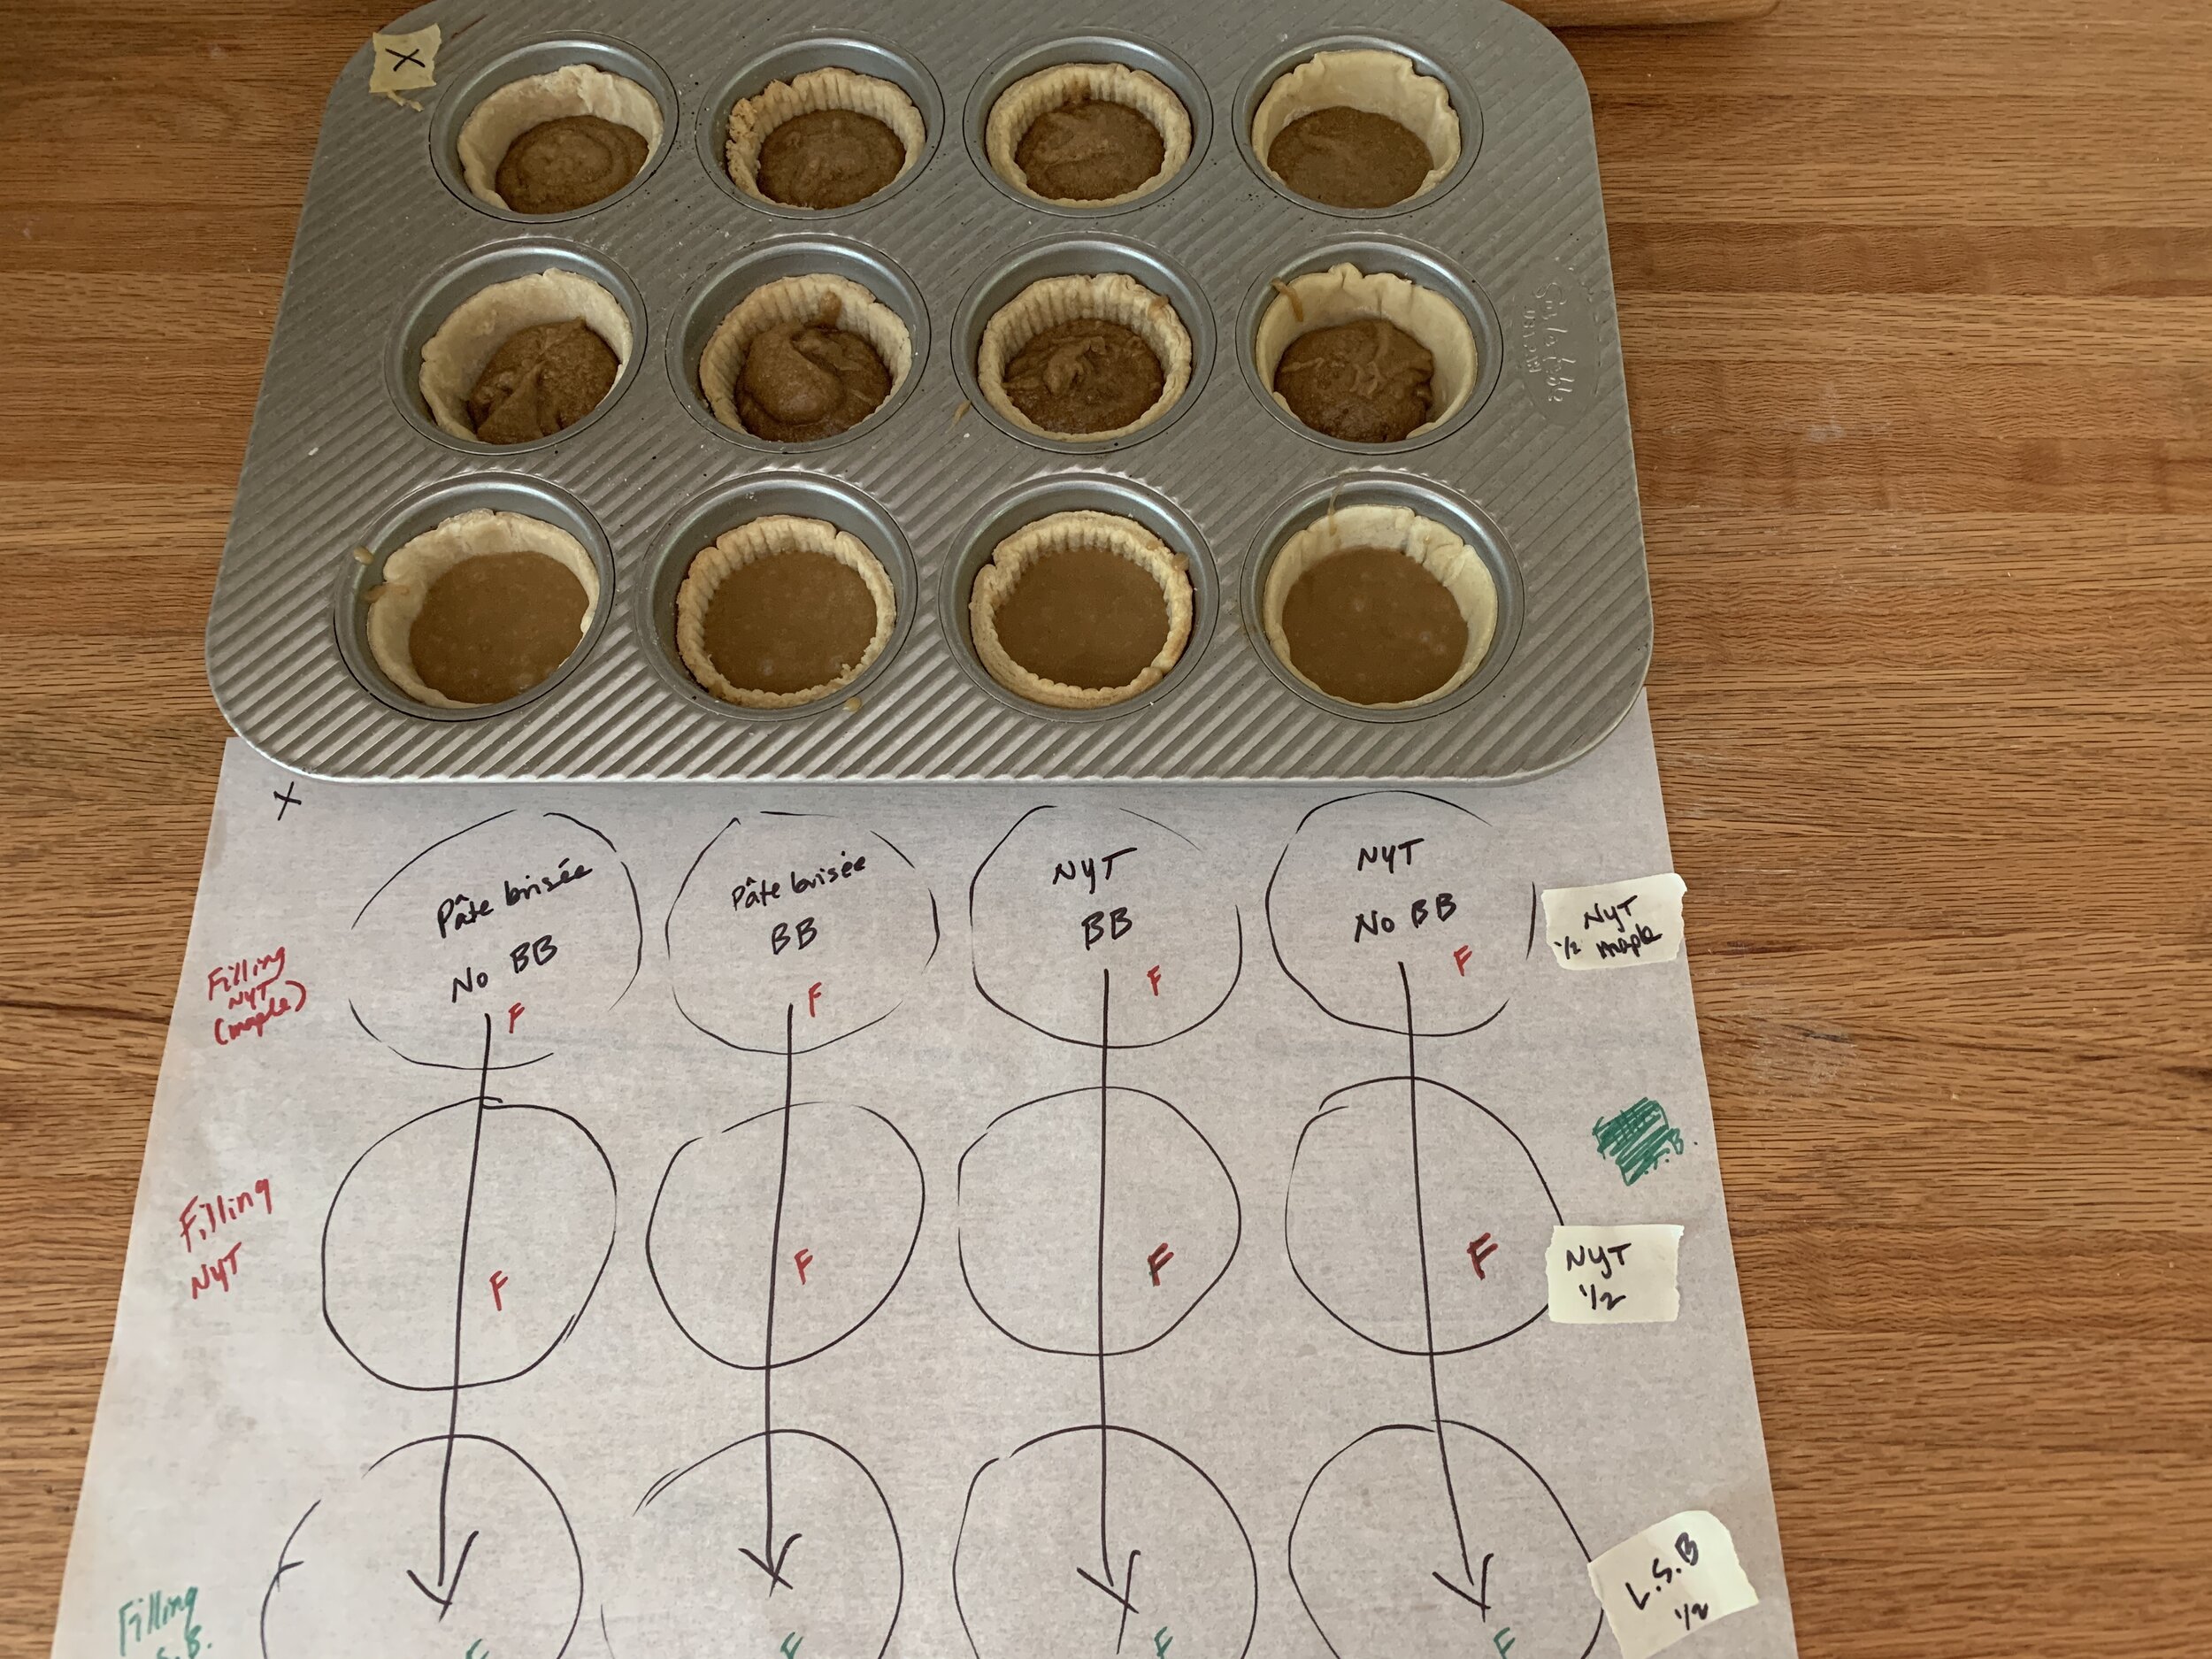
I guestimated about 28 g or so of filling for each tart and proceeded to dole the different fillings into the shells. Remember the central 6 wells are blind baked and the outer 6 are not.

B9F5ED14-AF96-49BA-AAE3-B23C5C2DEA8A.jpeg

Here they are, all filled up and ready to go.

129D2521-A69F-4682-8608-0983D39927B3_1_201_a.jpeg

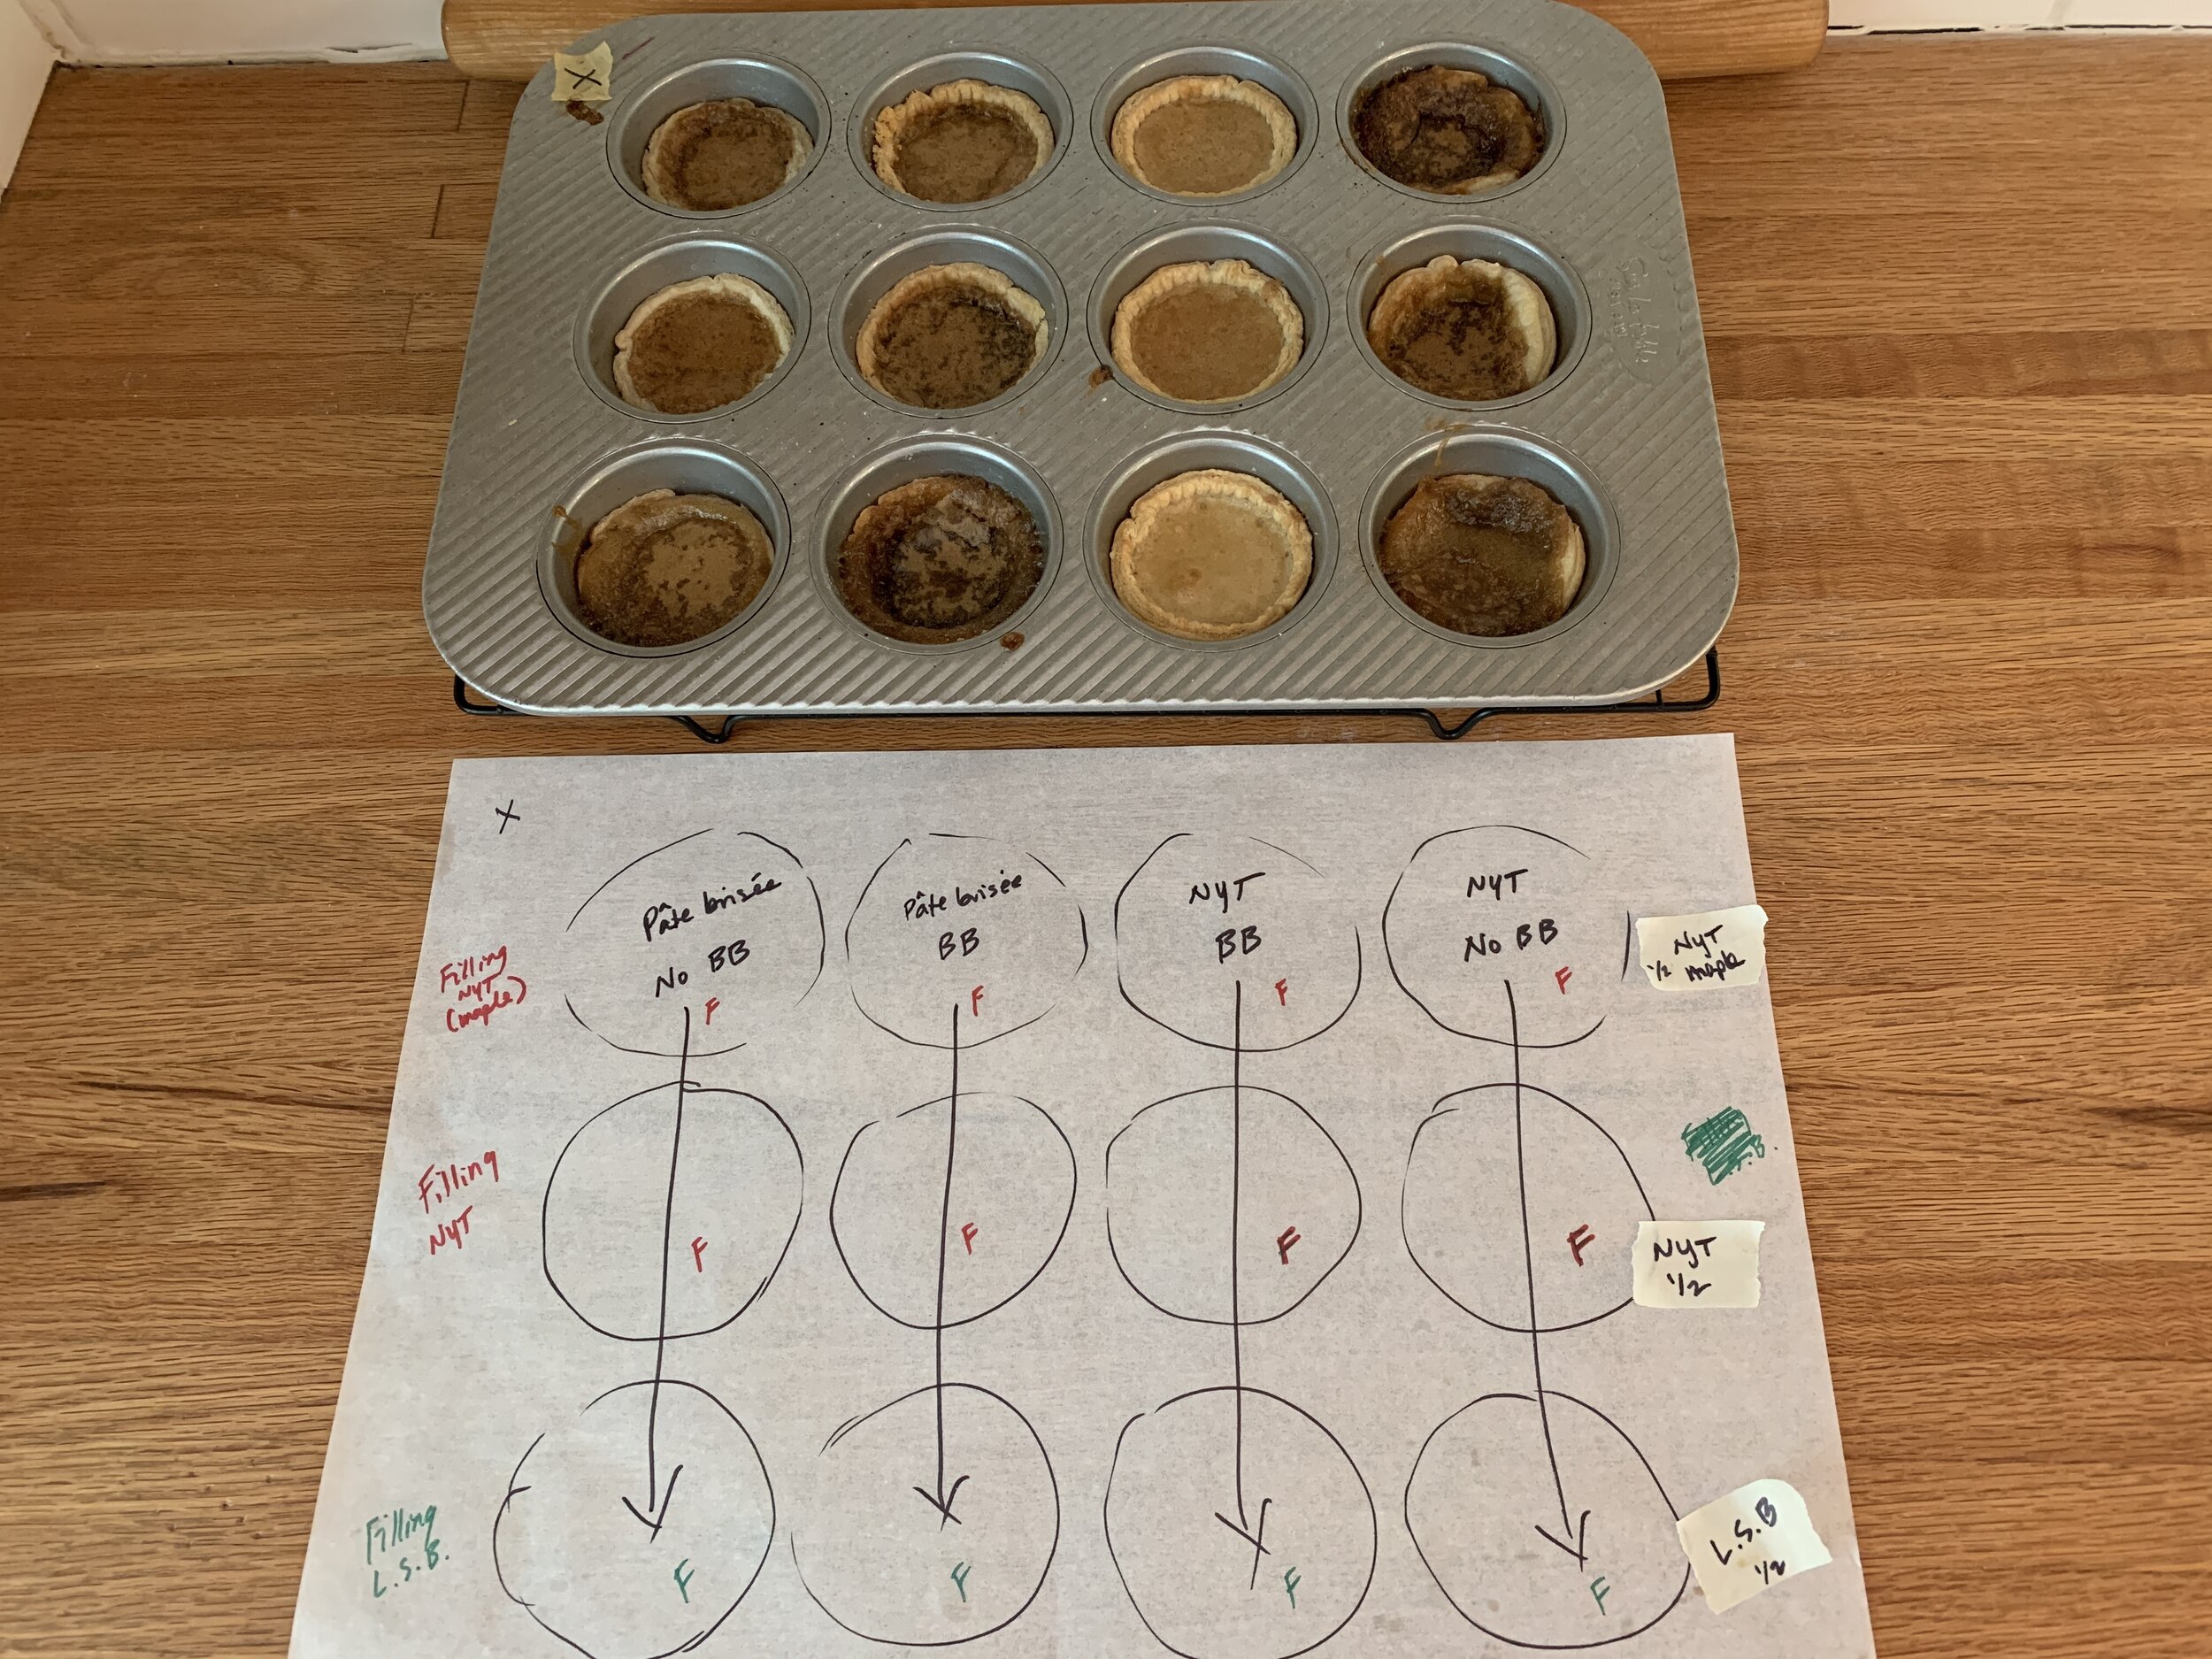
Bake at 400ºF for about 13-15 minutes for a gooier result or up it to 17-19 minutes for a firmer result. I went for the gooey time frame - you want the crust to be nicely browned and the filling looking set and deeper brown. What surprised me is the stark difference in the color of the third (from the left) column of tarts (the NYT blind baked ones) - much lighter golden vs the deep caramel-y brown of the others.

7E720EA9-E600-4B82-8506-5CFE869FBB1B_1_201_a.jpeg

Once baked, run a small offset spatula (my FAVE tool!) around the edges to loosen any sticky goo before it hardens. Then let them cool completely, lift them out of the tins and enjoy.

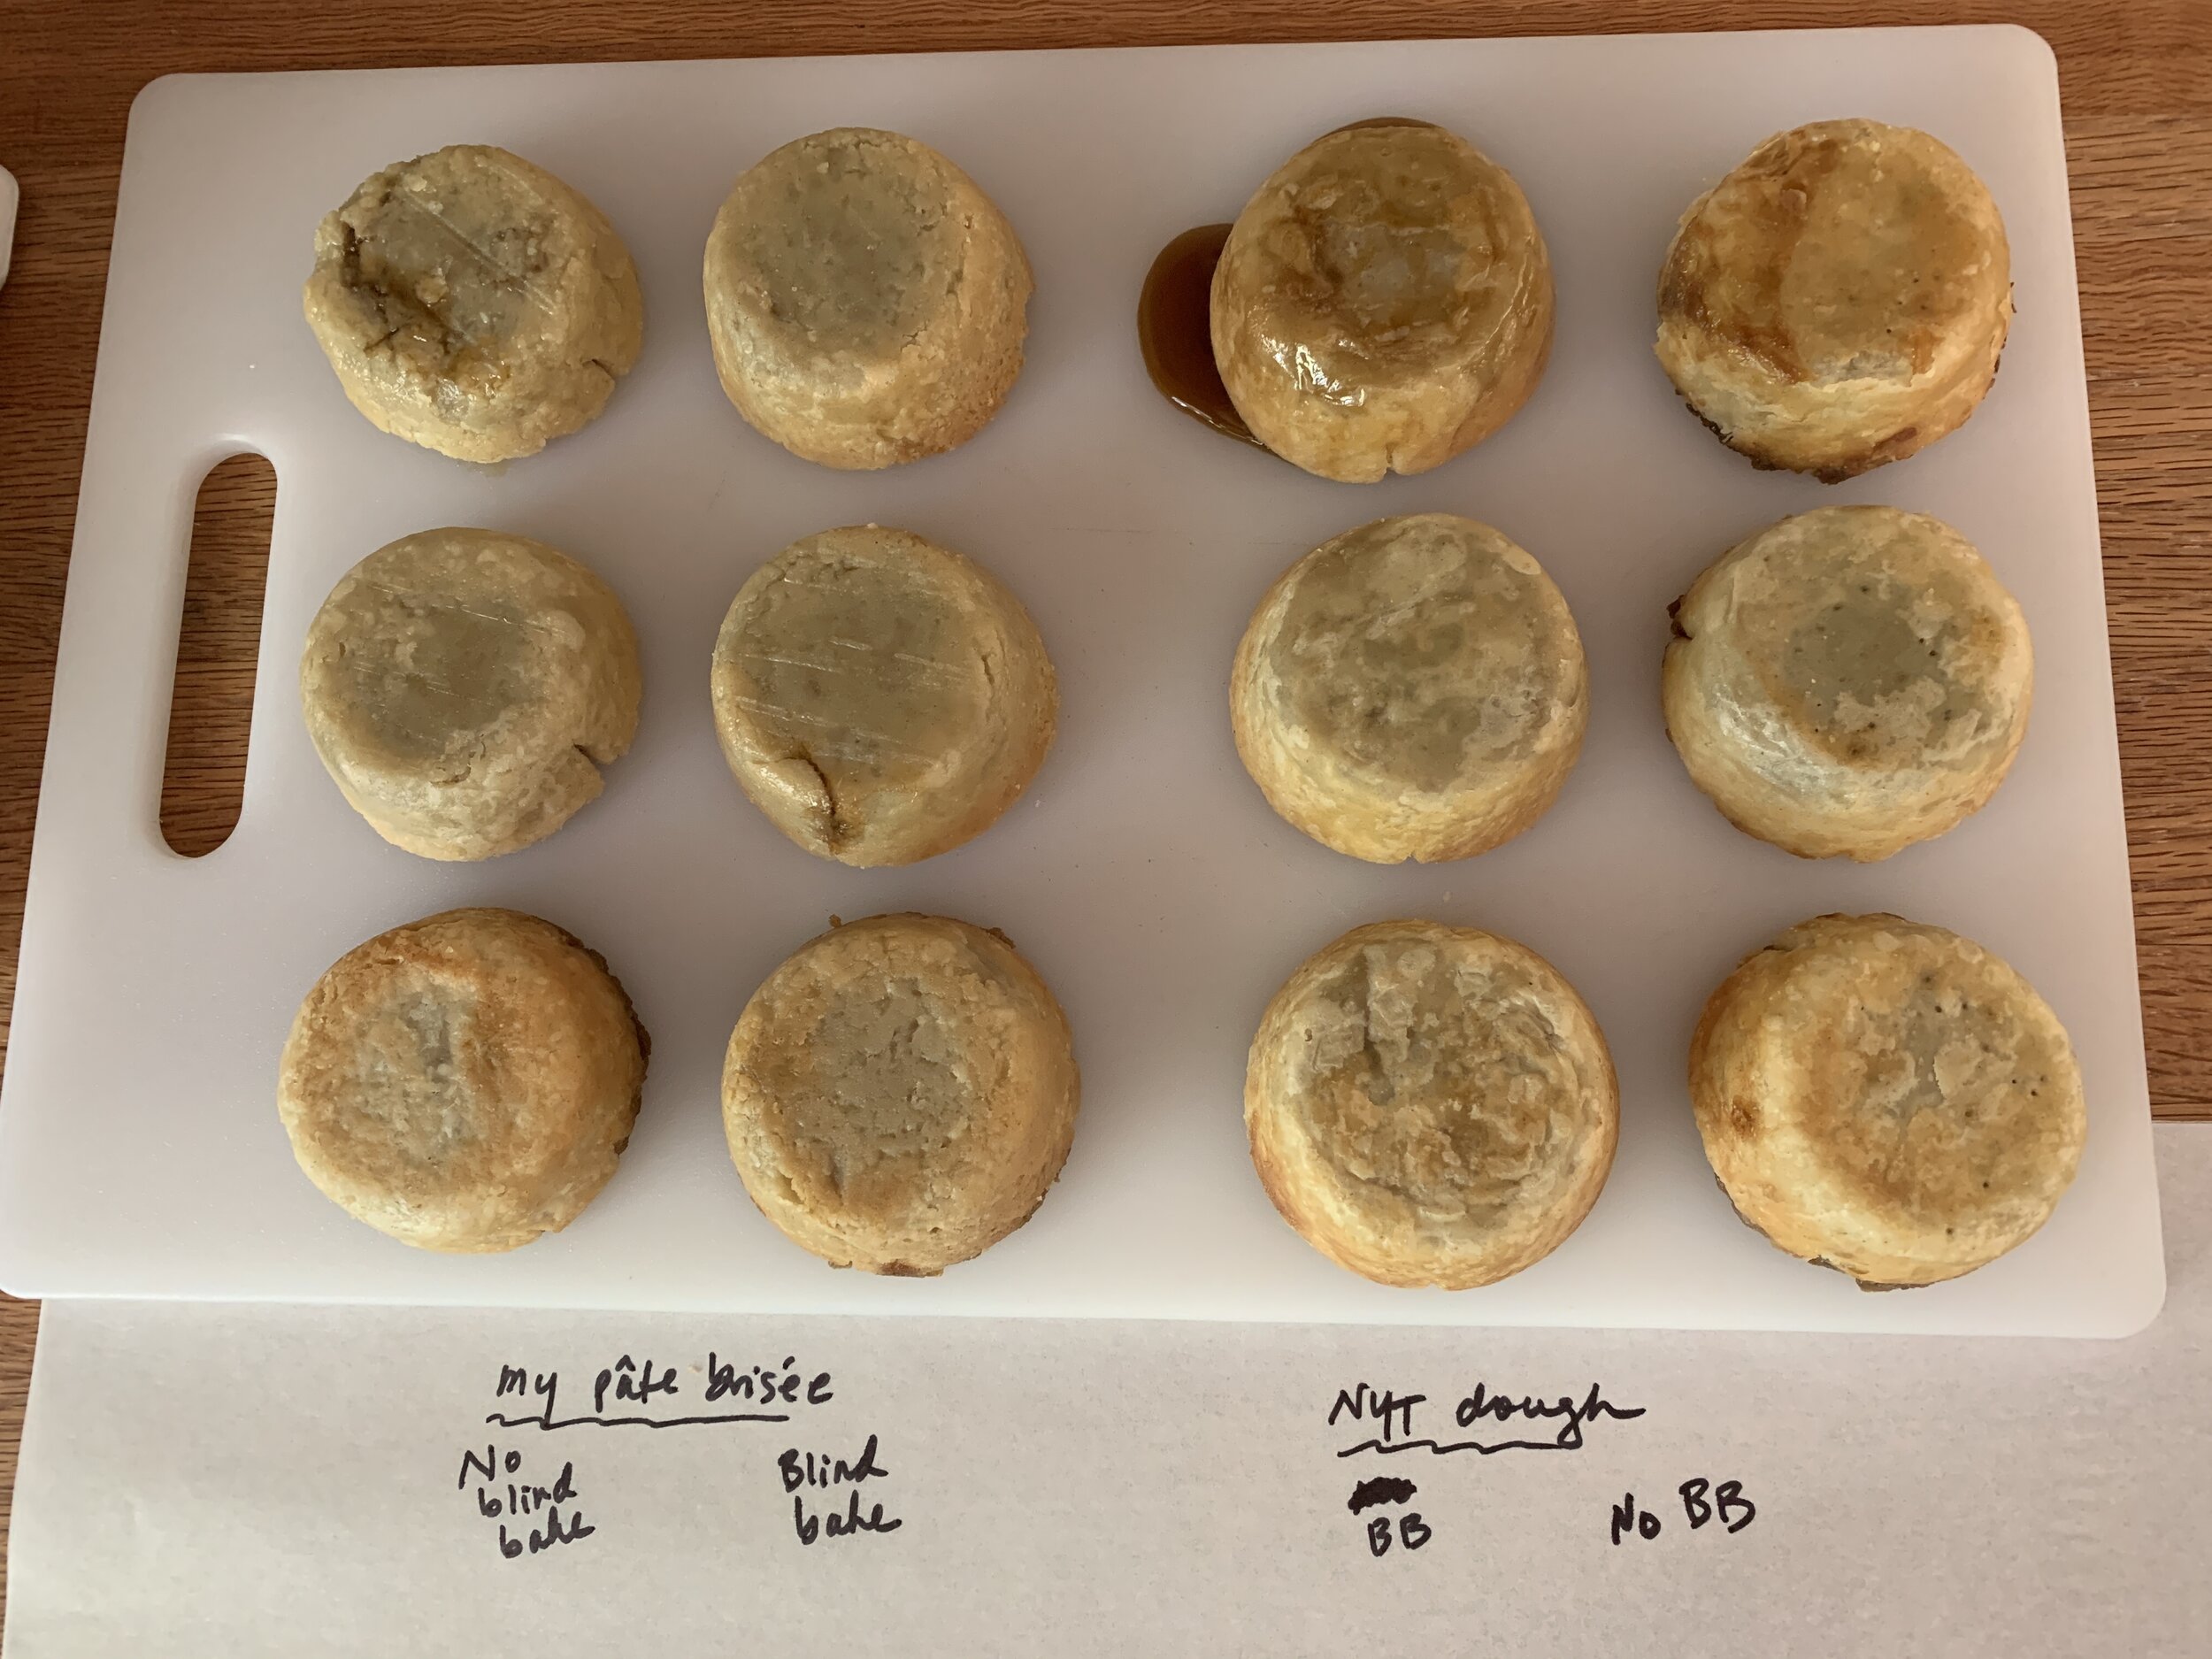
I turned them all out upside down (note the filling oozing out of the top, 3rd to the left tart) to assess the bottom crusts. I must say I’d be hard pressed to tell which were blind baked and which were not if I didn’t already know.

B84A839E-4F7F-4A4F-A429-E12A71FB5393_1_201_a.jpeg

Time to taste! Steve was a good sport for this one - we agreed that too many tastes became quite overwhelming with the sweetness of it all.

There was no rhyme nor reason to which fillings baked up runny and which gooey - you can see below that the NYT dough/blind baked threesome yielded a runny result for all three fillings. Go figure! Lucy I just can’t ‘splain it.

4082F727-347A-4D56-8C36-62E7E4175C95_1_201_a.jpeg

The NYT dough was unpleasant in the mouth - chewy and less flaky than good old pâte brisée - and the maple syrup filling was simply too runny. Due to those two things, the right half of the pan was eliminated.

Our final analysis: the pâte brisée plus Little Sweet Baker filling won the day, and it didn’t seem to matter at all whether the crust was blind baked first.

EA001655-E6C2-444E-8B93-8C5CA2AE515F_1_201_a.jpeg
257BA32C-31D0-41D7-99A5-4FB46E1C7D49_1_201_a.jpeg

For my final round of butter tart baking for the actual birthday order I used my classic pâte brisée, no blind baking needed. I upped the Little Sweet Baker filling recipe by 50% since I found the base recipe meant for 12 tarts to be meager. Of course, let’s remember I’d had no prior experience making these but it just felt right.

The final bake: 400ºF for 7 minutes; rotate the pan 180º and bake another 5 minutes; decrease to 375ºF and bake another 3 minutes. Since I had 12 of these for the order, I didn’t have an extra one to cut into but . . . . . imagine the end result looking like the close up above with a skosh more filling to enjoy. Sounds pretty darn good to me.

Et voilà! All boxed up and ready to go. And the feedback from the Canadian birthday girl: “a big hit”! Yippee!!

75D12CD5-87C8-4AB1-97B9-53891244E0A0_1_201_a.jpeg

Any tips or tricks of the trade from all of you butter tart aficionados are welcome!

Stay healthy everyone!!

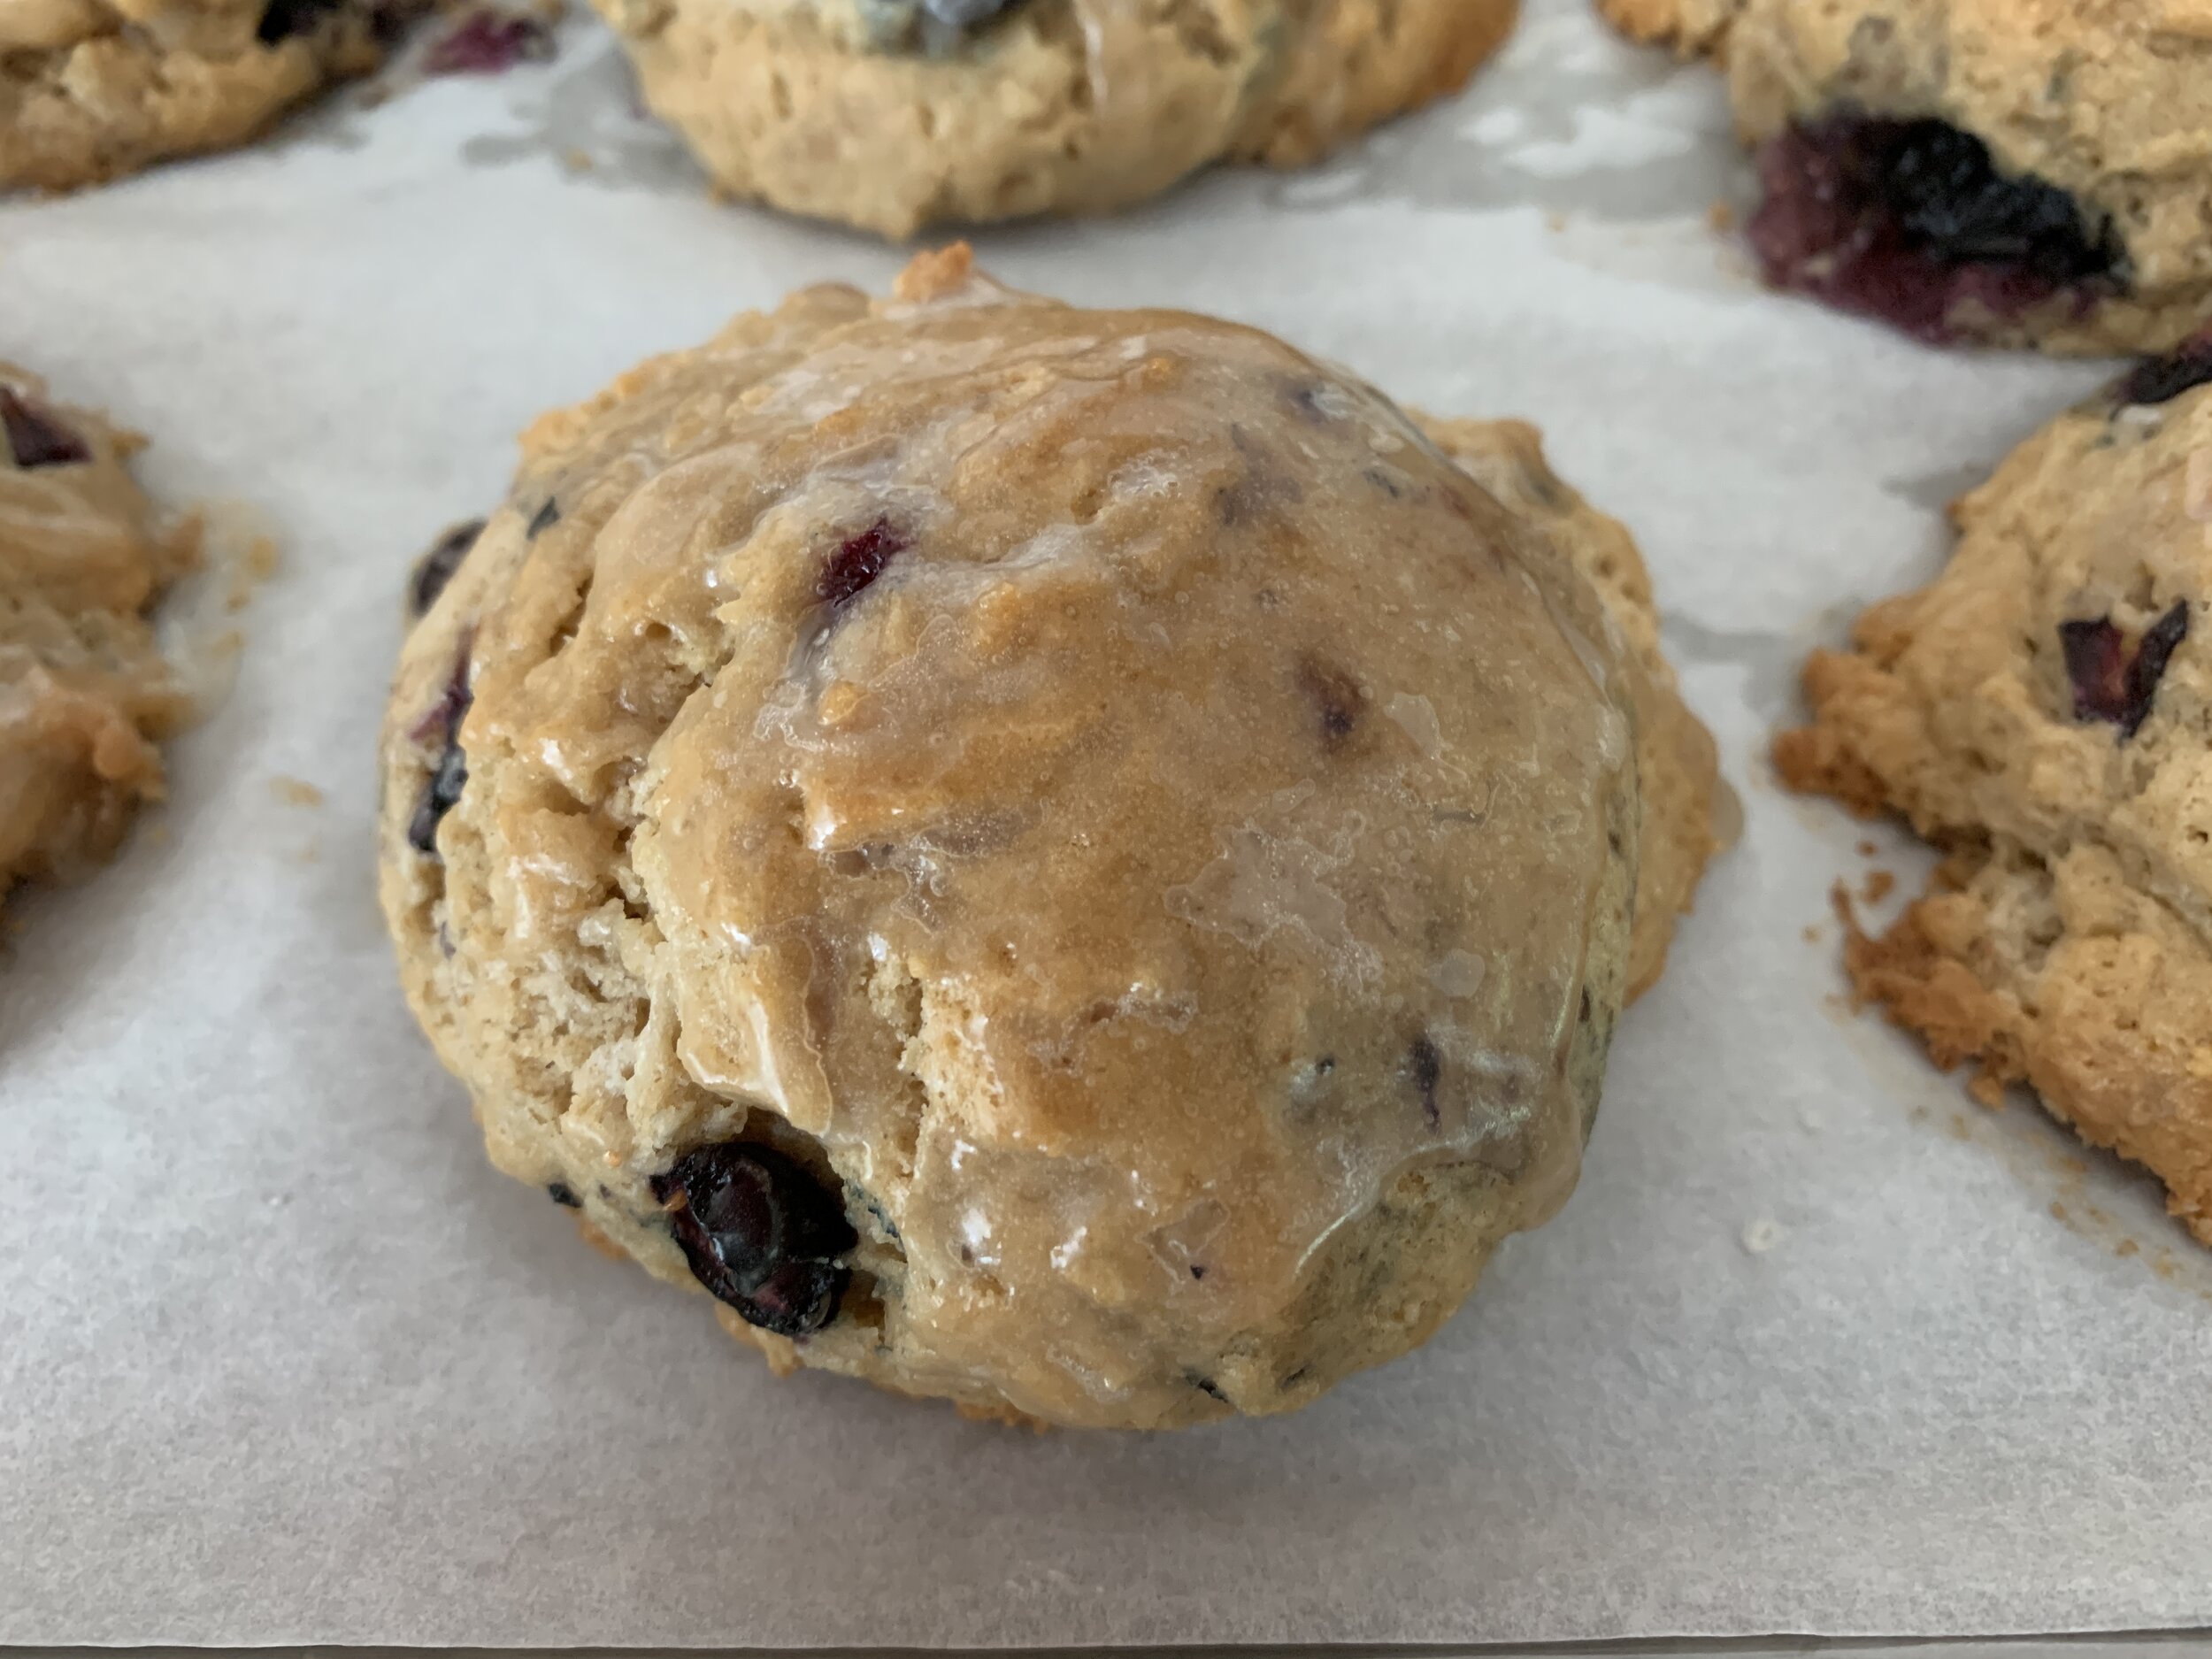
Maple glazed blueberry drop scones

IMG_1295.JPG

I originally included this blueberry drop scone review in my recent “Puttering in the kitchen in August” post but, after consideration and Steve’s helpful encouragement, I’ve broken it out into it’s own post. Enjoy my discoveries on these tasty treats!

IMG_1298.JPG

I’ve now made these scones THREE times since discovering Dorie Greenspan’s NYT article on Joanne Chang’s recipe. Print it out for your own to-do list!

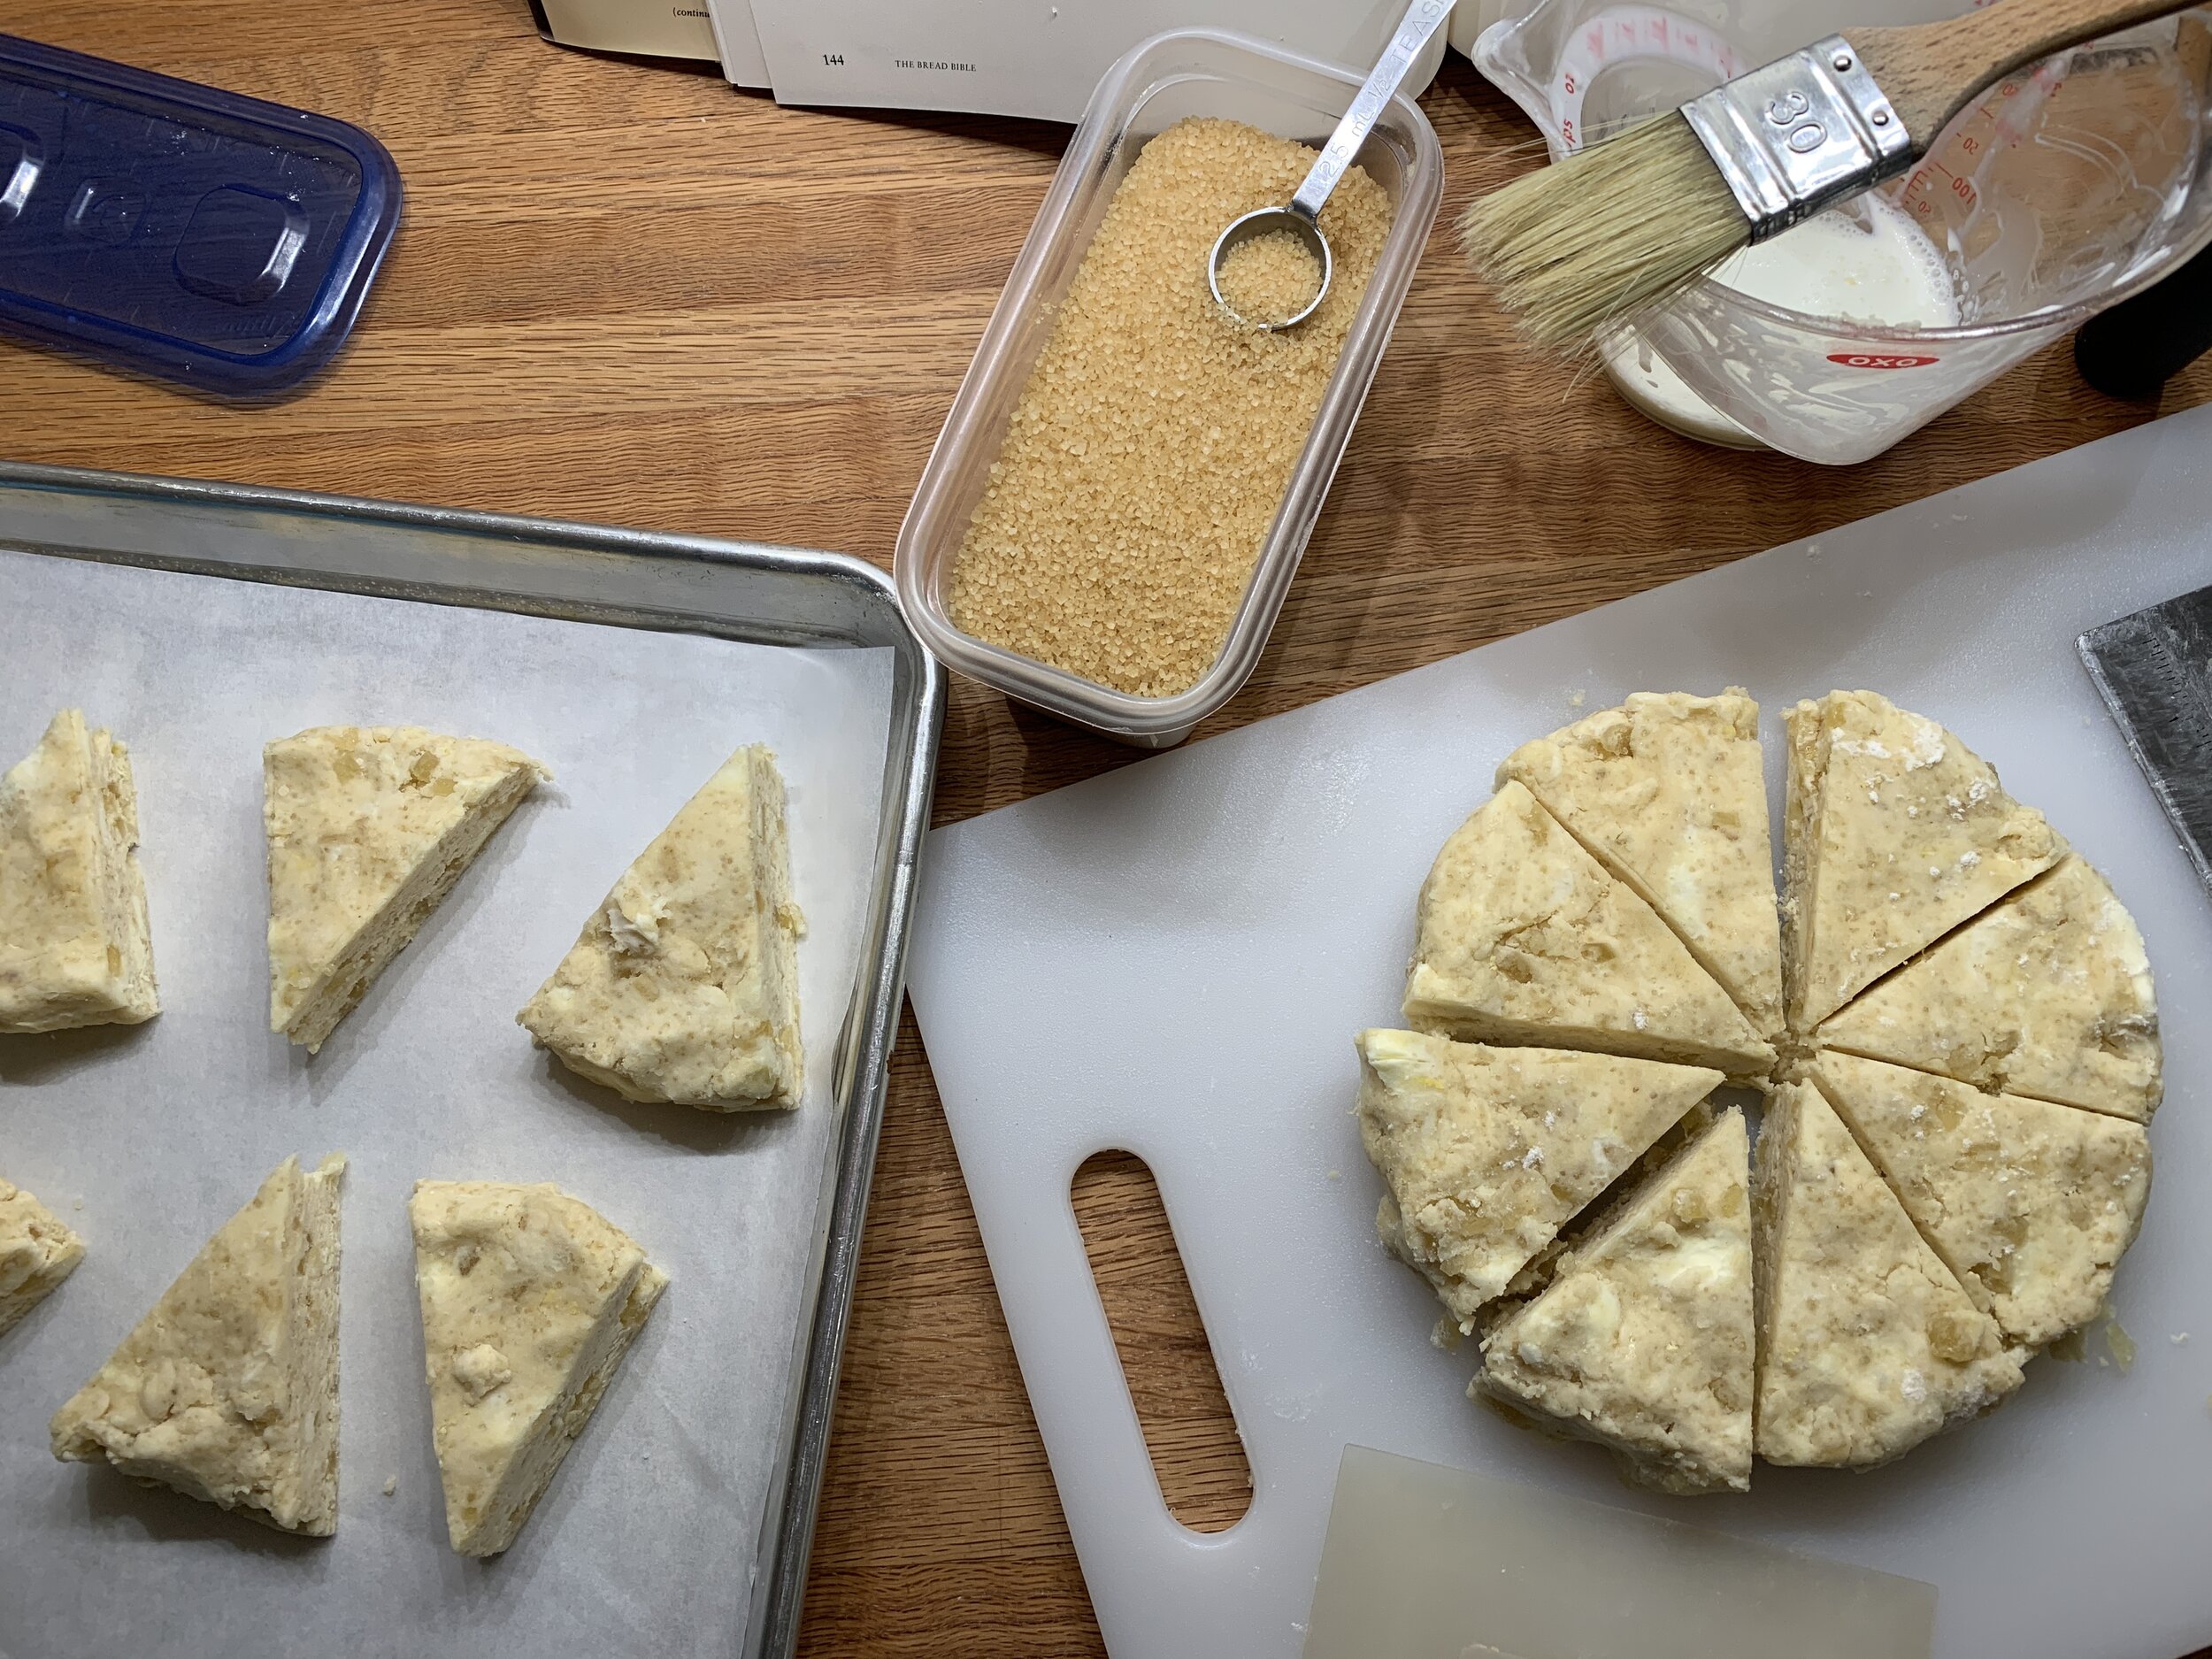
The term drop scones refers to scooping and dropping the balls of dough on the sheet pan as opposed to forming a dough round or rectangle and cutting more uniform triangle shapes for baking as seen below. Both work depending on your vision.

IMG_0881.JPG

Upon first taste test I found them delightful - just a hint of crispy to the outside and more cake like, tender and moist on the inside than my usual scones. The more I ate them, the more they grew on me.

I’m usually not big on cute-sy combo names like cruffins or cronuts, but for these the word “scuffins” definitely comes to mind - a term someone somewhere coined some years back - a cross between a scone and muffin. Oh well, call them what you’d like - they’re good no matter the label. Try them out yourself and see what you think.

IMG_1296.JPG

This recipe involves a slightly different mixing method than the one I’ve come to rely on over the years. Here’s what I discovered about the process (having the recipe on hand as you read through this is helpful). You need to plan ahead - the dough is wrapped and refrigerated for at least 1 and up to 24 hours to allow the flour to fully absorb the moisture before scooping and baking. While the recipe calls for 8 large scones, I made mine smaller using a generous 1/4 cup size scoop with a yield of 16-18 scones.

Chilled dough ready to scoop - check out those butter pieces!

Chilled dough ready to scoop - check out those butter pieces!

First batch: I pretty much followed Joanne’s recipe, using Vermont Creamery’s crème fraiche but since I didn’t have any buttermilk in the house I made the faux version by adding lemon juice to whole milk. I added the first half of the butter into the dry ingredients using the mixer with the paddle to break up the butter pieces (as she suggests), but when it came time to add the second half of the butter, I gave the mixer a rest and used my by-hand method of flaking the butter into the mix by literally flattening the butter pieces with my fingertips and leaving visible pieces in the dough.

The liquid ingredients are all blended together along with fresh blueberries and then added to the flour/butter mixture. Here again I preferred doing this by hand using a spatula and bowl scraper to quickly and gently blend everything, picking up the dry ingredients until a cohesive dough ball forms. I typically don’t add fresh fruit to scones since the fruit can become mushy and macerated during mixing, but the fresh blueberries held up well with a gentle touch.

I refrigerated the dough for four hours and then baked them. Glaze them right out of the oven, cool a bit and enjoy warm or room temperature. Nice!

First batch

First batch

I continued the by-hand approach for the next two batches as well. It speaks to me. Remember our two hands are some of the best tools we have!

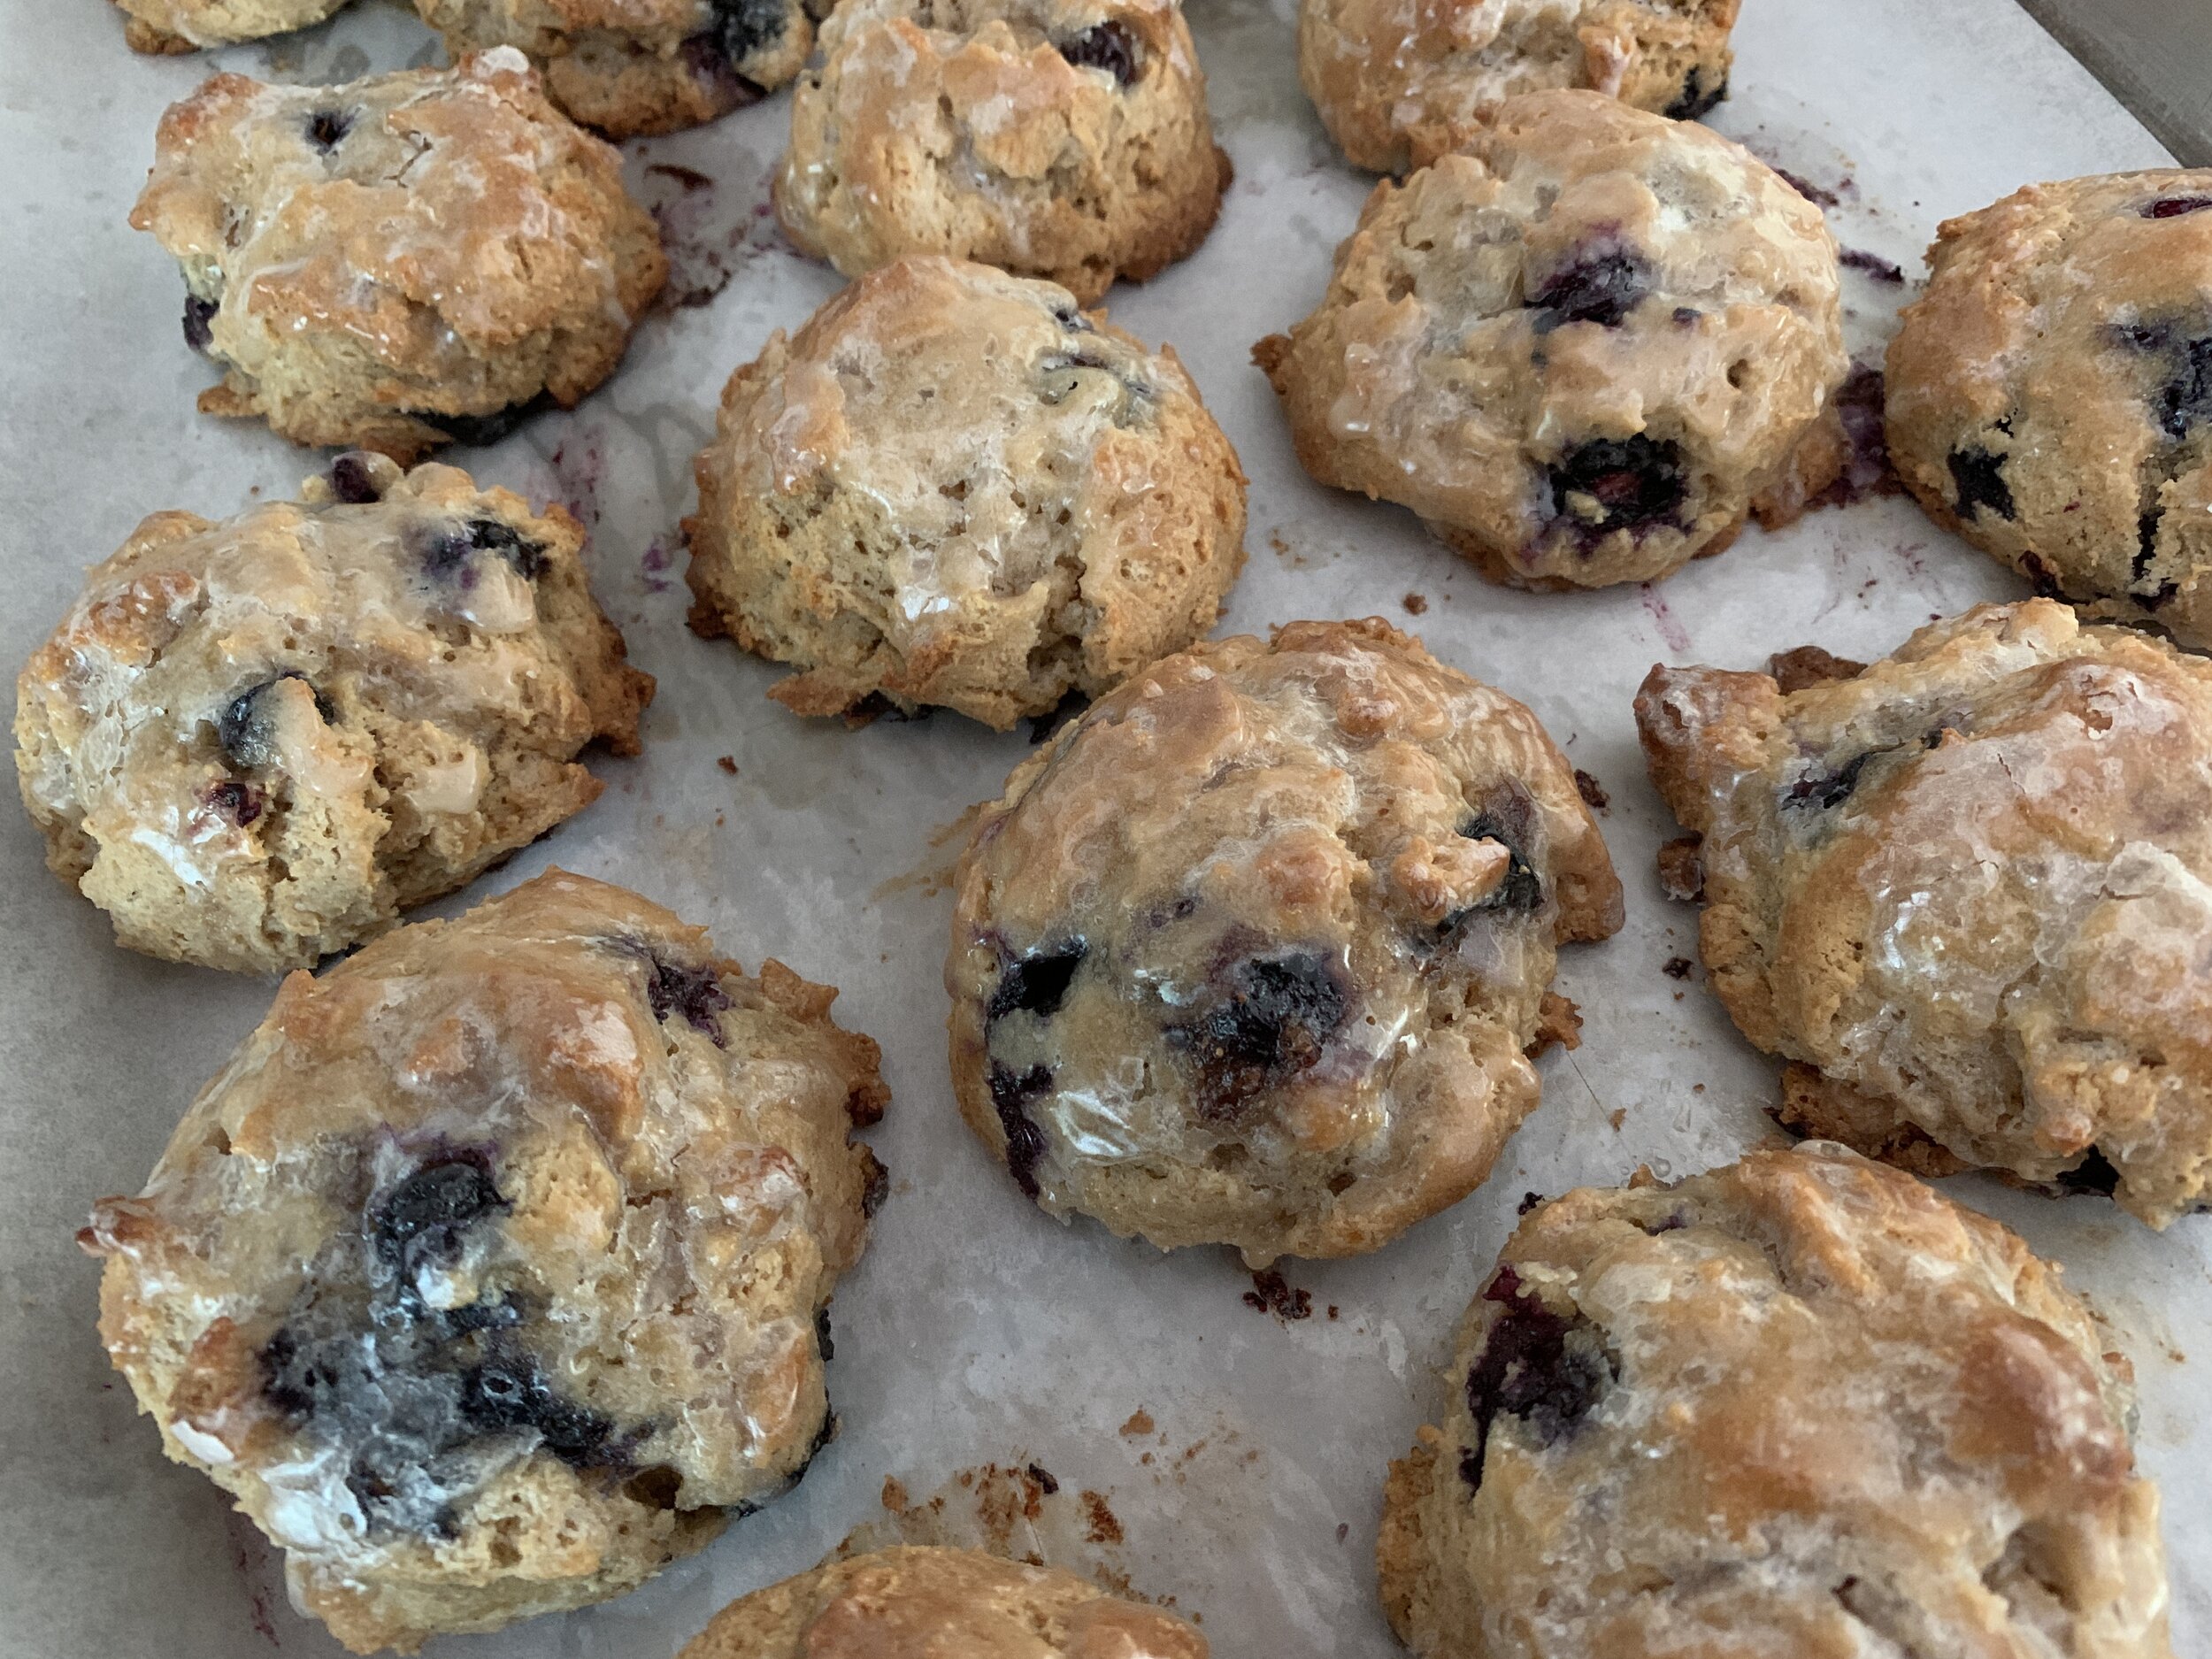
Second batch: no crème fraiche on hand so this time I used Siggi’s Icelandic “touch of honey” whole milk yogurt and actual buttermilk. Once I had the dough mixed and gave it a few hours of refrigeration, I scooped out the dough balls onto a parchment lined sheet pan and froze them. It was a couple of days before I baked them (directly from freezer to oven) and they didn’t bake as evenly as the first batch. I also found they browned more on the bottom and were less tender and delightful. Perhaps you can appreciate their “rough and tumble” look below.

Full disclosure - I messed up the baking powder amount and attempted a fix so accuracy is in question. Even though they rose OK they weren’t as fluffy as batch one. Yikes - not my usual M.O.

True confession time - a few weeks back I tried some roasted tomato, ricotta, herb scones and realized after I had them in the oven that I FORGOT to add the baking powder. Whoa! How many times have I made that base scone recipe?? Just goes to show you how distraction and lack of focus can sneak right in there these days.

Second batch

Second batch

Third batch: I made my own crème fraiche - yay! Here’s the deal: heat a cup of heavy cream to about 95ºF (easy in a glass Pyrex measuring cup in the microwave), stir in a teaspoon of buttermilk, cover loosely and let sit at room temperature for 24 hours. Mine was thickening nicely by then and into the fridge it went. I used it for the scones on day 4 of it’s maturation - nice and tangy. I again used a squeeze of lemon juice in whole milk as my buttermilk. I reduced the whole wheat flour by 20 g and increased the all purpose by 20 g (I just felt like it).

BTW - For all three batches I used white whole wheat flour for the whole wheat portion. In the future I’ll try whole wheat pastry flour (if I can ever get my hands on some again!) for an even more tender result.

This time I kept the dough refrigerated for a full 24 hours before scooping and baking. The end result was much like the first batch. Mmmmm good.

IMG_1295.JPG

What I learned: mix by hand, refrigerate the dough 4-24 hours then scoop the chilled dough and bake soon after. Use the right quantity of baking powder. Duh. Thumbs up on the crème fraiche and buttermilk combo. Maybe don’t freeze them unbaked but I’m not necessarily giving up on that approach. That second batch was the outlier due to a questionable baking powder amount and maybe even the oven temp when baking directly from the freezer.

I encourage you to give these a try. You’ll like them.

Autumn is coming . . .

World egg day!

Maple pot de crème

Maple pot de crème

How many of you knew that October 12 was World Egg Day? I wouldn’t have known if it hadn’t been for Kim, the activities director at Heron Manor/Woods just down the street from our home.

It all started in 1996 when the International Egg Commission set the second Friday in October as World Egg Day to increase awareness of the benefits of eggs and how important they are in human nutrition. Who knew?

Needless to say, eggs are utilized in many different ways in the baking and pastry world. For a morning event this past Friday, October 12, I decided to really go for it in the egg department.

Never one to turn down pot de crème, I thought others would enjoy a maple version of this unctuous delight, topped with maple mascarpone cream, a sprinkle of walnut praline crumbs and a petite maple walnut shortbread cookie on the side. So lovely and so delicious.

The base is essentially a crème brulée type custard made with cream, yolks and sugar (maple syrup here). I used 3 ounce ramekins which I find to be a perfect portion for a just right taste.

To yield 14 portions, whisk together 9 yolks, 3/4 cup REAL maple syrup (don’t you even dare use “pancake syrup“!), 3/4 teaspoon salt and 3/4 teaspoon vanilla extract; heat 3 cups heavy cream to barely simmering and temper it into the egg/maple syrup mixture. Strain through a fine mesh sieve into a pouring measuring cup then fill the ramekins to 1/4” below the rim.

Bake in a water bath at 325ºF. I use a clear pyrex glass baking dish, set the ramekins in, pour hot water into the corner of the dish and fill to about half-way up the sides of the ramekins. Cover loosely with foil and bake about 30-35 minutes, checking it periodically - you want the custard just set with a hint of a jiggle in the center. Once out of the oven, lift them out of the water bath and cool to room temperature on a wire rack.

IMG_3255.JPG

Then refrigerate until chilled. Garnish with whatever you’d like! If not being consumed the same day, I cover them with plastic wrap to enjoy over the next few days.

IMG_3266.JPG

Now for a tart!

IMG_3253.JPG

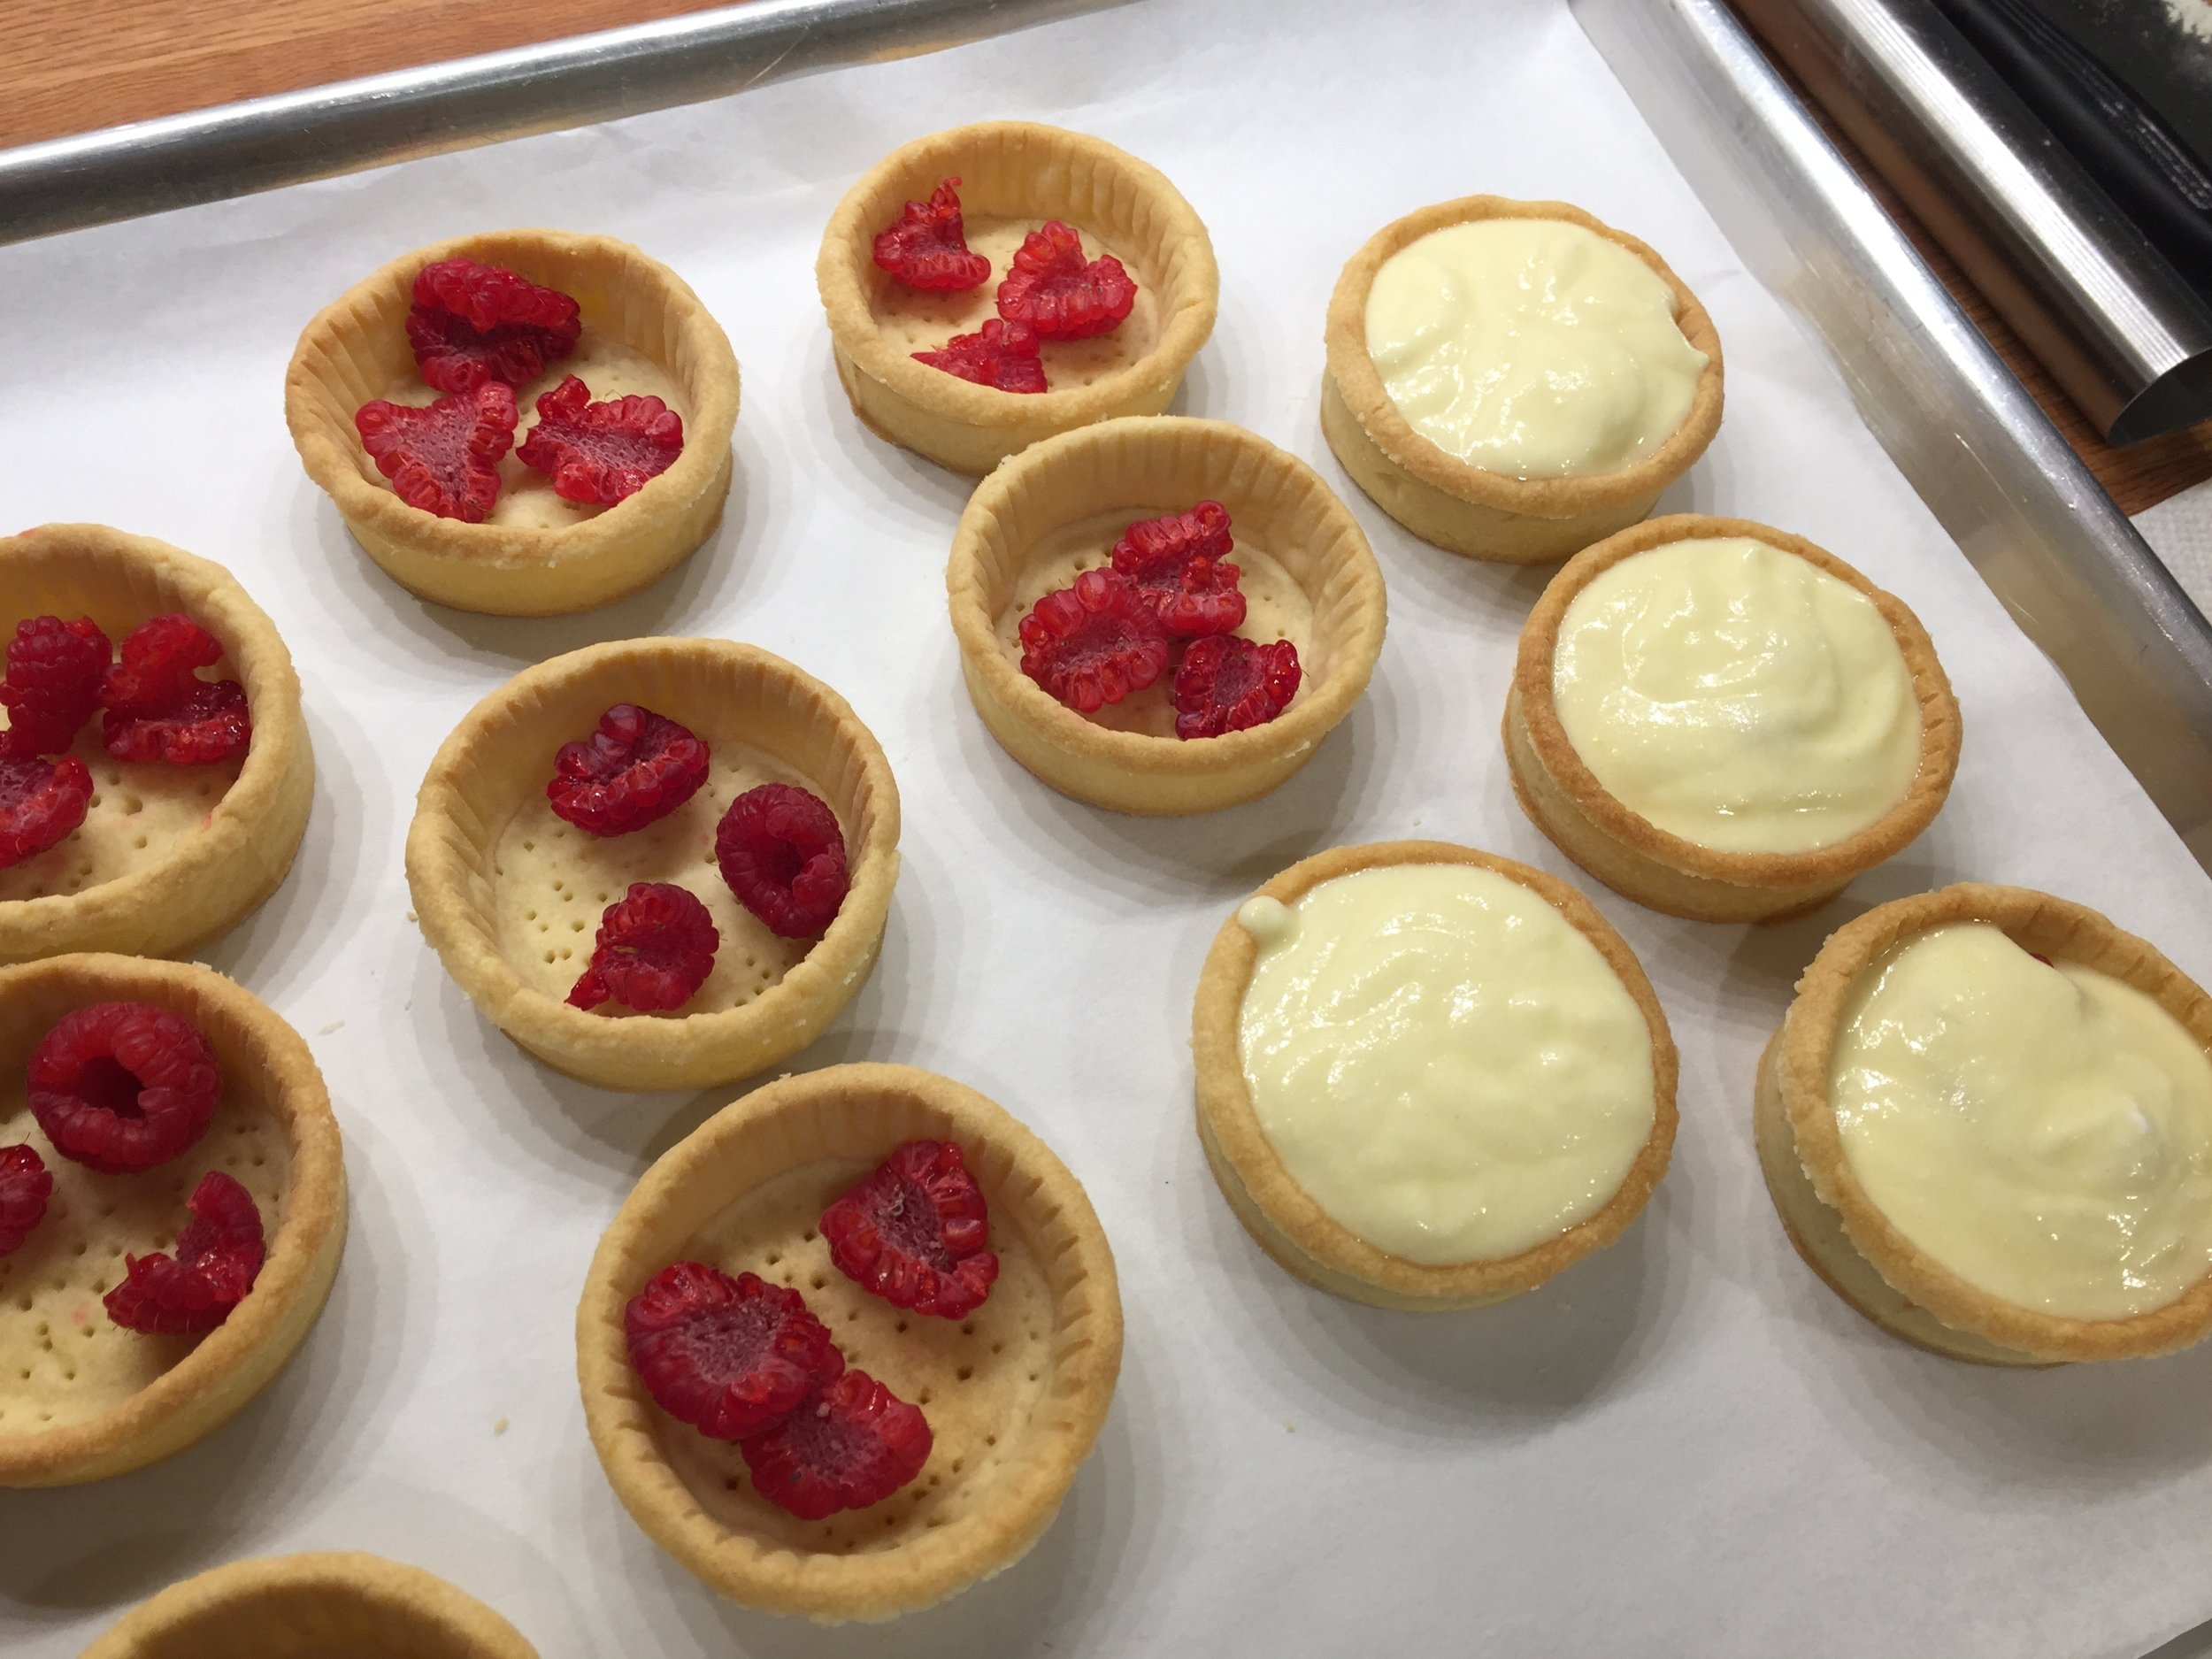
As always, having some version of a tart in the mix is right up my alley and thus a ricotta custard raspberry tartlette was born - buttery blind baked short crust filled with a few raspberry pieces and an easy to make ricotta filling.

For the filling whisk together 2 cups ricotta/3 eggs/one tablespoon cornstarch/3/4 cup sugar/zest of a lemon/ 1 teaspoon vanilla. Et voilà, très simple!

IMG_3244.JPG

Bake at 350ºF until the filling is set and a bit puffy, about 20-25 minutes.

IMG_3247.JPG

To give these babies some panache I made a lightly gelled raspberry coulis and pooled it on the top.

IMG_3249.JPG

Then a nice string-of-pearls crème Chantilly rim and a fresh raspberry to top it off. Smooth and berry delicious !

IMG_3251.JPG

The World Egg Day table also held browned-butter pistachio crumb cakes (egg whites) . . . .

IMG_3263.JPG

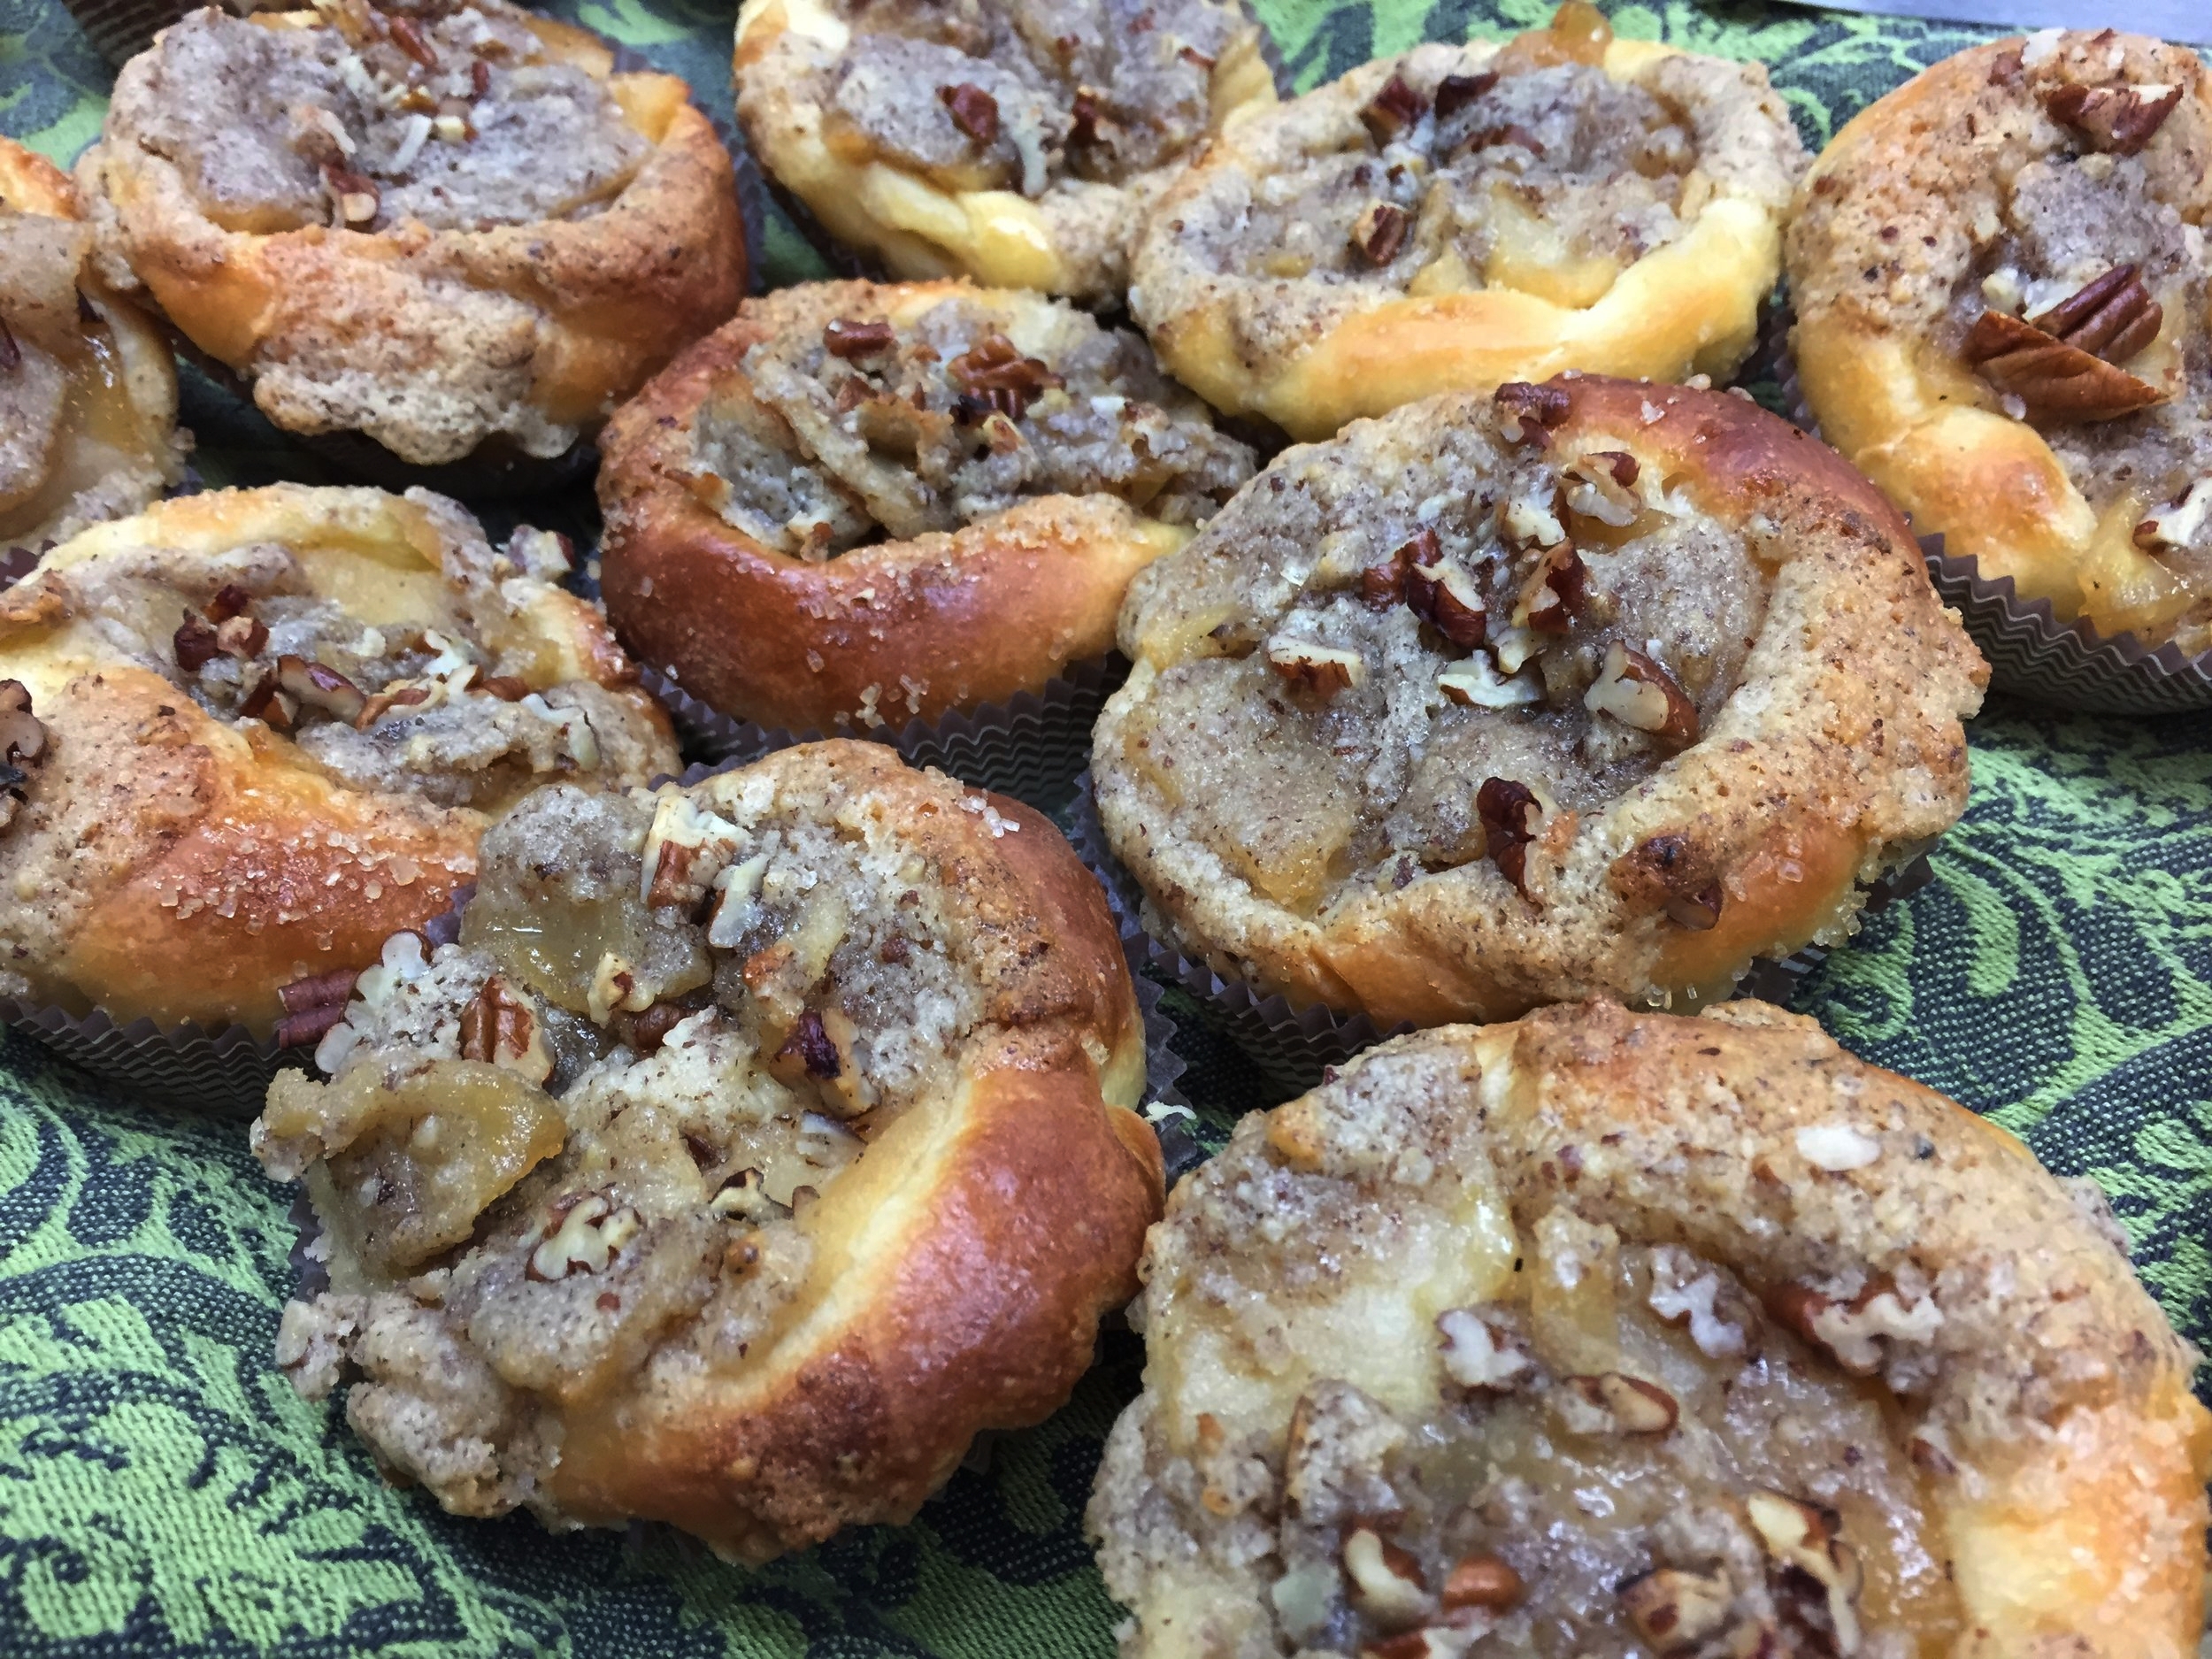
. . . . and apple pecan brioche (we all know that has eggs!).

Note: more on revisiting brioche recipes later - it’s an ongoing task.

IMG_3264.JPG

An enjoyable egg day it was!! Can’t wait until next year.

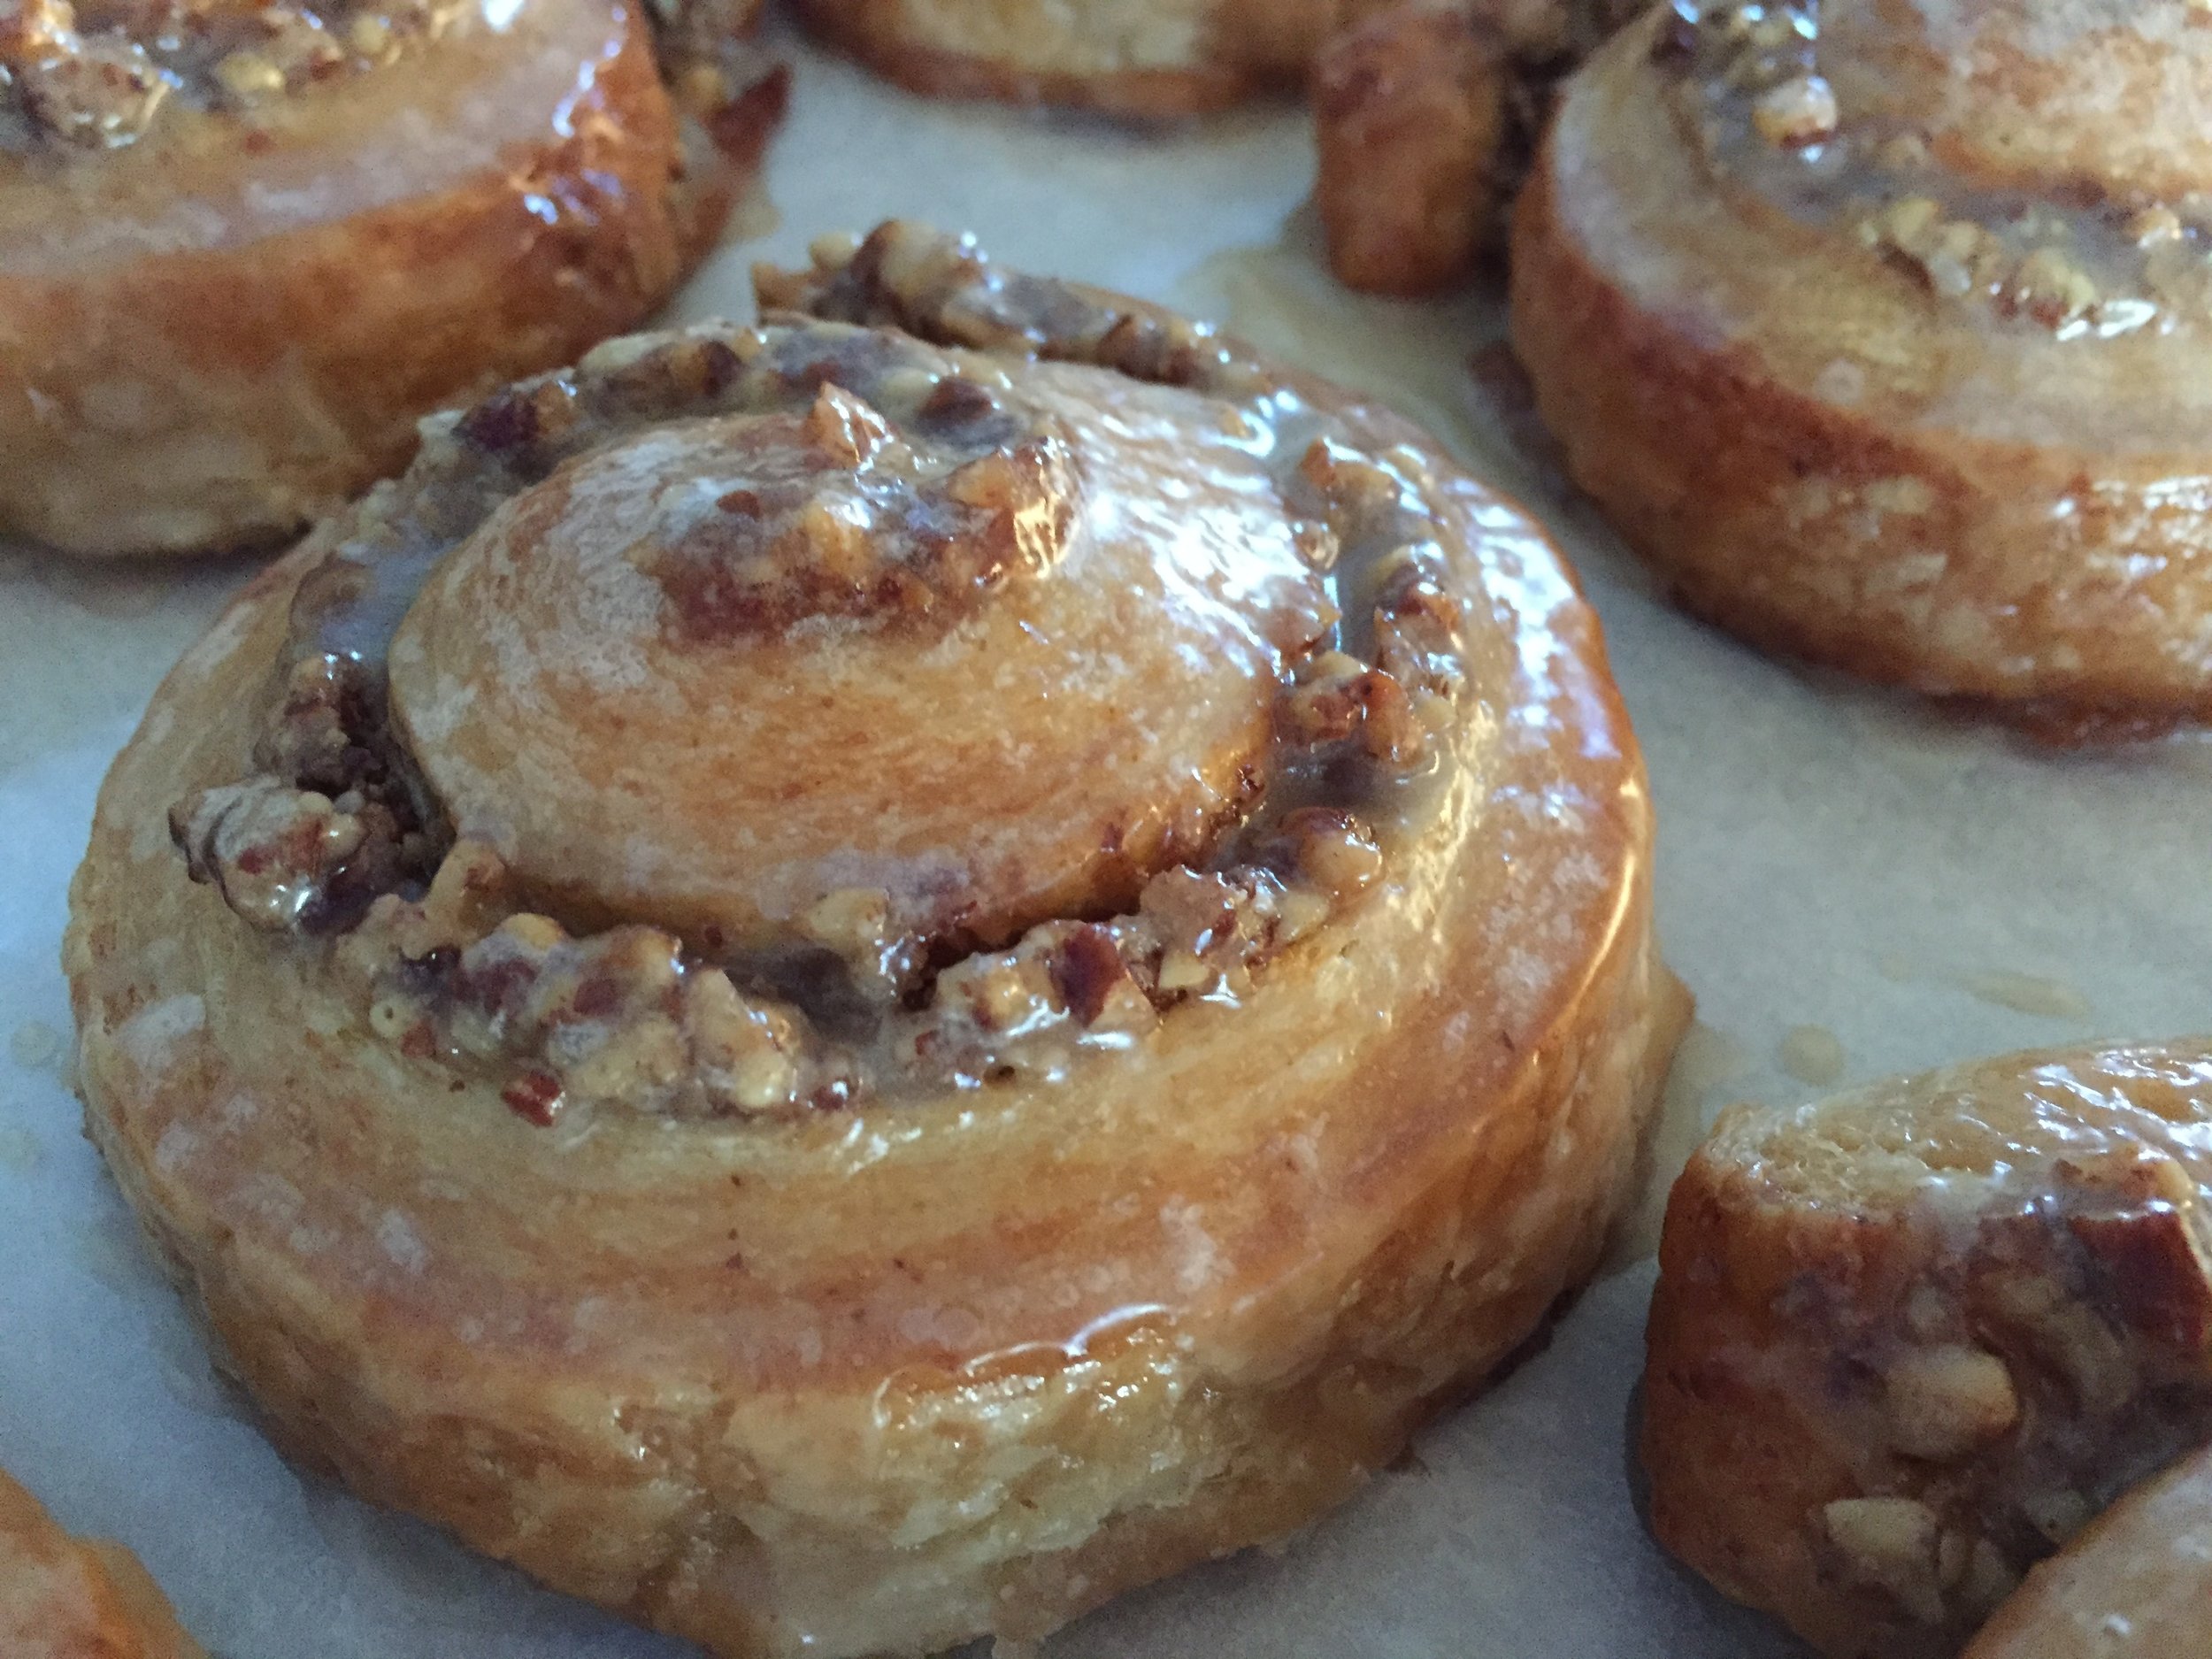
Maple pecan brioche spirals

IMG_2575.JPG

These babies were really fun to make, particularly if you enjoy the whole laminated dough experience (as I certainly do!). 

IMG_2535.JPG

On my regular walks I pass a small woods near the Lincoln School here in Grand Rapids, Michigan and recently noticed they had put out the sap buckets for maple syrup. I have no idea how much sap/syrup they get from this late winter project, but it's cool nonetheless. It reminds me of our days of living in Vermont when it was tree-tapping-sap-running time and the sugar shacks were in full swing. Oh the memories.

Since we just happened to have a jug of Michigan maple syrup in the fridge, the maple pecan version of a laminated brioche roll was born.

IMG_2495.JPG

This post isn't so much about the process of making laminated brioche dough (which I wrote about here), but about the variety of goodies one can make with the same base dough.

Think pain au raisin, which is one of the classics for sale in many French pâtisseries. Typically made with croissant or brioche dough,  the dough is spread with pastry cream and sprinkled with rum soaked raisins, rolled up into a log, sliced, proofed and baked. This maple pecan version is simply another take on a delicious buttery dough, spread with an even greater filling. Yeah!

I made my brioche base dough, completed the beurrage and four 3-folds then wrapped it up to chill in the fridge overnight.

Going through the folds

Going through the folds

I had chosen pecans for my project, but you can certainly substitute your favorite nut instead. Toast up about 250 g pecan halves and let cool. I divided those into 150 g to coarsely chop and 100 g to grind into a meal for the filling.  The filling was inspired by a recipe in the French book Viennoiseries & brioches by Parisian pâtissier/chocolatier Laurent Duchêne who has been awarded the coveted MOF title (Meilleur Ouvrier de France) and has his own pâtisserie in the 13th arr.

After the dough's overnight rest in the fridge I rolled it out into an approximately 25 cm/10" by 50 cm/20" rectangle and spread the filling in a thin layer all over. The filling is made very simply by combining 85 g egg whites, 100 g ground toasted pecans, 85 g sugar and 30 g maple syrup. Then I sprinkled 150 g of toasted and coarsely chopped pecans over the filling and rolled it all up into a neat log.

IMG_2506.JPG
 
IMG_2507.JPG
 
IMG_2508.JPG

When I do this sort of log/slice/proof/bake approach, I typically pop the log into the freezer for 15 or 20 minutes to firm things up. It's a bit easier to slice without having the filling ooze out as much as it might otherwise.

IMG_2510.JPG

I sliced my spirals about an inch thick and, after trimming the irregular ends, had a yield of 16 slices.

IMG_2511.JPG
 
IMG_2514.JPG

Then it's on to a proof of about an hour under cover of lightly buttered film wrap, heating the oven to 350ºF and baking for about 25 minutes until nicely browned.

IMG_2518.JPG

I must admit I feared they might be a tad dry, so I brushed on a mix made with 4 tablespoons melted butter and 4 tablespoon maple syrup right when they came out of the oven.

Once cooled, Steve and I did a taste test. Our diagnosis: something is missing! And so, back to the drawing board. This time I made a glaze with confectioner's sugar mixed with maple syrup and a bit of milk to a thin enough consistency that I could brush on a nice coating. Then back into the oven for a few minutes to set the glaze and voilà. It was the perfect solution!

IMG_2573.JPG

These spirals did not disappoint. Not too sweet, just the right hint of maple, a pleasant nutty crunch and a lovely texture to the dough all made for a delicious treat. Steve gave them a thumbs up, particularly with that last glaze addition.

IMG_2581.JPG

Now it's time for you to choose your favorite brioche dough and make your own version of spirals. How about a spread of lemon curd and a sprinkle of candied pistachios? Or a raspberry version of pastry cream along with mixed berries and some chopped white chocolate? Or crème d'amande with chopped candied orange peels and toasted sliced almonds? So many choices!

Whatever you decide, have fun. That's what counts.