Brioche craquelin encore

A16C22CD-914E-4EB8-B6C4-7ABA09A66B09.jpg

I first wrote about Thomas Keller’s version of this pastry back in February of 2015 - many moons ago - and a lot has happened since, that’s for sure. I’ve been churning this through my mind for awhile and decided that autumn is a good time to write about it.

Some time back, earlier in the pandemic days, I received an email from a gentleman in NYC who was searching for tips on how to create a version of craquelin that he used to enjoy at one of François Payard’s pâtisseries (closed for several years now). He described it as having the perfect crunchy almond top that gave the orange scented brioche just the right je ne sais quoi.

Hurray! I had a project to research. Challenge accepted. I’ve puttered with it on and off and am finally getting around to setting pen to paper as it were.

1A19482D-29FC-4CAB-9436-C50E7DB45ED2.jpeg

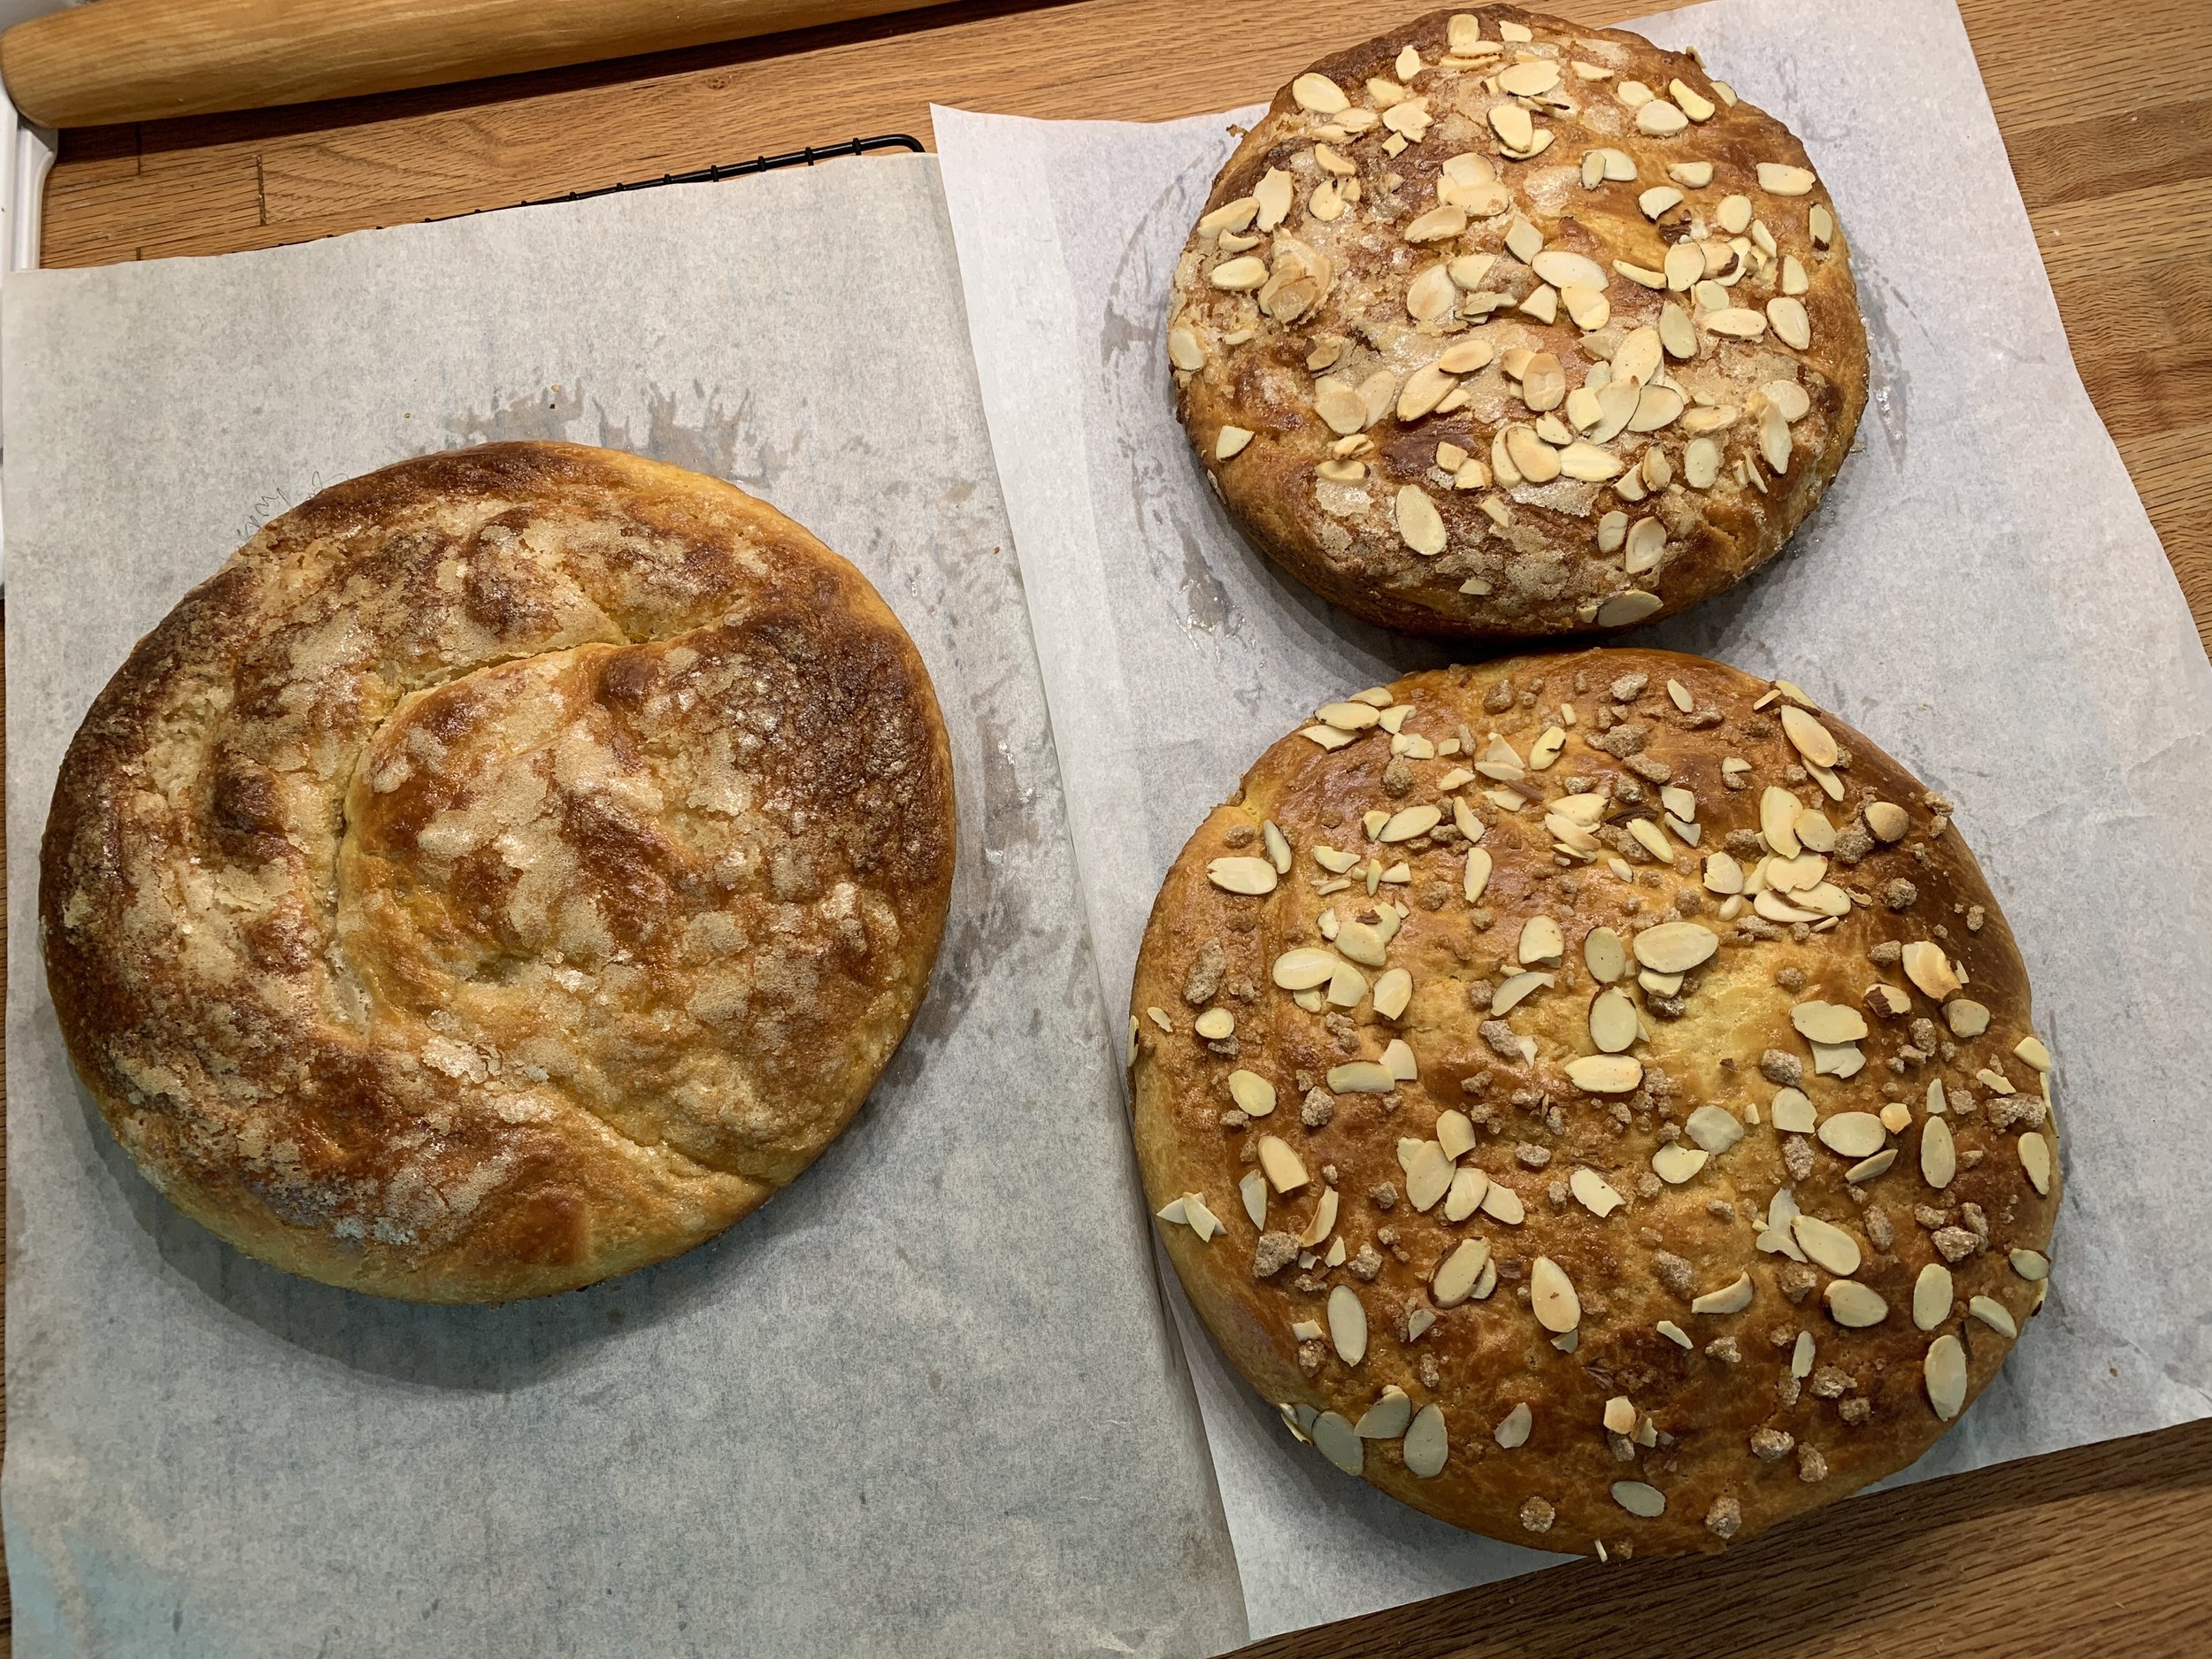
I made two different versions in my quest to replicate his memory of this treat. The first made three full sized rounds in well buttered cake pans (I had two 9-inch and one 8-inch).

The process: using my freshly prepared base brioche dough, I mixed 100 g / 1/2 cup of brown sugar with a bunch of orange zest (probably 3 or 4 oranges - I eyeball it) . . . .

sprinkled half of it over the flattened dough . . . .

folded it in three as I attempted to work the filling into the dough, turned it 90 degrees, stretched it back out a bit, sprinkled the second half over it and folded it in thirds one more time.

Then into the fridge covered for an overnight rise.

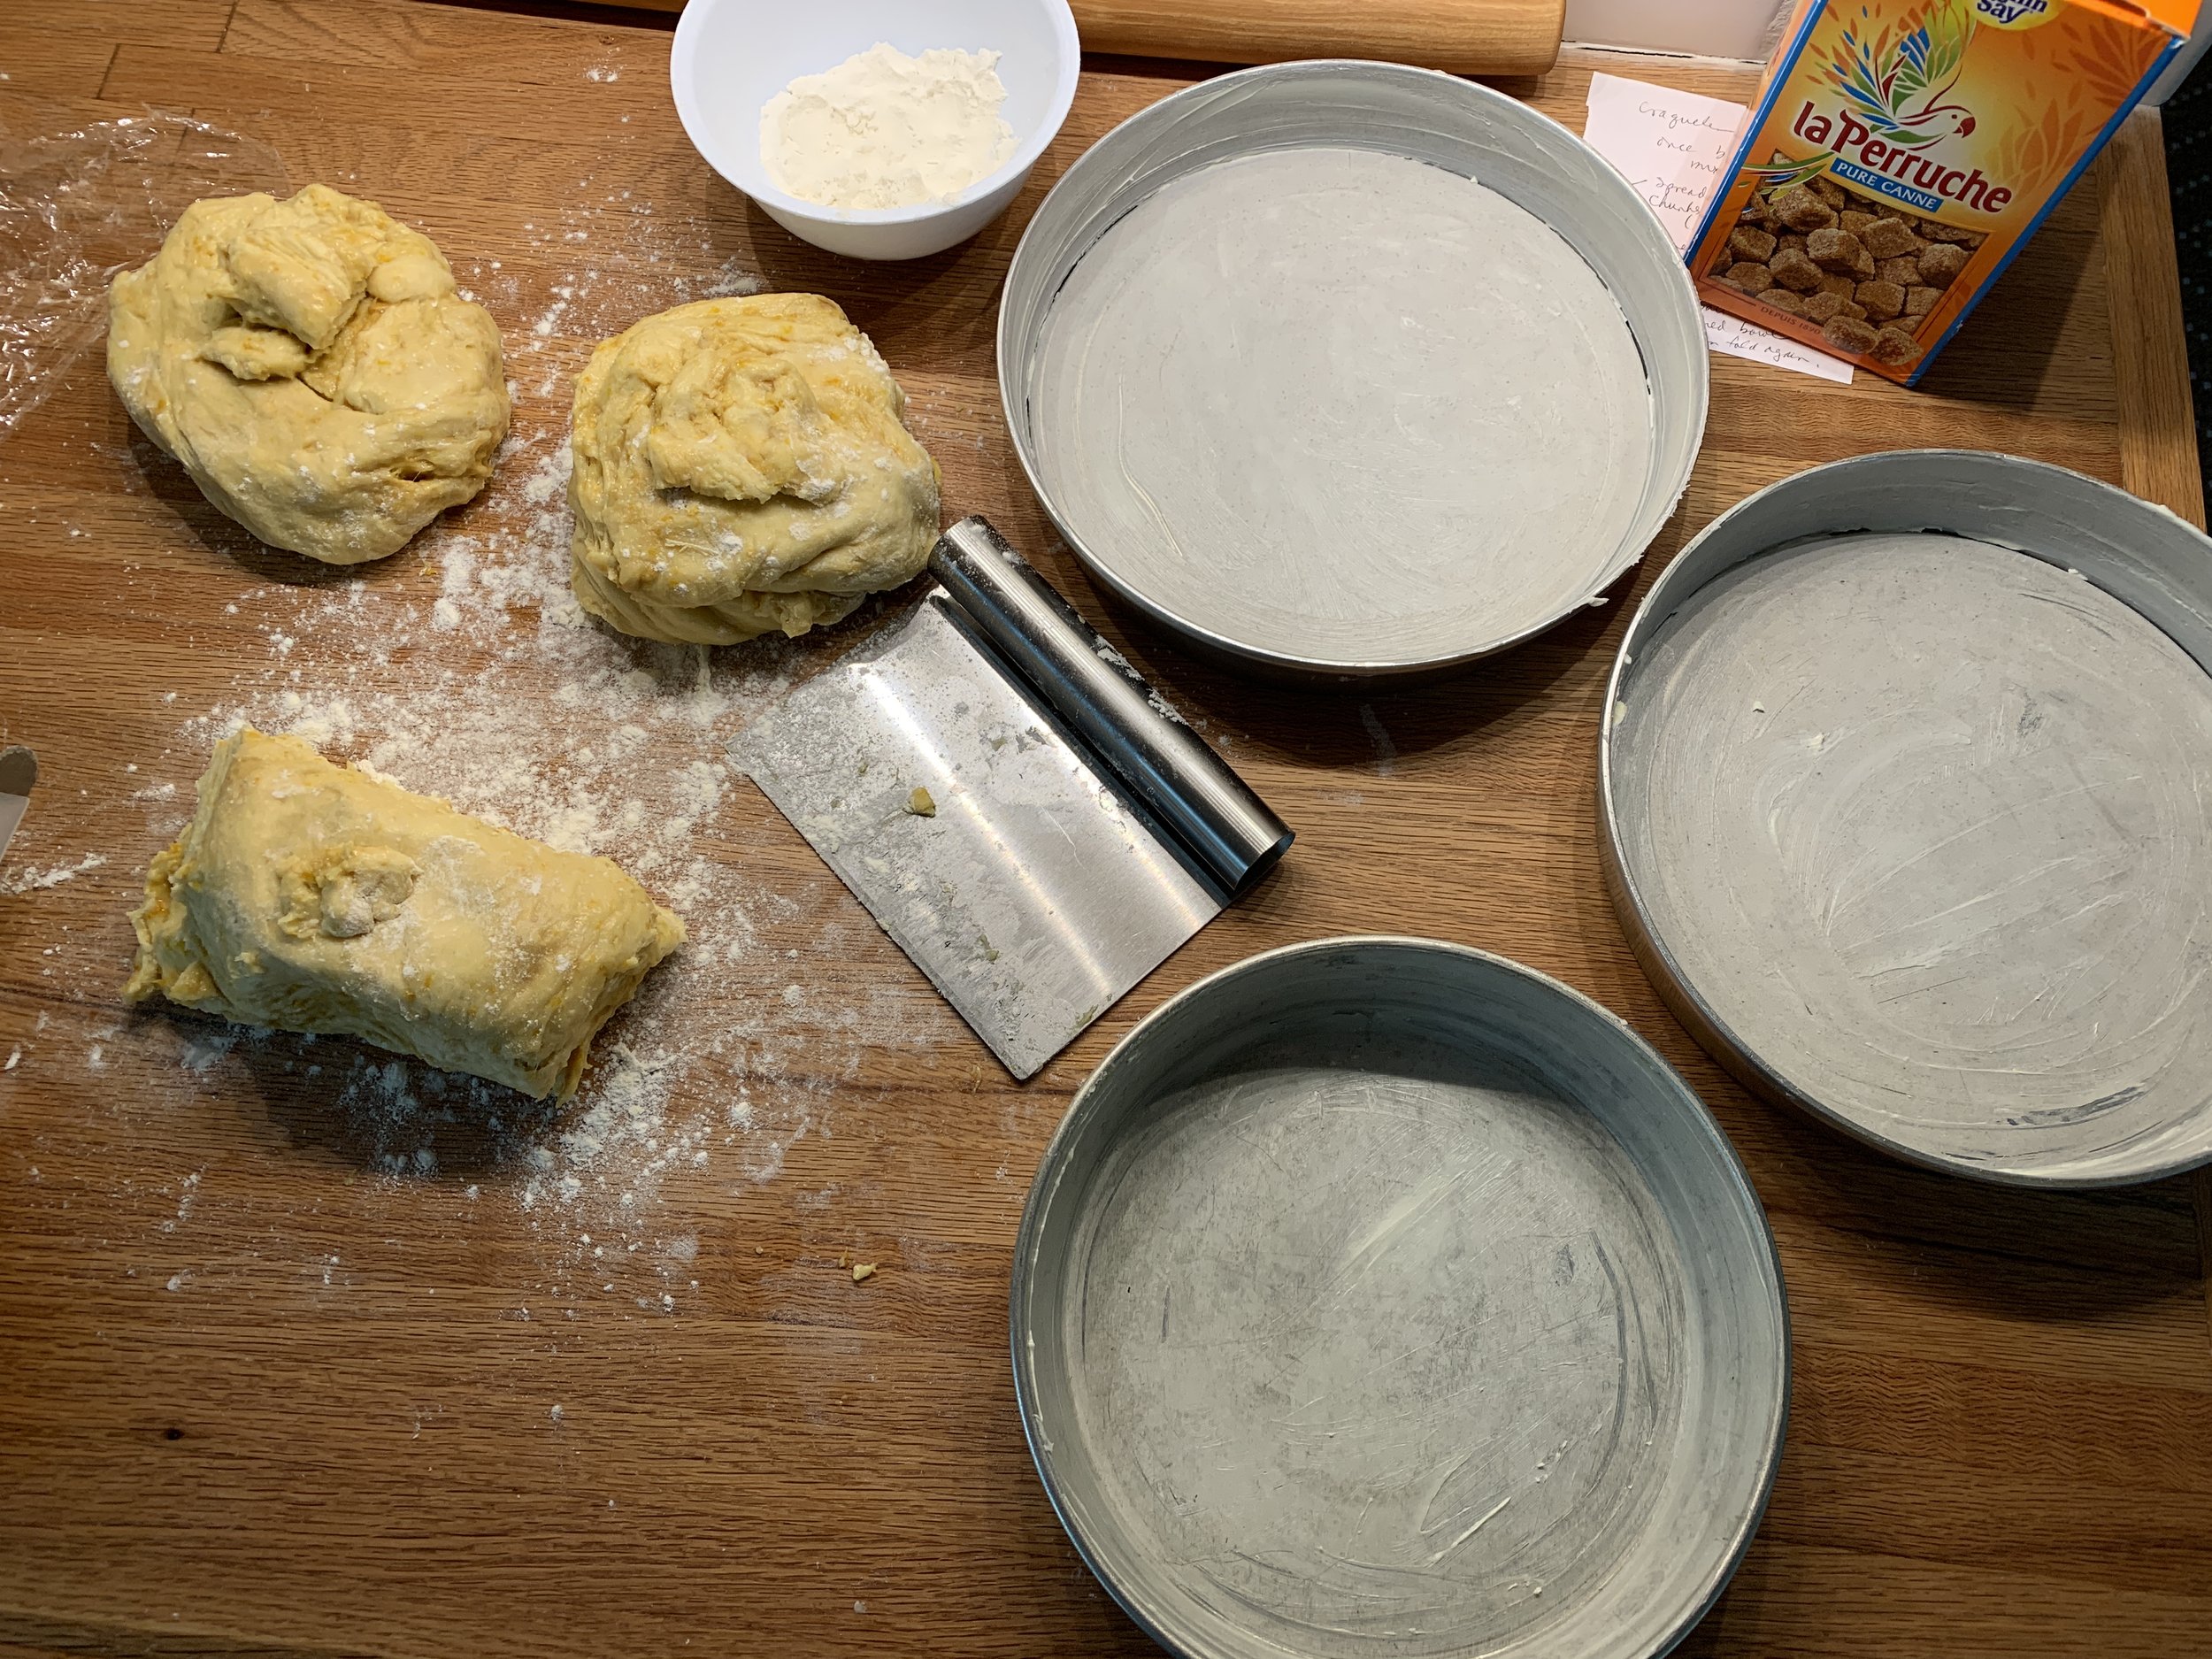
Before the rise

Here it is the next morning.

I divided the dough into three pieces, about 400 g each ( a tad more for the two 9-inch and a tad less for the 8-inch), formed rounds and placed them in the prepped pans. Note the aluminum foil wrapped around the 9-inch pans. They have removable bottoms so I wanted to avoid any butter leakage during baking.

Cover with lightly buttered plastic wrap and let rise for 1.5 to 2 hours. Remember brioche is very enriched and requires a good rise for the hoped for fluffy and light end result.

Toward the end of the rise heat the oven to 350ºF.

After the rise

I used three topping variations just for comparison’s sake. Have some toasted sliced almonds at the ready. Make the crunchy sugar topping by blending 6 tablespoons granulated sugar with 1.5 teaspoons vanilla and 1 tablespoon water (this is enough for the three pans).

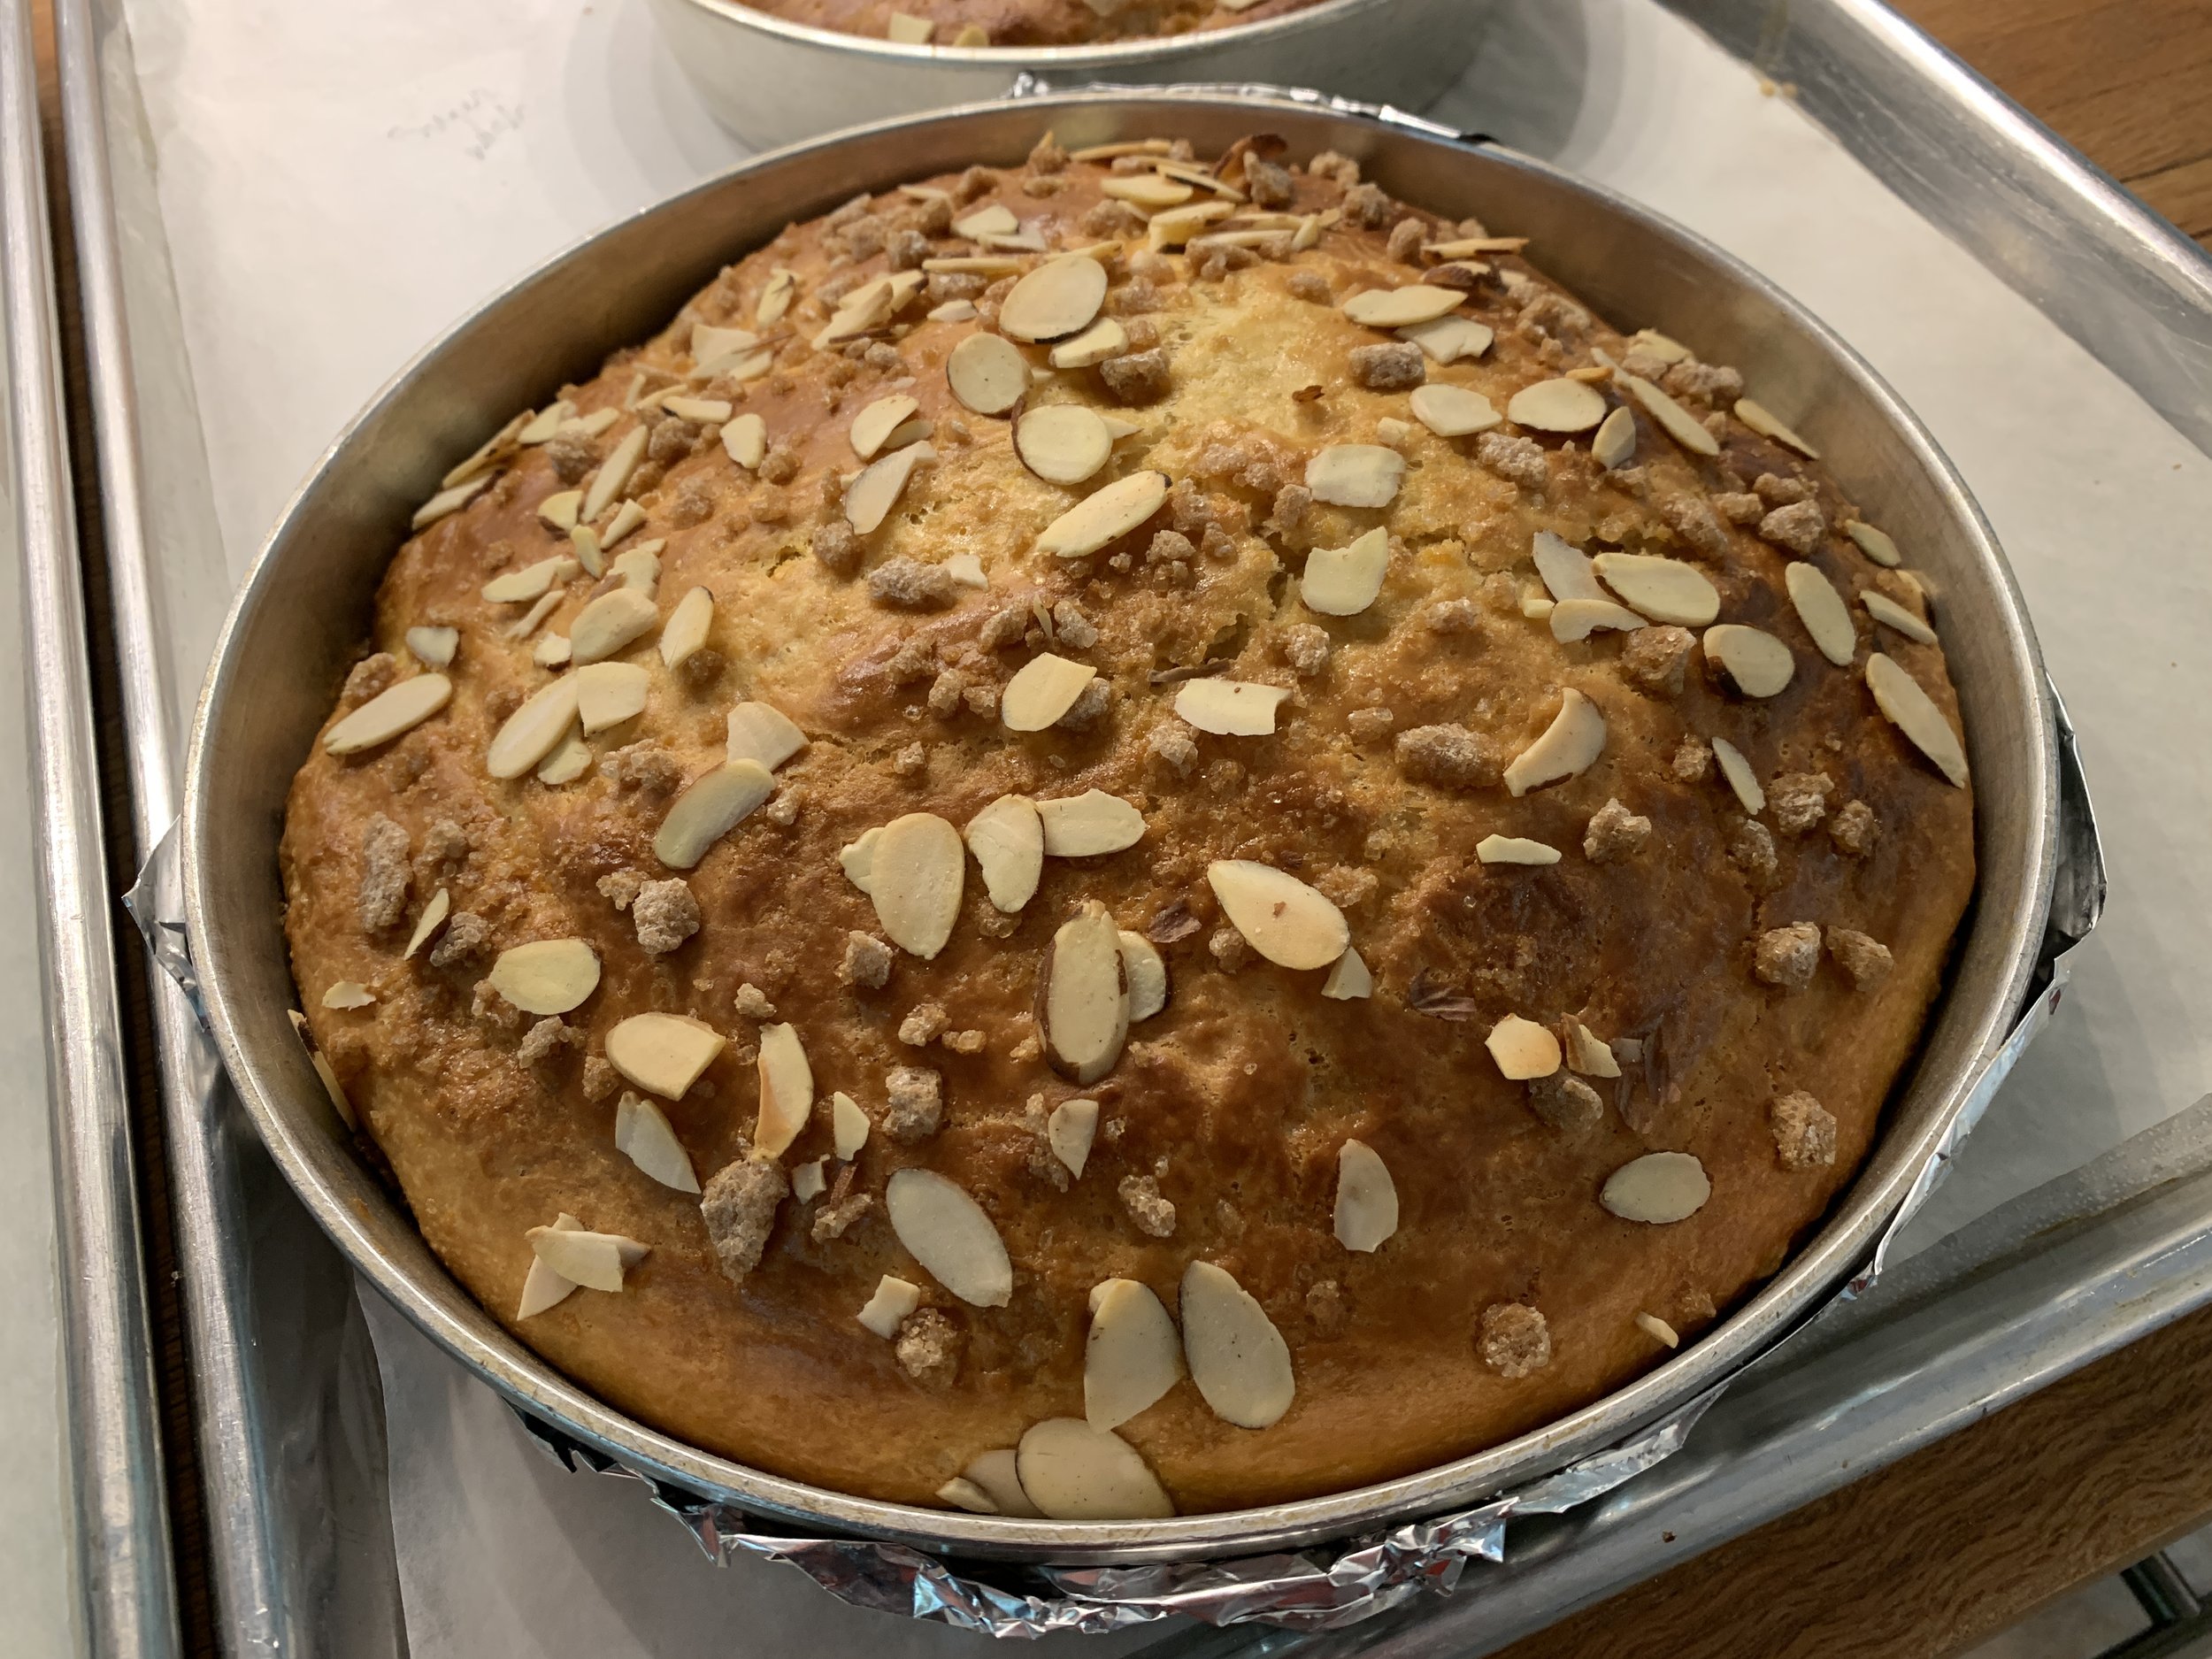
Drizzle about a third of the sugar mixture over each brioche. I left one without further adornment, topped one with sliced almonds and the third with both sliced almonds and some crushed raw sugar cubes.

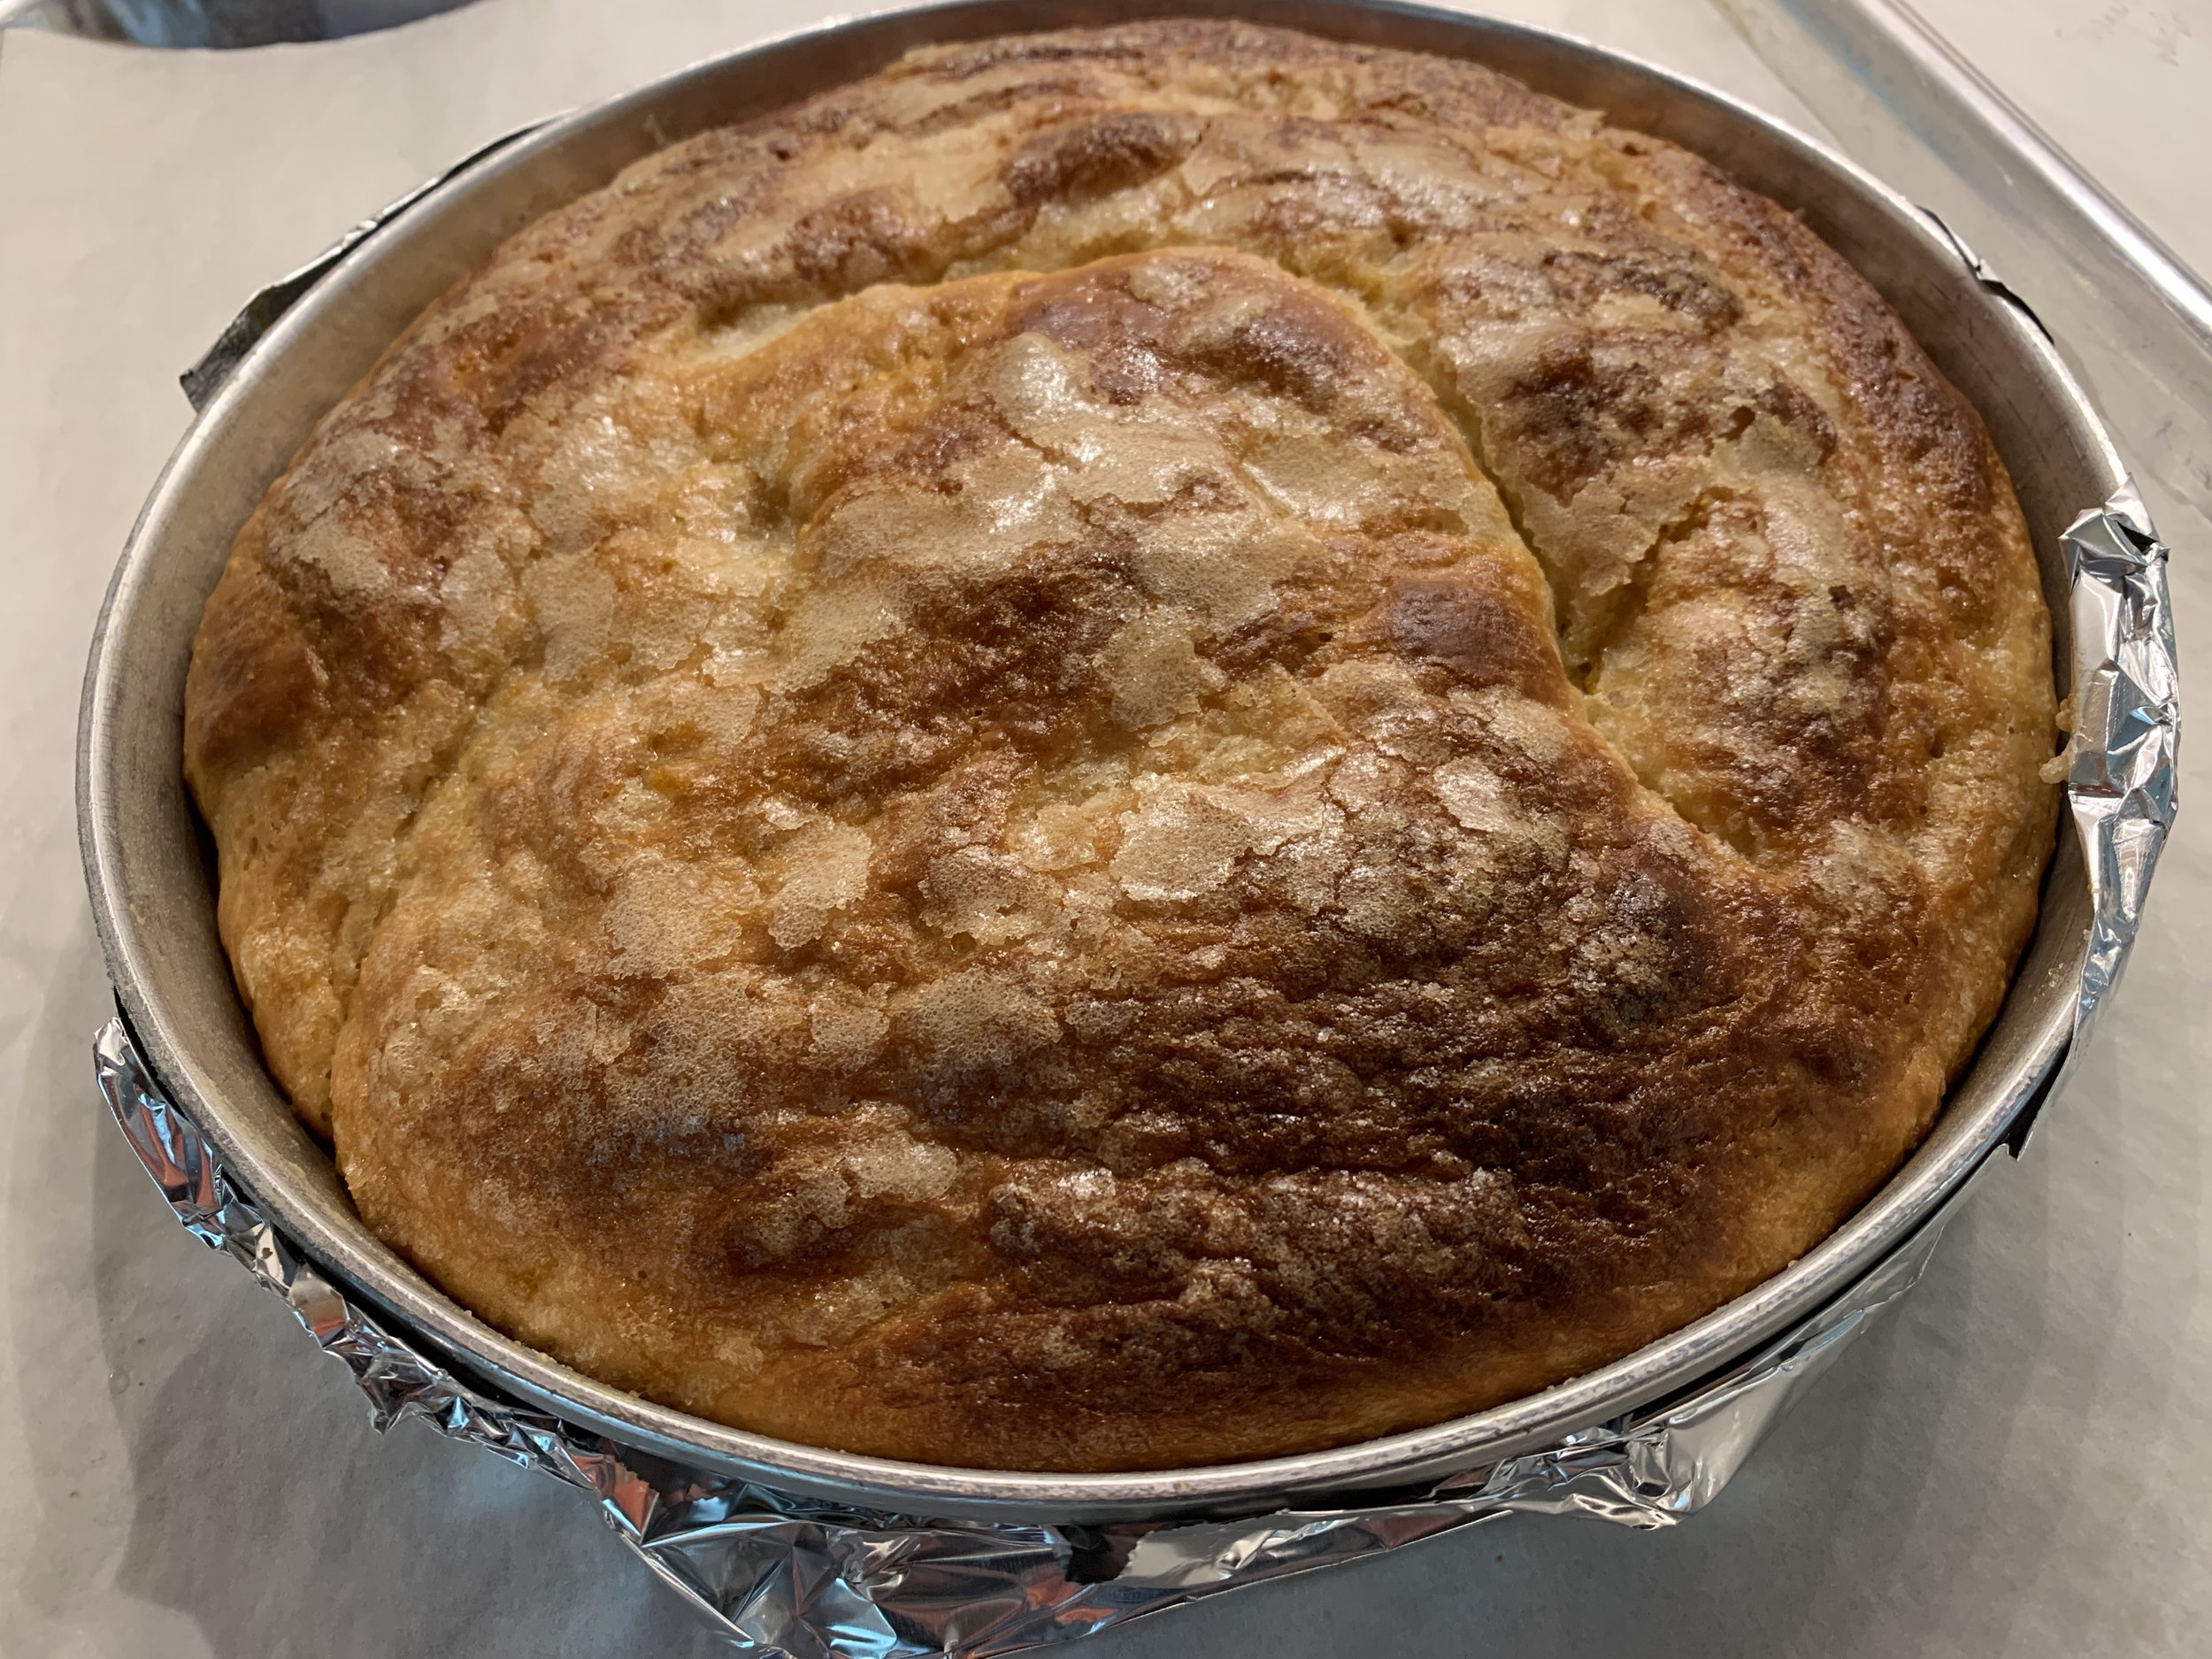
Bake 35-40 minutes, rotating pans half way through, until nicely golden brown.

Sugar drizzled

Sugar drizzled with almonds

With added crushed raw sugar

Let sit about 10 minutes before un-molding and placing on racks to finish cooling.

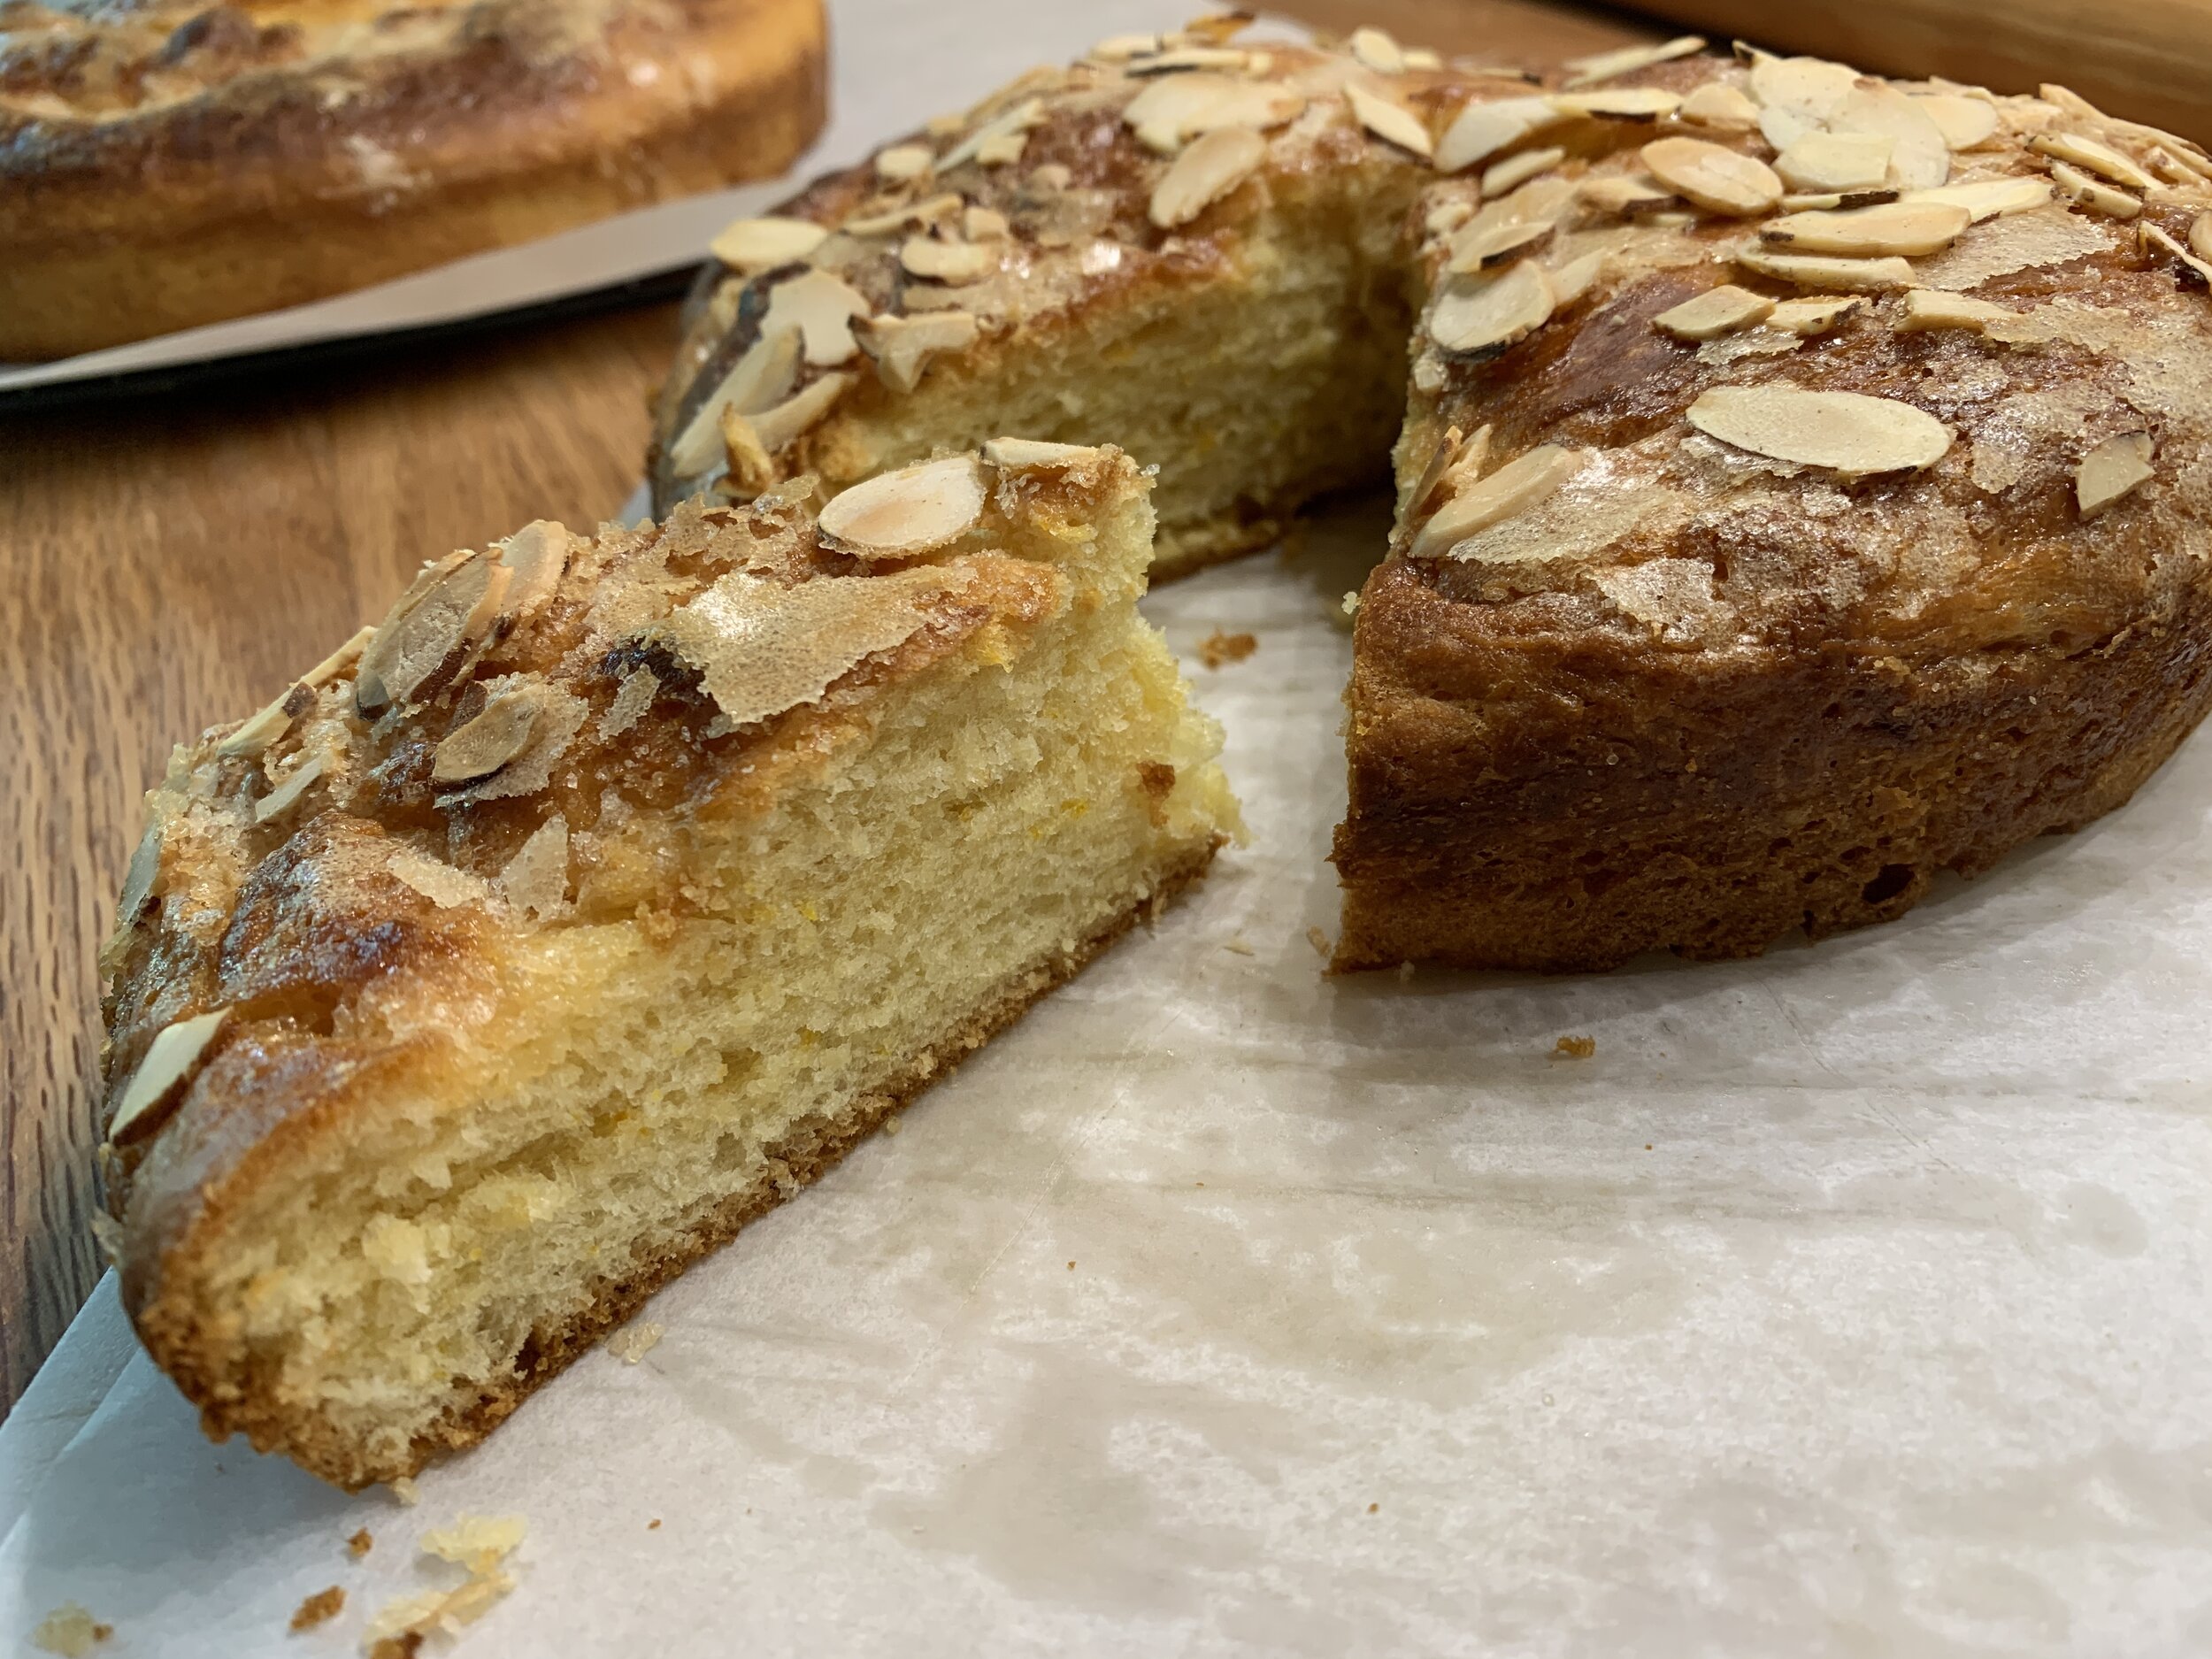
I must say all were pretty tasty, but, being a sucker for crunchiness, I really enjoyed the sugar drizzle/almond/crushed sugar cube version.

The crumb was light and nicely flavored with the orange zest.

OK good! Now on to the second version for which I followed Joanne Chang’s approach from her book “Flour: Spectacular Recipes from Boston’s Flour Bakery + Cafe”.

I knew that Joanne had worked at Payard’s in NYC back in the beginning of her baking career, so what did I do? I sent her an email asking about the process they had used! She kindly directed me to her book (link above) which I found at our local library and delved into the steps.

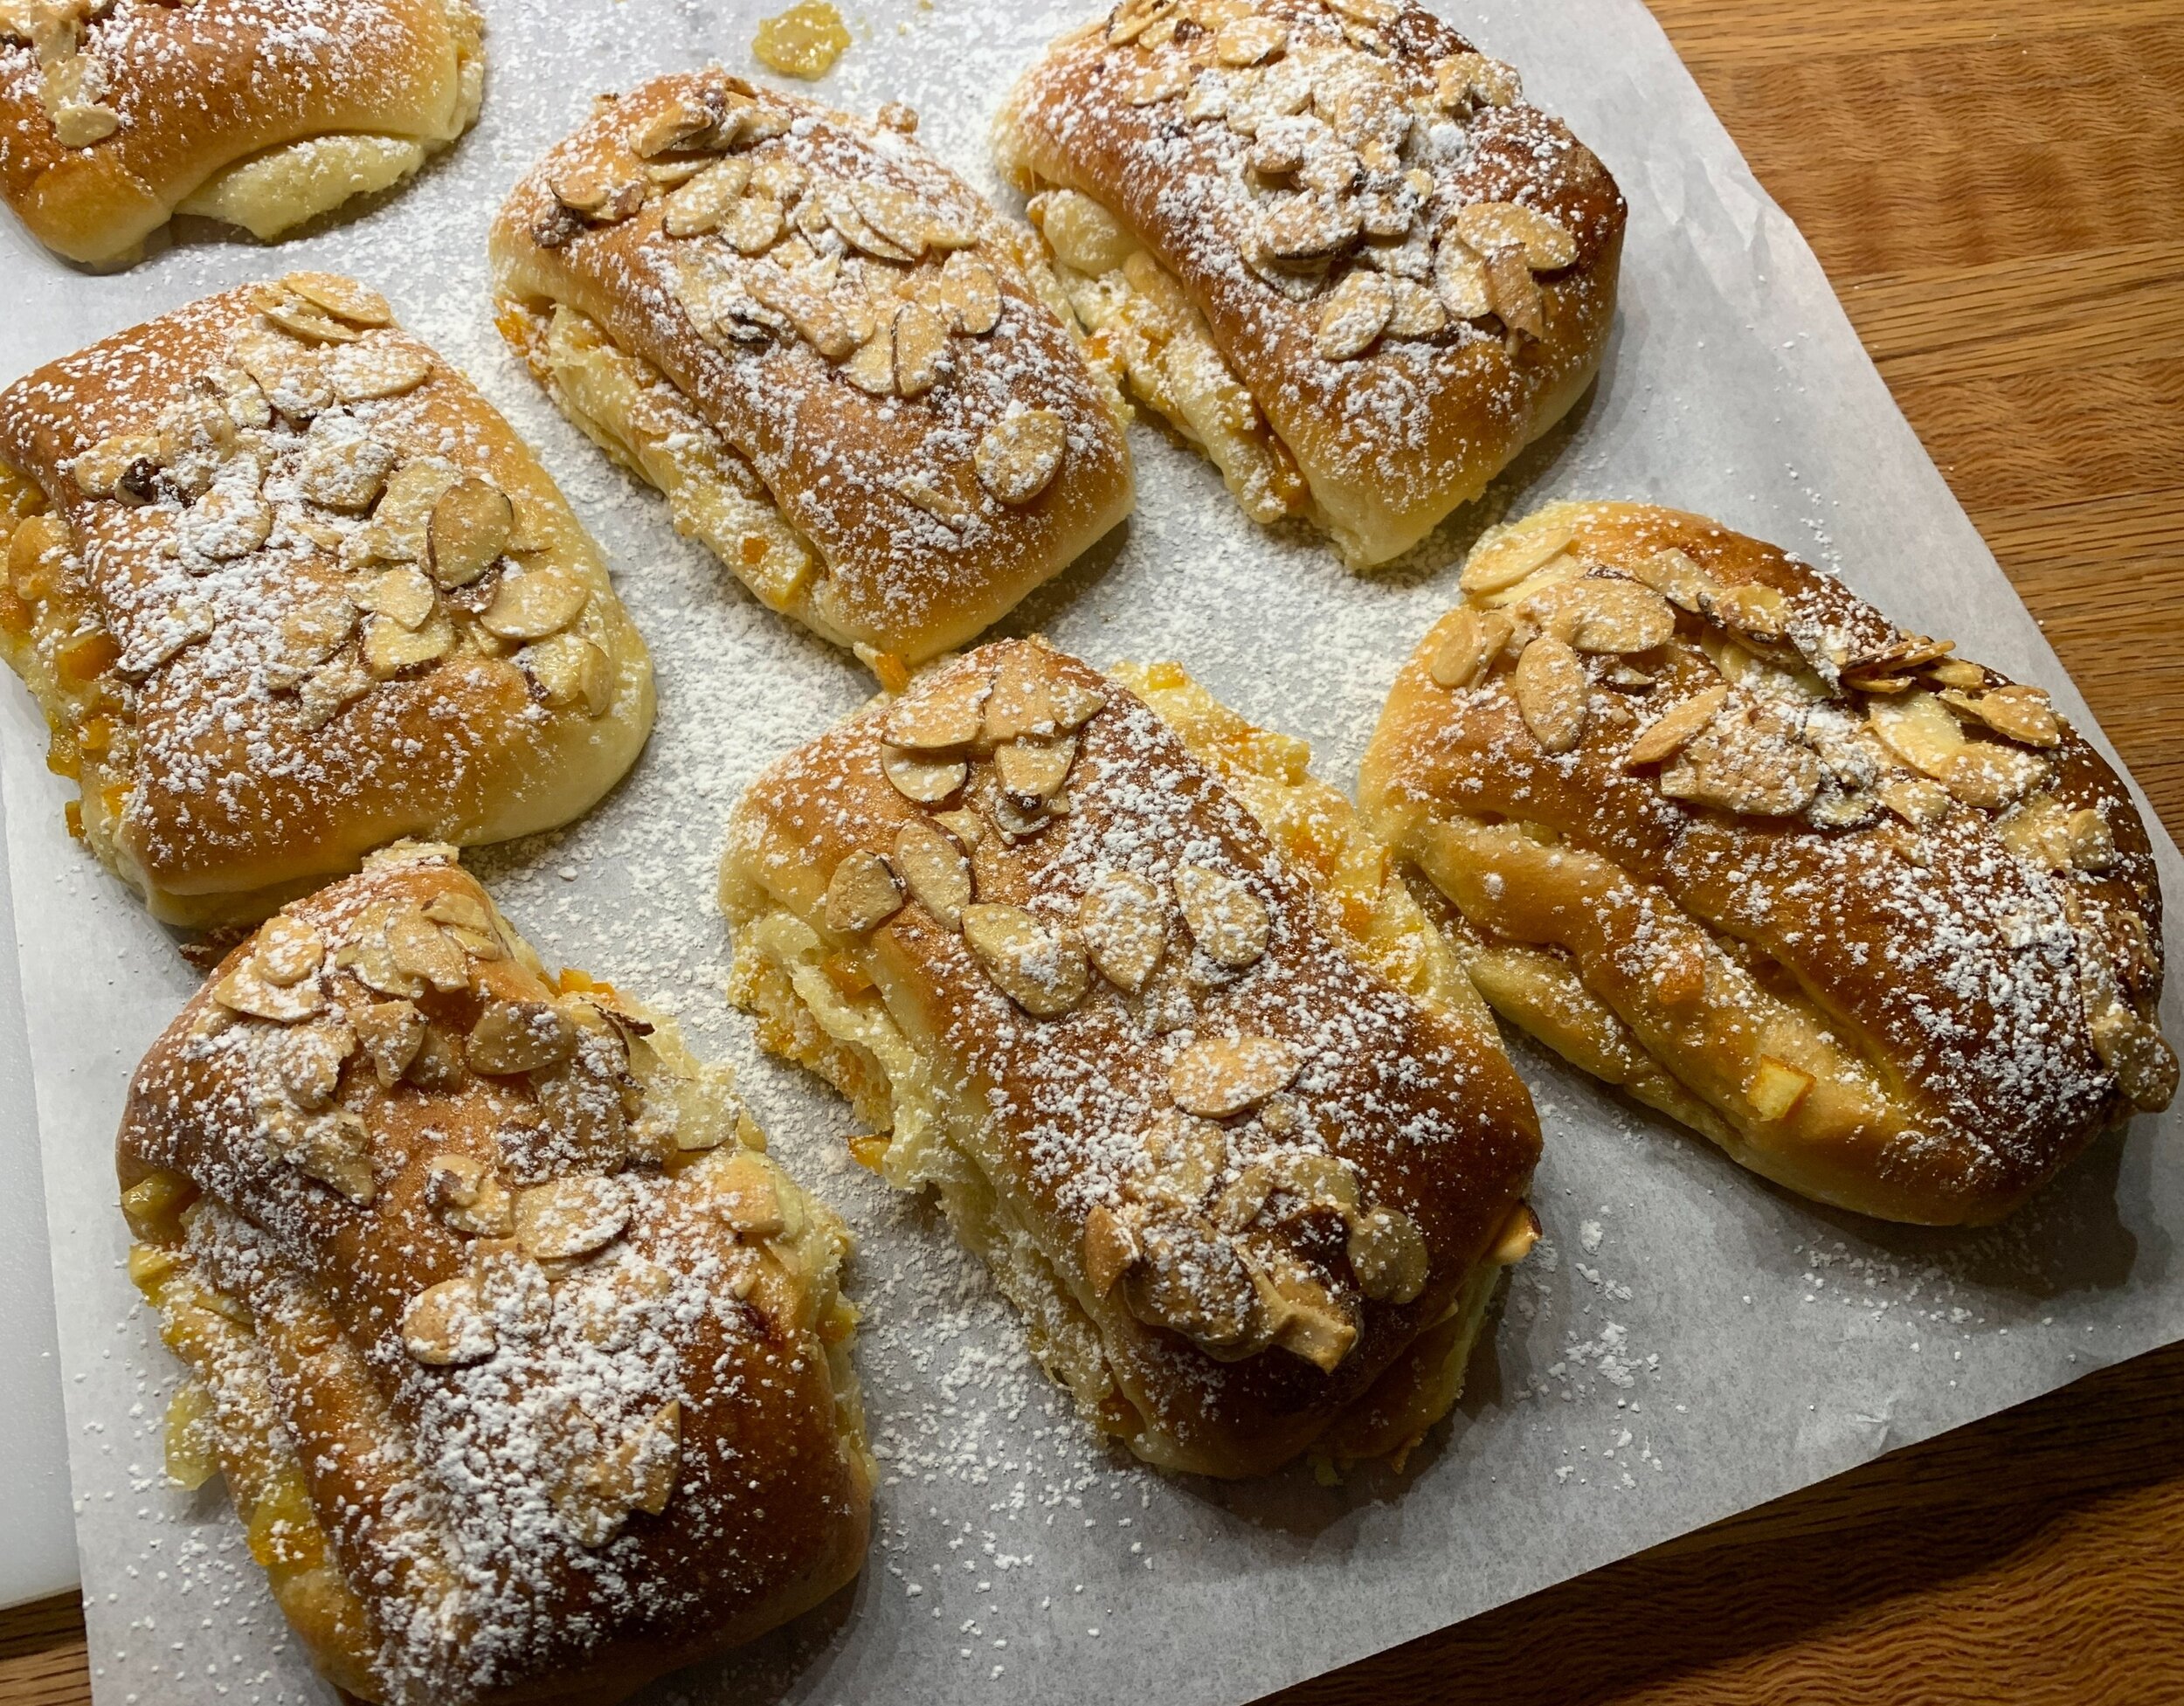
A few differences: individual brioche, adding candied orange rind (like Keller does) with crushed raw sugar and a slightly different topping. I can do this.

Thin slice two oranges and poach the slices in simple syrup until softened and more translucent. Let them cool and drain on a wire rack then chop into small pieces. You can do this ahead and hold in the fridge for several days if need be.

I had about a cup of rind in the end. Crush raw sugar cubes to yield about 1/2 cup of rough pieces.

For a yield of nine ~ 80 g portions: using 720 g of cold brioche dough after its overnight fridge rise, roll the dough into an approximately 10” (25 cm) by 18” (45 cm) rectangle.

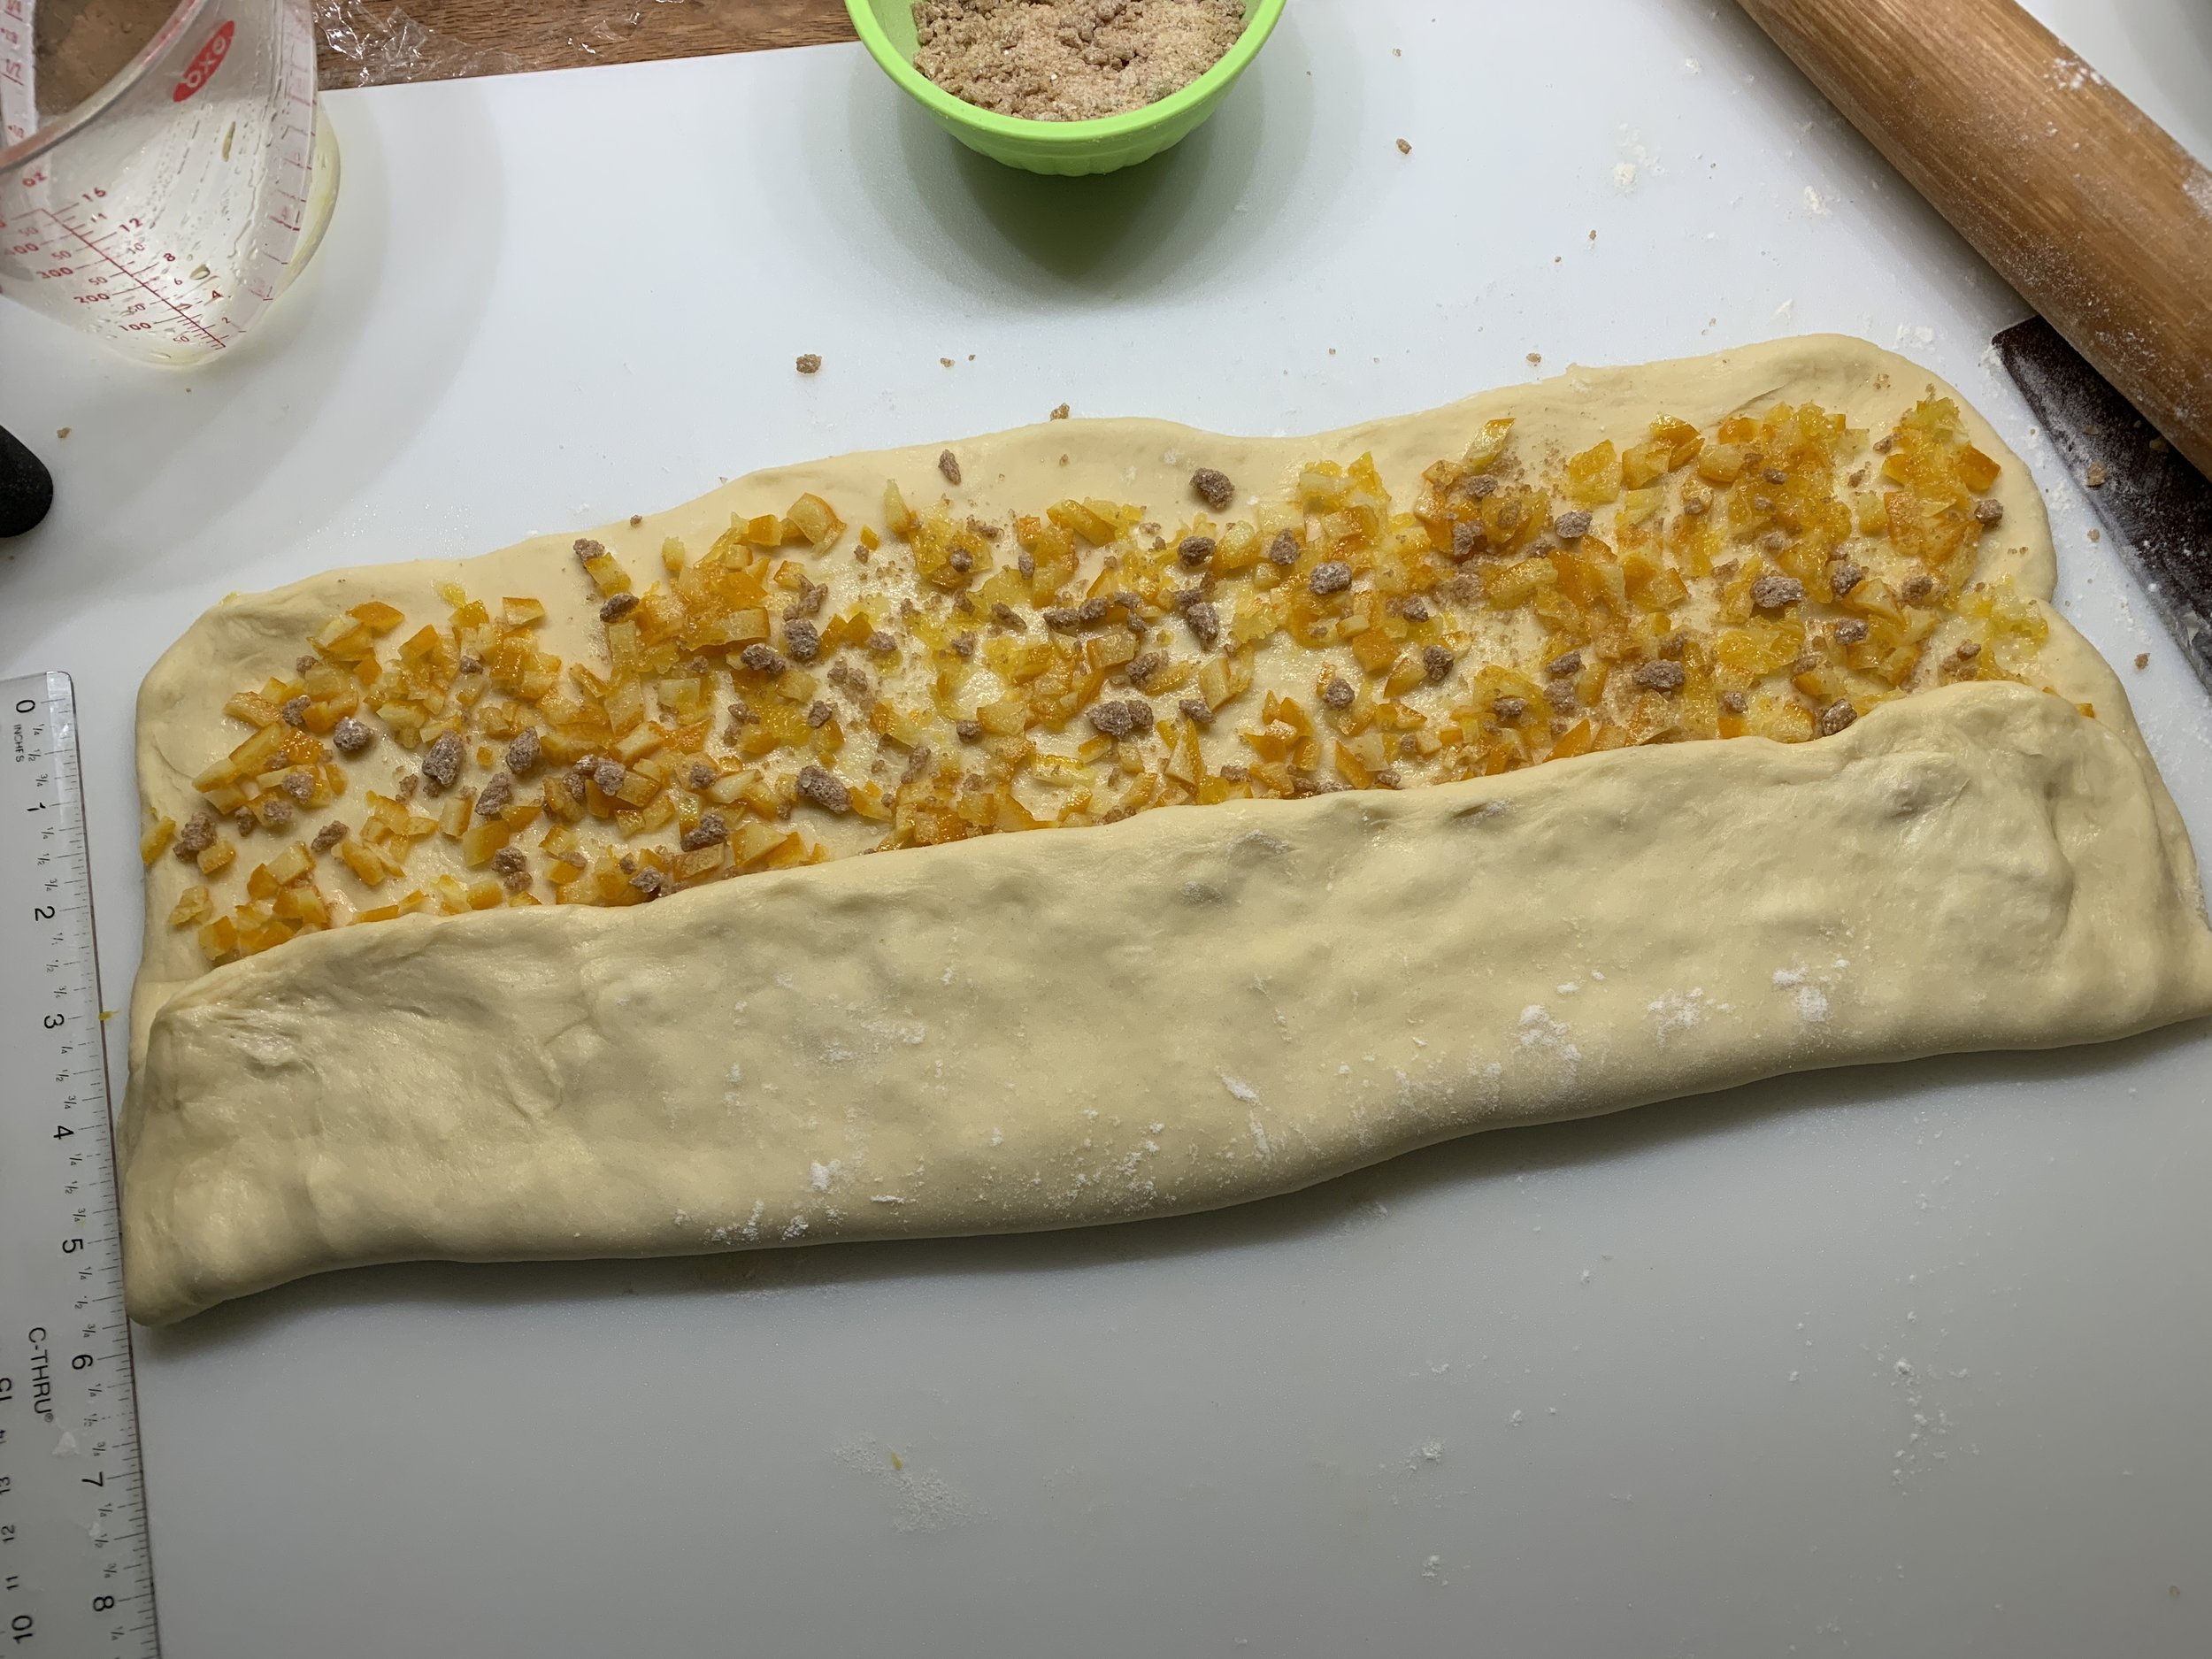
Distribute the chopped orange rind and crushed sugar over the top 2/3 of the dough.

Fold the bottom third up over the middle third.

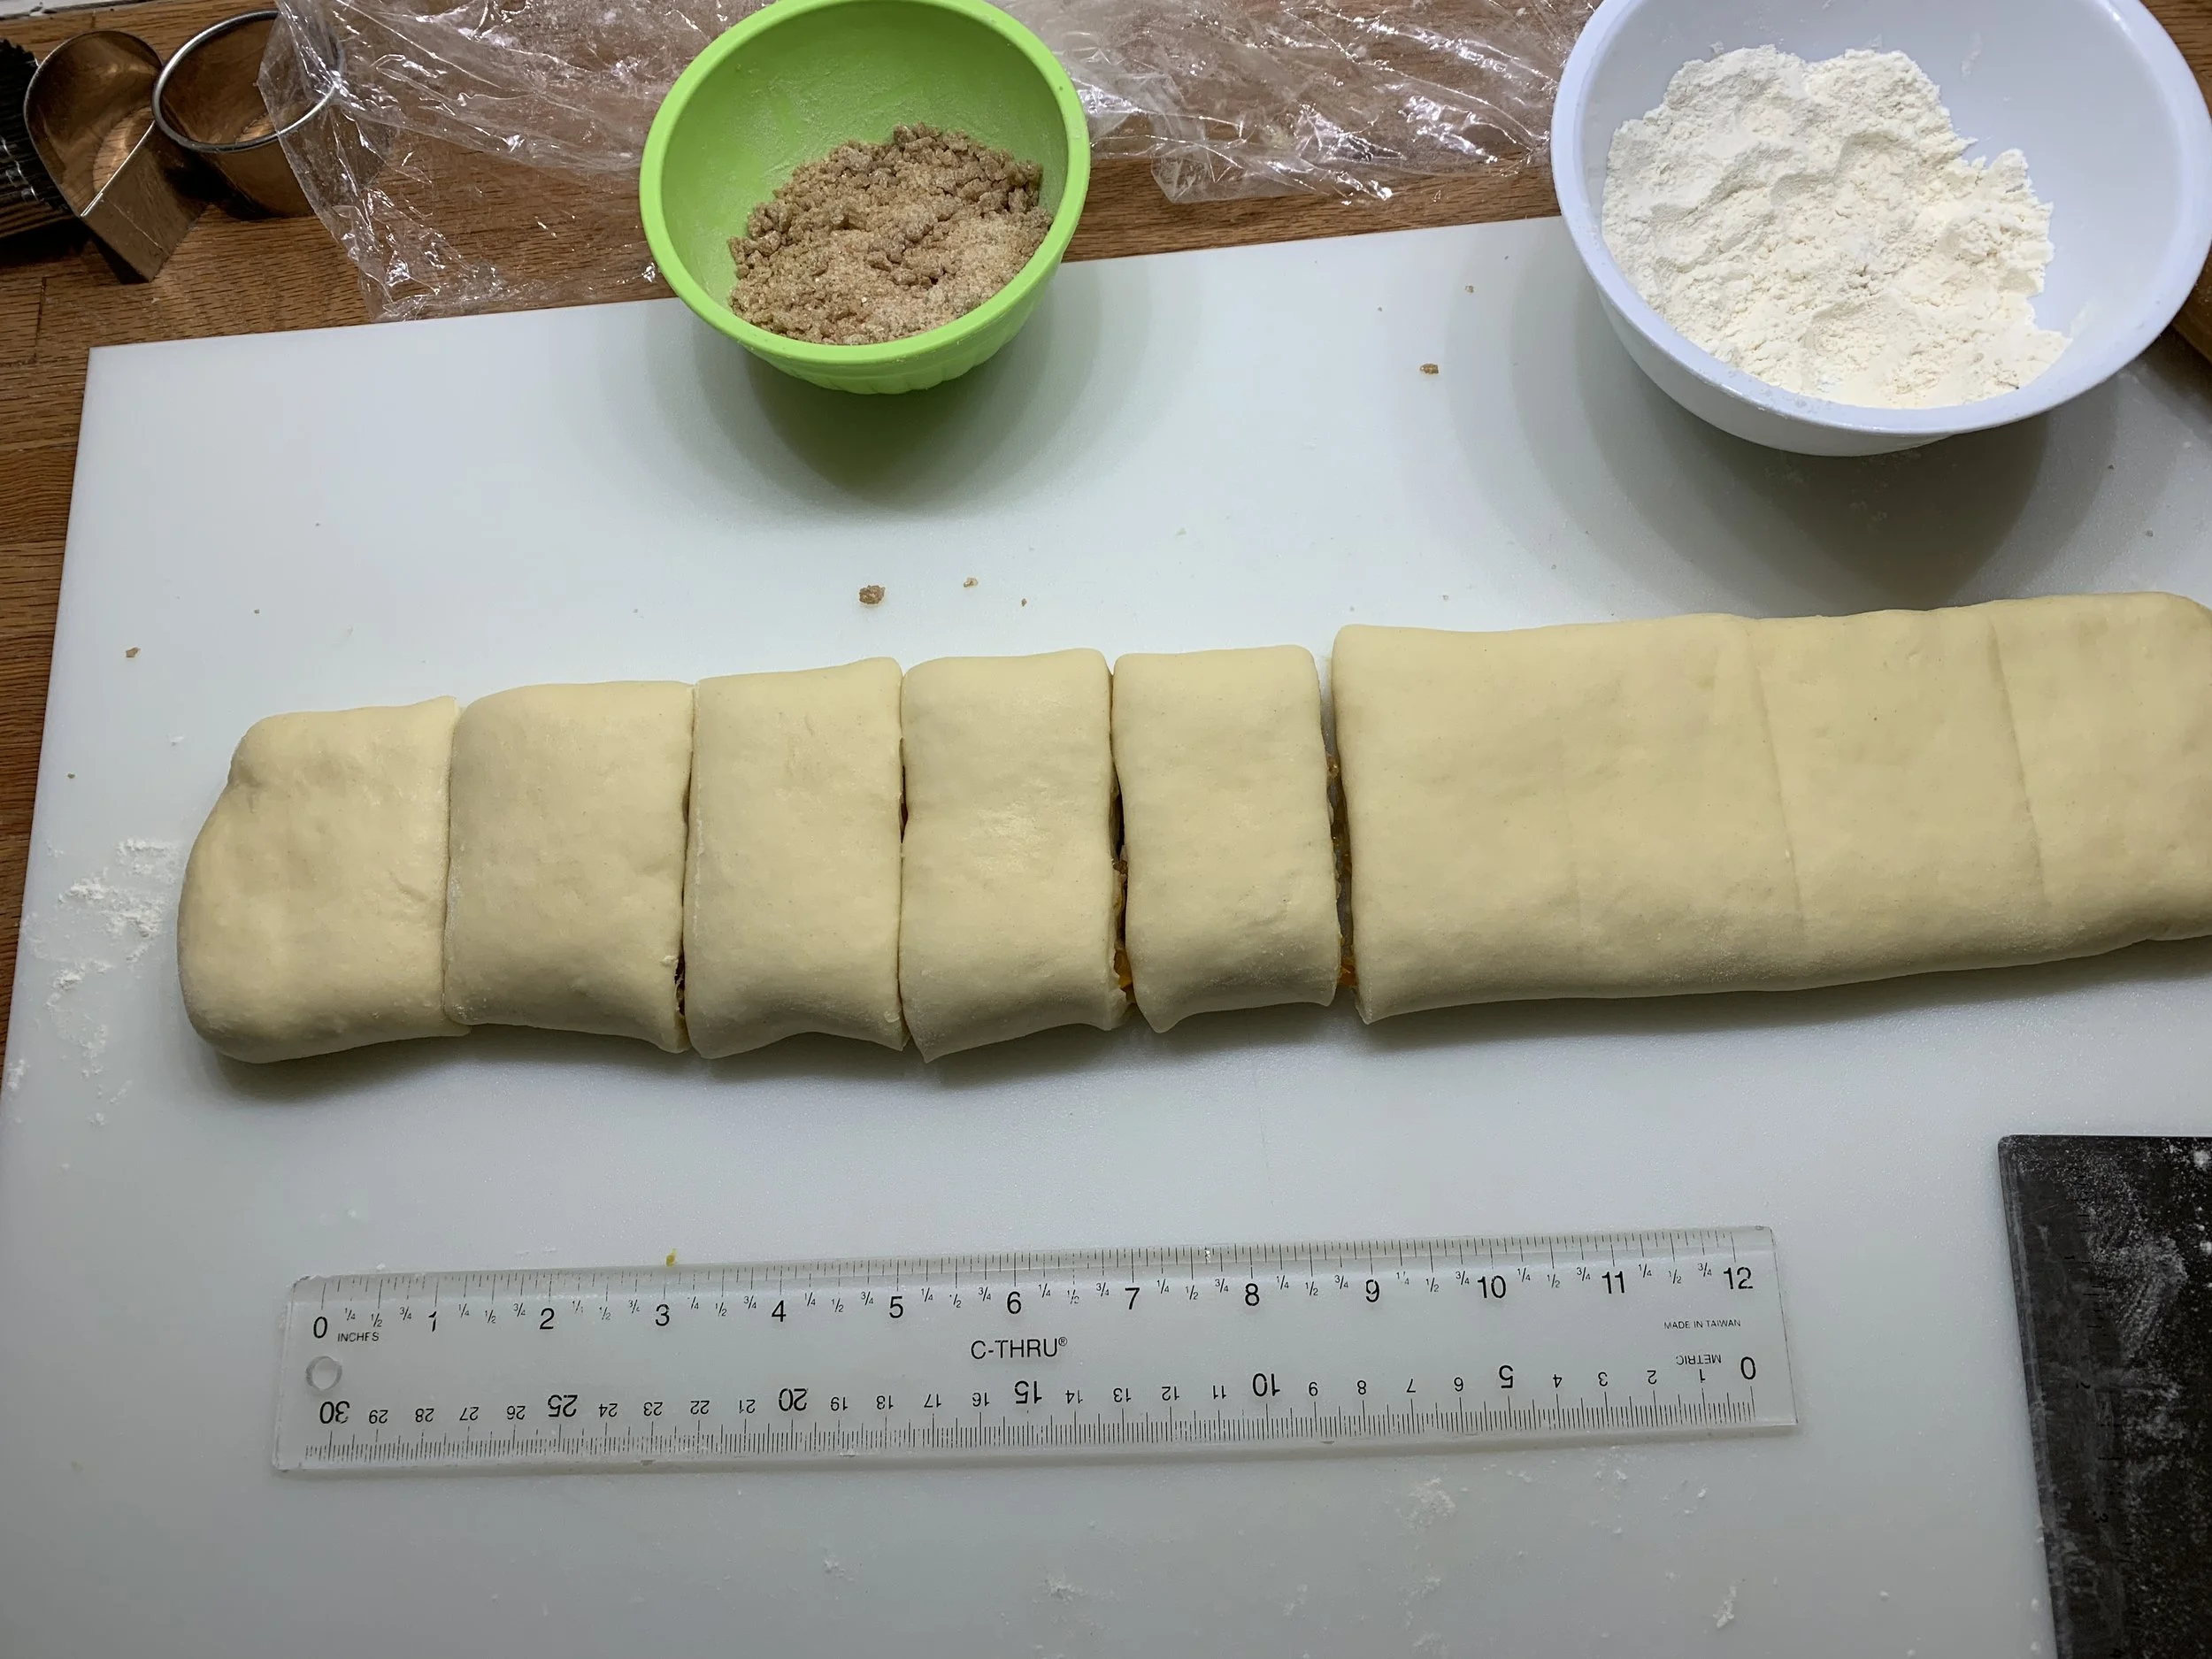
Fold up again to cover the top third.

Cut nine slices, each about 1 3/4 inches (4.5 cm) wide. You can trim up the ends first if you like - I left mine au naturel.

Place spaced apart on a parchment lined cookie sheet, cover with lightly buttered plastic wrap and let rise about 1 1/2 to 2 hours.

Before the rise

Toward the end of that time frame heat the oven to 350ºF.

After the rise

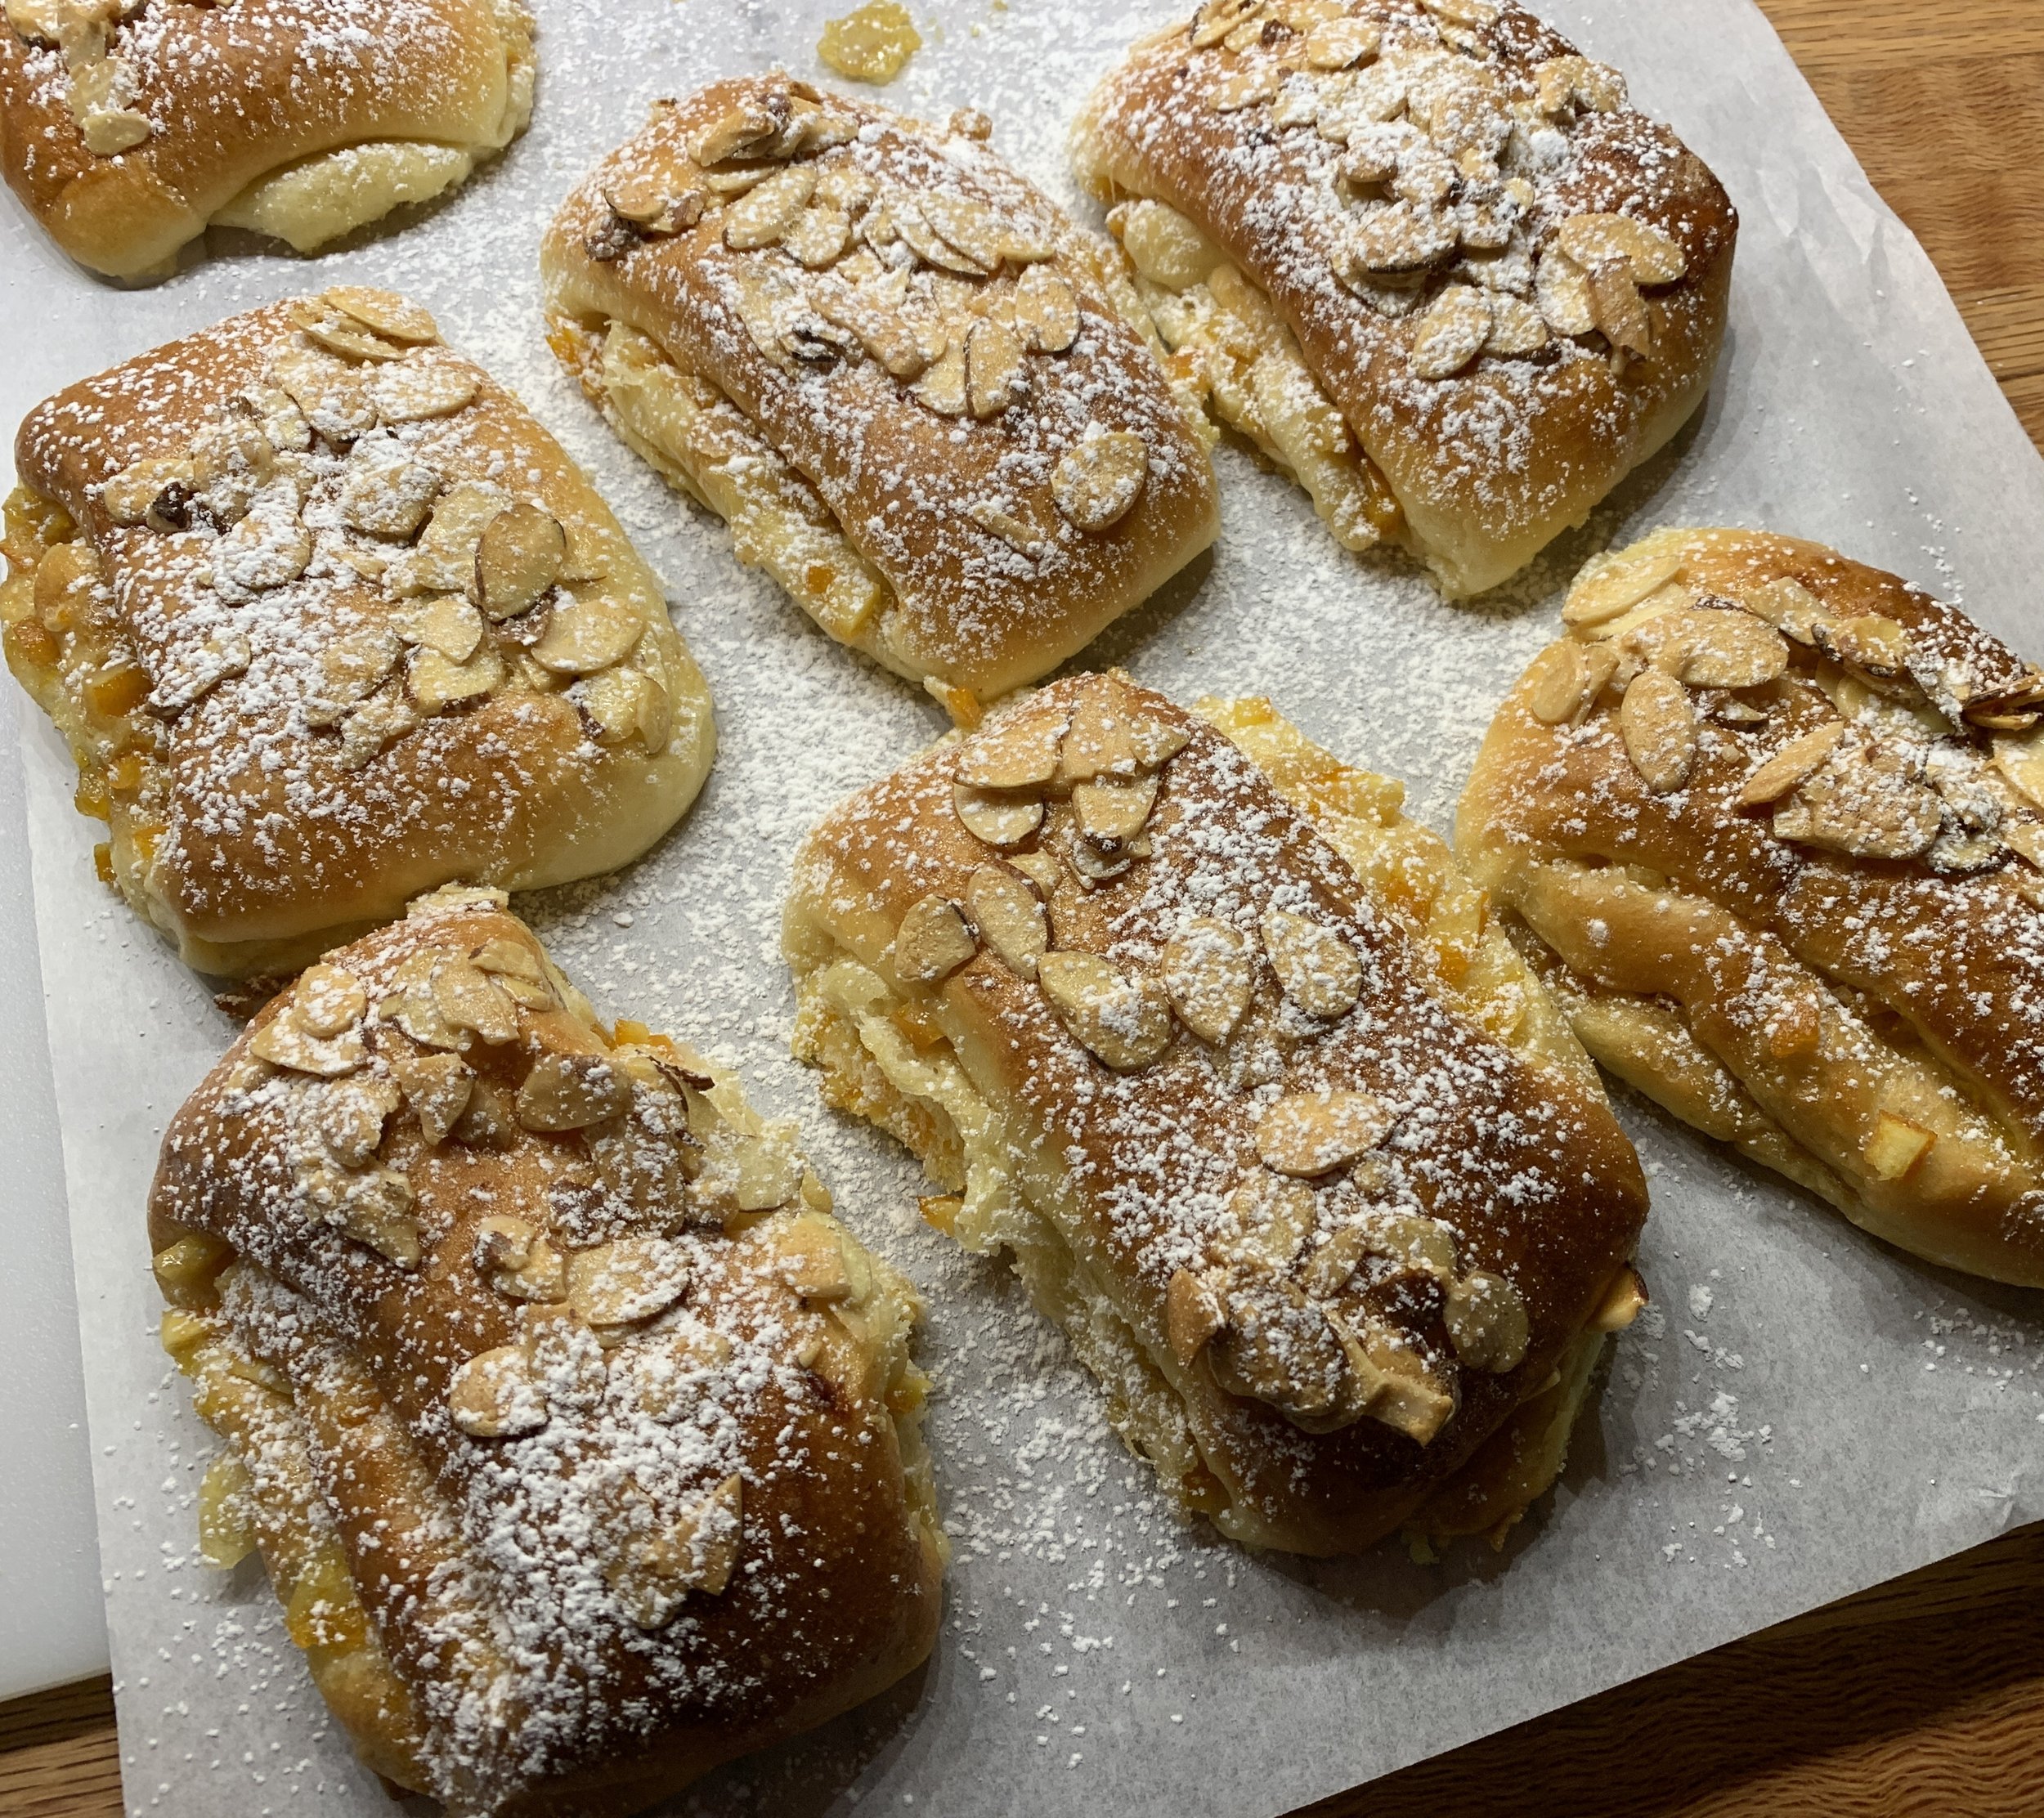
Make a slurry by mixing one large egg, 50 g granulated sugar and 50 g sliced almonds in a medium bowl. Spoon the mixture over each brioche.


Bake about 30-35 minutes until golden brown. You know my mantra - always check sooner than later!!

Cool, dust with powdered sugar and enjoy!

Here’s a cross section - lovely pockets of orange flavor, nice crumb and pretty darn good crunchy top too!

Just goes to show you how you can create variations with your own favorite brioche or sweet bun dough. Have fun with it!

Beautiful colors are popping and fall is definitely in the air! Enjoy!!


Summer baking - peach blueberry cobbler and a bit more

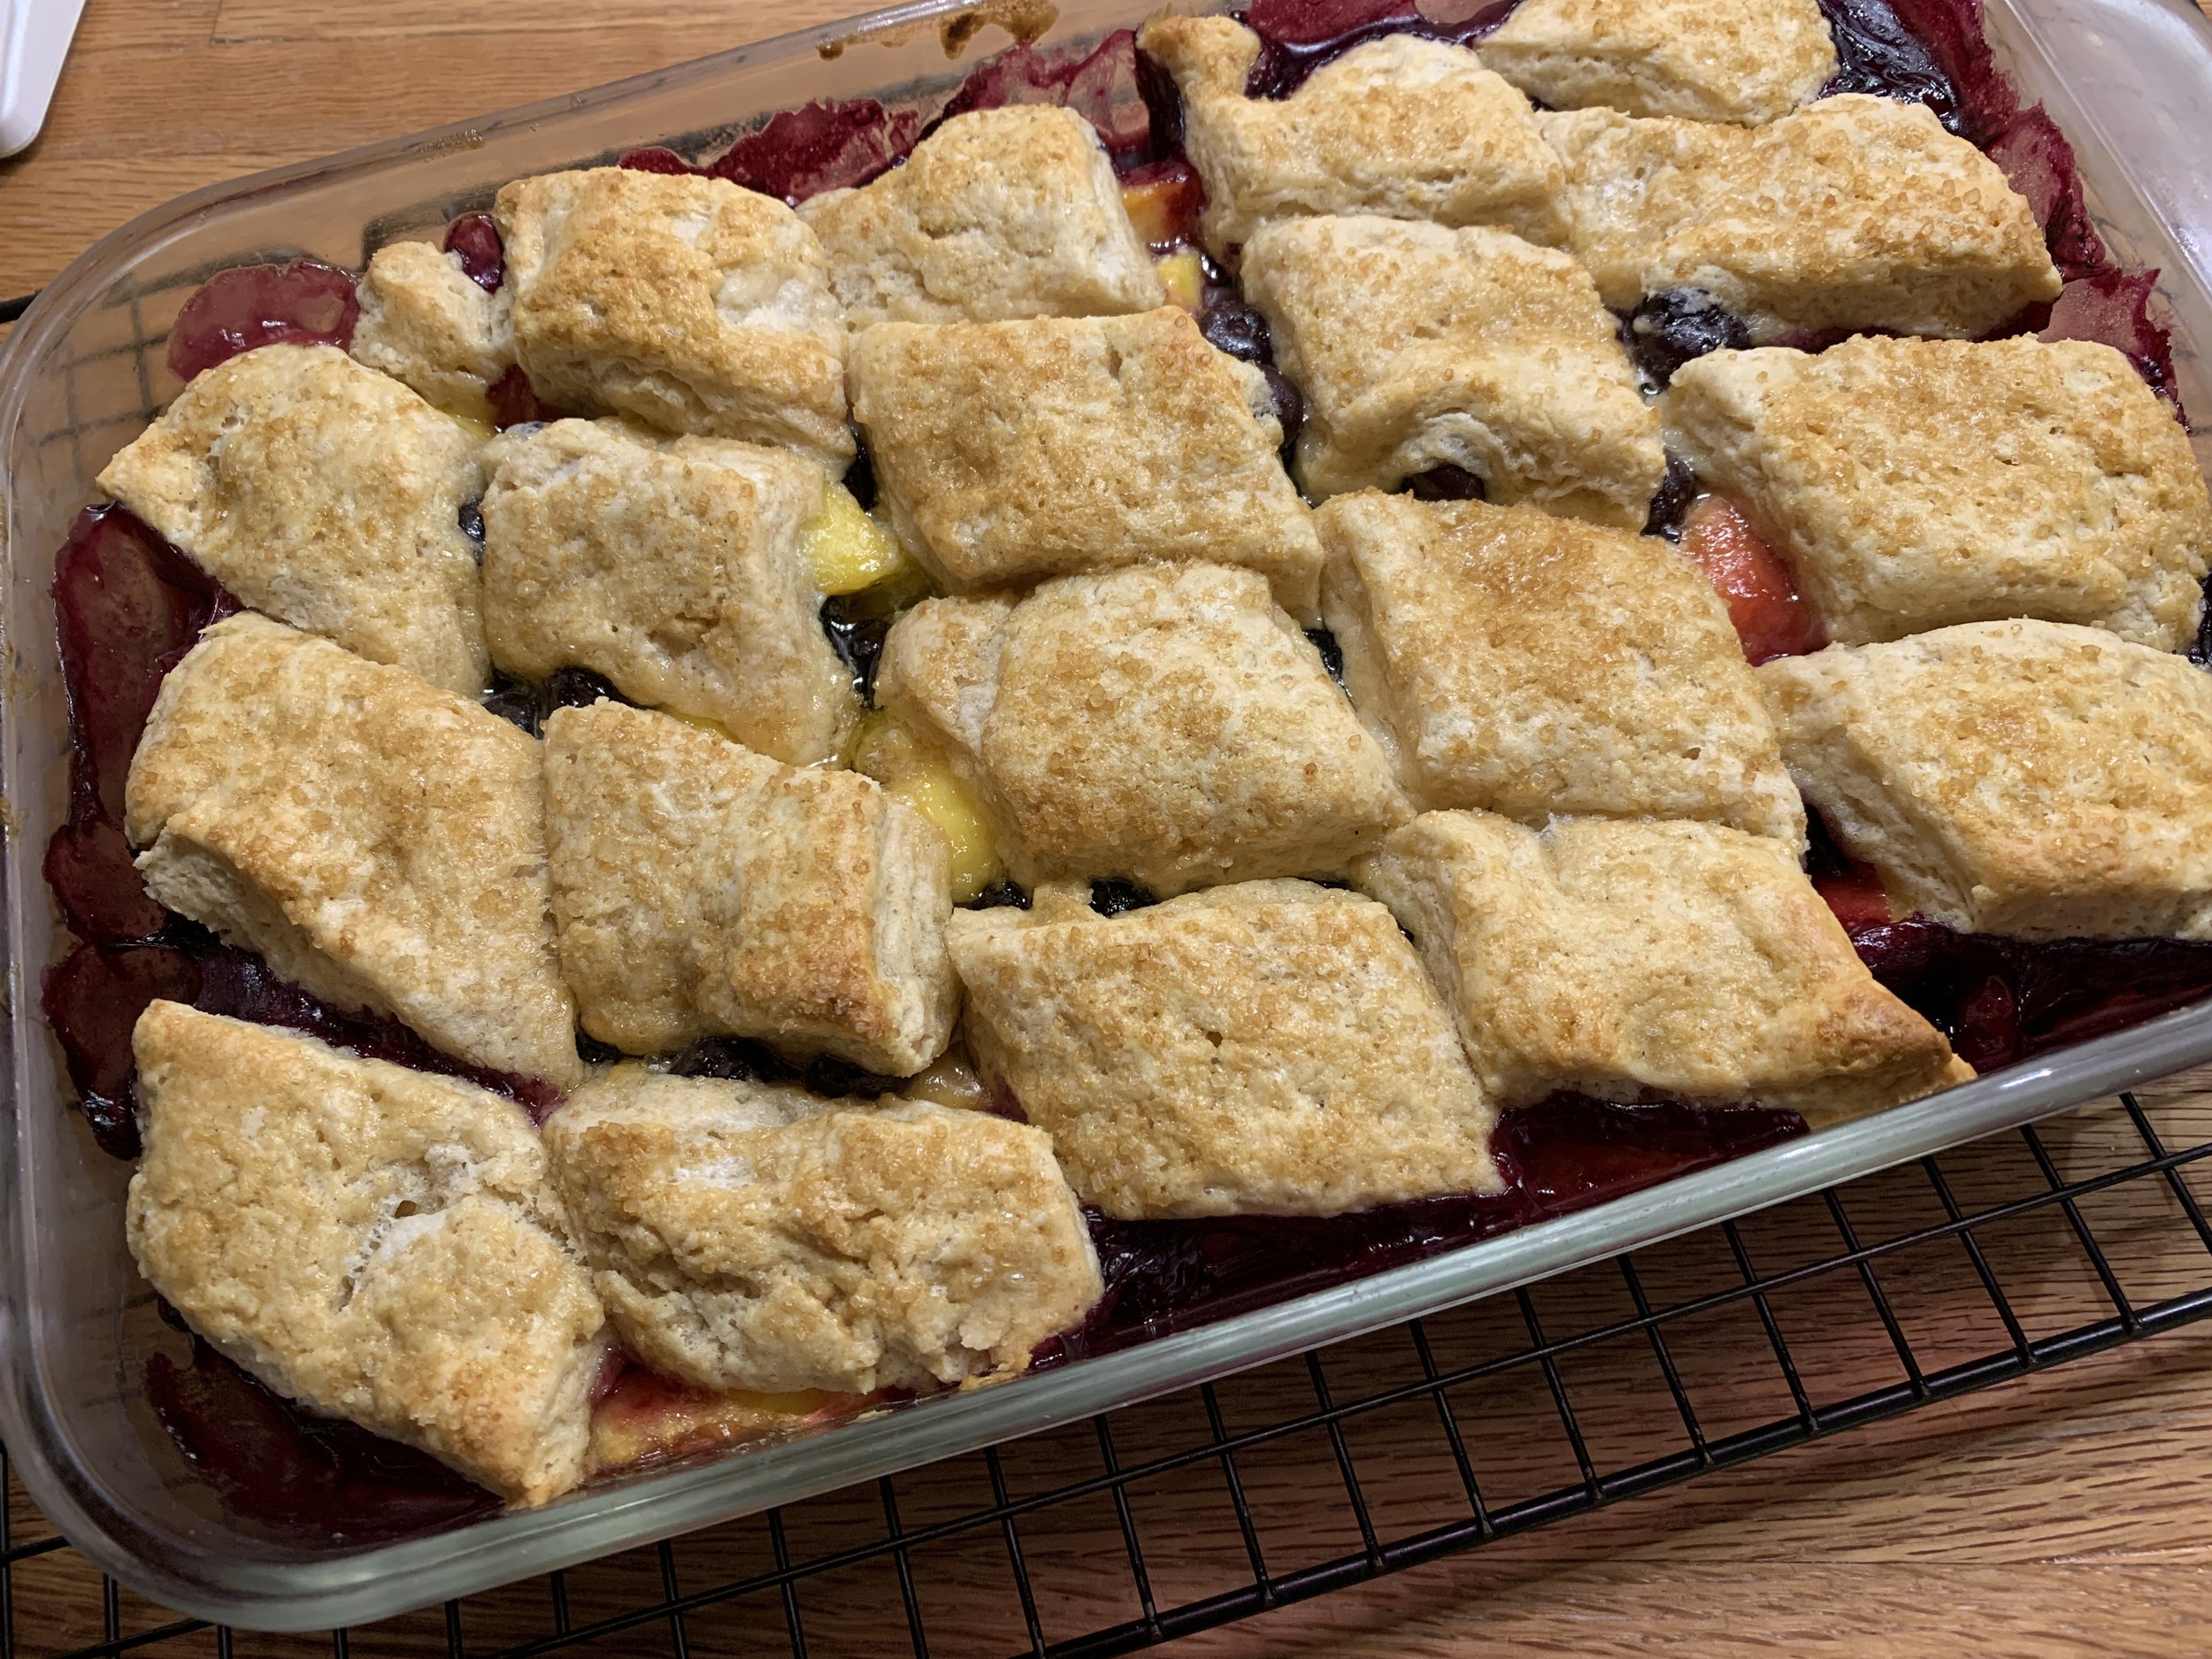
Peach blueberry cobbler

Recently we had a lovely cool-in-the-50s day with a gentle/sometimes heavy soaking rain that lasted ALL day! Somewhat unusual for August, It was nonetheless much needed and I could tell the earth was so happy.

I puttered in the kitchen using up some fresh Michigan peaches that I hadn’t otherwise had time for and fresh blueberries from one of our great local markets.

A couple of years ago I had purchased Lindsey Shere’s “Chez Panisse Desserts” but have only tried a smattering of recipes, most notably the almond torte. I turned to and checked out the cobbler dough - biscuit like (no egg which I normally use to make my scones), it comes together in a bowl, by hand, with cold cubed unsalted butter and cold cream added to all purpose flour, baking powder, salt and a bit of sugar. You can create whatever shapes that delight you - I went for rough diamonds - or should I say diamonds in the rough?

Here’s my version of the cobbler dough: in a medium bowl blend 195 g/1.5 cups whole wheat pastry flour (Lindsey uses all purpose), 1/4 teaspoon fine sea salt, 2 1/4 teaspoons baking powder and 1.5 tablespoons sugar; blend in 85 g/6 tablespoons cold, cubed butter with your fingertips to create coarse crumbs but leaving some flattened pieces of butter visible in the mix; with a fork quickly mix in 3/4 cup of dairy consisting of half cold buttermilk and half cold heavy cream (Lindsey uses all heavy cream); bring together with a bowl scraper then turn out onto a piece of plastic wrap and bring in any remaining dry flour with your hands.

Fold the plastic wrap over the dough leaving enough space to lightly roll the dough between the plastic into a rectangle about 7”x10” and 1/3” thick. Chill until ready to use - that makes it easier to handle and to cut into your desired shapes.

SIDE NOTE: here’s a cobbler post a few years ago using another delicious topping dough.

Yum!

For this smallish sized cobbler I used about 4.5 to 5 cups of fruit - about 3.5 cups sliced peaches (peeled and de-stoned) and 1.5 cups blueberries - tossed with 3 tablespoons sugar and 1.5 tablespoon flour. Spread into a small Pyrex 7-ish by 10-ish casserole, I dotted a few bits of butter all over, placed my cobbler pieces on top, brushed them with milk and added a sprinkle of raw sugar.

Bake at 400ºF for 20-25 minutes until the fruit is bubbly and the topping golden brown. If you’re happy with the bubbly-ness of the fruit but need a bit more top browning, reduce the oven to 350ºF and give it another 5-10 minutes.

Serve warm, slightly warm or at room temperature and don’t forget either a dollop of whipped cream of a scoop of vanilla ice cream. Even a sprinkle of sliced, toasted almonds adds just that extra something. Creamy, crunchy, fruity and delicious.

Pretty tasty

Because it’s still blueberry season I had an itch to make Joanne Chang’s maple blueberry scones again too. Boy they’re good!!

I scoop them out in a more petite version than Joanne does. Lightly glazed, a cross between a scone and a muffin, the texture is wonderful. Best of all they hold up to a couple of days’ shelf life wrapped loosely in parchment paper at room temperature. A short 10 second microwave warm up is just the ticket before enjoying. They freeze well too!

Our neighbors were getting ready to drive their daughter up north to return to school so I gave them a fresh boxful for the road. Another neighbor is recovering from an injury so guess what - she was also a recipient.

Of course I did keep a couple on hand for morning coffee and savored every bite.

Summer marches on and I’m dreaming of cooler weather and autumn days bustling in the kitchen. Can’t wait!

Black-eyed Susans along the walking path

Maple glazed blueberry drop scones

IMG_1295.JPG

I originally included this blueberry drop scone review in my recent “Puttering in the kitchen in August” post but, after consideration and Steve’s helpful encouragement, I’ve broken it out into it’s own post. Enjoy my discoveries on these tasty treats!

IMG_1298.JPG

I’ve now made these scones THREE times since discovering Dorie Greenspan’s NYT article on Joanne Chang’s recipe. Print it out for your own to-do list!

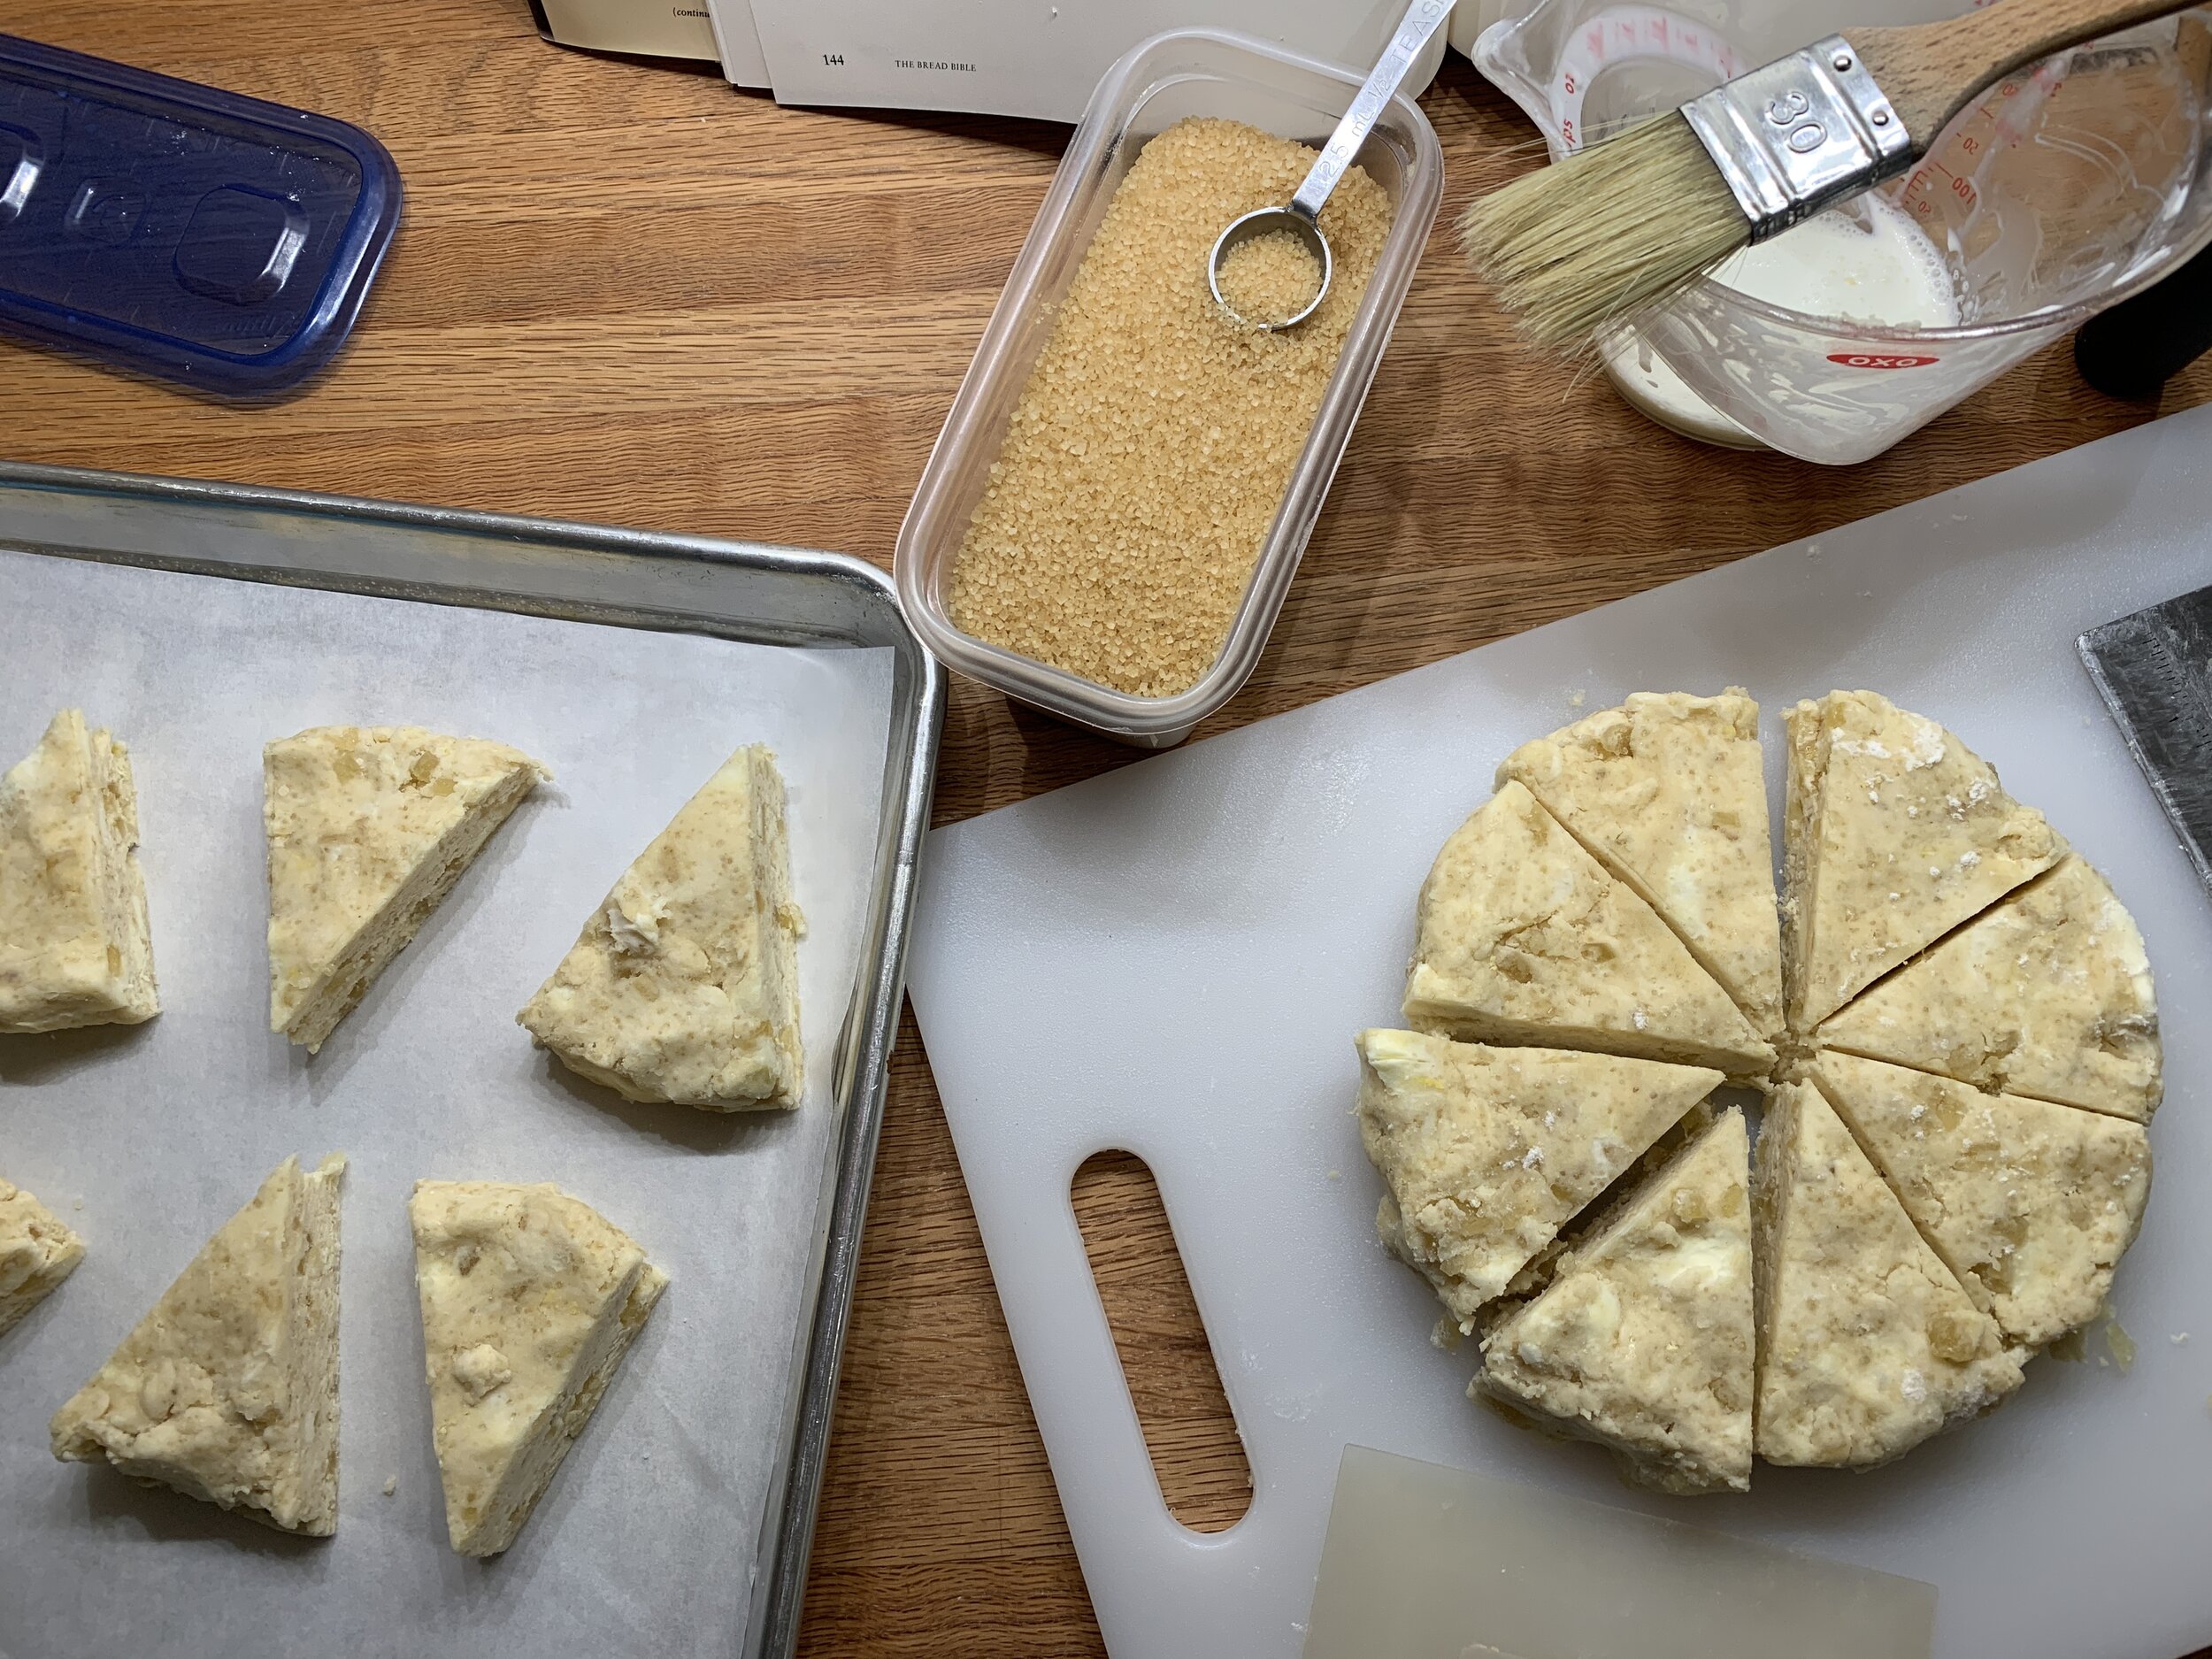
The term drop scones refers to scooping and dropping the balls of dough on the sheet pan as opposed to forming a dough round or rectangle and cutting more uniform triangle shapes for baking as seen below. Both work depending on your vision.

IMG_0881.JPG

Upon first taste test I found them delightful - just a hint of crispy to the outside and more cake like, tender and moist on the inside than my usual scones. The more I ate them, the more they grew on me.

I’m usually not big on cute-sy combo names like cruffins or cronuts, but for these the word “scuffins” definitely comes to mind - a term someone somewhere coined some years back - a cross between a scone and muffin. Oh well, call them what you’d like - they’re good no matter the label. Try them out yourself and see what you think.

IMG_1296.JPG

This recipe involves a slightly different mixing method than the one I’ve come to rely on over the years. Here’s what I discovered about the process (having the recipe on hand as you read through this is helpful). You need to plan ahead - the dough is wrapped and refrigerated for at least 1 and up to 24 hours to allow the flour to fully absorb the moisture before scooping and baking. While the recipe calls for 8 large scones, I made mine smaller using a generous 1/4 cup size scoop with a yield of 16-18 scones.

Chilled dough ready to scoop - check out those butter pieces!

Chilled dough ready to scoop - check out those butter pieces!

First batch: I pretty much followed Joanne’s recipe, using Vermont Creamery’s crème fraiche but since I didn’t have any buttermilk in the house I made the faux version by adding lemon juice to whole milk. I added the first half of the butter into the dry ingredients using the mixer with the paddle to break up the butter pieces (as she suggests), but when it came time to add the second half of the butter, I gave the mixer a rest and used my by-hand method of flaking the butter into the mix by literally flattening the butter pieces with my fingertips and leaving visible pieces in the dough.

The liquid ingredients are all blended together along with fresh blueberries and then added to the flour/butter mixture. Here again I preferred doing this by hand using a spatula and bowl scraper to quickly and gently blend everything, picking up the dry ingredients until a cohesive dough ball forms. I typically don’t add fresh fruit to scones since the fruit can become mushy and macerated during mixing, but the fresh blueberries held up well with a gentle touch.

I refrigerated the dough for four hours and then baked them. Glaze them right out of the oven, cool a bit and enjoy warm or room temperature. Nice!

First batch

First batch

I continued the by-hand approach for the next two batches as well. It speaks to me. Remember our two hands are some of the best tools we have!

Second batch: no crème fraiche on hand so this time I used Siggi’s Icelandic “touch of honey” whole milk yogurt and actual buttermilk. Once I had the dough mixed and gave it a few hours of refrigeration, I scooped out the dough balls onto a parchment lined sheet pan and froze them. It was a couple of days before I baked them (directly from freezer to oven) and they didn’t bake as evenly as the first batch. I also found they browned more on the bottom and were less tender and delightful. Perhaps you can appreciate their “rough and tumble” look below.

Full disclosure - I messed up the baking powder amount and attempted a fix so accuracy is in question. Even though they rose OK they weren’t as fluffy as batch one. Yikes - not my usual M.O.

True confession time - a few weeks back I tried some roasted tomato, ricotta, herb scones and realized after I had them in the oven that I FORGOT to add the baking powder. Whoa! How many times have I made that base scone recipe?? Just goes to show you how distraction and lack of focus can sneak right in there these days.

Second batch

Second batch

Third batch: I made my own crème fraiche - yay! Here’s the deal: heat a cup of heavy cream to about 95ºF (easy in a glass Pyrex measuring cup in the microwave), stir in a teaspoon of buttermilk, cover loosely and let sit at room temperature for 24 hours. Mine was thickening nicely by then and into the fridge it went. I used it for the scones on day 4 of it’s maturation - nice and tangy. I again used a squeeze of lemon juice in whole milk as my buttermilk. I reduced the whole wheat flour by 20 g and increased the all purpose by 20 g (I just felt like it).

BTW - For all three batches I used white whole wheat flour for the whole wheat portion. In the future I’ll try whole wheat pastry flour (if I can ever get my hands on some again!) for an even more tender result.

This time I kept the dough refrigerated for a full 24 hours before scooping and baking. The end result was much like the first batch. Mmmmm good.

IMG_1295.JPG

What I learned: mix by hand, refrigerate the dough 4-24 hours then scoop the chilled dough and bake soon after. Use the right quantity of baking powder. Duh. Thumbs up on the crème fraiche and buttermilk combo. Maybe don’t freeze them unbaked but I’m not necessarily giving up on that approach. That second batch was the outlier due to a questionable baking powder amount and maybe even the oven temp when baking directly from the freezer.

I encourage you to give these a try. You’ll like them.

Autumn is coming . . .

Puttering in the kitchen in August

Raspberry cream cheese Danish

Raspberry cream cheese Danish

I first published this post a few days ago but I’ve broken out the blueberry scone section into it’s own post and edited this one. So, if you saw it the first go-around, it’s different now.

We’ve had some touch of autumn days (which I LOVE!) but also some heat and humidity coming back in which doesn’t typically inspire one to do much baking. Even so - I still manage to get some quality kitchen time in. Gotta do it.

The raspberry Danish above are a result of tweaking and finalizing my Danish dough recipe mentioned in the recent Swedish cardamom bun post. So delicious!

Following are a few more visuals of some of the things I’ve been doing lately. I stumble across recipes that either get my attention or not, but those that might incorporate a different technique or ingredient are the ones that I put on the to-do pile.

Please enjoy the pics and dream of the things you might create!

First these blueberry scones are from a NYT article by Dorie Greenspan on Joanne Chang’s (of Boston’s “Flour” fame) recipe. Here’s a more fleshed out post on these. You should give them a try!

Maple glazed blueberry drop scones

Maple glazed blueberry drop scones

Next up - dukkah shortbread. I’ve been wanting to do this for awhile now. Dukkah is a middle Eastern and Egyptian concoction made with toasted nuts, herbs, seeds and spices that are coarsely ground and used in marinades or as garnish for soups, salads, meats, veggies or whatever you want really.

There are LOTS of recipes. Just Google it. I used pistachios and hazelnuts, sesame seeds plus cumin, coriander, fennel and sea salt. I blended about 75 g of the mixture into my base shortbread dough made by blending 75 g sugar (consider half or all dark brown sugar here to add some caramel notes to the nuts and spices) with 200 g unsalted room temperature butter; blend in 250 g all purpose flour (or use 60 g whole wheat pastry flour and 190 all purpose) along with the dukkah . Wrap, chill at least an hour, then roll out and cut shapes of choice. This is good. Sweet and savory. I might leave the fennel out next time and add almonds into the mix.

Dukkah shortbread cookies

Dukkah shortbread cookies

Individual cobblers are fun. These are made with fresh Michigan peaches and blueberries. Great with vanilla ice cream of course.

Individual peach blueberry cobblers

Individual peach blueberry cobblers

Financier batter is simply ripe with flavor possibilities.

Coffee walnut streusel financier

Coffee walnut streusel financier

Next up - these maple almond butter cakes are from a recipe on the underside of the foil lid on Siggi’s yogurt. I don’t keep flax meal on hand so I used almond flour instead. Other than adding a bit of almond butter to shortbread dough in the past, this is my first foray into baking with a significant amount of almond butter. Let’s just say I could get used to it.

There are many brands out there - Justin’s is a popular one. I used “Barney Butter” and have since purchased a roasted almond butter from my favorite almond paste supplier Mandelin. I’m looking forward to trying it.

IMG_1294.jpg

I made these twice. It’s an easy mixing process. The first time with some blueberries and/or peaches tucked on top before baking plus a basic crumb top. Two different sizes - 3” Fat Daddio aluminum pans and smaller panettone papers. One of the 3-inchers went to my mom for her birthday.

IMG_1222.jpg

The second time I used one of my favorite silicone muffin molds, didn’t add fruit but made a delicious almond streusel topping.

IMG_1259.JPG

I will say these are growing on me. They have very little sugar in them compared to many muffin recipes (1/4 cup maple syrup and just a couple tablespoons of brown sugar) so at first bite they seem to fall flat on the taste buds yet . . . . the texture and overall experience is nice, and they seem right somehow. Even Steve said so.

Drizzling some maple syrup or honey on before eating is an excellent addition. The fruit version definitely beats the non fruit and with that added almond streusel . . Yum. Methinks a nice dollop of jam in the center of each before baking would be great too. Next time.

A look ahead - even though it has taken me a seemingly endless amount of time, in addition to putting the final touches on a new brioche feuilletée post, I’ve started the draft for a baguette project piece as well. I love sharing details of processes and steps but that also means I spend a lot more time reviewing and comparing in order to offer a reasonable summary of whatever it might be. At any rate, after 24 weeks of essentially being home, each day brings a different vibe to our lives.

Happy baking, be reasonable and don’t forget that periodic deep breathing helps too.

Soon we’ll be deep into official “baking season”. Love it.