Favorite garnishes, the end: crumbles

Banana rye cakes with hazelnut crumble (and a bit of chocolate tucked underneath)

Ready to bake mixed berry crisp with pistachio crumble

Time for the garnish finale in what has become a 4 parter on some favorite ways to dress up and enhance your baked goods.

Crumbles are easy, ever so adaptable, perfect for layering or topping and they keep either unbaked or baked in the freezer for many weeks. What a great way to be ready for any garnish occasion. Yes!

If you plan to make some crumble, feel free to double, triple or quadruple the recipe for future projects. Simply mix equal weights of flour and sugar in a medium bowl then sand in the same weight of cool, diced butter with your fingertips, work it to smallish coarse crumbs and voilà, that’s it!

A basic starter quantity is 60 g each of flour, sugar and butter which easily tops a dozen muffin size teacakes, a 9” fruit tart or a 9”x9” pan of fruit crisp.

Ready for sanding

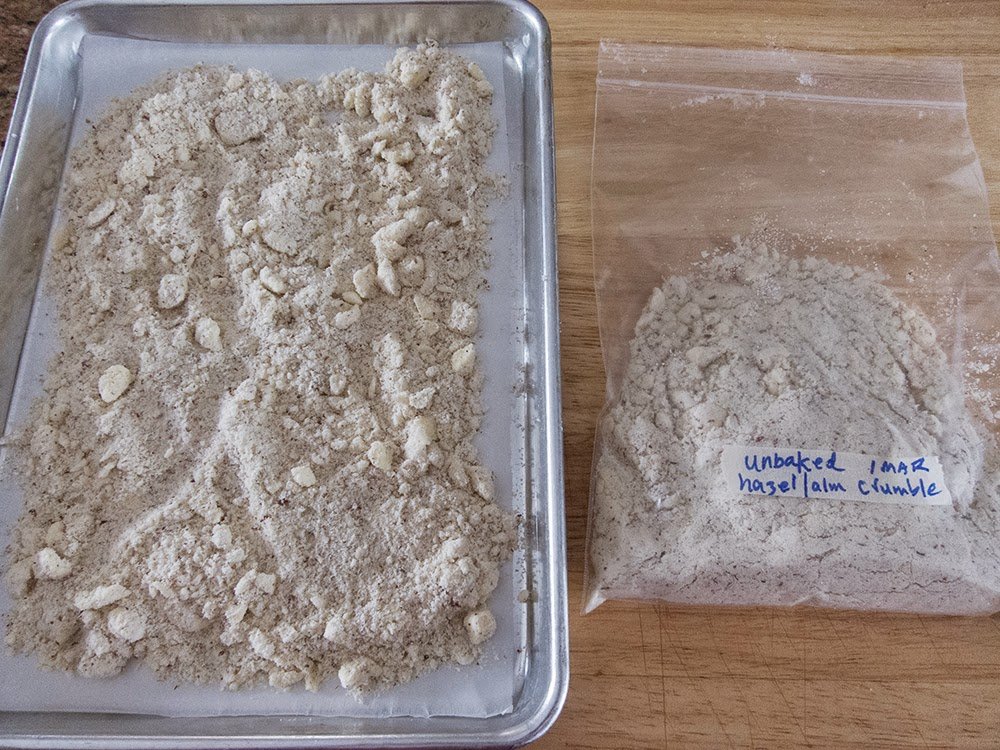
If you’re not using it right away, either spread it out on a sheet pan to bake ahead (350ºF for 15 to 20 minutes, stirring occasionally until golden brown), cool and bag up for the freezer OR store unbaked in a zip-top bag until ready to use.

Tray ready to bake/bag going into the freezer

All baked up

You can change up your crumble by subbing in spelt, whole wheat pastry or rye flour for all purpose (or do a mix) and swap out granulated sugar for raw or dark brown. Make it more nutty by adding an equal weight of nut flour or finely ground toasted nuts. Or simply add in chopped nuts (use anywhere from half to equal the weight of the other ingredients) for more texture and crunch. Add in your favorite spice(s) and/or some citrus zest. Create!

For an alternate crumble approach I use my favorite chocolate shortbread dough (recipe compliments of Thomas Keller’s “Bouchon Bakery”) and rather than bake it as cookies I just crumble up the dough in a single layer on a sheet pan and bake it up. There’s always a bag of the stuff in my freezer. Steve and I love it on ice cream, and I use it to top teacakes garnished with Swiss meringue buttercream or my favorite chocolate ganache tart.

Black gold!

Dark chocolate ganache and caramel apple teacakes

Chocolate ganache tart

You can do the same with your favorite crispy gingersnap dough or basic shortbread dough. I love making my own graham crackers too, both for crumb crusts as well as crushing them up for a garnish.

There’s nothing like the crispy crunch of crumble married with juicy, baked fruit, layered with luscious cream or as a topping for citrus curd or ganache - the list goes on. Just go for it and have fun.

Cheers until next time.

Hazelnut ricotta berry entremet layered and topped with almond/hazelnut crumble

Giving thanks for daily bread: Semolina rye 2 ways

B0A379E3-8A65-4BAD-99F5-D090C98D69C3.jpg

This one was fun to work on. I adapted a King Arthur Baking Company direct dough recipe, created a poolish version and tried it a couple of different ways - boules and standard sandwich loaves. Don’t you just love dough? And bread? And pastries? And . . . . . . . ! It’s all fantastic!!

I’ve written about poolish most recently in my baguette post. It’s in the category of pre-ferments or dough starters and is made up of equal weights flour and water. Fermented for some hours before being added to the final dough, it kick starts the fermentation process, adding more structure, flavor and a longer shelf life to the end result. All great reasons to do it! It just takes a bit of planning ahead.

I turned to Rose Levy Beranbaum’s book “The Bread Bible” for guidelines to convert a direct dough recipe to a poolish method. Generally you’ll weigh 1/3 to 1/2 the amount of the total water in the recipe (in my case 540 g x 0.33 = 180) and 22-33% the amount of the total flour (826 g x 0.22 = 180 give or take a gram) to create your poolish. Mix 180 g cool water, 180 g bread flour plus a pinch of instant yeast, cover and let sit overnight.

Note: as you can see, RLB gives a range within which you can work to create the poolish . I chose the lower ends of the spectrum.

Here’s the result after an overnight room temperature ferment.

91233A40-091E-46EC-9134-F6A283220B5E.jpg

Here’s my full recipe. I love writing recipes out by hand - something I got used to during my stage in Paris in 2007. It’s a great way to place the mixing steps along side of the ingredients which for me makes it more user friendly. Notes can easily be added in the margins as well.

0E0FEECF-AB27-4B11-94E5-4860BF20EA0C.jpg

I’m a big fan of King Arthur’s all purpose and bread flours, and I turn to Bob’s Red Mill for other specialty flours, in this case semolina and dark rye.

699A4916-0BAB-440E-AAFD-712315B70F95.jpeg

When ready to mix the final dough, weigh out the remaining dough ingredients. Add the warm water to the poolish and mix to loosen. Place the bread, rye and semolina flours and the instant yeast in the bowl of a stand mixer fitted with the dough hook, then add the poolish/water to it. At this point I give it an initial blend with a spatula to get things started. Then let the mixer do the work!

79404B96-C4D1-4E8F-AEFC-82724B650D86.jpg

Mix on low speed and add the sugar, olive oil and salt. Once the majority of the flour has been blended in, increase speed to 2-4 and knead for 7-8 minutes to a smooth, slightly sticky dough.

5C9FA152-774E-4BC7-B97A-163672719556.jpeg

Since the dough is a bit sticky, lightly wet your hands and bowl scraper to help you form a ball. Cover with lightly oiled plastic wrap and let rise 60 minutes.

After the first rise

After the first rise

My first round with the full recipe was to make boules. Many months ago I had snagged a great deal on a 2 1/4 quart Le Creuset lidded enameled cast iron saucepan at Sur La Table (now sadly closed here in Grand Rapids), and I wanted to make a cast iron pot loaf as well as a couple of on-the-baking-stone boules.

9996A523-B6C0-4063-AD3C-D83931EA2888.jpg

Divide the dough into three ~479 g portions and shape three boules. Place one on a piece of floured parchment cut as seen below to allow for easy lifting and placing into the pot. Cover lightly with oiled plastic wrap and let rise one hour.

Now’s the perfect time to heat the oven to 450ºF with the empty covered pot inside. You want the pot nice and hot! I also keep my baking stone on the bottom rack so that heats up for the next two loaves too.

All risen!

All risen!

Set the other two on a parchment lined overturned sheet pan, cover and let rise one hour.

Note: Since I planned to bake in two batches, I popped these two into the fridge at the end of the rise so as to avoid over proofing while my pot bread was baking.

Risen!

Risen!

When ready to bake the first loaf, very carefully remove the heated pot from the oven, lift the boule by the parchment and lower it into the hot pot. Don’t burn yourself!!

185E773C-9735-40D9-8783-6351C16CDAB3.jpg

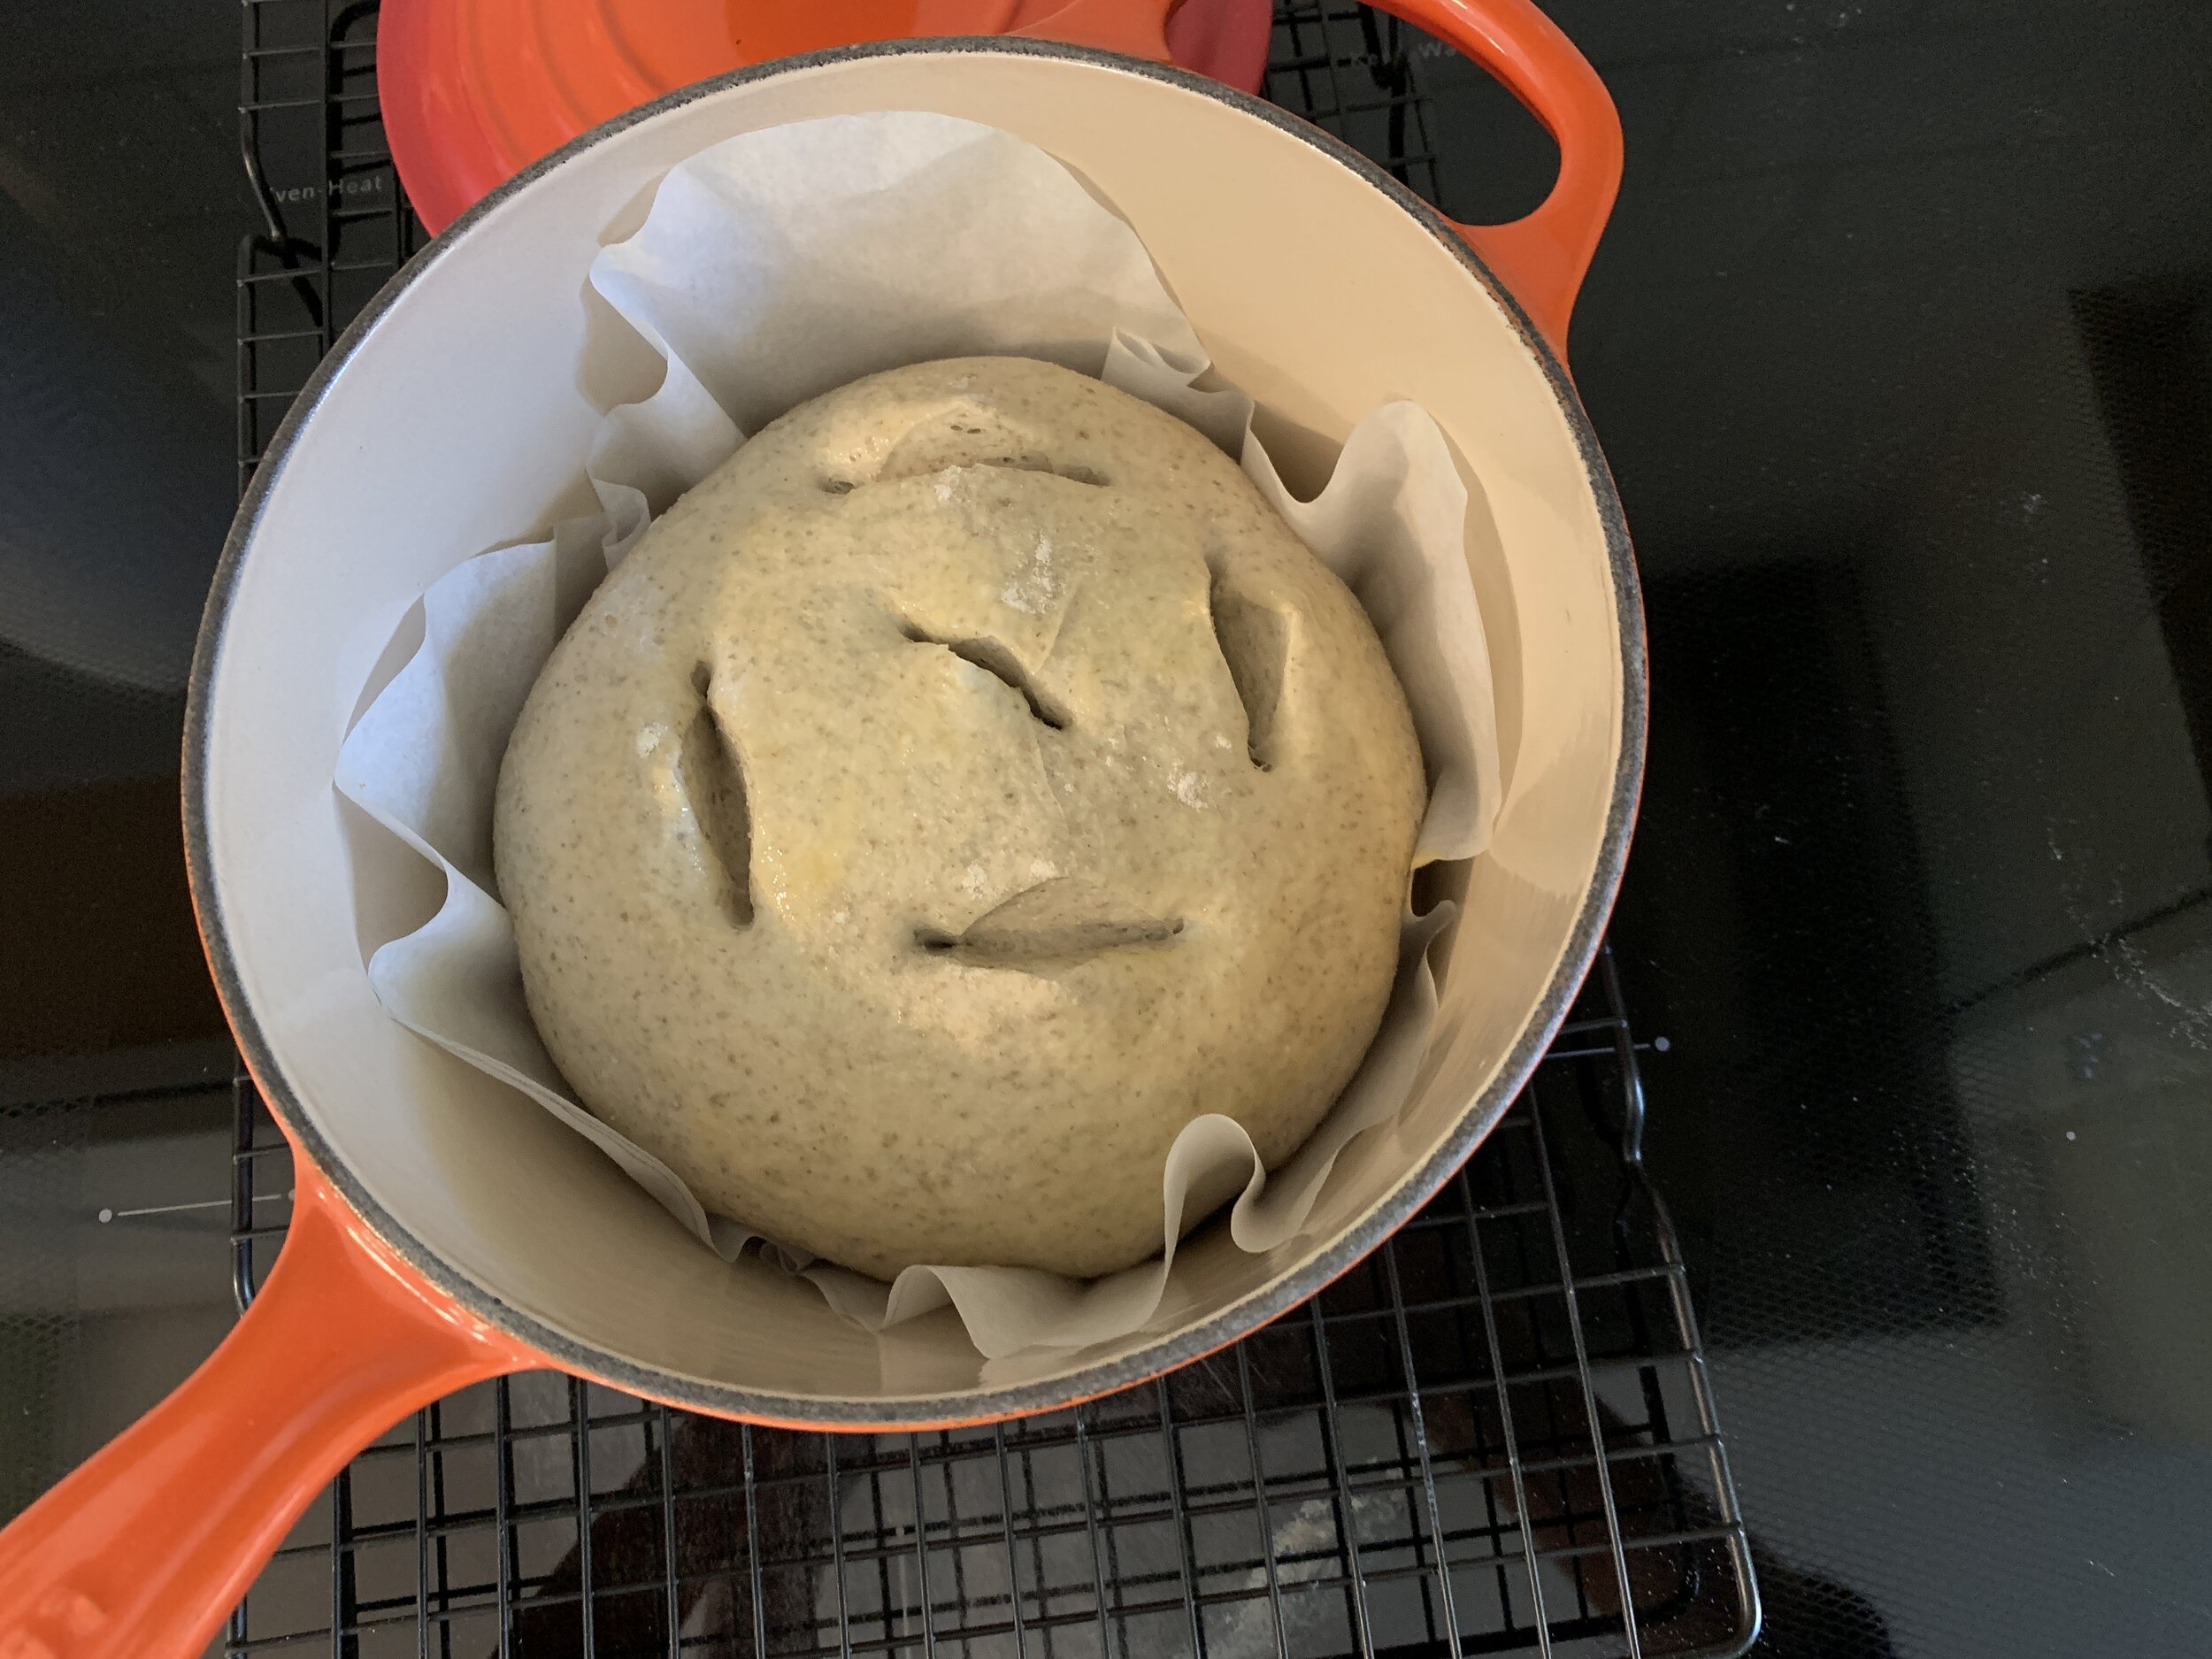
I opted to snip the top with scissors rather than score it - my pattern came out somewhat catty-wompus - hmmmmm, what exactly was I going for here? Looks like a strange Halloween pumpkin. I realized after the fact that I forgot to snip across each slash like an X to create little ears that would open up during baking. Oh distraction!! At least it didn’t negatively affect the end result!

4AFDB0E1-E126-4E32-A604-7D18ADBEBA73.jpeg

Brush it with egg wash or a little milk and bake covered for about 20 minutes . . . . .

C3CCB502-554A-4C7F-A9EB-DB8F315CA118.jpg

then uncovered for an additional 10-15 minutes until nicely browned.

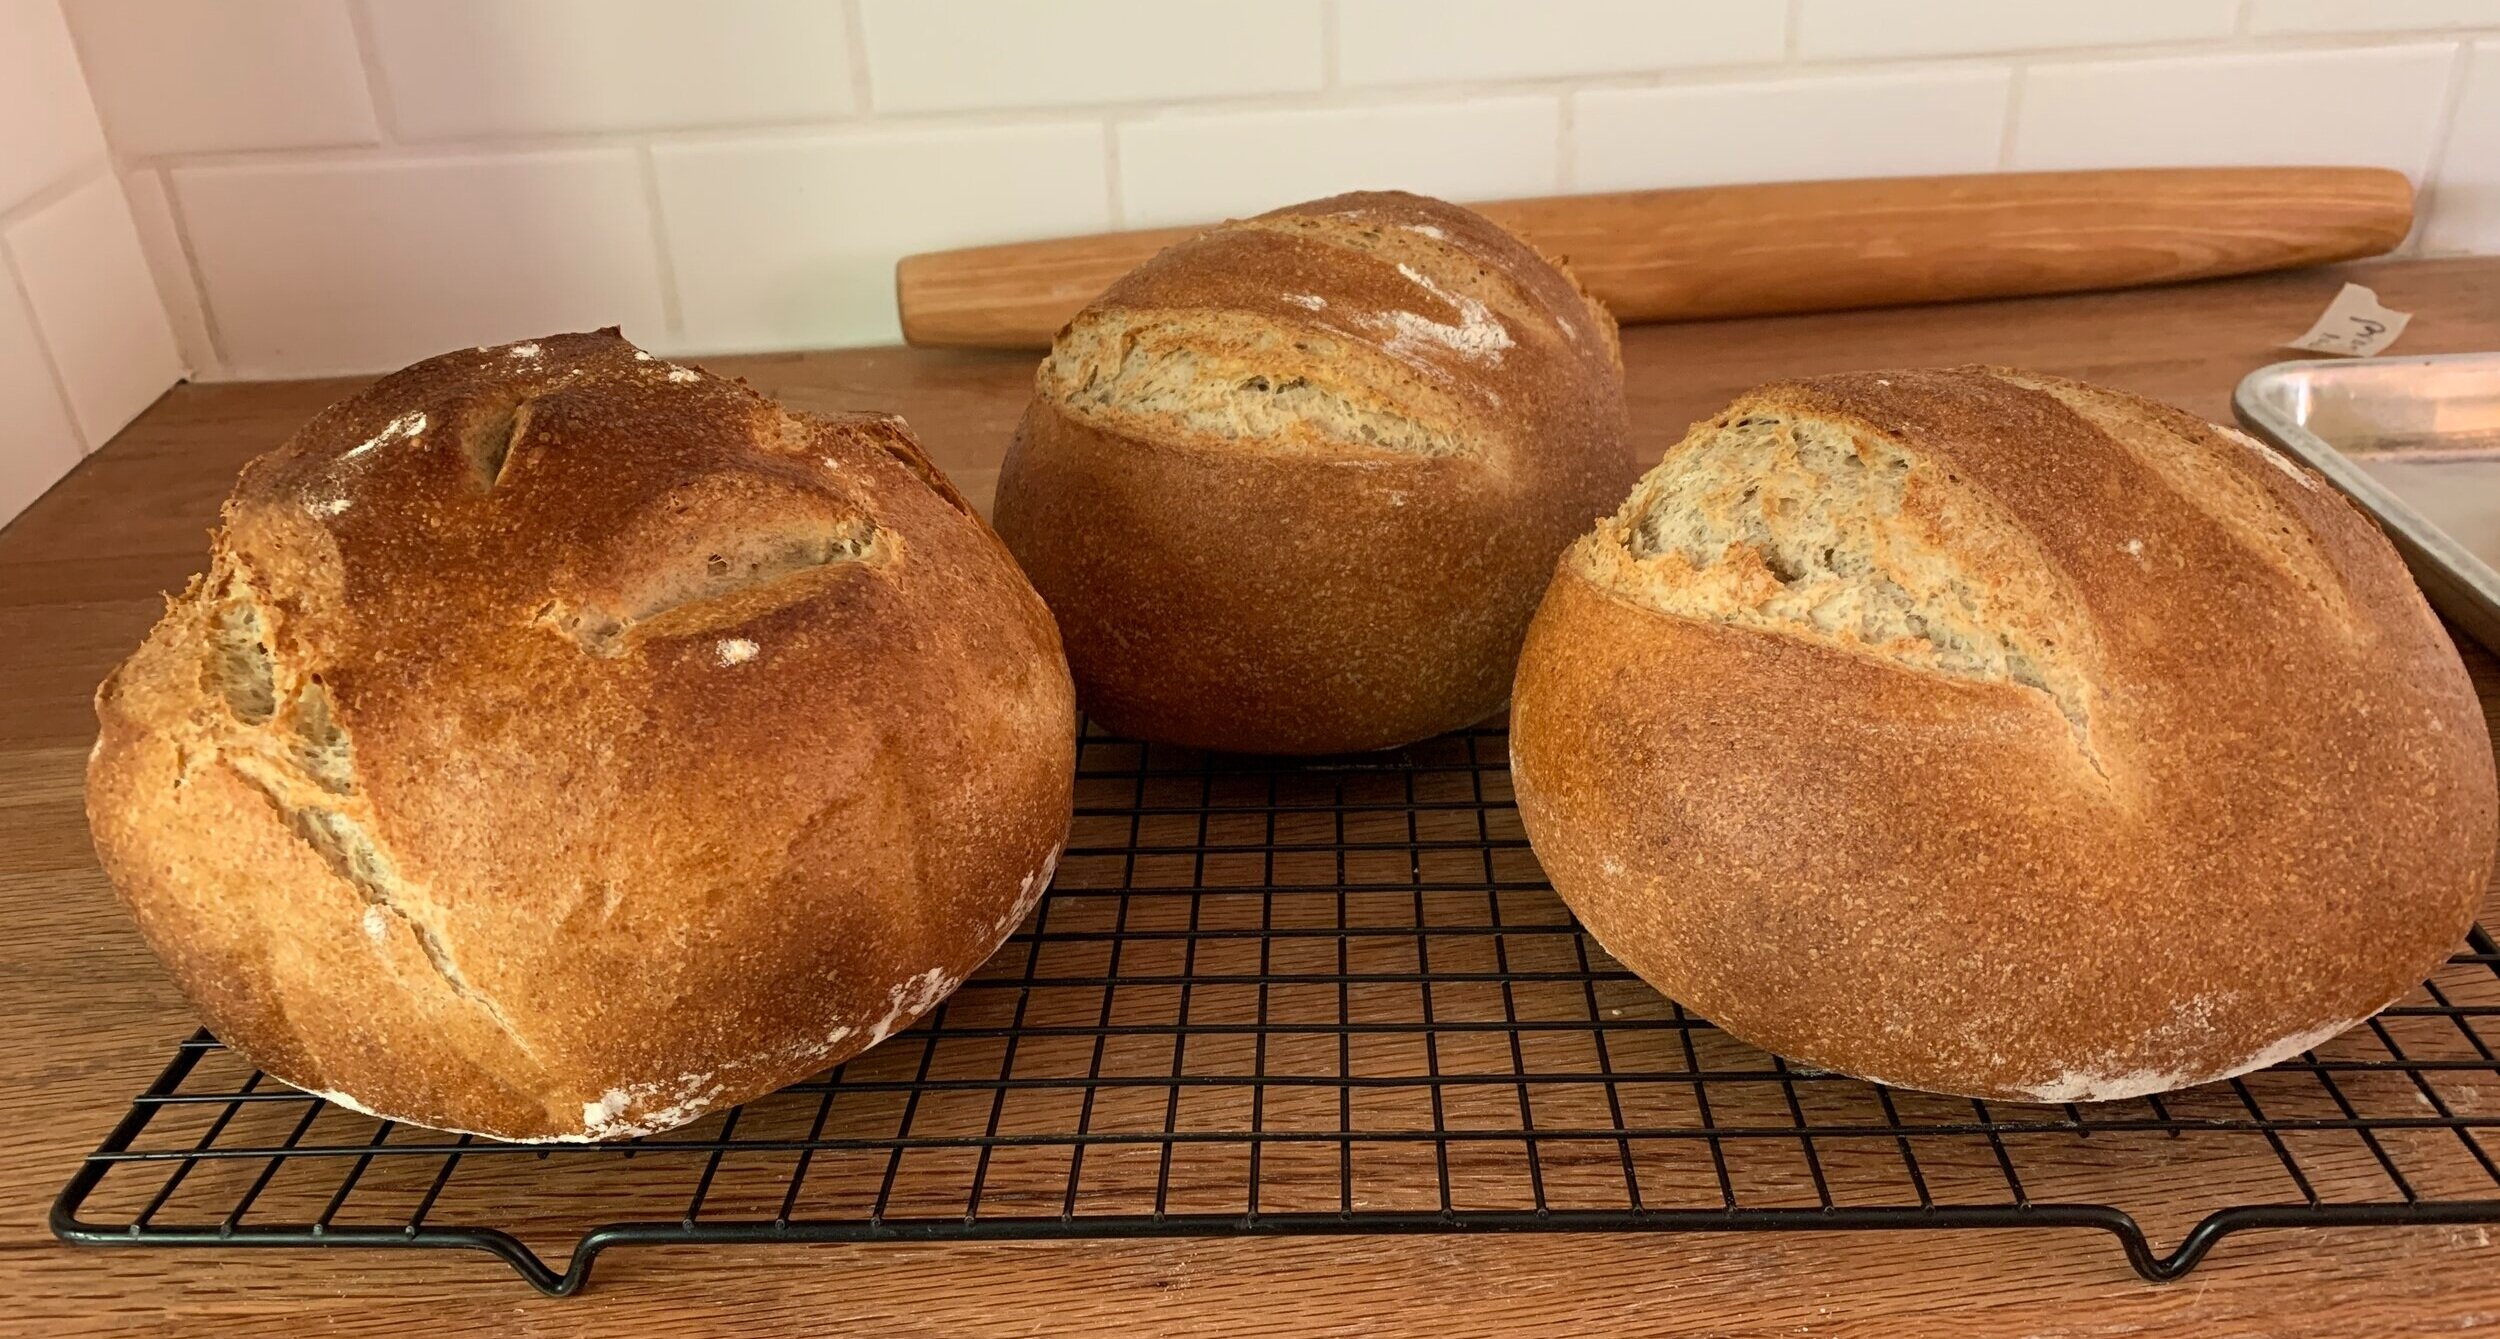
Voilà

Voilà

Lift it out and let cool on a rack. Don’t you think the scissors snips actually lend it a certain carefree character?

7905D48F-6843-439C-934C-9004B09B4950.jpeg

For the other two boules, turn the oven down to 400ºF, egg wash, score and slide them, with the parchment, off the sheet pan onto the baking stone which has been heating up all along. I squirt 3-4 ounces of hot water into the metal pan in the bottom of my oven to give a burst of steam, then close the door and let the baking begin.

1879FF45-3E0D-45ED-B46A-92CA0B3E0452.jpg

Give them 10 minutes at 400ºF then turn down to 375ºF for another 20 minutes or so until nicely browned. Cool on a rack (keep your pot bread company!).

971A3650-03D0-4BDA-8A61-46C1C627342F.jpeg

My second session with the full recipe was geared to making standard sandwich loaves. Steve and I love having good bread around for toast or sandwiches and this one fits the bill. The primary difference here is dividing the first risen dough into two portions about 715 g each, shaping loaves and tucking them into oiled medium loaf pans.

E74468D7-B160-49AA-AC37-D099F4736F25.jpeg

Cover with lightly oiled plastic wrap and let rise about an hour until the dough is nicely mounding above the rims. Meanwhile heat the oven to 375ºF.

87AD36D0-C3E5-4698-A4DA-FF5525B3F940.jpeg

Score . . . .

D9E72207-C162-458C-9ED5-BD6BBC9DB5F5.jpeg

and bake 30- 40 minutes until nicely browned and a digital thermometer in the center reads 190ºF.

While scoring isn’t strictly necessary here, it allows for a more uniform oven rise to the bread.

52039F65-21AE-4F30-A422-D903F860681E.jpeg

Remove from the pans and let cool on a rack.

734FC5C9-46D5-4A56-AF66-FDC10BCDCA6E.jpeg

I am so happy with this bread! Both the boules and the loaves have a nice chew to the crust, a tight crumb and the texture holds up well to a hearty sandwich. And let’s not forget morning toast with a fried egg on top or your favorite nut butter and jam. Yes.

4D9FF201-8697-4027-B6C5-BCA8E9DF6CD3.jpeg
6E9BBEDE-D58E-4DD2-9D55-4DA50817D31A.jpeg

Here’s a big cheer for dough and bread making - Hip hip hooray!

Let’s give thanks for safety and health as we look forward to next year and new beginnings. Meanwhile, think about a bit of holiday spirit, cut some local greens and twigs and tuck them into pots. You’ll be happy you did.

Happy Thanksgiving to all!

F1C4D47E-9971-4554-A5AD-5F98FDC81C4F_1_201_a.jpeg