
Challah
/
This is just one of the many times of year when these lovely shiny loaves appear. Steeped in Jewish tradition, served on the Sabbath and for holidays, this egg bread is also enjoyed by folks from many different backgrounds and parts of the globe. A very similar bread is also popular around Easter, often enriched with butter added to the dough (and maybe dyed Easter eggs tucked on top).
I embarked on this project after receiving a request from a friend for a pair of loaves as part of an egg related scavenger hunt she was planning for a group. Sounds like fun!
I’ve made challah on occasion over the years but have never posted on the topic. While there are tons of recipe variations and reams of information about its history and preparation, I barely skimmed the surface in deciding how to approach this. All purpose or bread flour? How many eggs? Whole or yolks? Honey vs sugar? Three or four (or six!) strand braid?
Particularly when I’m baking for an order, I want to be sure that the end result will be tasty. Of course that means a trial or two. I was inspired to do a test between a King Arthur recipe that I’d made in years past (to excellent reviews) and a recipe from a new book I purchased recently entitled “Breadsong: How Baking Changed Our Lives”. I’ve paged through the book’s recipes and am truly enjoying the story written dually by Brits Kitty Tait and her father Al Tait. It’s their story of Kitty’s journey through some difficult times in her young life with bread baking ultimately becoming her salvation. They now own/run “The Orange Bakery” in Watlington, Oxfordshire UK. Cool story.

test bakes
I won’t focus on recipe details yet, but, suffice it to say, both half loaf trials turned out OK. Kitty’s adds some butter to the dough but the recipes are otherwise quite similar. Both used two eggs for the full recipe unlike the one I ultimately went with.
Perhaps I over baked them a bit since they were a tad dry. With a fine, light crumb, both are excellent spread with a bit of butter/jam, especially toasted. I recommend either for bread pudding or French toast, easy and delicious ways to revive and repurpose.
After a bit more review, I went with an adaptation of the recipe I ultimately turned to - Jeffrey Hamelman’s challah in his book “Bread: A Bakers Book of Techniques and Recipes”. This one uses more egg than many recipes I reviewed along with the usual suspects - flour, vegetable oil, water, honey, salt, yeast.

Let’s get started! I’ll go through the steps, listing ingredients in gram weights but remember you can go to the recipe PDF for equivalent measures and read through it at your leisure.
First have all your ingredients mised out: 600 g all purpose flour, 300 g bread flour, 160 g honey, 2 large eggs plus 5 (or perhaps 6) yolks, 85 g vegetable oil like canola (EVOO is tasty!), 300 g water (tepid/coolish), 17 g instant yeast, 13 g kosher salt.
Place all ingredients in the bowl of a stand mixer fitted with the dough hook. My 6 quart Kitchenaid bowl works well for this. I may have mentioned this in the past but I have an 8 quart commercial Kitchenaid stand mixer. The beauty of it is that not only is the mixer’s motor more heavy duty than a 6 quart, the attachments are much more work-horse like, solid and heavy. And! - they work with my 6 quart bowl that fits on the 8 quart stand! The six quart is my go to size for most bread, croissant or large batches of shortbread or tart doughs. Love it.

All in!
I give it a stir up with a spatula to gets things moistened.

iinitial blend
Then blend with the dough hook on low speed (stir on a Kitchenaid) for several minutes to incorporate the ingredients.

Now knead on speed 2 for about 6 minutes to develop the gluten. The dough should ball up and pull away from the sides of the bowl.

Give the dough a couple of quick kneads by hand and round it up, then place in a lightly oiled bowl for the first proof.

Let rise in a warm place for 1.5 - 2 hours, gently de-gassing at 1 hour. OPTION: after the first de-gassing, refrigerate the dough for several hours or overnight, de-gassing a couple of more times during the first few hours. The dough is easier to work with/shape when cool, plus you can create your own time table to mesh with your schedule.
For my project I de-gassed at hour one, then refrigerated the dough for an hour and a half (due to my schedule that day!). Then another de-gas and a 45 minute room temperature rise before shaping. Here are the visuals.

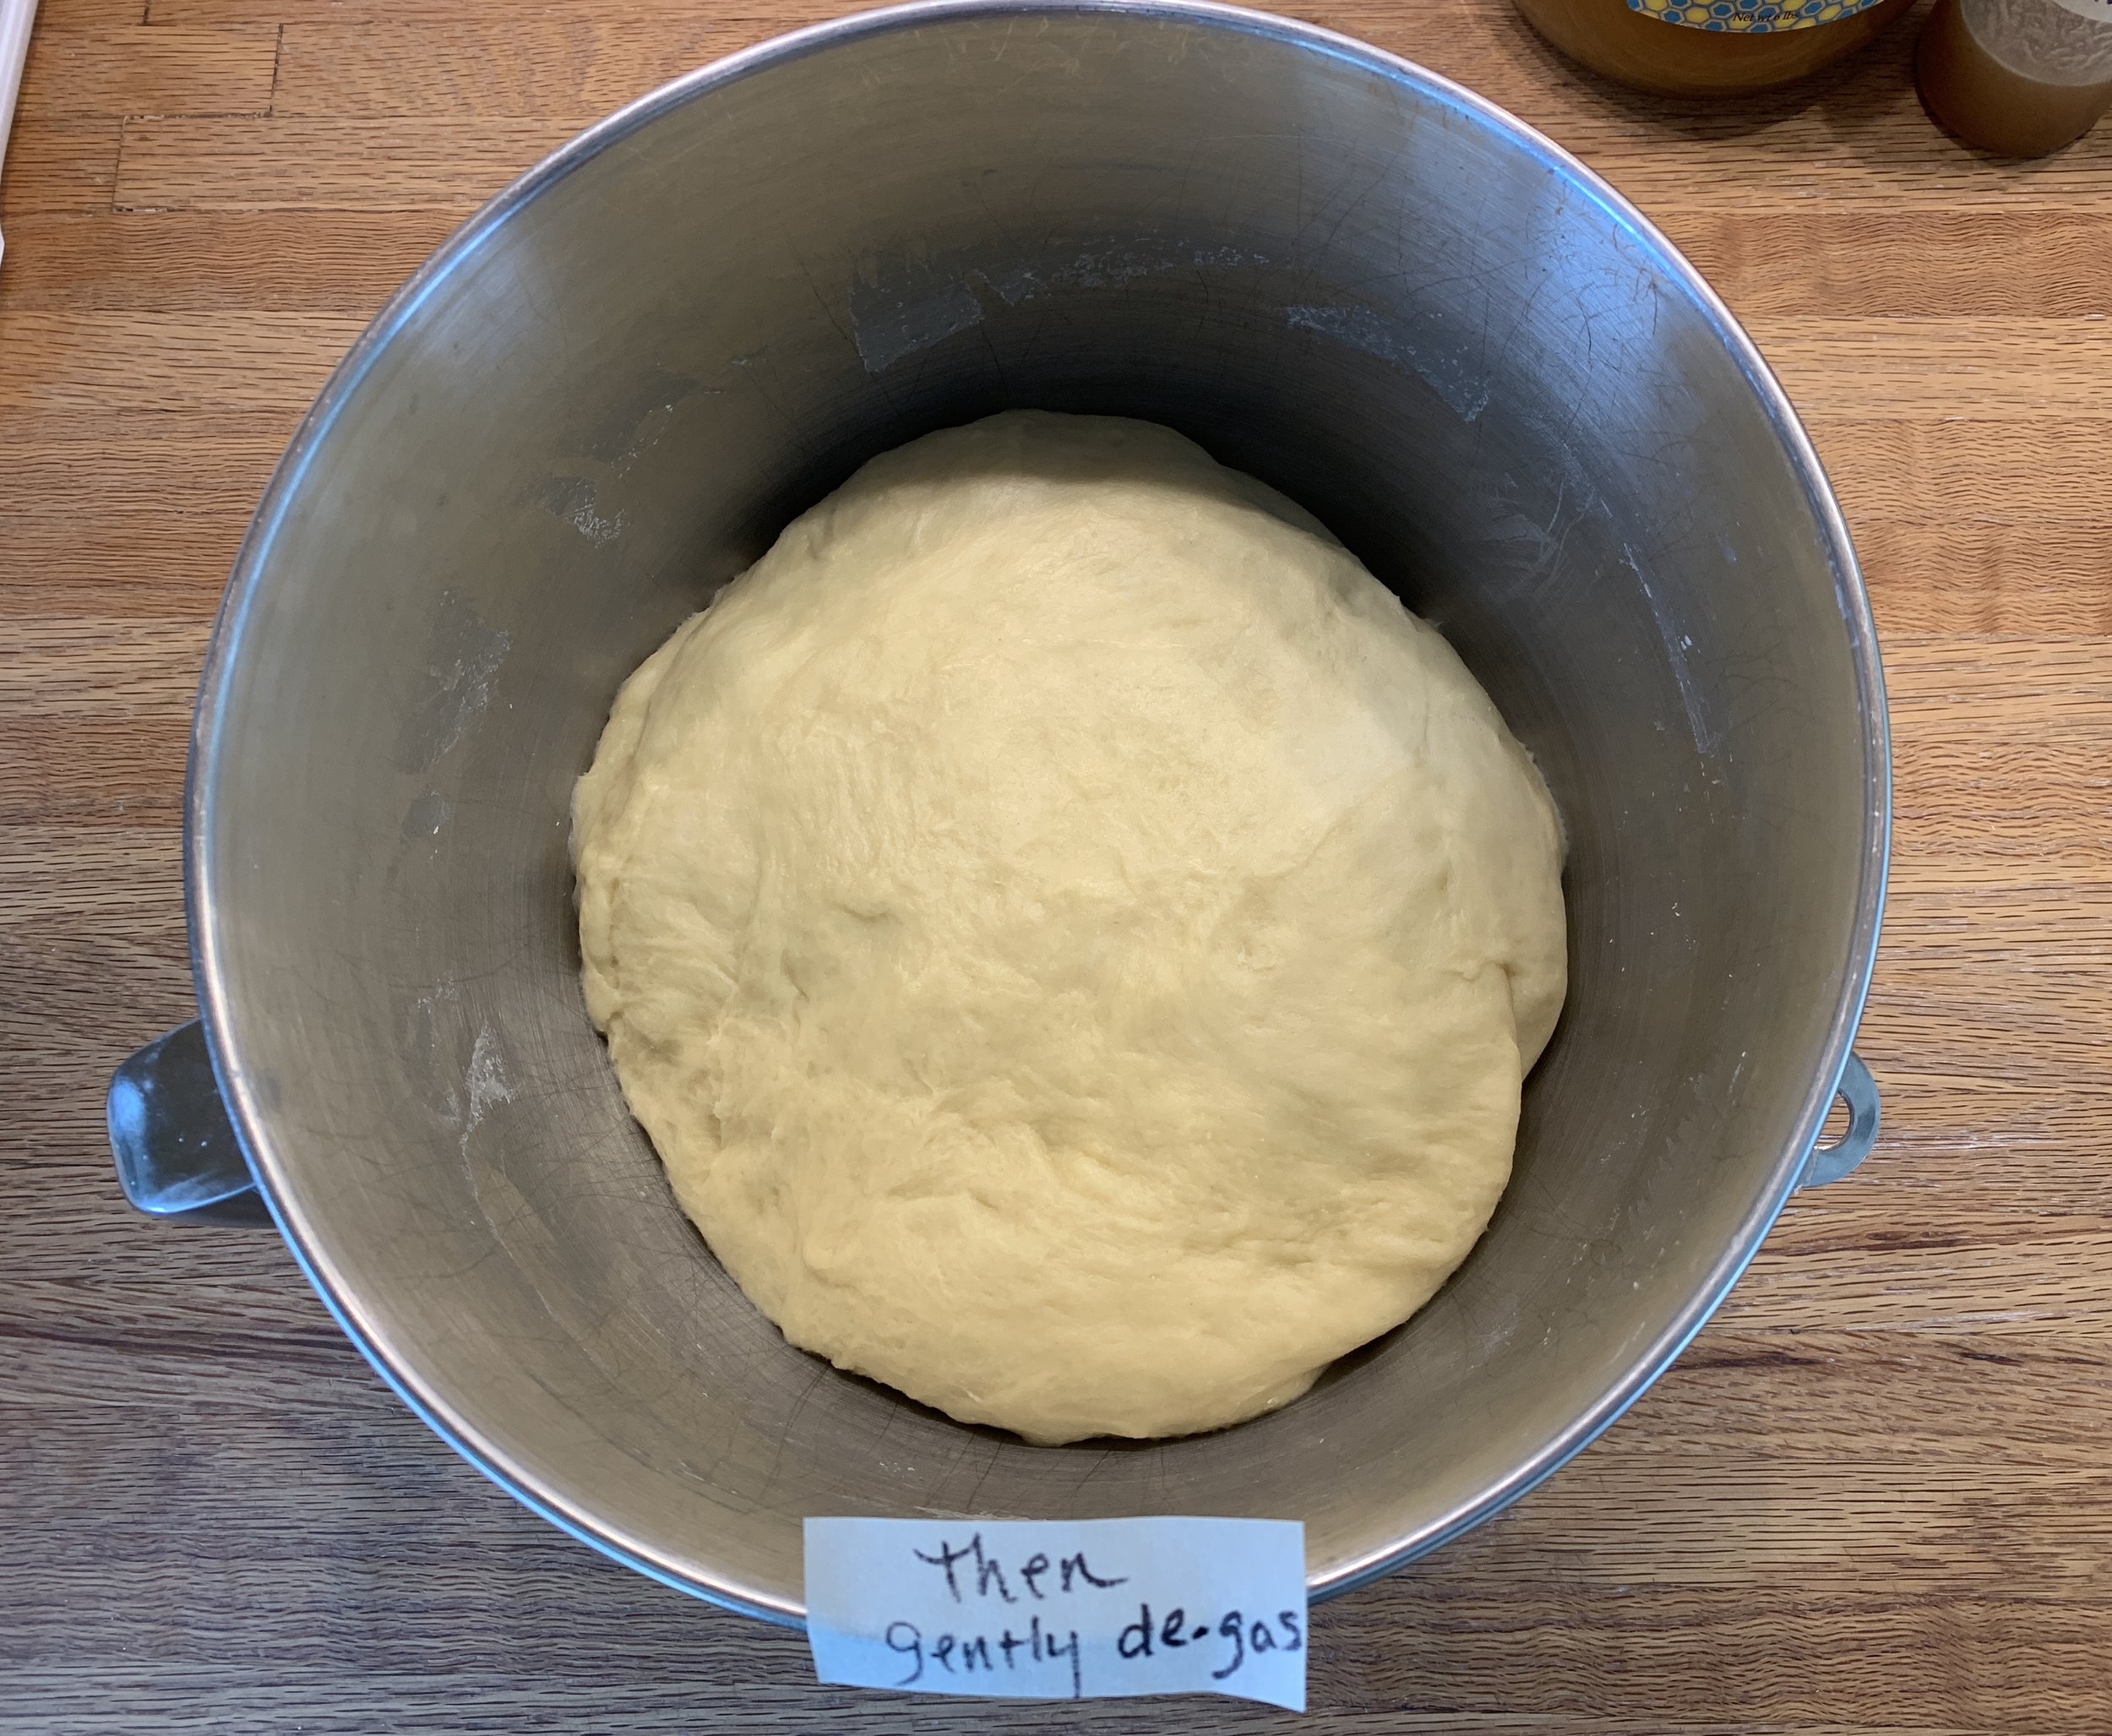

nice fridge rise!

dough is feeling good!

Place the risen dough on your work surface - you don’t need much flour at all for the dividing/shaping/braiding. Use a bit if needed, but the dough handles well without being sticky.
For two 3-strand braids, divide the dough in half then each half into three equal pieces. Do a rough, stubby torpedo pre-shape of each piece and let rest 20 minutes covered lightly with plastic. I made two 750 g braids and used the rest of the dough for a mini two strand twist so I could do a taste test.

After the rest, roll each piece into a 14”-ish rope. Set up three pieces for your first braid.

One way to braid is to start in the middle, braid toward one end then flip it and finish braiding from the center to the other end.
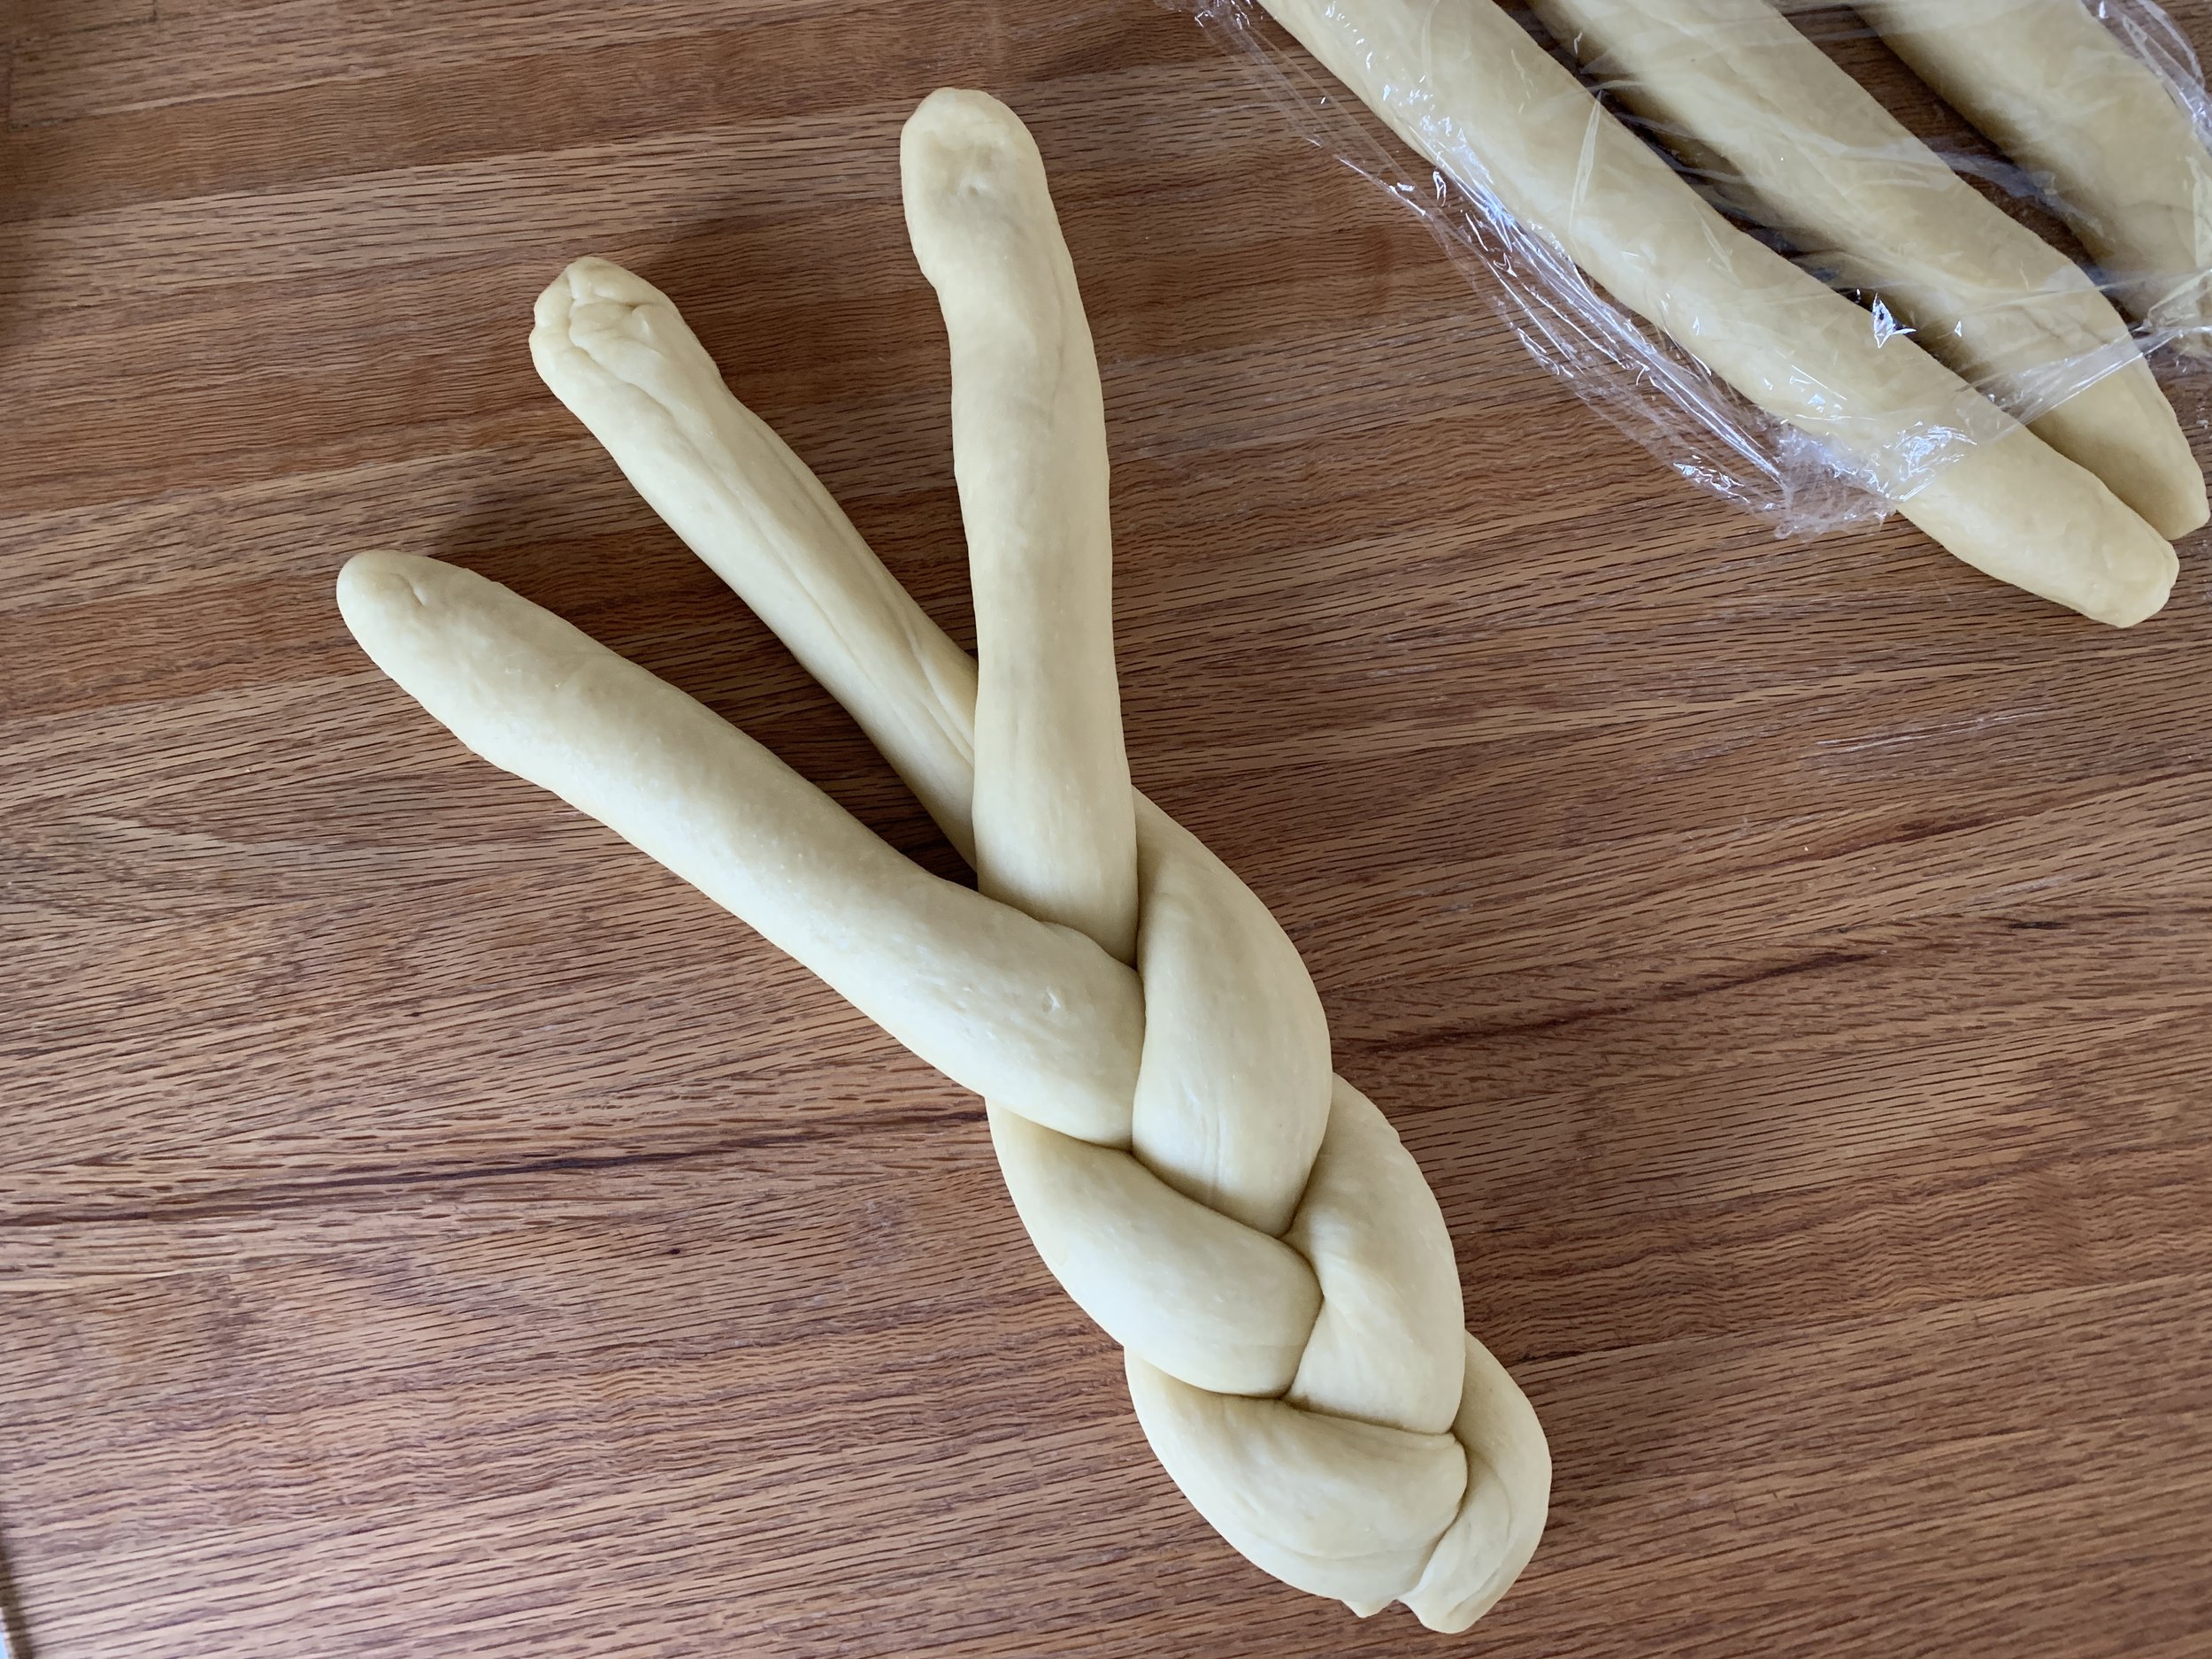
first half complete

Tuck the ends under to clean things up
Once both loaves are braided, place them on a parchment lined sheet pan, lightly cover with a cotton towel and cover that with plastic wrap. This protects the dough from drying out but also reduces moisture accumulation between the braids by eliminating direct contact with the plastic wrap on the dough surface.
Let rise for two hours. Toward the end of the rise heat the oven to 375ºF.

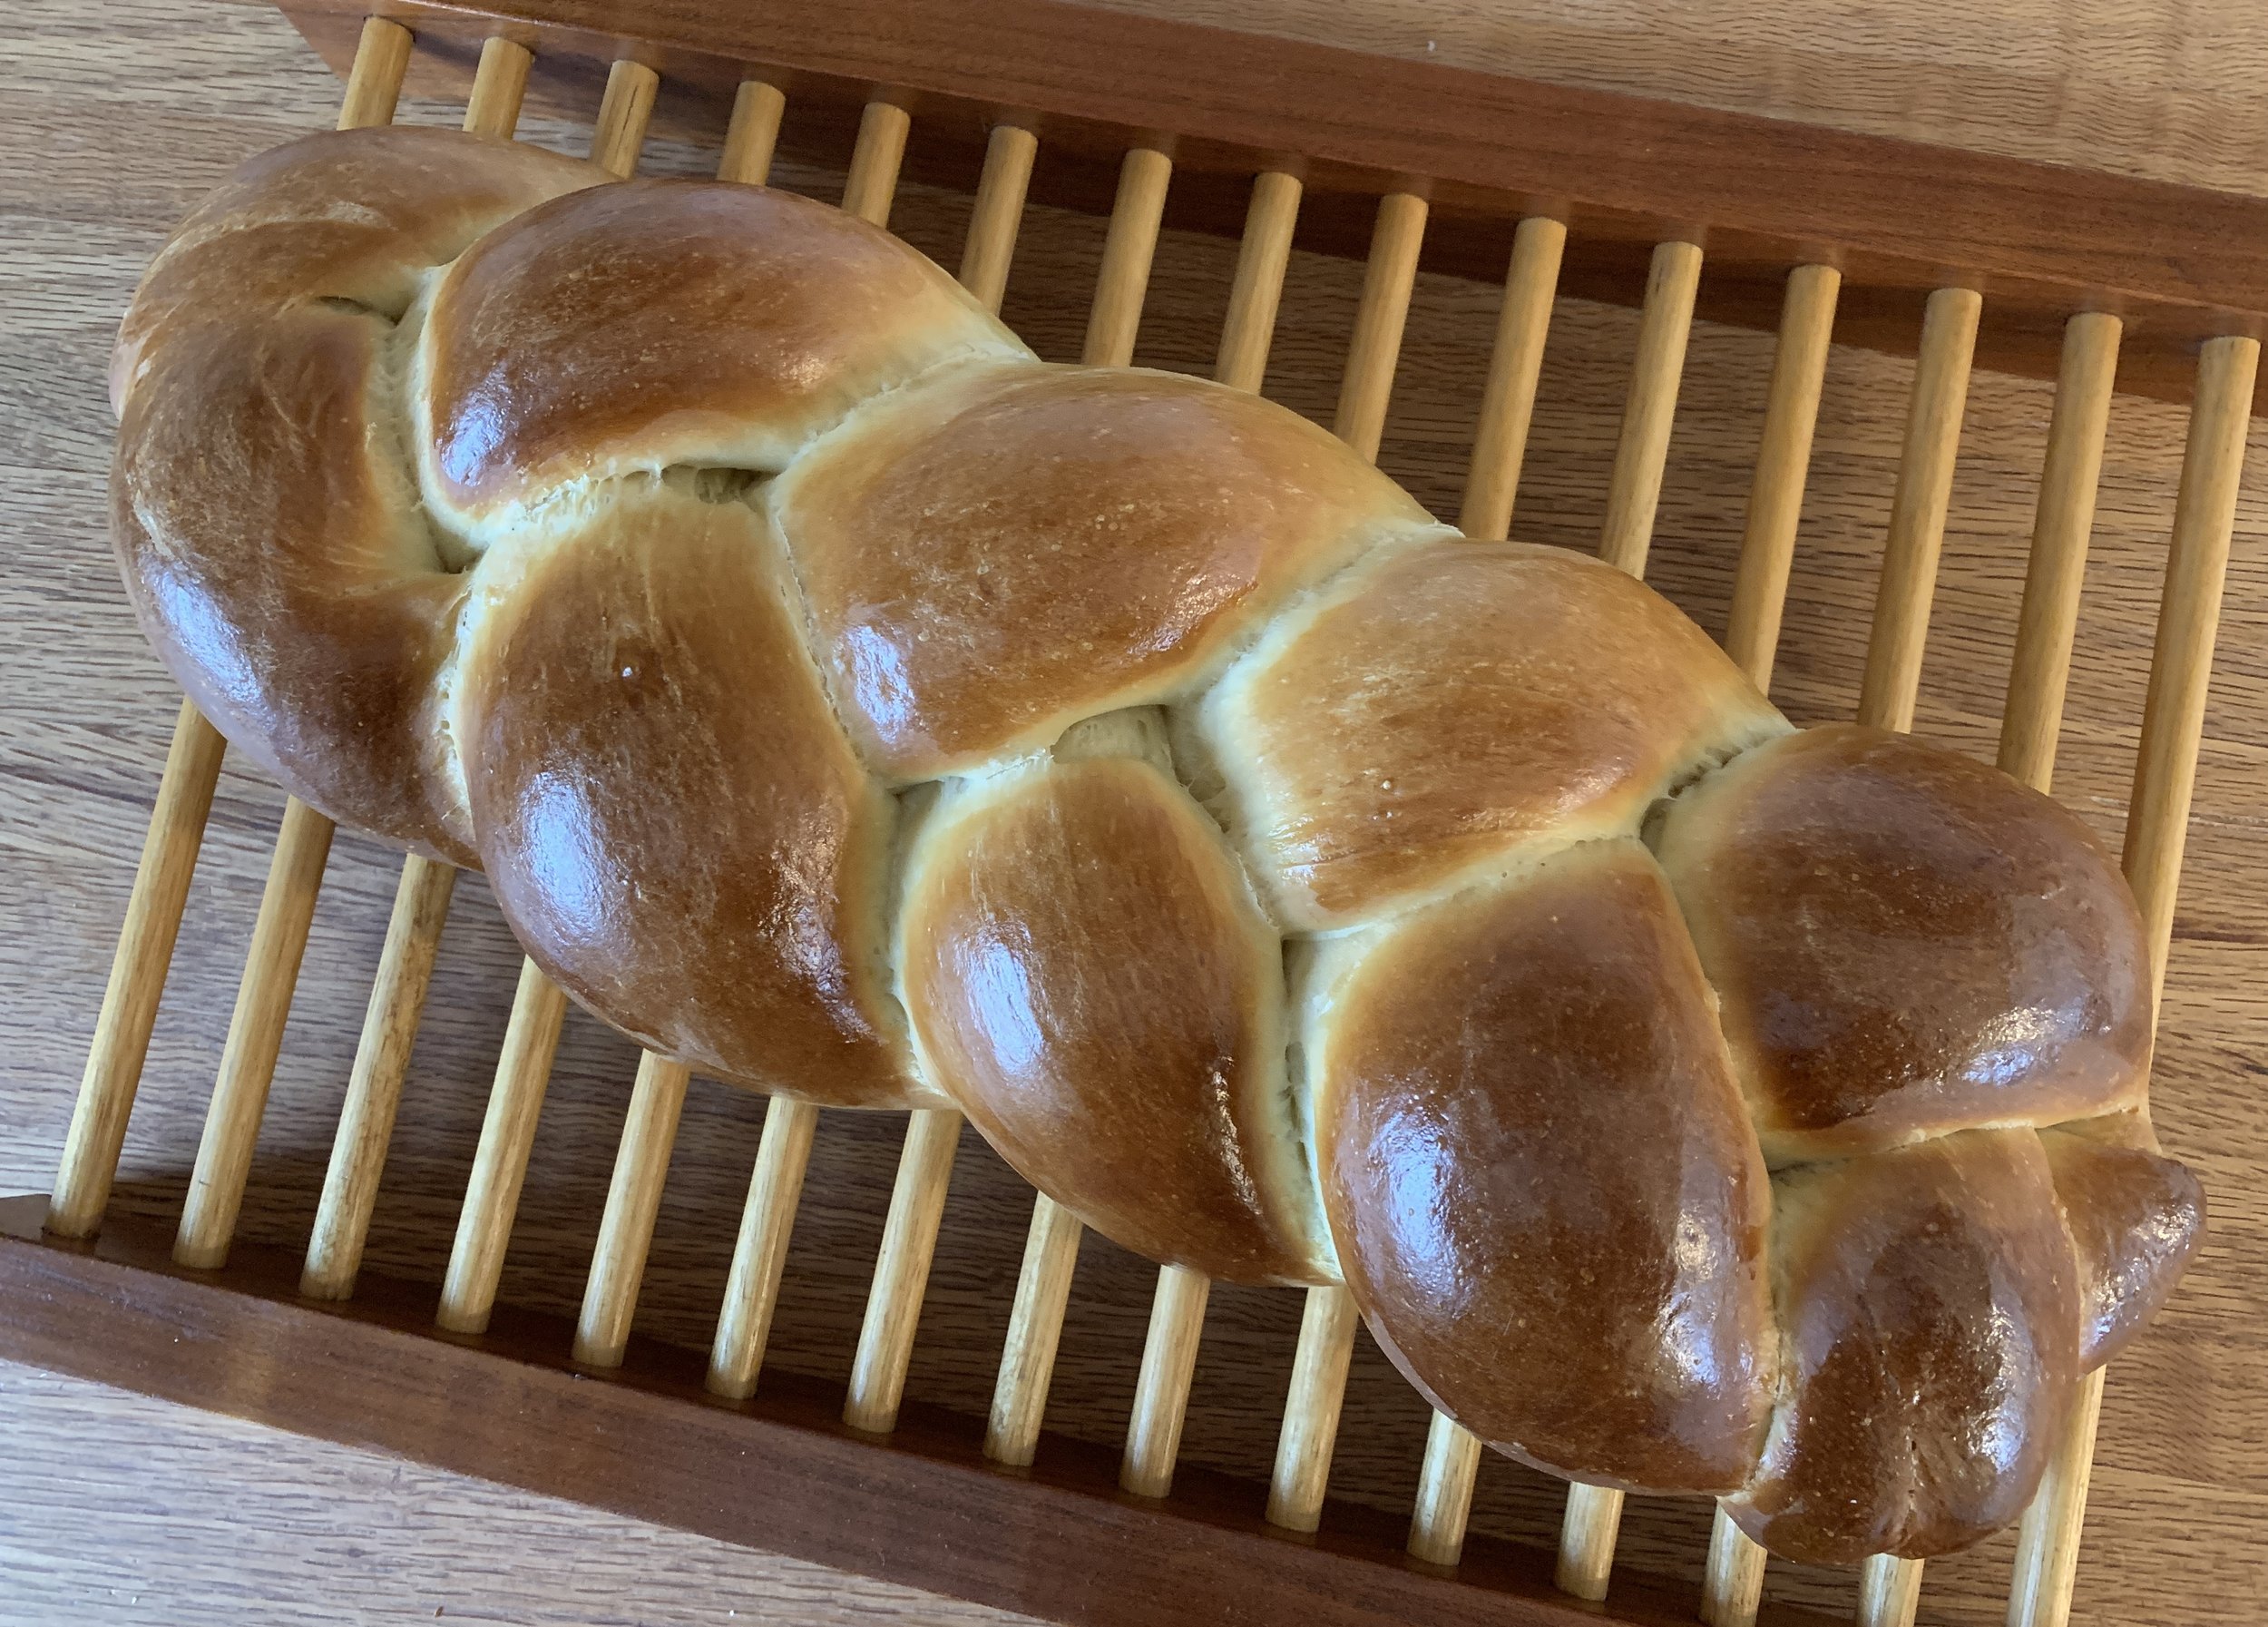
These are looking great after the two hours. Thoroughly egg wash the surfaces.
You can see my mini twist on the right, sprinkled with poppy and sesame seeds.

Bake about 30 minutes until golden brown. Cool on grids.

Serve when ready. The challah loaves freeze well - remove from the freezer a couple of hours or so ahead to thaw at room temperature.
Here’s a look at my mini twist. I tried it with a schmear of butter and sandwiched it with a bit of ham and cheese. Good crumb, tender and tasty!

The report from those who received the full sized loaves was a thumb’s up. Good deal!

Just a final bit of nature for you. Happy spring!

cherry blossoms in le jardin des plantes, paris
