
Couronne aux amandes et aux noisettes . . . . and more!
/
During our weeks of staying home and sheltering in place I’ve been doing a variety of baking projects with an eye toward using ingredients I have on hand (hmmmm . . . this is starting to sound old). That also includes croissant dough sitting in my freezer waiting for just the right moment.
Wouldn’t you know I had two batches of said dough that were nearing their “use by” date - I don’t like unbaked yeasted dough to sit for longer than 6 weeks in the freezer since after that the yeast starts dumbing down and the dough doesn’t rise well at all. Trust me - I know.
Time to create! Get ready for it!
I decided to make four different pastries: a bit more than half of one batch for a couronne (can be translated as crown or wreath), the remainder of that batch for petite pain au chocolat, another half batch for apricot twists and the final half batch for what I refer to as cherry cream cheese “flip throughs”. Oh boy!
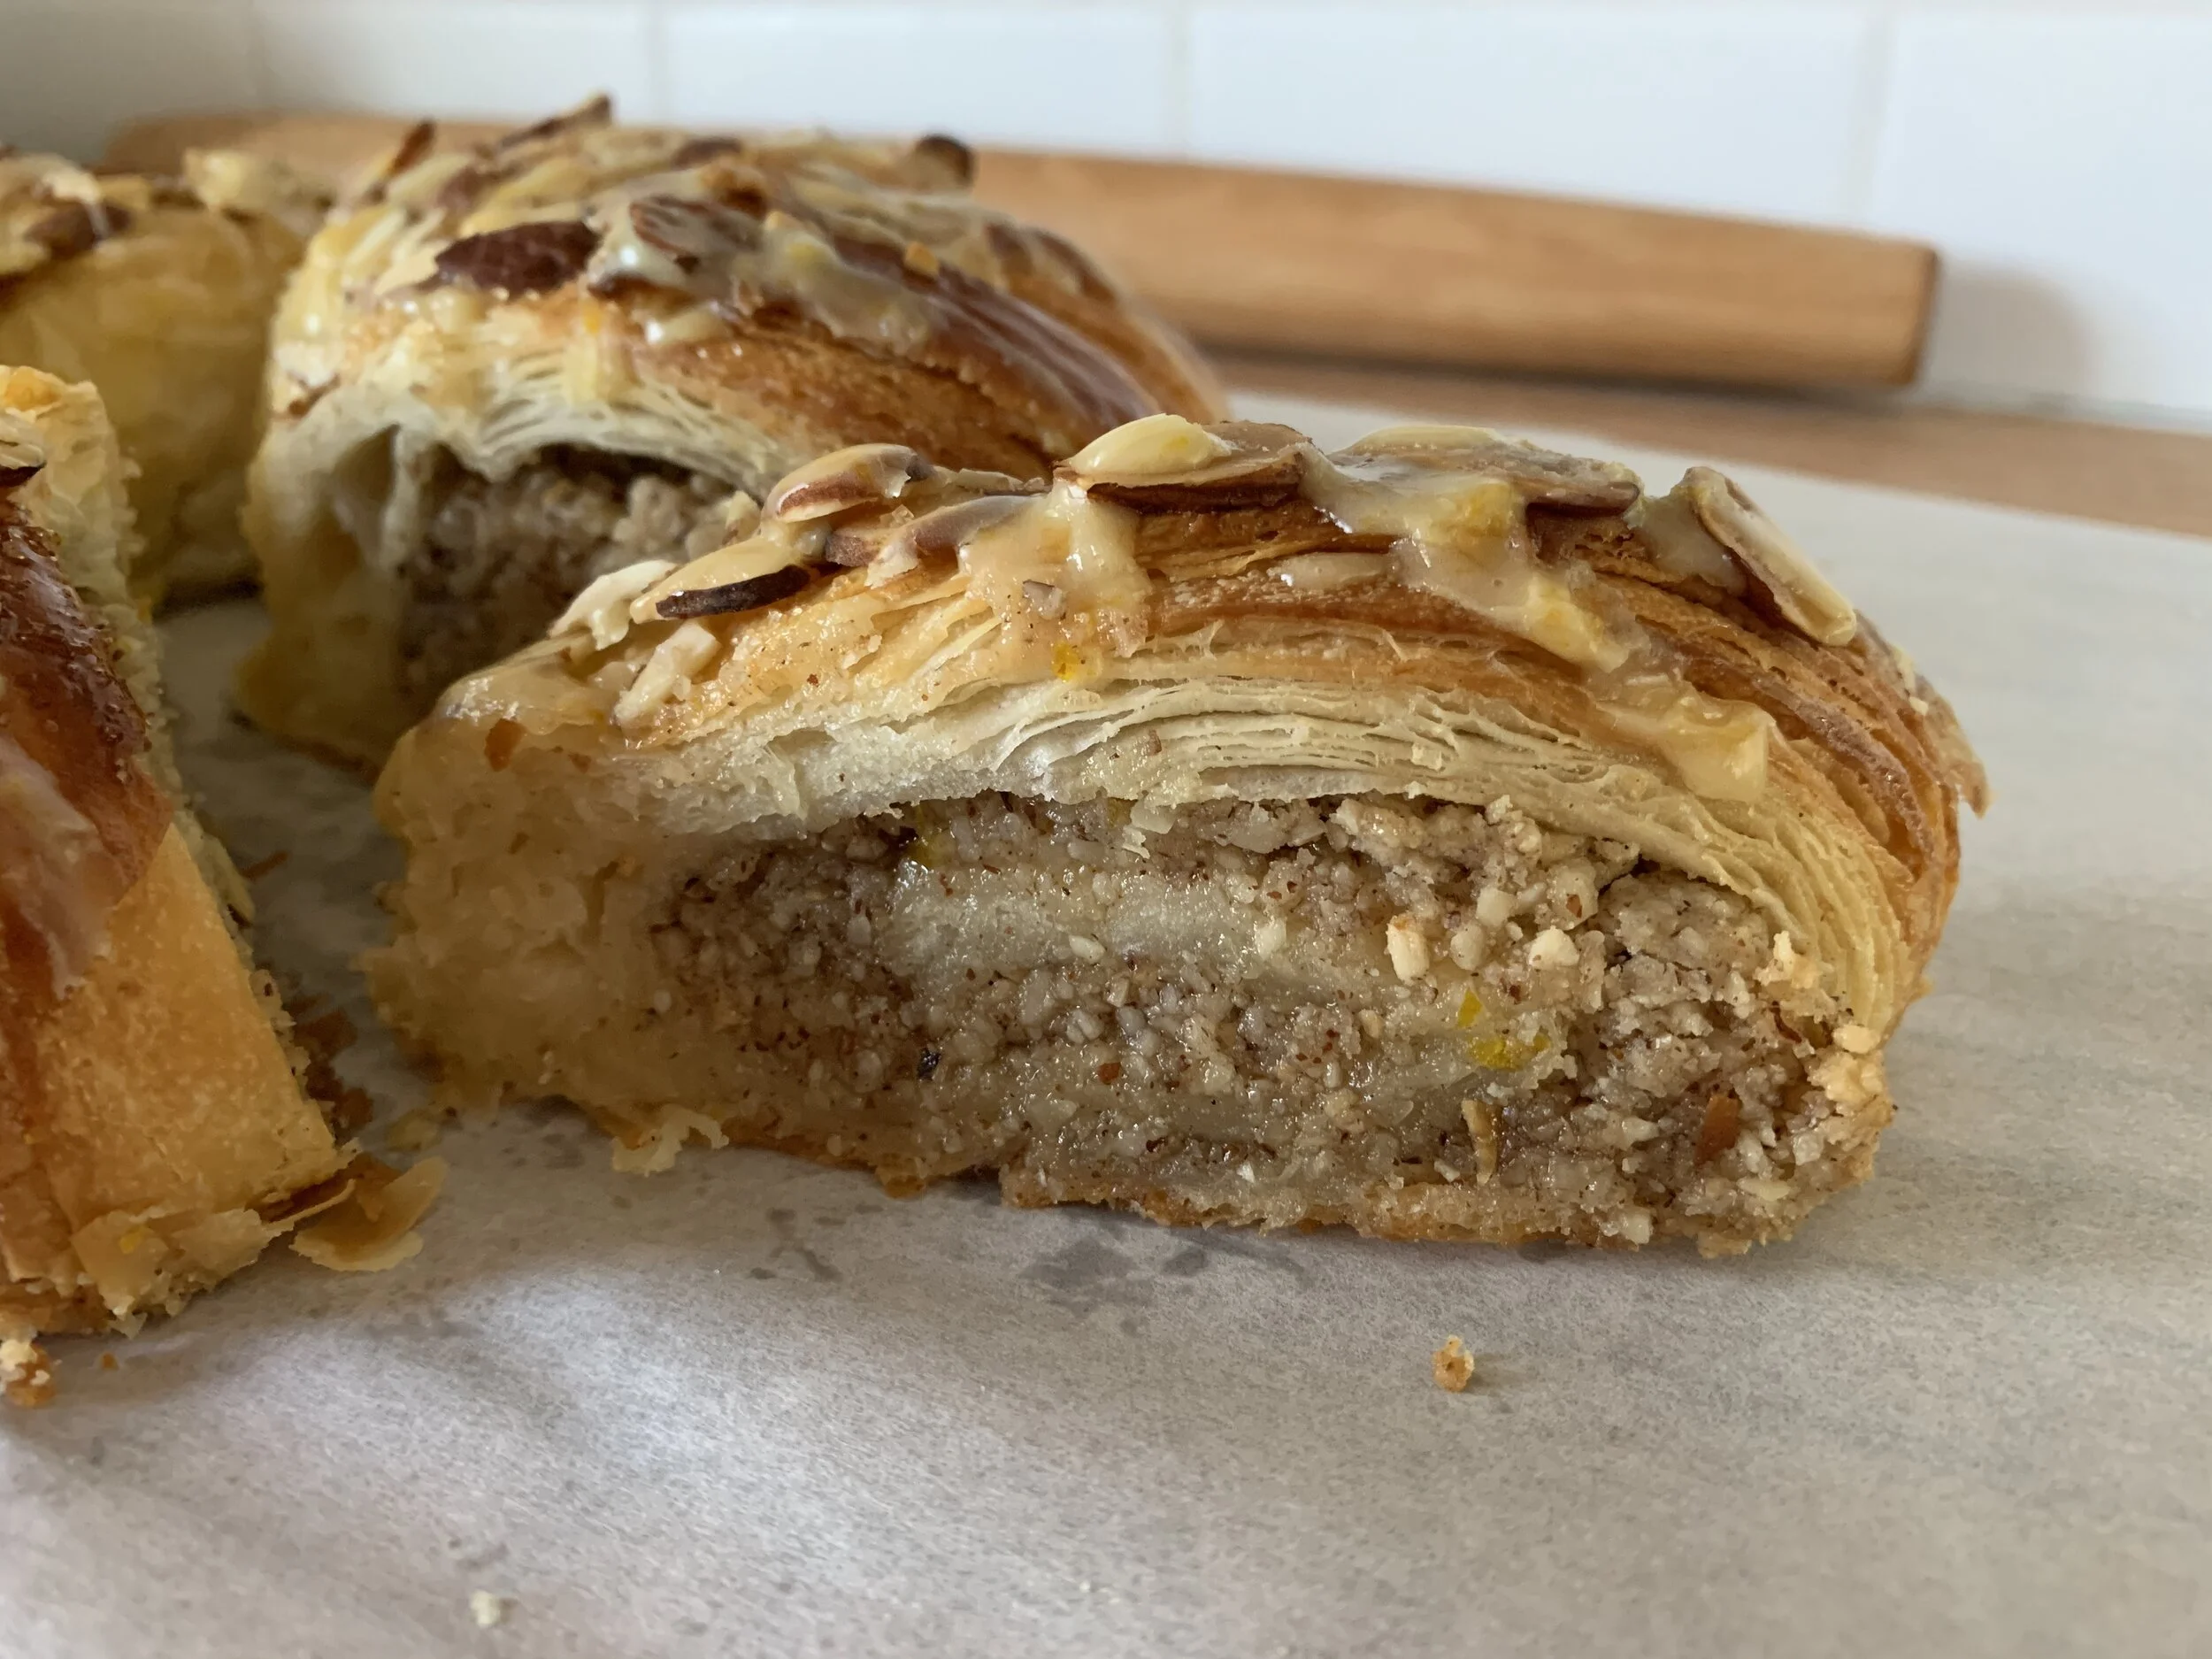
First up is the hazelnut and almond couronne which is shaped in a pretty cool way. A good rule of thumb when rolling this type of dough, no matter what you’re going to shape, is to aim for a finished piece of dough that’s about 1/4” thick. If you start getting much thinner than that, you’ll lose some of the discrimination of your layers and won’t have as lovely of a laminated finish.
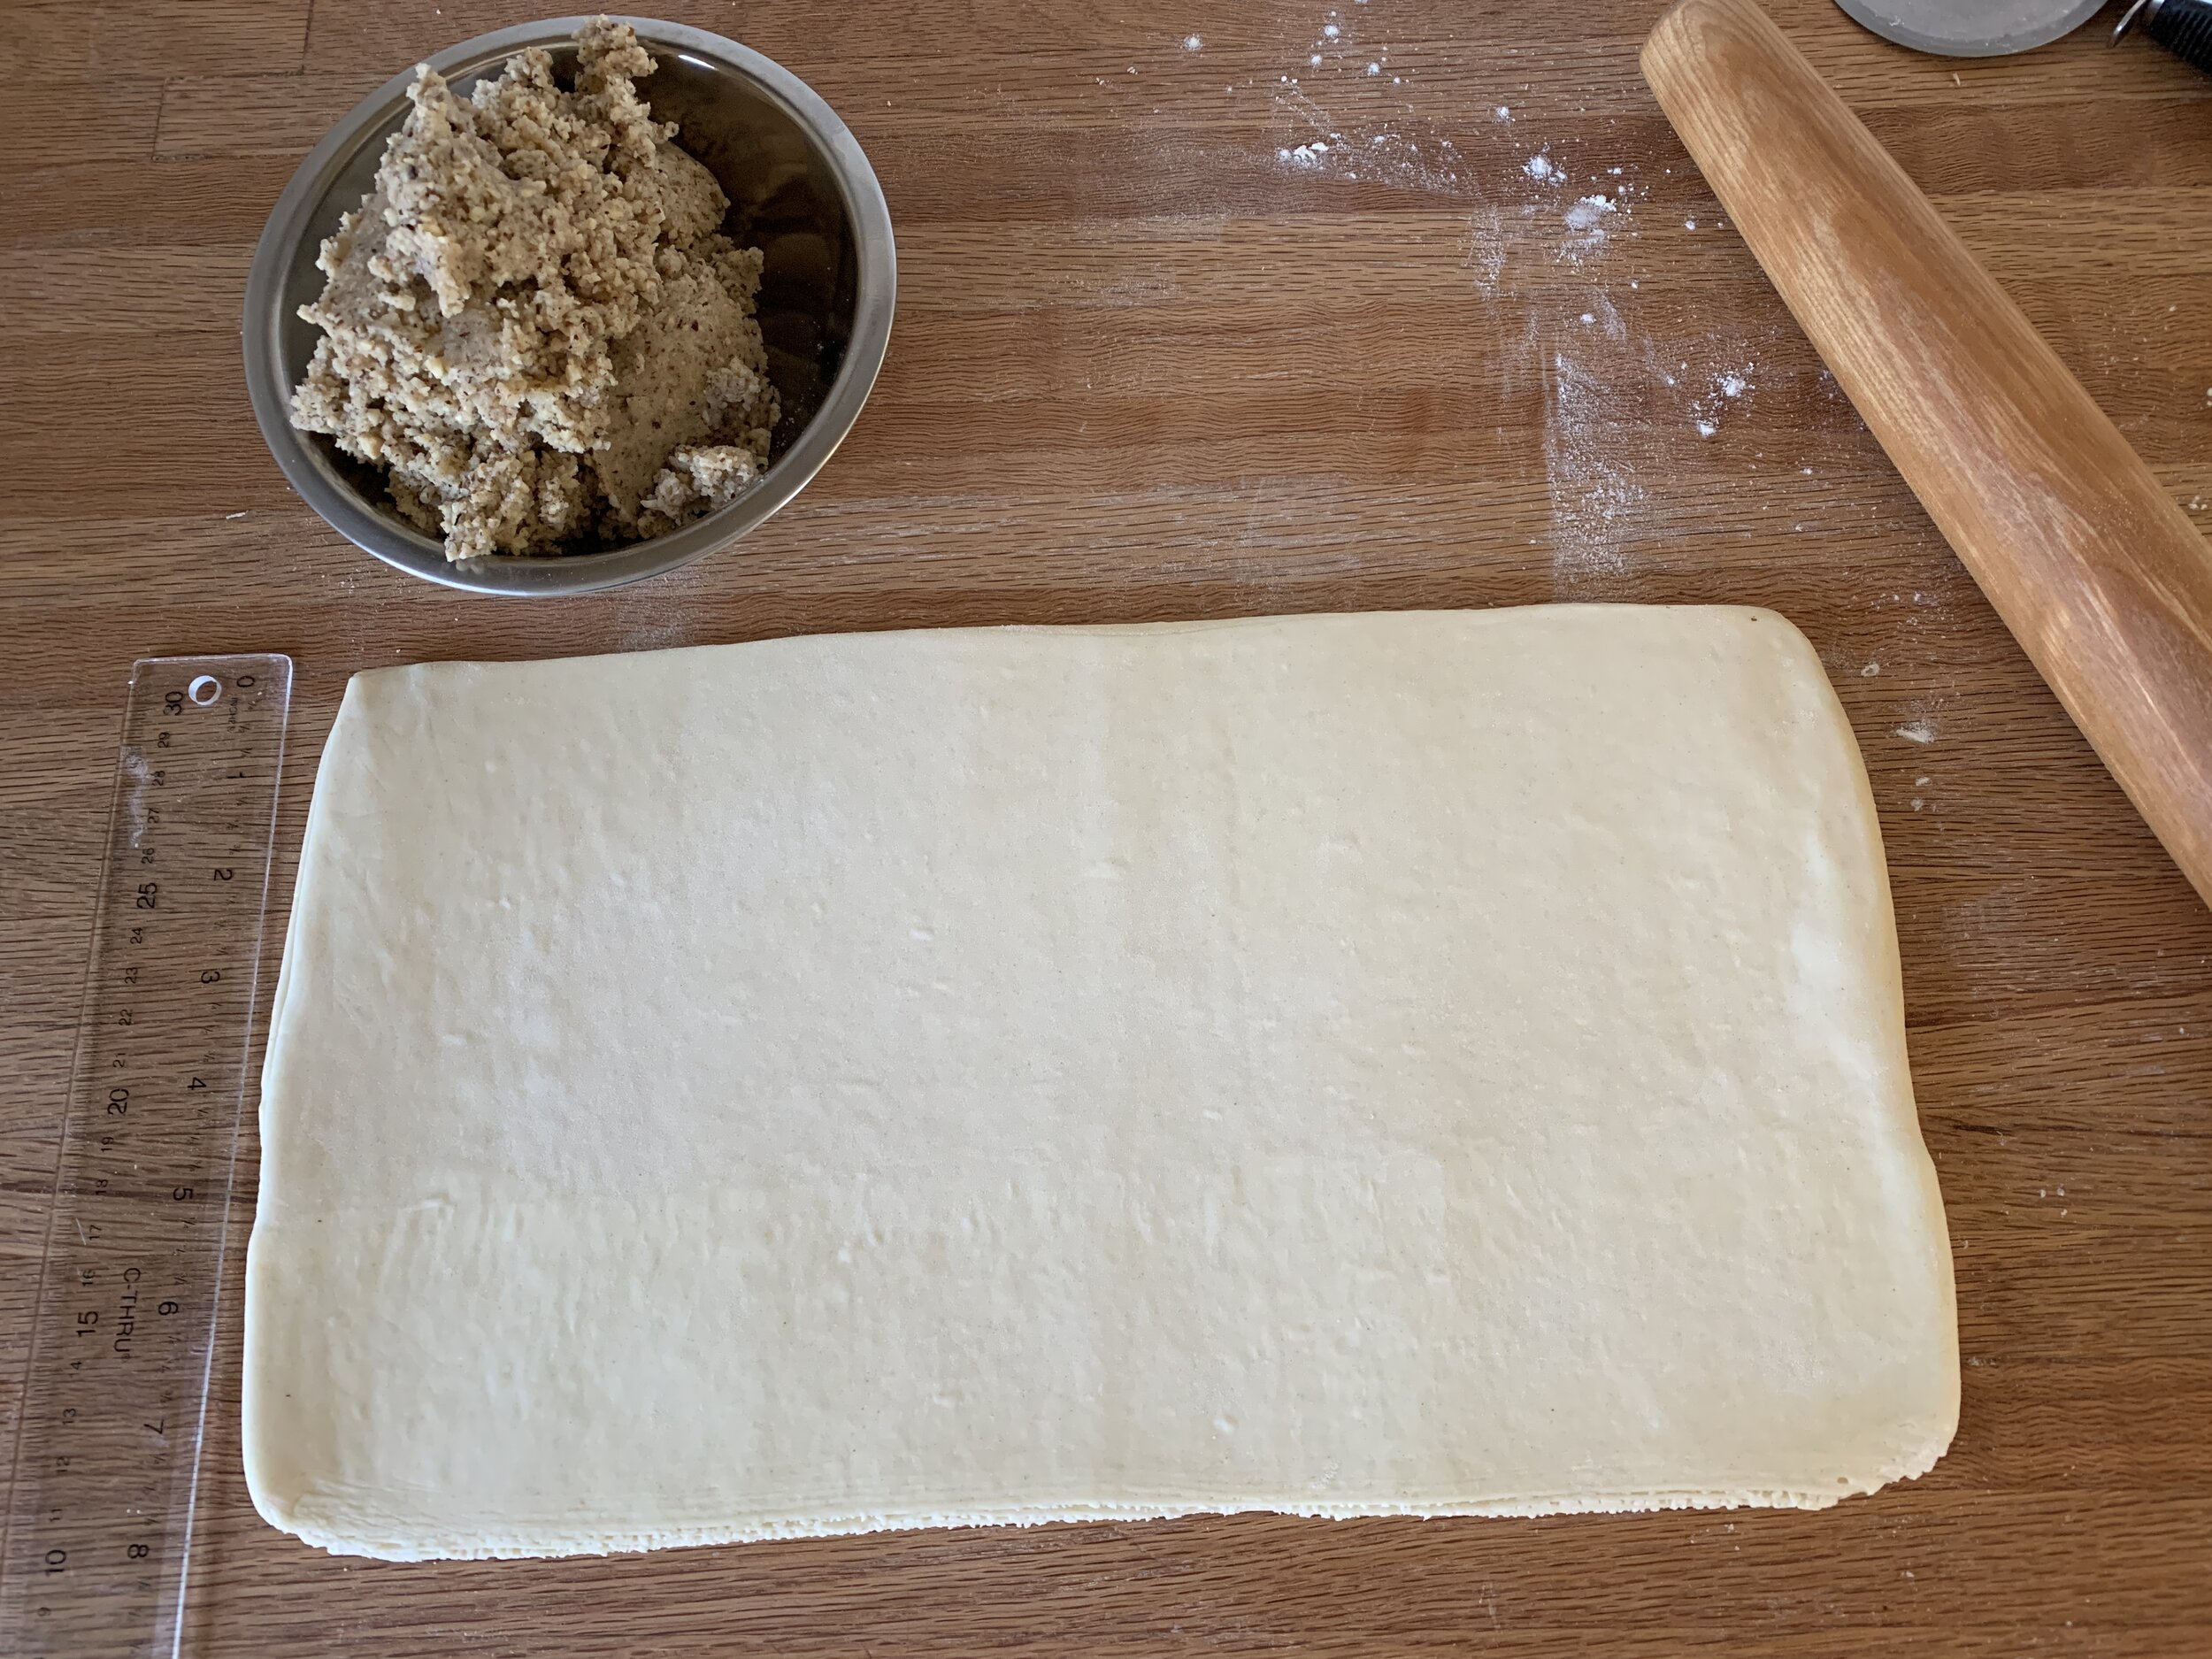
I rolled ~680 g of croissant dough into a 8”x14” rectangle. I had my hazelnut filling ready to go - very much like remonce (which I wrote about in the recent Danish Kringle post), it combines equal weights of almond paste (I’m loving Mandelin premium), sugar and butter followed by the addition of three times that weight in toasted, finely ground hazelnuts - e.g I used 100 g EACH of almond paste, sugar and butter plus 300 g toasted, ground hazelnuts. Cinnamon or other spices can also be added.
My couronne required 340 g of filling so I had leftovers which I wrapped and froze for another day.
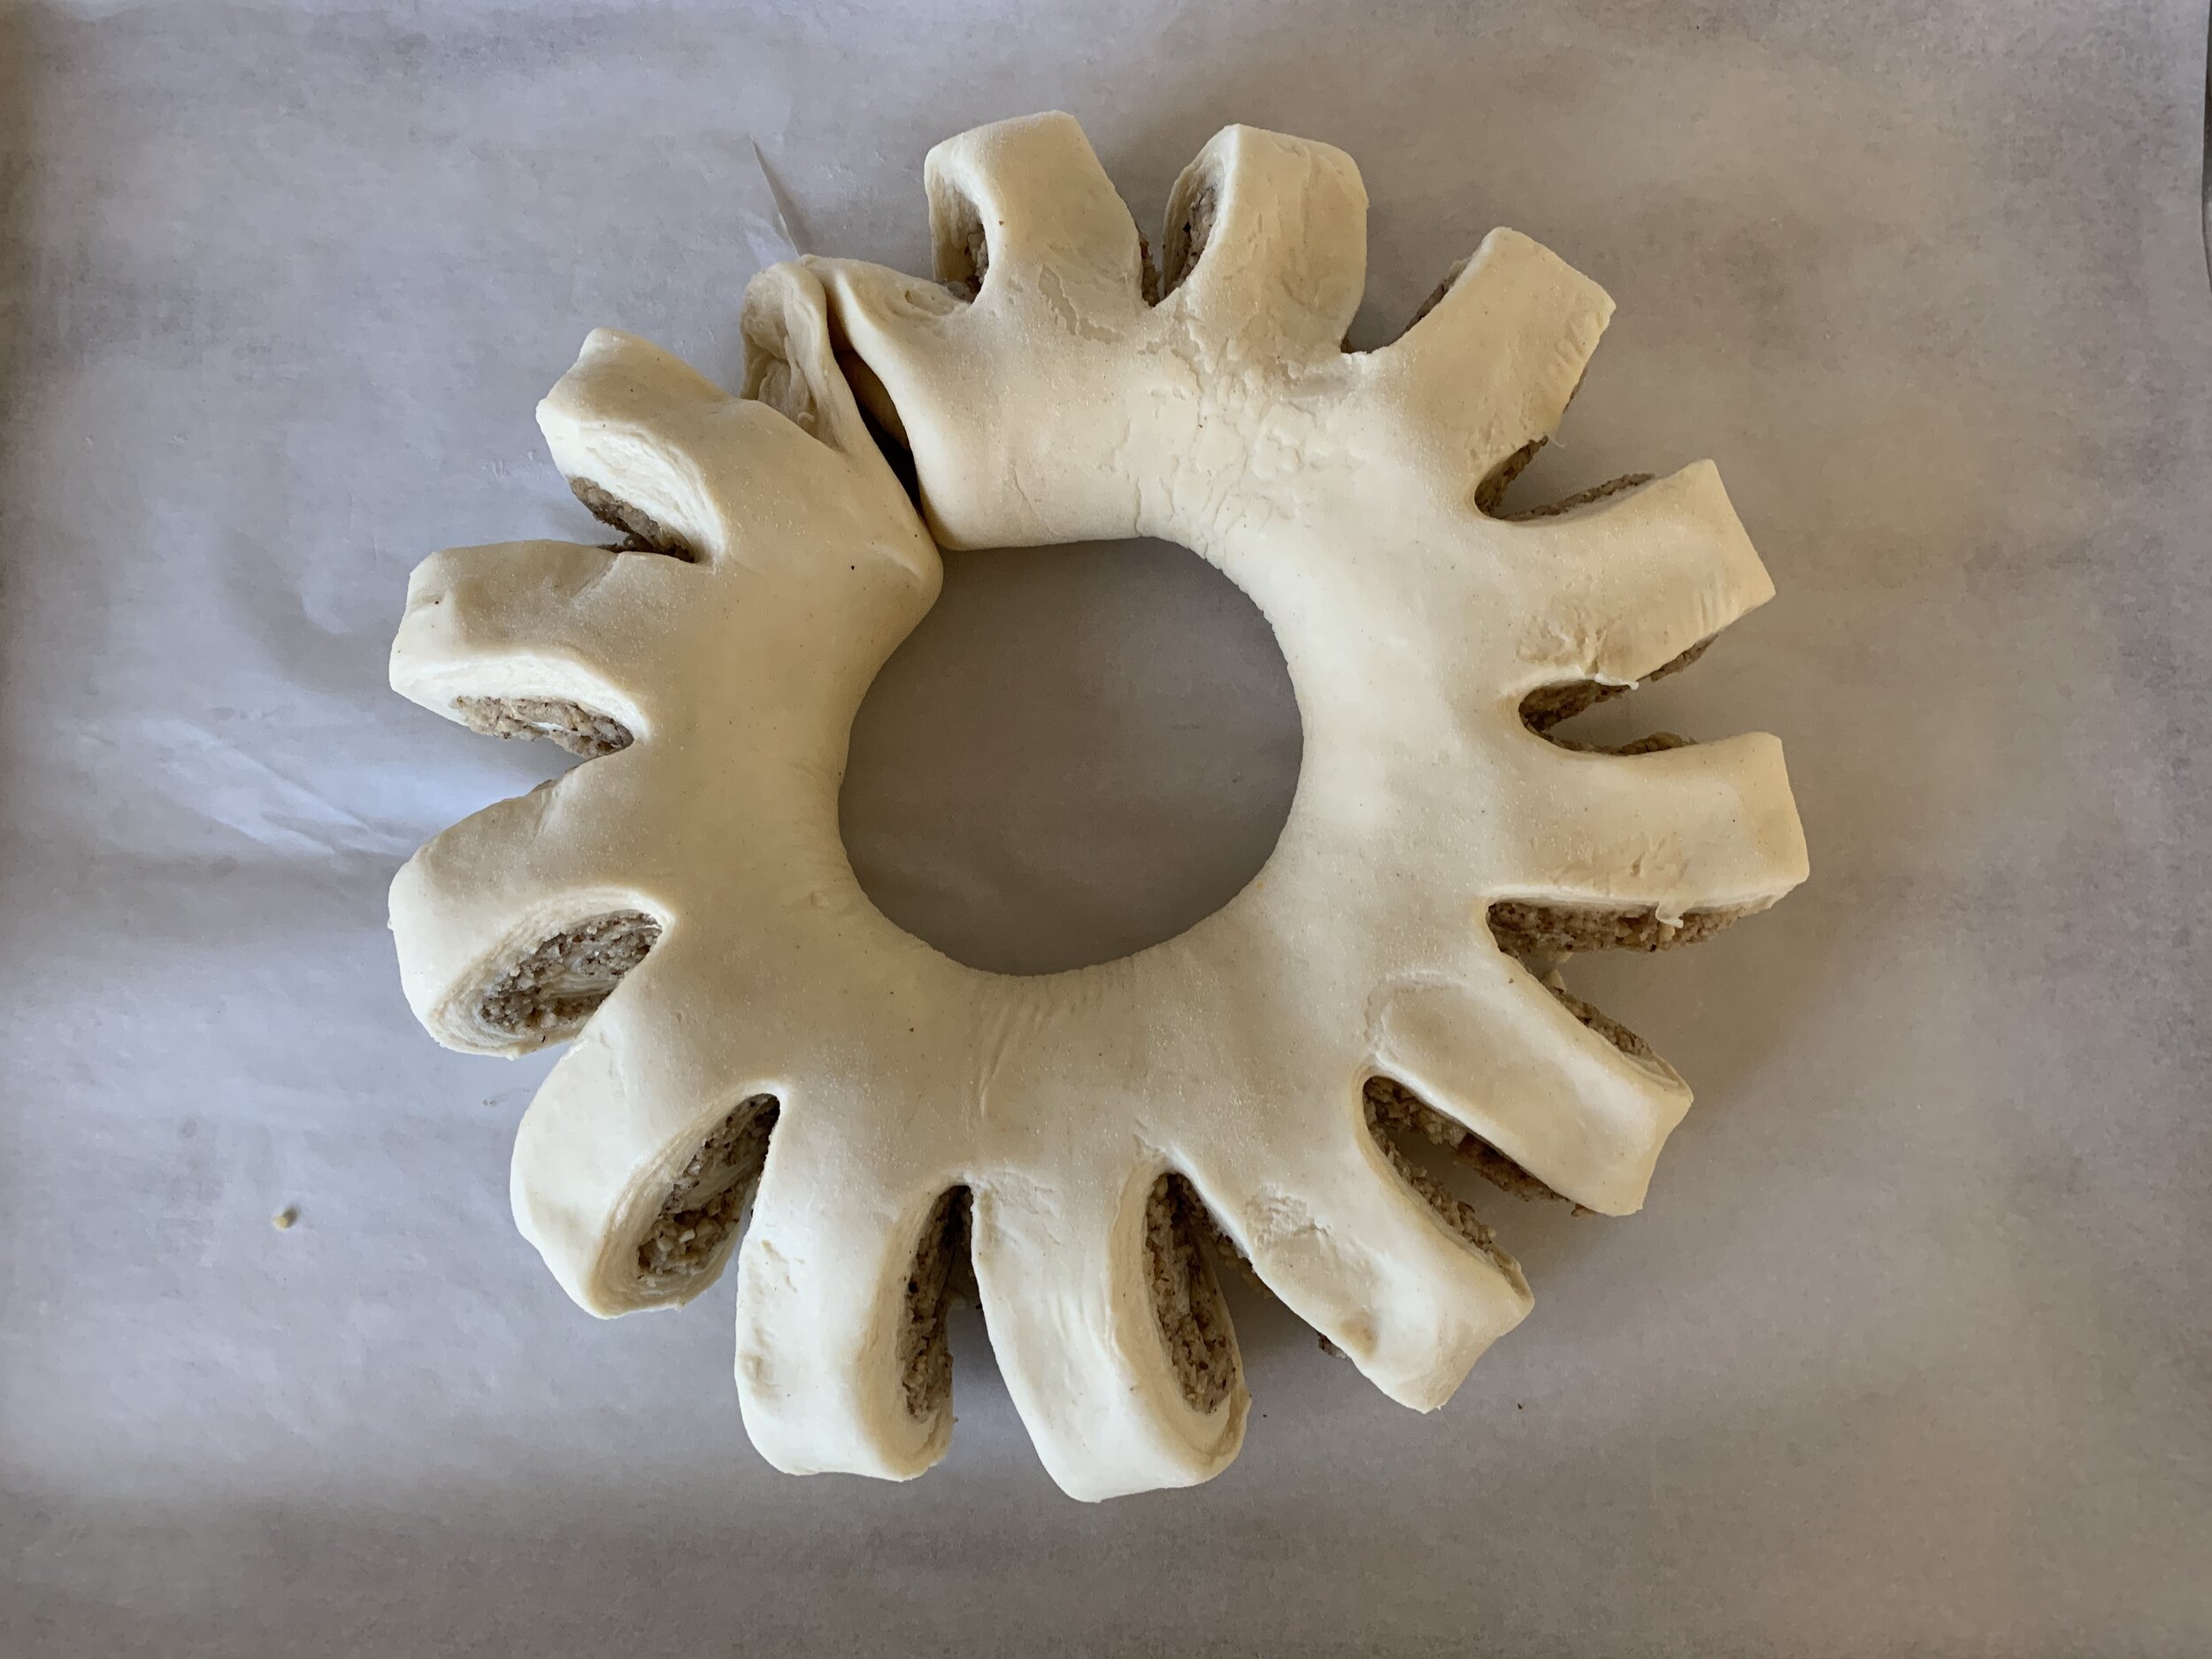
Spread the filling over the dough and roll it up into a log.

Once rolled, cut slits about 1 inch apart along one side, not quite all the way through.

Then form the log into a circle, joining the ends. Twist each sliced portion outward so you see the filling.
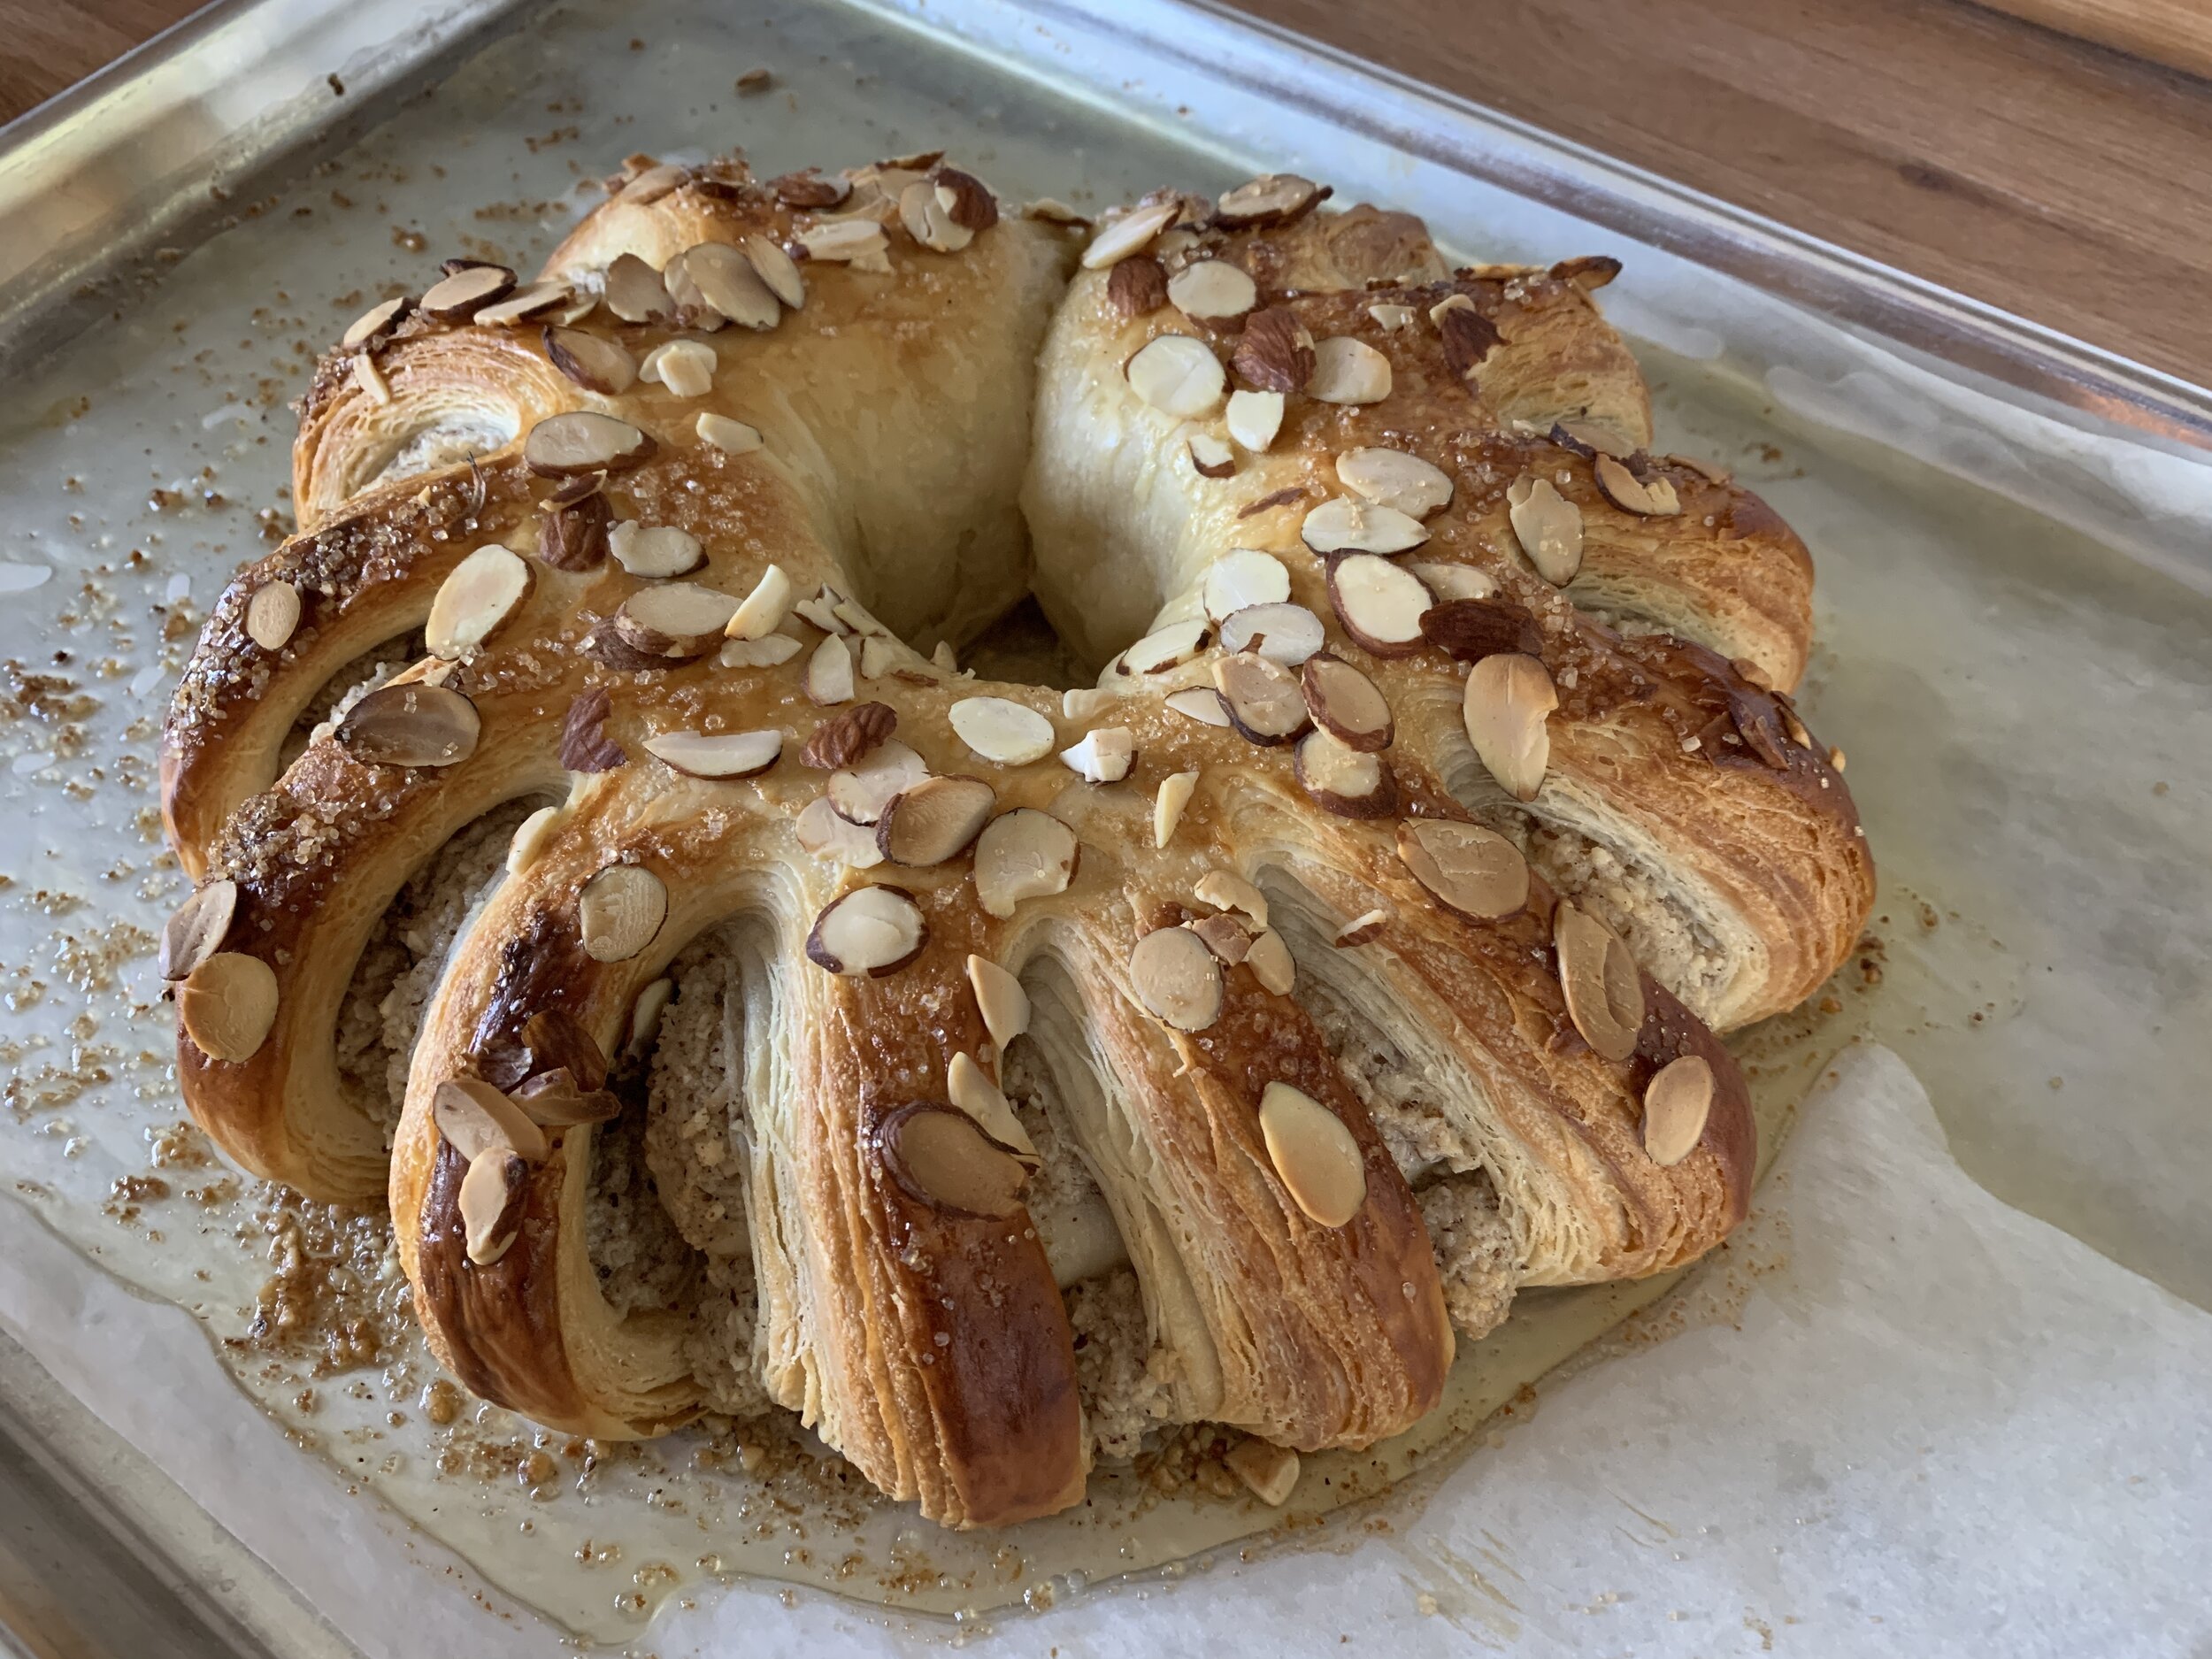
Brush lightly with egg wash and let rise about 1.5 hours. Toward the end of the rising time heat the oven to 350ºF.
Do a second egg wash and sprinkle with sliced almonds.

Bake about 45 minutes until golden brown. I always check about half way through and rotate my tray to promote even baking.
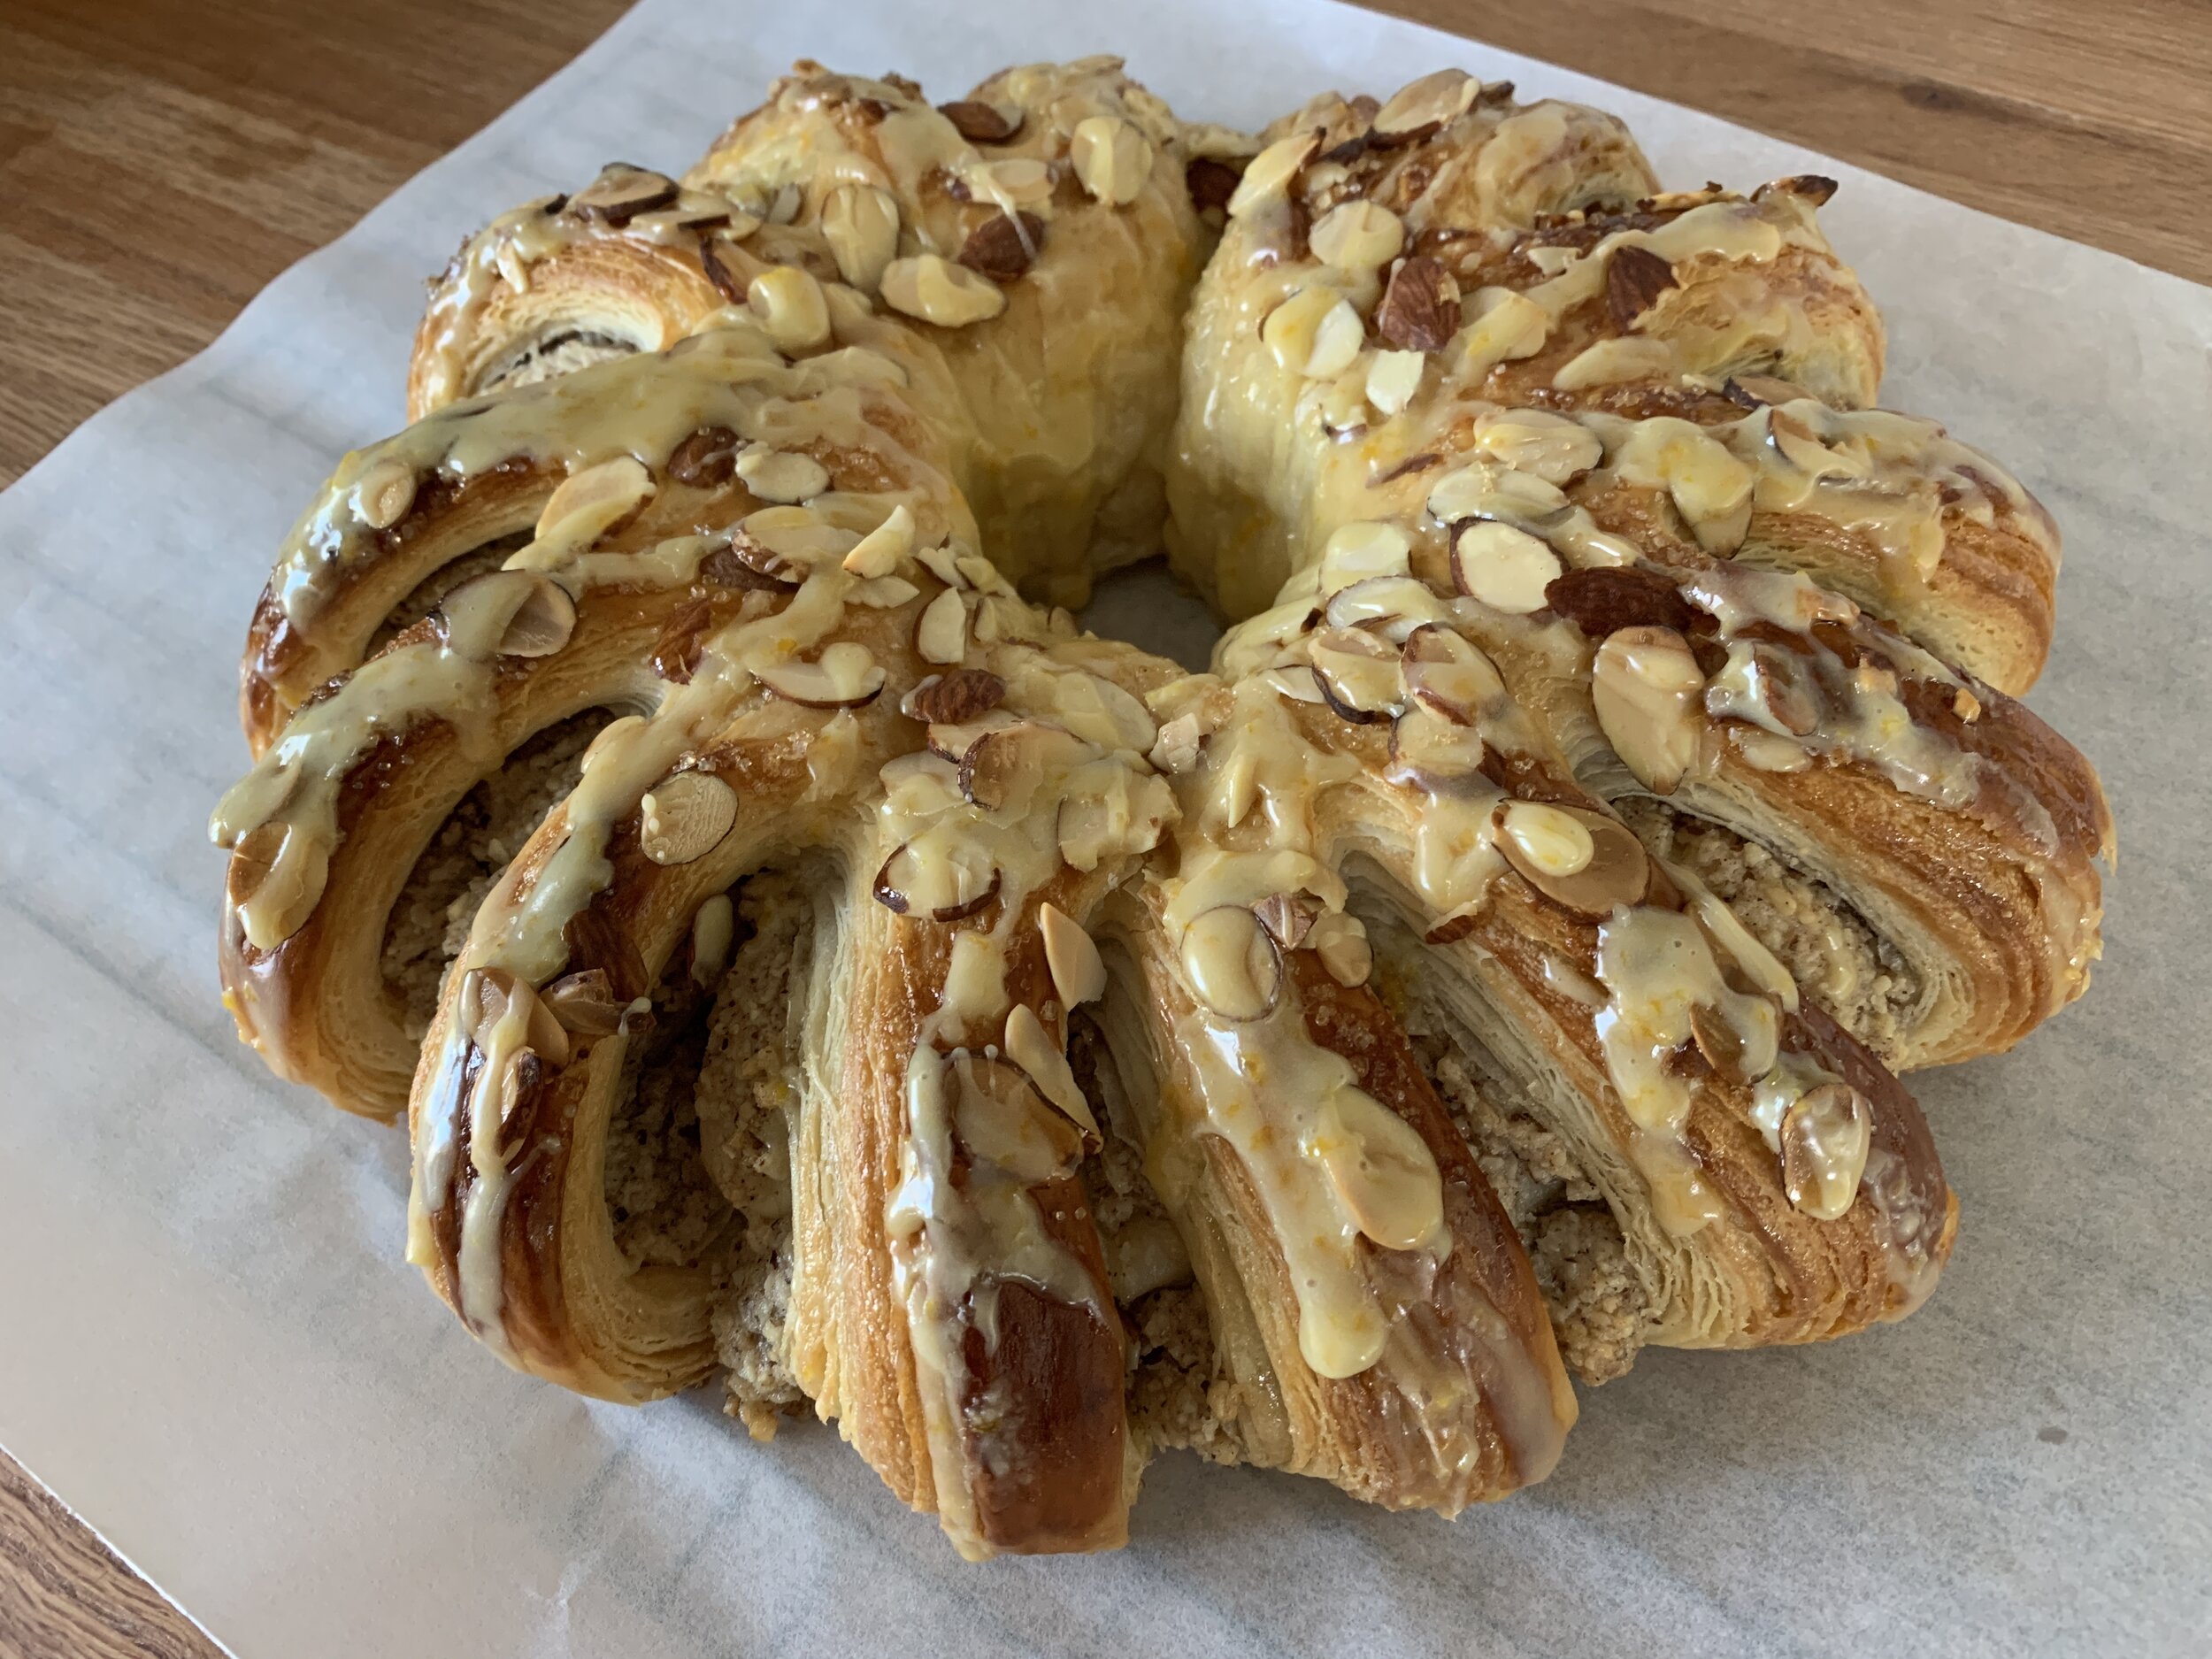
I decided to gussy it up a bit by making a simple orange scented glaze with some orange zest, confectioner’s sugar and fresh orange juice and drizzled it all over.

Once cooled I sliced a section for testing and loved it! I’m a big fan of hazelnut and orange anyway, so this definitely did the trick. And the almond/hazelnut combo took it up a notch too. A big thumbs up!
The petite pain au chocolat portion of the program was straight forward, a process I’ve done many times. A simple image will do this time around. Hmmm . . . . I’m getting low on chocolate batons.

Next up - apricot twists. Using a half batch of croissant dough, I rolled it out to 12”x 14” rectangle with the long side facing me, parallel to my work surface. Brush the dough with melted butter then sprinkle on about 1.5 tablespoons of vanilla sugar (cinnamon sugar if you like). Roll lightly with a rolling pin to help the sugar stick.

Fold the dough in half from one side so that you end up with a 12”x7” piece. Roll the dough to seal it and slightly stretch it.
Now cut seven strips, each 1” wide.

Holding each strip at the ends, stretch it as you twist it several times then coil it up into a spiral.


Place on a parchment lined sheet pan, brush lightly with egg wash and let rise about an hour.

I often use my cold oven as a proof box, placing a pan of warm water on the bottom shelf. However, if my oven is in use, I tuck my tray in a safe spot, place a small glass of warm water on the tray and cover with an overturned clear tote bin to provide moisture and a hint of warmth.
Once risen - they should look more pouf-y and the laminations appear more prominent. Brush again with egg wash, push down at a couple of central spots with your little finger tip or the end of a wooden spoon or chopstick and do your best to direct some apricot jam in there. Don’t fuss over it - just go for it. I added a sprinkle of vanilla sugar too.

Bake at 375ºF for about 17-18 minutes until golden.

To bring up the rear, last but not least are my “flip-throughs”. Once again using a half batch of croissant dough, I roll it out to ~8” by 13.5” and cut 12 pieces, each 4” by 2.25”. Each rectangle gets a slit down the center leaving the ends intact. I consider these my medium size - you can make them smaller or larger - just cut any size rectangle you’d like!
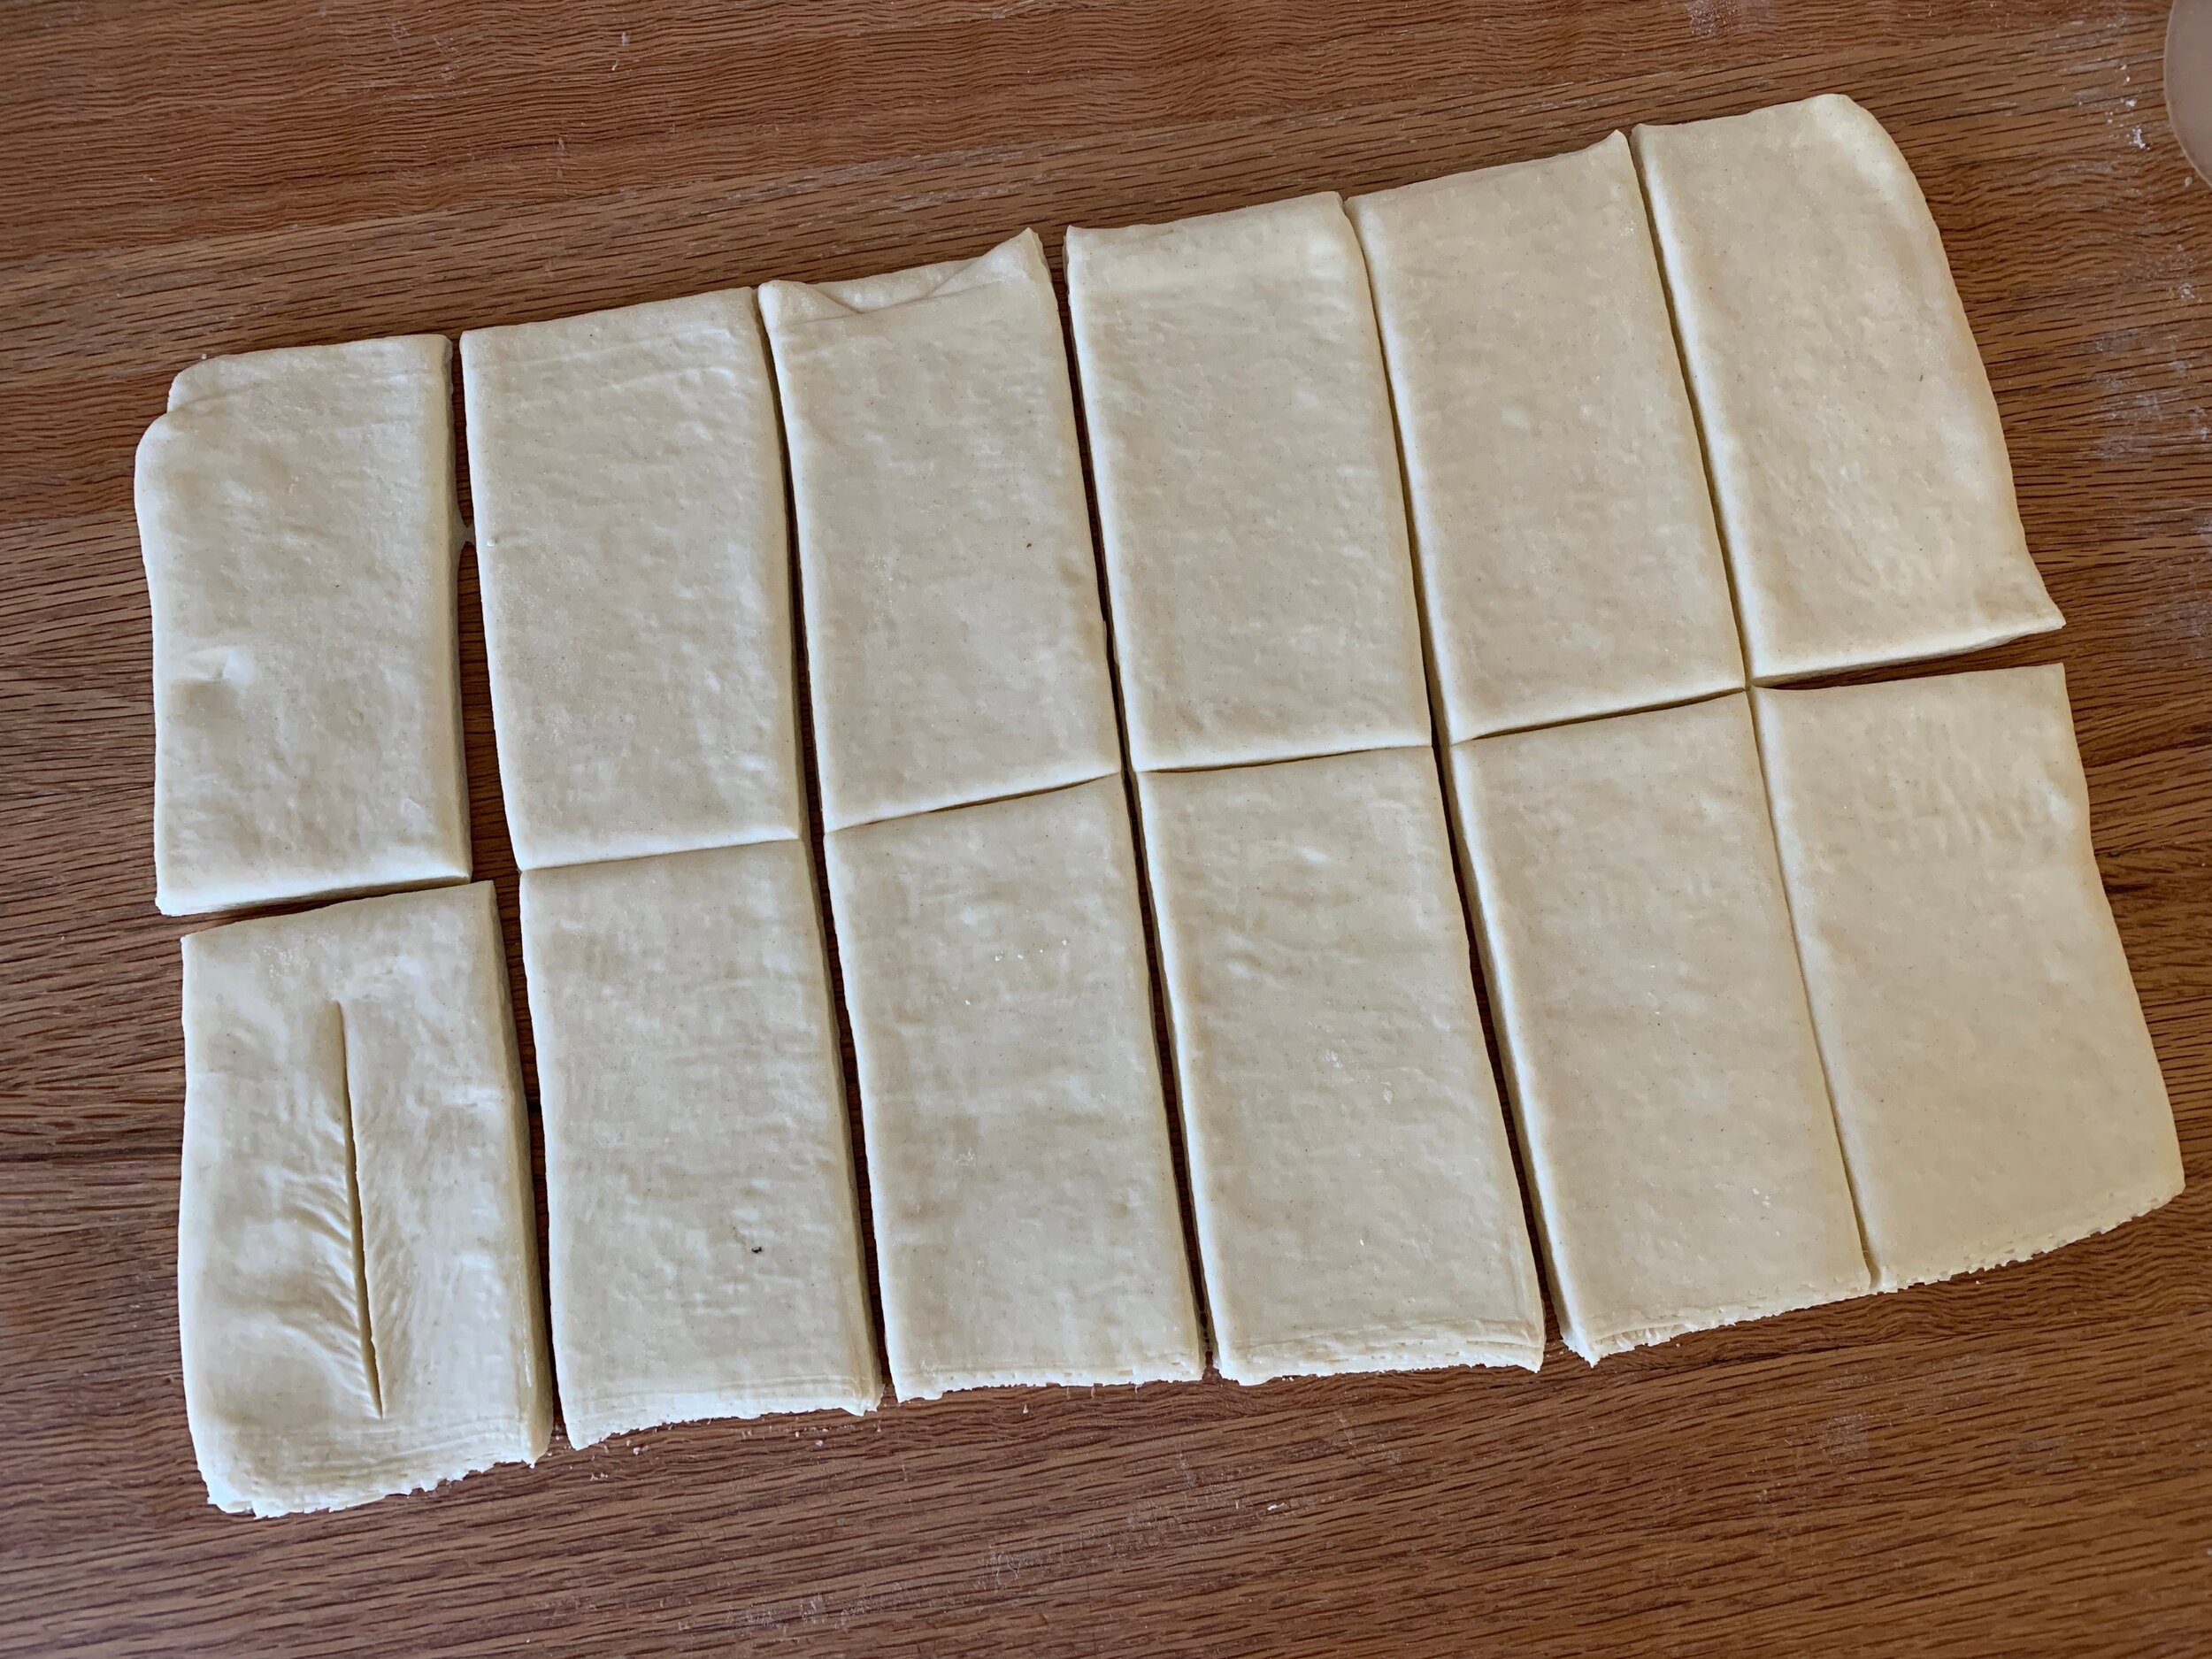
Now take one short end, roll it downward then bring it up through the slit, essentially flipping it through to the top as the sides naturally twist. Looks kinda like a bowtie - just straighten the rectangle a bit and they’re ready to rise. The first time I did this way back when, I found it helpful to cut a piece of paper or felt and practice - you can visualize it immediately.

Place on a parchment lined sheet, lightly egg wash and let rise about an hour. Egg wash again and top with your chosen filling - lemon curd, almond cream and jam are just some of the possibilities.
One of my favorite ways to finish these off is with a basic cream cheese filling made by blending 227 g / 8 ounces cream cheese with 57 g / 1/4 cup sugar, 3 tablespoons cornstarch, some lemon and/or orange zest, 1/2 teaspoon vanilla; beat on medium with the paddle until light and smooth; blend in 2 large egg yolks until fully incorporated. This made plenty for my purpose here but you can certainly double the recipe if you’re doing a larger batch of pastries.
NOTE: After the rise the center should fill in but sometimes there’s still a gap between the twisted sides. Just blob your filling/jam more along the edges if need be, otherwise just dollop a blob along the center and top with jam of choice - in this case cherry.. Once they bake it all blends in.

Bake at 375ºF about 17-20 minutes until golden and the filling is set.

Planning for properly timed rises and taking turns in the oven for each type of pastry made for a busy baking day and resulted in a wonderful assortment of goodies that I ended up divvying up amongst a number of our neighbors. A great way to use croissant dough that would have soon been over-the-hill after too long a stay in the freezer.
The neighbors were most happy!
Have fun, stay safe and keep on keepin’ on folks.
