One great bread a few different ways

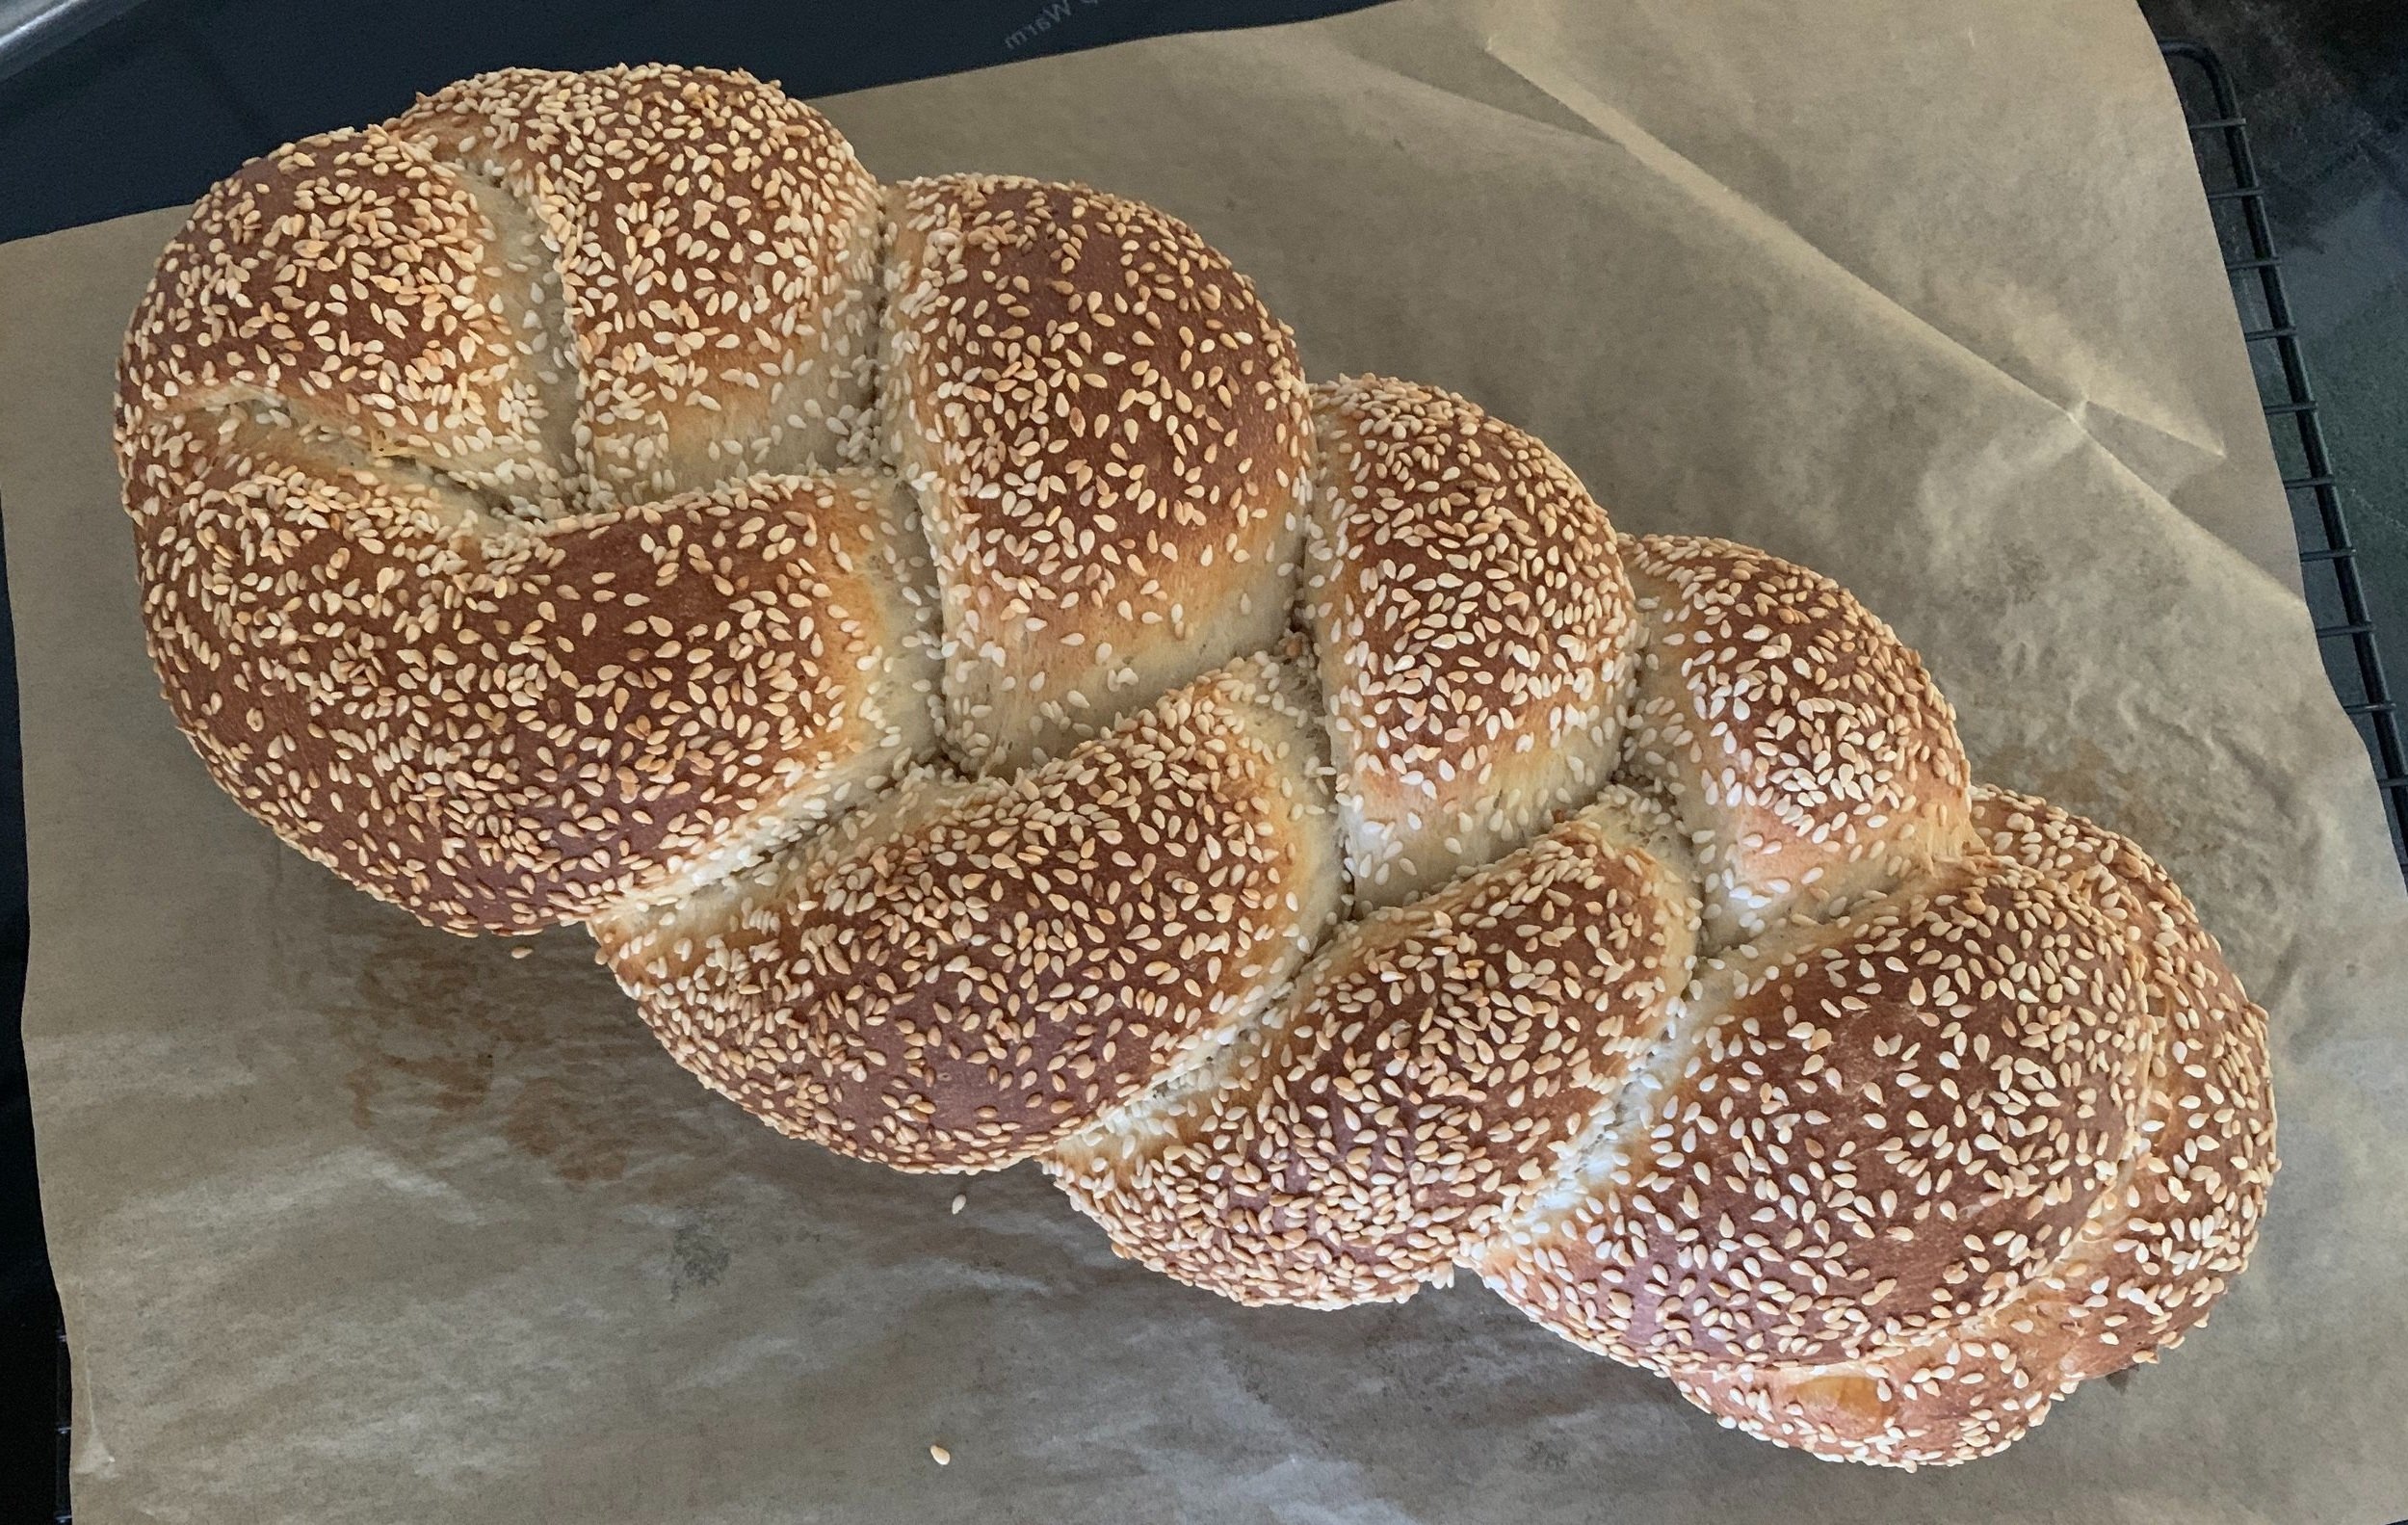
Sesame braid

Hi all. I gave you a sneak peek at this one awhile ago. My how time flies - seems like eons! I packed a lot into this post so get ready.

I LOVE this dough! It calls for an overnight preferment, a process that not only lends itself to planning ahead but also to a stellar end result.

This is my adaptation of scali bread from King Arthur Baking Company. I first came across it in the spring 2017 issue of SIFT magazine (now defunct -awwww!) and made it for the first time back in April of 2022. It’s said to be a staple in Boston’s North End, and, as is the case with the internet, I found a bunch of references/posts about it on line. Meatball sandwiches anyone?


Classically made as a three strand braid coated in sesame seeds, I started with KA’s base recipe for one braid but then doubled it and created my own recipe, subbing in some rye and white whole wheat flour. I’ve tried several different approaches - braid it, twist it, torpedo it, loaf it, herb it, cheese it, seed it - they’re all good!

Let’s take a look at the steps. Make the preferment the evening before. Please note - the dough/proofing images are for my recipe which would make TWO braids. I’m showing the shaping steps for ONE braid.

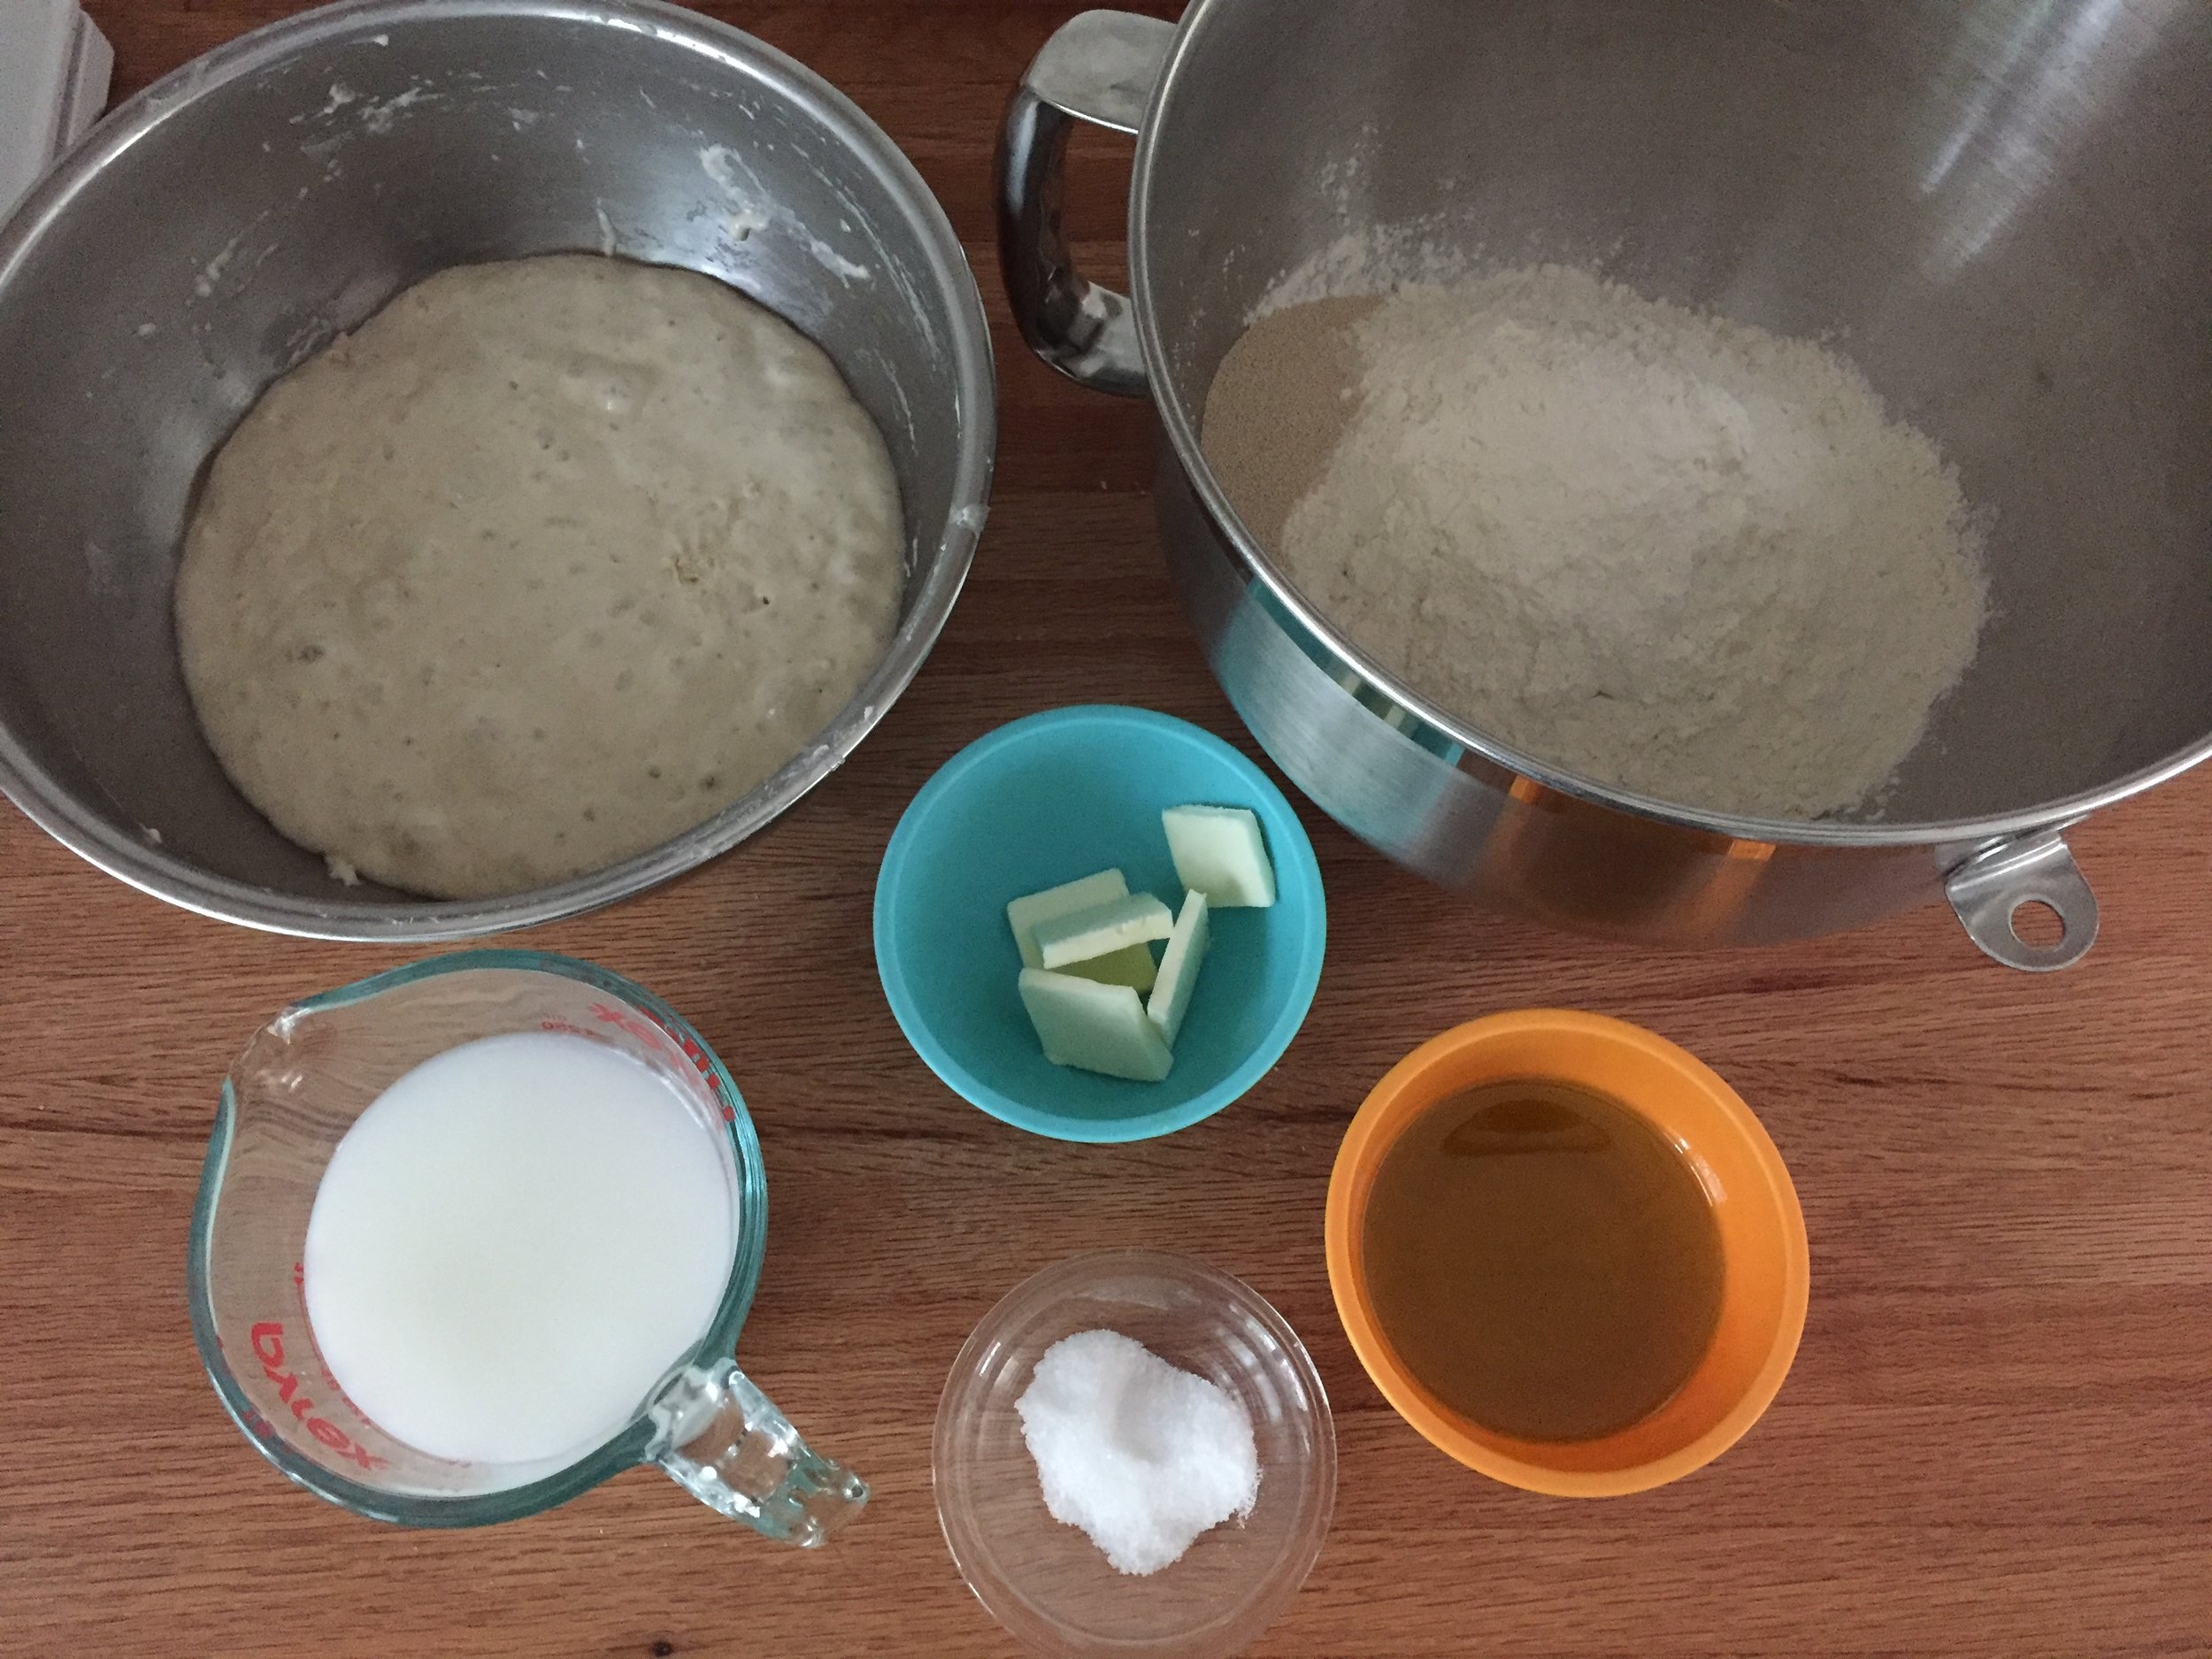
Give it 13-15 hours at room temperature after which it should be actively fermenting. It’s more stiff than let’s say a typical poolish which is equal weights flour and water.

Mix the preferment with the other dough ingredients and knead to a nice smooth end result.

Give it a 90 minute rise until nice and pouf-y.

That’s what I call a rise folks!

Proceed with your desired shaping. Here are the steps for one sesame coated braid using HALF of the above dough.

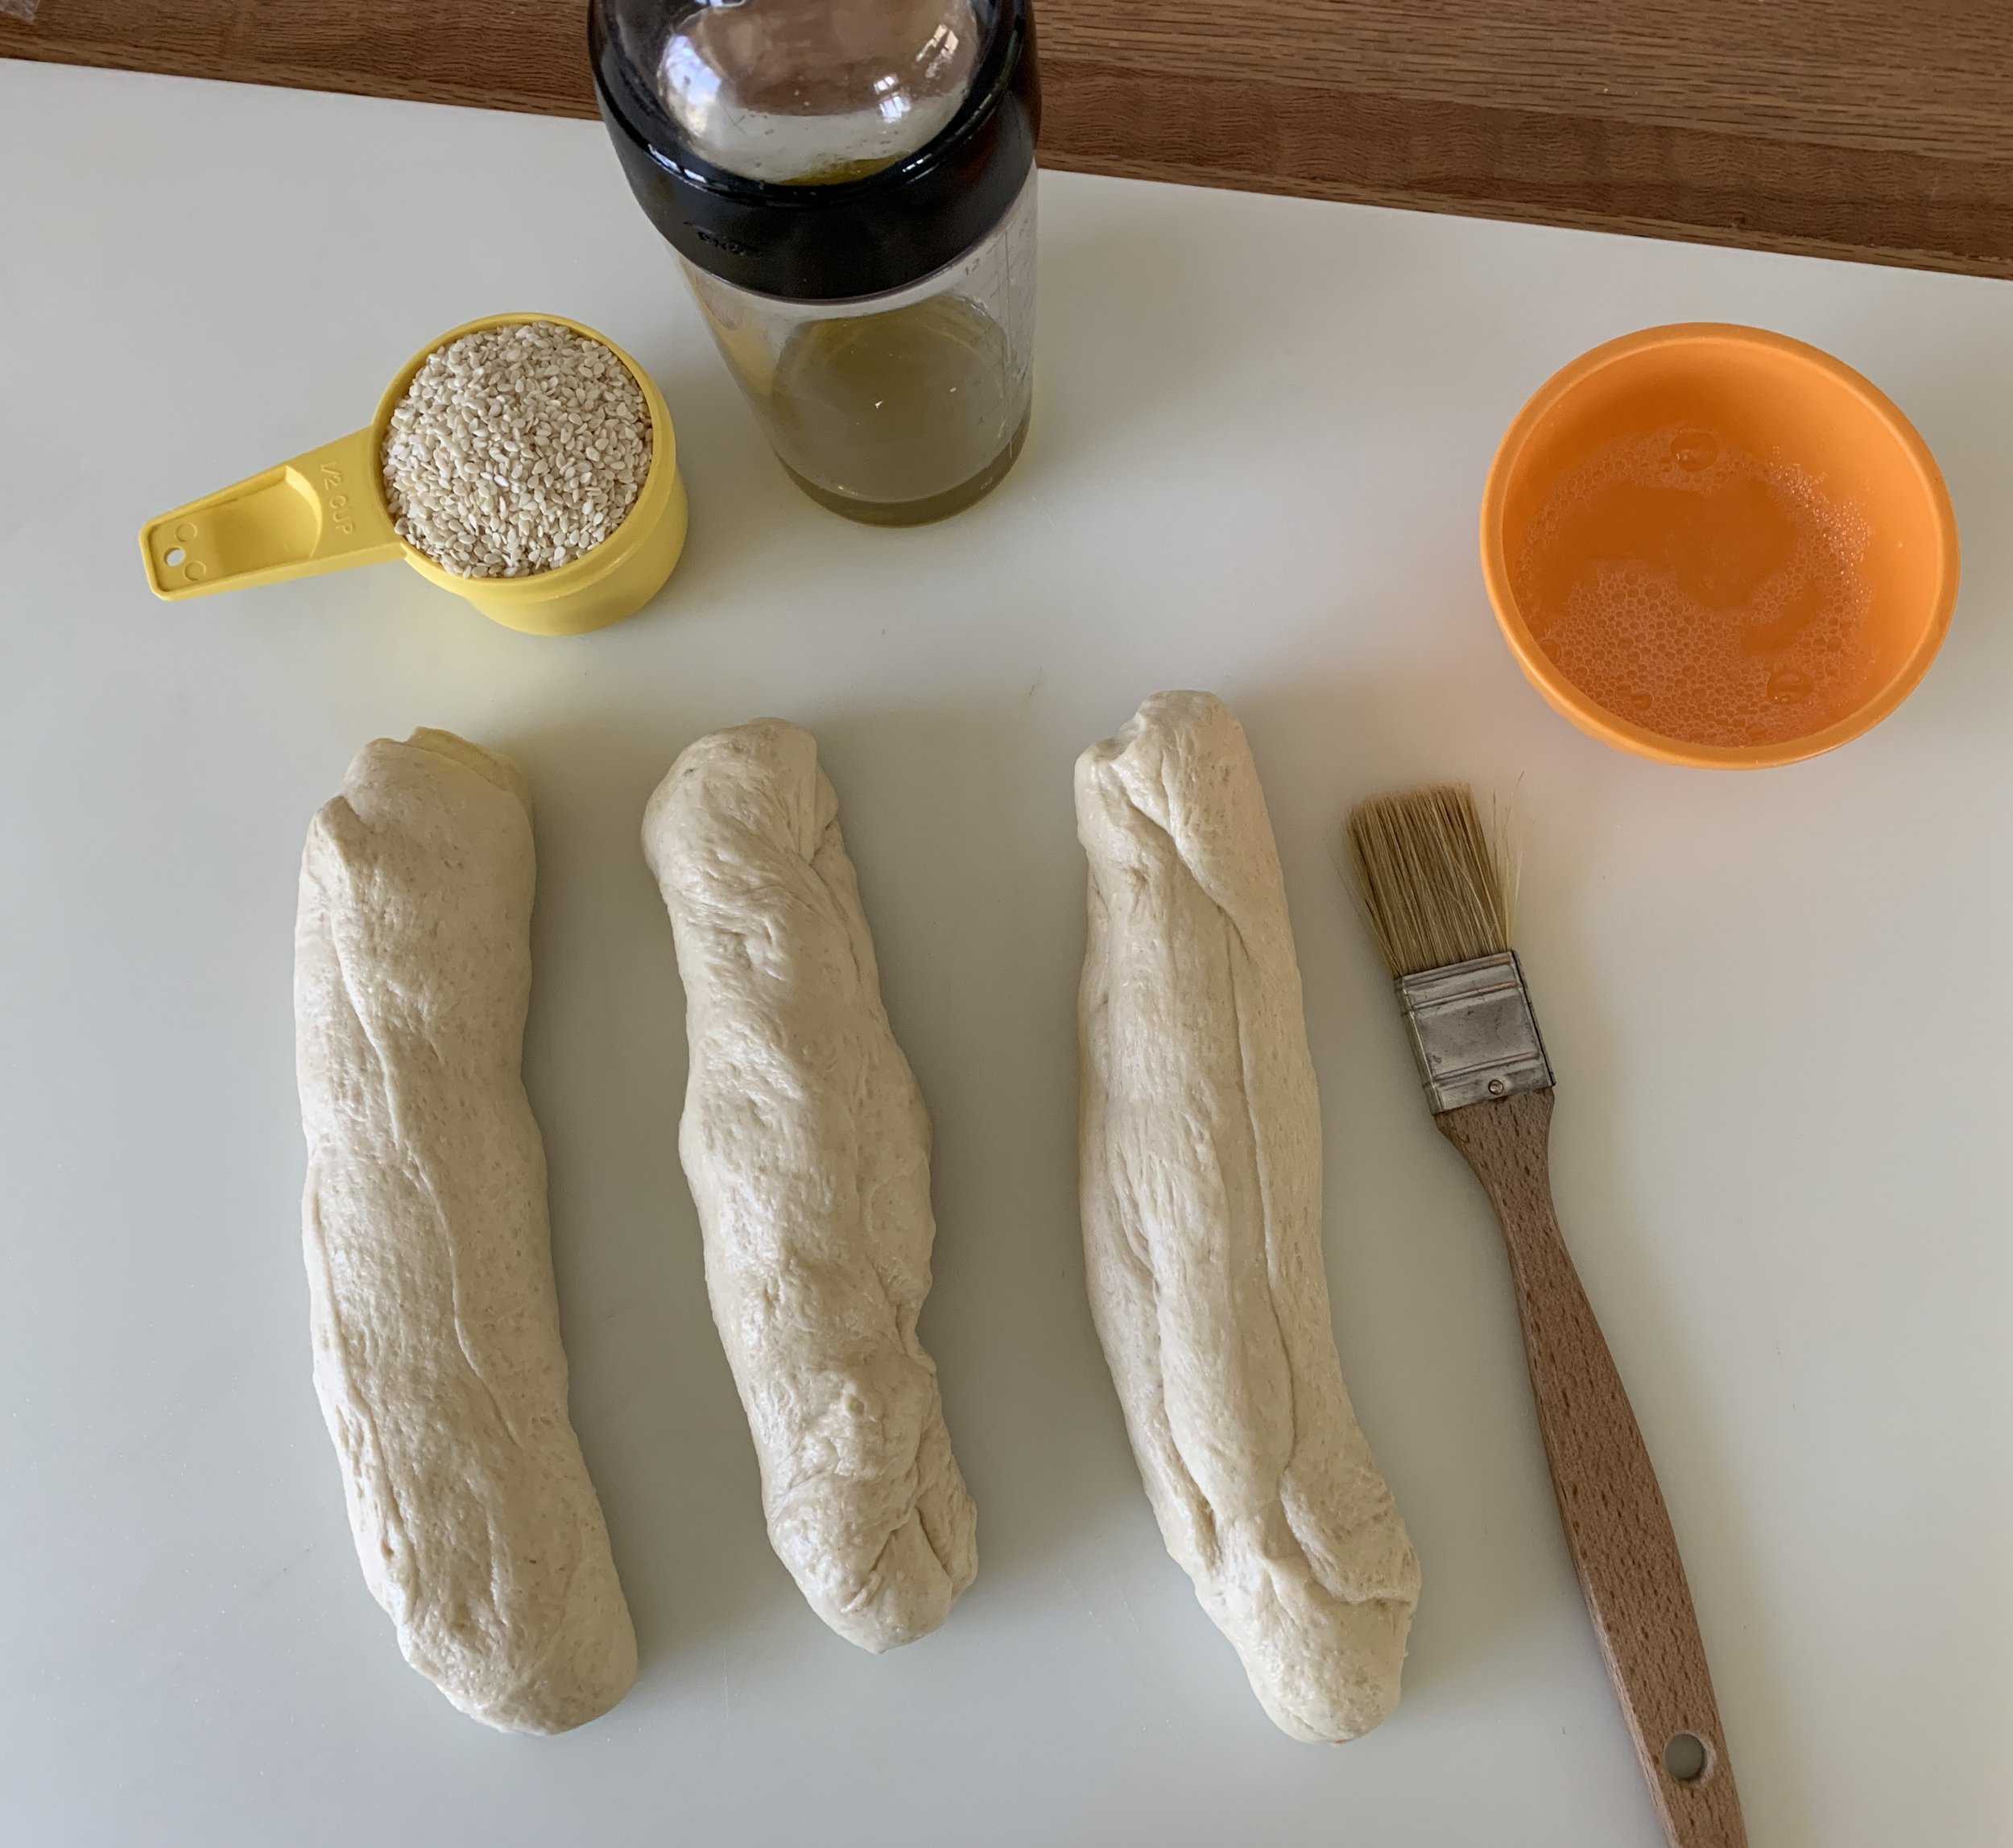
Deflate the dough gently, divide in three equal pieces (each should be about 230 g or so). On a lightly oiled surface roll each piece into a rough log and let rest 10-15 minutes.

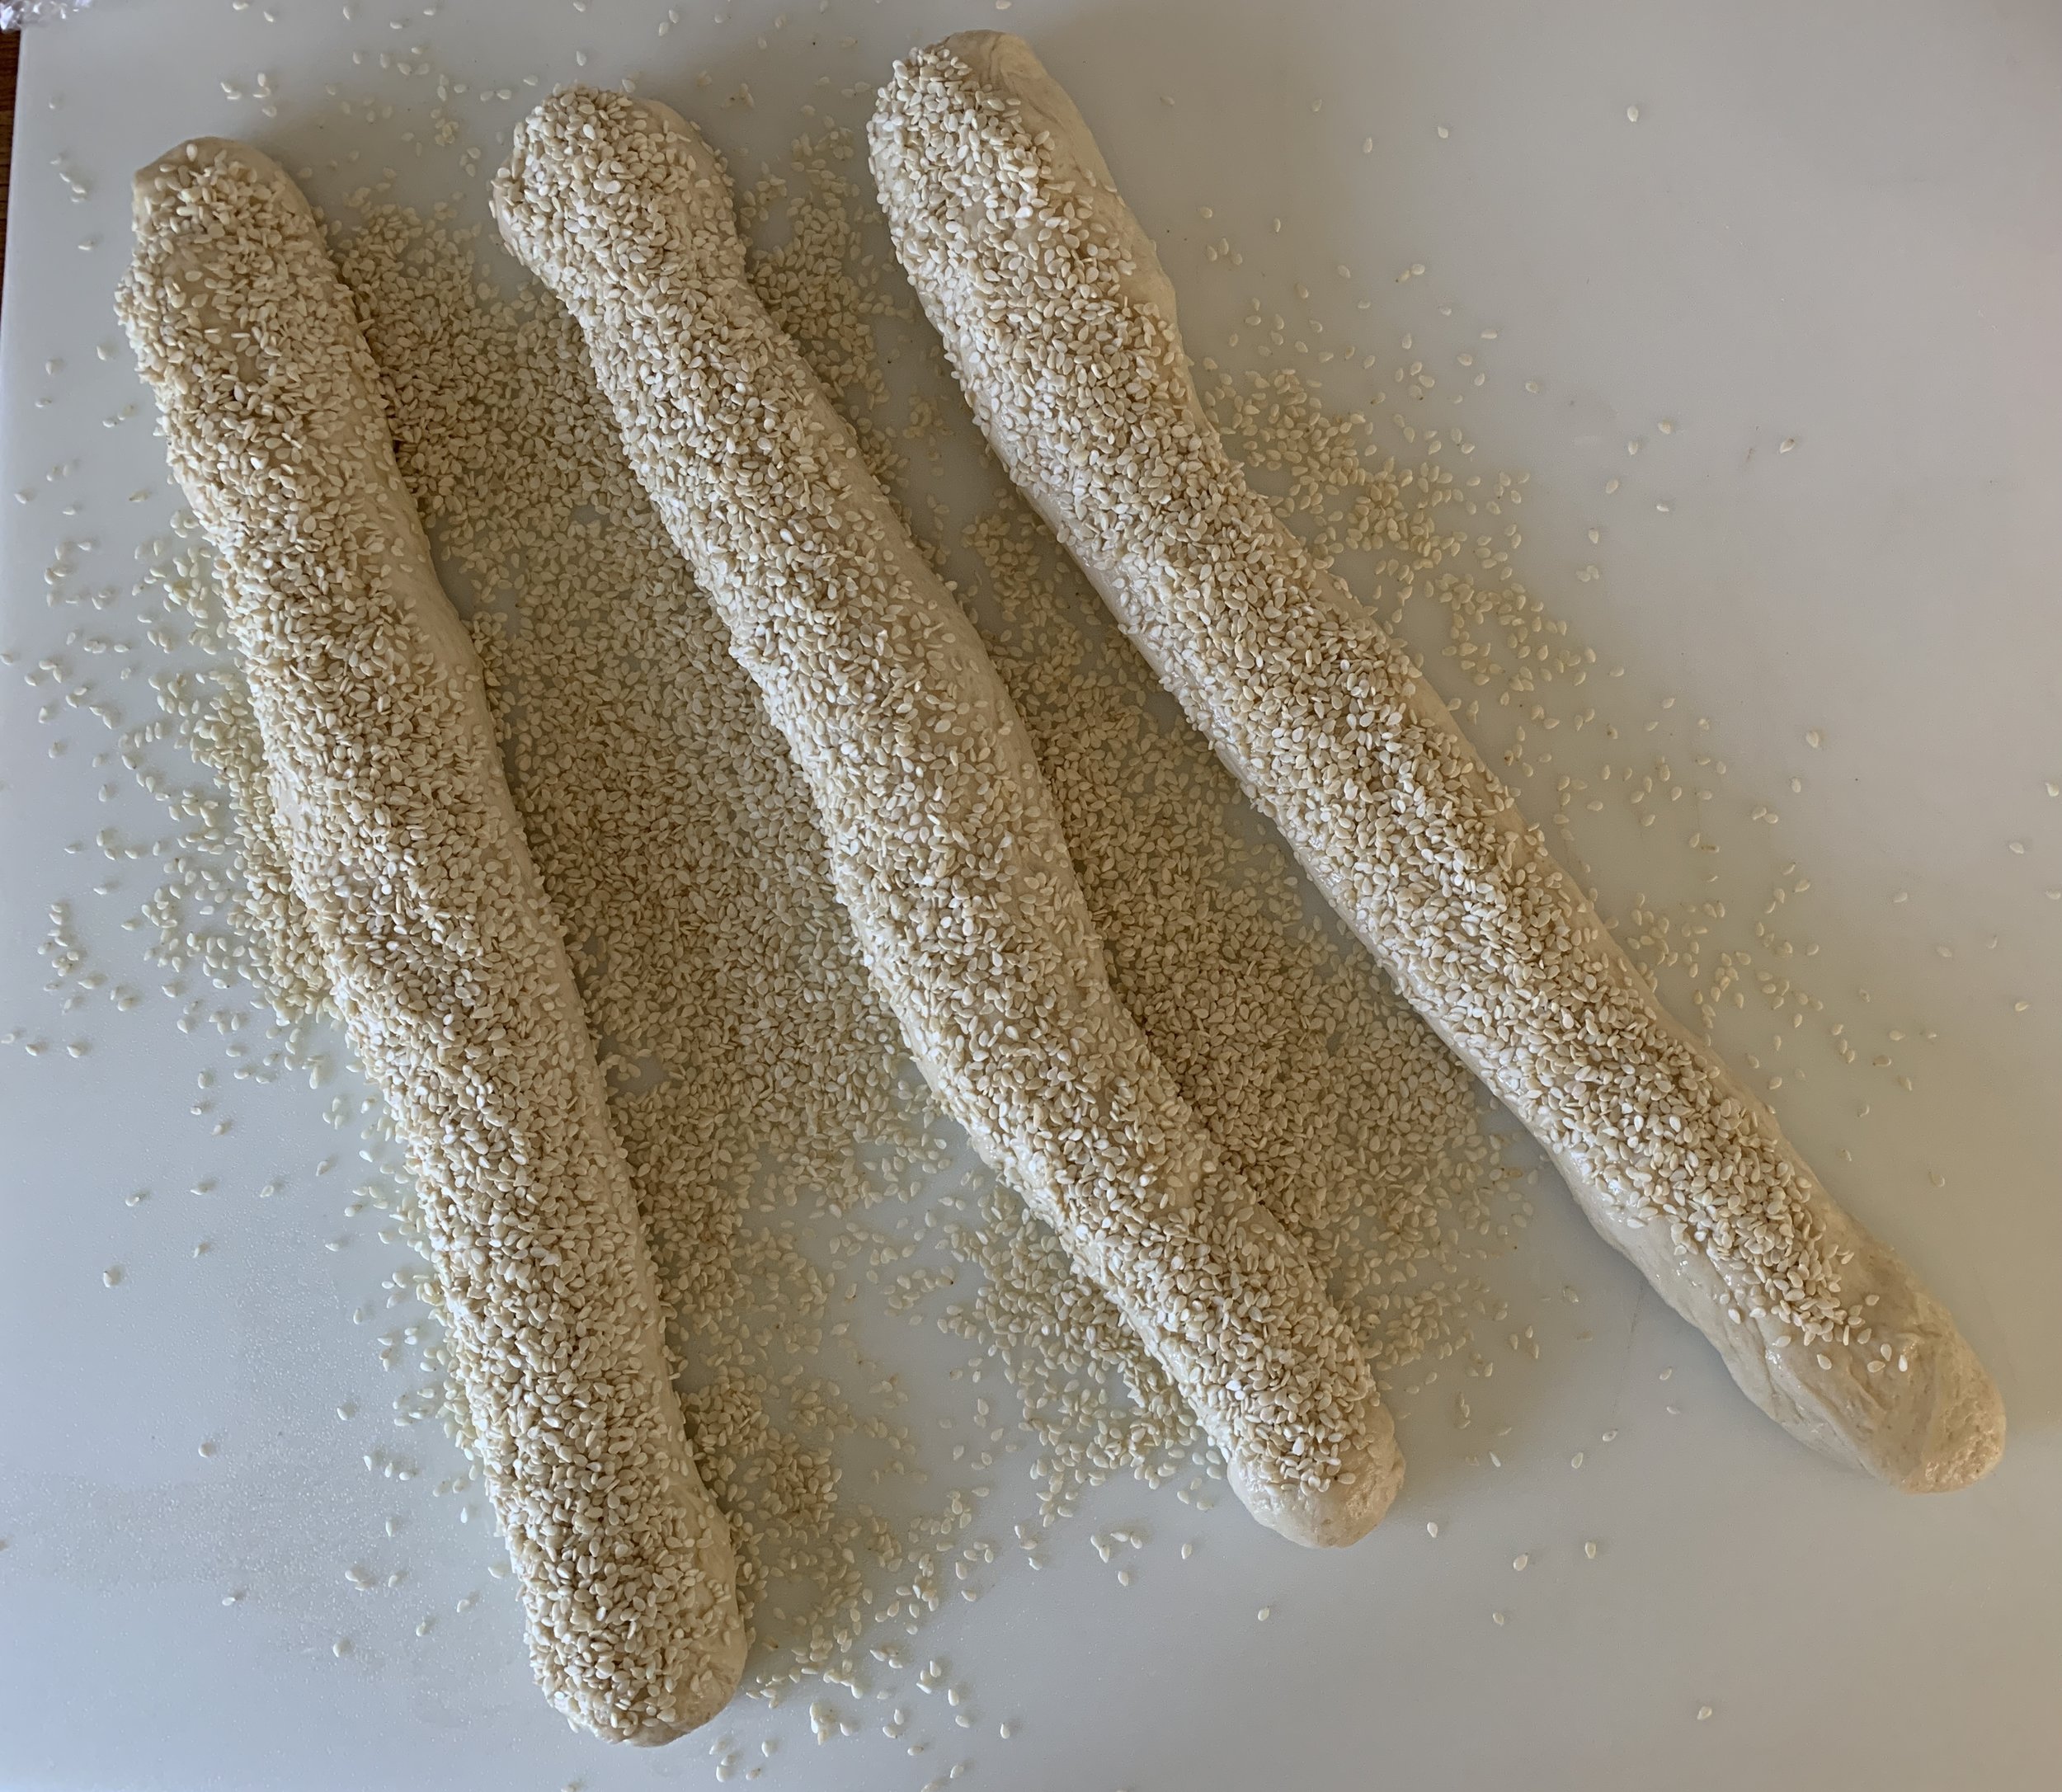
Now roll each log out to a 10-12” length then brush each with egg white and coat thoroughly in sesame seeds.

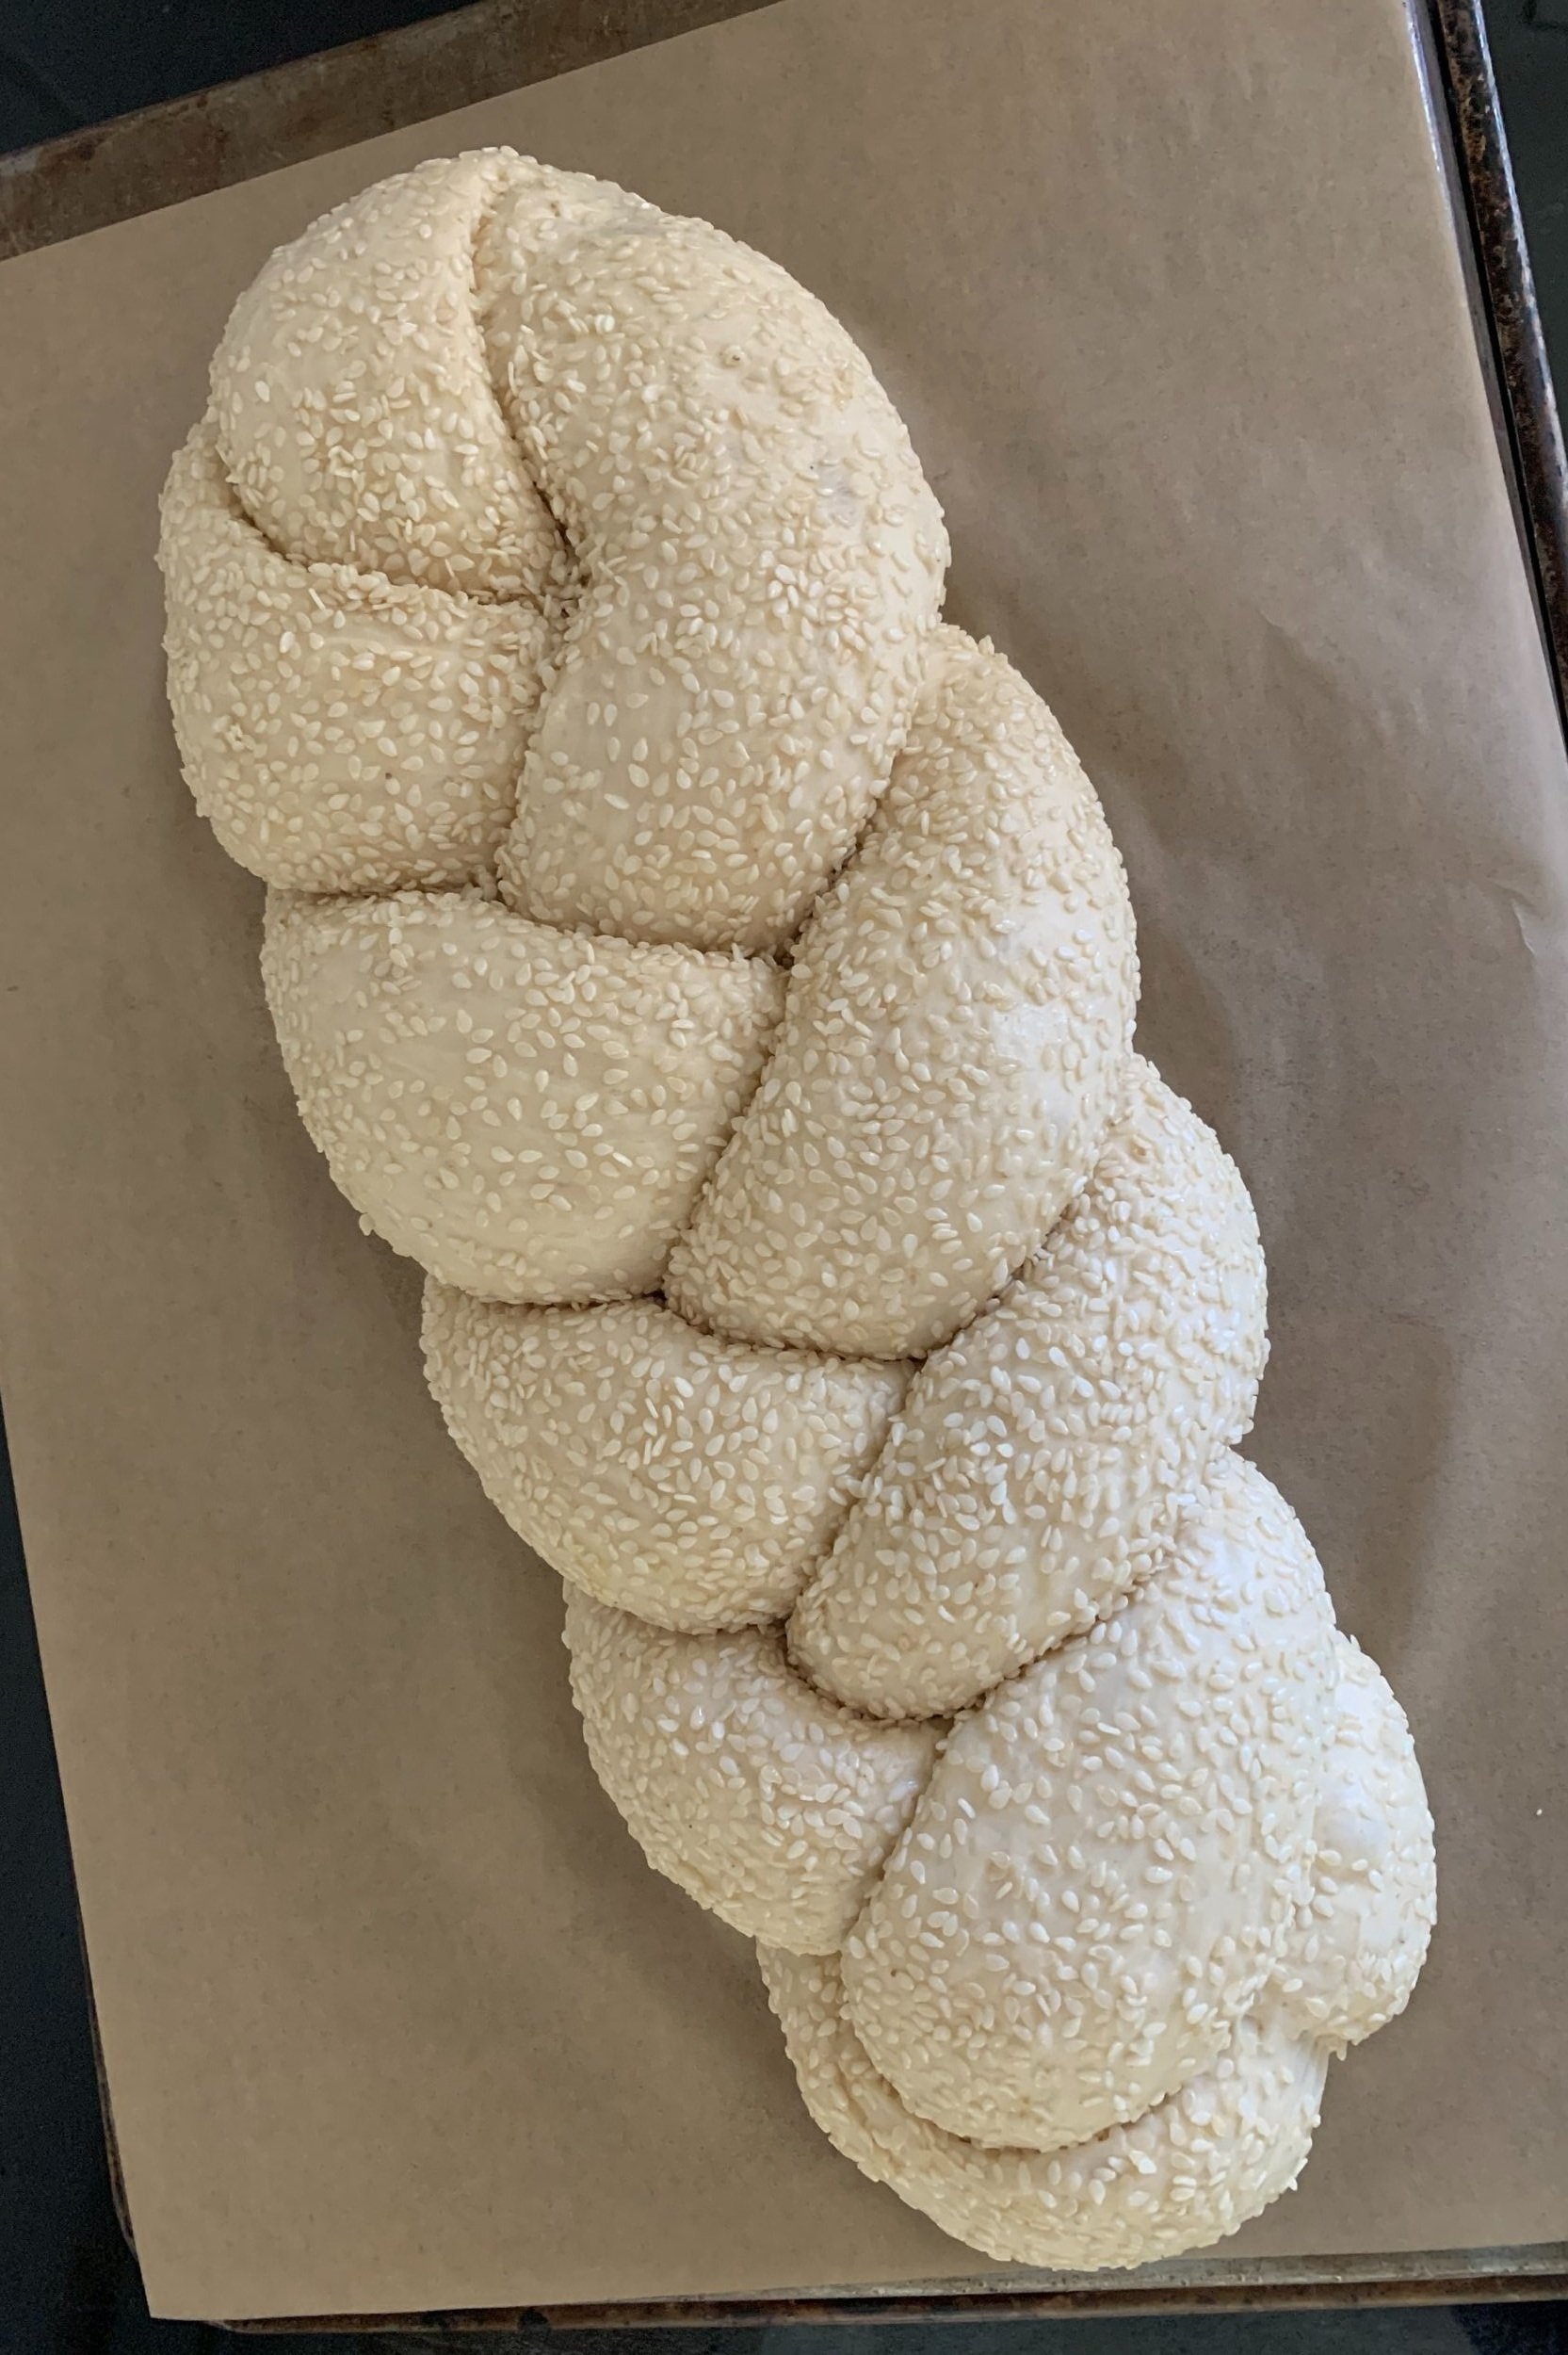
Pinch top ends together and do a typical three strand braid. Tuck the ends under to neaten things up. I placed mine on parchment on an overturned sheet pan in preparation for sliding it onto my heated baking stone.

Cover with lightly oiled film wrap and let rise about 90 minutes until pouf-y.

Toward the end of the rise, heat the oven to 425ºF (400º convection) with your baking stone if using.

Bake 25-35 minutes until golden brown.

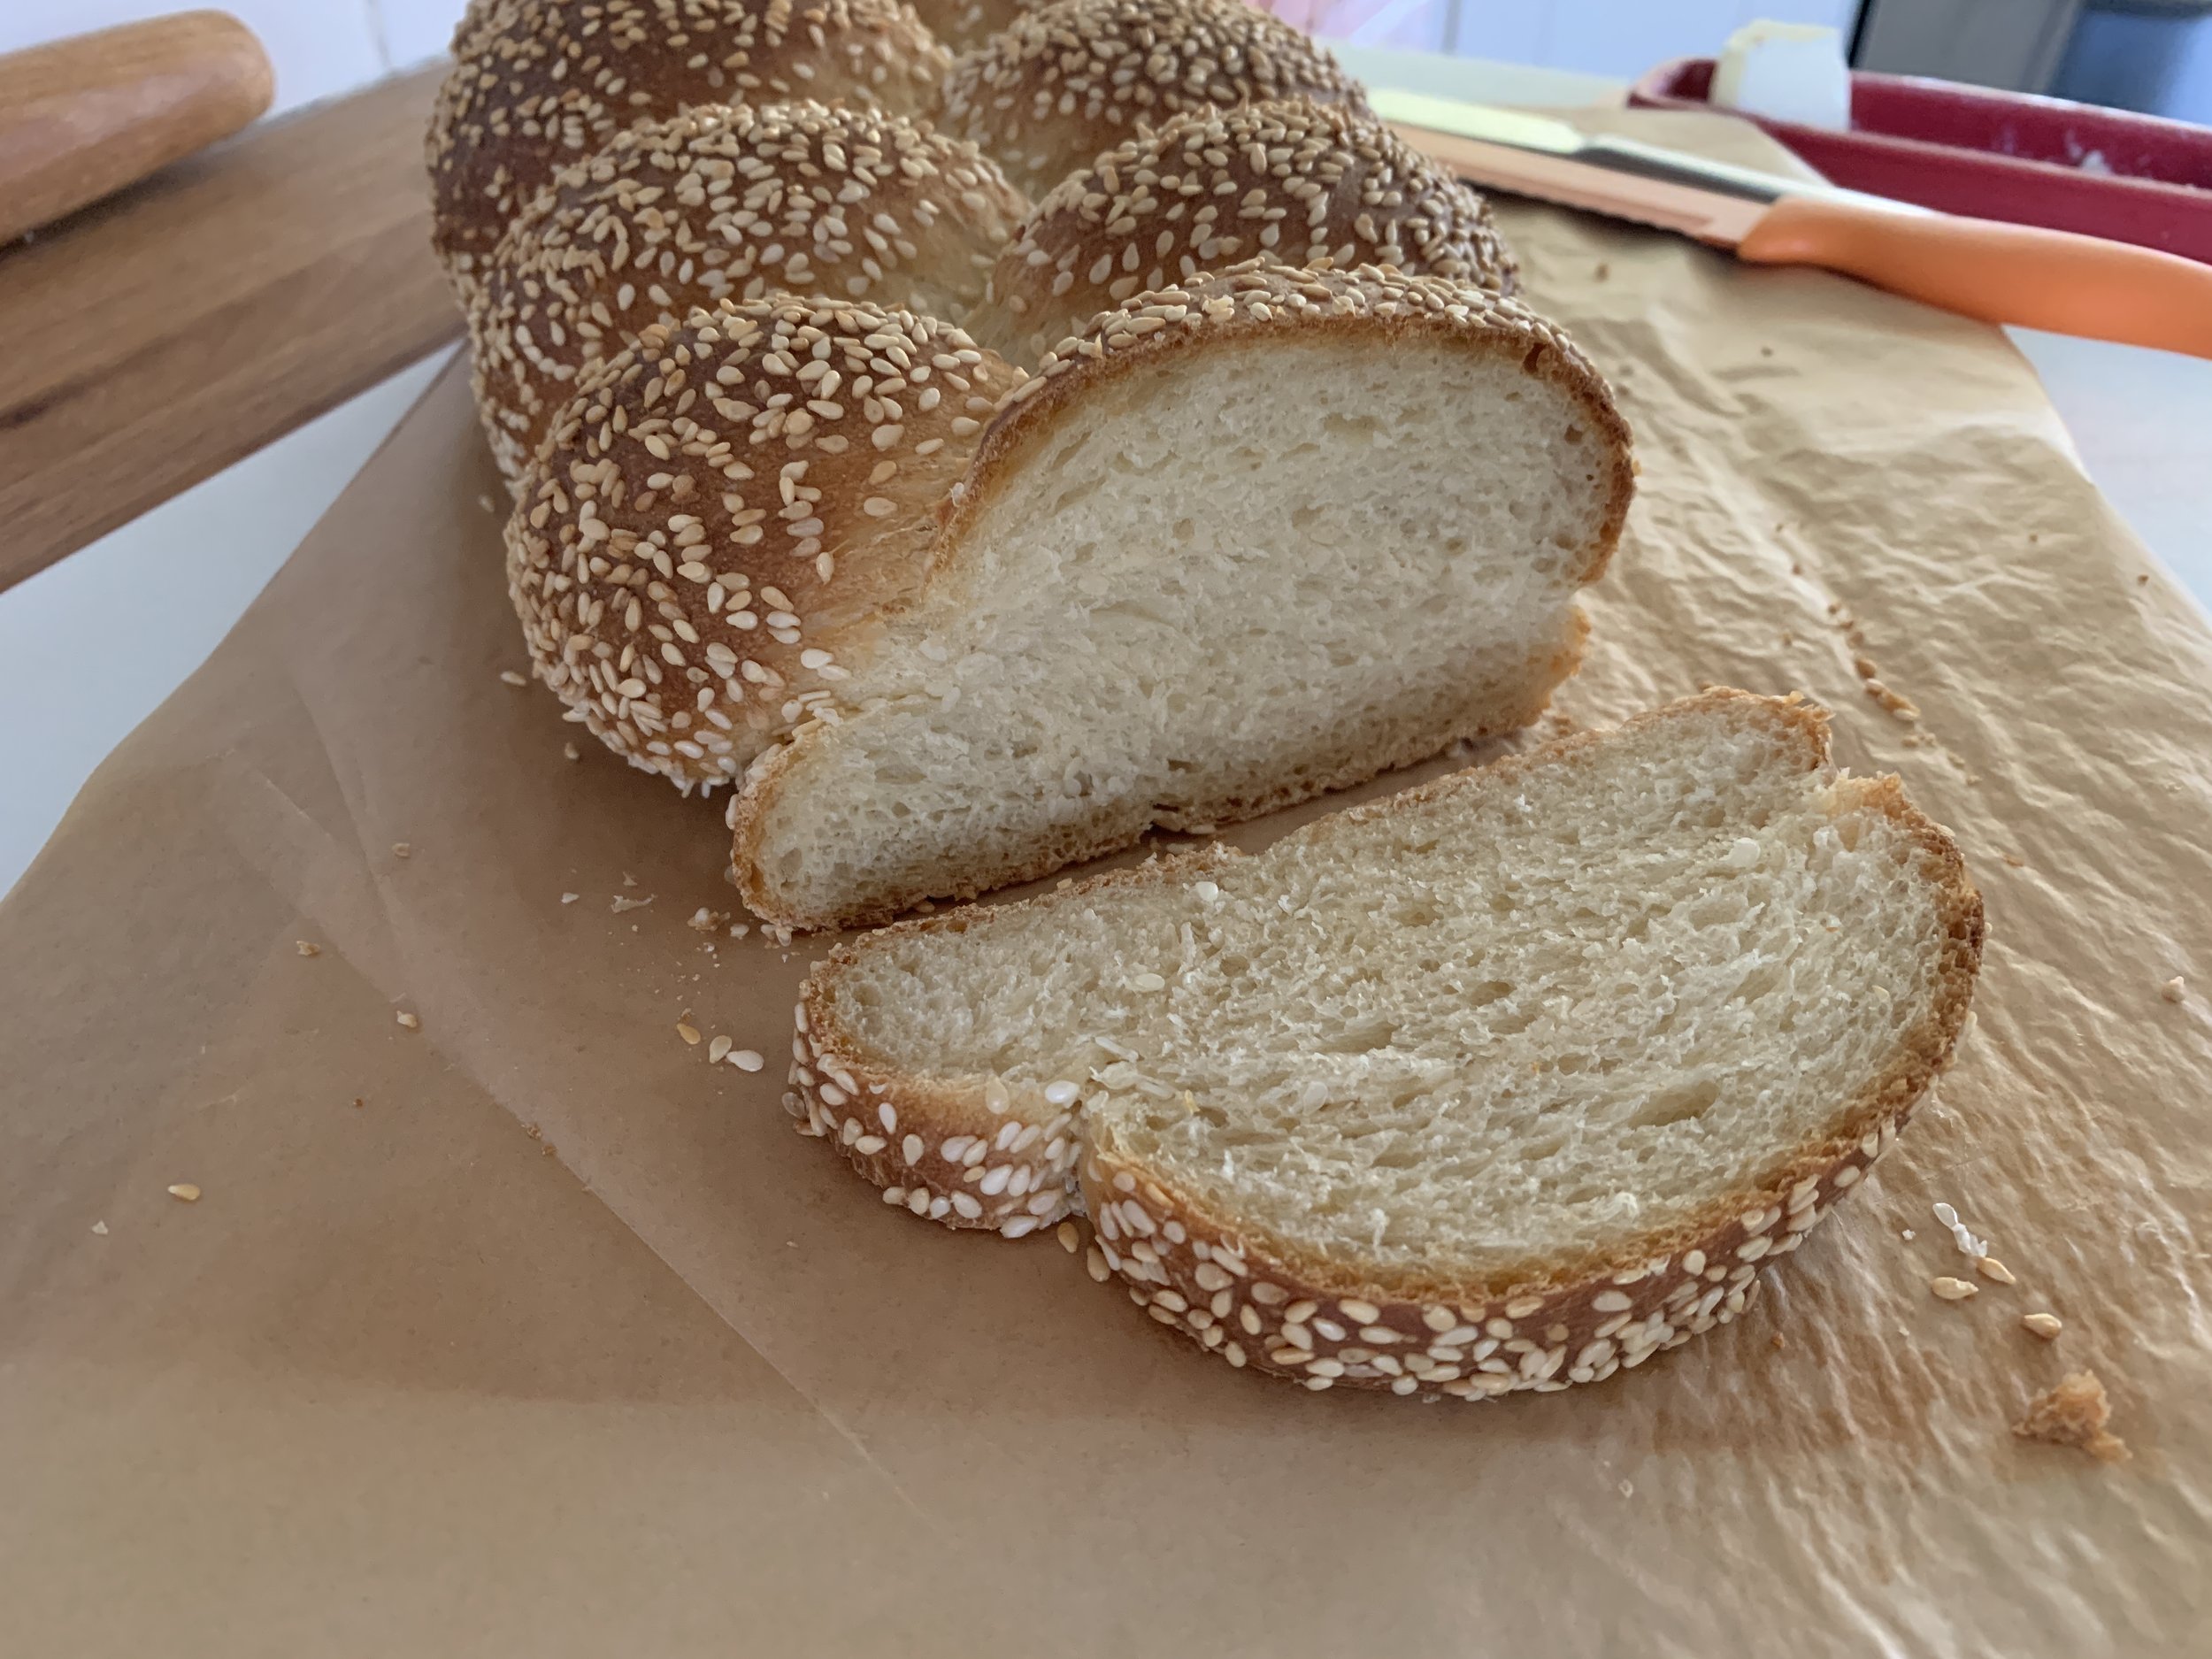
Cooled, sliced, buttered - oh so good!

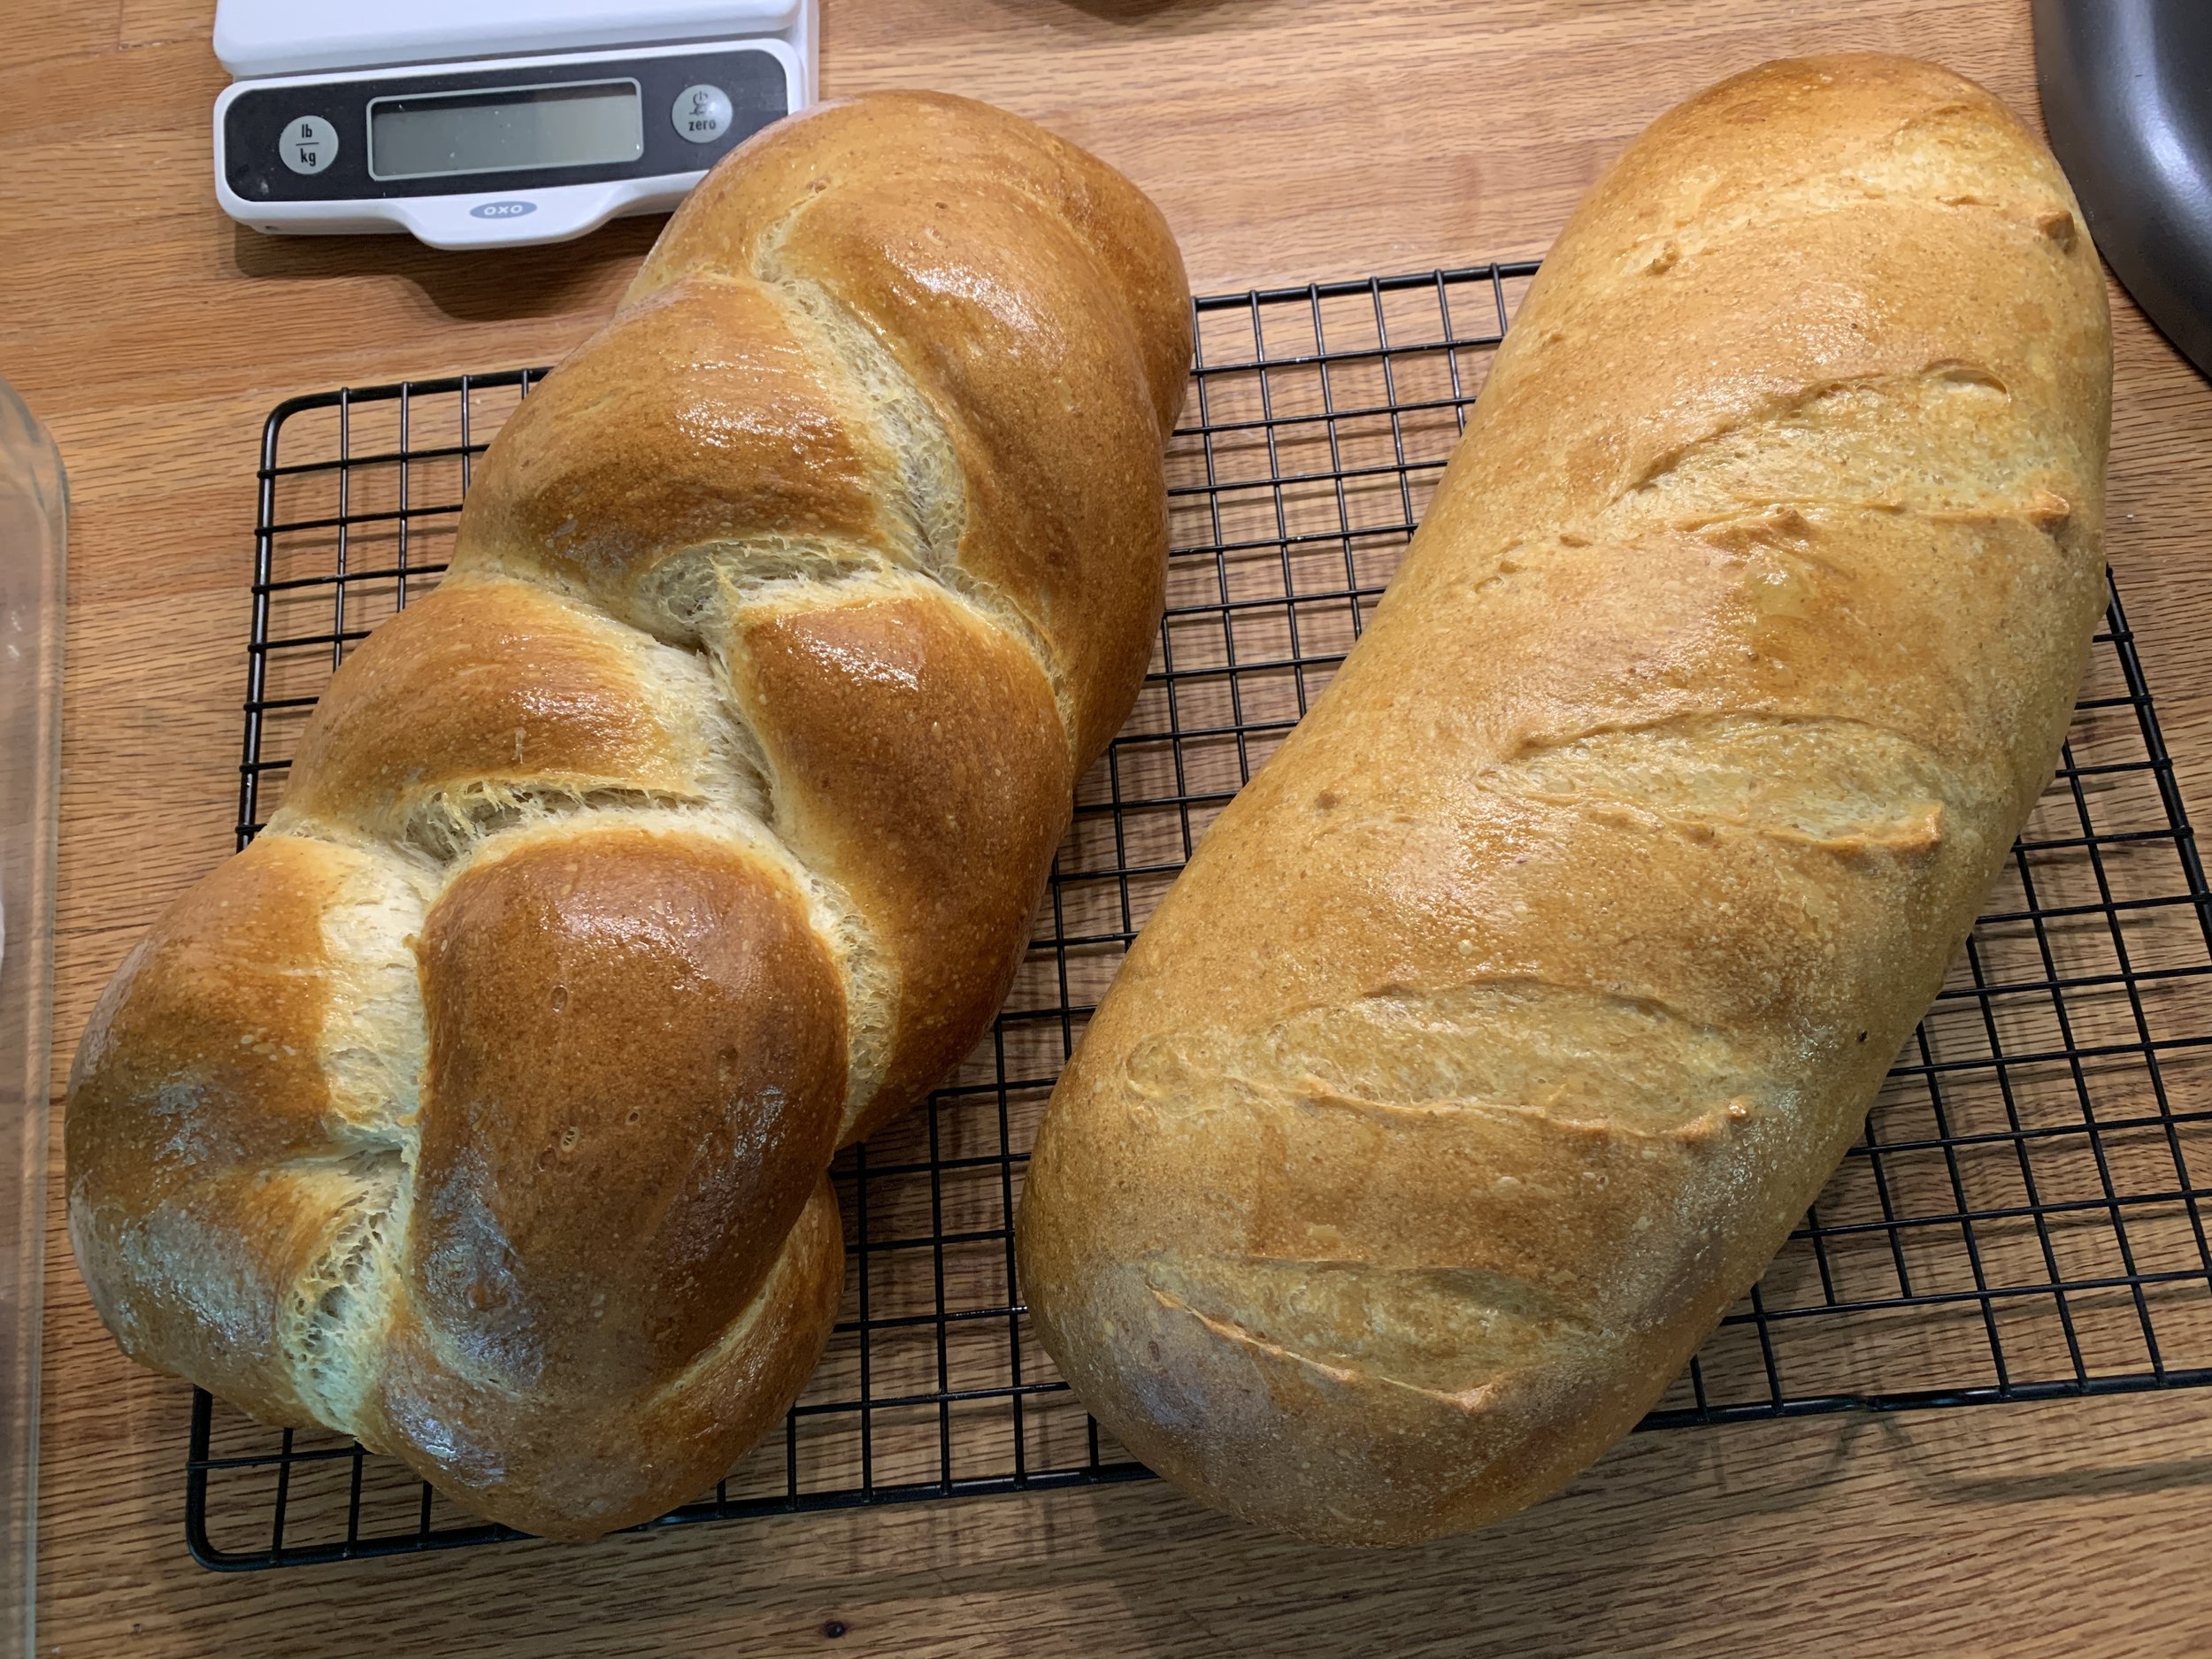
Here are a few other things I made with my full batch recipe. Two basic loaves, one braided and one slashed before baking.

Butter basted braid and a simple loaf

Another full recipe went into making a couple versions of rolls and a cheesy braid.

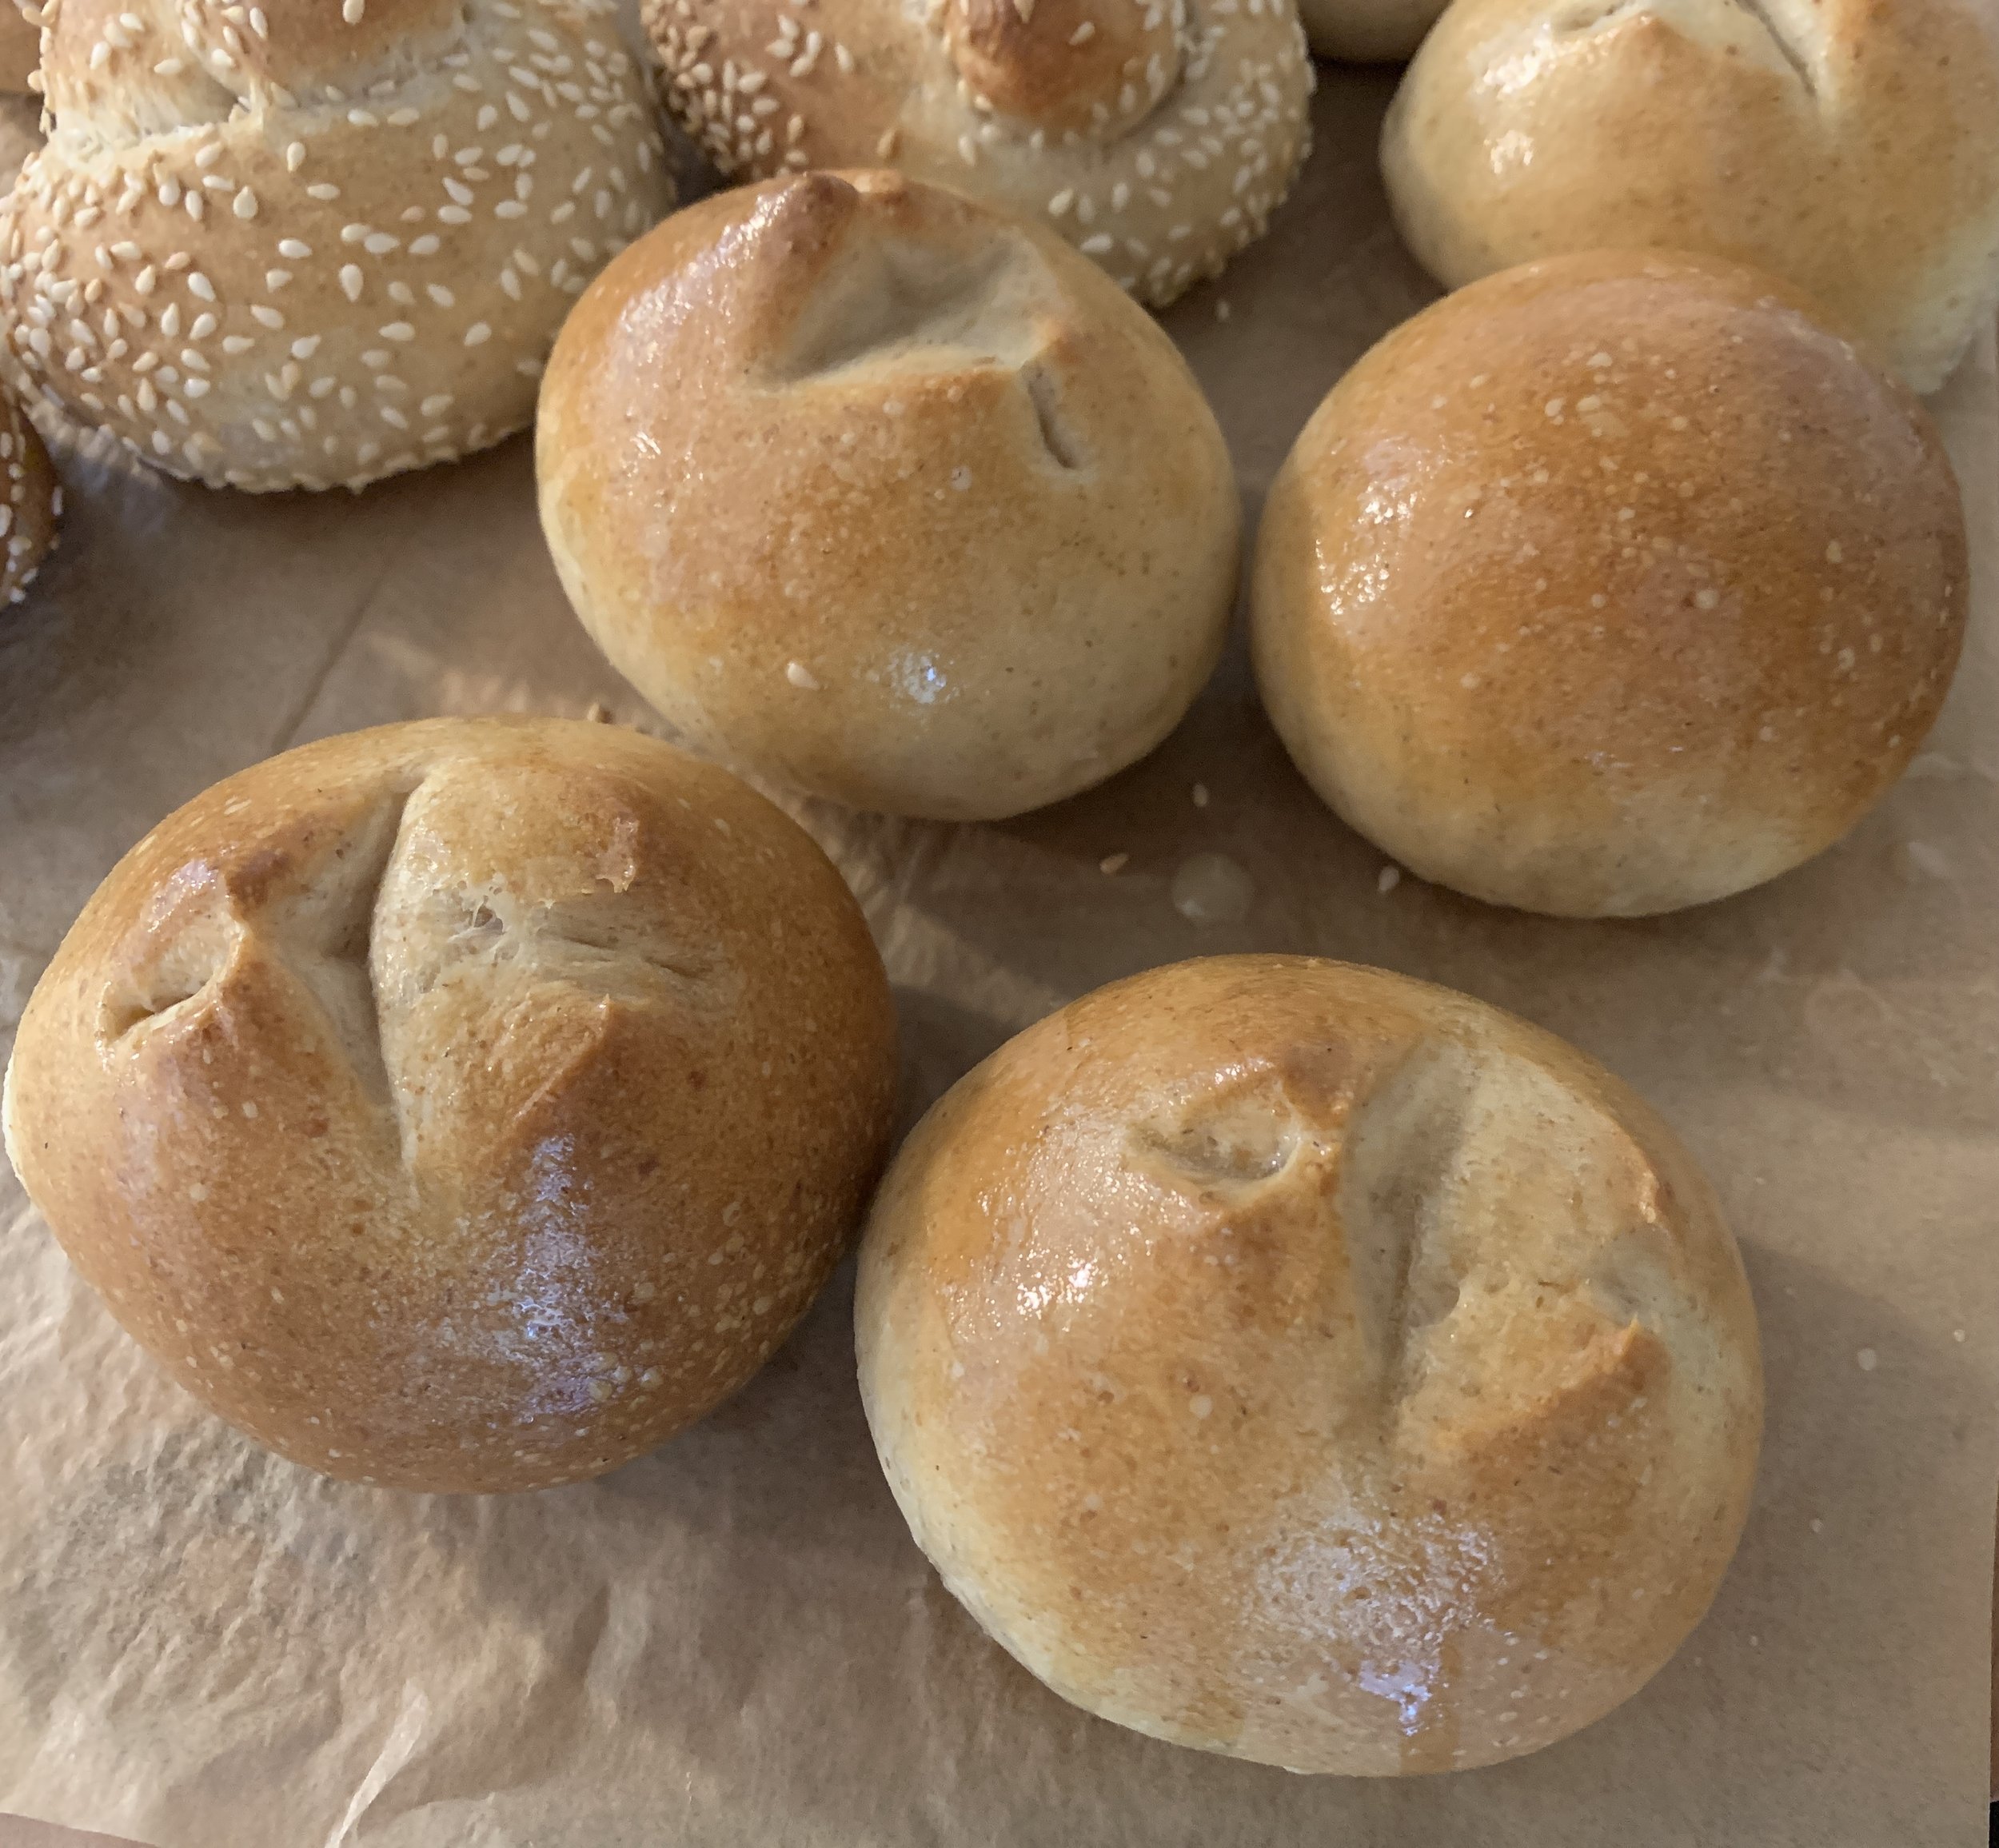
For the rolls I used a tad less than half the recipe to make fifteen 45 g rolls - 8 as sesame knots and 7 as butter basted. The rest became the cheese loaf.

I formed eight “logs” that I rolled in sesame and knotted up and left the other seven as standard round rolls (with a top snip before baking).

shape, shape, shaping!

The rolls enjoyed a nice long rise of ~100 minutes.

REady to bake, Before the snip!

Oops! Forgot one snip!!

Sesame knots and butter basted dinner rolls

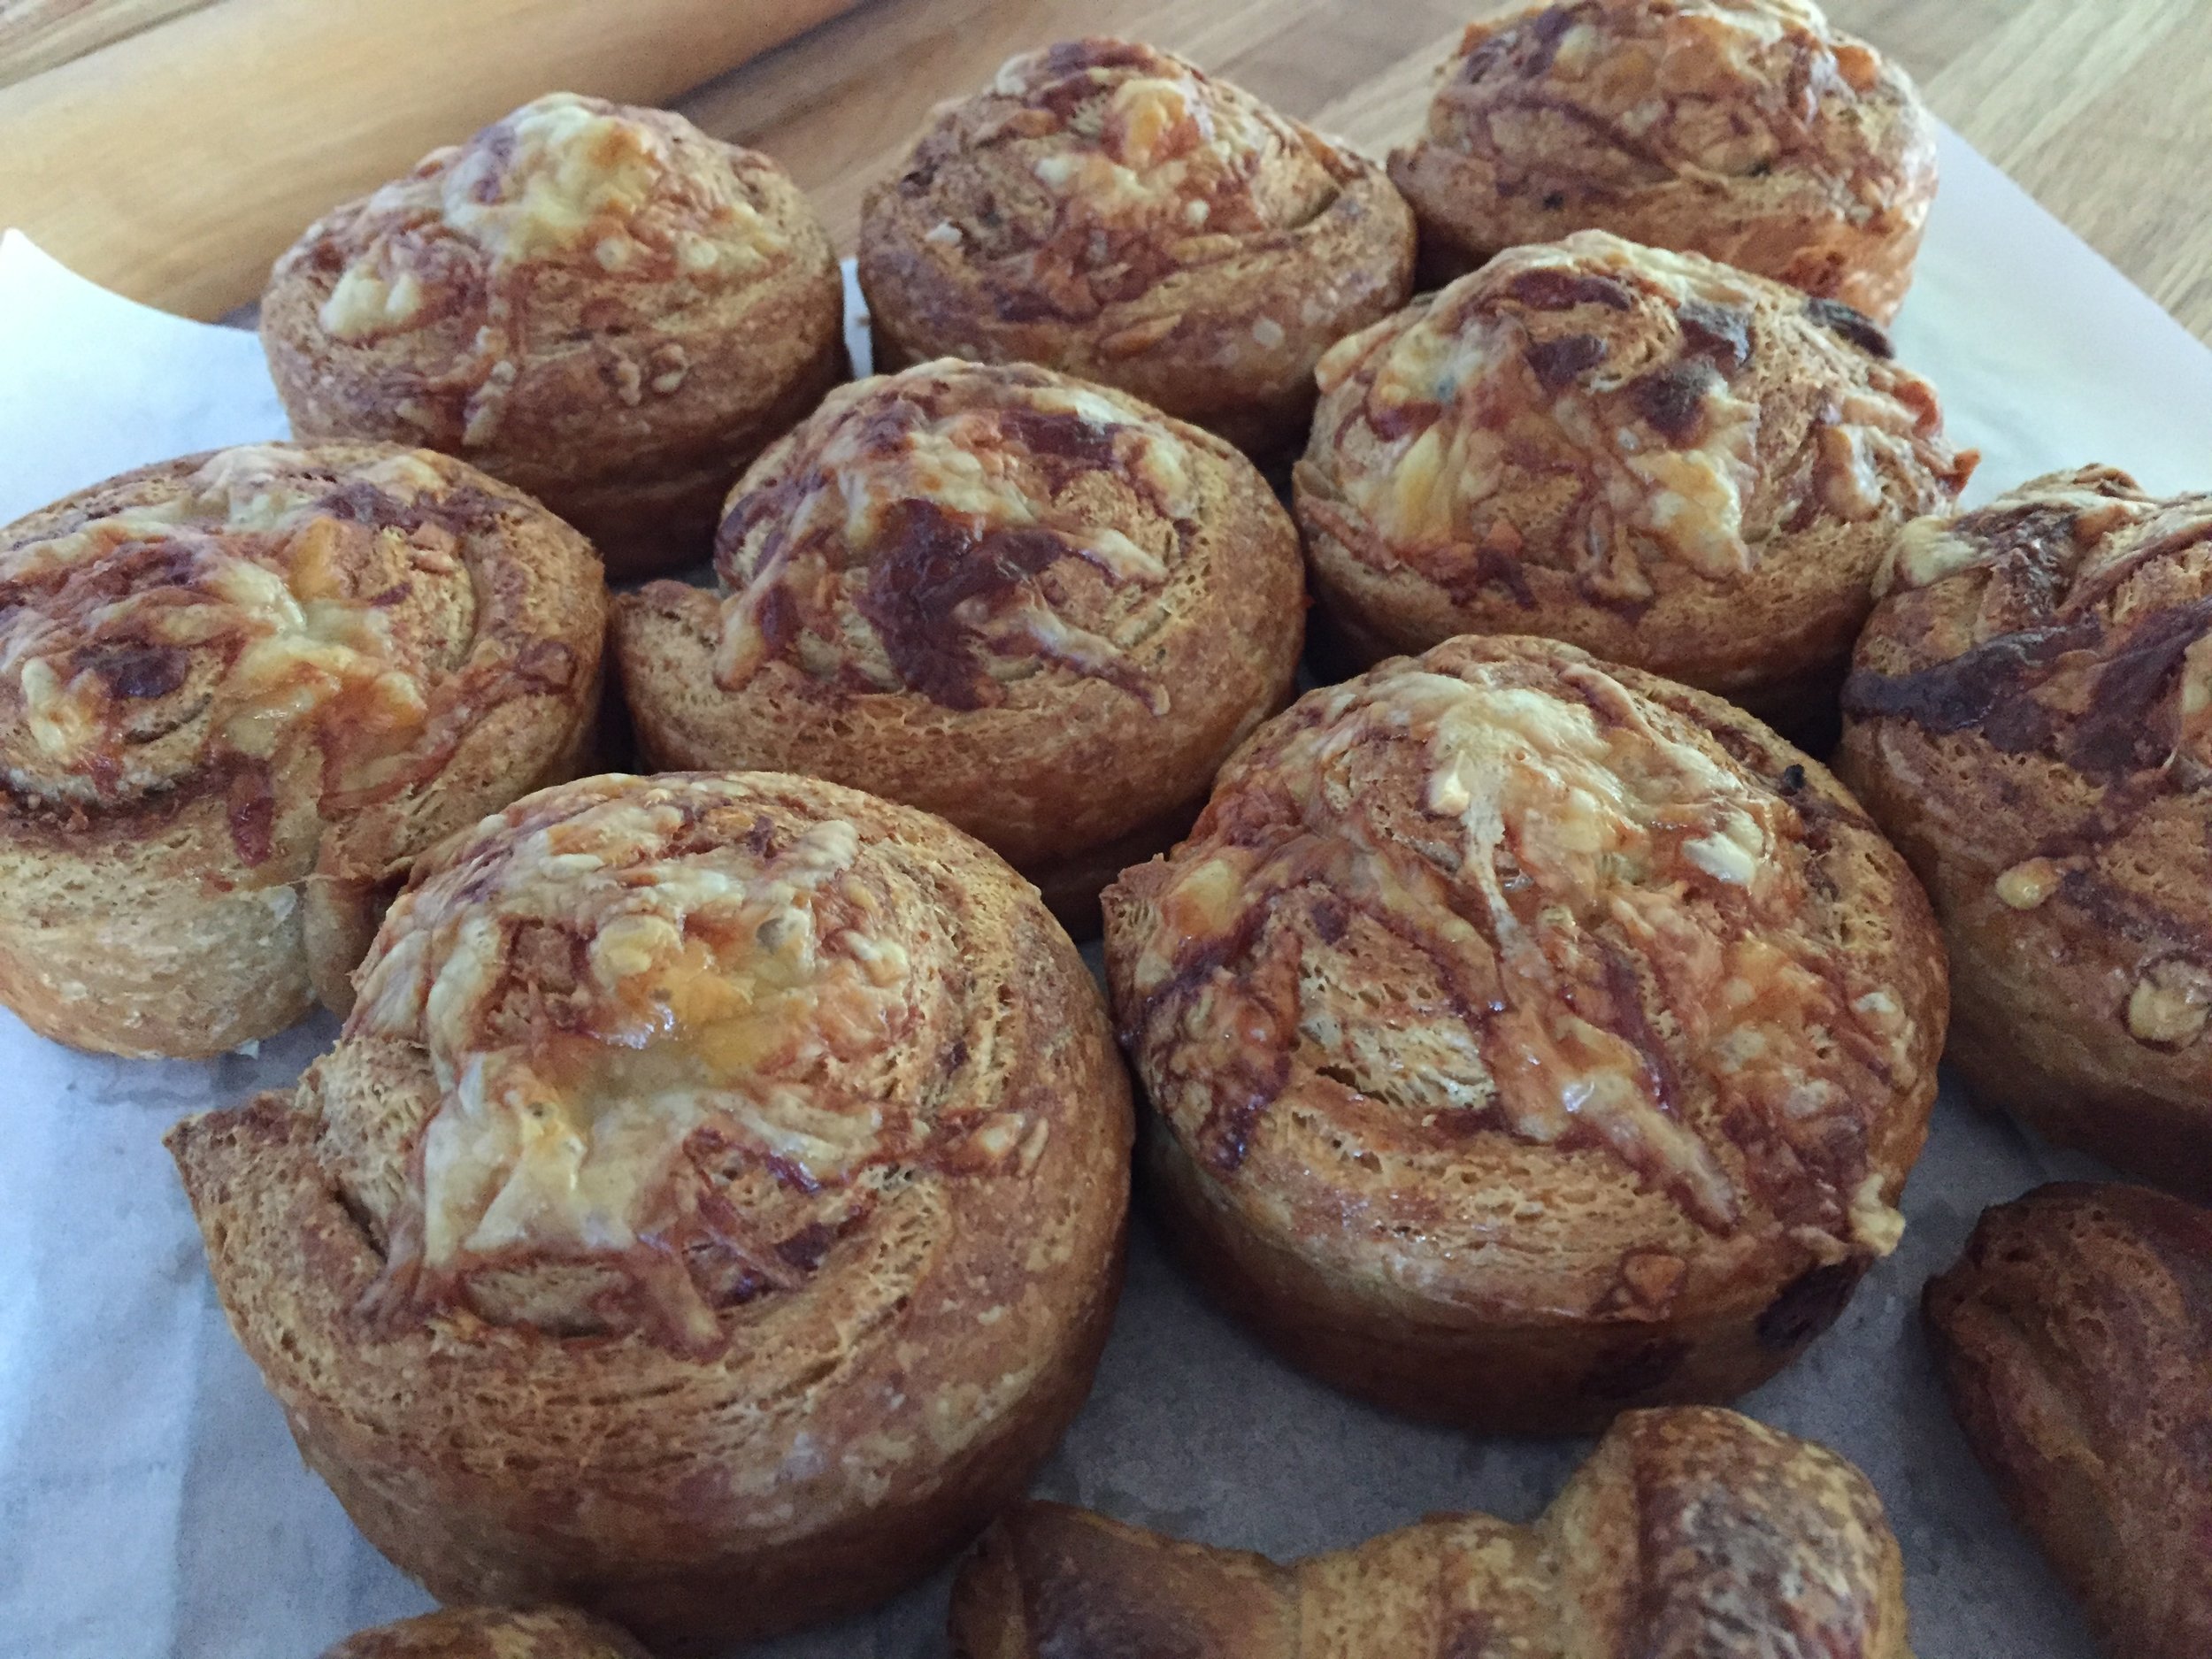
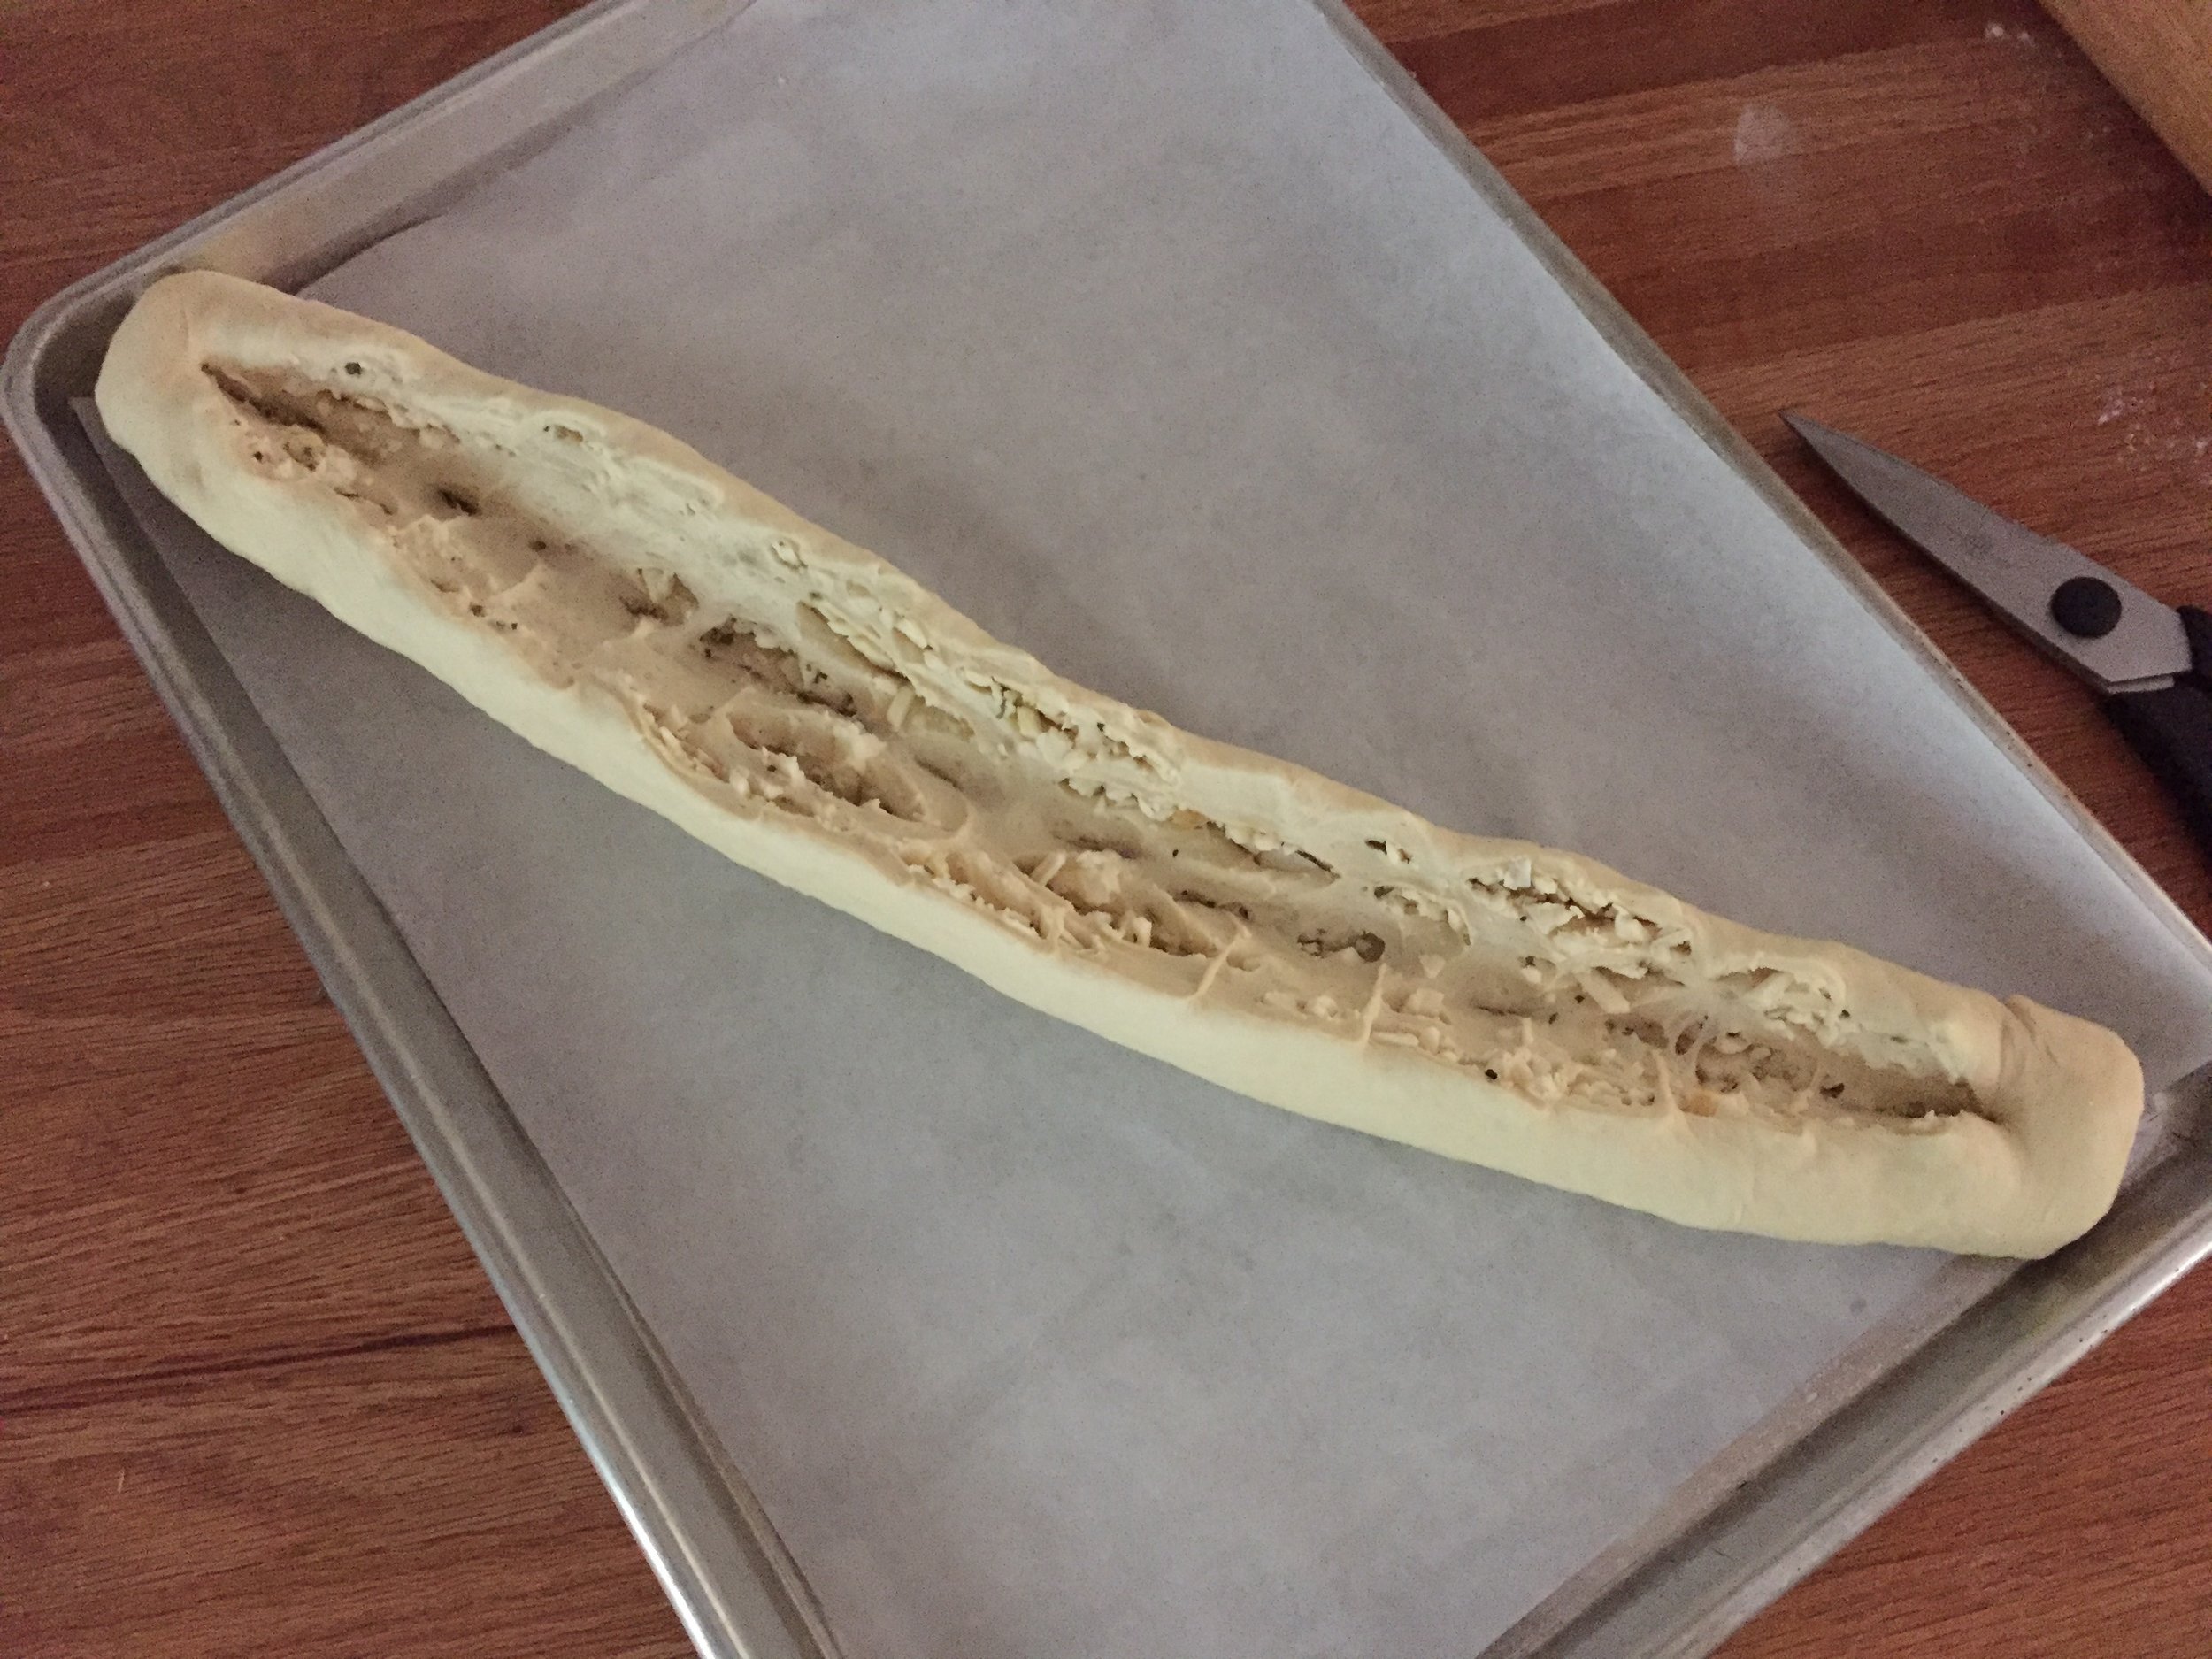
This cheesy braid is just like the sesame approach except I coated the ropes in grated cheese the quantity of which I eye-balled. I used sharp Cheddar but gruyère, emmental (or a mix of your faves can all work) and topped with more cheese. I’d use more next time. You could add herbs if you wish. Mmmm good.

Cheesy braid

Had enough yet?? Almost there, I promise.

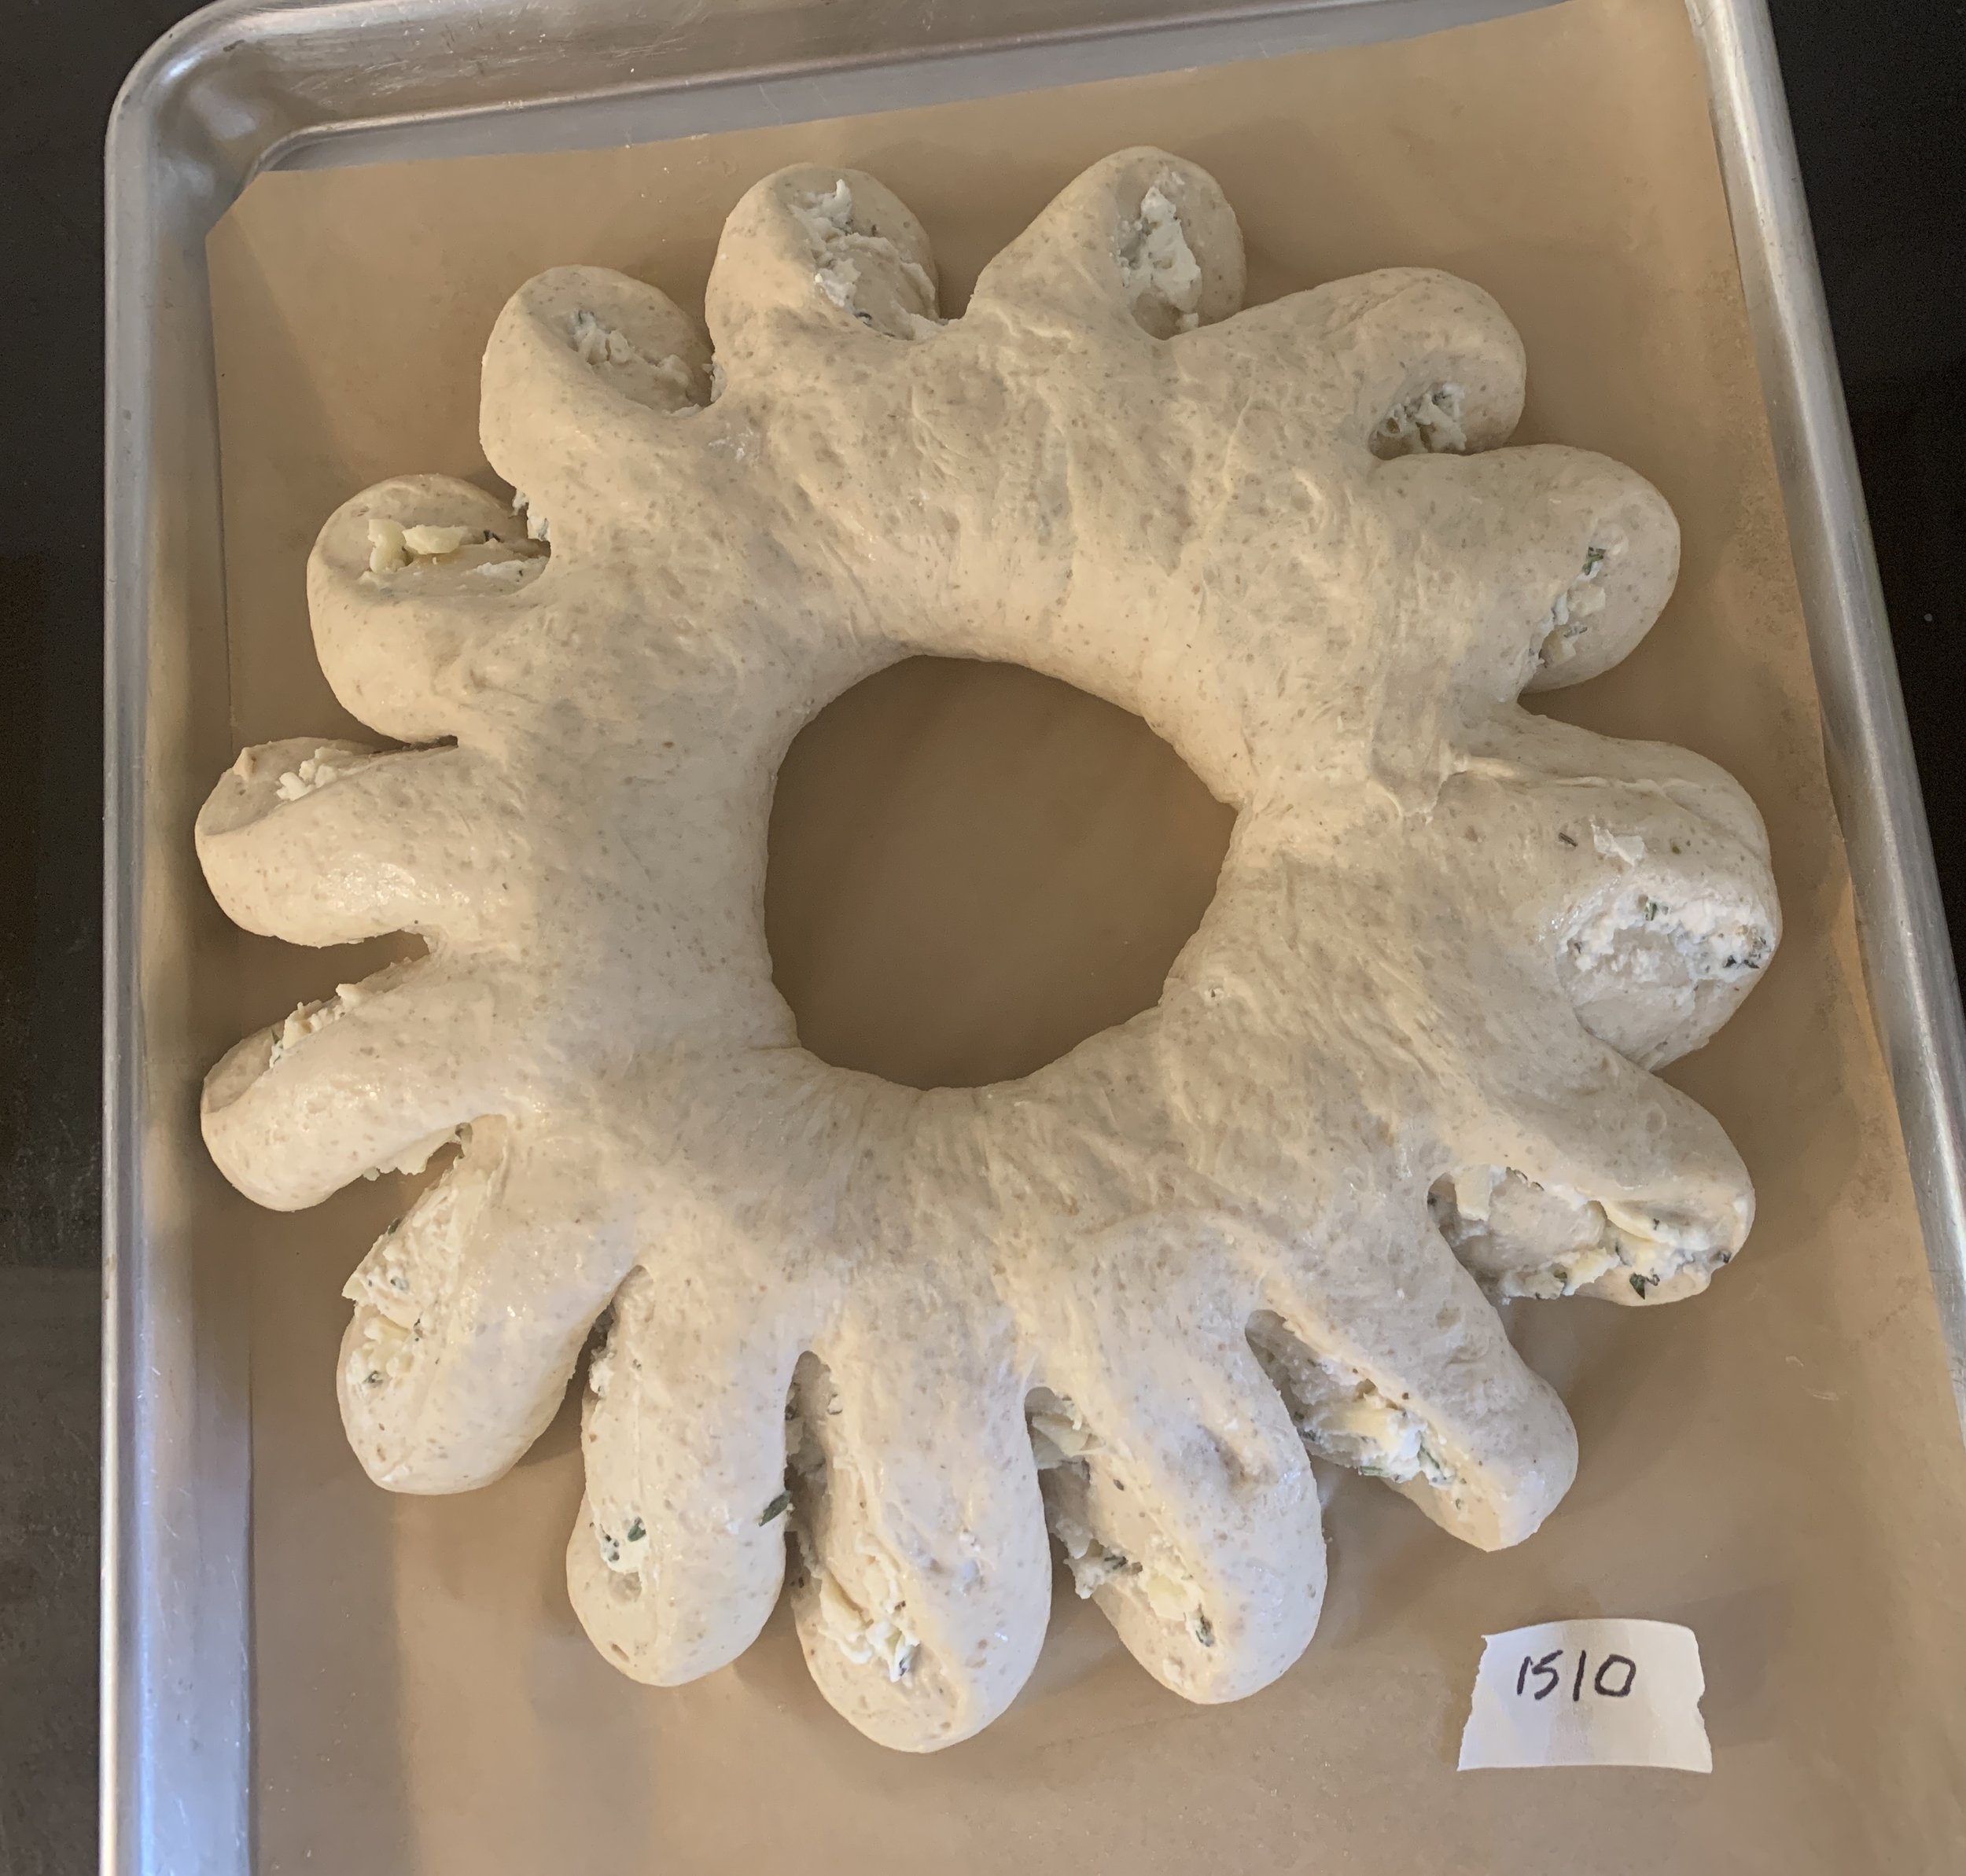
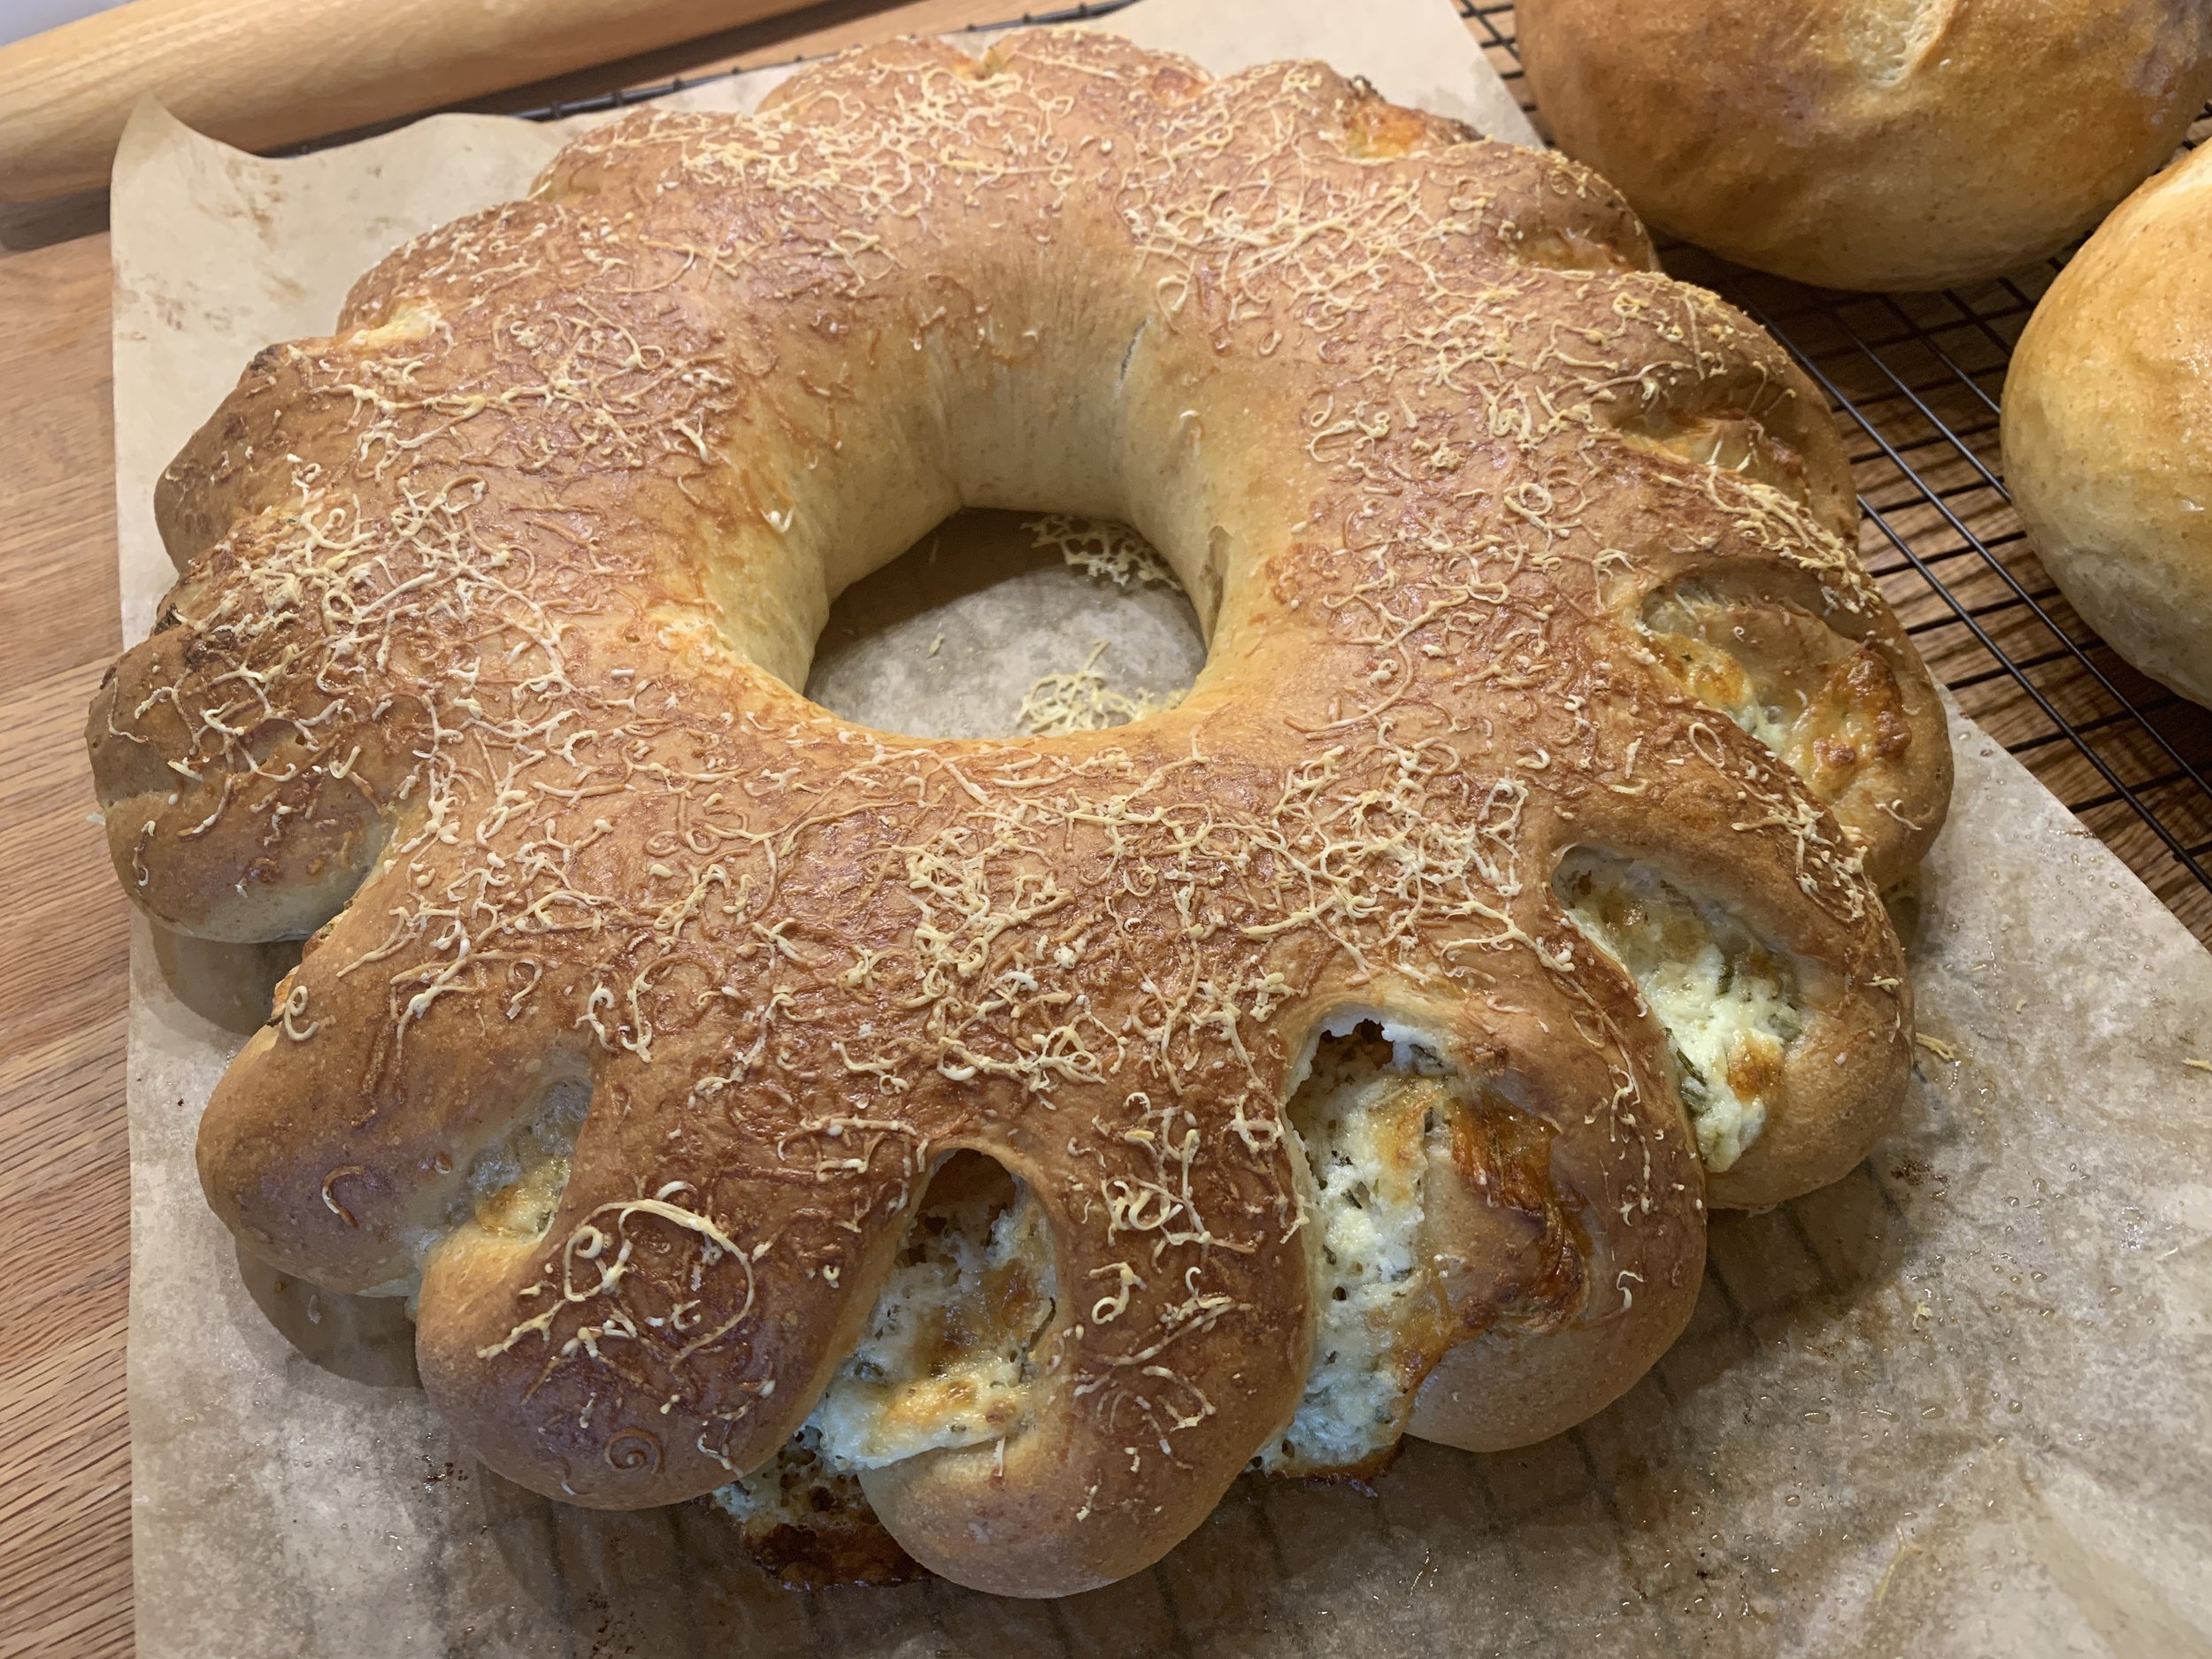
I wanted to try a filled wreath, using half a recipe (~700 g) for that and dividing the rest into two for a couple of simple boules.

Ricotta herb wreath and two small boules

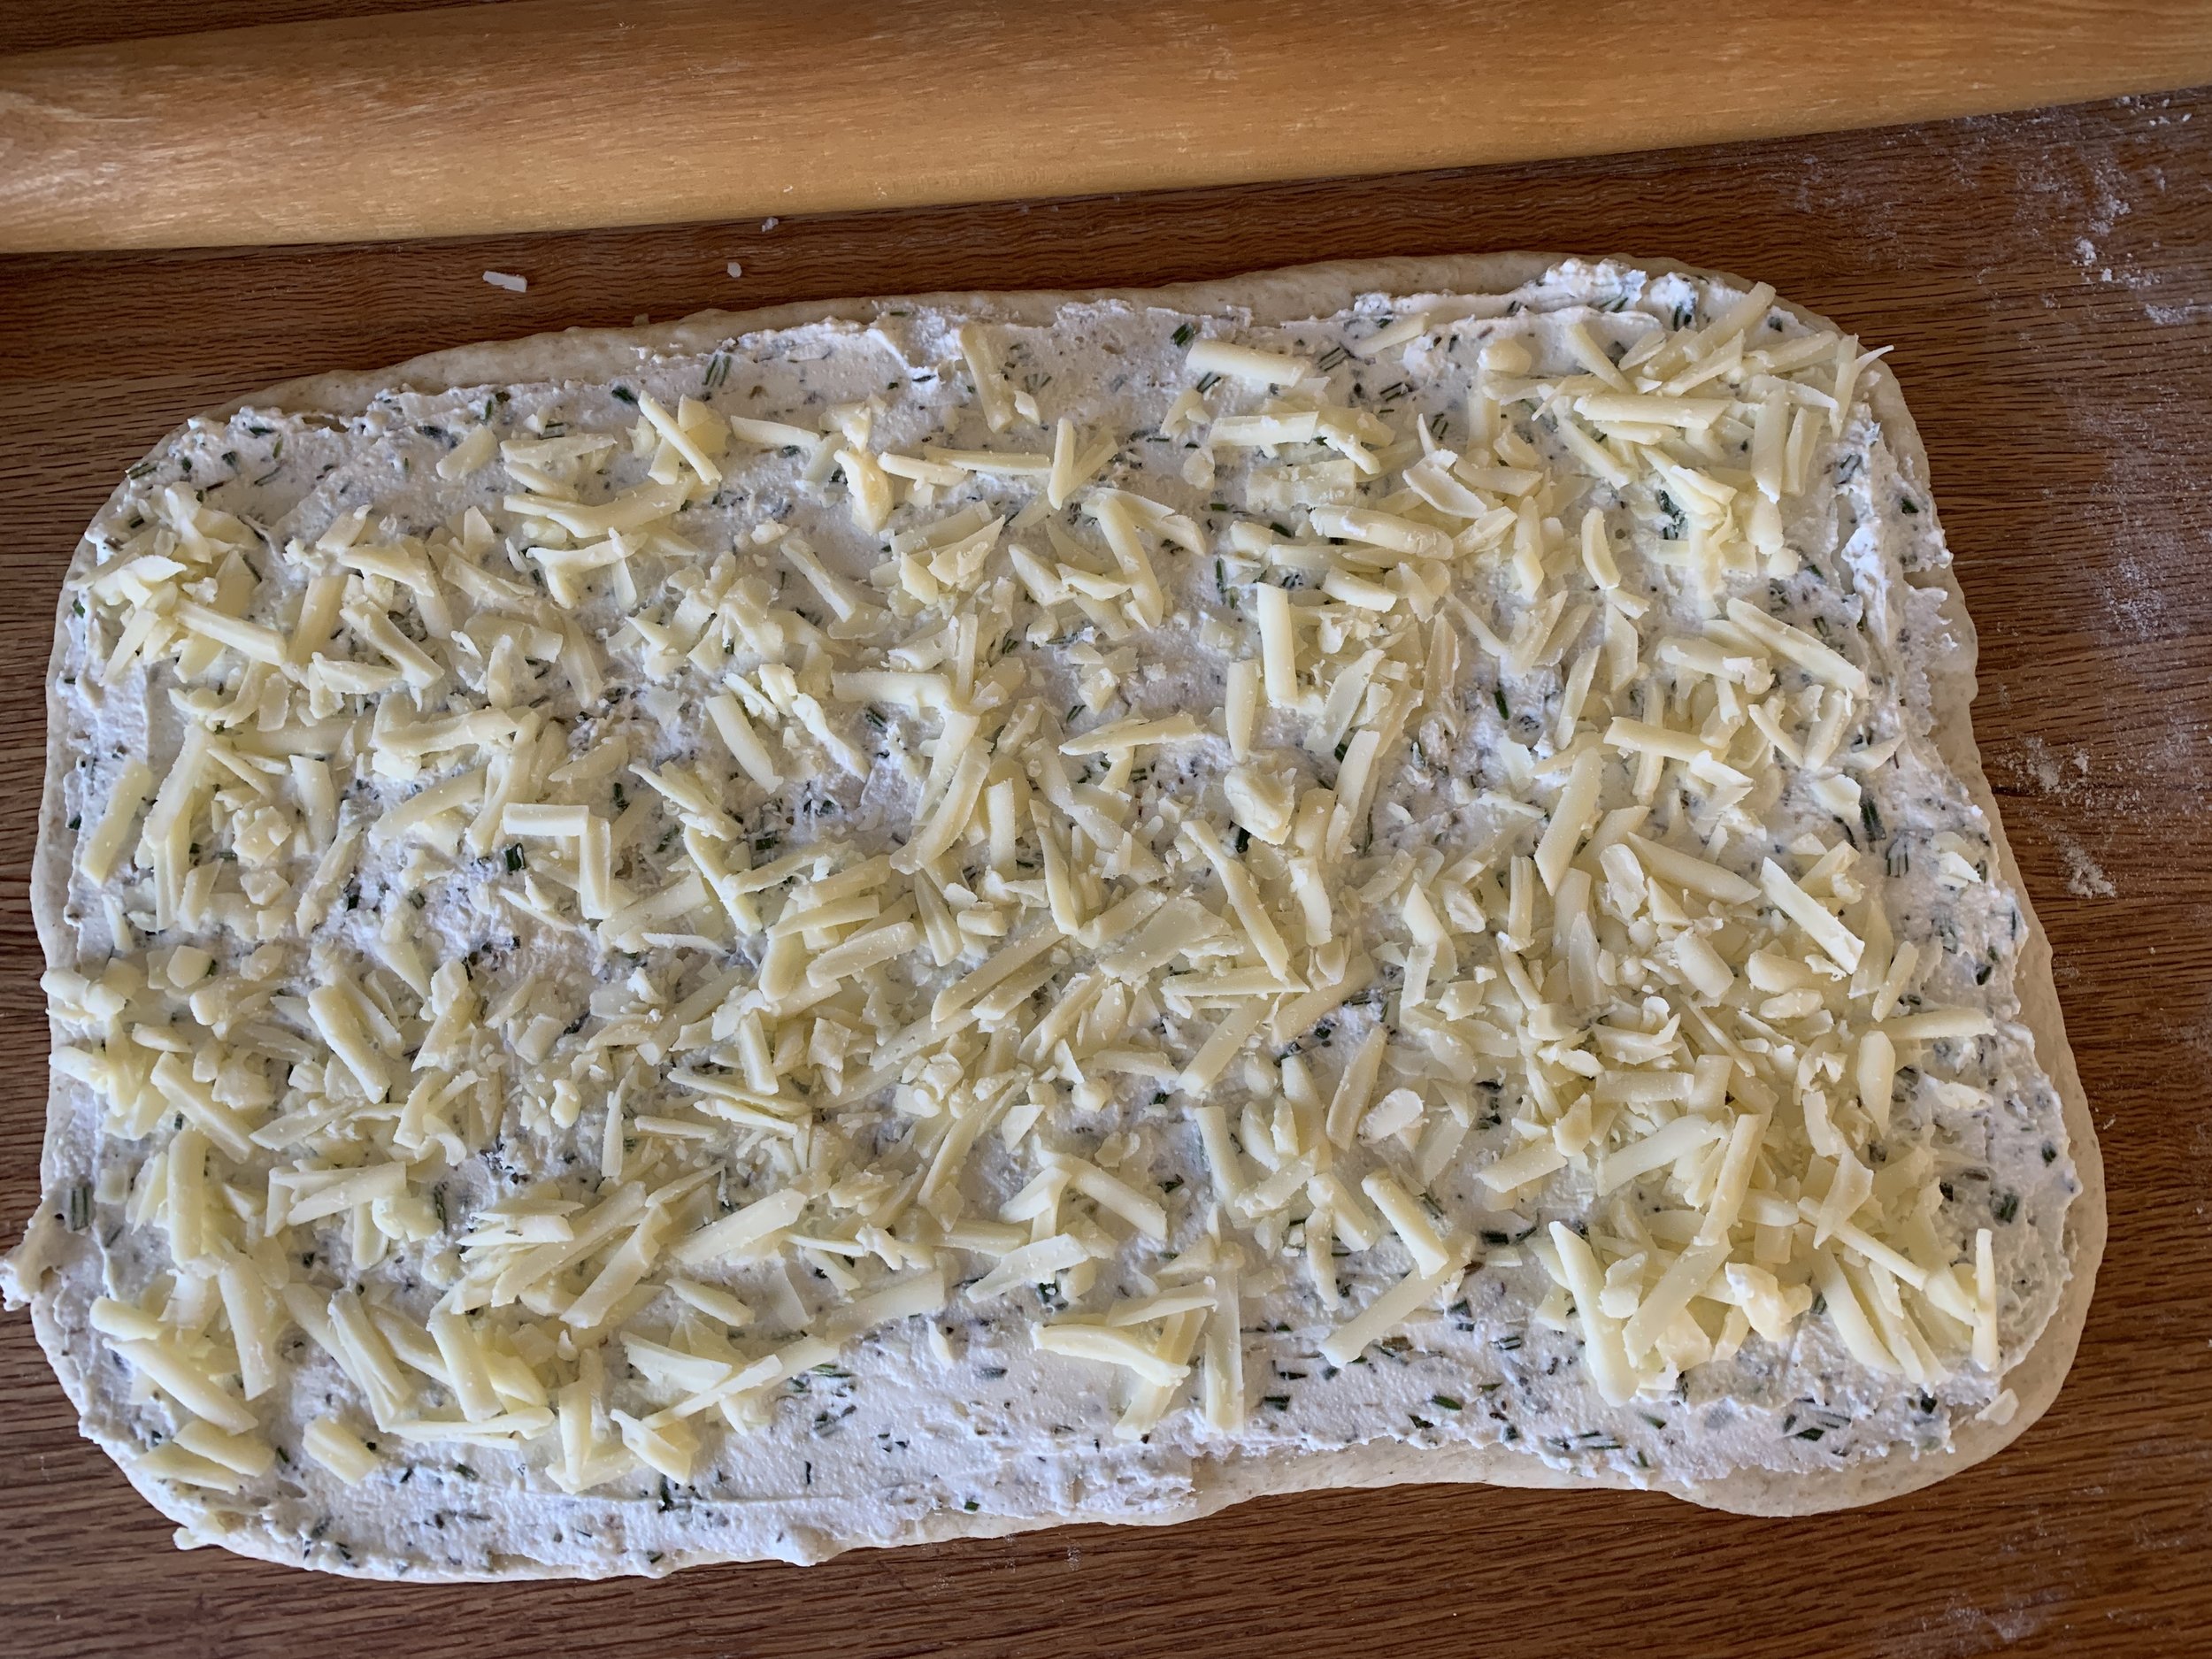
For the filling I mixed 3/4 cup whole milk ricotta, 1/4 cup cream cheese, a few pinches of dried oregano and herbes de provence plus ~2 tablespoons chopped fresh rosemary, one grated clove garlic and 4 ounces of grated sharp provolone which I ultimately thought too over powering - too much!. Live and learn, eh? Next time . . . . .

Roll the dough out to a rectangle of 8-ish by 16-ish inches.

Spread the ricotta filling over the dough and top it with the grated cheese. Press it down lightly.

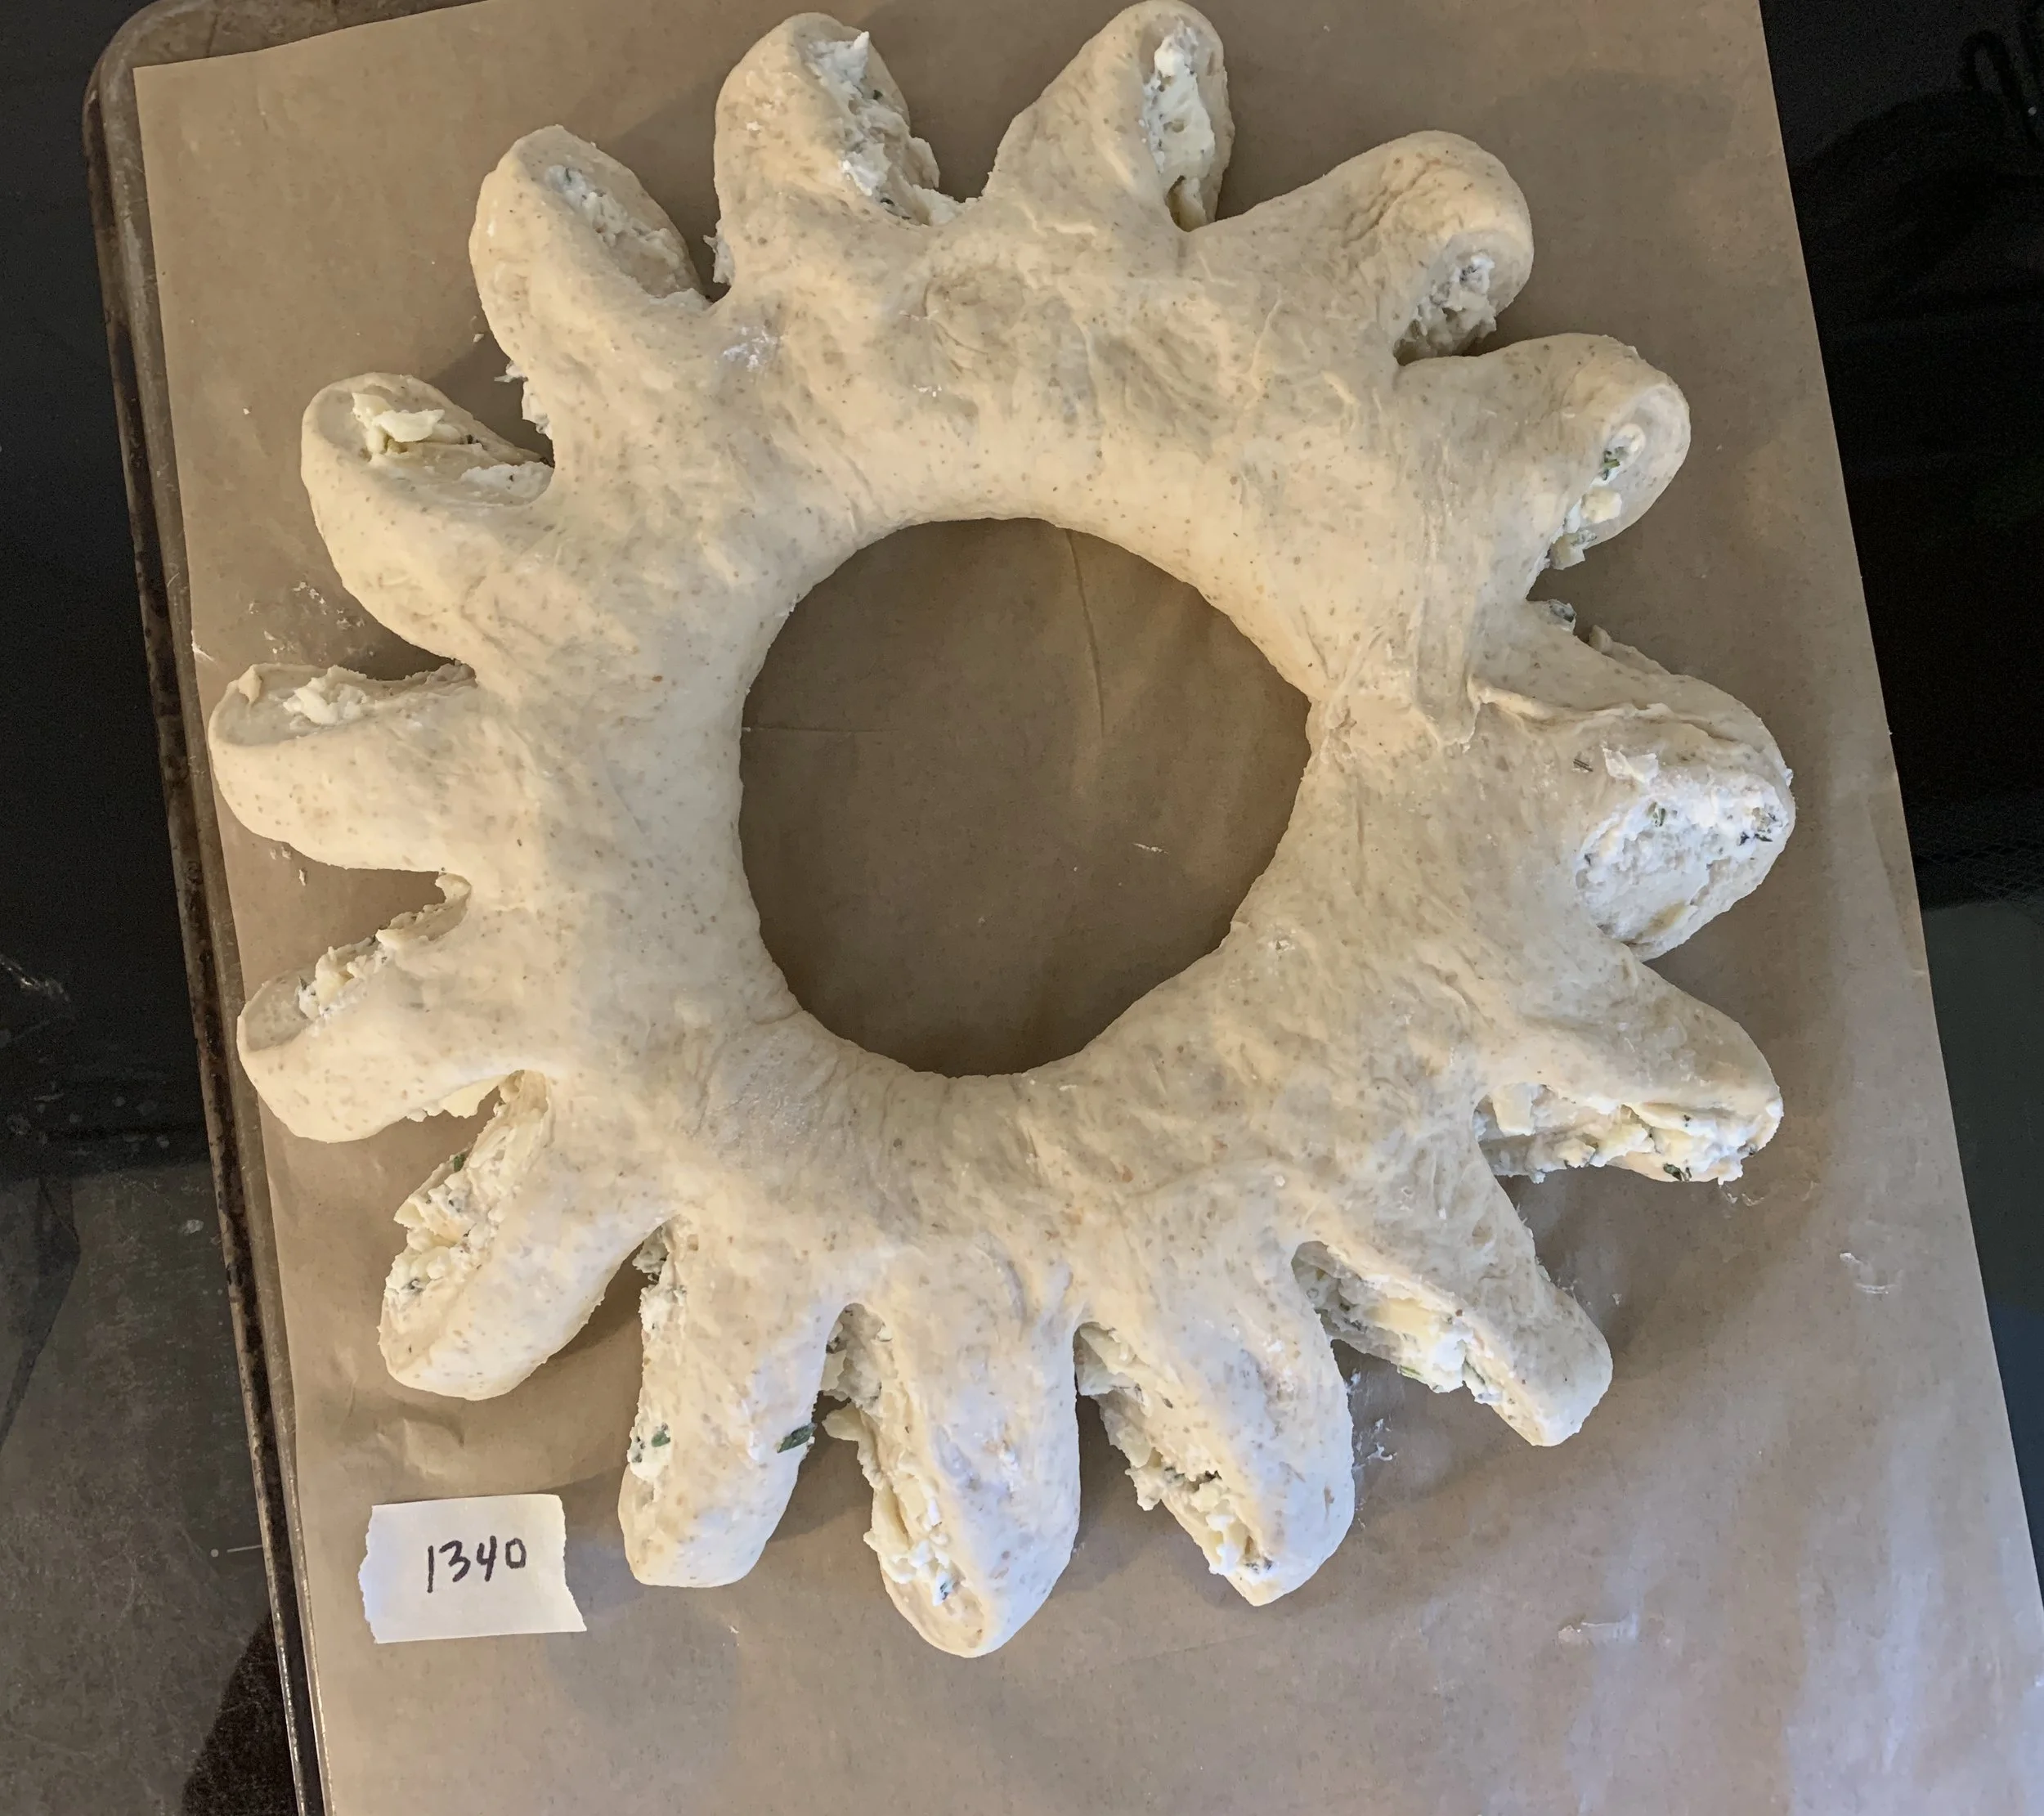
Log roll it up and cut slits along one side every inch of so, half way through.

Form it into a wreath and pinch the ends together. Separate and twist the sections out a bit. Hmmm . . . looks like some sort of sea creature.

Cover lightly with oiled plastic wrap and let rise about 90 minutes.

Lightly brush top with egg white or water and grate more cheese on top - parmesan or locatelli work well.

Bake 25-30 minutes, let cool and enjoy.

Whew! The end. It’s a good dough to work with and so tasty no matter how you choose to bake it. Have fun!

Apple pie tart

IMG_0032.JPG

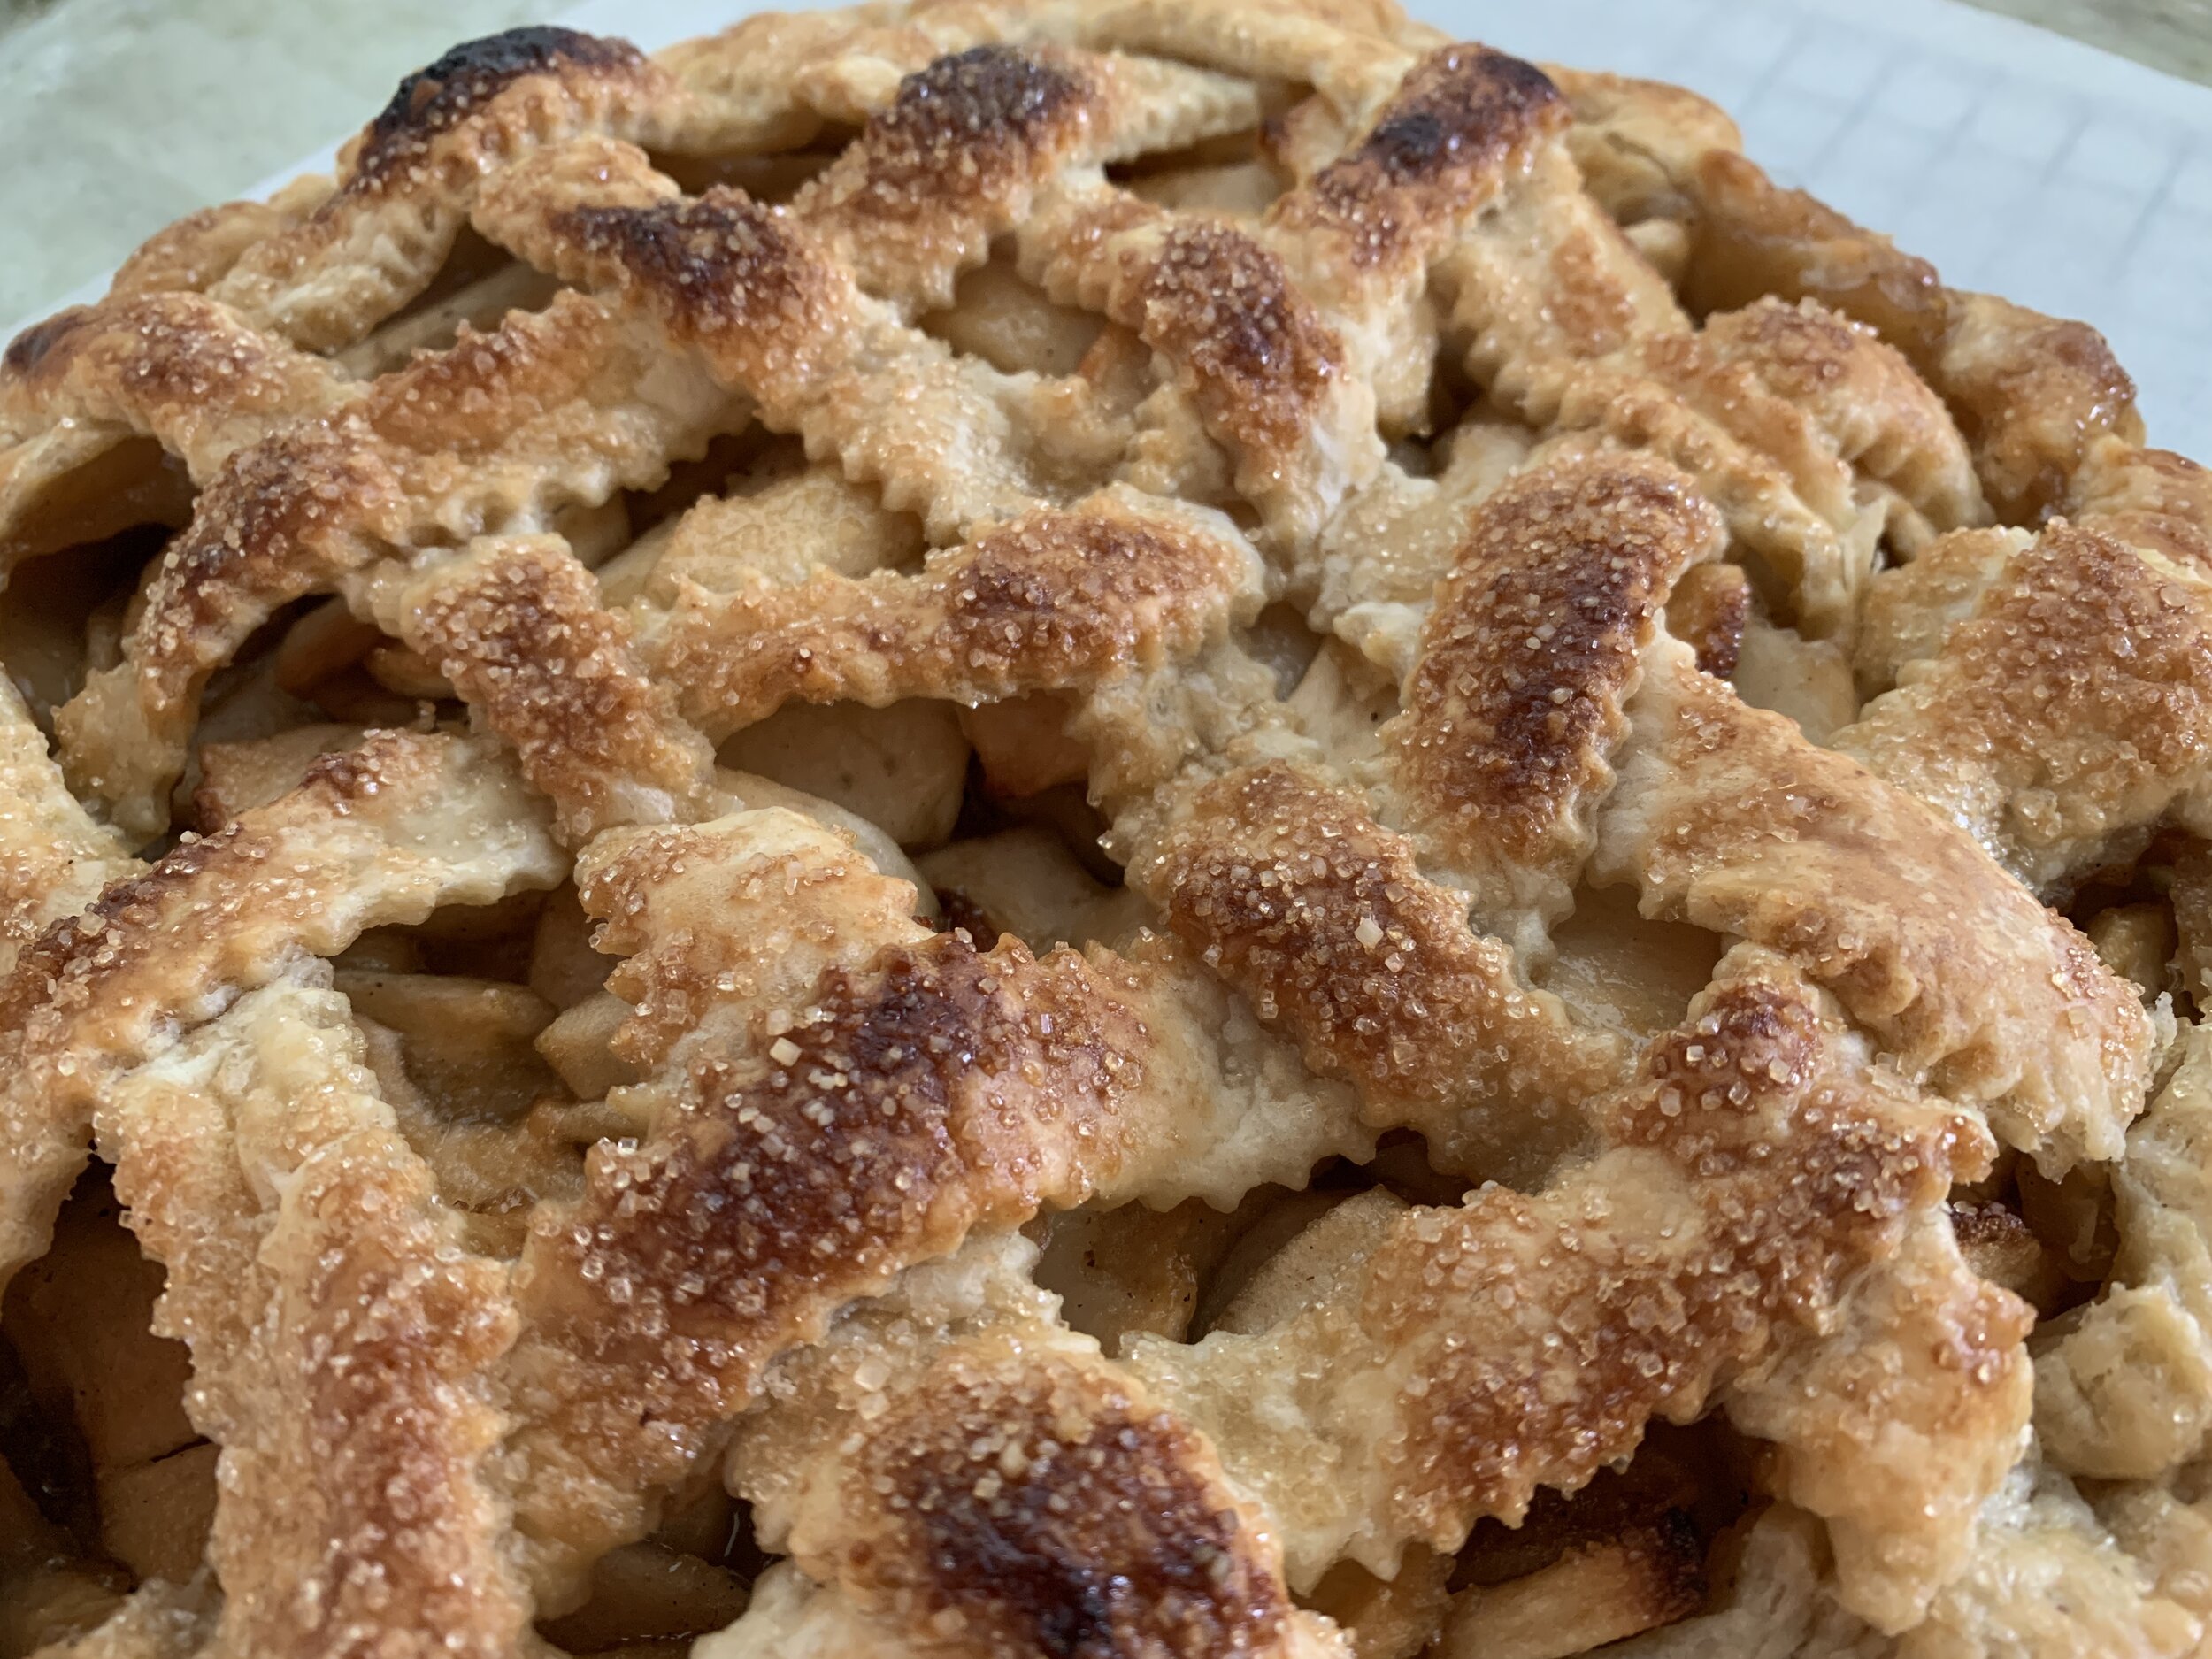
It’s a pie! No wait, it’s a tart! What?? Frankly, it kinda looks like some kind of coral reef creature.

For a recent supper at cousin Jen’s, I was in the mood to make something apple. Besides that, I had sprung for a bottle of boiled cider from King Arthur Flour and was so ready to try it out. It’s made in Springfield VT, a state which Steve and I called home for nearly 12 very enjoyable years.

IMG_0022.JPG

If you’re a regular reader of this blog, you’ve most likely realized by now that I LOVE reading baking and pastry books, comparing recipes and techniques and continuing to gain knowledge about this craft. They give me much pleasure and inspiration to boot! Some of my faves are FOOD 52’s “Genius Desserts” and anything by Rose Levy Beranbaum. They are chock full to overflowing with cool stuff.

As I approached this apple project I reviewed apple pie recipes (again!) from “Tartine”, “Art of the Pie”, “The Baking Bible” as well as “Genuis Desserts”. GD’s is essentially a review of RLB’s recipe for fruit pies, creating a filling with concentrated flavor by cooking down the juices. I’m IN!

In my fall 2018 post on a couple of apple/pear/berry tarts, I followed Tartine’s method of cooking the apples in butter and sugar first then draining off the liquid and cooking that down. They were deelish! The Genius Desserts/Rose LB approach is a bit different - macerating but not cooking the fruit, then reducing down the drained off liquid to a lovely caramel.

Here goes! This go-around I used a combo of Granny Smith and Jonagolds. Years ago I used to think peeling and coring apples was such a chore, but it’s amazing how one can get into a rhythm and actually make a bit of sport out of it, racing against the clock to see how fast you might finish. It’s so satisfying!

IMG_4383.jpg

Once the 2.5 pounds of apples for a 9-inch tart are peeled and cored, slice them up into ~1/4 inch slices and toss them in a large bowl with 50 g light brown sugar (or dark if you prefer), 50 g granulated sugar, a tablespoon freshly squeezed lemon juice, 1/4 teaspoon fine sea salt, some freshly grated nutmeg and 1/2 teaspoon cinnamon. Cover and allow to sit a room temperature for at least 30 minutes and up to three hours to juice ‘em up.

In the meantime take your favorite pâte brisée, roll it out about 1/8” thick and line your chosen tart pan or pie plate. I chose an open 220 mm tart ring this time, and since I planned a lattice top I made sure I had a 2-crust quantity of dough on hand. Cover the dough with plastic wrap and hold in the fridge until ready to fill.

IMG_0018.JPG

I rolled out the dough for my lattice as well, cut my strips and held them in the fridge until ready for final assembly. I thought I’d be creative and cut curvy pieces, but, when it came time to create my lattice, the strips didn’t really feel like staying very curvy until I coaxed them into submission. I made the best of it and it worked out just fine and dandy.

IMG_0024.jpg

Ready to finish the filling! Transfer the apple mixture to a colander set over a bowl and let drain to release anywhere from 1/2 - 1 cup liquid. Sounding good already.

Pour the juice into a small saucepan along with 2 tablespoons unsalted butter and bring to a boil. Cook until caramelized and reduced to about 1/3 cup. Then I added a tablespoon or so of boiled cider to intensify the apple flavor.

Transfer the drained apples back into the large bowl and mix them with 1 tablespoon plus 1 teaspoon of cornstarch.

IMG_0026.jpg

Place a baking stone or empty sheet pan on the bottom rack of your oven and heat to to 425ºF.

In the meantime blend the reduced apple caramel liquid into the apples and transfer it all into the lined tart ring. Create the lattice, trim, tuck and crimp or flute the edges. Brush with milk and sprinkle with raw sugar. Hold in the freezer while the oven heats.

IMG_0029.jpg

Bake approximately 50-55 minutes. If your crust edges are browning too quickly, place an aluminum foil ring over them. Watch for bubbling juices and tender fruit when poked with a small, sharp knife. My pie-tart baked about an hour before I was happy with the bubbles and texture. Looking pretty tasty!

IMG_0031.JPG

One problem with this baby is that a small section of the crust bottom and edge seemed to collect a lot of juice and didn’t bake through. It was also an interesting challenge to get it out of the tart ring. I ended up cutting a cardboard round slightly smaller in diameter, slid it under the pie/tart and lifted it up and out of the ring. Whew. Maybe a solid pie plate or lovely fluted ceramic pie dish next time, eh?

No matter - it was delicious, the boiled cider adding just the right tang and deep apple flavor. A classic, particularly topped with a scoop of vanilla ice cream.

IMG_0033.JPG

Always remember - there’s more than one way to skin a cat!

Now can’t you just imagine the hint of spring just around the corner? It won’t be long folks. Happy baking!

Rye buns

IMG_4527.jpg

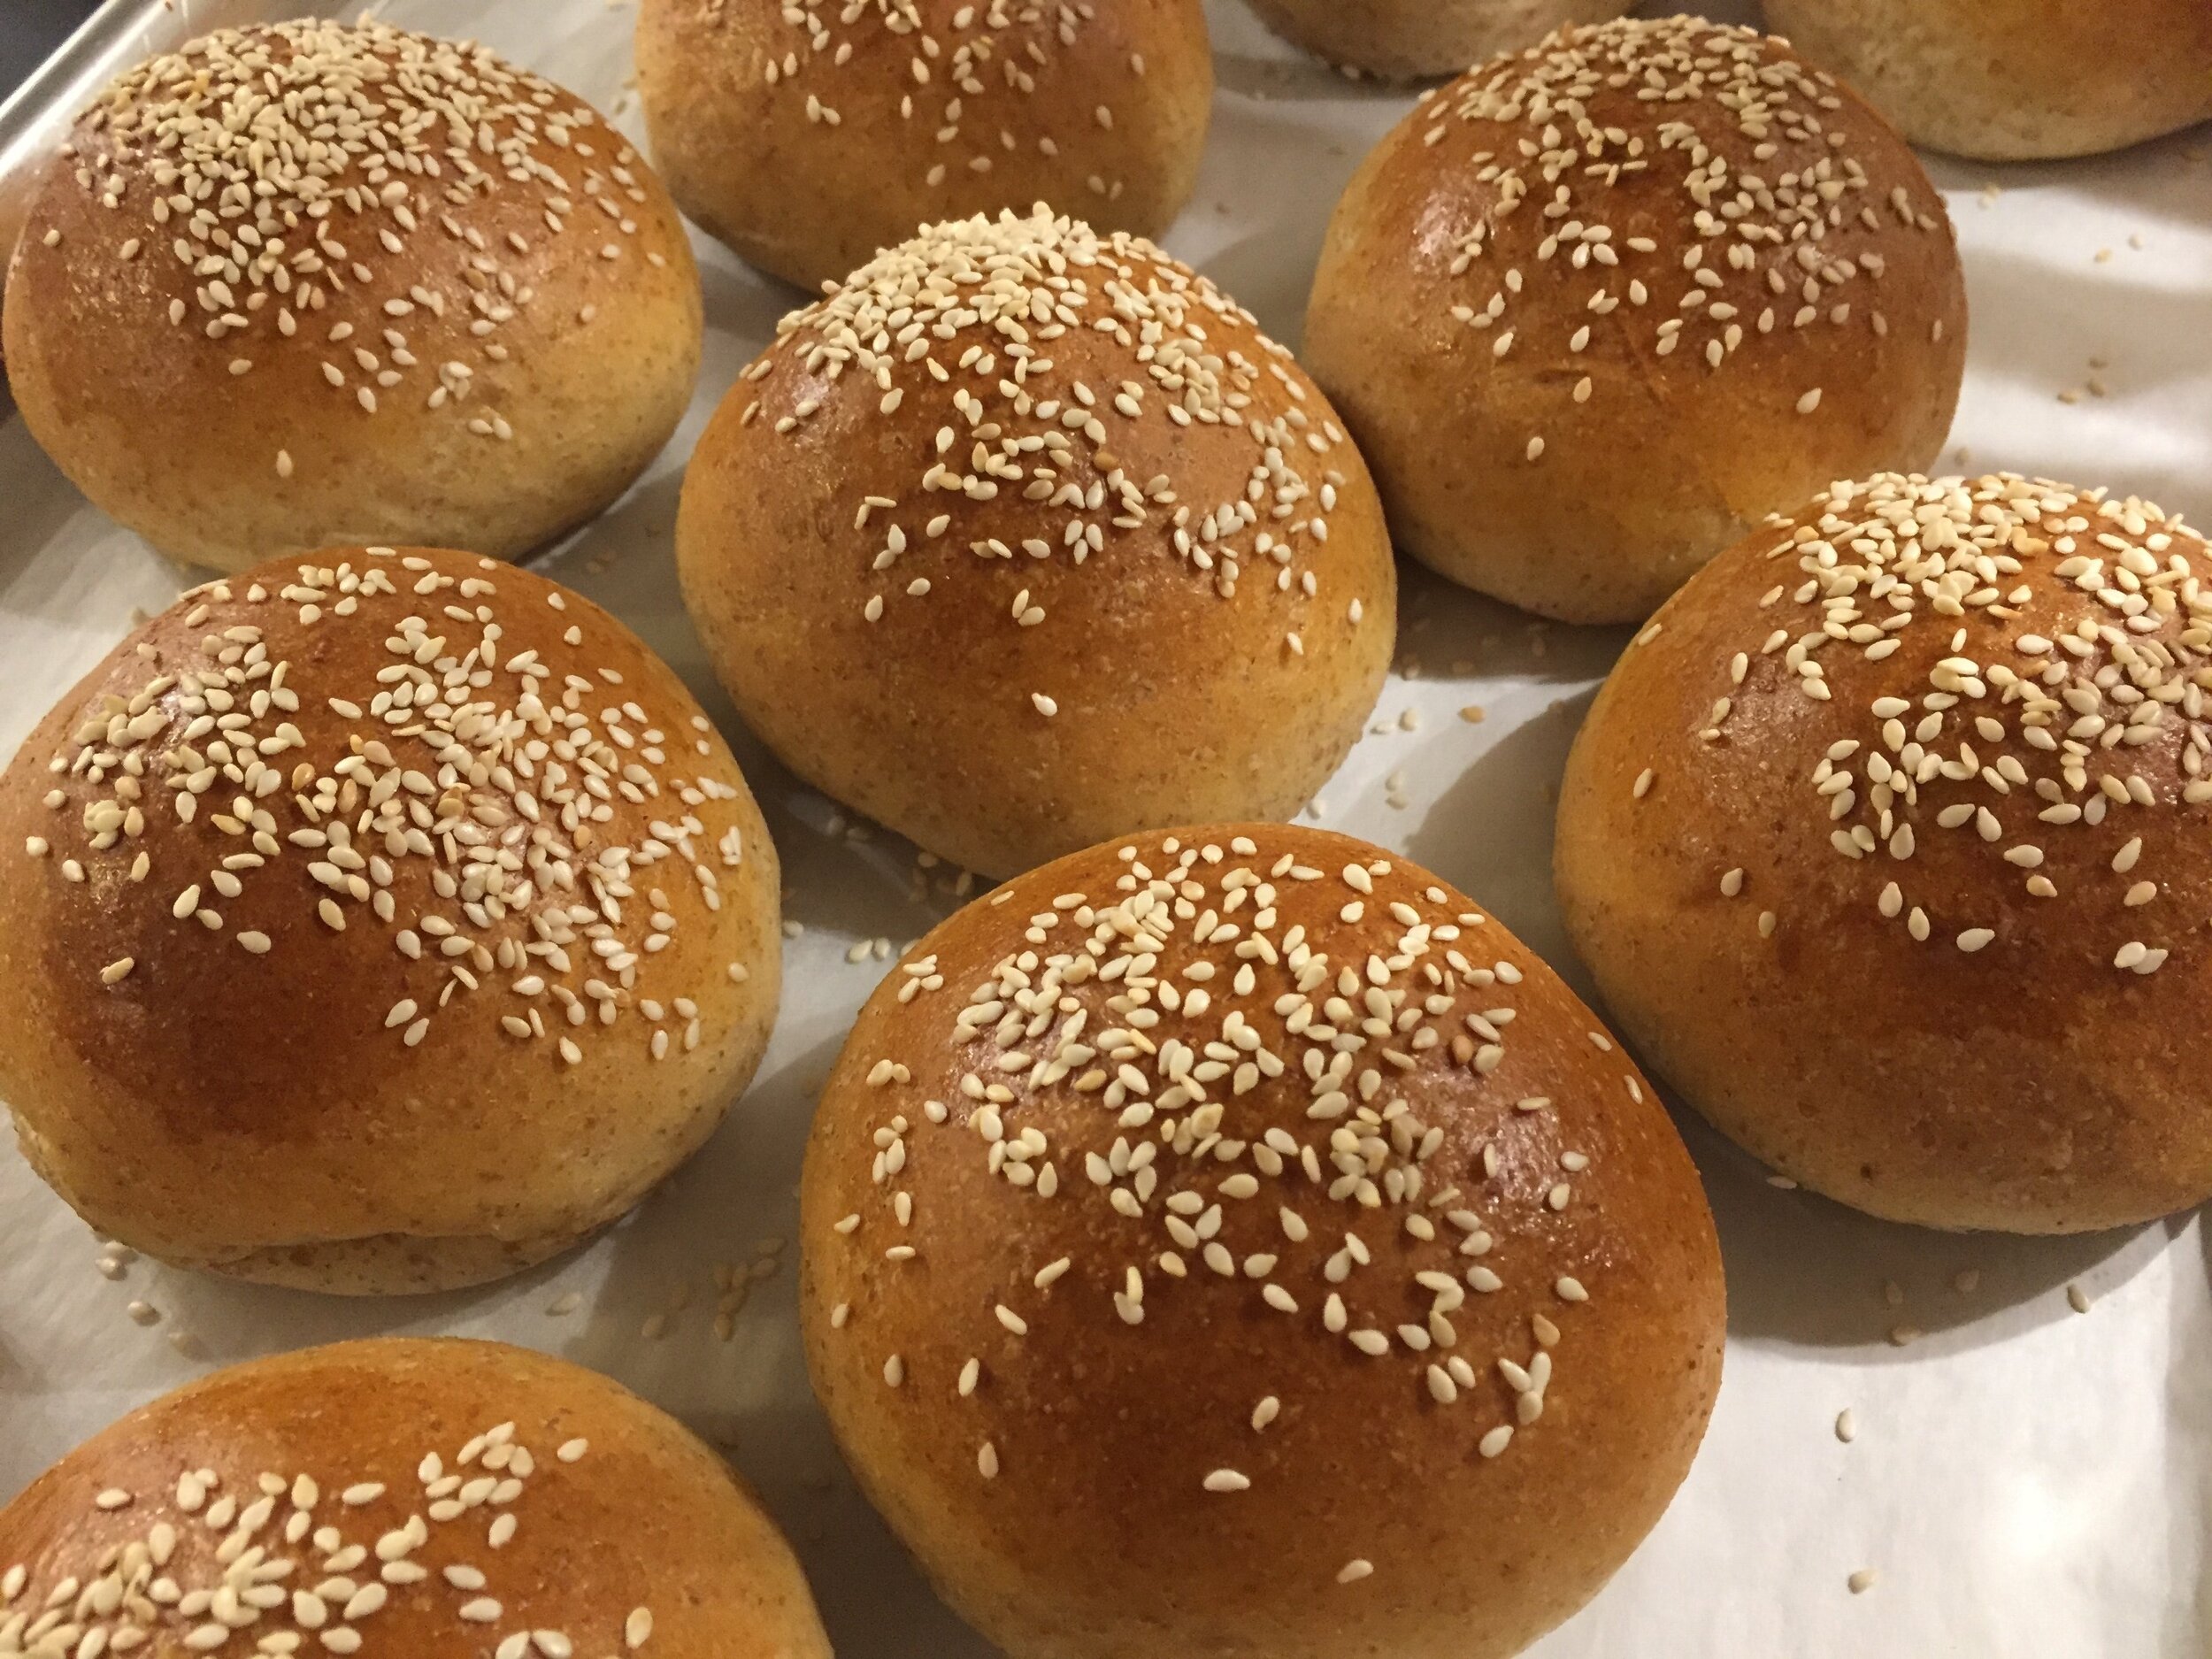
These buns are a true delight! Based on a recipe from “Brontë at Home: baking from the Scandi Kitchen” by Brontë Aurell, they come together like a dream, are great for any type of sandwich, have a lightness about them yet are sturdy enough to hold up to the juiciest grilled burger (which Steve’s tend to be!).

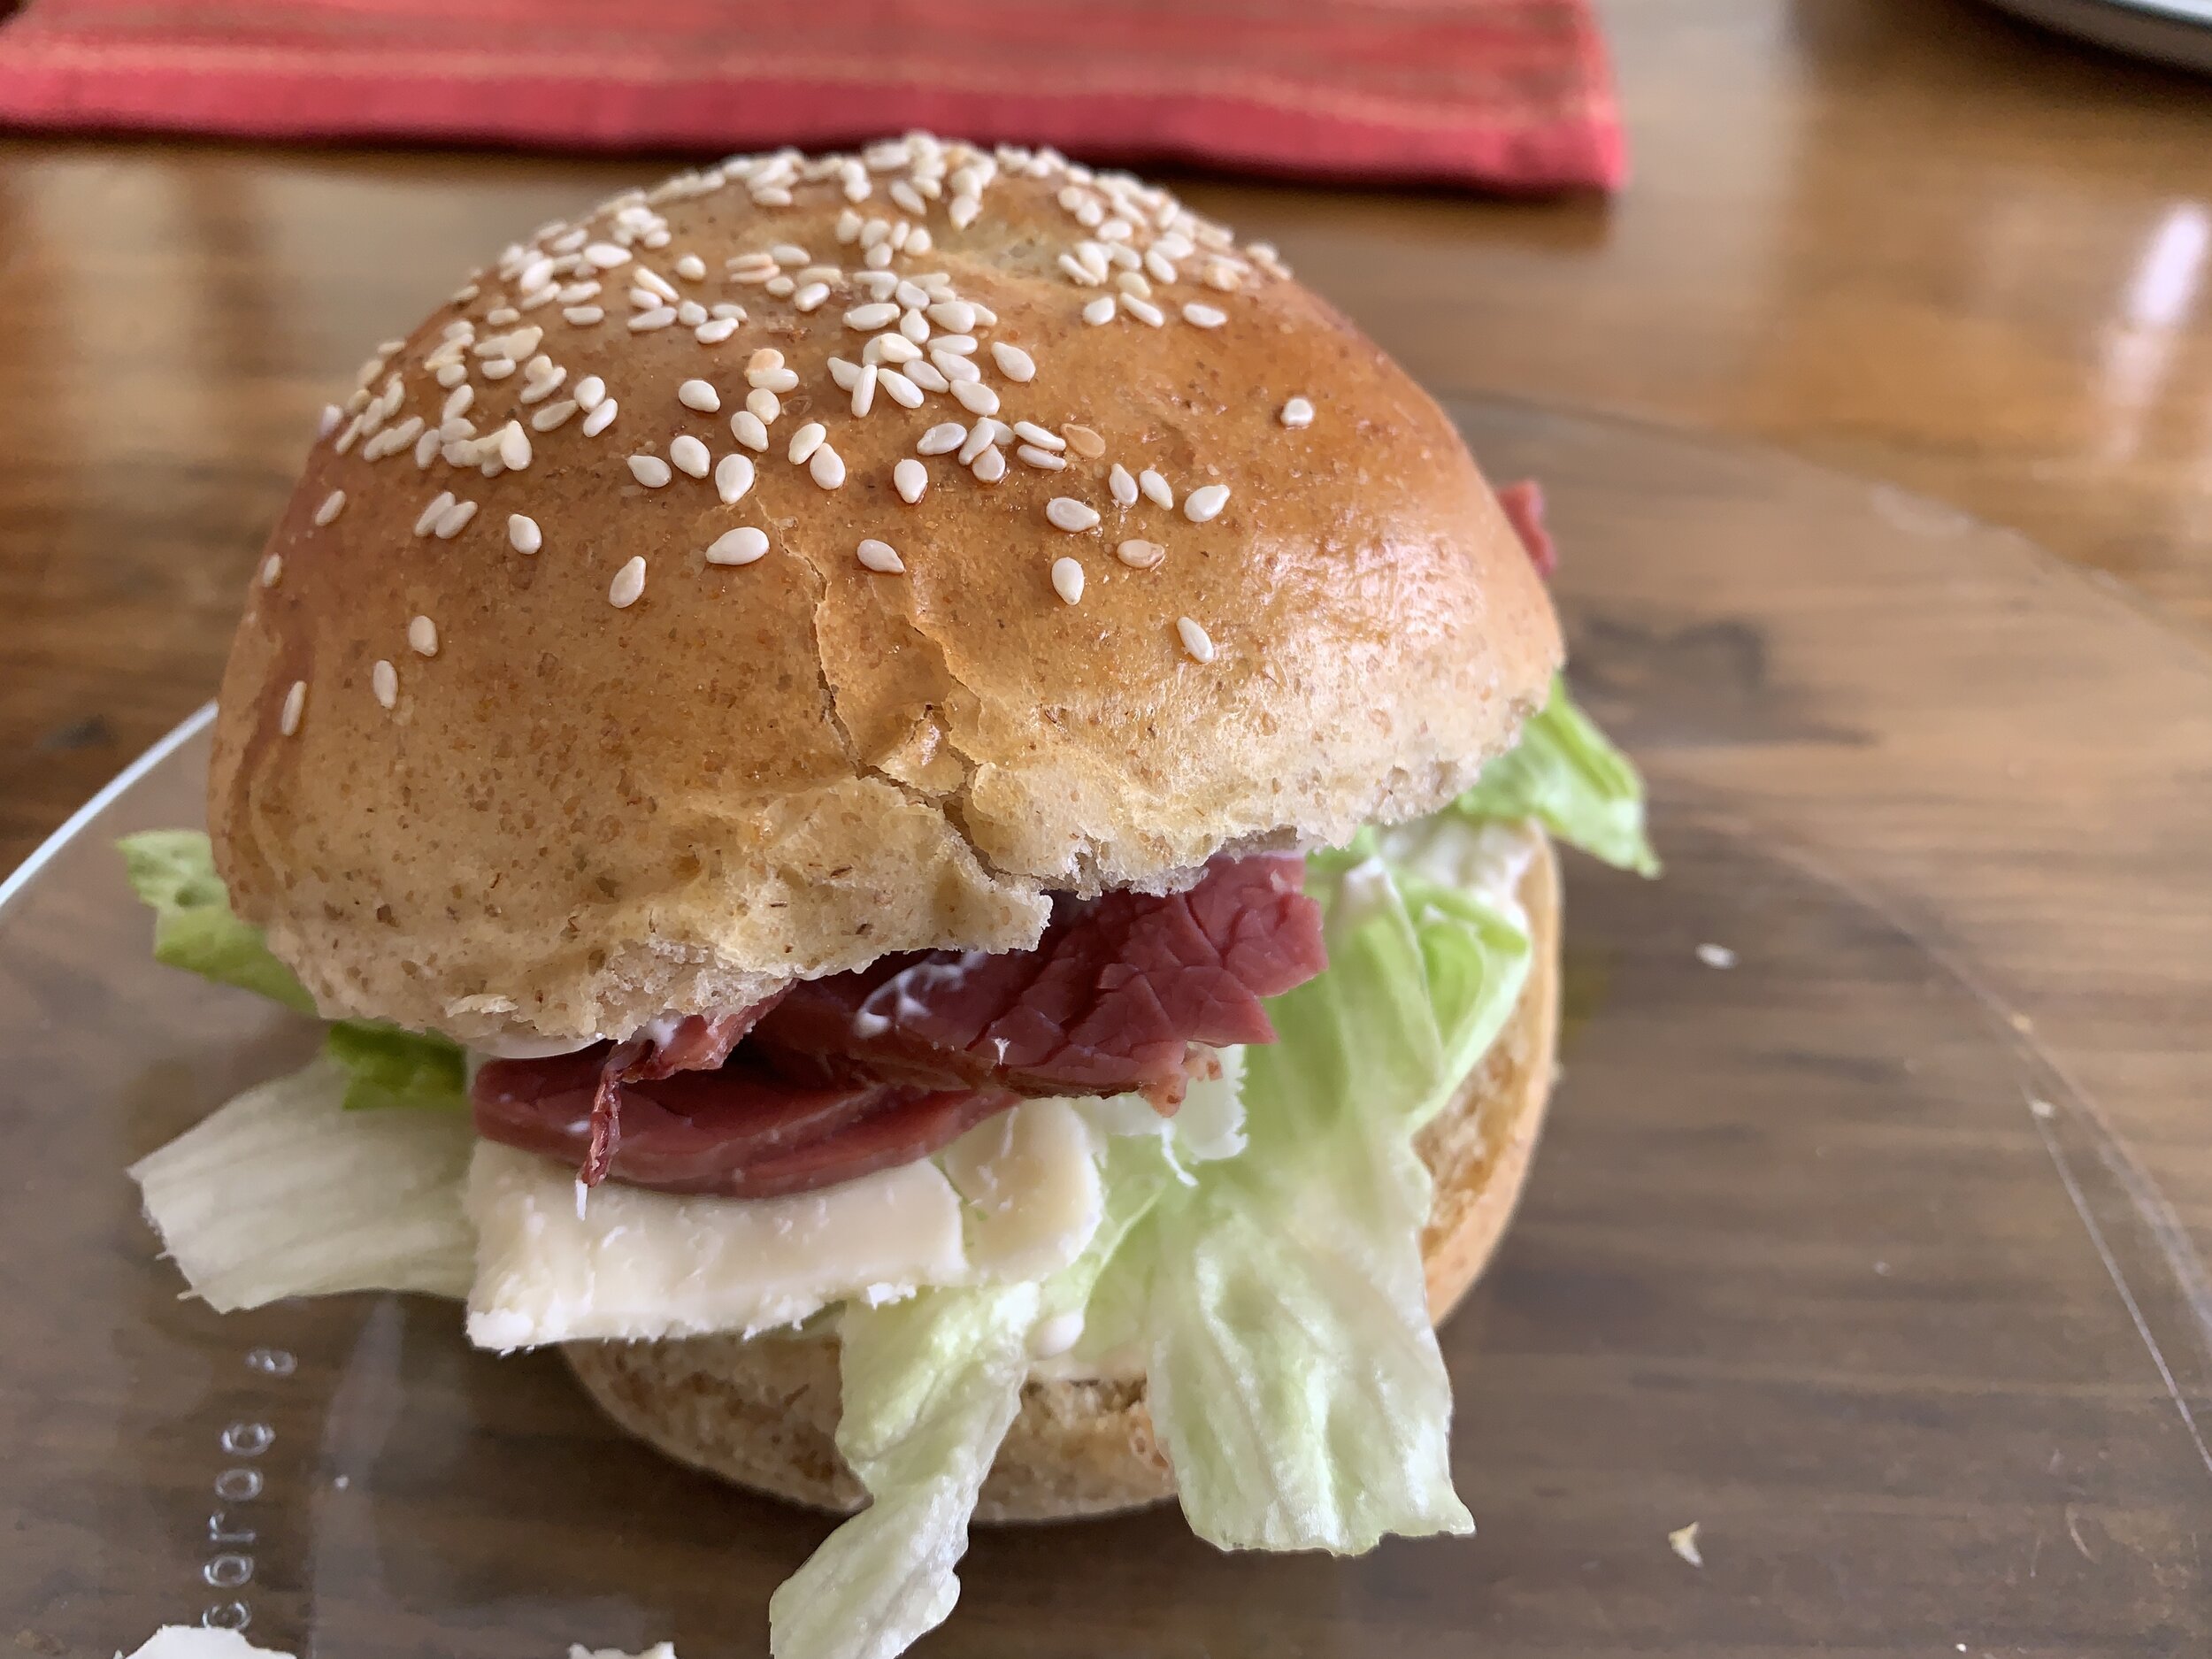
We’ve discovered that they’re great with most any sandwich you can dream up - one of our favorites is thinly sliced dried beef from our local Kingma’s market (no not the stuff you buy in packages in the cold meat section) with crisp lettuce and a schmear of mayo - yum! And a bit of cheddar never hurt either!!

IMG_0120.JPG

Here’s an interesting bit of trivia: in Aurell’s book she mentions these buns are especially good for Biff Lindström. Now what in the world is that I ask? Biff is the Swedish word for beef and, as it turns out, there’s a Swedish specialty named after one Henrik Lindström, a prominent industrialist back in the 1800s. It’s a fried burger made with ground beef, egg, onion, pickled beetroot and a bit of its juice, capers, seasonings (salt and pepper) and optional chopped chives. Hmmm . . . . not being a beet fan, I’m not sure I’ll go for that one, but you might like it - you never know!

Even though they’re called rye buns and contain dark rye flour, these buns have only the teensiest hint of rye flavor. That’s neither good nor bad, just a simple observation.

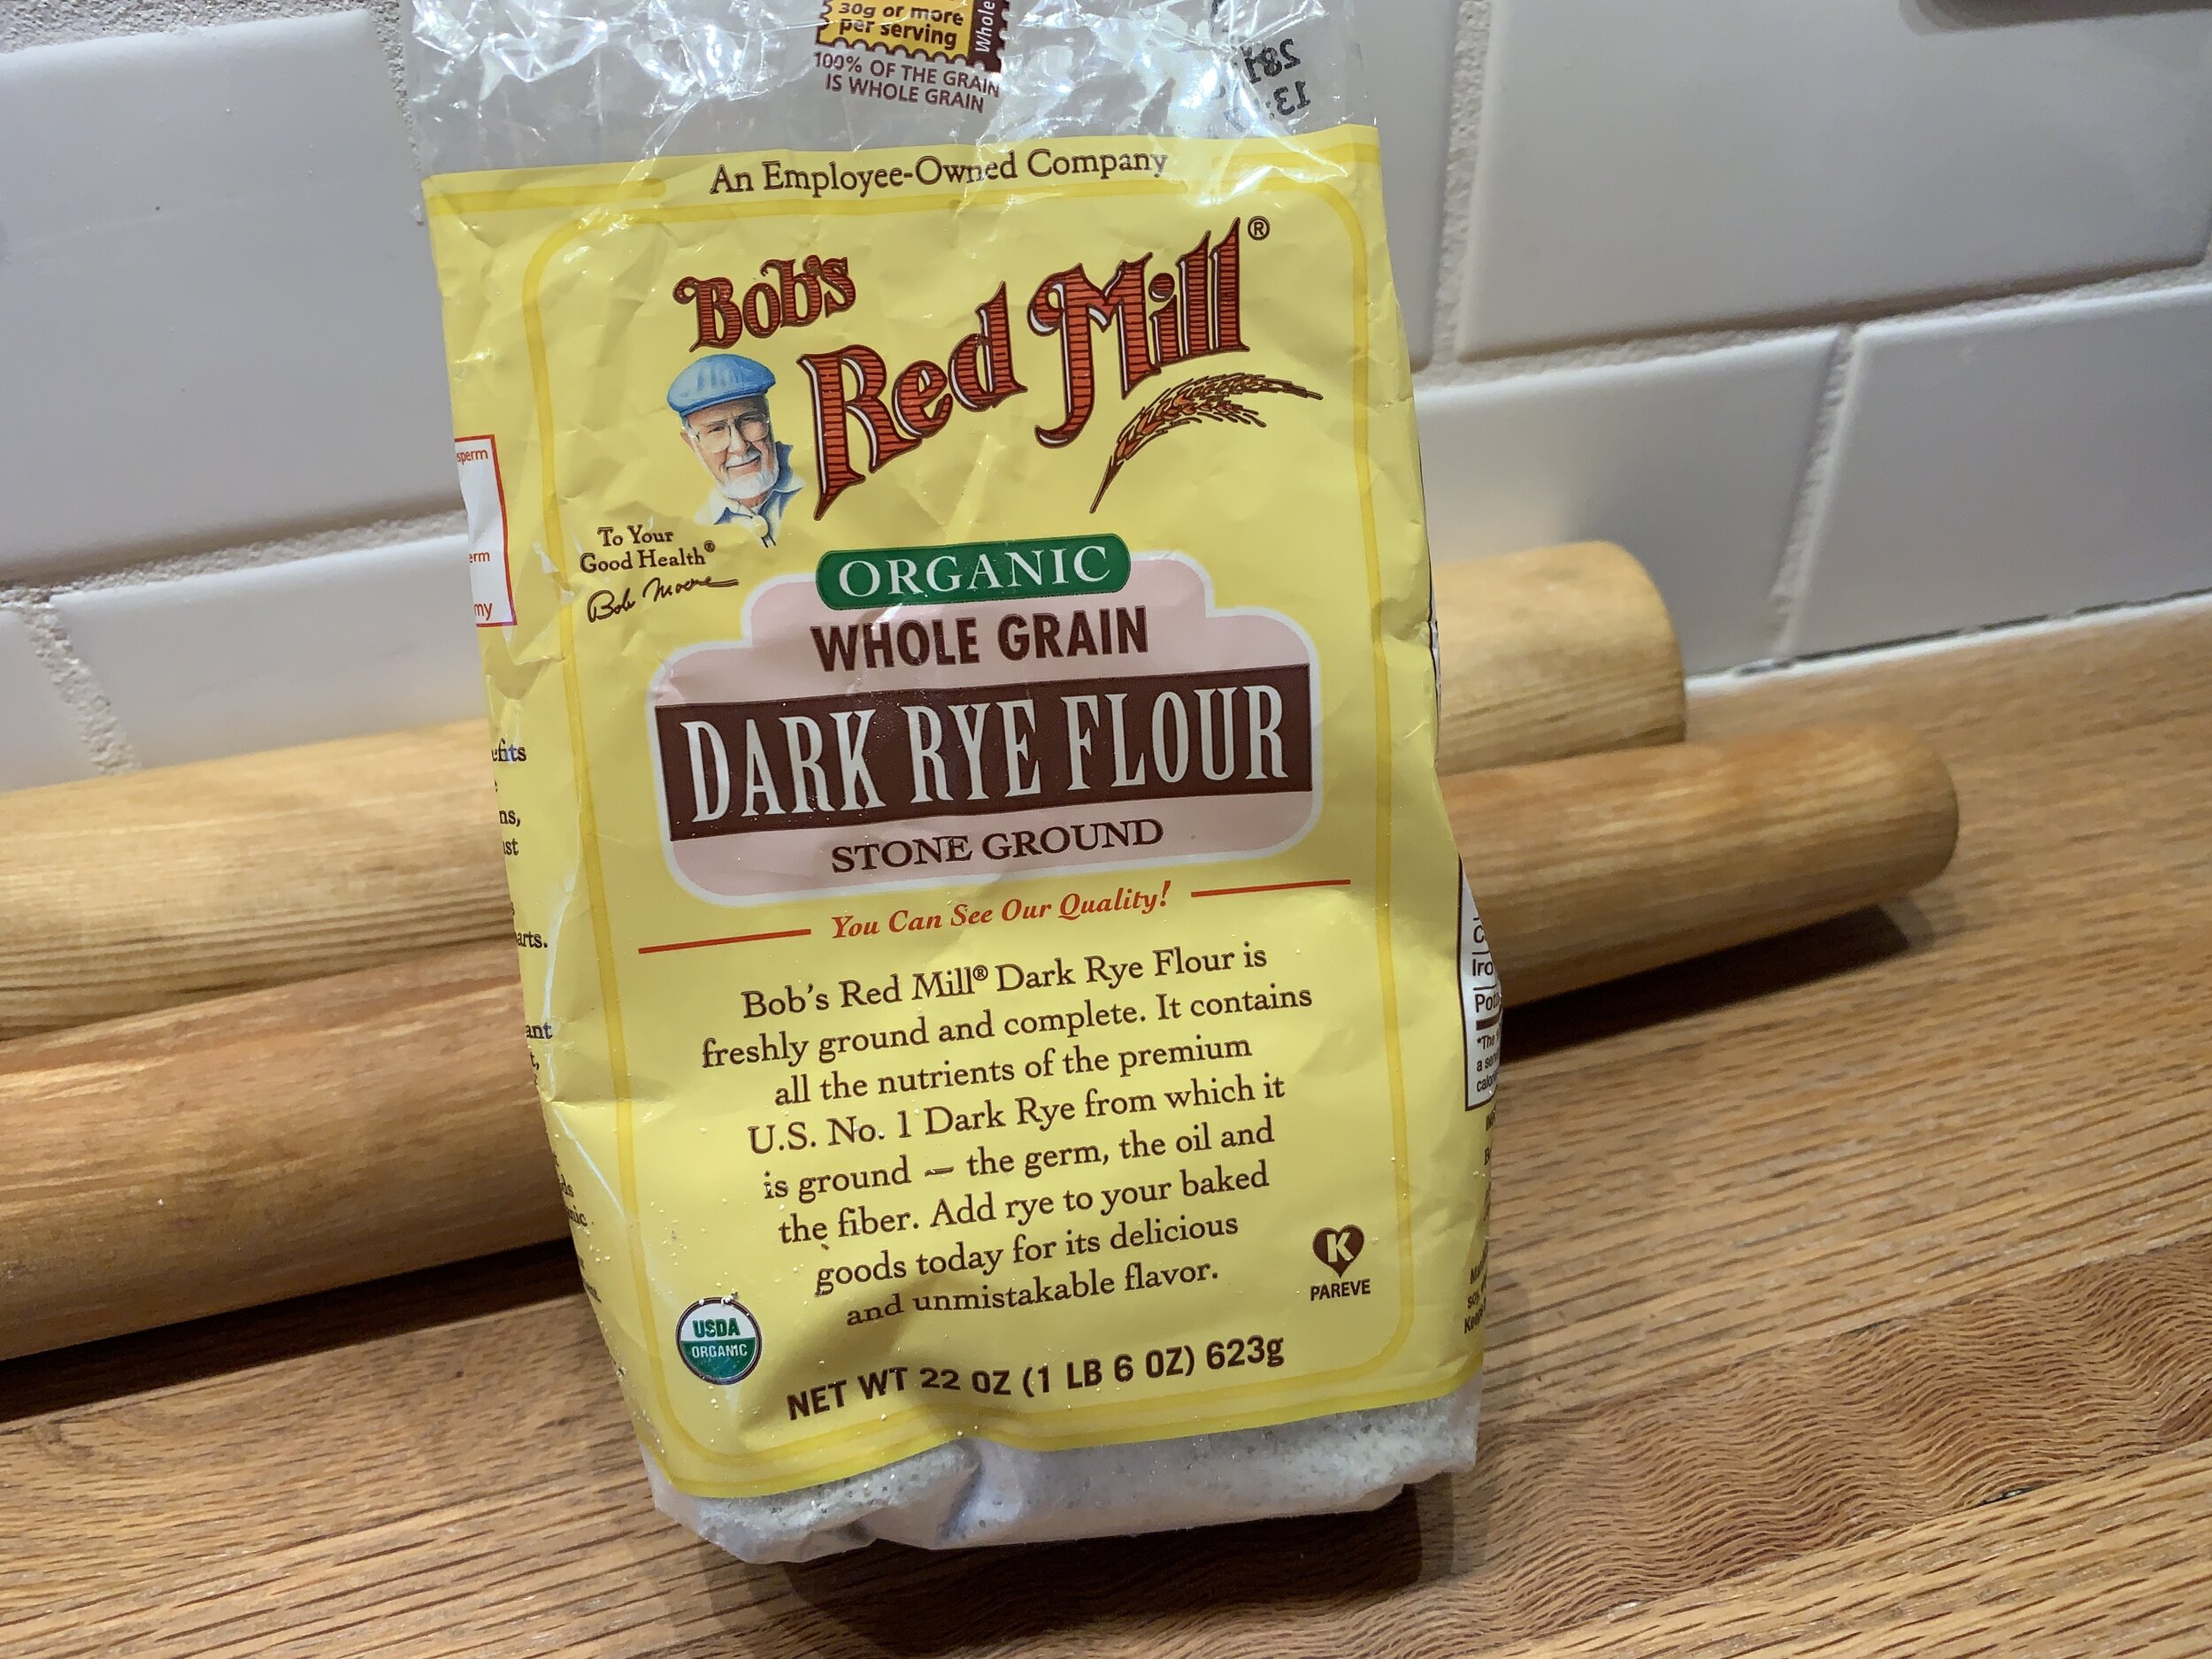
For this project I used Bob’s Red Mill, a line of wonderful flours readily available at local markets around here. While I’m a big fan of King Arthur Flour’s range of products and can buy the standards (i.e. all purpose, bread, whole wheat, white whole wheat, self rising and even the sprouted wheat) at the grocery store, their specialty flours have to be ordered from the company which obviously requires some planning ahead. Cue Bob’s - yes!

IMG_0039.JPG

The range of rye flours available go from white/light rye, medium rye, dark rye and pumpernickel. Here’s a great overview of rye from King Arthur Flour. Since rye flour doesn’t contain as much gluten as its wheat flour counterparts, for a better rise and lighter texture it’s best to combine it with all purpose. Using all rye flour makes for a dense loaf, plus the larger percentage of rye you use in your bread, the slower the rise.

No matter - this recipe works. You can accomplish it in a morning or afternoon and have fresh buns for supper. What’s not to like.

I use instant yeast as my go to dried yeast. It doesn’t require jump starting in tepid liquid like active dry does, however, if you’re proceeding with the recipe to complete that day, it’s doesn’t hurt to give the instant yeast a little bath in the warm liquid - gets it going just a tad faster.

IMG_0063.jpg

In the bowl of a stand mixer fitted with the dough hook, mix 10 g / ~3 teaspoons instant yeast with 160 ml (2/3 cup) EACH of tepid water and whole milk. Let stand 10-15 minutes to become frothy. Add 50 g (1/4 cup) light brown sugar and mix until dissolved.

Have 200 g (1.5 cups) dark rye flour and 390 g (3 cups) of white bread flour at the ready, as well as 1.5 teaspoons salt, 1 large egg, 84 g (6 tablespoons) softened unsalted butter.

On low speed add the rye flour to the yeast/milk mixture along with the salt, then the egg and butter. Increase speed to medium low and start adding the bread flour. You may not need all of it. Continue to mix for about 5 minutes.

IMG_0068.jpg

You’re looking for a slightly sticky dough that’s pulling away from the sides of the bowl. FYI - I did end up using all of the bread flour.

IMG_0064.jpg

Place dough in a lightly oiled bowl, cover with plastic wrap and let rise in a warm place about an hour until doubled.

Before the first rise

Before the first rise

After the rise

After the rise

Turn the dough out on a lightly floured work surface, gently knead to form a log that you will then divide into your chosen sizes.

IMG_0079.jpg

Note: the recipe yield will vary depending on the size you wish to make. For example, if making 9 buns (as the base recipe suggests), each one comes in at a hefty 122 g (4.25 ounces) which is a bit too generous methinks. For my first batch I chose 85 g (3 ounces) which gave me a yield of 13 buns, but since Mr. Steve prefers his burger buns a little larger, my second go-around yielded 11 buns at ~100g each.

Into the slider thing? Make them even smaller!

IMG_0080.jpg
IMG_0082.jpg

Shape each piece into a nice boule, place on a parchment lined sheet pan, cover with a damp towel or a lightly oiled piece of plastic wrap and give them a second rise for about 1/2 hour.

Meanwhile heat your oven to 350ºF. Brush lightly with egg wash and sprinkle sesame seeds (white or black or both) on top (or any seed mixture you like).

IMG_4524.jpg

Ms. Aurell suggests moisture in the oven during baking. Place the sheet pan of buns onto the middle rack and place a shallow heat proof pan with a cup or so of hot water onto the bottom rack. Bake about 13-15 minutes until golden and sound hollow when tapped on the bottom.

Great buns!!

IMG_4526.jpg

So far we’ve had grilled burgers on these babies twice and a couple of different sandwiches. Definitely a keeper. Give ‘em a try - you won’t be sorry.

IMG_0122.JPG

Whole wheat croissants

IMG_3564.JPG

As I experiment more and more with whole grain flours, I just had to do a trial of croissant dough with a couple of variations on using whole wheat flour. Just can’t get enough of the laminated dough thing, or so it seems. Oh well, there are worse things to be fixated on, don’t you think?

IMG_3515.jpg

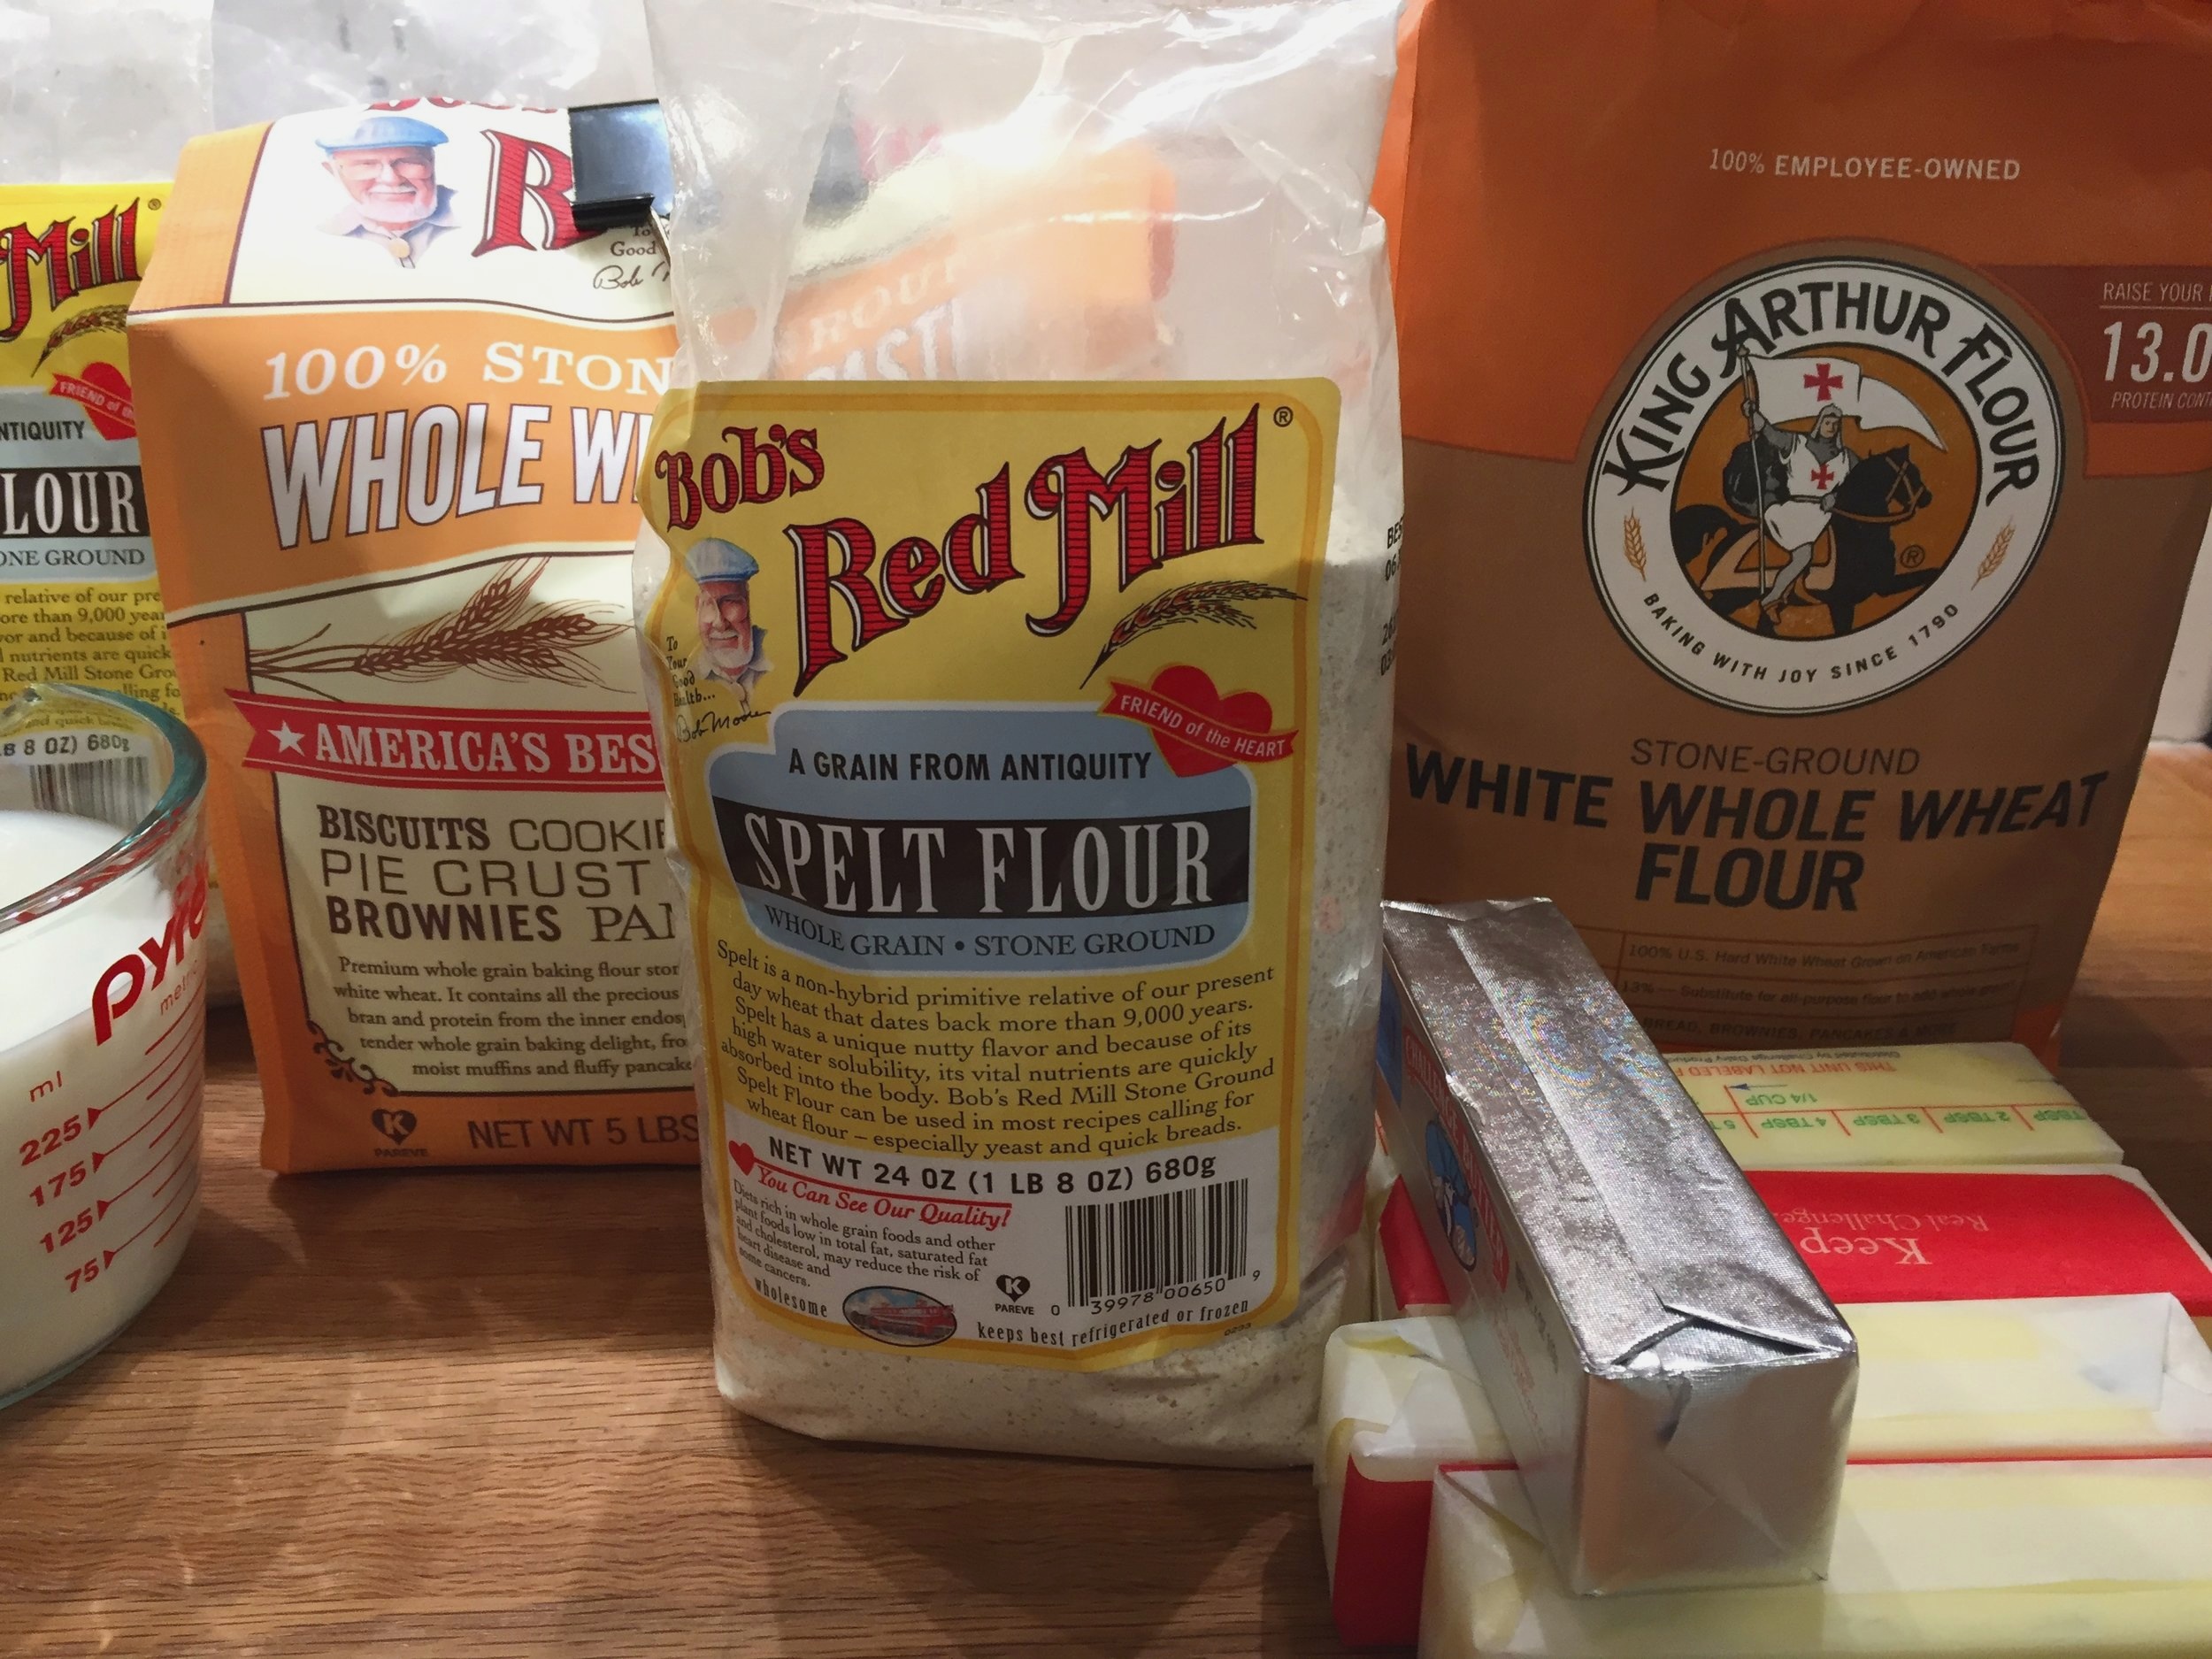
The first version adjusts my base recipe from 450 g all purpose flour and 50 g bread flour (recipe coming at the end, I promise!) to a mixture of 300 g spelt flour and 200 g whole wheat pastry flour, both from Bob’s Red Mill. The spelt I used is a coarse grind and gave my dough a speckled look. I was hoping that my choice of those two flours would sort of balance each other out in terms of gluten content, giving me something closer to all purpose but with the nutritional benefits of using whole grain flours. Kinda winging it here.

The second version uses a mixture of 300 g white whole wheat flour from King Arthur (a finer grind than the spelt and a softer flour from soft white wheat) and 200 g whole wheat pastry flour from Bob’s Red Mill (another softer flour), yielding a smoother appearance with less speckling. Again - wingin’ it.

I normally use whole milk for my liquid but this time I replaced about a third of the milk with water, thinking that the final, slightly less enriched, nutty-wheaty croissants would lend themselves to more savory uses like ham/cheese or chicken salad sandwiches. I know, I know - this isn’t a very scientific study since I’m changing a number of variables, but why not play around? It’s what I love.

My two dough versions and butter blocks ready to go

My two dough versions and butter blocks ready to go

I put both versions through the usual steps of beurrage followed by three business letter folds (or 3-folds) and a final rest in the fridge before rolling out. I divided each batch into halves so I could create two different pastries with each version.

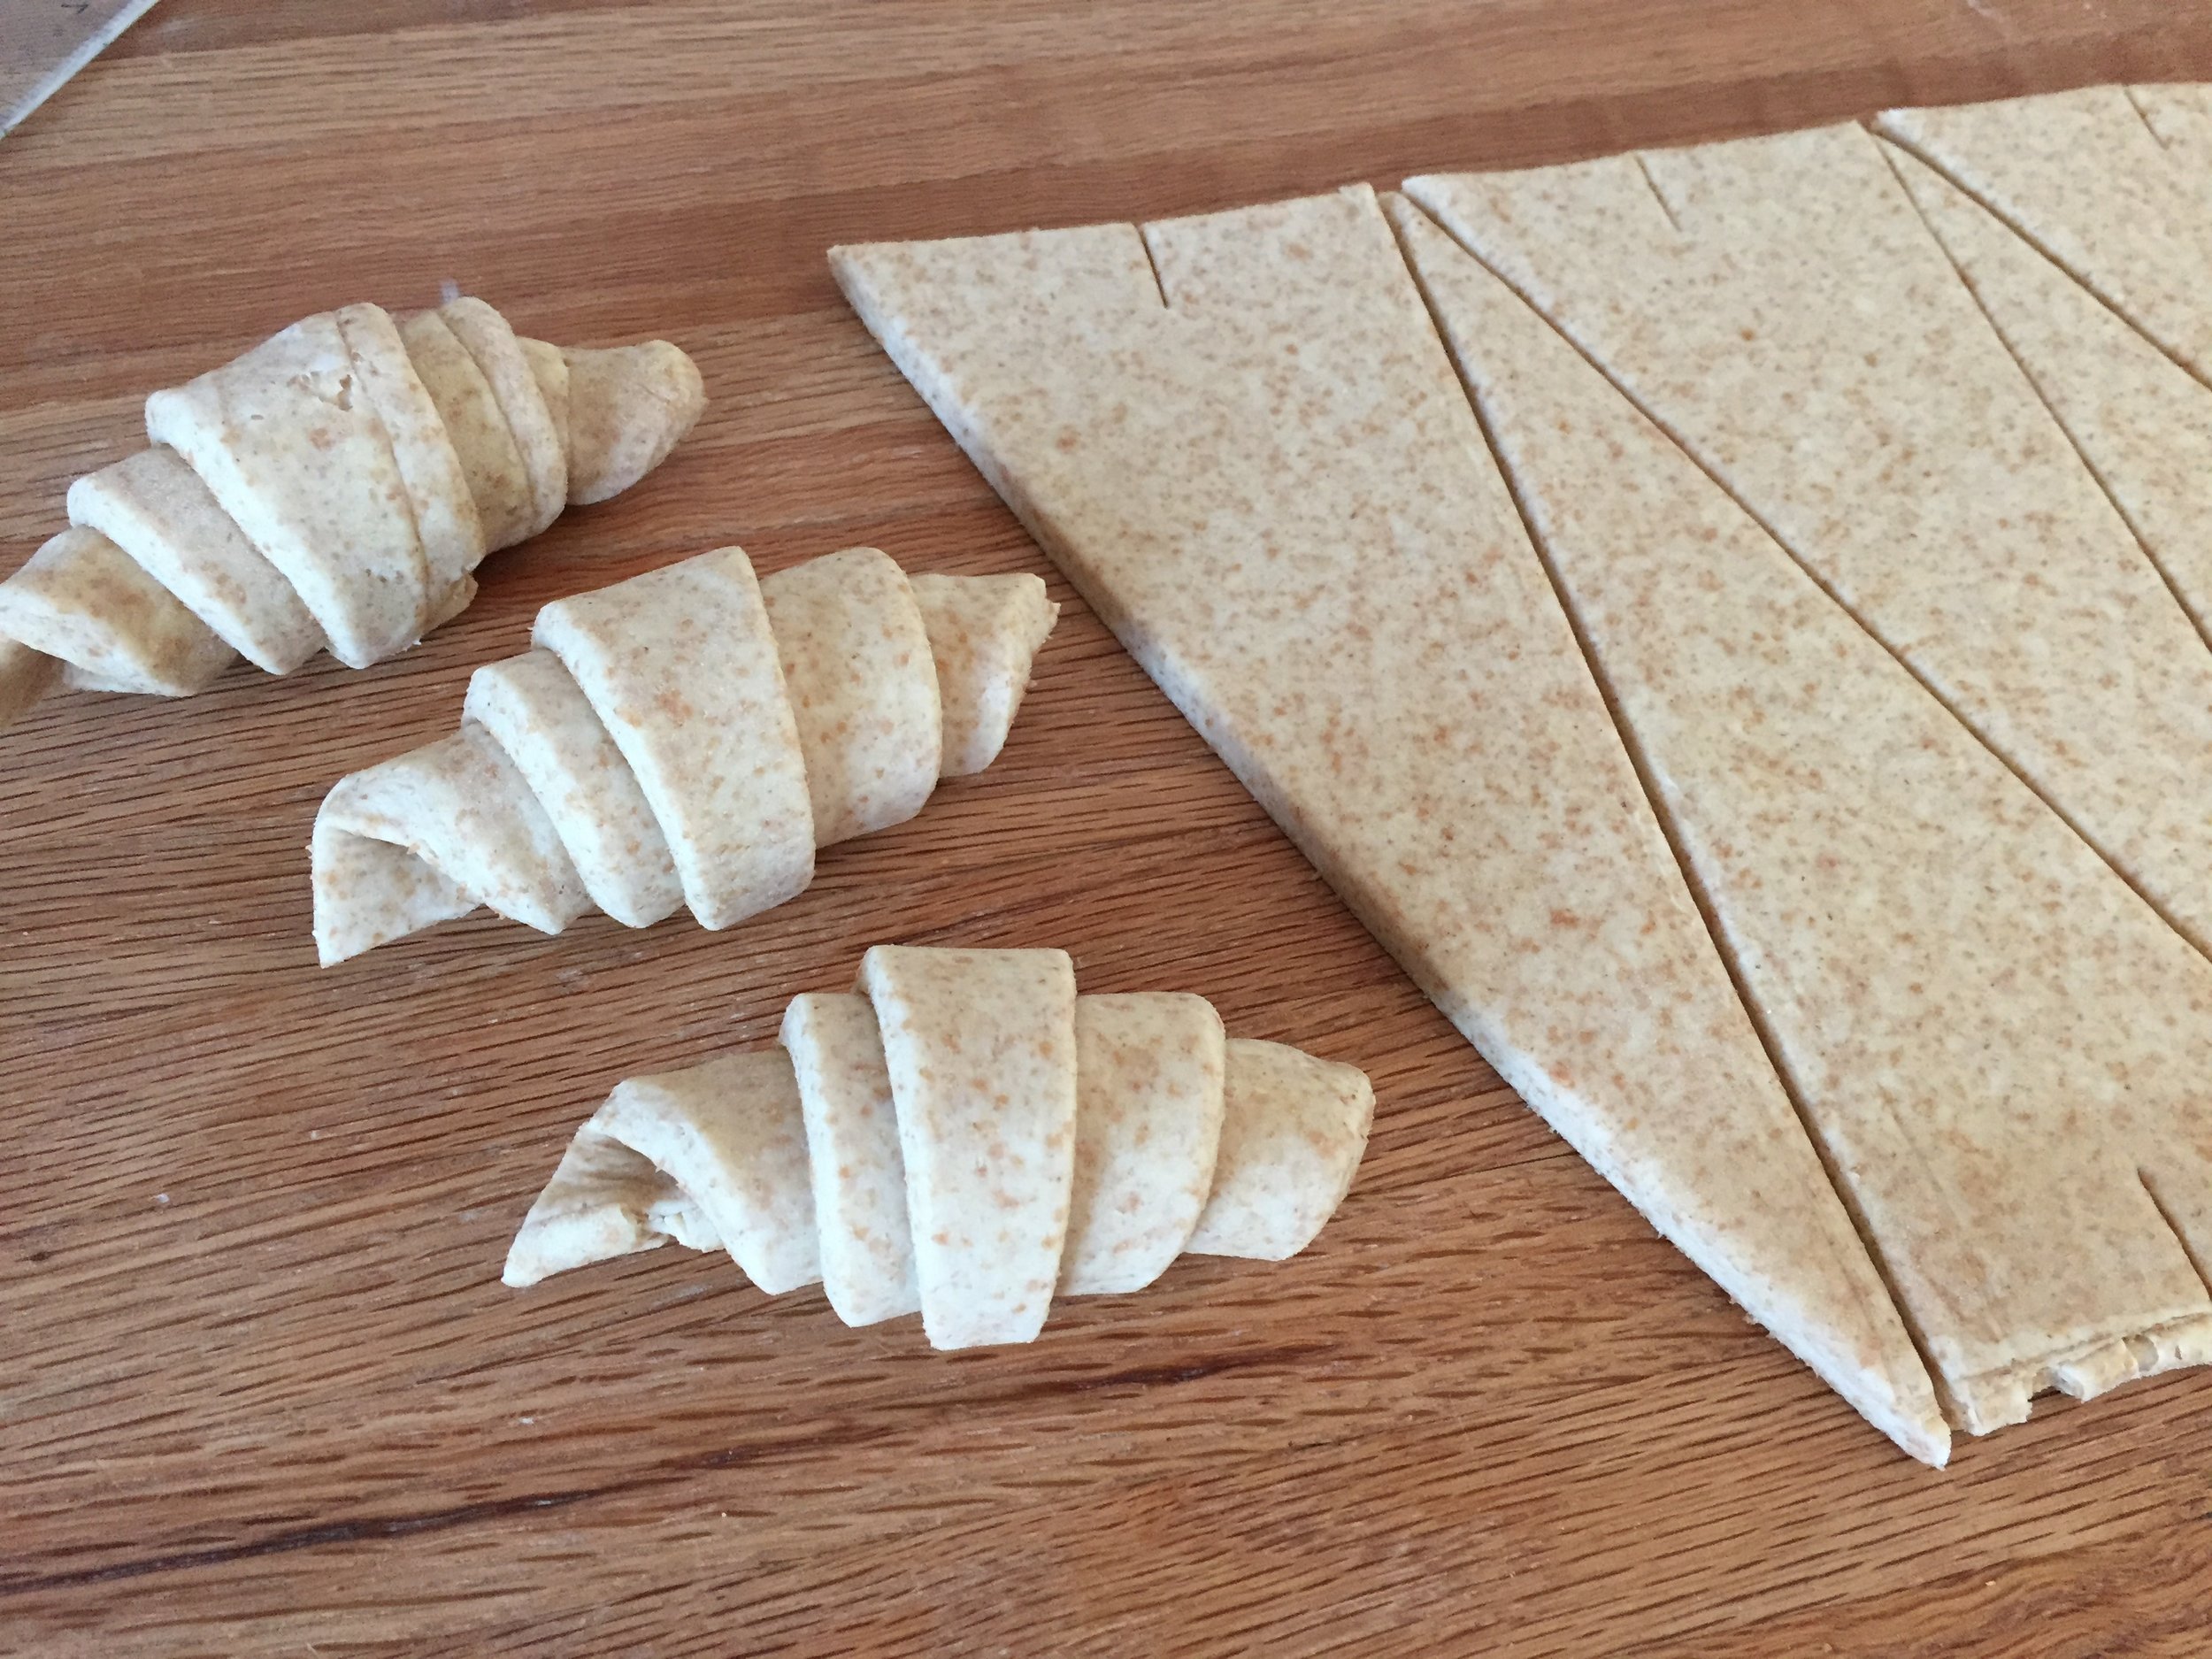
The spelt dough rolled nicely but when it came time to cut and shape the croissants, the dough felt drier and was not quite as sturdy, tending to tear when being stretched a bit.

Shaping the spelt croissants

Shaping the spelt croissants

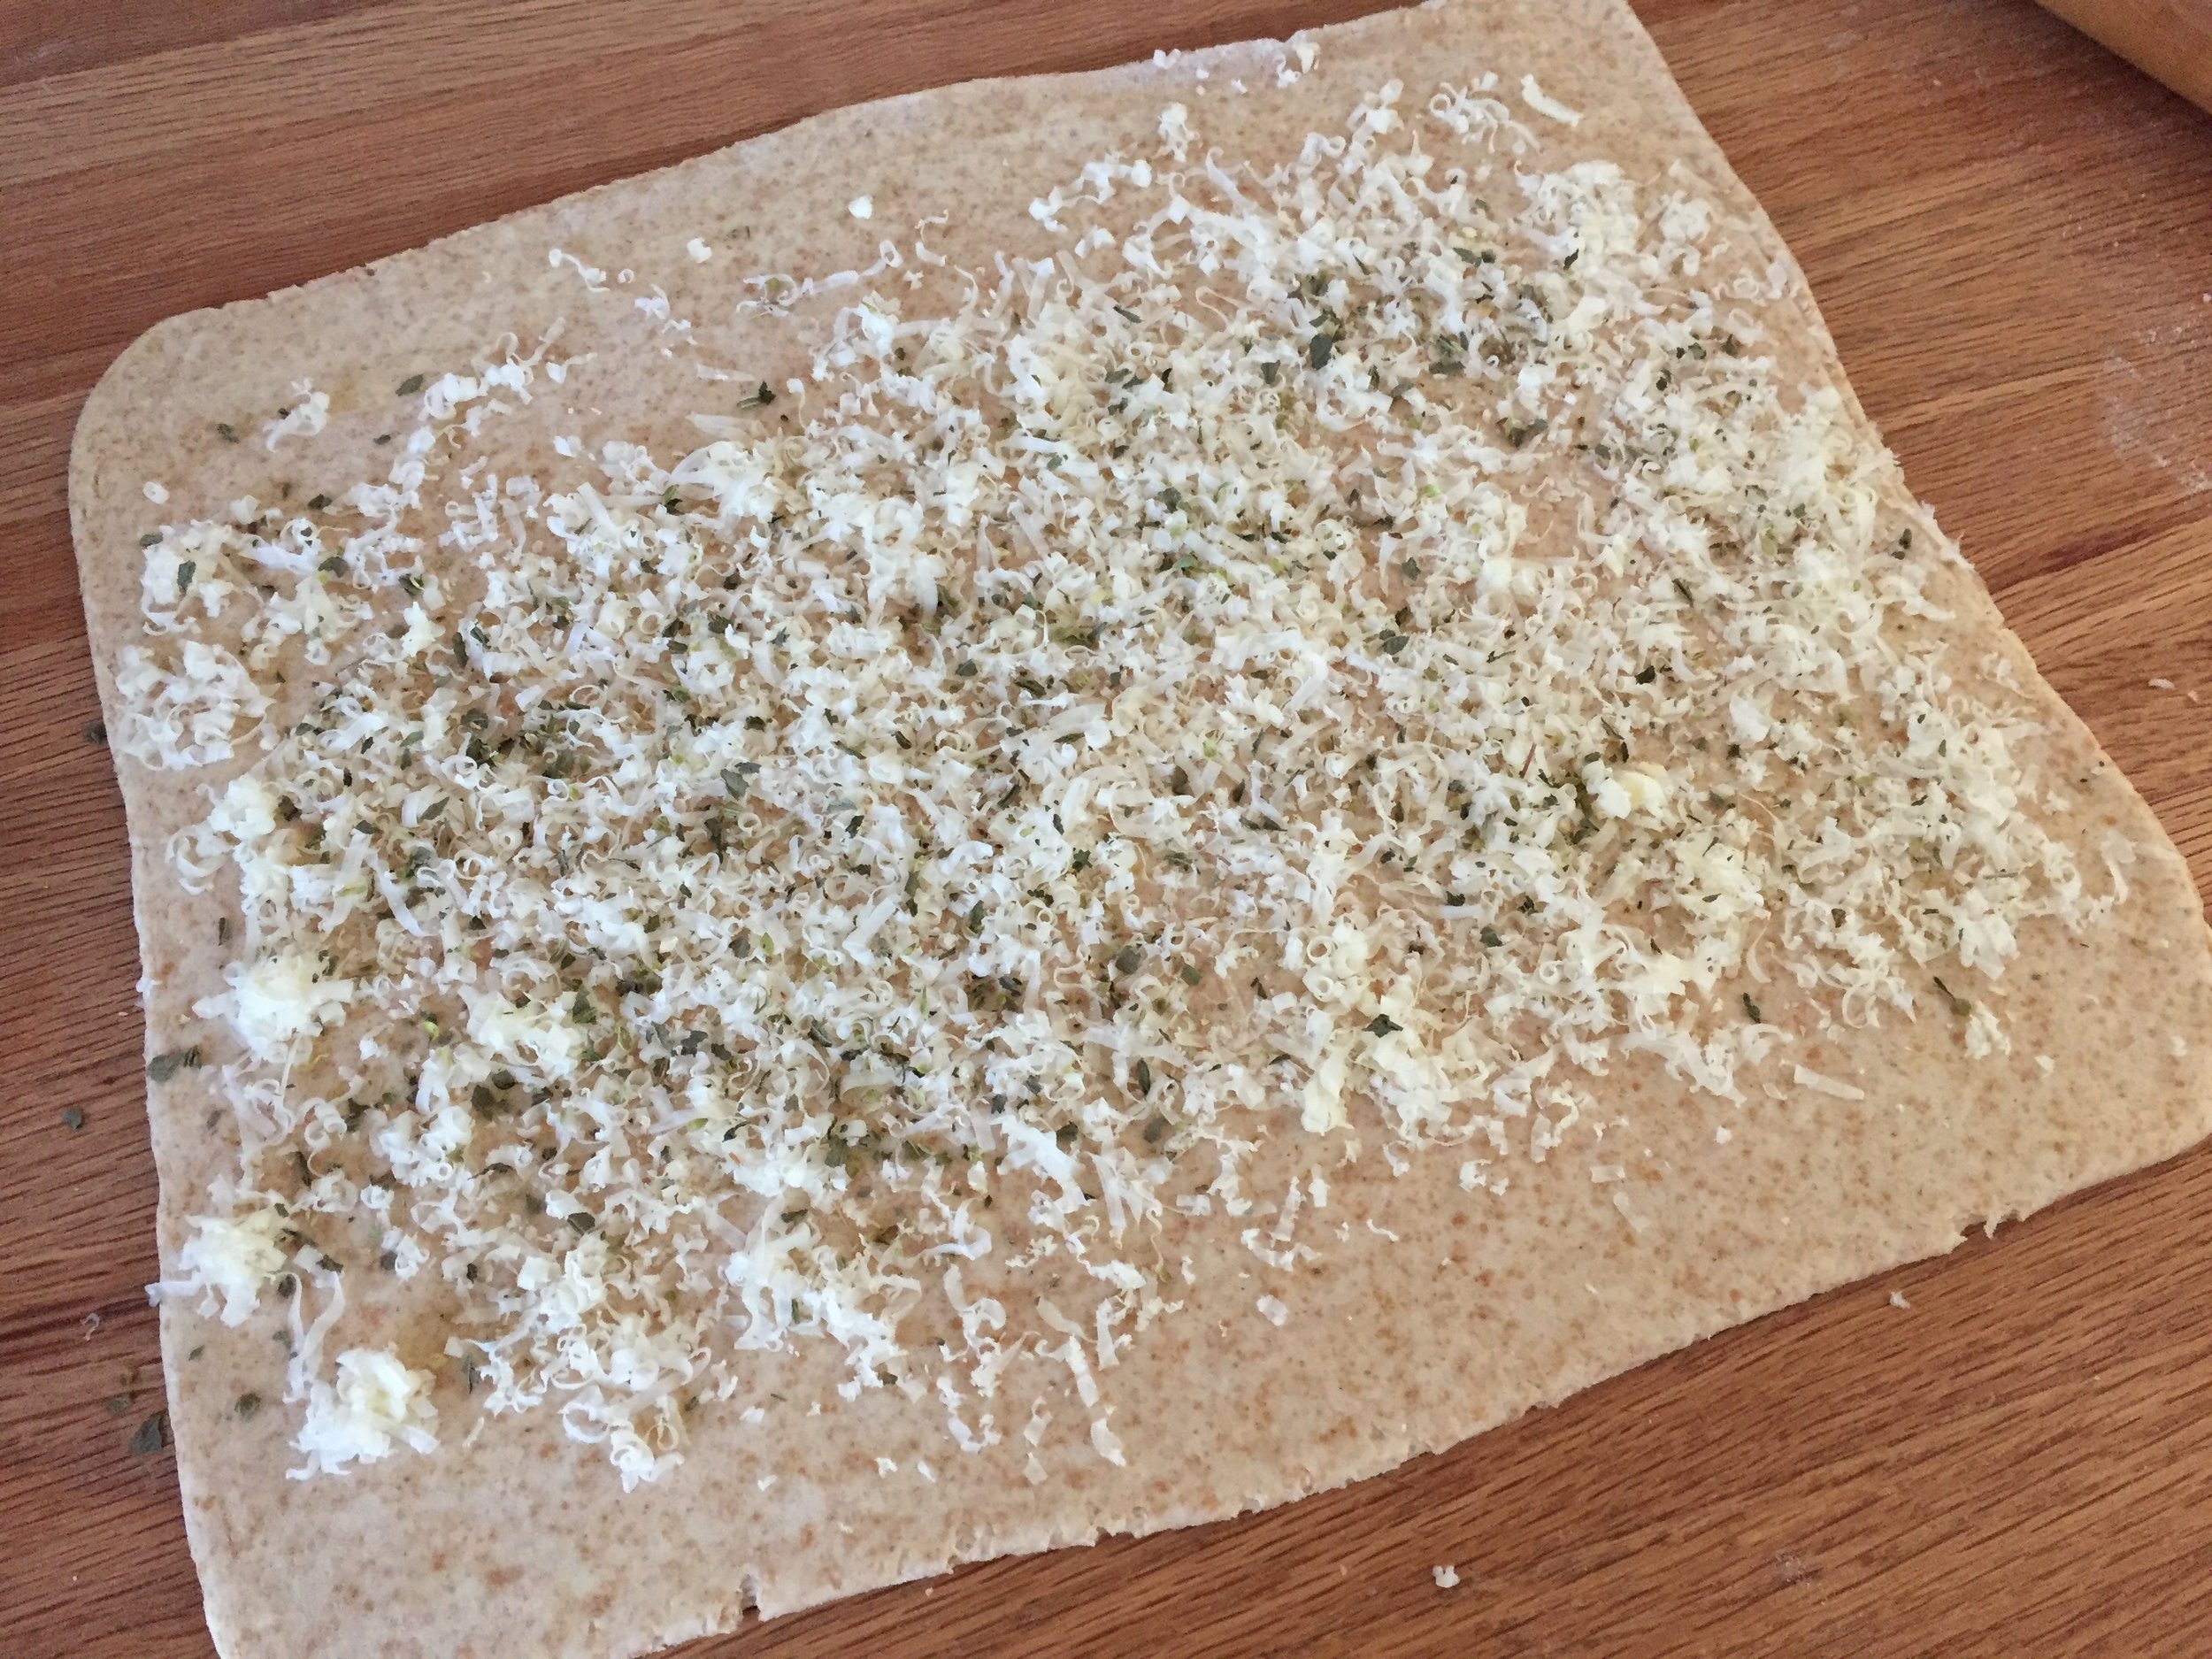
With the second half of the spelt dough I did a savory spiral - rolled it out into a 10”x12” rectangle, brushed it with egg wash and sprinkled on mixed Italian herbs and grated gruyère cheese . . . .

IMG_3534.jpg

rolled it up into a log and sliced ~1 inch slices.

IMG_3535.JPG

The slices went into buttered 80 mm rings to proof.

IMG_3551.JPG

The white whole wheat version also rolled out easily and was less inclined to tear when being stretched and shaped.

IMG_3540.jpg

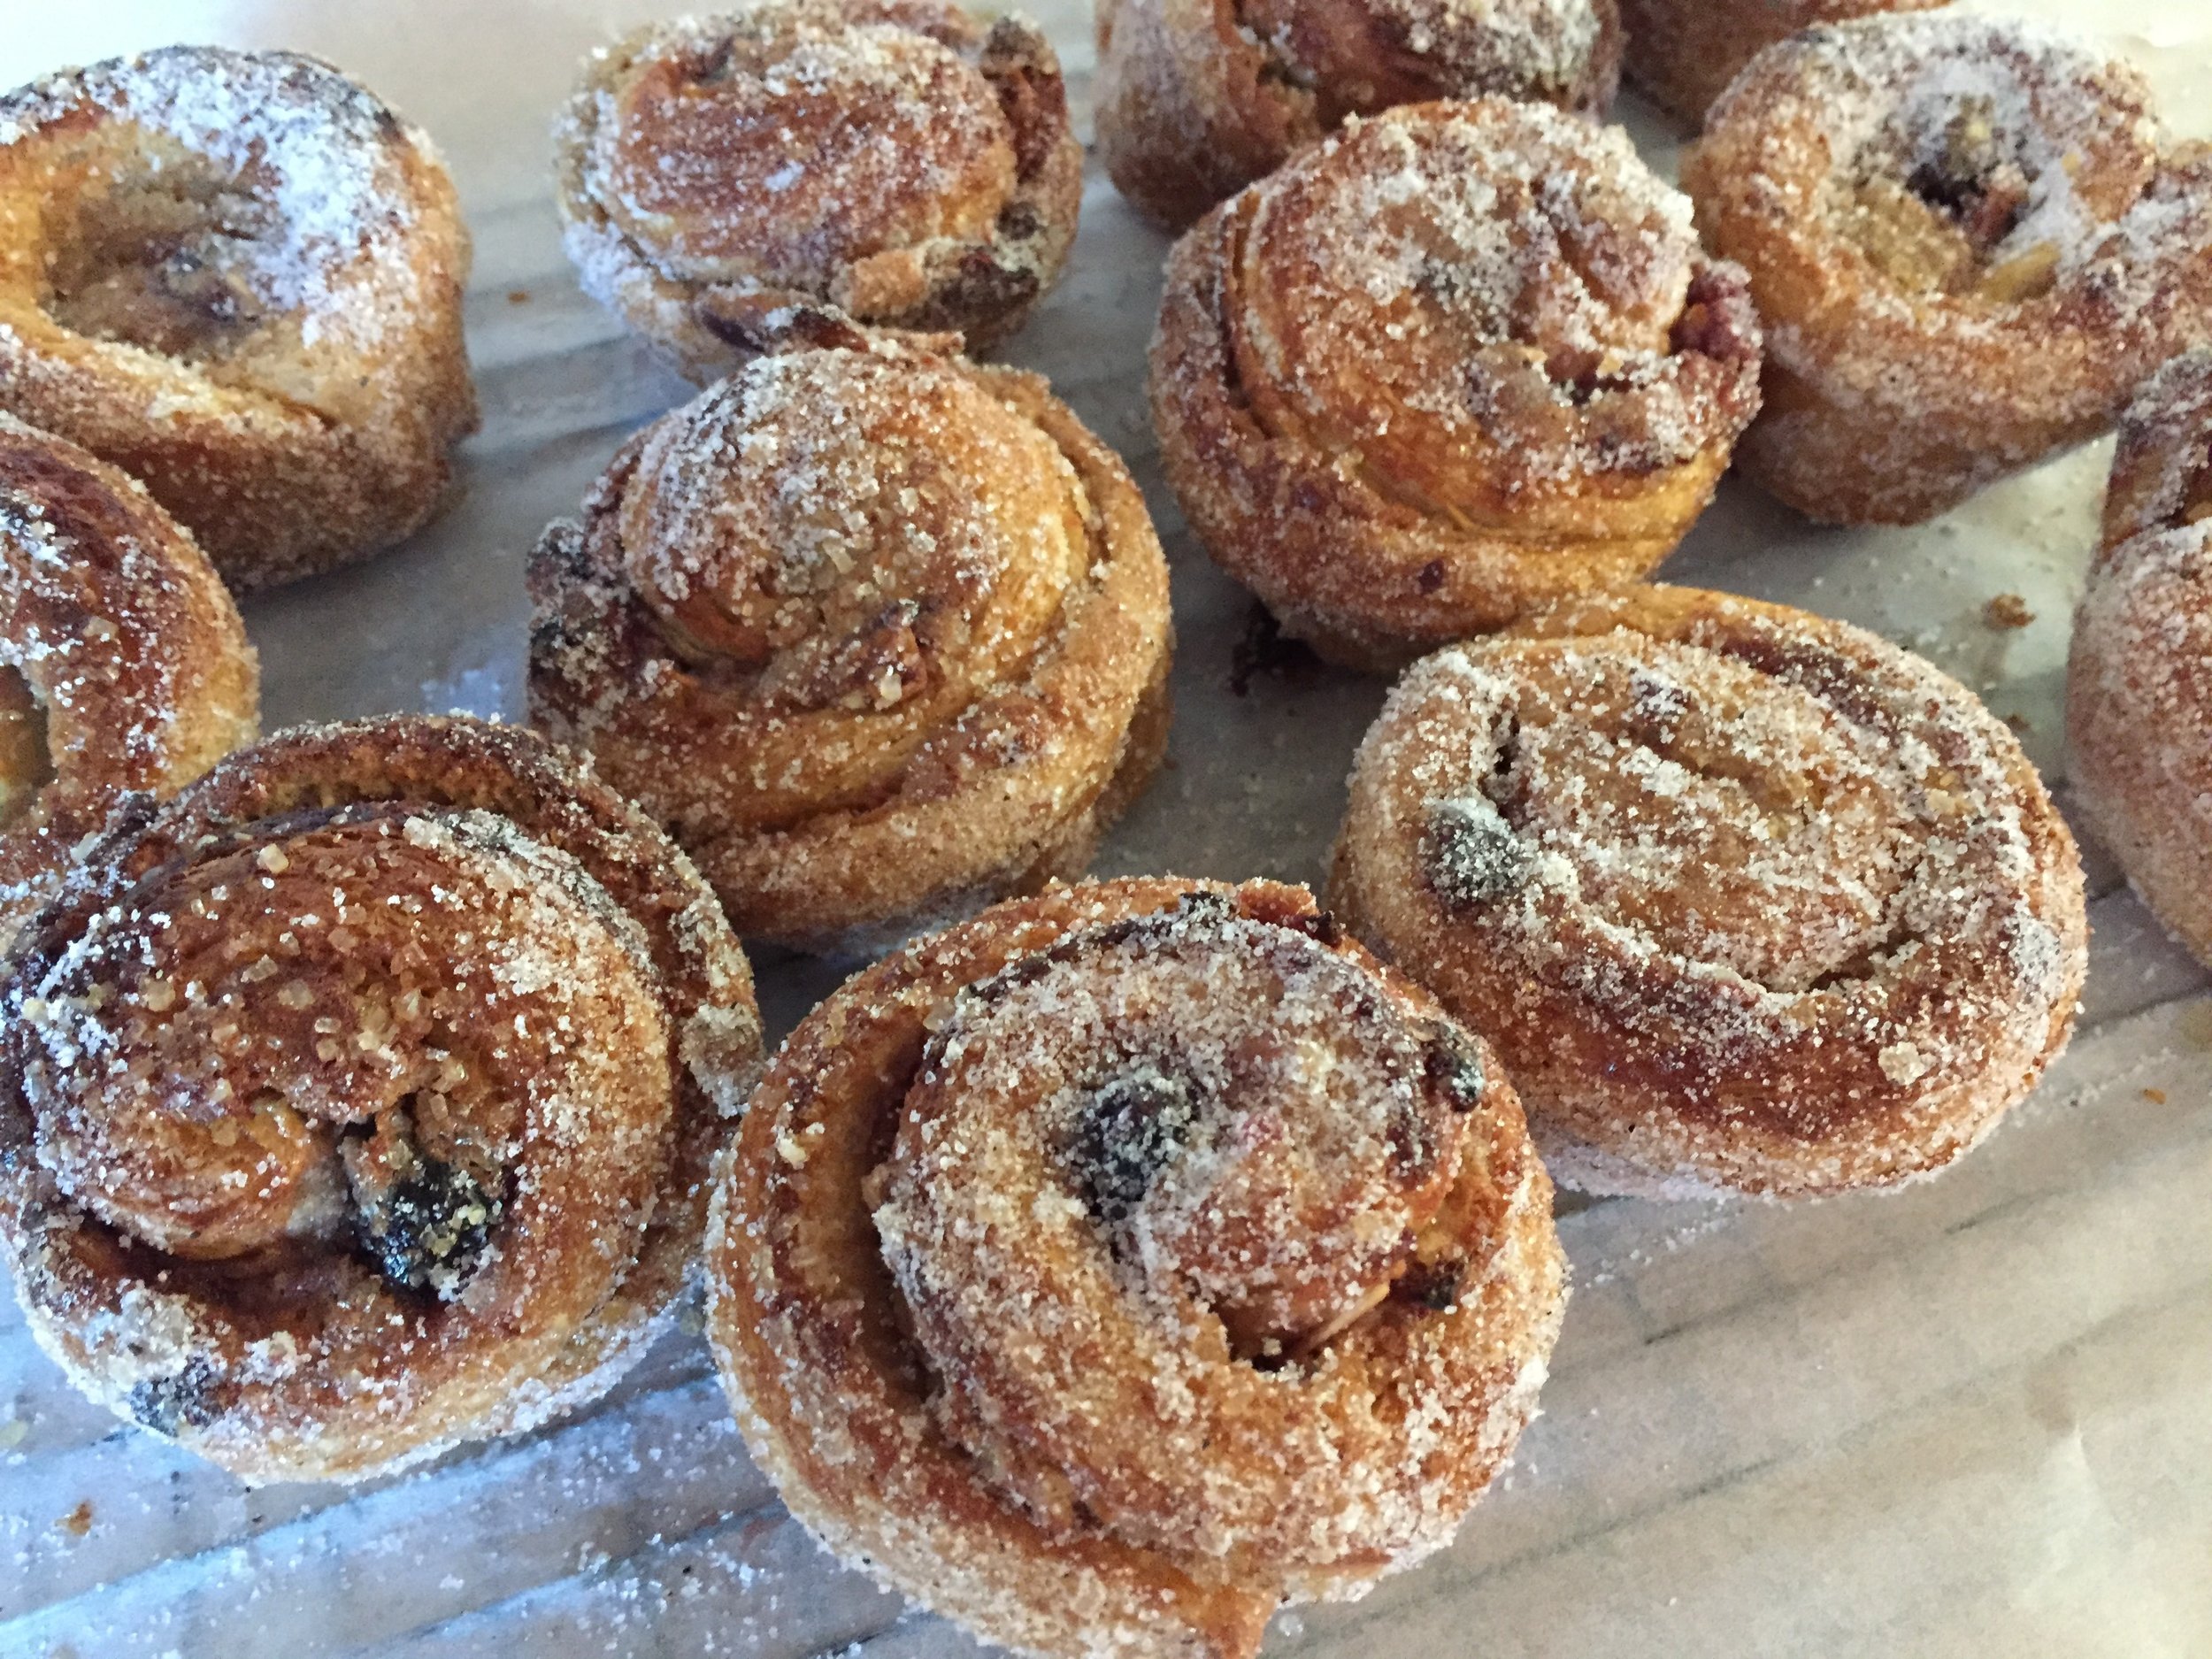
The second half of this dough became cherry-almond spirals - same idea as the cheese/herb spirals above - spread on a mixture of almond flour, egg white and brown sugar and topped it with cherry preserves and sliced almonds.

IMG_3545.jpg

Rolled up and sliced, these went into buttered muffin tins to proof.

IMG_3546.jpg

I gave the croissants a good 2-2.5 hours to proof and the spirals a bit less. Then on to the bake!

Proofed spelt version

Proofed spelt version

Out of the oven

Out of the oven

I gave the proofed cheese spirals a sprinkling of more cheese . . . .

IMG_3553.JPG

and here they are all baked up!

IMG_3557.JPG

I gave half of the egg washed white whole wheat croissants a sprinkling of KAF’s Artisan bread topping, a delicious mixture of sesame, flax, sunflower, black caraway, poppy and anise seeds.

Proofed

Proofed

all baked up

all baked up

Cherry almond here we come! A sprinkling of raw sugar and into the oven.

IMG_3567.JPG

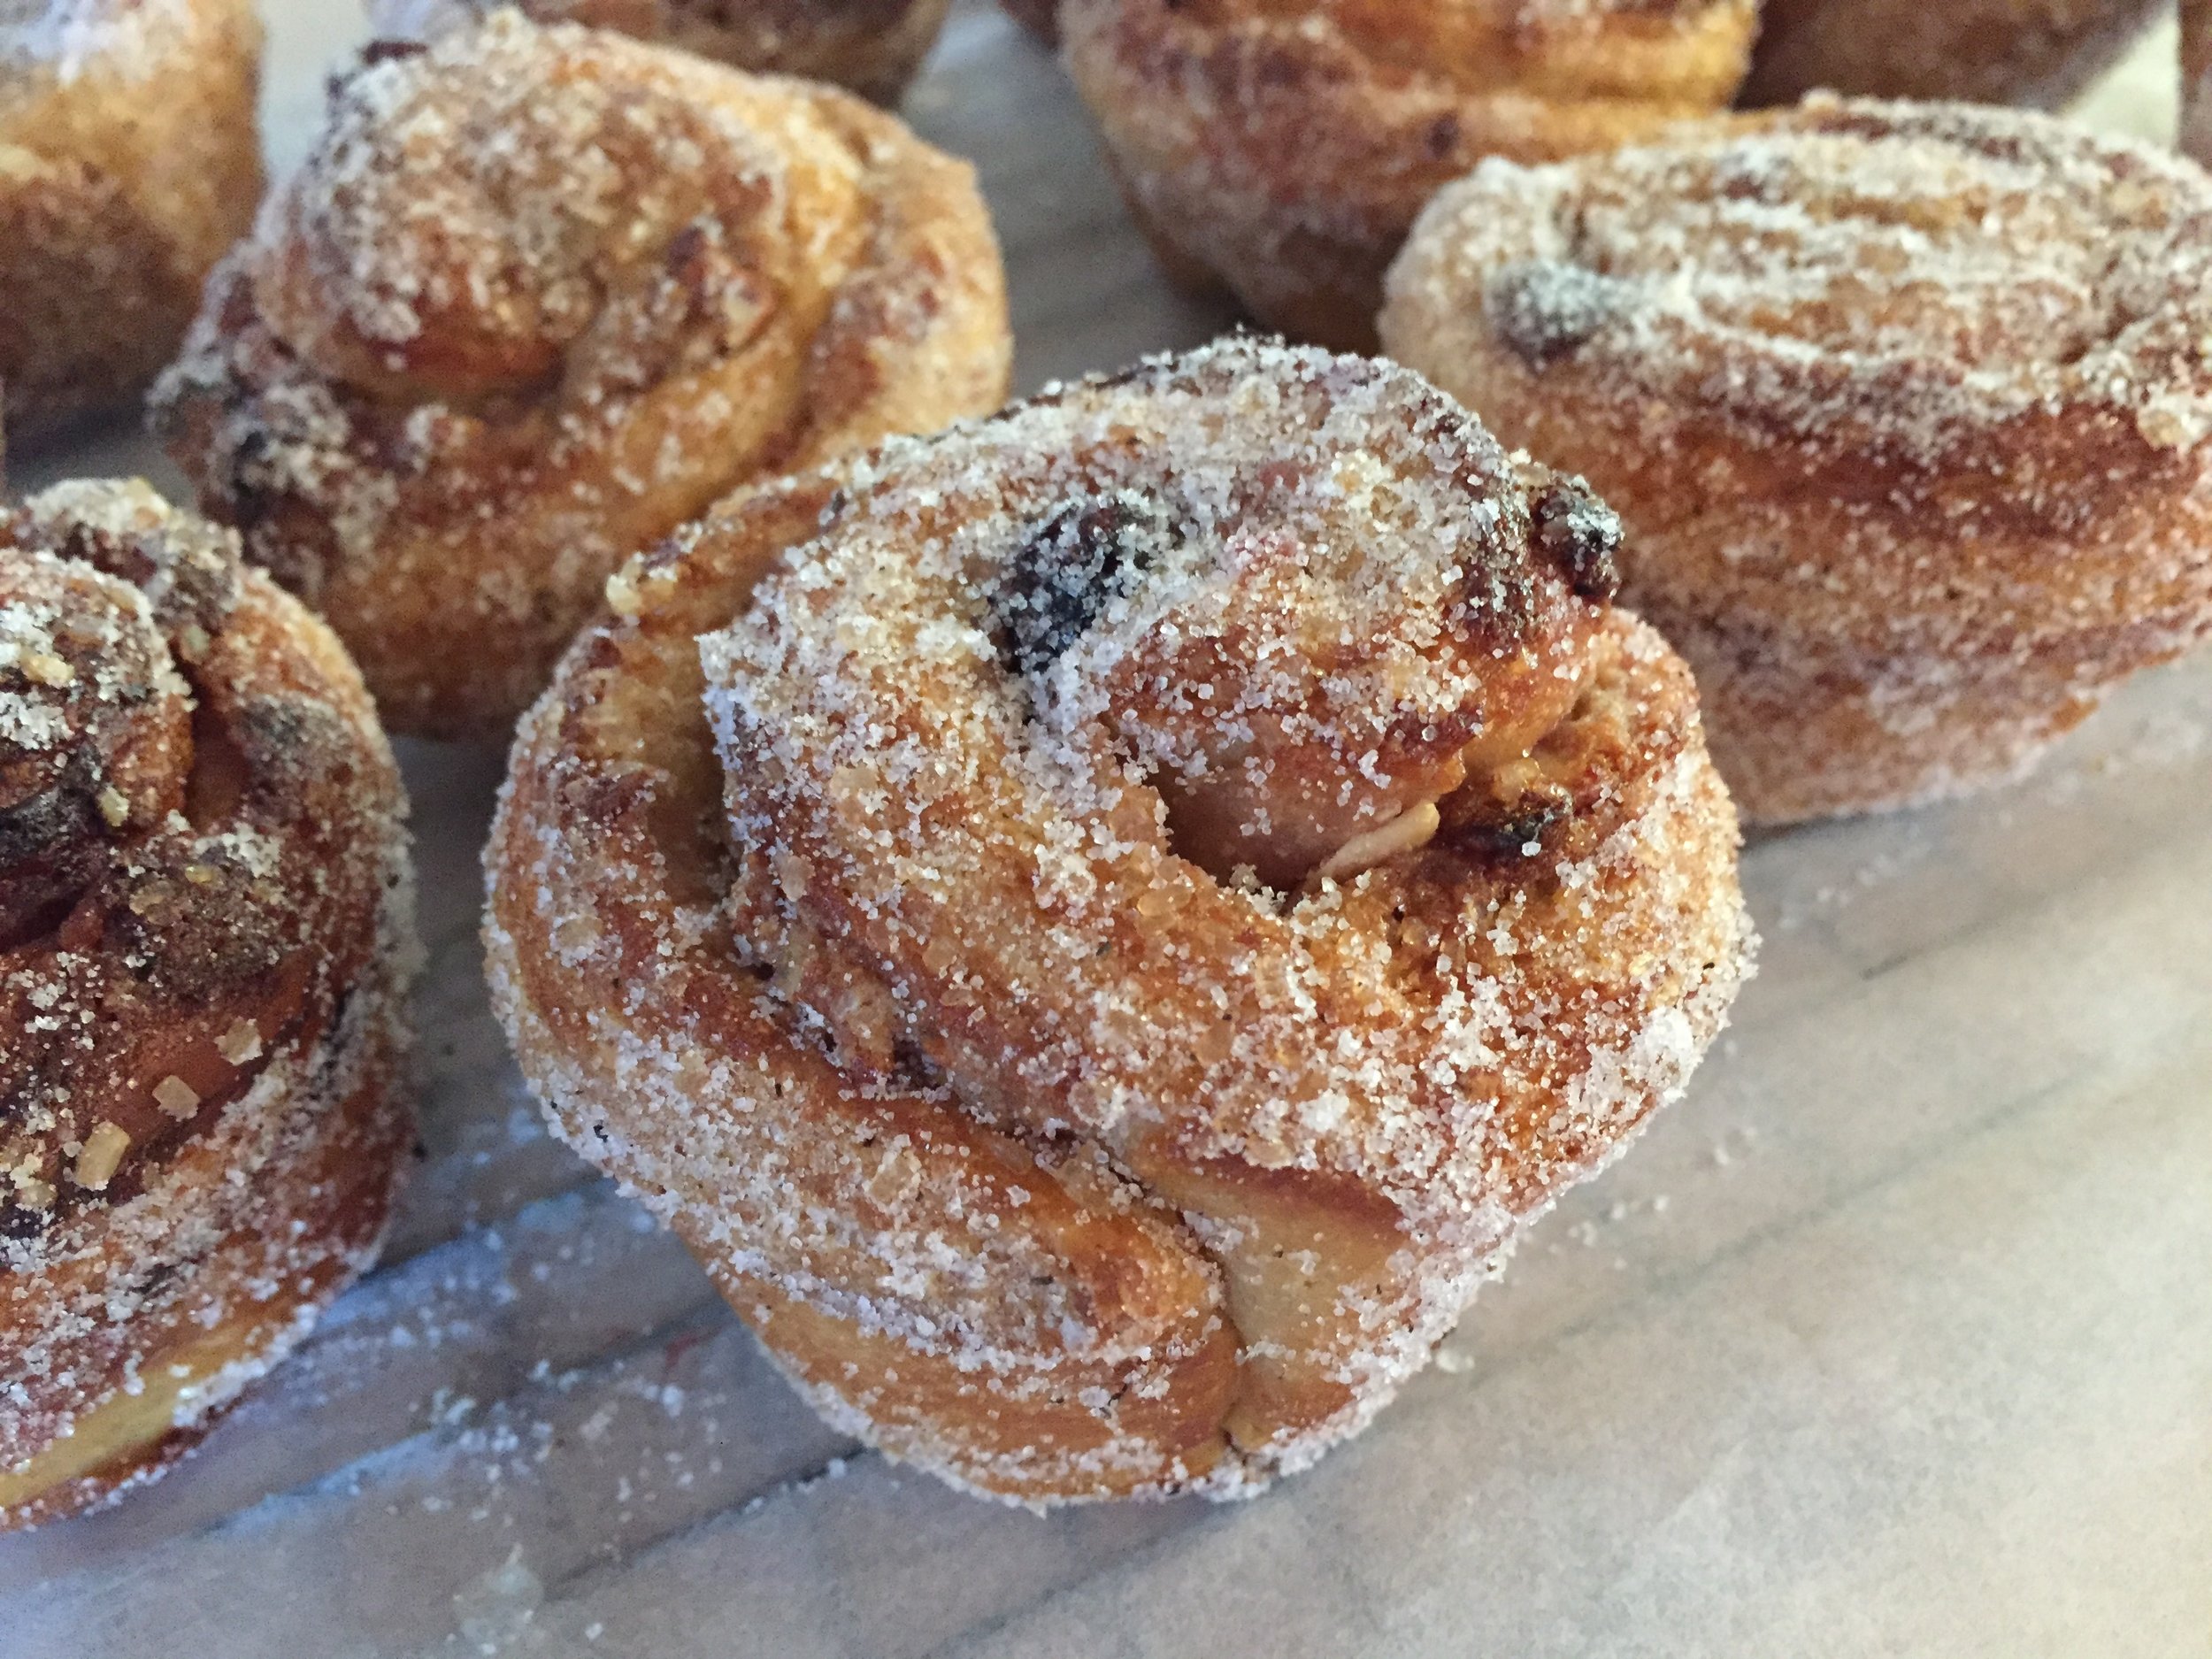
Once baked I rolled them in some vanilla sugar for the pièce de résistance.

IMG_3575.JPG

Steve and I did a thorough sampling of all four versions. We thought the flavor was deelish and the texture pretty decent. Personally I love the nuttiness and whole grain sense of these doughs and would definitely make whole wheat croissant dough again.

I froze a good portion of the baked and cooled end results, and we were able to enjoy the croissants and cheesy spirals thawed and oven warmed with a delicious chili Steve made for a family supper out at cousin Jen’s. Everyone enjoyed them immensely. Who says you can’t have a croissant for supper eh?

So what did I learn from all of this? Truth be told, I had done some reading before the project but had neglected to consider the need for some increased hydration when using all whole wheat flour. Duh. Hence I did a thorough read through of very helpful tips and suggestions from the Whole Grain Council/KAF - so much information out there kids!

Going forward I now know to add an additional 2 teaspoons of liquid per cup of whole wheat flour used. It’s also important to work the dough more gently and shape more loosely since the germ and bran in the whole wheat flour can actually shred the gluten strands in the dough, weakening it (it was very clear to me with the spelt version that it was drier and much more prone to tearing).

Whole wheat doughs generally ferment a bit faster (more nutritive stuff in them for the yeast to munch on) but don’t achieve quite as much volume. I did give my dough the same amount of rising time that I normally give my regular croissants but did note that the rise didn’t appear quite as full. Yet I was very happy with how they baked and tasted in the end. YES indeed.

IMG_3563.JPG

Here’s my standard base croissant recipe with adjustments for whole wheat:

450 g all purpose flour + 50 g bread flour (option 300 g white whole wheat flour/200 g whole wheat pastry flour)
44 g sugar
10 g salt
50 g soft unsalted butter
8 g instant yeast
317 g whole milk, can be cold or room temp (add 35 g additional liquid if using whole wheat flour - may be a mix of water and milk)
283 g unsalted butter for the butter block

  1. Blend flours, sugar, salt and yeast in the bowl of a stand mixer.

  2. Stir in milk (milk/water if using) with a rubber spatula or dough whisk to roughly combine. If using whole wheat flour let the mixture sit for 20 minutes to hydrate before proceeding.

  3. Mix with the dough hook on “stir”, adding the 50 g soft butter to incorporate.

  4. Increase to speed 2 and knead for 3-4 minutes (2-3 minutes if using whole wheat flour).

  5. Place on a lightly floured work surface, cover with plastic wrap and let the dough rest for 30-40 minutes.

  6. Shape into a ball, wrap tightly in plastic wrap and place in the refrigerator for at least 8 hours or overnight.

  7. Shape the 283 g butter into a 4-5 inch square (I do this between two layers of plastic wrap). The butter should be cool and malleable for the beurrage.

  8. Perform the beurrage followed by three business letter folds, resting the dough 30 minutes between each fold. Let the finished dough rest at least 2 hours or up to 12 hours before final shaping.

It’s not my intention here to review all the steps and nuances of making laminated dough, proofing and baking croissants but primarily to share the dough recipe. Now it’s time for you to experiment on your own. Go for it! You can do it.

IMG_3576.JPG

Roasted garlic cheese bread

IMG_3223.JPG

Ooooh I loved this baking adventure! Not only did I use Fontinella, a delicious bread-worthy cheese from The Cheese Lady, but added in some roasted garlic that the Steve-man has recently been providing in spades.

IMG_3208.JPG


I’ve been wanting to experiment more with different ways of filling and shaping bread dough and am often inspired by ideas I absorb from King Arthur Flour’s “Sift” magazine and/or their website which is chock full of wonderful tips, tricks and ideas.

In addition, I’m learning more about the ways to tweak one’s bread recipe from a straight or direct dough to a pre-ferment approach to build more flavor into the final result. Not only is it fun but appeals to my scientific bent.

In addition to KAF’s website, my go-to resources for bread baking include Rose Levy Beranbaum’s “The Bread Bible”, Peter Reinhart’s “artisan breads every day” and Jeffrey Hamelman’s “Bread”. So much to learn.

For this project I married ideas from a provolone bread recipe from CIA’s “Baking and Pastry” that I’ve been making for some years now with a KAF recipe for a cool looking twisty cheese/sundried tomato/herb number. I wanted to do a poolish this time and found some great tips on the “Weekend Bakery” blog, written by a Dutch couple who bake at their home. Lots of good stuff there too.

I’m not here to slog through the calculations but, in a nutshell, a poolish is equal weights of flour and water taken as a percentage of the whole from the base bread recipe you’re using. Based on my understanding of how one goes about this, I created my poolish with 200 g bread flour, 200 g water and 1/8 + 1/16 teaspoon of instant yeast, looking for a 6 hour room temperature fermentation. NOTE: the amount of yeast you add will vary depending on how long you wish your poolish to ferment.

Here’s my poolish after about 5.5 hours - nice and active and bubbly!

IMG_3210.JPG

To make the final dough I combined the poolish with 510 g bread flour, 7 g instant yeast, 235 ml tepid water/milk mix, 71 g olive oil, 20 g butter and 16 g salt.

IMG_3209.JPG

Using the dough hook I mixed everything for 4 minutes on low speed and then 2 minutes on medium speed. Then a 30 minute bulk fermentation followed by a fold-over then another 30 minutes before dividing.

After the bulk fermentation

After the bulk fermentation

I divided my dough into two 740 g portions with a plan for two different shaping approaches.

IMG_3212.JPG

The first shape involves rolling the dough into a rectangle and sprinkling it with 227g grated cheese (fontinella in my case). Then I took 6-7 cloves of roasted garlic and smooshed and pieced them up, scattering the pieces over the rectangle. A light sprinkle of Penzey’s salt free pizza seasoning mix, then roll up a snug log.

Starting the log roll

Starting the log roll

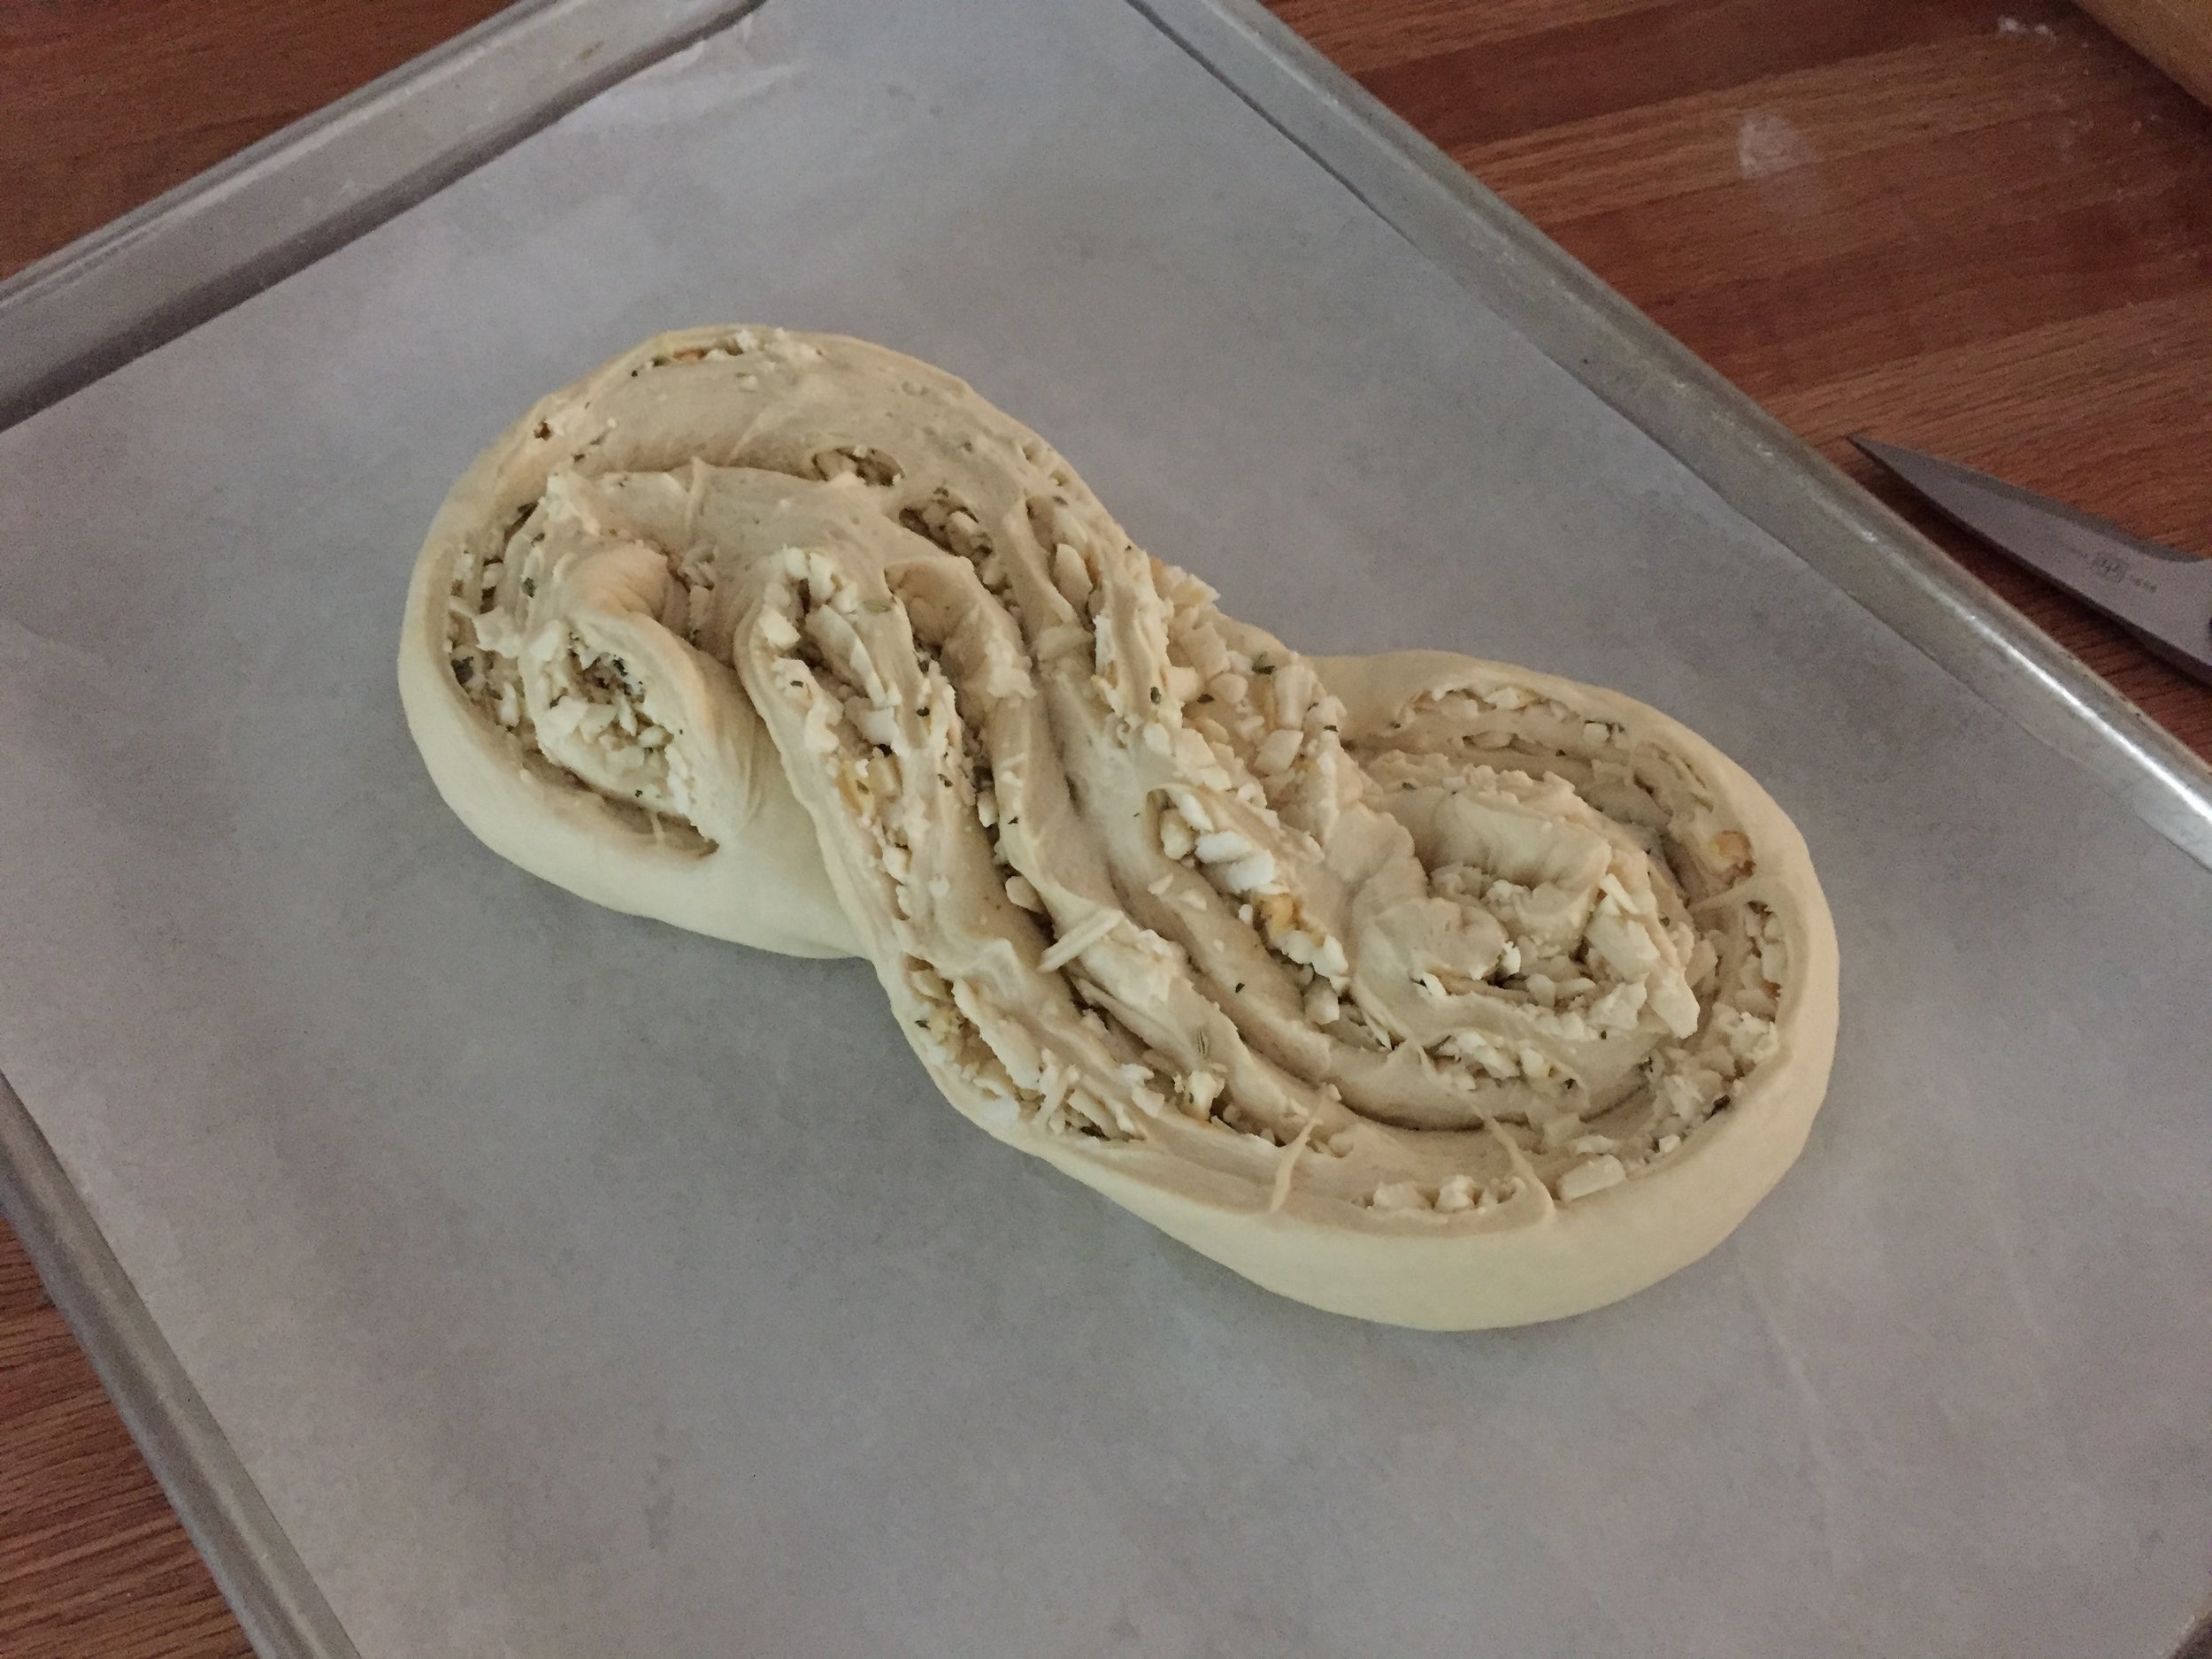
Once the log is complete, pinch the seams, place it seam side down on a parchment lined sheet, slit it down the middle to a depth of about an inch, leaving the ends intact. The log will open up to expose the filling.

IMG_3215.JPG

Then shape it into an “S” and tuck the ends under. Pretty cool.

IMG_3216.JPG

My second shape followed the method used for babka in which you roll up the log as already described, then slit the log entirely down the middle yielding two separate pieces filling side up.

IMG_3218.JPG

Begin at one end and twist the two pieces over and under each other, continuing to keep the filling side up as best you can (I could use some more practice on this one!). In this case I then went for a couronne or crown by forming it into a ring and tucking the ends under.

IMG_3219.JPG

Cover and let rise in a warm place for about 45-60 minutes, heating the oven to 350ºF during the last half of the rise.

Bake for 35-40 minutes until nicely browned.

IMG_3225.JPG
IMG_3226.JPG

The fontinella and roasted garlic went a long way to making this one a truly delectable bread experience.

IMG_3232.JPG
IMG_3231.JPG

For a family supper we sliced it, drizzled some melted butter over it, loosely wrapped it in foil and warmed it for about 10 minutes in a 325ºF oven. Oh my.

Yup. I’d make this again.

Sablé Breton au céréales avec fraises et crème

IMG_2886.JPG

Multigrain Breton shortbread, smooth luscious pastry cream and fresh strawberries. Yup. That's it.

Summer is upon us with a vengeance, with heat and humidity spending time with us for some days to come. Great for those who are spending the July 4th week at the beach or campground, but not ideal for the bakers of the world. There are some mornings when one gets up that simply announce themselves as baking days but, alas, not right now.

The good news is that strawberry season is in full swing here in west Michigan, and in fact is already starting to wane. What a delicious, albeit short, time of year, making it so important to take advantage of it while we can. 

freshstrawb.JPG

I had made some sablé Breton dough the other day, adding a mixture of seeds and grains to it for a change of pace. The base recipe is a favorite of mine, kind of a cross between a tart dough and a buttery dense, yet light and airy cake. Bake it on the thin side and it's a crispy texture, but on the thicker side it's kind of like a soft-ish, chewy cookie. You just have to taste it to know what I mean.

IMG_2871.JPG

It's a straight forward preparation and can be accomplished by hand or with a mixer. First you whisk 3 large egg yolks with 140 g sugar for several minutes to blanch and thicken it. Then blend in 150 g soft, unsalted butter until homogeneous. Sift in 200 g flour (I used half whole wheat pastry flour and half all purpose flour) along with one teaspoon baking powder, add in 1/2 teaspoon fine sea salt and 70 g almond flour and mix it all together. Finally blend in 80 g mixed grains, wrap the dough in plastic wrap and chill one hour. (See my previous post about Breton dough here and the full recipe here).

All mixed up

All mixed up

For the grains I decided on King Arthur Flour's Harvest Grain Blend, a combo of oat groats, wheat flakes, rye flakes, sunflower seeds, sesame seeds, flaxseed, poppy seeds and hulled millet. I've already used this mix in a simple wheat sandwich bread as well as in my favorite buttermilk scone recipe - wonderful toothsome chew and crunch going on. I'm definitely in.

IMG_2885.JPG

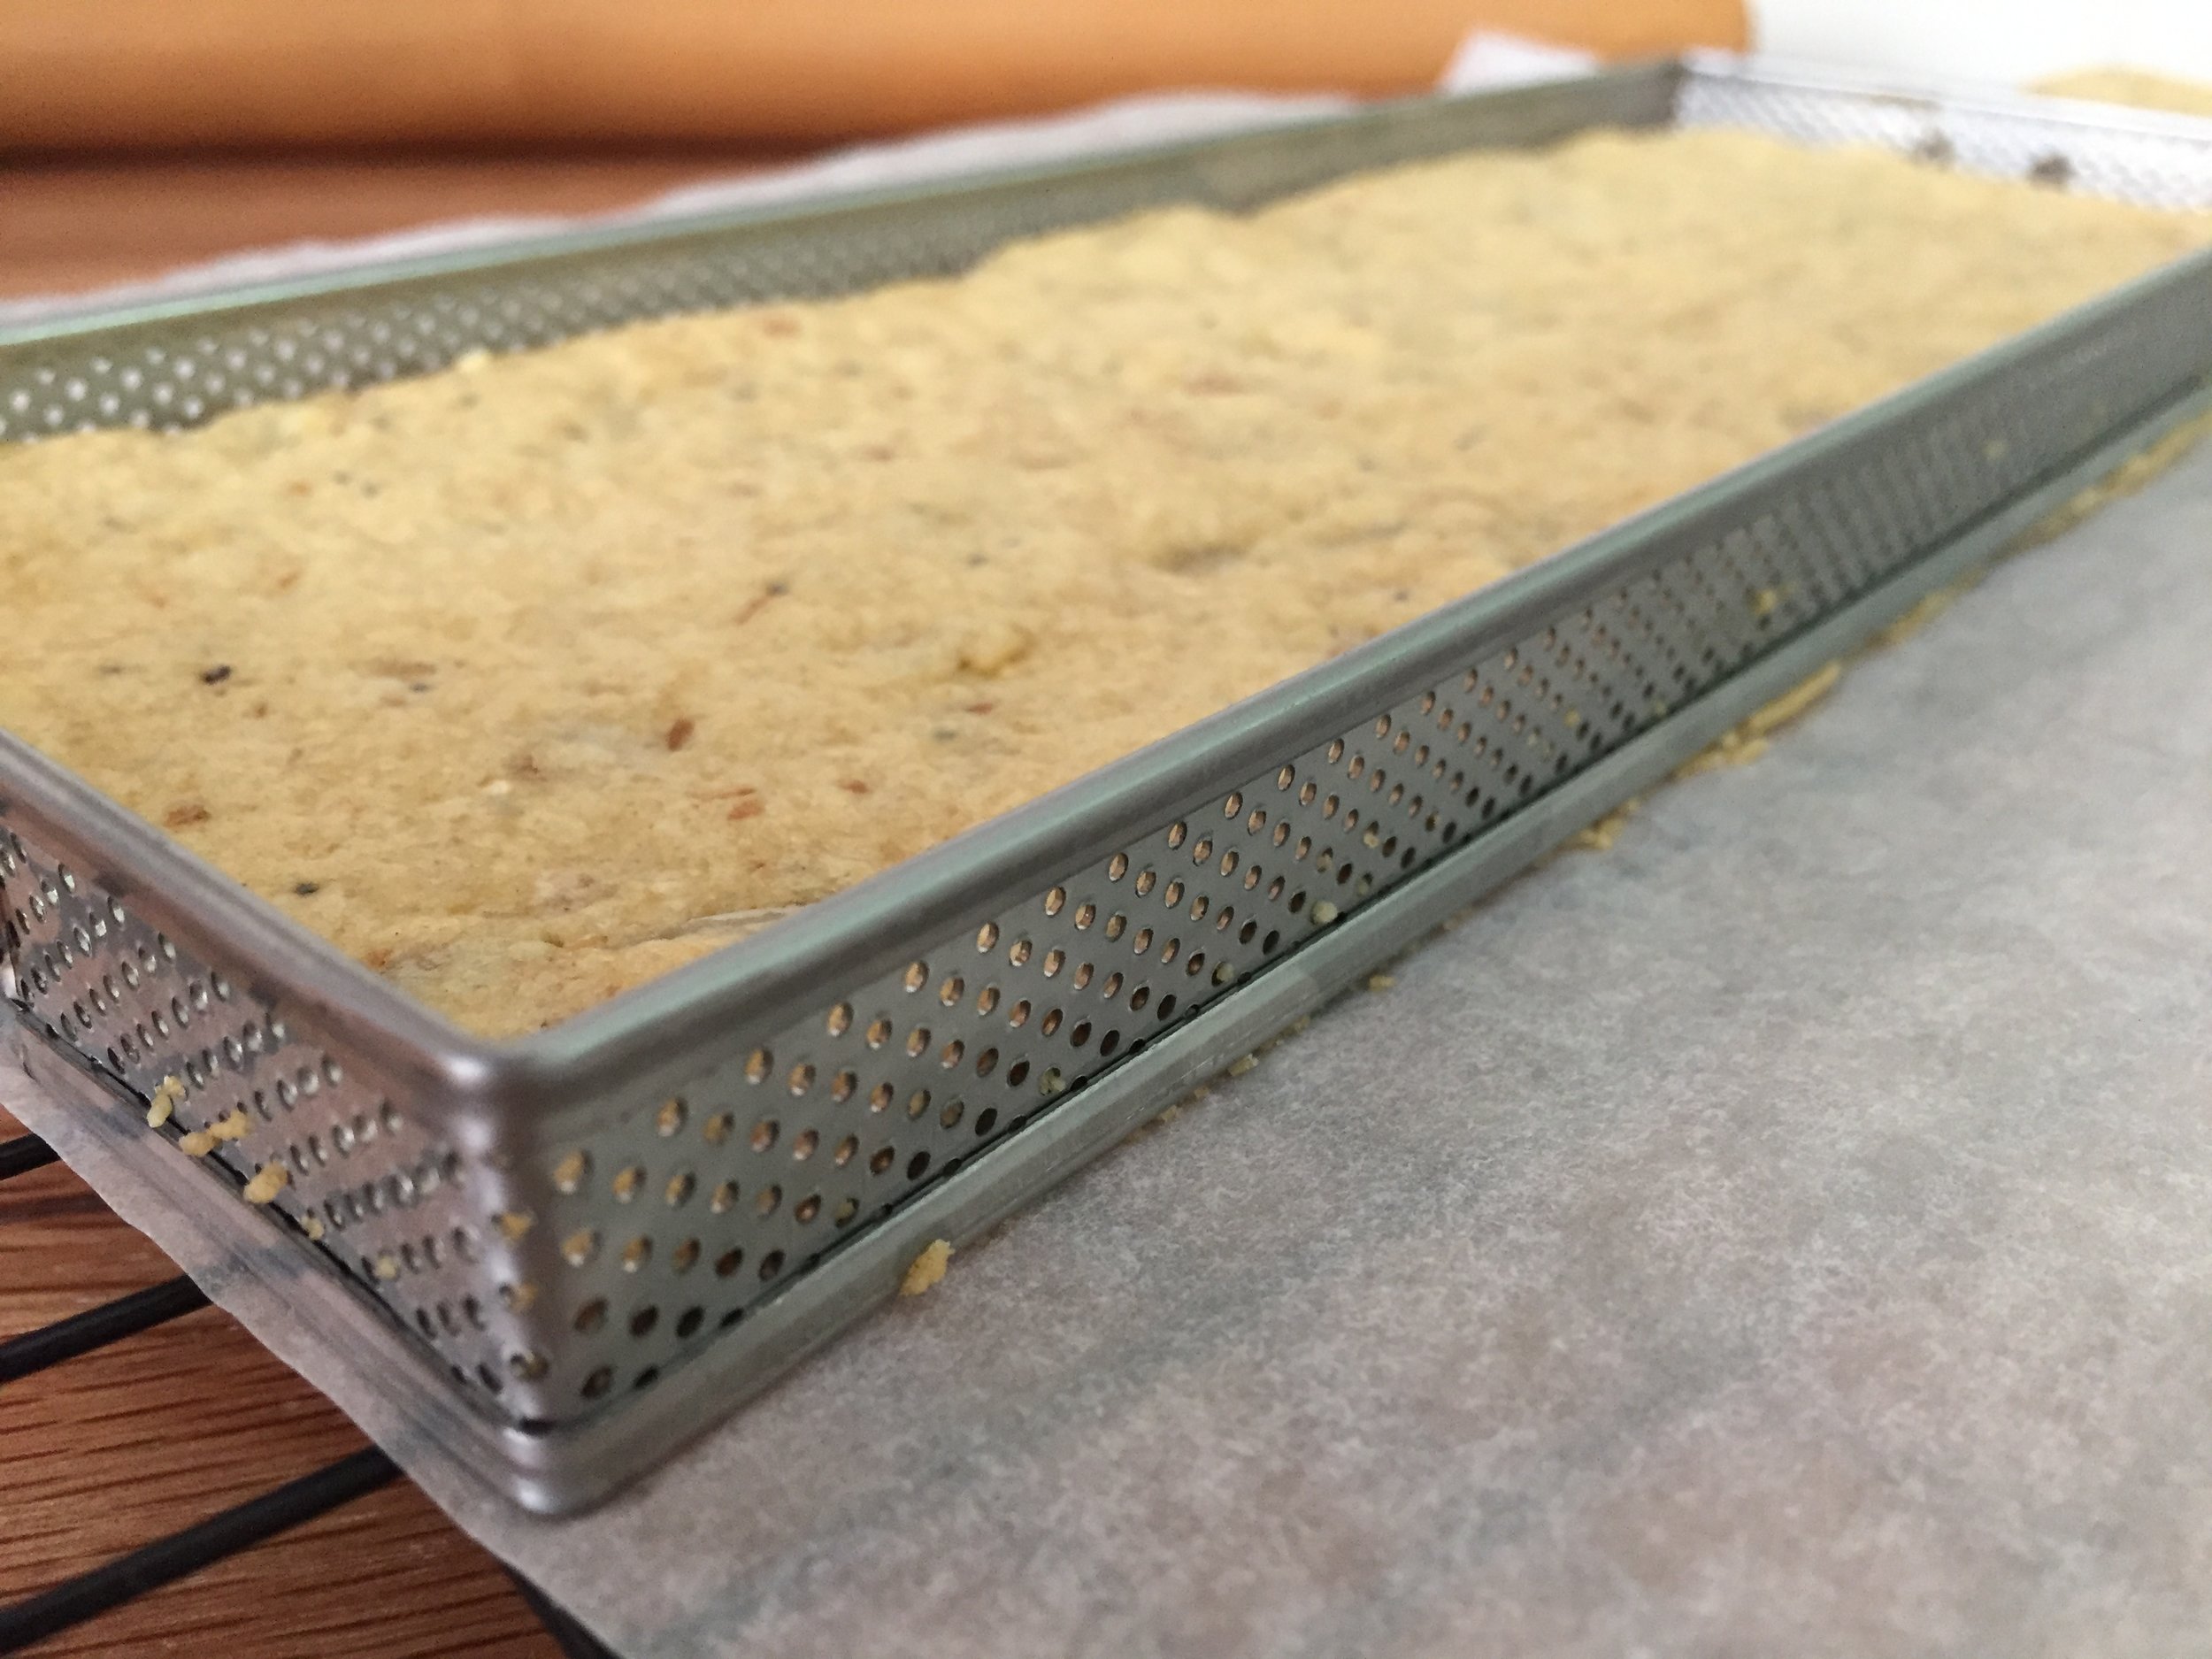
On our recent spring time trip to Paris I visited Mora, that wonderful all-things-pastry shop near the Etienne Marcel line 4 metro stop. There I purchased my first perforated tart form, a relatively new iteration that comes in all shapes and sizes for the avid and/or professional tart maker. The idea is to expose more of the dough to the heat of the oven for even better browning. I like that.

IMG_2879.JPG

For this Breton dough project I wanted a simple flat base, no edges, so I just had to roll and shape a piece of dough about 1/4 inch thick to fit my form. Easy. The quantity of dough needed is up to you, something you have to gauge based on size of the form or pan you are using and thickness desired. Remember - thicker is softer and chewier while thinner is crisper.

In spite of the heat I proceeded to bake the dough during the earlier morning hours while the temps were still on the coolish side. This one baked at 325ºF, convection, for about 20 minutes (look for golden brown and a lovely aroma). 

I had already been imagining the pastry cream/strawberry garnish, so my pastry cream was made and chillin' in the fridge. I just had to gently wash, pat dry, hull and slice my fresh local strawberries from the Fulton Farmer's Market.

IMG_2884.JPG

I sliced my Breton base into strips, piped on simple rounds of crème pâtissiére and topped with the fresh berries. The result was a delightful combo of creamy, fruity and that nutty, seedy chewiness of the Breton dough. Not bad at all. 

I can imagine this multigrain Breton option as a lovely biscuit on a cheese board. Hmmmm. . . . now there's an idea.

IMG_2891.JPG

In the meantime have a wonderful Fourth of July week and stay cool everyone!

Multi-grains and seeds bread

multigrain

It's the new year and wouldn't you know it's time to bake bread again? The wonderful news is that Steve and I just purchased our tickets to Paris for April!! Yippee yo-kiyay my friends. And to top it off I've signed up for a 4 day bread class at Le Cordon Bleu, my alma mater. Yessirree.

This bread is chock full of seeds, grains, cranberries and walnuts and is thanks to a recipe on King Arthur Flour's website. As I continue to focus on adding more whole grains into my baking, I often turn to KAF for suggestions and products. Thus I am now the proud owner of a couple of their different grain blends. 

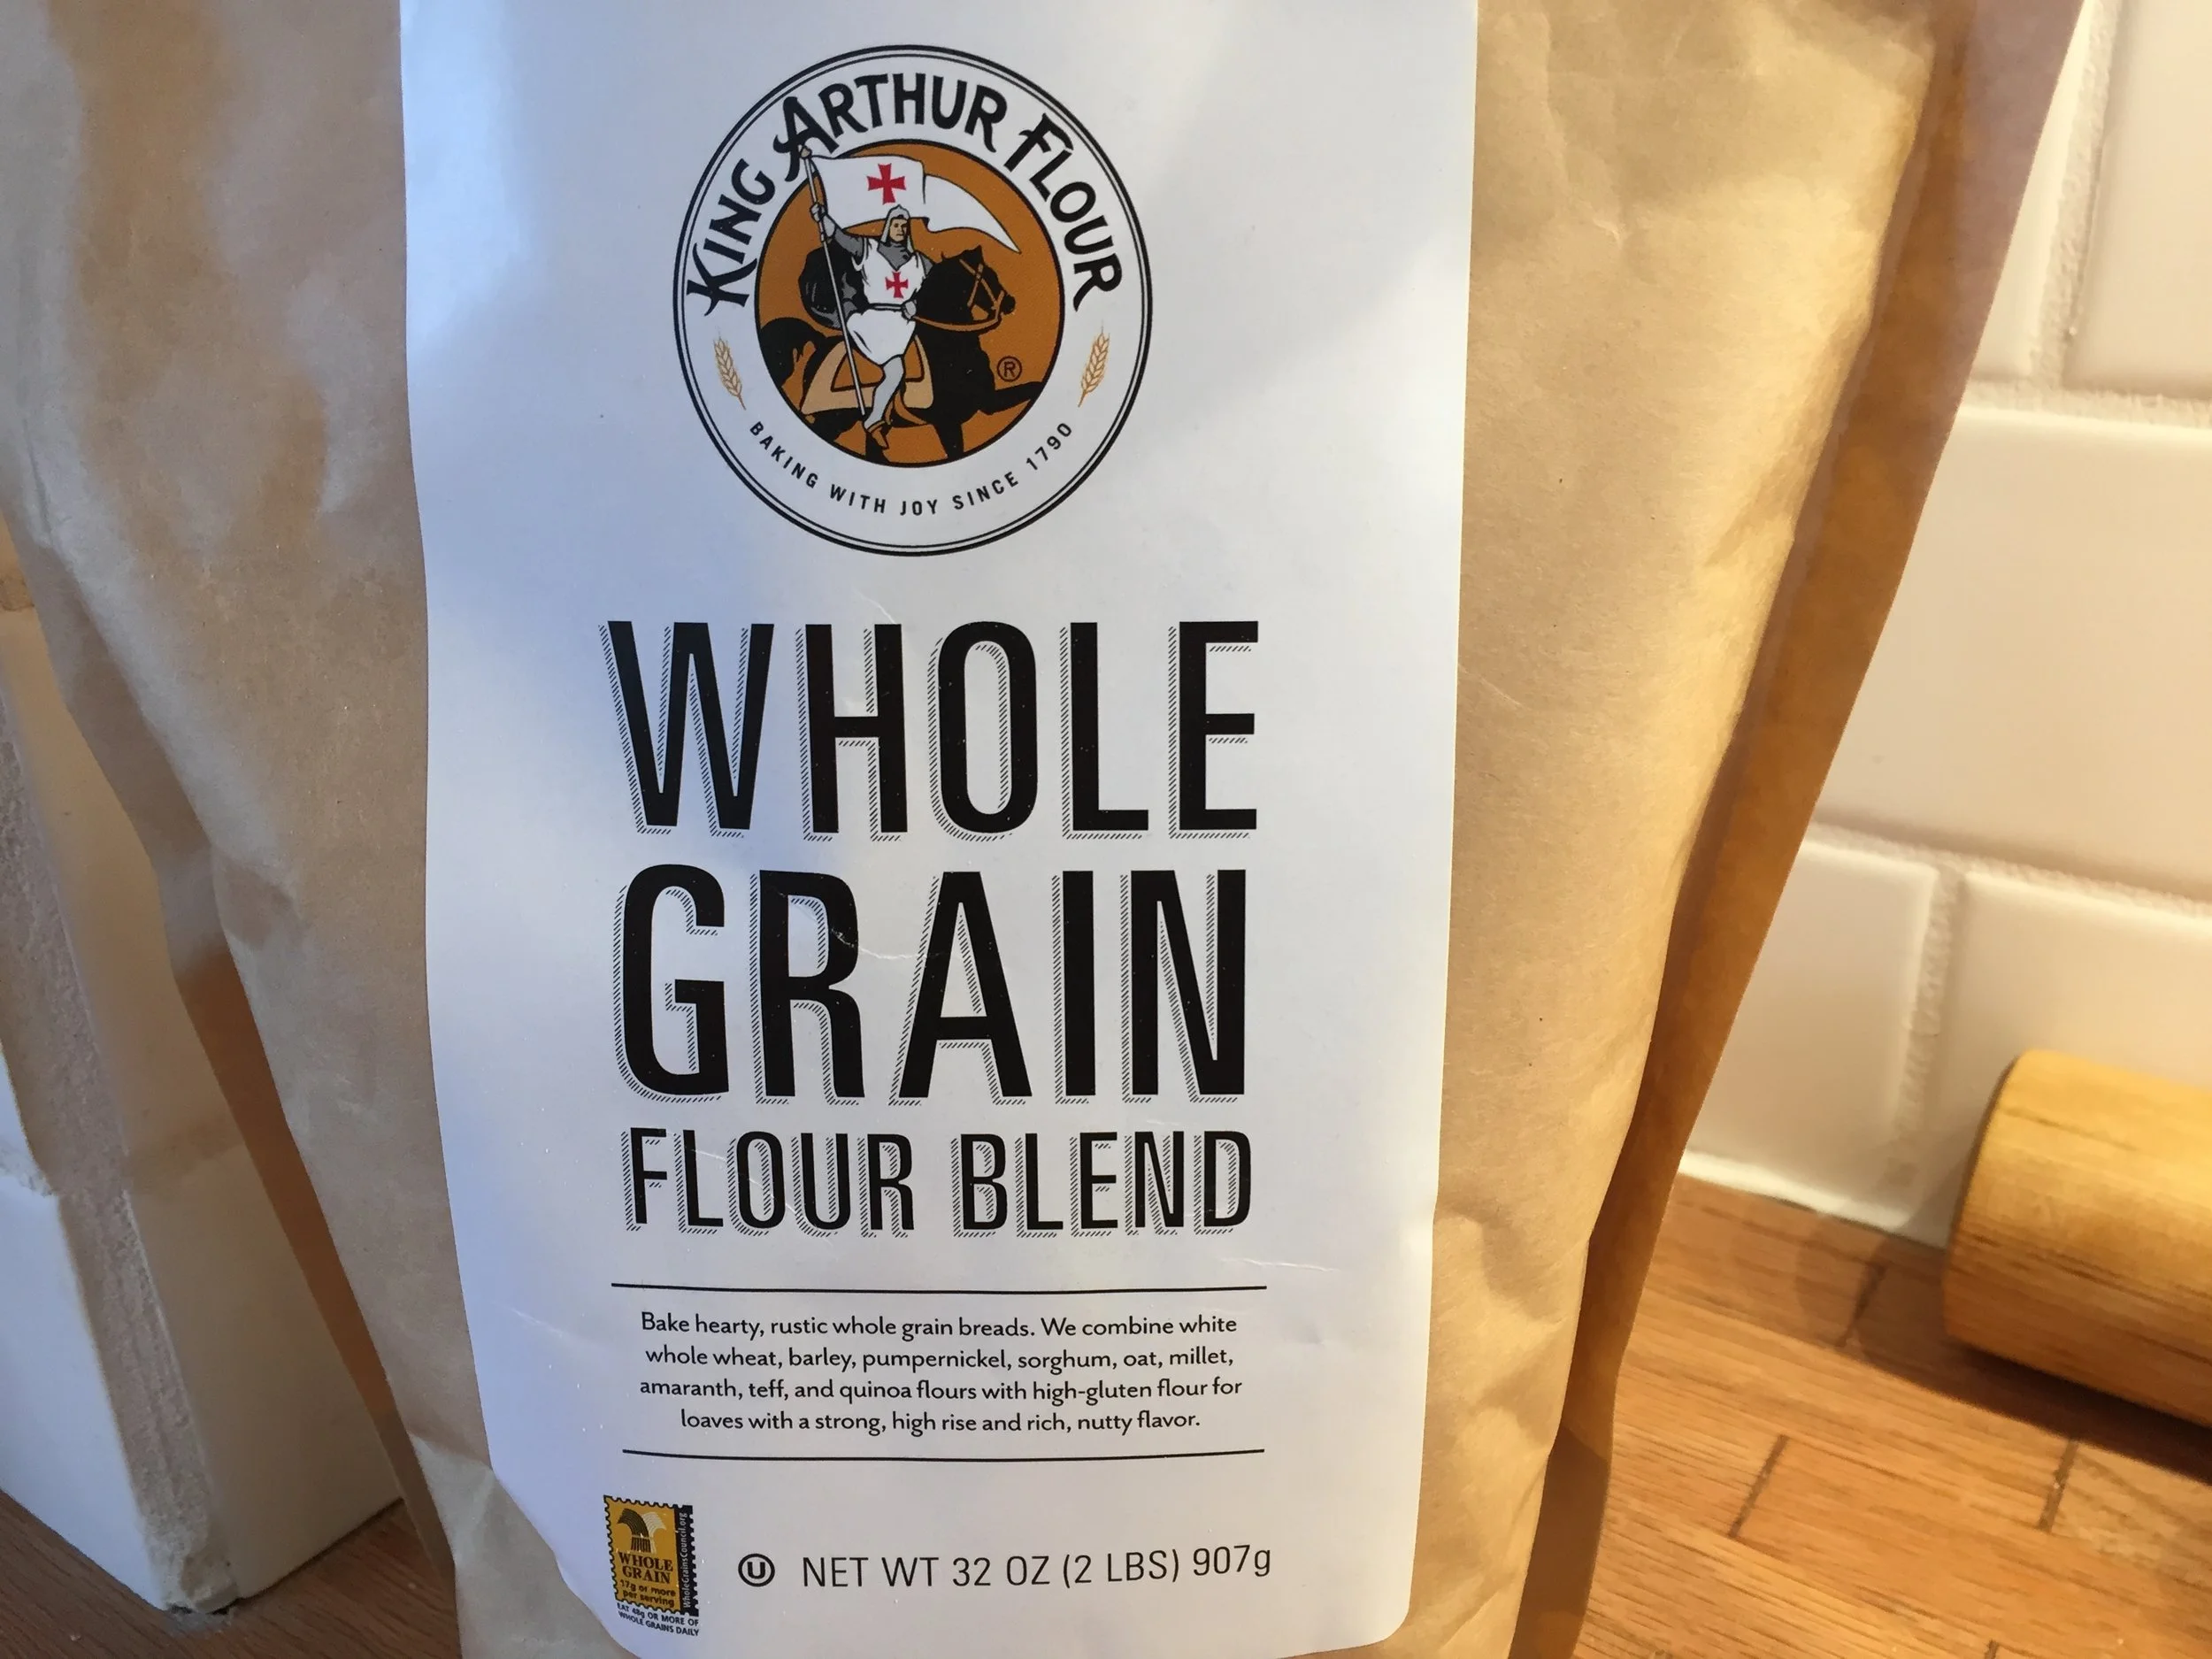
One is a whole grain flour blend containing all sorts of goodies.

wholegrain

Here's a closer look at the ingredients. What's not to like, eh?

flourblend

The other is their Harvest Grain Blend full of good stuff.

harvestgrain
harvestgrain

The recipe makes two typical loaves, baked in standard loaf pans. It has a fair amount of molasses in it, giving it a dark, hearty appearance.

wholegrain

I made some adjustments in the recipe to tailor it to the ingredients I had on hand. It's a straight forward direct dough method of mixing, rising, etc.

Once everything is mixed together, the dough can be kneaded either by hand or in a stand mixer with the dough hook for 7-10 minutes to achieve a springy yet sticky dough. This step is always the most challenging for me - knowing just when a wet/sticky dough is at the right stage. Gotta just keep on doing it over and over and over!

The dough goes into a lightly oiled bowl, covered, and allowed to rise for a couple of hours "until noticeably expanded". Recognizing THAT stage is another step that comes with lots of practice!

Before the first rise

Before the first rise

I hope you can appreciate the expansion of the dough - it may be subtle, but not as much of the bowl is visible now.

After the first rise

After the first rise

Deflate the dough, divide and shape into two logs. Place them in lightly oiled loaf pans.

multigrain

Cover the pans and let rise 1-2 hours until the center of the loaves is about an inch above the rim of the pans. I'd say these babies have poofed up nicely.

multigrain

Toward the end of the second rise, heat your oven to 350ºF. Bake 40-50 minutes, tenting with foil about half way through to prevent over browning (it's that molasses, don't ya know!). The internal temperature should be 200ºF.

Take the loaves out of the oven and turn them out of the pans onto a cooling rack.

multigrain

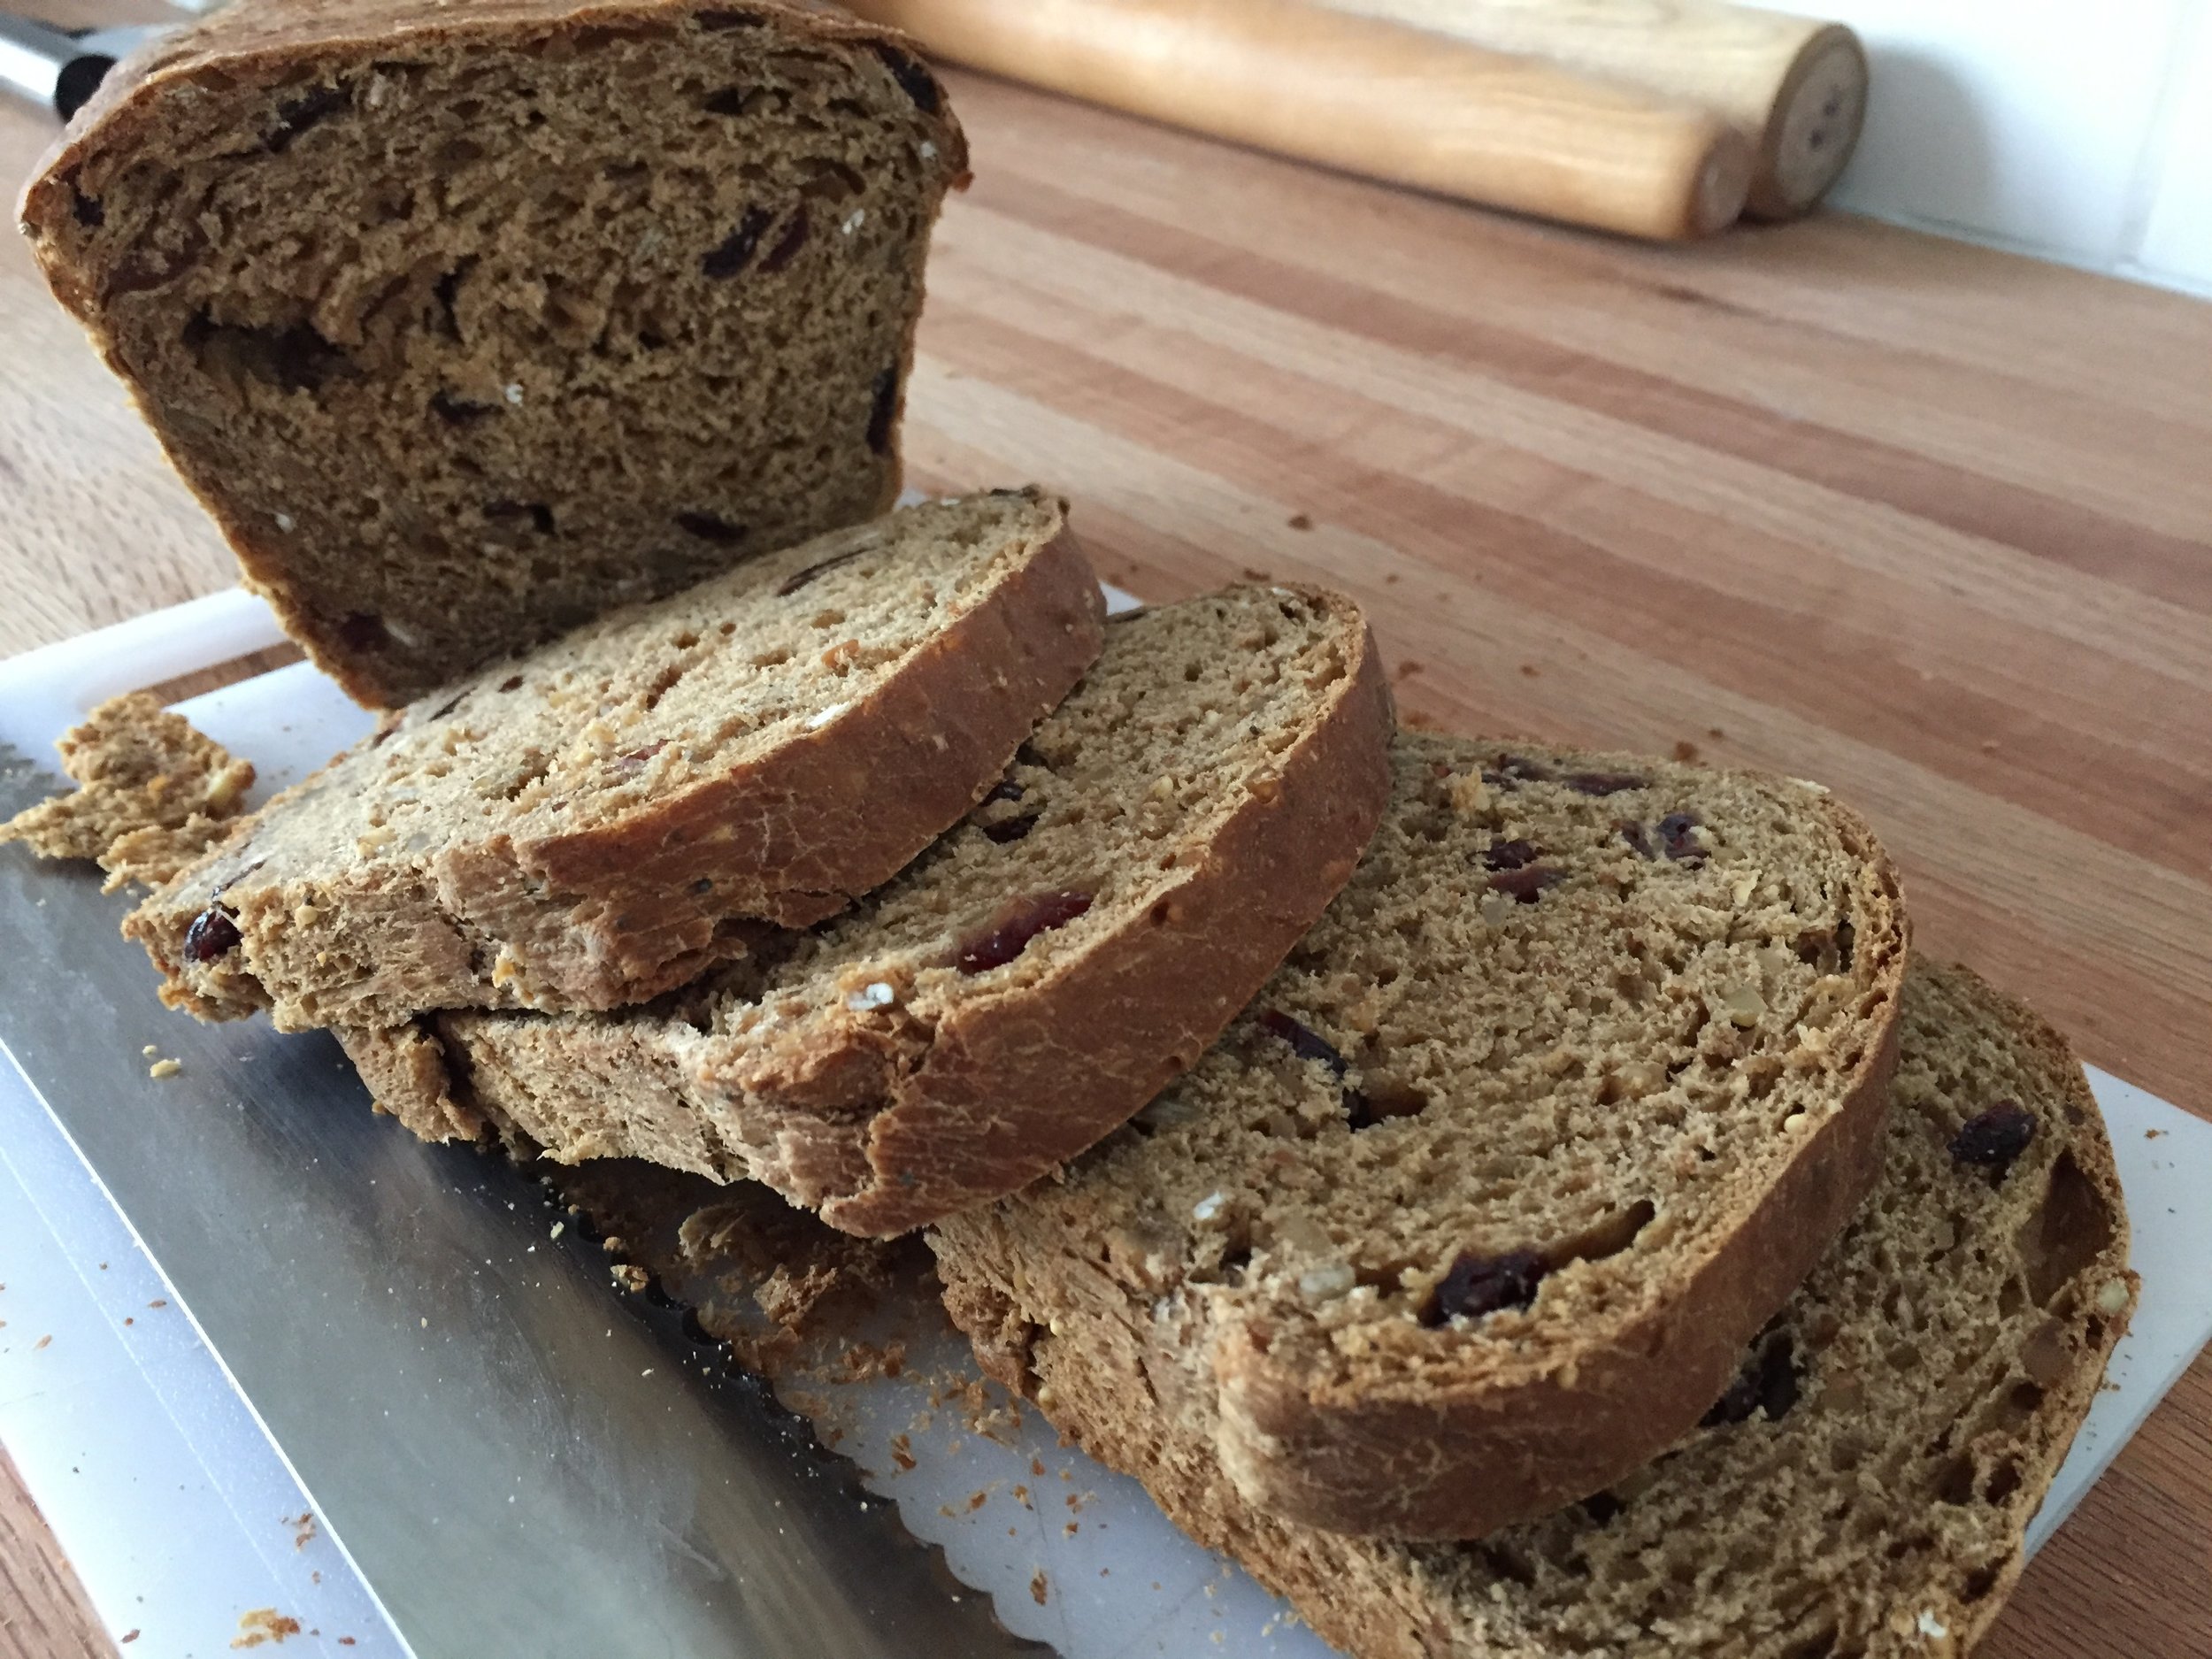
Waiting for freshly baked bread to cool is sooooo hard! But wait I did. I enjoyed my first slice just plain . . . .

multigrain

 but the second received a well deserved thin layer of butter. Yum.

multigrain

And a nice slice of cheddar cheese ain't bad either.

This is definitely worth a repeat. I gave a loaf to friend Margaret for her birthday and we both agreed that the molasses was a bit over the top. Buuuuuttt . . .  otherwise it's a hearty, crunchy, full of goodness loaf. Next time I'll replace a portion of the molasses with honey and see where it takes me. The adventure is always good.

Here's my version of the recipe.

1. Whisk together 454 g tepid water, 1 large egg and 170 g molasses in a large bowl (your stand mixer bowl if kneading that way).
2. Add 16 g Kosher salt, 13 g instant yeast, 113 g softened butter, 142 g Harvest Grains Blend and 340 g Whole Grain Flour Blend. Stir to combine.
3. Stir in 113 g finely chopped walnuts and 128 g dried cranberries. Add 454 g bread flour and mix until it comes together.
4. Knead for 7-10 minutes until springy but still quite sticky.
5. Place dough in a lightly oiled bowl, cover and let rise about 2 hours until noticeably expanded.
6. Deflate the dough, divide in two and shape each half into a log. Place each log in a lightly oiled pan.
7. Cover and let rise 1-2 hours until the center of the dough has risen about 1" above the pan rim.
8. Heat oven to 350ºF. Bake for 40-50 minutes, tenting with foil about half way through. The internal temperature should be 200ºF.
9. Remove the loaves from the oven, turn out of the pans onto a cooling rack.
10. Let cool , slice and enjoy!


Smashed potato rolls


Some weeks back for the Memorial Day gathering at Clear Lake we planned to bring brats and sausages from Kingma's market (good stuff by the way) for the main course. There was also a potato contest in the works to see who might create something that could hold a candle to one of the family favorites, cheesy potatoes.

Steve planned to make his famous potato galette, and I wanted to contribute something potato-y as well. Hey! How about potato rolls to go with those delicious brats? Why not.

Embarking on my potato roll quest, I reviewed a couple of recipes that used roasted potatoes in the dough but ended up with a dinner roll recipe from King Arthur Flour that seemed like just the ticket.

Back during our Vermont days we would often prepare and enjoy food with friends Ross and Candi Walton. Candi always referred to mashed potatoes as "mashies", a term we have used now for many years when referring to that particular dish.

For this roll recipe I boiled up some Yukon Golds and gave them a rough mash - something I like to refer to as "smashed". I think Candi would be on board with that one, don't you?


Let me tell you! This recipe process was molto interessante as the Italians would say. I pretty much followed the KAF recipe (it'll come, don't worry), aside from reducing the egg a bit, but what really tangled me up was the lack of any guidelines for the kneading time of this starchy, enriched dough. Soooooo sticky!

I kneaded it for 8 minutes in my Kitchenaid stand mixer then gave it a 30 minute rest with an every 10 minute stretch and fold over. It was still pretty sticky so I gave it another 6-7 minute mixer knead. Frankly I wasn't quite sure where I was with this dough.

But I plowed ahead, placed it in a lightly greased bowl covered with plastic wrap and let it rise about 90 minutes.


I had intended to make hot-dog style buns, but, when it came to dividing and shaping the dough, I found it simply wasn't behaving the way I had hoped. It remained quite sticky, so I tried both the flouring-the-surface-and-hands method and the oiling-the surface-and-hands method to be able to handle this interesting dough. Both worked - sort of.

First I created 75 g pieces, gave them an initial boule shape, let them rest 5-10 minutes and then attempted to roll them into hot-dog, log-like shapes. Nuh-uh. It was not happening.

So I reverted to the boule roll form and persevered. FYI - I almost gave up on this one.

Once shaped and placed on a parchment lined sheet pan, I gave them a 1.5 hour rise until puffy.

I heated the oven to 350ºF and baked 20-25 minutes until nicely browned.

Hmmmmm. Maybe this will work after all.


They felt REALLY soft once cooled, but, not to be thwarted this far into the process, I decided to let them sit overnight covered with parchment.

Boy howdy! These babies were delicious. A wonderful soft texture, delicate flavor but with enough structure to hold up to a good turkey-lettuce-mayo sandwich. Yum.

Steve declared them unfit for brat use (not the right shape don't ya know), so into the freezer they went and we've been enjoying them since. Burgers, sandwiches. It's all good.

Now for the recipe. Going against my usual grain, I'm providing this in good ole measurements as opposed to metric weights. It just feels right here.

2 large eggs (I backed that off to about 1.5 eggs)
1/3 cup sugar (I made this one a scant 1/3 cup)
2 teaspoons salt
6 tablespoons butter, soft
8 ounces smashed potatoes (unseasoned), at room temperature
2 1/4 teaspoons instant yeast
3/4 cup lukewarm water, preferably water in which the potatoes were boiled. I used half potato water and half milk.
4 1/4 cups unbleached all purpose flour (King Arthur of course - after all, this is I recipe I found on their website!)

1. Mix and knead all the ingredients to make a smooth, soft dough. No time frame is given so I winged it as described above.

2. Place dough into a lightly greased bowl, cover with plastic wrap and let rise about 90 minutes until doubled in bulk.

3. Gently deflate the dough and divide into desired sized pieces. For a good size hamburger bun I used 2 5/8 ounce or 75 grams with a yield of 16 rolls. Round each ball into a smooth roll.

4. Place the rolls on parchment lined pans, cover lightly with greased plastic wrap and let rise 1.5-2 hours until quite puffy. Toward the end of the rise preheat the oven to 350ºF.

5. Bake for 20-25 minutes until golden brown and feel set. Remove from the oven and transfer to wire racks to cool. (Option - brush with melted butter)

6. Serve warm or at room temperature. Store well wrapped in plastic for several days at room temperature or freeze (what I did).


All I can say it there is so much to learn about bread baking. I recently purchased Jeffrey Hamelman's book "Bread" and have just begun delving into it. So much detail, so many variables and so many ways to make delicious bread. 

With this recipe I based my kneading time somewhat on the fact that this is an enriched dough with butter, egg, and sugar, reminiscent of lean brioche. It seemed like a longer kneading time was the thing to do. Was that the right approach? I'm not sure. All I know is they taste good and that's what counts!


Seeded knot rolls


I try to keep homemade bread on hand in our freezer.  There's nothing like it for morning toast, a tasty egg salad sandwich or a nice grilled cheese.

This time I used a basic sandwich bread recipe from the folks at King Arthur Flour and decided to double it - one half for a loaf and one half for some rolls.

The recipe uses a basic straight dough made with all purpose flour, although there's a suggested option for replacing half of that with white whole wheat flour (which is what I did).

Here's the base recipe (remember - you can double it as I did).

390 g/3 cups flour (half all purpose, half white whole wheat for me)
120 ml/1/2 cup milk (any fat content you choose)
120-180 ml/1/2 to 2/3 cup hot water to make a smooth dough
56 g/4 tablespoons melted butter or vegetable oil (I used butter)
45g/3 tablespoons sugar
7g/1.25 teaspoons salt
7g/2 teaspoons instant yeast

Combine all the ingredients in the bowl of a stand mixer fitted with the dough hook.  Mix on low to moisten all the ingredients until the dough starts to pull together.  Then knead on low for about 5-6 minutes to achieve a smooth and supple dough.

Place the dough into a lightly oiled bowl, cover it and let rise for about an hour at room temperature.

Place the dough on a lightly oiled surface.  In my case I divided my double batch of dough in half and shaped one half into an 8 inch log which I then placed in a lightly oiled 8 1/2" x 4 1/2" loaf pan.  Cover with lightly oiled plastic wrap and allow it to rise about 60 minutes (or longer if you're working in a cool kitchen).  The dough should crown about 1 inch above the pan rim.

The second half of dough was destined to become knot rolls.  Oh boy!

Working on a lightly oiled surface, I divided the dough into nine 85 g/3 oz pieces.  I rolled each piece into a snake-like ~12" length and formed each into a knot. Cool! It's all about tucking the ends just so.


I placed the rolls on a parchment paper lined sheet pan, covered them loosely with lightly oiled plastic wrap and gave them a good 1 to 1.5 hour rise.

I heated the oven to 350ºF.

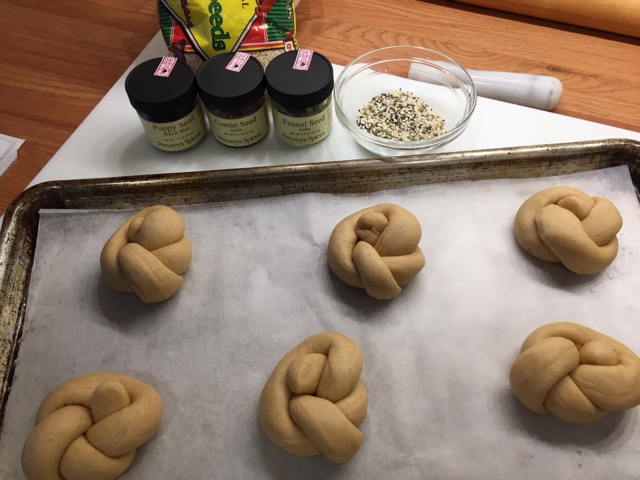
I made a mix of fennel, cumin, sesame and poppy seeds . . . .


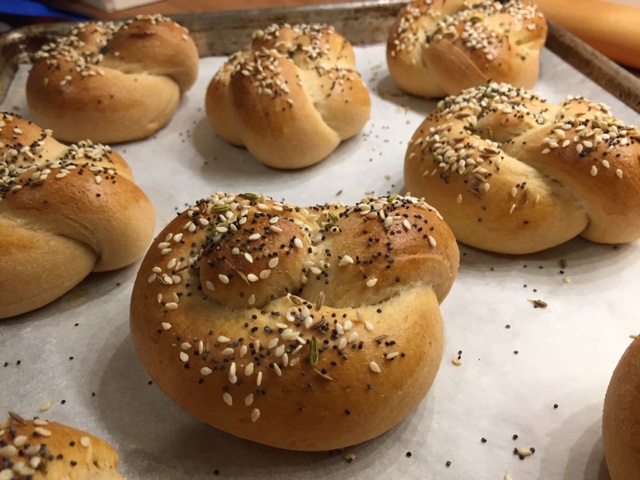
then lightly brushed the knots with egg wash and sprinkled them with the seed mixture.


Into the oven they go!

After about 20 minutes of baking time, they emerged nicely browned and smelling heavenly.


They had a bit of cooling time before we took some over to Mom's for supper.


There's nothing like a freshly baked warm roll with a bit of thinly spread butter.  You can't beat it.

Thanks King Arthur!


My first English muffins!

Not long ago Steve and I had lunch at one of our favorite local haunts (Nick's on Broadway) where Steve ordered a fish sandwich served on the house-made English muffin.  Boy was it good!  Nothing at all like the store-bought varieties - thicker, flavorful and a wonderful vehicle for sandwich fixins.

I decided it was time to try my hand at making some, and what better day than when we were expecting (and ultimately getting) a blizzard here in Providence.


only the beginning

lots more comin'

Whenever I'm making something new, I enjoy reading and reviewing a number of recipes for whatever that something new might be.  I checked out Rose Levy Beranbaum, Bouchon Bakery, Peter Reinhardt and King Arthur Flour and settled on Peter Reinhardt's recipe as my initiation into English muffin making.


Little did I know that English muffins are "baked" on the stove top - I had no idea!  Plus I find it so intriguing to compare techniques and processes - Rose's uses a poolish (dough starter), Bouchon bakery uses a liquid levain (another version of a starter), whereas the one I chose to follow is a straight forward direct dough that is as easy as pie to put together and can sit in the fridge for up to four days!  I like that.  Thanks Peter!

On to the recipe.

ingredients

Whisk 14 gm (2 teaspoons) honey and 14 gm (1 tablespoon) olive oil into 1.5 cups (340 gm) of lukewarm milk.  In a separate bowl whisk together 340 gm (2 2/3 cups) unbleached flour, 1 1/4 teaspoons kosher salt and 6 gm (2 teaspoons) instant yeast.

the dry and the wet

Now blend the wet into the dry, mixing for a minute or so to moisten all the flour.  Scrape down the bowl and mix the batter for a few more seconds.


ready to cover and refrigerate

Cover tightly with plastic wrap and refrigerate overnight or up to 4 days.

On the day you plan to bake the muffins remove the dough from the fridge a good 2 hours ahead of time.  I chose to bake the following day, so my dough had an overnight rest in the fridge.


just out of the fridge after an overnight rest

After a couple of hours you should see that the dough has bubbled a bit.  It's subtle, but it's there.


can you see the difference?

Now it's time to dissolve 1/4 teaspoon of baking soda in 3 tablespoons of warm water and fold that gently into the dough.


Let the dough rest for 5-10 minutes.  In the meantime prepare your English muffin rings (in my case I used my 7/8" high, 80 mm tart rings) by oiling them and coating the insides with corn meal (I used semolina).


Heat a flat griddle or cast iron skillet over medium heat and place the prepared rings on the cooking surface.  I'm using a non-stick flat griddle, but if you're using a classic cast iron "stick" pan or griddle, mist or coat it with oil first.


Sprinkle cornmeal in the rings . . . .


Lightly oil a 1/3 measuring cup and use it to scoop the dough into the prepared rings.


The dough is a bit sticky but just go for it - scoop away!  Sprinkle a little more cornmeal on top . . .


and cook the muffins for about 12 minutes over low-medium heat - the dough will start to rise and fill the rings.


away we go!

Then it's time to flip them over, rings and all . . . .


all flipped

You want them to be golden on the bottom before the flip, and then you cook them for another 12 minutes or so to achieve the same golden-ness on the flip side.  You can peek underneath to check for the degree of browning, and they should also feel springy to the touch.

At that point remove them from the pan, let them cool a couple of minutes and then remove the rings.

Based on some of the techniques I gleaned from reading different recipes, I decided to pop them into a 325 oven for 5-10 minutes to finish them off.  Since I haven't made these before, I wasn't sure how they should feel when they're done, and there's nothing worse than an under baked end result.  Think of it as "baking insurance"!


the finished goods


After a good 30 minute cool down Steve and I simply had to do a taste test.  I performed a "fork-split" and found the interior to have that quintessential "nooks and crannies" appearance that one hopes for in an English muffin . . . .


First we toasted one and topped it with a little butter . . .


and then a second one with butter and cherry jam . . . .


yup - that's good!

So the English muffin test was a success.  Crispy outside yet tender with an almost custard like interior, a medium-coarse crumb and a just right taste.

Yes, I would make these again!

Artisan bread class at King Arthur Flour, Day 4

On to the finale of the 4 day artisan bread class at King Arthur Flour!
We began the morning by mixing our semolina dough which we had planned the day before as a straight dough, no pre-ferment required.

The dough came to together very nicely and felt great!  A good sign.

After folding and a rest - ready to shape:

We shaped a basic batard . . .

and, after a rise, scored it before baking:

And now I must insert a Charley Brown "RATS", for I fear I do not have a photo of the baked semolina!!  How sad.

We had some lecture time today as well, specifically focusing on rye and its variables. The approach changes depending on the percentage of rye flour (vs all purpose or whole wheat e.g.) in the dough or whether you use medium or whole rye. Factors such as hydration as well as the proteins, sugars and enzymes in rye play major roles in how the dough is mixed and proofed.

I won't go into all the technical jargon, but suffice it to say, there's a lot to learn about rye! Hey, here's an idea! Take a class at King Arthur!  

Taking our rye starters that had been sitting overnight at room temperature . . . .

we mixed the deli rye dough, the lighter rye of the two . . . .

and the volkornbrot, a classic German whole rye dough:

Above: all the mixin's for volkornbrot

For the volkornbrot, once all of us had weighed the ingredients into our mixing bowls, our KitchenAids were started in sync so the slow speed, 8-10 minute mixing time would be the same for all.  We stopped the mixers a couple of times to scrape down the bowl, then shaped a rectangular loaf, scored it and placed it in a standard loaf pan for baking.

The finished product:

We had the option of shaping loaves or rolls with the deli rye dough.  A number of us opted for loaves, and the majority of these were scored with traditional crosswise slashes.  We could try other patterns if we wished.

The finished loaves had a lovely browned exterior and a wonderful rye aroma.  Notice the scissors snipped pattern on one of my loaves.

Some of the sourdough bread and bagels that had been refrigerated overnight were also baked today, so there were loaves galore sitting around the kitchen.

And then it was time for a tasting!

The semolina is along the left side of the table above. It had a lovely crumb and very nice flavor - a keeper for sure! We were proud of this bread we had created, although many of us felt a bit of sweetening with honey or maple syrup would add just the right balance to this loaf.

Wanda voted for adding cranberries, and Jeff suggested a nice schmear of orange marmalade to garnish a slice.

To top off our terrific 4 day experience we ended with a low-key graduation ceremony. We all received a certificate of completion and a "lovely parting gift" of a bakers couche.  Hip hip hooray for bread baking!!

Above: instructors Sharon and Jessica doing the honors

We gathered for a final group shot . . . .

then packed up our goods and said au revoir.

Perfect.

Artisan bread class at King Arthur Flour, Day 3

Here we go again!  It's time to mix our sourdoughs, the primary focus of day 3 of artisan bread class at King Arthur Flour. Our liquid levain and stiff starter had rested at room temperature over night and were looking nicely bubbly and poofy as we then proceeded with the final dough.  We mixed both of these by hand, followed by the "slap-pull" kneading technique that we had practiced on day 2.

Notice the difference in appearance:  the "L" (liquid) version on the right appears more tan, while the "S" (stiff) version is bordering on white.

After a rest:

"L" version

"S" version

We then folded them into "dumpling" shapes with seam side up.

Above: awaiting final shaping

Jessica demonstrated how to shape the final boules (which we accomplished pretty handily) before placing them into brotforms. Part of the experiment was to place our boules in both the floured bare form (as we did for the roasted potato fendu) for baking today and the same form lined with cloth (seen below) for overnight refrigeration and baking tomorrow.

Above: an "L" loaf waiting to go into the fridge

The dough in the floured forms was given a good rise, after which we turned them out onto peels and scored them with whatever pattern we wished.

I chose a standard approach with this one . . .

and into the oven they go!

Out of the oven, looking good!

Day 3 also involved sourdough bagel making.  This was the one dough during the entire 4 day class that we did not make ourselves. Since Jessica was mixing a huge batch, and it required the commercial spiral mixer (a VERY cool piece of equipment by the way) for kneading, she took over the helm to accomplish that very thing.

Whoa baby!

My apologies for not having a pictorial history of the process, but, suffice it to say, we all had a chance to shape, boil and garnish the bagels. Half of them were baked today and the rest would be refrigerated and baked tomorrow.

The results:

Upon tasting, the chewiness and texture were OK, but I couldn't help but think back to those med school days while living in Detroit.  My roommate Jane and I purchased the best bagels at the Detroit Bagel Company perhaps?  I'm no longer sure of the name, but they were oh so good - still warm from the oven and the perfect road food as we drove to our familial homes on our weekend breaks!

Now, on a completely different note, I don't want to forget the more scientific side of this whole process, and I'll try not to bore you with the details.

Yesterday Jessica talked about determining the proper water temperature for dough, starting with a desired dough temperature (DDT) and also taking into consideration other factors such as flour and air temps and the temperature that friction adds in the mixing (i.e. by hand or in a mixer). Pretty fascinating for the science-geeky types.

We also received information about bakers percentages based on the amount of flour one is using, from figuring out how much hydration you might need in a particular dough, as well as the common percentages for salt and yeast.

Today she regaled us with all things sourdough - starters, feedings, room temp or refrigerator, expanding for baking - you name it, it was there! Up until now this topic has held a good deal of mystery for me, but, at least after this class, I've gained a novice's understanding of the process. Will I pursue the sourdough track? Now that's an entirely different matter.

As the day was coming to a close we accomplished one of the coolest projects of this 4 day class - as a group, we created our own bread recipe! Using what we had learned about bakers percentages and working with a list of ingredient options, we developed a semolina-olive oil-sunflower seed bread recipe. And we'll make it tomorrow!

As if we hadn't already accomplished enough, we quickly put together our 2 rye starters for day 4 using rye cultures that had been fed each day by our instructors.

More coming - stay tuned for day 4!

Artisan bread class at King Arthur Flour, Day 2

On the second day of class we dove right in, working with the preferments from the day before - all bubbly and ready to go!

The potato bread dough was made using the pâte fermentée and contains chunks of roasted Yukon Golds and russets which had been prepared on Day 1.  This dough was mixed in the KitchenAid . . . .

and subsequently kneaded by hand with what I refer to as the "slap and pull" method of kneading. You have to see it and feel it to really know what it's all about:  the dough is lifted with two hands, given a quarter turn then slapped down on the table, pulled and folded on itself. The process is continued until the dough starts to firm up and hold its shape.  I find the transformation from a sticky, messy blob to a tighter, smoother ball so amazing.

We made a fendu (from the verb fendre, to crack) loaf in which a rolling pin is pushed firmly down across the center of the dough ball, then the ball is turned over into a floured brotform.

After rising, the dough is turned out of the form onto a peel and slid into the hot deck oven. 

Et voila! Ready to slide into the oven.

Out of the oven - oh so brown and lovely!

The ciabatta (made with biga) and baguette (made with poolish) doughs were mixed by hand and subsequently kneaded with the same "slap and pull" technique.  Once again, an amazing transformation occurred!

The ciabatta was rather gently formed into very rough roundish rectangle (or what-have-you) sort of shapes and placed on well floured boards for proofing.

After rising, they're transferred onto the peel, flipping them over so the flour side is up.

In the oven:

And out:

Baguette time! Once the baguette dough was mixed, slapped-pulled and rested, Jessica demonstrated the shaping technique.  We lined up our baguettes on linen couches which allows them to proof without touching and sticking together.

Once risen, the loaves were transferred onto a peel (or in Jessica's case onto the back of a sheet pan)  and scored before baking.

Not bad for a novice!

We aren't finished yet - whew, what a day!! We also shaped the brioche dough we had prepared on day one, creating the classic Nanterre (which, as some of you may recall, I mentioned in my brioche mousseline post).  Here individual boules are lined up in a buttered loaf pan, allowed to rise, egg washed and then baked to golden brown perfection.  We even had enough dough to shape a few burger buns.

Above: before the rise . . . . and below, after.

Brioche is great for savory canapes, french toast, bread pudding or bostock, that delightful imbibed, almond-cream-covered, twice-baked treat (just to name a few).

We're getting there - hang on!

Before we mixed our final baguette dough in the morning, Jessica had divided us up into three groups.  One used all purpose flour, one French flour, and one European flour.  What you see in the picture below are the a-p flour version in the foreground, followed by French then European. You can see that the a-p version achieved the most browning. 

My memory is fuzzy, but I think most of us preferred the flavor and texture of the French flour version. However, there was a lot going on, so I could be strolling down the wrong memory lane.

Jessica sliced into everything so we could appreciate the different textures. We have ciabatta . . . .

then baguette . . . .

then brioche . . . . .

and lastly roasted potato fendu

The differences in crumb and texture are easy to appreciate. We sampled and remarked favorably on all of the tasty options before us - what a treat!

Before we packed it up for the day, we quickly mixed our sourdough starters for the morrow - one liquid levain and one stiff starter - with which we would be creating two different sourdough breads. 

So as we finished up a jam-packed day of bread making and baking, we realized we still had TWO days to go!!  Stay tuned for Day 3.

Artisan bread class at King Arthur Flour, Day 1

On Sunday, October 26, 2014 I wended my way north from Providence amidst beautiful autumn colors, arriving at the Hampton Inn in White River Junction, VT several hours later. My purpose - to attend a 4 day artisan bread class at King Arthur Flour in Norwich, VT, just a few miles north of my lodgings.

When Steve and I lived in Vermont some years ago, I visited the King Arthur baking store on a few occasions, but little did I know what awaited me this time around. The new Baking Center is a stunning piece of VT architecture, right down to its quintessential metal roof.

Inside one finds a cozy café, the bakers retail store and a couple of large production kitchens where you can watch what's going on - so cool!  I especially got a kick out of seeing the large blocks of butter being formed for croissants and danish, followed by the butter being enveloped in the dough in preparation for sheeting - bordering on massive compared to my small, hands-on batches of croissants!

Then there is the baking center where many have honed their skills and enhanced their knowledge as they pursue their passion for baking.

I and 10 fellow students were warmly greeted by Robyn, our instructor for the first day. Free coffee cards were handed out as we each settled in at what would be our "bench" spot for the remainder of the class.

The teaching kitchen is open, airy, extremely well equipped with impressive tiered deck ovens, proofing cabinets, roll in refrigerators, cheery red KitchenAid stand mixers and more. What a great place to learn!

The plan for the week:

We began with a couple of "straight" doughs (also known as direct doughs) which are made and baked the same day. We made pissaladiere (a classic southern French pizza-like dish typically topped with caramelized onion, olives and anchovies) and grissini (bread sticks).

Both of these doughs were very user-friendly, came together smoothly with a silky feel.  Then after kneading, some resting/rising time and shaping, they were baked in the hot deck ovens. Since I'm not an olive lover, I chose to top my pissaladiere with only the caramelized onions (seasoned with herbes de provence and pepper), although my classmates all happily embraced the olive-onion combo.

The grissini were a bit chubby, some twisty and crooked since everyone put their own spin on the shaping process:

We had the option of keeping our results or leaving them on the wire racks to be donated to a local food cause. Since there wasn't any chance I would (or could) eat all of these, I chose the second option, both for the pissaladiere and the grissini.

Day 1 also included making brioche dough which would be refrigerated overnight for use on Day 2. I found the recipe and process less time consuming than the recipe I normally use (from my stage days at Pâtisserie Pascal Pinaud), and the end result was as silky and smooth as could be.  I'll show you what we did with this dough in Day 2's post.

We then focused on the group of doughs called "pre-ferments". These are portions of dough that are typically made a day ahead and then incorporated into the final dough the following day. They are important for flavor, structure and extended shelf life, and many feel that doughs made in this manner are superior to "straight" doughs for those very reasons.

There are many types of "pre-ferments" and many more references available to explain the difference and variables among these, including King Arthur's web site. Or you could sign up for a class yourself!!

The three we made today were pâte fermentée (for roasted potato bread), biga (for ciabatta) and poolish (for baguette). 

They mix together in the nick of time, are covered, held overnight at room temperature, and then incorporated into the final dough the following day. You can see below that they have different structure and moisture content, the poolish being the wettest.

We were off to a great start! Next up - Day 2!