Roasted garlic cheese bread

IMG_3223.JPG

Ooooh I loved this baking adventure! Not only did I use Fontinella, a delicious bread-worthy cheese from The Cheese Lady, but added in some roasted garlic that the Steve-man has recently been providing in spades.

IMG_3208.JPG


I’ve been wanting to experiment more with different ways of filling and shaping bread dough and am often inspired by ideas I absorb from King Arthur Flour’s “Sift” magazine and/or their website which is chock full of wonderful tips, tricks and ideas.

In addition, I’m learning more about the ways to tweak one’s bread recipe from a straight or direct dough to a pre-ferment approach to build more flavor into the final result. Not only is it fun but appeals to my scientific bent.

In addition to KAF’s website, my go-to resources for bread baking include Rose Levy Beranbaum’s “The Bread Bible”, Peter Reinhart’s “artisan breads every day” and Jeffrey Hamelman’s “Bread”. So much to learn.

For this project I married ideas from a provolone bread recipe from CIA’s “Baking and Pastry” that I’ve been making for some years now with a KAF recipe for a cool looking twisty cheese/sundried tomato/herb number. I wanted to do a poolish this time and found some great tips on the “Weekend Bakery” blog, written by a Dutch couple who bake at their home. Lots of good stuff there too.

I’m not here to slog through the calculations but, in a nutshell, a poolish is equal weights of flour and water taken as a percentage of the whole from the base bread recipe you’re using. Based on my understanding of how one goes about this, I created my poolish with 200 g bread flour, 200 g water and 1/8 + 1/16 teaspoon of instant yeast, looking for a 6 hour room temperature fermentation. NOTE: the amount of yeast you add will vary depending on how long you wish your poolish to ferment.

Here’s my poolish after about 5.5 hours - nice and active and bubbly!

IMG_3210.JPG

To make the final dough I combined the poolish with 510 g bread flour, 7 g instant yeast, 235 ml tepid water/milk mix, 71 g olive oil, 20 g butter and 16 g salt.

IMG_3209.JPG

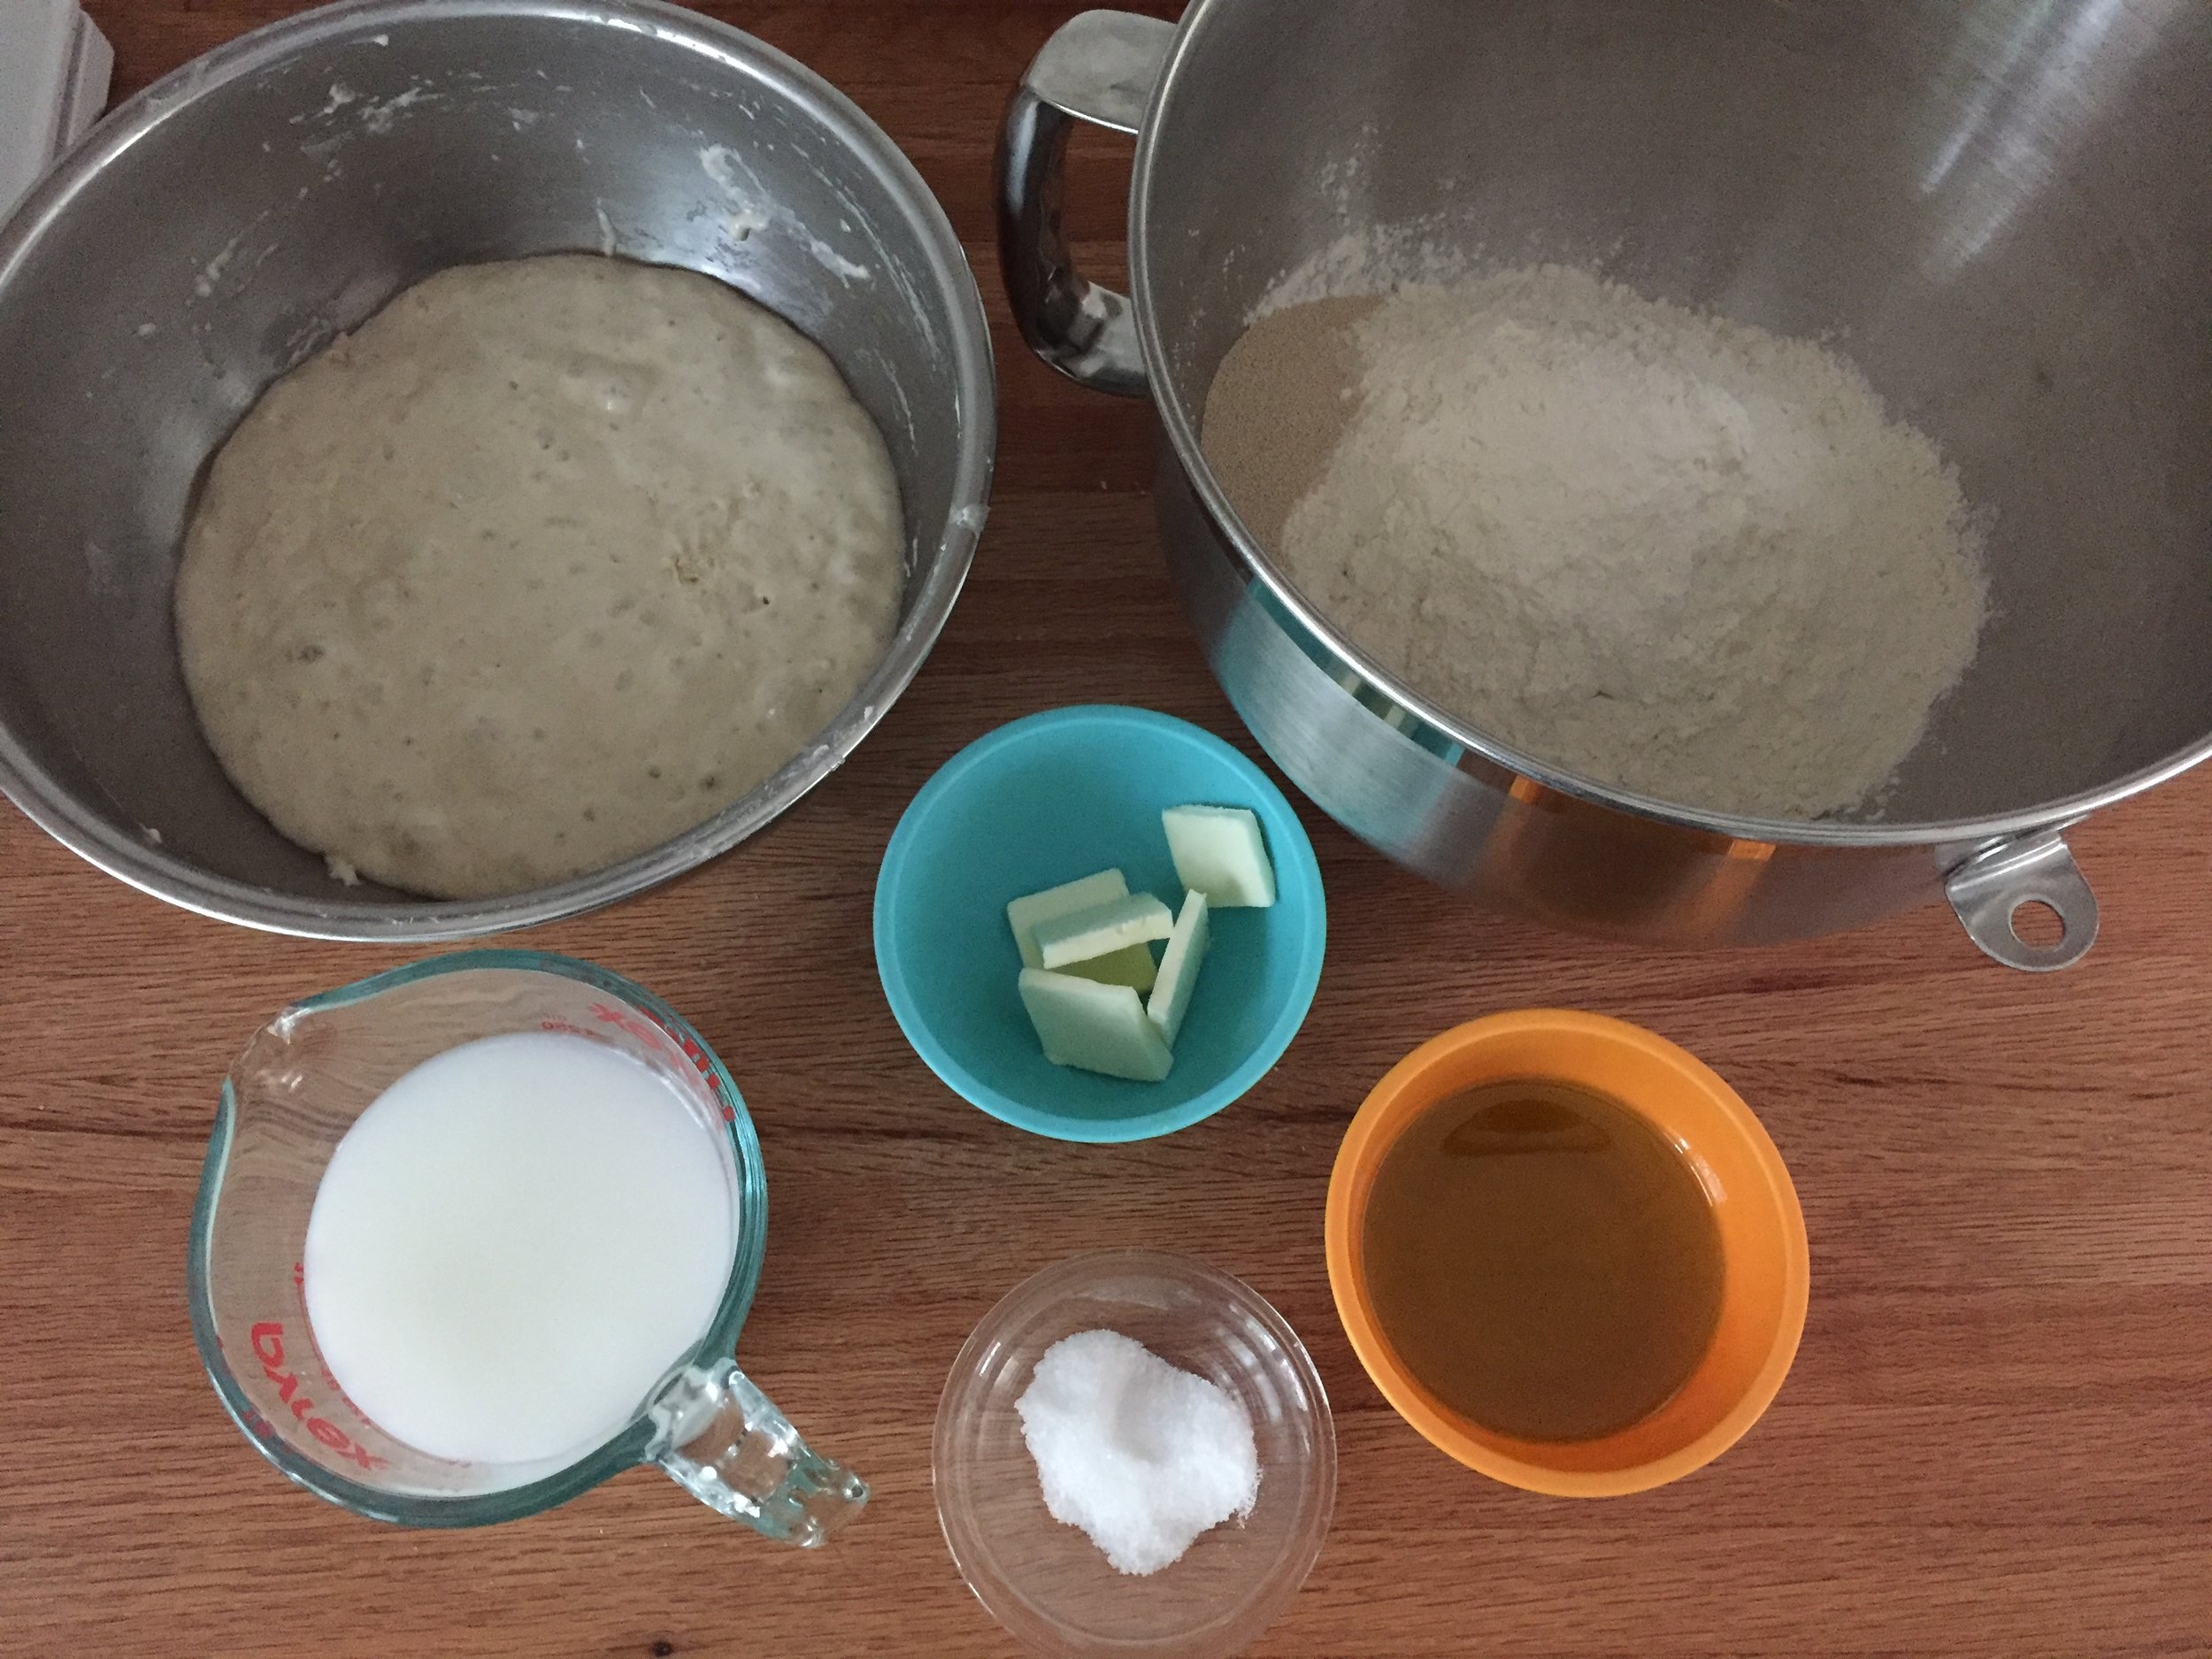
Using the dough hook I mixed everything for 4 minutes on low speed and then 2 minutes on medium speed. Then a 30 minute bulk fermentation followed by a fold-over then another 30 minutes before dividing.

After the bulk fermentation

After the bulk fermentation

I divided my dough into two 740 g portions with a plan for two different shaping approaches.

IMG_3212.JPG

The first shape involves rolling the dough into a rectangle and sprinkling it with 227g grated cheese (fontinella in my case). Then I took 6-7 cloves of roasted garlic and smooshed and pieced them up, scattering the pieces over the rectangle. A light sprinkle of Penzey’s salt free pizza seasoning mix, then roll up a snug log.

Starting the log roll

Starting the log roll

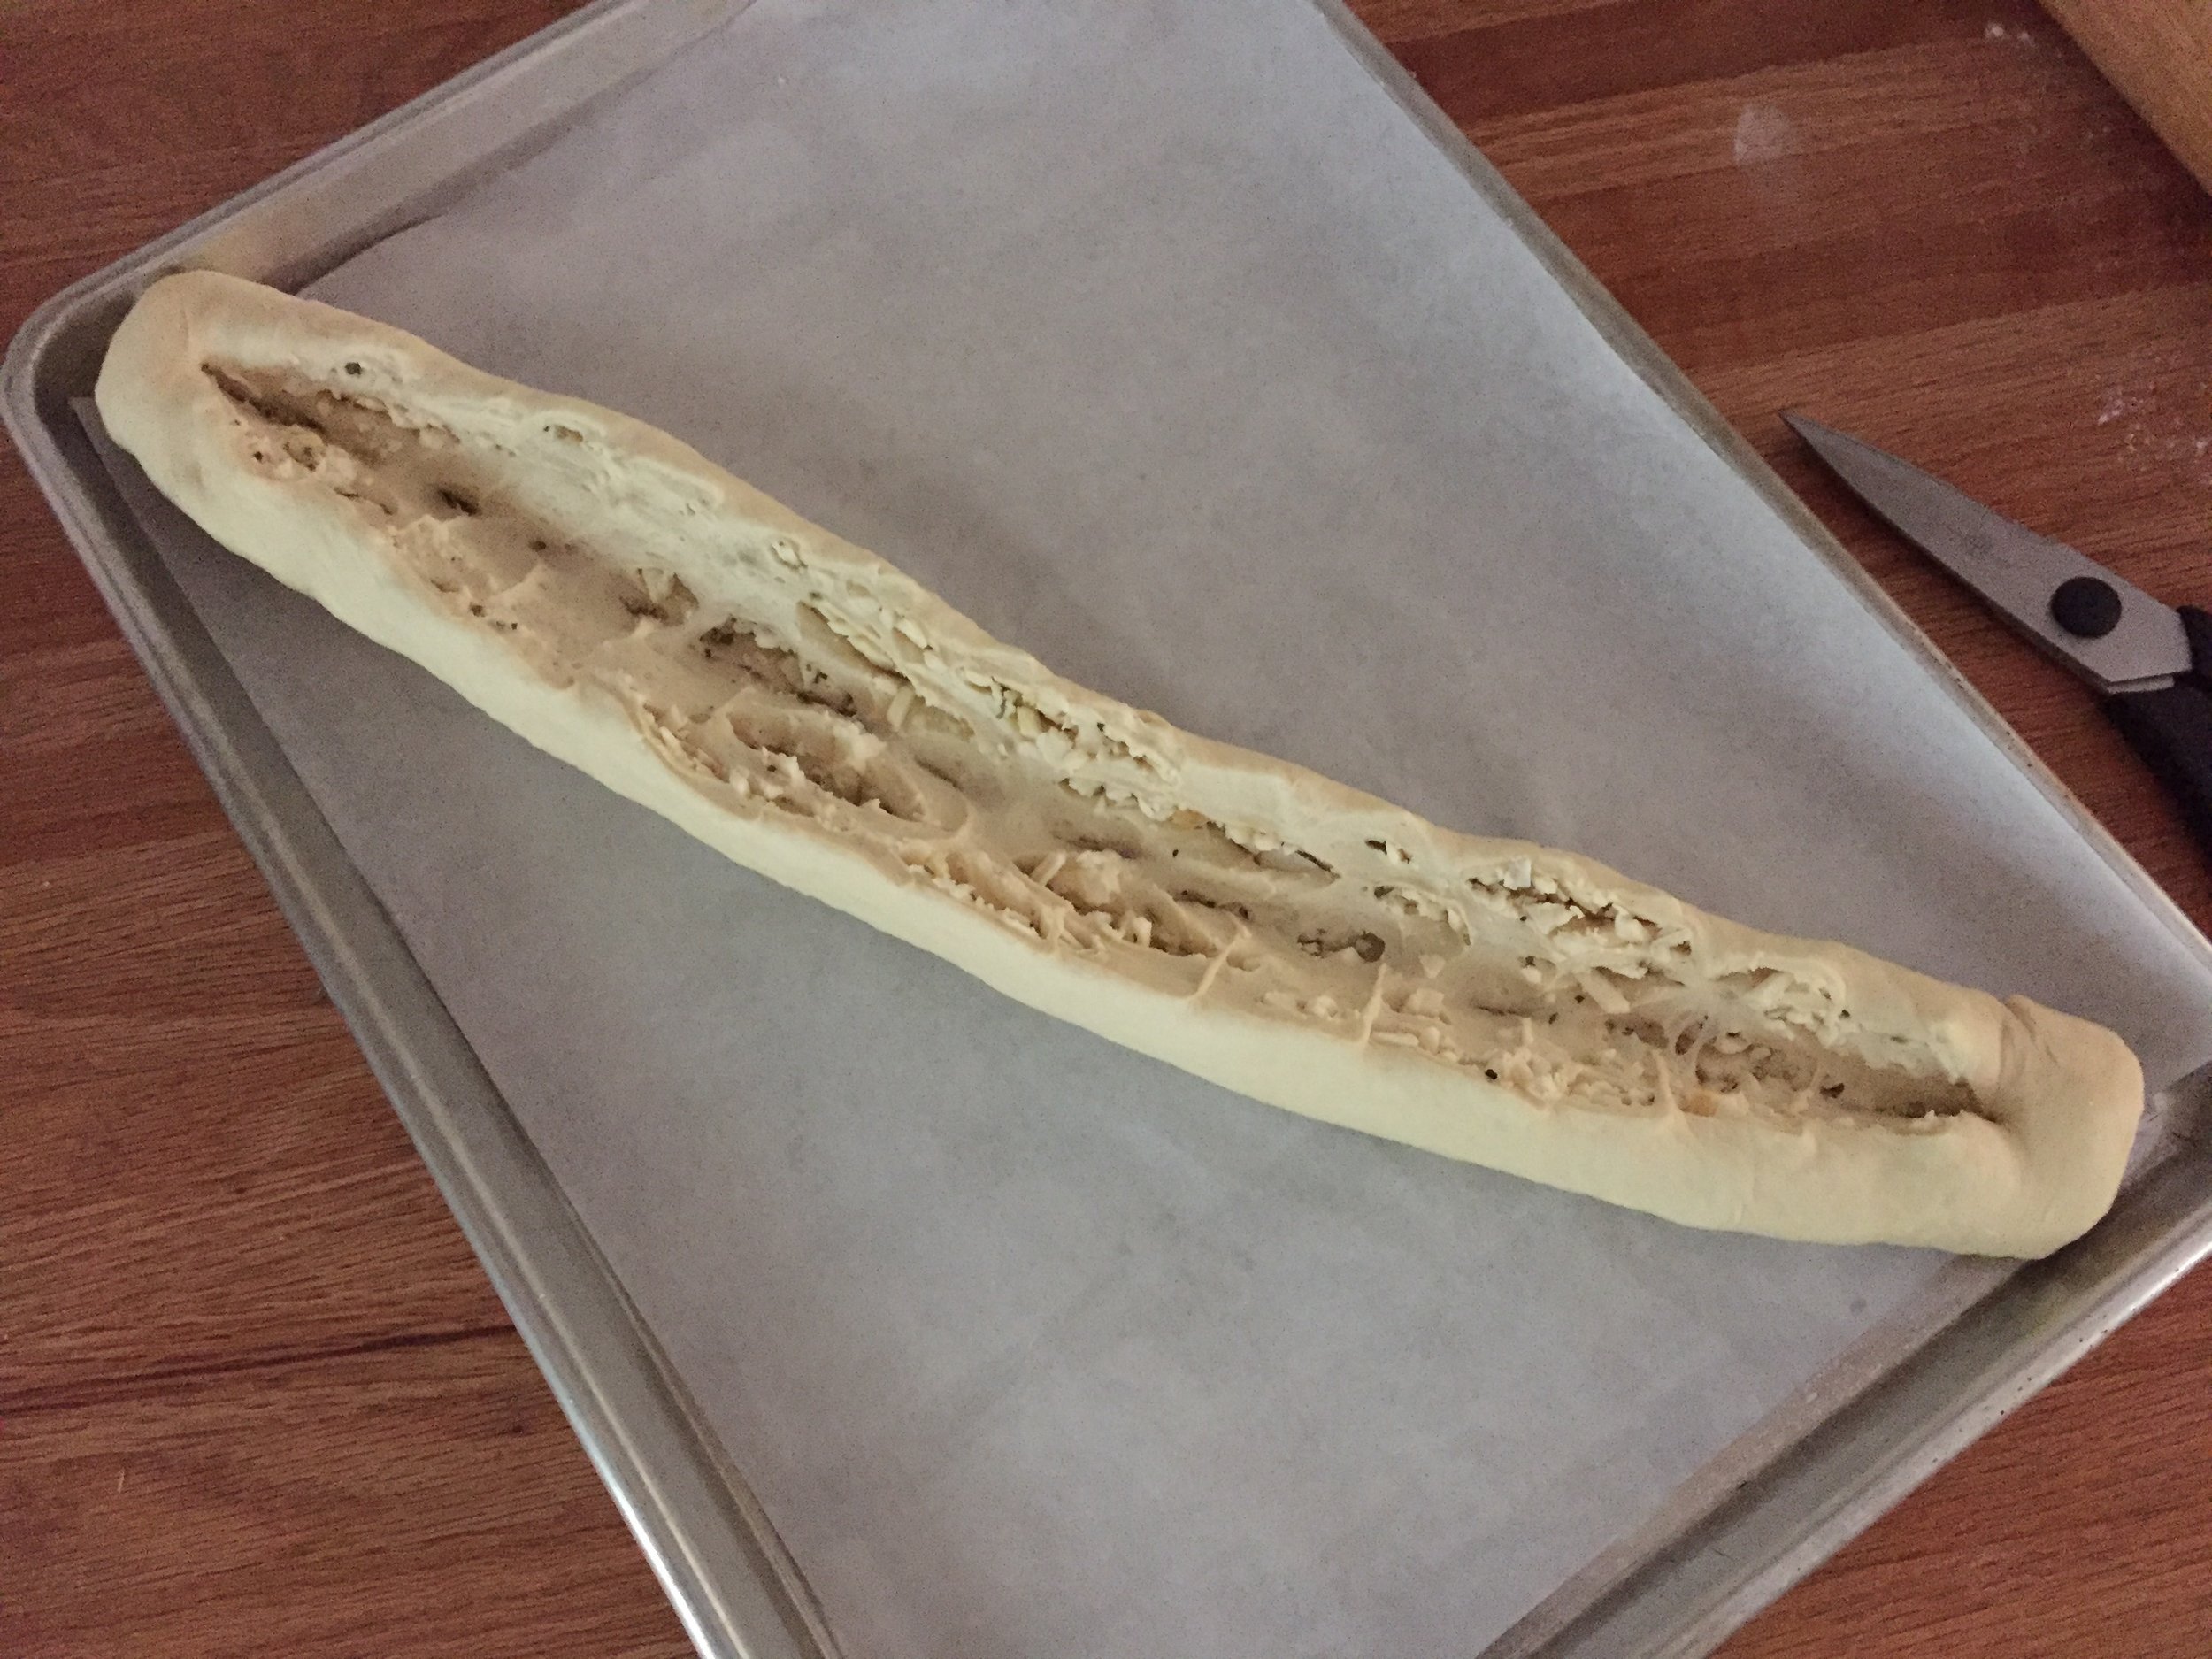
Once the log is complete, pinch the seams, place it seam side down on a parchment lined sheet, slit it down the middle to a depth of about an inch, leaving the ends intact. The log will open up to expose the filling.

IMG_3215.JPG

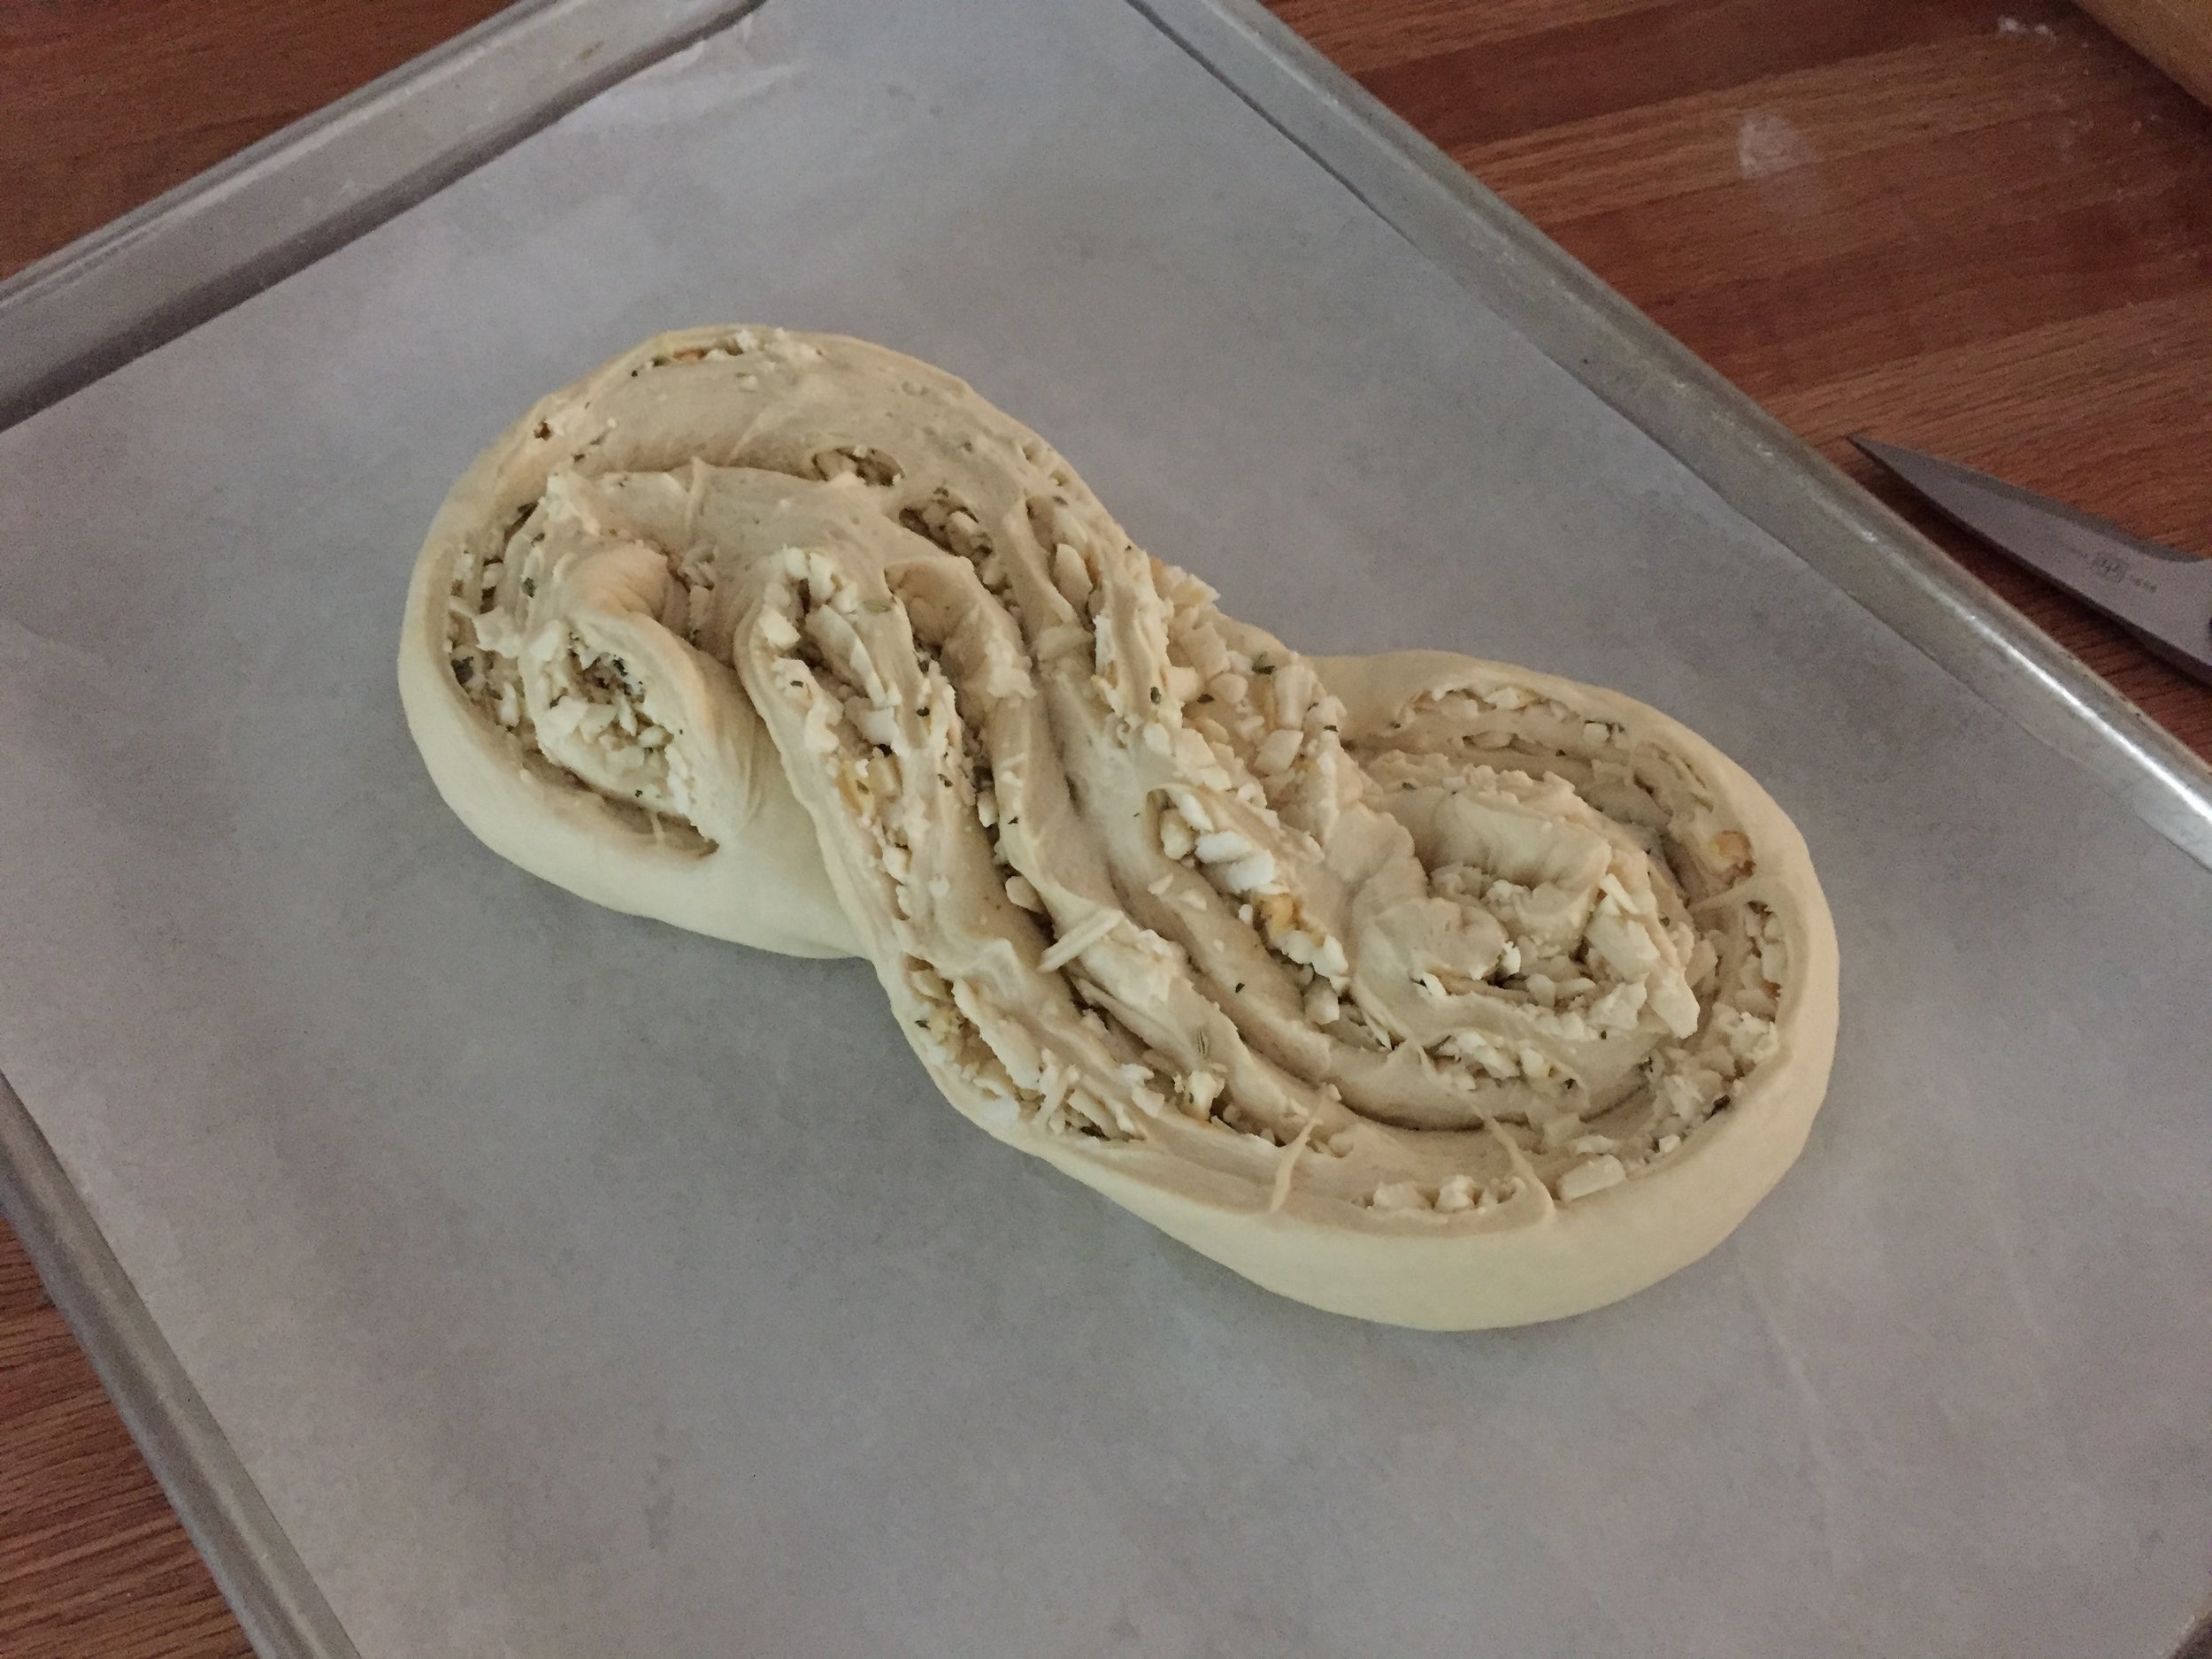
Then shape it into an “S” and tuck the ends under. Pretty cool.

IMG_3216.JPG

My second shape followed the method used for babka in which you roll up the log as already described, then slit the log entirely down the middle yielding two separate pieces filling side up.

IMG_3218.JPG

Begin at one end and twist the two pieces over and under each other, continuing to keep the filling side up as best you can (I could use some more practice on this one!). In this case I then went for a couronne or crown by forming it into a ring and tucking the ends under.

IMG_3219.JPG

Cover and let rise in a warm place for about 45-60 minutes, heating the oven to 350ºF during the last half of the rise.

Bake for 35-40 minutes until nicely browned.

IMG_3225.JPG
IMG_3226.JPG

The fontinella and roasted garlic went a long way to making this one a truly delectable bread experience.

IMG_3232.JPG
IMG_3231.JPG

For a family supper we sliced it, drizzled some melted butter over it, loosely wrapped it in foil and warmed it for about 10 minutes in a 325ºF oven. Oh my.

Yup. I’d make this again.

Tarte au fromage blanc

IMG_3027_1.jpg

Continuing on with my baking with cheese series, this tarte au fromage blanc is the latest adventure - and a delicious adventure it was. One of my favorite tart books is Les Folles Tartes by Christophe Felder, one I purchased back in early 2011 in Paris. I've been eyeing his recipe for this particular tarte for some time now, and what better way to pursue it than to include it in the cheese project. Love it.

Heather Zinn, the proprietor of our local GR Cheese Lady shop was kind enough to order a full fat version of this cheese for me from Bellweather Farms in Sonoma County CA. It's a European style fresh cow's milk cheese, not unlike a creamy goat cheese, with a bit of tang and salt and is also referred to as "fresh farmer's cheese".

IMG_2993.JPG

I wasn't sure what to expect but was pleasantly surprised at it's creaminess, spreadability and delicious dairy flavor straight out of the tub. Steve and I loved it on our favorite original Triscuit crackers, thinking it would only be enhanced by some herbs, a grind or two of black pepper and perhaps a little succulent fresh tomato. Yeah baby! 

I opted to use my standard pâte brisée which I blind baked first so as to avoid an under baked bottom crust once the filling was added and baked. This time I tried a new approach, one I gleaned from reading Thomas Keller's "Bouchon Bakery". It involves leaving an over hanging edge of dough around the tart ring, baking it as such and then eventually trimming off the excess dough after baking. The idea is to cut down on dough shrinkage during the bake. Pretty cool.

IMG_2997.JPG

Once the ring was lined, I popped it in the freezer on my parchment lined sheet pan for about 15-20 minutes while heating the oven. Then in goes a round of parchment and dried beans as weights and onto the bake. As you see below, I had a few cracks in the dough around the periphery but, when it came time to add the filling, I simply took some small pieces of raw dough and patched them. Okey-dokey.

IMG_2998.JPG

The filling is a straight forward blending of 400 g fromage blanc, 2 large egg yolks (2 whites comin' up!), a pinch of salt, 90 g cane sugar, 20 g flour, 100 g heavy cream, a teaspoon of vanilla extract, finished off by folding in the 2 whites that have been whisked until fluffy. I added my own zest of two lemons - it seemed so right with this cheese.

Have 50 g of cubed butter set aside to dot on the top of the filling before it all goes into the oven. (Notice my raw dough patches on the crust!)

IMG_3007.JPG

I decided to trim some of the dough over hang before the final bake - took my serrated knife and gently trimmed away.

IMG_3008.JPG

The cubed butter on top (seemed like a lot - I would reduce it next time!) . . . .

IMG_3010.JPG

a 45 minute bake at 375ºF . . . . et voilà!

IMG_3014.JPG

Pretty pouffy just out of the oven, but after a short time things calmed down and sunk, as a custard type filling is often wont to do. Kind of moonscape like, non?

Once fully cooled, I trimmed the flaky crust edges and eased this baby out of the tart ring. It can be served room temp, or in my case, it went into the fridge, covered, to chill and be served later.

IMG_3015.JPG

This was destined for dessert at cousin Jen and her husband Scott's lovely woodland home and, since we're deep into blueberry season, it only seemed right to whip up a quick blueberry sauce. A warm up in a saucepan of 2 cups blueberries, a couple of tablespoons of simple syrup, a teaspoon of cornstarch dissolved in a tablespoon of lemon juice and a pinch of salt. Once the juices release a bit, take half the blueberries, purée then strain and add the purée back into the remaining blueberries, cooking a few minutes to thicken. Easy and oh so good. Plus, I had some fresh raspberry purée in the fridge that was begging to be used.

IMG_3024_1.jpg

Some chose both the blueberry sauce and raspberry purée while others kept to a solo blueberry arrangement. All were topped with my homemade graham crumble for that just right added crunch.

IMG_3030_1.jpg
IMG_3027_1.jpg

Creamy, just right lemon-y, fruity, berry-y and graham crunchy in a flaky just right crust. OH. SO. GOOD.

Yes, I would make this again.