One great bread a few different ways

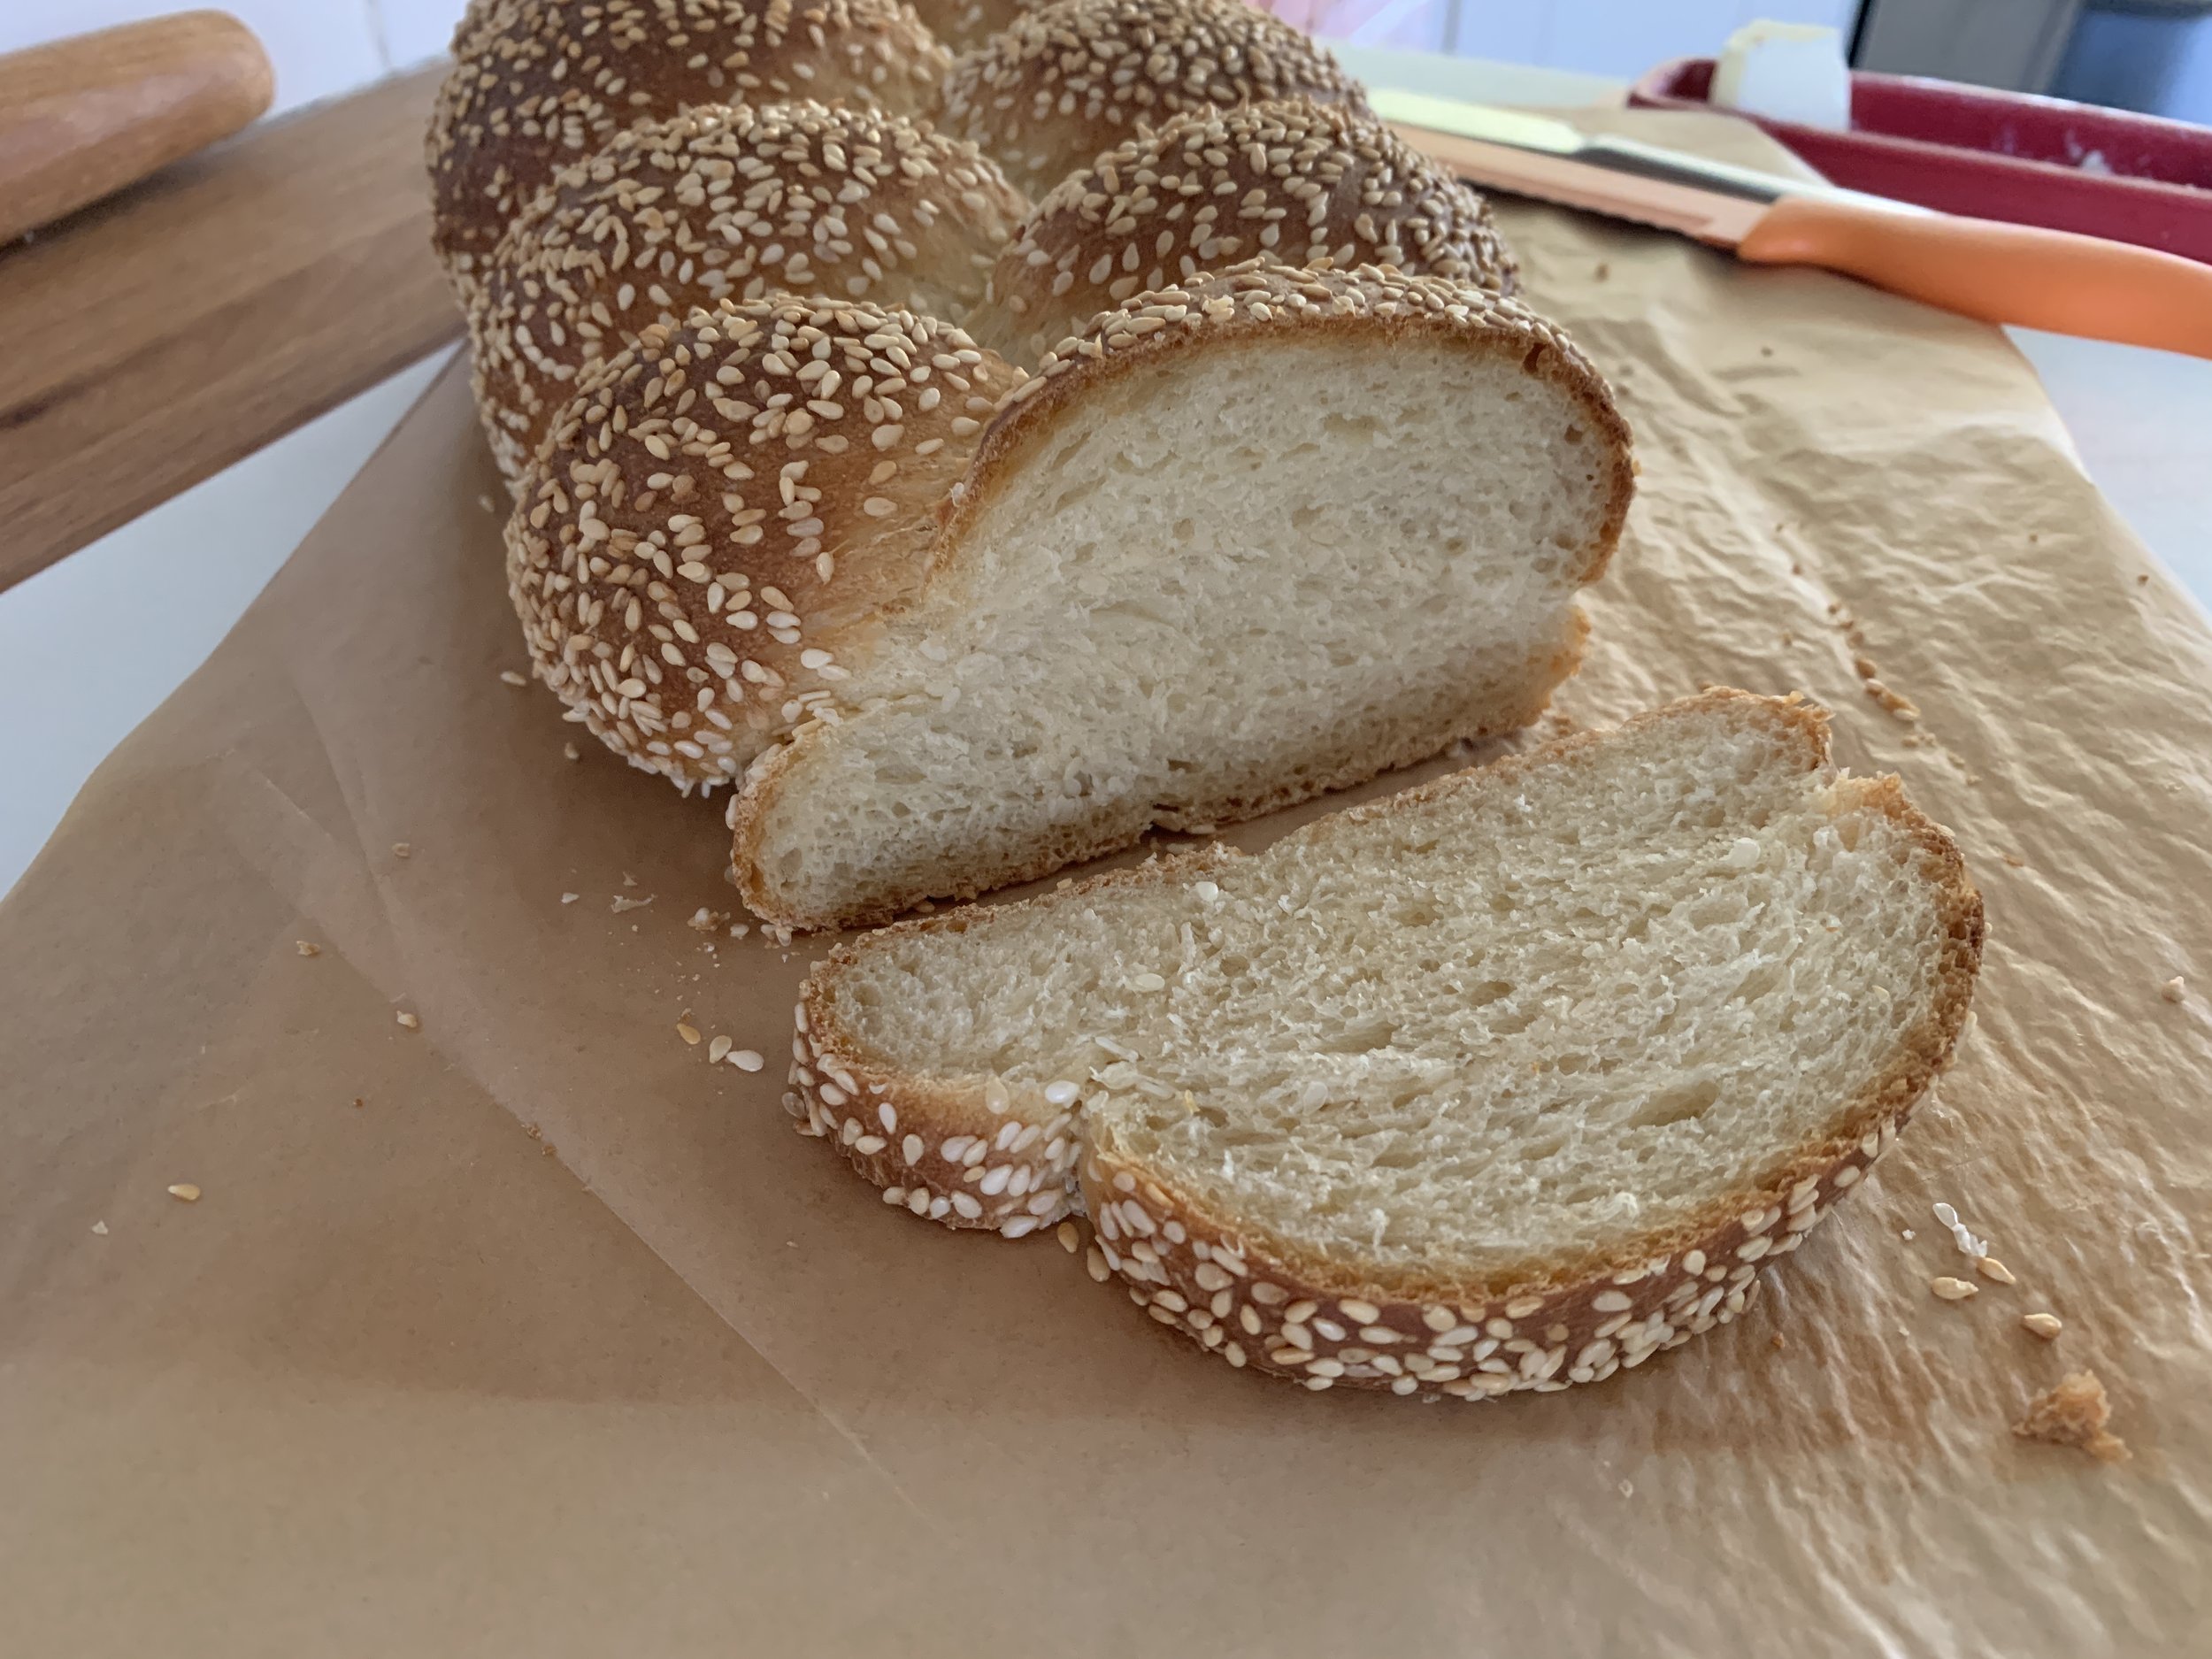
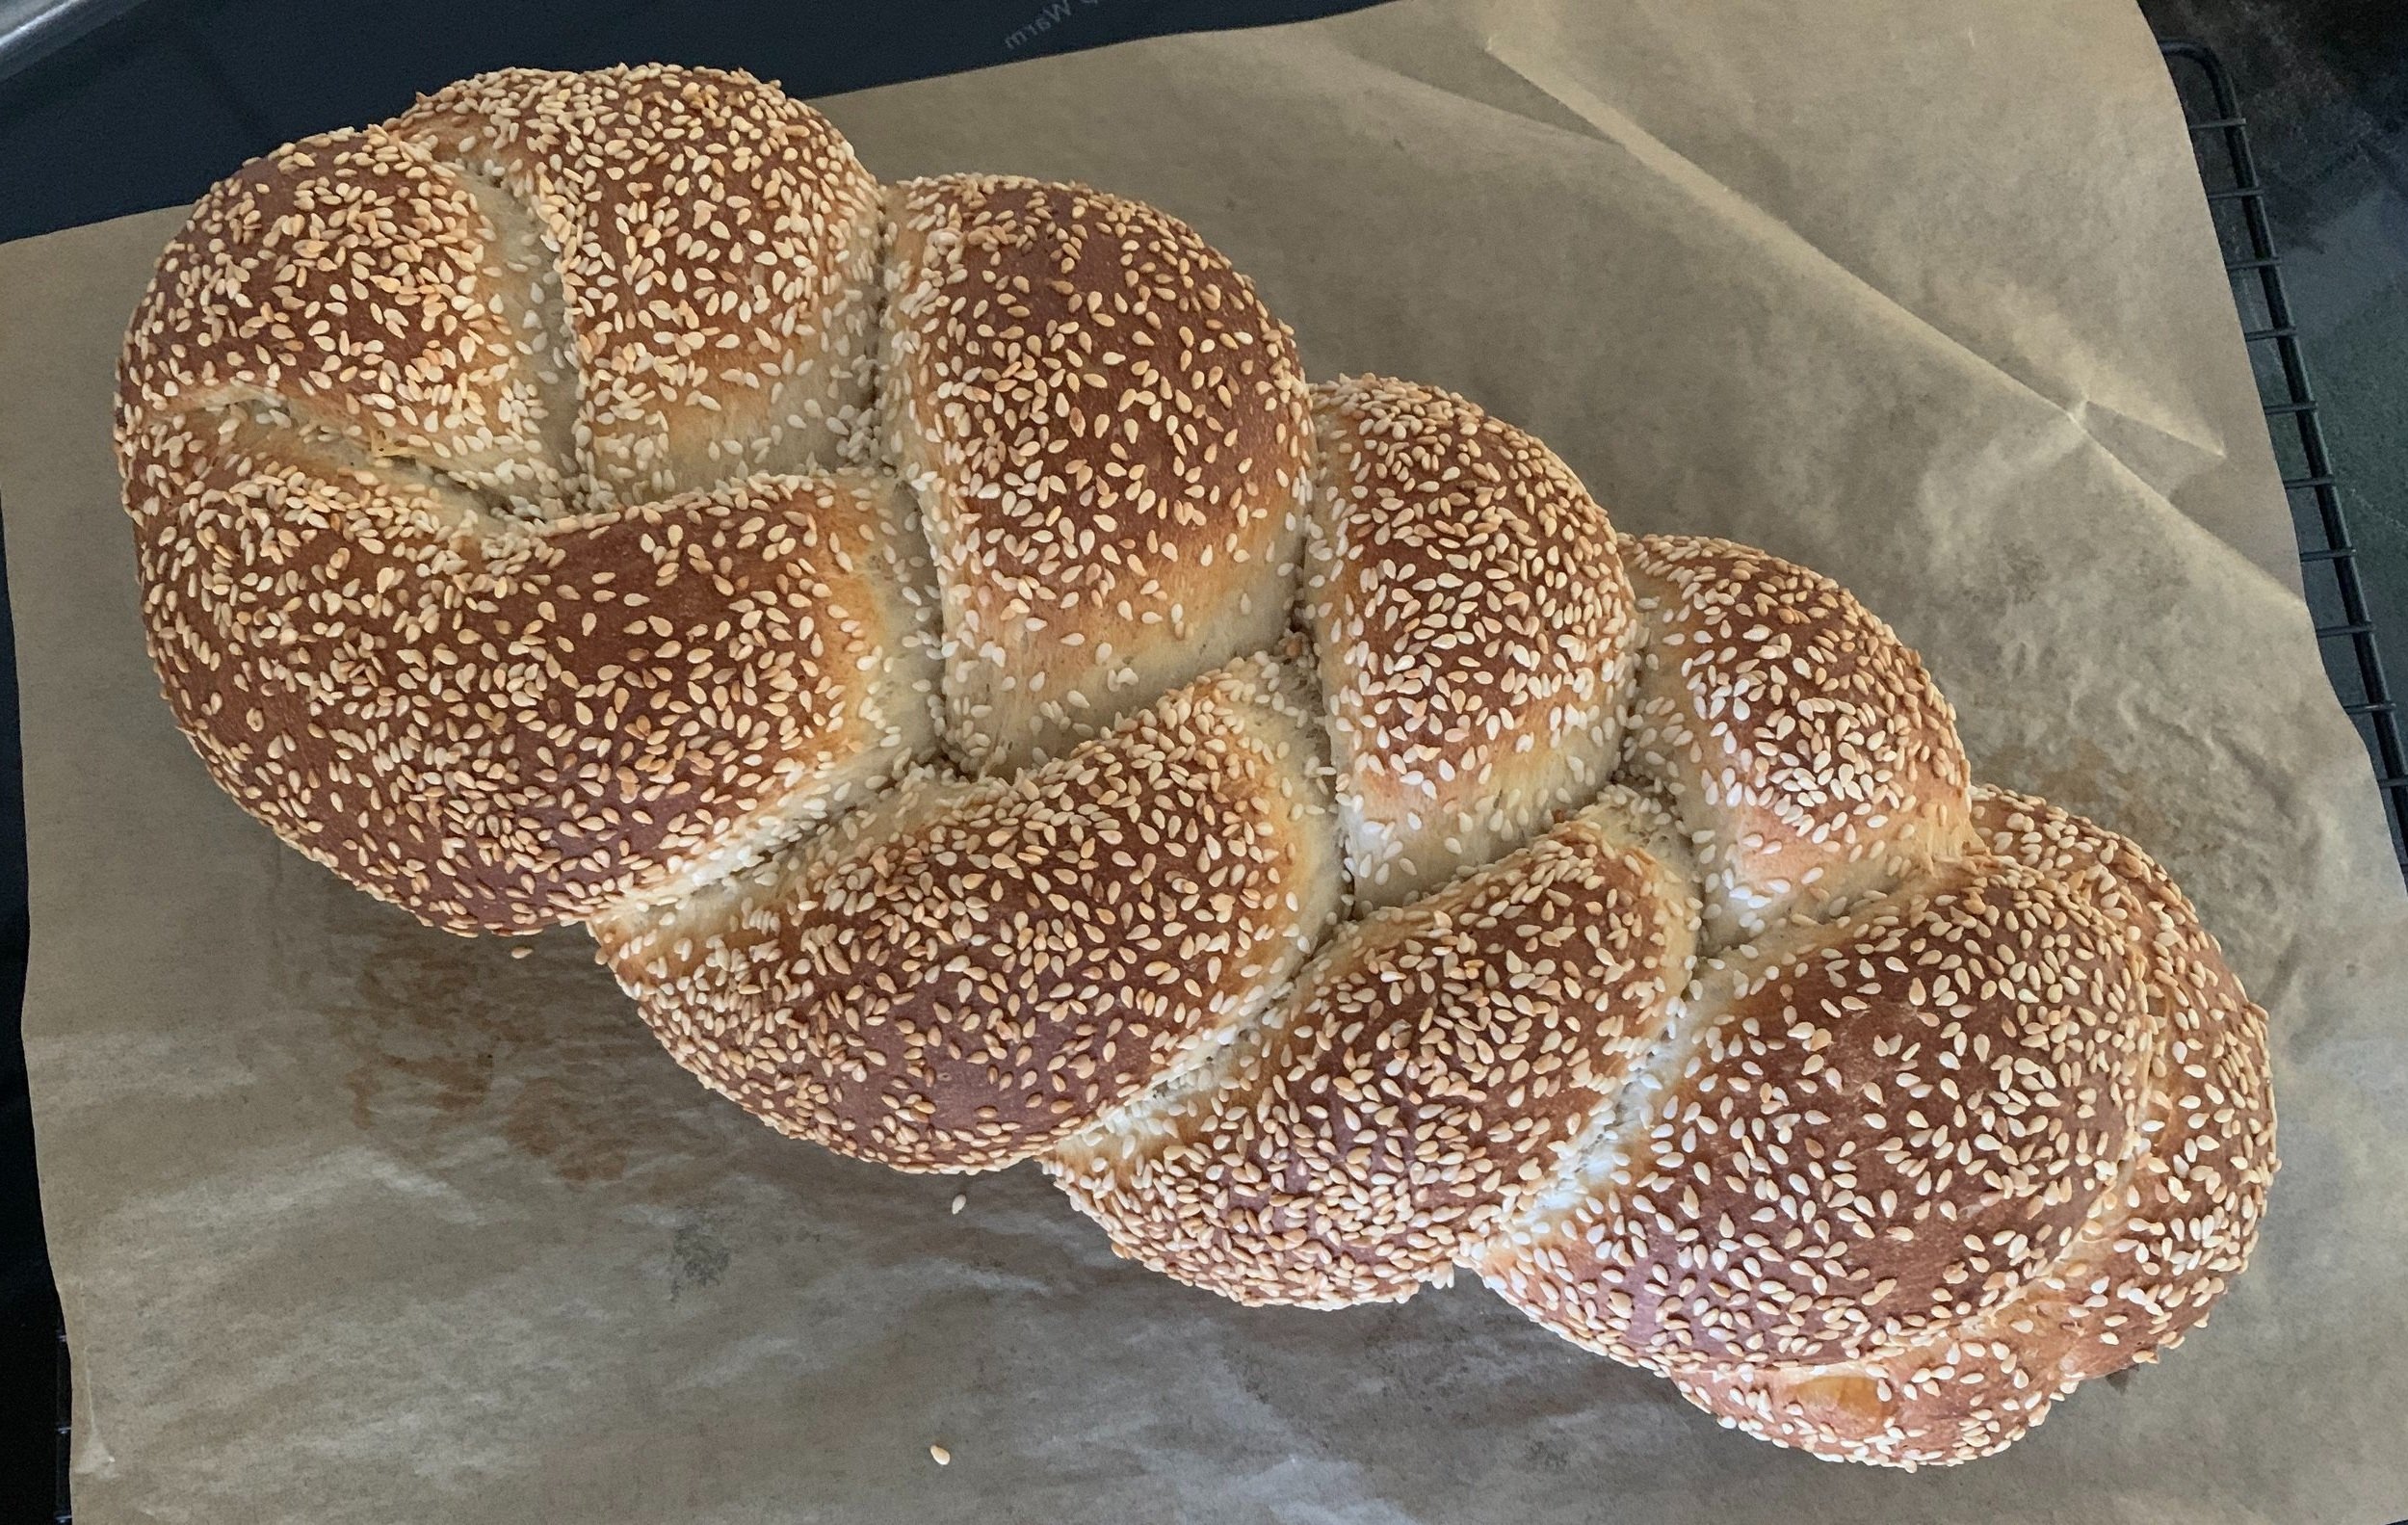
Sesame braid

Hi all. I gave you a sneak peek at this one awhile ago. My how time flies - seems like eons! I packed a lot into this post so get ready.

I LOVE this dough! It calls for an overnight preferment, a process that not only lends itself to planning ahead but also to a stellar end result.

This is my adaptation of scali bread from King Arthur Baking Company. I first came across it in the spring 2017 issue of SIFT magazine (now defunct -awwww!) and made it for the first time back in April of 2022. It’s said to be a staple in Boston’s North End, and, as is the case with the internet, I found a bunch of references/posts about it on line. Meatball sandwiches anyone?


Classically made as a three strand braid coated in sesame seeds, I started with KA’s base recipe for one braid but then doubled it and created my own recipe, subbing in some rye and white whole wheat flour. I’ve tried several different approaches - braid it, twist it, torpedo it, loaf it, herb it, cheese it, seed it - they’re all good!

Let’s take a look at the steps. Make the preferment the evening before. Please note - the dough/proofing images are for my recipe which would make TWO braids. I’m showing the shaping steps for ONE braid.

Give it 13-15 hours at room temperature after which it should be actively fermenting. It’s more stiff than let’s say a typical poolish which is equal weights flour and water.

Mix the preferment with the other dough ingredients and knead to a nice smooth end result.

Give it a 90 minute rise until nice and pouf-y.

That’s what I call a rise folks!

Proceed with your desired shaping. Here are the steps for one sesame coated braid using HALF of the above dough.

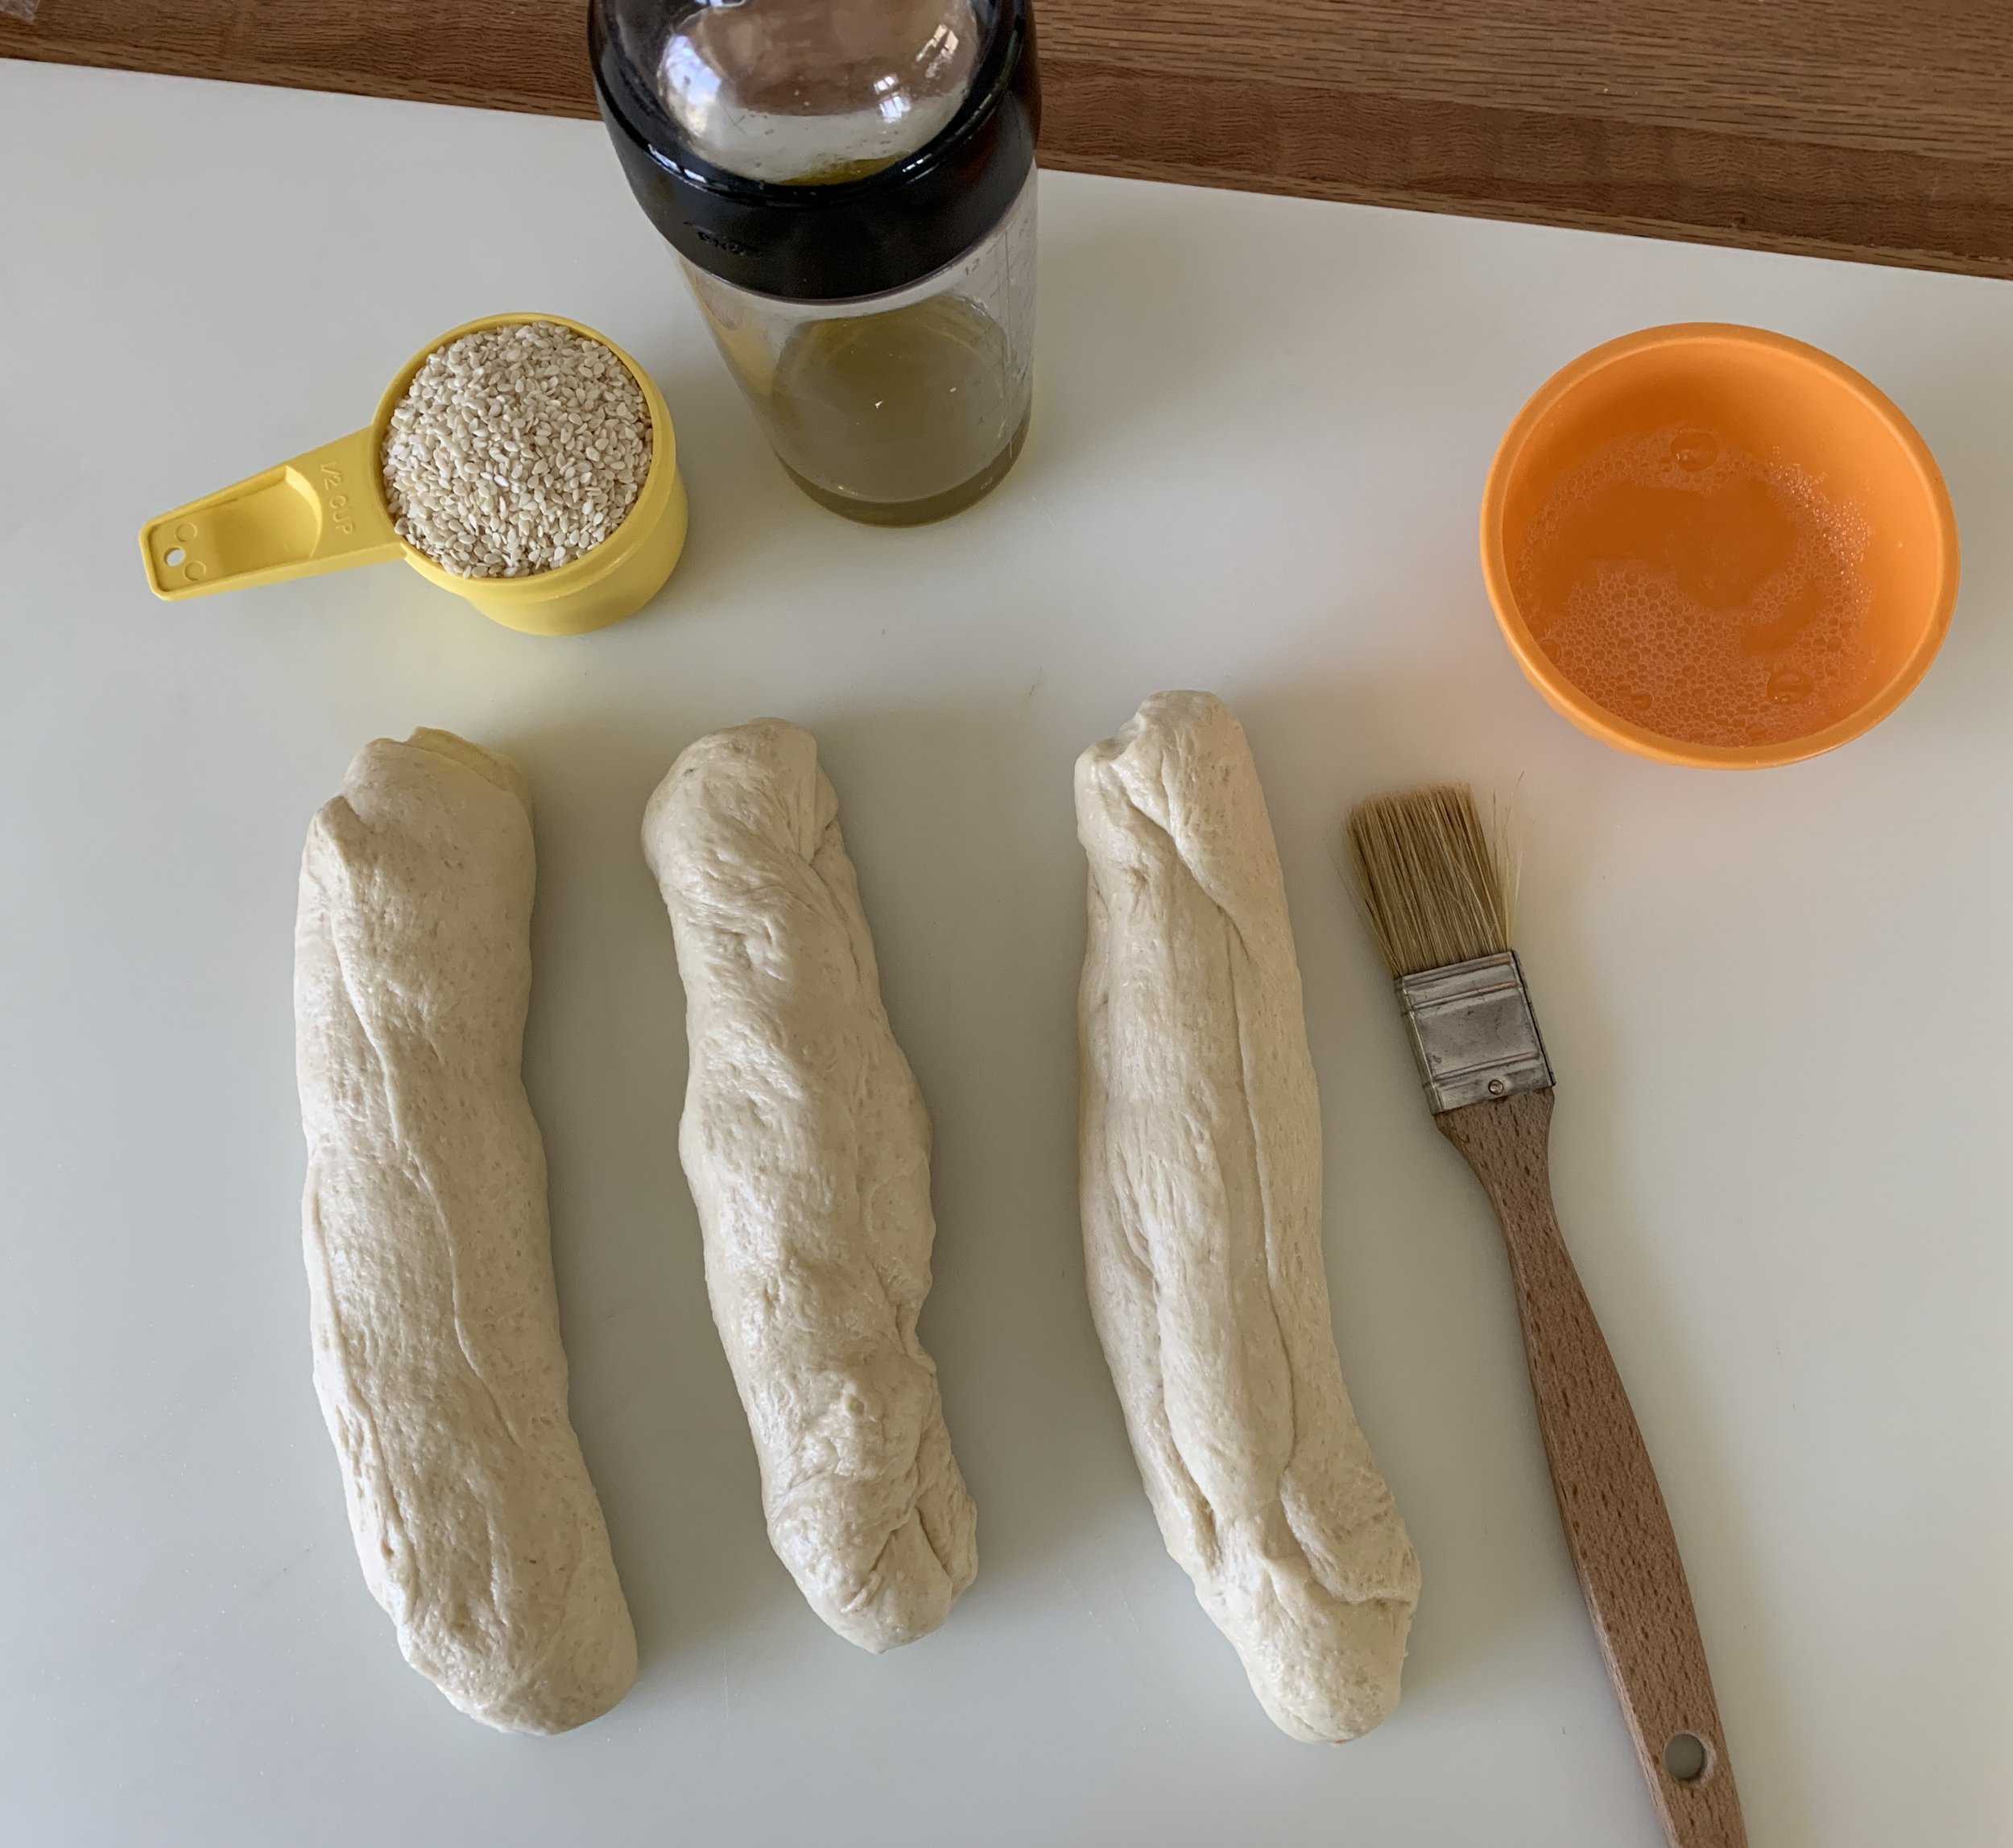
Deflate the dough gently, divide in three equal pieces (each should be about 230 g or so). On a lightly oiled surface roll each piece into a rough log and let rest 10-15 minutes.

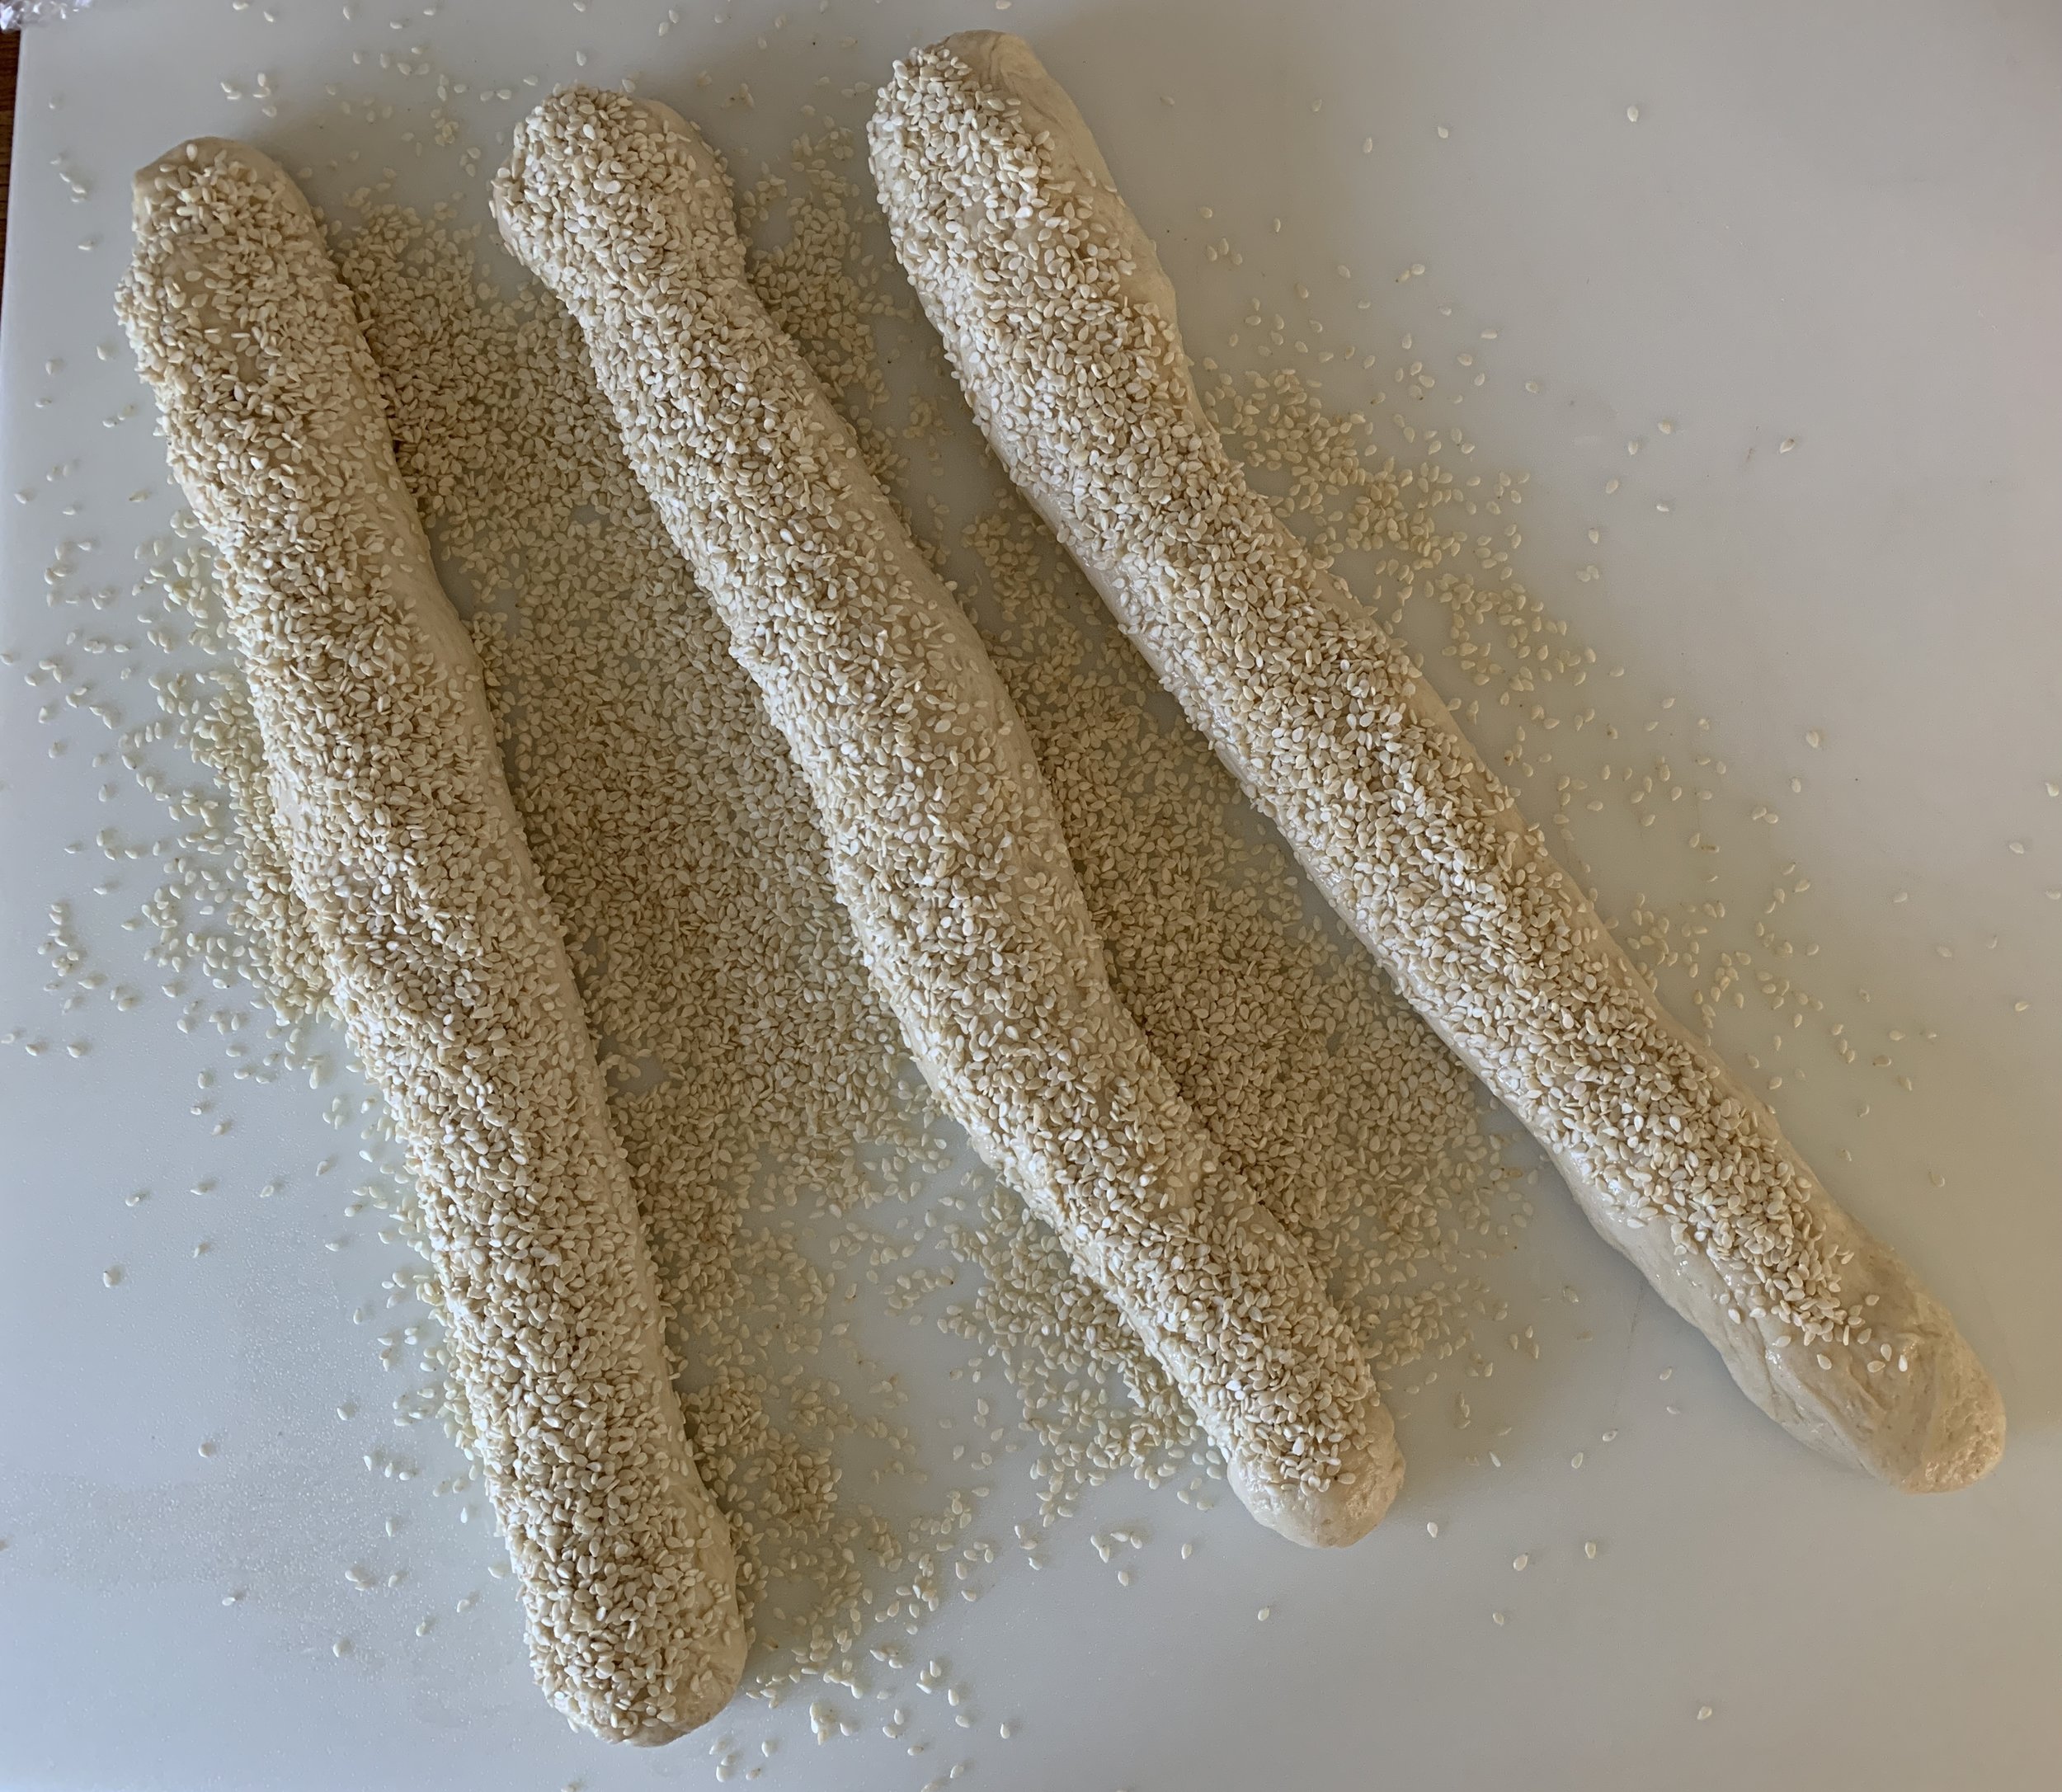
Now roll each log out to a 10-12” length then brush each with egg white and coat thoroughly in sesame seeds.

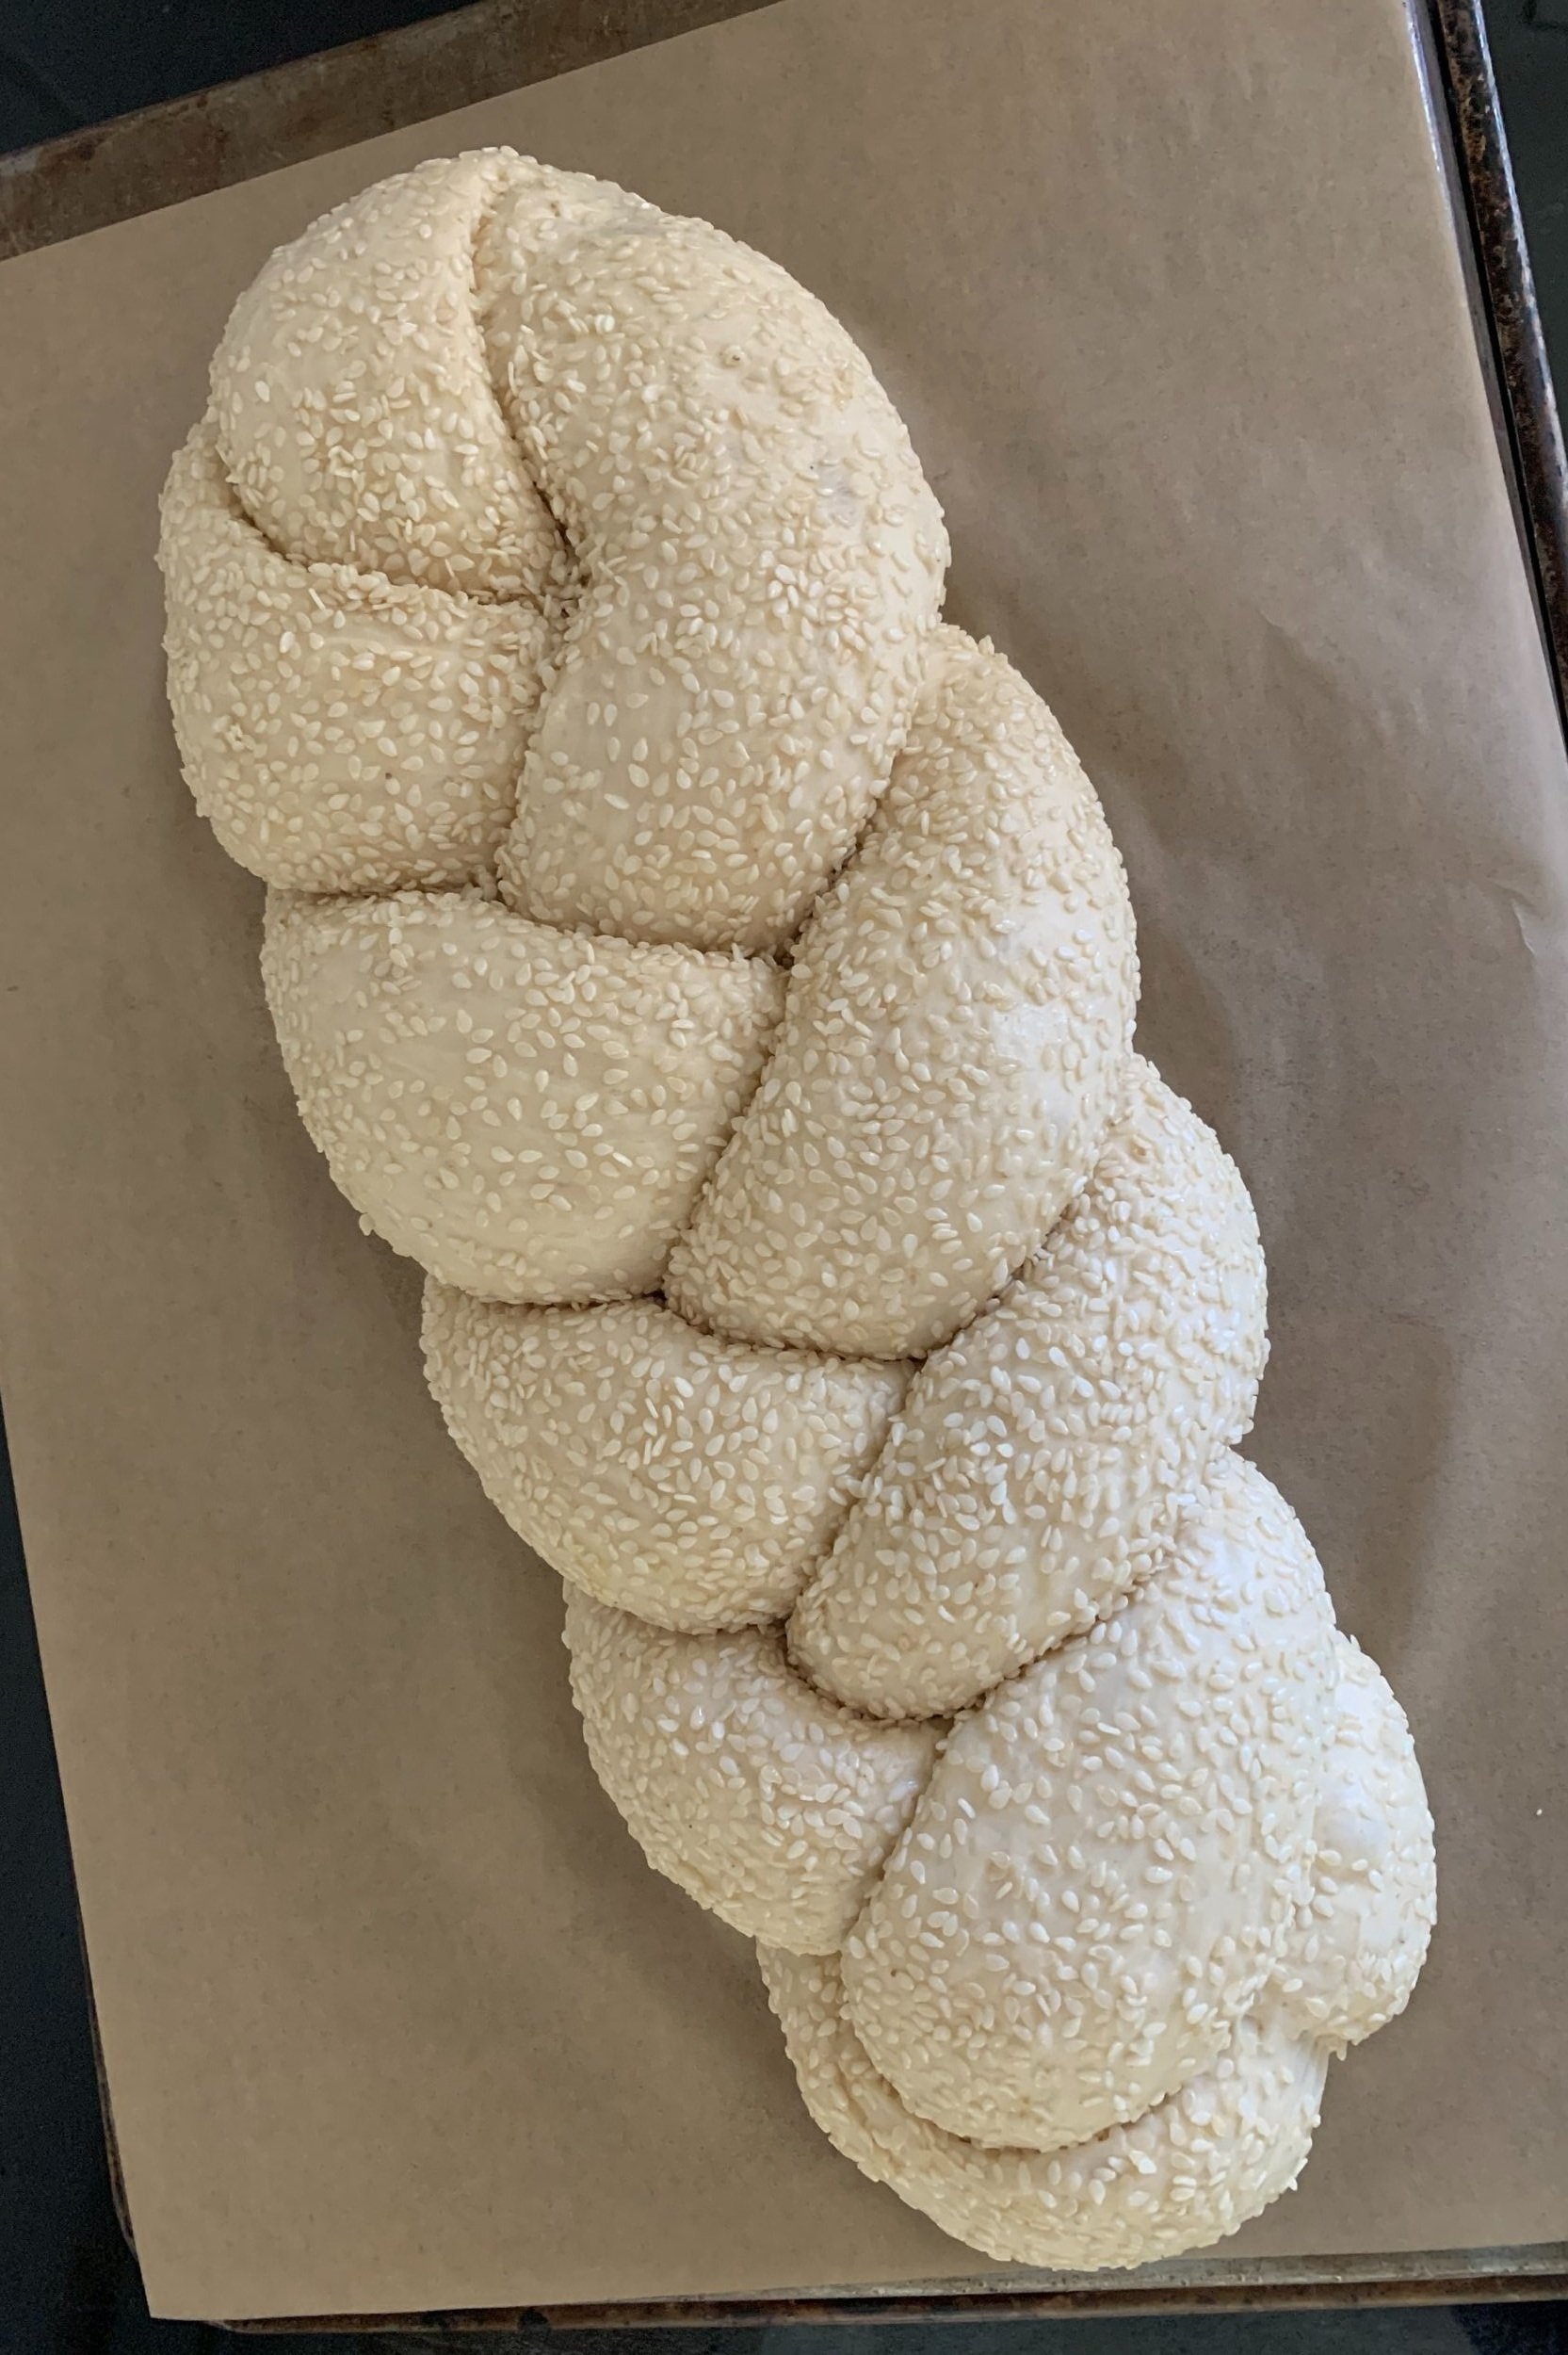
Pinch top ends together and do a typical three strand braid. Tuck the ends under to neaten things up. I placed mine on parchment on an overturned sheet pan in preparation for sliding it onto my heated baking stone.

Cover with lightly oiled film wrap and let rise about 90 minutes until pouf-y.

Toward the end of the rise, heat the oven to 425ºF (400º convection) with your baking stone if using.

Bake 25-35 minutes until golden brown.

Cooled, sliced, buttered - oh so good!

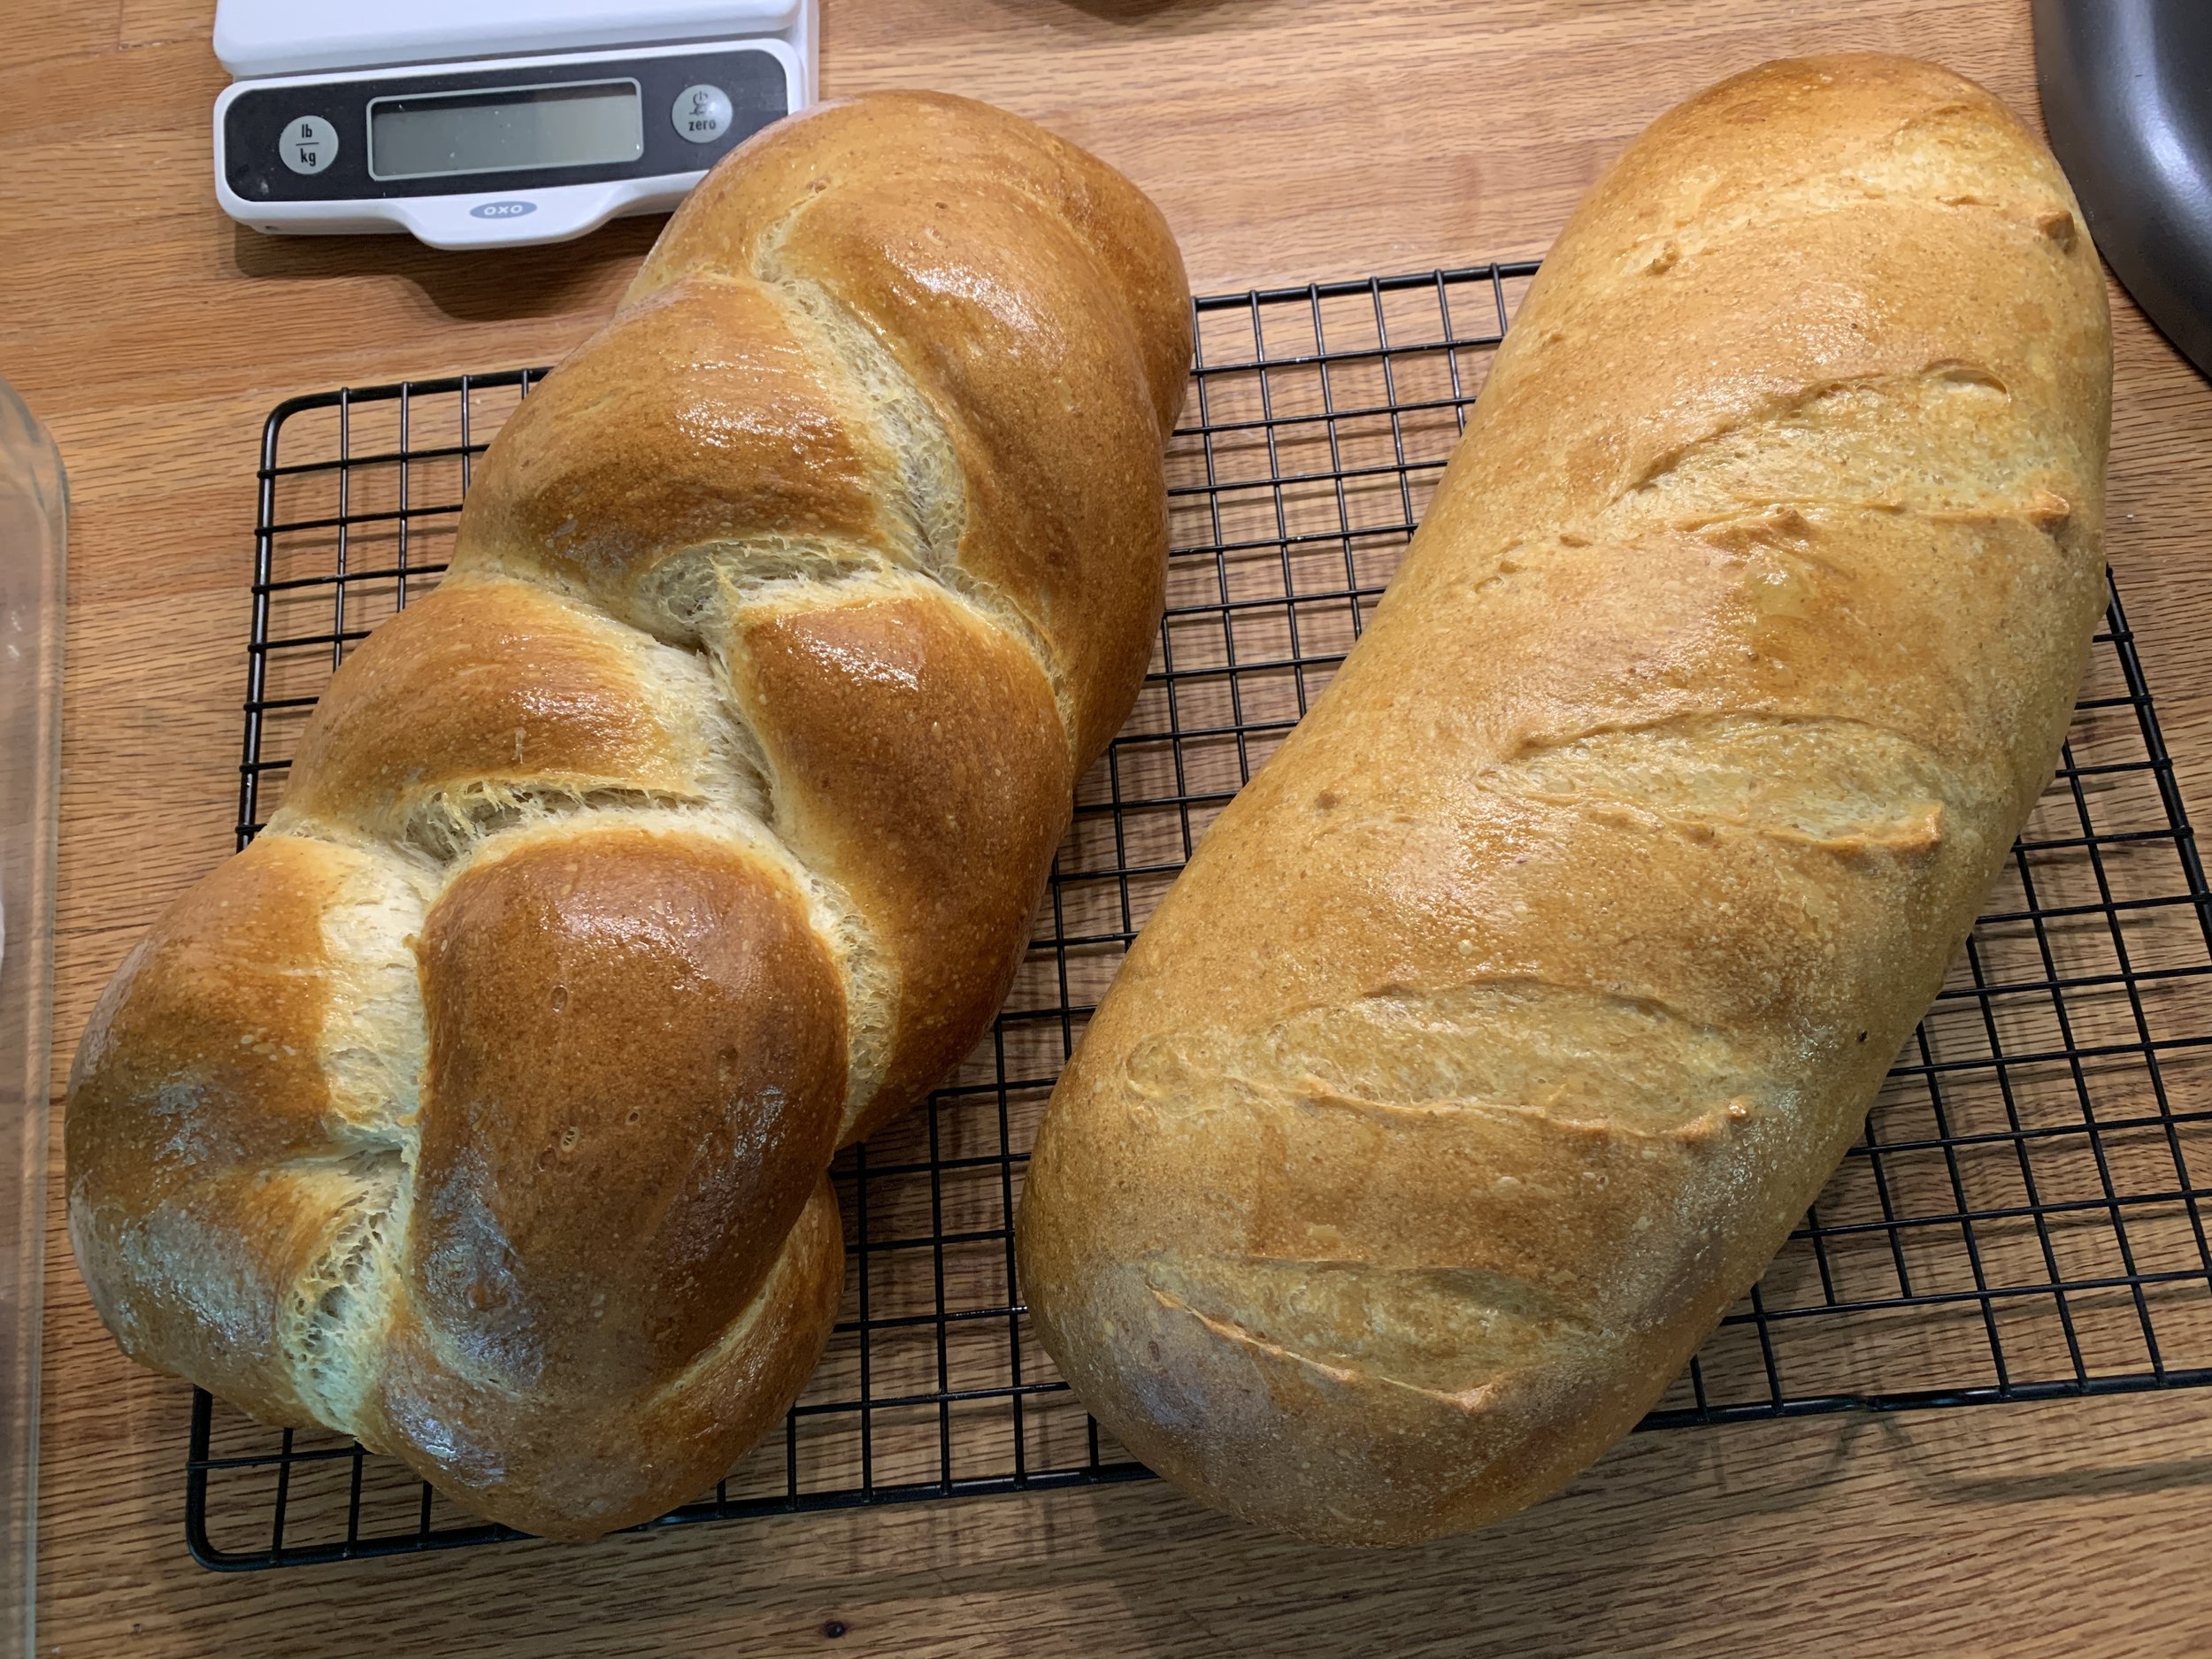
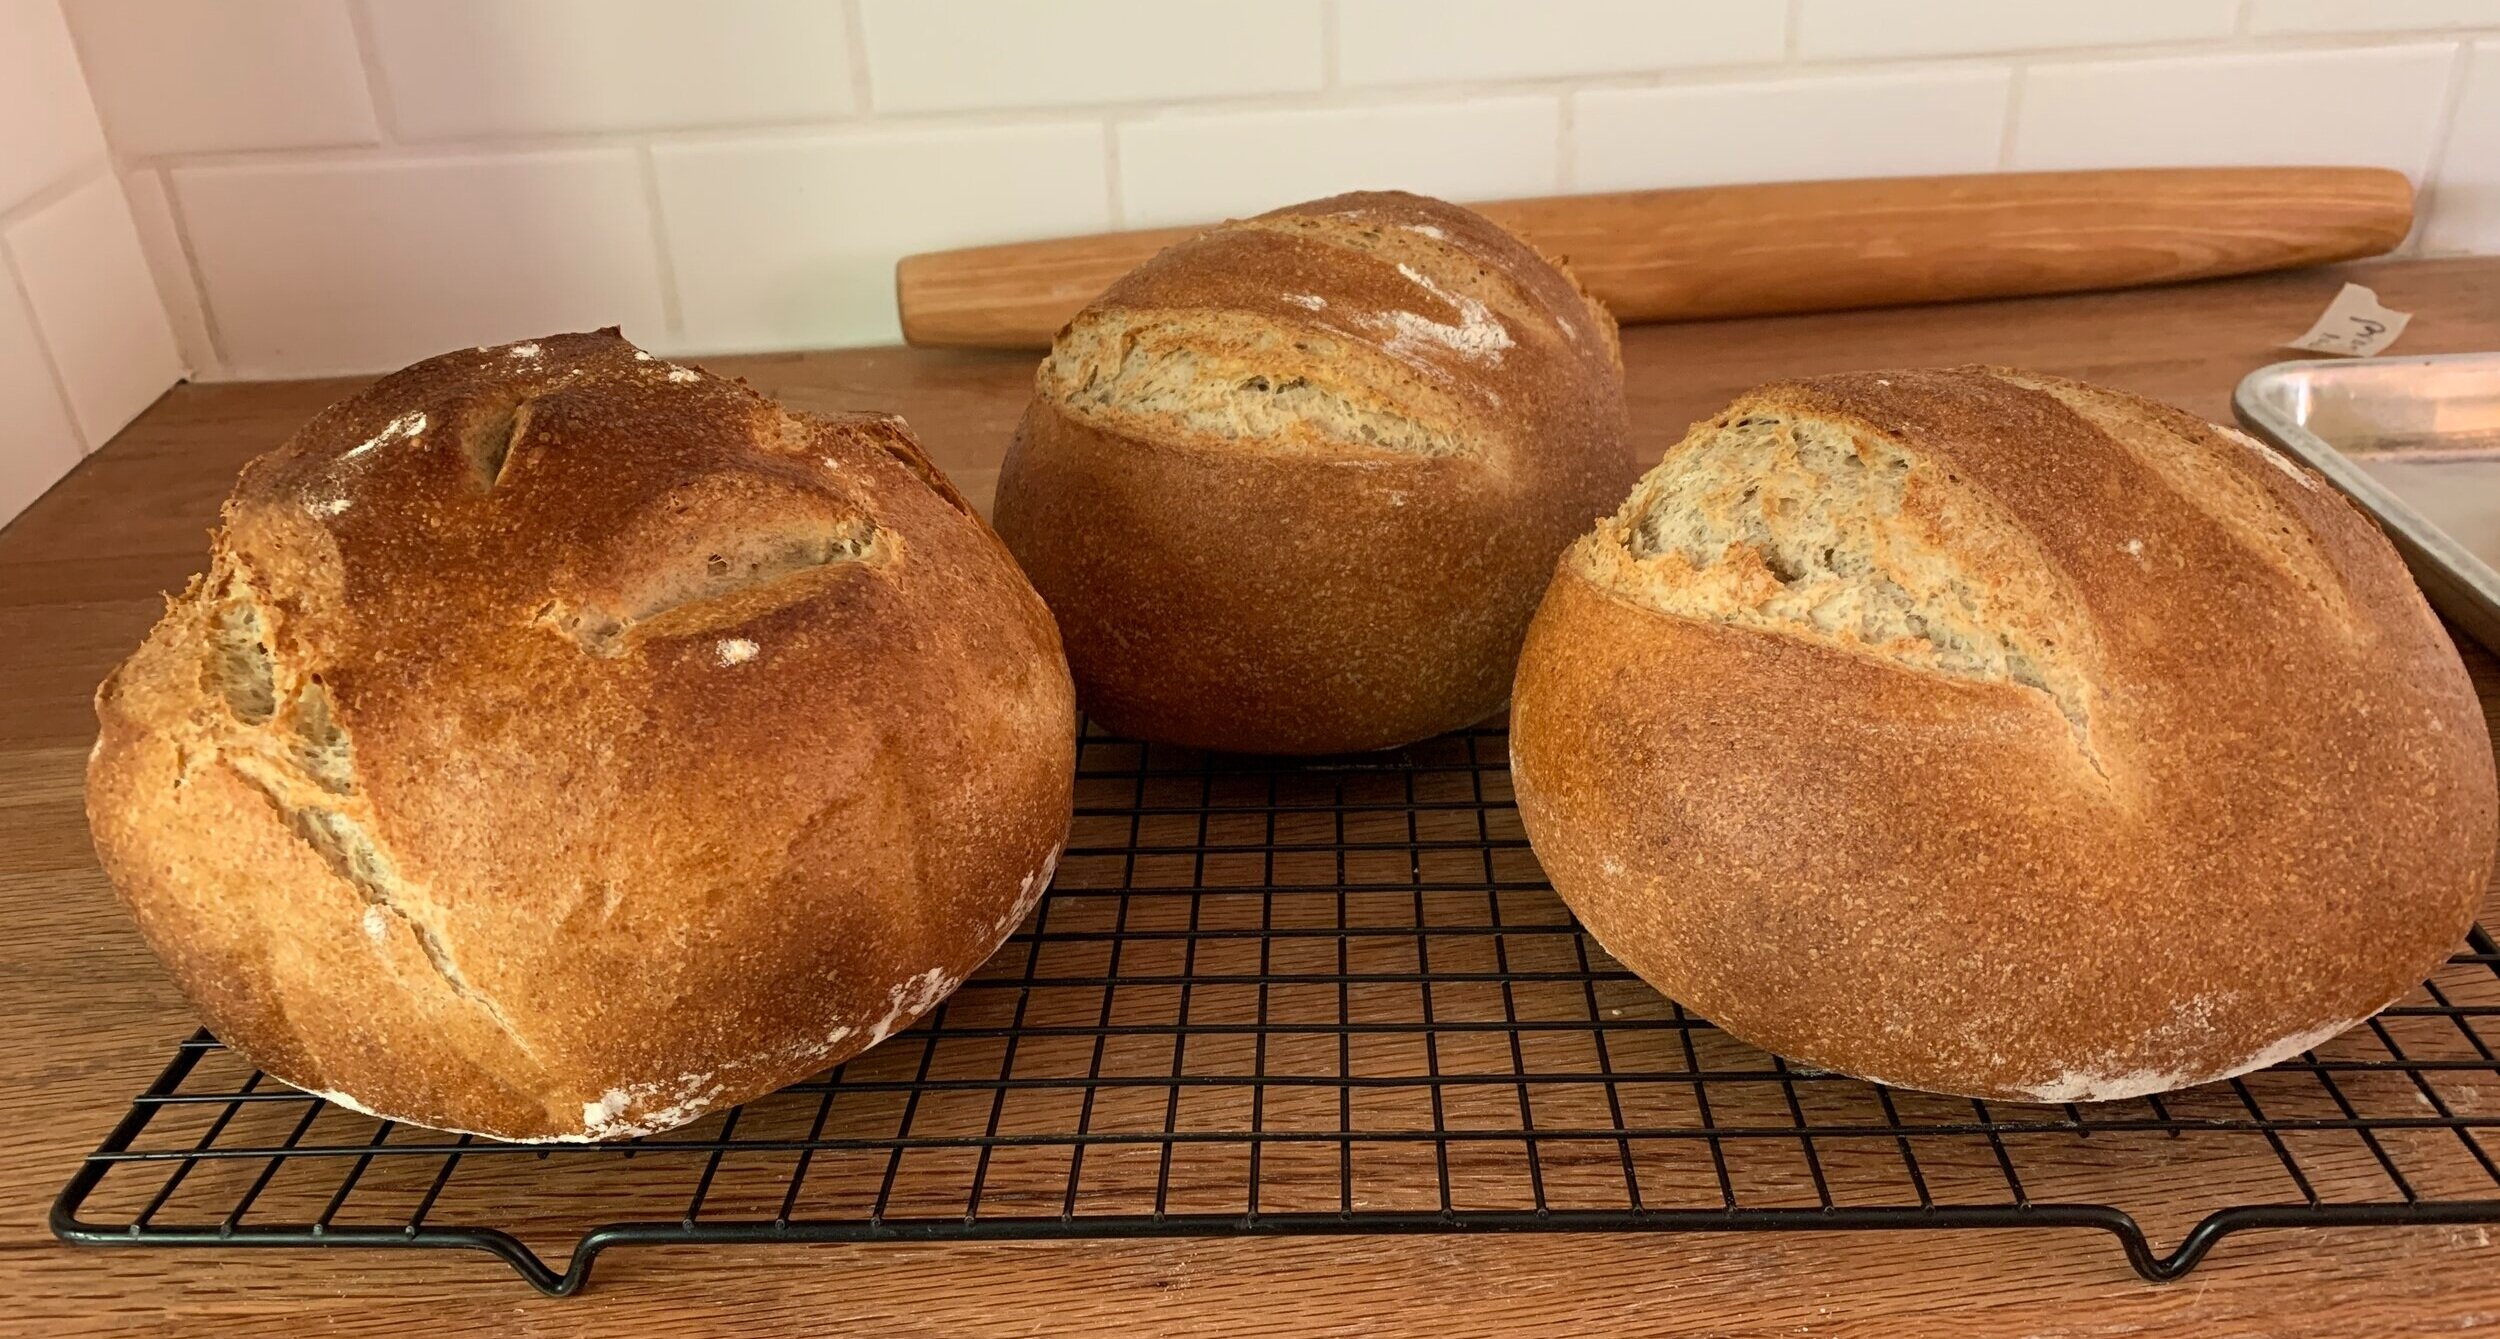
Here are a few other things I made with my full batch recipe. Two basic loaves, one braided and one slashed before baking.

Butter basted braid and a simple loaf

Another full recipe went into making a couple versions of rolls and a cheesy braid.

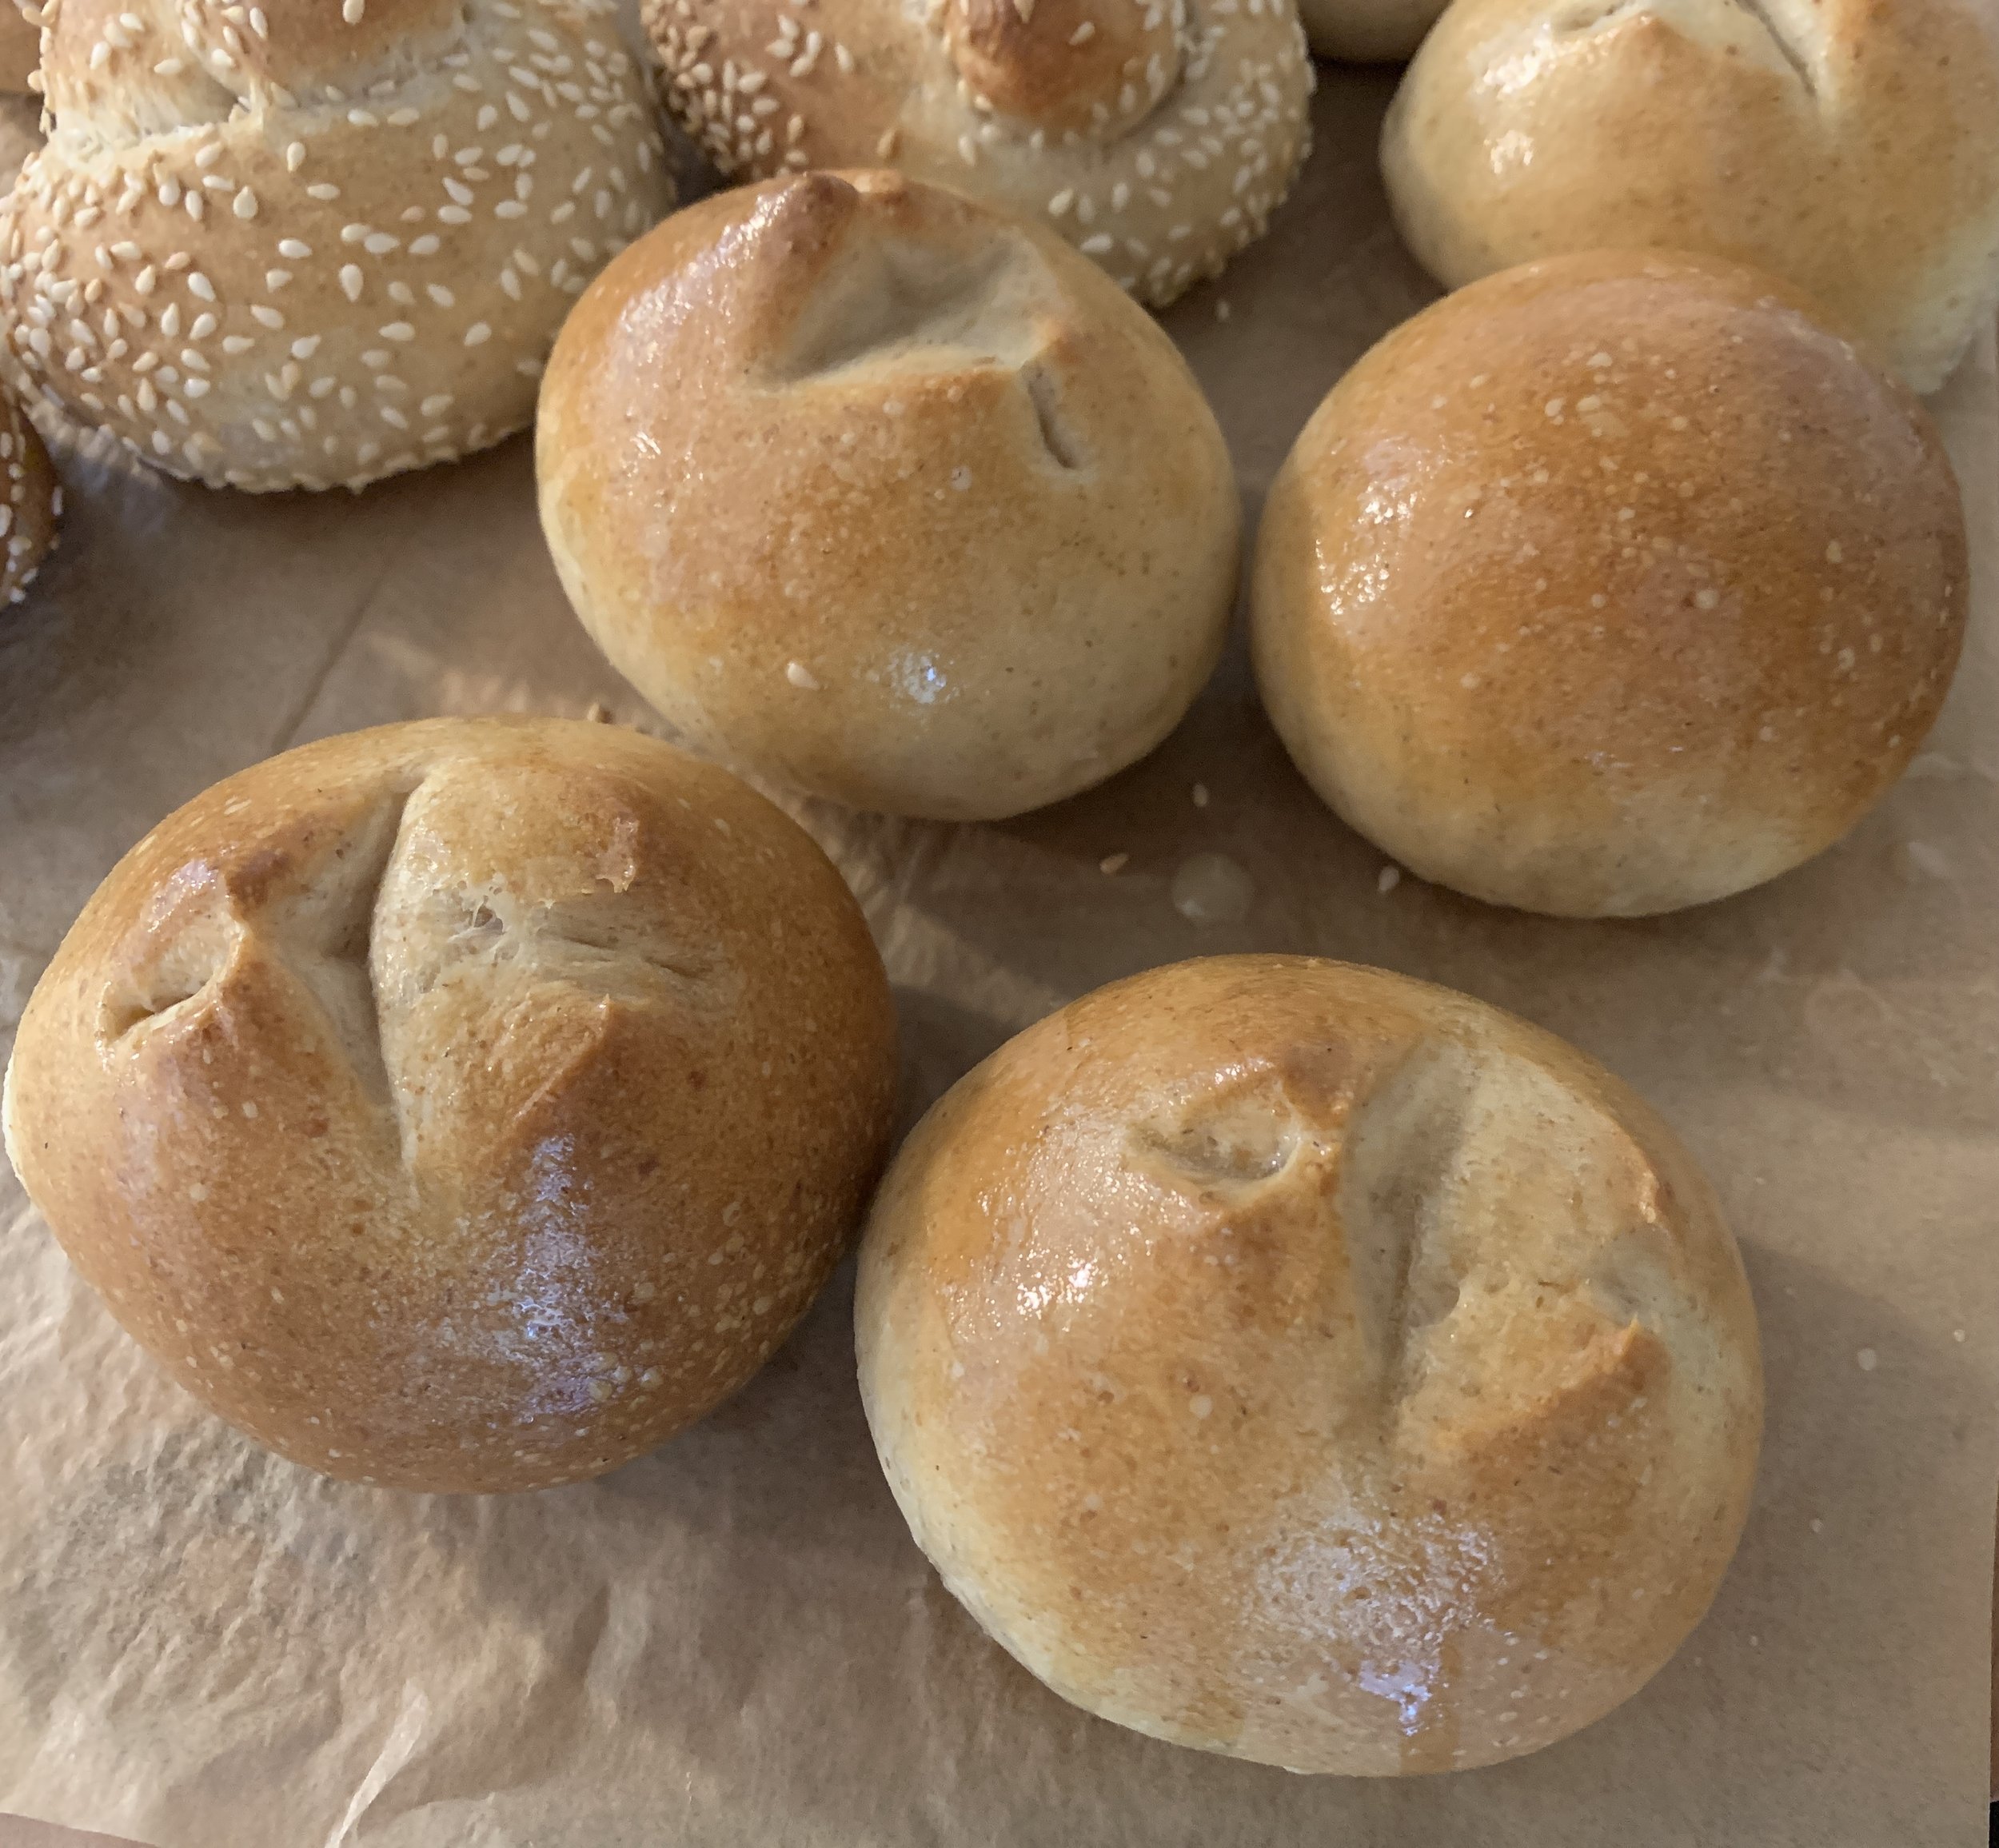
For the rolls I used a tad less than half the recipe to make fifteen 45 g rolls - 8 as sesame knots and 7 as butter basted. The rest became the cheese loaf.

I formed eight “logs” that I rolled in sesame and knotted up and left the other seven as standard round rolls (with a top snip before baking).

shape, shape, shaping!

The rolls enjoyed a nice long rise of ~100 minutes.

REady to bake, Before the snip!

Oops! Forgot one snip!!

Sesame knots and butter basted dinner rolls

This cheesy braid is just like the sesame approach except I coated the ropes in grated cheese the quantity of which I eye-balled. I used sharp Cheddar but gruyère, emmental (or a mix of your faves can all work) and topped with more cheese. I’d use more next time. You could add herbs if you wish. Mmmm good.

Cheesy braid

Had enough yet?? Almost there, I promise.

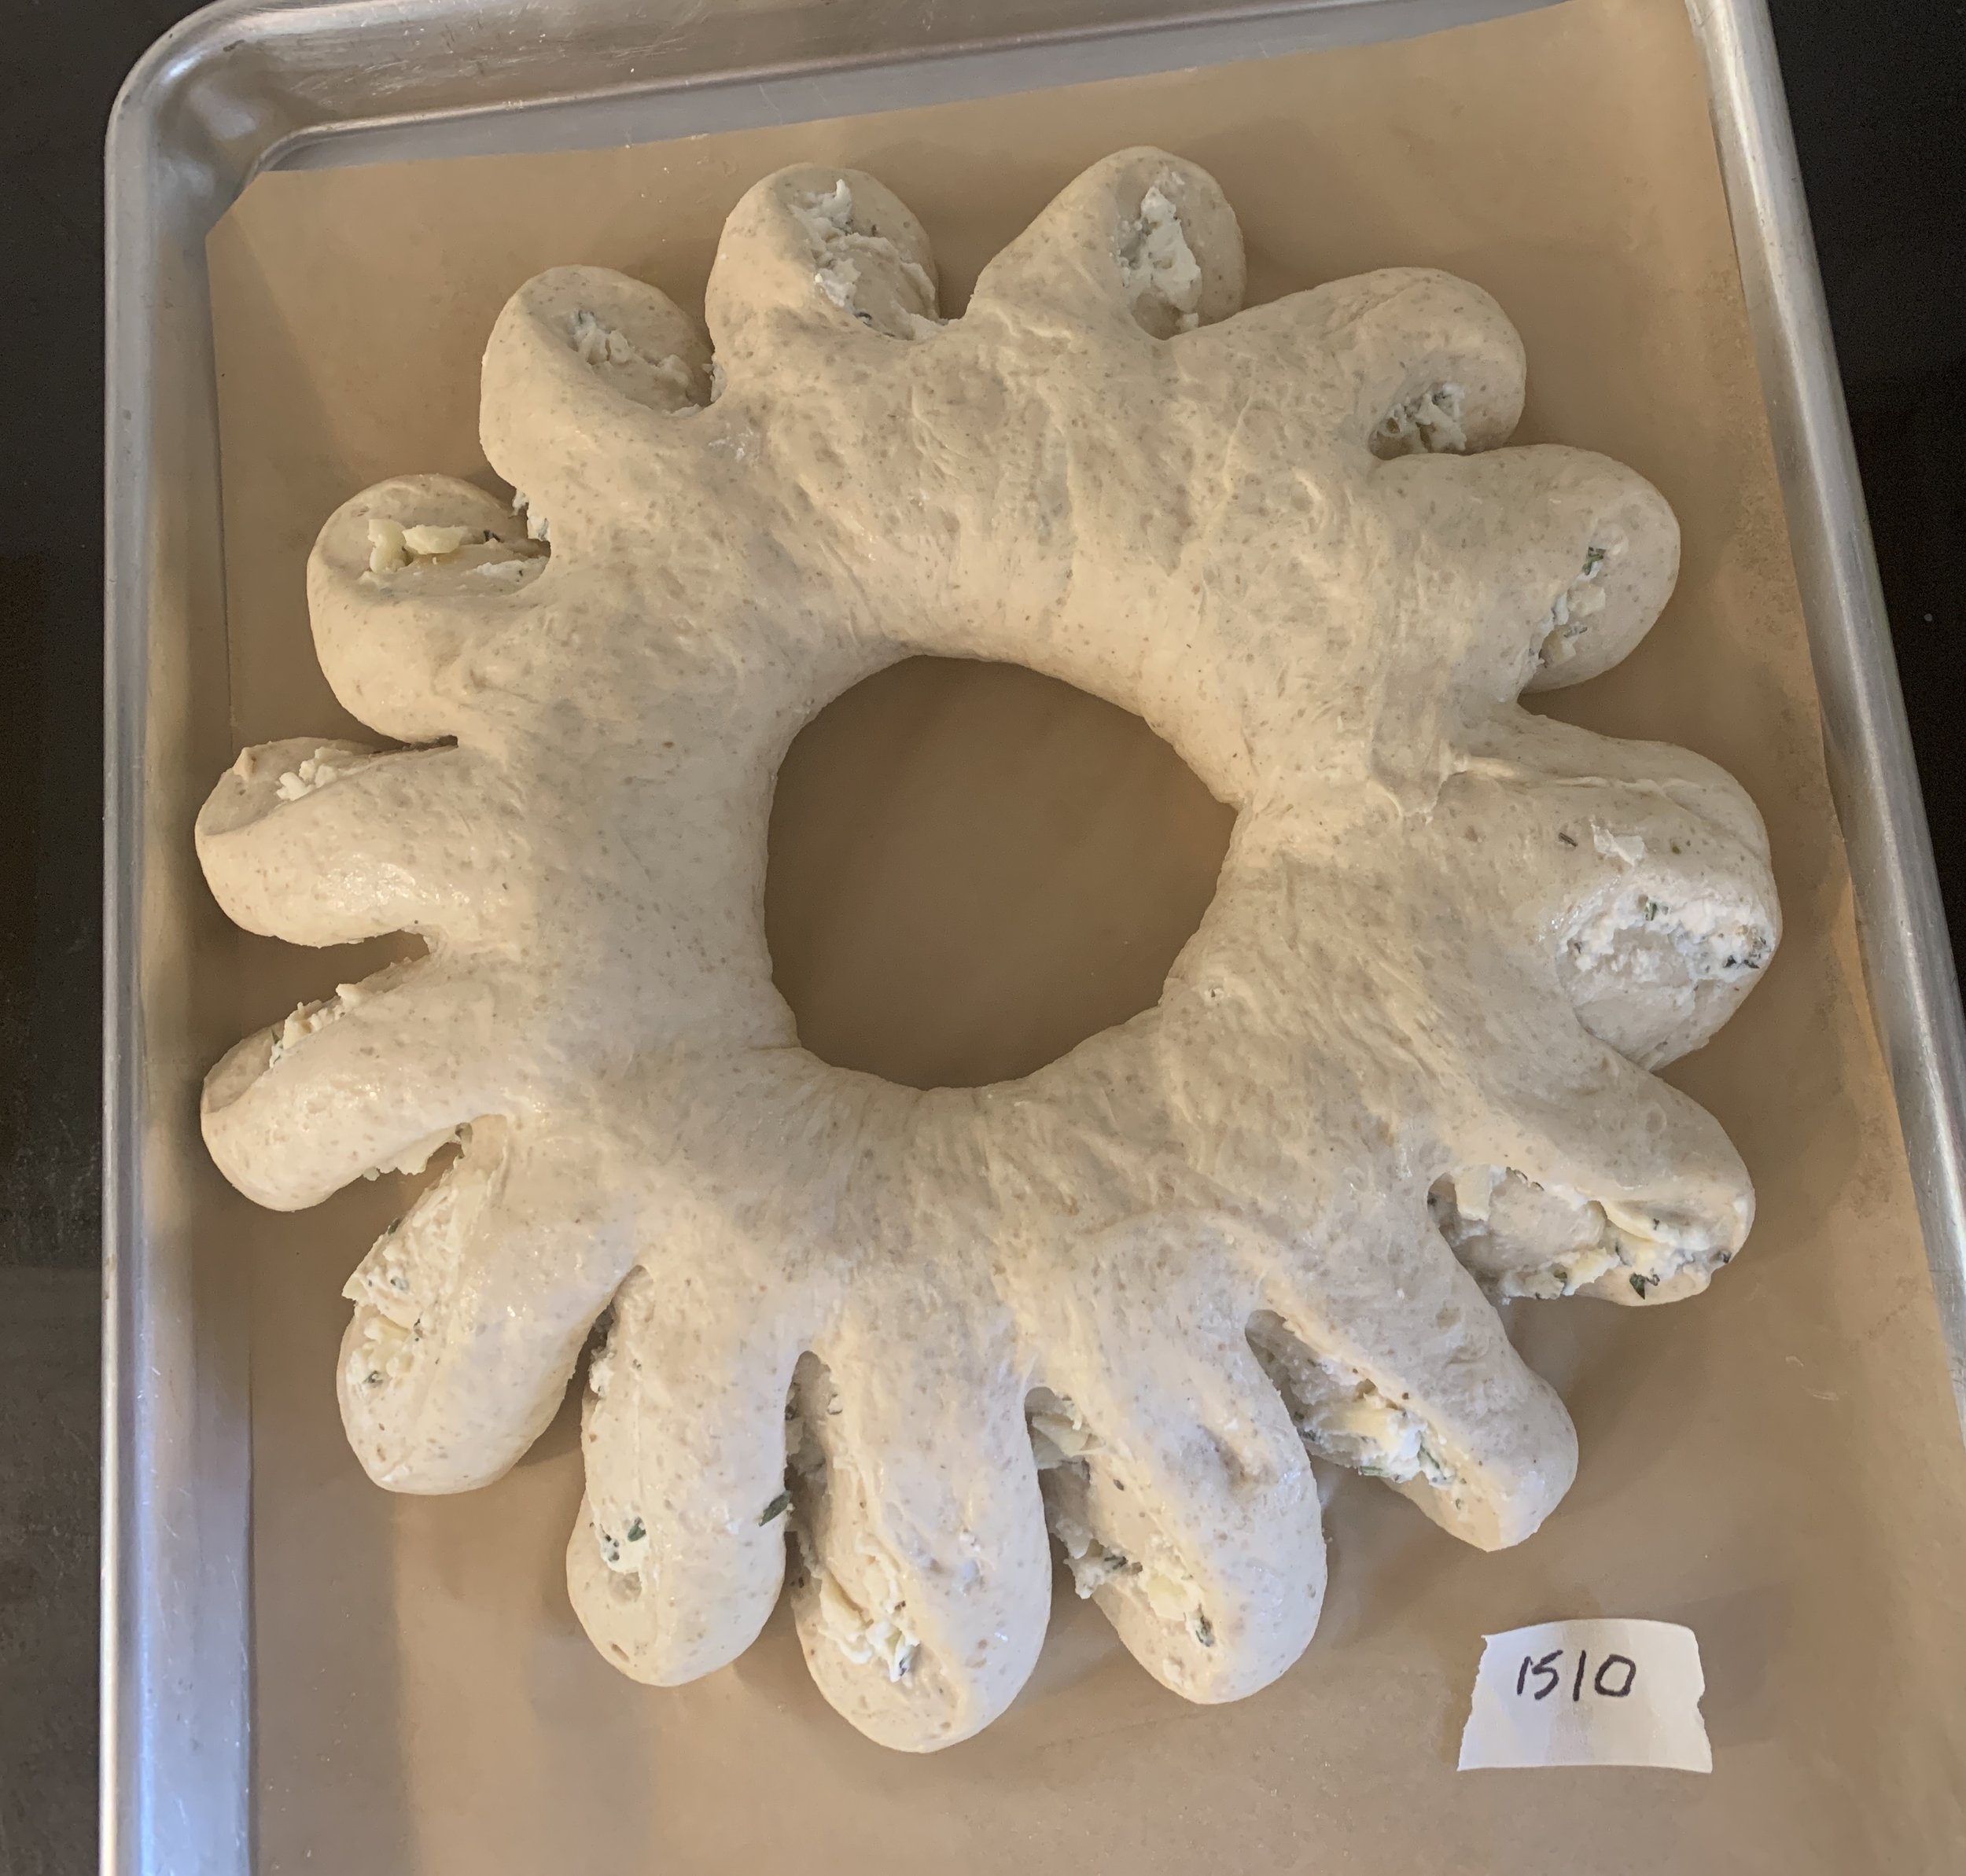
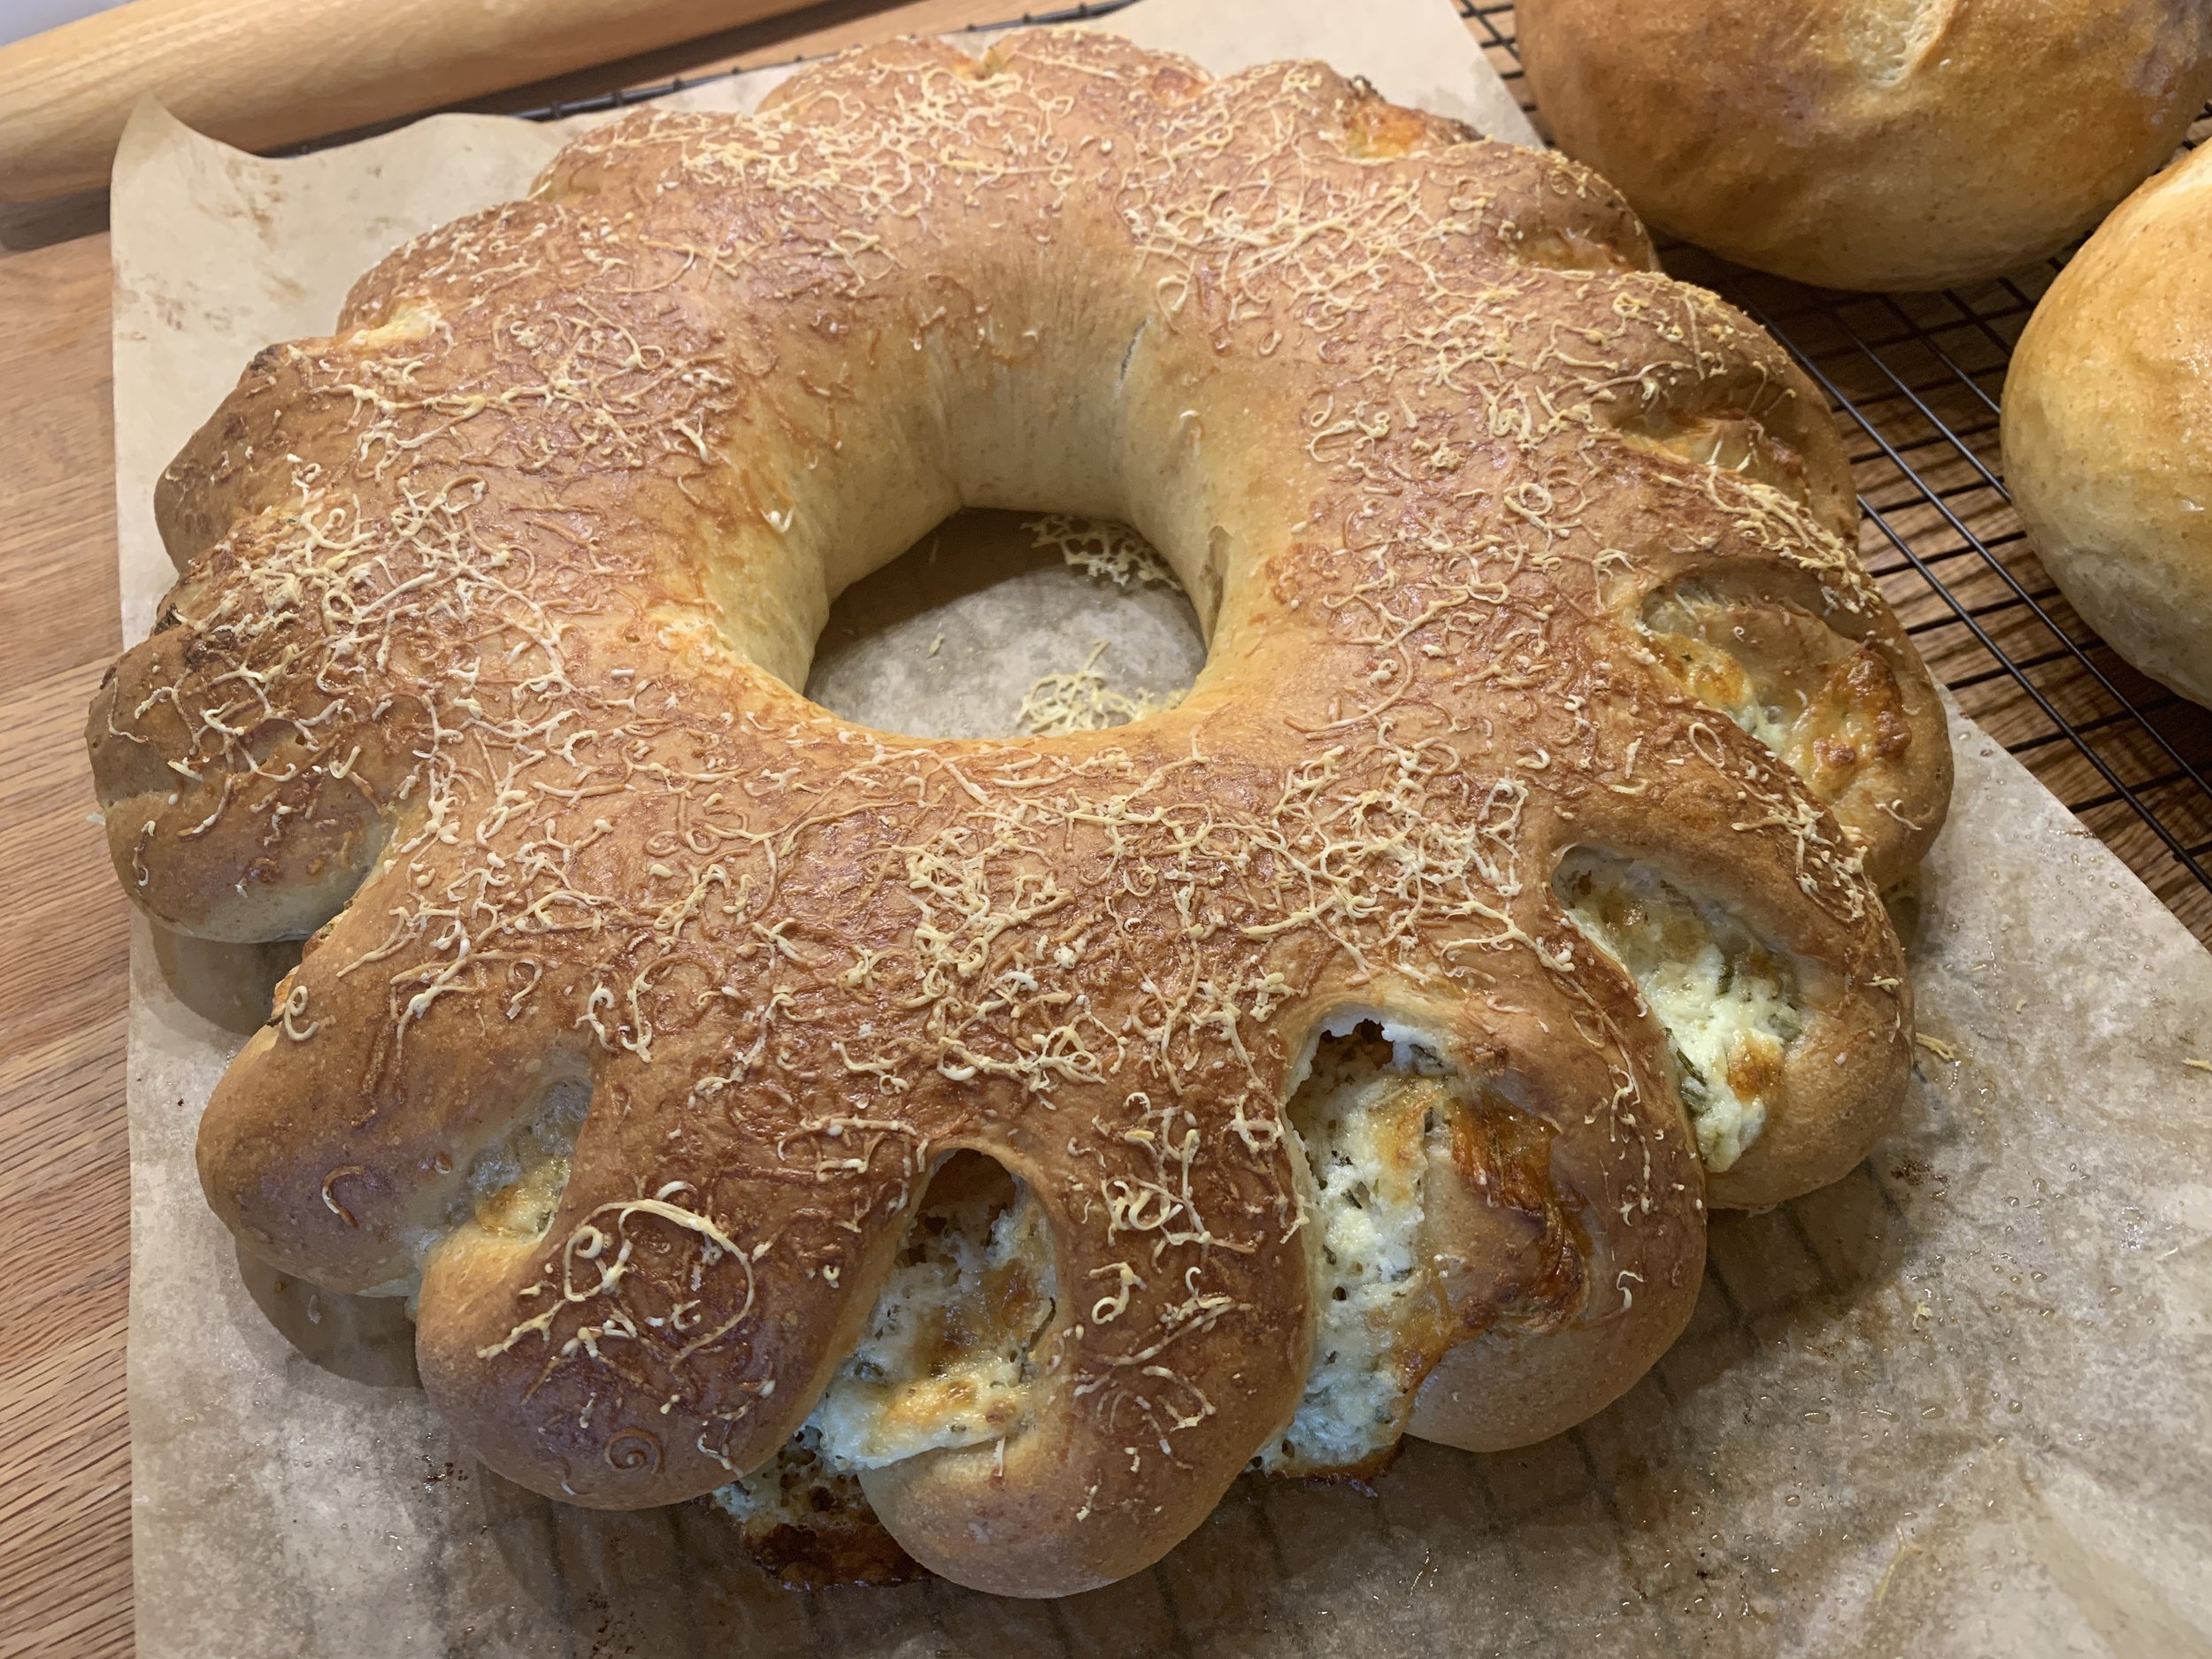
I wanted to try a filled wreath, using half a recipe (~700 g) for that and dividing the rest into two for a couple of simple boules.

Ricotta herb wreath and two small boules

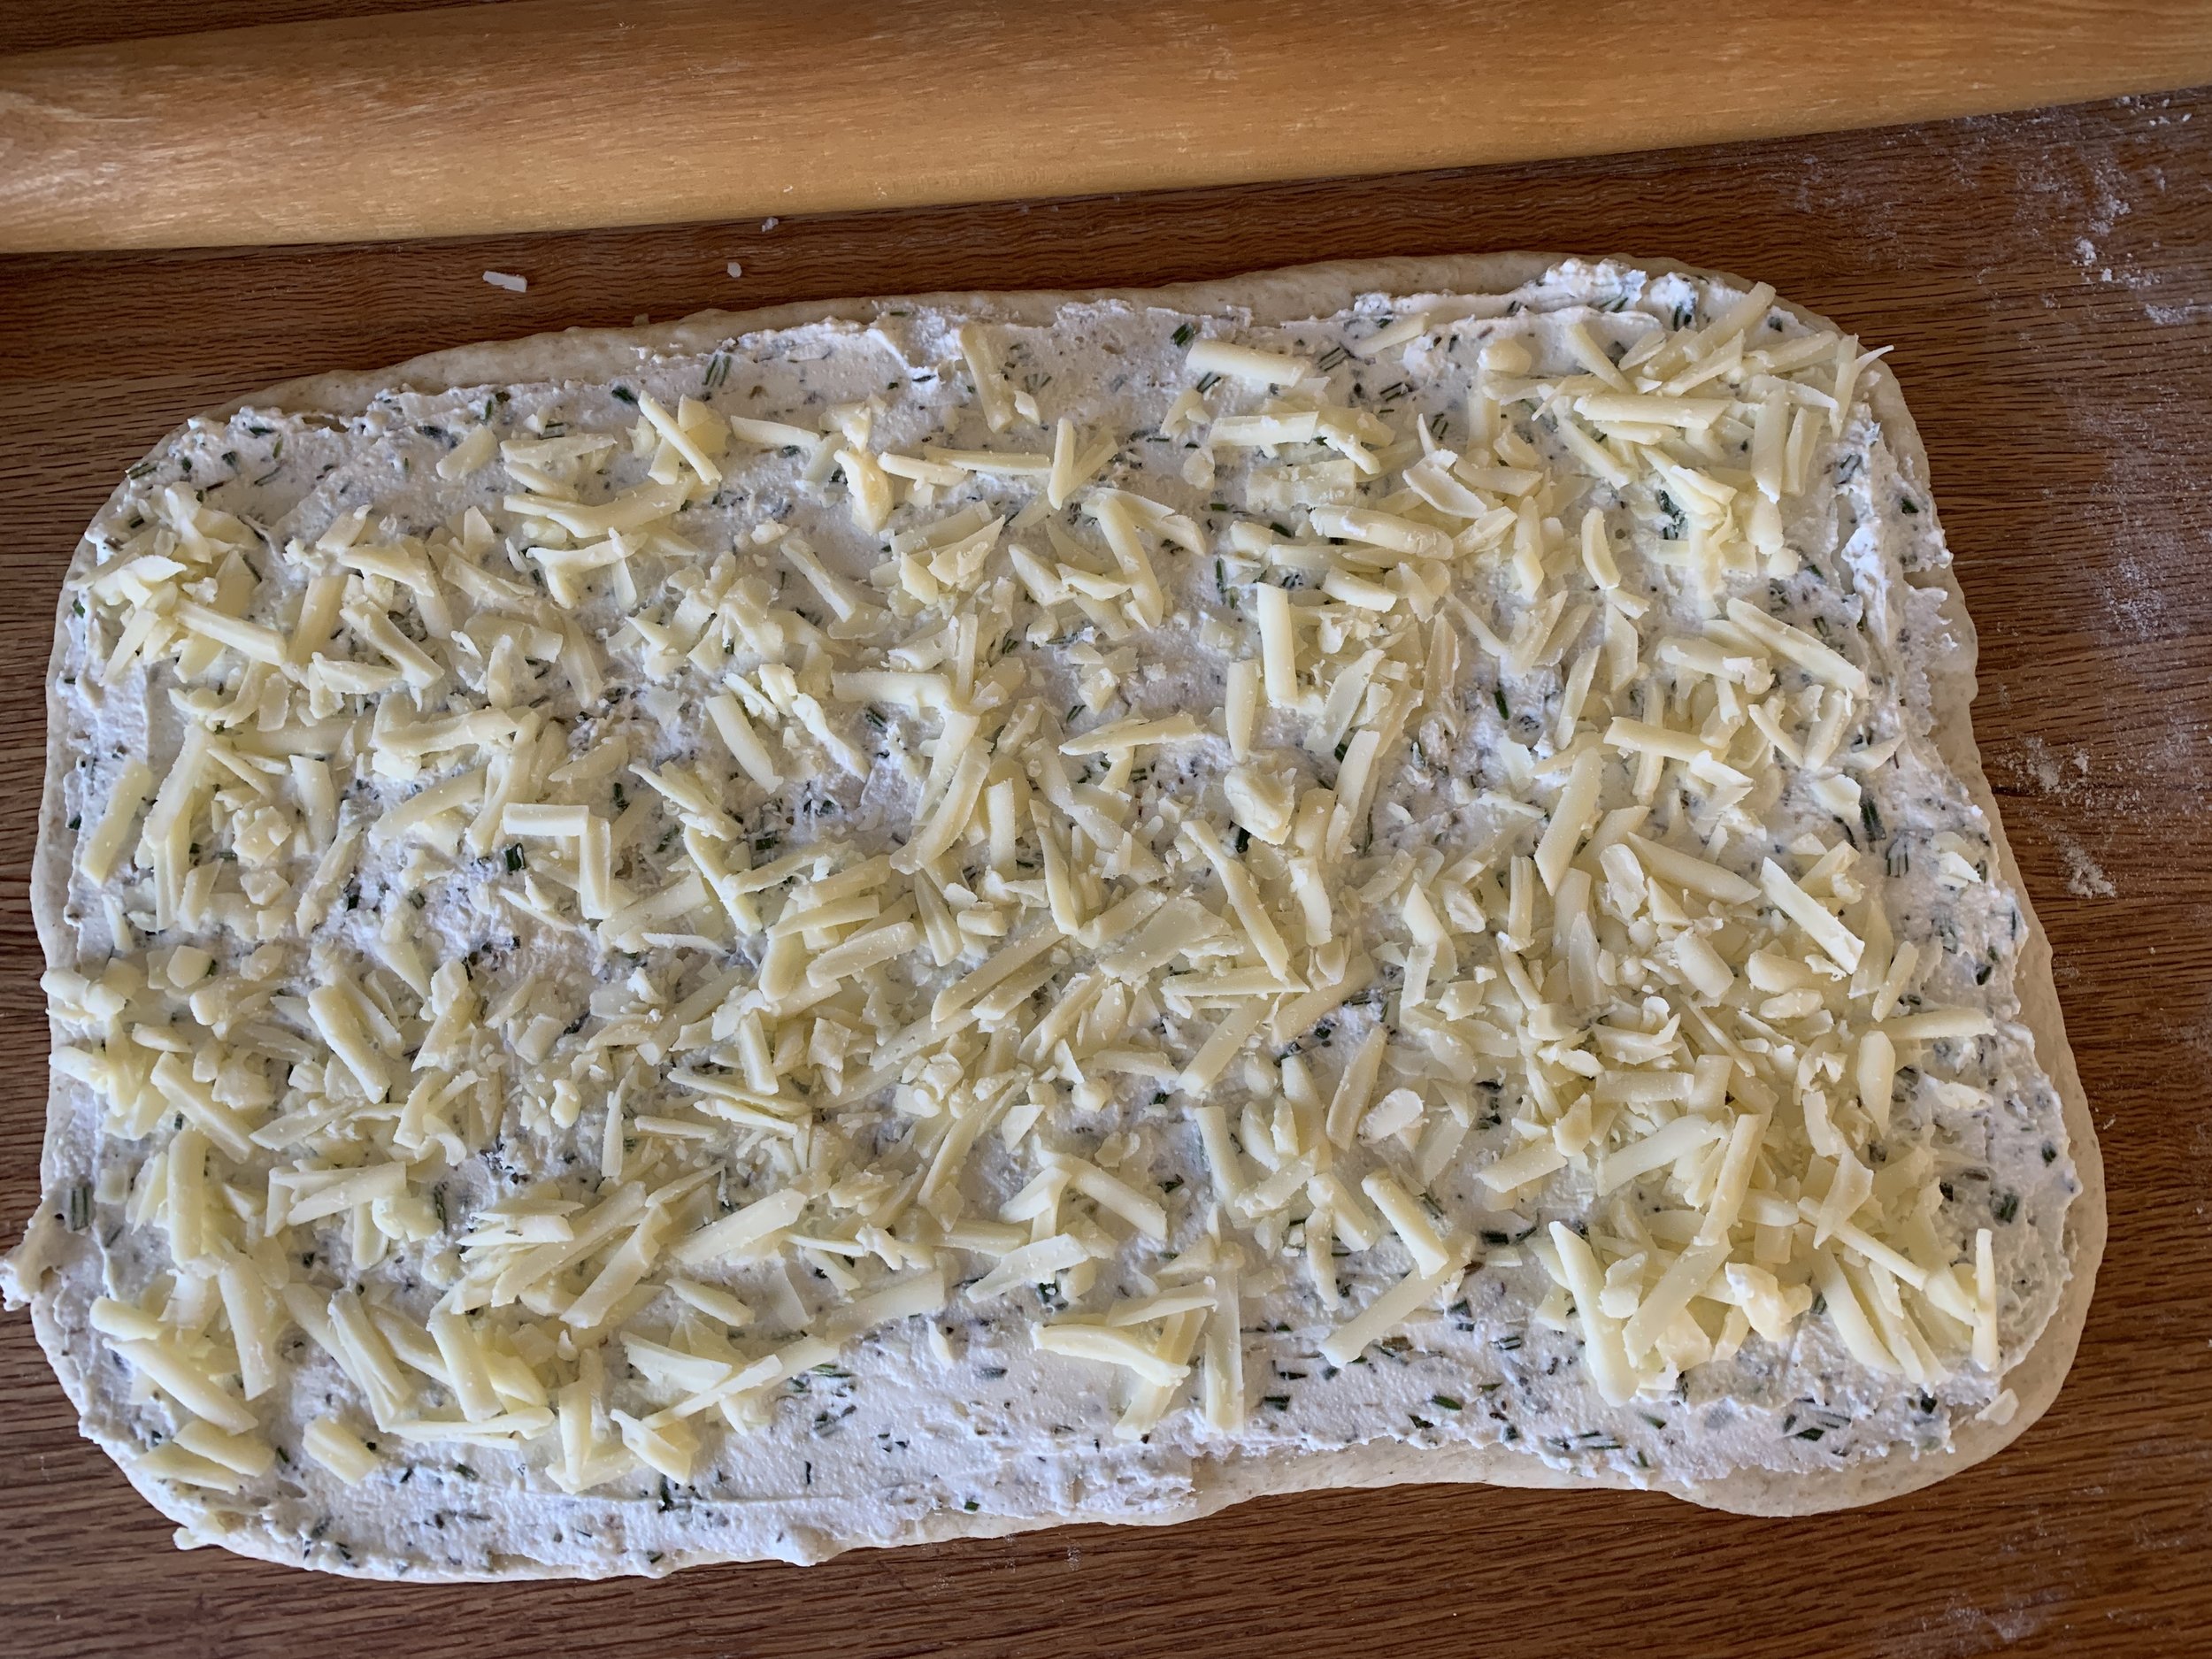
For the filling I mixed 3/4 cup whole milk ricotta, 1/4 cup cream cheese, a few pinches of dried oregano and herbes de provence plus ~2 tablespoons chopped fresh rosemary, one grated clove garlic and 4 ounces of grated sharp provolone which I ultimately thought too over powering - too much!. Live and learn, eh? Next time . . . . .

Roll the dough out to a rectangle of 8-ish by 16-ish inches.

Spread the ricotta filling over the dough and top it with the grated cheese. Press it down lightly.

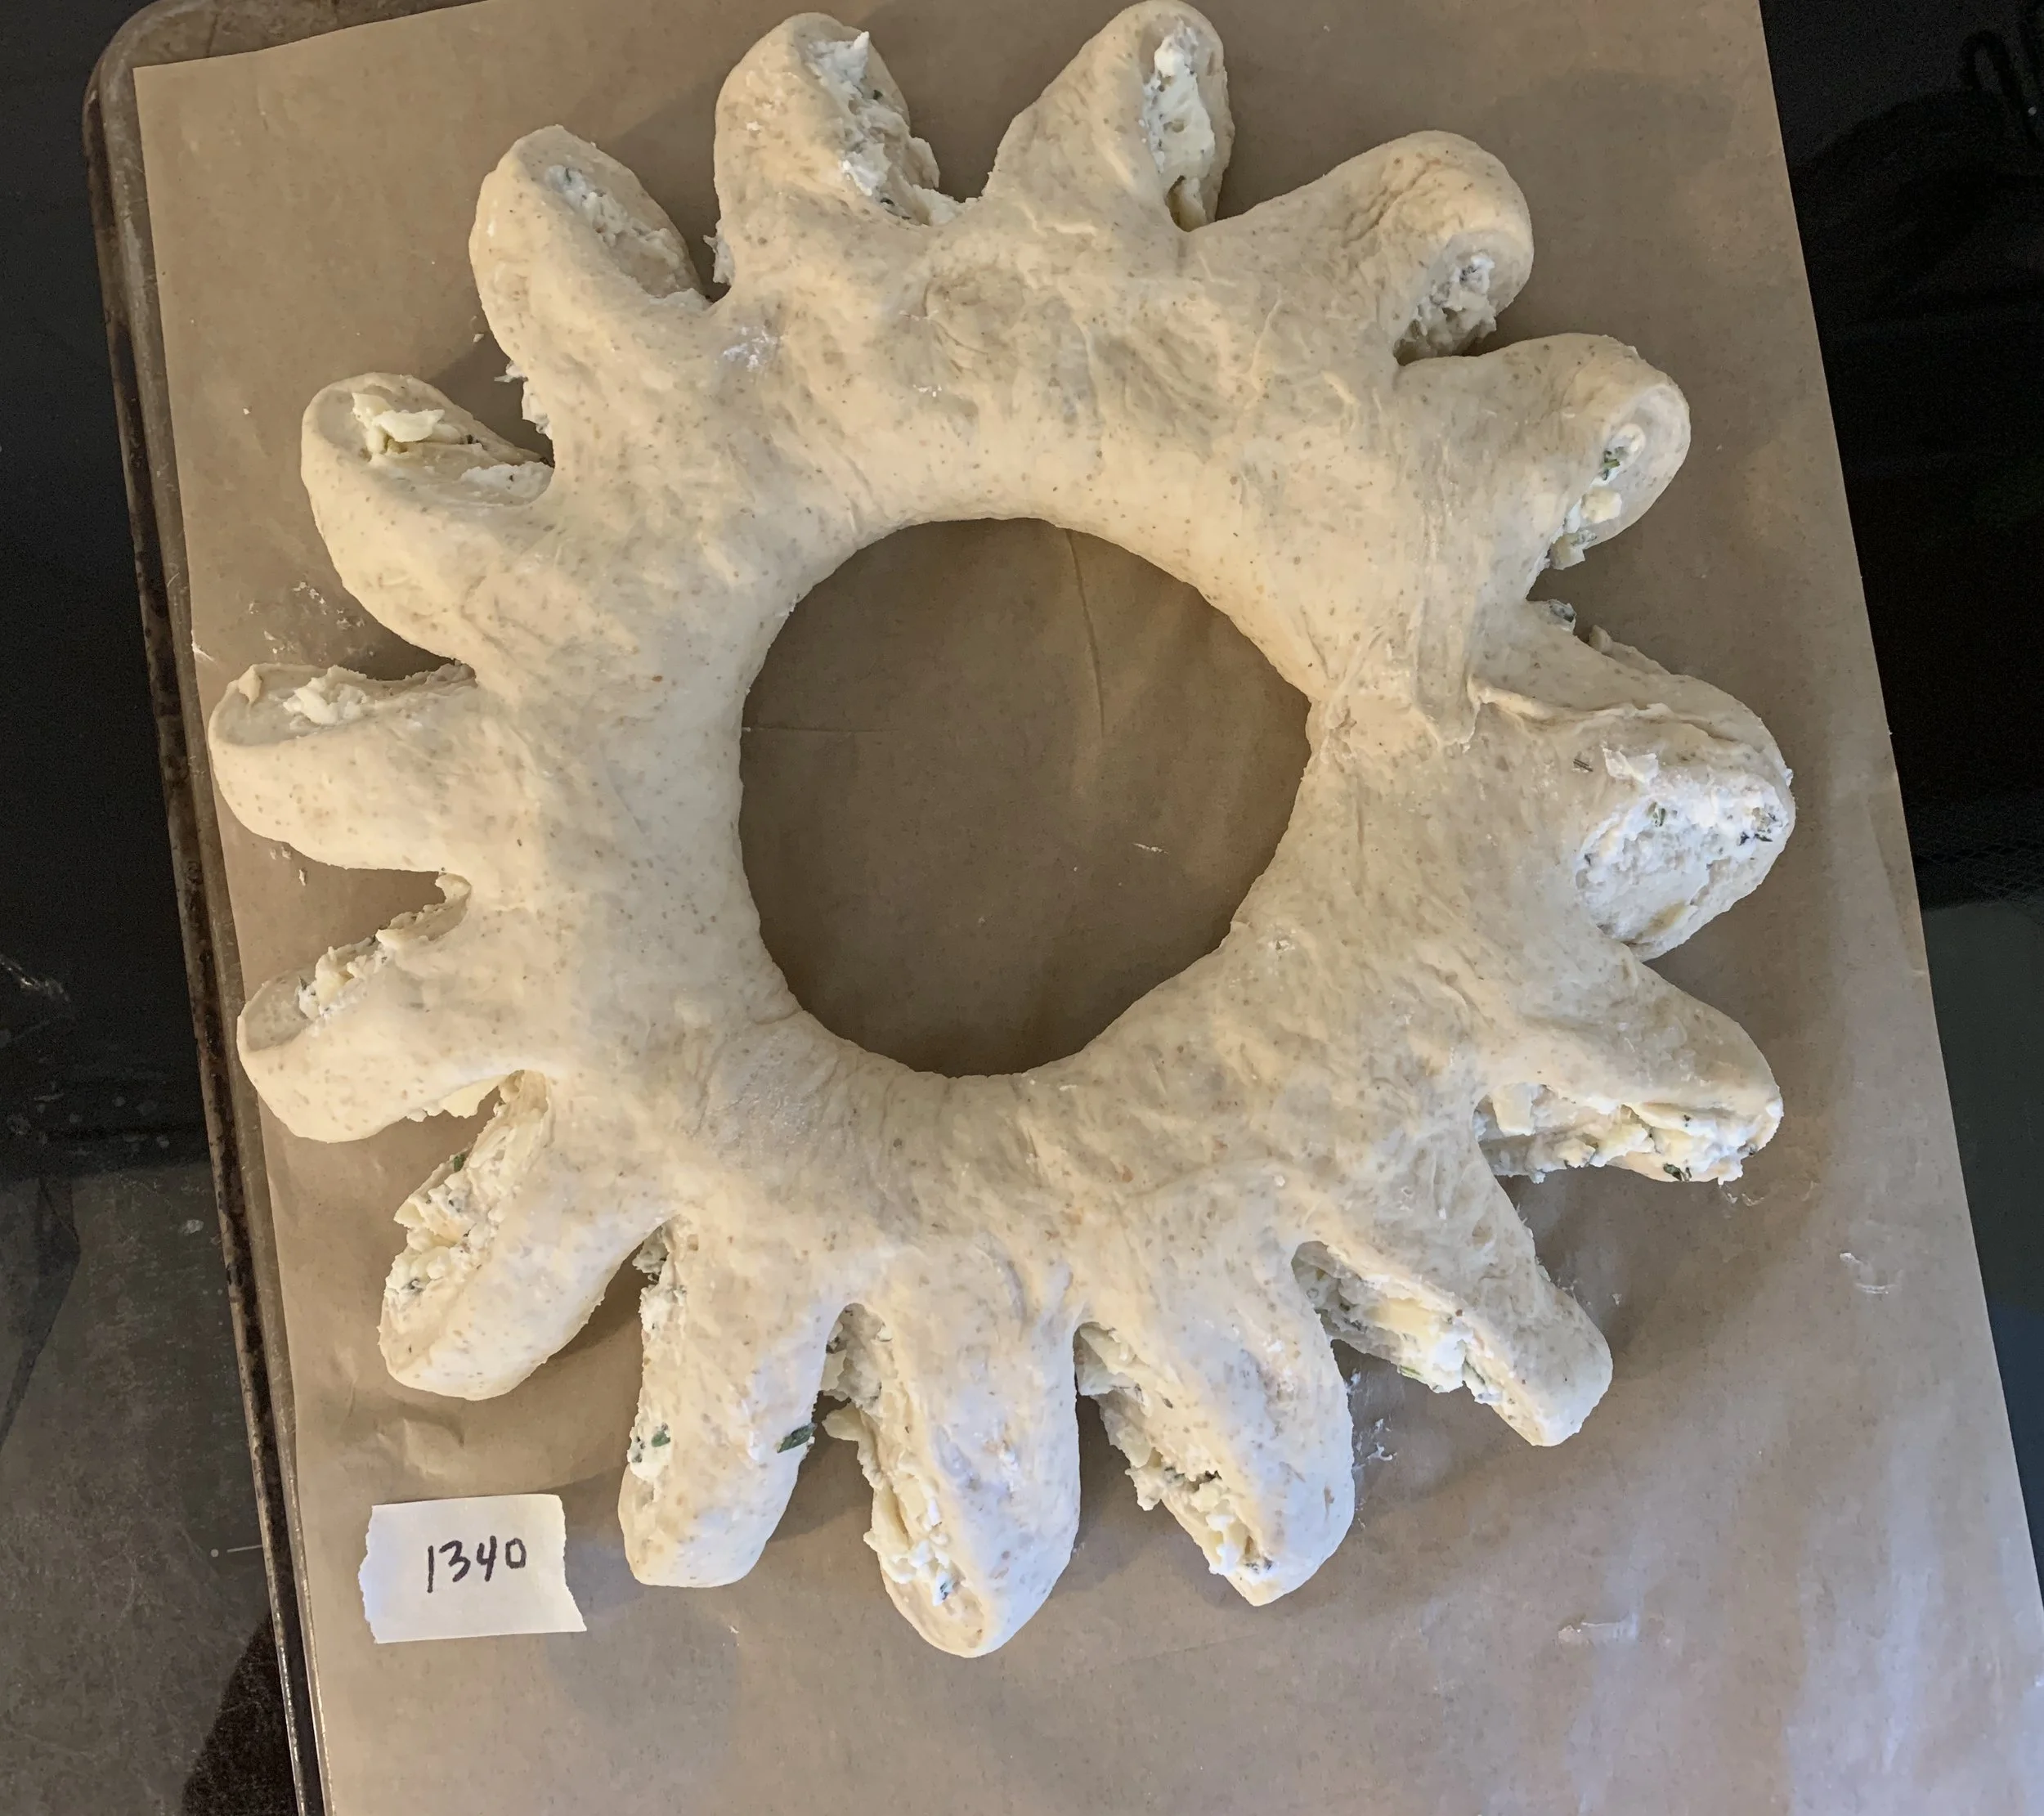
Log roll it up and cut slits along one side every inch of so, half way through.

Form it into a wreath and pinch the ends together. Separate and twist the sections out a bit. Hmmm . . . looks like some sort of sea creature.

Cover lightly with oiled plastic wrap and let rise about 90 minutes.

Lightly brush top with egg white or water and grate more cheese on top - parmesan or locatelli work well.

Bake 25-30 minutes, let cool and enjoy.

Whew! The end. It’s a good dough to work with and so tasty no matter how you choose to bake it. Have fun!

Giving thanks for daily bread: Semolina rye 2 ways

B0A379E3-8A65-4BAD-99F5-D090C98D69C3.jpg

This one was fun to work on. I adapted a King Arthur Baking Company direct dough recipe, created a poolish version and tried it a couple of different ways - boules and standard sandwich loaves. Don’t you just love dough? And bread? And pastries? And . . . . . . . ! It’s all fantastic!!

I’ve written about poolish most recently in my baguette post. It’s in the category of pre-ferments or dough starters and is made up of equal weights flour and water. Fermented for some hours before being added to the final dough, it kick starts the fermentation process, adding more structure, flavor and a longer shelf life to the end result. All great reasons to do it! It just takes a bit of planning ahead.

I turned to Rose Levy Beranbaum’s book “The Bread Bible” for guidelines to convert a direct dough recipe to a poolish method. Generally you’ll weigh 1/3 to 1/2 the amount of the total water in the recipe (in my case 540 g x 0.33 = 180) and 22-33% the amount of the total flour (826 g x 0.22 = 180 give or take a gram) to create your poolish. Mix 180 g cool water, 180 g bread flour plus a pinch of instant yeast, cover and let sit overnight.

Note: as you can see, RLB gives a range within which you can work to create the poolish . I chose the lower ends of the spectrum.

Here’s the result after an overnight room temperature ferment.

91233A40-091E-46EC-9134-F6A283220B5E.jpg

Here’s my full recipe. I love writing recipes out by hand - something I got used to during my stage in Paris in 2007. It’s a great way to place the mixing steps along side of the ingredients which for me makes it more user friendly. Notes can easily be added in the margins as well.

0E0FEECF-AB27-4B11-94E5-4860BF20EA0C.jpg

I’m a big fan of King Arthur’s all purpose and bread flours, and I turn to Bob’s Red Mill for other specialty flours, in this case semolina and dark rye.

699A4916-0BAB-440E-AAFD-712315B70F95.jpeg

When ready to mix the final dough, weigh out the remaining dough ingredients. Add the warm water to the poolish and mix to loosen. Place the bread, rye and semolina flours and the instant yeast in the bowl of a stand mixer fitted with the dough hook, then add the poolish/water to it. At this point I give it an initial blend with a spatula to get things started. Then let the mixer do the work!

79404B96-C4D1-4E8F-AEFC-82724B650D86.jpg

Mix on low speed and add the sugar, olive oil and salt. Once the majority of the flour has been blended in, increase speed to 2-4 and knead for 7-8 minutes to a smooth, slightly sticky dough.

5C9FA152-774E-4BC7-B97A-163672719556.jpeg

Since the dough is a bit sticky, lightly wet your hands and bowl scraper to help you form a ball. Cover with lightly oiled plastic wrap and let rise 60 minutes.

After the first rise

After the first rise

My first round with the full recipe was to make boules. Many months ago I had snagged a great deal on a 2 1/4 quart Le Creuset lidded enameled cast iron saucepan at Sur La Table (now sadly closed here in Grand Rapids), and I wanted to make a cast iron pot loaf as well as a couple of on-the-baking-stone boules.

9996A523-B6C0-4063-AD3C-D83931EA2888.jpg

Divide the dough into three ~479 g portions and shape three boules. Place one on a piece of floured parchment cut as seen below to allow for easy lifting and placing into the pot. Cover lightly with oiled plastic wrap and let rise one hour.

Now’s the perfect time to heat the oven to 450ºF with the empty covered pot inside. You want the pot nice and hot! I also keep my baking stone on the bottom rack so that heats up for the next two loaves too.

All risen!

All risen!
Set the other two on a parchment lined overturned sheet pan, cover and let rise one hour.

Note: Since I planned to bake in two batches, I popped these two into the fridge at the end of the rise so as to avoid over proofing while my pot bread was baking.

Risen!

Risen!

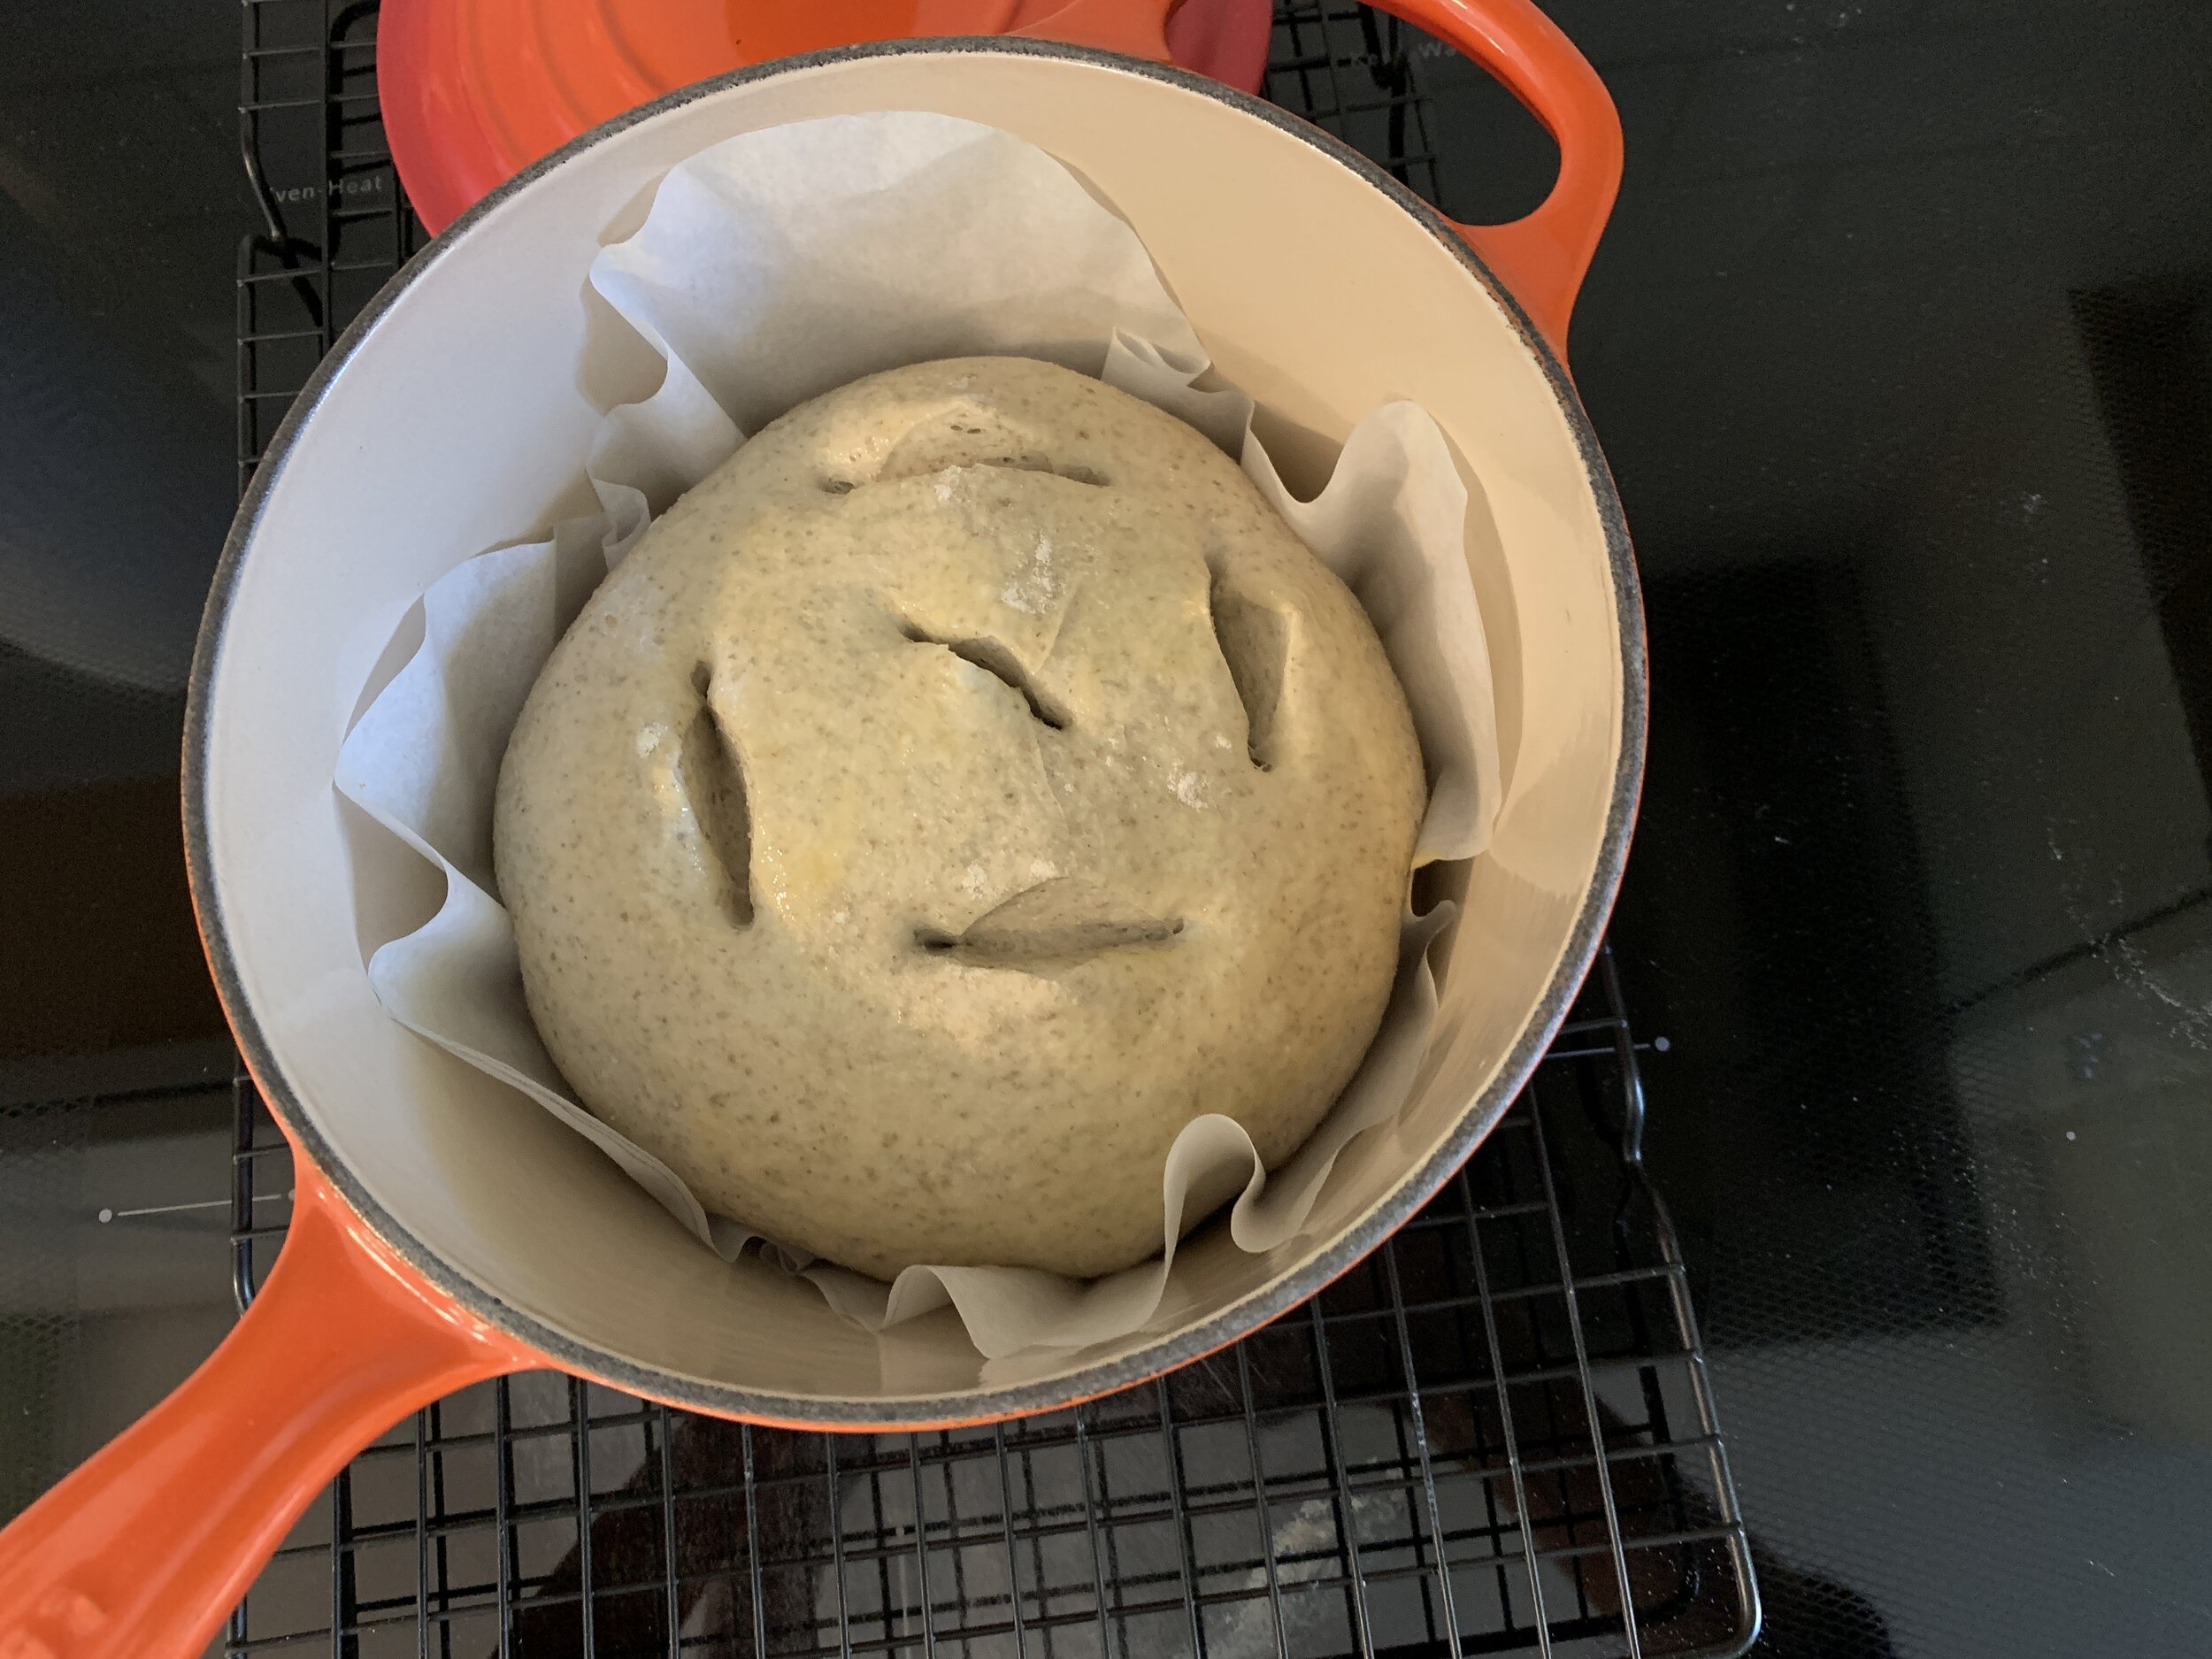
When ready to bake the first loaf, very carefully remove the heated pot from the oven, lift the boule by the parchment and lower it into the hot pot. Don’t burn yourself!!

185E773C-9735-40D9-8783-6351C16CDAB3.jpg

I opted to snip the top with scissors rather than score it - my pattern came out somewhat catty-wompus - hmmmmm, what exactly was I going for here? Looks like a strange Halloween pumpkin. I realized after the fact that I forgot to snip across each slash like an X to create little ears that would open up during baking. Oh distraction!! At least it didn’t negatively affect the end result!

4AFDB0E1-E126-4E32-A604-7D18ADBEBA73.jpeg

Brush it with egg wash or a little milk and bake covered for about 20 minutes . . . . .

C3CCB502-554A-4C7F-A9EB-DB8F315CA118.jpg

then uncovered for an additional 10-15 minutes until nicely browned.

Voilà

Voilà

Lift it out and let cool on a rack. Don’t you think the scissors snips actually lend it a certain carefree character?

7905D48F-6843-439C-934C-9004B09B4950.jpeg

For the other two boules, turn the oven down to 400ºF, egg wash, score and slide them, with the parchment, off the sheet pan onto the baking stone which has been heating up all along. I squirt 3-4 ounces of hot water into the metal pan in the bottom of my oven to give a burst of steam, then close the door and let the baking begin.

1879FF45-3E0D-45ED-B46A-92CA0B3E0452.jpg

Give them 10 minutes at 400ºF then turn down to 375ºF for another 20 minutes or so until nicely browned. Cool on a rack (keep your pot bread company!).

971A3650-03D0-4BDA-8A61-46C1C627342F.jpeg

My second session with the full recipe was geared to making standard sandwich loaves. Steve and I love having good bread around for toast or sandwiches and this one fits the bill. The primary difference here is dividing the first risen dough into two portions about 715 g each, shaping loaves and tucking them into oiled medium loaf pans.

E74468D7-B160-49AA-AC37-D099F4736F25.jpeg

Cover with lightly oiled plastic wrap and let rise about an hour until the dough is nicely mounding above the rims. Meanwhile heat the oven to 375ºF.

87AD36D0-C3E5-4698-A4DA-FF5525B3F940.jpeg

Score . . . .

D9E72207-C162-458C-9ED5-BD6BBC9DB5F5.jpeg

and bake 30- 40 minutes until nicely browned and a digital thermometer in the center reads 190ºF.

While scoring isn’t strictly necessary here, it allows for a more uniform oven rise to the bread.

52039F65-21AE-4F30-A422-D903F860681E.jpeg

Remove from the pans and let cool on a rack.

734FC5C9-46D5-4A56-AF66-FDC10BCDCA6E.jpeg

I am so happy with this bread! Both the boules and the loaves have a nice chew to the crust, a tight crumb and the texture holds up well to a hearty sandwich. And let’s not forget morning toast with a fried egg on top or your favorite nut butter and jam. Yes.

4D9FF201-8697-4027-B6C5-BCA8E9DF6CD3.jpeg
6E9BBEDE-D58E-4DD2-9D55-4DA50817D31A.jpeg

Here’s a big cheer for dough and bread making - Hip hip hooray!

Let’s give thanks for safety and health as we look forward to next year and new beginnings. Meanwhile, think about a bit of holiday spirit, cut some local greens and twigs and tuck them into pots. You’ll be happy you did.

Happy Thanksgiving to all!

F1C4D47E-9971-4554-A5AD-5F98FDC81C4F_1_201_a.jpeg