Danish pastry class in Copenhagen

Update note 3/06/23: please note that I am NOT the owner/operator of the Terrible French Pastry School. I’ve had several people who plan to travel to Copenhagen email me requesting class sign ups. You must contact the school (link below) to set up any classes with Chef Fred. You’ll be happy you did!!

Always up for another baking adventure, particularly one involving one of my favorites, laminated dough, I checked out various pastry/baking classes that might be available in the cities on our travel itinerary. What better subject to tackle than Danish pastries (aka wienerbrød) in Copenhagen, the capital of Denmark! Yes please.

The site of said class was at the Terrible French Pastry School (hmmm . . . . the name gives one pause) located in the Frederiksberg section of Copenhagen. The school is owned and operated by Frédéric Terrible, a Frenchman by birth, Dane by assimilation, who has been running the school for about 10 years now, following a long career in the pastry world. Classes are generally available in Danish and English (“for the tourists” says Fred) and can also be arranged with French as an option. His “open” classes are available for general sign up, and he also accepts requests for private events.

Turns out it was an easy Metro ride + short walk from our digs on a coolish, sunny beautiful morning, perfect for working with the layered, buttery dough. The building is set back off the street situated on a small cul de sac and the entrance very unassuming with a small gold “Terrible” plaque to the left of the door (Steve snapped this photo of me working on taking my own photo).

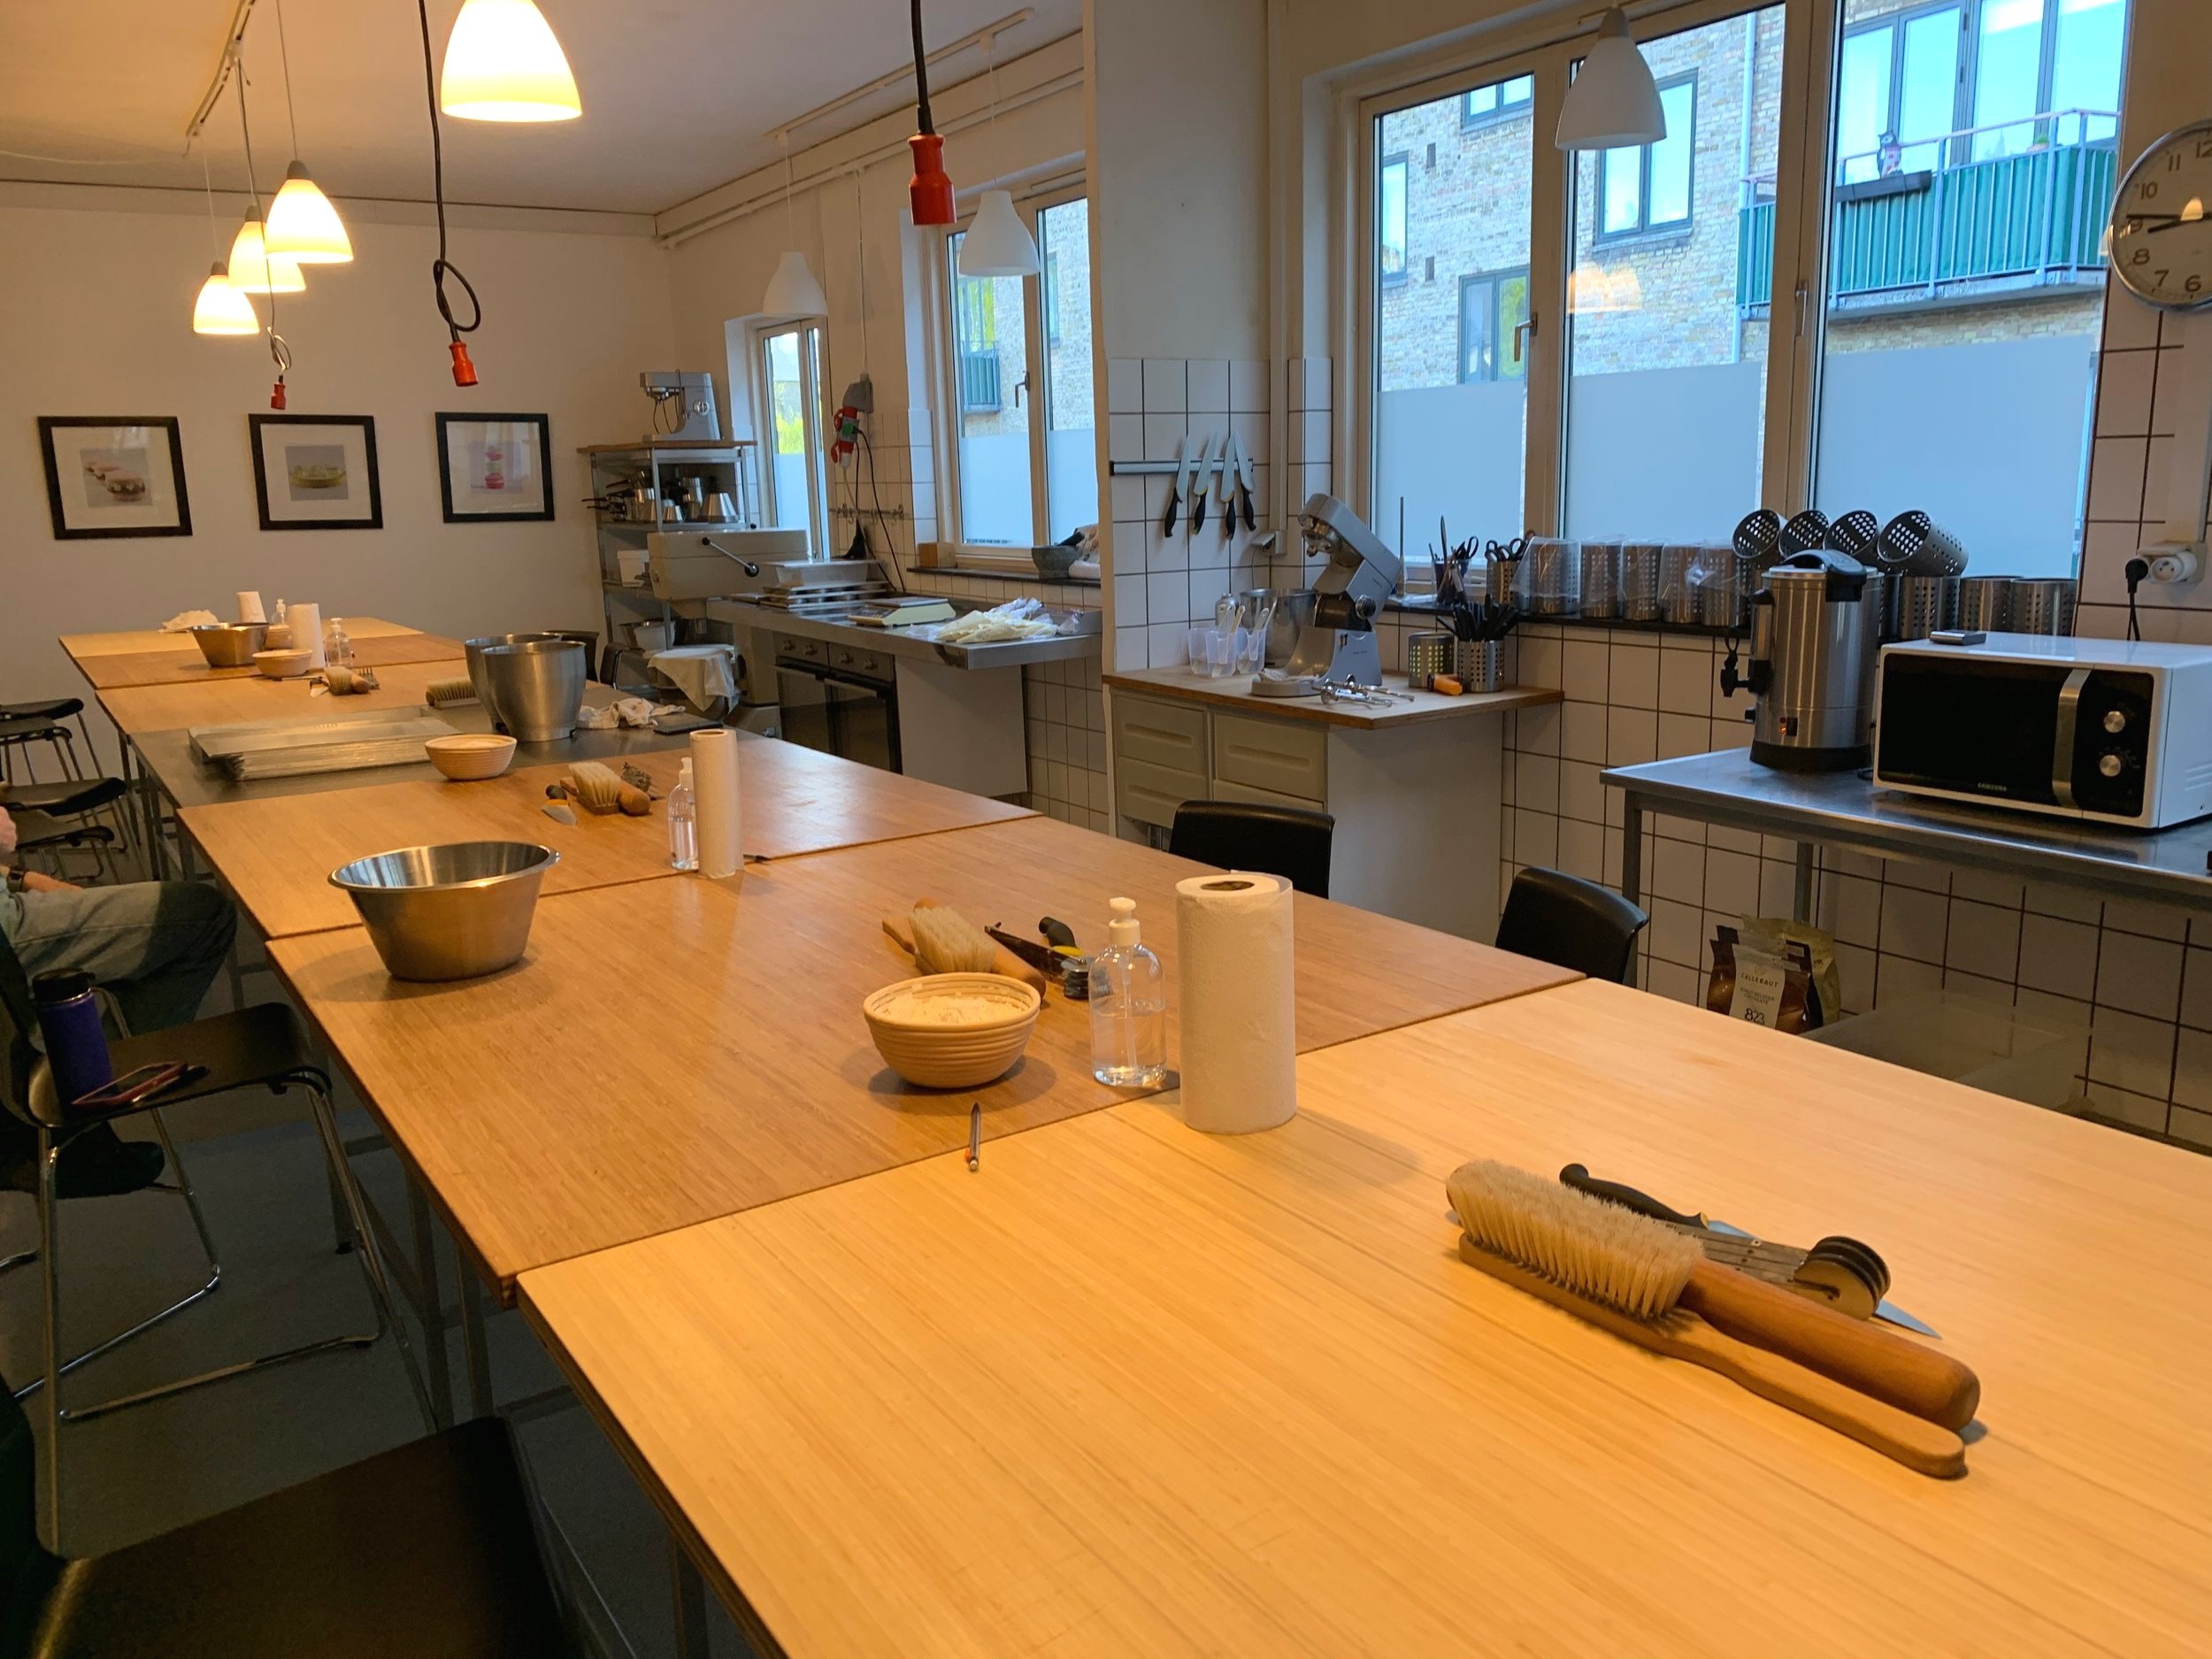
The kitchen/teaching space is perfect for groups of 10-12 people with a line up of working stations topped with dusting flour and necessary tools in the center. Ovens, mixers and assorted supplies are appropriately placed along the windows and periphery of the space.

Recalling fondly my own commercial kitchen during our Rhode Island years, I appreciated its spaciousness and organization.

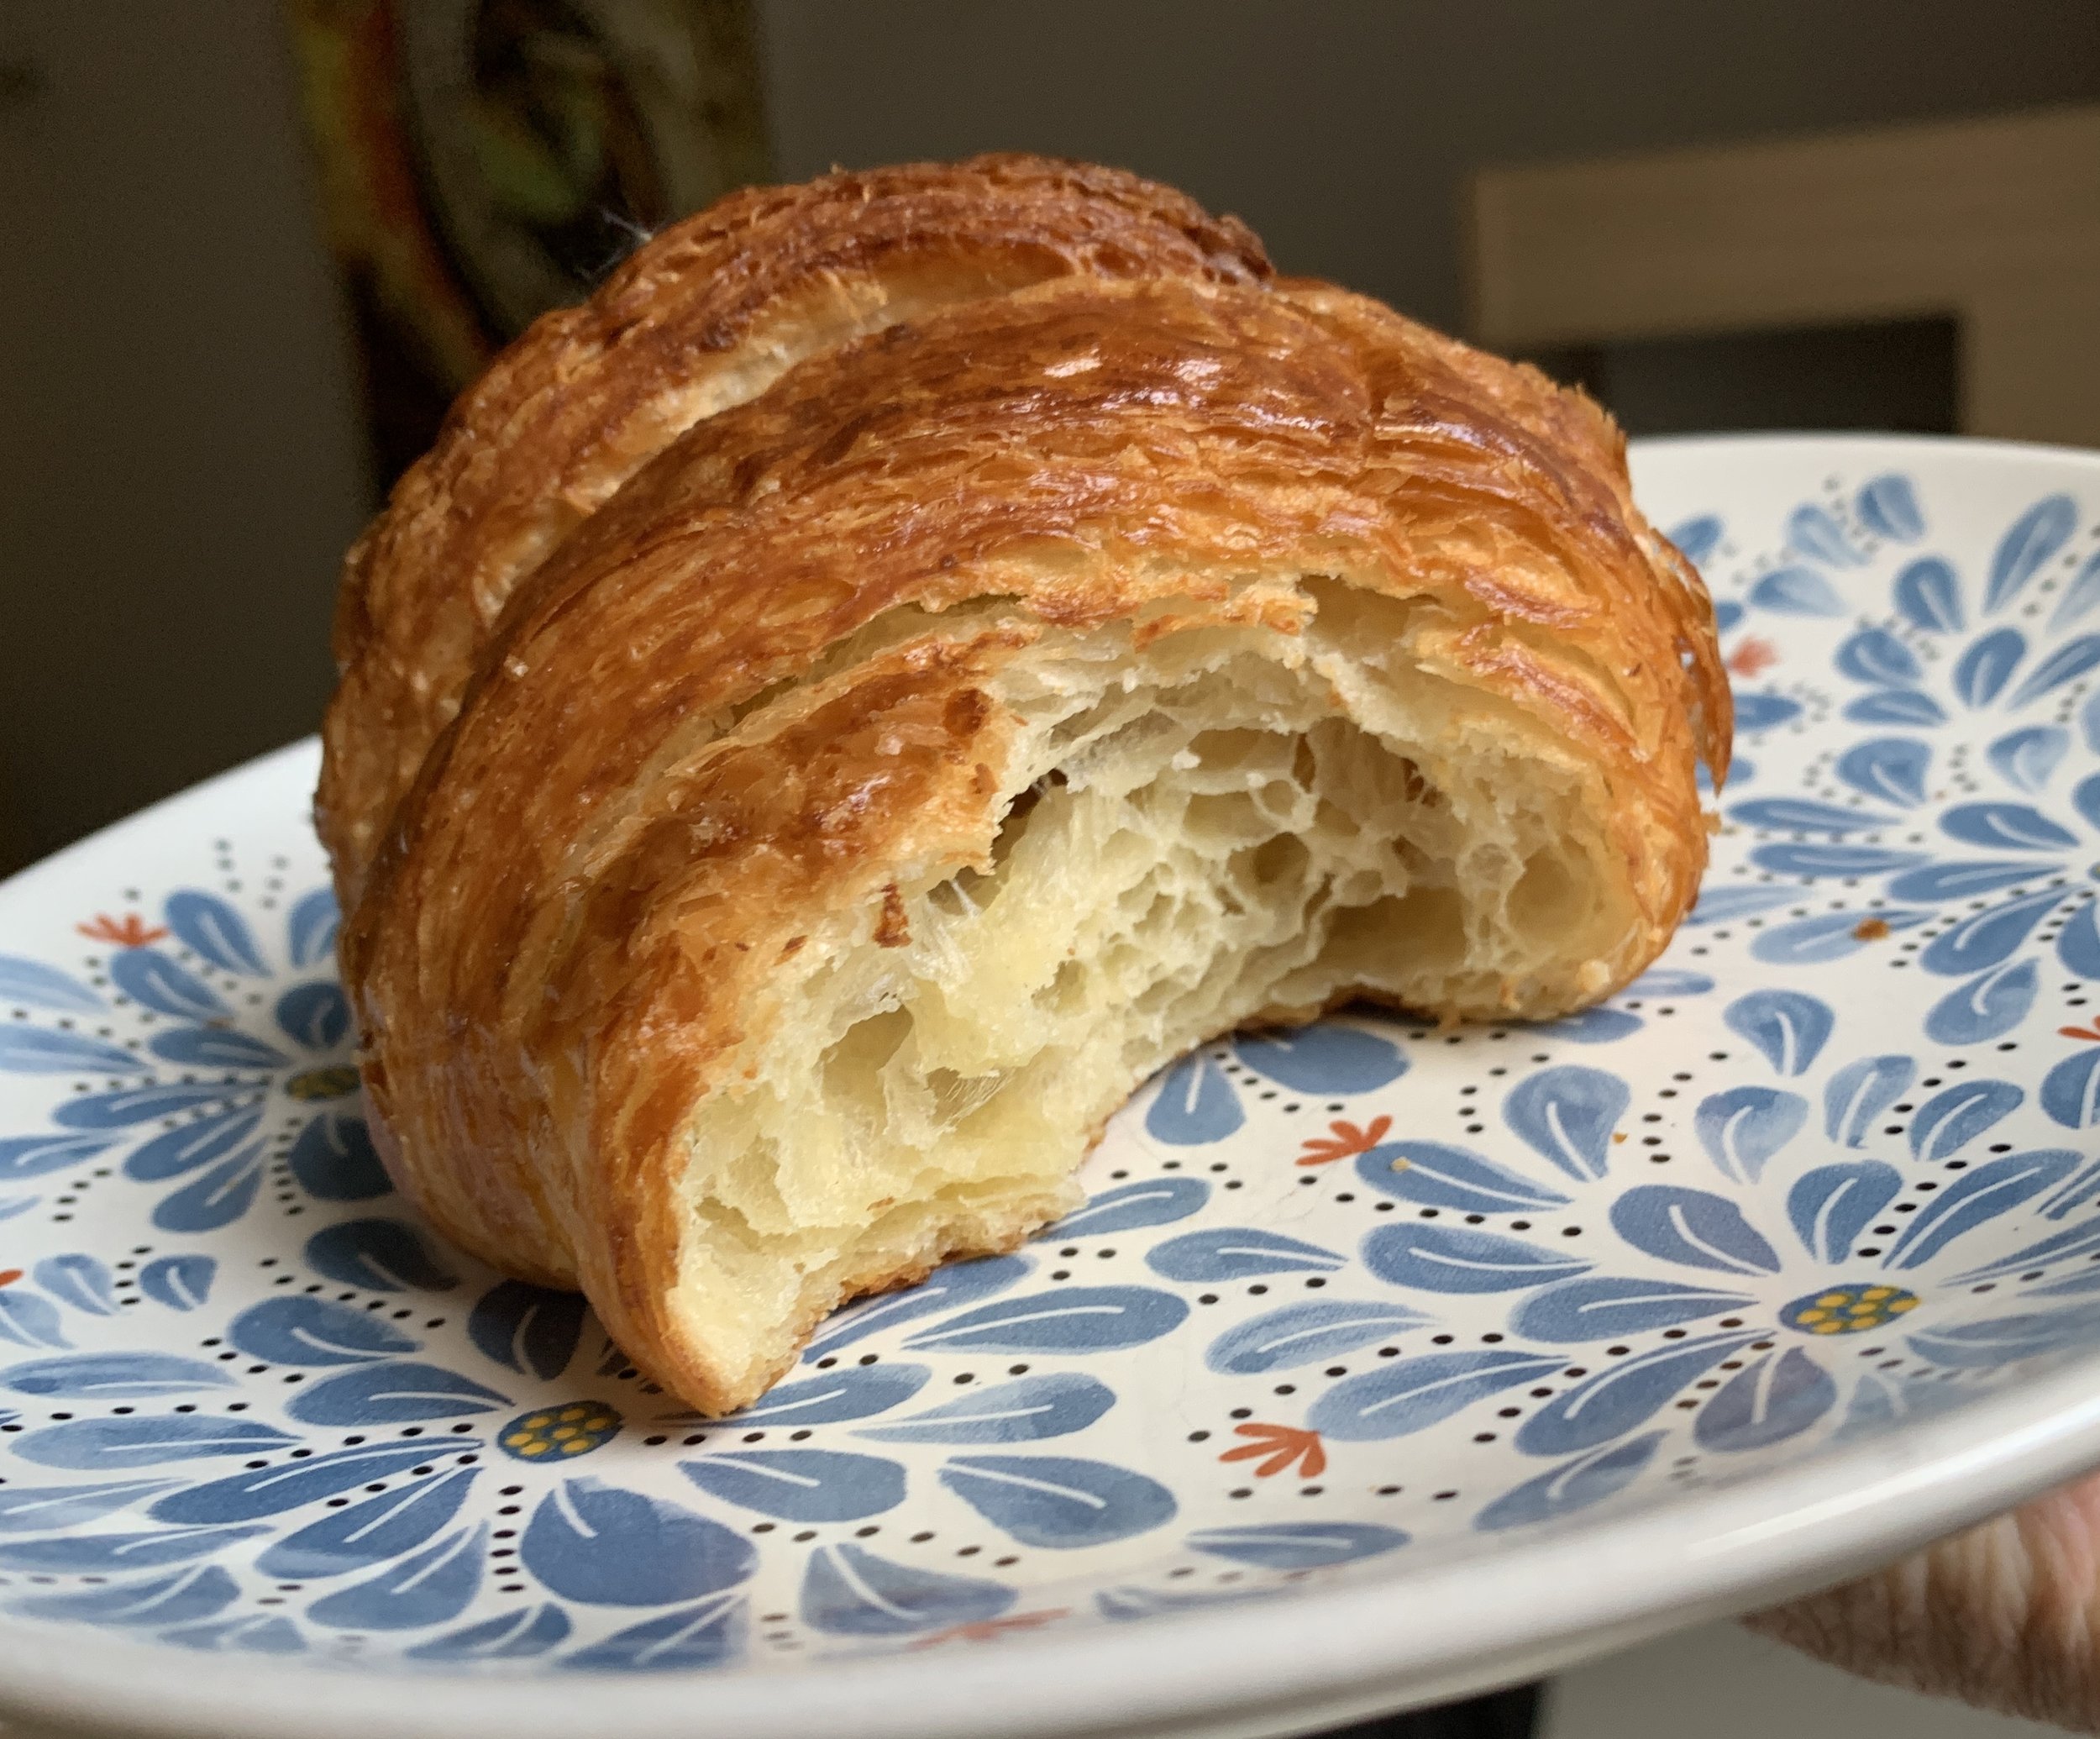
Chef Fred had his base dough recipe hanging up for all to see and would review the steps of dough making later in the class. I appreciated his insight into some of the differences in the dough when one uses water (crispy) or milk (less crispy), egg (softer) or no egg (less soft), different types of flour - all details that I’ve reviewed, compared and tried a number of times when deciding on a base recipe. So much to take in and everyone has their own favorite way of doing things.

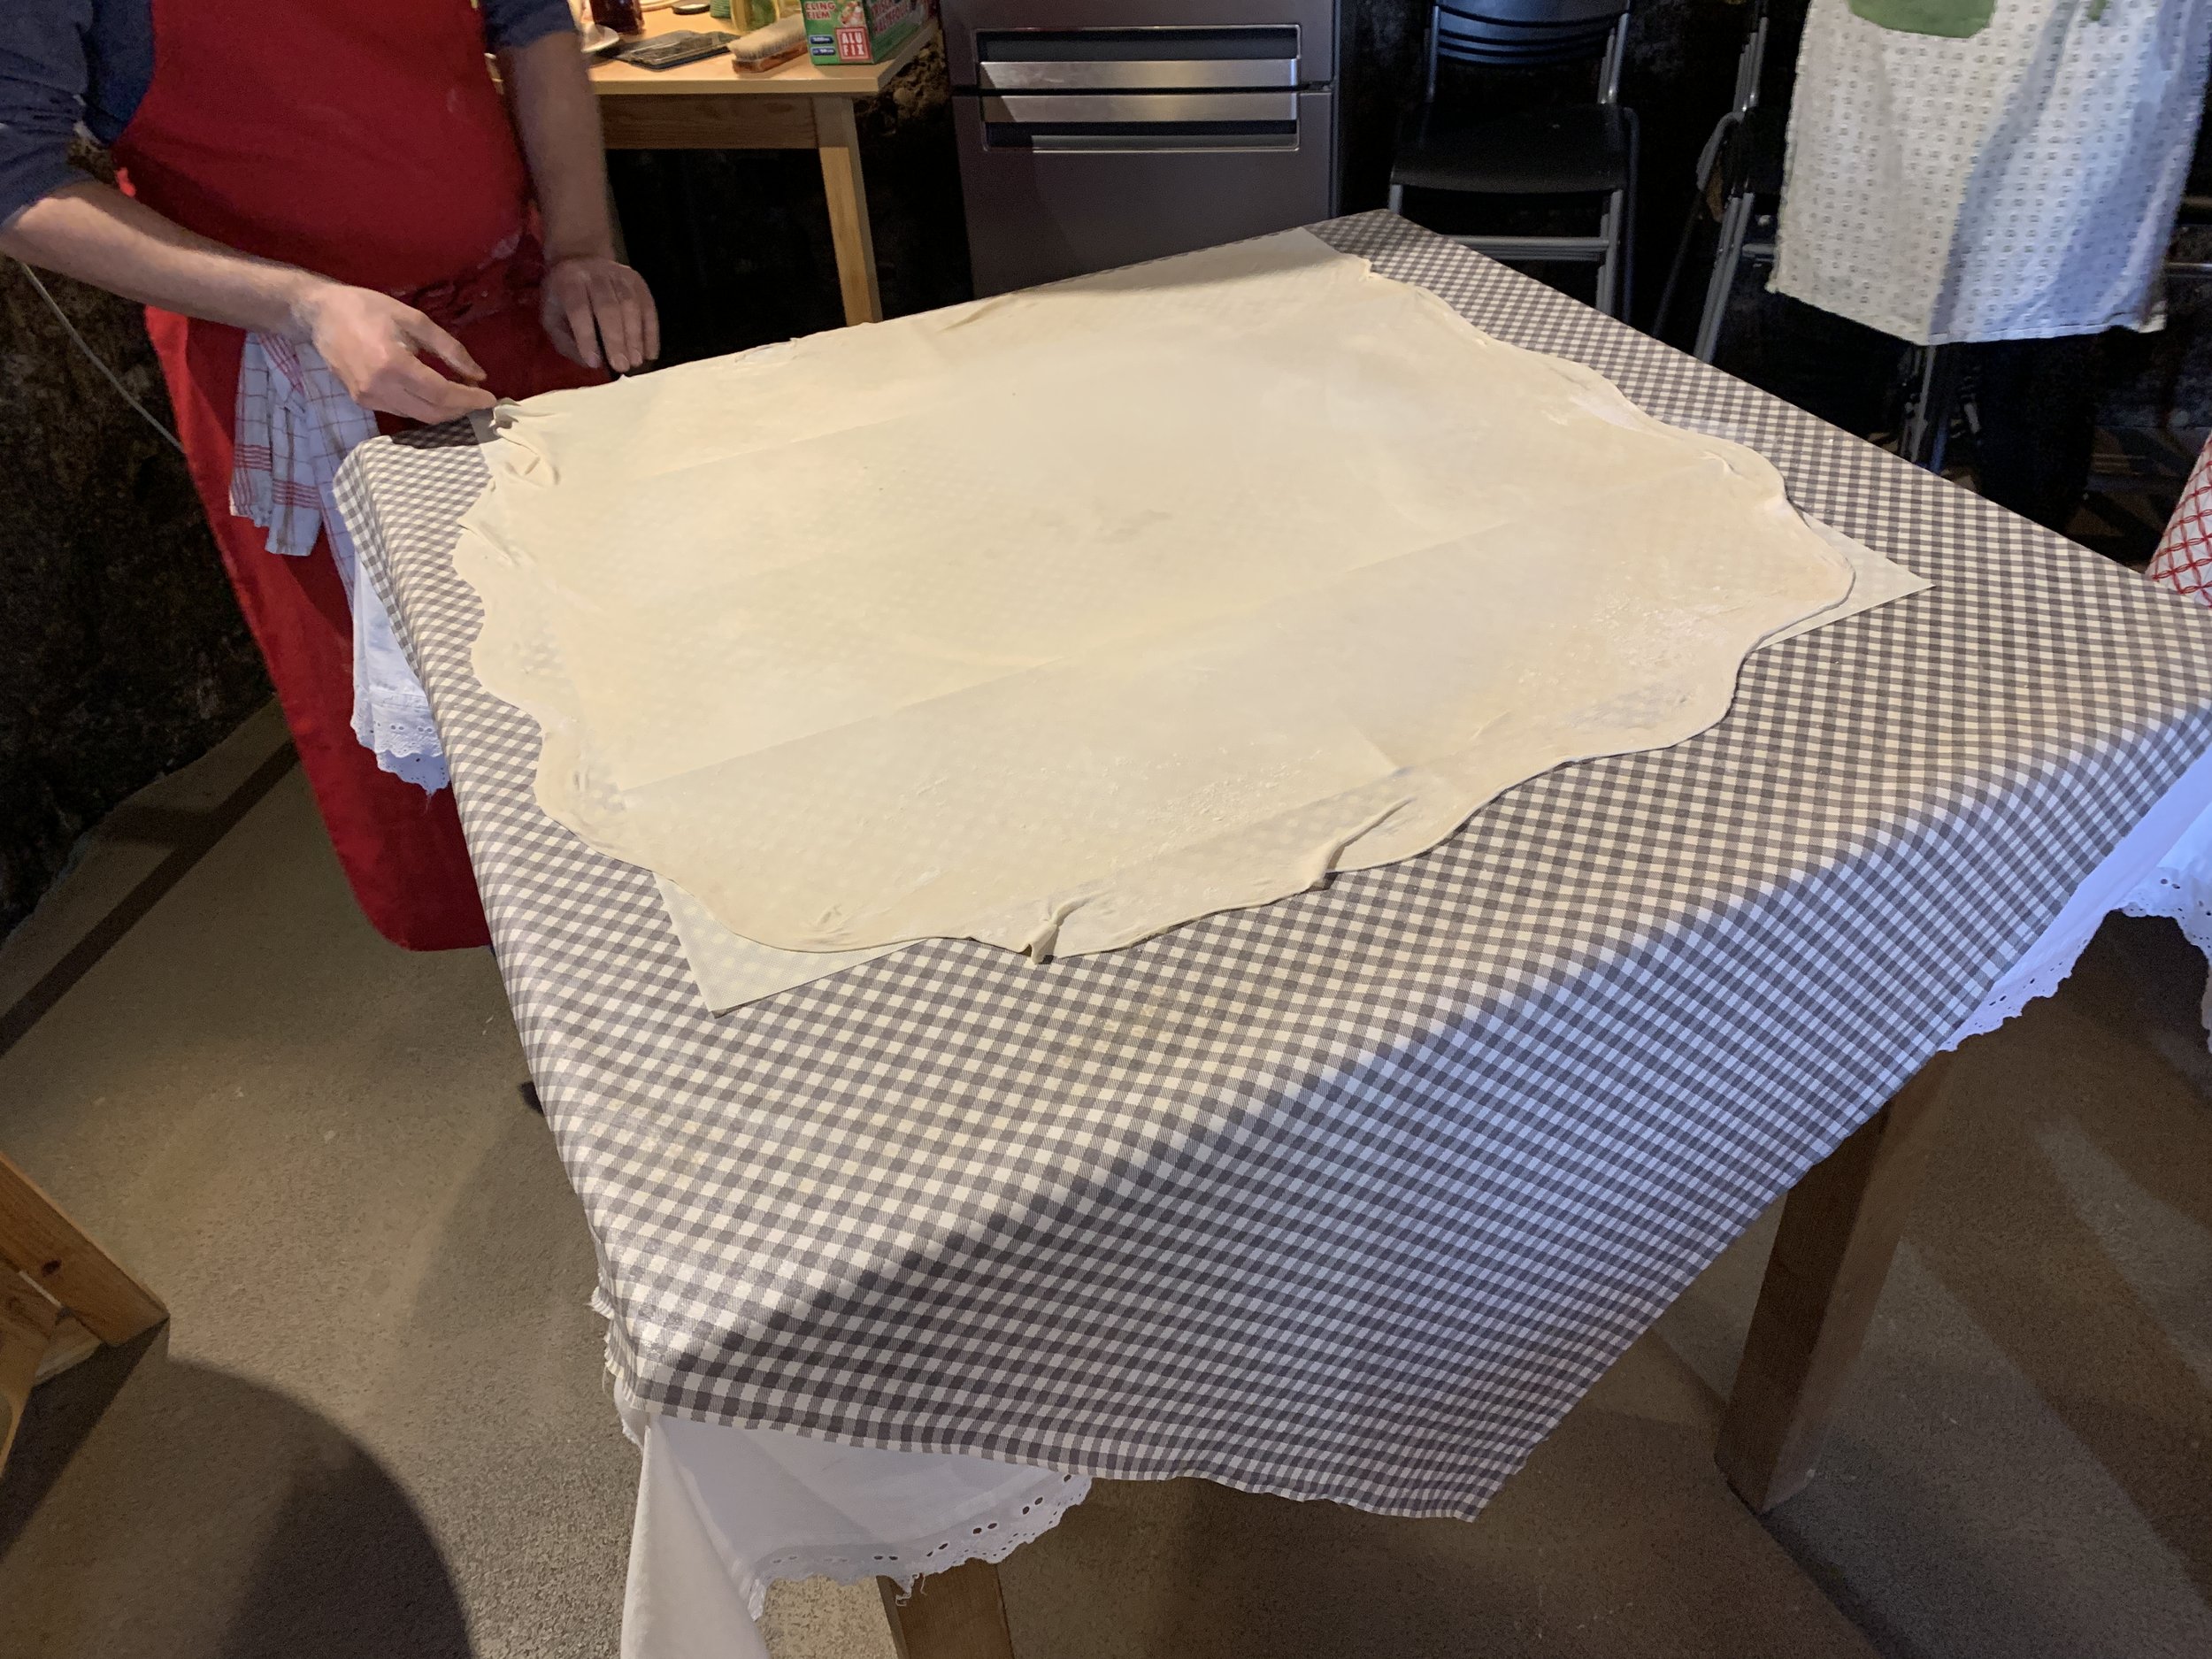
While we didn’t actually perform all of the dough laminating steps in class, he reviewed the different approaches to doing the folds (noted on the right side of his chart). He makes a lot of dough for his Danish and croissant classes ahead of time using a professional sheeter which yields more precise layers than when rolling by hand as we homebodies do. So cool!

We worked in pairs (my mate was Naomi from the UK), each pair having an oven available to bake the various pastries we created. We sat comfortably while Chef Fred made some introductory remarks about the class flow and then it was time to push our chairs back and get rolling!

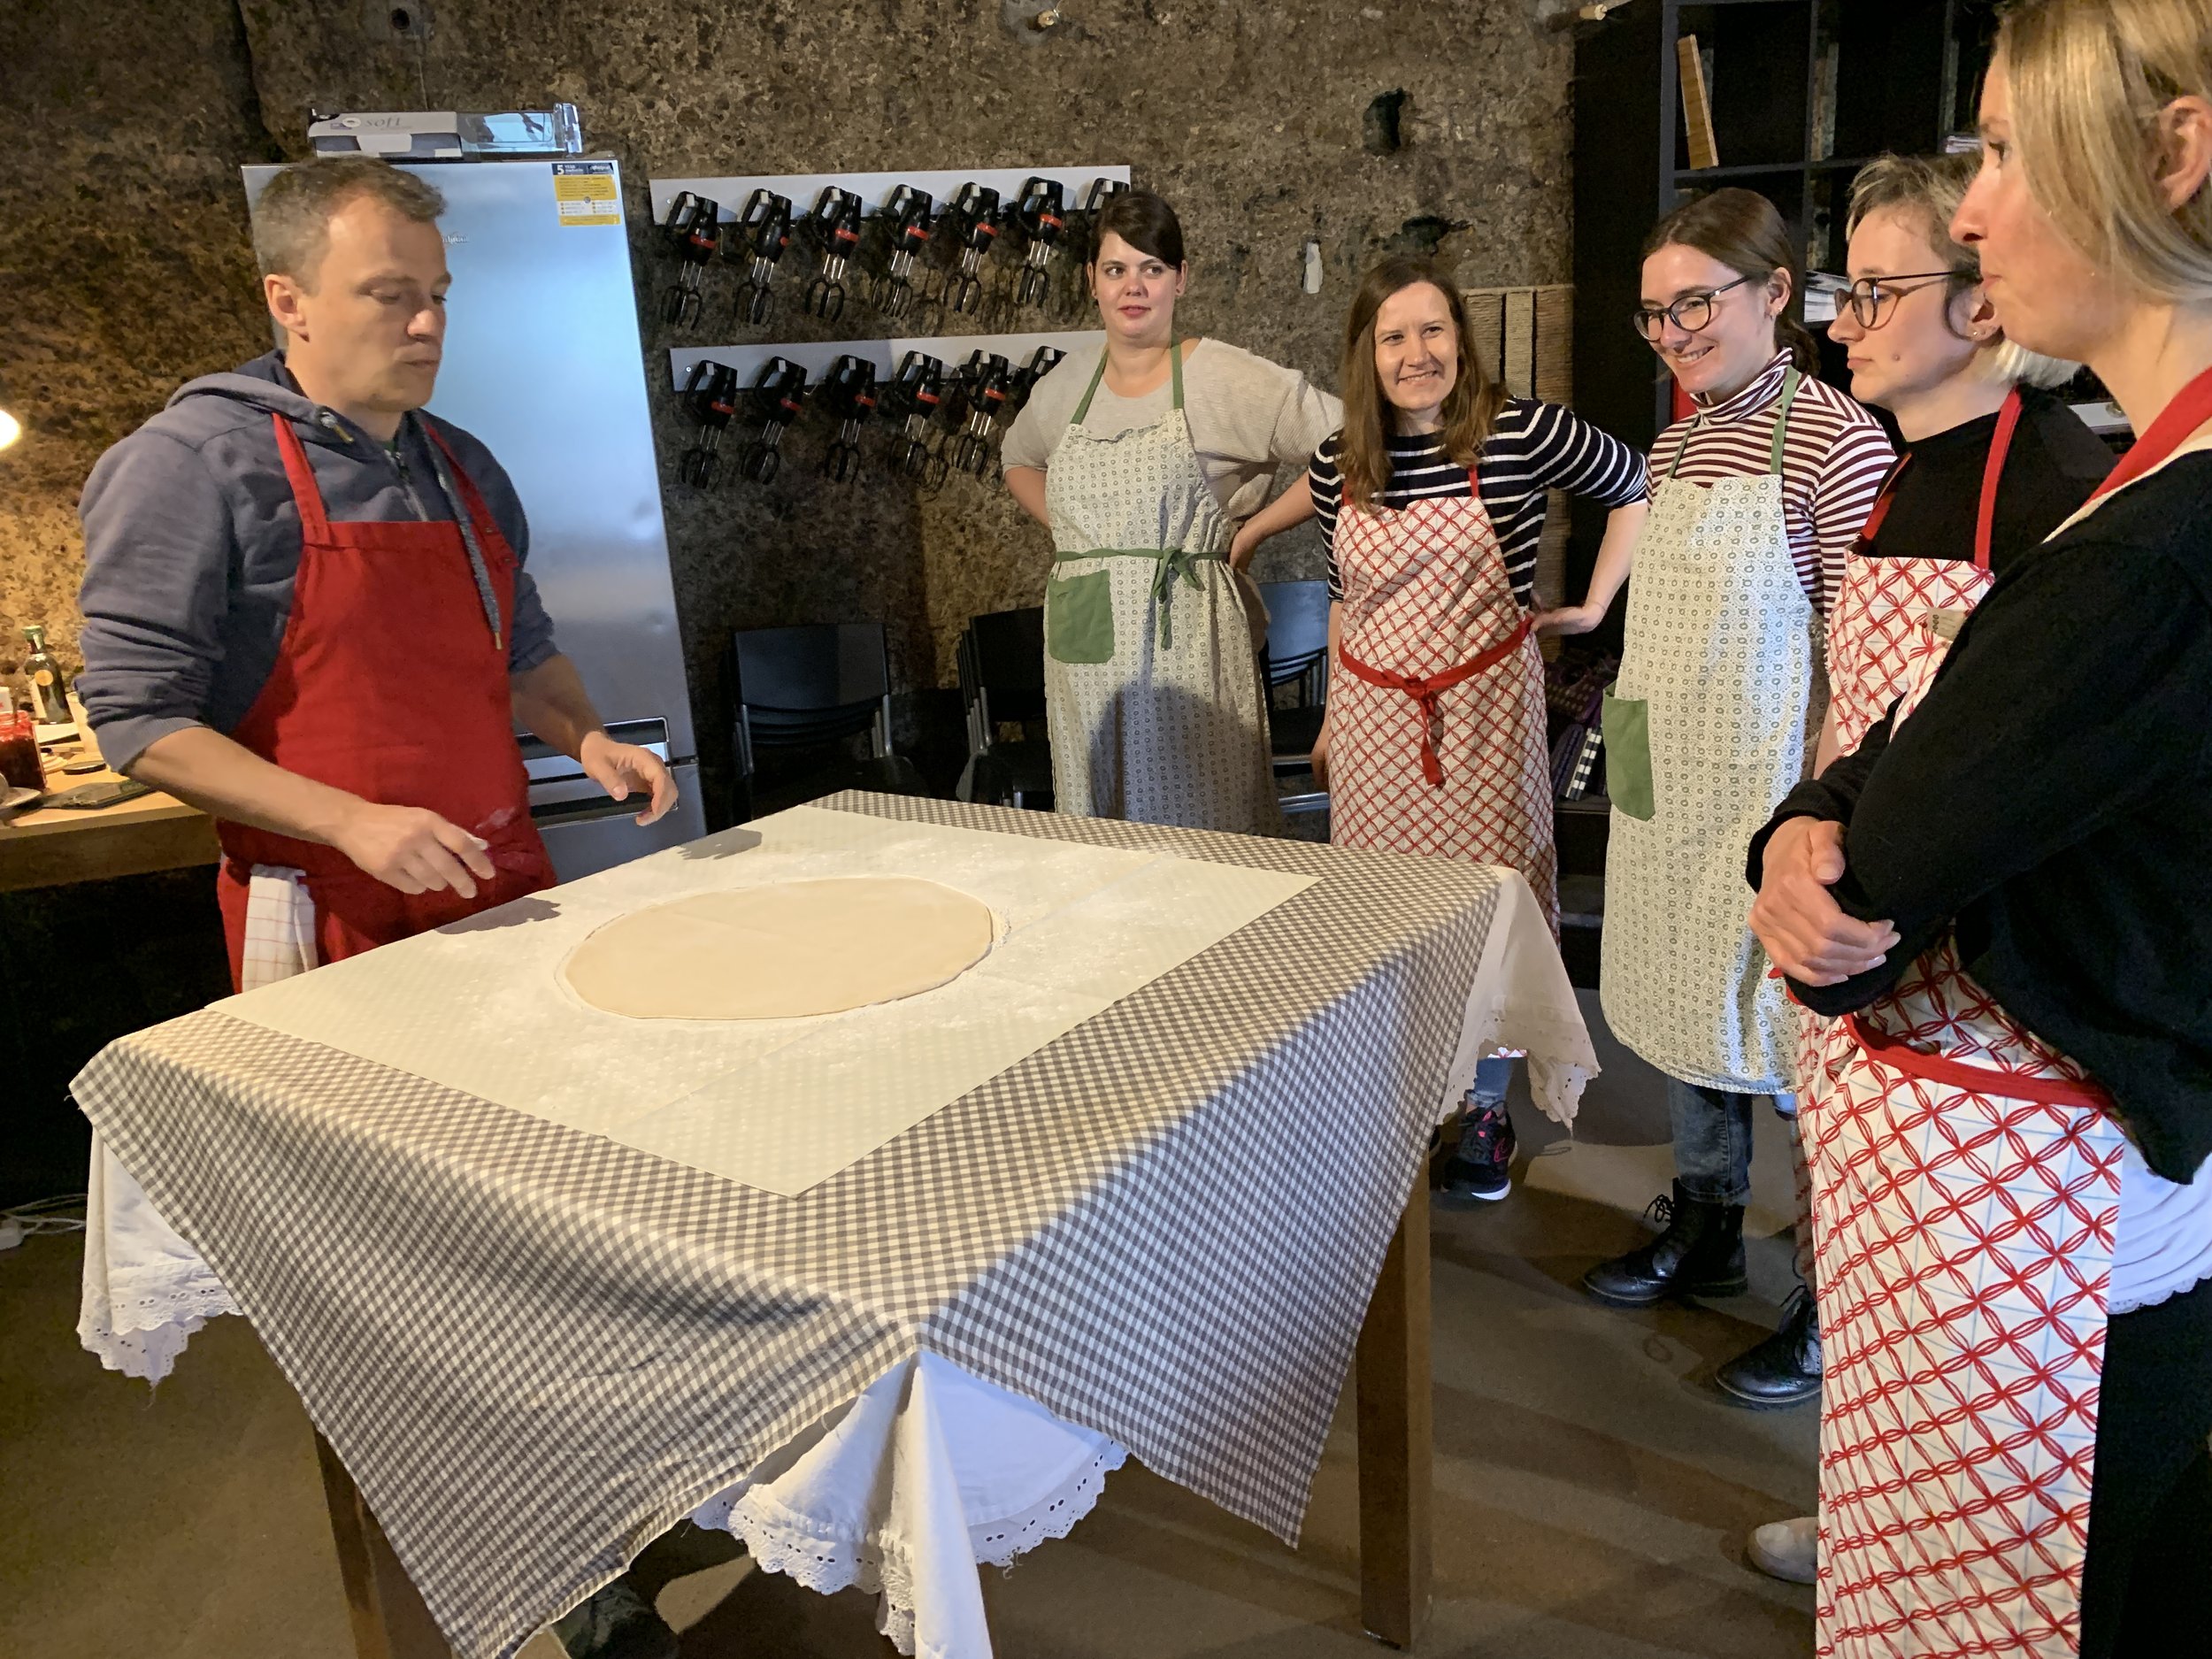
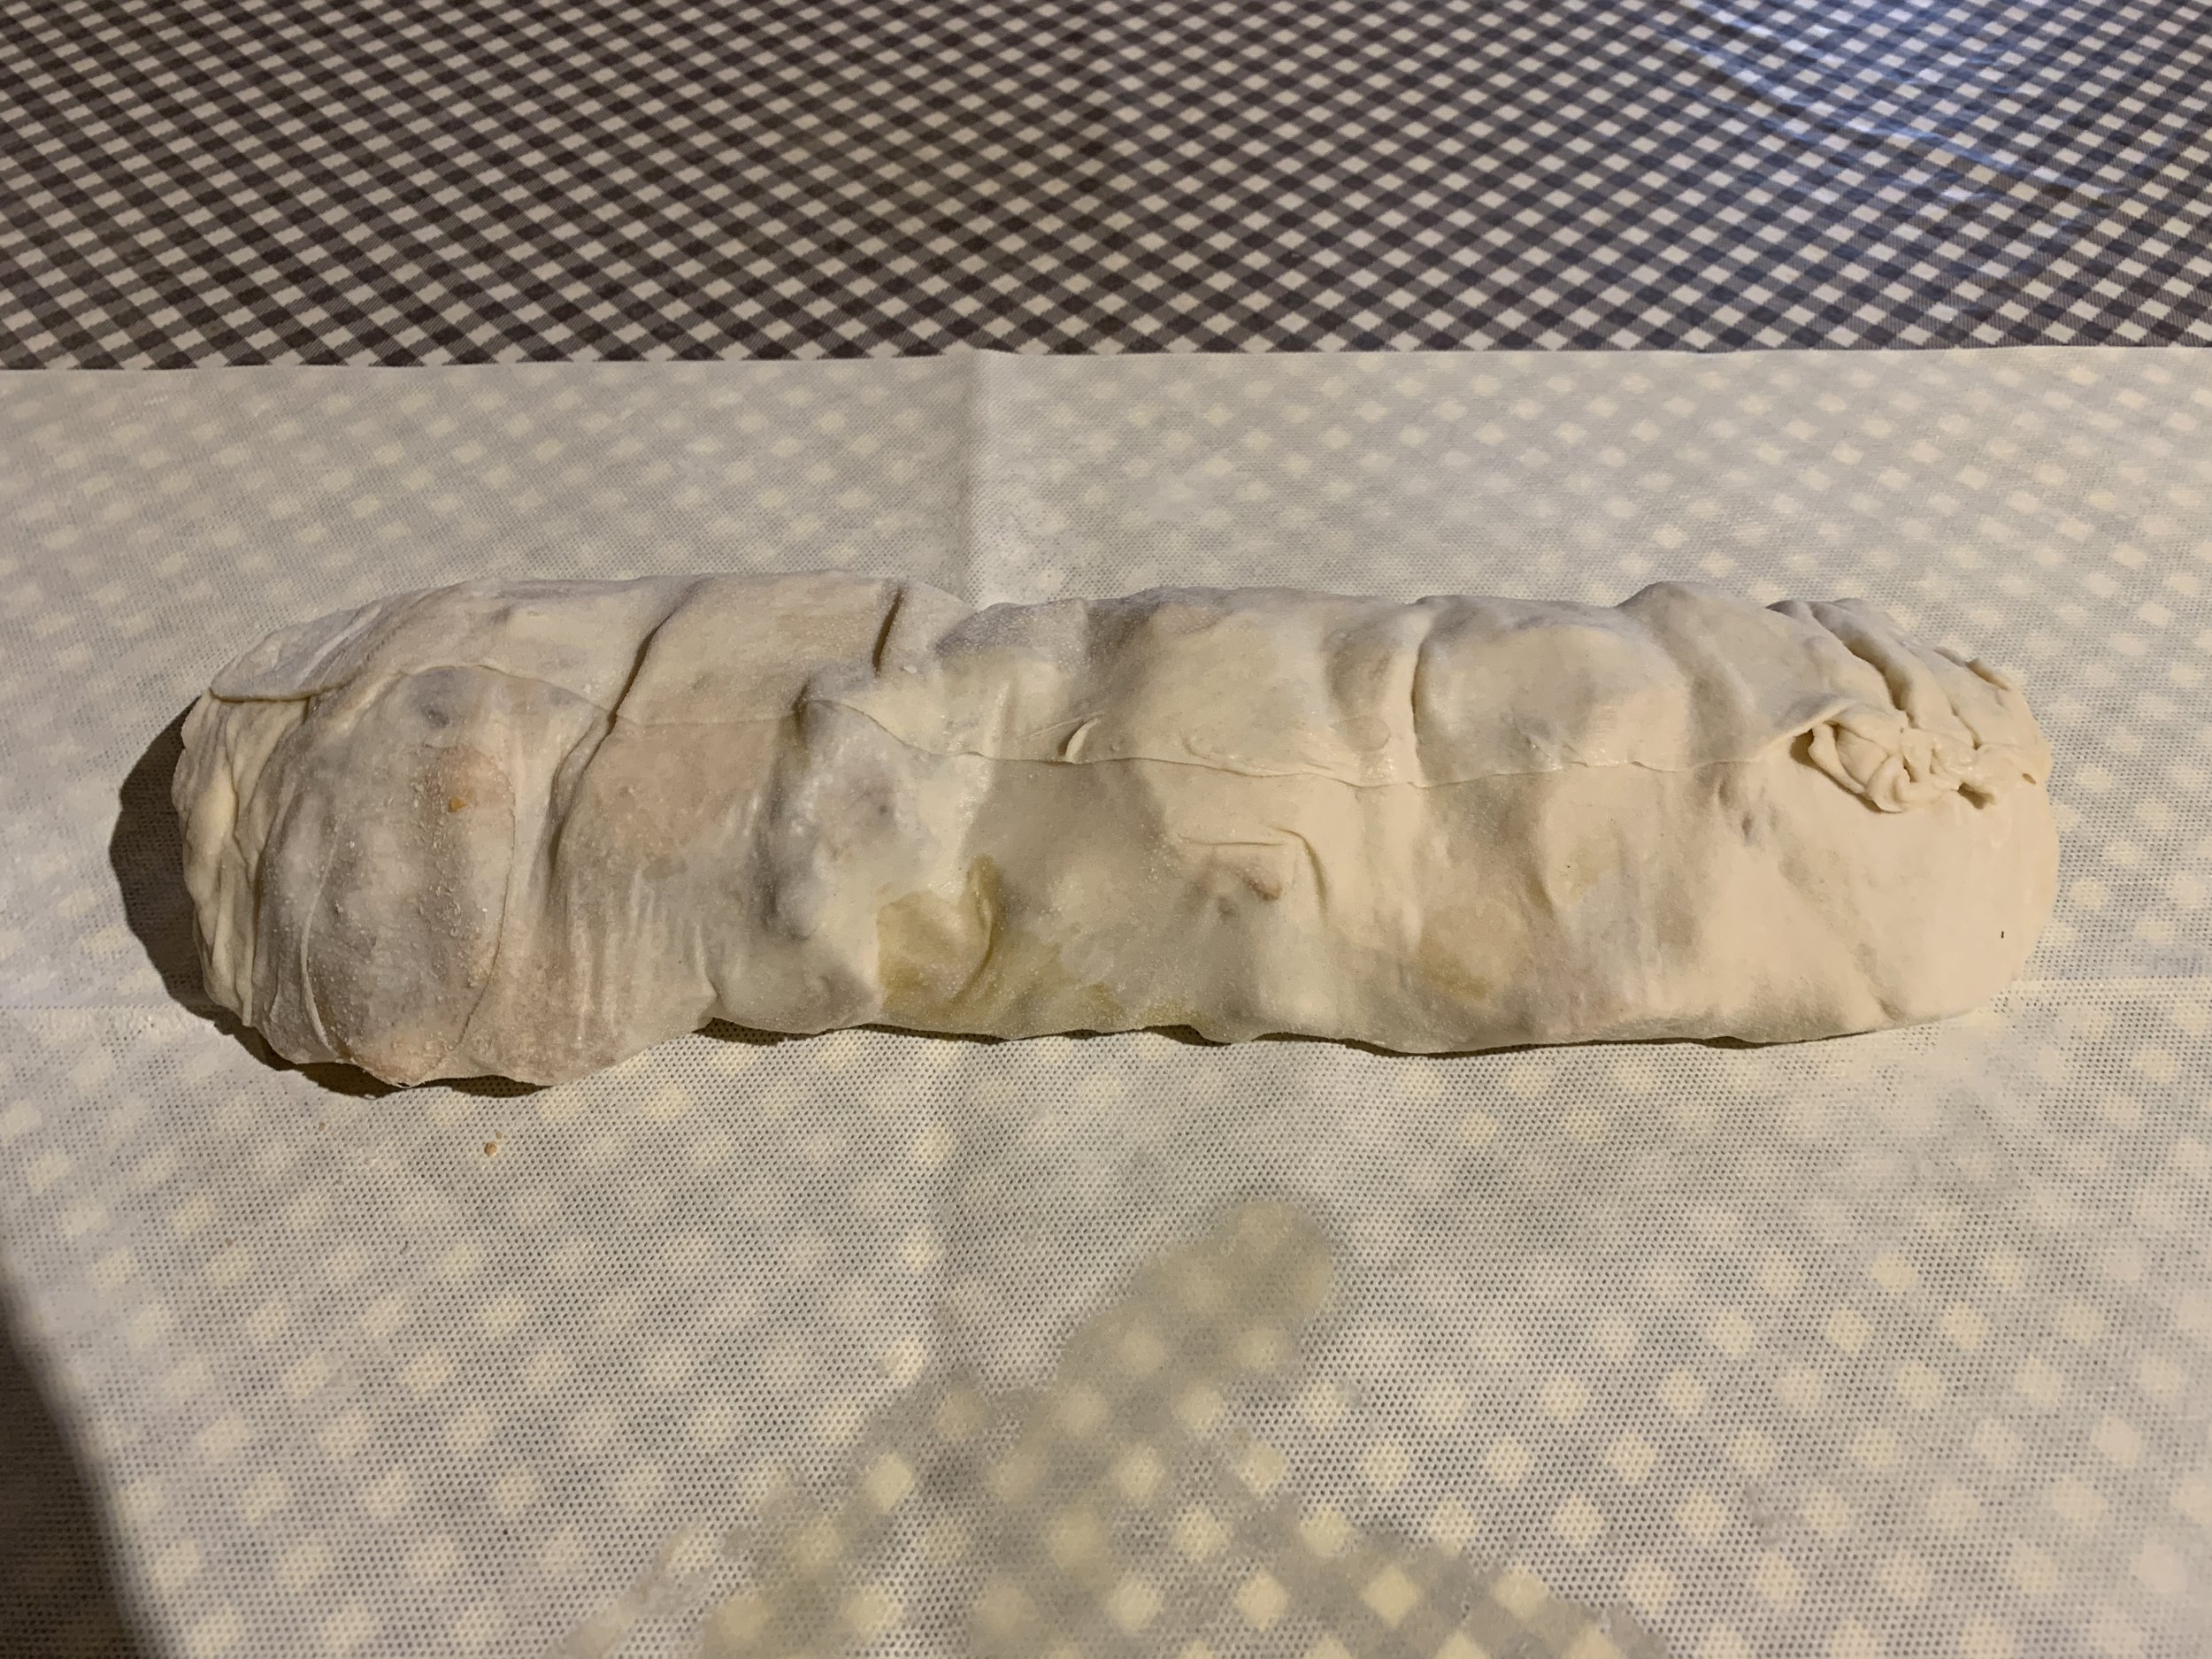
Any laminated dough class I’ve attended or have taught myself typically starts with completed dough that the chef makes ahead - otherwise one could not accomplish all that one hopes to in the allotted time frame. We proceeded to roll out four different dough portions (6 pastries from each), cutting and shaping them in various ways.

Demo to get us started

First up - 12x12 cm squares cut with a pastry bicycle cutter, a useful tool for even portioning. I’ve never owned one but certainly realize how helpful they can be. Please note: I have NO affiliate links with Amazon or anyone else; the link simply shows you what this tool looks like.

Also known as spandauer (traditionally remonce filling and a topping of custard or jam), we piped a just right dollop of remonce (equal weights almond flour, sugar, butter) - not too much and not too little - in the center.

Bring 2 opposite corners to the center and push down very firmly with your fingertip, all the way down through the dough and the cream to the paper. Whoa! This was one of those ah-hah moments. Typically I push/press but this is much more dramatic with very firm pressure. It’s all about being in charge of the dough.

Repeat with the other 2 corners. Yes!

Quick note - even with the firm pressure, once proofed some corners might unfurl - just press them back into the center before topping with custard and baking.

We rolled out the next dough portion and cut 6 rectangles about 10x15 cm each. Fold in half and make 5 cuts along the open edge . . . . .

Open each piece up and pipe a strip of remonce (not too much, not too little, not too close to the edges) down the center; top with chocolate chips.

Proceed with the braid (of sorts) by crisscrossing alternating strips from top to bottom, kind of like this Danish braid.

Chef Fred gave us a demo - here’s the start of his.

Once all wrapped up, press the side of your little finger across the open top to seal it and tuck the bottom ends underneath. Voilá

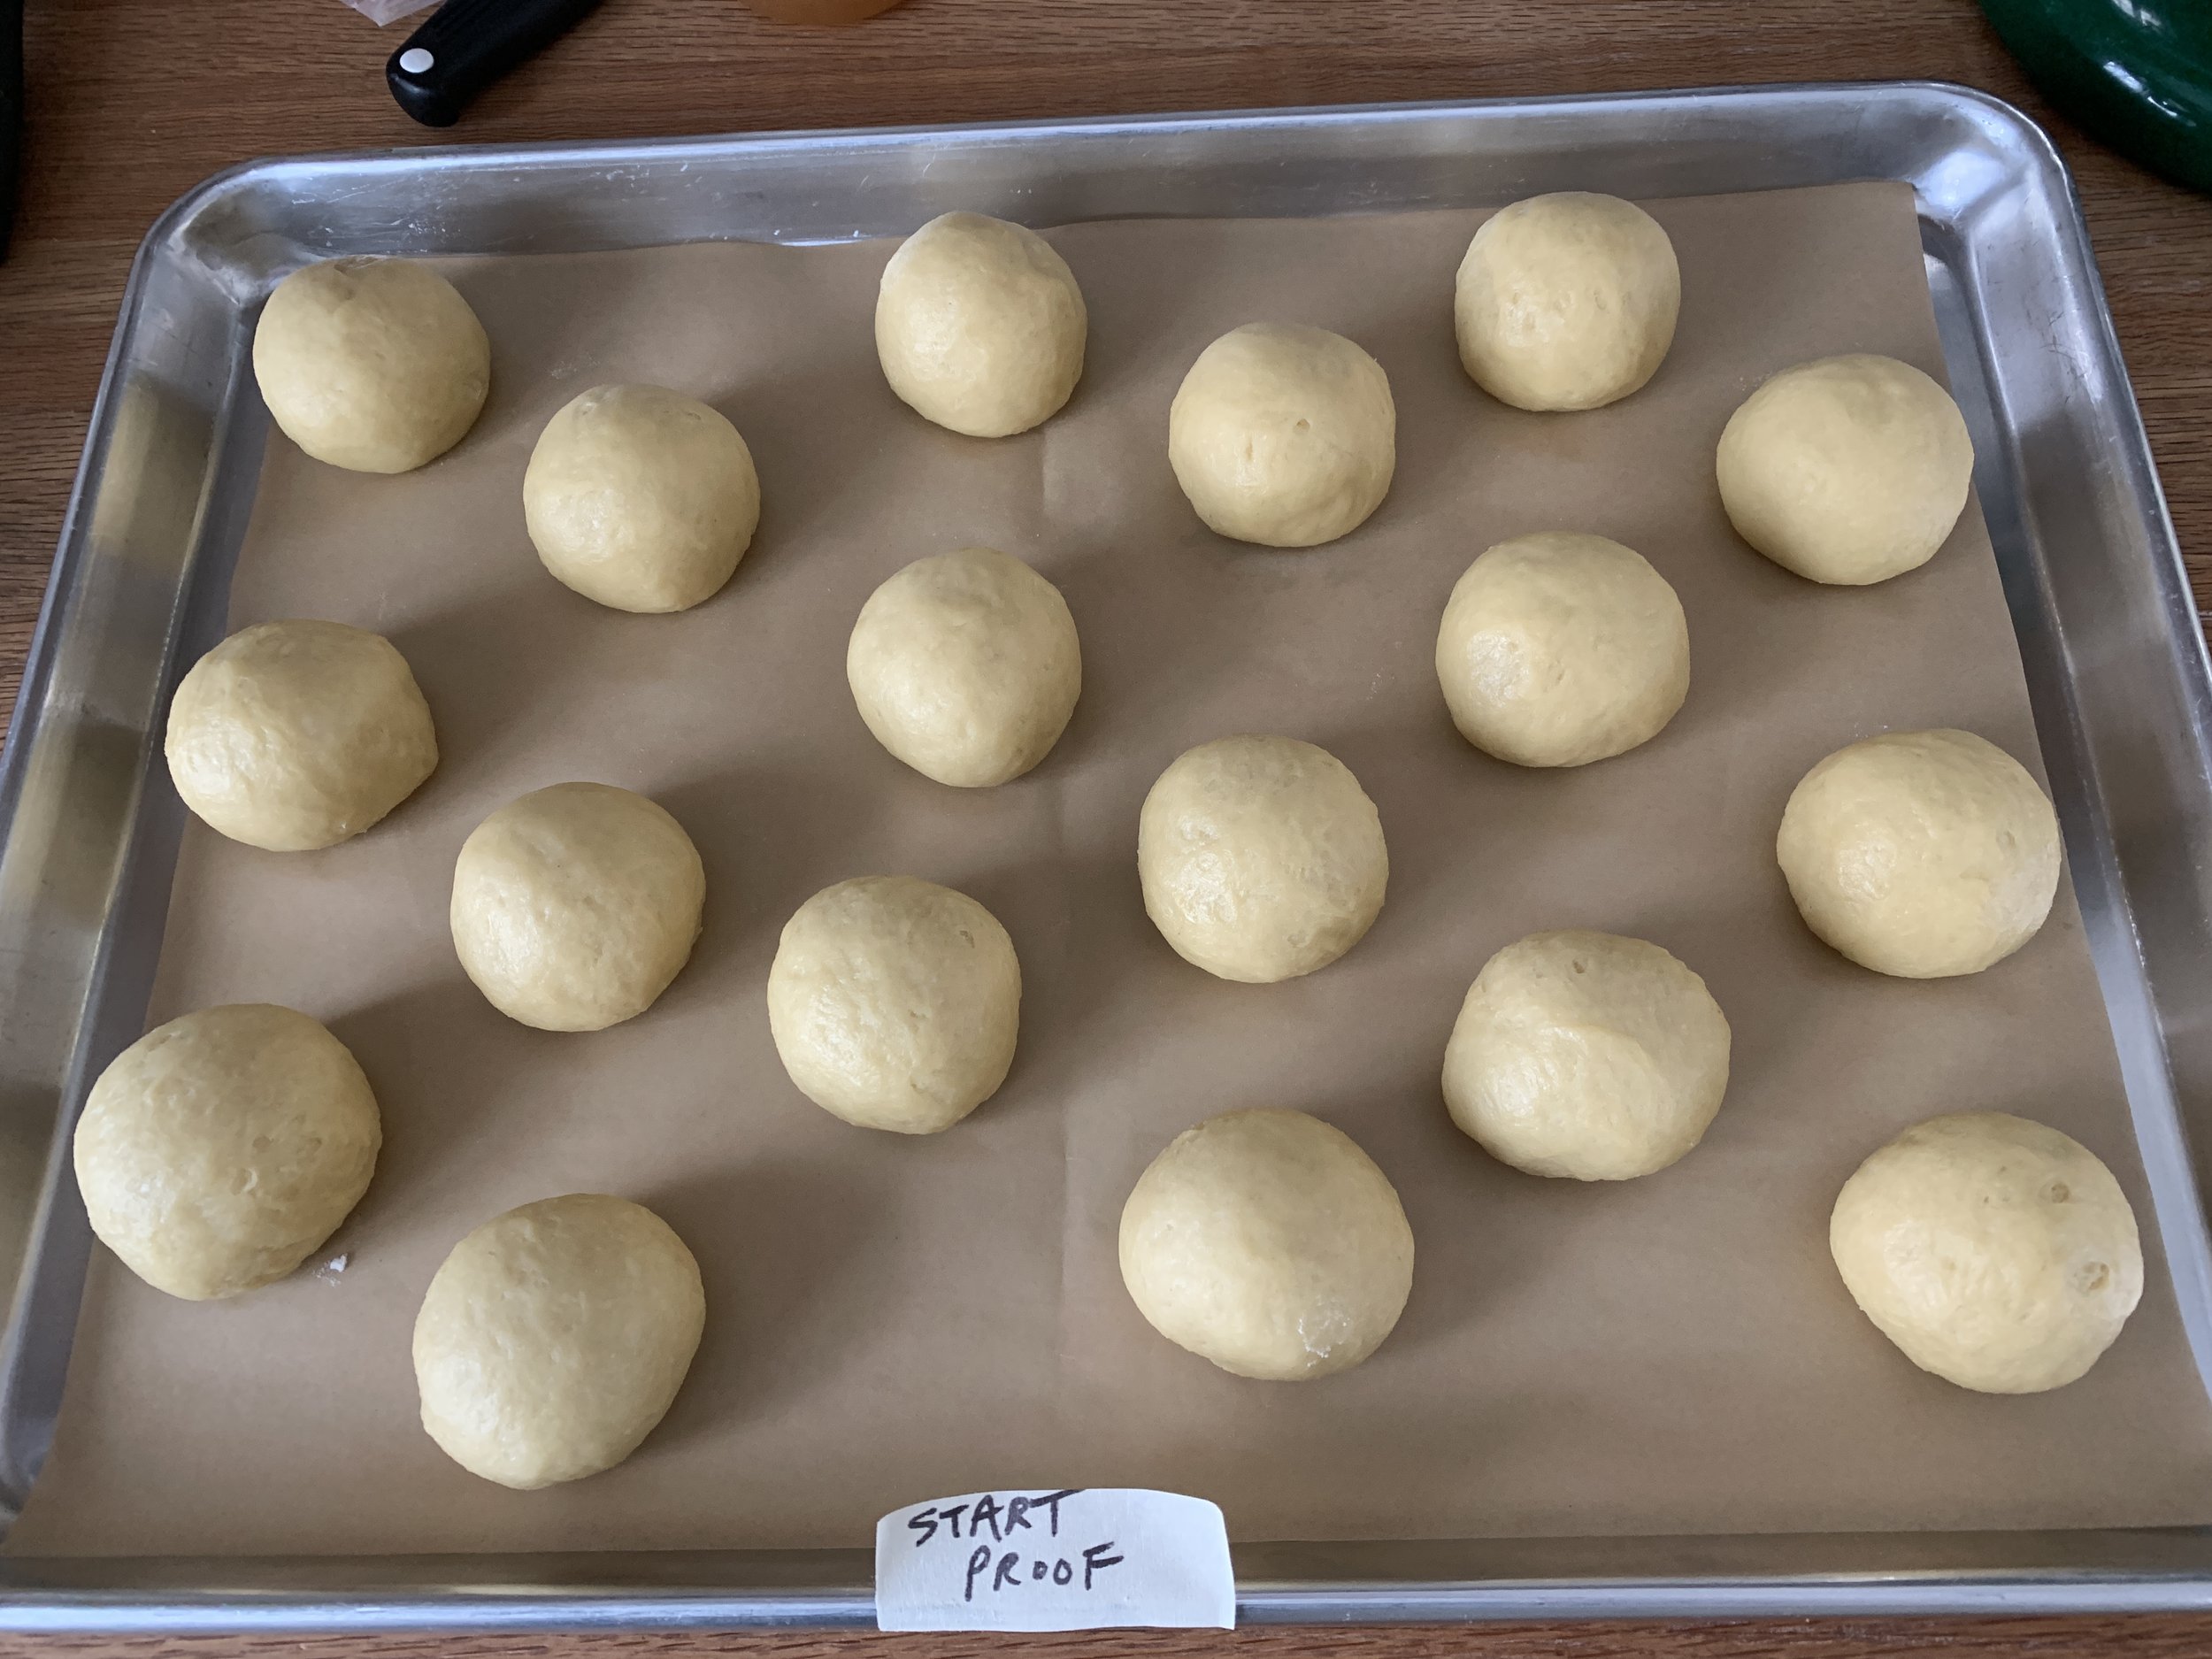
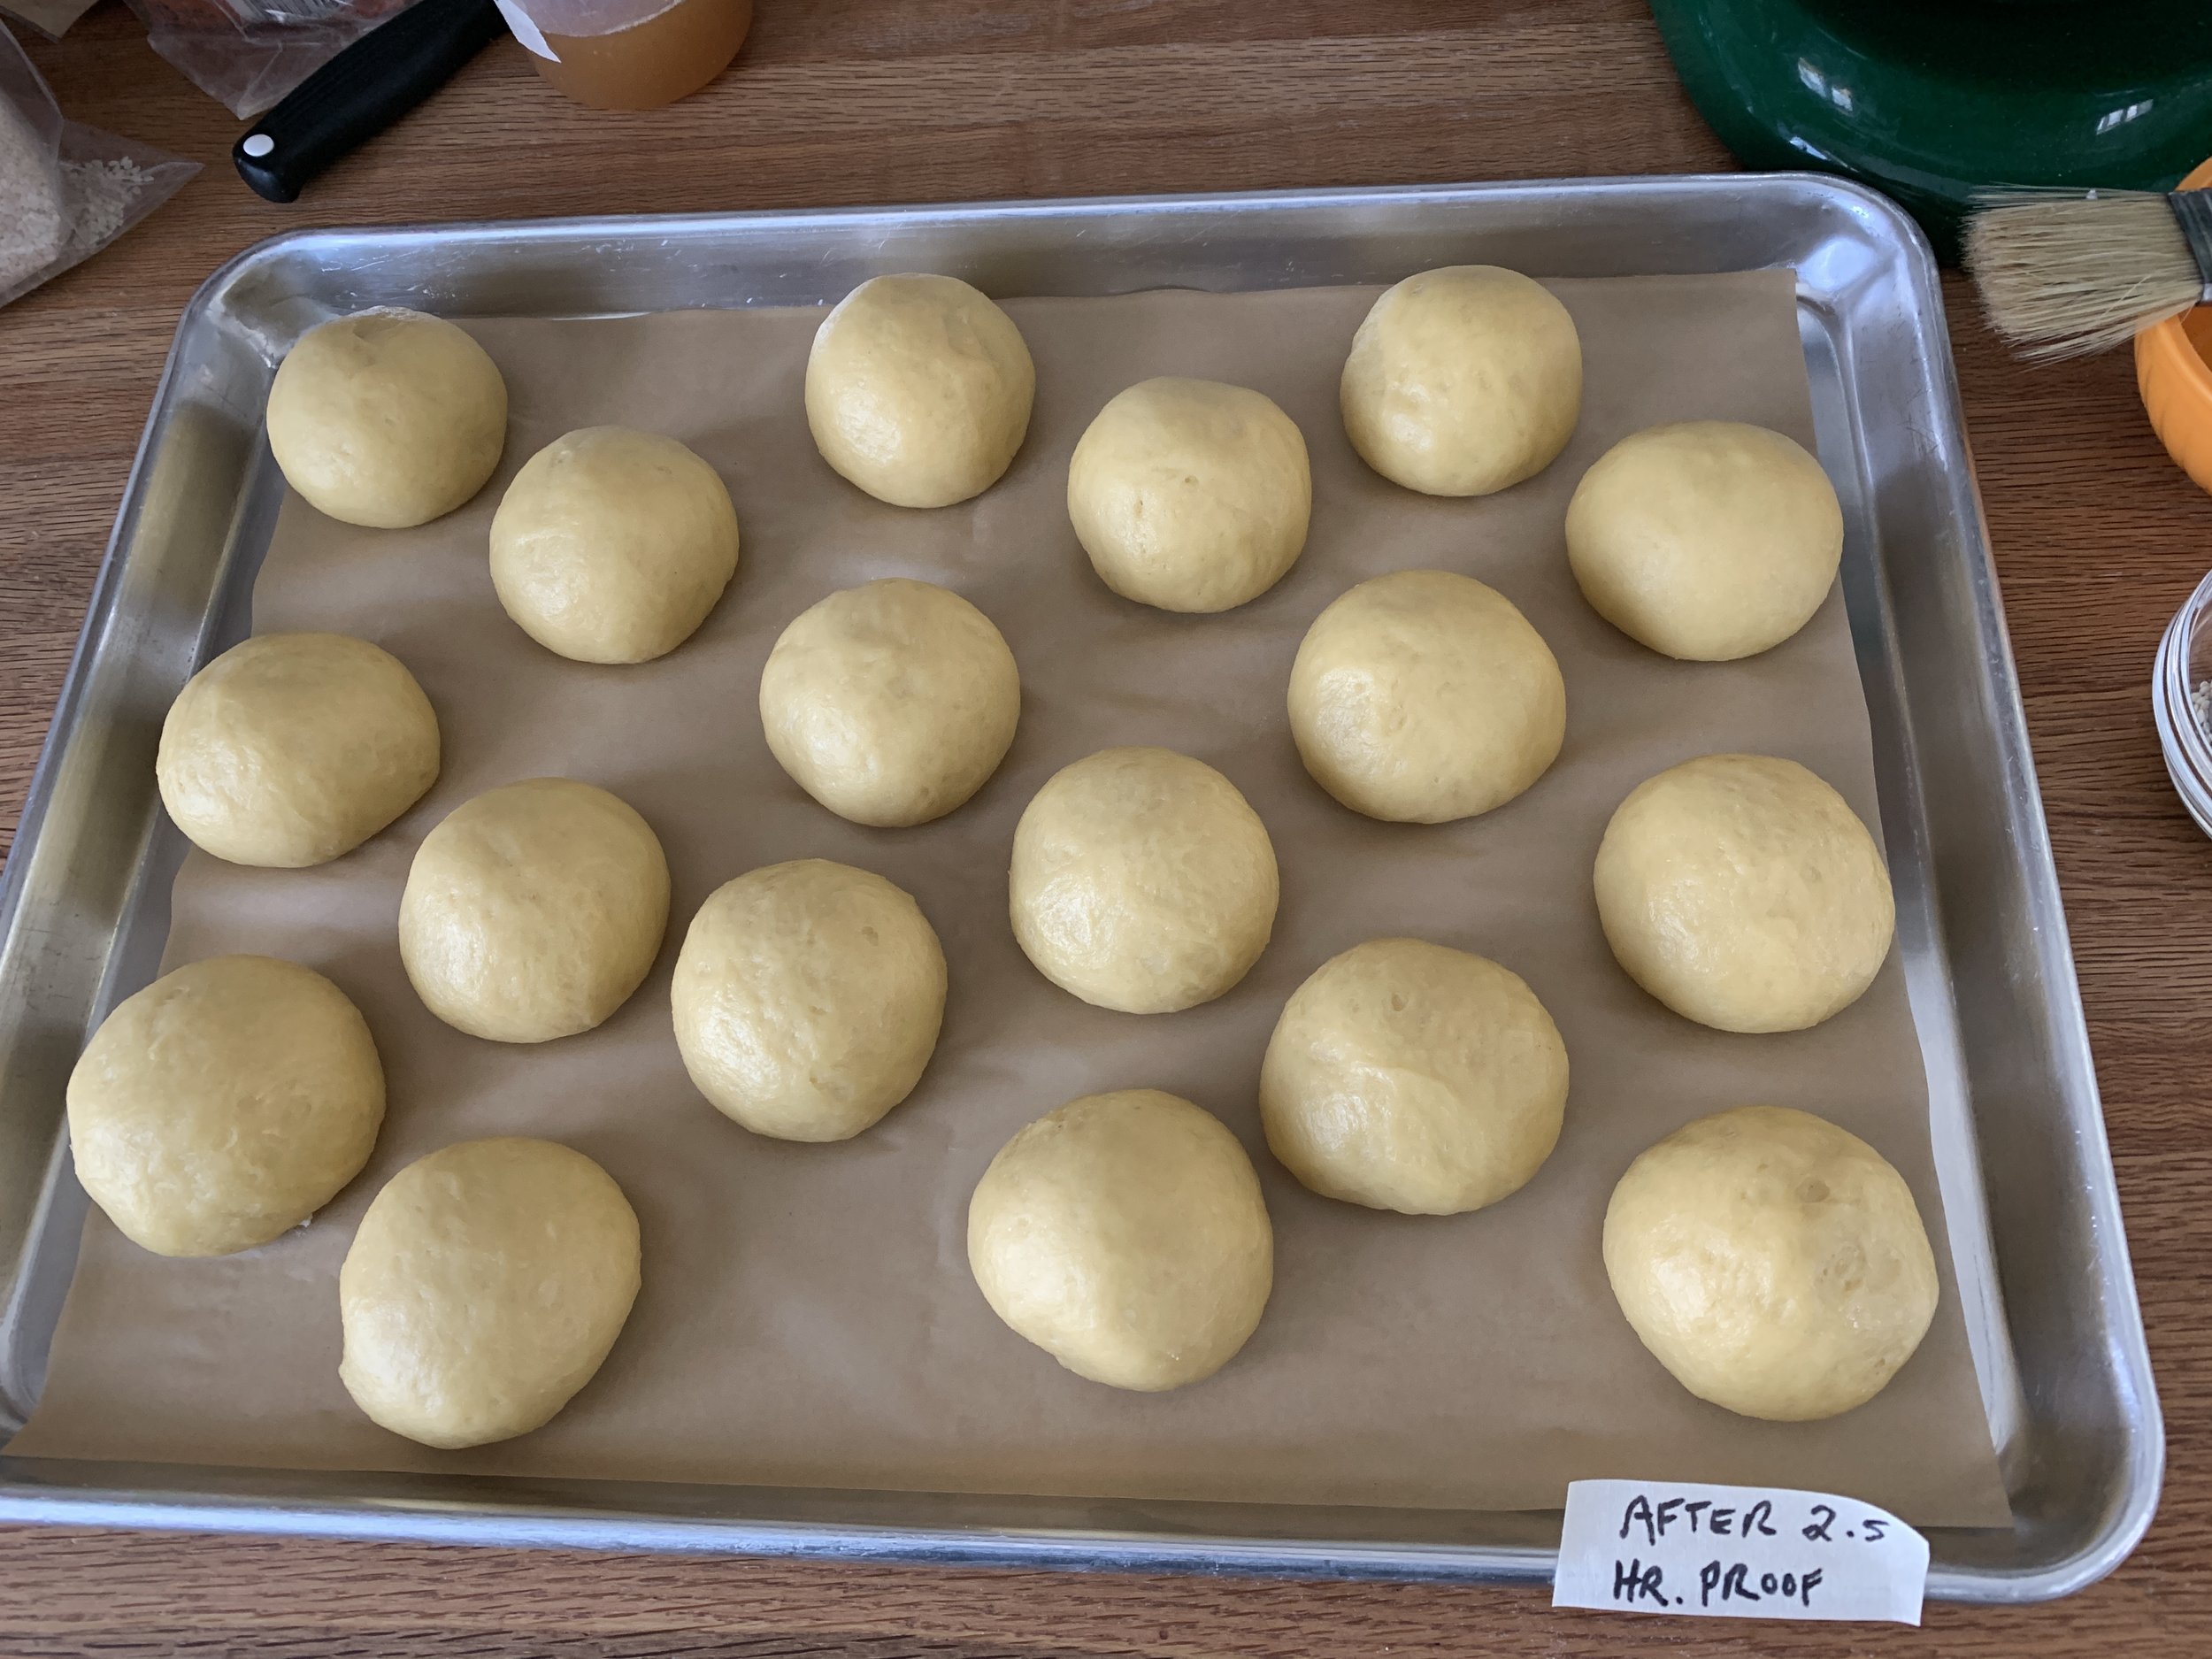
As we completed each tray of pastries, they went into the oven for proofing. Chef had given the ovens a whiff of warmth and kept an eye on the temps so they hung between 25ºC (77ºF) and 28ºC (82ºF). Too warm and the butter will start to melt, resulting in pools of butter and less than stellar texture after baking.

Note that European style butter with higher butterfat content can stand up to warmer proofing temps than run-of-the-mill butters so be forewarned! When in doubt I plan for a lower temp (70 - 75ºF) and longer rise (instead of 1 to 1.5 hours, go 2 to 2.5 hours) to avoid the butter leak issue.

We continued on with cinnamon spirals and sesame/poppy seed twists to complete the morning’s foursome of pastry treats.

Another ah-hah moment - to keep the cinnamon spirals from unfurling during proofing/baking, simply lift the end away from the coil a bit and fold/tuck it underneath the center. It’s now trapped on the bottom. Then press two fingertips in the center of each spiral and stretch it out, also flattening the whole thing (lower center below). This essentially tells the dough to bake outward not upward for a nicely shaped end result.

Amazing what one never read about or witnessed anyone do before. Cool.

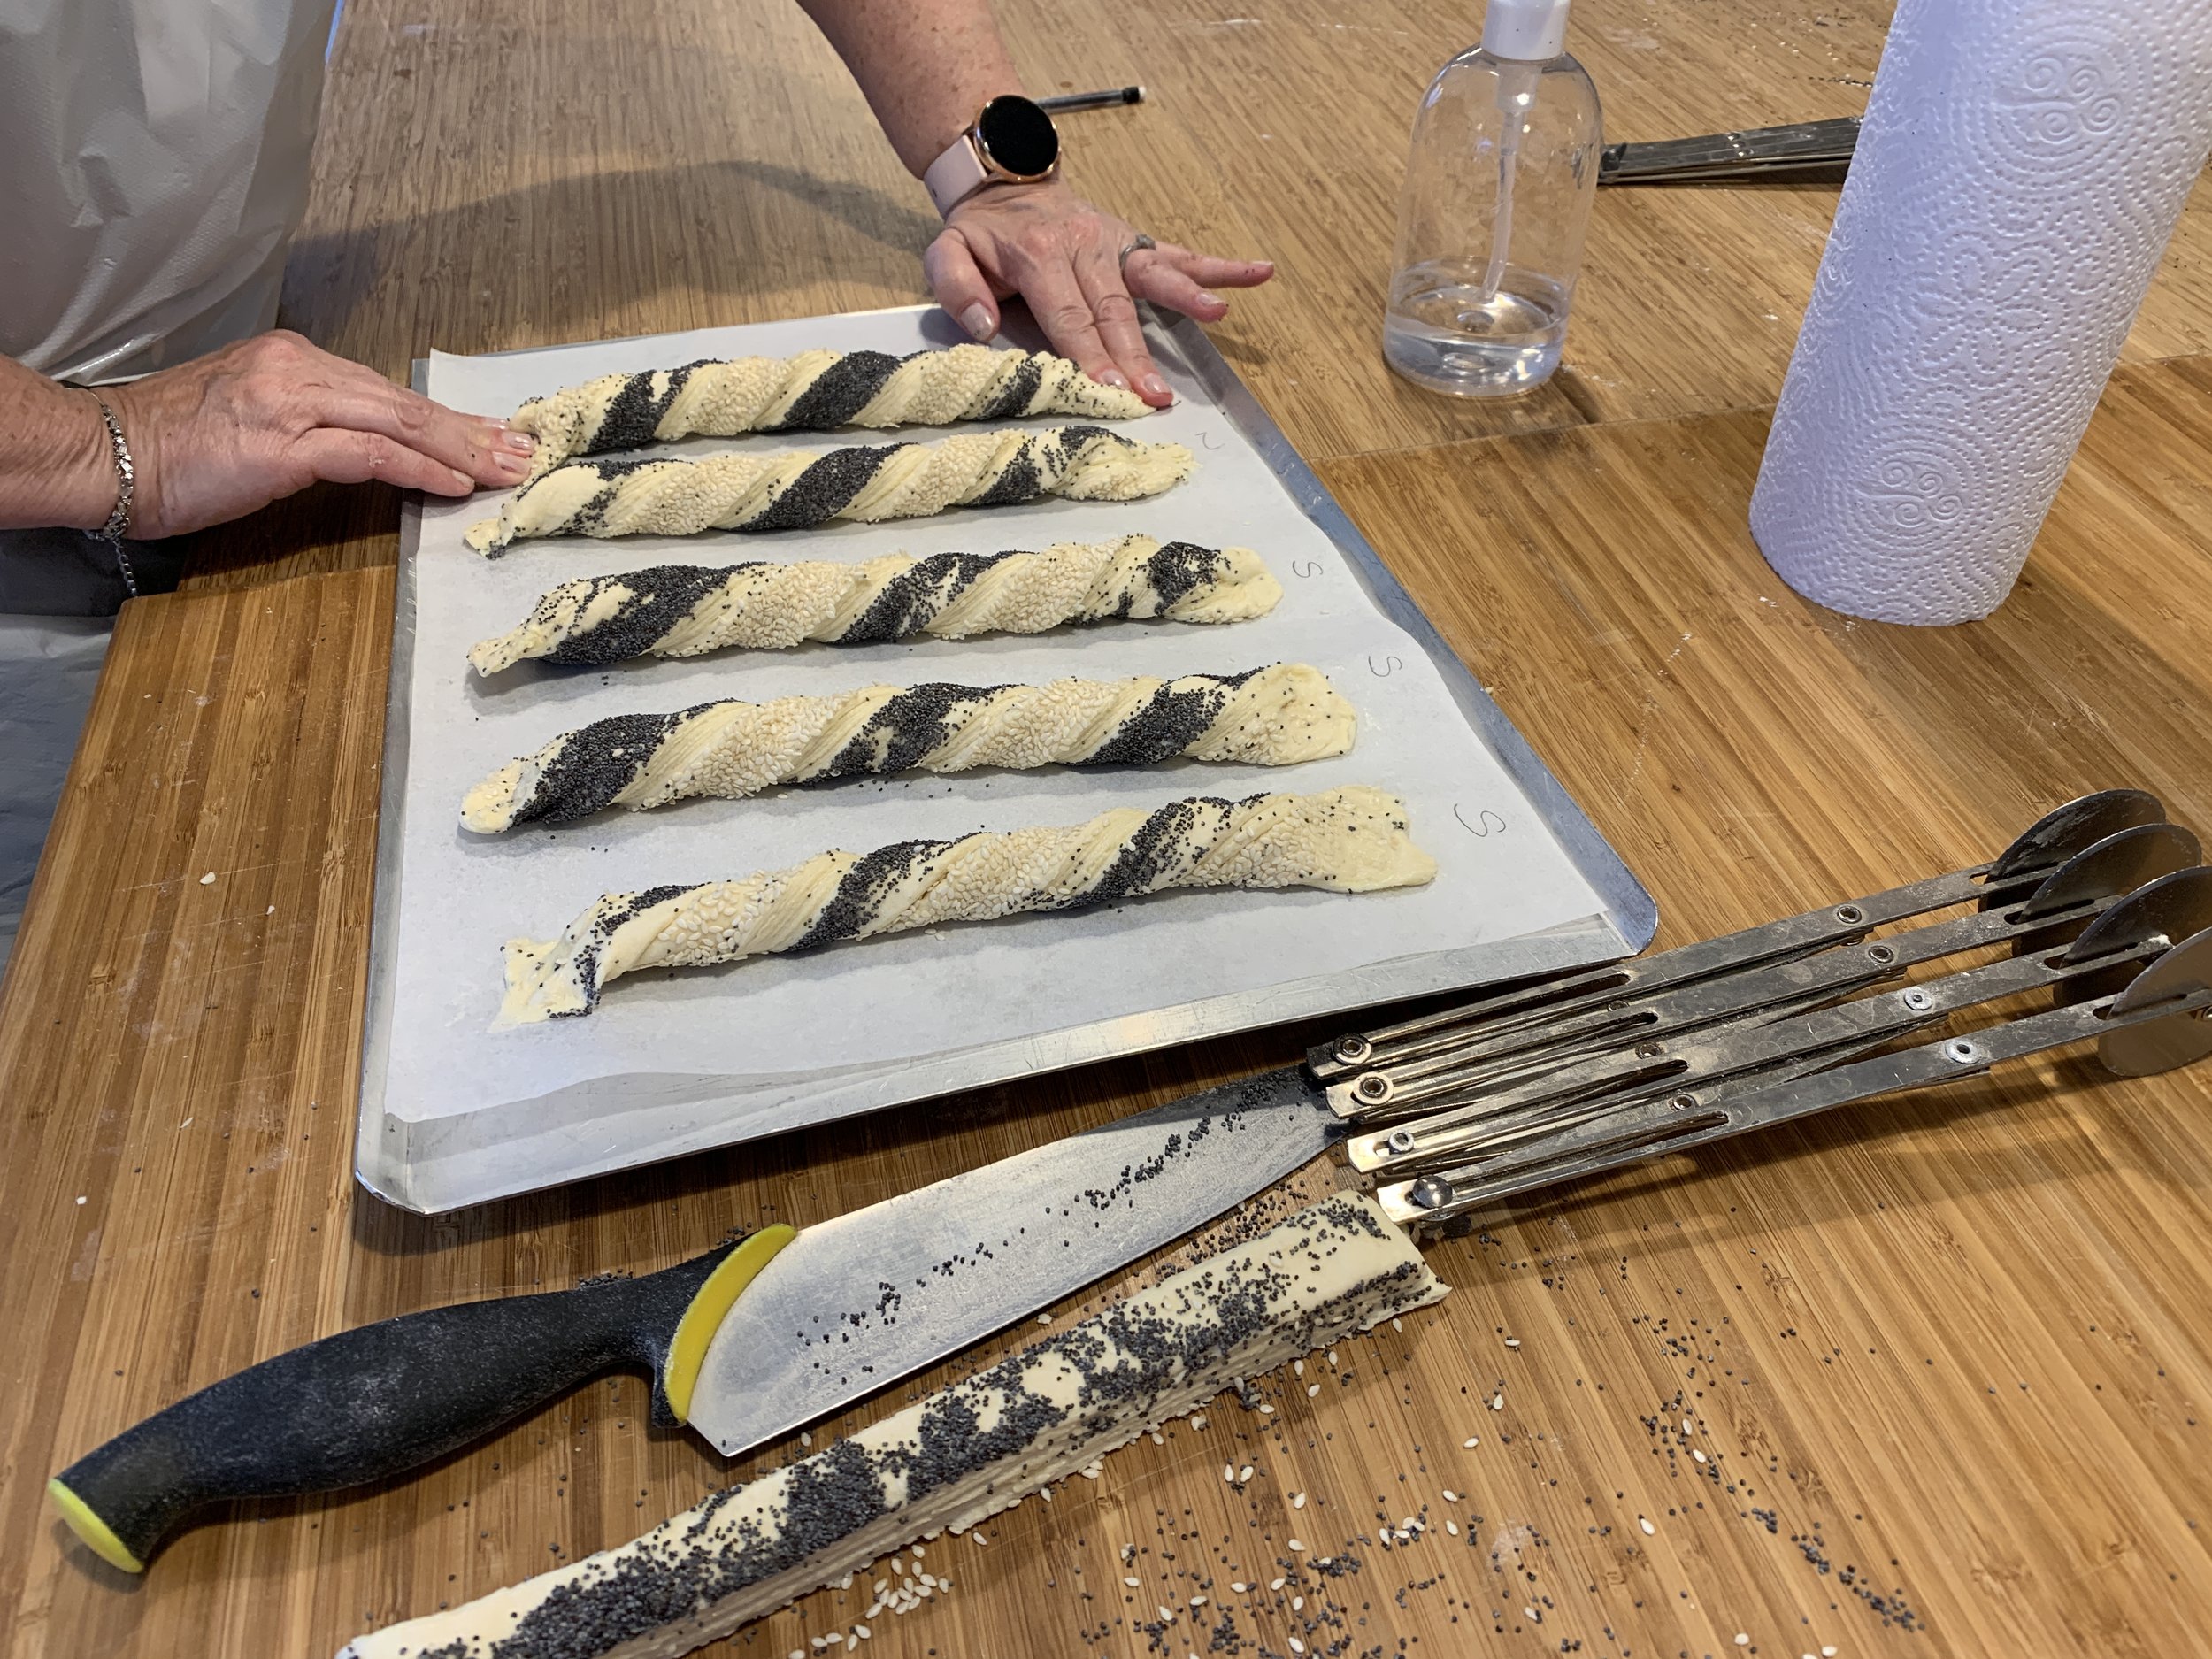
The sesame poppy twists came about after rolling a rectangle of dough, spreading a thin layer of remonce over it then folding it in half. We coated one side with sesame seeds and the other with poppy then cut and snugly twisted the strips.

Press the ends of the twists firmly onto the parchment to hold them in place (and don’t be afraid to really smoosh them down!). Notice the bicycle cutter below.

Once the proofing was underway Chef Fred gave a quick demo on making crème pâtissiére, one of the essentials of French pastry.

When we were ready to bake, we piped pastry cream on the center of the spandauer (not yet accomplished in the image below), egg washed them and added a sprinkle of pearl sugar. The almond/chocolate chip braids were adorned with the pearl sugar and slivered almonds.
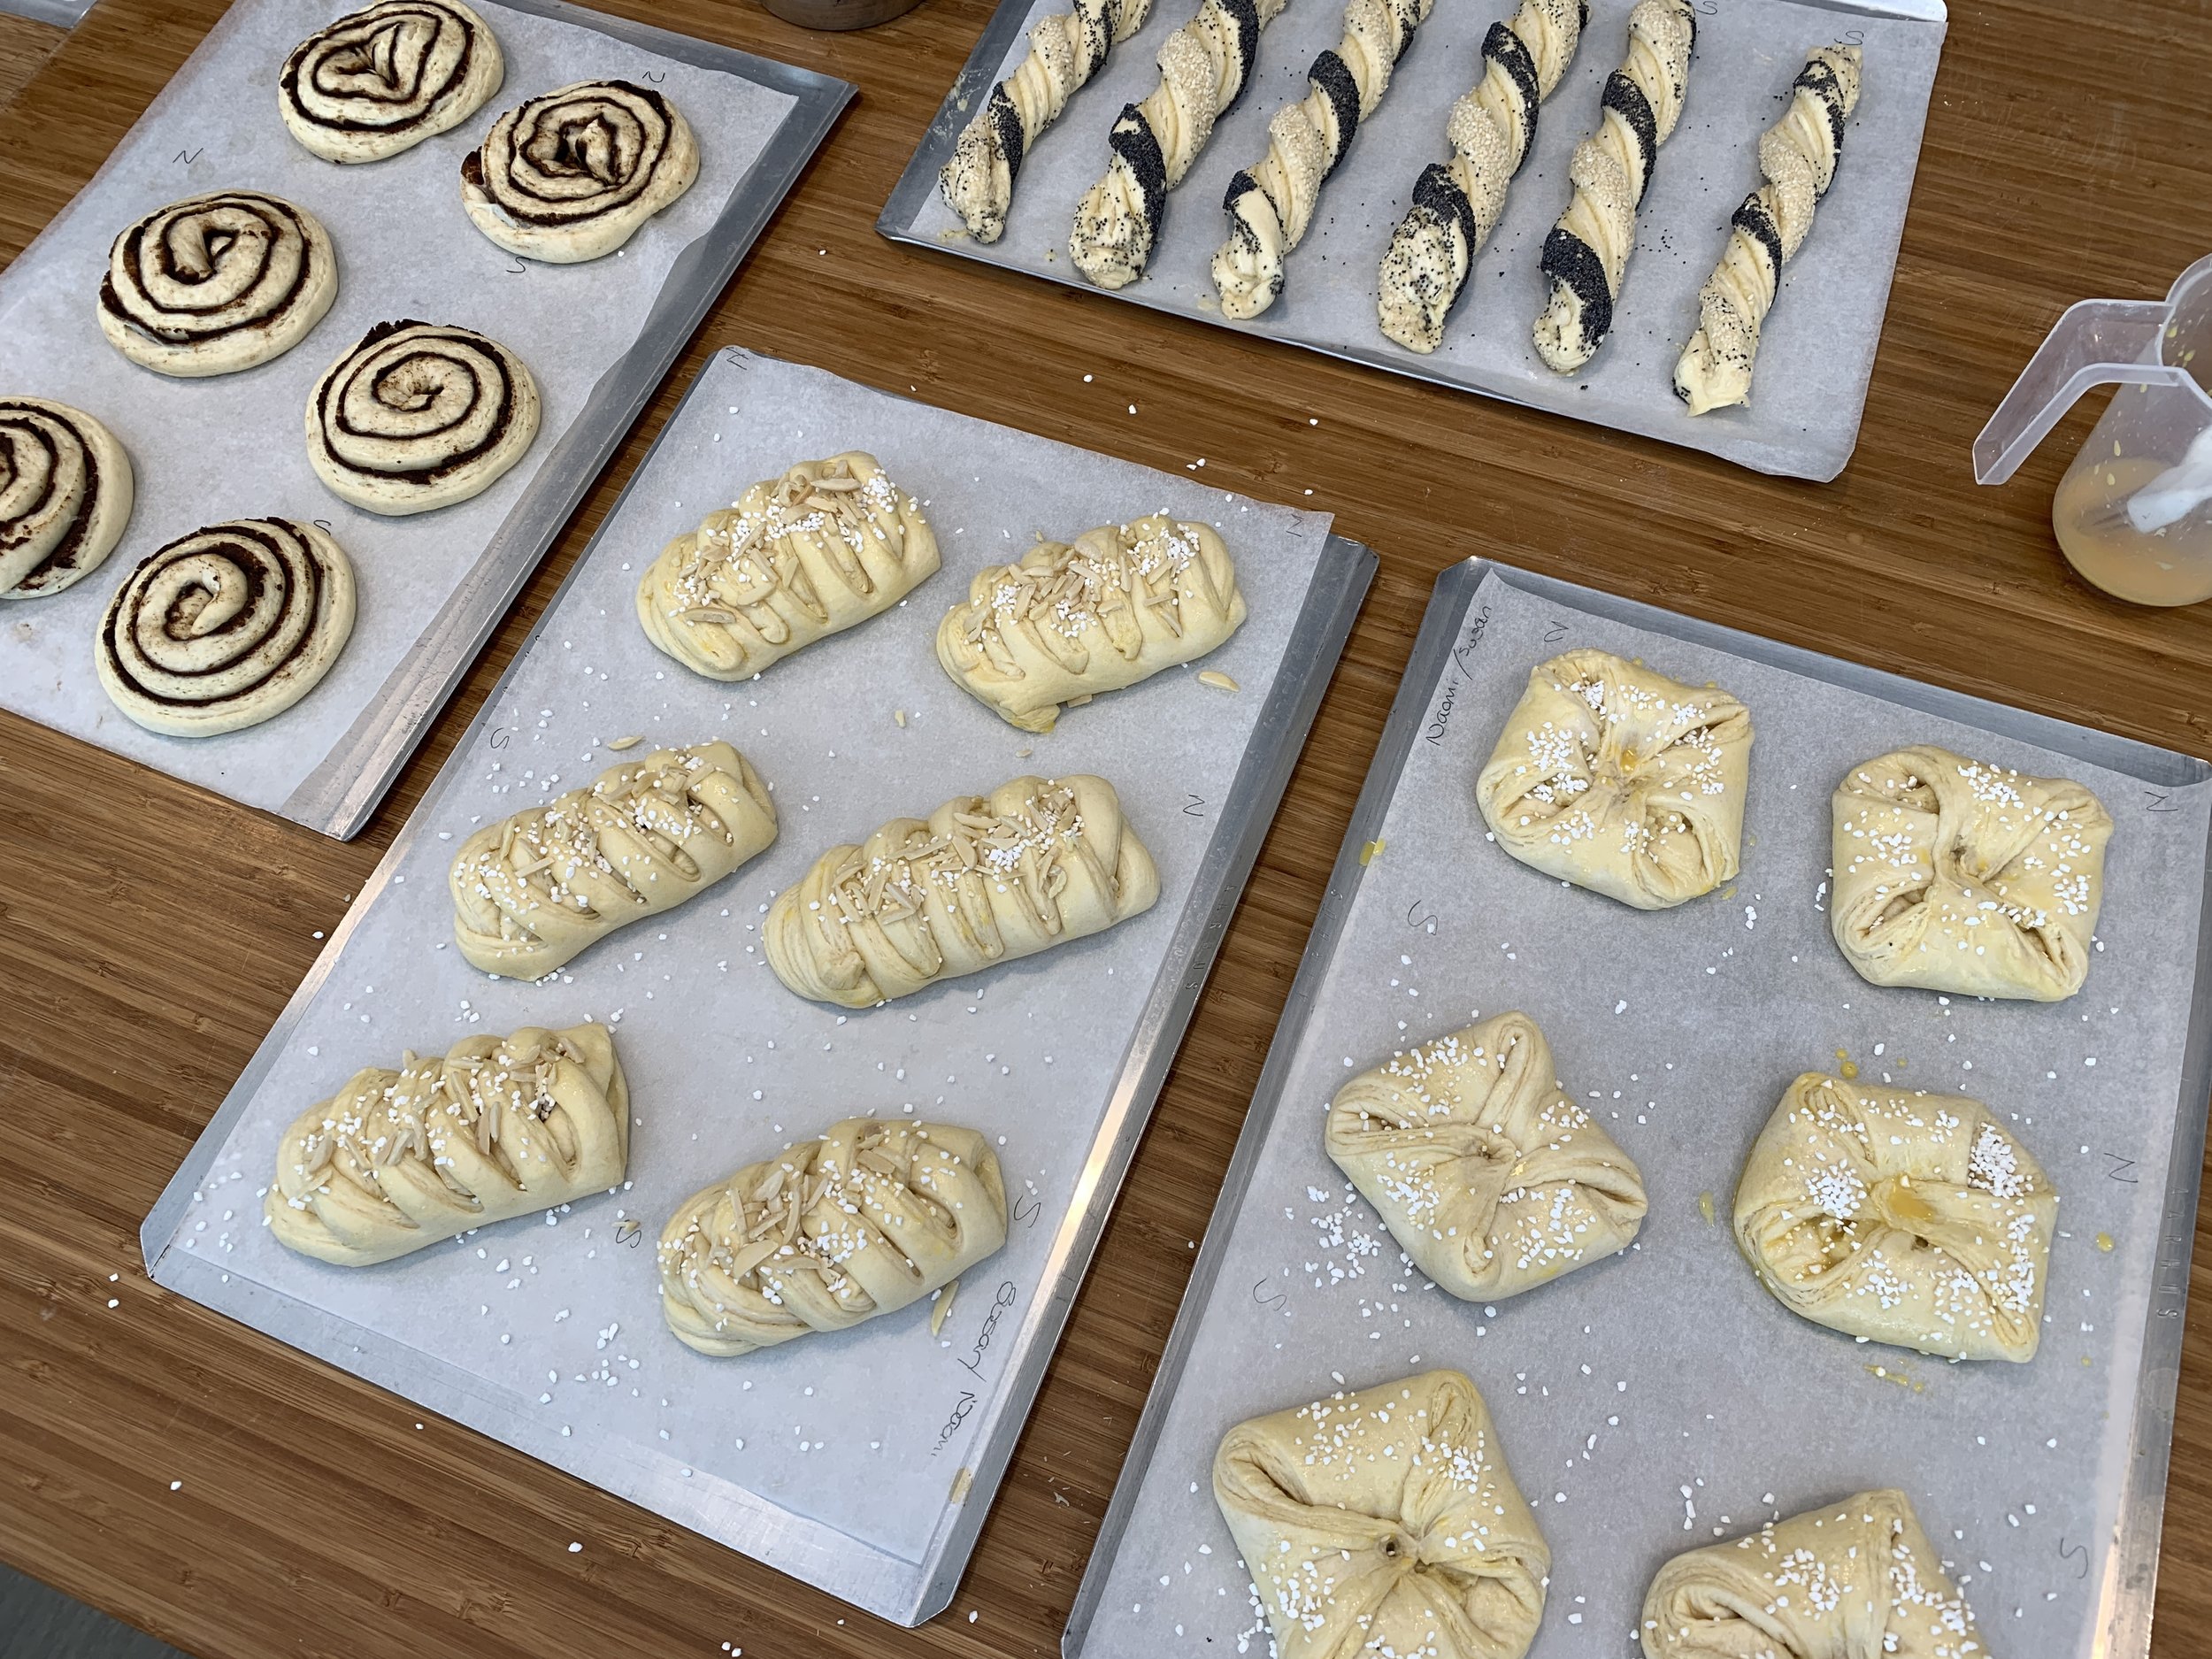
All proofed

Let the baking begin! We rotated trays in and out of the oven until all were baked to golden perfection.

We sampled our wares and also boxed some up to take home. Steve was a happy camper indeed!

After the class Chef emailed all of us a detailed recipe pack with great diagrams of various Danish shapes - can’t wait to try a few others!

All in all a great morning and lots of fun. If you’re planning to be in Copenhagen and feel the baking bug coming on, I highly recommend Terrible French Pastry School. Thanks so much Chef Frédéric (who BTW is cool with me writing and sharing this).

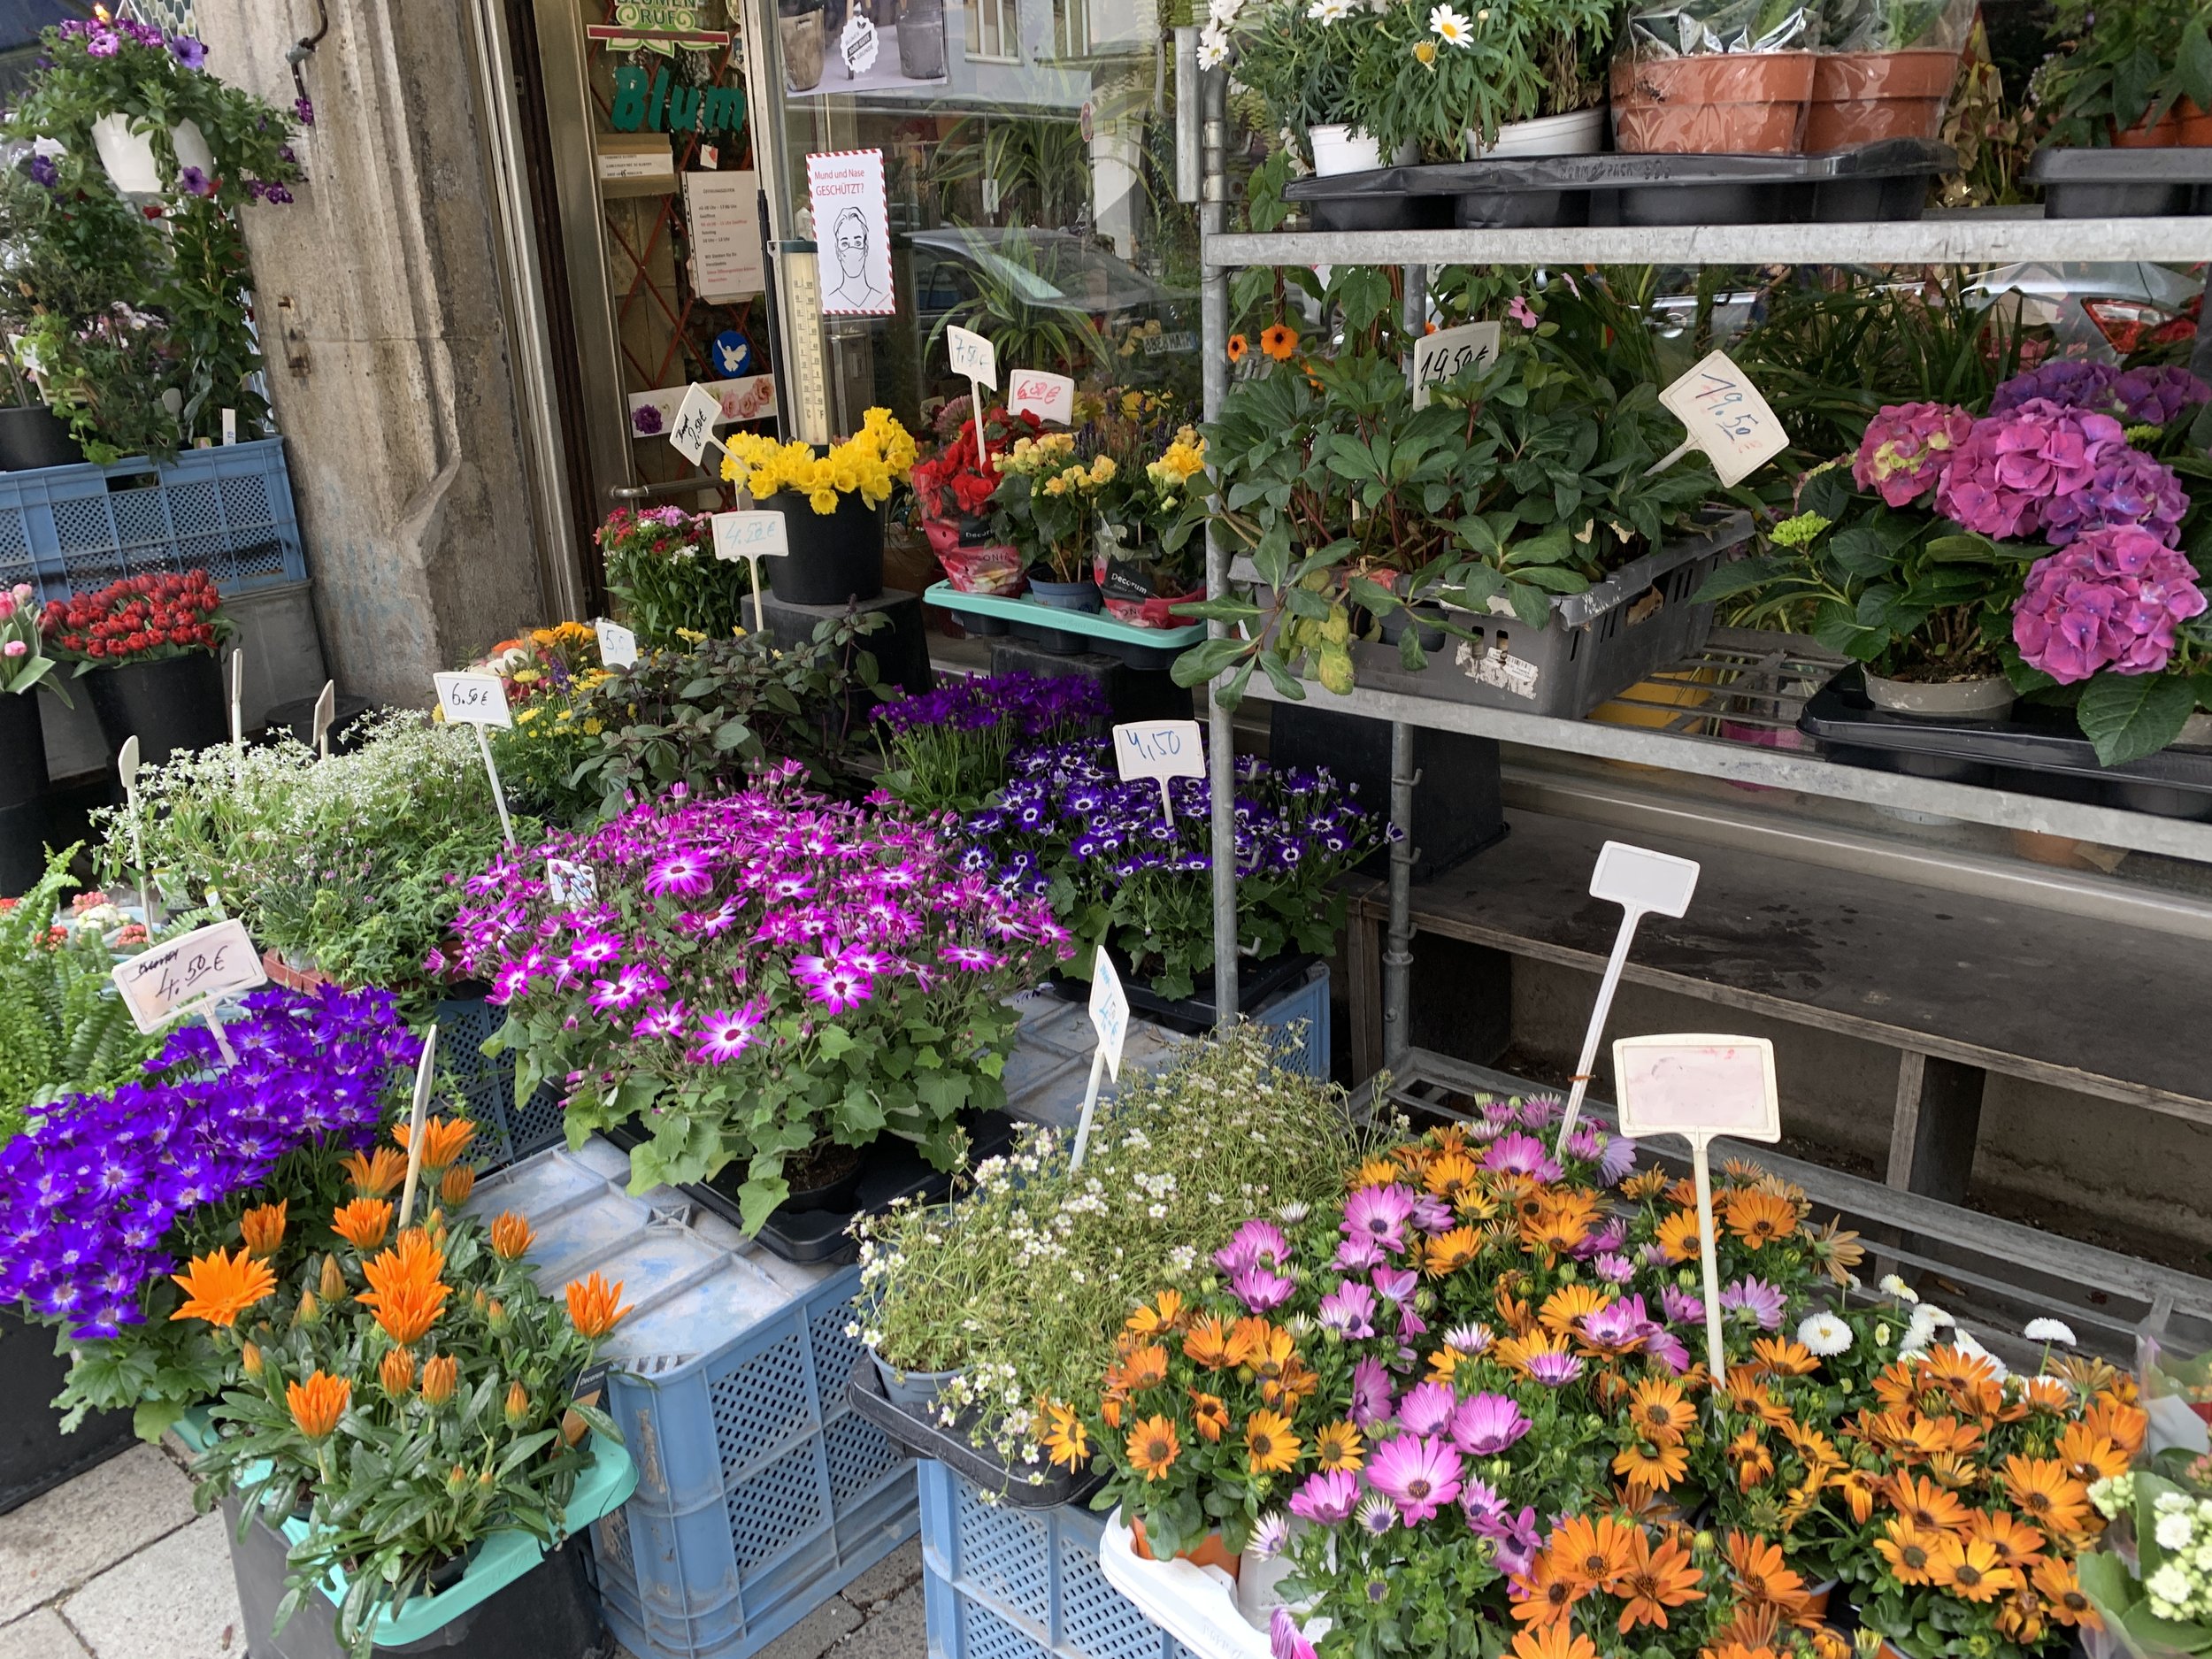
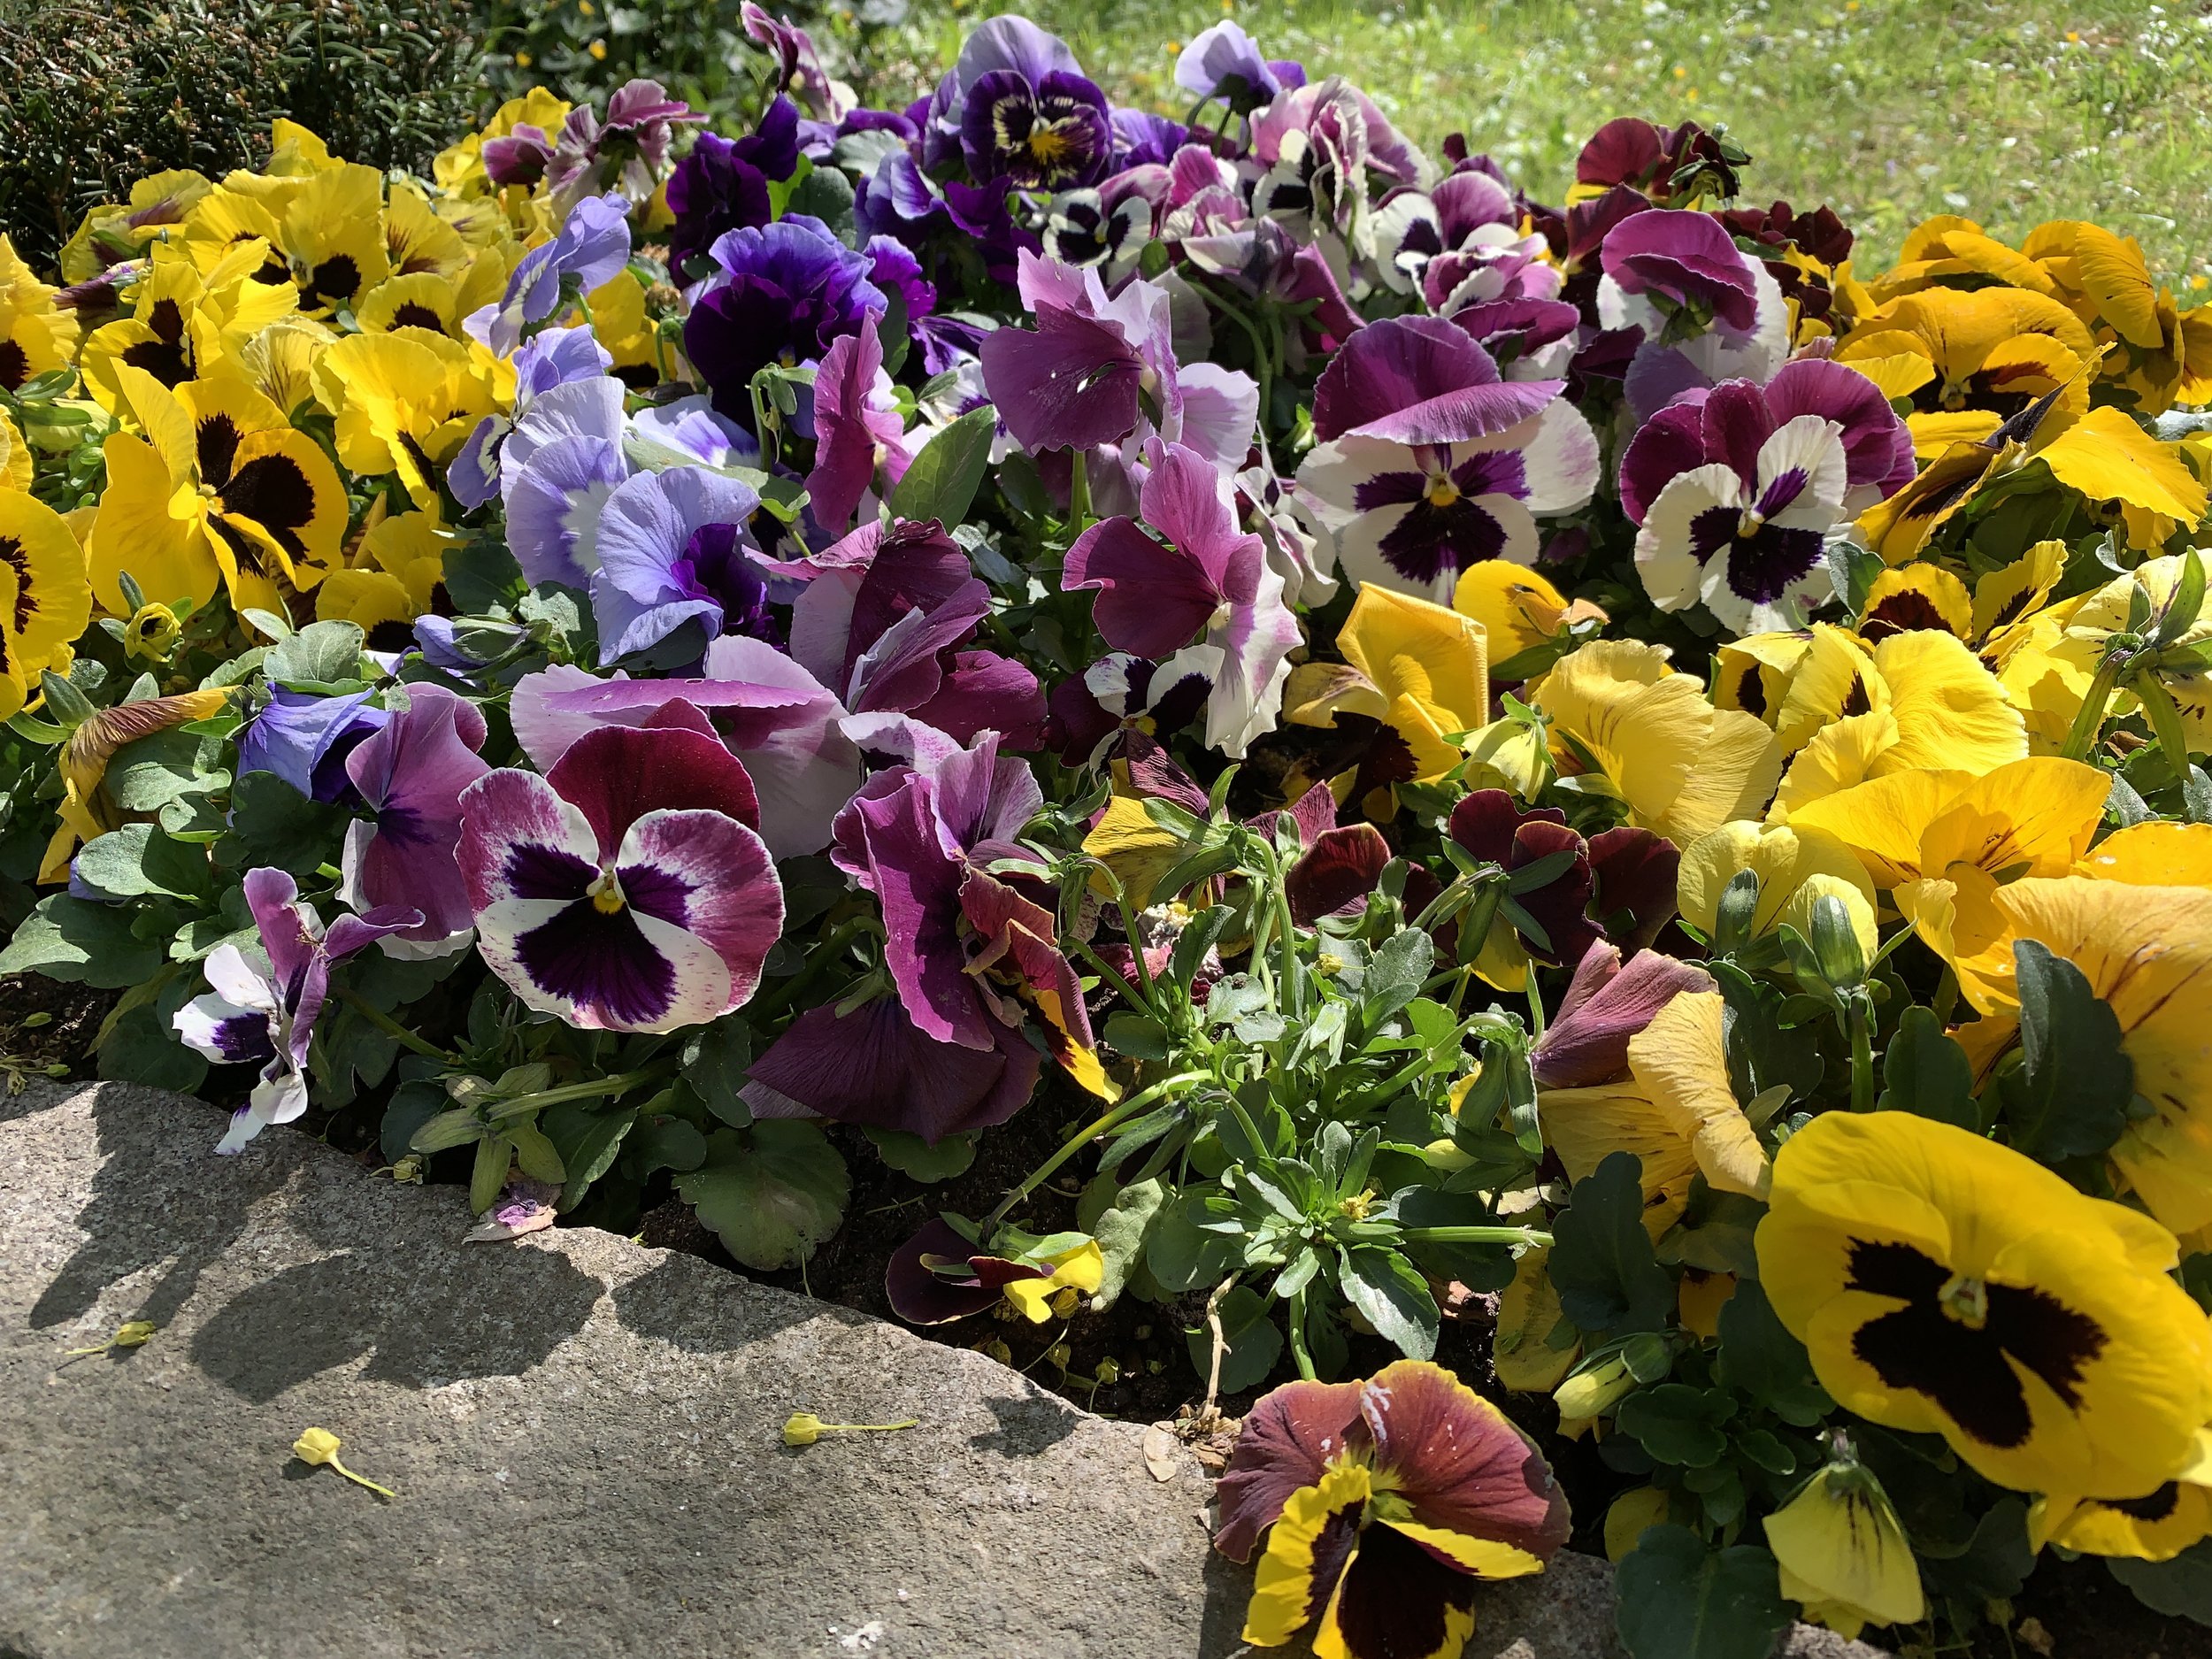
Later that day Steve and I strolled through popular Tivoli Gardens where we found the flowers simply divine. Enjoy!


Tasty treats in Prague - Cukrárna Myšák and trdelnik

Part of traveling is to experience the food and culture of another place. When I surfed the web for best pastry shops in Prague, Myšák was at the top of the list for many. Just follow the link to read about the interesting history of the place and what they have to offer (BTW - cukrárna is translated as confectionary or sweet shop.)

Steve and I visited the shop/cafe after our visit to Prague Castle and a somewhat lengthy walk from the tram to the “main drag” leading up to the statue of Wenceslas, a big name in Bohemian history. But enough about that. As it turned out, Myšák is located on a side street not too far from our apartment and so we settled in for a respite and some treats.

Pastry case

After perusing the case I opted for three treats: Karamelový větrniček - pâte à choux with caramel cream and glaze; tartaletka - a petite lemon tart topped with Swiss meringue and dried blueberries; pražská koule, literally translated as Prague ball - sponge cake with caramel cream, chocolate, peanuts.

Interestingly, each came on its own plate with fork (along with the requisite cappuccino) while I had expected the medley to arrive on a single plate. Oh well - when in Rome . . . . .


Tartaletka

All were tasty, particularly the Prague ball which Steve and I agreed offered a surprisingly pleasant combo of sponge cake texture, crunchy nut and tasty chocolate coating without being cloyingly sweet.

They also have an upstairs space offering the same cakes and pastries in addition to packaged goods like cookies, chocolates and assembled cakes as well as their own ice cream. We picked up a couple of croissants to go and enjoyed them the following morning.

Upstairs at Myšák

Morning croissant - yum!

On our first day of strolling around the old city of Prague we noticed a number of trdlo/trdelnik shops along the way (and a lot of folks eating them!). After a bit of research I learned that the treat itself is referred to as a trdelnik and the mold on which the dough is shaped is a trdlo. I also discovered that these are called chimney cakes in the English vernacular.

Niece Christina had given us a heads up about these popular treats, and we waited until our last day in Prague to give one a try. Sharing one seemed like the thing to do.

Basically a sweet yeasted dough wrapped around the trdlo, coated in sugar (sometime nuts) and grilled on a spit, you can get them edge dipped in chocolate and nuts, filled with whipped cream or soft serve ice cream with fruit options and various add-ons as well.


Choose your options

Most shops had rows of horizontal spits, grilling multiples at one time. Here’s an example of a single vertical one.

Some shops offer more choices than others - ours was pretty straight forward - chocolate/pistachio edge dip with vanilla ice cream.

The dough is what intrigued me the most - slightly sweet, chewy in a good way and a great contrast to the creamy ice cream, chocolate and nuts. Once we had eaten some of the ice cream, it nestled down into the hollow of the dough and one could take bites of the edges. We truly enjoyed it!

I’ve found a couple of recipes on line and realize there’s a bit of finagling to do to create a form and bake them in the oven buuuuuttt . . . . who knows - once we’re back from our travels I may give it a try!

Meanwhile spring continues springing. Take good care - I’ll be back!

Flowering tree at Prague Castle

Out and about in eastern Bavaria

Lest you think all I/we do when traveling is eat pastries and enjoy a nice cappuccino, taint so!

It was delightful to spend time with niece Christina and her family in the small town of Hohenfels in eastern Bavaria, enjoying coolish but pleasant temps and sunny blue skies. Our visit just happened to coincide with the spring Volksmarsch, a yearly tradition in Germany that has been revived as COVID is on the wane (we hope!).

Joining the 4th/5th grade elementary class on the Hohenfels army base, a large group of parents and children headed out for our 10k walk through forests and fields. What a great way to soak up the local traditions.

Volksmarsch

Another of our outings took us to nearby Kallmünz to visit castle ruins and enjoy delicious pizza at a trattoria right along the Naab river. The view from the castle is picture perfect with multicolored buildings and roofs, grassy fields and distant hills.

On our way up to the castle

View from the castle

We had taken our time trekking up to the castle on an inclined road but once we were ready to descend we headed down a stepped, rocky path right into town. Christina and family had eaten at the trattoria before and knew exactly where to find it.

Delicious food, fun service and a great river view made for an oh so pleasant evening.

Naab river

A visit to Nuremberg was on the hit list so one day we trained in from Parsburg for a few hours of strolling, churches, castles, bratwurst and brötchen. I particularly enjoyed the flowers and gardens at the castle. A feast for the eyes and the soul.


Lest you think I’m willing to completely ignore pastries in this post, think again - I’ll leave you with these images from Munich’s Eataly and connect with you next time around.

Ciao for now.

Pistachio cream croissant

Petite pastries in the case

A view down the aisles

Dallmayr cafe and delicatessen

Festooned with blossomed branches for spring, this famous Munich foodie space has been around since 1700. A bustling delicatessen, cafe/bistro, bar/grill and fine dining spot (which reopens September, 2022), Dallmayr attracts locals and travelers alike throughout the year.

After a sobering and rainy visit to Dachau that morning and always in search of a delicious lunch/coffee/pastry experience, we decided to give the cafe a try. Located upstairs, it offers comfortable seating, attentive staff and an all around welcoming vibe. We had a big blue ceramic parrot as our nearby companion.

Even though mask mandates have been lifted for the most part, many folks still mask in indoor public environs, and it’s required on all public transportation and in buildings the likes of museums and government related locales. But when it’s time to eat and drink, the masks come off! Looking around one can just tell that people are so happy to be out and about with family and friends again.

For our lunch Steve chose vitello tonnato, one of his favorite Northern Italian dishes and I went for quiche Lorraine. The dark, seeded rye and traditional baguette in the accompanying bread basket were deelish and our Sancerre was none too shabby either.

If in the mood for dessert, one can go peruse the pastry case for the day’s selections.

Tortes, tartes, kuchens, strudels oh my!

Given the recent apfelstrudel class I attended in Salzburg, that was my choice hands down. Available with ice cream or crème anglaise, I chose the latter along with the requisite afternoon cappuccino of course.

Warmed with flaky pastry, vanilla scented sauce, lightly sweetened cinnamon apple filling - I give it a thumbs up!

After a bit of post lunch relaxing we headed downstairs and wandered a bit through the deli/food hall area very reminiscent of Paris’ famous Fauchon.

Another pastry case caught my eye

Lovely time spent in a lovely location - how fortunate we are.

Leaving you with these classic European floral shop scenes, take care until next time and happy spring!

Apfelstrudel in Salzburg

As is my wont when traveling in Europe, I like to incorporate a pastry class or two into my itinerary. Even if it’s a topic with which I’m familiar, I love to quietly observe the instructor, the process, the group interactions and invariably pick up a tip or two. I might even chime in with a baking nugget of my own.

My only recollection of making apple strudel was back in the early days of my pastry schooling at Apicius in Florence. Since strudel is classically Austrian, one might ask - strudel in Italy?? Why yes as it turns out. Part of the curriculum at Apicius focused on specialties from all regions of Italy, each having its own culinary charm. In Northern Italy strudel is popular in the Trentino-Alto Adige which borders on Austria and, as a matter of fact, once belonged to Austria. As I envision the Apicius teaching kitchen, I see in my mind’s eye a large sheet of dough that we stretched and pulled until paper thin before rolling it around an apple filling and baking it to perfection.

As Steve and I were planning this trip I looked for a strudel class in or around Munich but alas, no dice. But never fear - the trusty internet led me to Edelweiss Cooking School in Salzburg, Austria just over the German border. We had Salzburg on our hit list so it seemed like the perfect thing to do.

View of Salzburg’s altstadt

We took the train from Munich to Salzburg, the bus into the old town then a short walk to Ursulinenplatz 9 where we found the school, literally built into the rock of Mönchsberg, a large part of the backdrop of the old city. Steve dropped me off and ambled off for some cemetery tromping.

The school’s space is cave-like with light and shadows playing off each other. Quick aside - I’ve done my best to lighten and reduce the shadowing in my photos - please understand!

Chef Johann was on hand to welcome me along with the 5 young German women from Augsburg who appeared just behind me. They were on a much belated bachelorette outing (thanks COVID) with some surprise activities planned for the bride-to-be (who actually was married three years ago!!). We were ready for action.

Johann began with a demo of mixing the apple filling and the initial rolling out of the strudel dough which had been made and allowed to rest for a couple of hours before the class. He then gave us a stretching demo to shape the dough into a larger rough square, thin enough to see through.

Preliminary round

All stretched out

He proceeded with the filling and rolling up of the strudel and then it was our turn. My compatriots grouped off at two tables as a pair and a trio, while I was stationed at a table alone with Johann as my partner.

First up - the apple filling. As Johann pointed out, strudel is very forgiving and something you can adjust to your whims. Add a bit more sugar or cinnamon to the apples, add dried cherries or cranberries instead of raisins, add nuts, use apricots or a savory filling like cabbage - all kinds of options.

The apple work had been completed for us - peel, core, slice about 4 cups of apples (e.g. Golden Delicious, Granny Smith, Gala or even a mix), sprinkle on a couple tablespoons sugar, a couple of shakes of cinnamon and a couple tablespoons raisins. Mix it up and set aside. Remember - your dough must be made ahead and ready for you, so wait to mix up your apples until assembly time.

Johann’s dough recipe is simple: 210 g / 1.66 cups flour (recommended ~12% protein which FYI is in between King Arthur’s all purpose and bread), 125 ml / 1/2 cup water, 1 tablespoon neutral oil like sunflower or canola (consider olive oil for a savory strudel) and 1/4 teaspoon salt. Blend all in a bowl and knead by hand to a smooth, silky dough. Lightly oil the dough, cover and rest two hours.

NOTE: I did a quick review of a couple of other strudel recipes, both of which use egg yolk and vinegar (helps tenderize) in the dough and one which utilizes a long mixing time and an overnight rest in the fridge before proceeding. Hmmmm . . . . . . future project methinks.

Rolling and stretching time! It’s very helpful to have a square table, something you can walk around to stretch the dough. Cover the work surface with a large tea towel, linen or oilcloth tablecloth, flour it and place the dough in the center. Flour the dough surface, turn over and flour again; roll out to a round (mine is rather oblique). Johann cautions not to lift/rotate the dough as you might for tart or pie dough - just roll.

Now using the backs of your fisted hands, get under the dough and stretch it out all around to a rough square. The dough may tear but is forgiving and will be wrapped up around the apples anyway.

Whoa! Mine isn’t nearly as nice as Johann’s.

Trim the thicker, irregular edges with a pizza cutter then drizzle 2-3 tablespoons melted butter over the dough (don’t brush since it may tear the dough) then a couple tablespoons bread crumbs. These help absorb some of the liquid from the apples during baking.

Place the apple mixture over the lower third of the dough, fold the sides over and the bottom up . . .

then using your cloth as a lifter, roll up the whole thing, leaving it seam side up. Snug it up a bit at the ends if needed so it will fit into your pan. Pretty rough and tumble, eh?

Have a buttered or parchment lined 1/2 sheet pan or metal 9-ish by 13-ish baking pan at the ready and, using Johann’s method, pick up the strudel with your towel or cloth and gently roll it onto/into the pan so the seam side is down. Brush melted butter over it and bake in a preheated 400º oven for about 30-35 minutes.


We all gathered round the table for a lunch of delicious goulash and a sampling of the soufflé-like Salzburg specialty Nockerl (a future post perhaps?) that we had whipped (literally!) together during class.

Salzburger Nockerl

Then it was time to sample our strudel, dusted with confectioner’s sugar and hot out of the pan.

Crisp crust, mellow apple flavor, not too sweet - all in all a worthwhile endeavor and a fun experience in old Salzburg. Thanks Johann! I look forward to making it at home, especially when autumn rolls around.

Steve and I finished our Salzburg visit with a boat ride on the Salzach River and a stroll through Mirabellgarten (Sound of Music anyone?) before our return train ride back to Munich.

Happy spring and take care until next time. Who knows what I may have up my sleeve.

Greetings from Munich!

Guten Tag allerseits!

Live! - coming to you from Munich at the start of a much awaited European adventure. After a very long travel day/night, we caught our breaths with a short nap, a stroll down the street for some basic staples for our AirBnB and topped it off with the first (of many!) coffee and pastry experiences at a nearby shop. With a natural rustic vibe and friendly staff who spoke English in counterpoint to our very rusty German (we’re trying), it was a relaxing way to feel welcomed to the neighborhood.

I went for a cappuccino with a freshly baked custard tart (à la the classic portuguese pastel de nata). The dried flowers atop the delicious, flaky-pastried-creamy treat were a colorful touch, especially nice since spring is in the air.

Steve had a doppio espresso and his favorite, pain au chocolat. The pain was nicely laminated and flavorful but with a bread like texture, a characteristic I suspect came from addition of egg to the dough. The quintessential flaky, shard producing French style laminated pastries we all know and love don’t typically contain egg, But different strokes for different folks - egg is often added to laminated pastry dough in countries the likes of Germany and Denmark (here’s the recipe I like to use). It’s all in how it’s done!

We strolled down a few of the neighborhood’s winding streets and discovered the church yard cemetery that is literally behind our building. Dappled light, sun and shadows, spring flowers and the memories of those in repose - a beautiful spot.

Check out Steve’s blog for more on our trip comings and goings.

We ended our first day in Munich with a Campari soda toast and tasty freshly made pasta dishes at another nearby eatery . Now it’s time for a good night’s sleep.

More coming up. Ciao for now!

Whole wheat bread

For some reason my brain has been swimming with all things bread lately. I’m in the midst of reading Samuel Fromartz’s book “In Search of the Perfect Loaf” and once again realize how much there is to understand. It takes lots of practice, trying techniques over and over, yet every time and every loaf will be just a bit different.

I’ve been on a sporadic and, I admit, rather lackadaisical hunt for the perfect whole wheat loaf that will fill the bill for a great sandwich or tasty morning buttered and jammed-up toast. There are so many possibilities, and I’ve run the gamut from a softer, gently enriched sandwich bread to a heartier nutty/fruity almost granola like bread to a chewy crusted hearth bread. They’ve all been tasty, but I have yet to reach bread nirvana. Buuuut . . . . I’m getting closer!

I have Jeffrey Hamelman to thank for this one, having found the recipe in his book “Bread” (full of great stuff!). An overnight pâte fermentée kicks it off. The evening before you want to bake, place 147 g / 5.2 ounces cool water in a medium bowl, add 1/8 teaspoon instant yeast, 227 g / 1.75 cups whole wheat flour and 5 g / 1 teaspoon salt. Blend until smooth and cover with plastic wrap.

Let sit at room temperature (70ºF) 12-16 hours.

When ready to make the dough, place 454 g / 3.5 cups whole wheat flour, 227 g / 1.75 cups bread flour, 480 ml / 2 cups tepid water, 10 g / 2 teaspoons salt, 4 g / 1.25 teaspoons instant dry yeast and 28 g / 1 tablespoon + 1 teaspoon honey in the bowl of a stand mixer. Blend on low about 3 minutes to incorporate ingredients, adding the pâte fermentée in pieces as it all comes together. Then mix on speed 2 about 3 minutes - look for supple, slightly loose dough.

Cover and let rise about 2 hours, doing a fold about half way through.

My kitchen is on the cool side so I gave mine a total bulk rise of 2.5 hours.

Dividing time! I opted for 2 free form loaves, each ending up about 788 g. Alternatively you can choose 2 loaf pan loaves or make a bunch of rolls (I like 50-60 g size for rolls).

Pre-shape rounds, place seam sides up, cover lightly with plastic and rest 10-15 minutes

Now shape loaves - boules, ovals, bâtards - whatever floats your boat. I placed mine on parchment on an overturned sheet pan that served as my peel for sliding them into the oven when the time came. Cover lightly with plastic wrap and give ‘em a rise. Hamelman instructs 1 to 1.5 hours at 75º F but in my cool kitchen I went for a 2 hour-ish rise. During the rise, place a baking stone in the lower part of the oven and heat to 450º F.

Start of rise

Make your desired slashes . . . . . (yes, mine could use a little fine tuning)

and slide those babies onto the baking stone, followed by a generous squirt of hot water (I have a tray that slides right onto my bottom oven rack) to create some steam. Bake about 40-45 minutes until nicely browned.

Nice! Good hollow thump as well.

Once cooled, slice away and enjoy.

Steve and I agreed that the exterior was wonderful - crusty with a perfect chew that wasn’t tough - and the bread itself deelish with that just right sweet hint of honey. Sandwiches and toast, here we come!!

Of course, I dream of many more bread baking adventures ahead. Hmmmm . . . what shall I try next??

FYI - I’ll be popping in and out over the next couple of months as Steve and I will be doing some long awaited traveling. How about a Danish pastry class in Copenhagen? Sounds good to me!

And now I’ll leave you with another example of the beauty we find at nearby Meijer Gardens. Certainly gets one in the mood for spring and summer, eh?

Take good care until next time.

If pastry could change the world . . . . .

If only everything could remind us of love . . . . .

If we could all share fresh bread, cheese and wine . . . . .

If a simple and delicious apple tart could make each day better . . . . .

If a bright, flashy chewy macaron could shout “Be Happy”! . . . . .

If croissants could bring us together as one, multi-layered though we are . . . . .

If a buttery scone could make us giggle with delight . . . . . .

If creamy profiteroles could smooth out all the kinks amongst us . . . . .

If a shortbread sandwich cookie could hug each and every one . . . .

If caramelized Kouign-amann could roll us up in a big warm embrace . . . . .

Don’t you think the world would be a better place?

Sesame brioche rolls

Hmmmm . . . more sesame you say? This time let’s talk tahini brioche. While I don’t always have tahini on hand, once purchased and used for its intended project, it sits in the cupboard waiting. I think Steve and I bought a jar some weeks back to make a dressing or marinade for something. Fortunately the shelf life is good, but I don’t like to let it linger too long before figuring out ways to use it up.

Always up for trying a new brioche recipe, I thought I’d give this one a try. As was true of the sesame cumin crackers of which I wrote recently, the recipe comes from Sofra, the popular middle Eastern bakery/cafe in Cambridge MA. It was presented in the holiday 2018 issue of King Arthur Flour’s erstwhile magazine “SIFT”, a beautiful, glossy presentation of all things baking and pastry. Please note - all credit goes to Sofra and King Arthur - I’m simply here to share my experience as I went through the steps.

i love a buttery brioche and have tried and tweaked many a recipe. My current go to recipe involves the usual long mixing time for this enriched dough, followed by an overnight rest in the fridge before dividing, shaping and baking the intended rolls or buns or whatever. The primary difference with Sofra’s is the first step of making a sponge before mixing the final dough. A sponge belongs to the family of pre-ferments like poolish, biga, pâte fermentée and levain and is intended to give the dough a chance to develop more flavor as well as give it a longer shelf life.

After a quick review of pre-ferments in Rose Levy Beranbaum’s “The Bread Bible”, as well as a few recipes that utilize the sponge approach, I realized that the sponge in this brioche sits for a short 30 minutes. It seems that 1-4 hours at room temperature or even overnight refrigeration are more typical, buuuuuut . . . . . I opted to follow the recipe - you gotta try, right!

The image below shows my mise with the sponge not quite at the 30 minute stage (as you see above).

OK - let’s go through the steps. For the sponge blend together 60 ml / 1/4 cup tepid whole milk, 7 g / 2.25 teaspoons instant yeast, 1/2 teaspoon sugar in the bowl of a stand mixer; once the yeast has dissolved, whisk in 2 large eggs and stir in 130 g / 1 cup all purpose flour.

Sprinkle another 65 g / 1/2 cup all purpose flour over the top of the mixture.

Cover and set aside for 30 minutes until the top flour layer is cracked, a sign that the yeast has started its work.

Now add to the sponge: 227 g / 1.75 cups all purpose flour, 50 g / 1/4 cup sugar, 10 g / 2 teaspoons salt, 3 large eggs, 1 large yolk and 110 g /~1/3 cup well stirred tahini. Mix on low speed with the dough hook to bring everything together. Then increase to medium for 8-10 minutes until the dough starts forming around the hook.

Scrape down the sides and give it a high speed mix for a minute more.

On medium speed add half (100 g) of the cold, cubed butter; mix until incorporated; add the remaining 100 g butter and mix about 10-15 minutes more until silky smooth. Give it one more minute on medium high - you want the dough pulling away from the sides of the bowl.

Oooooooh - love that sheen!

Lightly butter a 3 or 4 quart bowl or container, place the dough in and press into a rectangle. Fold the edges in, turn the dough over and press again into a rectangle. Cover or tightly wrap and refrigerate 6 hours or overnight. Being such an enriched dough, it doesn’t tend to rise too aggressively.

Here it is the next morning. Rise and shine!!

In general when shaping brioche dough it’s best to keep it cold, so leave it in the fridge until you’re ready to go. I envisioned a smallish roll so I figured about 60 g / 2 ounces for each piece (Sofra’s yield is a dozen rolls, making each a generous 90-ish g each). My total dough came to 1100 g; divide that by 60 g which yields 18 rolls. Sounds good to me.

Divide the dough and shape each piece into snug balls.

Place rolls on a parchment lined sheet pan. NOTE: Sofra’s recipe directs use of a buttered 9 or 10” springform pan, tucking the rolls in and ending up with pull-apart rolls.

Cover with lightly buttered plastic wrap and let rise 2 to 2.5 hours. On a cold winter day and in my kitchen at 69ºF, I give them the longer rise. Since brioche is so enriched, it needs plenty of time and won’t appear to rise as robustly as lean yeasted doughs. Toward the end of the rise, heat your oven to 350ºF.

Brush the tops with a bit of egg white (or water or milk) and sprinkle with sesame seeds.

Bake about 30-35 minutes until nicely browned (internal temp 190ºF). Cool and enjoy!

Of course Steve and I had to taste test a warm roll with a drizzle of honey (good!) and followed that the next day with sliced/lighted toasted versions served along side (or sandwiched with!) Sunday morning scrambled eggs. Yummy.

These will keep for several days well wrapped but I chose to freeze the majority of my batch (dinner rolls coming up?). I’m imagining a tasty chicken salad sandwich or sliced/cheesed up and broiled to go along with some of the great soups Steve has been making lately. Yes indeed.

Meanwhile , in spite of winter’s attempts to hold on, we’re getting little whiffs of spring - red wing blackbirds, the sandhill cranes who hung around all last summer have returned, pussy willows are starting to open and there’s a different feel in the air. You just know it.

Take care until next time!

Sesame cumin crackers

Nothing fancy here folks but these babies are delicious! My first foray into baking with chickpea flour, I came across this recipe when browsing back through some old issues of SIFT magazine (Holiday 2018, No. 12) from King Arthur Baking Company (King Arthur Flour back then). The company published this beautiful magazine over 5 years, 3 issues per year, but, alas, they stopped with the holiday issue at the end of 2019. I have all of them except the very first and they tell me it’s not available. I did find an old press release with a PDF of the first 5 pages and also this link to what’s in that first issue if you’d like to check it out.

This cracker recipe comes from Sofra, the popular middle Eastern bakery/cafe in Cambridge MA. Steve and I have experienced some of their goods in past years, since it’s not far down the road from Mt. Auburn cemetery. During our Providence days, we would occasionally take a drive to stroll the beautiful grounds, enjoy the arboretum and pay our respects to the likes of Henry Wadsworth Longfellow, Dorothea Dix, Winslow Homer and Isabella Stewart Gardner. There’s a great view of Boston from the higher elevations, and birding is popular too. A calming place!

The dough is simple to put together but plan ahead since you roll out quarters of the dough, stack them between parchment and chill them for at least 4 hours or overnight before cutting and baking.

Here’s the recipe: In a small bowl blend 3/4 cup buttermilk with 2 tablespoons tahini (be sure and stir it up well first!). In the bowl of a stand mixer with the paddle combine 227 g / 1.75 cups all purpose flour, 50 g / 1/2 cup chickpea flour (I use Bob’s Redmill), 1 tablespoon sugar, 1 teaspoon kosher salt, 1 tablespoon ground cumin, 1/4 teaspoon ground allspice and 113 g / 4 ounces cold unsalted butter cut in 1/4” cubes. Blend on low until butter is in small pieces then add the buttermilk mixture and mix to a wet dough.

The dough is pretty easy to handle when the work surface is properly floured. Divide the dough in 4, keeping the waiting quarters in the fridge as you roll out one at a time. Roll each quarter to a 12”x13” (ish) rectangle - mine was pretty loose-y goose-y since I envisioned my crackers would end up in a variety of shapes and sizes, and I didn’t mind some rough edges. The main thing is rolling the dough nice and thin (1/16”) for better crisping up during the bake.

Line a half sheet pan with parchment, sprinkle with cornmeal (or semolina) and place the first rolled out dough quarter on it. Place a second piece of parchment on the dough, sprinkle again with cornmeal and place the rolled out second quarter on it. Repeat with the other two portions. Cover with plastic and refrigerate 4 hours or overnight. I chose overnight.

When ready to bake, heat the oven to 350ºF. Have a teaspoon of kosher salt and 2 tablespoons sesame seeds on hand. Lift one of the dough portions on its parchment onto an empty sheet pan. Fork prick it all over, brush lightly with water and sprinkle 1/4 teaspoon kosher salt and 1/2 tablespoon sesame seeds over the top. Cut into squares or rectangles (or whatever shape and size you’d like) with a pizza cutter.

Repeat the above with the next batch of dough on a second empty sheet pan. NOTE - I baked two pans in one go but if you prefer to bake one at a time, go for it.

If you only have one or two half sheet pans and need to rotate batches, pull the baked sheets off onto cooling grids and let the pans cool completely before you continue the above steps with the remaining dough quarters.

Bake about 15 minutes, rotating your pans half way through. I baked mine a bit longer since they weren’t deeply browned and crispy at the 15 minute mark. Remember - all ovens are different! Let cool then recut or break apart and enjoy.

Steve and I found them very tasty with a schmear of hummus or a nice slice of Cotswald cheese. Yum. One note - the medium grind cornmeal that I used for “dusting” the parchment sheets had too much coarse crunch for our tastes. I’d suggest using either fine-grind cornmeal or semolina to 86 that problem.

They keep well in a closed container for a good week. Try ‘em, you’ll like ‘em.

Have a wonderful week!

Favorite garnishes, the end: crumbles

Banana rye cakes with hazelnut crumble (and a bit of chocolate tucked underneath)

Ready to bake mixed berry crisp with pistachio crumble

Time for the garnish finale in what has become a 4 parter on some favorite ways to dress up and enhance your baked goods.

Crumbles are easy, ever so adaptable, perfect for layering or topping and they keep either unbaked or baked in the freezer for many weeks. What a great way to be ready for any garnish occasion. Yes!

If you plan to make some crumble, feel free to double, triple or quadruple the recipe for future projects. Simply mix equal weights of flour and sugar in a medium bowl then sand in the same weight of cool, diced butter with your fingertips, work it to smallish coarse crumbs and voilà, that’s it!

A basic starter quantity is 60 g each of flour, sugar and butter which easily tops a dozen muffin size teacakes, a 9” fruit tart or a 9”x9” pan of fruit crisp.

Ready for sanding

If you’re not using it right away, either spread it out on a sheet pan to bake ahead (350ºF for 15 to 20 minutes, stirring occasionally until golden brown), cool and bag up for the freezer OR store unbaked in a zip-top bag until ready to use.

Tray ready to bake/bag going into the freezer

All baked up

You can change up your crumble by subbing in spelt, whole wheat pastry or rye flour for all purpose (or do a mix) and swap out granulated sugar for raw or dark brown. Make it more nutty by adding an equal weight of nut flour or finely ground toasted nuts. Or simply add in chopped nuts (use anywhere from half to equal the weight of the other ingredients) for more texture and crunch. Add in your favorite spice(s) and/or some citrus zest. Create!

For an alternate crumble approach I use my favorite chocolate shortbread dough (recipe compliments of Thomas Keller’s “Bouchon Bakery”) and rather than bake it as cookies I just crumble up the dough in a single layer on a sheet pan and bake it up. There’s always a bag of the stuff in my freezer. Steve and I love it on ice cream, and I use it to top teacakes garnished with Swiss meringue buttercream or my favorite chocolate ganache tart.

Black gold!

Dark chocolate ganache and caramel apple teacakes

Chocolate ganache tart

You can do the same with your favorite crispy gingersnap dough or basic shortbread dough. I love making my own graham crackers too, both for crumb crusts as well as crushing them up for a garnish.

There’s nothing like the crispy crunch of crumble married with juicy, baked fruit, layered with luscious cream or as a topping for citrus curd or ganache - the list goes on. Just go for it and have fun.

Cheers until next time.

Hazelnut ricotta berry entremet layered and topped with almond/hazelnut crumble

Paris Brest - more fun with pâte à choux

After my recent post on religieuses and the steps of making pâte à choux, while we’re in the mood let’s take a look at Paris Brest. Another classic choux paste creation, it’s reportedly named to commemorate the famed Paris to Brest bicycle race, being created years ago by a pastry chef to resemble a bicycle wheel. I’m only one in a long, long, long line of folks who have written about this very thing.

One can make the round any size - large, medium or individually small - it’s all up to you. I used to make individual ones on occasion back in our Providence days, but it’s certainly been awhile. Since Steve and I are the only ones around to eat the goods, I decided on a round about 6-7 inches in diameter that would yield decent wedges to be consumed over 2-3 days.

I piped and baked the Paris Brest rounds the same day as the religieuses then held them in the freezer overnight before assembly the following day. One can pipe one ring with two tiers, splitting it in half once baked, but I decided to bake two separate rings, one for the top and one for the bottom.

Here’s the breakdown. Draw two circles of your chosen size on parchment, overturn the paper and place it on a sheet pan. Using a medium star tip I piped a ridged bottom layer and a more swirly top layer. I tucked in small rounds of “crunchy top” circles then sprinkled on some chopped hazelnuts.

Here they are nicely baked and browned.

When you’re ready to assemble, carefully slice off the top edges of the bottom layer to shave off any unevenness (snack time!).

I went with classic praline pastry cream for the filling. The same day that I had made the crème pat for the religieuses, I separated out 200 g and blended in praline paste made by processing 40 g sugared hazelnuts to a paste consistency. Once chilled I added a nice dollop of whipped cream to lighten it. Using a medium star tip I got a little carried away with my squiggles and ruffles. Have fun with it!

Set the top on and gently nestle it in place. I like to give it a dusting of confectioner’s sugar too.

Now slice and enjoy. You won’t be sorry.

Wherever you are and whatever you’re doing, keep up the good work and live happily. It’s not always easy, that’s for sure.

Religieuse - fun with pâte à choux

Steve LOVES anything made with choux paste, and coffee religieuse (French for nun) is at the top of his list. He’s been asking me to make these for awhile now, and what better time than during the down days of January as we catch our collective breaths and ease into 2022.

Pâte à choux takes me back to Le Cordon Bleu school days and my stage at Pascal Pinaud’s in Paris’ 5th arr. (15 years ago this month!!). My task each morning was to fill and garnish the èclairs and religieuses for the day. As a matter of fact, the job I was given that very first morning oh so long ago was to make a big batch of traditional crème pâtissière (and make it I did!). Yes, I can do this!!

Chocolate and coffee crème pat (in Brit speak) are de rigueur for the fillings, with fondant of each flavor used to garnish. In recent years dedicated choux shops have popped up in and around Paris with all manner of flavors available.

Even though fondant is typically used to cap the choux buns, I felt no joy when working with the stuff and have avoided it ever since. I choose to use a lovely ganache instead when dressing up my ladies. The collar consists of buttercream piped in a ruffle fashion, another morning job for which I was often chided when not piping perfectly. Looks like I still have a ways to go on the perfect ruffle. Live and learn. BTW - you’ll see all manner of ruffles if you search the internet for religieuse. Lots of variations.

For the filling I used my base crème pâtissière recipe. Since I planned to make just a few religieuse, I divided out 200 g of the warm cream and blended in 30 g of chopped milk chocolate and some coffee extract to taste to go the mocha route.

Let’s do a quick run through of the choux making process. Here’s the recipe - I’ll highlight what I feel are the important things to notice through the steps.

Have your flour and eggs ready in separate bowls. Place the milk/water/butter/sugar/salt in a medium saucepan on low heat. You want the butter completed melted before you turn the heat up.

Up the heat to medium high and bring it to a boil. Have the flour at the ready.

Remove from the heat and dump the flour in all at once, stirring quickly to incorporate. It will look kind of clumpy at first like rough mashed potatoes.

Move it back onto the heat and stir vigorously to release some steam and dry it out for a minute or two. Look for the paste to start forming a smoother ball and there will be a light coating on the pan bottom.

Transfer the paste to the bowl of a stand mixer and let it sit a minute to release some more steam. With the paddle attachment on low add the first egg and blend on medium to incorporate completely. It will look gloppy and will seem like it doesn’t want to come together. Don’t worry.

Note: you can blend the eggs in by hand with a sturdy wooden or silicone spoon - you just have to have enough elbow grease to bring it together!

As you add each egg and blend it in, the paste will become more uniform and smooth. The base recipe I use calls for four large eggs. Here’s the paste after three eggs have been added.

Before I proceed I assess by checking the mixture. It should hold, not tear, and start ribboning down as you lift the paddle and let it hang in a “v”. Not quite ready.

I break up the last egg and add about half, blending and reassessing. I don’t consider myself superstitious but it usually works out for me that about 3/4 of the last egg is just right to call it good. Here’s the “v’ coming off the paddle. Notice the paste has more of a smooth, luscious looking sheen too.

Time to pipe! I pulled out a couple of round cutters to help me eyeball what size I wanted my heads and bodies. I forgot to include my trusty ruler in the shot, but in the image below I’m using a quarter sheet pan which measures 8x12”. That gives you some scale. I used a round tip for the bodies and a star tip, just because, for the heads (which you can sort of appreciate in the final analysis, but a round tip is just fine).

Here they are all baked and cooled. I had an extra head which I filled with a bit of mocha cream and ate. Gotta test the product.

Match the heads and bodies and shave enough top off the bodies to give a flat surface on which to perch the head.

When ready for the filling portion of the program, I give the chilled cream a good smoothing out in the mixer with the paddle or in a bowl with a spatula, then fold in a dollop of whipped cream to lighten it. I learned early on that Parisians are none too happy if their choux aren’t properly filled. There has to be a certain heft to show that the job is done well.

I have a basic one to one dark chocolate ganache on hand for dipping (once made, let it cool a bit so it doesn’t run down the sides). Fill first, dip second.

Poke holes in the bottoms of the heads and bodies then pipe in your cream. As you hold the choux with your non-piping hand, you’ll appreciate the heft as you fill. Fill until some cream starts to ooze out, a sign that you’ve filled adequately. You can scrape off the excess and have a snack.

Set the buns upright and dip both bodies and heads in ganache to give a nice cap. Set the heads on the bodies - the ganache will hold them together.

Once assembly is complete, I usually hold them in the fridge until I’m ready to do the collar. I used sea salt caramel Swiss meringue buttercream for my ruffles, piping with a small star tip.

I think of these nuns as roly-poly with a mock turtleneck look.

As you might imagine, Steve was a happy camper. Filled choux will keep well in the fridge for a couple of days to give you some time to savor the treats.

Here’s a cross section - you can see they are chock full of cream. The Parisians would be happy.

Coming soon! More choux fun with Paris Brest.

Stay warm and stay healthy. Ciao for now.

Chocolate semifreddo (or what to do for a holiday dessert when your oven is on the fritz)

Chocolate semifreddo

Wouldn’t you know that a mere 10 days before Christmas my oven decided to take a vacation. Fortunately I had a good deal of holiday baking already completed, plus we have a couple of neighbors who were more than game to let me use their ovens for the few tarts and pastries that still needed attention.

While this type of occurrence can certainly frustrate, I saw it as the chance to think about how I might function without said oven for a short time. It’s not unlike many things we’ve had to adjust to in the past couple of years as we’ve done our best to navigate through the current state of the world.

My mind starting listing off the goodies that can easily be created without an oven - semifreddo, ice cream, fruit fools, chocolate/nut/dried fruit barks, brittles, chocolate truffles, lemon curd/cream with berries, whipped ganache with caramel and chocolate crunchies, crepes with sautéed fruit, crepe cake . . . . You get the idea.

Perhaps I should be thinking of this as the “ghost of Christmas past” since we’ve already slid into January, but I think it’s still fun to tell you about this deelish semifreddo. Remember - Valentine’s day isn’t far away.

For our small family gathering for Christmas Eve (also a celebration of what would have been my father’s 100th birthday), I chose a chocolate semifreddo, a classic Italian “half-frozen” dessert. While many semifreddo recipes are based on the incorporation of whipped cream or meringue into a sabayon type of mixture (egg yolk, sugar, liqueur or wine or citrus juice), this one is a combination of a Swiss meringue and whipped dark chocolate ganache placed in a mold of choice, frozen and essentially ready to serve whenever the time is right. A perfect make ahead dish.

I chose the simple loaf pan approach in which you lightly grease the pan then line it with plastic wrap that overhangs the sides and gives you enough to cover the semifreddo once it’s in the pan. For individual portions, it’s fun to use small ramekins ready to serve right out of the freezer. Just garnish with a dollop of whipped cream and some crunchies or fresh berries. Easy peasy. You can also scoop it like ice cream to top a crisp or crumble (if your oven is working - ha!).

For the ganache portion, place 170 g / 6 ounces dark chocolate (chopped or discs if that’s what you have) in a medium heat-proof bowl. Bring 360 ml / 1.5 cups heavy cream to a boil in a saucepan on the stovetop or in a glass Pyrex measuring cup in the microwave (my preference). Pour the hot cream over the chocolate, let sit a minute then gently stir to blend. Add in 2 teaspoons vanilla extract and 1/4 teaspoon kosher salt. Cover the surface with plastic wrap and chill in the fridge a good hour or two.

NOTE: You’ll be whipping the ganache then blending the cooled Swiss meringue into it so think about your timing. I used my trusty Kitchenaid hand mixer for the chilled ganache while the Swiss meringue was in progress.

For the Swiss meringue, fill a medium saucepan half full with water and bring to a simmer. In a separate bowl that will nest nicely in the saucepan, whisk together 3 large egg whites (this process goes faster if they’re already at room temp) and 133 g / 2/3 cup granulated sugar then place it over the simmering water. Whisk constantly until the mixture reaches 160ºF. Transfer the meringue into the bowl of a stand mixer with the whisk attachment and beat on high speed until cooled and thickened with shiny, stiff peaks (I usually give it a good 10 minutes).

Blend the meringue into the ganache in three additions, folding to incorporate. It’s OK if there are a few meringue streaks left.

Part way through the folding

Scrape the mixture into the prepared pan, cover and freeze. Give it a minimum of 6 hours but overnight or up to several days is even better.

When ready to serve, I find it easiest to overturn it gently onto a plate and peel off the plastic. For garnish I have cocoa nib brittle, pistachio nougatine, chocolate cookie crumbs, and, for the pièce de resistance, freezer stash strawberry macarons filled with strawberry Swiss meringue buttercream, a center of chocolate ganache and a dusting of strawberry powder on top. Whoa!

Stripes of brittle and nougatine across the surface, a bottom collar of chocolate cookie crumbs and a crowning flourish of strawberry macs.

I finished off the decor earlier in the afternoon on Christmas Eve so that I could have my garnishing completed and the whole thing ready to slice. Then I held it in the freezer until dessert time. Yes!

For serving I spooned out a small pool of this past summer’s roasted Michigan strawberry purée from my freezer stash, a slice of semifreddo, dollop of whipped cream, chocolate cookie crumbs and a strawberry macaron.

You can’t go wrong with marrying tastes and textures like these. Chocolate-y, creamy, crunchy, chewy and fruity. Yum yum yes.

The good news is, as of January 4th, the oven has been repaired and is functioning in good form. Of course I had to bake some croissants don’t ya know.

Keep on keeping on everyone. Make 2022 your best year yet.

Our first “BIG” winter storm of the season

Favorite garnishes part 3: easy brittles (and Happy New Year!)

Moelleux chocolat/mascarpone cream/sesame brittle

I freely and proudly admit that I’m a dough loving gal in the pastry kitchen. Give me tart dough, puff pastry, croissant and Danish dough, yeast breads (lean and enriched) and shortbread and I’m a happy camper.

Other than the occasional chocolate nut bark or cluster, soft caramel or chocolate truffle, candy making isn’t something I do often. But, particularly when it comes to a tasty garnish, there’s nothing like a snappy brittle to brighten up one’s day. Not only great for a small snack when you’re craving a hint of sweet crunch, they’re a wonderful way to dress up small cakes, custards, ice cream, tarts . . . . . . . . I think you know where I’m going with this.

Here I’ll focus on what has become my go-to-perfect-for-garnsh brittle recipe, compliments of Yotam Ottolenghi”s book “Sweet”. So straight forward with nary any muss nor fuss with candy thermometers or sugar cooking stages. Let’s keep it easy!.

Ottolenghi’s sesame brittle

Here’s a previous post with the recipe and one of the ways I’ve used it. And here’s the recipe again.

  1. Toast 125 g sesame seeds (mix of 1/3 black and 2/3 white or all white like I did) either in the oven at 325ºF for about 10 minutes until nicely brown, stirring occasionally, or in a skillet on medium-low on the stove top. Do what you're most comfortable with. Set aside. Increase the oven temp to 350ºF.

  2. Have two half sheet pans and four pieces of parchment (or two parchment and two silicone mats) at the ready.

  3. In a medium saucepan put 100 g granulated sugar, 100 g light corn syrup, 50 g unsalted butter and 1/8 teaspoon salt. Stirring constantly on high heat, blend the mixture and bring to a boil. Remove from the heat and stir in the toasted sesame seeds.

  4. Put two pieces of parchment (or Silpat!) on a heat proof surface (I used two overturned half sheet pans) and pour half of the sesame mixture on each. Cover with the other parchment pieces and roll with a rolling pin until about 1/8 inch thick.

  5. Slide the paper with the sesame caramel onto half sheet pans and remove the top layer of parchment. Peel it back gently, using an oiled silicone spatula to push down any caramel that might stick. Bake for about 20 minutes until nicely browned. Remove from oven, cool and break into shards.

Oiled spatula to hold the brittle down while removing the parchment

Bubbling away in the oven

Out of the oven

Pumpkin custard tart with sesame brittle from a Thanksgiving past

I also made a HALF recipe of a cocoa/cacao nib version by subbing cacao nibs (60 g in this case) for the sesame seeds and adding 10 g sifted Dutch process cocoa powder into the sugar/butter mixture along with the nibs. It’s another great addition to teacakes and ice cream as well as a garnish or crunchy layer for desserts, particularly when you need a bit of chocolate-ness.

Note: the cacao nibs I use are pretty chunky so I put them in a zip-top bag and pound them with the smooth side of a meat mallet to crush them up. It works!

Cacao nib version

These brittles come out thin and crispy without fear of any tooth-sticking pull. They store nicely in single layers between pieces of parchment or waxed paper in a well sealed container (ideally in a cool/non-humid environment) and can also be frozen for several weeks.

Get creative with your own version. I’ve done one with puffed rice. Finely chopped nuts of choice are always an option and crushed pumpkin seeds aren’t bad either.

Before I go, here’s a quick tart project I did to use up some leftover components in my fridge and freezer. I had enough dough for a few small tarts; some dark chocolate ganache (3 parts cream to 2 parts chocolate); a handful of petite, frozen ricotta custard rounds from an earlier project; some thawed roasted Michigan strawberry purée that I had used for our Christmas Eve dessert (more on that later); a little bit of white chocolate to make a loose ganache for whipping; plenty of cacao nib brittle.

I blind baked some chocolate tart shells with my favorite chocolate tart dough - one 140 mm “sharing” size and four 65 mm individual sizes. TIP: this is a good plan ahead step since you can freeze blind baked tart shells for days.

Two of the smaller tarts served as a quick dessert after the Christmas holiday, filled with ganache, topped with whipped cream and crushed nibs. So tasty.

For the remaining tarts I brushed some dark chocolate ganache on the bottoms . . . . . .

then sprinkled crushed cacao nib brittle over the chocolate and popped in the frozen ricotta rounds (they thaw pretty fast but hold their shape).

I spooned the ganache around as best I could. It’s a tad messy but will be covered up so no one’s the wiser. You could pipe it in too but I wasn’t in the mood.

I added a generous soup spoon full of strawberry purée to the chilled white chocolate ganache (used 120g heavy cream to 40 g white chocolate) and whipped it up to soft peaks. For the sharing size tart I piped the cream around and over the ricotta discs then topped with fresh raspberries and more crushed nib brittle.

Et voilà - our New Year’s Eve dessert!

Triple chocolate tart with berry cream

Psst . . . . the smaller tarts were used as taste tests. I was able to spread the softened ricotta flush into the tartelettes then top with a bit of berry cream and nib brittle for a midday snack that Steve and I so enjoyed. Yum - the chocolate crust and ganache with the smooth ricotta custard, hint of berry cream and crunchy nibs is just divine.

Happy New Year everyone and may 2022 bring us new adventures and peaceful, happy days!

I’ll leave you with just a hint of the lovely holiday displays at nearby Meijer Gardens


Favorite garnishes part 2: candied citrus

Citrus teacakes

On to part 2 of my favorite garnishes - candied citrus. It takes a bit of time but is a perfect project for a snowy winter day. Put on some music, feel a calm come over you and have fun!

Lemon, lime, grapefruit, orange, tangelo - all are fair game. Check out this post on just one way to use them.

Orange craquelin

To candy citrus peels you’ll need a couple of small to medium sized sauce pans and a medium strainer.

In one pan make a simple syrup using equal parts granulated cane sugar and water (1/2 to 3/4 cup each should be plenty), and in the other one place enough cold water in which to immerse your citrus peels.

Prep the peels by cutting the rind off the fruit, white pith and all, then trimming the pith off (there will invariably be some left) to leave the colored outer skin (the oils and flavor are here!) Cut the peel into matchsticks and place them in the pan with the cold water.

Bring to a boil, strain and rinse, refill the pan with fresh cold water then repeat the process two more times. This helps reduce the bitterness.

Now put the peels into the simple syrup and simmer until softened and translucent. This can take 30 minutes or so. Go ahead and busy yourself with cookie dough or pastry cream or cake batter. You’ve got time.

Starting the process

All softened up - see the difference?

Remove from the heat and let cool. At this point you can store them in the syrup in the fridge for several weeks, using as desired.

You can also separate some out, strain off the syrup and toss them in sugar.

Separate and place them on a wire grid to dry then store in a covered container at room temperature for a couple of weeks.

Either the sugared and dried rinds or the soft and refrigerated-in-syrup rinds are great for a garnish on a tartelette or teacake. Or chop them up finely and add to your cake batter, cookie or brioche dough or Swiss meringue buttercream. You be the judge.

Hint: the sugared/dried pieces are lovely with a small piece of chocolate and a few candied nuts for a satisfying after meal treat when you’re looking for just a little something.

Meanwhile, feel the calm and peace of the holiday season. We all deserve it.

My handmade angel shoes

Favorite garnishes part 1: candied nuts

Lightly candied sliced almonds

Lightly candied sliced almonds

Wow! It seems like this one’s been awhile in the making. Let’s just say that life has a way of taking us on a variety of paths and unknowns.

Now let’s talk about garnishes! It’s time to take your pastries and desserts to the next level with . . . . . . . Crunchies!!

Whether you choose cookie crumbs, candied citrus, nutty crumbles, brittles or candied nuts, they’ll all add that extra splash your creations deserve. Use as garnishes on top of ice cream, teacakes, baked fruit and custard desserts or tuck them into creamy layers between your favorite cake slices and you’ll be the happier for it. It’s the little things that make all the difference.

I’ve touched on many of these when writing about different projects over the years, but now I’ve attempted to organize some of my favorites in separate posts so as not to overwhelm with too much info.

Let’s talk nuts. I’ll explain three approaches to candied nuts. Generally you’ll need the stove top and in some cases the oven. I find silicone mats perfect for these projects - no sticking plus easy cleanup.

Start with a clean slate, as it were - use raw, non-salted, non-roasted nuts. I typically have almonds, pecans, walnuts, pistachios and hazelnuts in my larder and, unless I know I’m going to use them within a few weeks, I keep them in the freezer up to six months to preserve freshness.

Here we go. The first approach calls for making a syrup on the stovetop, stirring in your choice of nuts (whole or sliced) and then baking in the oven to crisp things up. Sounds good.

Heat your oven to 350ºF. In a small saucepan stir together 1/4 cup (50 g) sugar, 2 tablespoons water, 1 tablespoon corn syrup and a large pinch of kosher salt. Bring it to a boil over medium heat then remove from the heat and stir in 1.5 cups (~ 200g) of nuts until coated. Then spread the mix out on a parchment or silicone lined 1/2 sheet pan and bake for 5 minutes. Stir them up and bake another 8-10 minutes until golden brown. Let cool and store in an airtight container at room temp. They should last several weeks and are great for garnishing ice cream, custards, crisps, tarts or whatever your little heart desires. Even your morning oatmeal. And they’re not bad all by themselves!!

Cherry almond Breton tartelettes with almond crunchies

The next approach (which I refer to as the egg white method) uses a bowl, whisk, rubber or silicone (my preferred) spatula and the oven (no stovetop). I particularly love making pistachios this way, coarsely chopped and blended into my favorite Breton shortbread dough for just the right touch of crunch. Yum.

Halve or double the recipe to suit your needs. Prep note - you’ll be toasting and cooling the nuts first before blending them into the egg white mixture and then back into the oven. You can do the toasting a few days ahead of time and store the nuts at room temperature in a covered container.

Heat the oven to 300 - 325ºF depending on the nuts you’re using (325º for whole almonds, walnuts and hazelnuts; 300º for pecans and pistachios which tend to burn more easily). Spread 2 cups (about 227 g / 8 ounces) of nuts in a single layer on a sheet pan and toast them about 8-10 minutes to bring out the fragrance. Let cool. Keep the oven on at the same temperature at which you toasted the nuts.

If you’re like me and save your egg whites for various purposes, this is just one way to use ‘em. In a medium bowl whisk 1/2 or ~ 16 g (give or take) of a large egg white with about 75 g of granulated sugar and a pinch of salt until the mixture has thickened and looks like a loose meringue. Don’t fret about the egg white - using one large white will simply give you a frothier coating.

NOTE: change things up by using brown sugar instead of white and adding spices like ginger, cardamom, cinnamon or coriander (or a mix!) for a tasty option.

Blend the nuts into the mix and spread out on a parchment lined pan.

Bake 20-30 minutes, stirring every 10 minutes or so until the egg white mixture appears dry and crunchy, coating the nuts. Let cool and store in a covered container at room temperature for a couple of weeks.

Use whole as a teacake topper; coarsely crush/chop as a garnish for your favorite ice cream; pulse them up in a food processor and blend into buttercream for your favorite layered cake or dessert creation.

Cocoa hazelnut teacakes with white chocolate-mascarpone cream

Buttercream anyone?

The last method also involves toasting the nuts first so have your oven ready. The nuts should be warm when blending them into the caramel for which you’ll need a medium-large saucepan. Have a silicone-mat-lined or buttered baking sheet on which to spread the caramelized nuts. This is akin to making brittle (coming up in a future garnishes post) but no baking soda here.

During my schooling at Le Cordon Bleu in Paris and internship at Pâtisserie Pascal Pinaud, we referred to this concoction as nougatine - caramelized nuts, spread out and cooled, then ground up into crunchy goodness for layering the many entremets that the French love to make and eat. Here’s just one entremet example.

I’m making a pistachio nougatine here. I’ve toasted 170 g / 6 oz pistachios and have them waiting warmly on the side. Have a silicon spatula lightly oiled at the ready.

Place 300 g / 1.5 cups granulated sugar and 60 ml / 1/4 cup water in your saucepan on low to dissolve the sugar.

Once the sugar is dissolved turn the heat up to medium high and bring to a boil.

Cook the sugar to a lovely medium amber. The image below is almost there. When I get close, I give it another 30 seconds or so to reach my desired color. Don’t wait too long - you don’t want burned sugar. After you’ve done it a bunch of times, you just know when to snatch it off the heat.

Remove the caramel from the heat and stir in the nuts with the oiled spatula. Scrape out onto the silpat lined sheet pan and spread into a single layer. Don’t hesitate - just do it.

Let cool. Your options now are to break it up into smaller pieces (a mallet is great for this!) as a topping for ice cream or process it to medium fine crumbs and use it as a garnish or layer for your chosen dessert.

Pistachio nougatine

WARNING! Please be careful when breaking this up since edges of caramel can be extremely sharp. Believe me, I’ve been there.

That’s it for now. You have a number of things in your dessert armamentarium that will add just that special touch. Go for it.

Next time - candied citrus . . . . . and more to follow that. All in due time.

On a final note, as noted at the beginning of this post, it’s taken me awhile to get this one finished. Life events tend to trap our attention when we least expect it. The main thing is to stay positive, stay safe and have a wonderful holiday season.

See you next time around!

A last gasp of bittersweet

Late autumn update - the holidays are coming!

In the japanese garden at Meijer gardens

Hi all. It’s still autumn here in West Michigan with the remaining late season colors as striking as ever.

I’ve been baking here and there and working on some holiday ideas. Keeping it simple, think classic shortbread, teacakes and tartes. Pumpkin, pear, chocolate and pecan are a few of the tastes I’m imagining.

I’ve added Earl Grey and espresso nib to the shortbread menu. Choose four flavors for either the 2 dozen or 4 dozen gift boxes. This year I have a new petite box holding 12 cookies (single flavor or choose up to 4 flavors), perfect as hostess gifts or just that perfect little something for teachers, co-workers or as stocking stuffers.

Petite box example

Teacakes are deelish: caramel apple and chocolate ganache are de riguer at the moment and now pumpkin, pear cocoa hazelnut and orange pistachio are on the docket. Hmmmm . . . . . sounds pretty good, don’t you think?

Caramel apple and chocolate ganache teacakes, boxed

Caramel nut tart here we come. If you’e a nut lover like I am and you’ve never experienced this one, now’s the time to give it a try. Chock full of nuts baked in a lovely, not too sweet caramel, it’s like the best nut bar you’ve ever had.

Caramel nut tart sharing size (5.5 inches)

Now’s the time to plan ahead for the holidays. Check out the menu page and contact me if there’s something that looks good.

Happy planning! Stay safe and stay well.

Japanese garden again