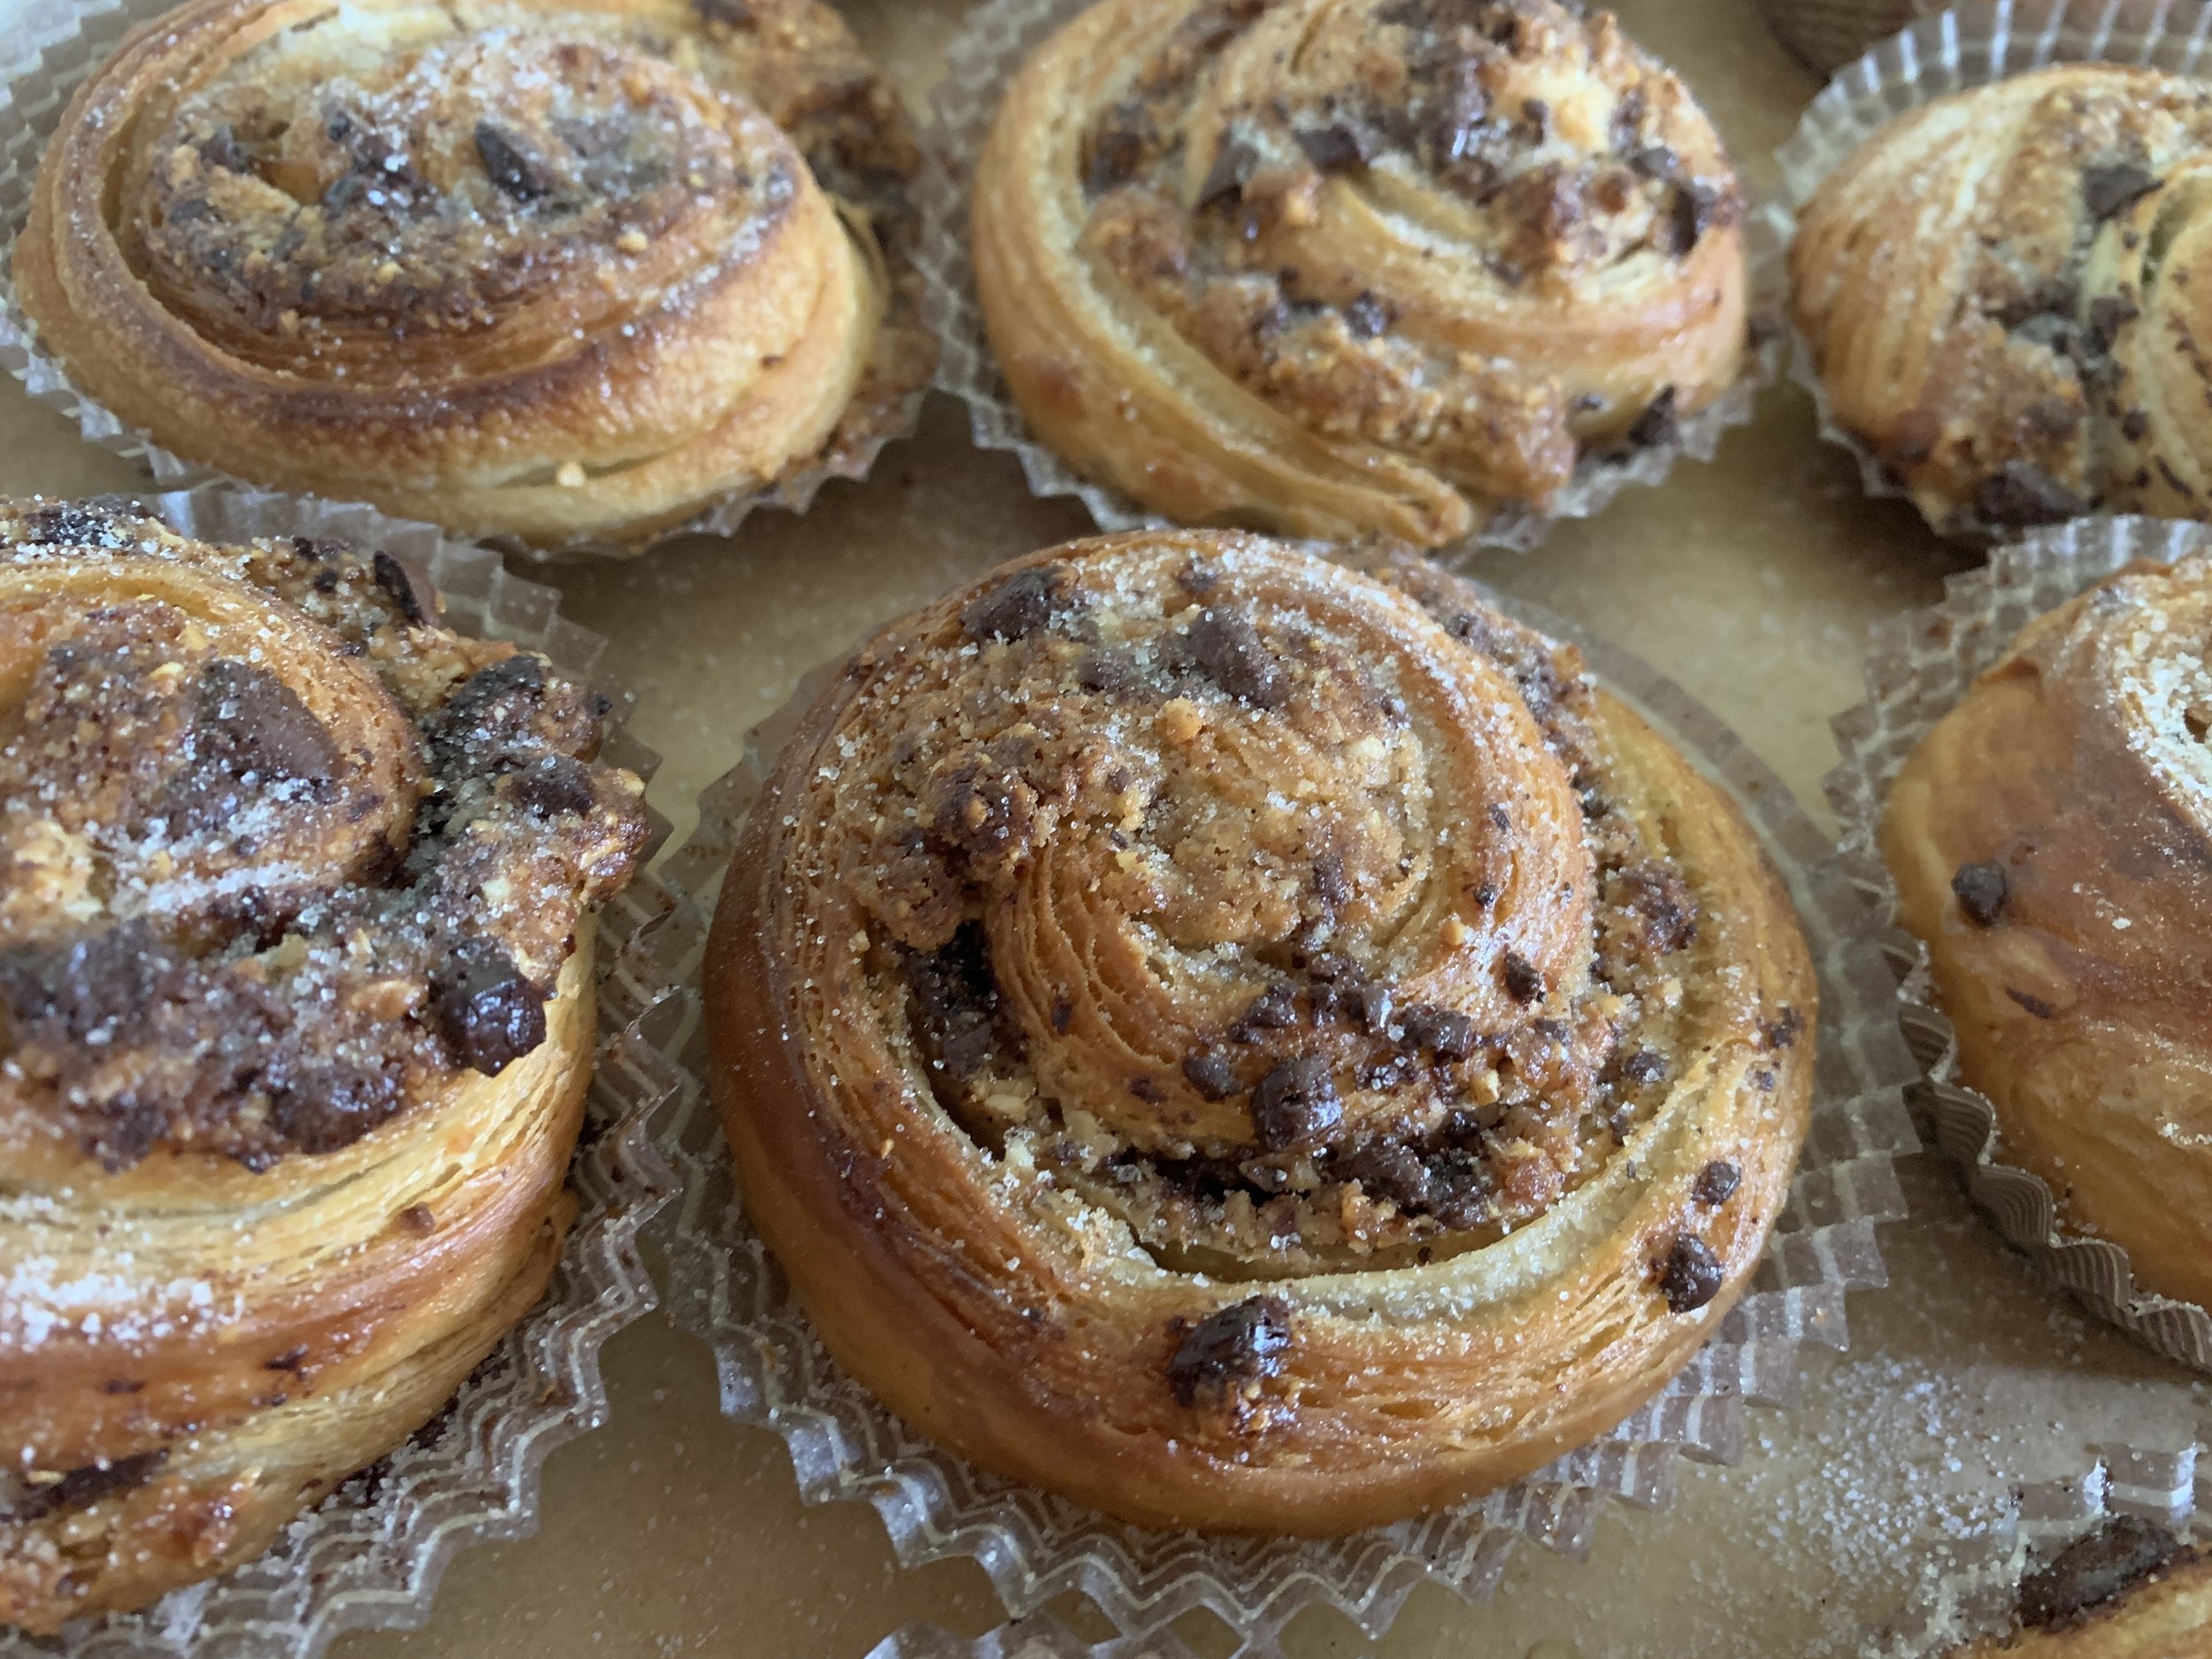
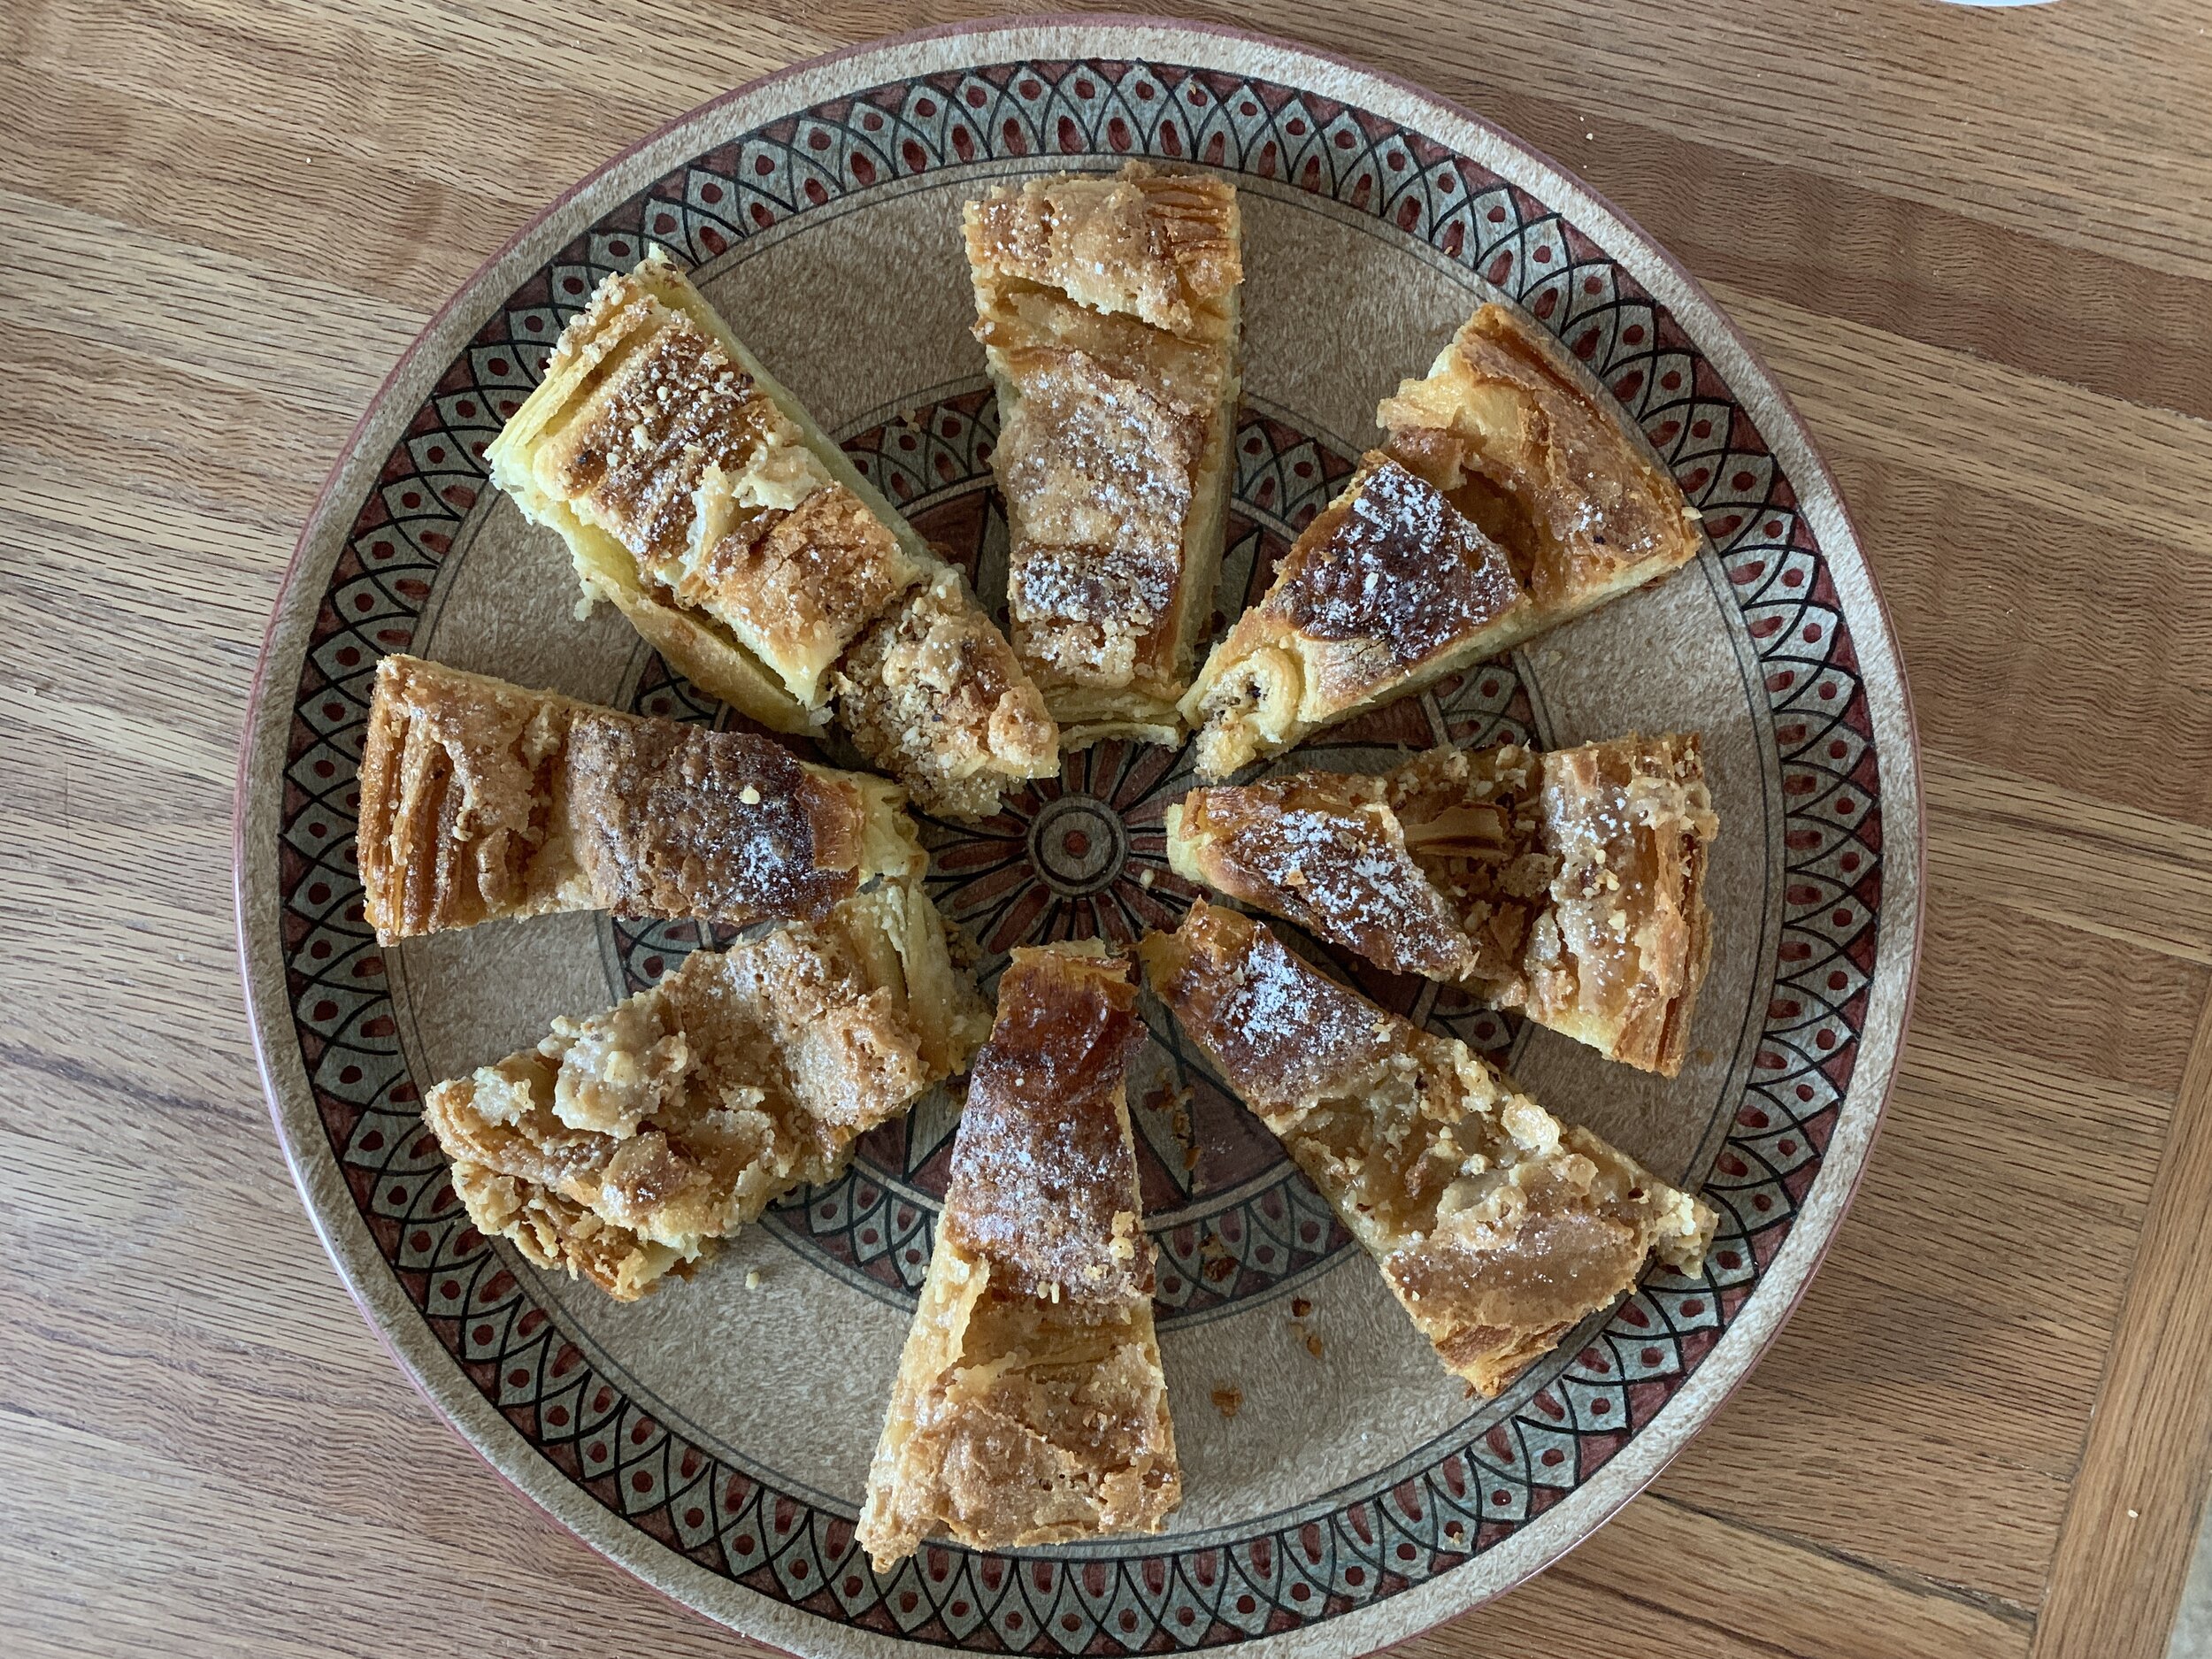
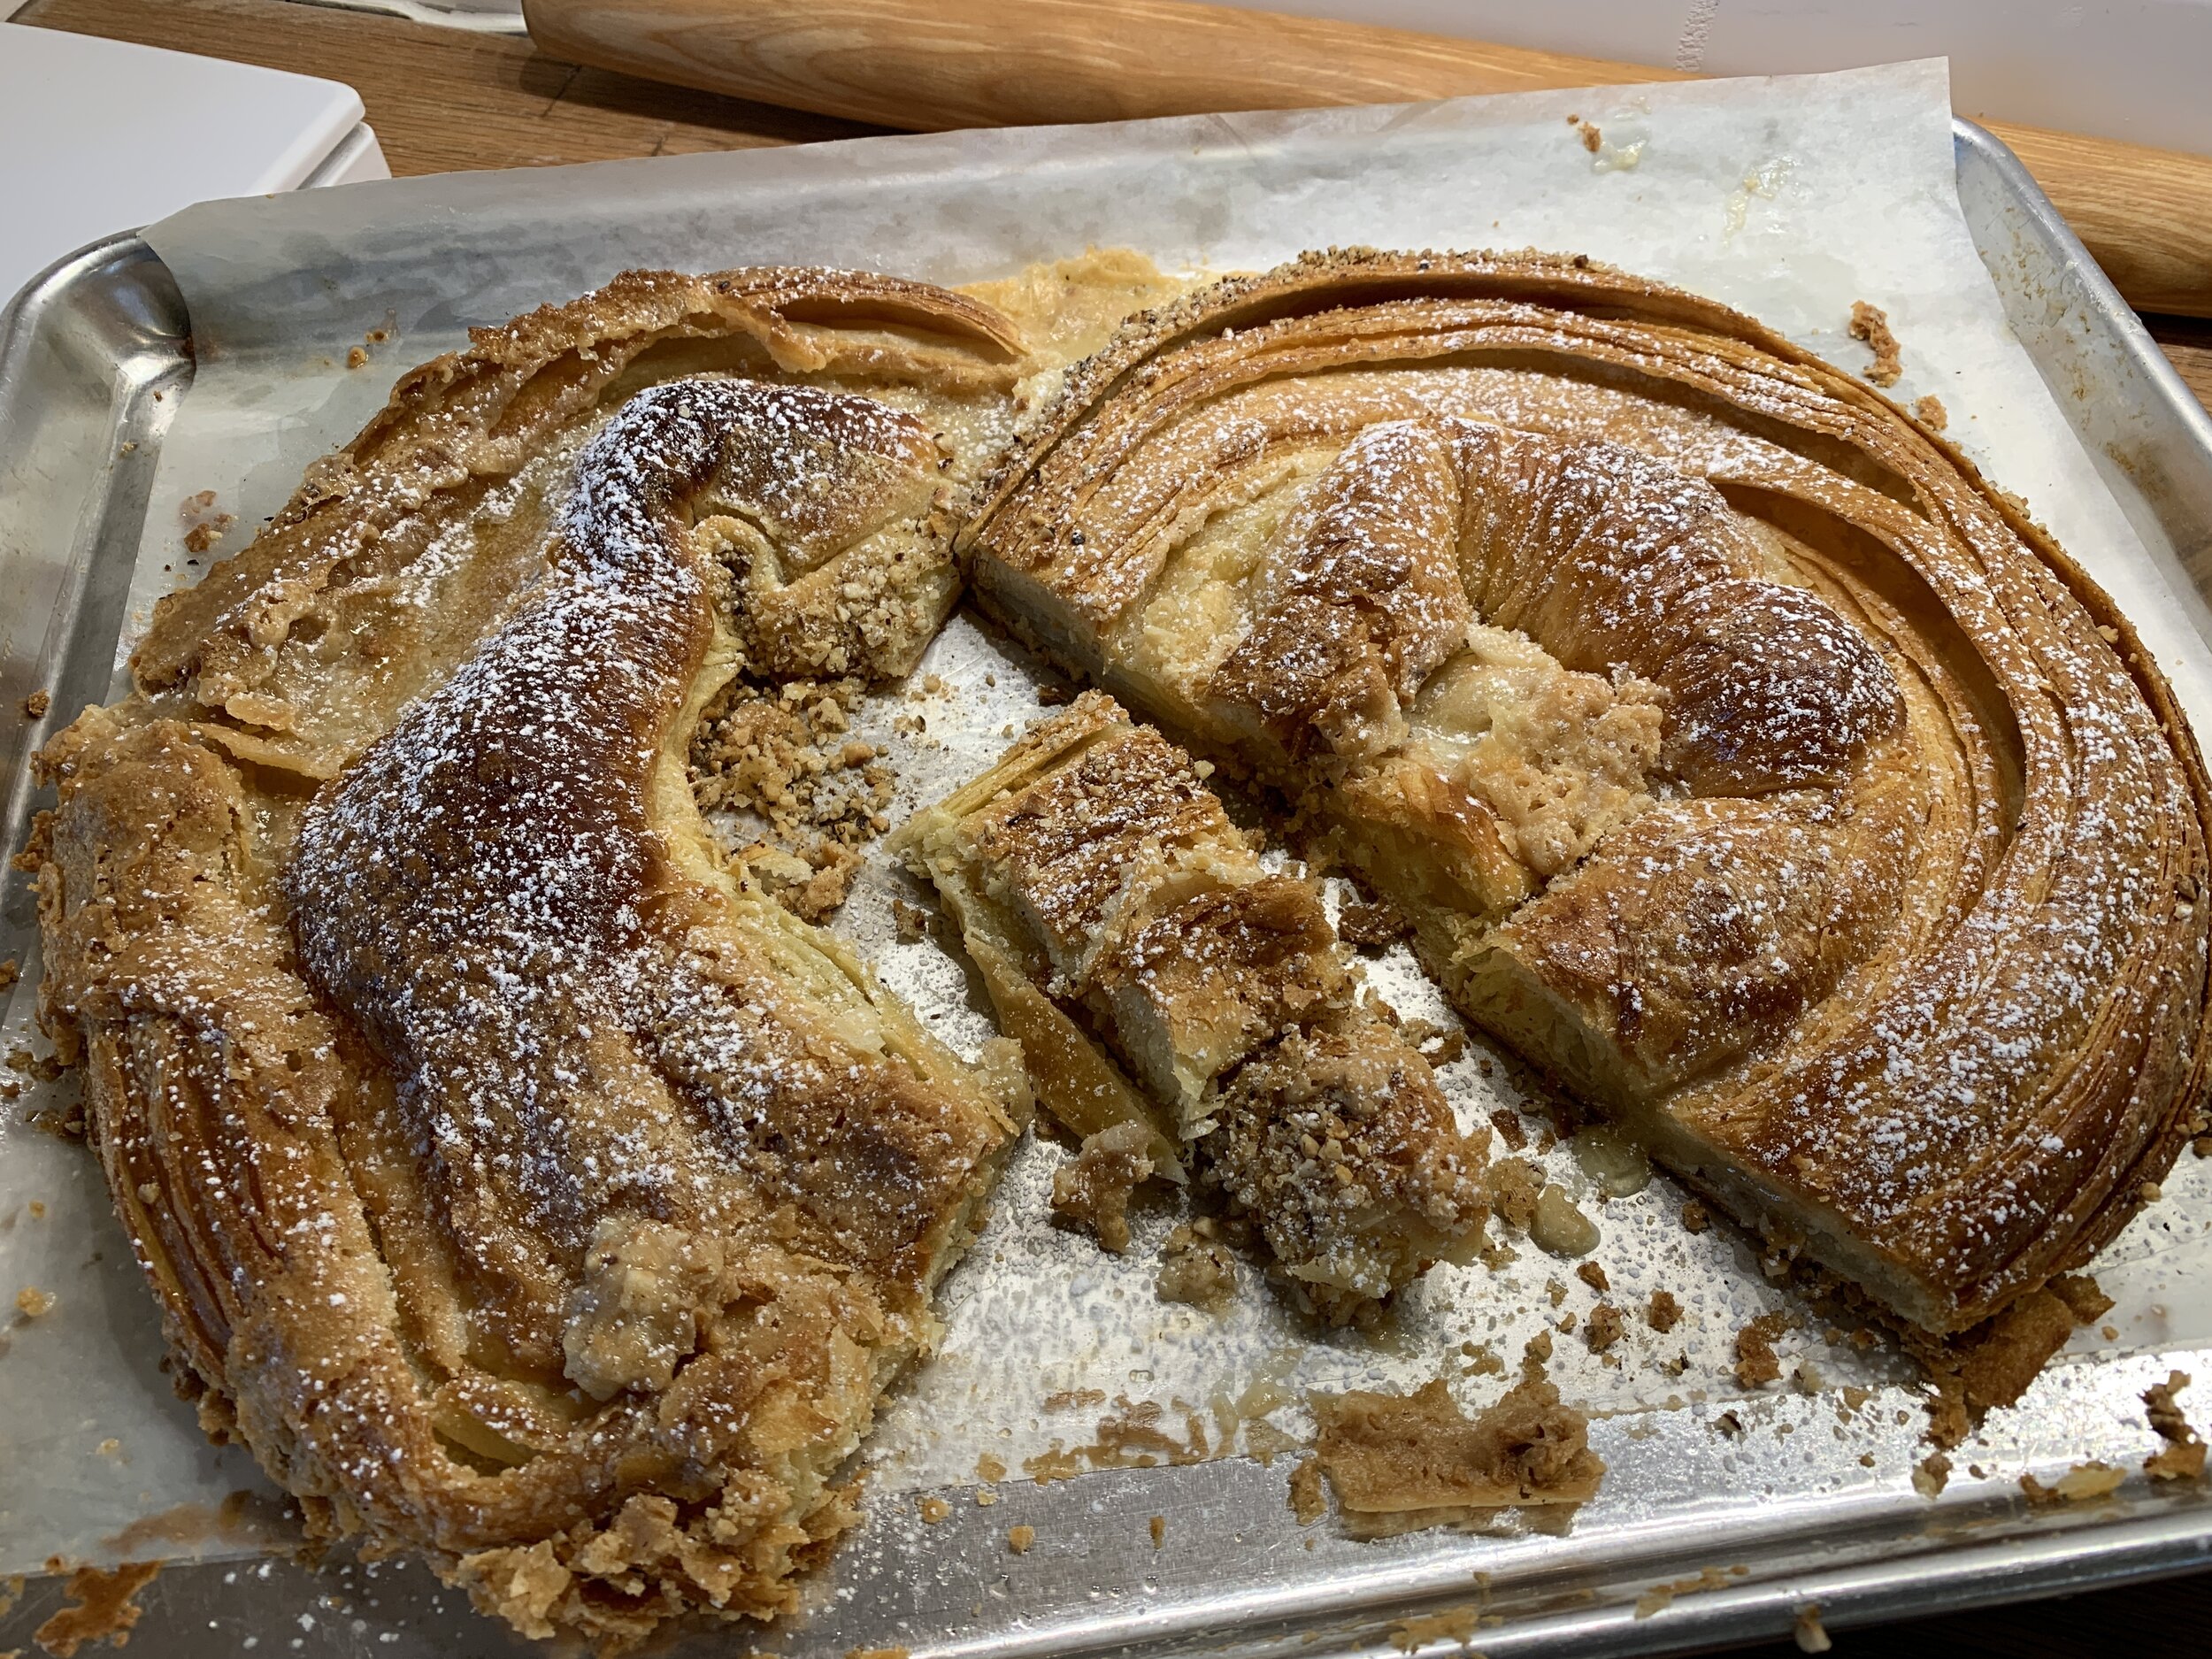
Hazel-chocolate spirals plus croissant squiggles

Back on our stage once again - it’s time for more fun with croissant dough! Some weeks back I came across an article about the various ways that many baking and pastry folks are shaping their laminated dough - eye opening to say the least. I wanted to give one of those shapes a try in addition to making some spirals for a group event.

First let’s review the classic spiral process (here’s one version), using one of my favorite fillings - hazelnut remonce topped with chopped chocolate for a match made in heaven.

A quick sidebar: I first made remonce about 3 years ago based on Brontë Aurell’s recipe - 100 g each of almond paste (preferably 50% almond/50% sugar), sugar and butter. As I thought about that mix, I realized it’s essentially 50 g almond, 150 g sugar and 100 g butter. After my lovely class experience in Copenhagen in May of 2022 where we made remonce with 100 g each almond flour, sugar and butter - essentially créme d’amande without any egg or flour - I tweaked the almond paste version to 100 g almond paste, 50 g almond flour, 50 g sugar and 100 g butter for a more almond, less sweet version than Aurell’s. Add 300 g of toasted, ground hazelnuts to the mix for the hazel version. Did you follow that?? It’s all in the details.

As many of you know, the spiral is what we all use for cinnamon rolls - roll out a rectangle of dough, spread or sprinkle your filling on, roll it up into a log, slice, pan up, proof, bake and enjoy! There are tons of filling options, either sweet or savory, so use your imagination and go for it.

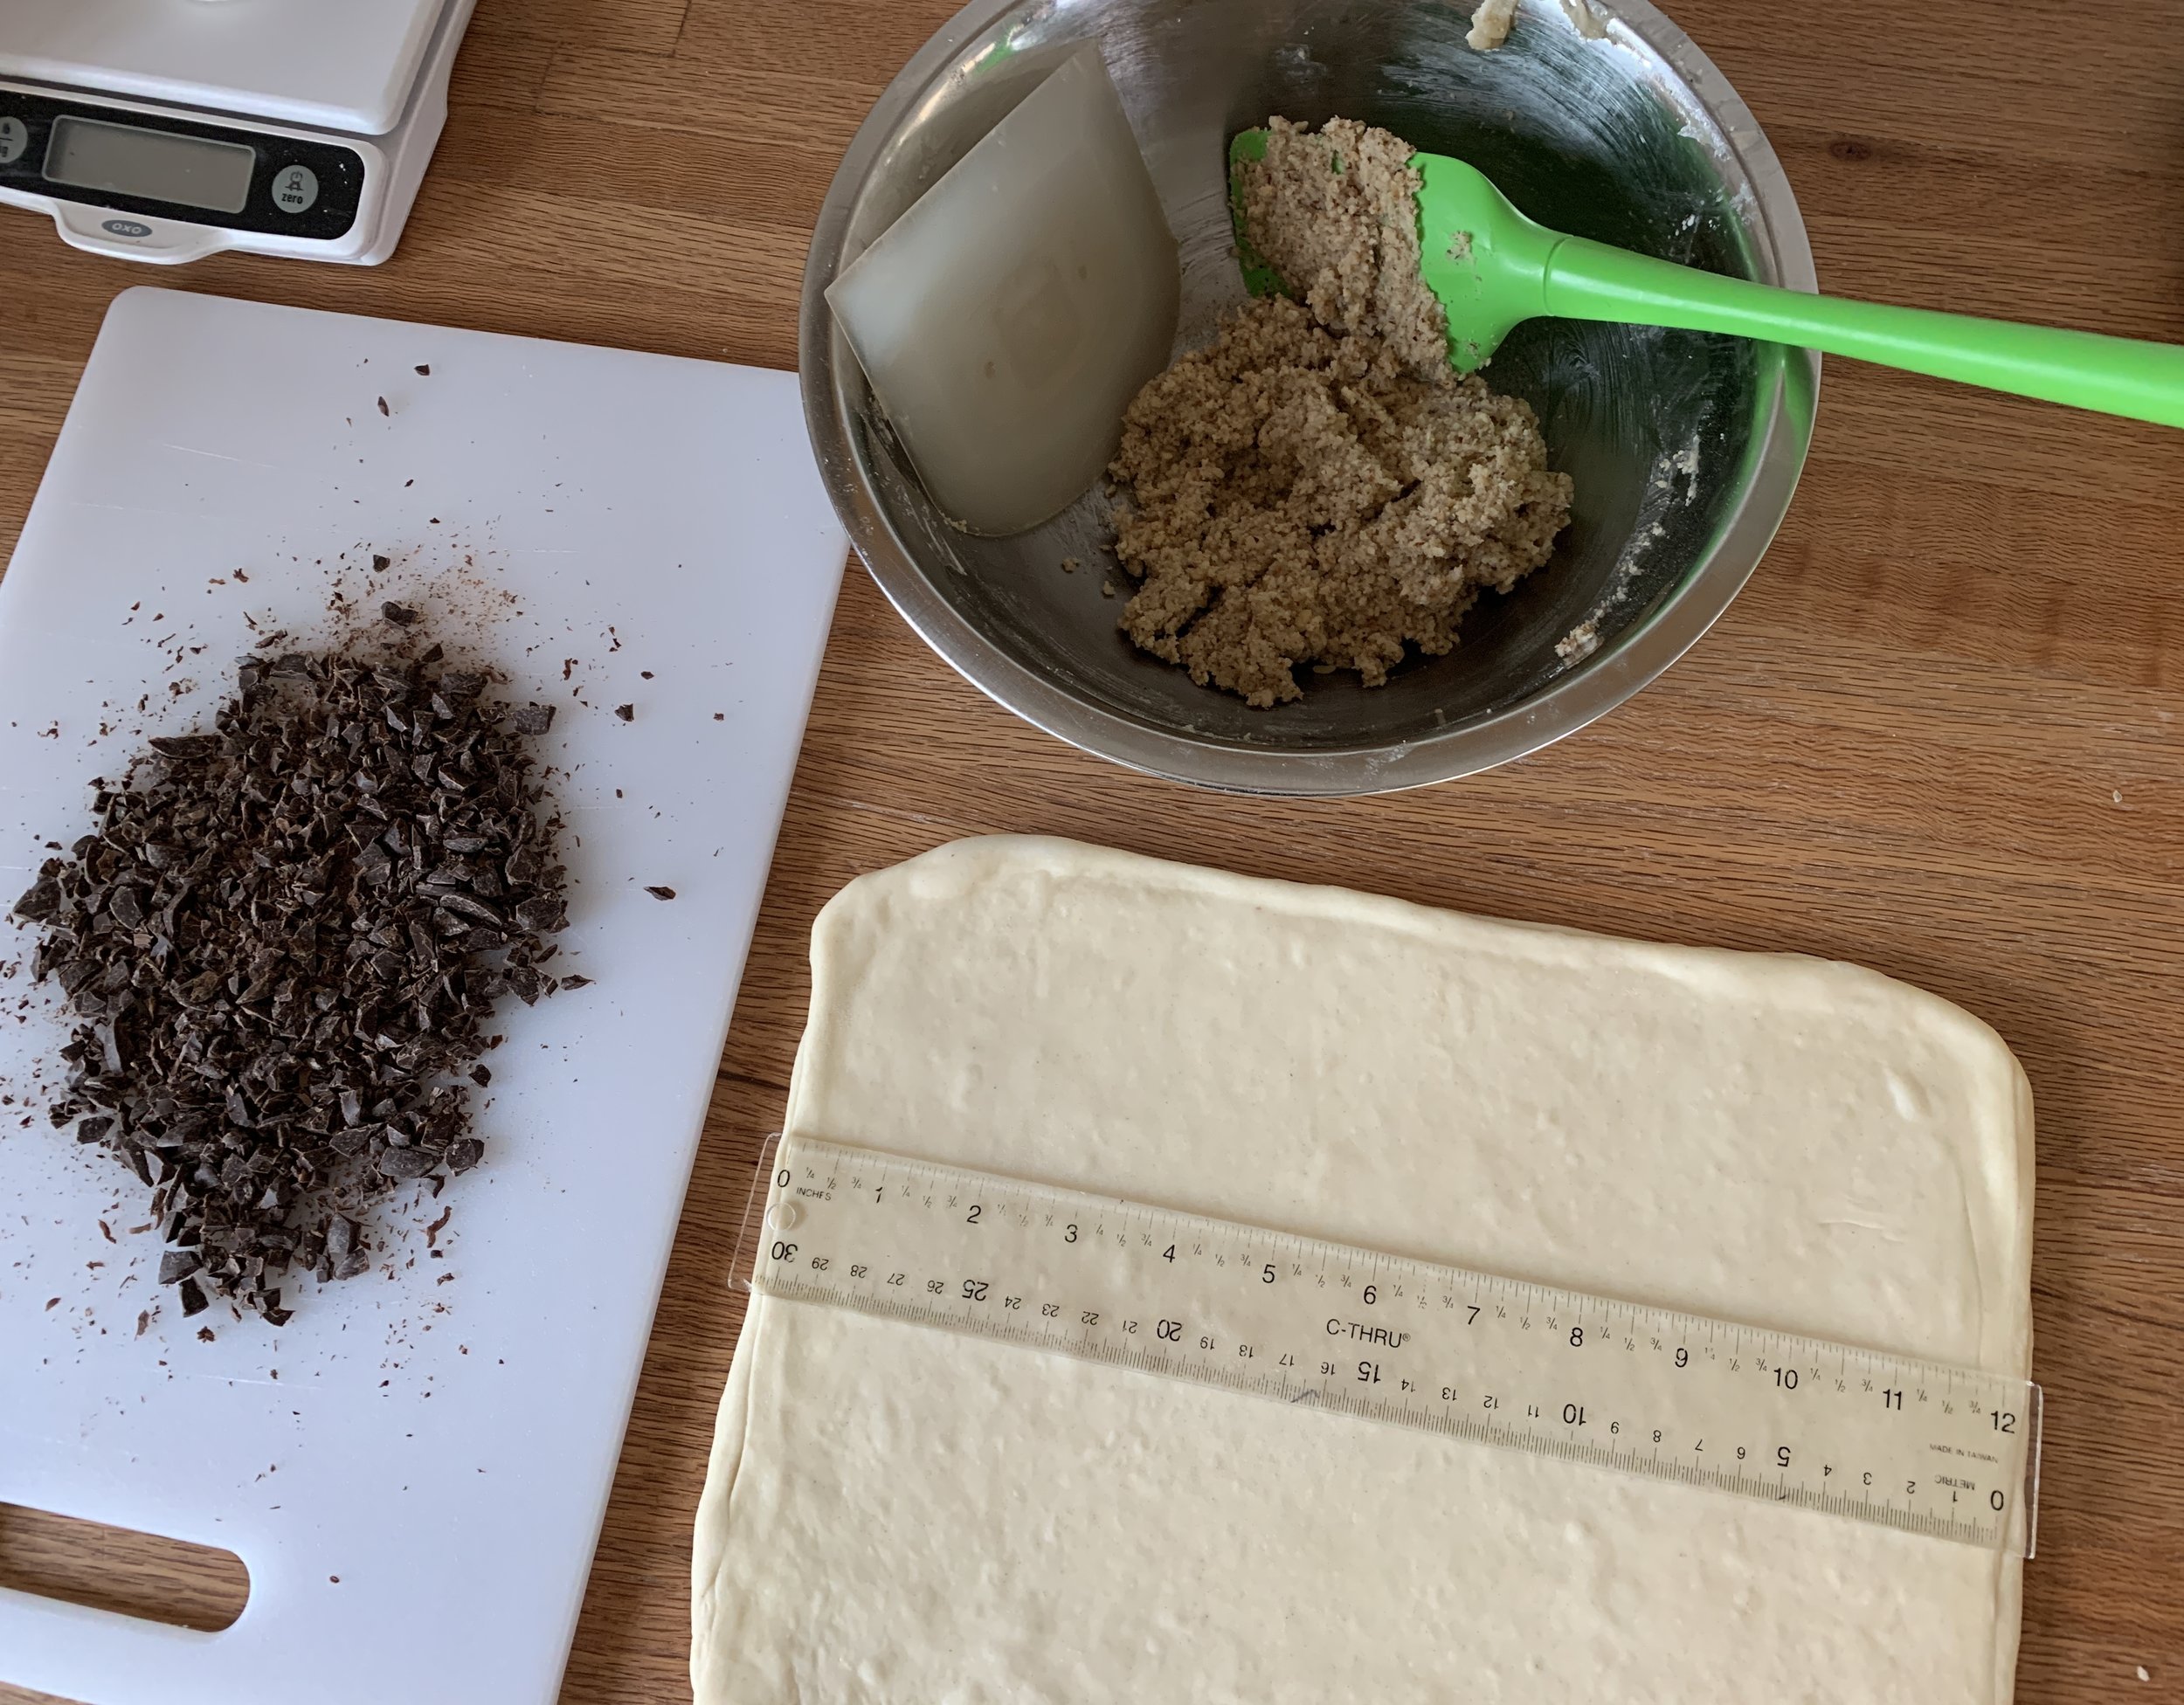
I’m using a half batch of croissant dough here - roll to about an 8” x 12” rectangle (20 cm x 30 cm).

Ready for the filling

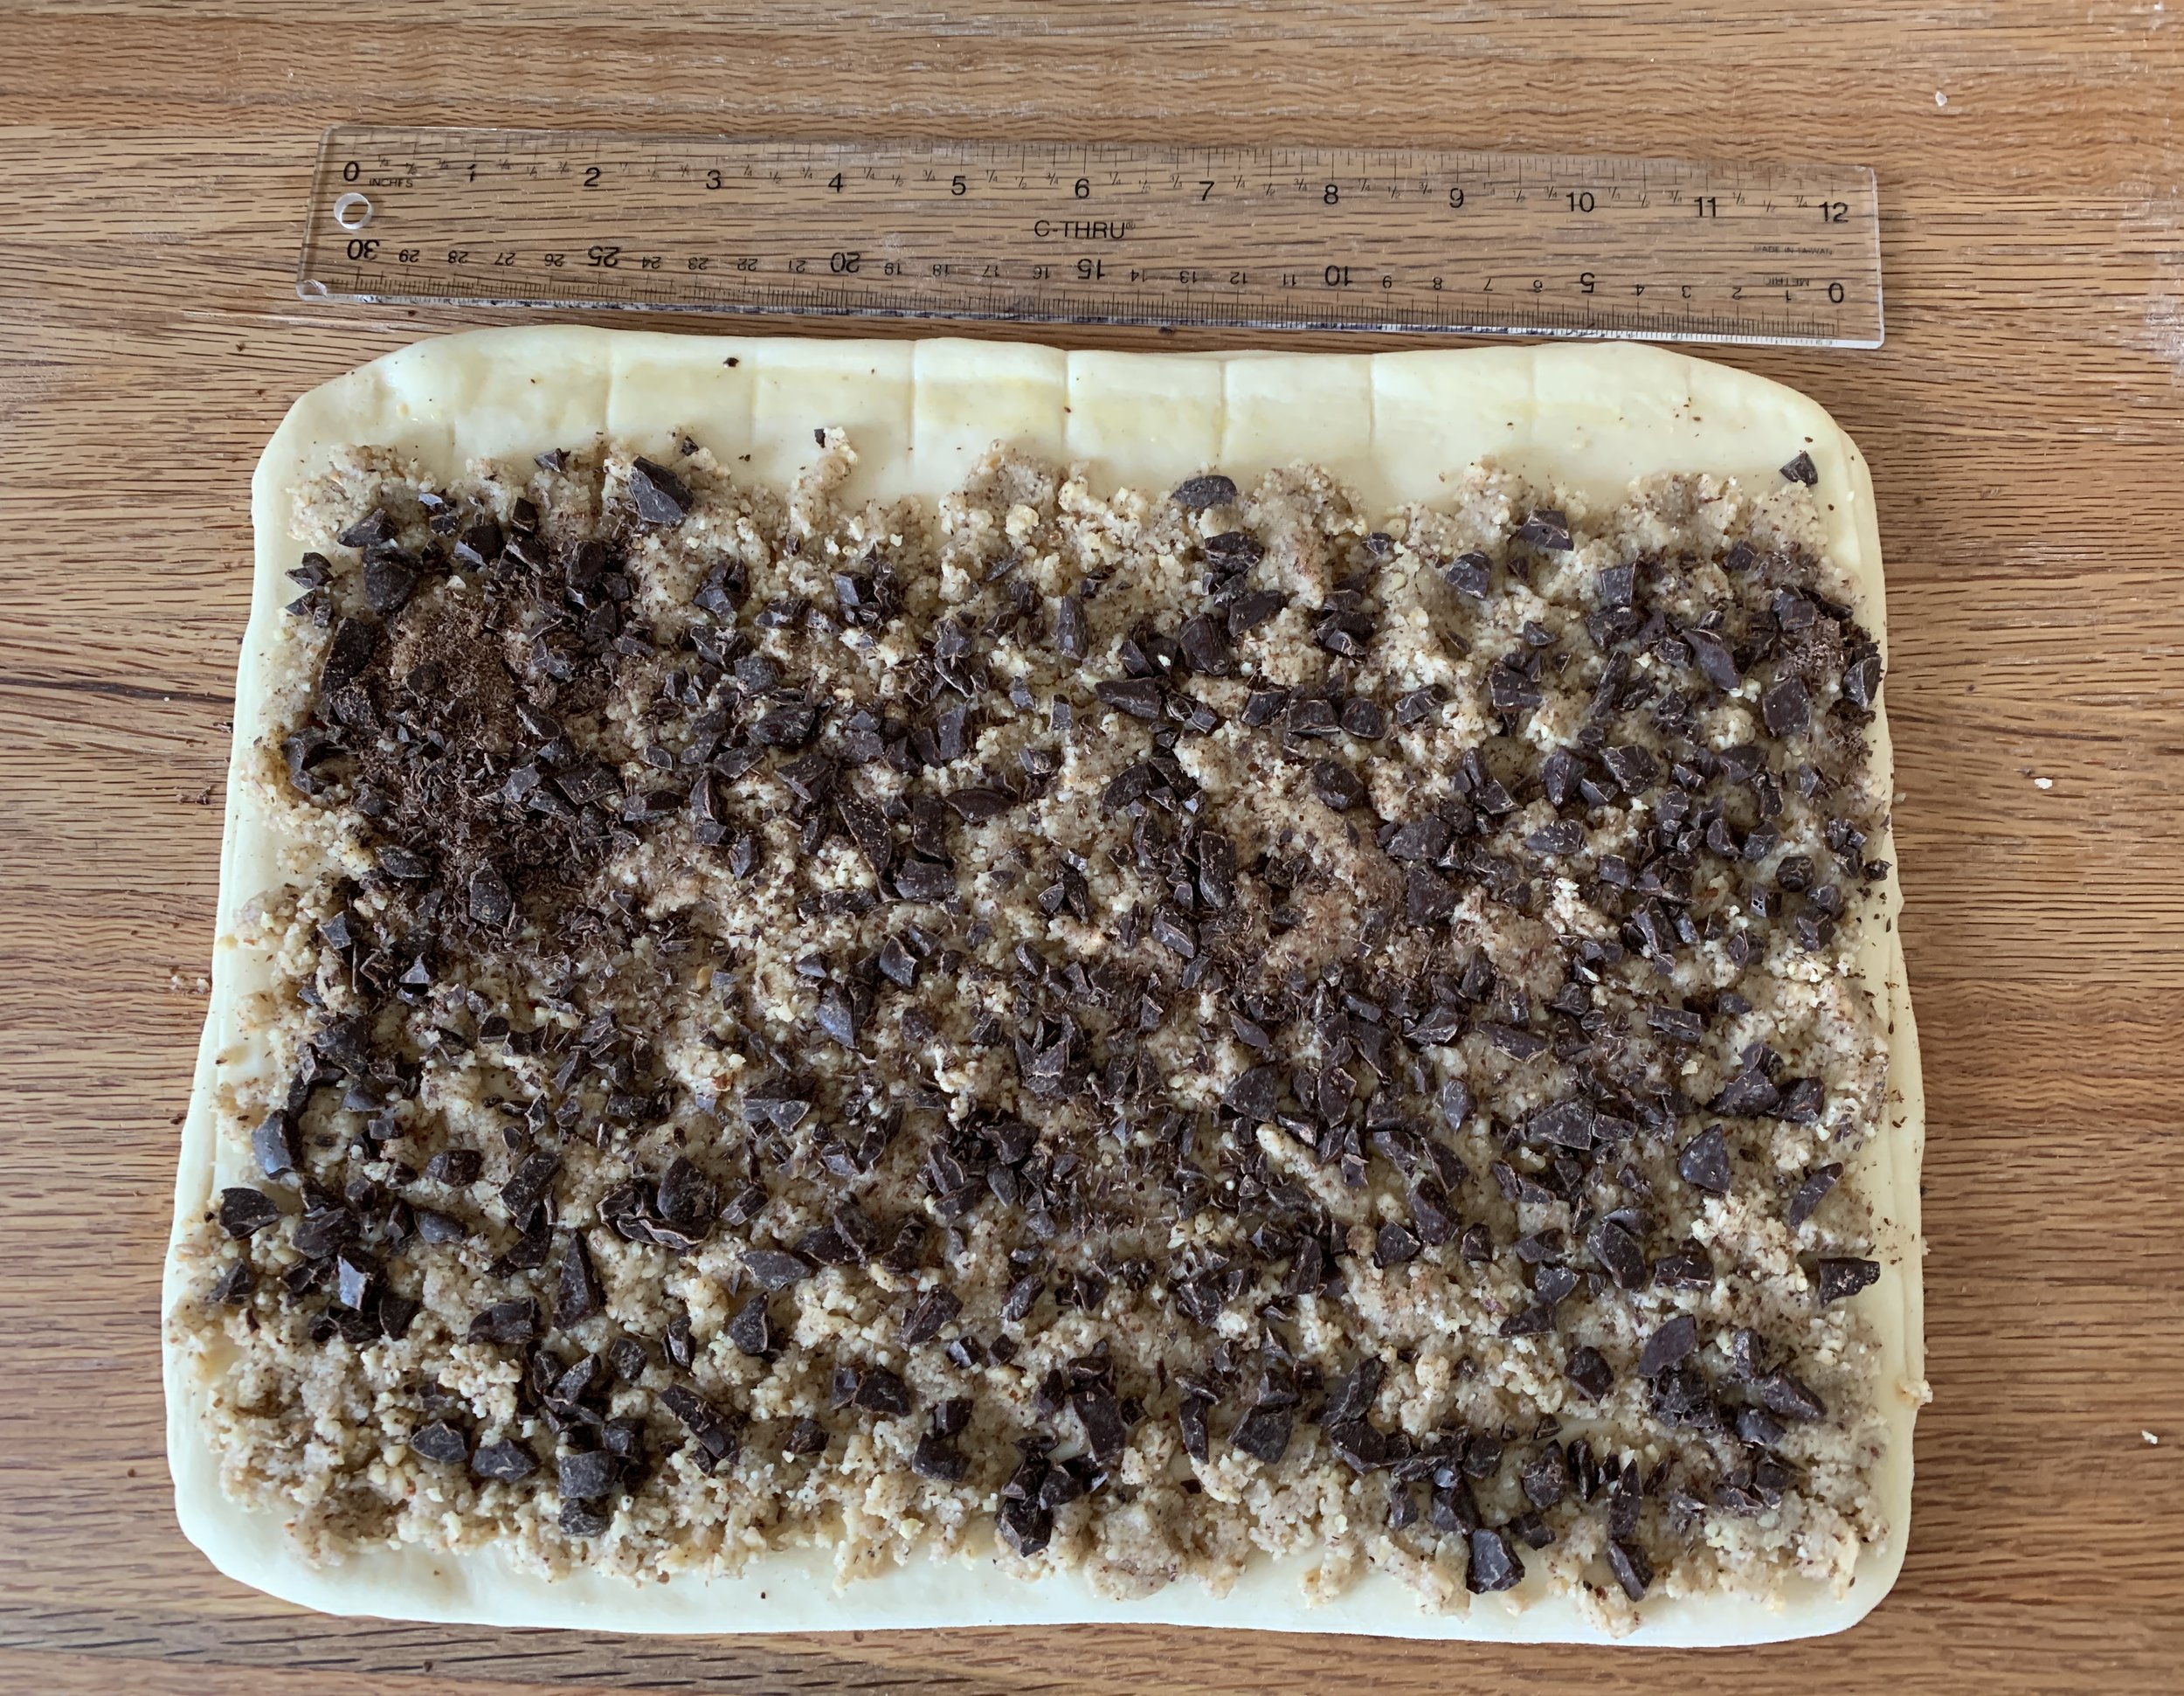
Spread 227 g / 8 ounces hazelnut remonce filling over the dough and sprinkle with 50 g chopped chocolate. I use Guittard 61%.

Ready to cut

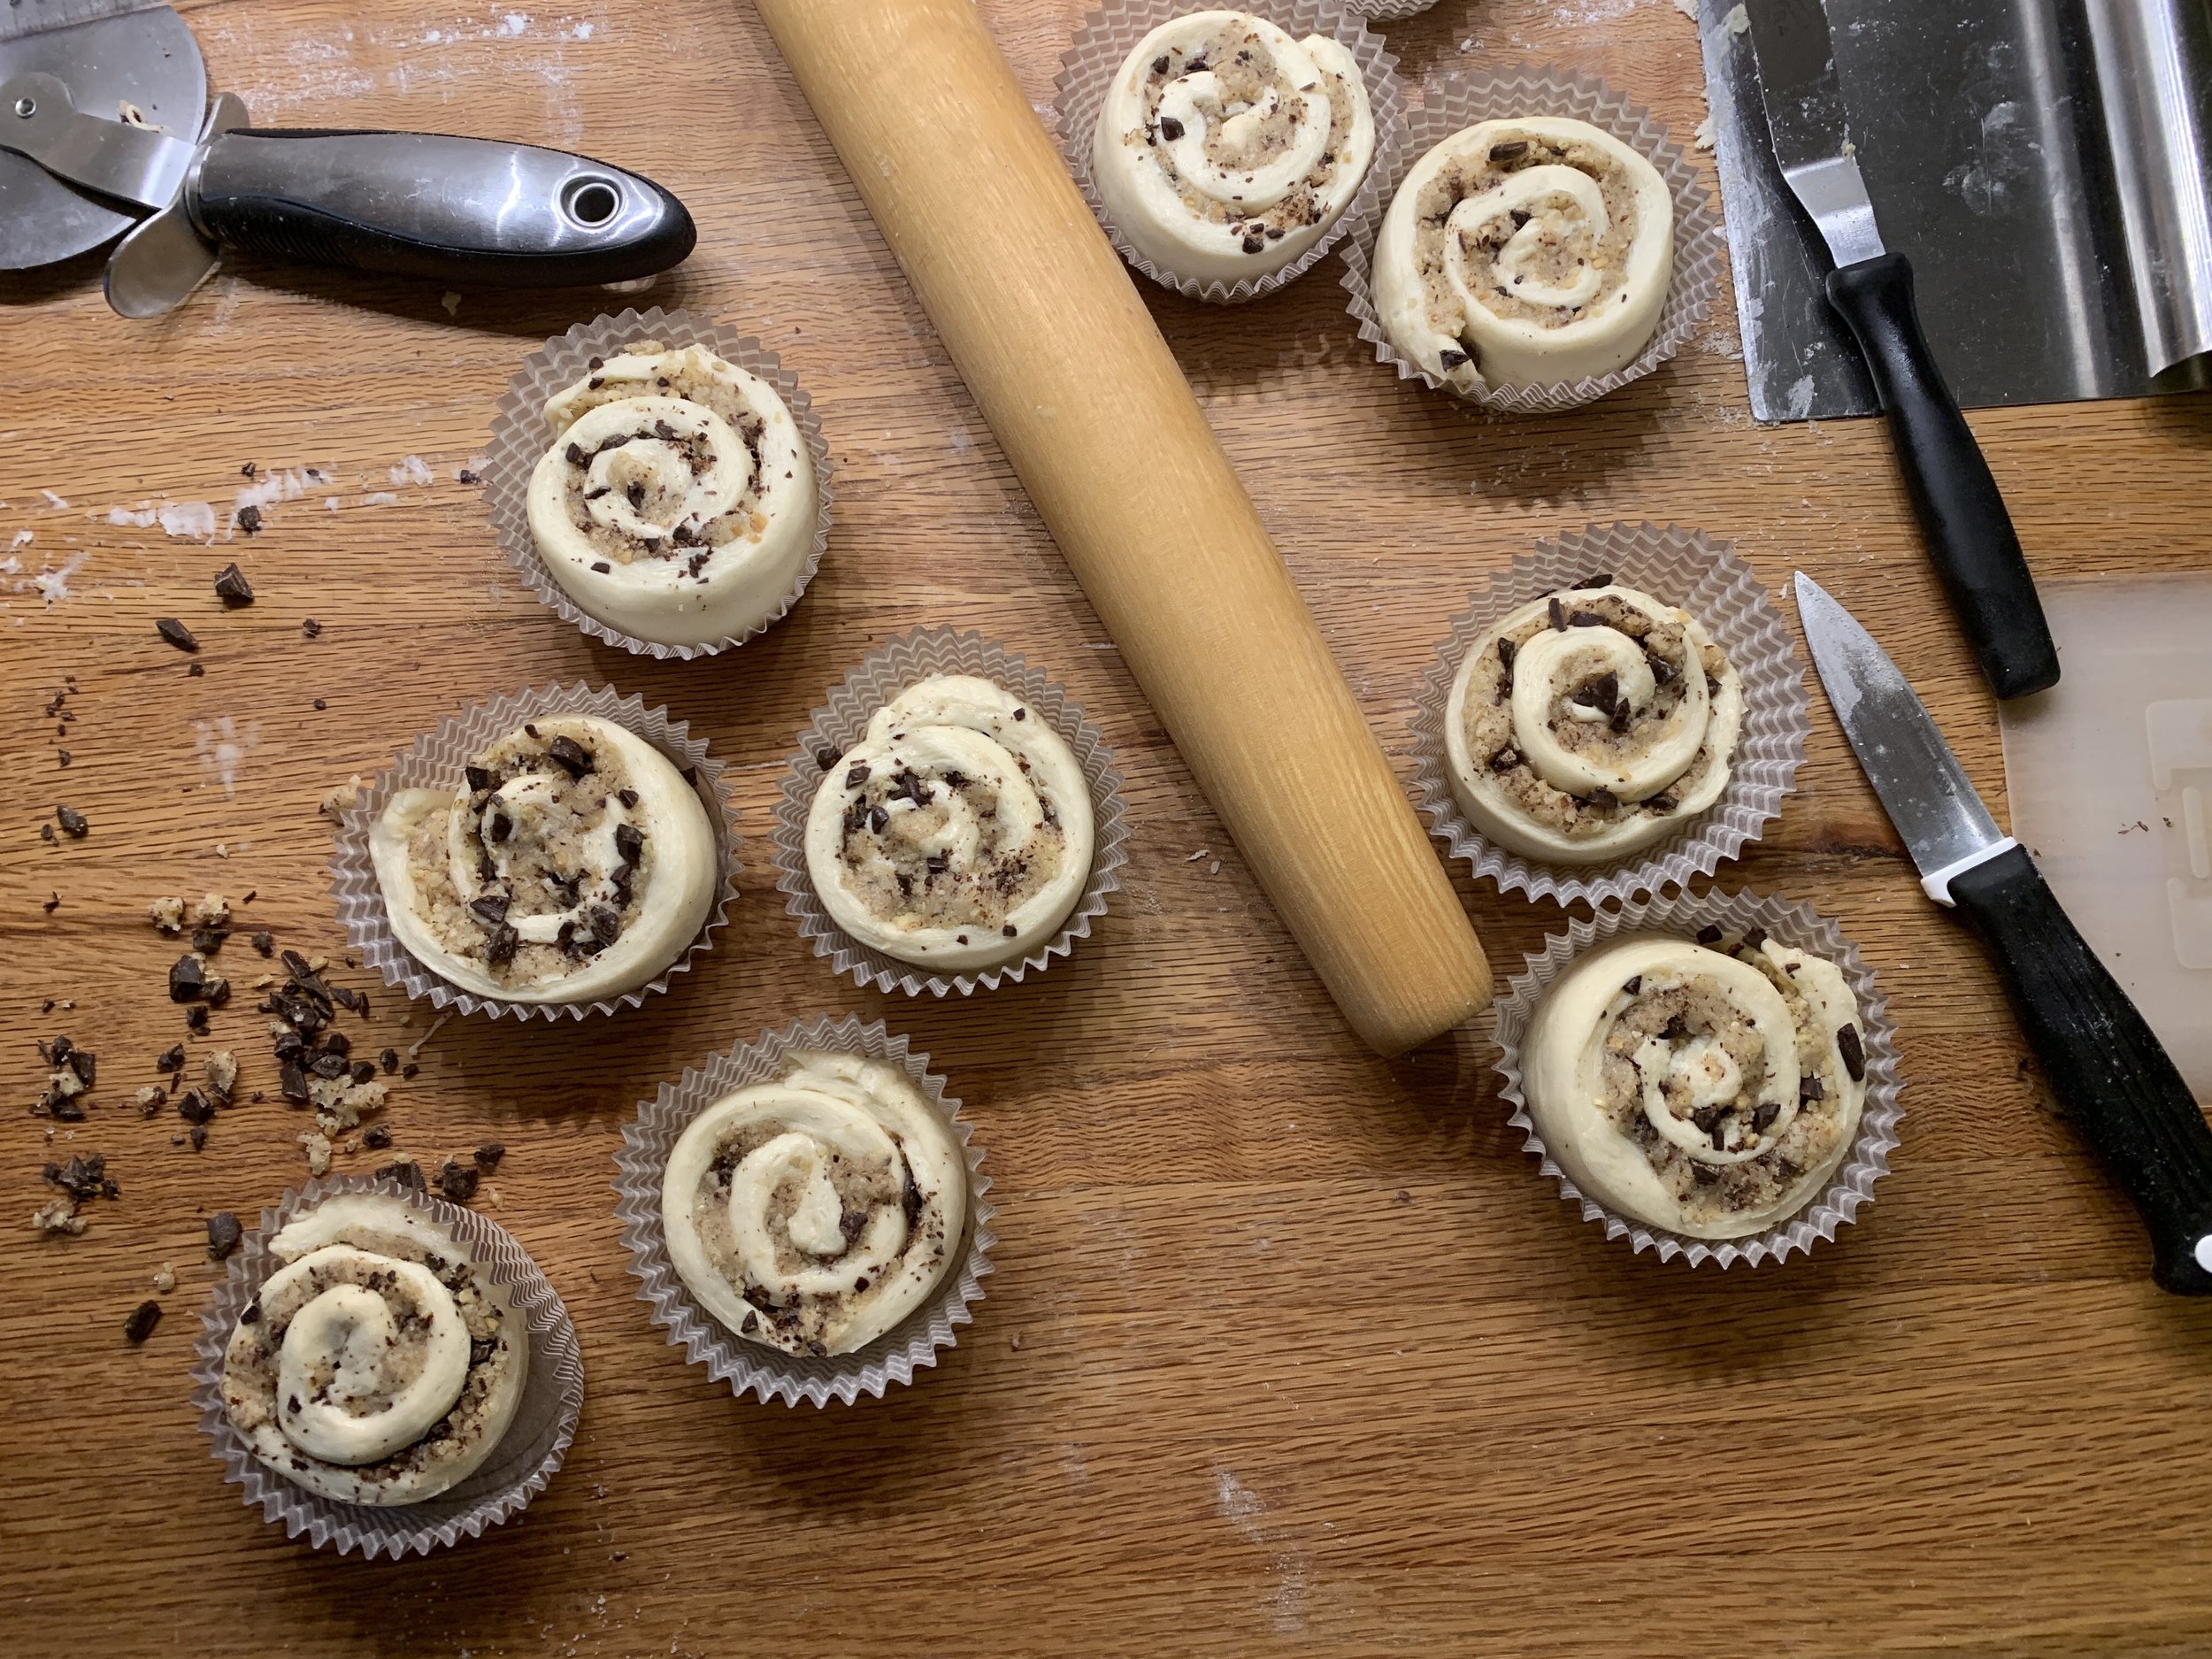
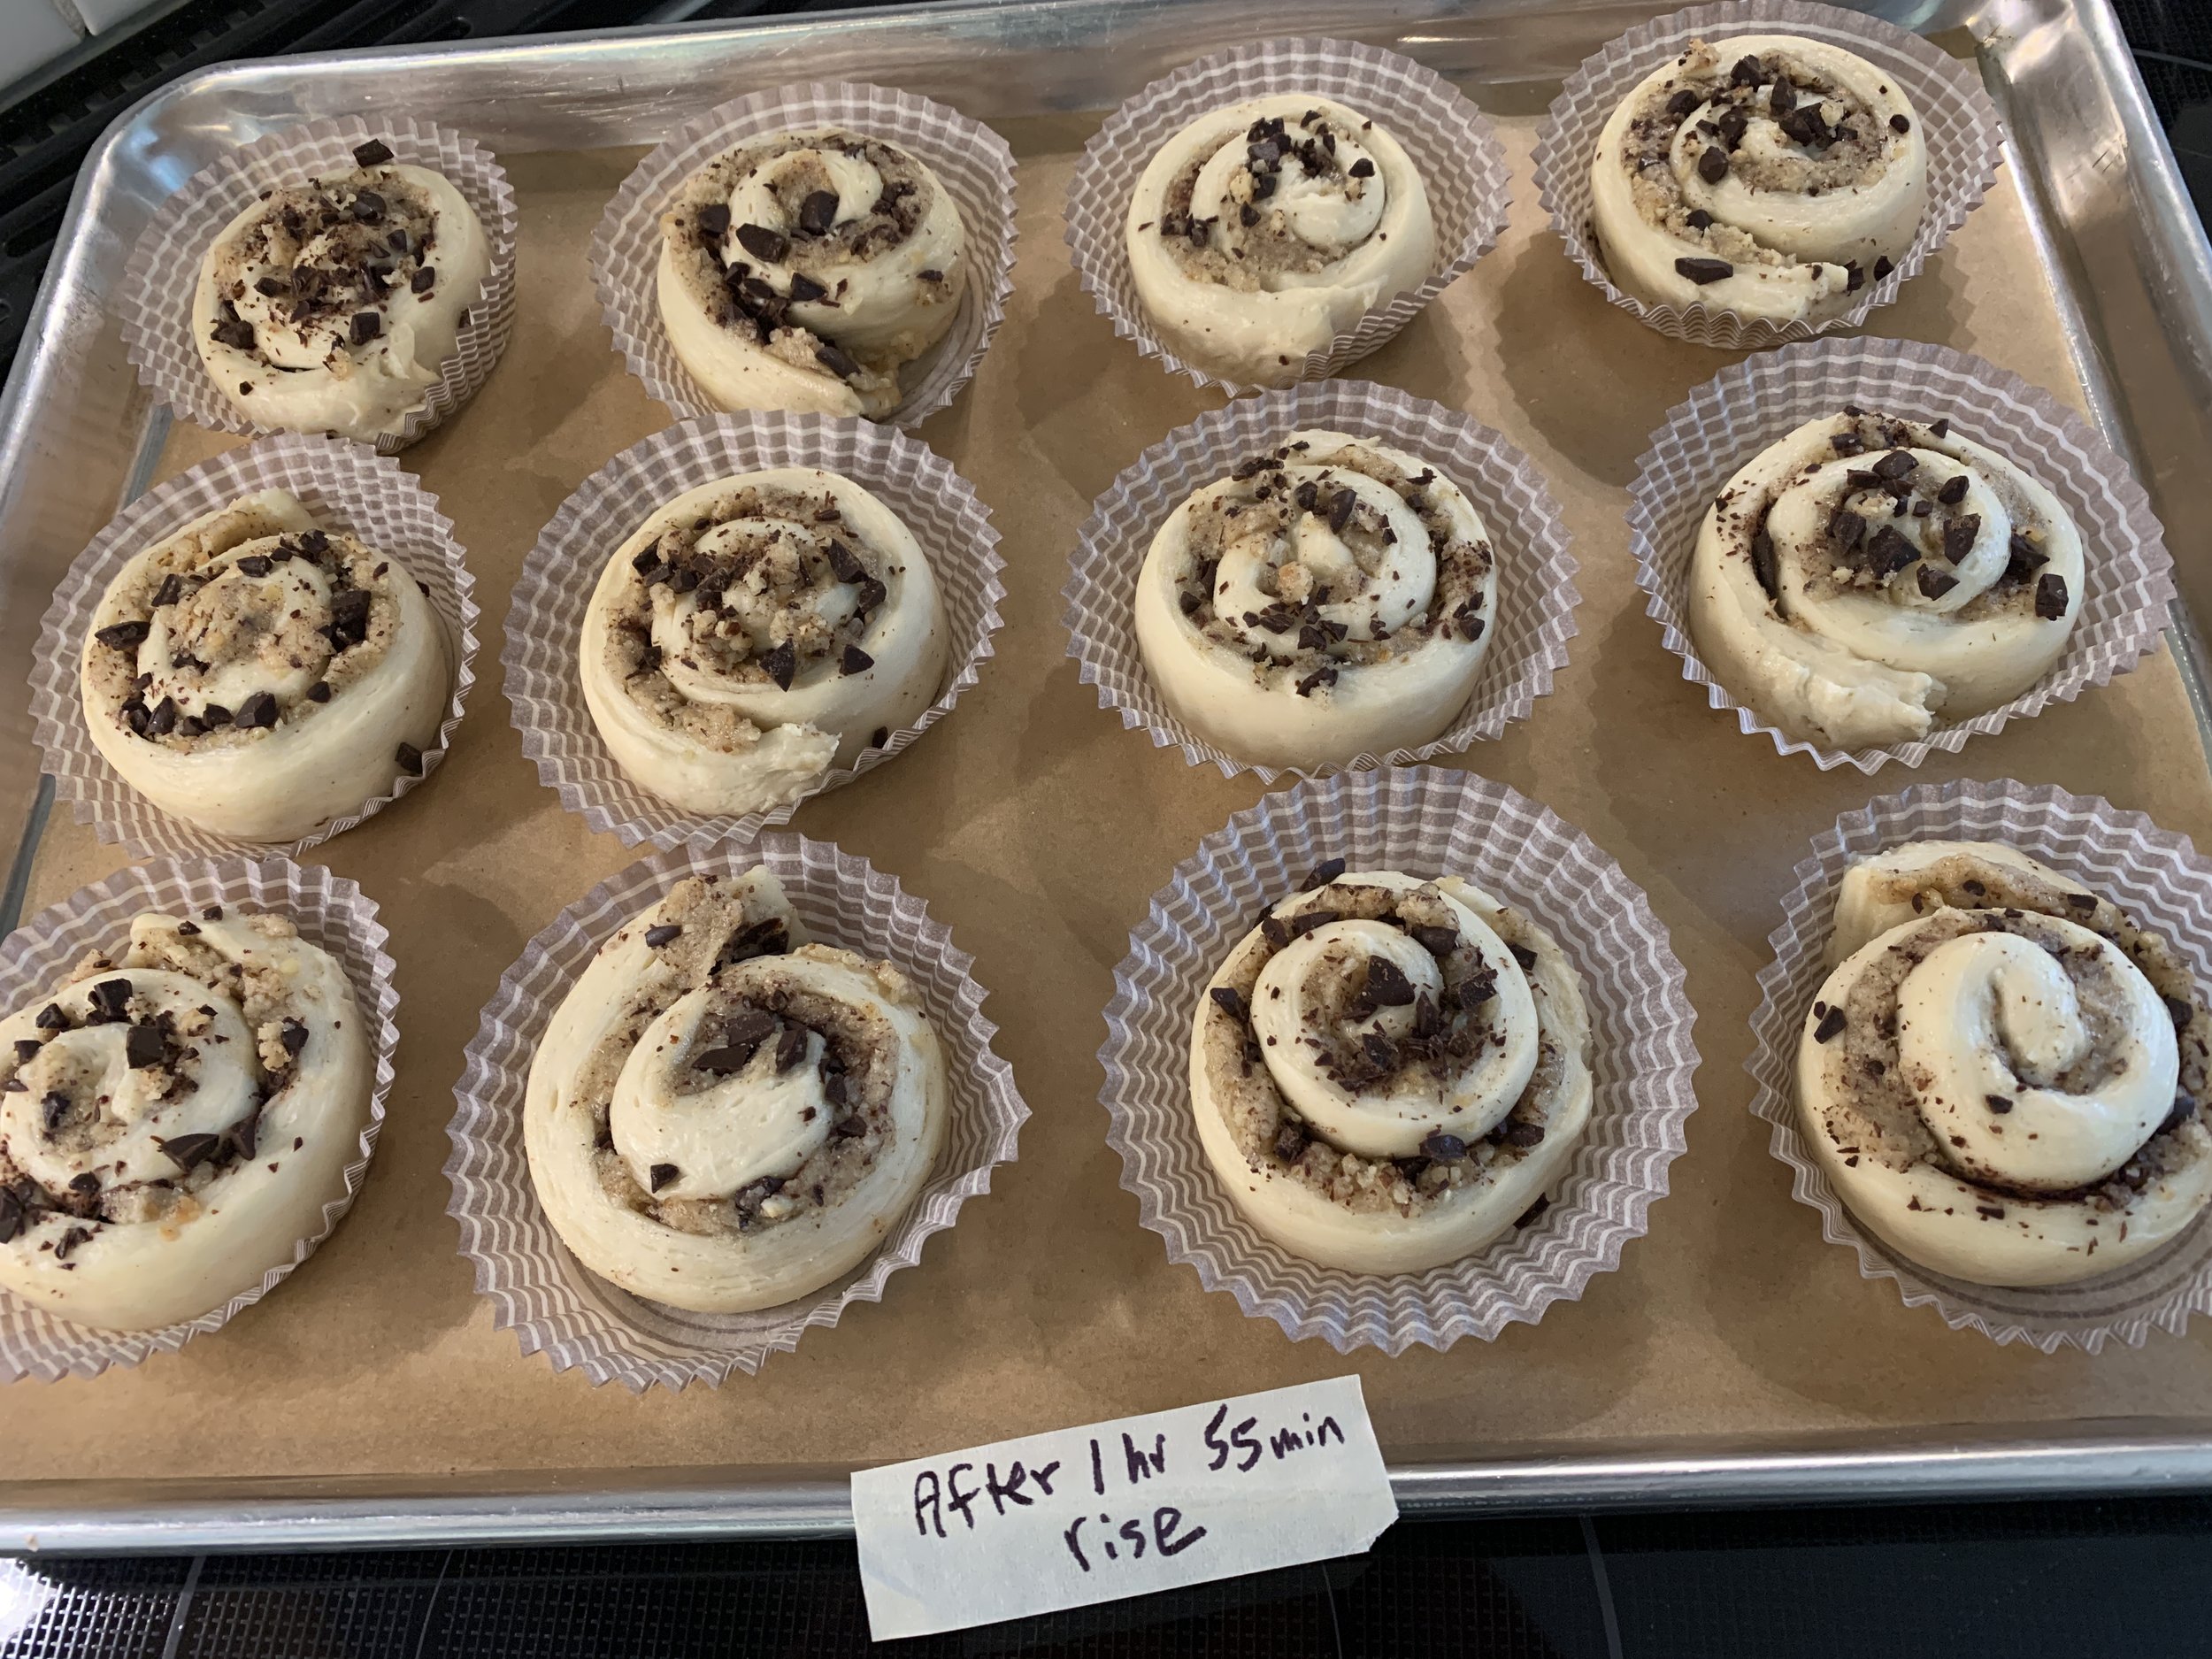
Cut ten 3 cm wide strips, roll ‘em up and place each in a standard sized baking paper. PSST - this is a new approach for me. Rather than tucking them in a pan cheek-by-jowl or setting them openly onto a sheet pan without any ring or form, the papers give them just enough of a boundary to allow for rising/spreading and baking very nicely. Yes!

Rolling, rolling, rolling


Cover lightly with buttered plastic wrap and let rise 1.5 to 2 hours. Not to confuse you, but I cut two additional strips from the half batch of dough I was using for the squiggle test (coming up) to give me an even dozen as you see below.


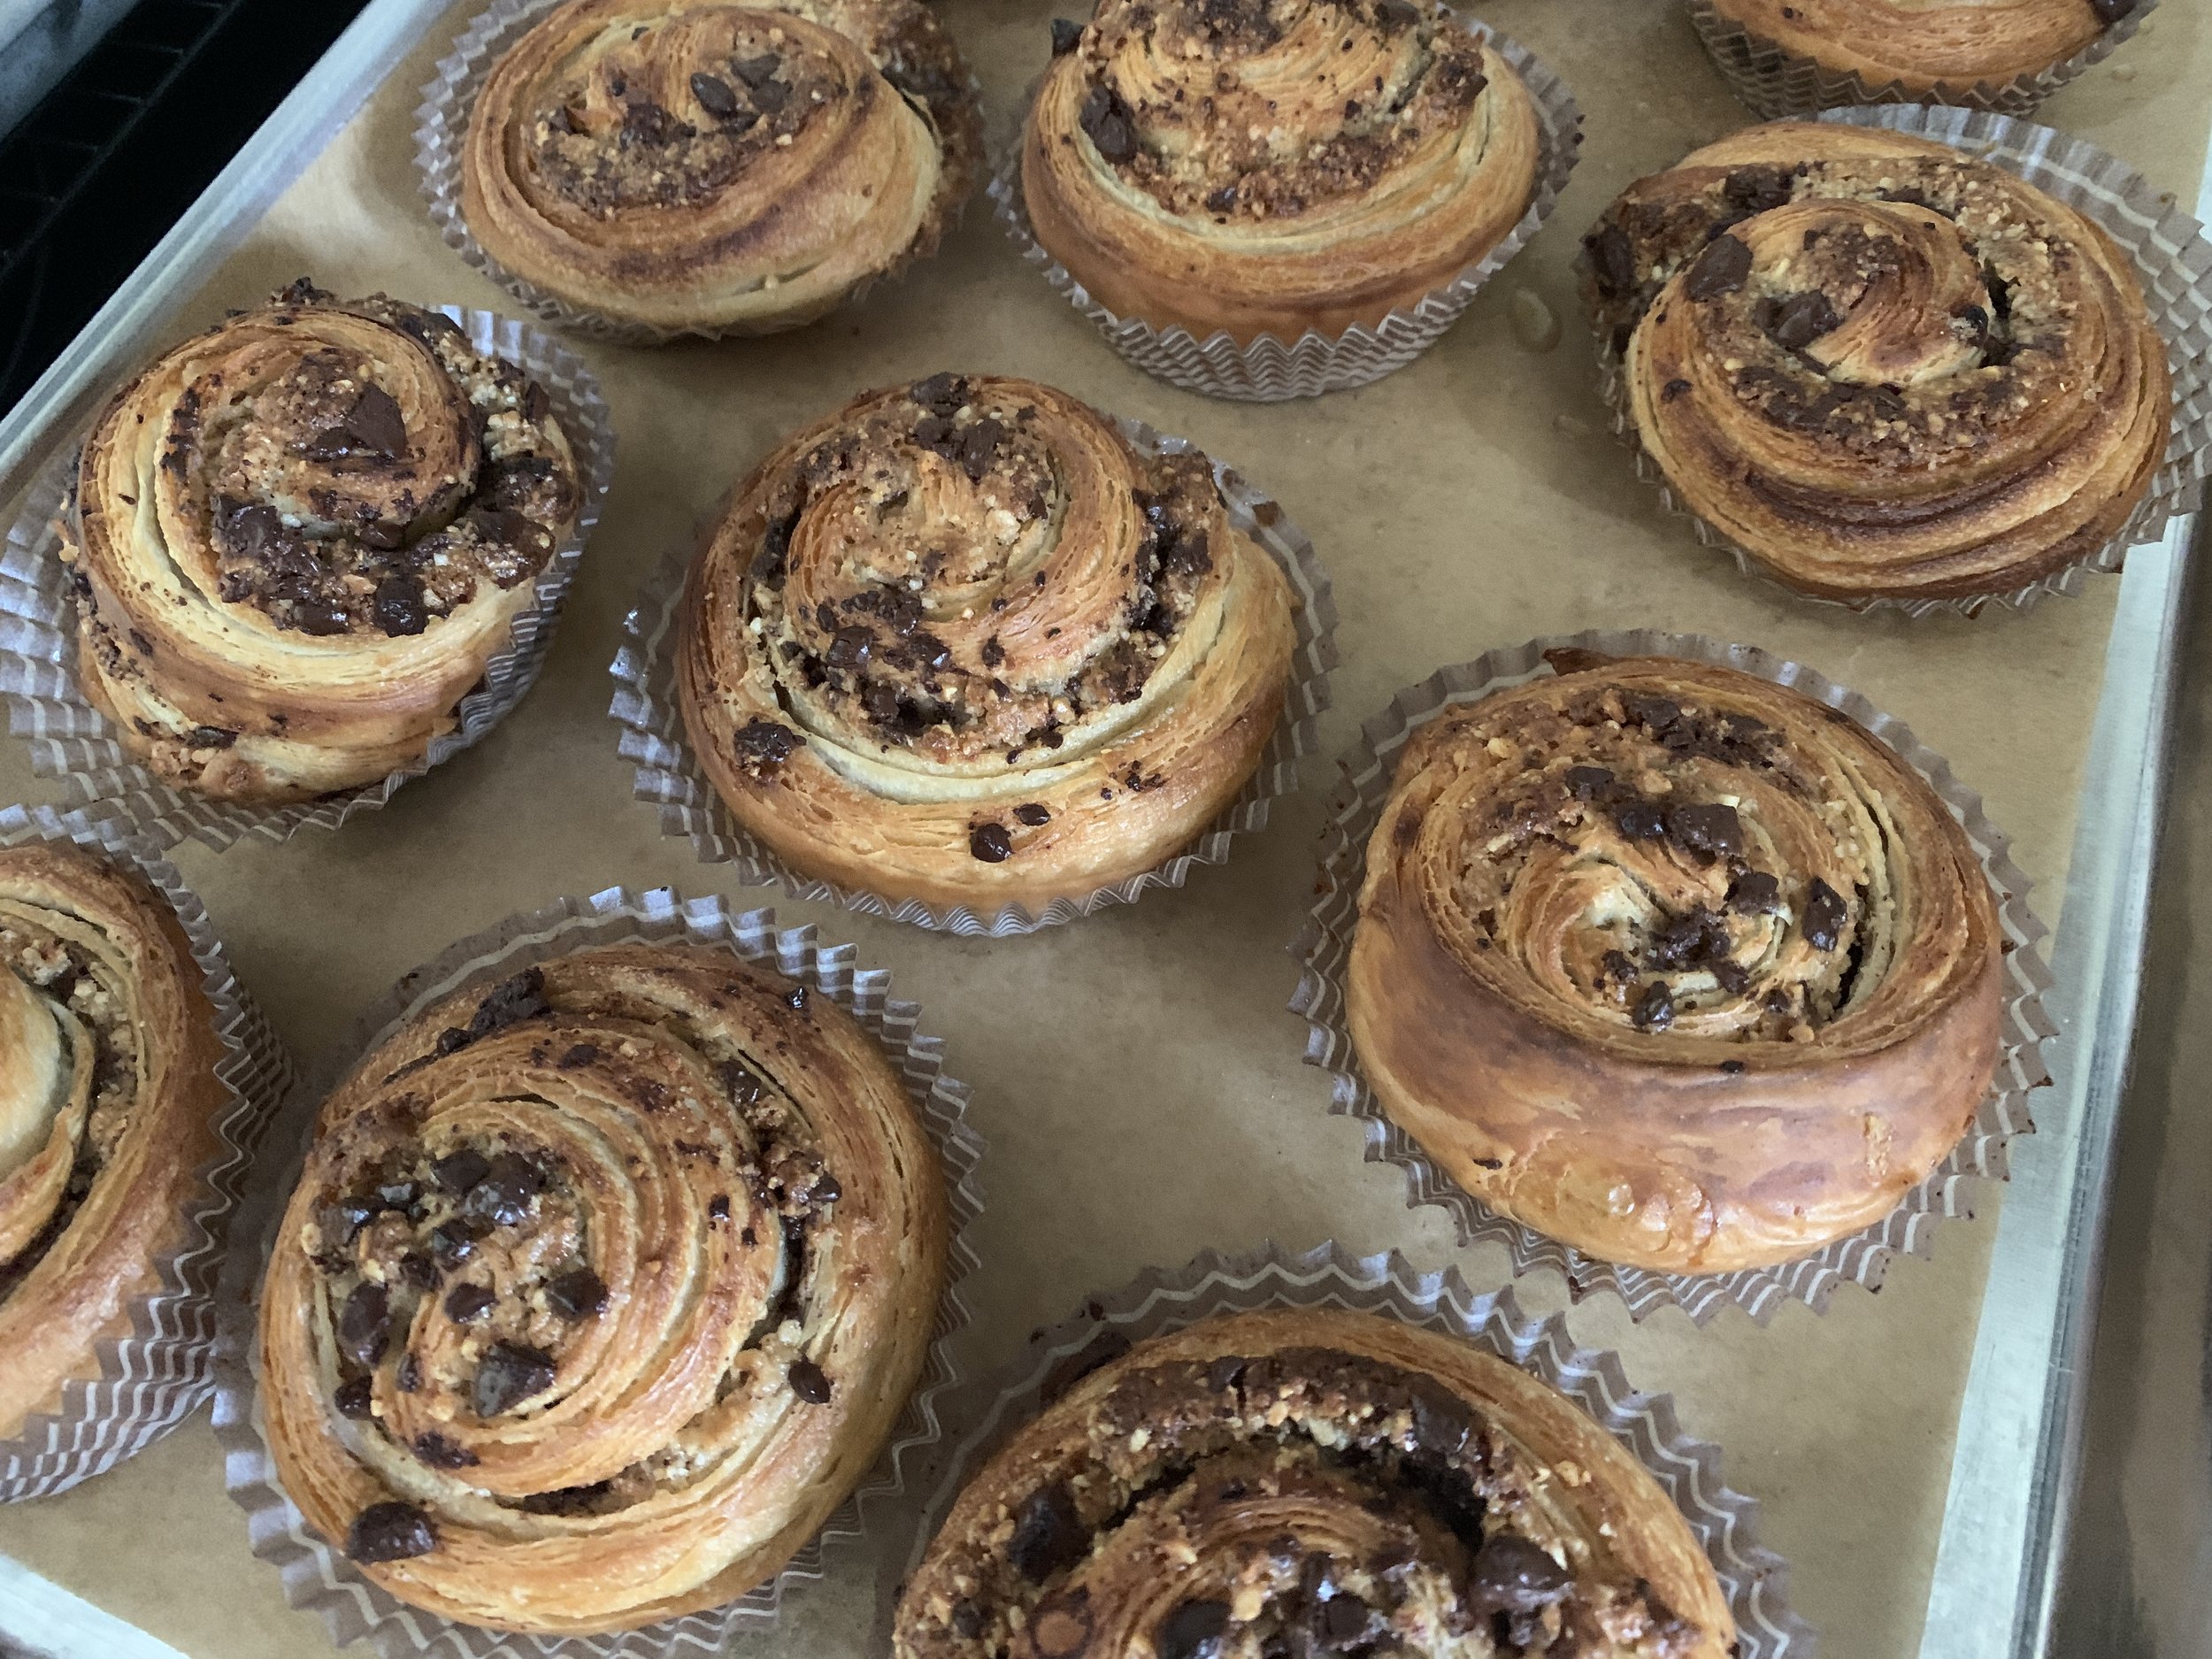
Toward the end of the rise heat the oven to 400ºF. Bake 10 minutes, rotate the pan and check the browning. If browning too quickly, reduce temp to 375ºF and bake an additional 10-15 minutes until nicely browned.


For a little shine I brush them with some simple syrup and then give ‘em a sprinkle of coriander sugar. Yum.


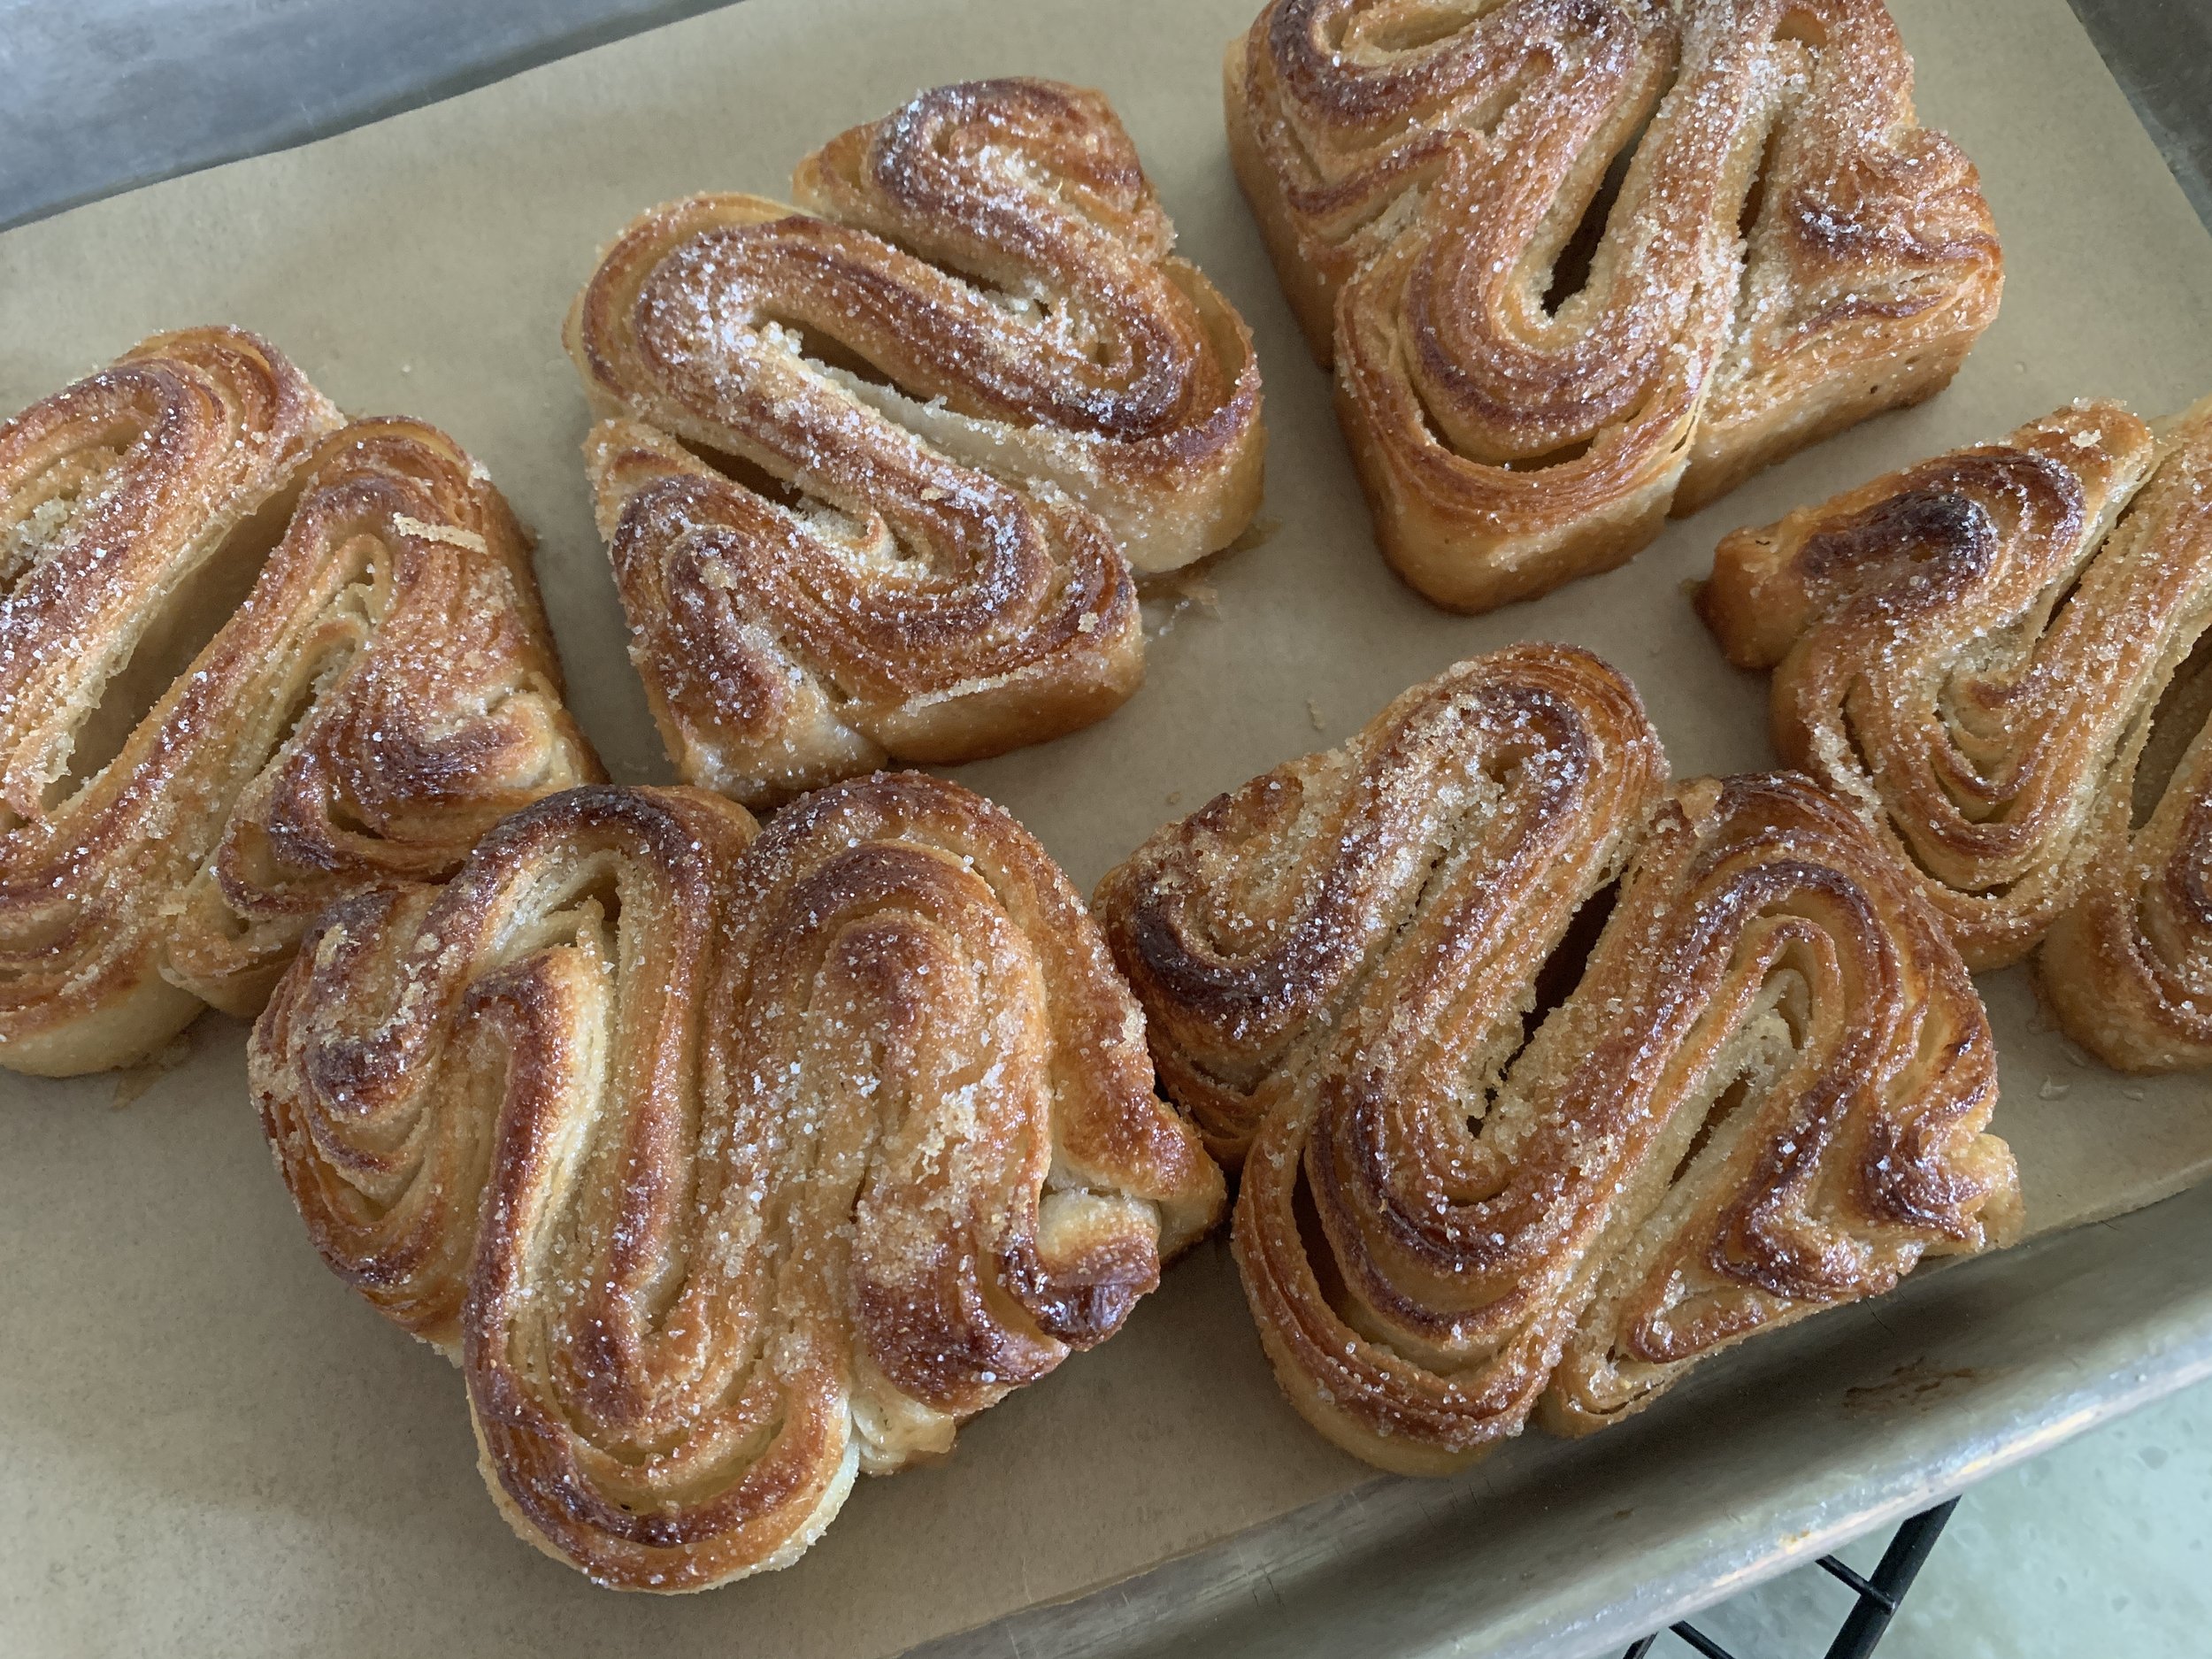
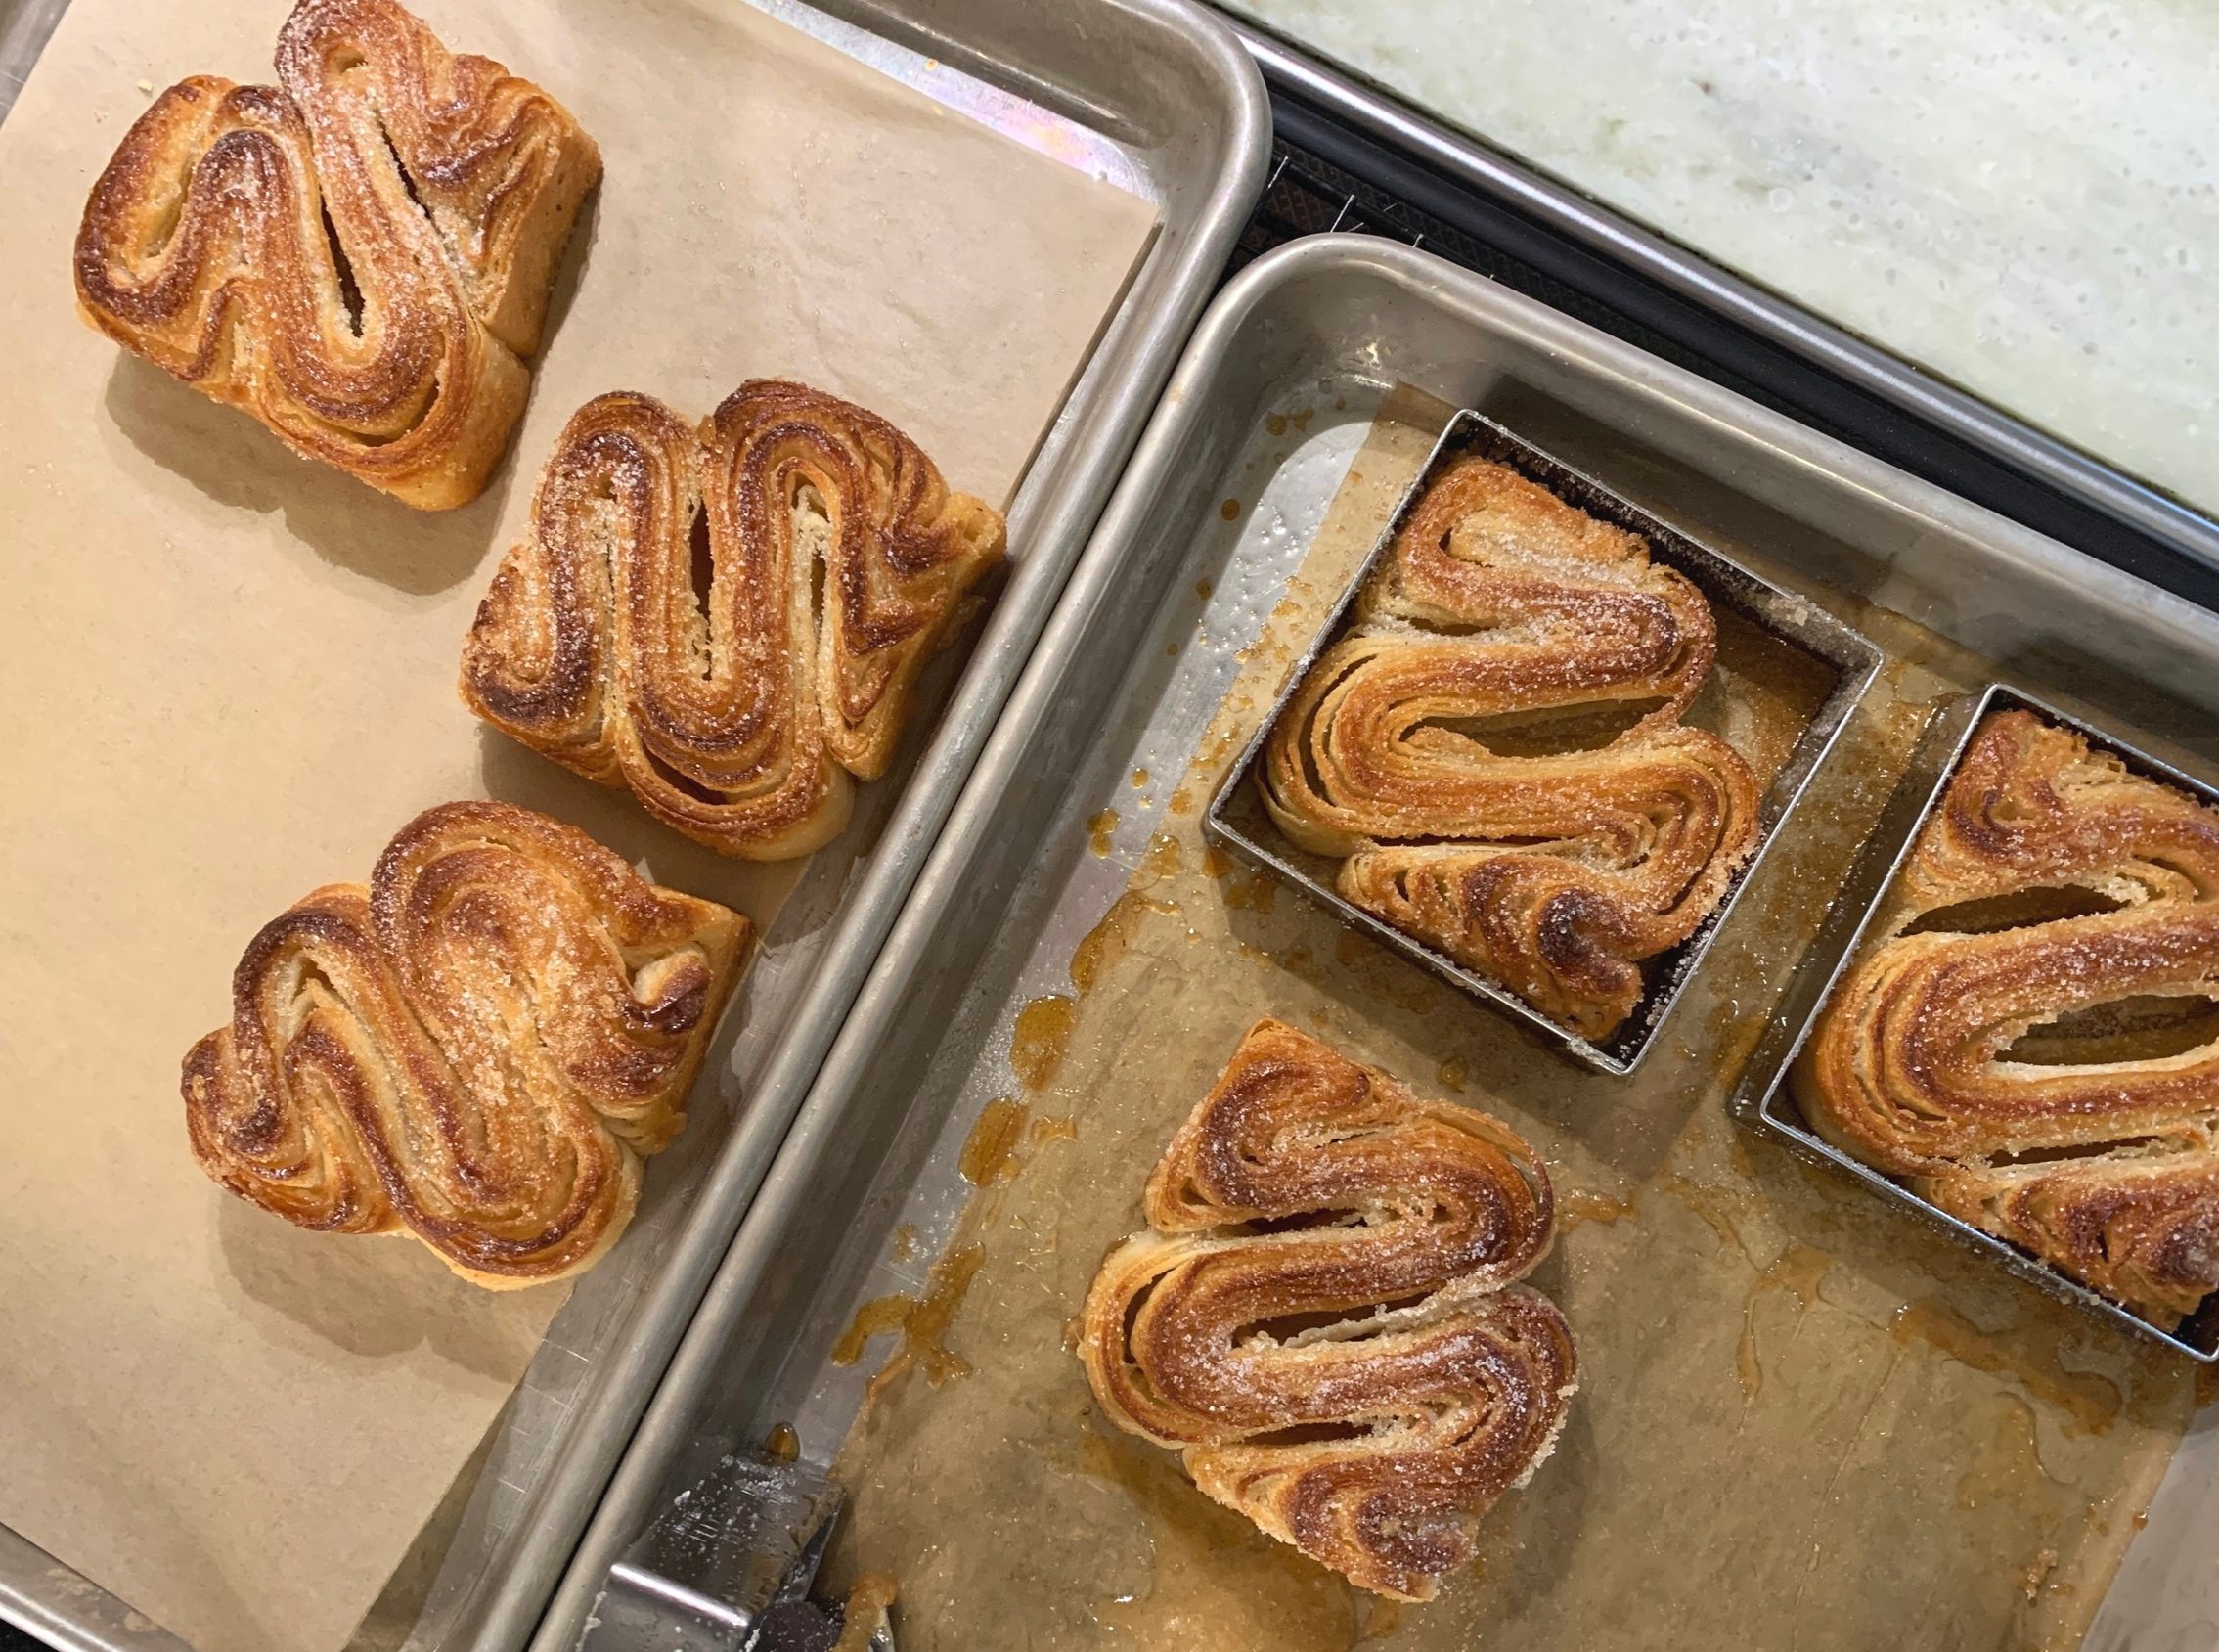
Time for the new shape! Squiggles. They remind me of fleur-de-lis.


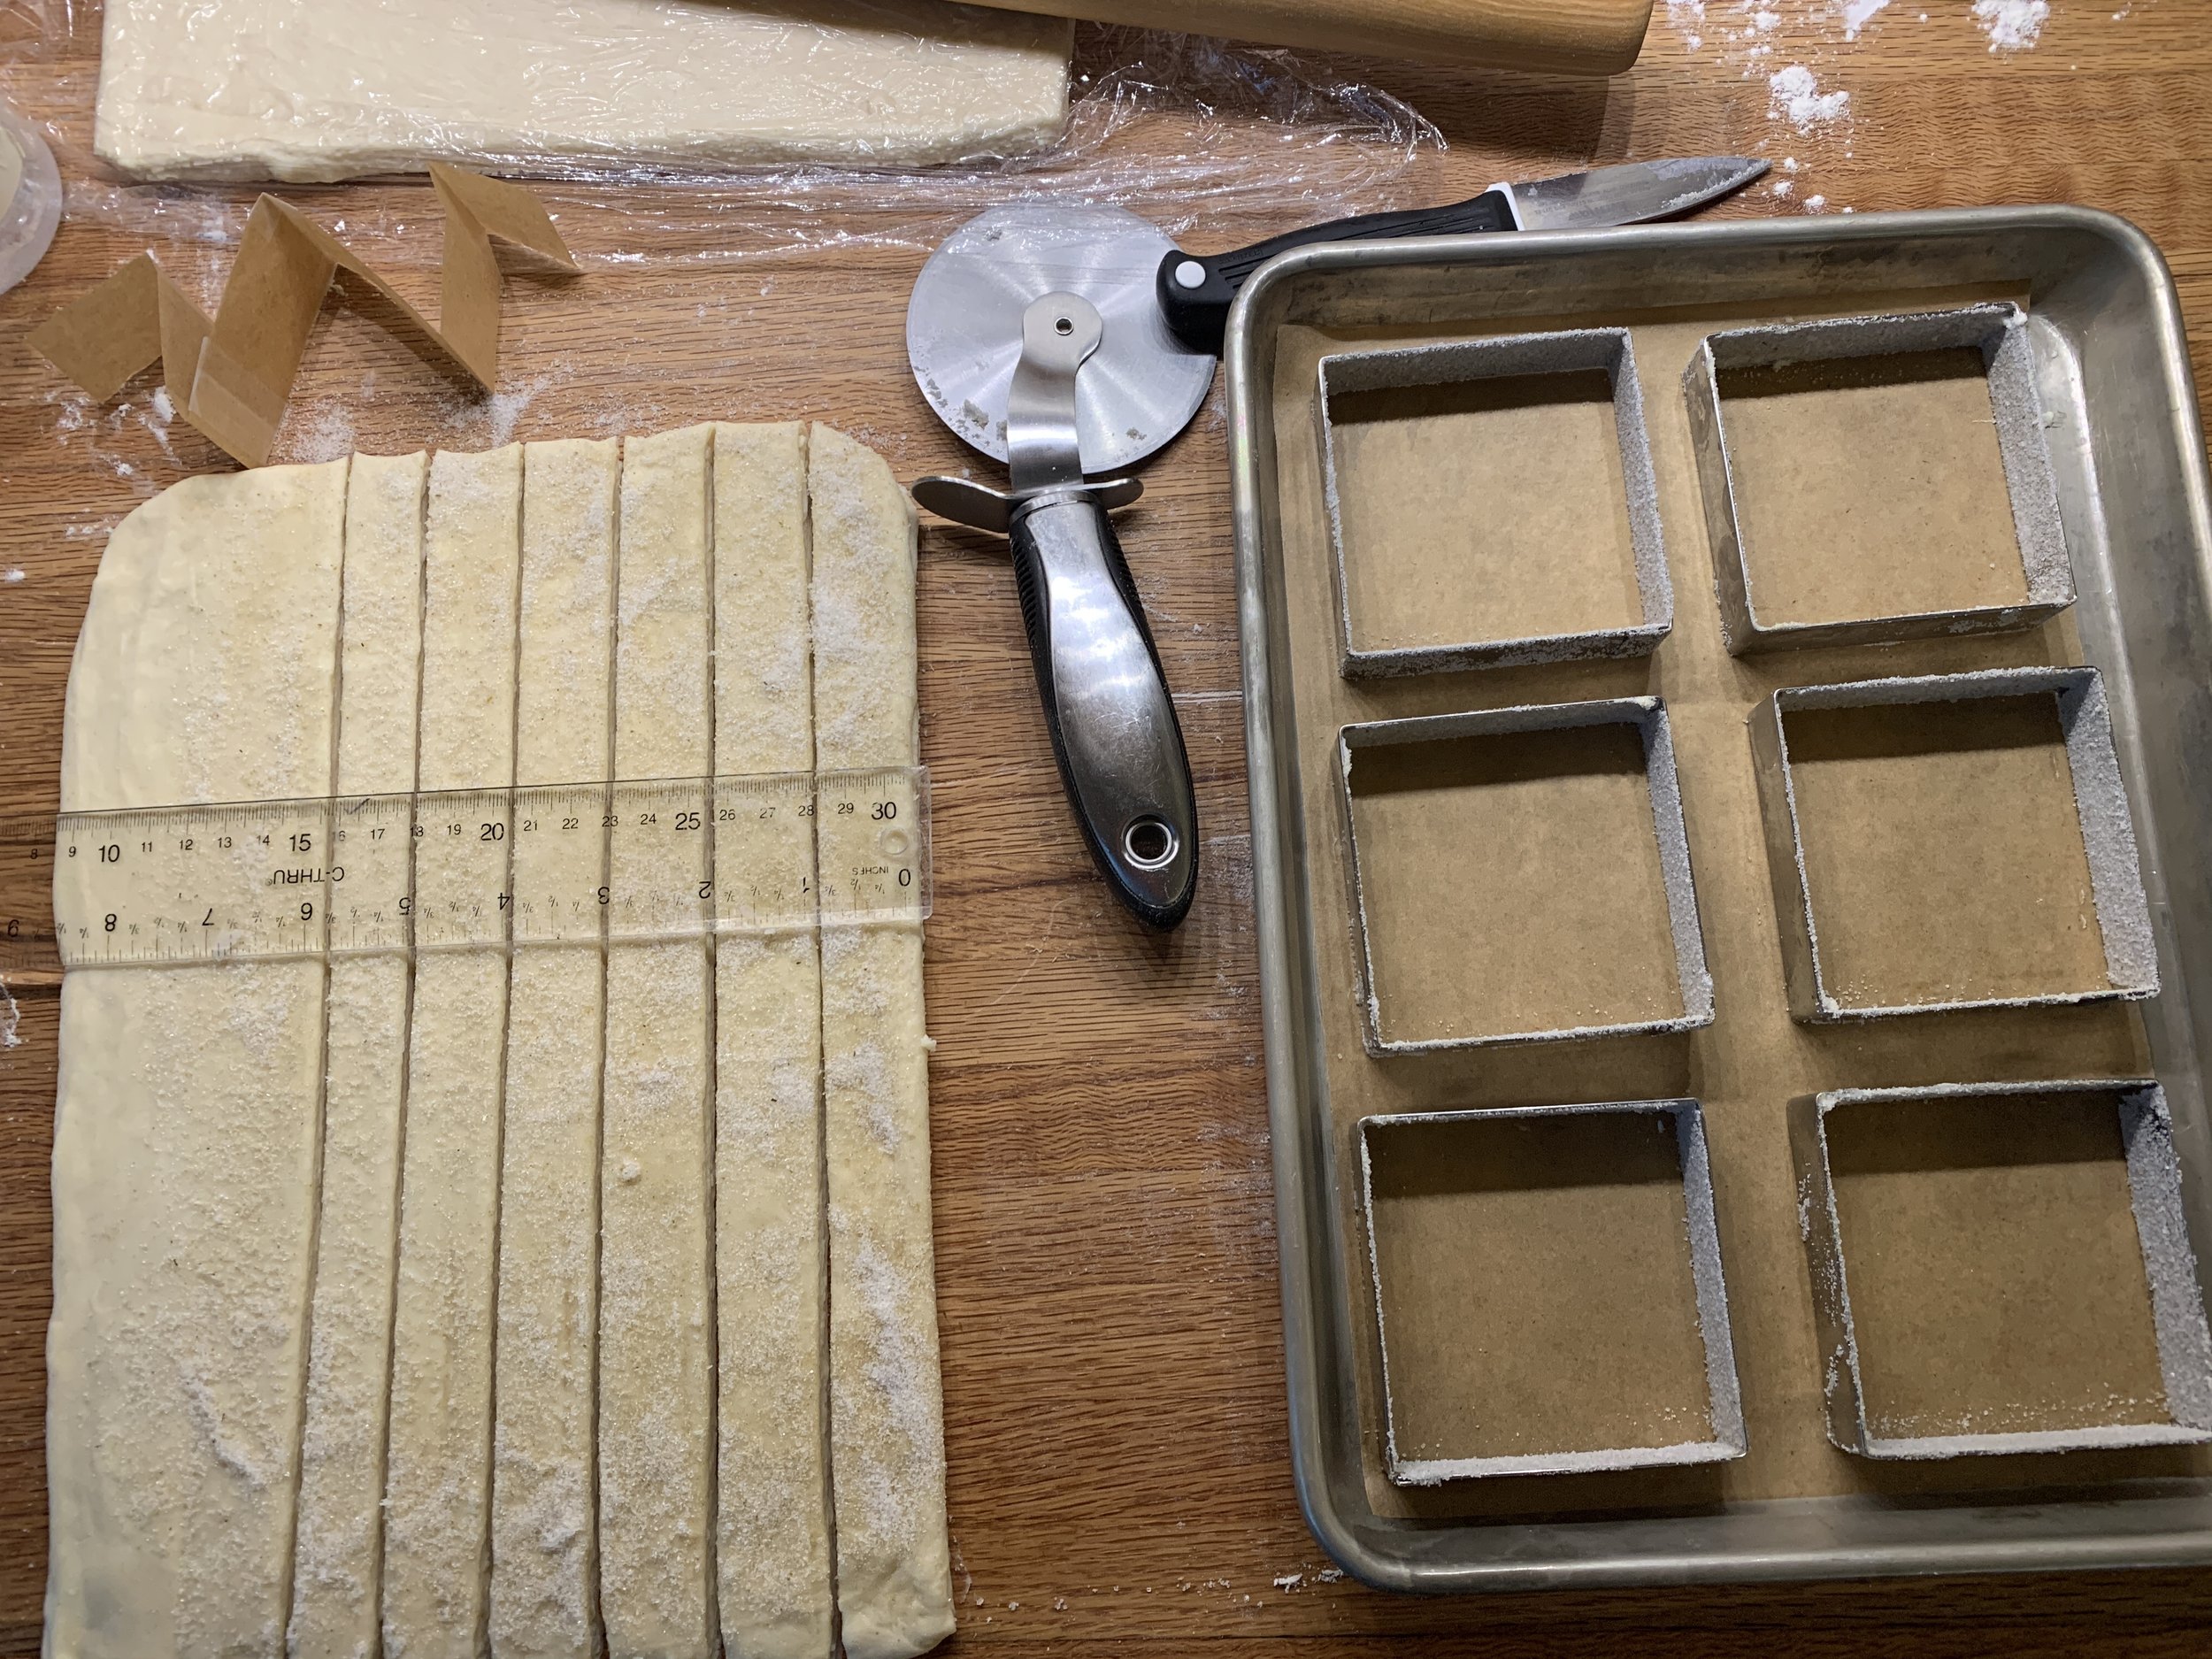
Using a half batch of dough, I rolled it out to an 8” x 12” rectangle, this time with the short side parallel to the edge of the counter. I have only six 80-mm square tart forms so six pastries resulted from this experiment.

Butter and sugar the tart forms which serve as the boundary for the dough to keep it in check, so to speak, as it proofs and bakes. Cut six 30 cm (12”) long and ~ 2.5 cm (1”) wide strips. My cutting eye was a bit off and a couple came out a bit narrower - going forward I’d cut them all a tad wider, ~3 cm each.


Shape each strip into a squiggle (I had practiced with a strip of paper first and figured out the curves I was going for), tuck each into a prepped form at an angle as seen below and sprinkle with some coriander sugar.


Cover lightly with buttered plastic wrap and let rise about 1.5 hours.


Bake at 375ºF about 20 minutes until nicely browned. I also gave these the simple syrup, coriander sugar treatment.


All in all, a fun time in the baking kitchen! I hope you’re having fun too!!

Summer marches on.

Danish pastry class in Copenhagen

Update note 3/06/23: please note that I am NOT the owner/operator of the Terrible French Pastry School. I’ve had several people who plan to travel to Copenhagen email me requesting class sign ups. You must contact the school (link below) to set up any classes with Chef Fred. You’ll be happy you did!!

Always up for another baking adventure, particularly one involving one of my favorites, laminated dough, I checked out various pastry/baking classes that might be available in the cities on our travel itinerary. What better subject to tackle than Danish pastries (aka wienerbrød) in Copenhagen, the capital of Denmark! Yes please.

The site of said class was at the Terrible French Pastry School (hmmm . . . . the name gives one pause) located in the Frederiksberg section of Copenhagen. The school is owned and operated by Frédéric Terrible, a Frenchman by birth, Dane by assimilation, who has been running the school for about 10 years now, following a long career in the pastry world. Classes are generally available in Danish and English (“for the tourists” says Fred) and can also be arranged with French as an option. His “open” classes are available for general sign up, and he also accepts requests for private events.

Turns out it was an easy Metro ride + short walk from our digs on a coolish, sunny beautiful morning, perfect for working with the layered, buttery dough. The building is set back off the street situated on a small cul de sac and the entrance very unassuming with a small gold “Terrible” plaque to the left of the door (Steve snapped this photo of me working on taking my own photo).

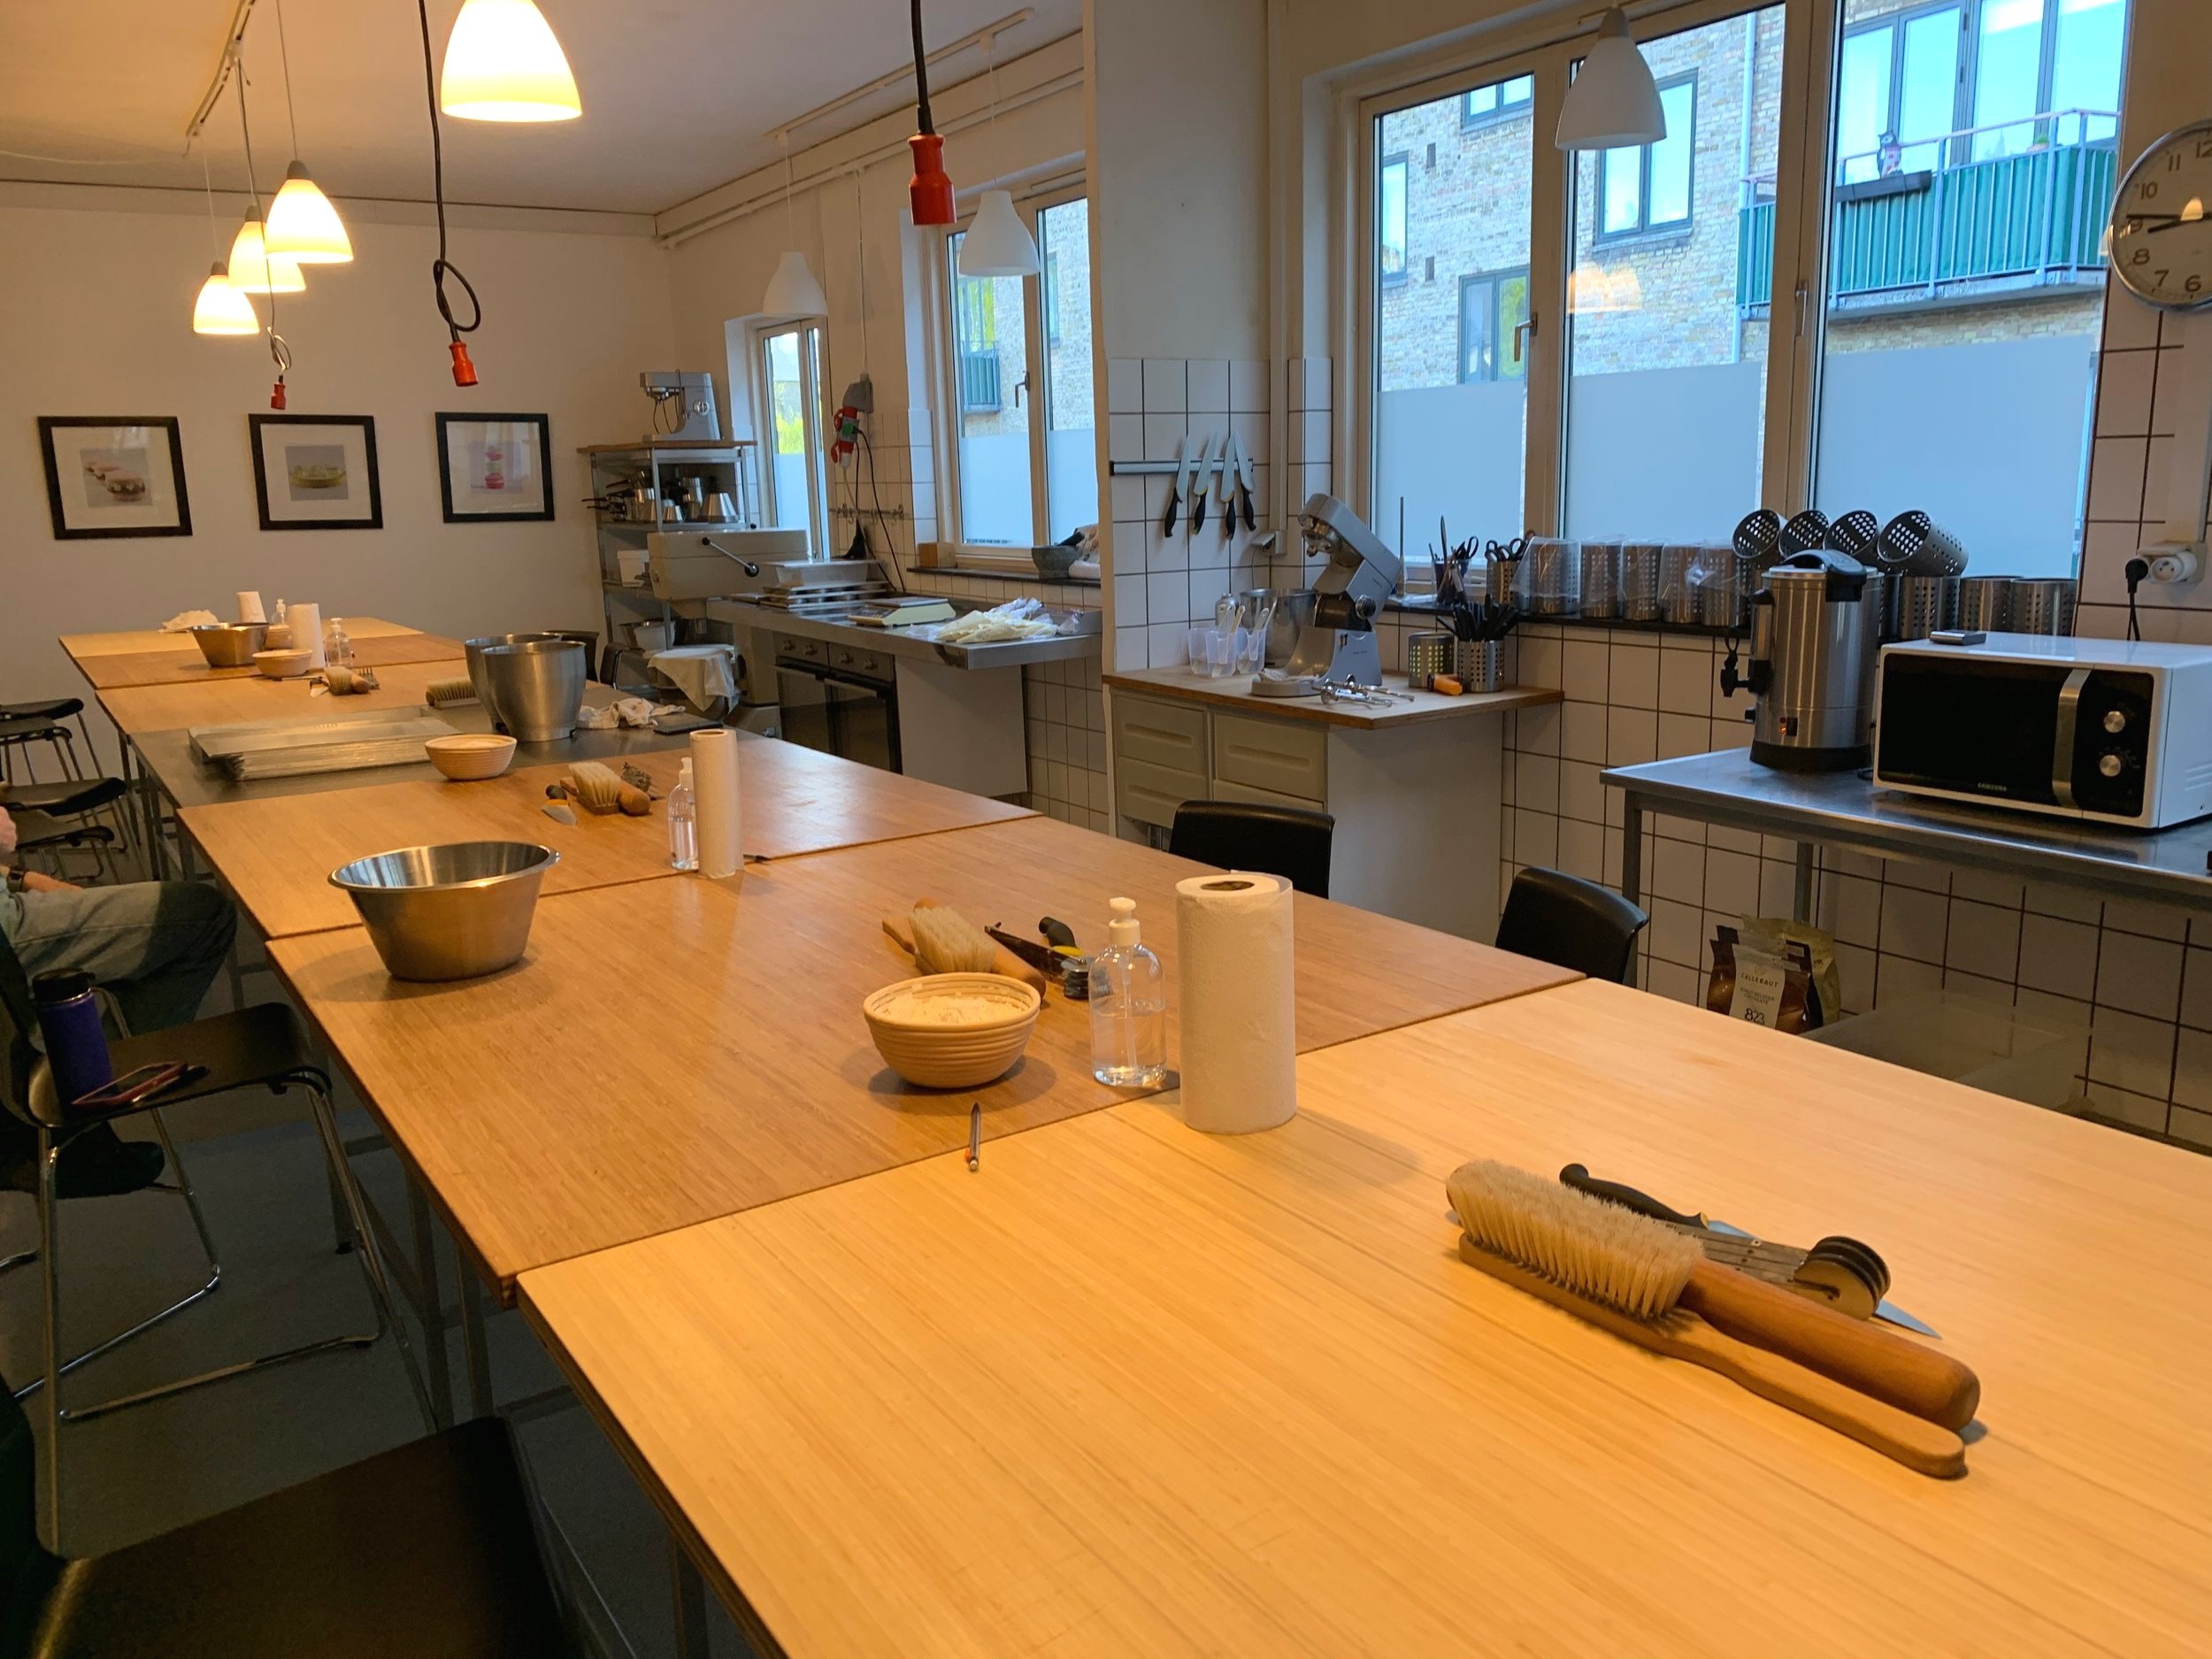
The kitchen/teaching space is perfect for groups of 10-12 people with a line up of working stations topped with dusting flour and necessary tools in the center. Ovens, mixers and assorted supplies are appropriately placed along the windows and periphery of the space.

Recalling fondly my own commercial kitchen during our Rhode Island years, I appreciated its spaciousness and organization.

Chef Fred had his base dough recipe hanging up for all to see and would review the steps of dough making later in the class. I appreciated his insight into some of the differences in the dough when one uses water (crispy) or milk (less crispy), egg (softer) or no egg (less soft), different types of flour - all details that I’ve reviewed, compared and tried a number of times when deciding on a base recipe. So much to take in and everyone has their own favorite way of doing things.

While we didn’t actually perform all of the dough laminating steps in class, he reviewed the different approaches to doing the folds (noted on the right side of his chart). He makes a lot of dough for his Danish and croissant classes ahead of time using a professional sheeter which yields more precise layers than when rolling by hand as we homebodies do. So cool!

We worked in pairs (my mate was Naomi from the UK), each pair having an oven available to bake the various pastries we created. We sat comfortably while Chef Fred made some introductory remarks about the class flow and then it was time to push our chairs back and get rolling!

Any laminated dough class I’ve attended or have taught myself typically starts with completed dough that the chef makes ahead - otherwise one could not accomplish all that one hopes to in the allotted time frame. We proceeded to roll out four different dough portions (6 pastries from each), cutting and shaping them in various ways.

Demo to get us started

First up - 12x12 cm squares cut with a pastry bicycle cutter, a useful tool for even portioning. I’ve never owned one but certainly realize how helpful they can be. Please note: I have NO affiliate links with Amazon or anyone else; the link simply shows you what this tool looks like.

Also known as spandauer (traditionally remonce filling and a topping of custard or jam), we piped a just right dollop of remonce (equal weights almond flour, sugar, butter) - not too much and not too little - in the center.

Bring 2 opposite corners to the center and push down very firmly with your fingertip, all the way down through the dough and the cream to the paper. Whoa! This was one of those ah-hah moments. Typically I push/press but this is much more dramatic with very firm pressure. It’s all about being in charge of the dough.

Repeat with the other 2 corners. Yes!

Quick note - even with the firm pressure, once proofed some corners might unfurl - just press them back into the center before topping with custard and baking.

We rolled out the next dough portion and cut 6 rectangles about 10x15 cm each. Fold in half and make 5 cuts along the open edge . . . . .

Open each piece up and pipe a strip of remonce (not too much, not too little, not too close to the edges) down the center; top with chocolate chips.

Proceed with the braid (of sorts) by crisscrossing alternating strips from top to bottom, kind of like this Danish braid.

Chef Fred gave us a demo - here’s the start of his.

Once all wrapped up, press the side of your little finger across the open top to seal it and tuck the bottom ends underneath. Voilá

As we completed each tray of pastries, they went into the oven for proofing. Chef had given the ovens a whiff of warmth and kept an eye on the temps so they hung between 25ºC (77ºF) and 28ºC (82ºF). Too warm and the butter will start to melt, resulting in pools of butter and less than stellar texture after baking.

Note that European style butter with higher butterfat content can stand up to warmer proofing temps than run-of-the-mill butters so be forewarned! When in doubt I plan for a lower temp (70 - 75ºF) and longer rise (instead of 1 to 1.5 hours, go 2 to 2.5 hours) to avoid the butter leak issue.

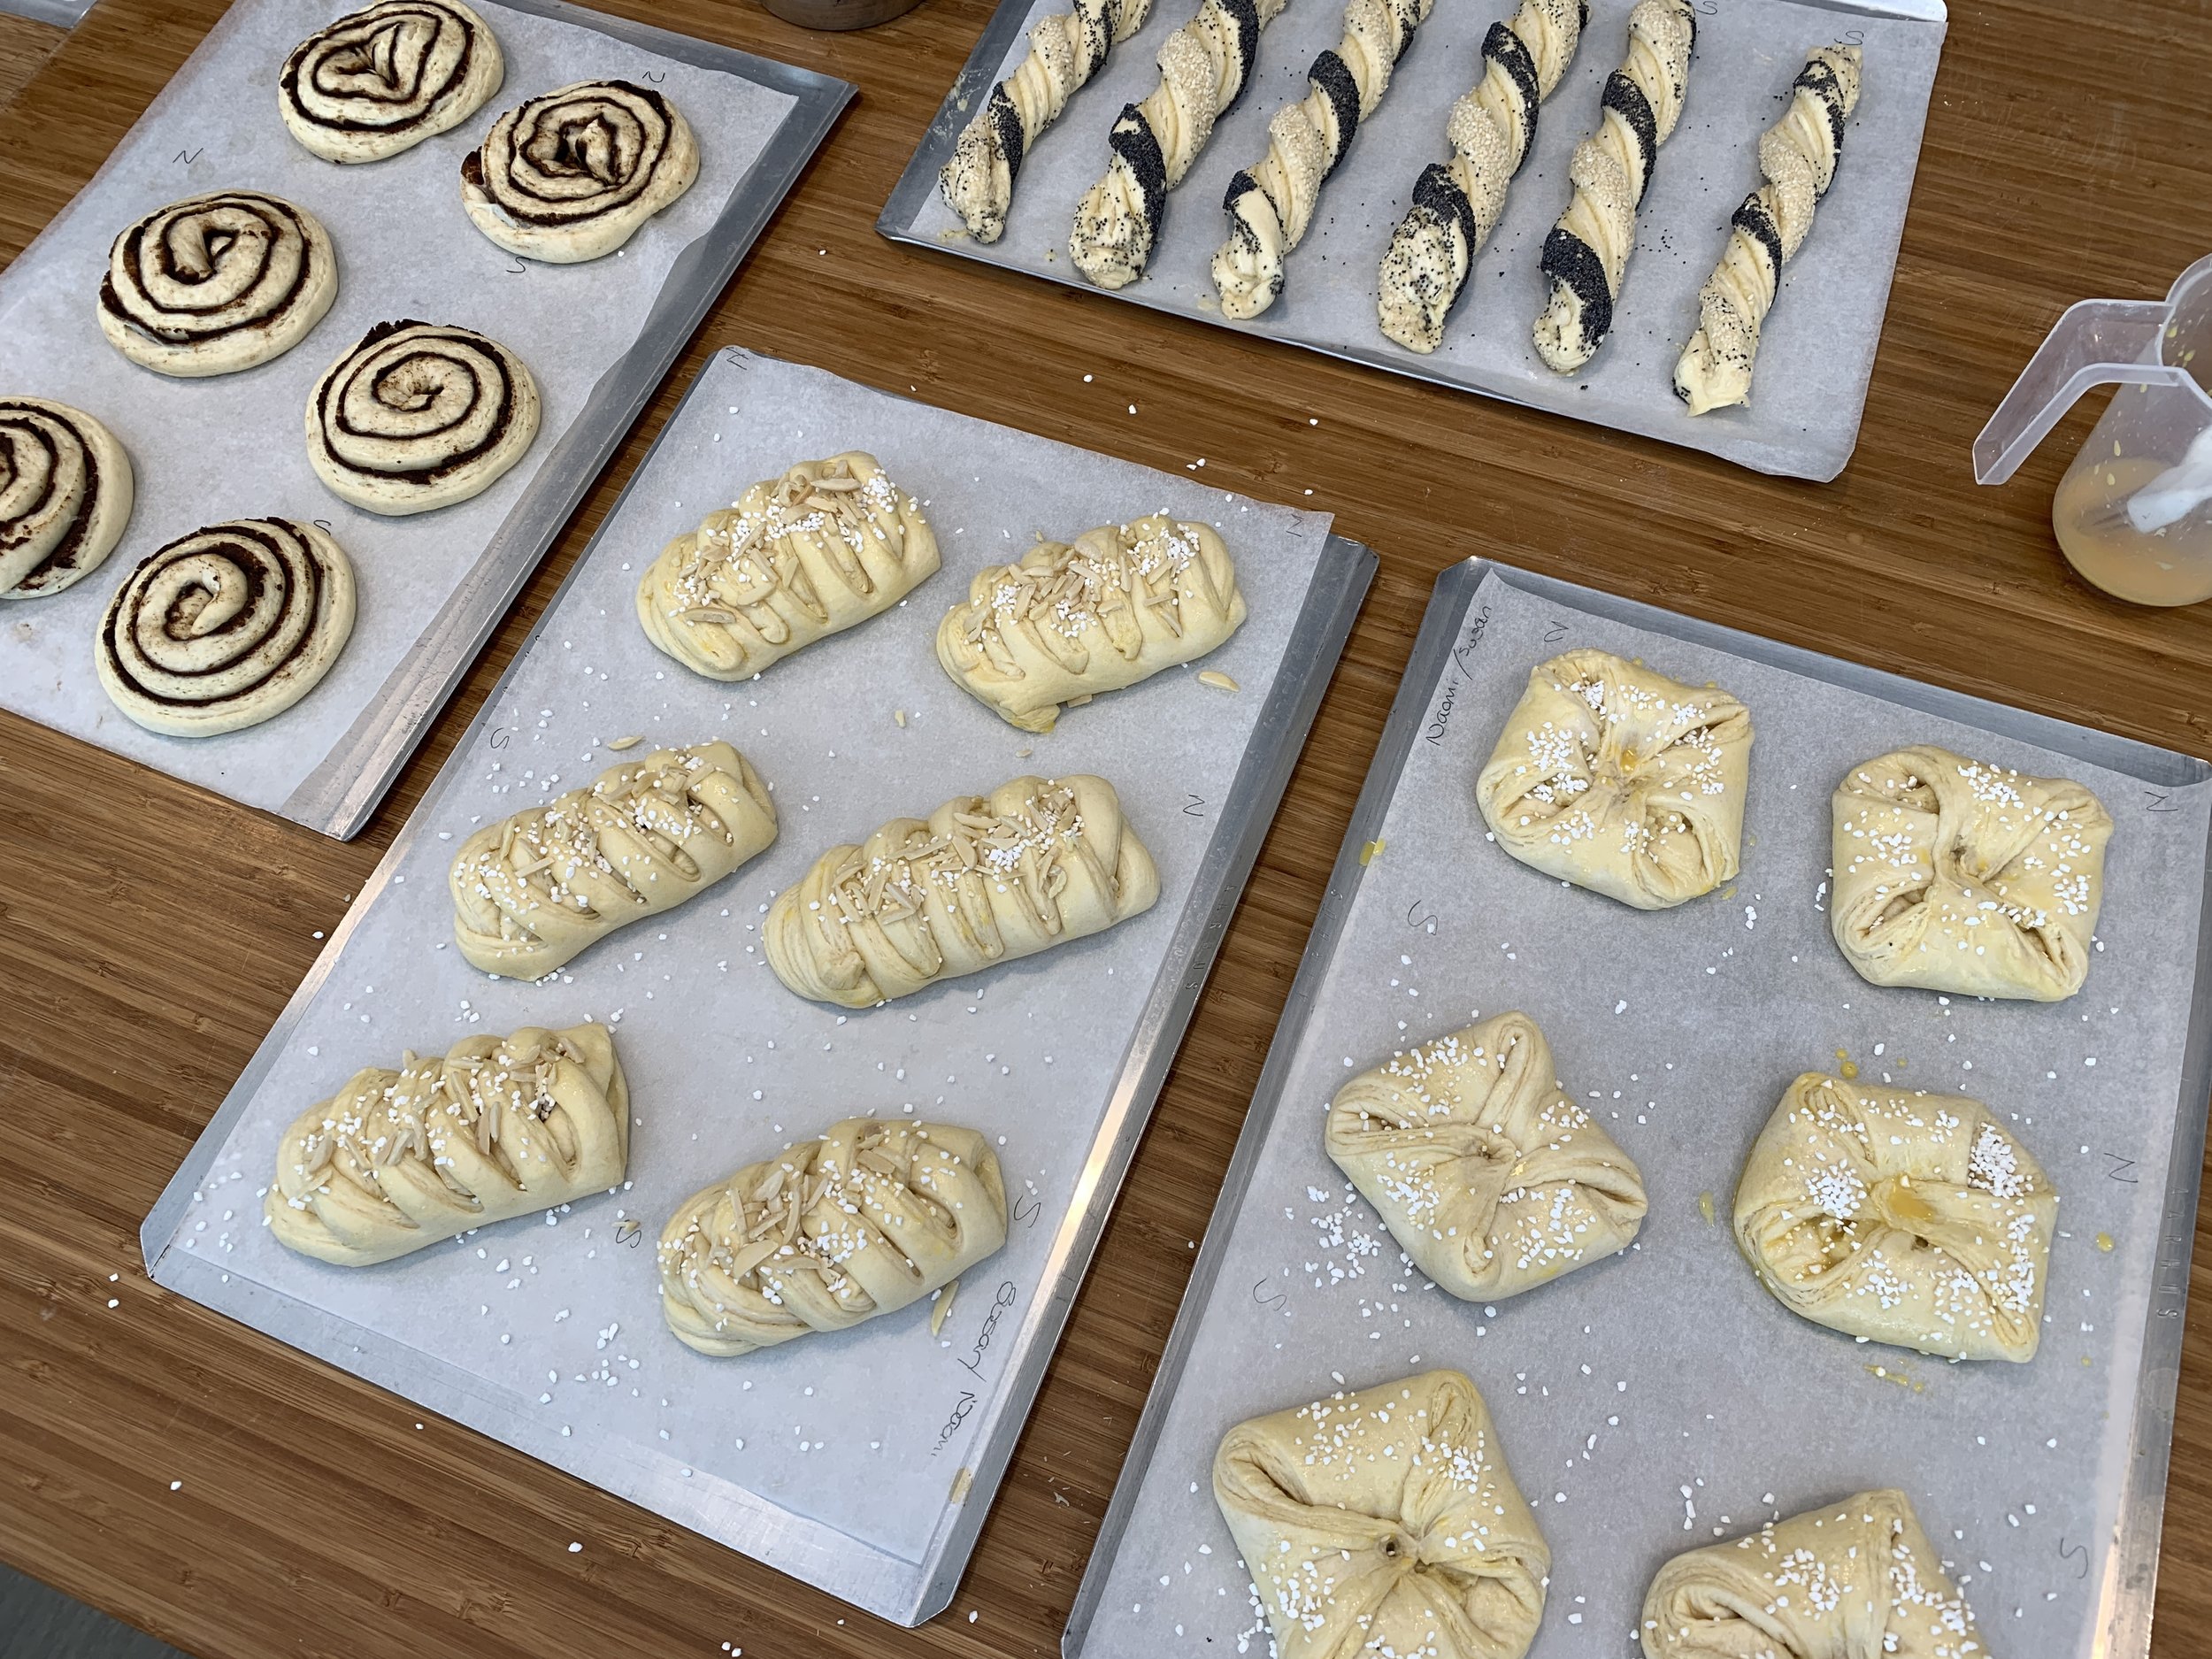
We continued on with cinnamon spirals and sesame/poppy seed twists to complete the morning’s foursome of pastry treats.

Another ah-hah moment - to keep the cinnamon spirals from unfurling during proofing/baking, simply lift the end away from the coil a bit and fold/tuck it underneath the center. It’s now trapped on the bottom. Then press two fingertips in the center of each spiral and stretch it out, also flattening the whole thing (lower center below). This essentially tells the dough to bake outward not upward for a nicely shaped end result.

Amazing what one never read about or witnessed anyone do before. Cool.

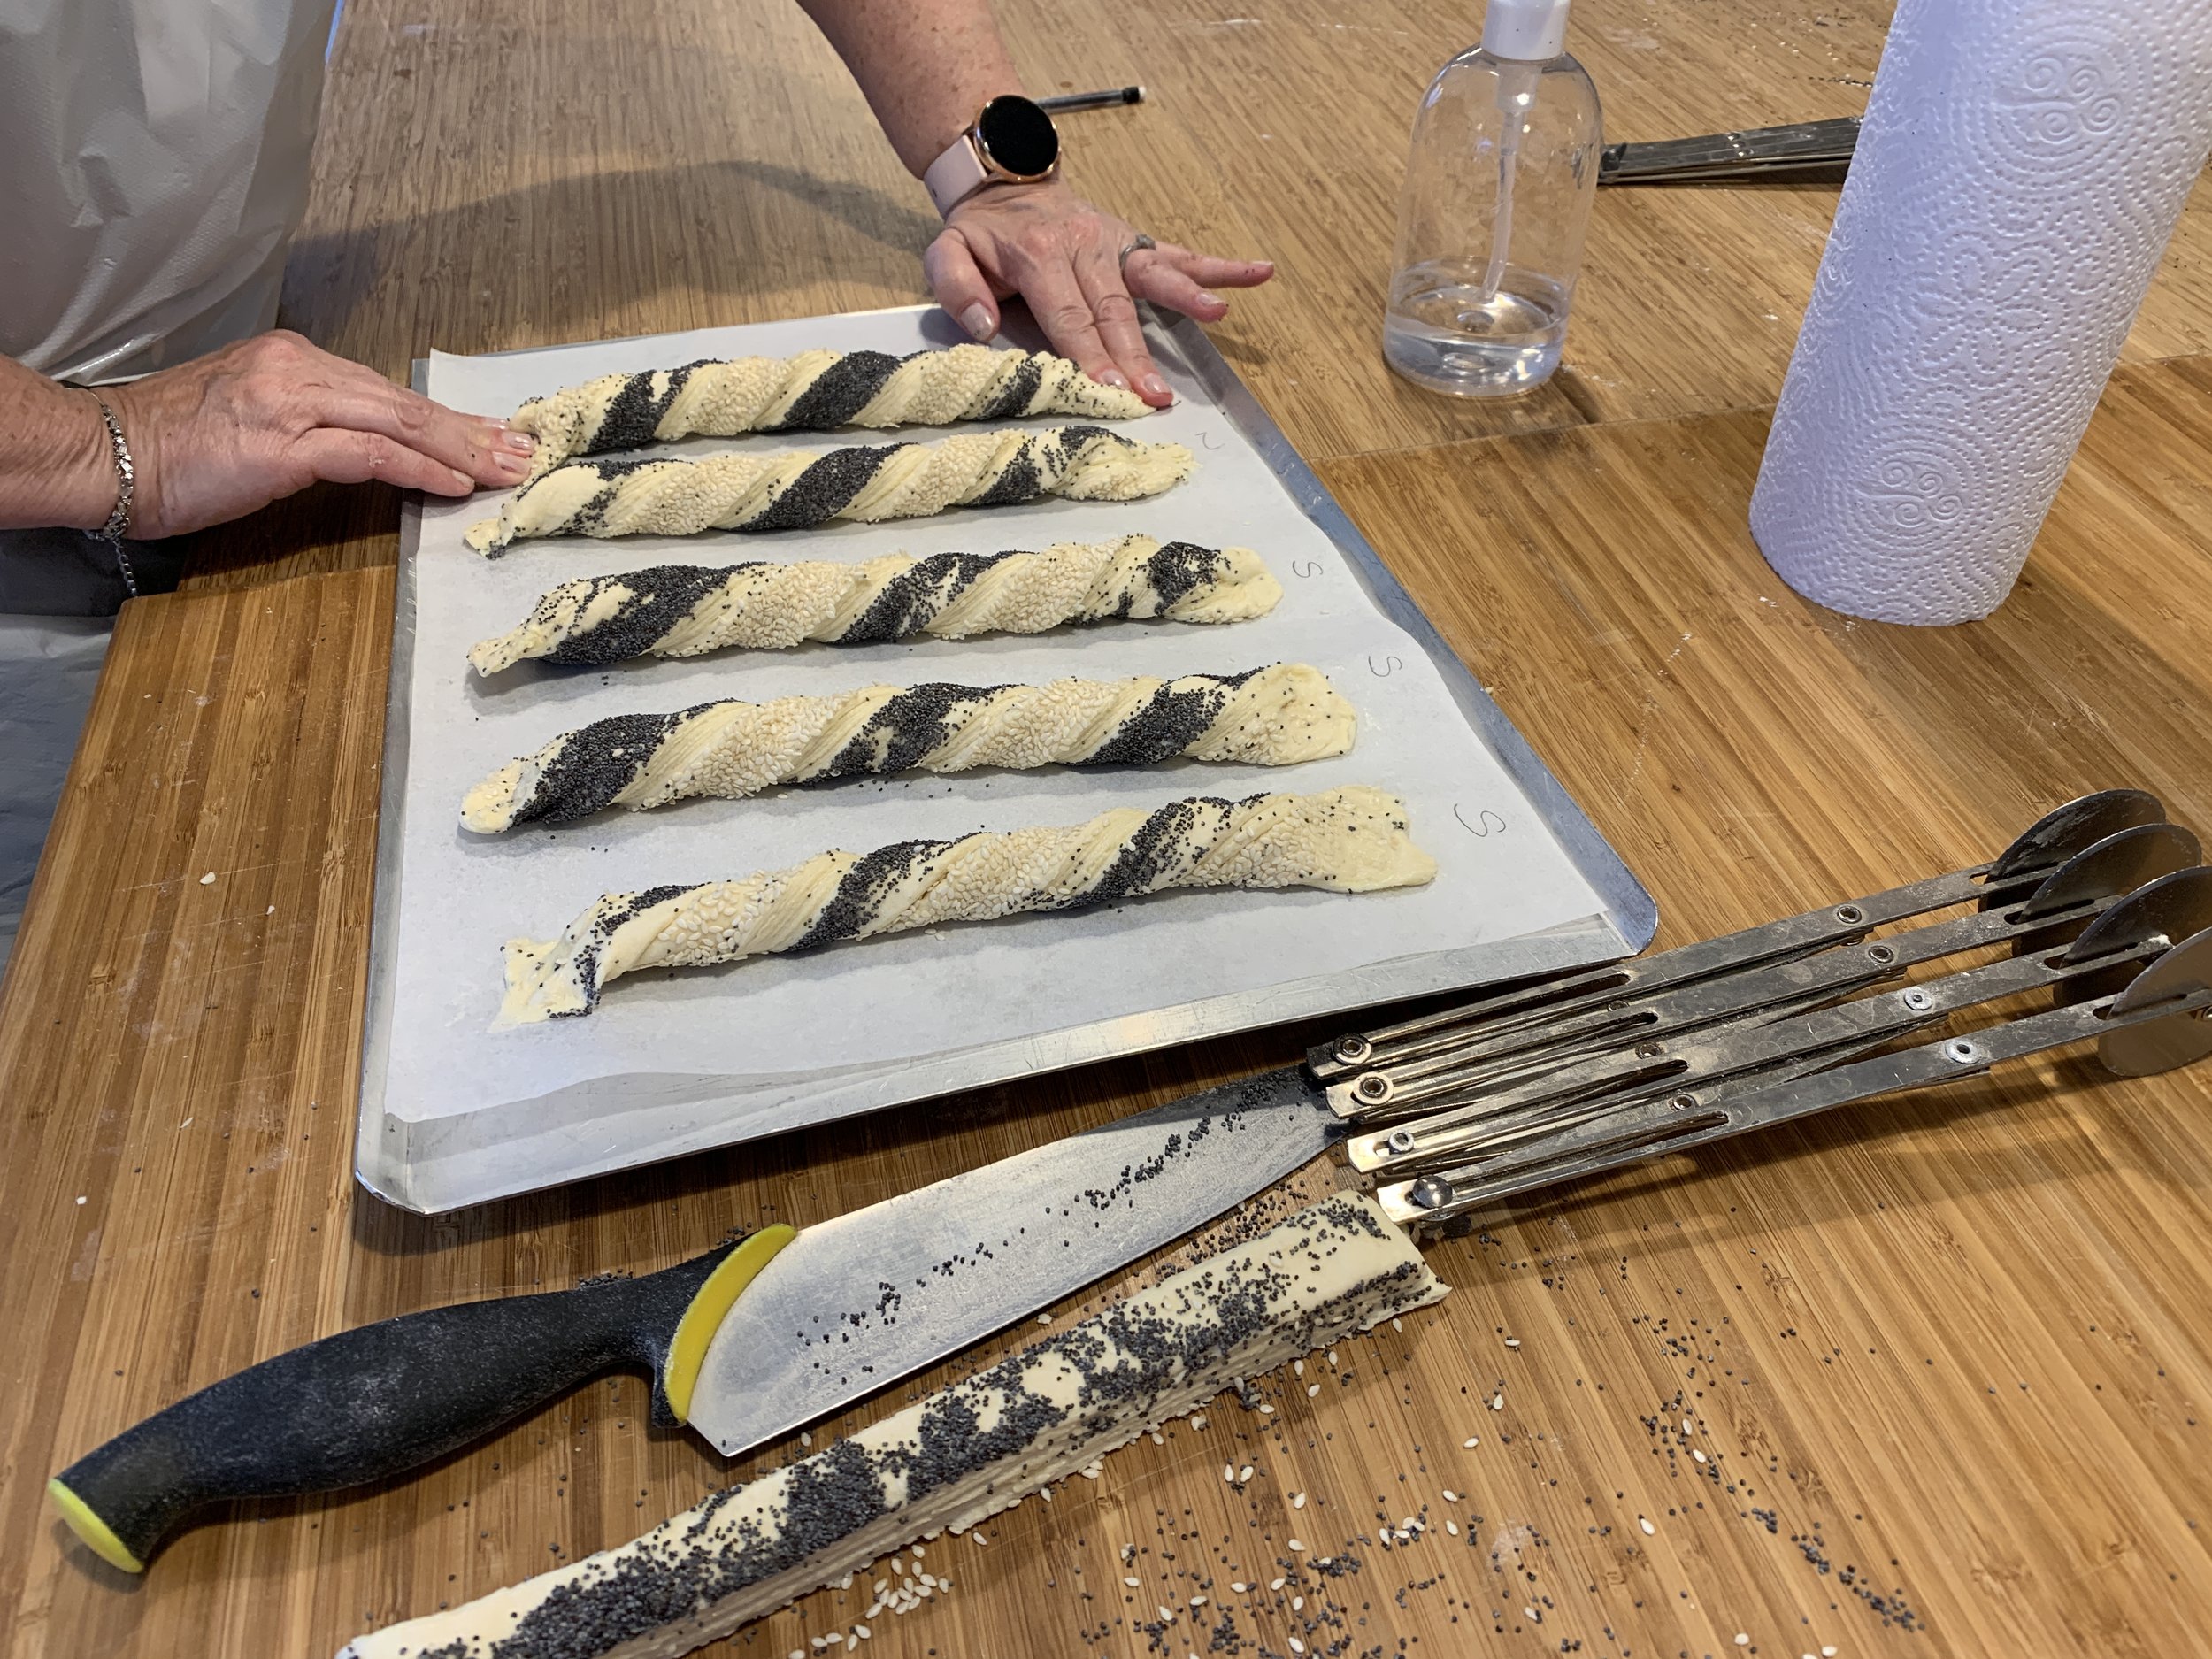
The sesame poppy twists came about after rolling a rectangle of dough, spreading a thin layer of remonce over it then folding it in half. We coated one side with sesame seeds and the other with poppy then cut and snugly twisted the strips.

Press the ends of the twists firmly onto the parchment to hold them in place (and don’t be afraid to really smoosh them down!). Notice the bicycle cutter below.

Once the proofing was underway Chef Fred gave a quick demo on making crème pâtissiére, one of the essentials of French pastry.

When we were ready to bake, we piped pastry cream on the center of the spandauer (not yet accomplished in the image below), egg washed them and added a sprinkle of pearl sugar. The almond/chocolate chip braids were adorned with the pearl sugar and slivered almonds.

All proofed

Let the baking begin! We rotated trays in and out of the oven until all were baked to golden perfection.

We sampled our wares and also boxed some up to take home. Steve was a happy camper indeed!

After the class Chef emailed all of us a detailed recipe pack with great diagrams of various Danish shapes - can’t wait to try a few others!

All in all a great morning and lots of fun. If you’re planning to be in Copenhagen and feel the baking bug coming on, I highly recommend Terrible French Pastry School. Thanks so much Chef Frédéric (who BTW is cool with me writing and sharing this).

Later that day Steve and I strolled through popular Tivoli Gardens where we found the flowers simply divine. Enjoy!


Brioche feuilletée revisited - chocolate hazelnut braid

IMG_0825.jpg

I would never have imagined that the most viewed post on this blog would be Brioche feuilletée, written back in November, 2016. I launched that project by tweaking the brioche recipe from a Le Notre Paris class I attended in September of that year. Reducing the butter in the base dough, adding a butter block and putting it through three 3-folds yielded a lovely laminated result.

Since then, as is my wont, I’ve reviewed a number of additional brioche recipes and techniques from the likes of Dorie Greenspan and Jeffrey Hamelman (of King Arthur Flour fame) and developed a new version of the base dough in November, 2018. The dough can be used for any brioche option you wish - Nanterre, brioche à tête, coffee cake, cinnamon buns or brioche rolls topped with pastry cream/jam/fruit. Lots of choices.

In this recipe PDF I go into more details about brioche, adjusting the recipe to yield either a leaner or an even richer dough plus some options for laminating the dough. So many possibilities.

It helps me to assess a brioche recipe by looking at the butter to flour ratio. A medium brioche dough typically contains butter that is about 50% the weight of the flour. Brioche can run from lean (where the butter may be as low as 25% of the flour) or rich where the butter can be all the way up to 100% of the flour.

The full batch of the base brioche dough (before adding any butter block/laminations) yields about 1300 g (2.8 lbs) of dough. So you can make the full batch and then separate out the 600 g for this braided two loaf project. Wrap and freeze the remaining dough for later or use it for other projects you might have up your sleeve.

Using Hamelman’s guidelines for these braided delights, I laminated 600 g of the base dough with an additional 120 g/4.25 ounces of butter which, by my calculations gave the final result a butter to flour ratio of 1:1. Now THAT’S a rich brioche! Remember - this makes TWO braids.

IMG_0829.jpg

Let’s do a quick review on laminating the dough - it never hurts, since the more you do it, the more it becomes second nature.

Roll the dough out to a 6”x12” rectangle. Have a 6” butter block ready - it should be cool and malleable.

IMG_0796.jpg

Place the butter on half of the dough . . . . . .

IMG_0797.jpg

then fold the dough over the butter, pinching the edges closed to fully envelope the dough. This is the beurrage.

IMG_0798.jpg

If your kitchen is pretty warm or your dough and butter seem warm and starting to squish, wrap it up and refrigerate for 30 minutes before proceeding. Now roll the dough out to about 18” long and 6” wide, always with the short side parallel to the work surface and rolling to and from yourself (not sideways) to achieve the length. Do a 4-fold (book fold) by bringing each short end into the middle with edges meeting . . . . . .

IMG_0799.jpg

then fold it on itself.

IMG_0800.jpg

Wrap and chill the dough for 30 minutes to allow it to relax then proceed with a 3-fold (business letter fold). Before rolling remember to turn the dough 90 degrees so the “spine” or fold is on your left then roll out to approximately 18”x6” again, rolling to/from yourself. Don’t get hung up on exact measurements - you’re going for about three times length to width.

IMG_0807.jpg

Visualizing the dough in thirds, fold one end up . . . . . .

IMG_0808.jpg

and the other down over it. Congrats! Your laminated dough is complete.

IMG_0809.jpg

Now wrap it snugly and refrigerate for a good 1-2 hours to let it relax and firm up before rolling it out for your intended purpose.

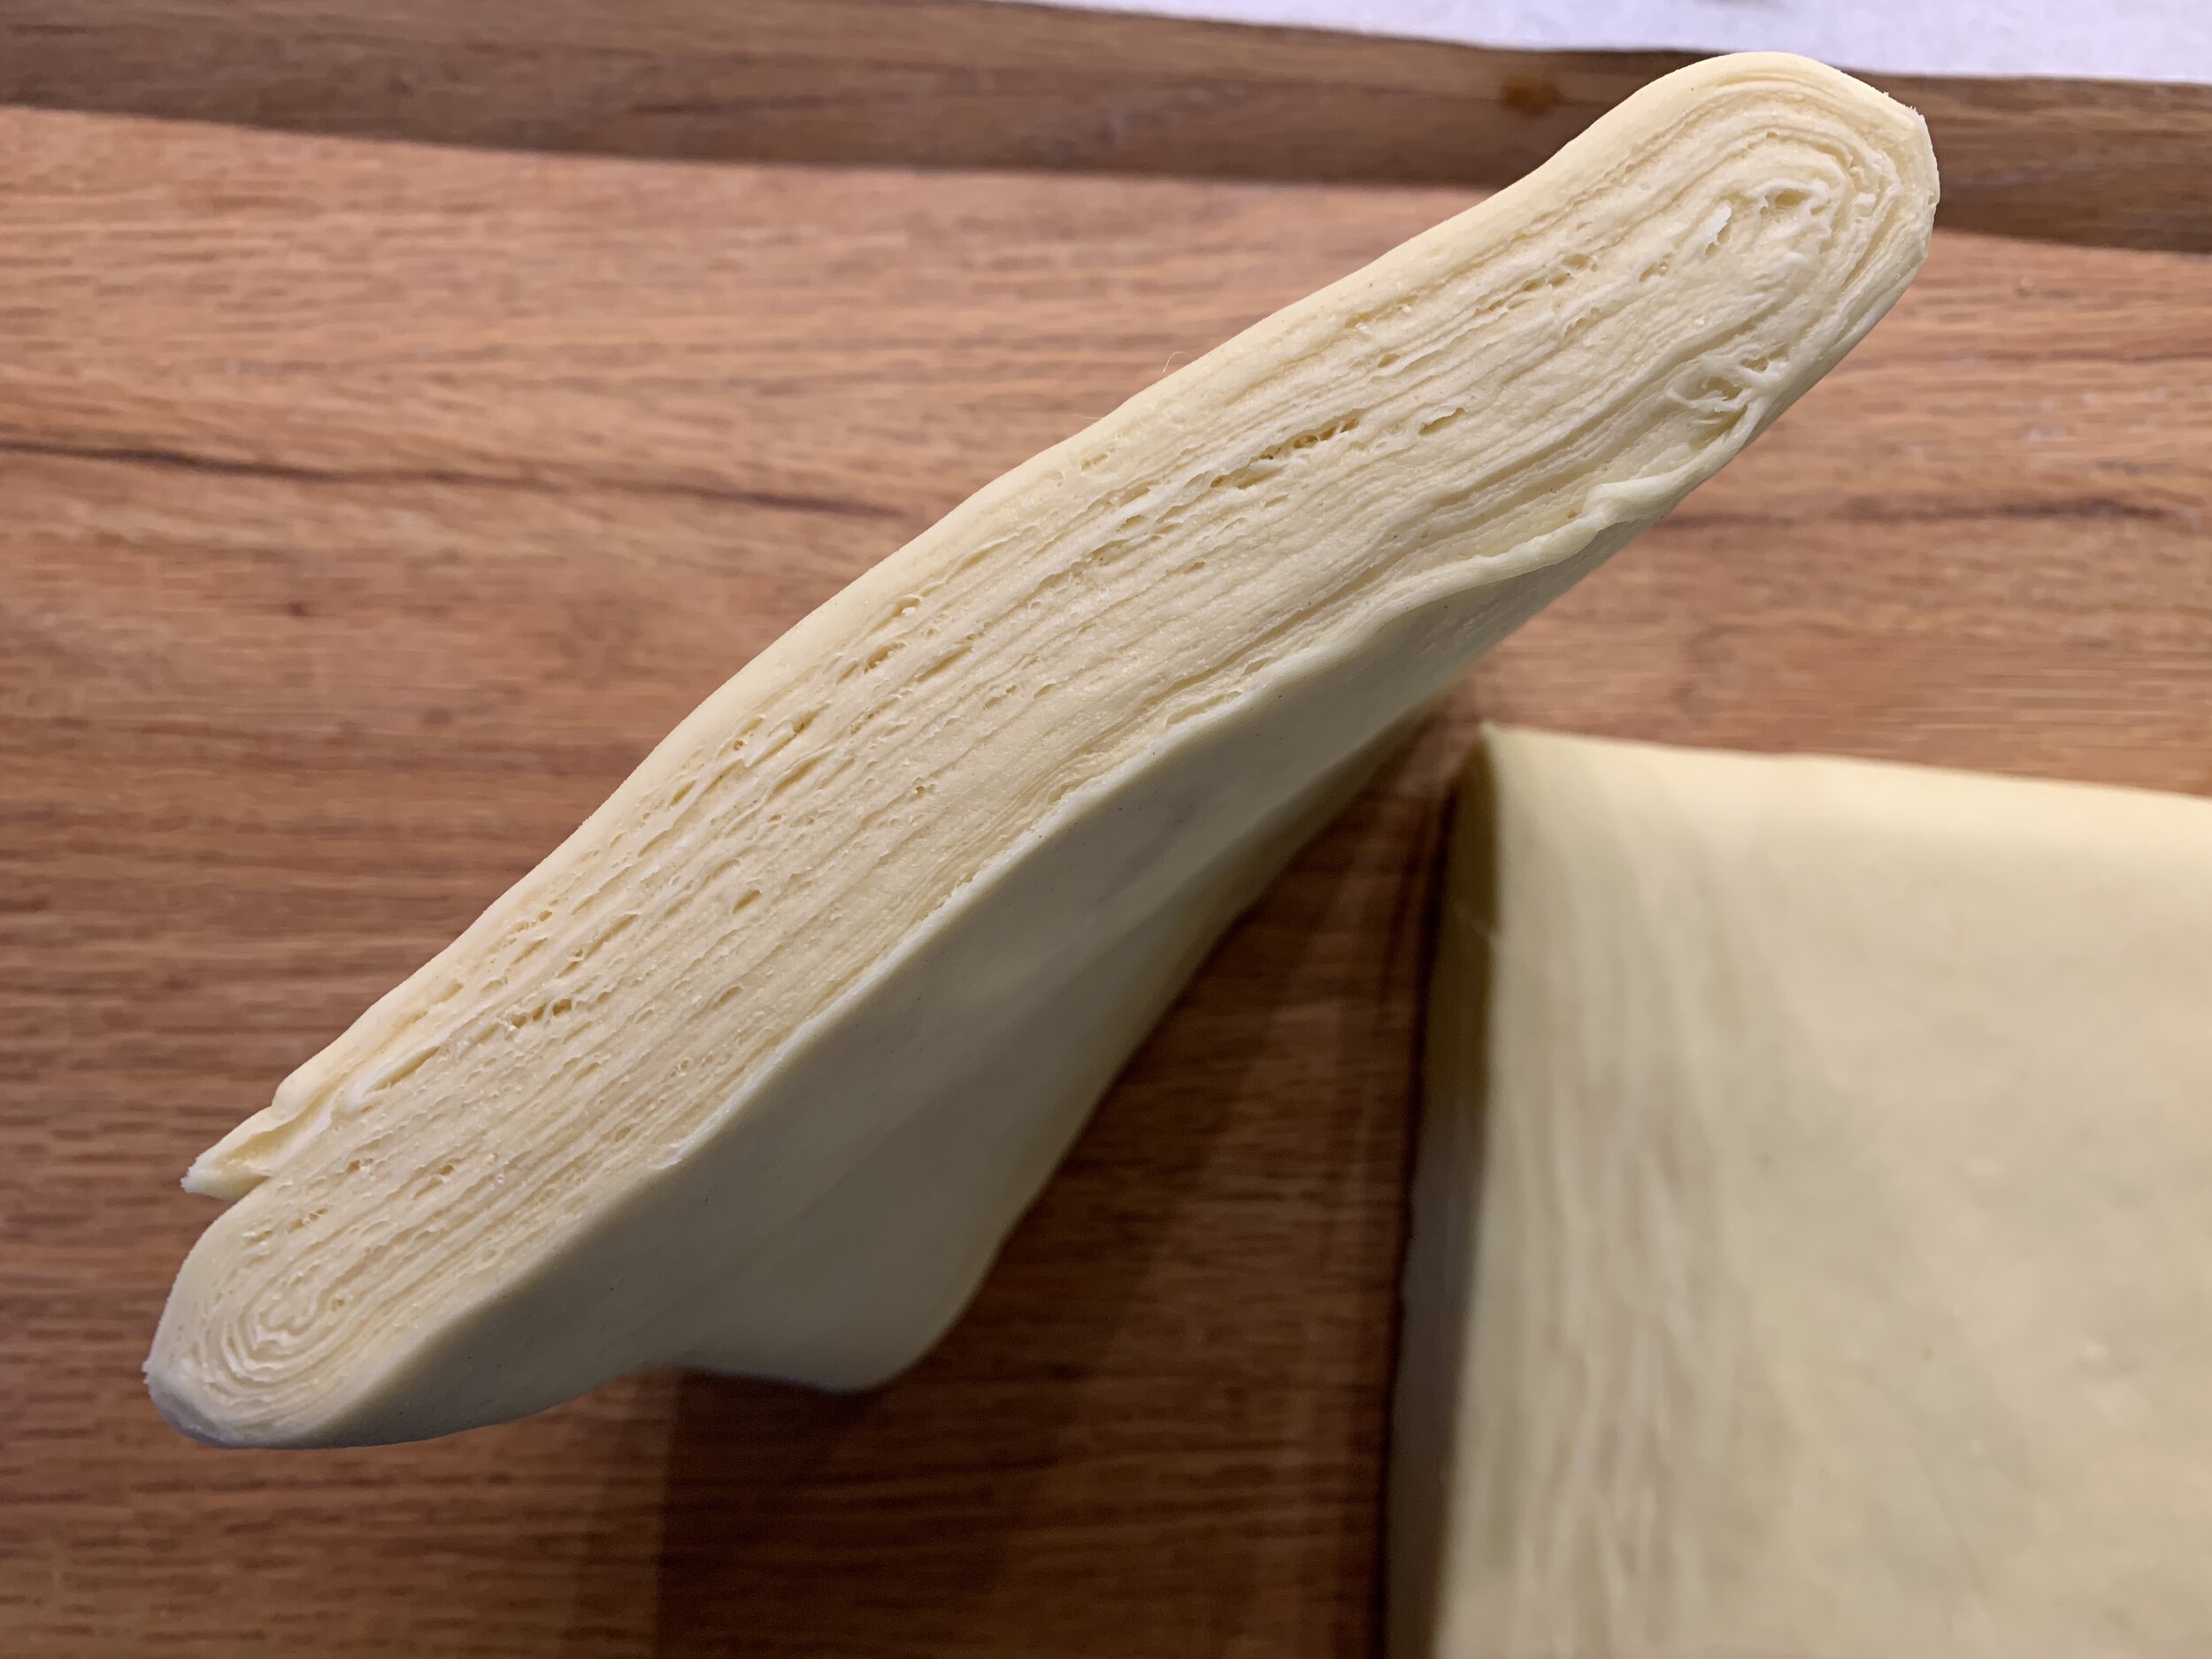
For this braid project I divided the dough in half - look at those buttery layers!

IMG_0814.JPG

Each half of the laminated version weighs about 360 g (before filling) and is good for a medium loaf pan size braid.

I created a chocolate hazelnut filling by taking 200 g of a hazelnut remonce mixture I had left from this hazelnut/almond couronne project and adding 50 g / ~2 ounces of Nocciola crema and a bit of egg white and simple syrup to loosen it a bit for piping.

IMG_0803.JPG
IMG_0802.JPG

Butter two medium (8”x4”) loaf pans and have the filling ready in a piping bag.

On a lightly floured surface roll one half of the dough into a 10”x10” square and divide it in three strips.

IMG_0815.jpg

Egg wash (I used egg white since I had some on hand) along one long edge of each strip then pipe a line of filling along the opposite edge.

IMG_0816.jpg

Roll each strip up into a log and press the edge to seal.

IMG_0817.jpg

With seam sides down do a classic three strand braid.

IMG_0818.jpg

As you come to the end of the braid, just tuck the ends under then pop it into a buttered loaf pan.

IMG_0819.jpg

Repeat the steps with the second half of the dough.

Cover the pans with buttered plastic wrap and let rise for a good 1.5 hours. Toward the end of that proofing time heat the oven to 375ºF.

IMG_0821.JPG

Brush the loaves with egg wash and bake about 35 minutes until nicely golden.

IMG_0823.jpg

Remove them from the pans and, if you’d like to gussy them up a bit, brush with either some simple syrup or apricot glaze for a bit of shine and even go another step and drizzle on a confectioner’s sugar/milk/vanilla glaze. I left mine au naturel.

IMG_0825.jpg

Once cooled, I sliced into one of these babies. Oooooh - buttery with just the right swirl of choco-hazelnut and pretty darn delicious to boot. Nothing like a good brioche, eh?

IMG_0831.JPG

I love the feel of dough, the shaping, the proofing, the baking, the aromas and, of course, the tasting! Dough reigns!!

Couronne aux amandes et aux noisettes . . . . and more!

IMG_0629.JPG

During our weeks of staying home and sheltering in place I’ve been doing a variety of baking projects with an eye toward using ingredients I have on hand (hmmmm . . . this is starting to sound old). That also includes croissant dough sitting in my freezer waiting for just the right moment.

Wouldn’t you know I had two batches of said dough that were nearing their “use by” date - I don’t like unbaked yeasted dough to sit for longer than 6 weeks in the freezer since after that the yeast starts dumbing down and the dough doesn’t rise well at all. Trust me - I know.

Time to create! Get ready for it!

I decided to make four different pastries: a bit more than half of one batch for a couronne (can be translated as crown or wreath), the remainder of that batch for petite pain au chocolat, another half batch for apricot twists and the final half batch for what I refer to as cherry cream cheese “flip throughs”. Oh boy!

First up is the hazelnut and almond couronne which is shaped in a pretty cool way. A good rule of thumb when rolling this type of dough, no matter what you’re going to shape, is to aim for a finished piece of dough that’s about 1/4” thick. If you start getting much thinner than that, you’ll lose some of the discrimination of your layers and won’t have as lovely of a laminated finish.

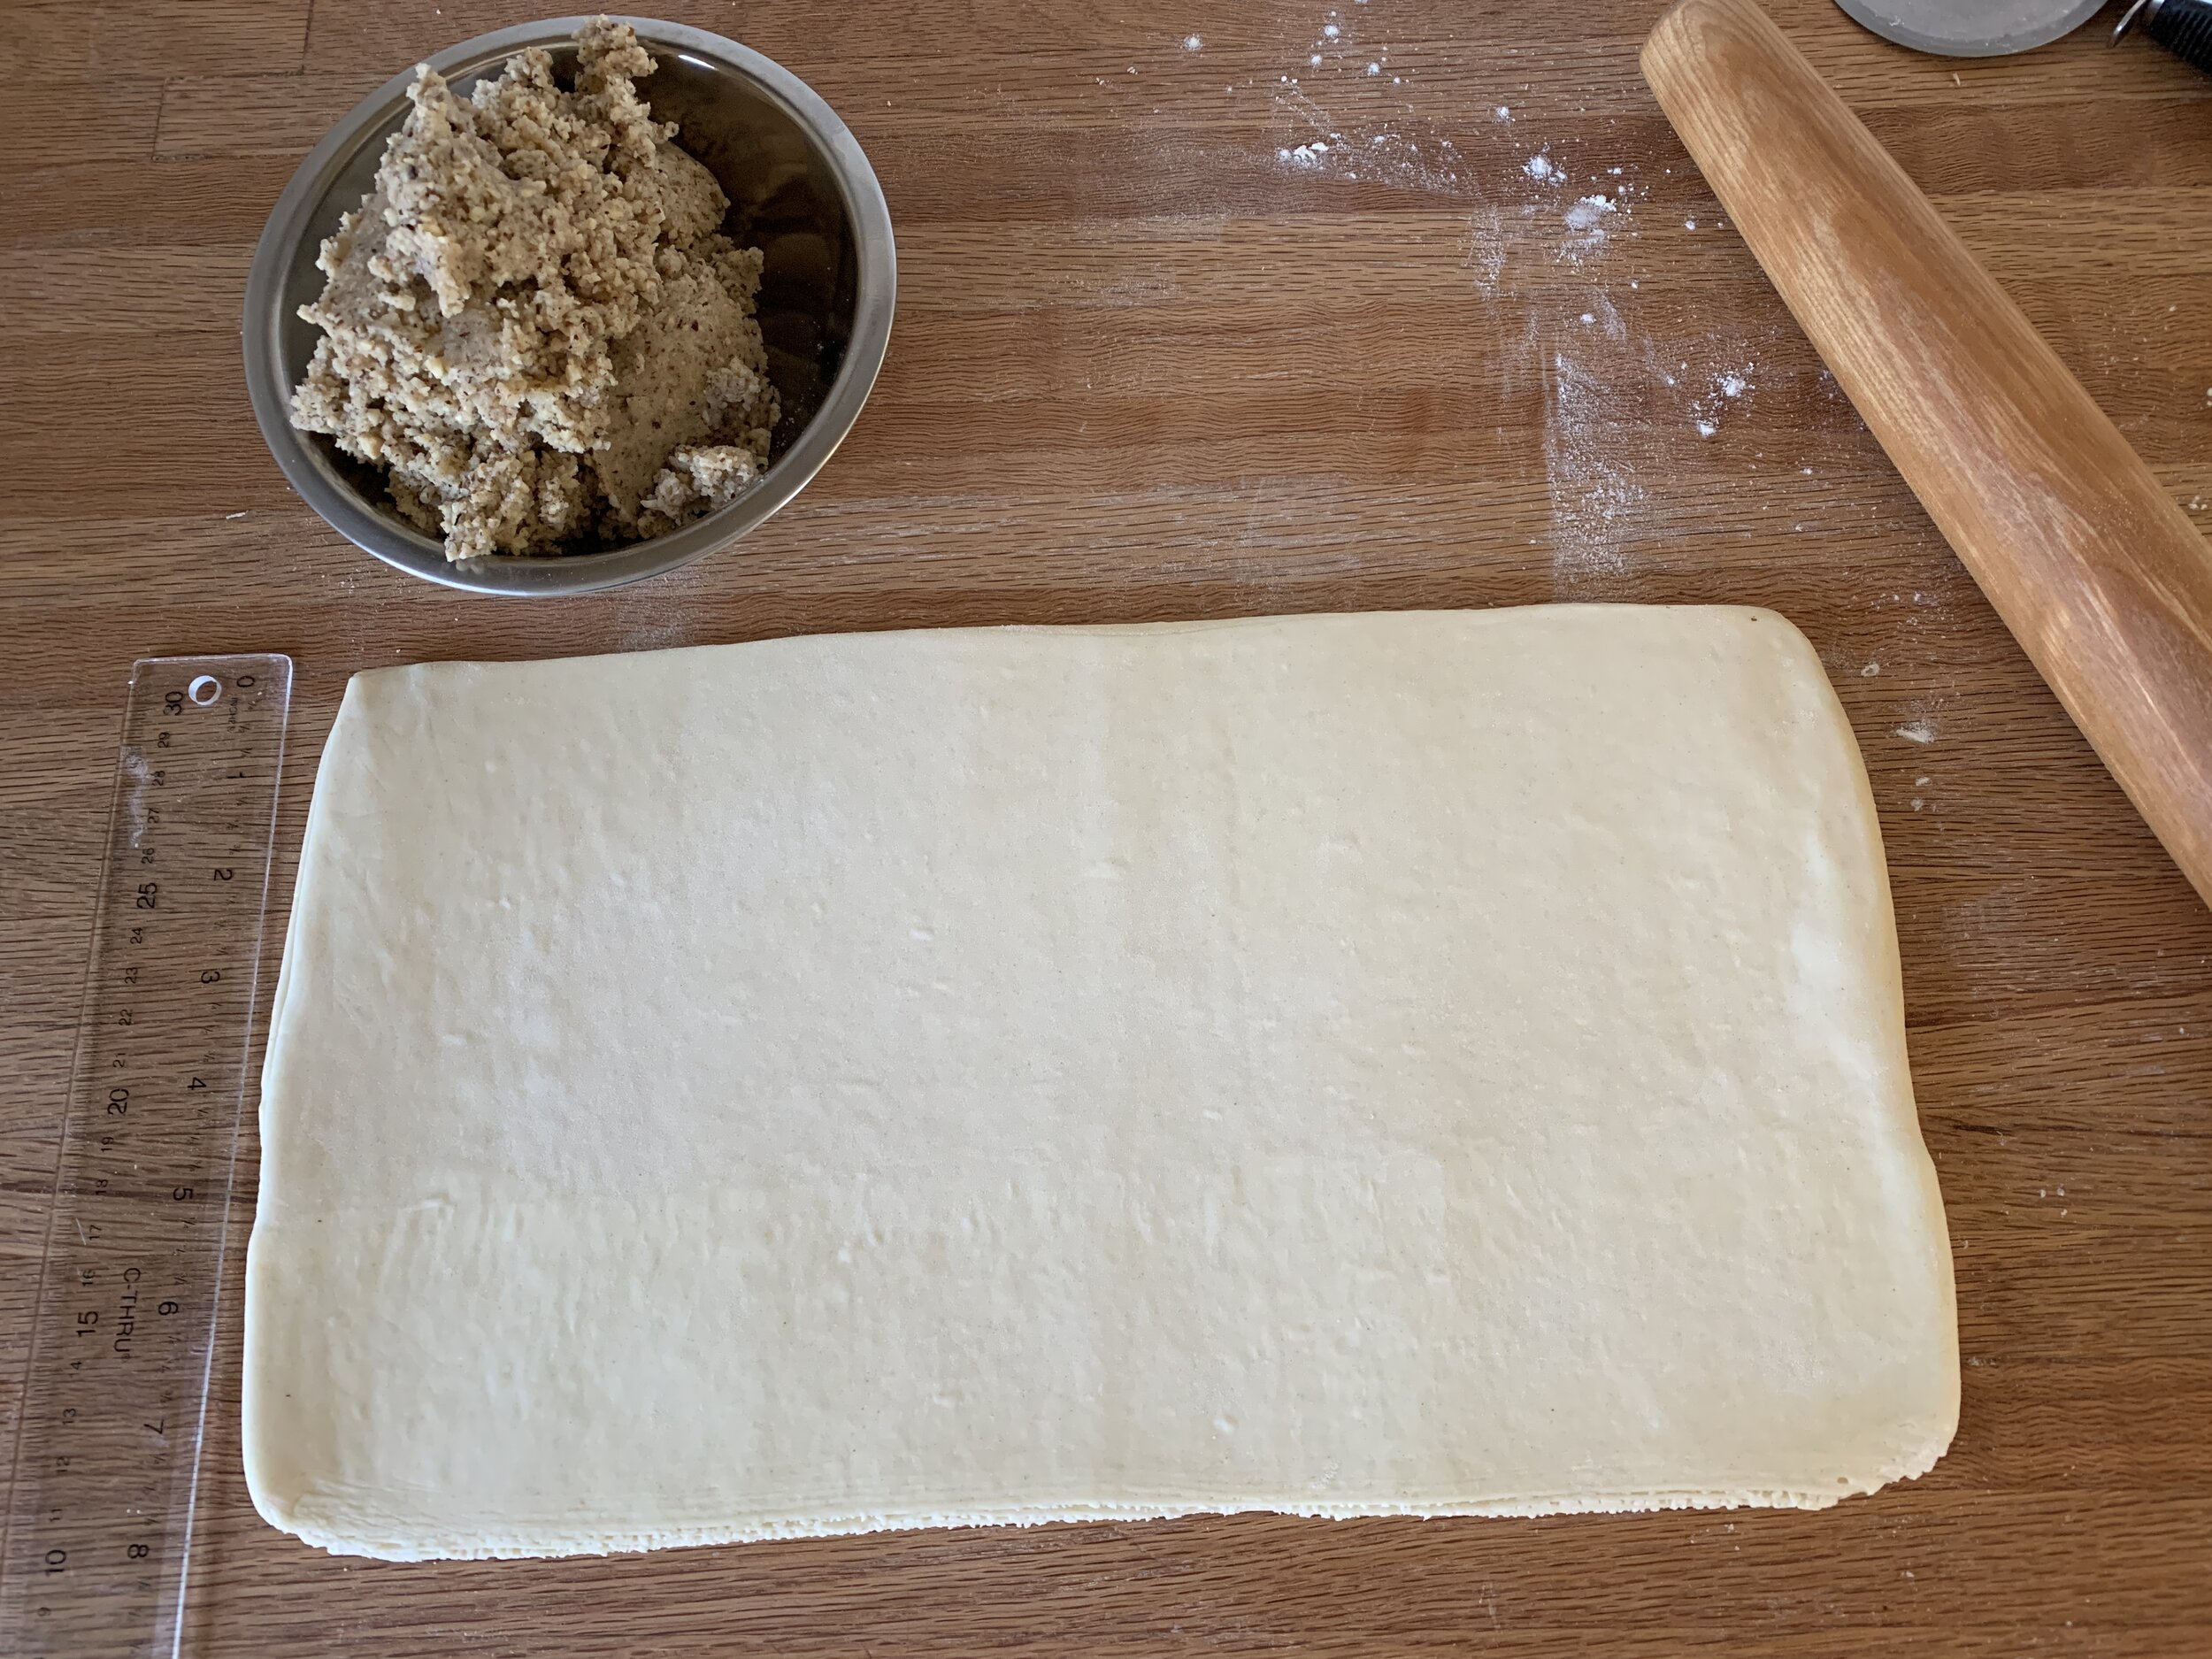
I rolled ~680 g of croissant dough into a 8”x14” rectangle. I had my hazelnut filling ready to go - very much like remonce (which I wrote about in the recent Danish Kringle post), it combines equal weights of almond paste (I’m loving Mandelin premium), sugar and butter followed by the addition of three times that weight in toasted, finely ground hazelnuts - e.g I used 100 g EACH of almond paste, sugar and butter plus 300 g toasted, ground hazelnuts. Cinnamon or other spices can also be added.

My couronne required 340 g of filling so I had leftovers which I wrapped and froze for another day.

IMG_0599.JPG

Spread the filling over the dough and roll it up into a log.

IMG_0602.jpg

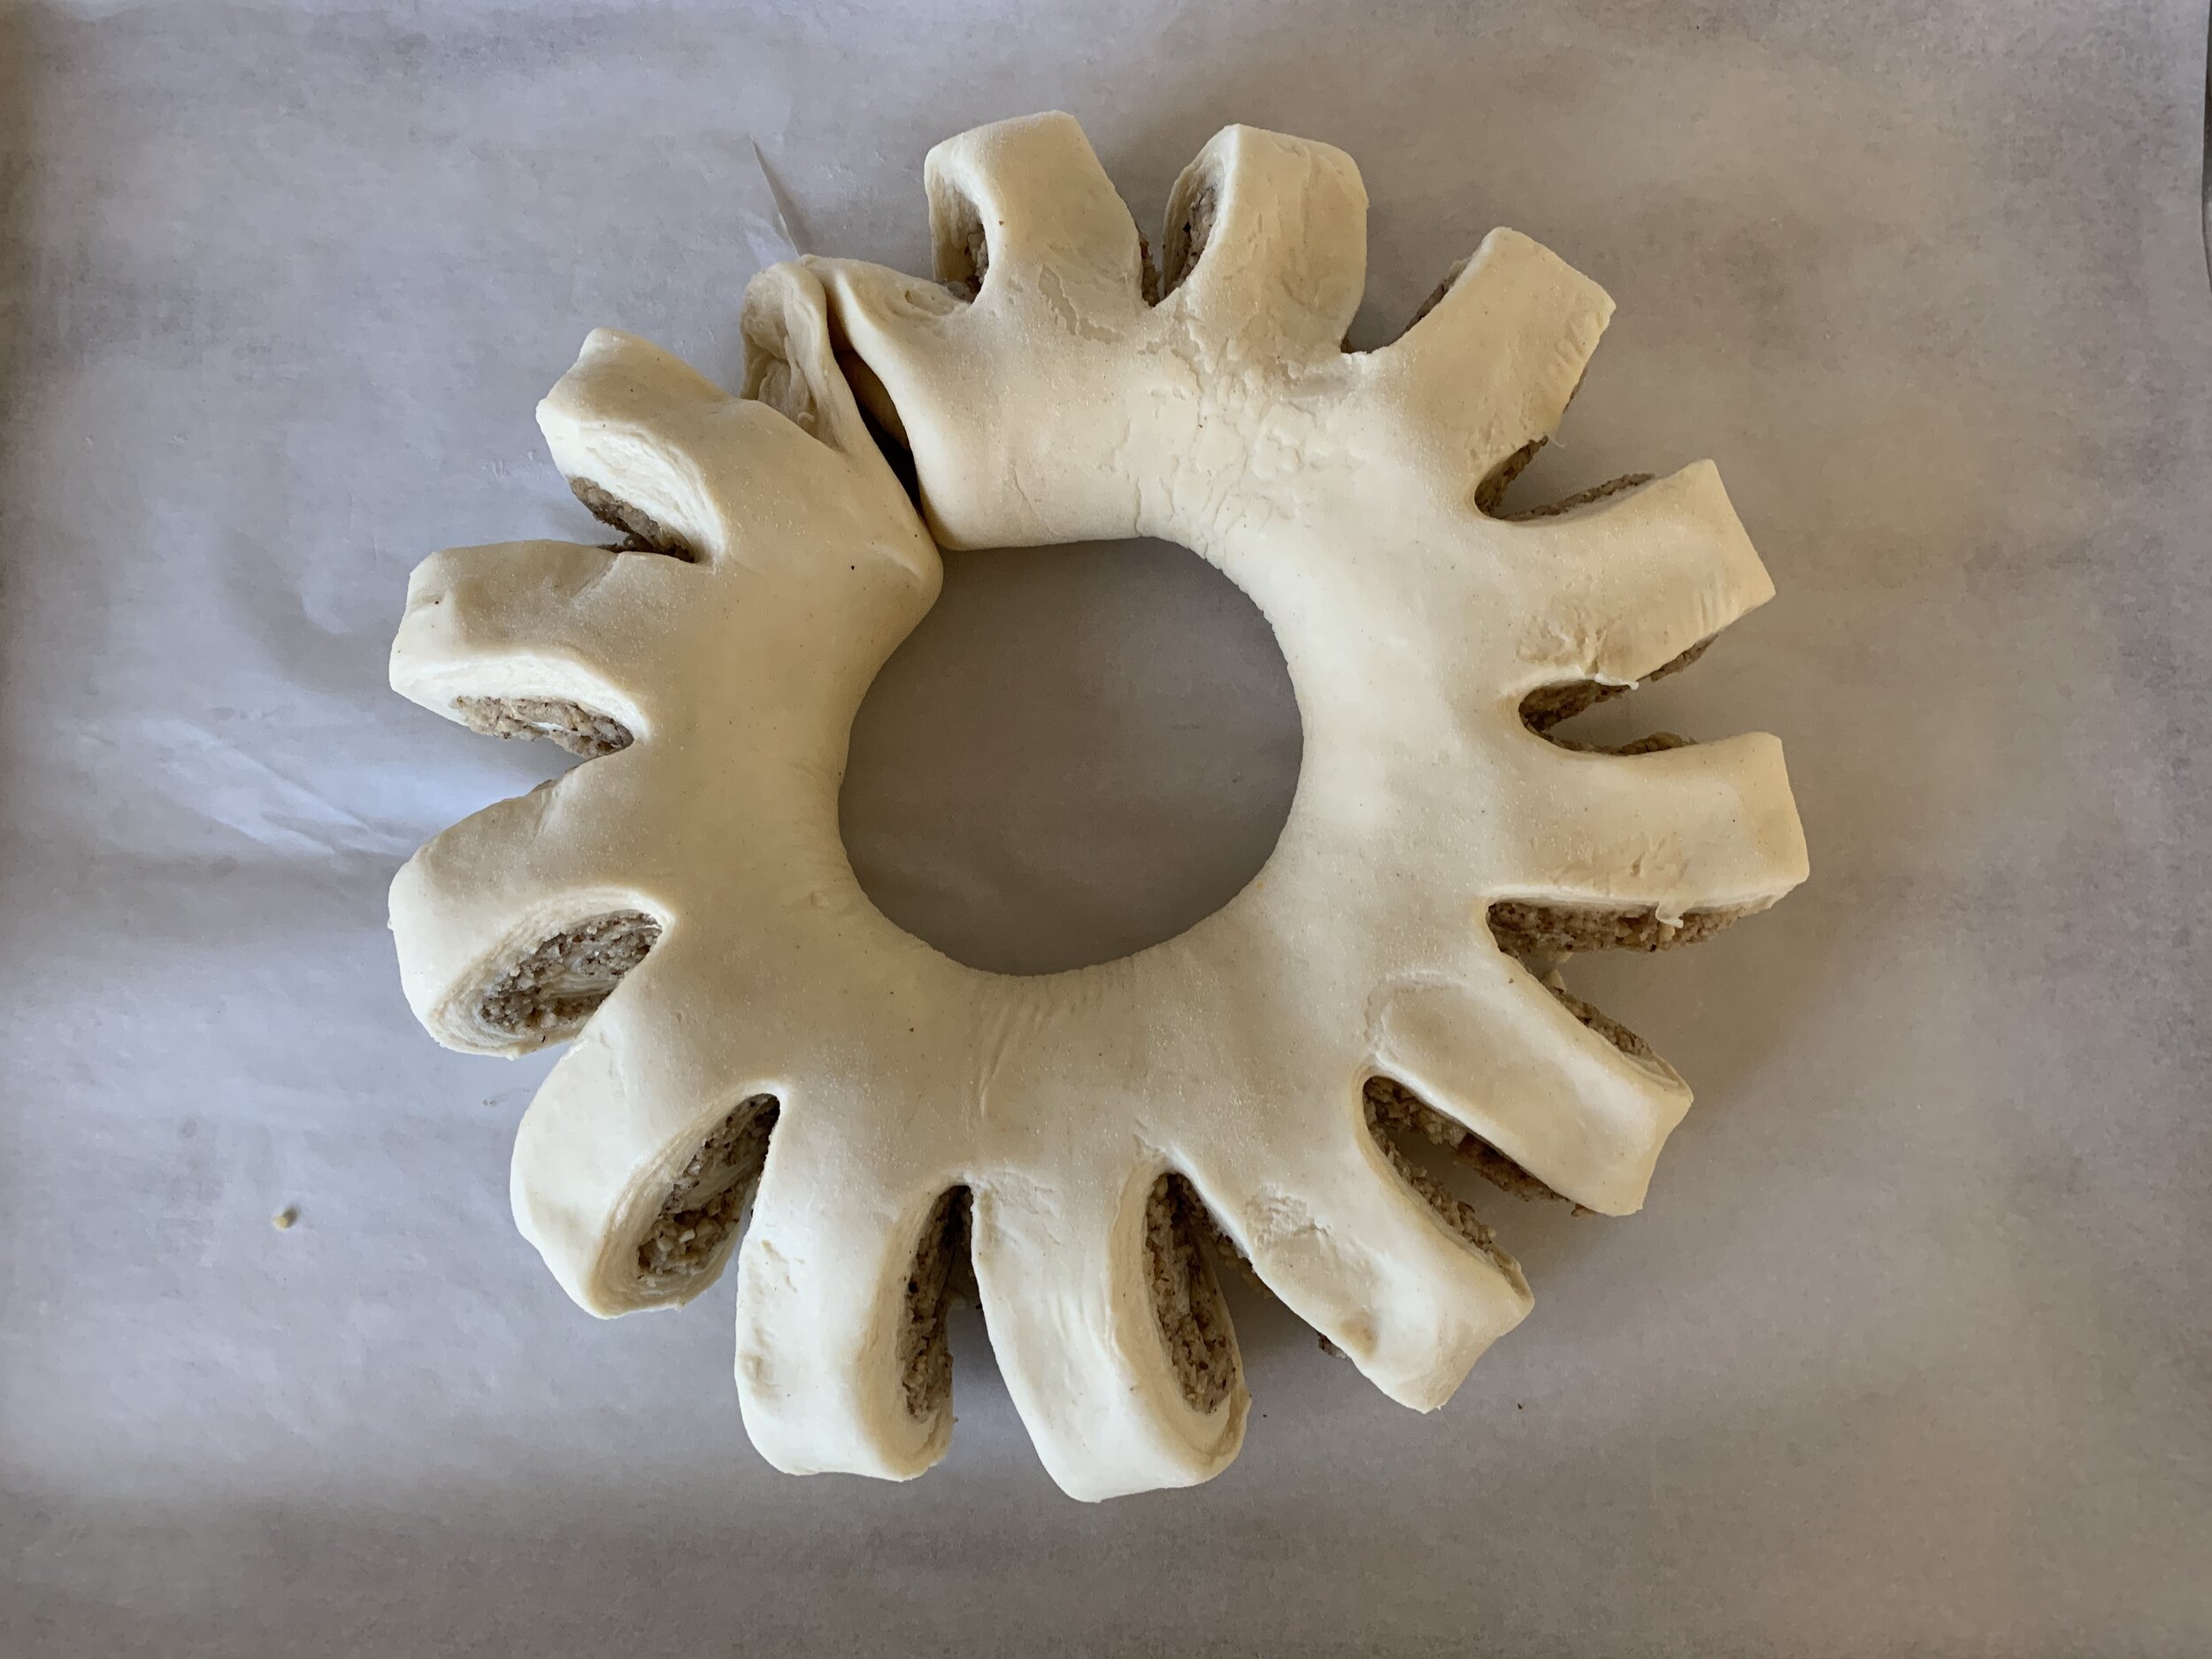
Once rolled, cut slits about 1 inch apart along one side, not quite all the way through.

IMG_0603.JPG

Then form the log into a circle, joining the ends. Twist each sliced portion outward so you see the filling.

IMG_0605.JPG

Brush lightly with egg wash and let rise about 1.5 hours. Toward the end of the rising time heat the oven to 350ºF.

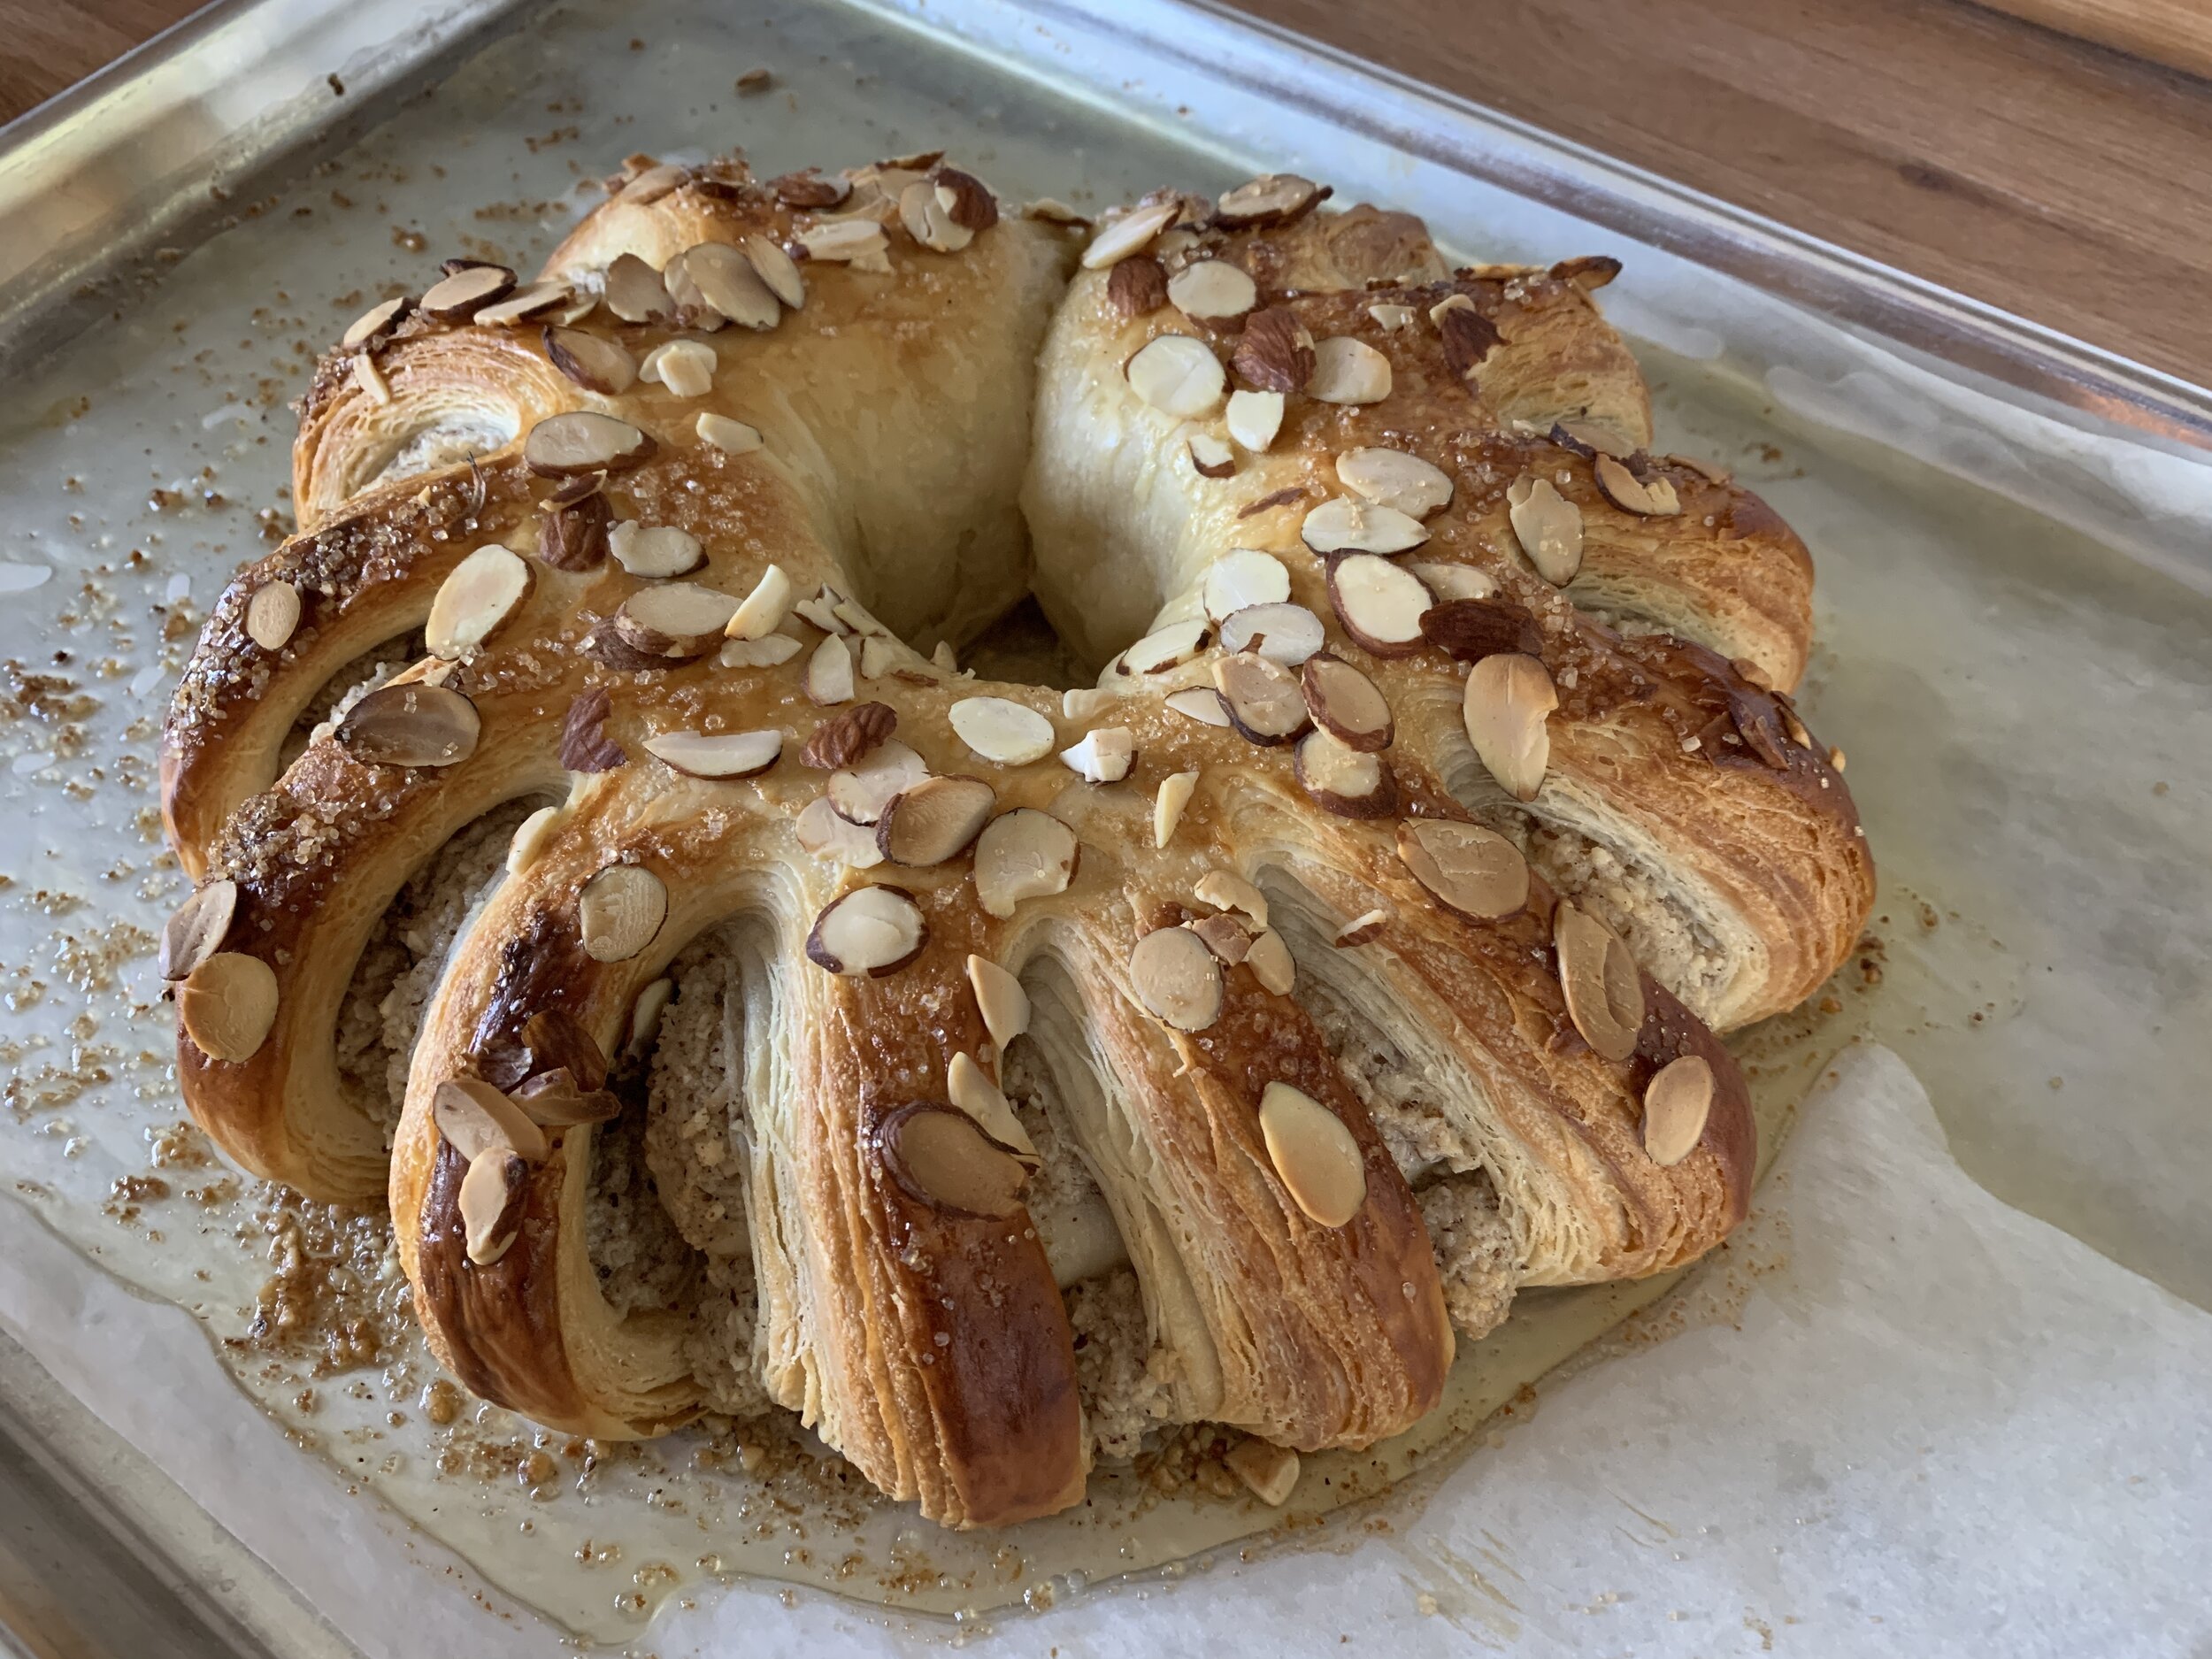
Do a second egg wash and sprinkle with sliced almonds.

IMG_0621.JPG

Bake about 45 minutes until golden brown. I always check about half way through and rotate my tray to promote even baking.

IMG_0624.JPG

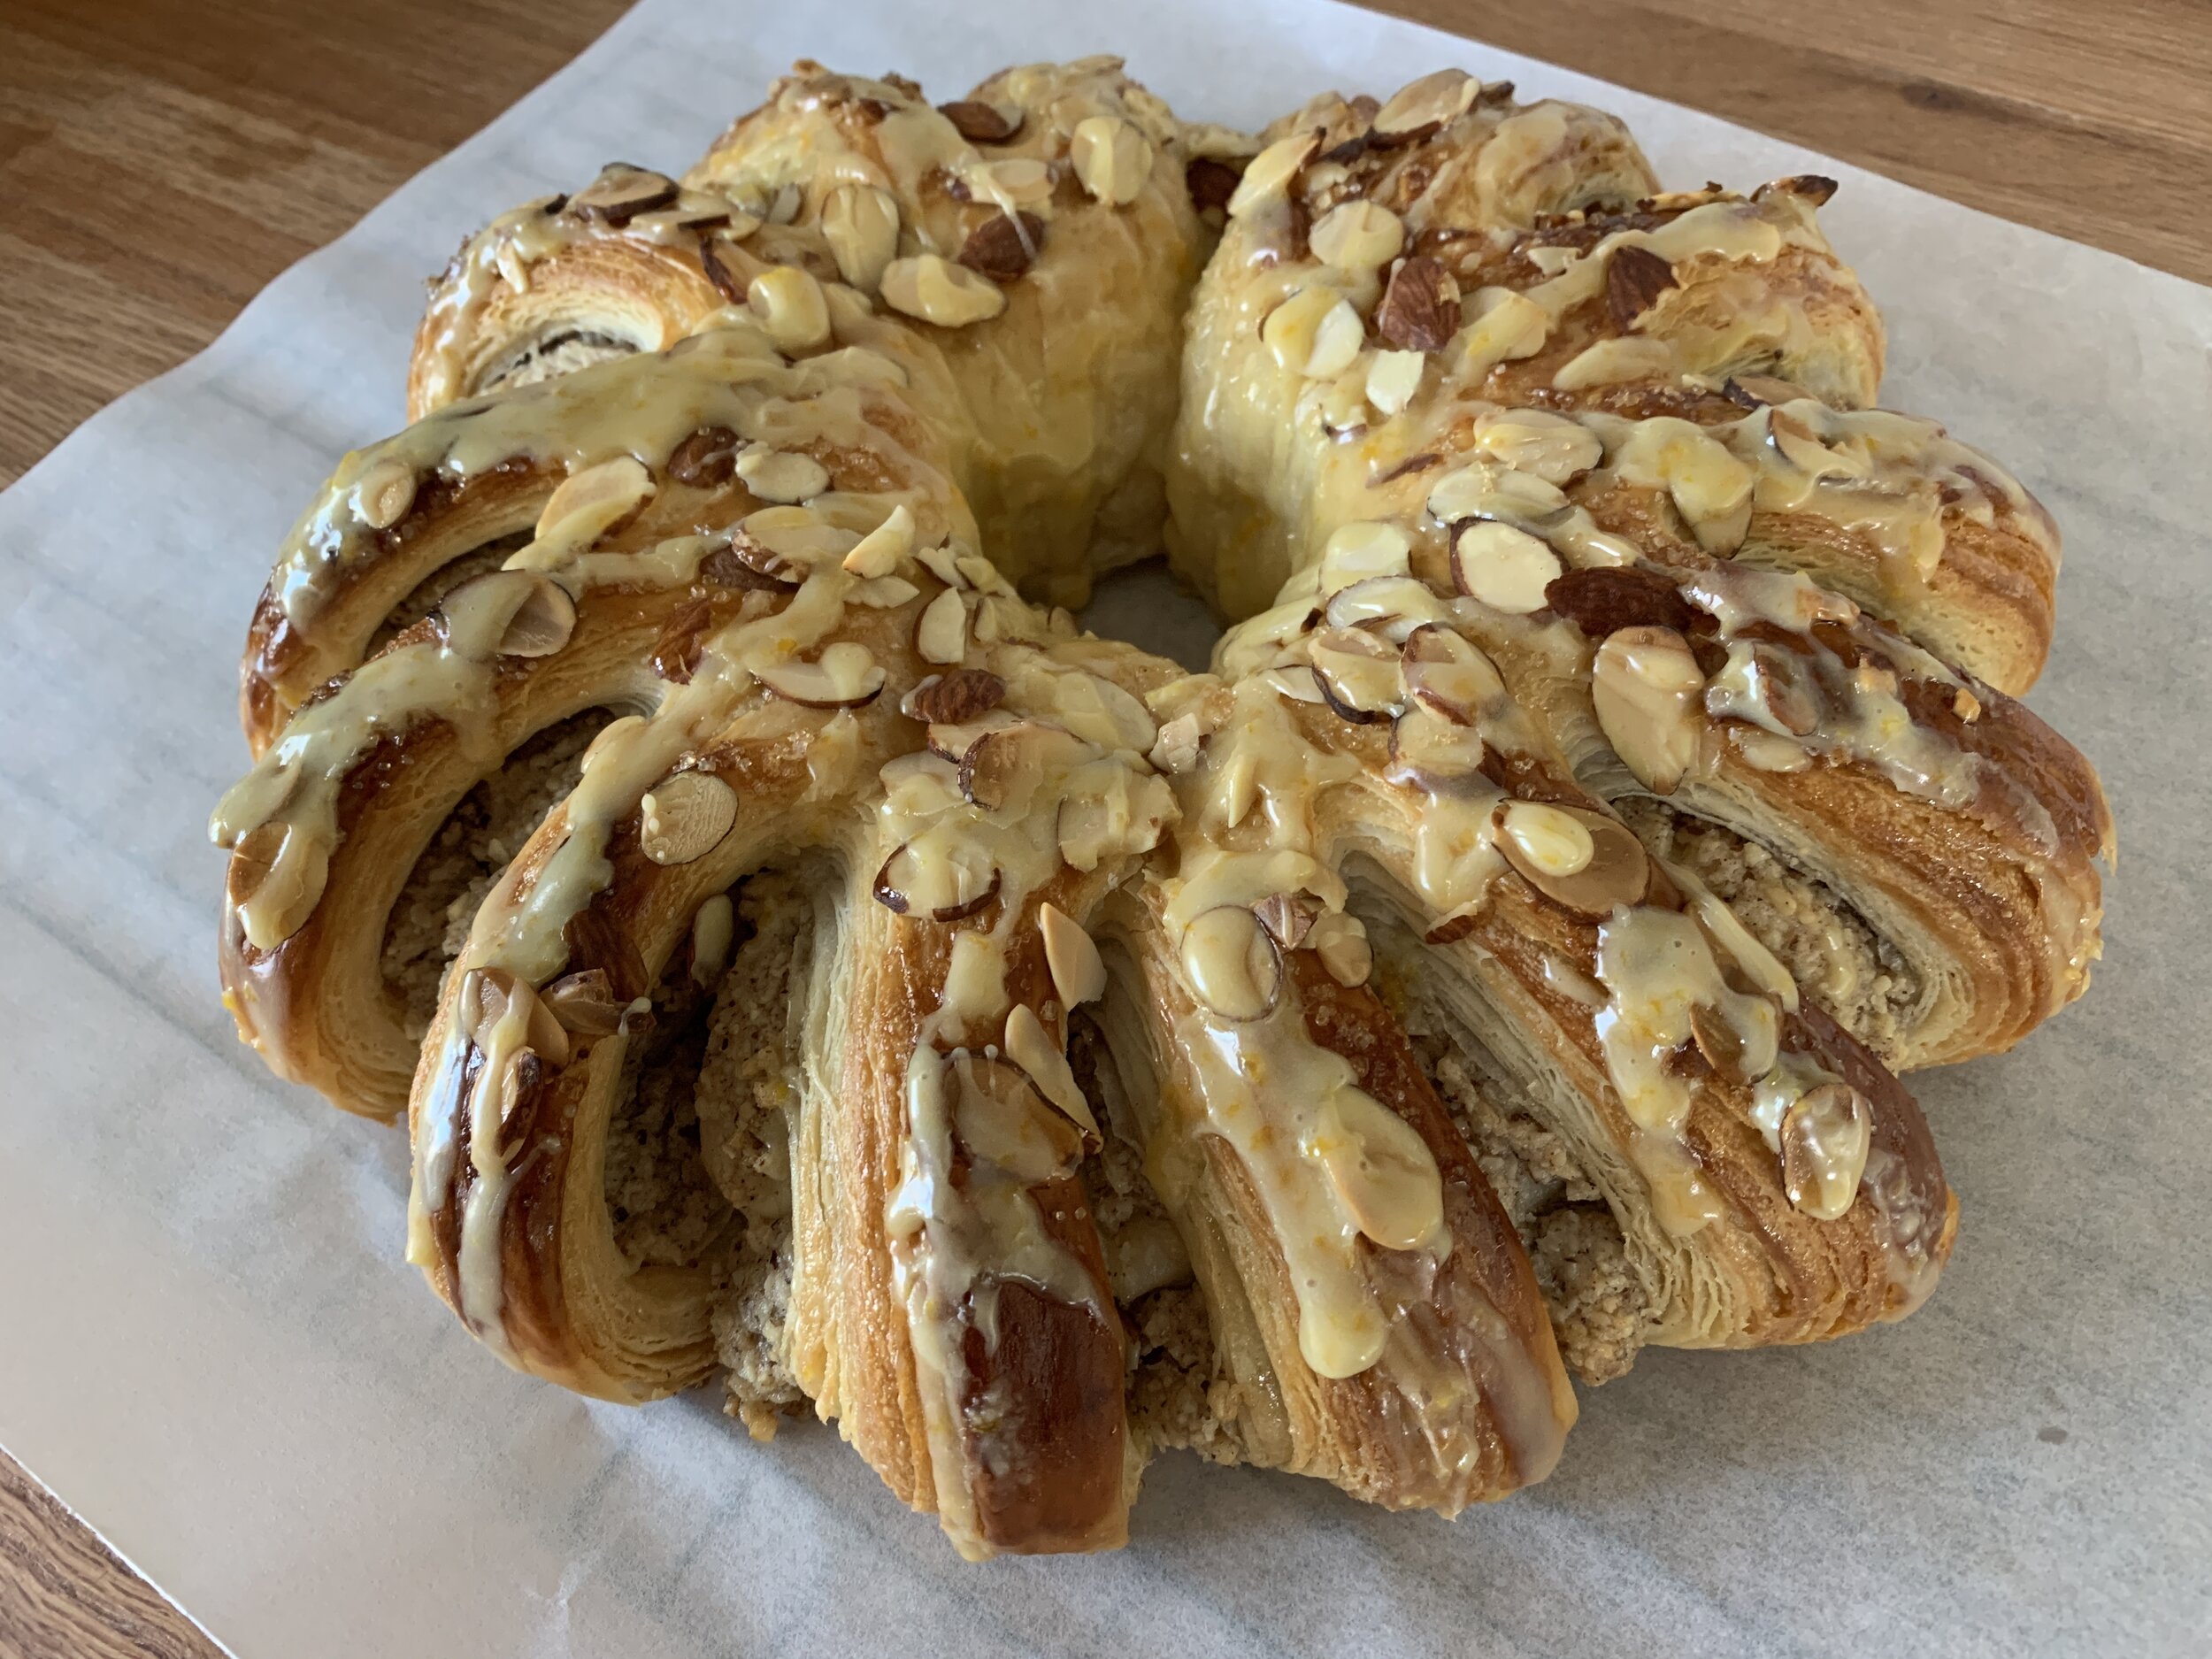
I decided to gussy it up a bit by making a simple orange scented glaze with some orange zest, confectioner’s sugar and fresh orange juice and drizzled it all over.

IMG_0627.JPG

Once cooled I sliced a section for testing and loved it! I’m a big fan of hazelnut and orange anyway, so this definitely did the trick. And the almond/hazelnut combo took it up a notch too. A big thumbs up!

IMG_0631.JPG

The petite pain au chocolat portion of the program was straight forward, a process I’ve done many times. A simple image will do this time around. Hmmm . . . . I’m getting low on chocolate batons.

IMG_0609.JPG

Next up - apricot twists. Using a half batch of croissant dough, I rolled it out to 12”x 14” rectangle with the long side facing me, parallel to my work surface. Brush the dough with melted butter then sprinkle on about 1.5 tablespoons of vanilla sugar (cinnamon sugar if you like). Roll lightly with a rolling pin to help the sugar stick.

IMG_0610.jpg

Fold the dough in half from one side so that you end up with a 12”x7” piece. Roll the dough to seal it and slightly stretch it.

Now cut seven strips, each 1” wide.

IMG_0612.jpg

Holding each strip at the ends, stretch it as you twist it several times then coil it up into a spiral.

IMG_0613.jpg
IMG_0614.jpg

Place on a parchment lined sheet pan, brush lightly with egg wash and let rise about an hour.

IMG_0615.jpg

I often use my cold oven as a proof box, placing a pan of warm water on the bottom shelf. However, if my oven is in use, I tuck my tray in a safe spot, place a small glass of warm water on the tray and cover with an overturned clear tote bin to provide moisture and a hint of warmth.

Once risen - they should look more pouf-y and the laminations appear more prominent. Brush again with egg wash, push down at a couple of central spots with your little finger tip or the end of a wooden spoon or chopstick and do your best to direct some apricot jam in there. Don’t fuss over it - just go for it. I added a sprinkle of vanilla sugar too.

IMG_0622.jpg

Bake at 375ºF for about 17-18 minutes until golden.

IMG_0632.JPG

To bring up the rear, last but not least are my “flip-throughs”. Once again using a half batch of croissant dough, I roll it out to ~8” by 13.5” and cut 12 pieces, each 4” by 2.25”. Each rectangle gets a slit down the center leaving the ends intact. I consider these my medium size - you can make them smaller or larger - just cut any size rectangle you’d like!

IMG_0617.jpg

Now take one short end, roll it downward then bring it up through the slit, essentially flipping it through to the top as the sides naturally twist. Looks kinda like a bowtie - just straighten the rectangle a bit and they’re ready to rise. The first time I did this way back when, I found it helpful to cut a piece of paper or felt and practice - you can visualize it immediately.

IMG_0618.jpg

Place on a parchment lined sheet, lightly egg wash and let rise about an hour. Egg wash again and top with your chosen filling - lemon curd, almond cream and jam are just some of the possibilities.

One of my favorite ways to finish these off is with a basic cream cheese filling made by blending 227 g / 8 ounces cream cheese with 57 g / 1/4 cup sugar, 3 tablespoons cornstarch, some lemon and/or orange zest, 1/2 teaspoon vanilla; beat on medium with the paddle until light and smooth; blend in 2 large egg yolks until fully incorporated. This made plenty for my purpose here but you can certainly double the recipe if you’re doing a larger batch of pastries.

NOTE: After the rise the center should fill in but sometimes there’s still a gap between the twisted sides. Just blob your filling/jam more along the edges if need be, otherwise just dollop a blob along the center and top with jam of choice - in this case cherry.. Once they bake it all blends in.

IMG_0637.JPG

Bake at 375ºF about 17-20 minutes until golden and the filling is set.

IMG_0639.JPG

Planning for properly timed rises and taking turns in the oven for each type of pastry made for a busy baking day and resulted in a wonderful assortment of goodies that I ended up divvying up amongst a number of our neighbors. A great way to use croissant dough that would have soon been over-the-hill after too long a stay in the freezer.

The neighbors were most happy!

Have fun, stay safe and keep on keepin’ on folks.

Danish Kringle

IMG_0454.JPG

More fun with laminated dough - an interesting project indeed!

As I was researching and reviewing the pastry known as Danish Kringle I learned that kringle is the word for pretzel and that Danish bakeries typically have a sign outside their shops shaped like a pretzel topped with a crown. A sure sign of good things inside.

Scandinavia is on Steve’s and my travel hit list, although it’s strange to contemplate when we might be able to travel again given our current times. We can only hope. In the meantime I’m reading and learning more about the types of baked goods that come from that corner of the planet. Cool stuff.

IMG_0446.JPG

Made with the Danish version of laminated dough (wienerbrød in Scandi talk), this is a traditional almond filled pastry, popularly served in Denmark for occasions like birthdays, anniversaries and other festivities. Much like croissant dough in its preparation, the primary difference is the addition of egg to the dough. As is true when comparing a number of recipes for a particular pastry, the range of ingredient quantities can certainly vary, particularly the amount of butter used for the laminations.

Inspired by Brontë Aurell’s version in her book “Brontë at Home”, I compared her Danish dough base recipe with several others, most notably the one in my 2004 first edition of CIA’s book “Baking and Pastry - Mastering the Art and Craft” (there have since been two further editions in 2009 and 2015).

It was the first pastry tome I purchased upon our return to the USA after completing my stage at Pâtisserie Pascal Pinaud in Paris’ 5th arrondisement in March of 2007. I used it as my primary reference source (and still refer to it all these years later) during my first summer job that year at JM Gerrish Provisions in Winter Harbor Maine. My how time flies.

IMG_0642.jpg

I ended up creating my dough recipe based on an amalgamation of Aurell’s and CIA’s - pretty similar actually, save for the lesser butter block quantity in CIA’s version. I tend to take a “less is more” approach in my croissant dough too.

The dough: remember if you’re going to mise out your ingredients ahead of time, keep the yeast separate from the salt until ready to actually start mixing since the salt can inhibit the yeast.
Using a stand mixer fitted with the dough hook, mix 375 g / scant 3 cups bread flour, 43 g / 3 tablespoons granulated sugar, 6 g / 2 1/8 teaspoons instant yeast, 6 g / 1 teaspoon salt, 40 g / 3 tablespoons soft unsalted butter, 1 large egg, 1 large egg yolk and 175 g / 3/4 cup room temperature whole milk. Blend on low speed for 2 minutes then increase to medium speed for 4 minutes.

Place the dough in a lightly greased bowl, cover and let rise for about 2 hours. Gently turn the dough out onto a lightly floured work surface, fold it over and form a rectangle on a parchment lined sheet pan. Wrap tightly and refrigerate overnight.

Form 243 g / 2 sticks + 1 tablespoon unsalted butter into a ~8”x8” square by tapping/rolling it between plastic wrap. Keep it wrapped and refrigerated until you’re ready to perform the butter incorporation and the laminations.

Let’s review the steps of creating a laminated dough. Take the butter out of the fridge about 20 minutes before you’re ready to go, then tap it with your rolling pin to make it more malleable - you want it cool and bendable.

Remove the dough from the fridge and roll out to ~8”x 16” rectangle. Place the butter in the middle of the dough and fold one end over it to cover half of the butter as seen below. Do your best to keep the corners square.

IMG_0420.JPG

Fold the other portion of dough over the remaining butter. You can stretch the dough a bit to square off the corners and pinch the edges and center seam together so as to completely envelope the dough. This is called the “lock-in” or le beurrage en Français.

IMG_0421.JPG

Next you’ll roll the dough out to an ~8”x 24” rectangle, paying attention to the edges and center seam to keep things together and prevent any butter from sneaking out. I like to roll the dough with the sealed edges positioned at top and bottom and the center seam vertical to me. Feel free to flip the dough seam side down as you roll.

If your dough ever becomes too warm and butter starts breaking through, wrap and chill it for 15-20 minutes to firm things up again.

IMG_0422.JPG

Typically croissant and Danish dough are put through three 3-folds (also called letter folds), but for this project I started with a 4-fold or book fold. Visualize the center of the dough, fold each end into the center to snuggle up to each other (leave a skosh of a space to allow for folding it) . . . . .

IMG_0423.JPG

then fold it on itself like a book.

IMG_0424.JPG

An important thing to remember when making laminated dough is that after each fold you turn your dough 90 degrees before you roll it out for the next fold. Think of it as the spine of a book on your left.

IMG_0425.JPG

Now wrap the dough in plastic wrap and refrigerate it for 30 minutes before doing the next fold. That keeps the dough/butter cool and stable and allows the dough to relax as well.

Roll it out again into a rectangle but this time visualize the dough in thirds and fold it like a business letter. One end up . . . .

IMG_0434.jpg

the other end down.

IMG_0435.jpg

Wrap and chill another 30 minutes. Making sure the “spine” is on your left, roll it out and repeat another 3-fold. Now the dough is complete. Wrap and chill for at least 30 minutes or up to overnight before rolling it out for its intended use. It can also be frozen up to a month.

Check out these layers!

IMG_0453.JPG

Before rolling the finished dough out for the Kringle, make the almond filling (remonce) by blending together 100 g EACH of almond paste (Mandelin brand is great!), softened unsalted butter and confectioner’s sugar. This is enough filling for one full Danish Kringle. Many Kringle recipes also include raisins but I opted out on that one.

Side note: New word alert for me! Remonce is said to be a Danish word and creation and refers to a commonly used filling in many Nordic cakes and pastries. Almond is a common flavor but it can be made with other nut pastes like pistachio or hazelnut or flavored with cinnamon, cardamom and/or vanilla, depending on what you’re making. For cinnamon rolls the confectioner’s sugar is often replaced with dark brown sugar. Life is full of variations, eh?

IMG_0419.JPG

For this my first Kringle attempt I followed Aurell’s instructions for rolling, filling and shaping the dough. Because her description of the process wasn’t terribly clear (there are no images in the book to help), I checked out a couple of YouTube videos and also went somewhat by instinct.

On a lightly floured surface roll the dough lengthwise to a rectangle about 7”x20” then split it right down the middle length wise. A pizza cutter is a great tool for this.

Then roll each piece again length wise to achieve a width of 4” and a length about 24”.

IMG_0428.JPG

Working with one piece at a time, place half the remonce in a line down the center. Fold the top edge over the filling . . . . .

IMG_0429.jpg

Then bring the bottom edge up and over to make a log.

IMG_0431.jpg

Repeat with the second piece then place both pieces on a parchment lined sheet pan in horseshoe shapes with their ends touching each other.

Turns out there’s actually supposed to be a narrow gap down the centers exposing the filling (that’s what I get for not paying attention) but, once the dough had risen, a gap developed during baking so it all worked out okey-dokey.

IMG_0432.jpg

Now grab one end of each horseshoe and bring them toward the other side, crossing each other to form a pretzel. This is one monster of a pastry! Reminds me of some kind of sea snake or something.

IMG_0433.jpg

Egg wash and let proof in a closed space (I often use an overturned clear tote bin for my cover) for about an hour. About 20-25 minutes before the end of the rise heat the oven to 375ºF.

Repeat the egg wash then sprinkle with toasted, coarsely chopped hazelnuts or sliced almonds (or a combo!) and some raw or pearl sugar.

IMG_0437.jpg

Bake for 10 minutes, turn the oven down to 350º and bake an additional 15-20 minutes. Since the thickness at the crossover point is essentially double the rest of the pastry, I tried to be sure that it had baked through. Not necessarily an easy task. I reduced my oven temp by 25º and continued checking every 5 minutes or so, but it’s not really until you cut into something that you know for sure.

Wow - check this out!! Nice and golden, plus you can appreciate the layers and how the top opened up to reveal the filling. Actually quite a messy looking end result, eh? But after all, it’s about sharing the experience and learning from it!

IMG_0438.jpg

Once it had cooled I started carving. While a bit gooey at some points the flavor and flakiness are definitely there, and our taste testing ended with a thumbs up.

IMG_0442.JPG

Slice it up, dust it with some confectioners sugar and share it with all your friends (safely distancing of course). They’ll thank you for it.

IMG_0456.JPG

Wait - I’m not finished yet! As if you haven’t had enough already, I made one more Kringle with a half batch of dough, hoping to make a more petite pretzel without the overlap.

The dough was a bit wider than I would have liked, but I proceeded with the filling and the folding over, leaving the gap in the center.

IMG_0551.jpg
IMG_0552.jpg
IMG_0553.jpg

It was too thick and bulky to form the pretzel I was envisioning, so ultimately it became a circle. Hmmm . . . those ends don’t really want to stay together. Oh dear.

IMG_0554.jpg

Once risen I topped it with sliced almonds and pearl sugar and baked ‘er up.

IMG_0560.JPG

Even though the risen Kringle looked pretty good, my ends did not stay together in the oven. This baby baked into a shape not unlike those leather horse harness collar thingies that you might see on a team of Clydesdales.

IMG_0563.JPG

Not to worry however. This one baked up beautifully with nice flaky layers, delicious flavor and came with the confirmation that I am now an official fan of remonce filling.

IMG_0567.JPG

Quite a project all-in-all. I’m not giving up on this one folks. It’s so important to share the processes, especially the first time around. Remember, if at first you don’t succeed . . . . you know the rest.

More Kringle? You bet! Stay tuned.

Happy baking, stay safe and think of the good days yet to come.