Have a cheery, peaceful and happy holiday season!

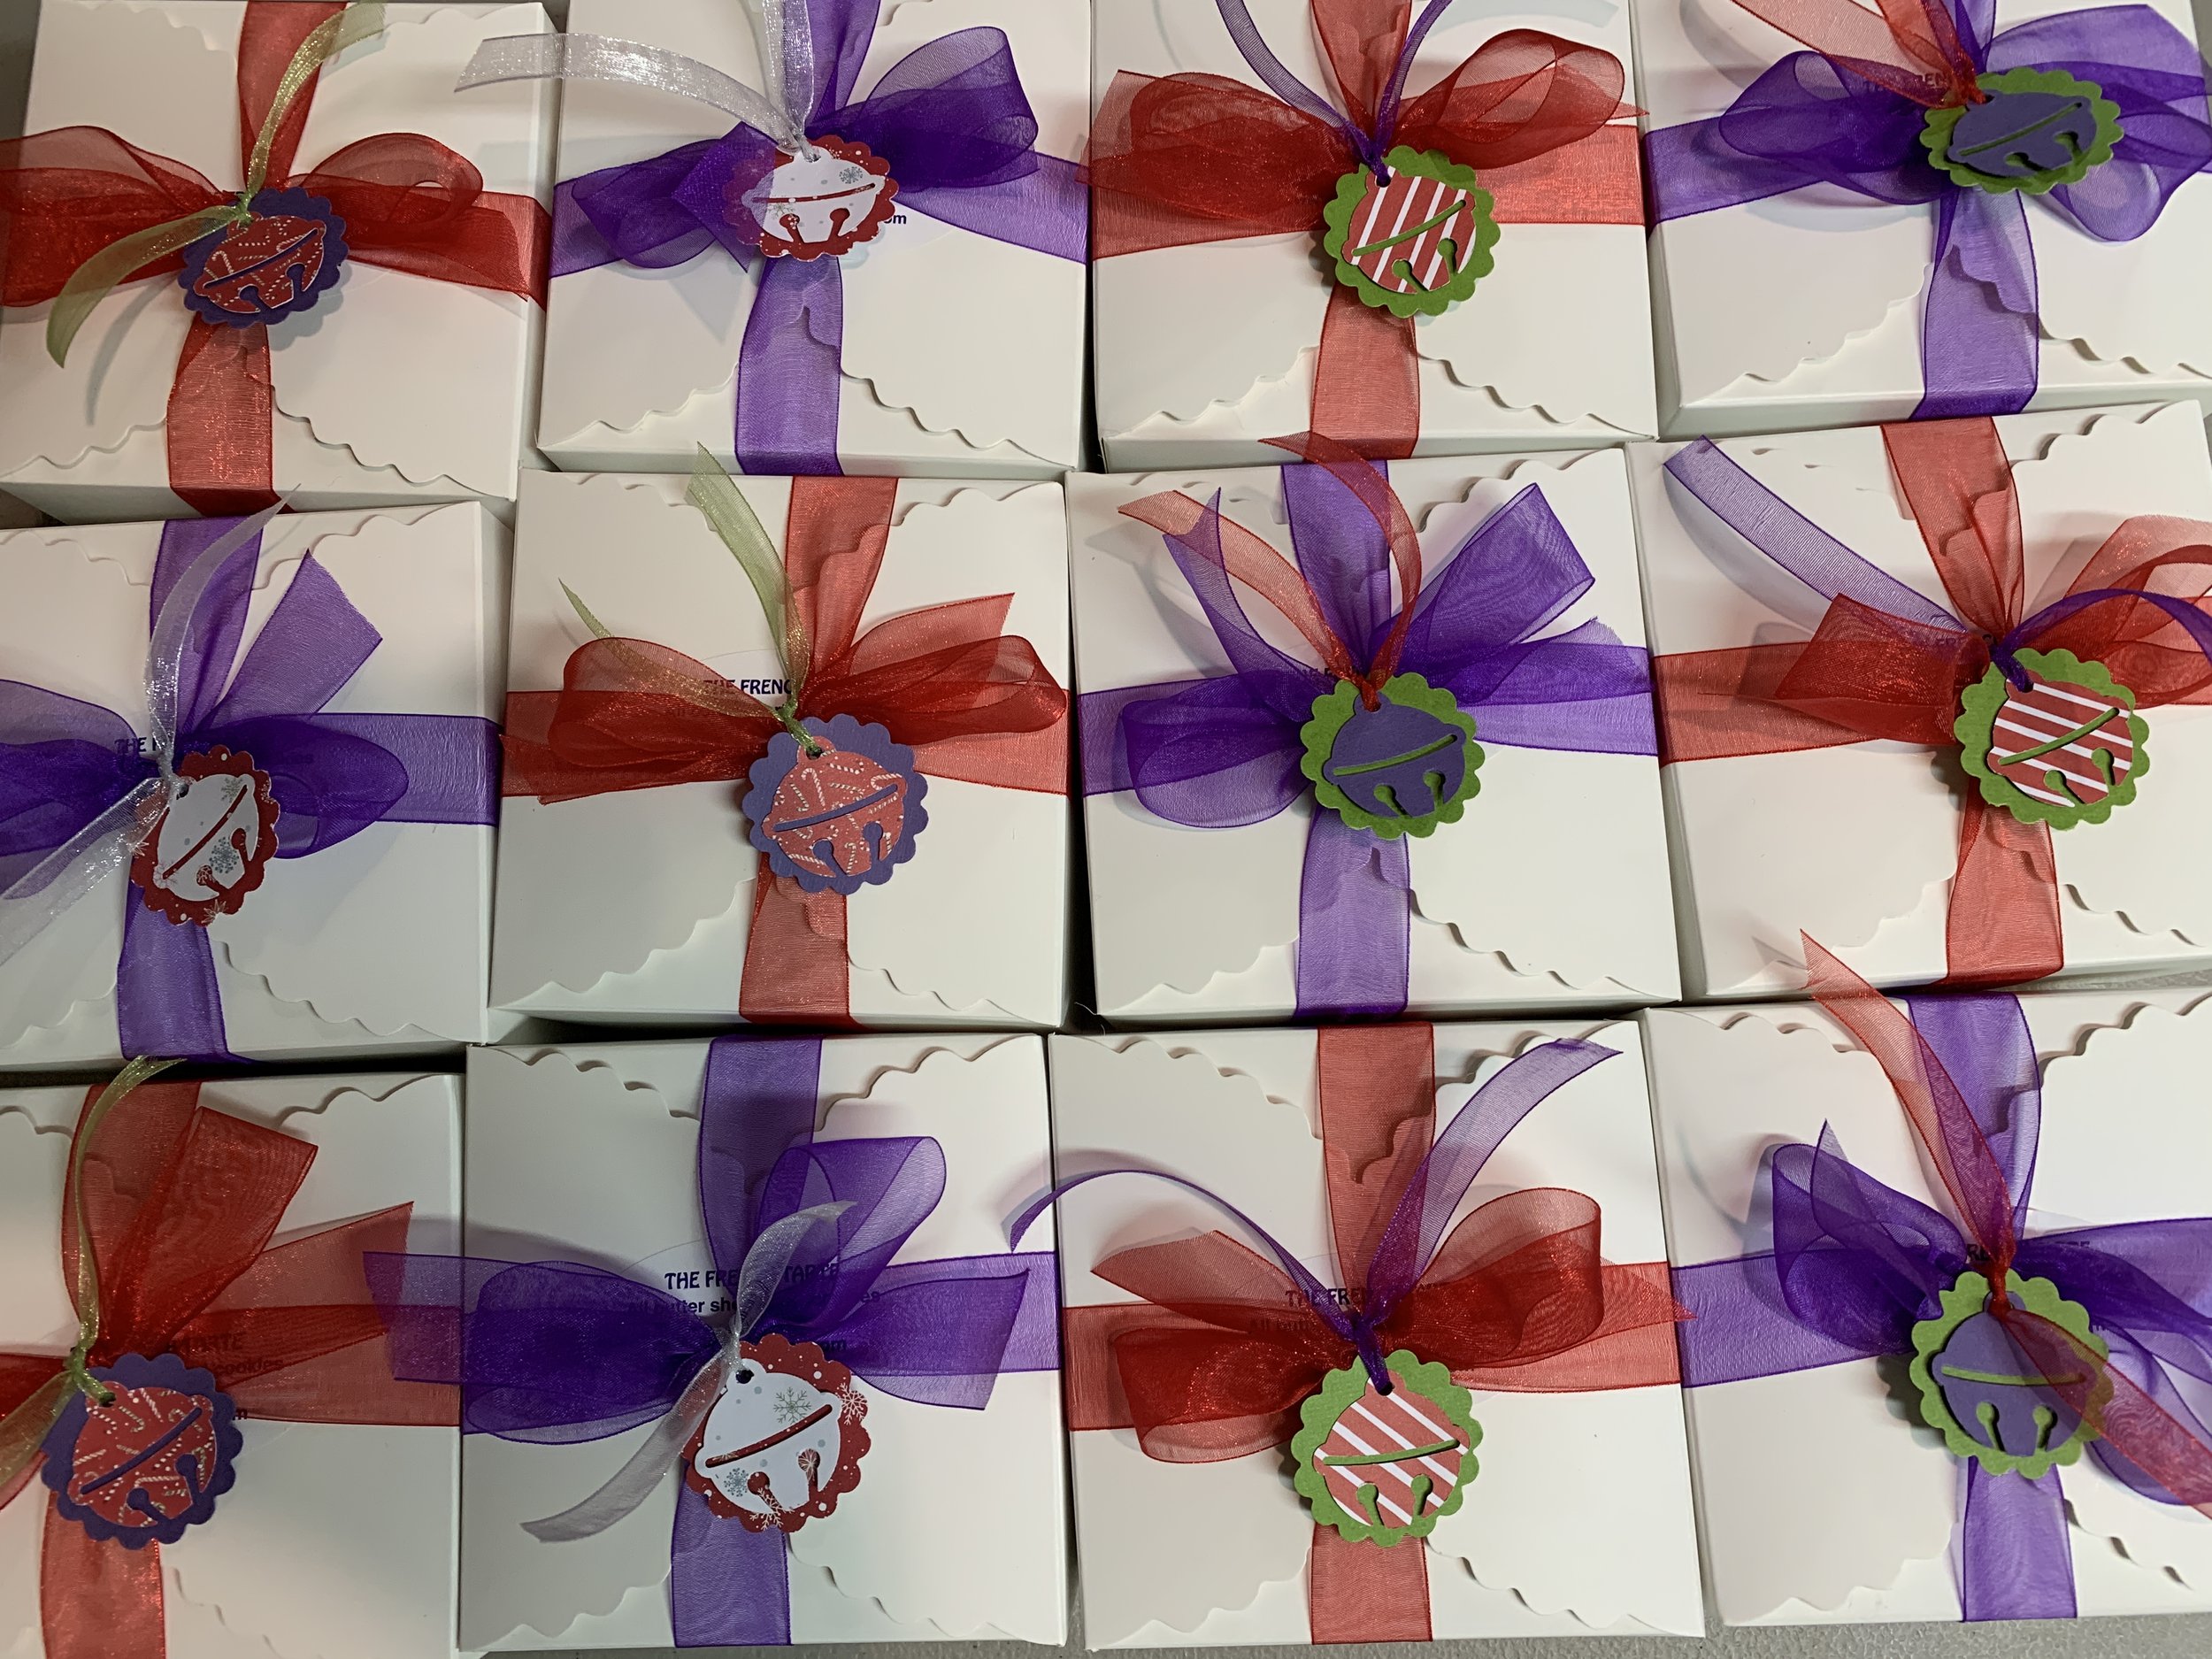
Holiday shortbread all boxed up

It’s been a busy time these past few weeks and blogging has taken a back seat. BUT . . . . I’ve tried a couple of new cakes from Aleksandra Crapanzano’s book “Gâteau” which I hope to share with you in the upcoming weeks.

One is a classic French apple rum-scented cake which I’ve made several times now. The first time around was for a demo I did back in October at a nearby assisted living facility during which I made two 6” smaller cakes. The time frame required a shorter bake than for a full 9” cake and it worked out just fine. The residents LOVED it!

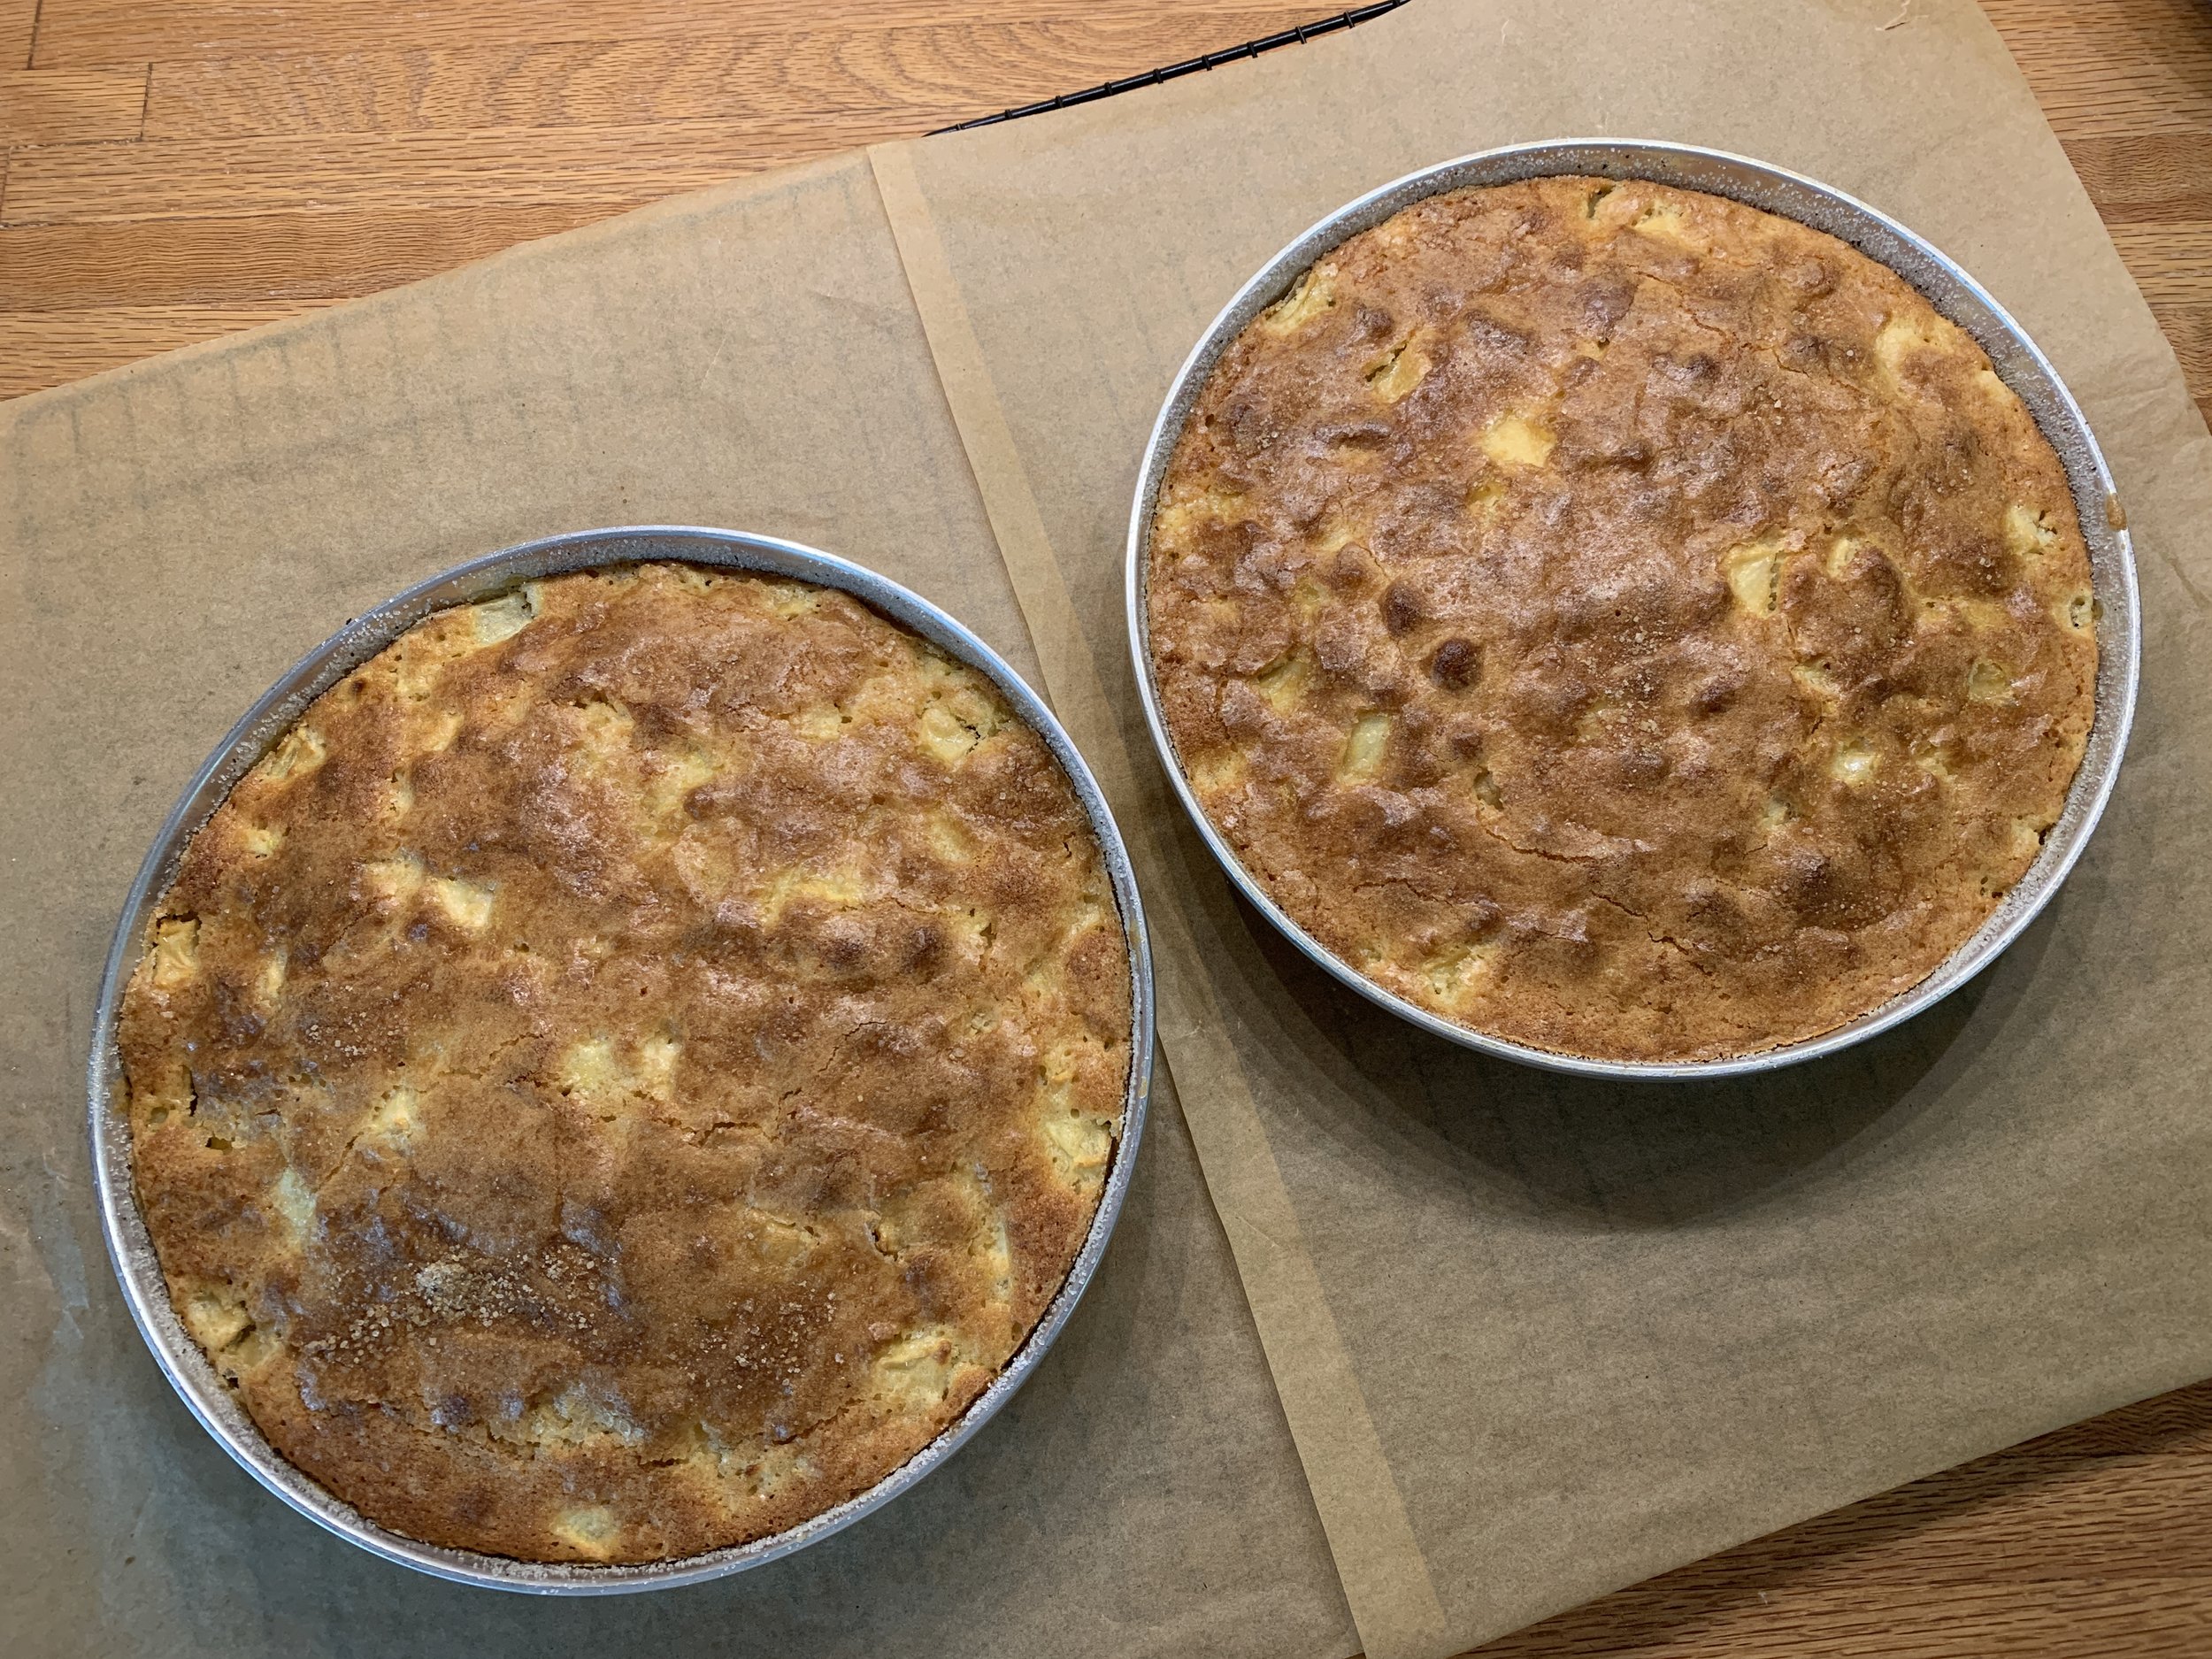
six inch french apple cakes

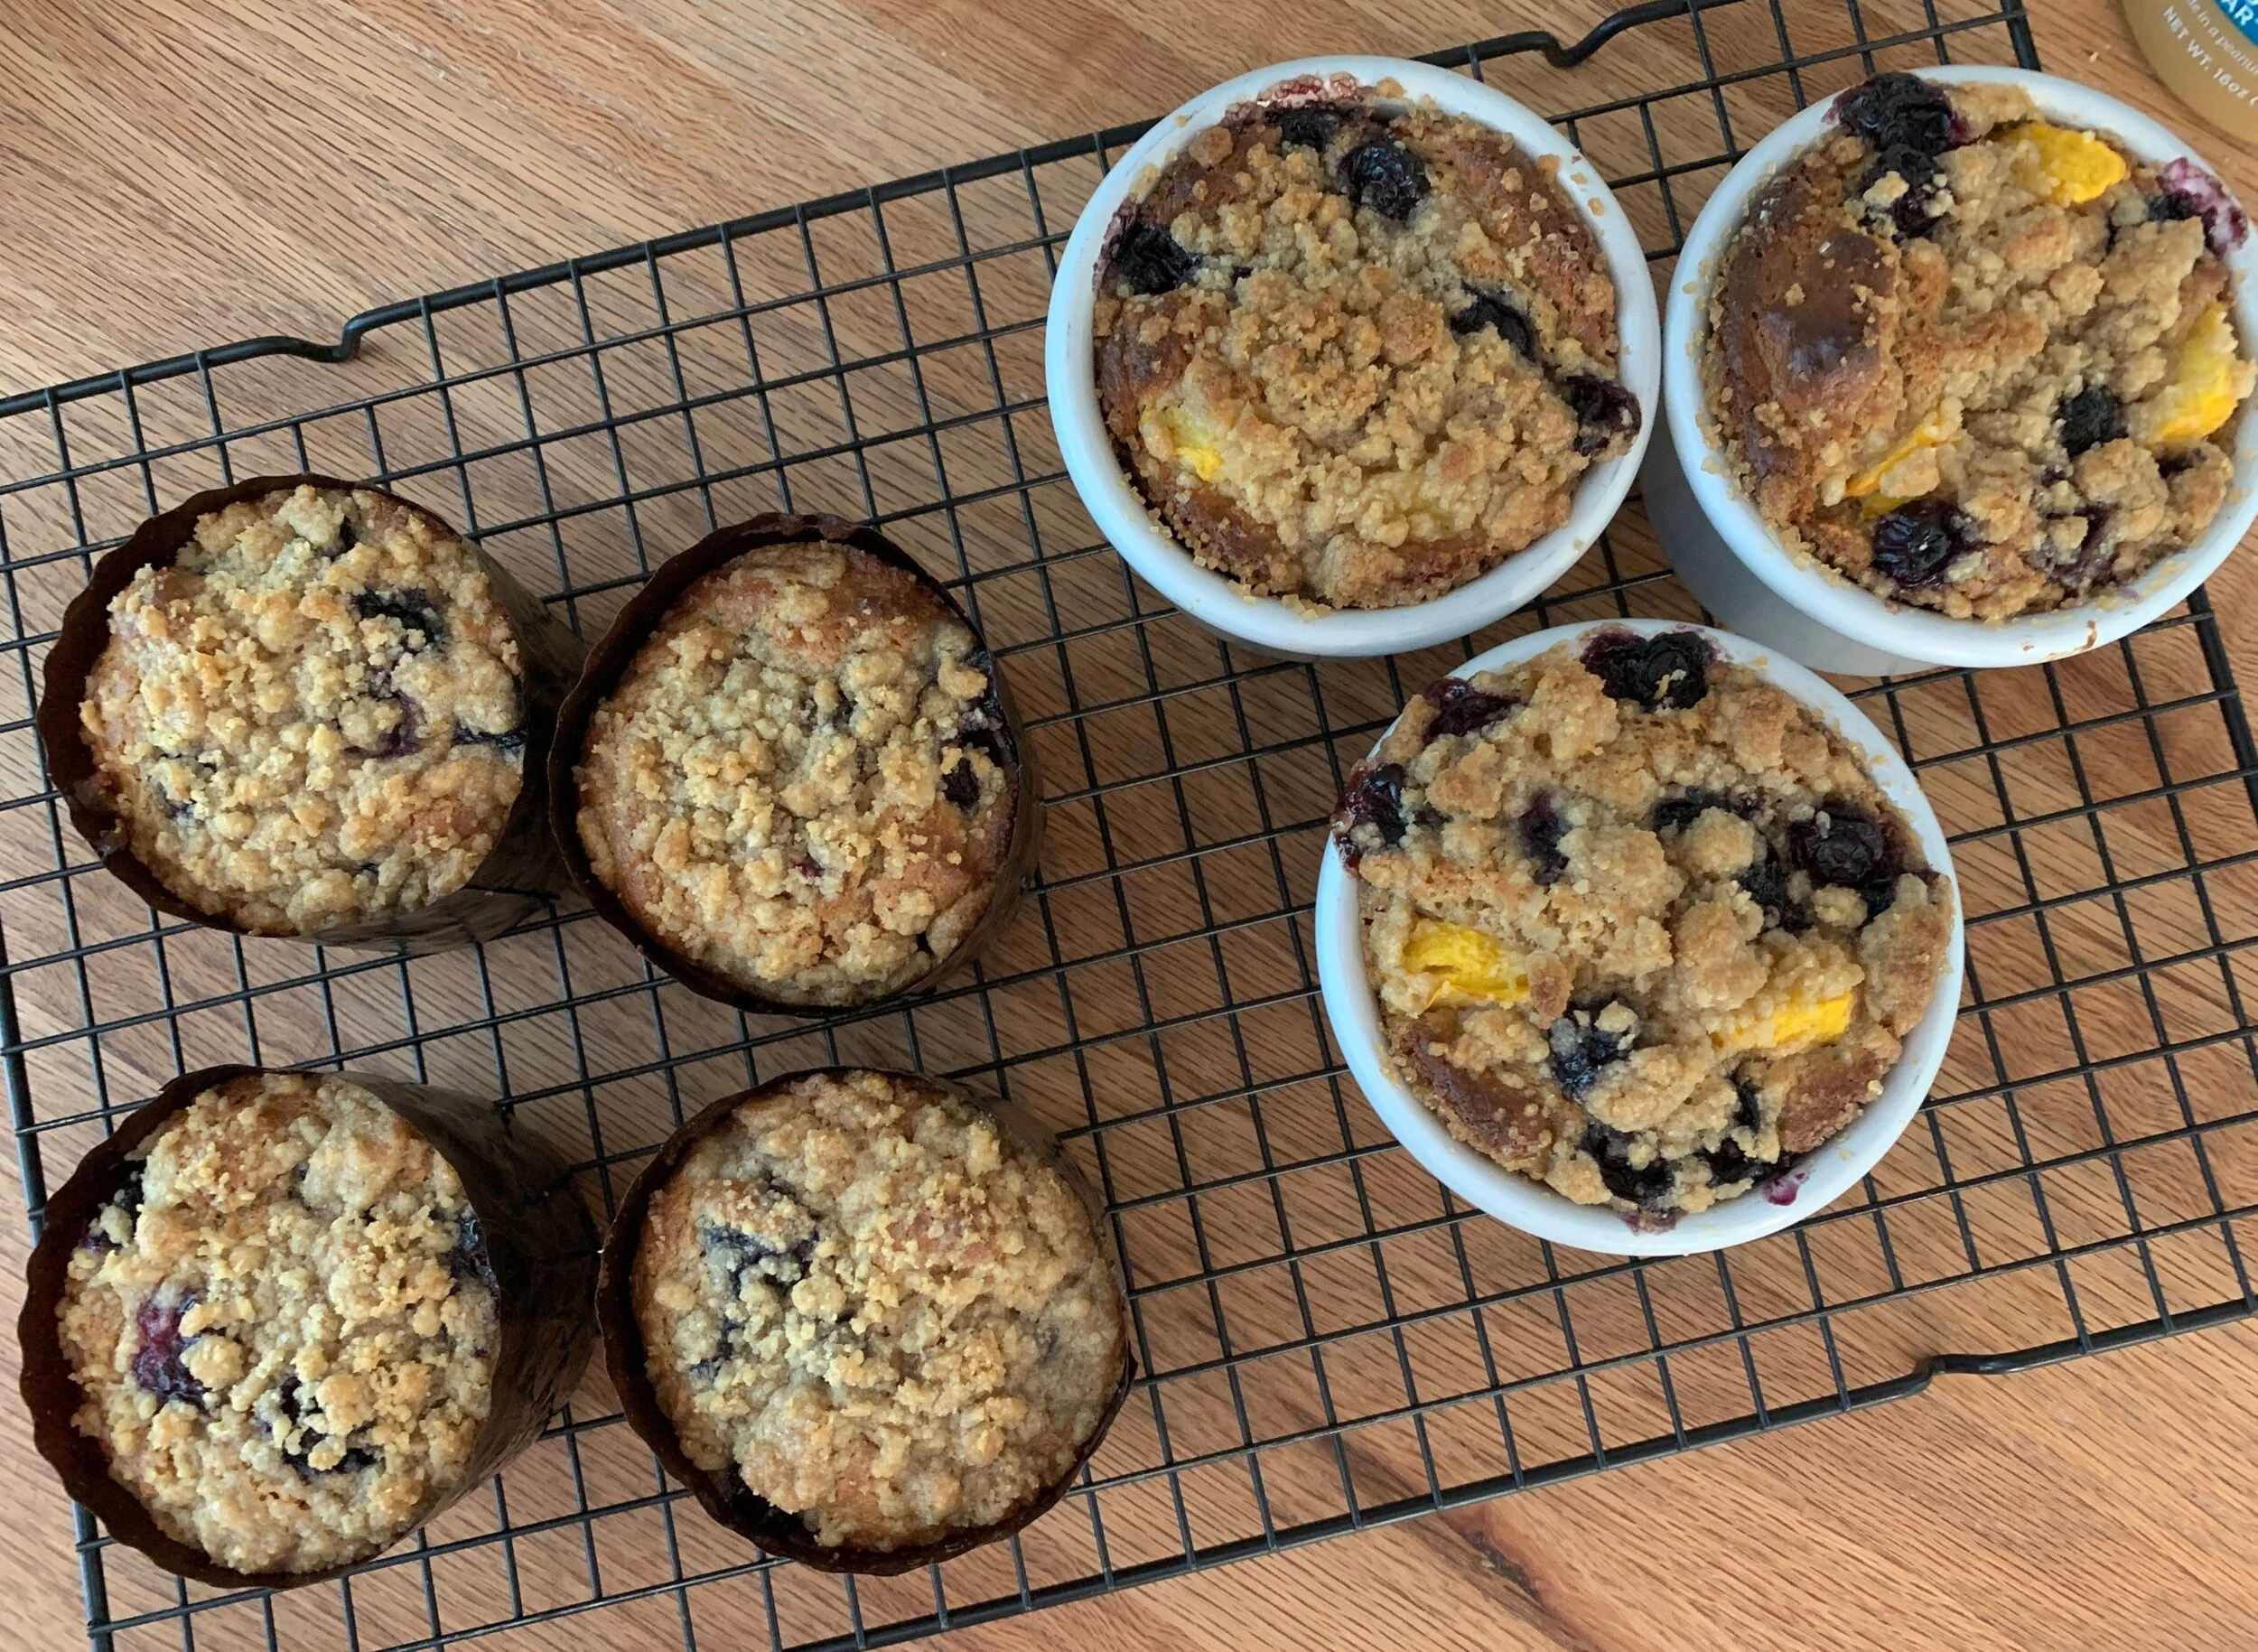
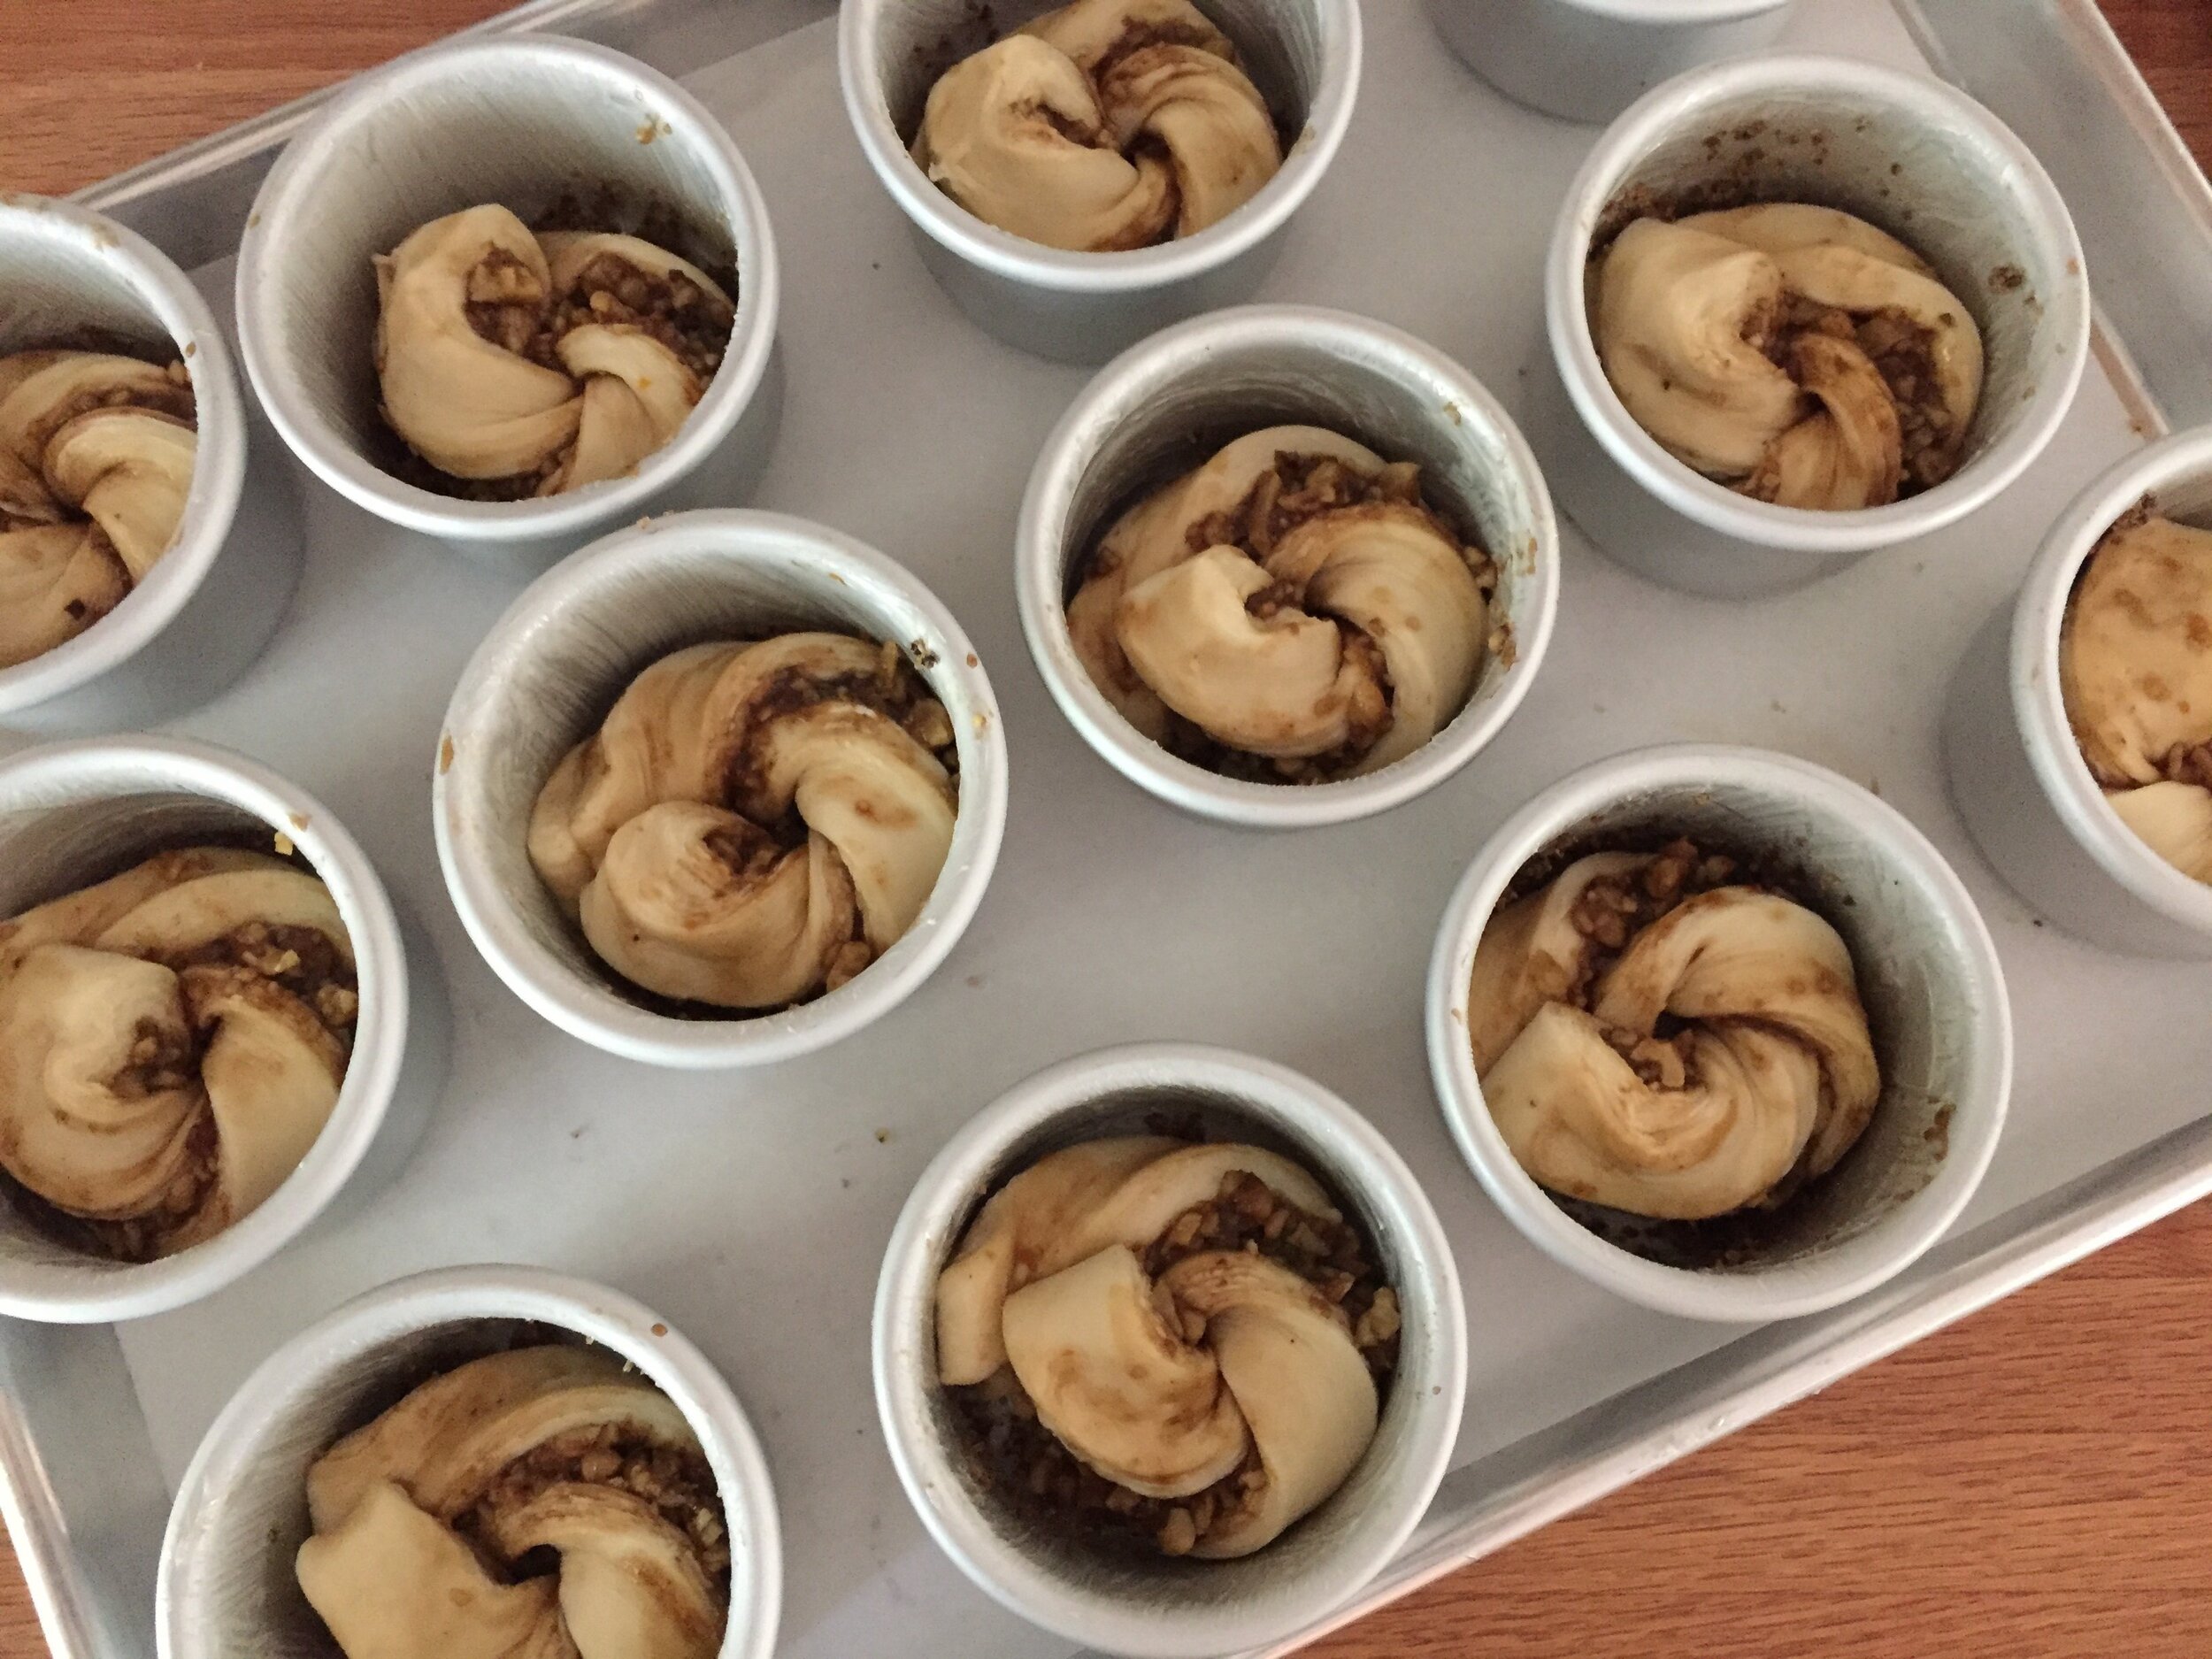
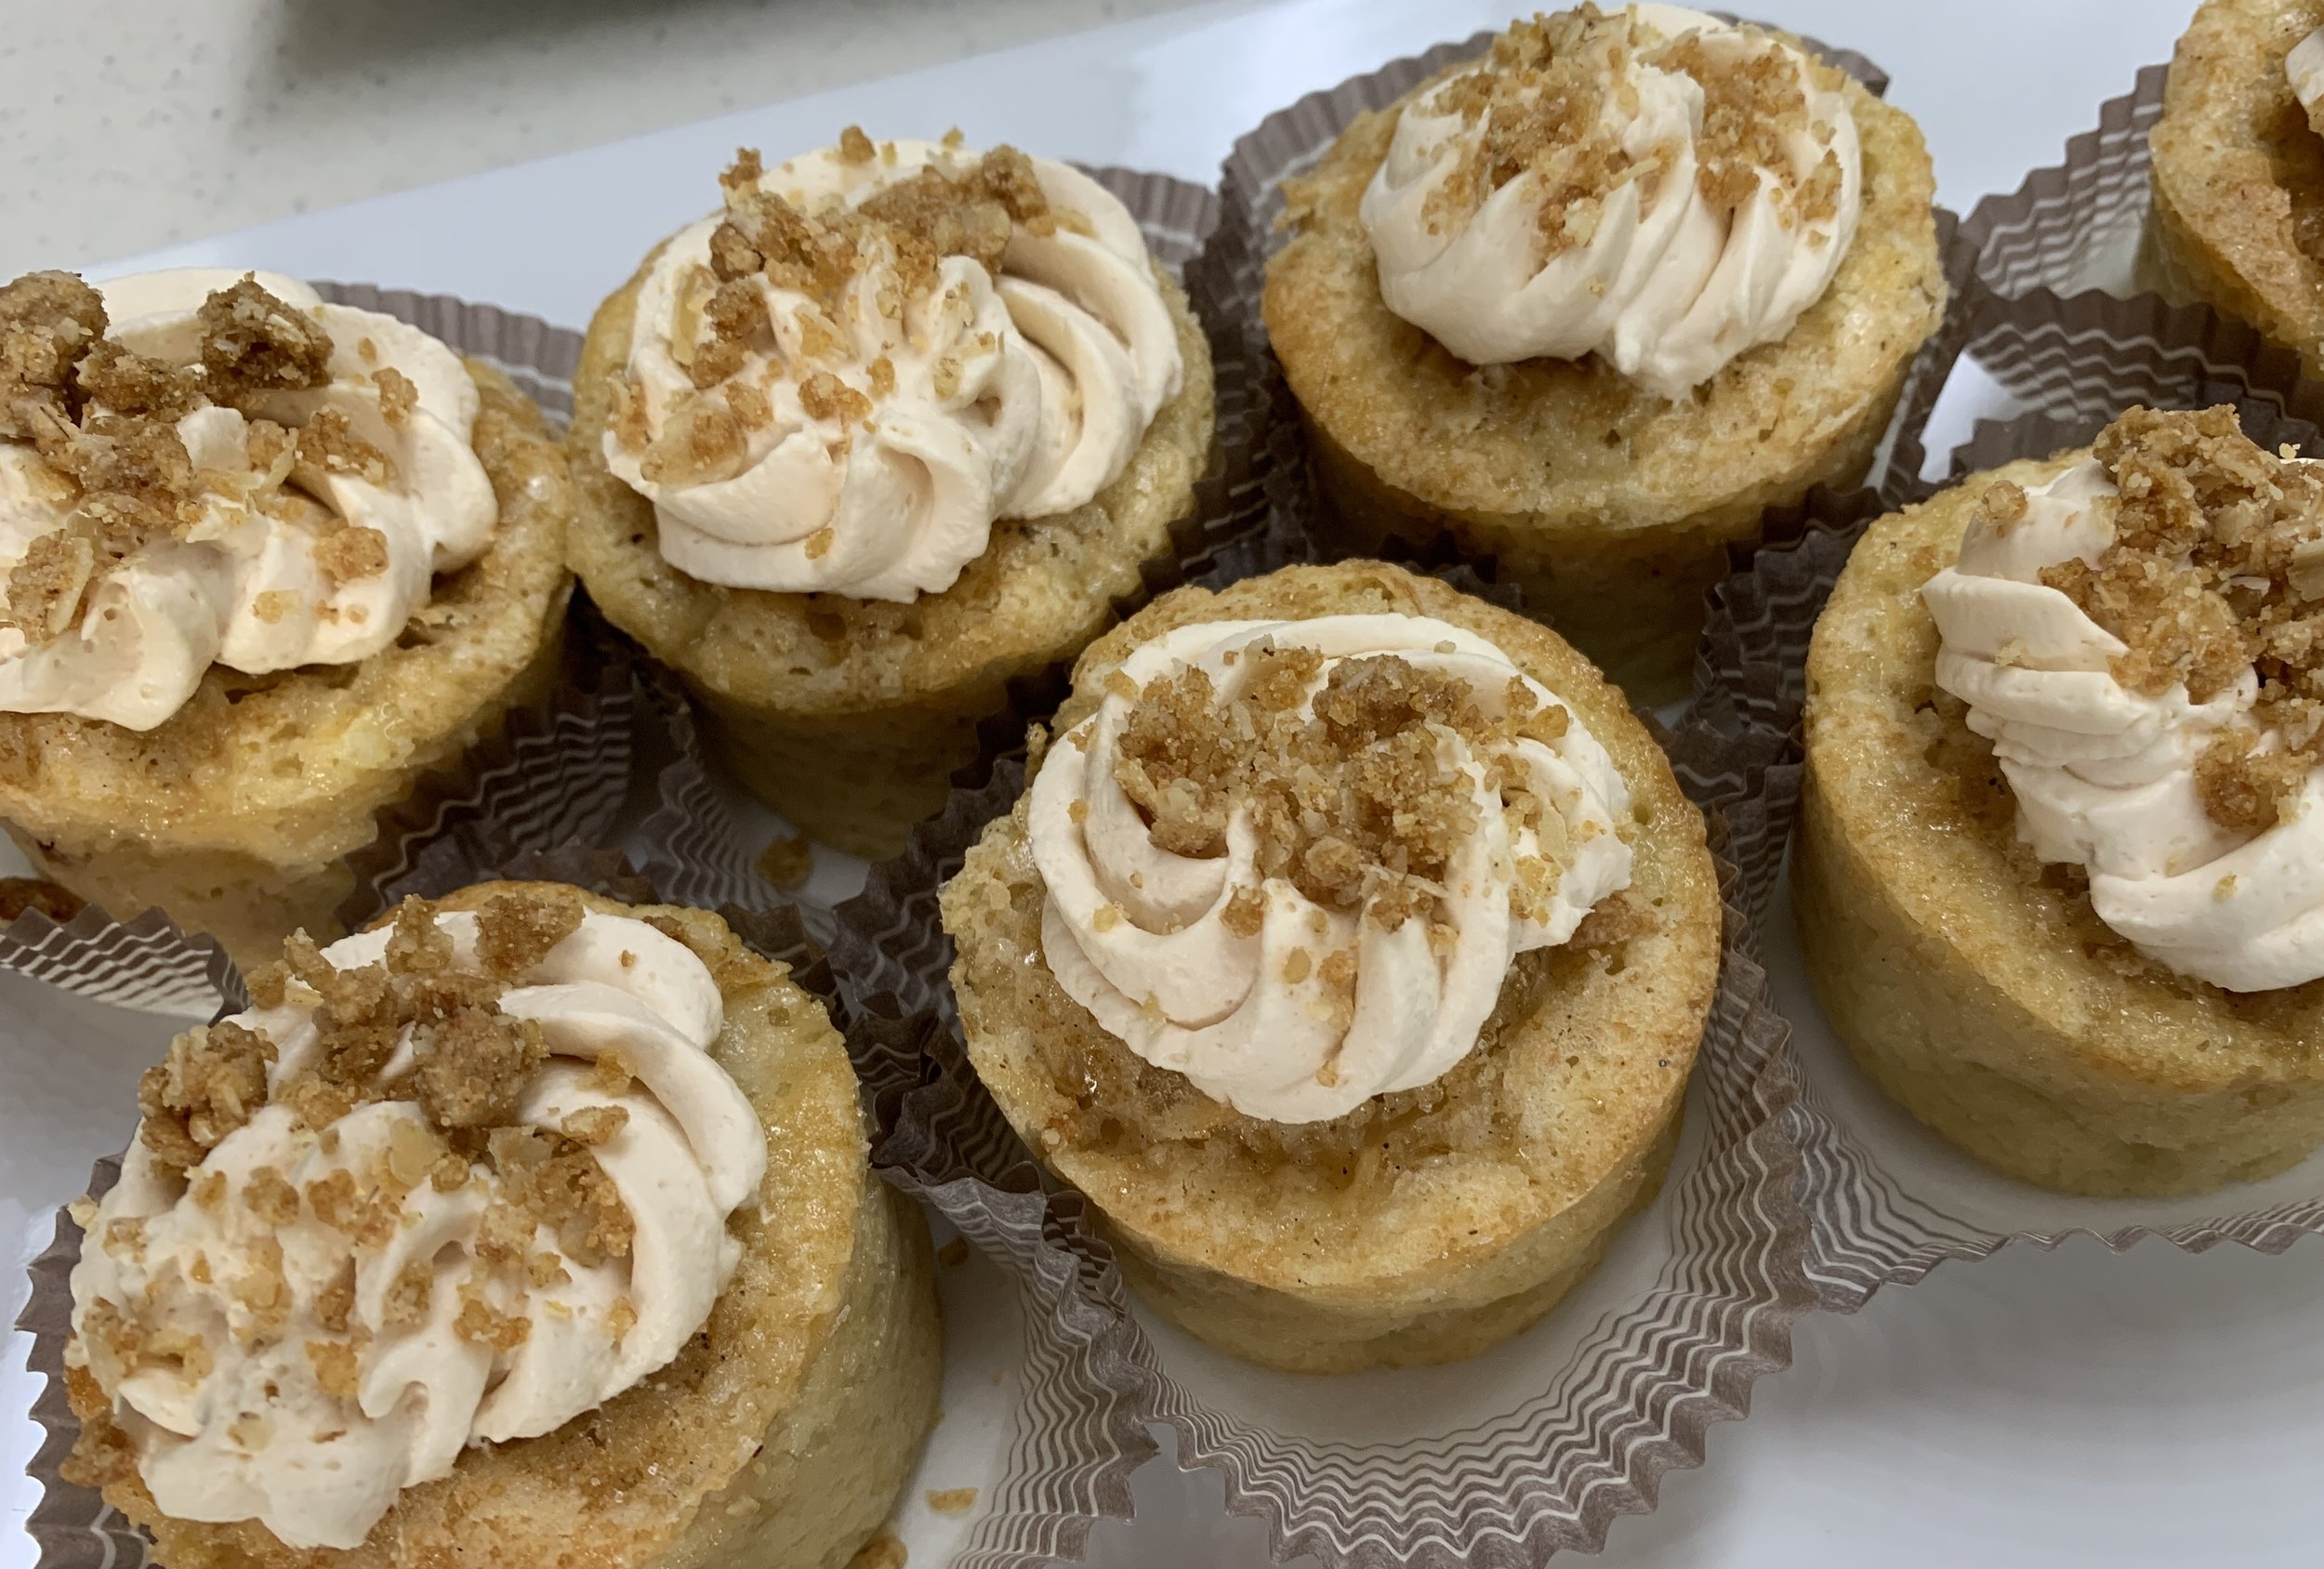
I’ve also made both standard “muffin” sizes (seen below at another assisted living gig) and petite teacake versions topped with whipped caramel mascarpone and oat crumble. Yum!


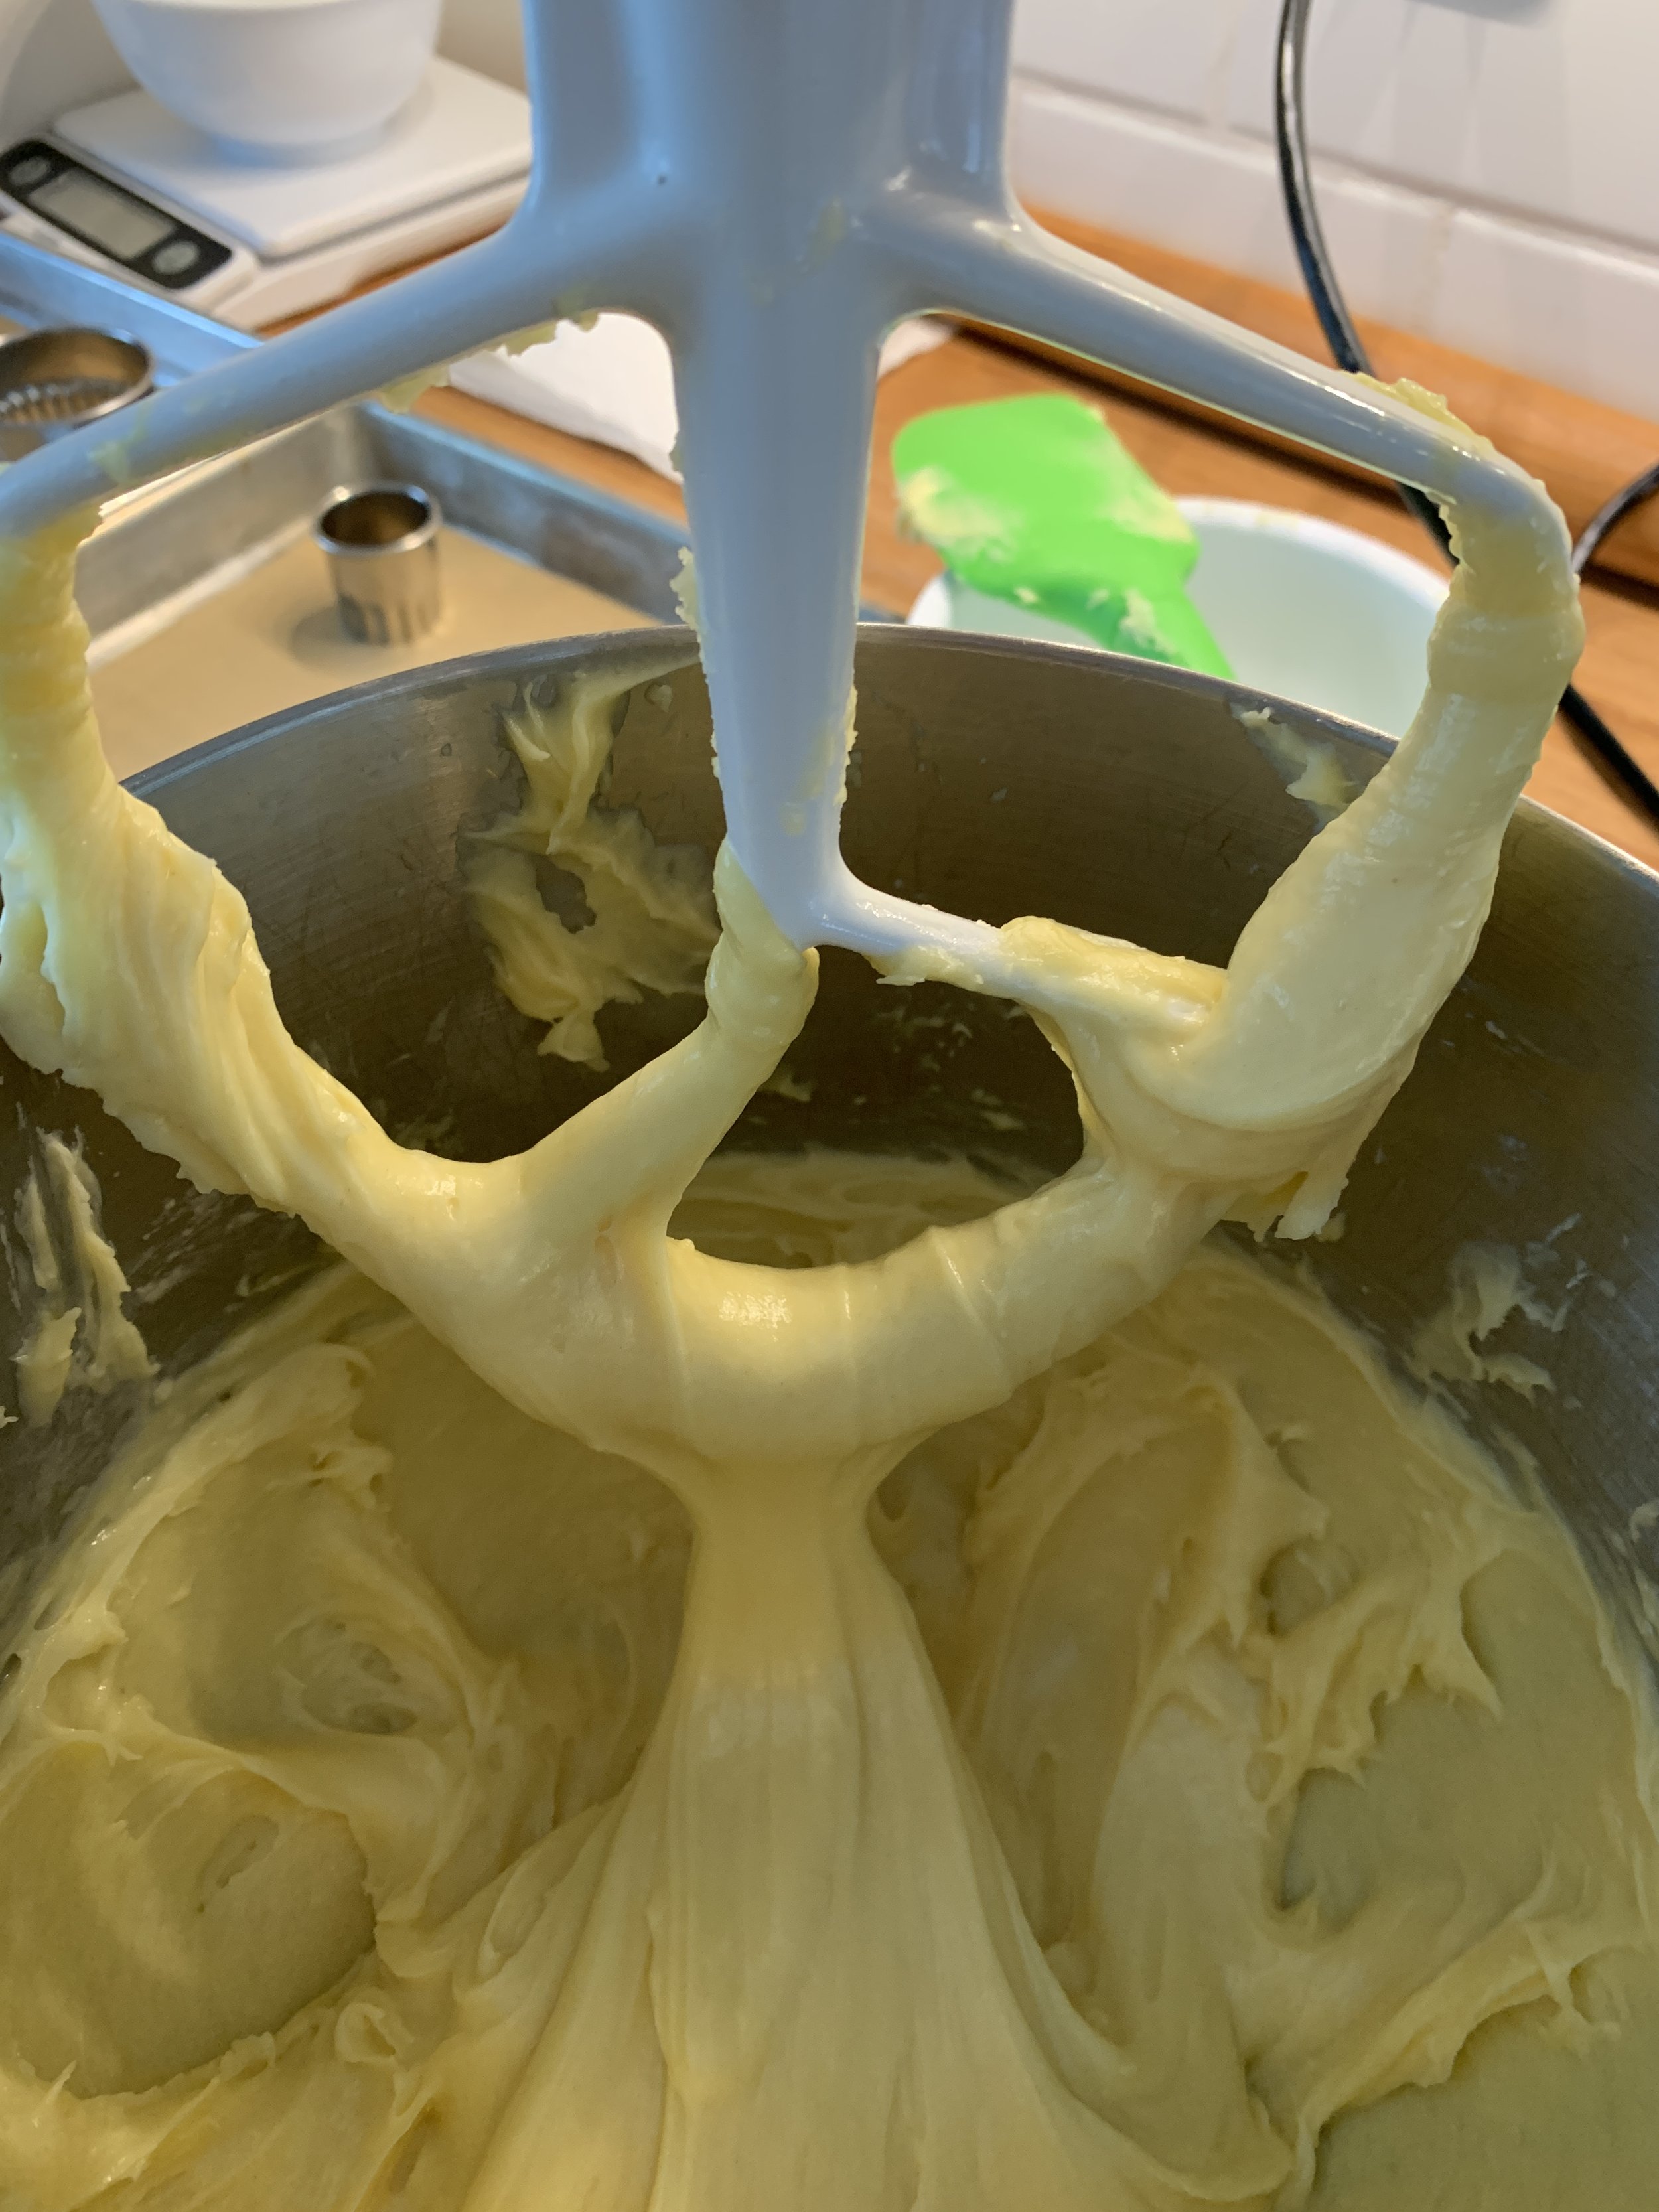
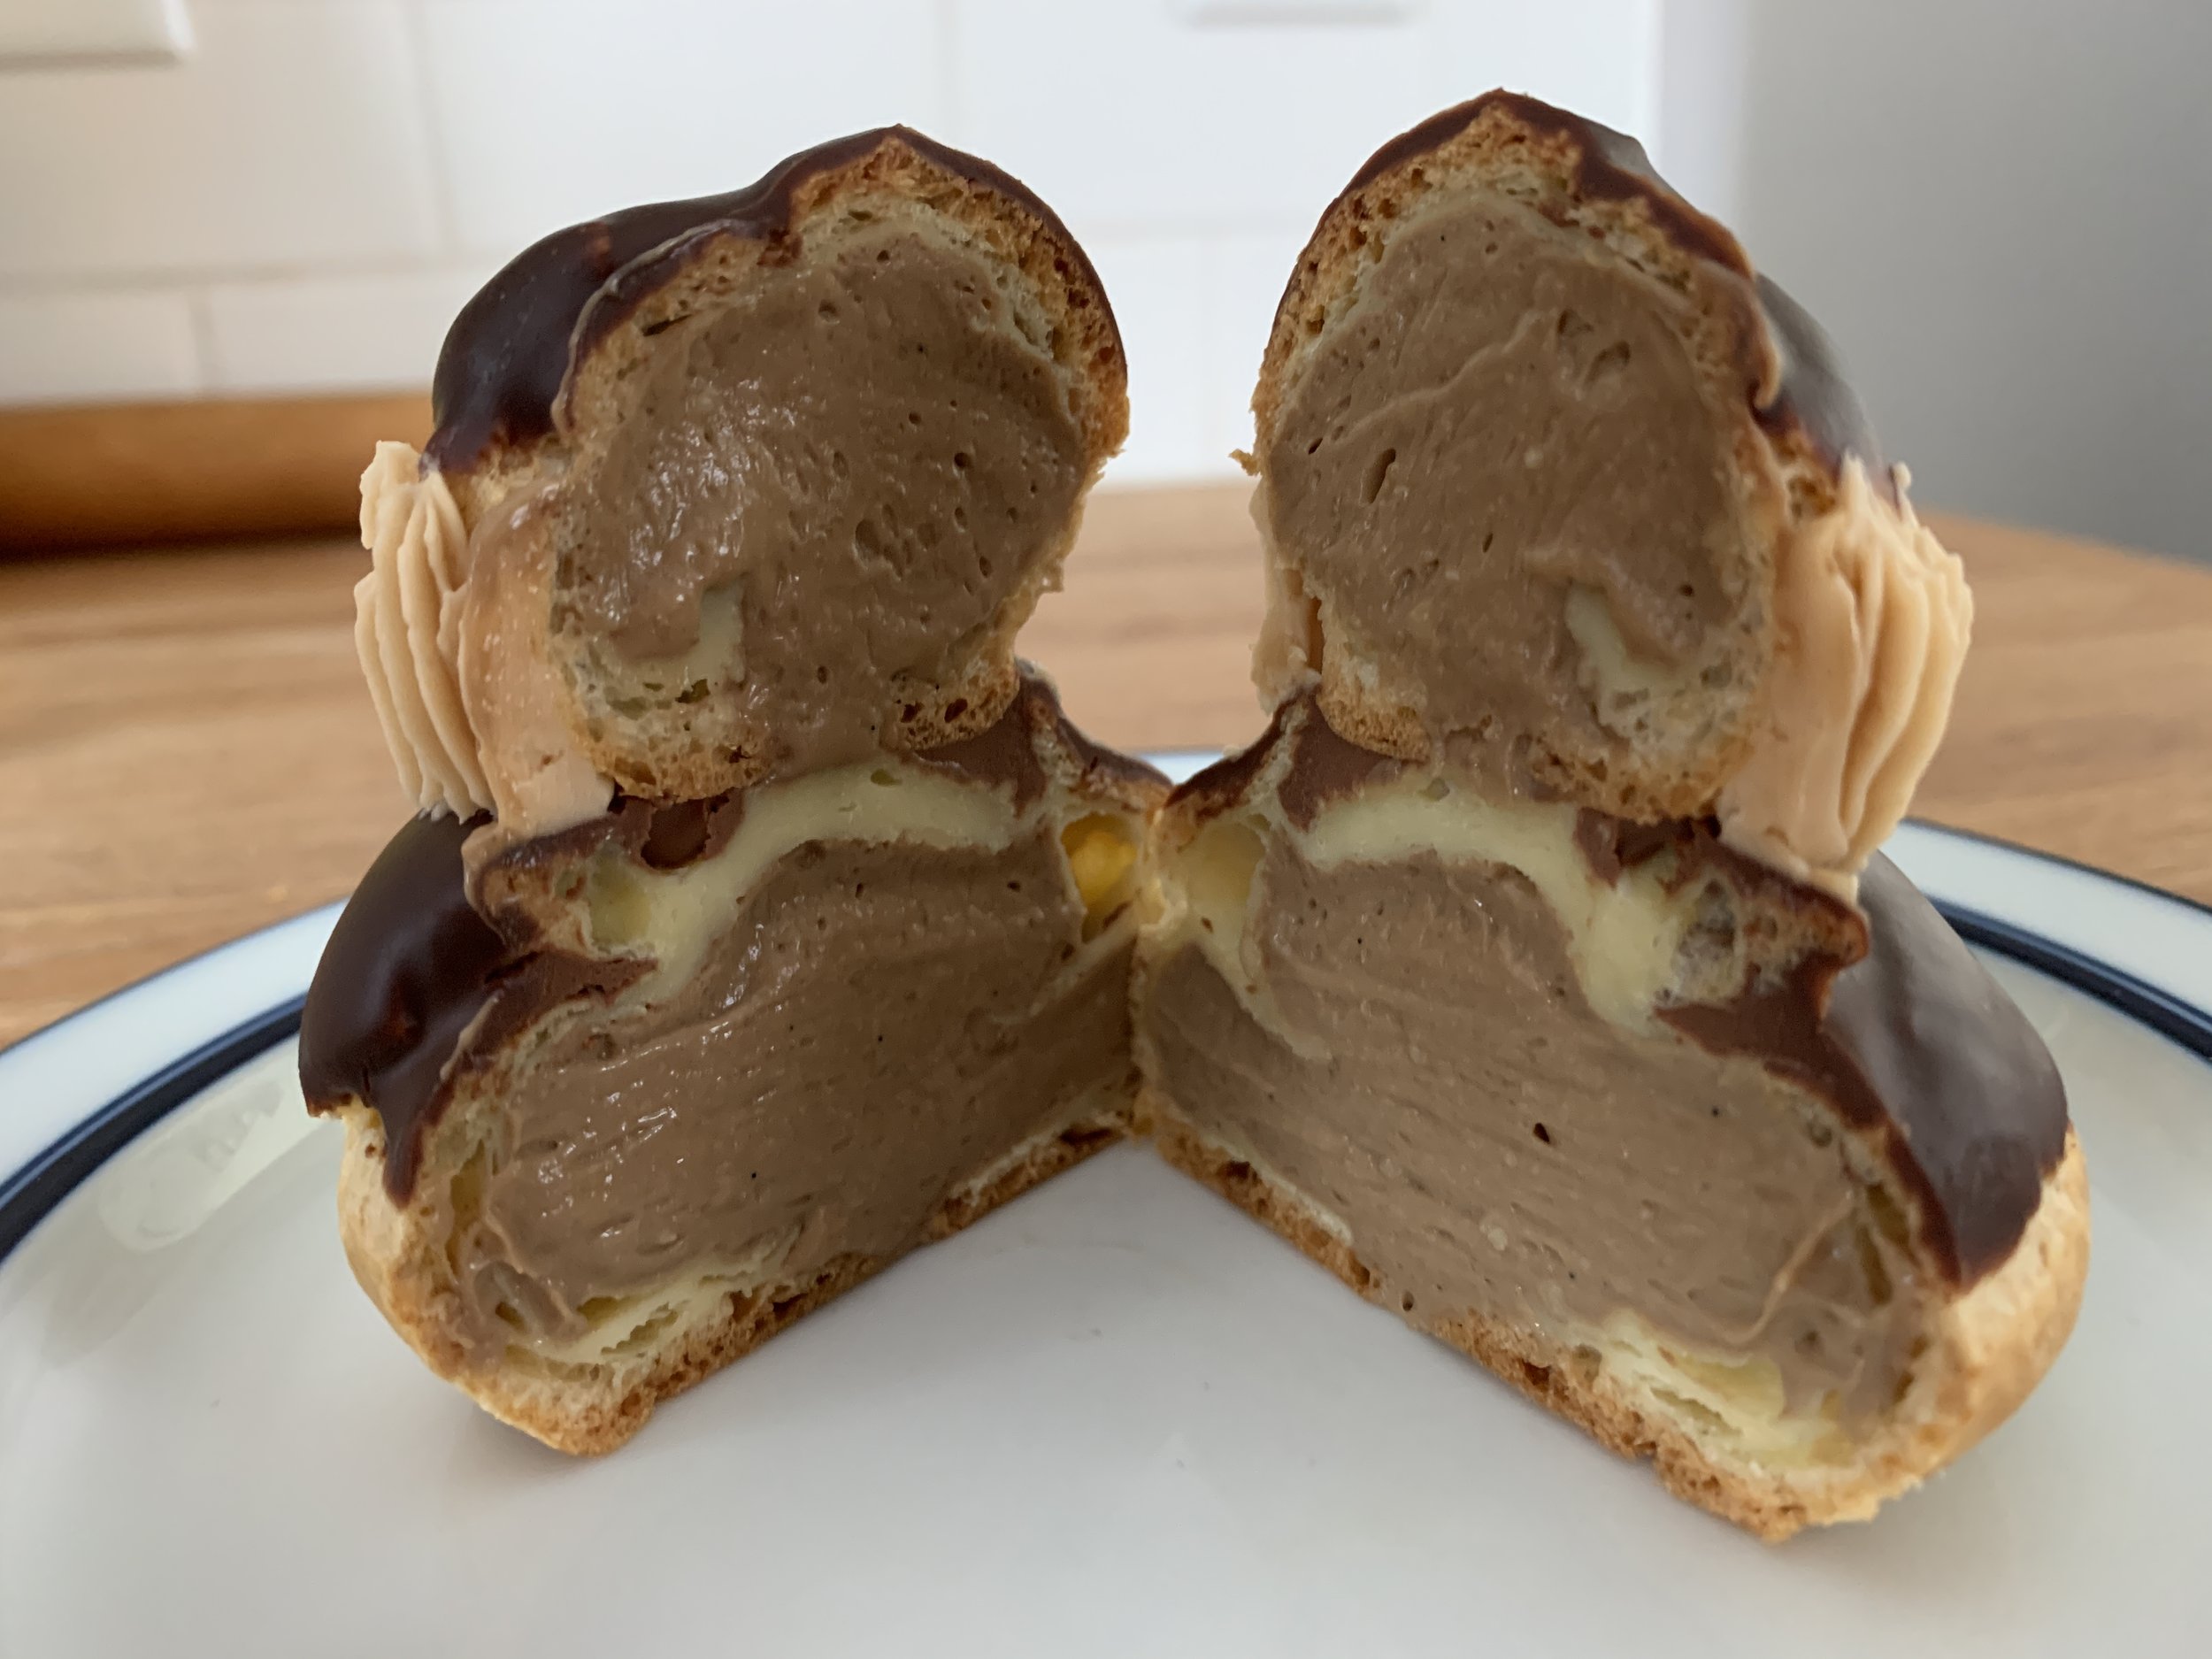
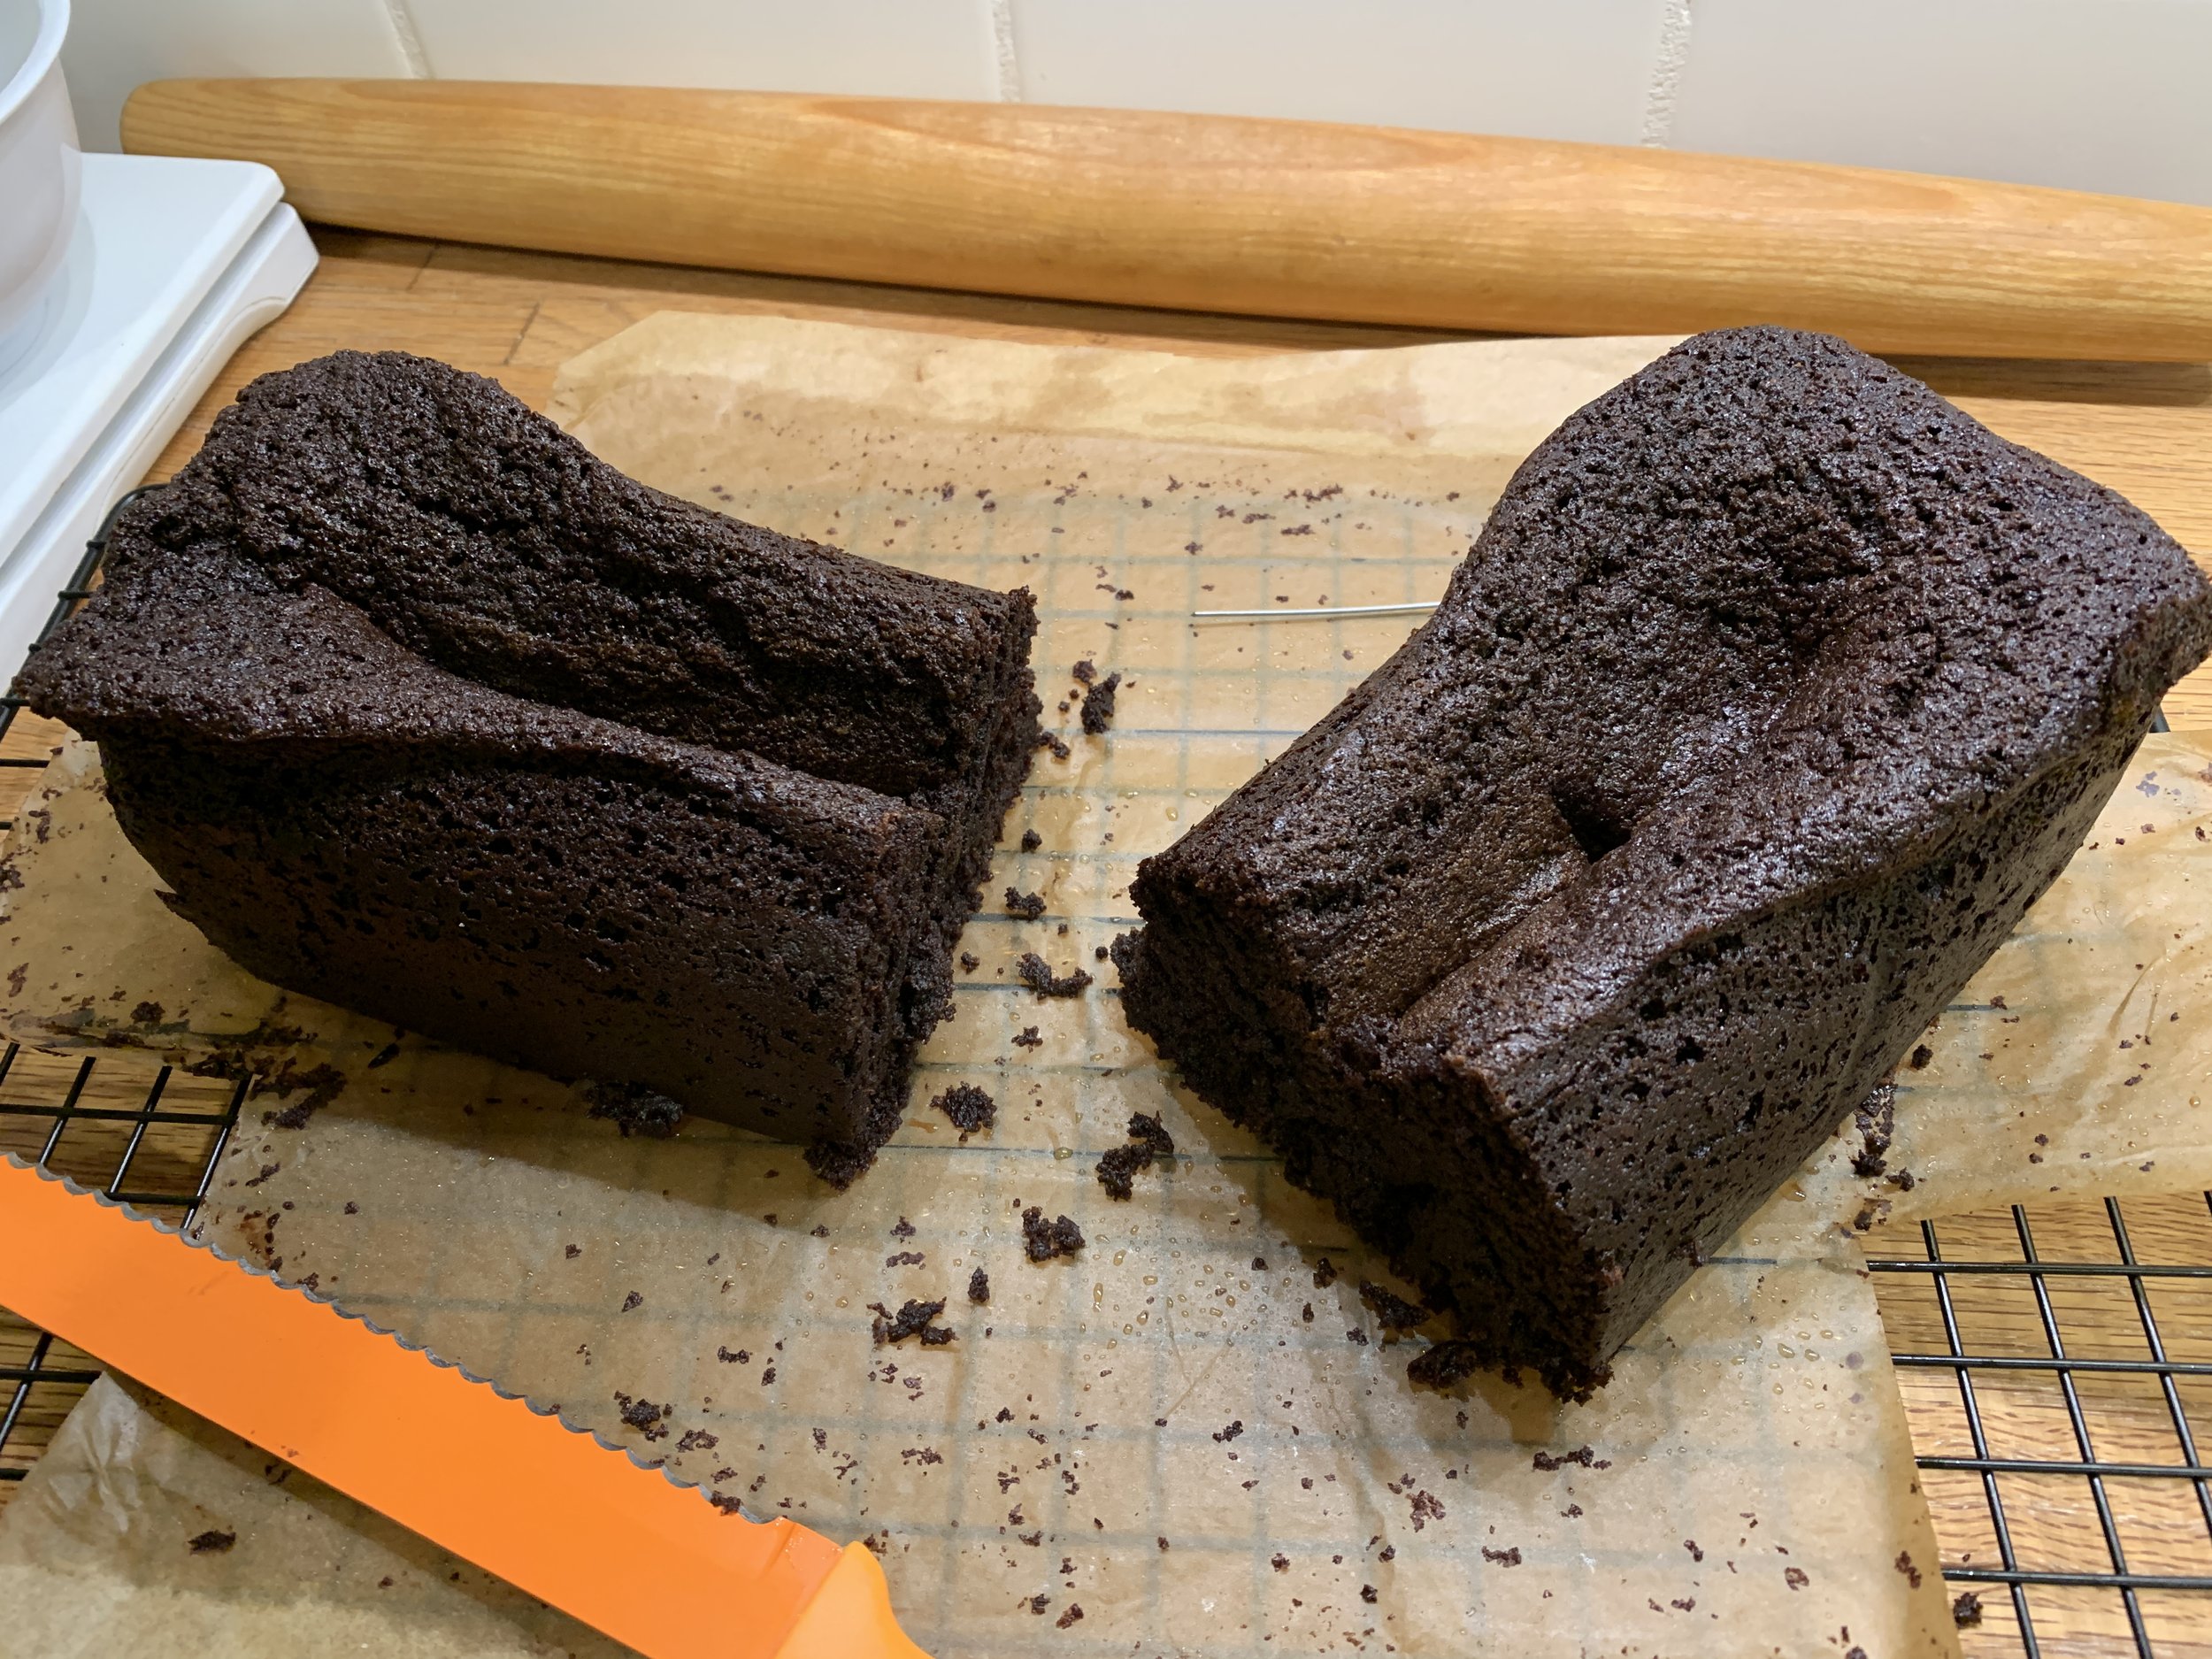
The other day I made a chocolate, spelt, crème frâiche, coffee enhanced loaf that I will definitely try again. The recipe calls for a 9”x5” loaf pan, but I used my mom’s Mirro pan that’s longer and more narrow than a standard loaf. I’ve done that a number of times with other cake recipes that call for a standard loaf but this time the batter was WAY too much for the pan, spilling over the ends like lava. I ended up scooping some of the batter out early on in the bake and then let it finish. Boy did I have my doubts.

Not a pretty picture - sunken right down the middle like a trough. All puckered up! Just goes to show ya that things don’t always end up as you might hope.


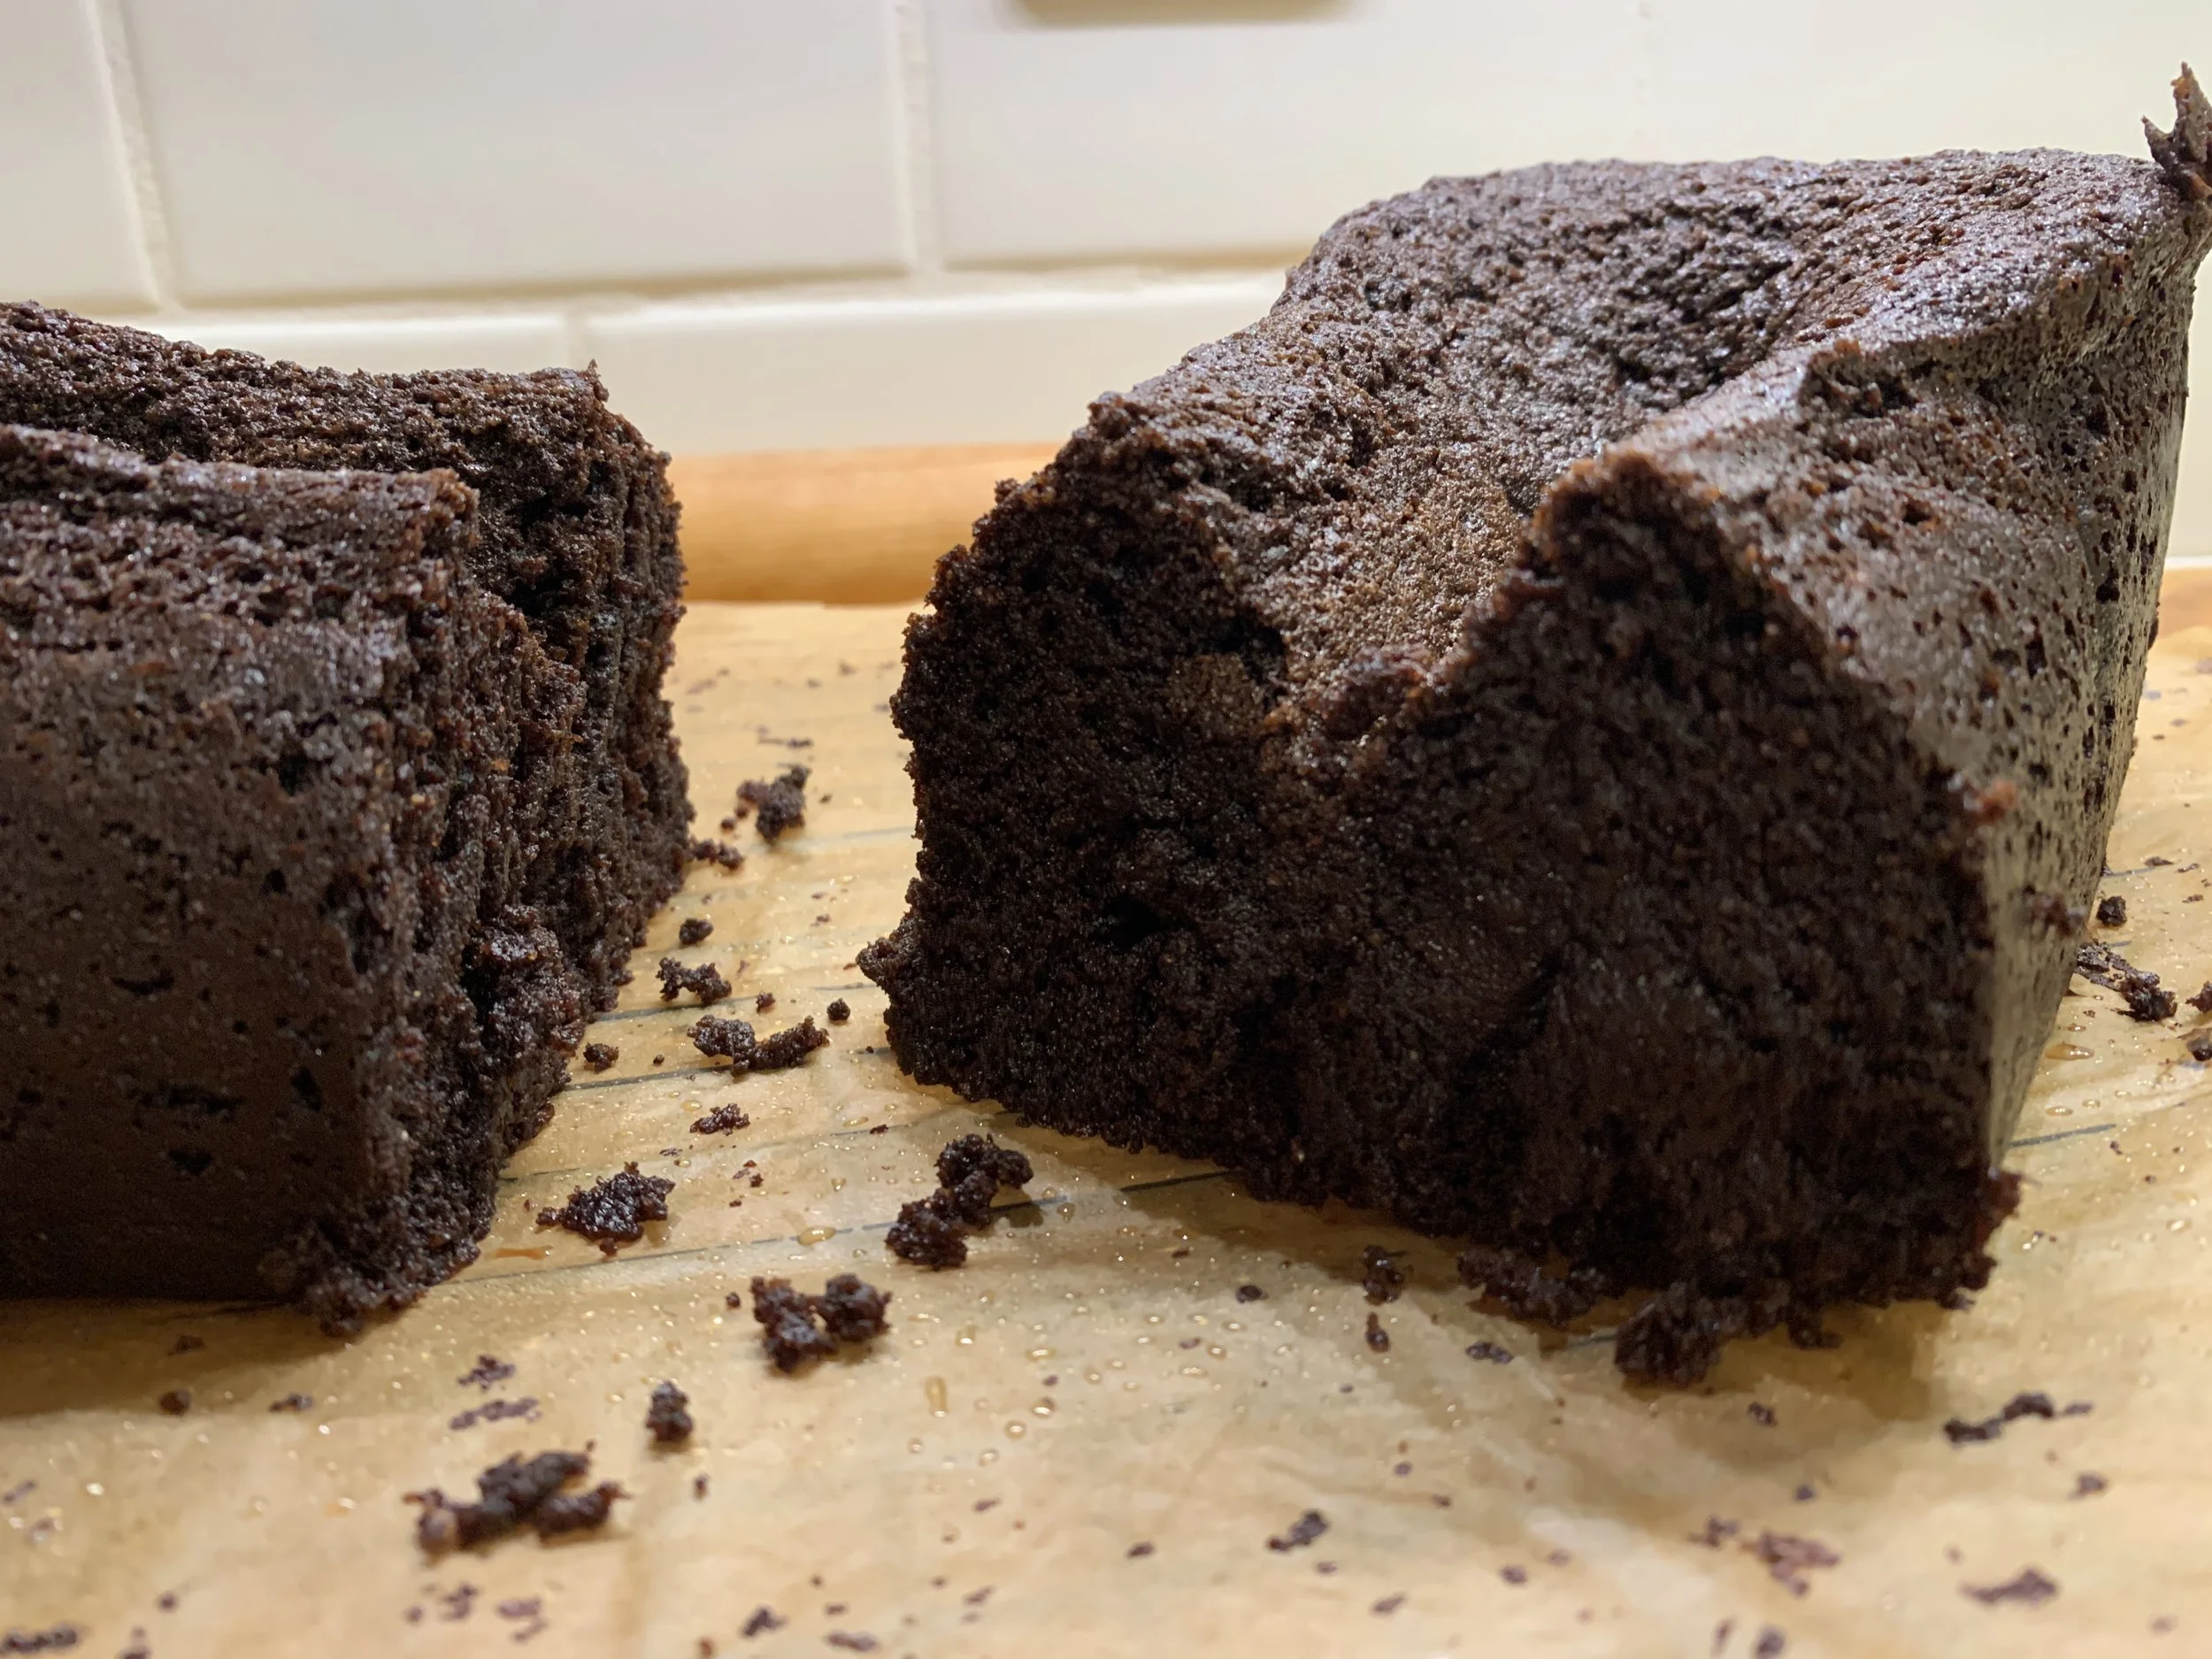
But wouldn’t you know it - it’s delicious! Deep cocoa flavor, moist crumb with just the right level of coffee flavor.


I’ll let you know how the Christmas dessert I hope to serve comes out. Slices and/or chunks of this cake with a vanilla/orange scented ricotta custard, some chocolate ganache and something crunchy to set it off. Maybe a nutty crumble or chopped candied hazelnuts or walnuts. Mmmmmm . . . sounds good!

Cheers and good wishes to all! Catch you later.

My vermont memories window display (No white christmas here!)

Religieuse - fun with pâte à choux

Steve LOVES anything made with choux paste, and coffee religieuse (French for nun) is at the top of his list. He’s been asking me to make these for awhile now, and what better time than during the down days of January as we catch our collective breaths and ease into 2022.

Pâte à choux takes me back to Le Cordon Bleu school days and my stage at Pascal Pinaud’s in Paris’ 5th arr. (15 years ago this month!!). My task each morning was to fill and garnish the èclairs and religieuses for the day. As a matter of fact, the job I was given that very first morning oh so long ago was to make a big batch of traditional crème pâtissière (and make it I did!). Yes, I can do this!!

Chocolate and coffee crème pat (in Brit speak) are de rigueur for the fillings, with fondant of each flavor used to garnish. In recent years dedicated choux shops have popped up in and around Paris with all manner of flavors available.

Even though fondant is typically used to cap the choux buns, I felt no joy when working with the stuff and have avoided it ever since. I choose to use a lovely ganache instead when dressing up my ladies. The collar consists of buttercream piped in a ruffle fashion, another morning job for which I was often chided when not piping perfectly. Looks like I still have a ways to go on the perfect ruffle. Live and learn. BTW - you’ll see all manner of ruffles if you search the internet for religieuse. Lots of variations.

For the filling I used my base crème pâtissière recipe. Since I planned to make just a few religieuse, I divided out 200 g of the warm cream and blended in 30 g of chopped milk chocolate and some coffee extract to taste to go the mocha route.

Let’s do a quick run through of the choux making process. Here’s the recipe - I’ll highlight what I feel are the important things to notice through the steps.

Have your flour and eggs ready in separate bowls. Place the milk/water/butter/sugar/salt in a medium saucepan on low heat. You want the butter completed melted before you turn the heat up.

Up the heat to medium high and bring it to a boil. Have the flour at the ready.

Remove from the heat and dump the flour in all at once, stirring quickly to incorporate. It will look kind of clumpy at first like rough mashed potatoes.

Move it back onto the heat and stir vigorously to release some steam and dry it out for a minute or two. Look for the paste to start forming a smoother ball and there will be a light coating on the pan bottom.

Transfer the paste to the bowl of a stand mixer and let it sit a minute to release some more steam. With the paddle attachment on low add the first egg and blend on medium to incorporate completely. It will look gloppy and will seem like it doesn’t want to come together. Don’t worry.

Note: you can blend the eggs in by hand with a sturdy wooden or silicone spoon - you just have to have enough elbow grease to bring it together!

As you add each egg and blend it in, the paste will become more uniform and smooth. The base recipe I use calls for four large eggs. Here’s the paste after three eggs have been added.

Before I proceed I assess by checking the mixture. It should hold, not tear, and start ribboning down as you lift the paddle and let it hang in a “v”. Not quite ready.

I break up the last egg and add about half, blending and reassessing. I don’t consider myself superstitious but it usually works out for me that about 3/4 of the last egg is just right to call it good. Here’s the “v’ coming off the paddle. Notice the paste has more of a smooth, luscious looking sheen too.

Time to pipe! I pulled out a couple of round cutters to help me eyeball what size I wanted my heads and bodies. I forgot to include my trusty ruler in the shot, but in the image below I’m using a quarter sheet pan which measures 8x12”. That gives you some scale. I used a round tip for the bodies and a star tip, just because, for the heads (which you can sort of appreciate in the final analysis, but a round tip is just fine).

Here they are all baked and cooled. I had an extra head which I filled with a bit of mocha cream and ate. Gotta test the product.

Match the heads and bodies and shave enough top off the bodies to give a flat surface on which to perch the head.

When ready for the filling portion of the program, I give the chilled cream a good smoothing out in the mixer with the paddle or in a bowl with a spatula, then fold in a dollop of whipped cream to lighten it. I learned early on that Parisians are none too happy if their choux aren’t properly filled. There has to be a certain heft to show that the job is done well.

I have a basic one to one dark chocolate ganache on hand for dipping (once made, let it cool a bit so it doesn’t run down the sides). Fill first, dip second.

Poke holes in the bottoms of the heads and bodies then pipe in your cream. As you hold the choux with your non-piping hand, you’ll appreciate the heft as you fill. Fill until some cream starts to ooze out, a sign that you’ve filled adequately. You can scrape off the excess and have a snack.

Set the buns upright and dip both bodies and heads in ganache to give a nice cap. Set the heads on the bodies - the ganache will hold them together.

Once assembly is complete, I usually hold them in the fridge until I’m ready to do the collar. I used sea salt caramel Swiss meringue buttercream for my ruffles, piping with a small star tip.

I think of these nuns as roly-poly with a mock turtleneck look.

As you might imagine, Steve was a happy camper. Filled choux will keep well in the fridge for a couple of days to give you some time to savor the treats.

Here’s a cross section - you can see they are chock full of cream. The Parisians would be happy.

Coming soon! More choux fun with Paris Brest.

Stay warm and stay healthy. Ciao for now.

Puttering in the kitchen in August

Raspberry cream cheese Danish

Raspberry cream cheese Danish

I first published this post a few days ago but I’ve broken out the blueberry scone section into it’s own post and edited this one. So, if you saw it the first go-around, it’s different now.

We’ve had some touch of autumn days (which I LOVE!) but also some heat and humidity coming back in which doesn’t typically inspire one to do much baking. Even so - I still manage to get some quality kitchen time in. Gotta do it.

The raspberry Danish above are a result of tweaking and finalizing my Danish dough recipe mentioned in the recent Swedish cardamom bun post. So delicious!

Following are a few more visuals of some of the things I’ve been doing lately. I stumble across recipes that either get my attention or not, but those that might incorporate a different technique or ingredient are the ones that I put on the to-do pile.

Please enjoy the pics and dream of the things you might create!

First these blueberry scones are from a NYT article by Dorie Greenspan on Joanne Chang’s (of Boston’s “Flour” fame) recipe. Here’s a more fleshed out post on these. You should give them a try!

Maple glazed blueberry drop scones

Maple glazed blueberry drop scones

Next up - dukkah shortbread. I’ve been wanting to do this for awhile now. Dukkah is a middle Eastern and Egyptian concoction made with toasted nuts, herbs, seeds and spices that are coarsely ground and used in marinades or as garnish for soups, salads, meats, veggies or whatever you want really.

There are LOTS of recipes. Just Google it. I used pistachios and hazelnuts, sesame seeds plus cumin, coriander, fennel and sea salt. I blended about 75 g of the mixture into my base shortbread dough made by blending 75 g sugar (consider half or all dark brown sugar here to add some caramel notes to the nuts and spices) with 200 g unsalted room temperature butter; blend in 250 g all purpose flour (or use 60 g whole wheat pastry flour and 190 all purpose) along with the dukkah . Wrap, chill at least an hour, then roll out and cut shapes of choice. This is good. Sweet and savory. I might leave the fennel out next time and add almonds into the mix.

Dukkah shortbread cookies

Dukkah shortbread cookies

Individual cobblers are fun. These are made with fresh Michigan peaches and blueberries. Great with vanilla ice cream of course.

Individual peach blueberry cobblers

Individual peach blueberry cobblers

Financier batter is simply ripe with flavor possibilities.

Coffee walnut streusel financier

Coffee walnut streusel financier

Next up - these maple almond butter cakes are from a recipe on the underside of the foil lid on Siggi’s yogurt. I don’t keep flax meal on hand so I used almond flour instead. Other than adding a bit of almond butter to shortbread dough in the past, this is my first foray into baking with a significant amount of almond butter. Let’s just say I could get used to it.

There are many brands out there - Justin’s is a popular one. I used “Barney Butter” and have since purchased a roasted almond butter from my favorite almond paste supplier Mandelin. I’m looking forward to trying it.

IMG_1294.jpg

I made these twice. It’s an easy mixing process. The first time with some blueberries and/or peaches tucked on top before baking plus a basic crumb top. Two different sizes - 3” Fat Daddio aluminum pans and smaller panettone papers. One of the 3-inchers went to my mom for her birthday.

IMG_1222.jpg

The second time I used one of my favorite silicone muffin molds, didn’t add fruit but made a delicious almond streusel topping.

IMG_1259.JPG

I will say these are growing on me. They have very little sugar in them compared to many muffin recipes (1/4 cup maple syrup and just a couple tablespoons of brown sugar) so at first bite they seem to fall flat on the taste buds yet . . . . the texture and overall experience is nice, and they seem right somehow. Even Steve said so.

Drizzling some maple syrup or honey on before eating is an excellent addition. The fruit version definitely beats the non fruit and with that added almond streusel . . Yum. Methinks a nice dollop of jam in the center of each before baking would be great too. Next time.

A look ahead - even though it has taken me a seemingly endless amount of time, in addition to putting the final touches on a new brioche feuilletée post, I’ve started the draft for a baguette project piece as well. I love sharing details of processes and steps but that also means I spend a lot more time reviewing and comparing in order to offer a reasonable summary of whatever it might be. At any rate, after 24 weeks of essentially being home, each day brings a different vibe to our lives.

Happy baking, be reasonable and don’t forget that periodic deep breathing helps too.

Soon we’ll be deep into official “baking season”. Love it.

Sweet and savory croissant twirls

IMG_4165.jpg

Time for more croissant dough fun! Love it!!

Sweet and savory coming your way. Some months back I posted on this very topic using my whole wheat version of croissant dough. Classic croissant and spirals were the forms I went for then and now its time for - twirls!

There are so many shapes to be made from croissant dough, and, once you’ve mastered the base recipe and the nuances of lamination, there’s (almost) no limit to what you can create using different twists and turns. Twists + swirls = twirls!

First up - a savory version using my whole wheat croissant dough only this time I chopped fresh herbs (basil, thyme, rosemary) and added them right to the butter block before proceeding with the beurrage et tourage. Hence an herbed whole wheat dough was born.

I buttered standard muffin tins and coated the wells with finely grated cheddar.

IMG_4144.JPG

After rolling the dough out to 12” x 18” I spread the top half of the dough with a mixture of 60 g (2 large) egg whites, 50 g toasted bread crumbs, 1 teaspoon dry mustard and pinches of black and cayenne peppers. Then a good sprinkle of 5 ounces grated cheddar cheese (Barber’s vintage reserve and Prairie Breeze are two of my faves).

IMG_4145.jpg

Then the bottom half gets folded up over the top.

IMG_4146.jpg

Cut into one inch strips, twist and coil into twirls.

IMG_4148.JPG

Tuck into the prepared muffin tins, sprinkle a little extra cheese on top, cover loosely with plastic wrap and let rise in a warm space about 45 minutes. Meanwhile heat your oven to 375ºF.

IMG_4149.jpg

These bake about 20-25 minutes until golden.

IMG_4159.jpg

Pop ‘em out of the pan and let cool on a wire rack.

Taste time was a delightful treat of cheesy herby layers with just a hint of sweetness.

IMG_4163.jpg

For the sweet version I went for a coffee walnut theme. Using my basic non-herbed croissant dough, the steps are the same as outlined for the savory version. This time my filling is made with 3 large egg whites, 100 grams dark brown sugar, 80 g ground walnuts and 100 g coarsely chopped toasted walnuts, a tablespoon almond flour (for a bit more binding of the mixture) plus orange zest from one medium orange.

I prepped my individual cake pans with butter and espresso sugar (grind 1 tablespoon espresso powder with 200 g raw sugar).

IMG_4152.JPG

Roll out the dough, spread the top half with the coffee walnut filling and a light brush of egg white plus chopped nuts on the bottom half . . .

IMG_4153.jpg

. . . fold it up, cut strips, twist and swirl. While shaping keep a bit of a stretch on the dough as you go. The filling here is more gooey than the savory version - just forge ahead even though it seems as though stuff is oozing out. It’s OK!

IMG_4154.jpg

Tuck ‘em in the prepped pans, cover and let rise about 45 minutes. Heat that oven of yours to 375ºF and bake away!

IMG_4155.jpg

Once out of the oven, gently lift them from the pans and place on a cooling rack. I brushed them with some simple syrup for a nice sheen. Alternatively roll them in espresso sugar while still warm, let cool and enjoy.

IMG_4168.jpg

Coffee and walnut go so well together, and the coffee essence here was just right. The orange didn’t come through very strongly so I’d add more zest next time (you can never have too much zest!).

It’s great fun to dream up other ways to use croissant dough. I’m keeping my thinking cap on and so should you. Happy baking and happy autumn!

IMG_2049.JPG