Paris Brest - more fun with pâte à choux

After my recent post on religieuses and the steps of making pâte à choux, while we’re in the mood let’s take a look at Paris Brest. Another classic choux paste creation, it’s reportedly named to commemorate the famed Paris to Brest bicycle race, being created years ago by a pastry chef to resemble a bicycle wheel. I’m only one in a long, long, long line of folks who have written about this very thing.

One can make the round any size - large, medium or individually small - it’s all up to you. I used to make individual ones on occasion back in our Providence days, but it’s certainly been awhile. Since Steve and I are the only ones around to eat the goods, I decided on a round about 6-7 inches in diameter that would yield decent wedges to be consumed over 2-3 days.

I piped and baked the Paris Brest rounds the same day as the religieuses then held them in the freezer overnight before assembly the following day. One can pipe one ring with two tiers, splitting it in half once baked, but I decided to bake two separate rings, one for the top and one for the bottom.

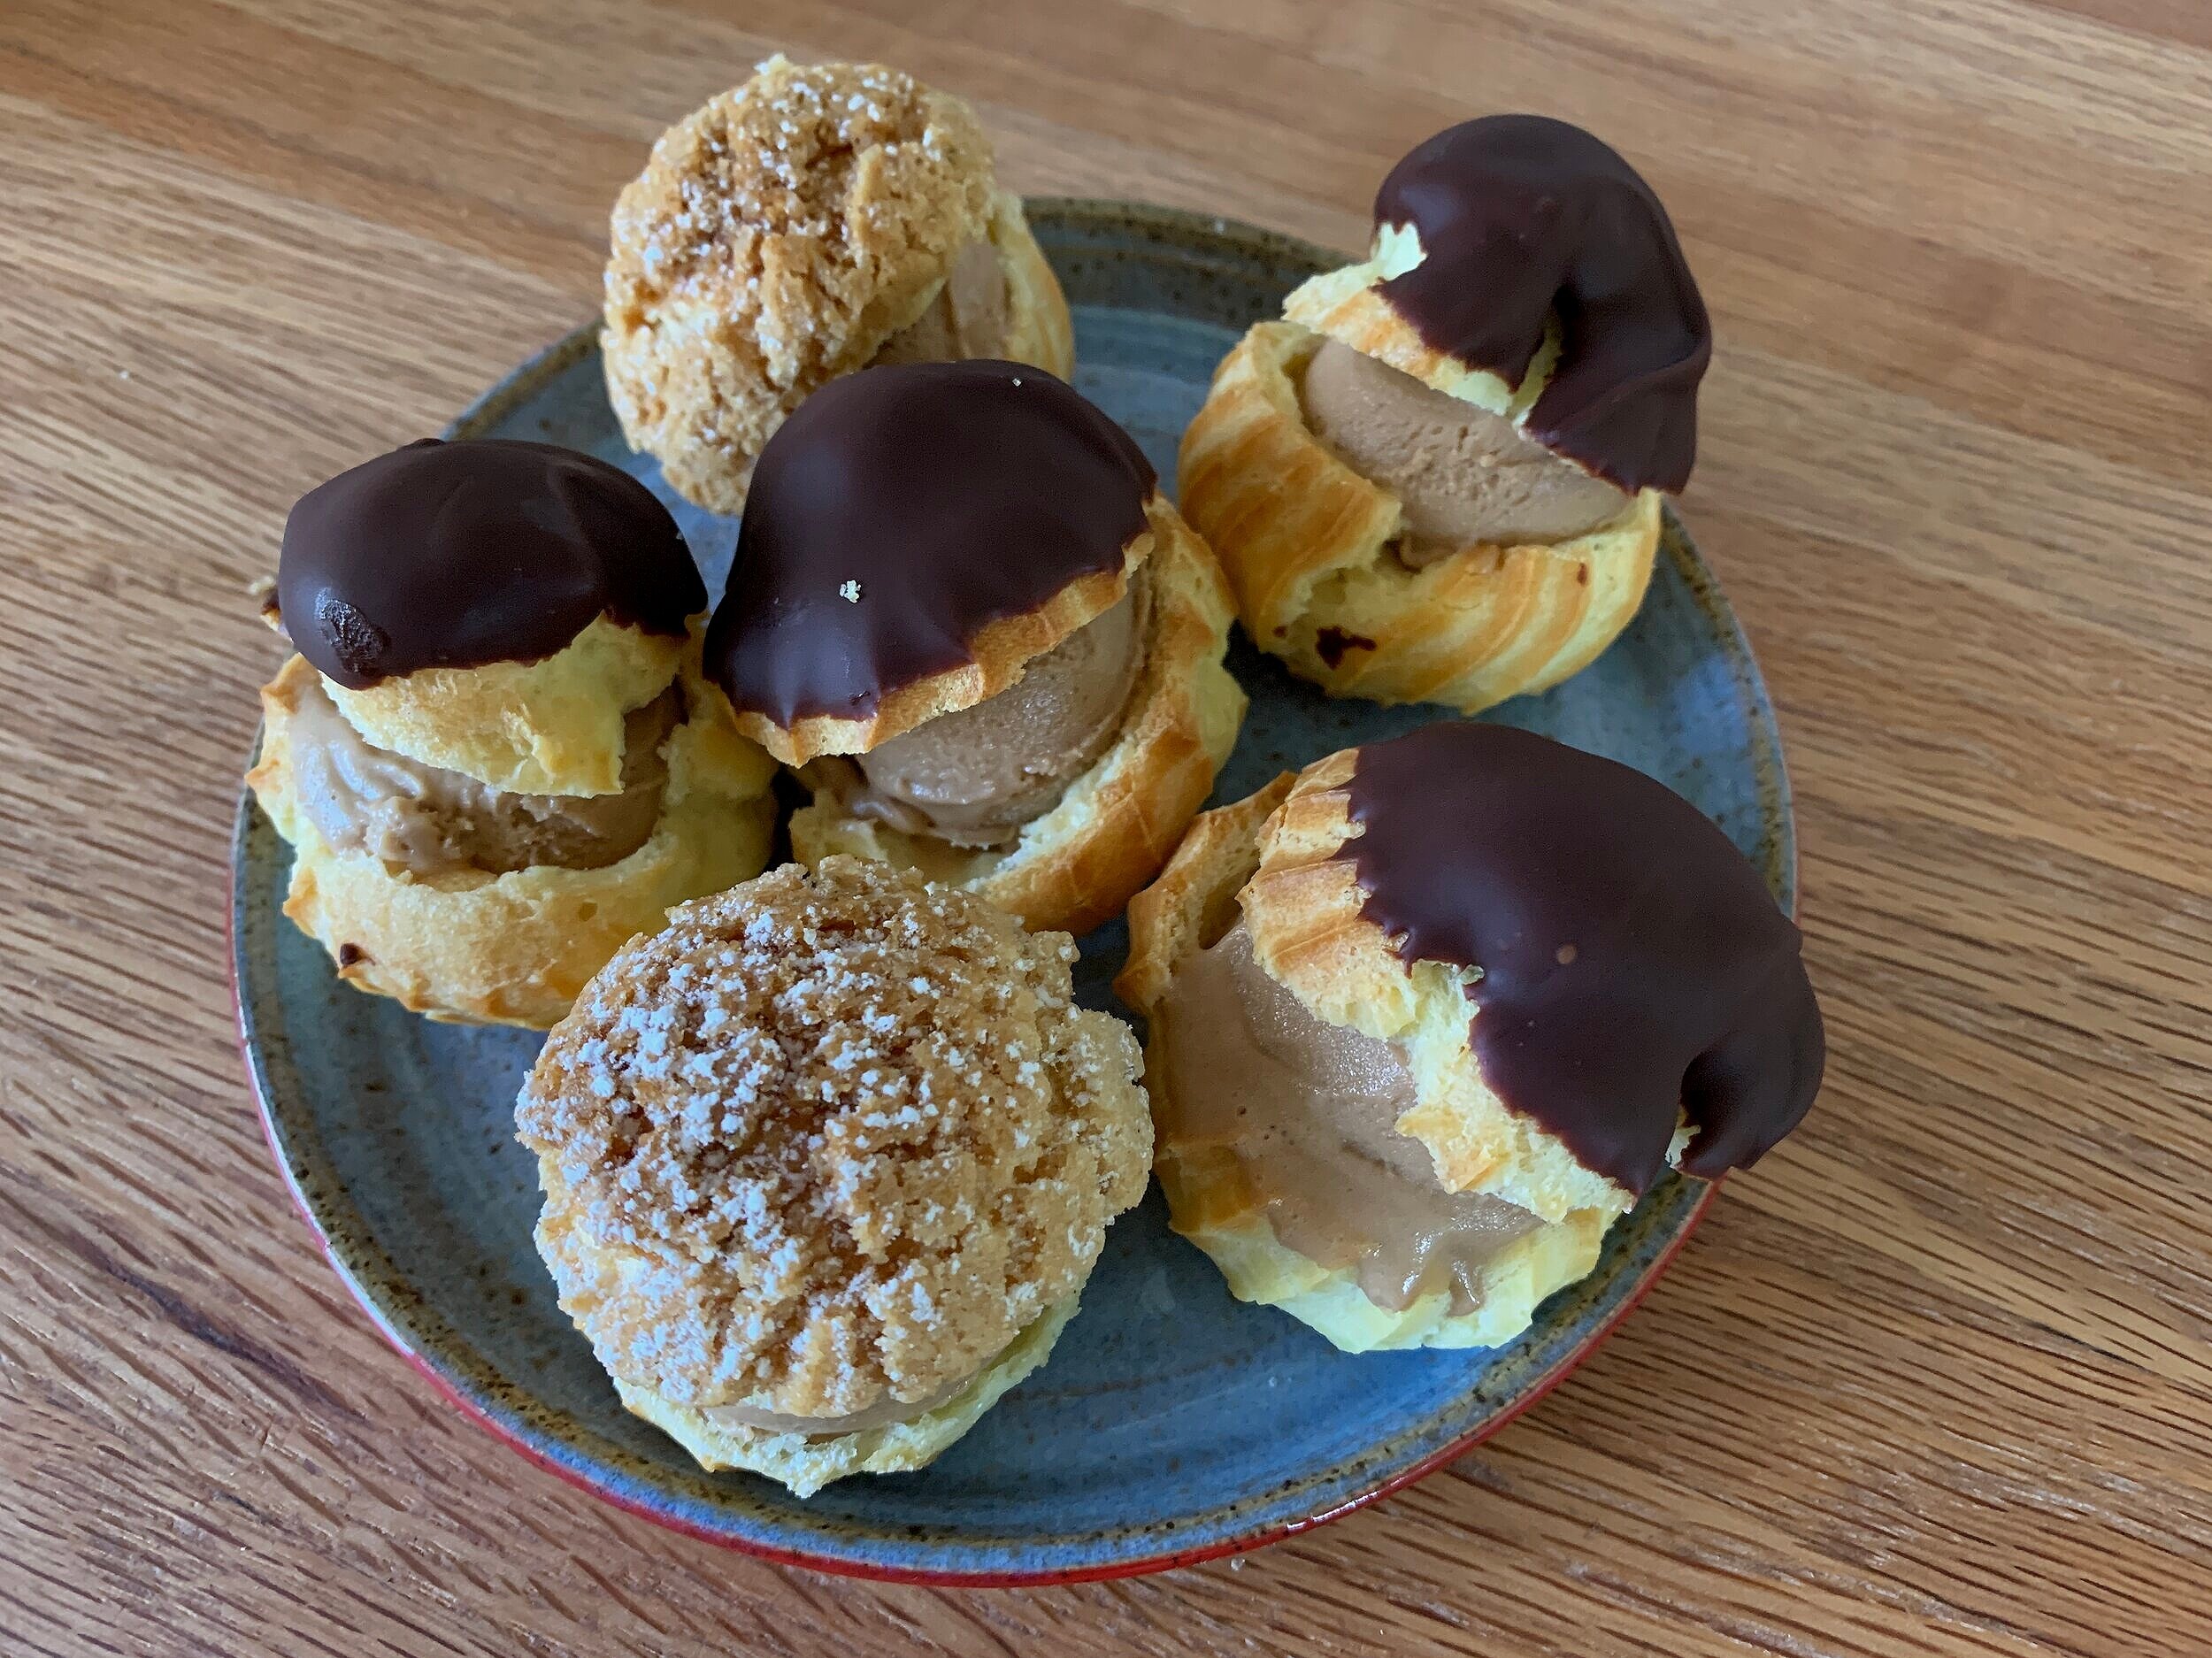
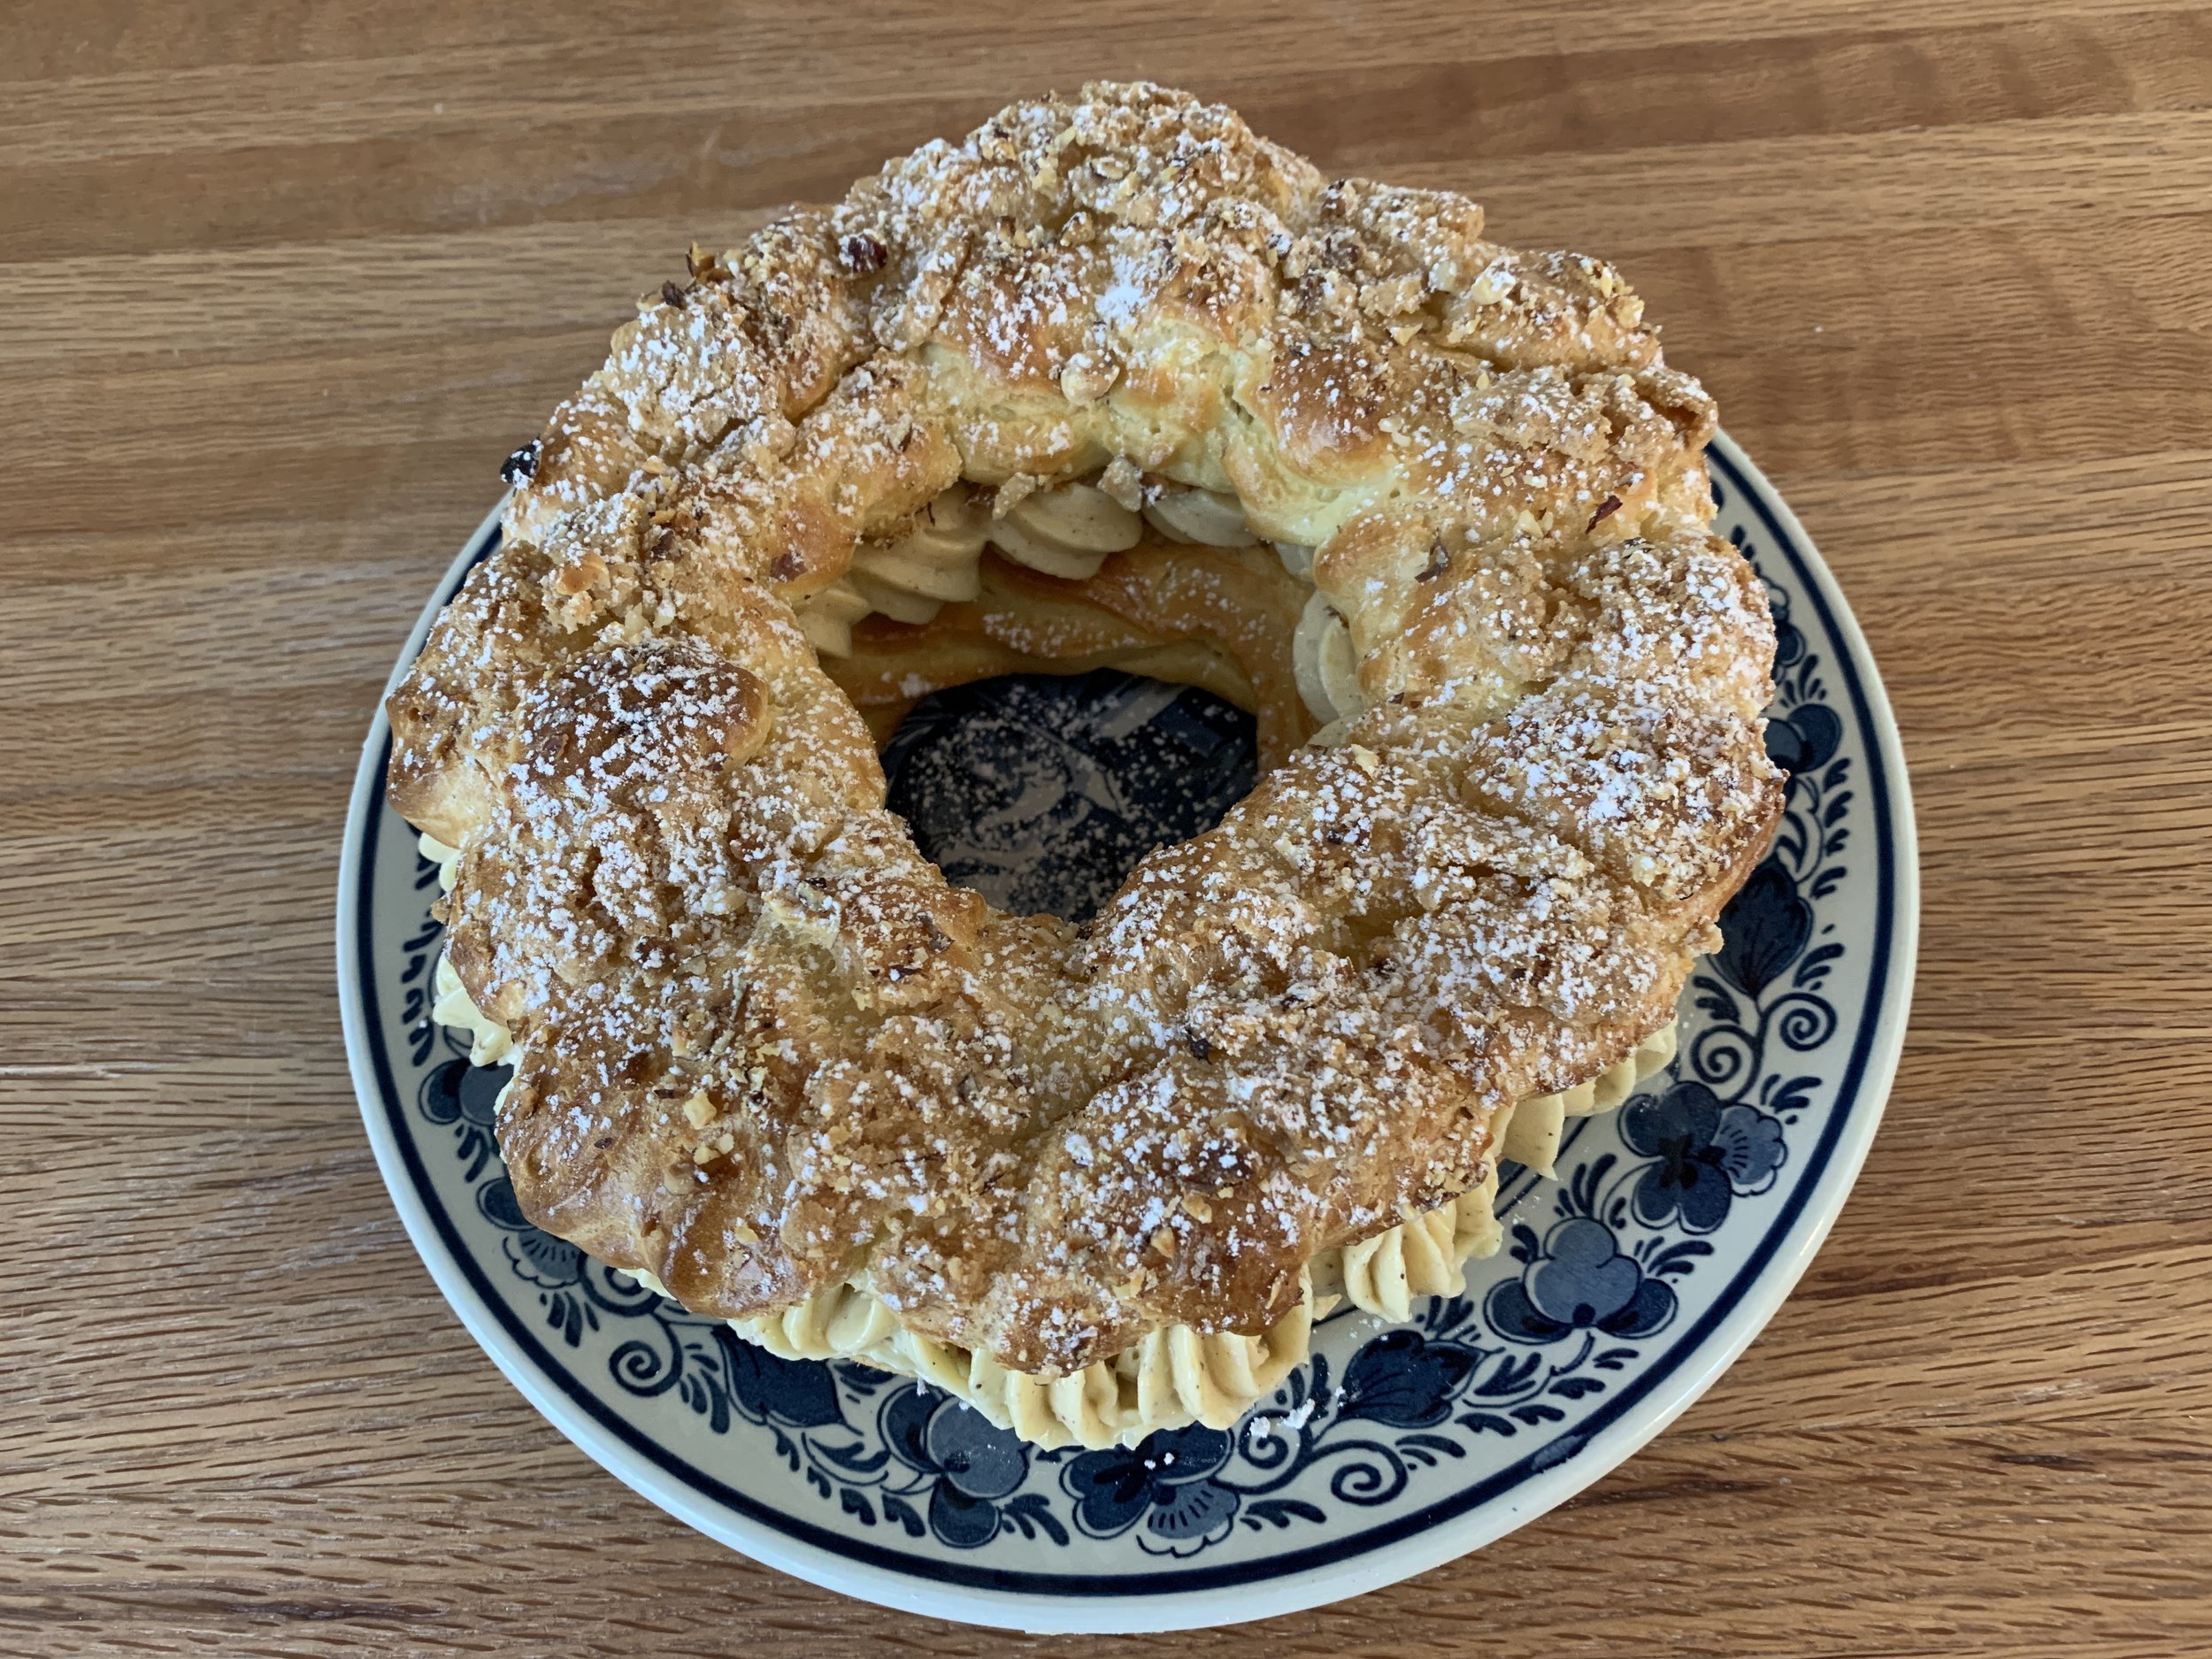
Here’s the breakdown. Draw two circles of your chosen size on parchment, overturn the paper and place it on a sheet pan. Using a medium star tip I piped a ridged bottom layer and a more swirly top layer. I tucked in small rounds of “crunchy top” circles then sprinkled on some chopped hazelnuts.

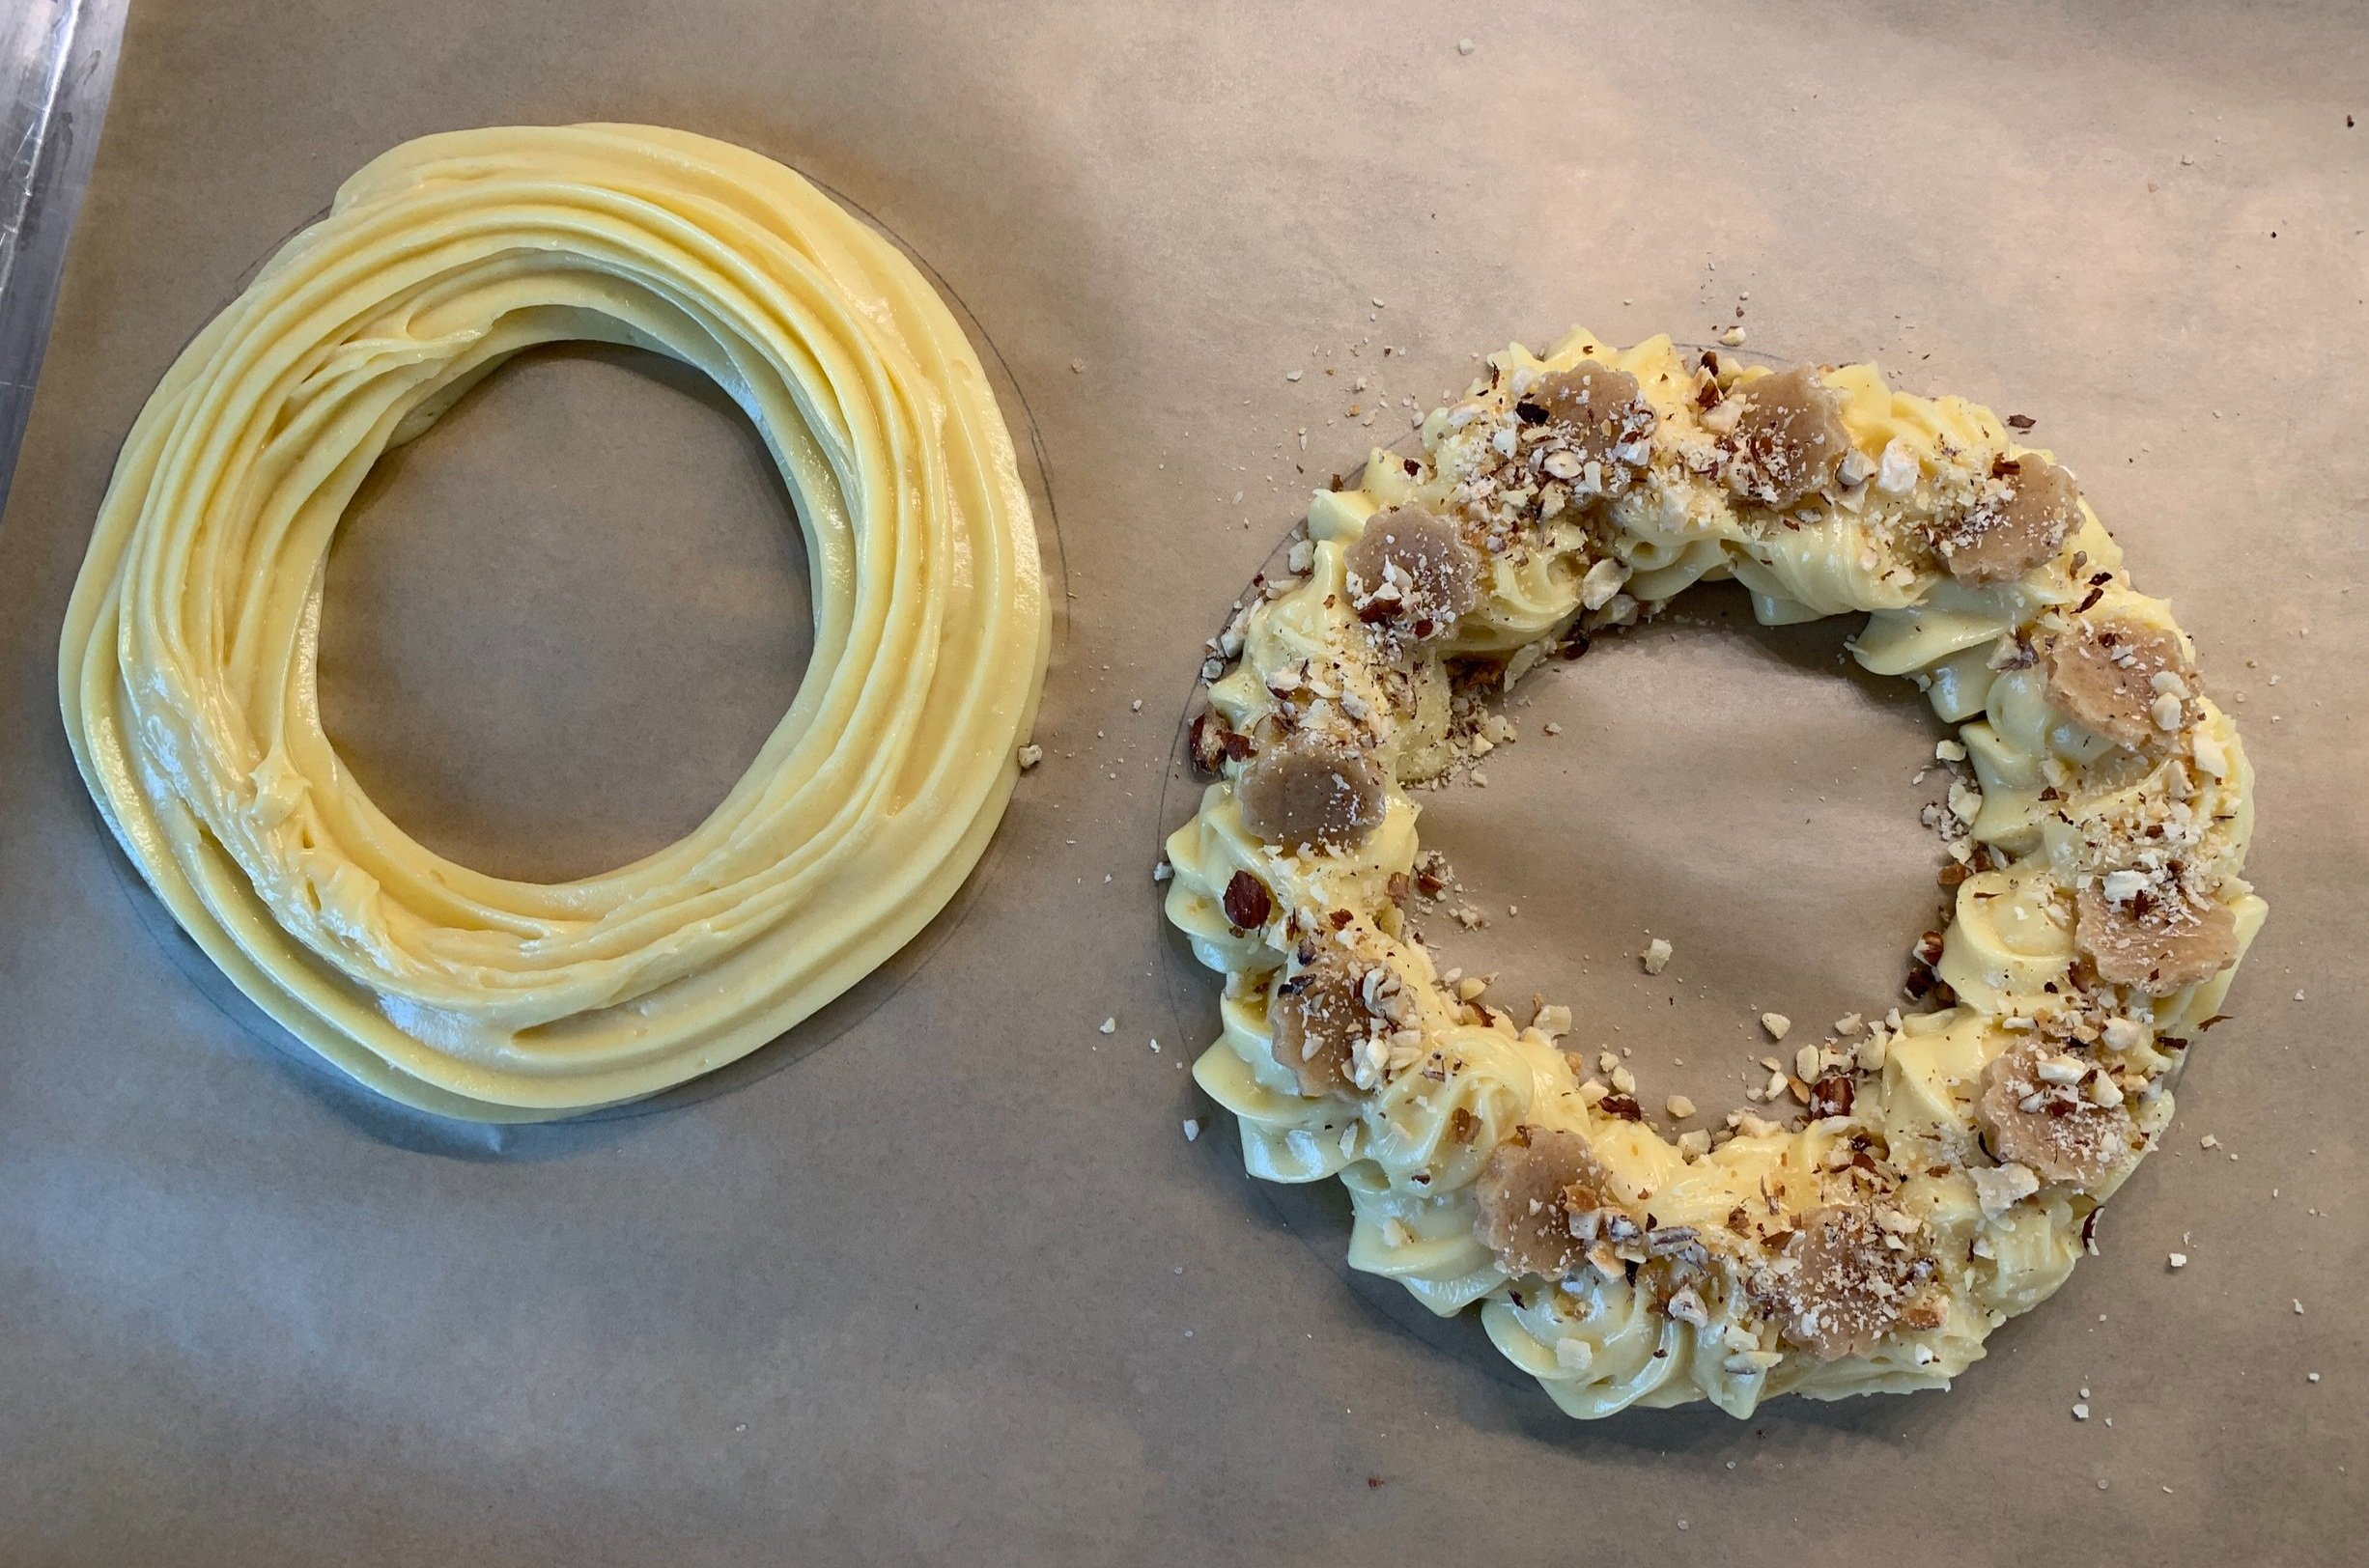
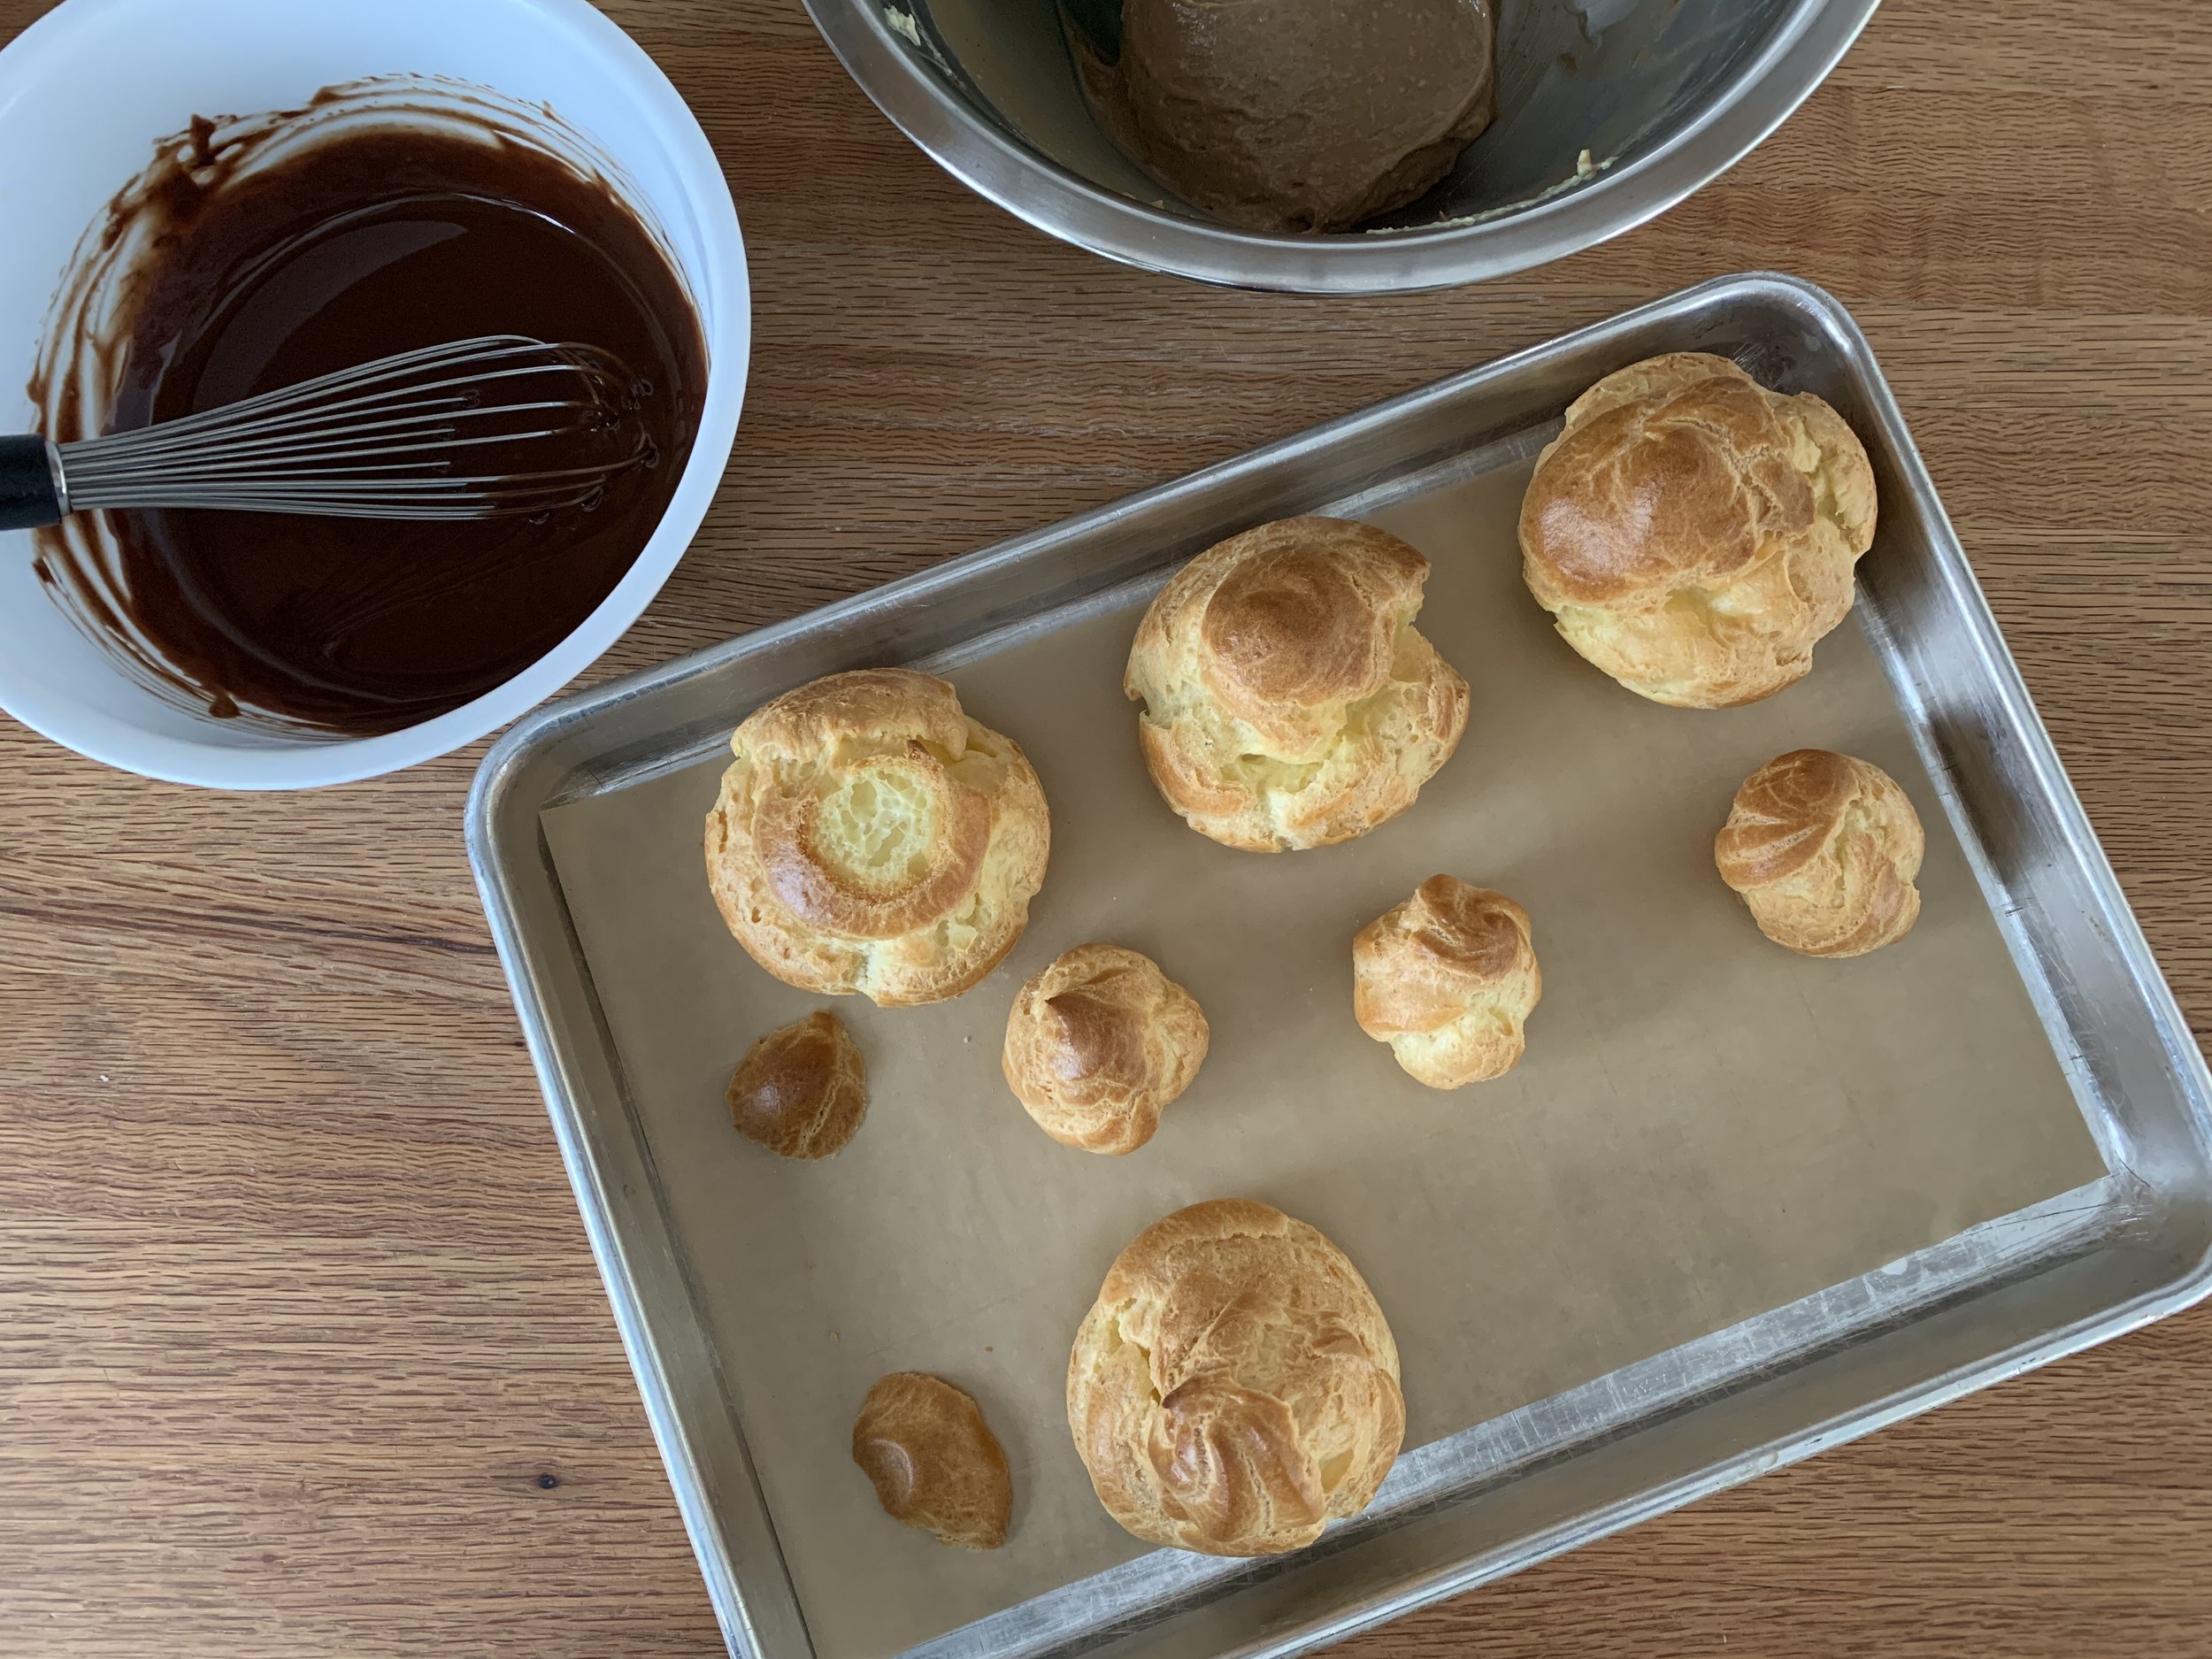
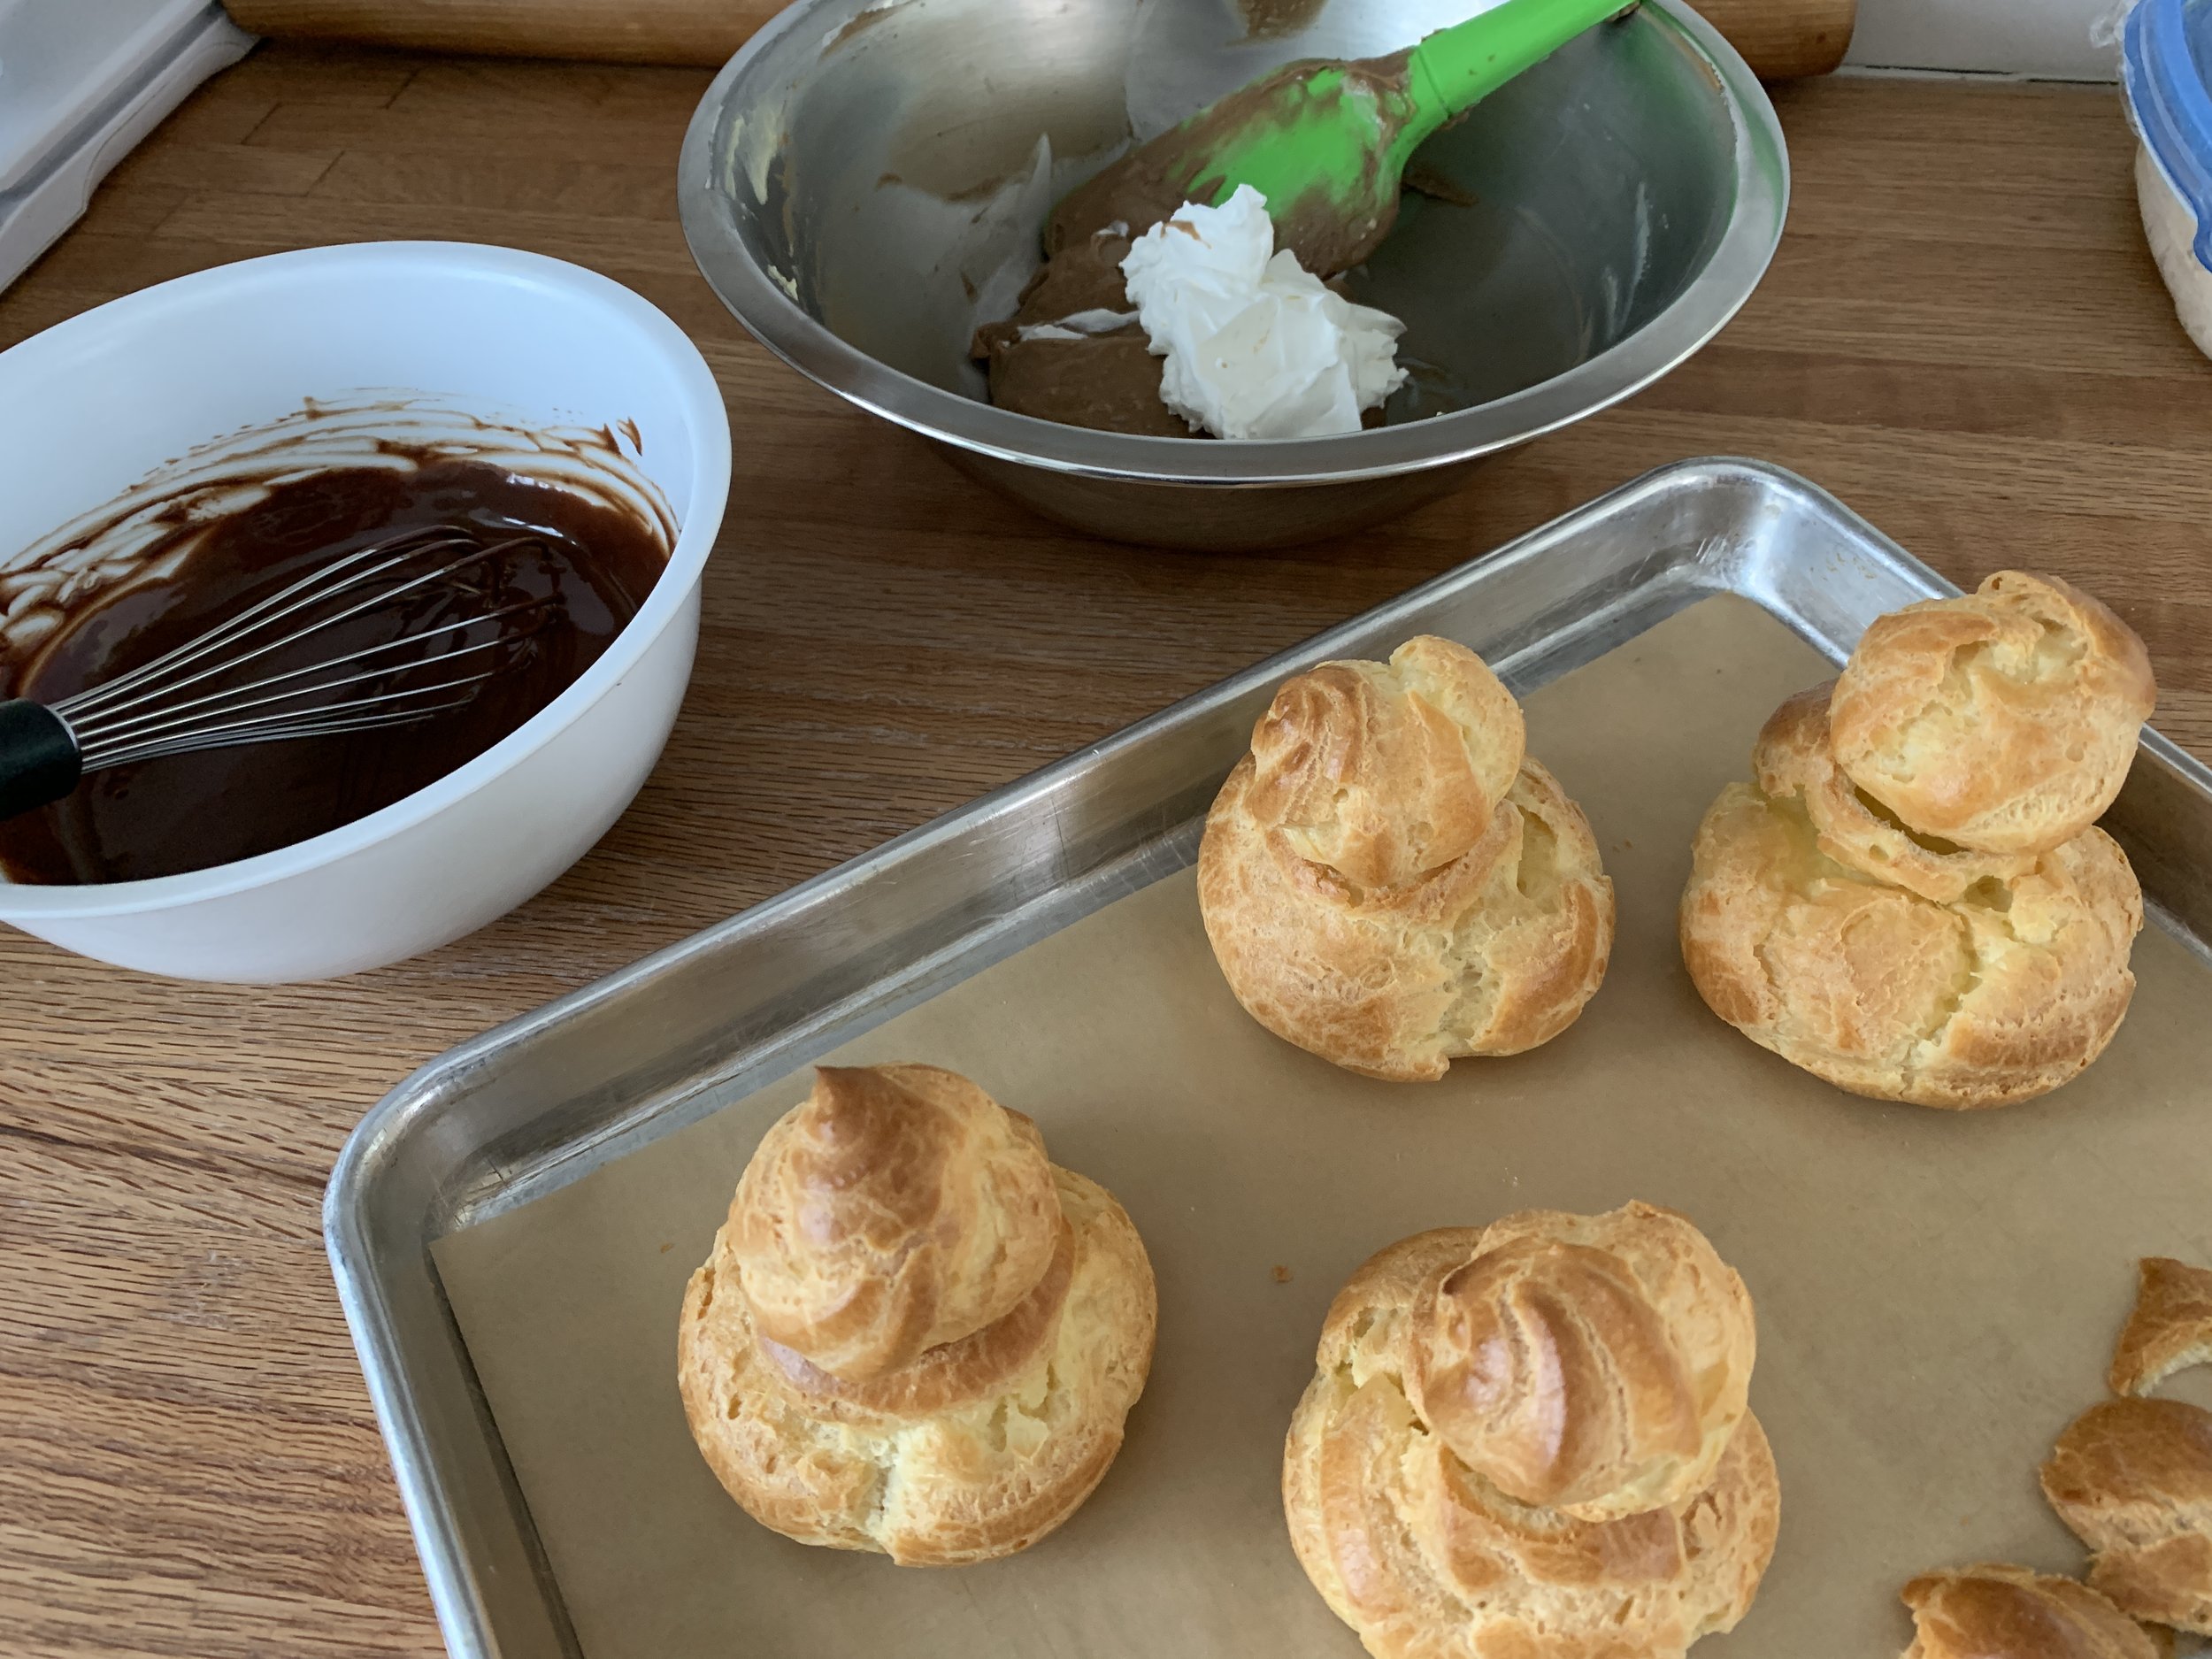
Here they are nicely baked and browned.

When you’re ready to assemble, carefully slice off the top edges of the bottom layer to shave off any unevenness (snack time!).

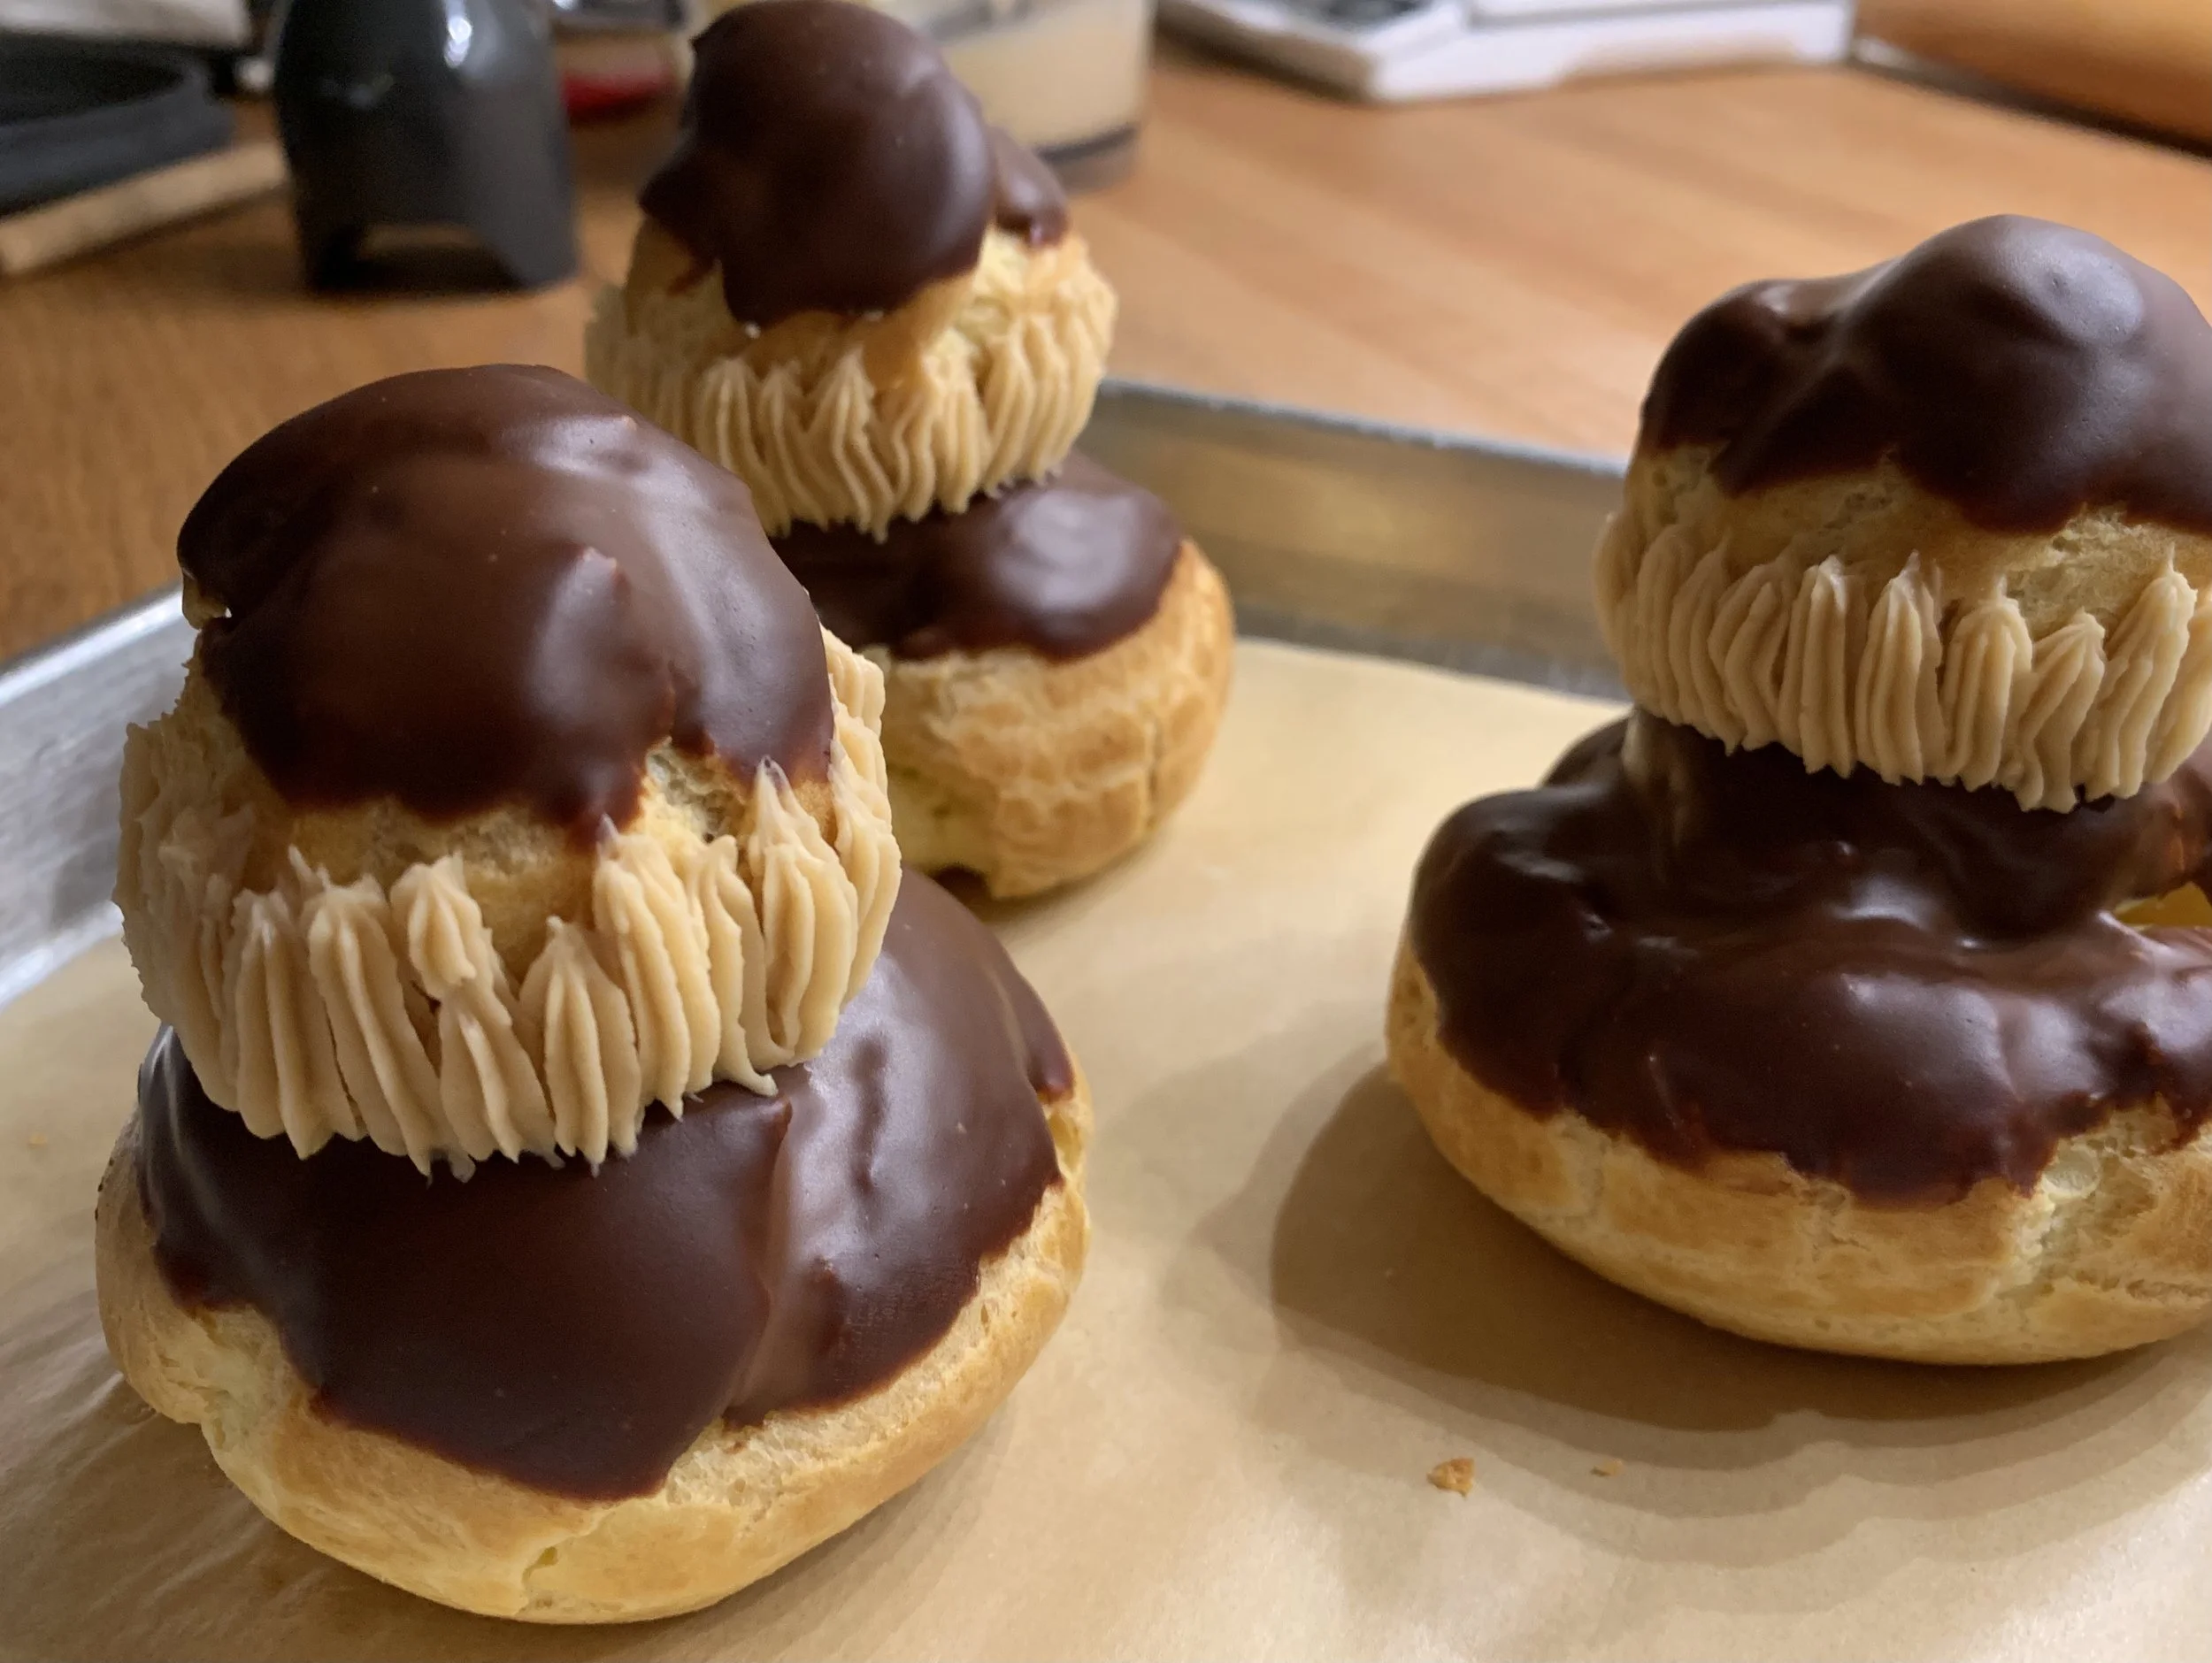
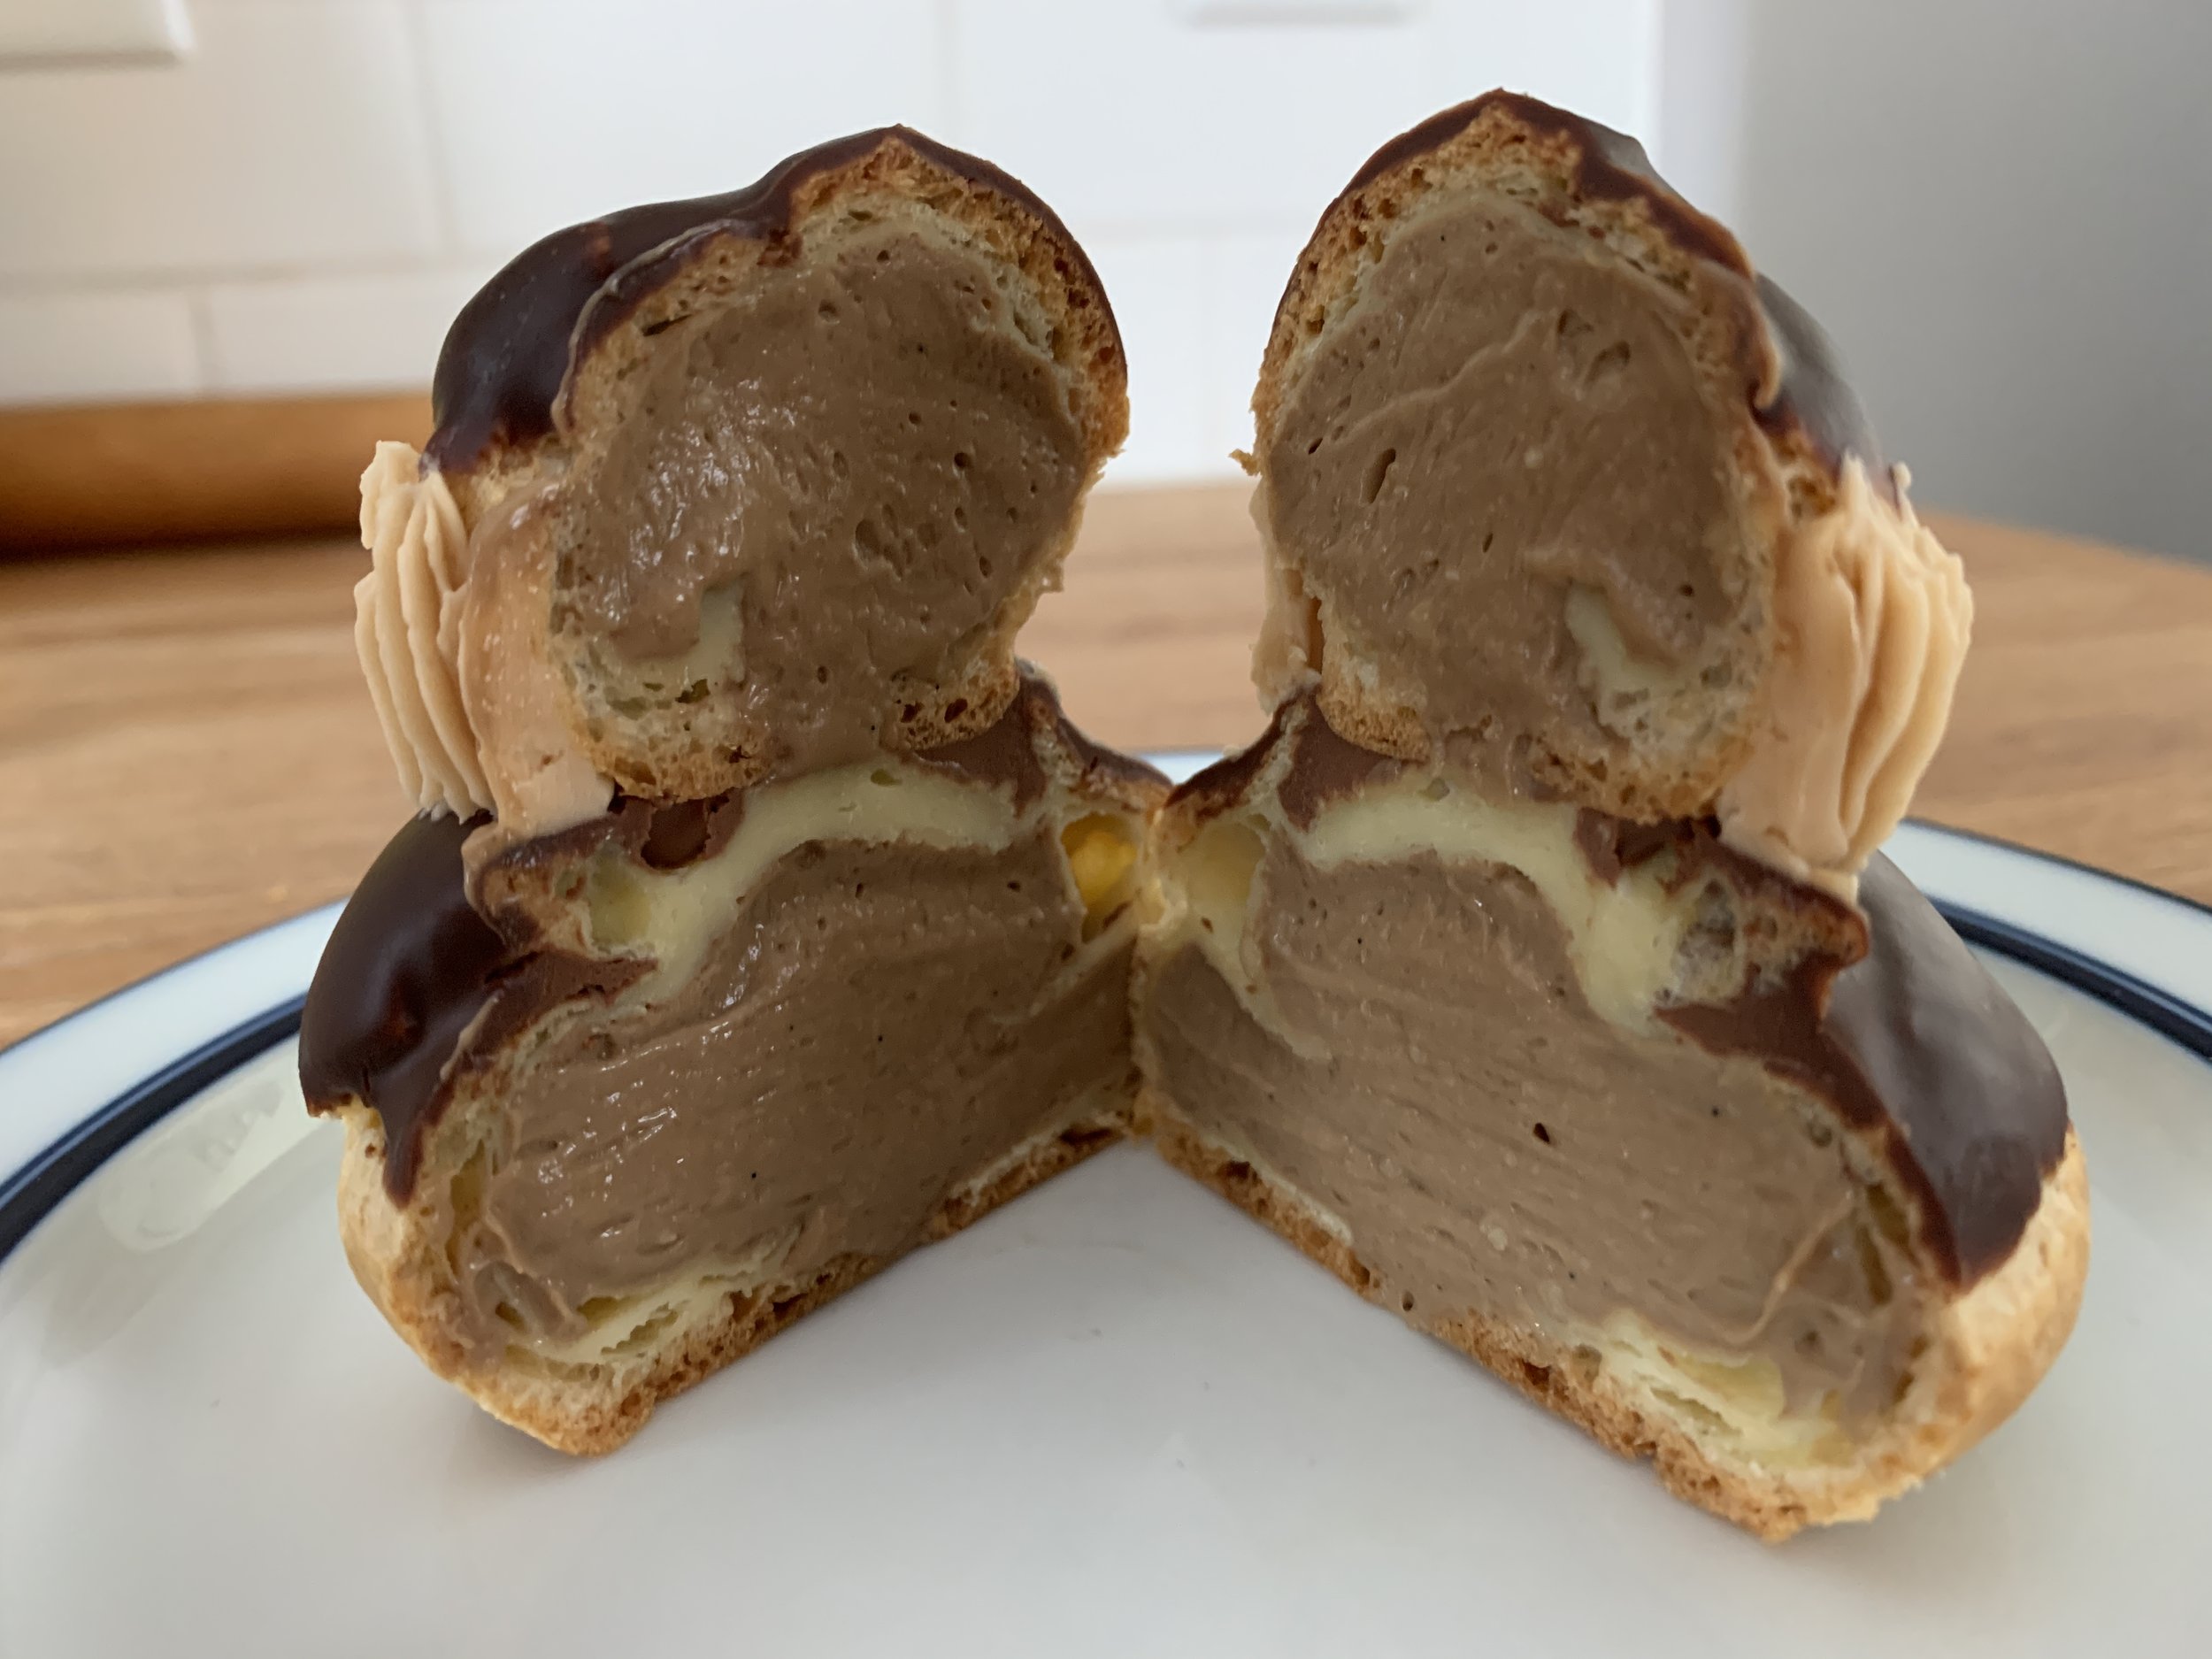
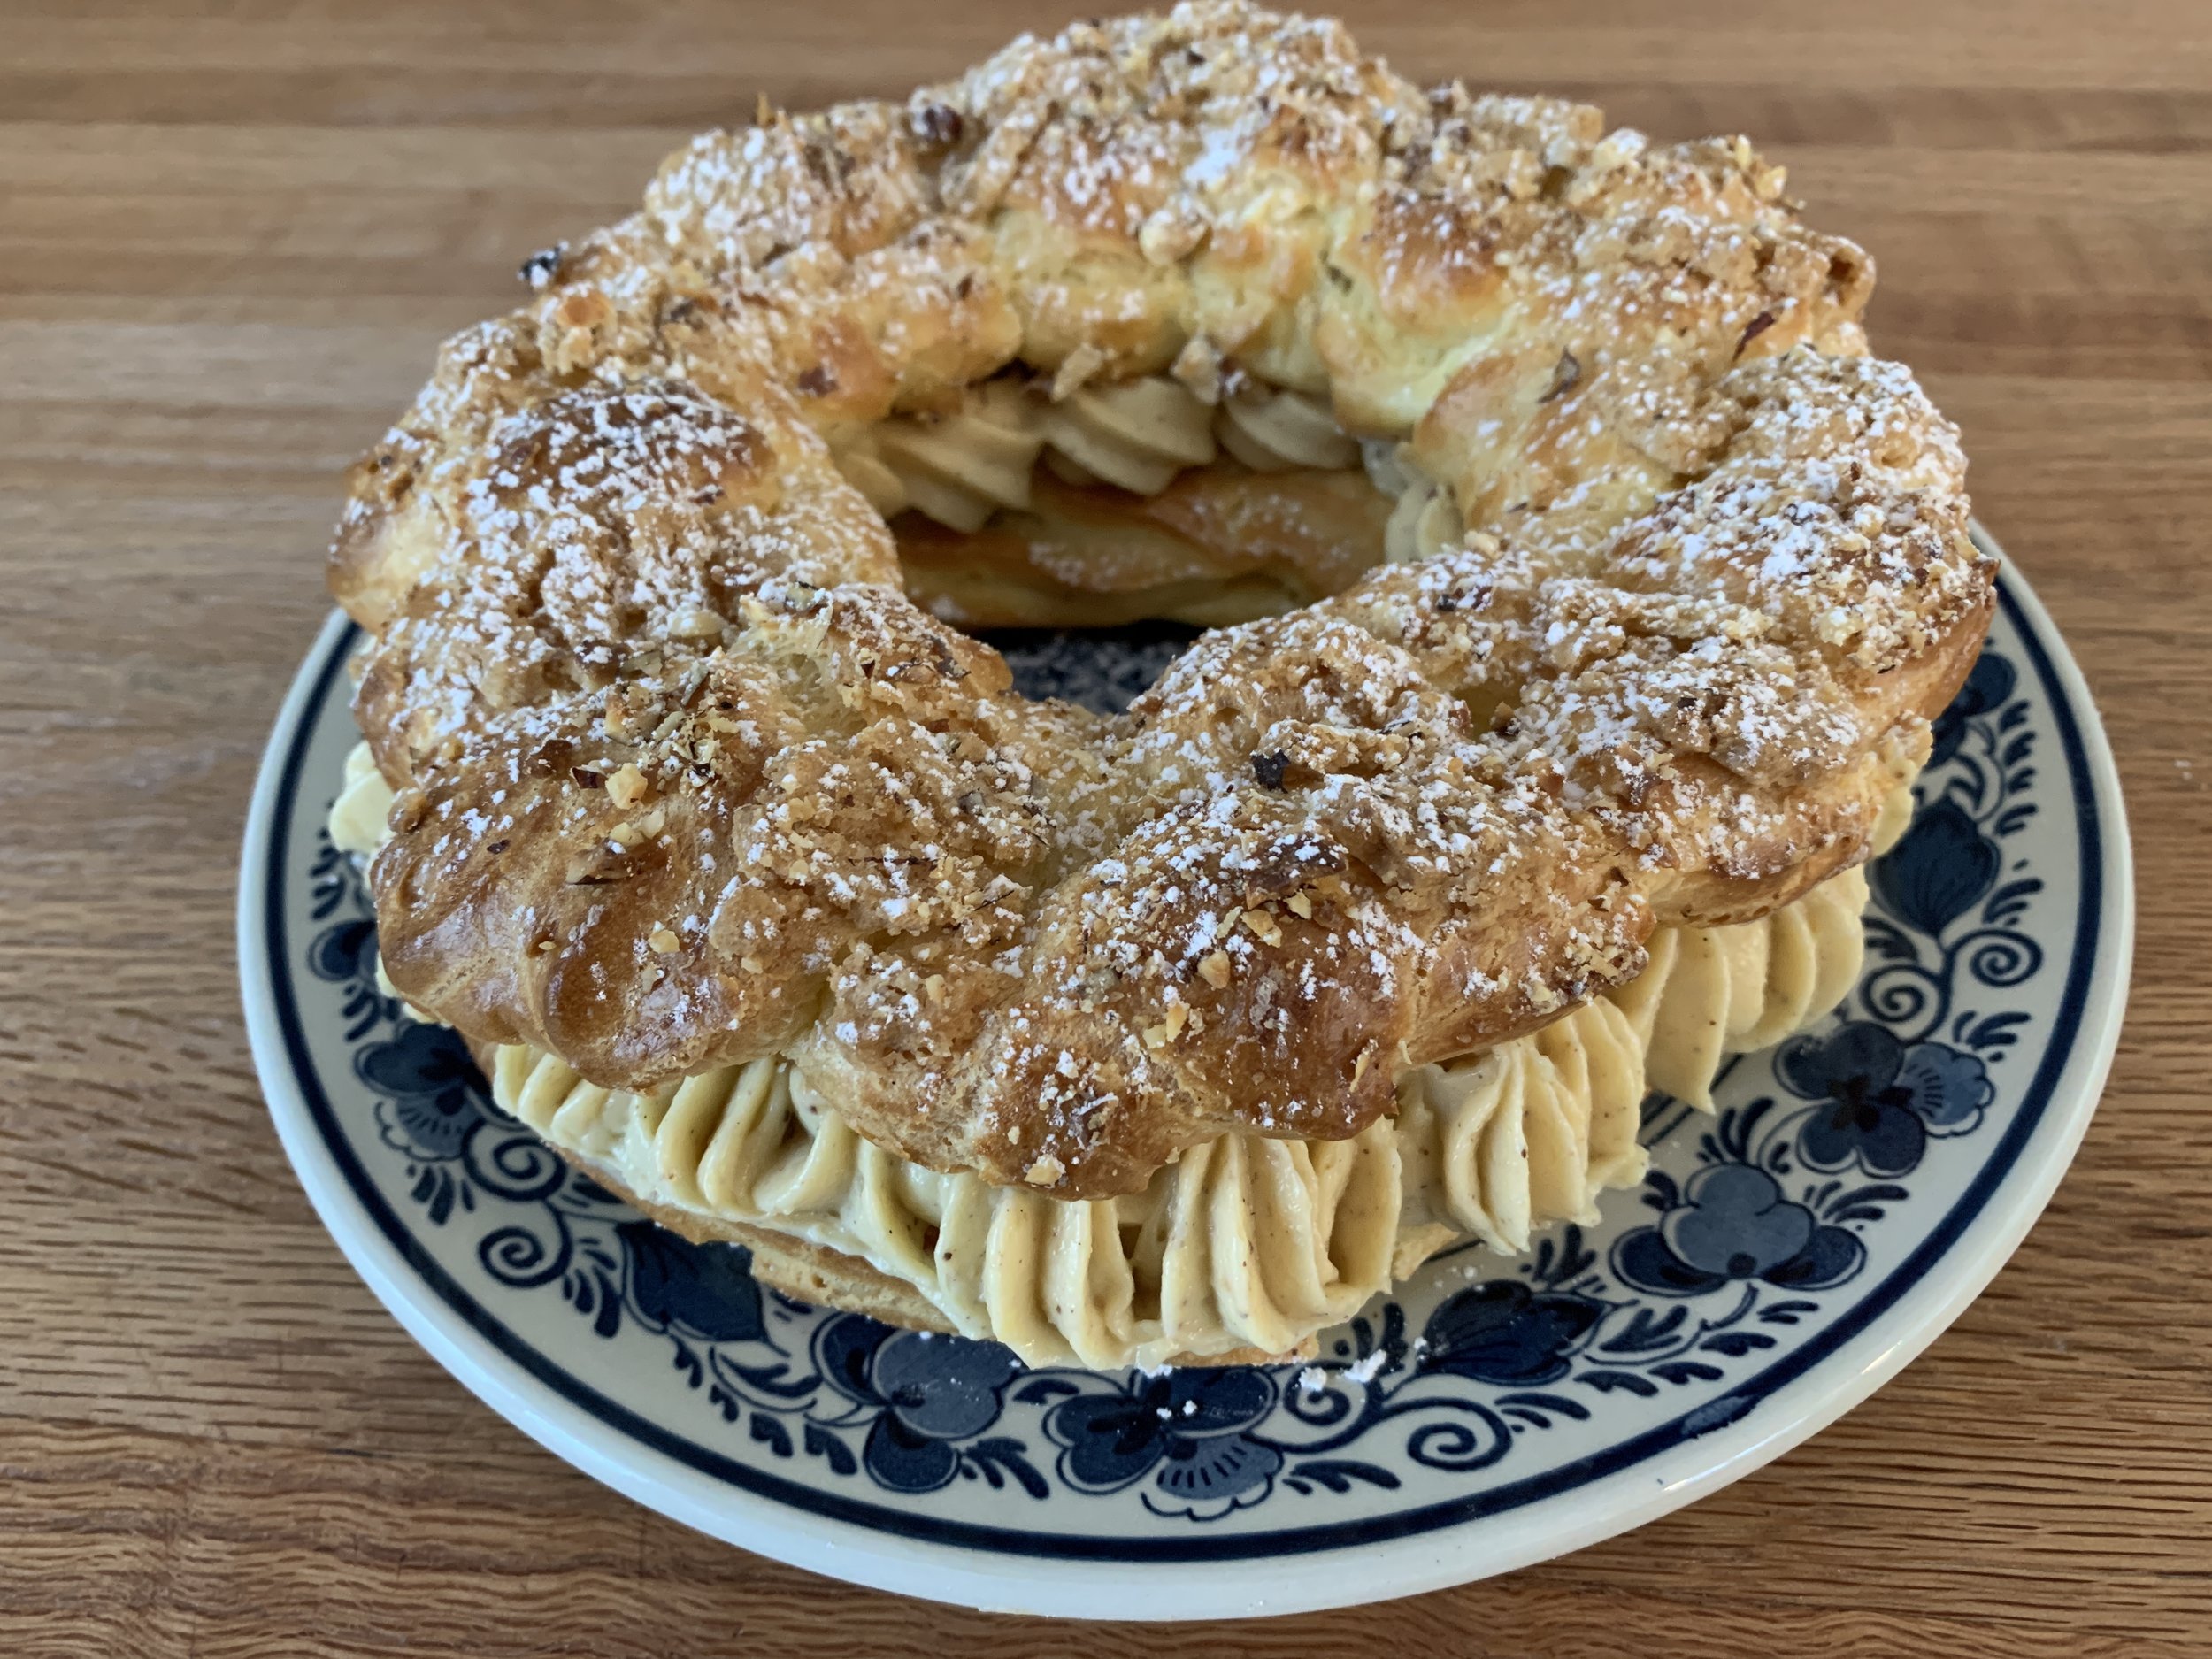
I went with classic praline pastry cream for the filling. The same day that I had made the crème pat for the religieuses, I separated out 200 g and blended in praline paste made by processing 40 g sugared hazelnuts to a paste consistency. Once chilled I added a nice dollop of whipped cream to lighten it. Using a medium star tip I got a little carried away with my squiggles and ruffles. Have fun with it!

Set the top on and gently nestle it in place. I like to give it a dusting of confectioner’s sugar too.

Now slice and enjoy. You won’t be sorry.

Wherever you are and whatever you’re doing, keep up the good work and live happily. It’s not always easy, that’s for sure.

Religieuse - fun with pâte à choux

Steve LOVES anything made with choux paste, and coffee religieuse (French for nun) is at the top of his list. He’s been asking me to make these for awhile now, and what better time than during the down days of January as we catch our collective breaths and ease into 2022.

Pâte à choux takes me back to Le Cordon Bleu school days and my stage at Pascal Pinaud’s in Paris’ 5th arr. (15 years ago this month!!). My task each morning was to fill and garnish the èclairs and religieuses for the day. As a matter of fact, the job I was given that very first morning oh so long ago was to make a big batch of traditional crème pâtissière (and make it I did!). Yes, I can do this!!

Chocolate and coffee crème pat (in Brit speak) are de rigueur for the fillings, with fondant of each flavor used to garnish. In recent years dedicated choux shops have popped up in and around Paris with all manner of flavors available.

Even though fondant is typically used to cap the choux buns, I felt no joy when working with the stuff and have avoided it ever since. I choose to use a lovely ganache instead when dressing up my ladies. The collar consists of buttercream piped in a ruffle fashion, another morning job for which I was often chided when not piping perfectly. Looks like I still have a ways to go on the perfect ruffle. Live and learn. BTW - you’ll see all manner of ruffles if you search the internet for religieuse. Lots of variations.

For the filling I used my base crème pâtissière recipe. Since I planned to make just a few religieuse, I divided out 200 g of the warm cream and blended in 30 g of chopped milk chocolate and some coffee extract to taste to go the mocha route.

Let’s do a quick run through of the choux making process. Here’s the recipe - I’ll highlight what I feel are the important things to notice through the steps.

Have your flour and eggs ready in separate bowls. Place the milk/water/butter/sugar/salt in a medium saucepan on low heat. You want the butter completed melted before you turn the heat up.

Up the heat to medium high and bring it to a boil. Have the flour at the ready.

Remove from the heat and dump the flour in all at once, stirring quickly to incorporate. It will look kind of clumpy at first like rough mashed potatoes.

Move it back onto the heat and stir vigorously to release some steam and dry it out for a minute or two. Look for the paste to start forming a smoother ball and there will be a light coating on the pan bottom.

Transfer the paste to the bowl of a stand mixer and let it sit a minute to release some more steam. With the paddle attachment on low add the first egg and blend on medium to incorporate completely. It will look gloppy and will seem like it doesn’t want to come together. Don’t worry.

Note: you can blend the eggs in by hand with a sturdy wooden or silicone spoon - you just have to have enough elbow grease to bring it together!

As you add each egg and blend it in, the paste will become more uniform and smooth. The base recipe I use calls for four large eggs. Here’s the paste after three eggs have been added.

Before I proceed I assess by checking the mixture. It should hold, not tear, and start ribboning down as you lift the paddle and let it hang in a “v”. Not quite ready.

I break up the last egg and add about half, blending and reassessing. I don’t consider myself superstitious but it usually works out for me that about 3/4 of the last egg is just right to call it good. Here’s the “v’ coming off the paddle. Notice the paste has more of a smooth, luscious looking sheen too.

Time to pipe! I pulled out a couple of round cutters to help me eyeball what size I wanted my heads and bodies. I forgot to include my trusty ruler in the shot, but in the image below I’m using a quarter sheet pan which measures 8x12”. That gives you some scale. I used a round tip for the bodies and a star tip, just because, for the heads (which you can sort of appreciate in the final analysis, but a round tip is just fine).

Here they are all baked and cooled. I had an extra head which I filled with a bit of mocha cream and ate. Gotta test the product.

Match the heads and bodies and shave enough top off the bodies to give a flat surface on which to perch the head.

When ready for the filling portion of the program, I give the chilled cream a good smoothing out in the mixer with the paddle or in a bowl with a spatula, then fold in a dollop of whipped cream to lighten it. I learned early on that Parisians are none too happy if their choux aren’t properly filled. There has to be a certain heft to show that the job is done well.

I have a basic one to one dark chocolate ganache on hand for dipping (once made, let it cool a bit so it doesn’t run down the sides). Fill first, dip second.

Poke holes in the bottoms of the heads and bodies then pipe in your cream. As you hold the choux with your non-piping hand, you’ll appreciate the heft as you fill. Fill until some cream starts to ooze out, a sign that you’ve filled adequately. You can scrape off the excess and have a snack.

Set the buns upright and dip both bodies and heads in ganache to give a nice cap. Set the heads on the bodies - the ganache will hold them together.

Once assembly is complete, I usually hold them in the fridge until I’m ready to do the collar. I used sea salt caramel Swiss meringue buttercream for my ruffles, piping with a small star tip.

I think of these nuns as roly-poly with a mock turtleneck look.

As you might imagine, Steve was a happy camper. Filled choux will keep well in the fridge for a couple of days to give you some time to savor the treats.

Here’s a cross section - you can see they are chock full of cream. The Parisians would be happy.

Coming soon! More choux fun with Paris Brest.

Stay warm and stay healthy. Ciao for now.

Milk chocolate malted ice cream profiteroles

IMG_0677.jpg

After that extensive Danish Kringle post (whew!) I knew it was time for a break with a quick note on a fun and delicious dessert experience.

This past weekend we celebrated Steve’s birthday in isolation, enjoying a tipple of champagne followed by his famous marinated flank steak on the grill, roasted little potatoes and a veggie mix of edamame and last summer’s freezer stashed sweet corn. Mmmm mmmm good.

As luck (or the fates) would have it, I had choux puffs in my freezer that were originally intended for an event that was canceled due to the pandemic, and I’d been scheming about how I might use them. Since anything made with choux paste is on Steve’s favorites list, I knew they would have to be part of his birthday dessert.

I recently posted on making chocolate chunk bars as a way of using up some of the chocolates I had in my cupboard. I still had some Valrhona milk chocolate on hand, as well as Carnation malted milk powder which I originally purchased some months ago to make brown butter shortbread cookies. Inspired once again by Claudia Fleming’s “The Last Course”, milk chocolate malted ice cream was officially on the menu. Profiteroles here we come!

IMG_0686.jpg

What a great plan ahead dessert. Make your choux puffs using your favorite recipe and stash ‘em in the freezer where they’ll be fine for some weeks. Make or buy any flavor ice cream you choose a few days, or even a week or two ahead and you’ll be ready to assemble on the big day.

I made my usual ice cream base and, once cooked and off the heat, blended in 113 g / four ounces chopped milk chocolate, 28 g / one ounce 64% Guittard chocolate discs and a scant cup of Carnation malted milk powder (sift before whisking it in). Then strain and chill.

I usually keep my ice cream bases refrigerated for a day or two before processing. Once the ice cream is churned it needs a good 3-4 hours in the freezer to firm up. But you can make it ahead and it should be fine in the freezer for a week or two.

On the day you plan to serve the profiteroles, take out as many as you want, put ‘em on a parchment lined sheet pan and warm them in a 300ºF oven for 10 minutes or so to thaw them and crisp them up a bit. Cool before slicing the tops open and filling with lovely scoops of frozen goodness. Then simply put them back in the freezer to hold until serving.

IMG_0667.JPG

A quick note about ice cream - this malted milk version was easy to scoop right out of the freezer (maybe due to the malted milk powder??), but some flavors of ice cream will freeze harder than others. Give yours a feel and if it’s rock hard, take it out 10-15 minutes ahead of scooping for greater ease of assembly.

IMG_0668.jpg

For a lovely ending to Steve’s birthday meal I just popped a few in each of our bowls, topped them with chocolate sauce, caramel drizzle and chocolate shortbread cookie crumbs et voilà - un dessert três délicieux!

The next day I had empty puffs on hand and more ice cream so I filled them all and froze them for enjoyment later. I found that once they had firmed up over the next hour or two, I could turn ‘em upside down while gently holding the tops on and dip them in a chocolate glaze made by melting 113 g / 4 ounces dark chocolate with 42 g / 3 tablespoons unsalted butter, then back into the freezer they went.

In case you’re wondering, I had a few crunchy topped puffs in the mix which I left unglazed.

IMG_0674.jpg

Even though we work at keeping our meals pretty darn healthy, during these days of ongoing isolation it’s nice to be able to anticipate a little sweet treat every now and again don’t you think?

Stay home, stay safe and keep on baking!

IMG_0677.JPG

Happy Valentine's weekend!

IMG_0128.jpg

Take your basic favorite choux paste, pipe it into lovely hearts . . .

IMG_0047.jpg

topped with central smaller hearts of lime scented crunchy dough . . .

fullsizeoutput_256.jpeg

bake ‘em with all the love you can muster . . .

fullsizeoutput_253.jpeg

then top with red fruits Swiss meringue buttercream, a dollop of Chantilly and a fresh raspberry. Enjoy!

Wishing all of you a wonderful weekend and lots of fun creating your own special treats for those you love.

IMG_0128.jpg