Tart cherry mascarpone custard torta (and one more)

Mascarpone here we come! I don’t typically keep this Italian style cream cheese on hand as a staple ingredient but, when I’ve used it for a specific project, there are usually leftovers that are begging to go into something delicious.

I’ve had mascarpone on the brain for a while now. It all started with a full day of three demo sessions for a local seniors group back in April. In addition to a couple of savory offerings, I prepared and served whipped lime mascarpone cream vol-au-vents topped with fresh strawberries. During the ensuing days I used the leftover mascarpone for a home freezer stash of strawberry lime mascarpone ice cream and some delightful raspberry teacakes (more on that later).

As it turns out, I still had one unopened tub in the fridge and - wouldn’t you know it (I believe it was kismet!) - a request came in to create something delicious for my cousin Mary’s afternoon book club group. You can guess where this is going.

*Just a quick note about mascarpone’s shelf life - if it remains unopened, it’s fine in your fridge for awhile - the use by dates are typically some months out. BUT . . . . once opened and the plastic sealer is removed it’s best to use it within 5-7 days. If I’ve used only a portion of the tub, I press plastic wrap directly on the surface to exclude air which helps keep it’s texture until I’ve finished it off.

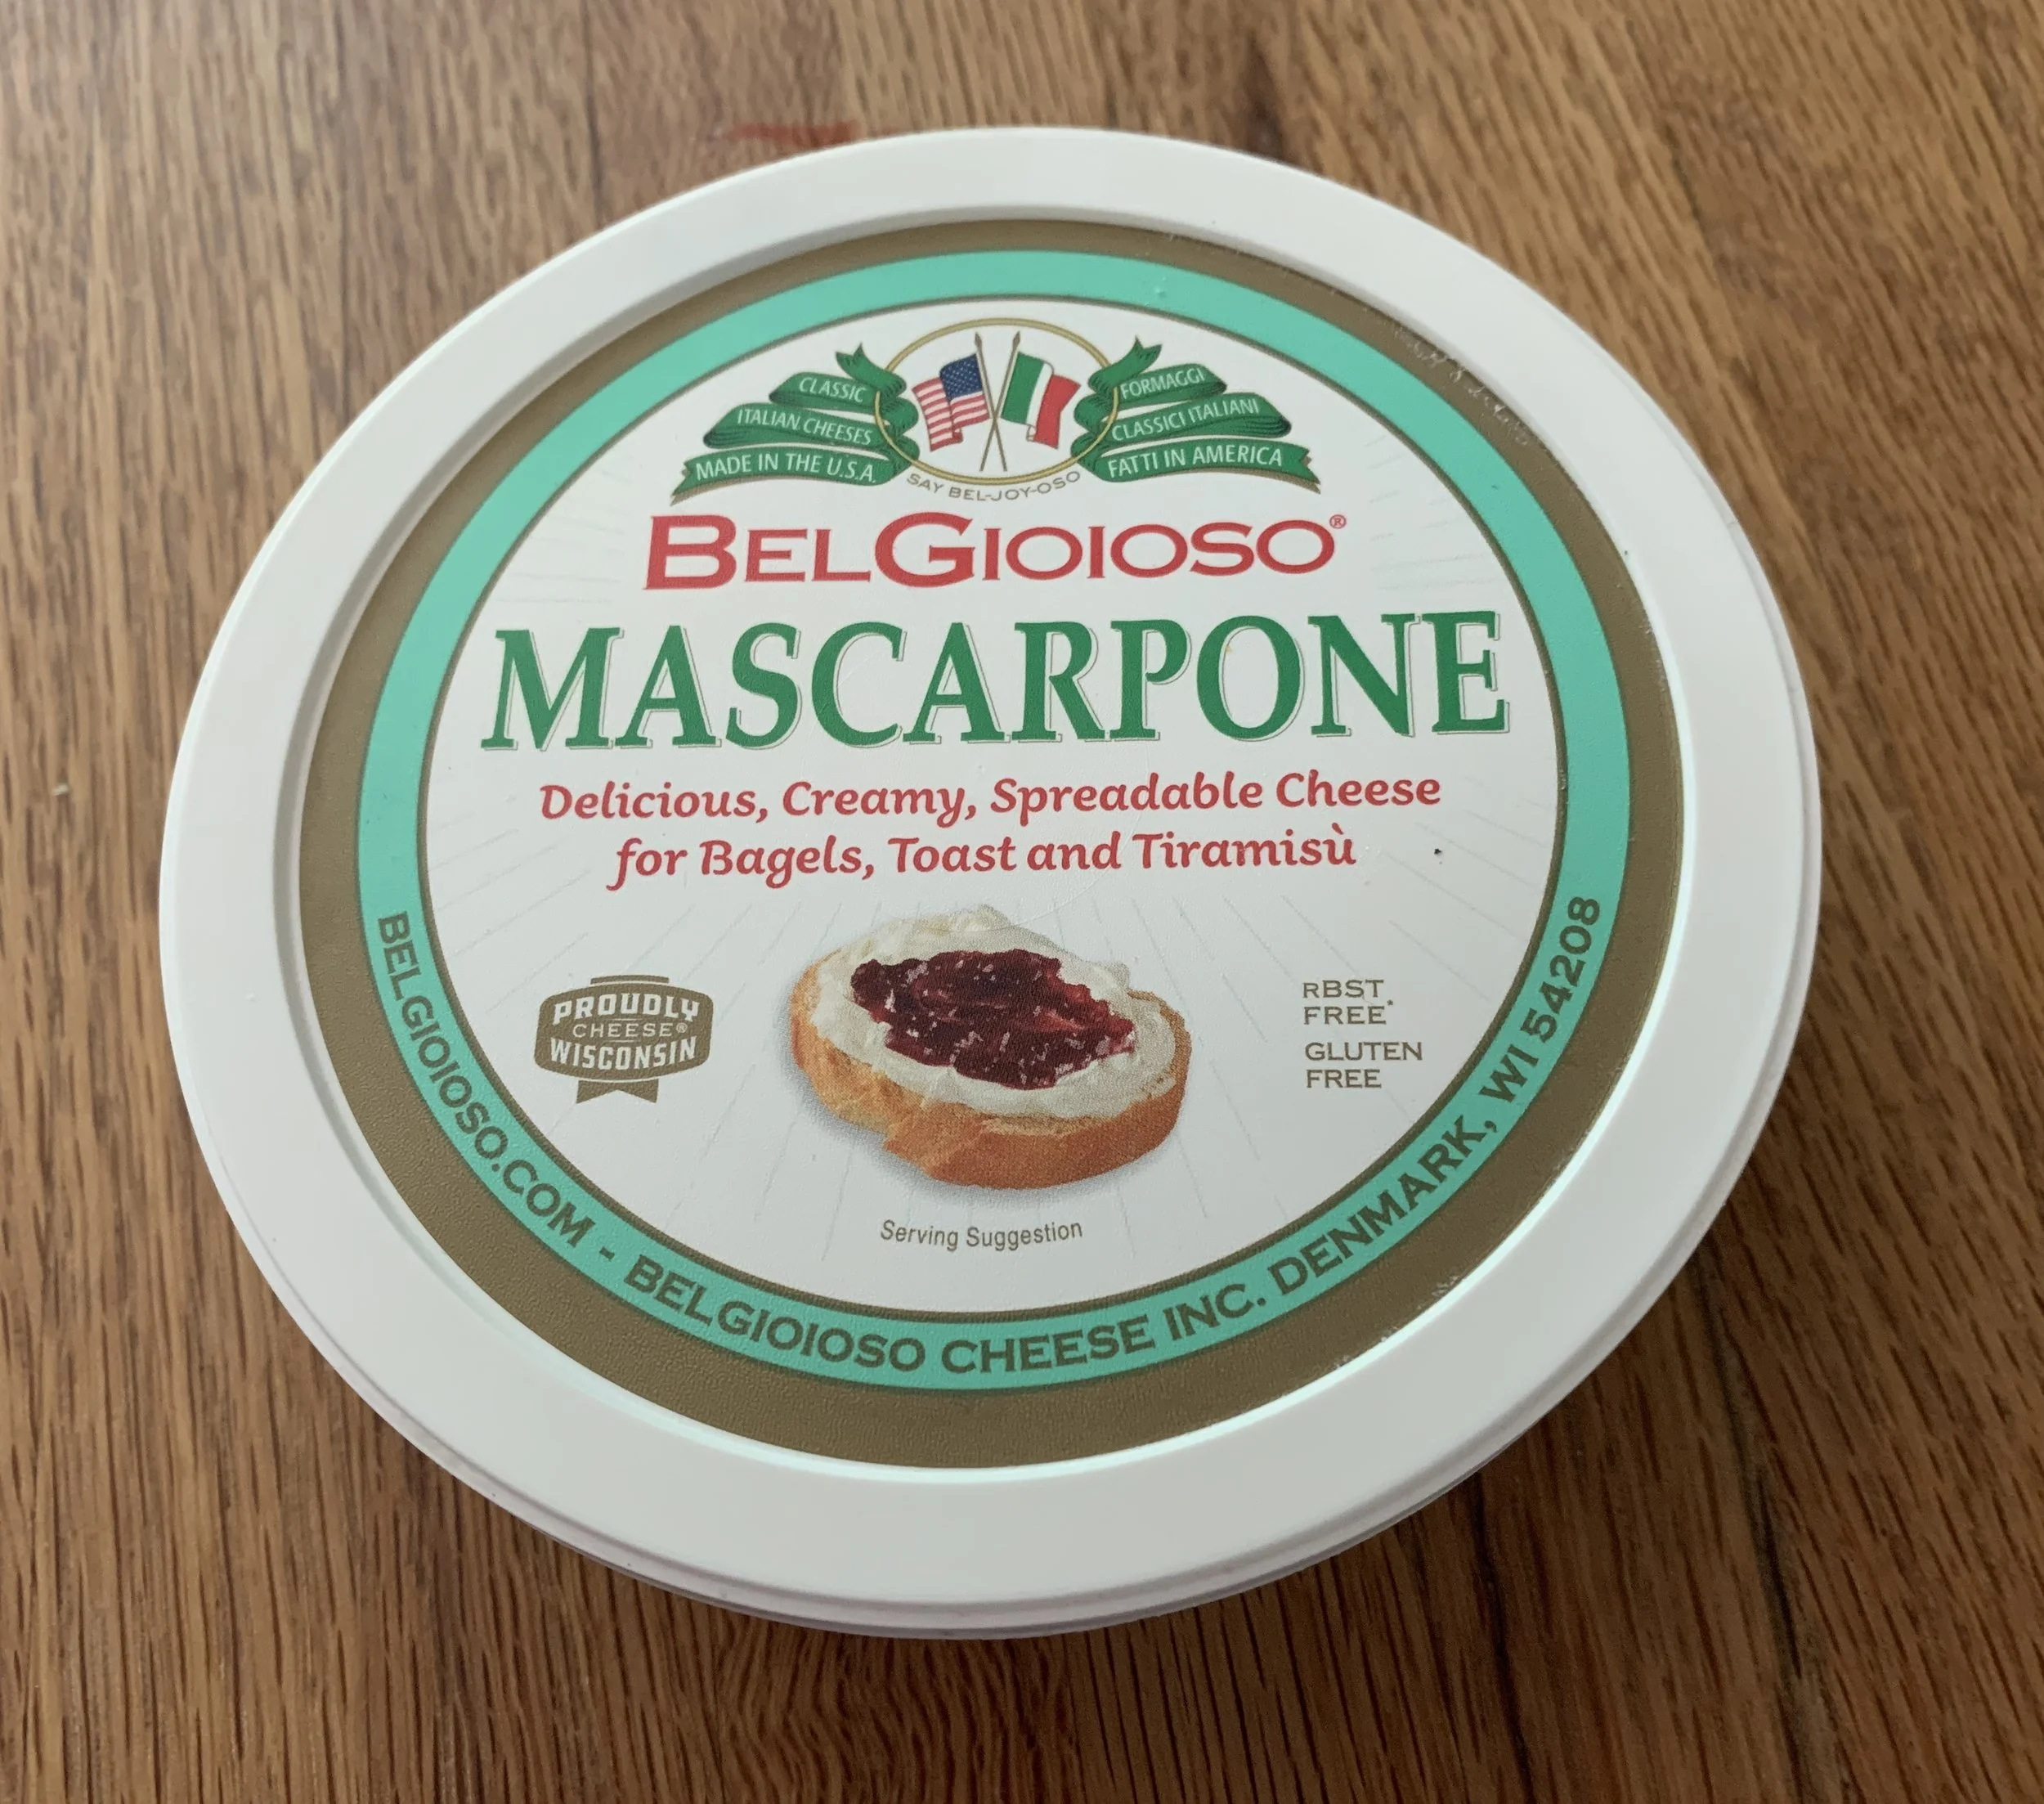
Most commonly found brand on grocery store shelves

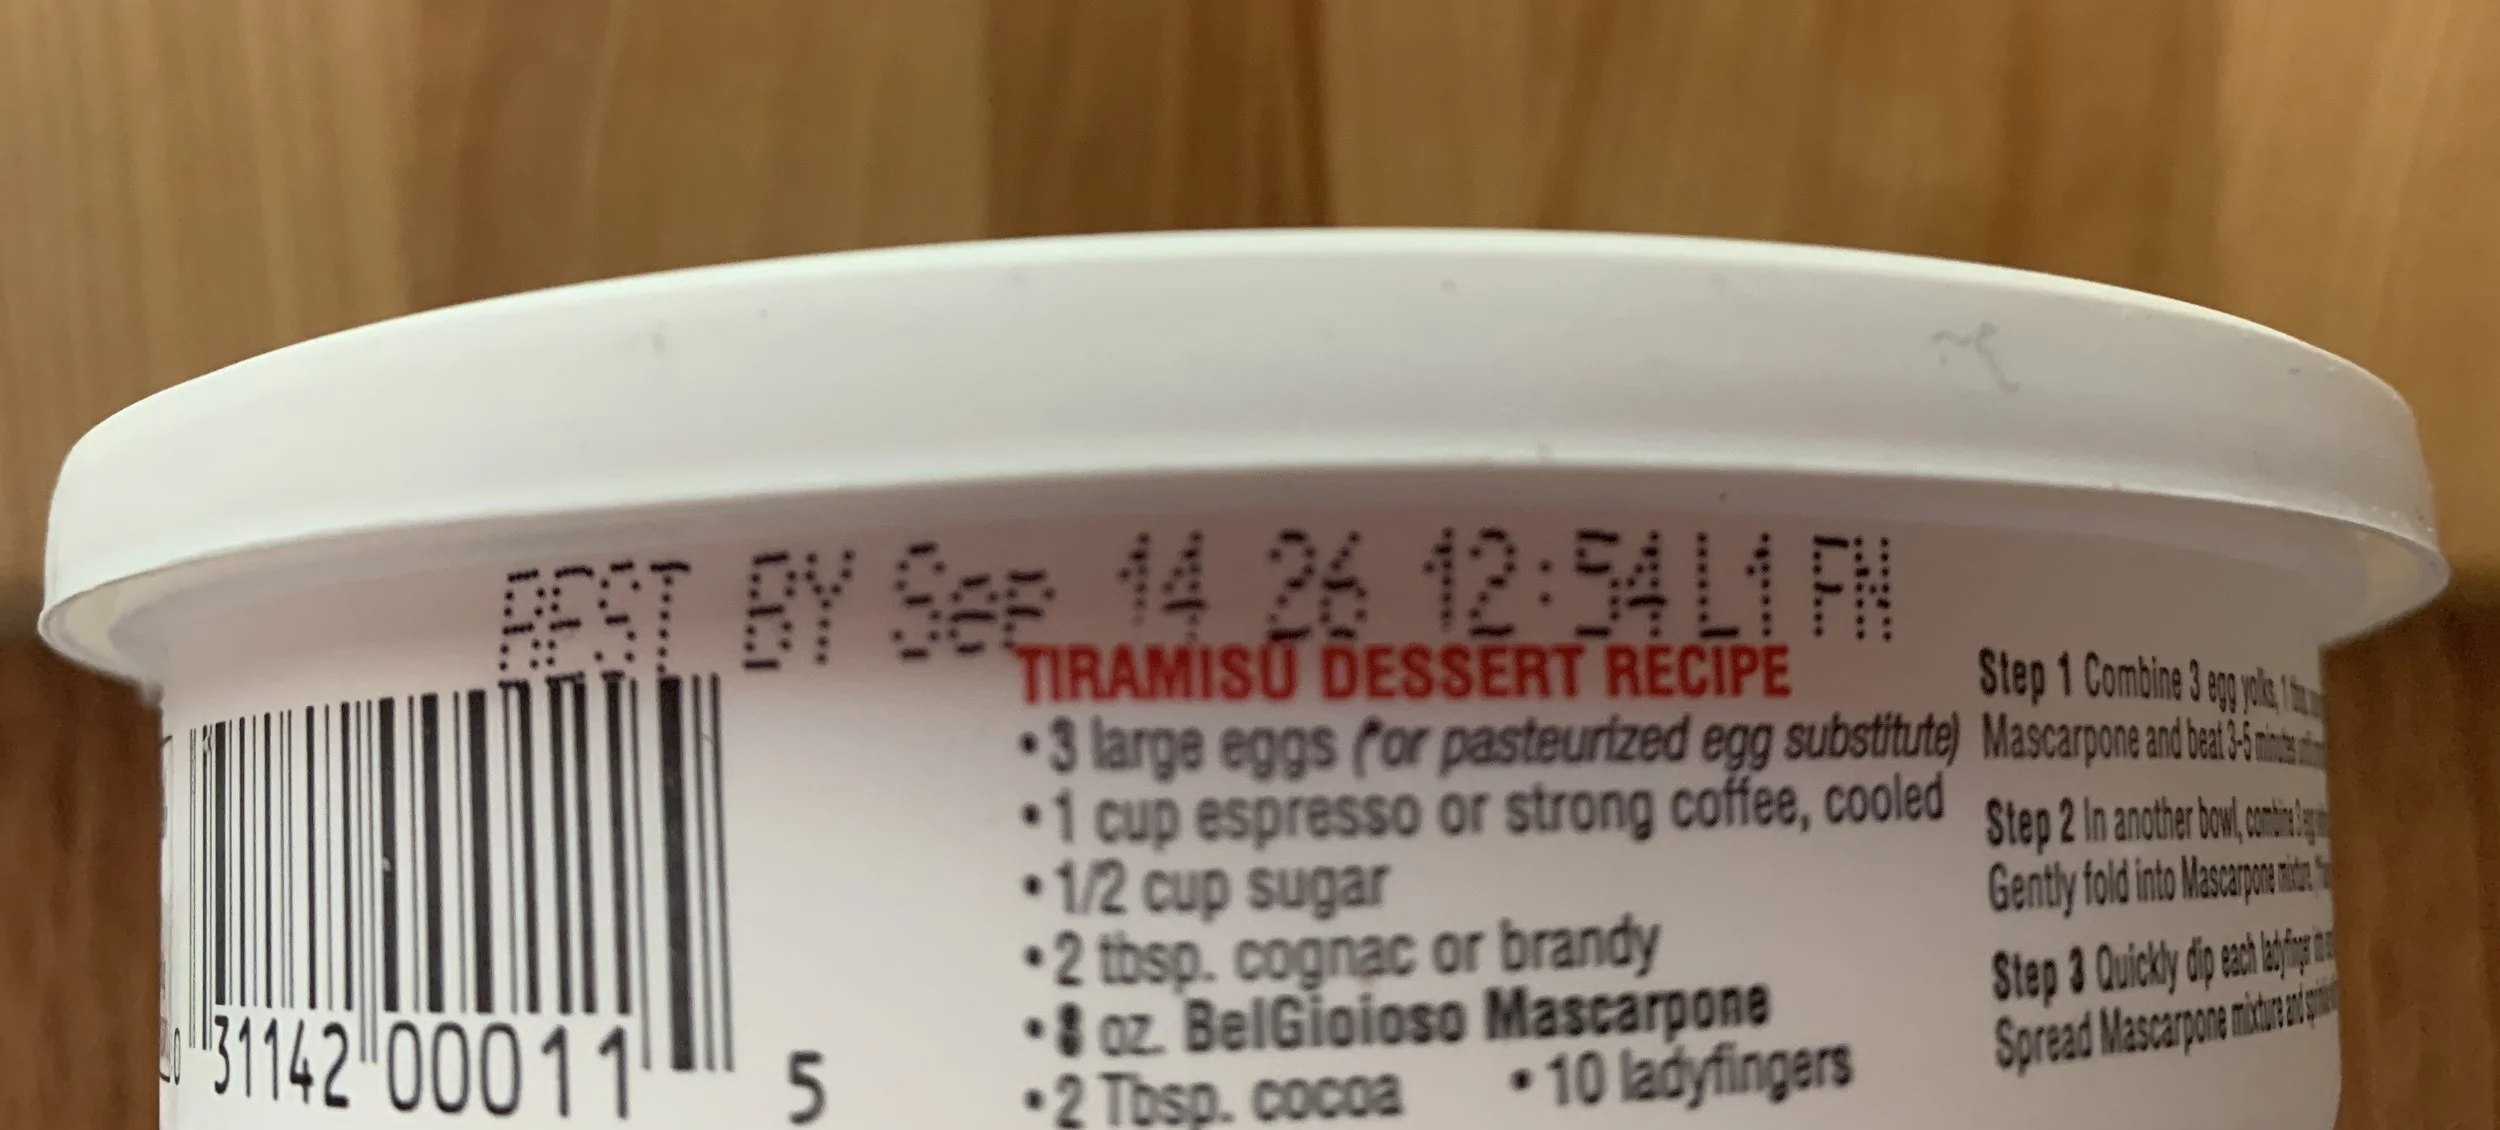
Purchased mid may - use by date 9/14/26 - if unopened!

Let’s get on with it! I had pasta frolla, Michigan tart cherries (the end of last year’s crop) and oat crumble in my freezer so, along with the unopened tub of mascarpone, I had a clear vision for the book club dessert. With a few additional ingredients always at the ready (cream, sugar, cornstarch, egg, lemon zest and vanilla) I was set.

Here’s the recipe PDF which includes all the components - if you prefer not to read through the entire post, you can go right to it and get to work on your own torta!

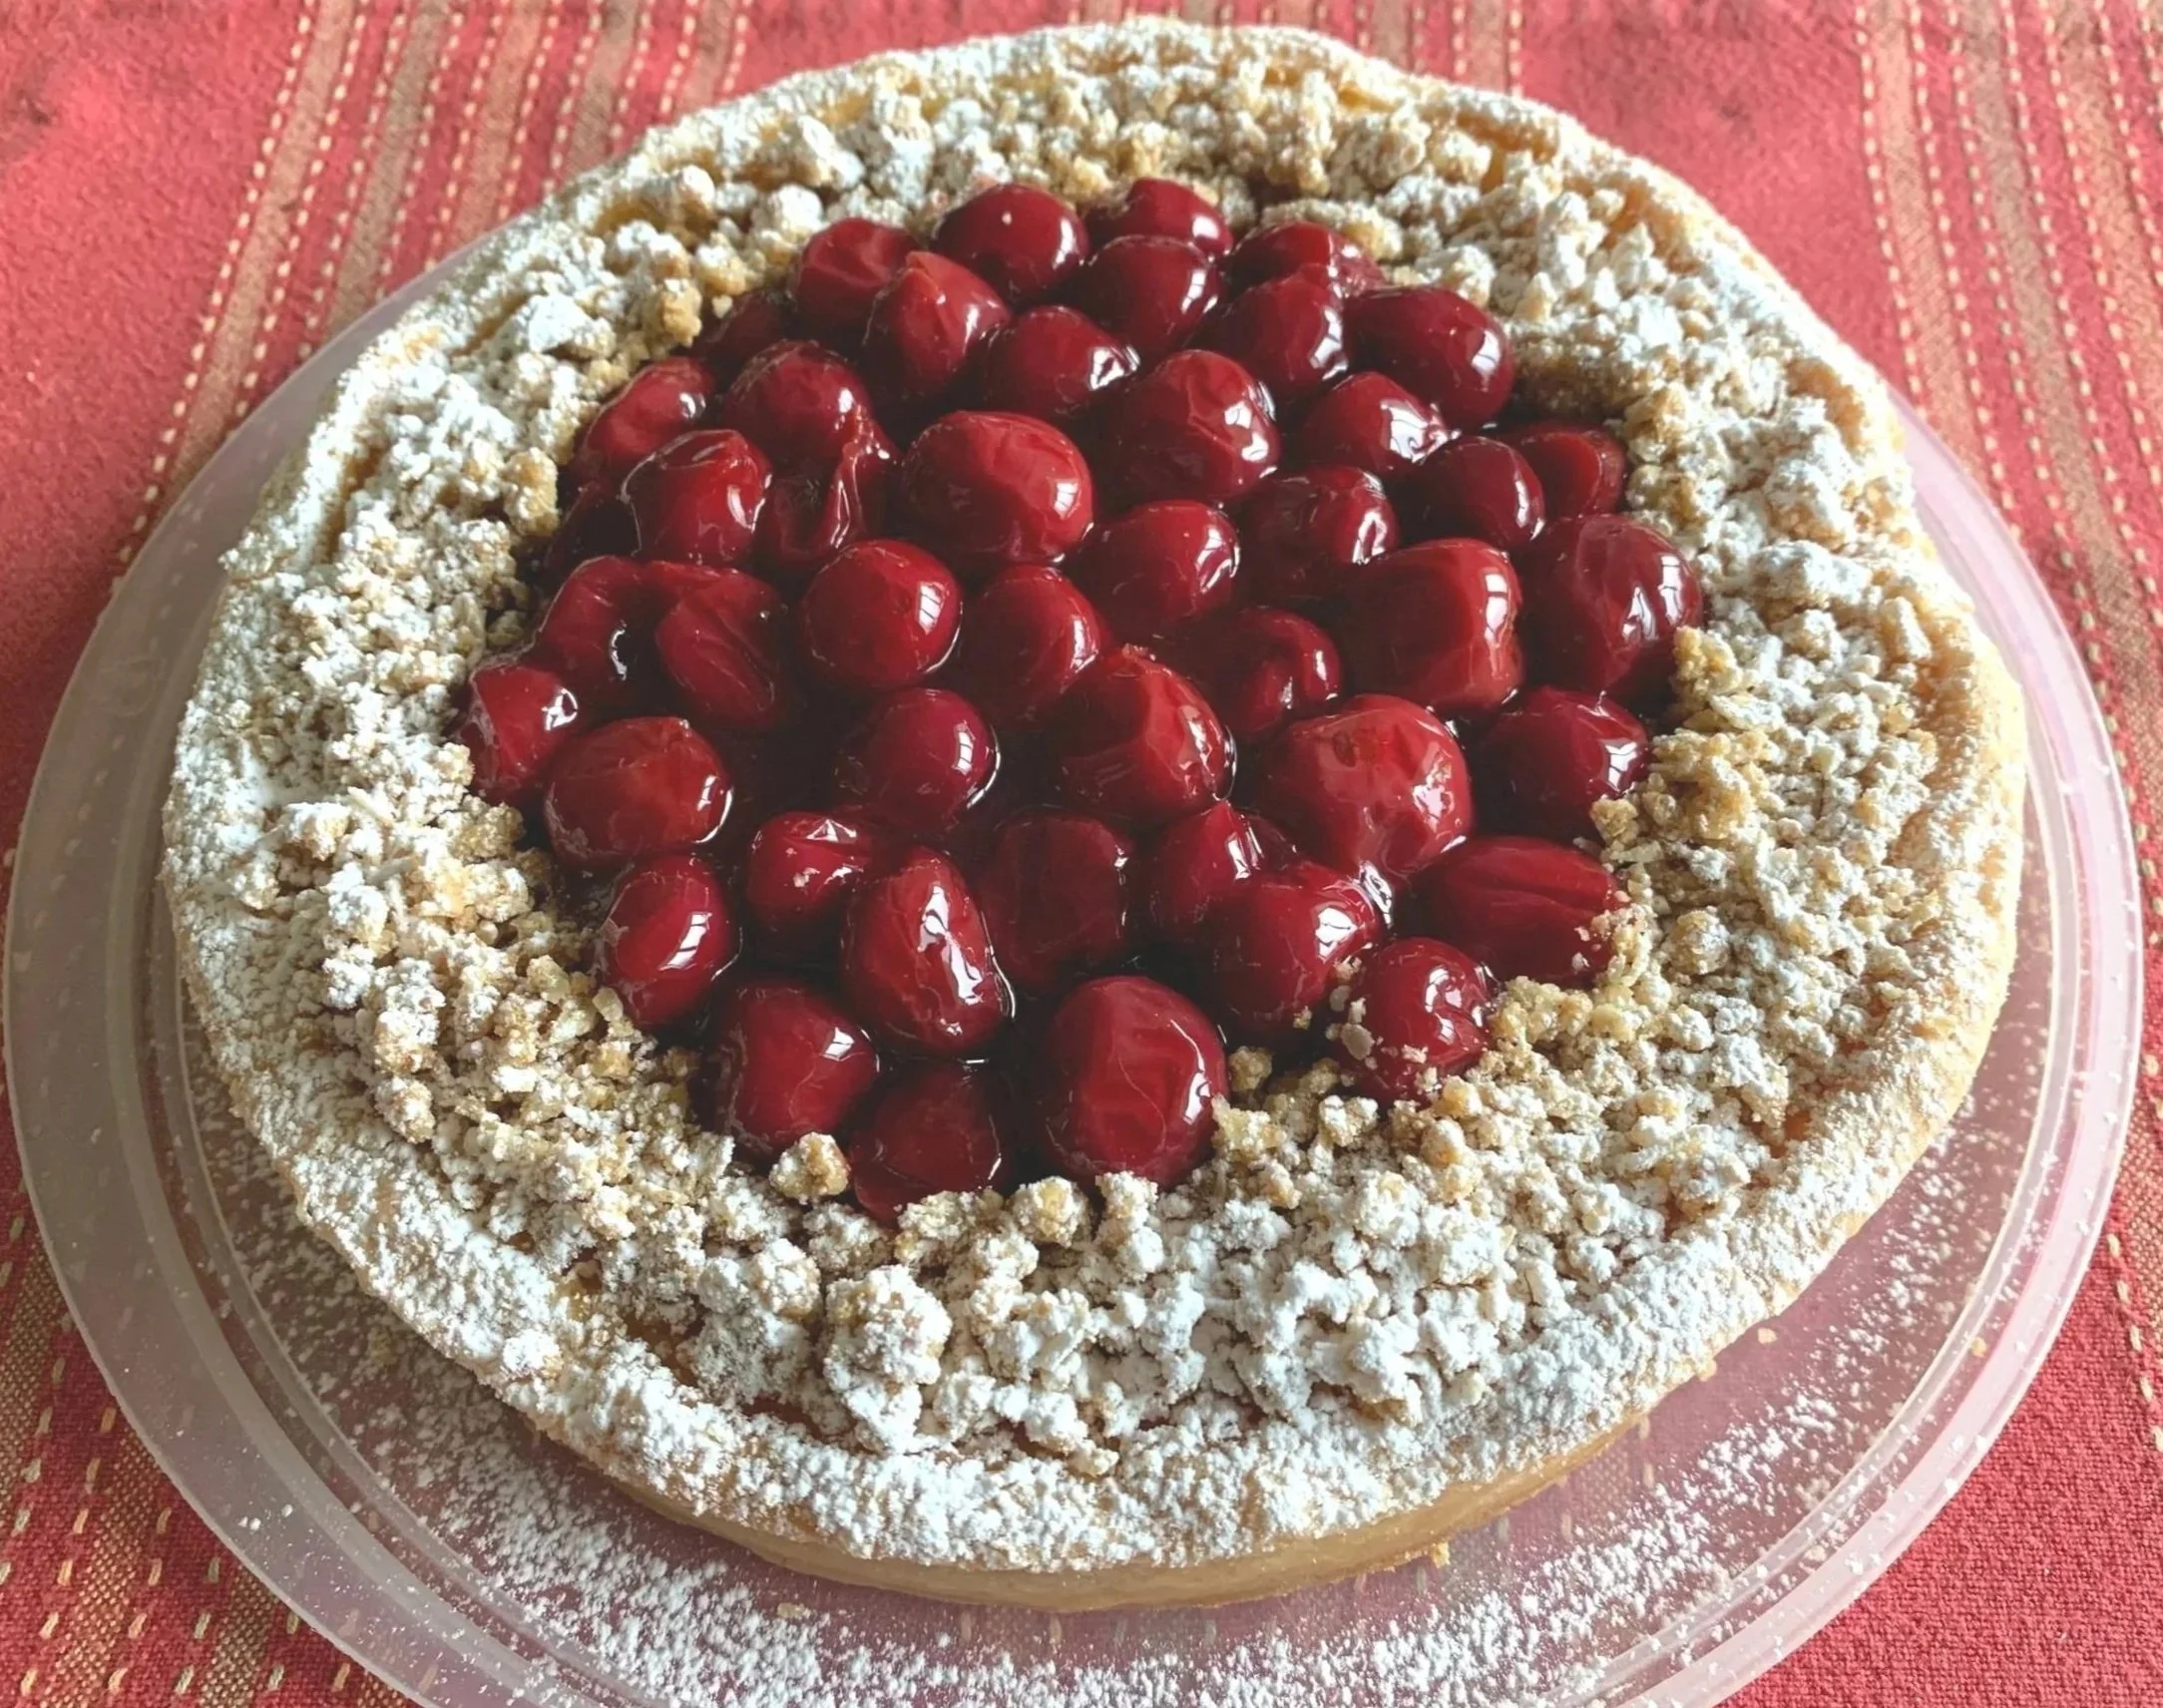
The book group torta

Cousin Mary’s book group gave the torta a thumbs up so, as Memorial Day approached, I thought it fitting to make another one for a family gathering at cousin Jen’s cottage! Yippee!

Let’s walk through the steps - or you can go to the full recipe here.

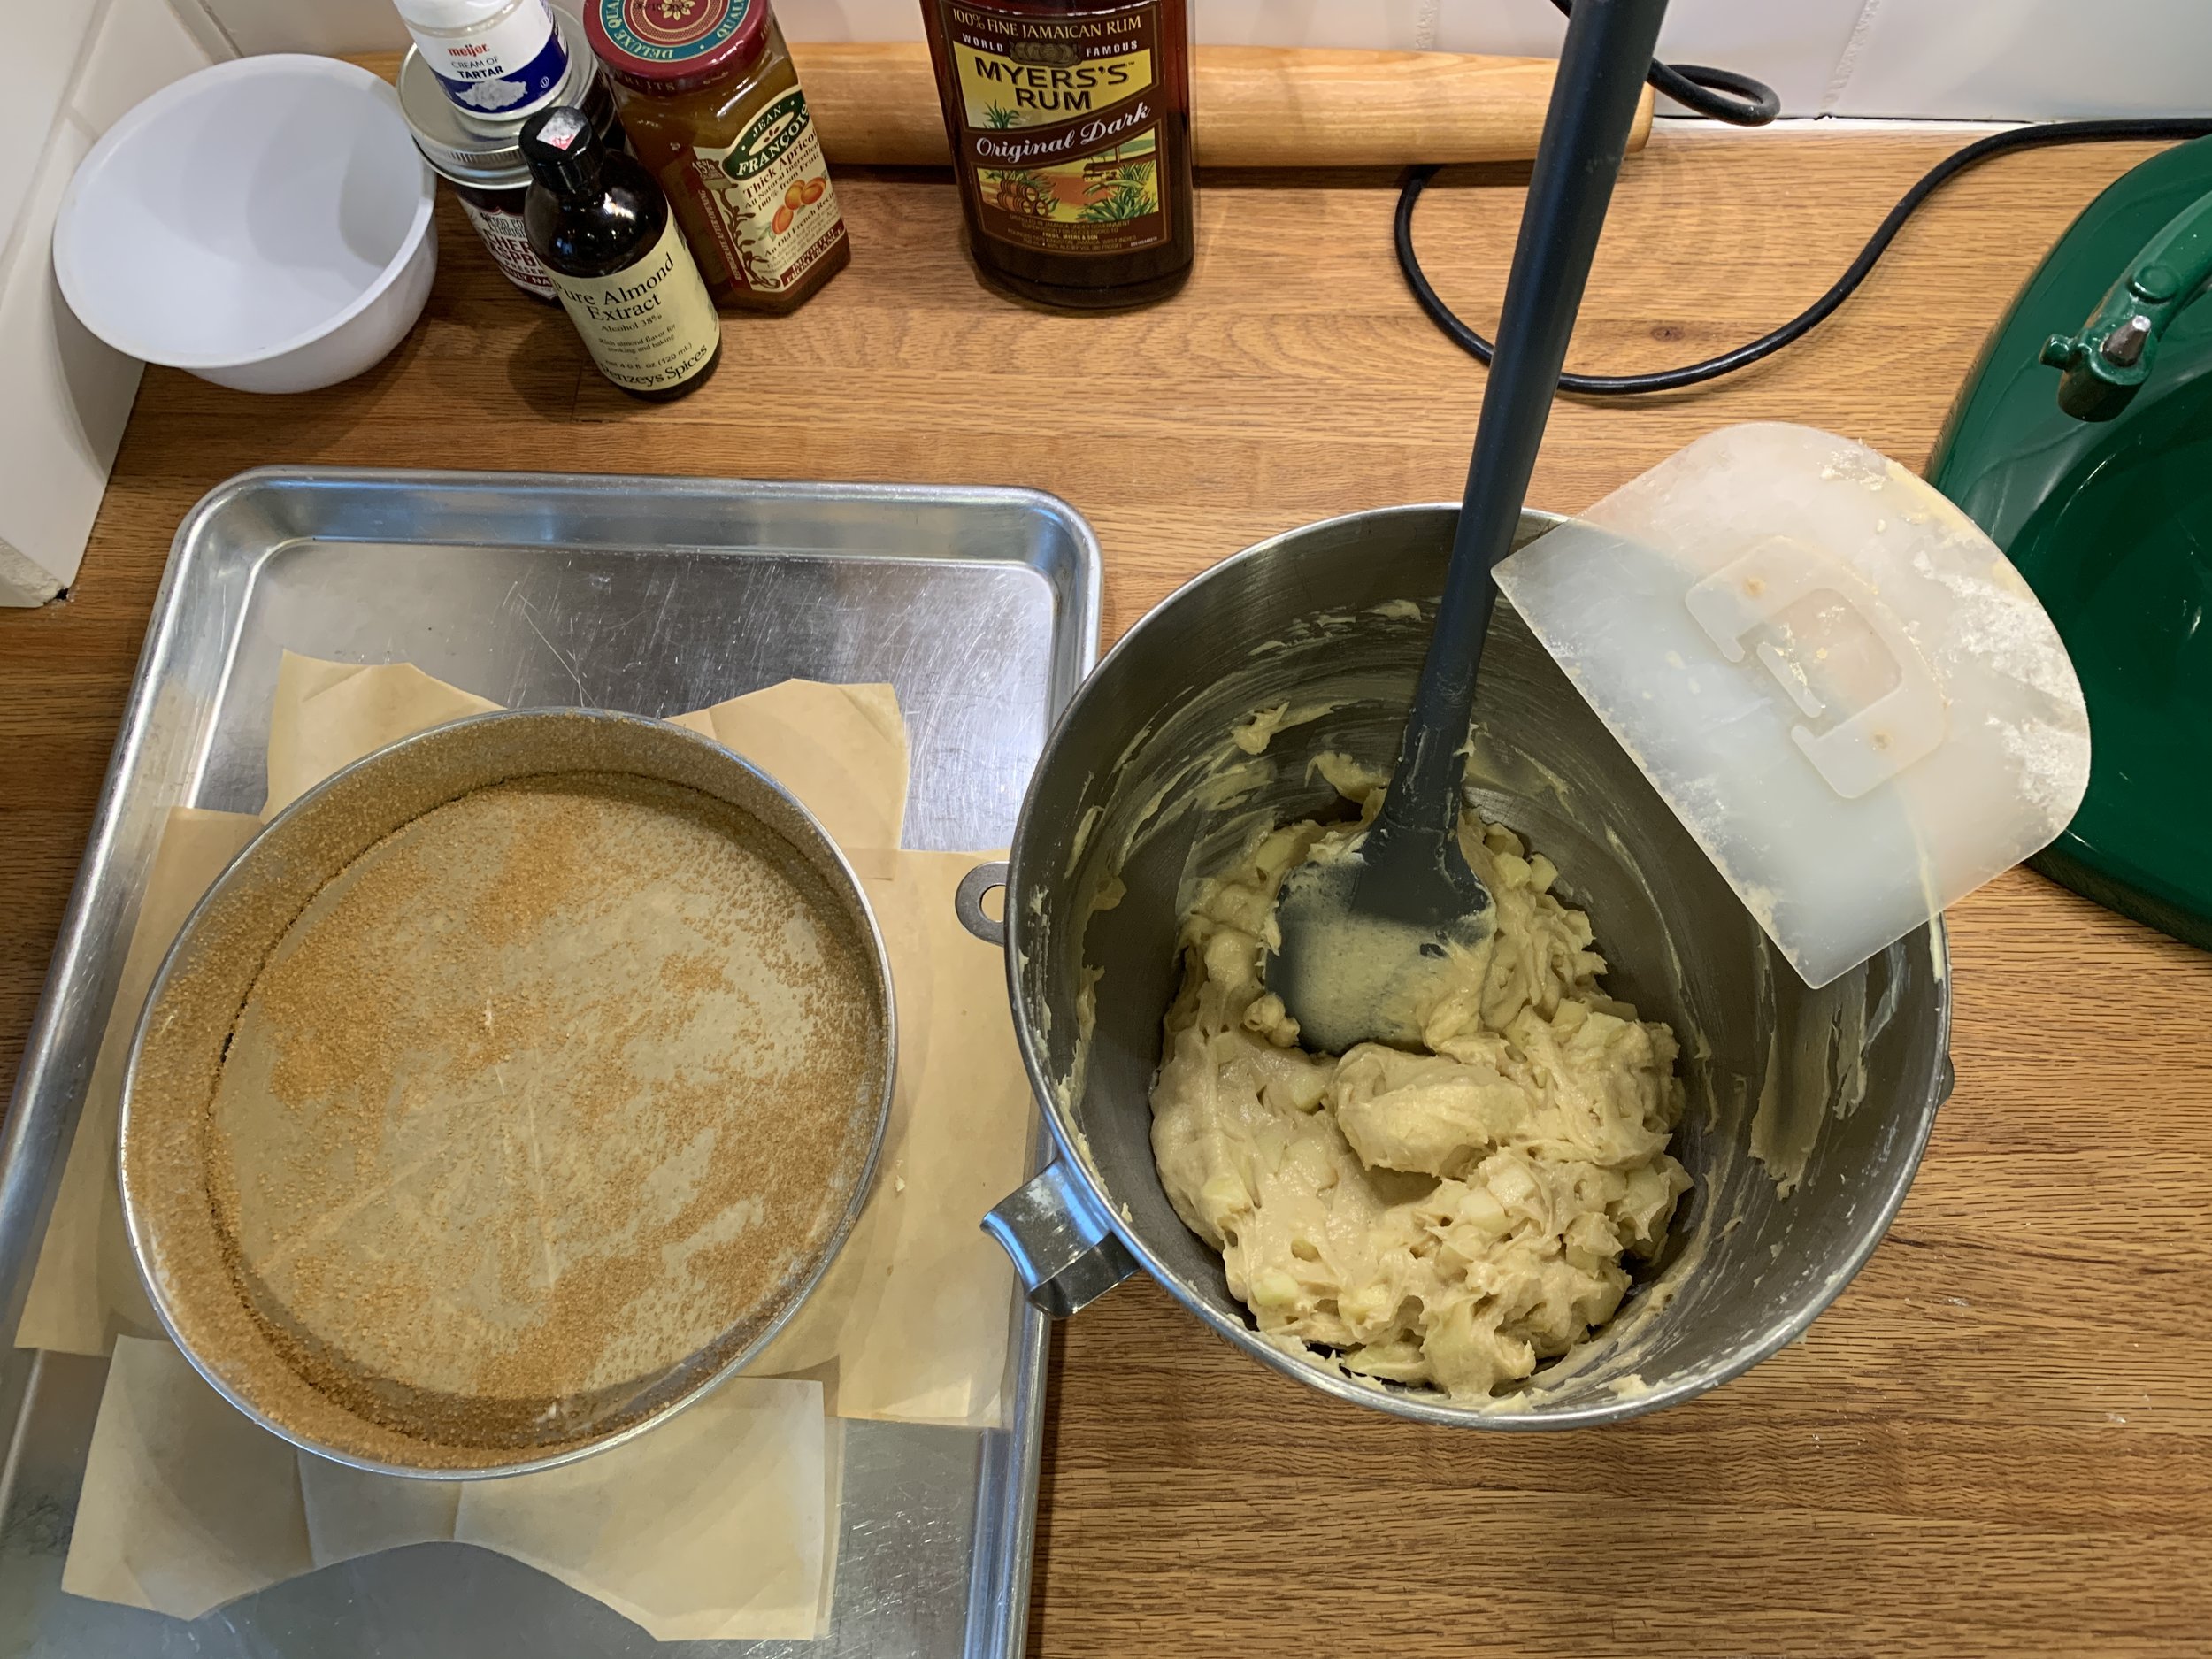
I decided to use an 8” springform pan so I could build up the sides a bit deeper than I might with a standard tart ring. I ended up using about 280-300 g of pasta frolla (the same dough I used for the crostata della Nonna last October). I lightly buttered the bottom of the pan and lined it with a parchment round.

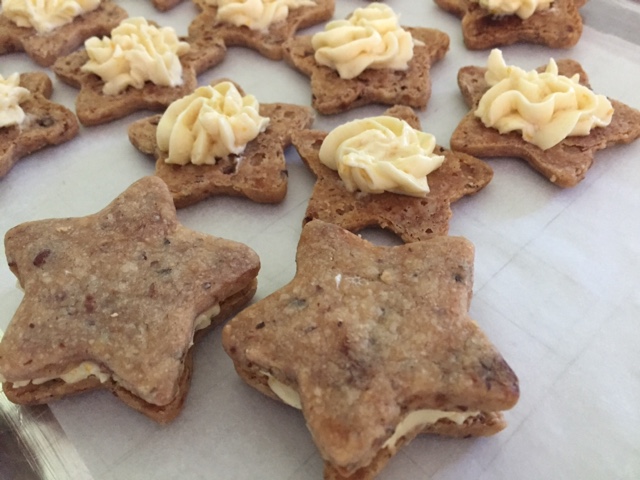
Roll the dough to about a 10” circle 4-5 mm thick and ease it into the form. I wanted a height of about 1.25” so gave myself plenty of dough to work with. Score the dough at your desired height then remove the excess. Save scraps to re-roll for cookies or petite tarts.
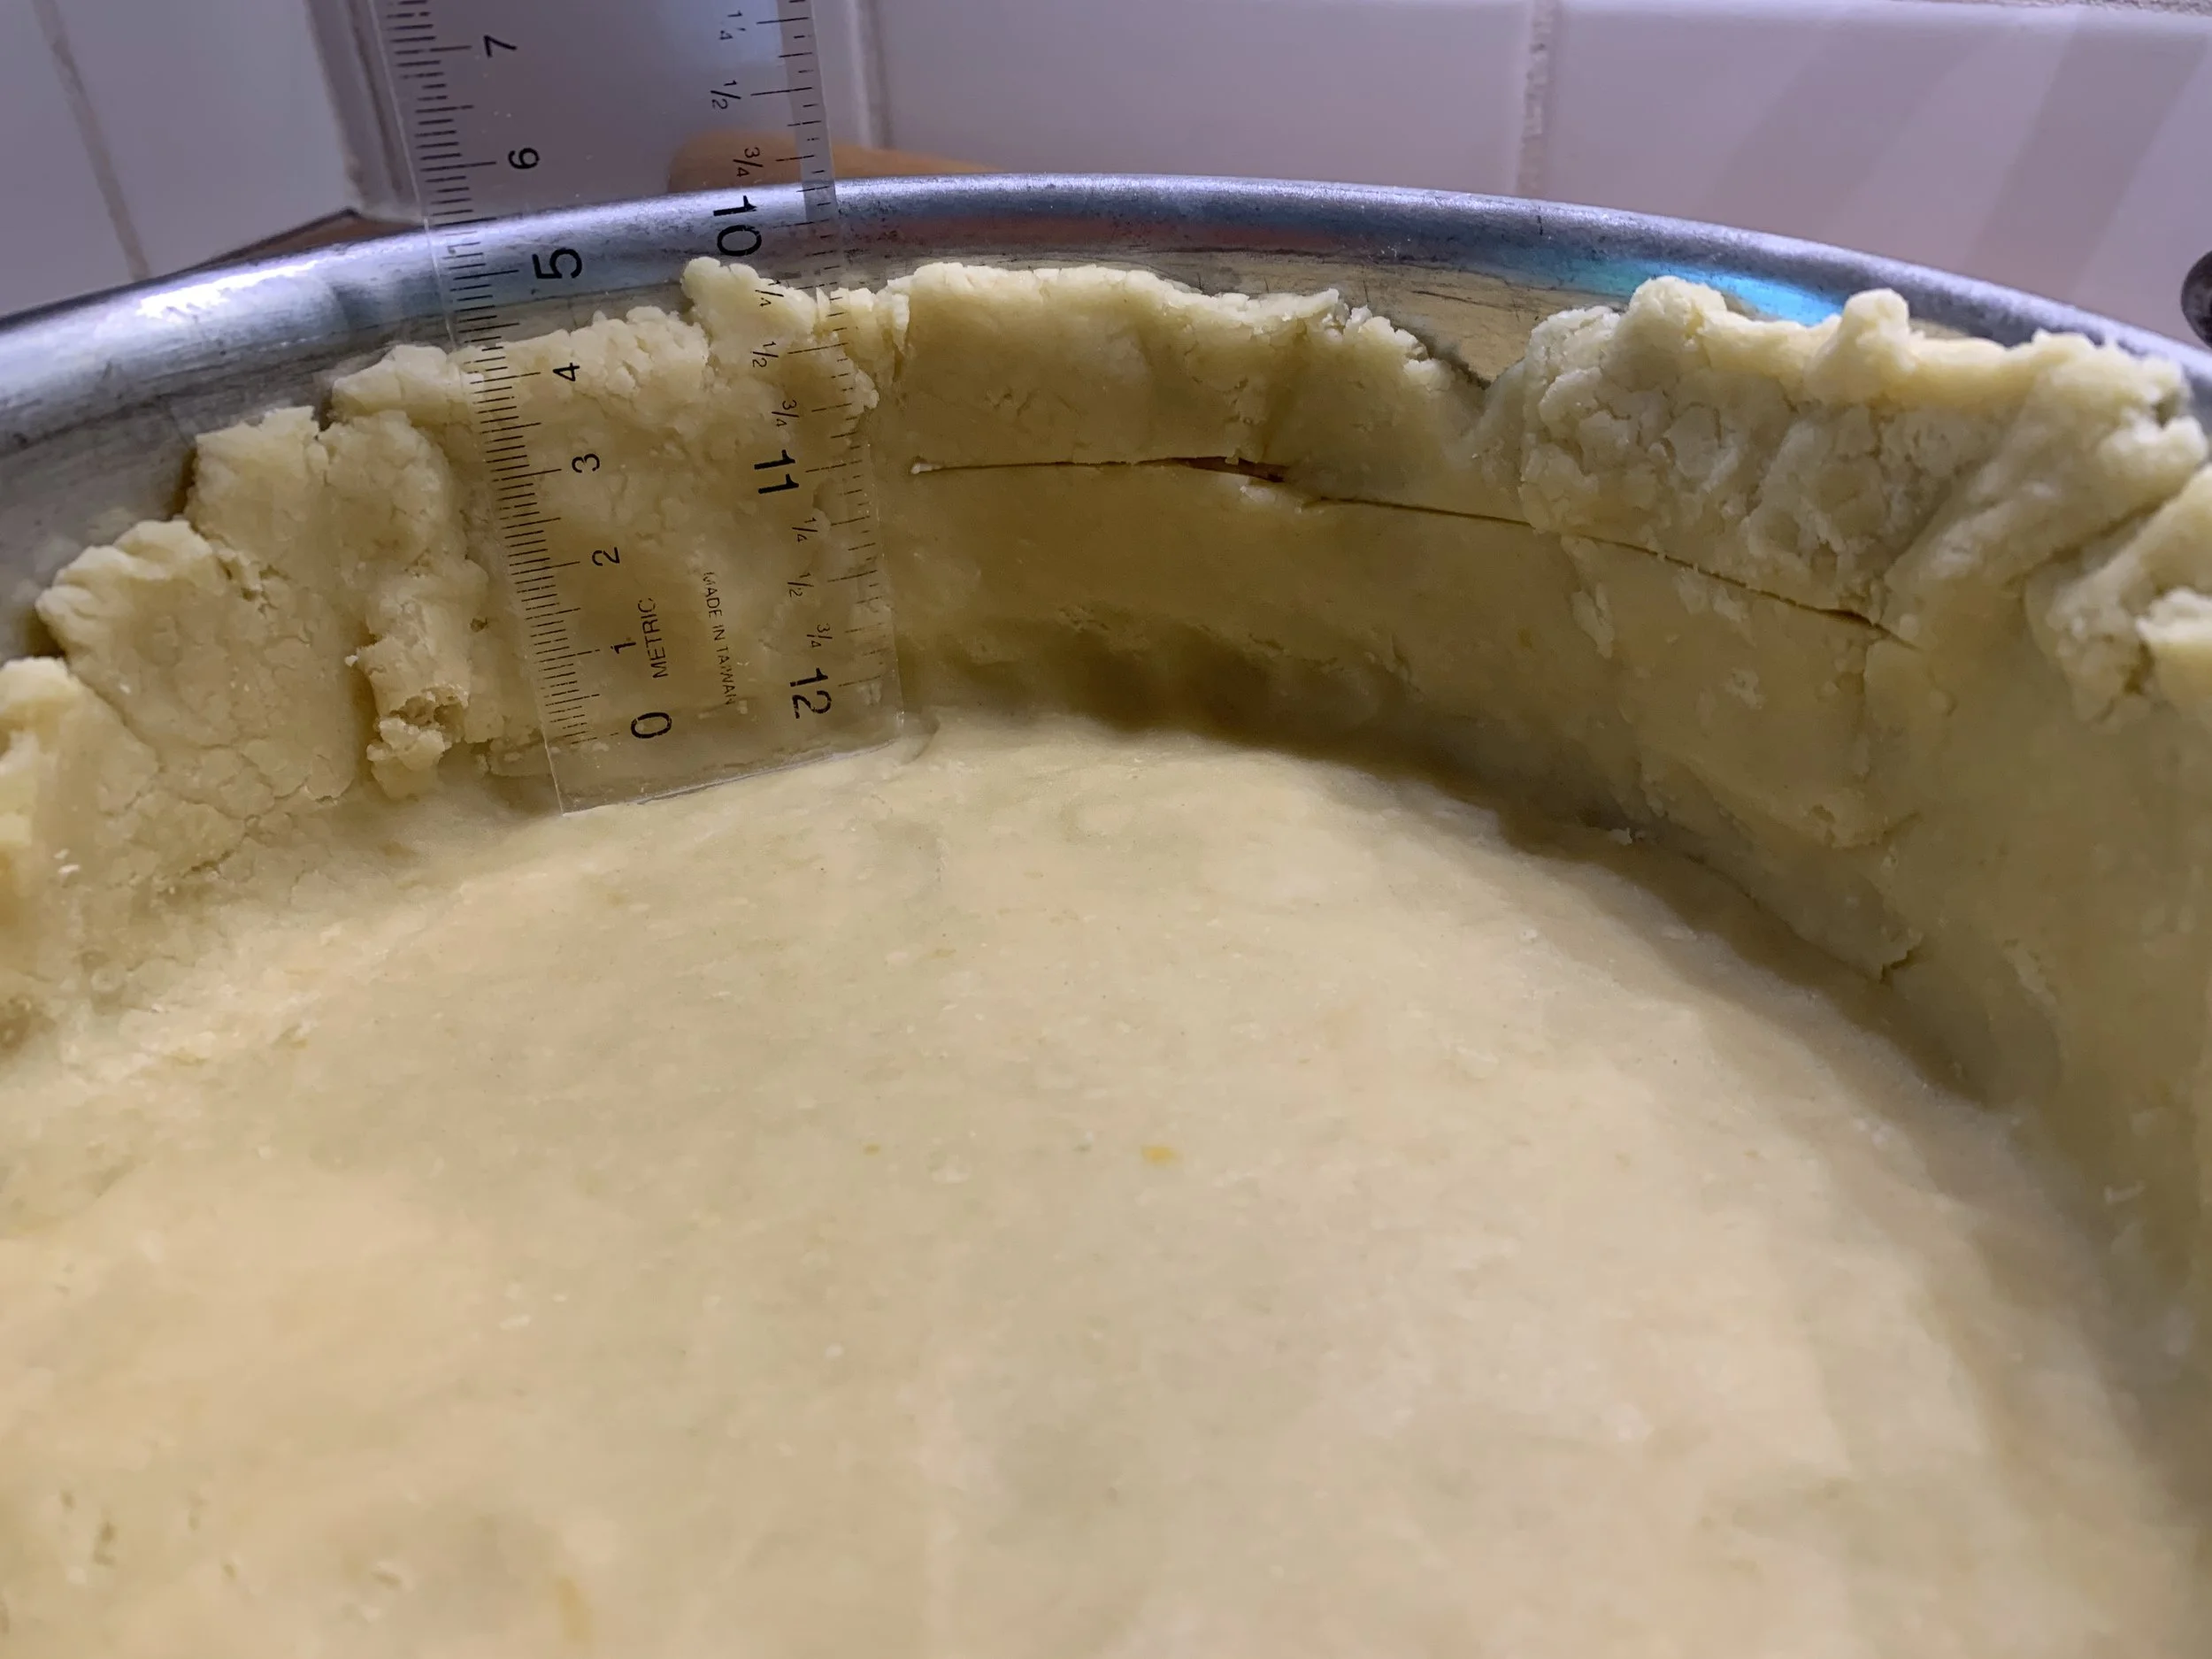
Starting the lining

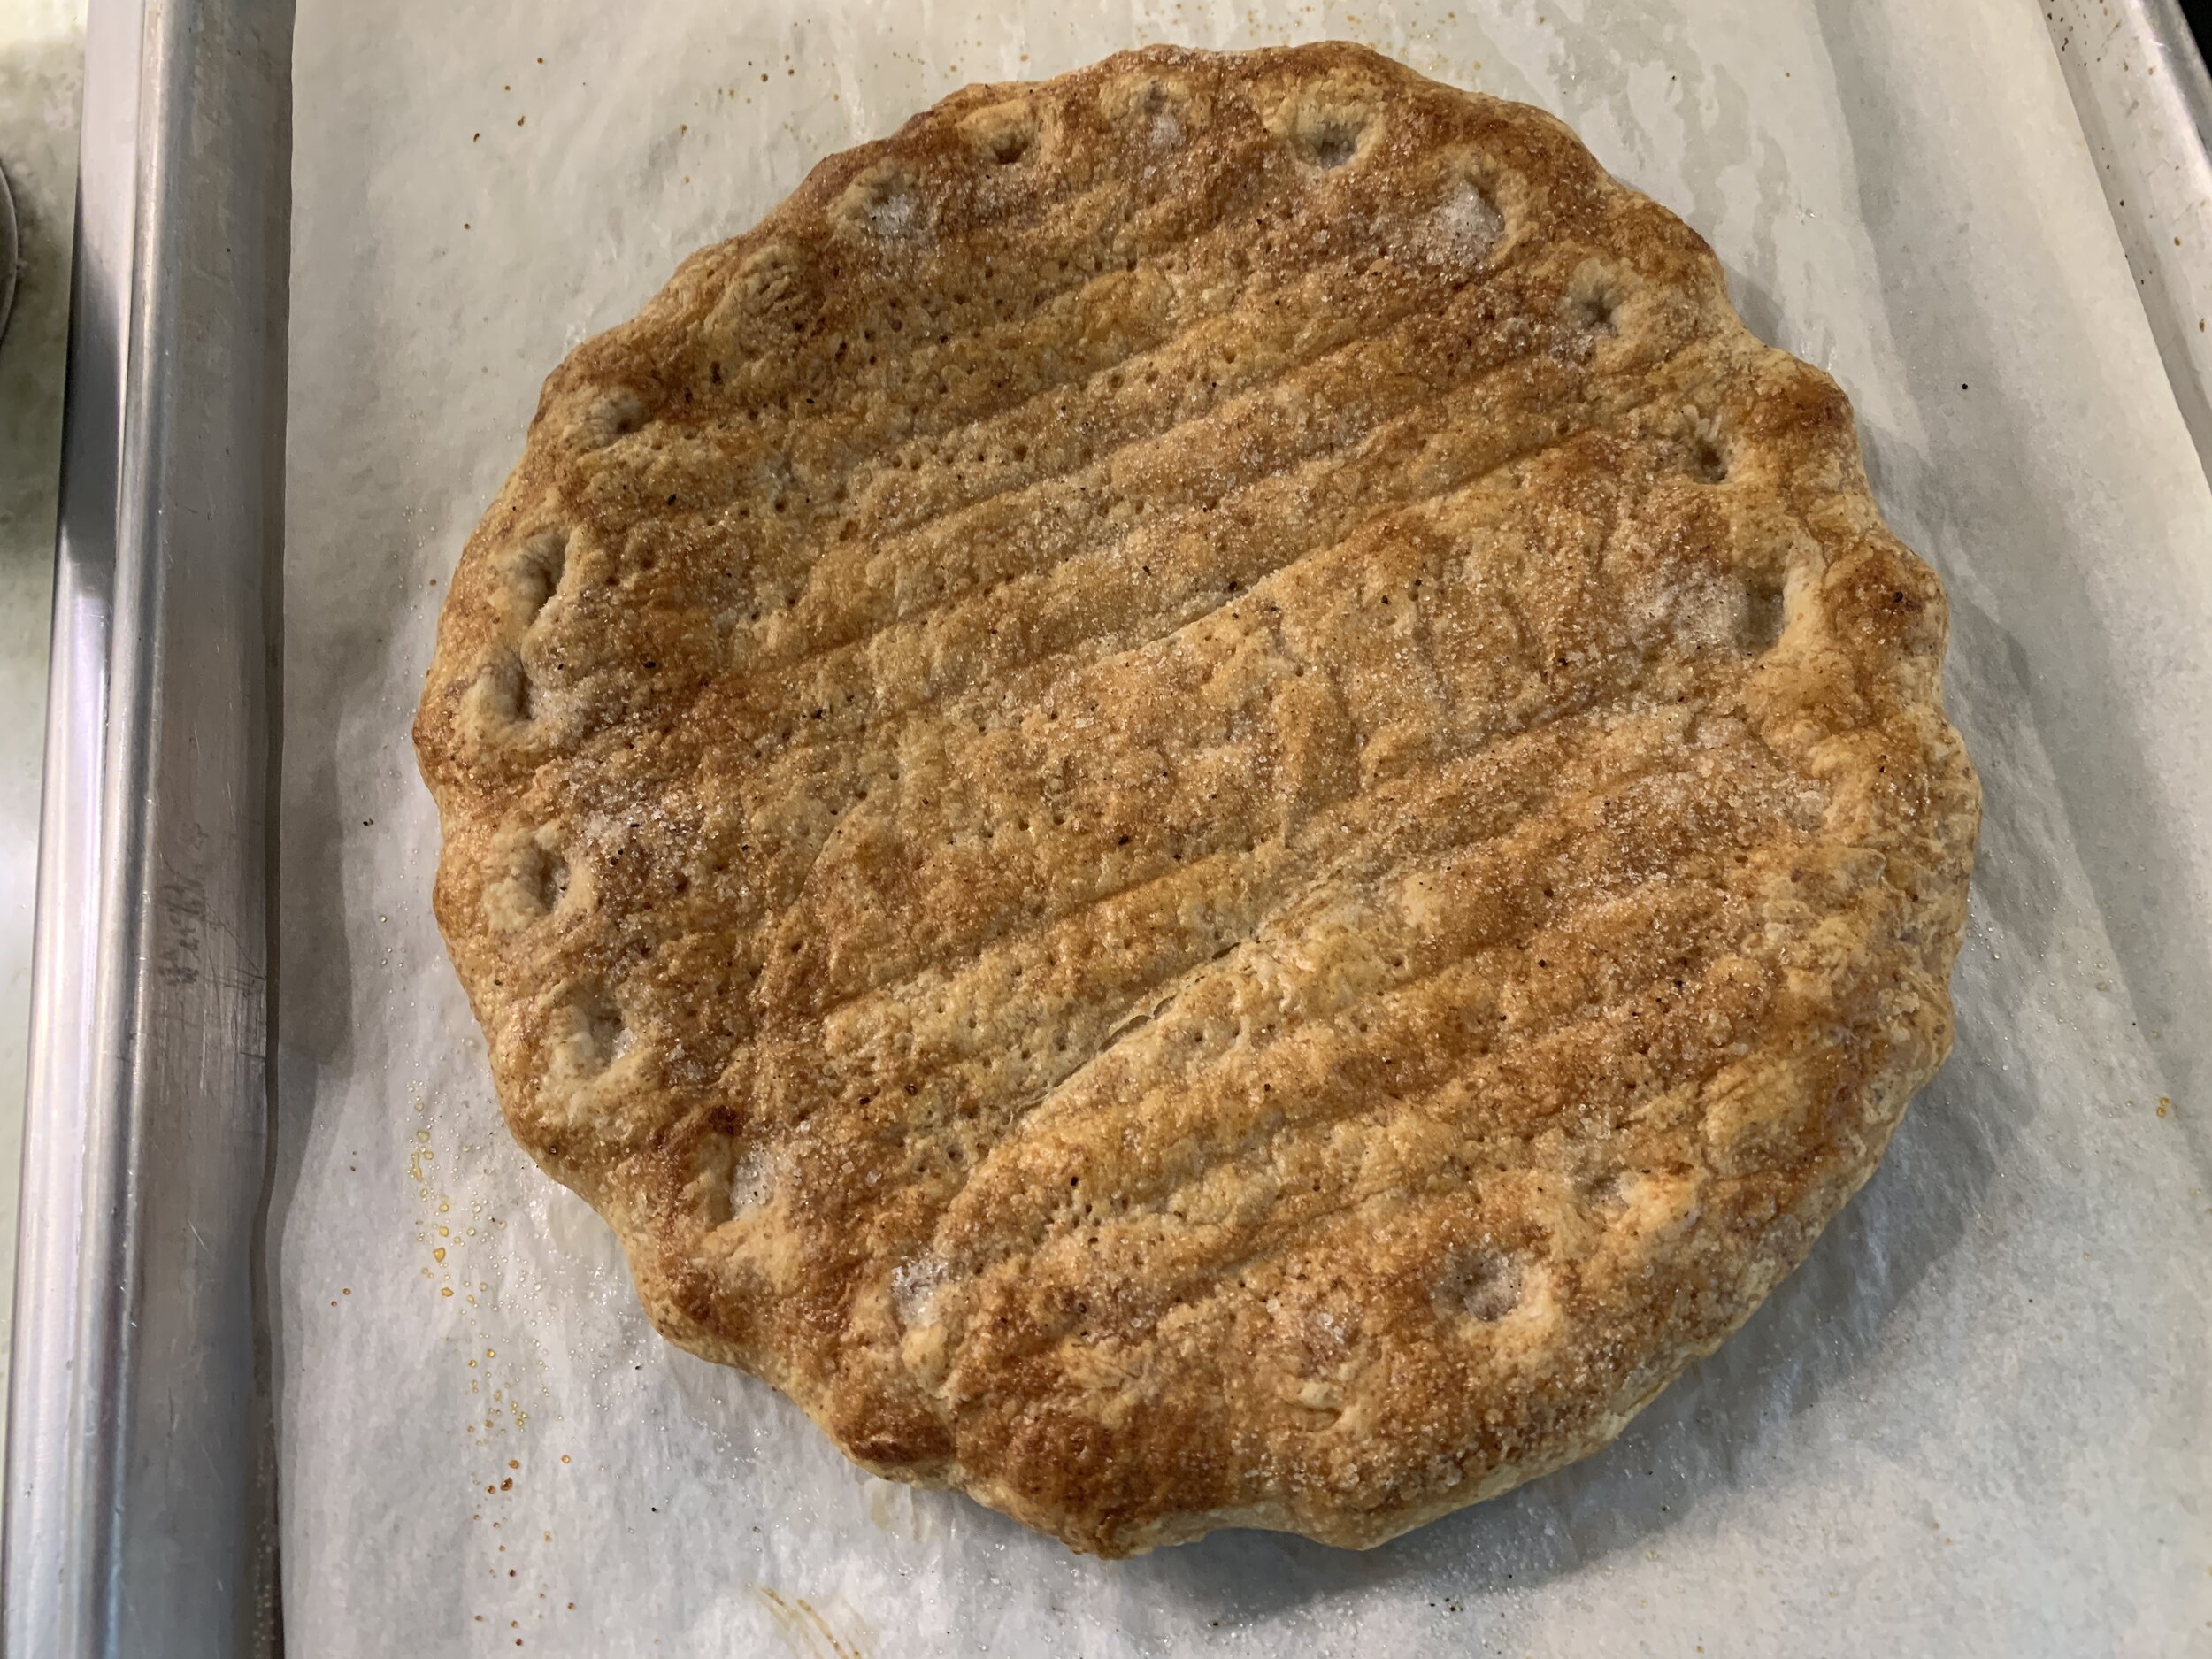
Here it is all neatened up with a distinct edge. Prick all over with a fork. I always place my lined form in the freezer while my oven is heating to 350ºF (325º convection) - it helps the dough keep its form during baking.

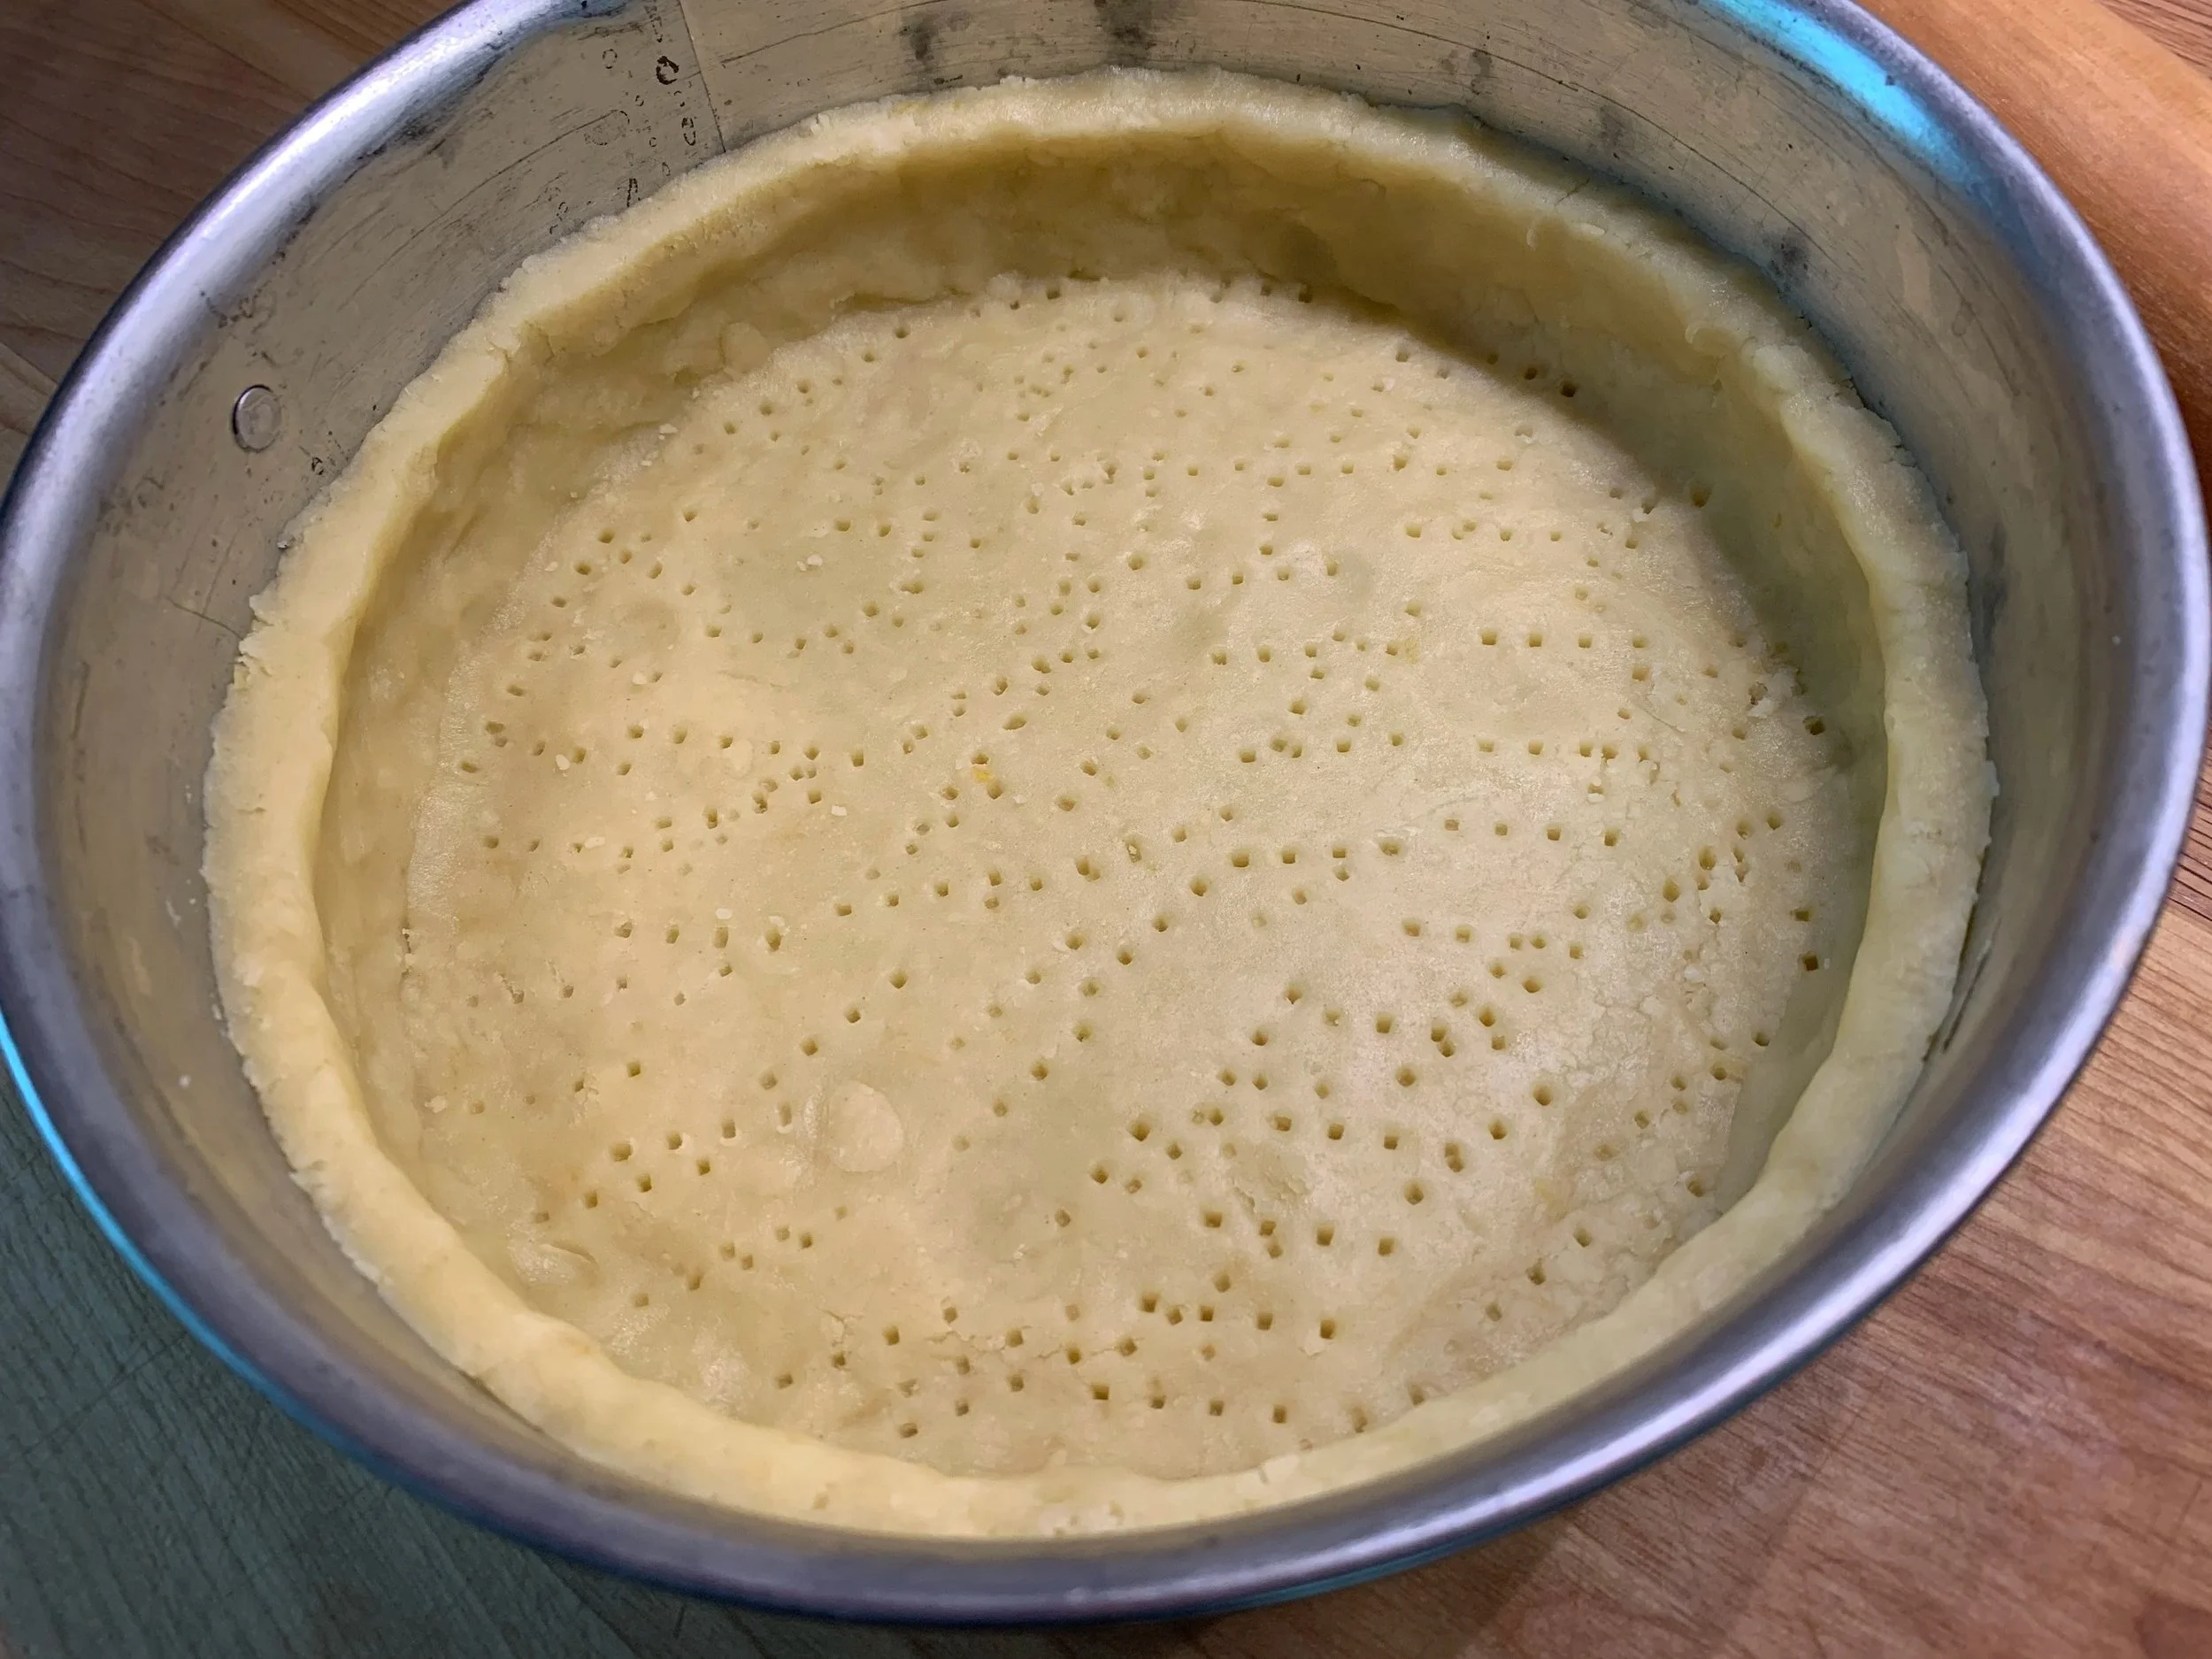
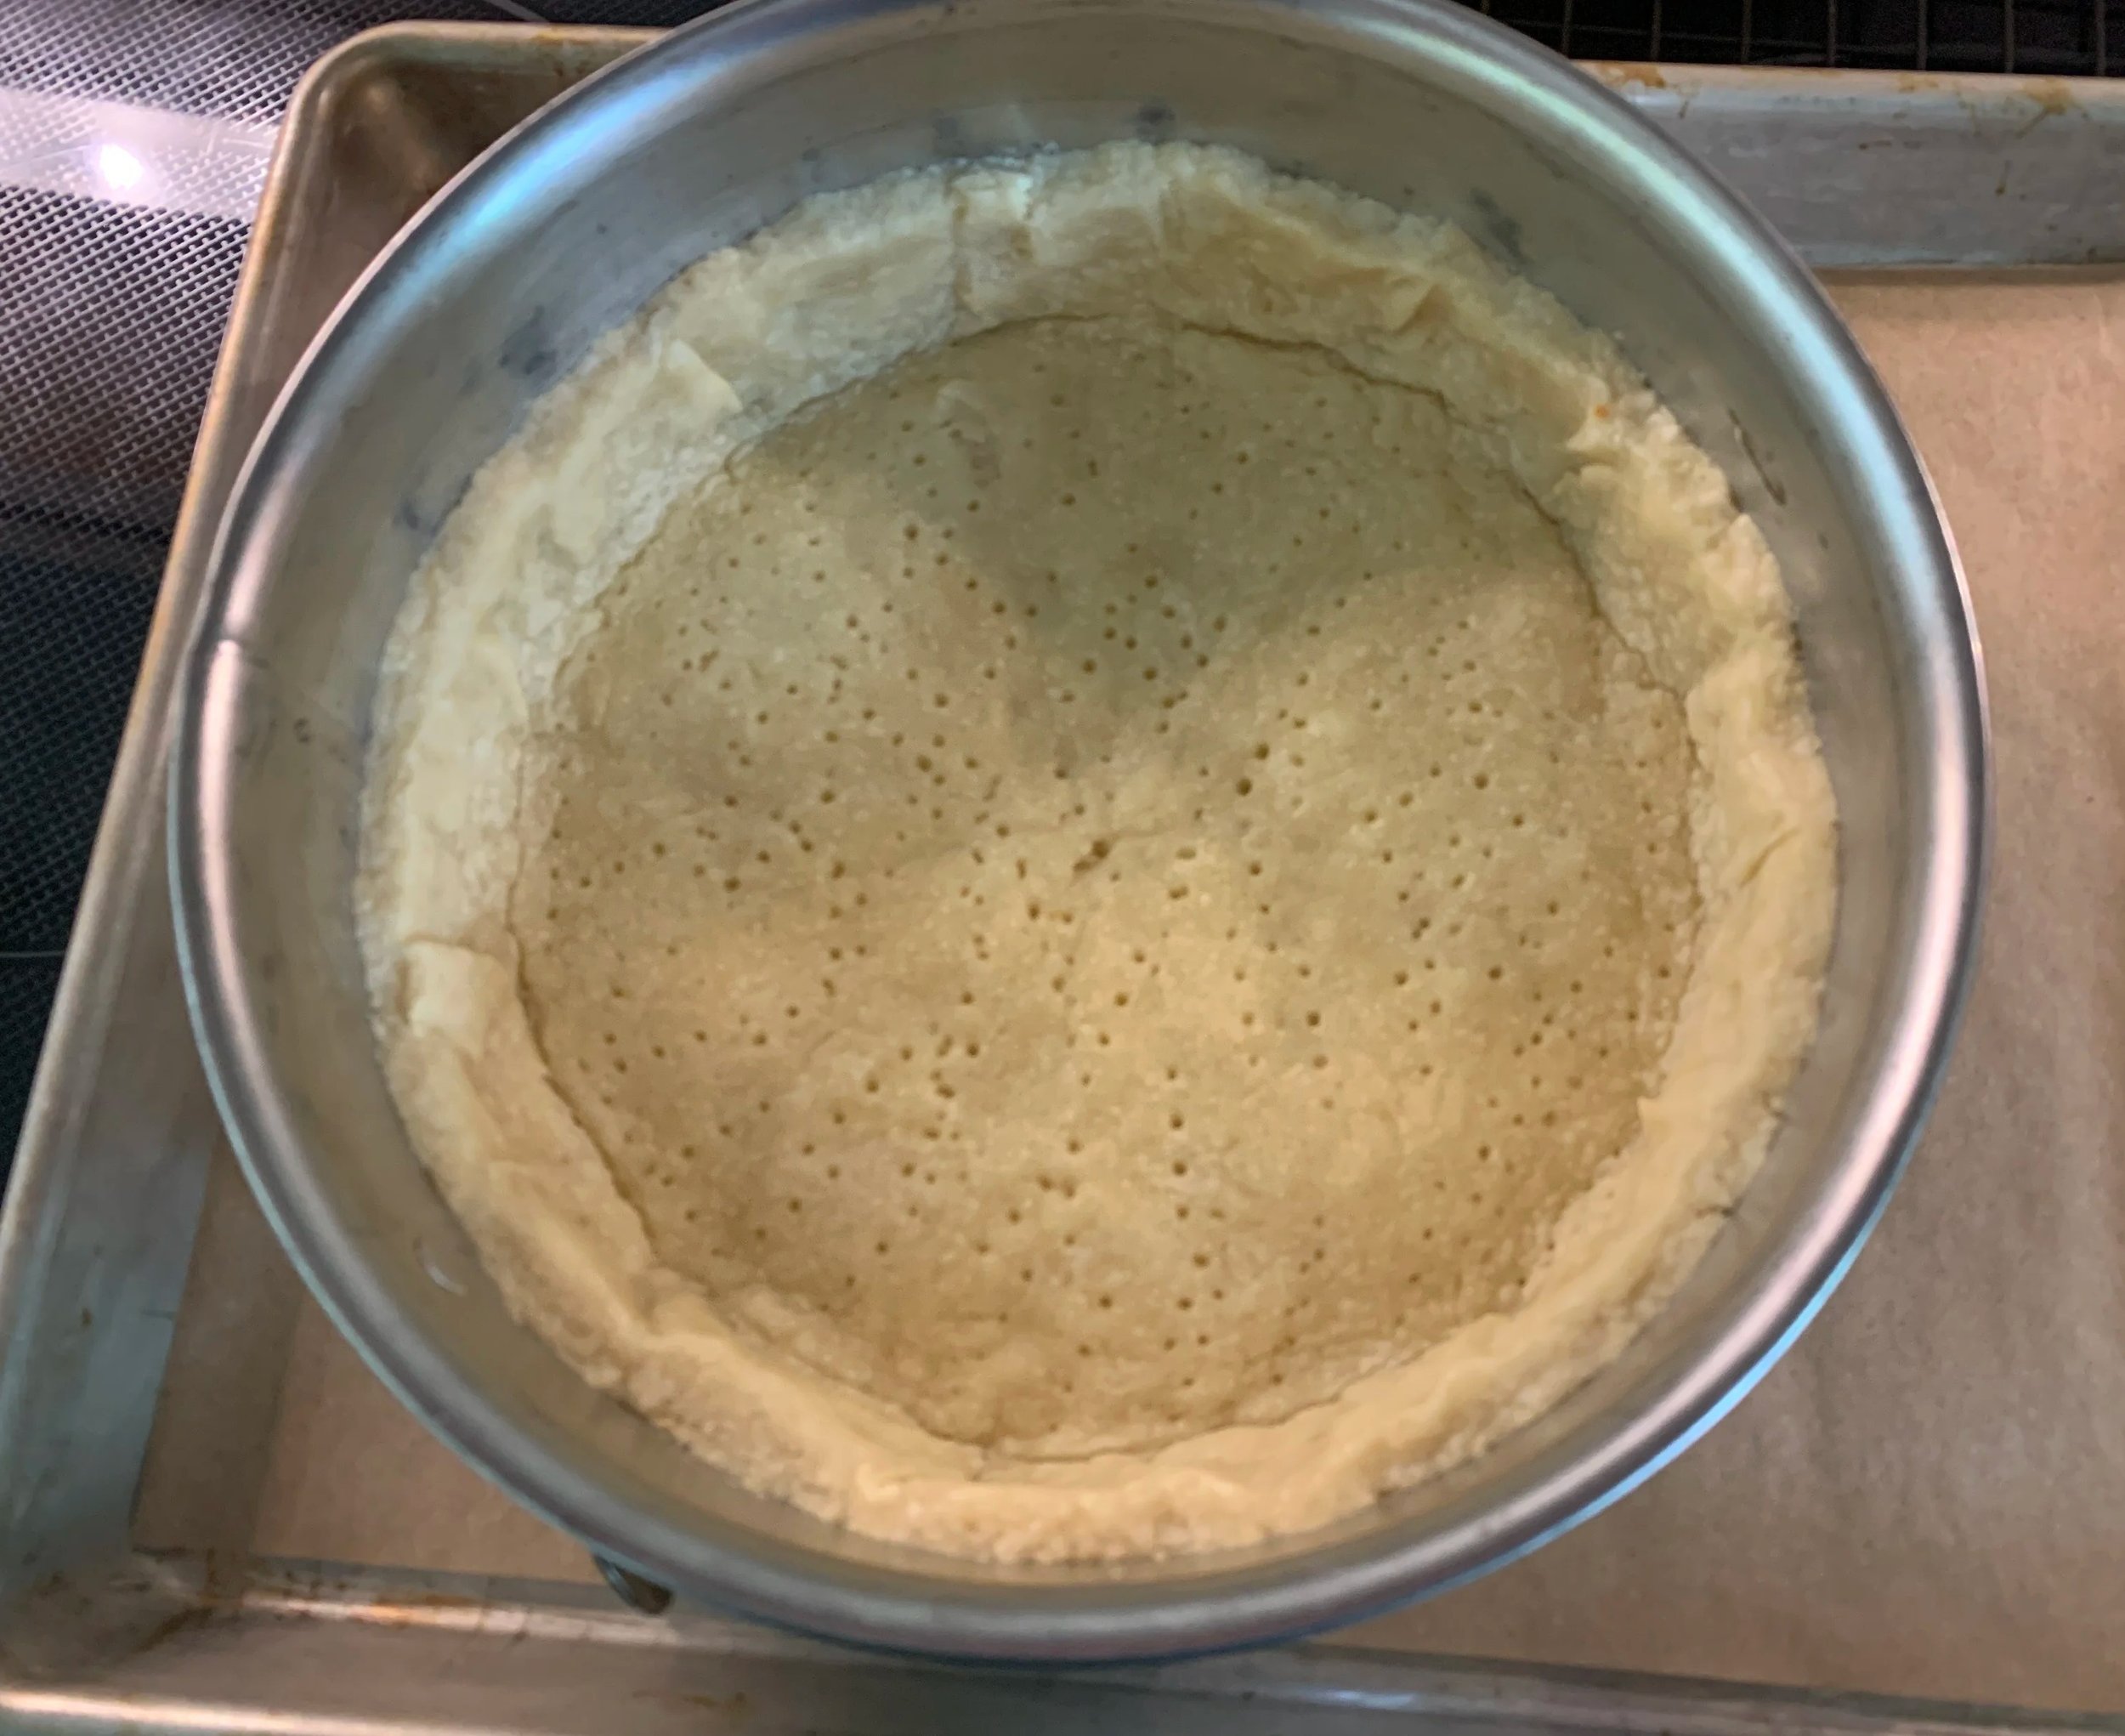
Ready for blind baking

Ease your parchment round into the pan, snugging it up against the dough. Fill with weights.


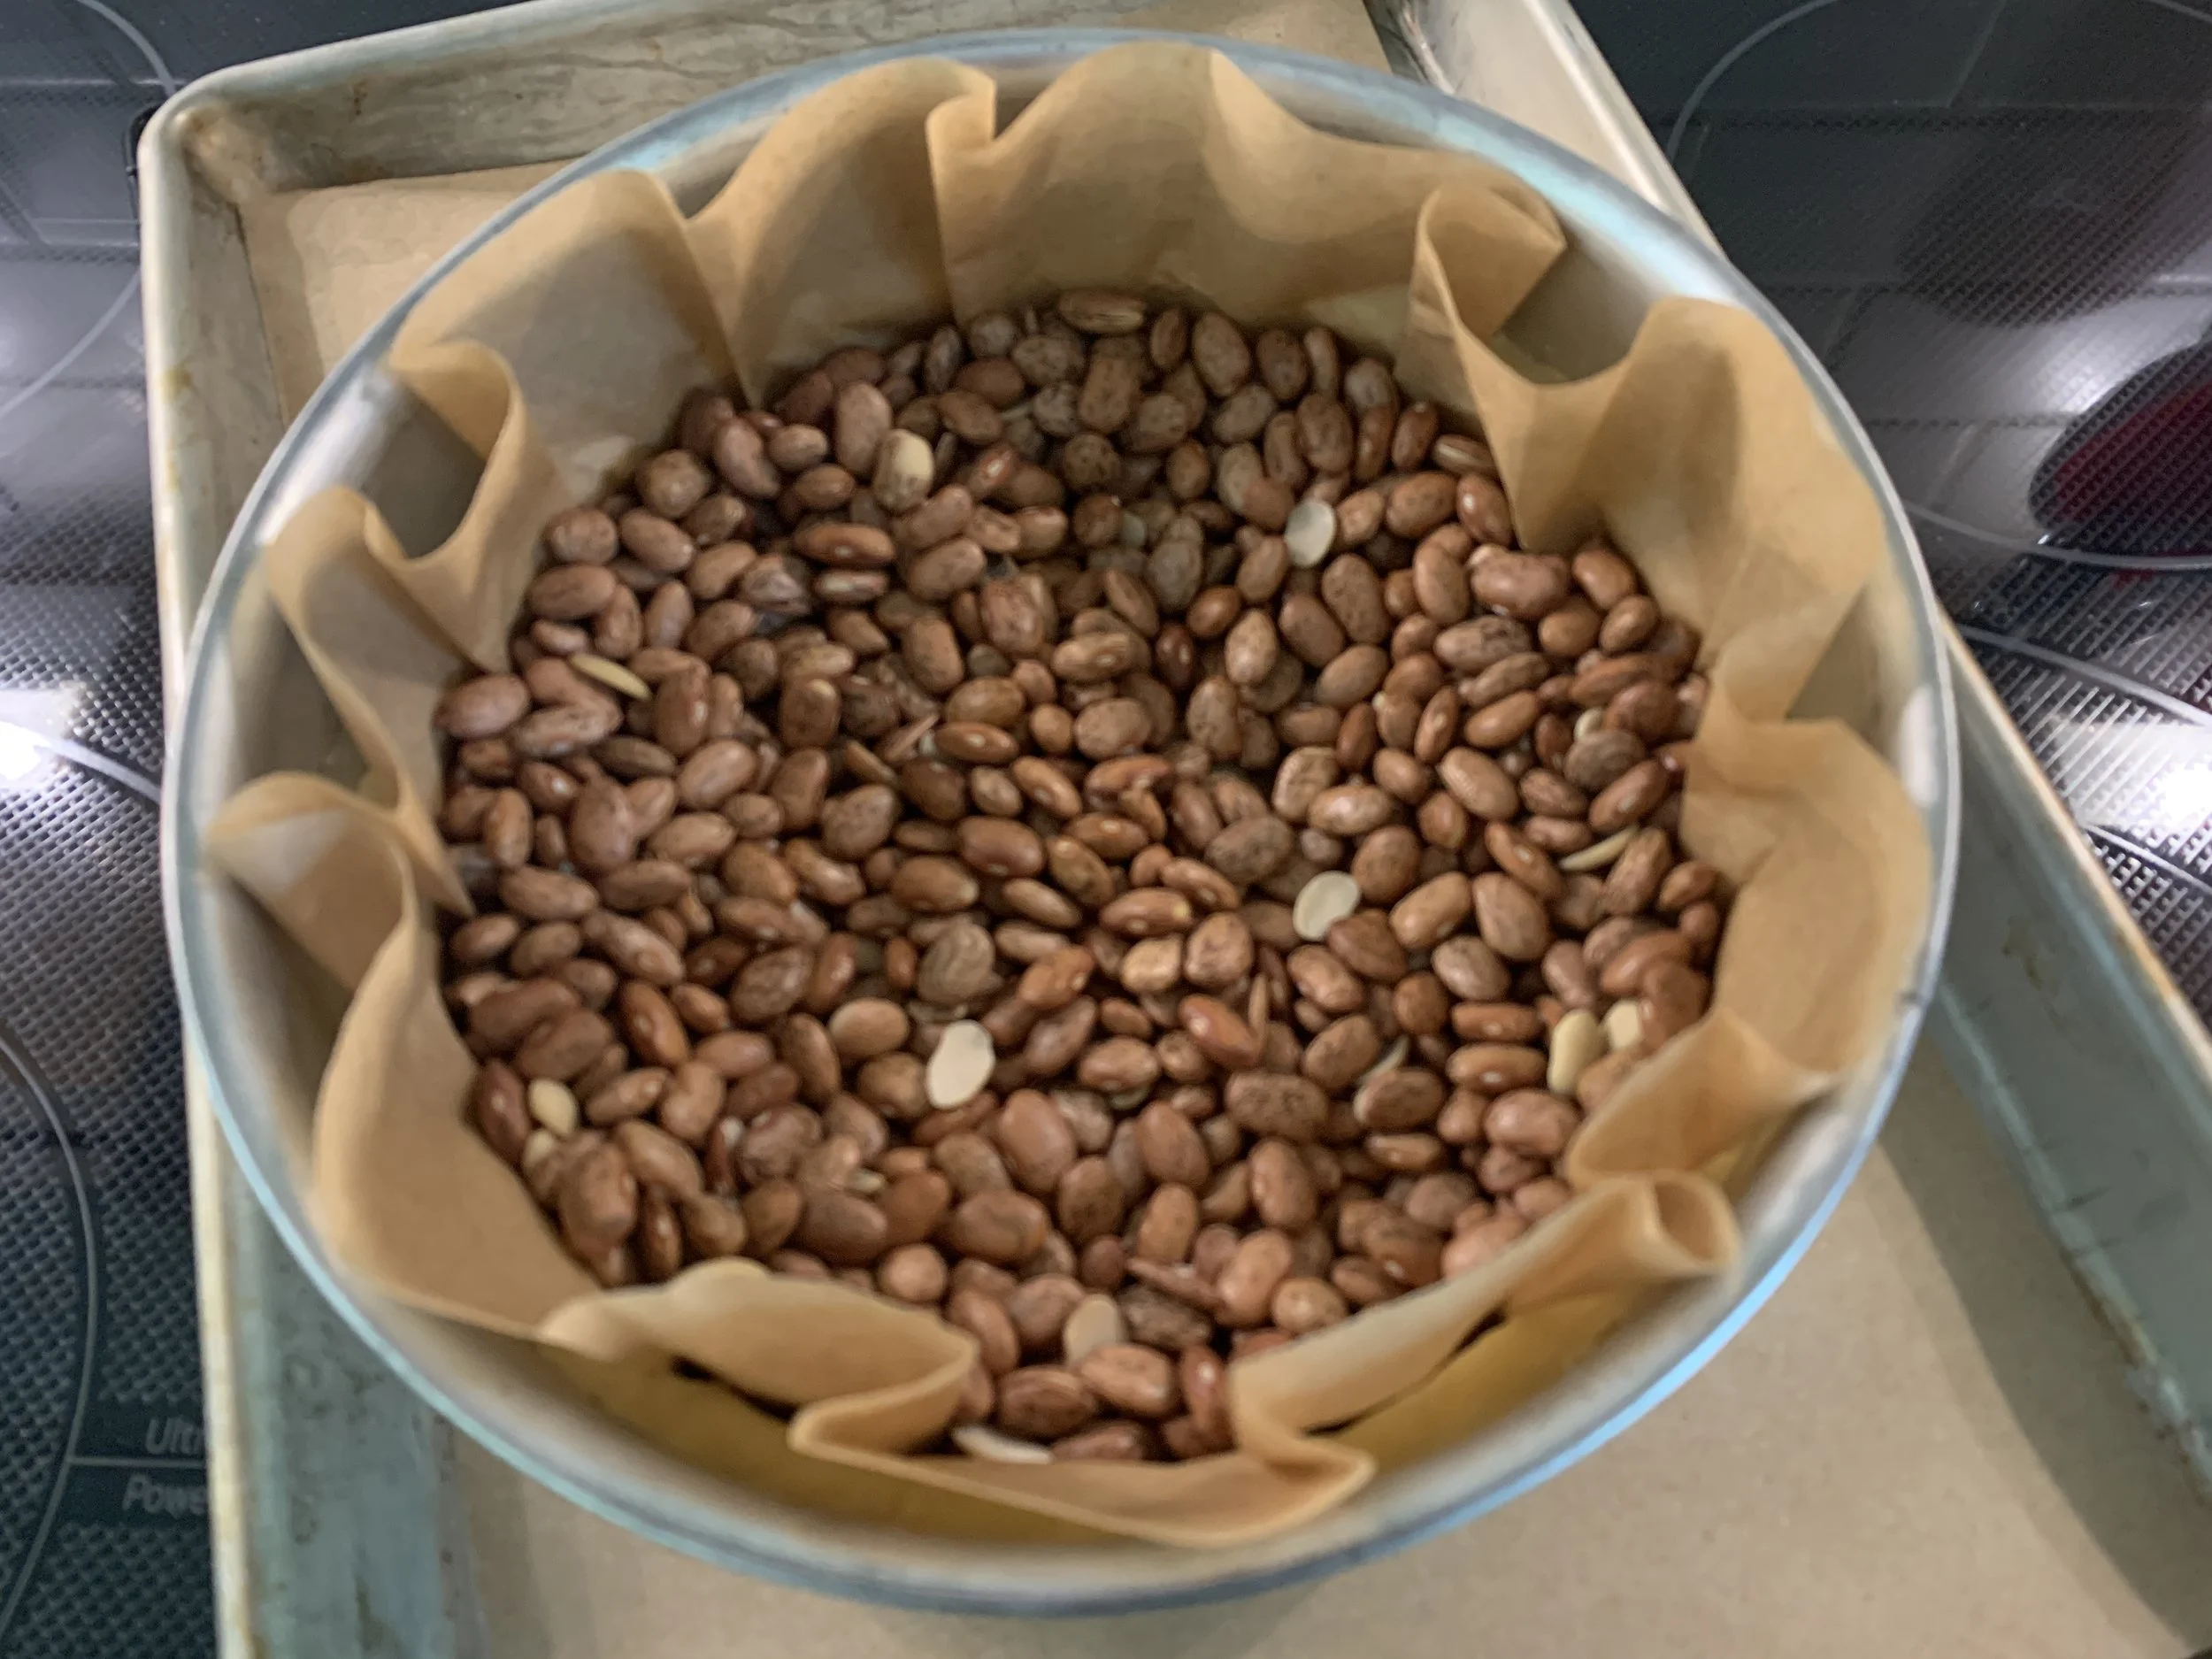
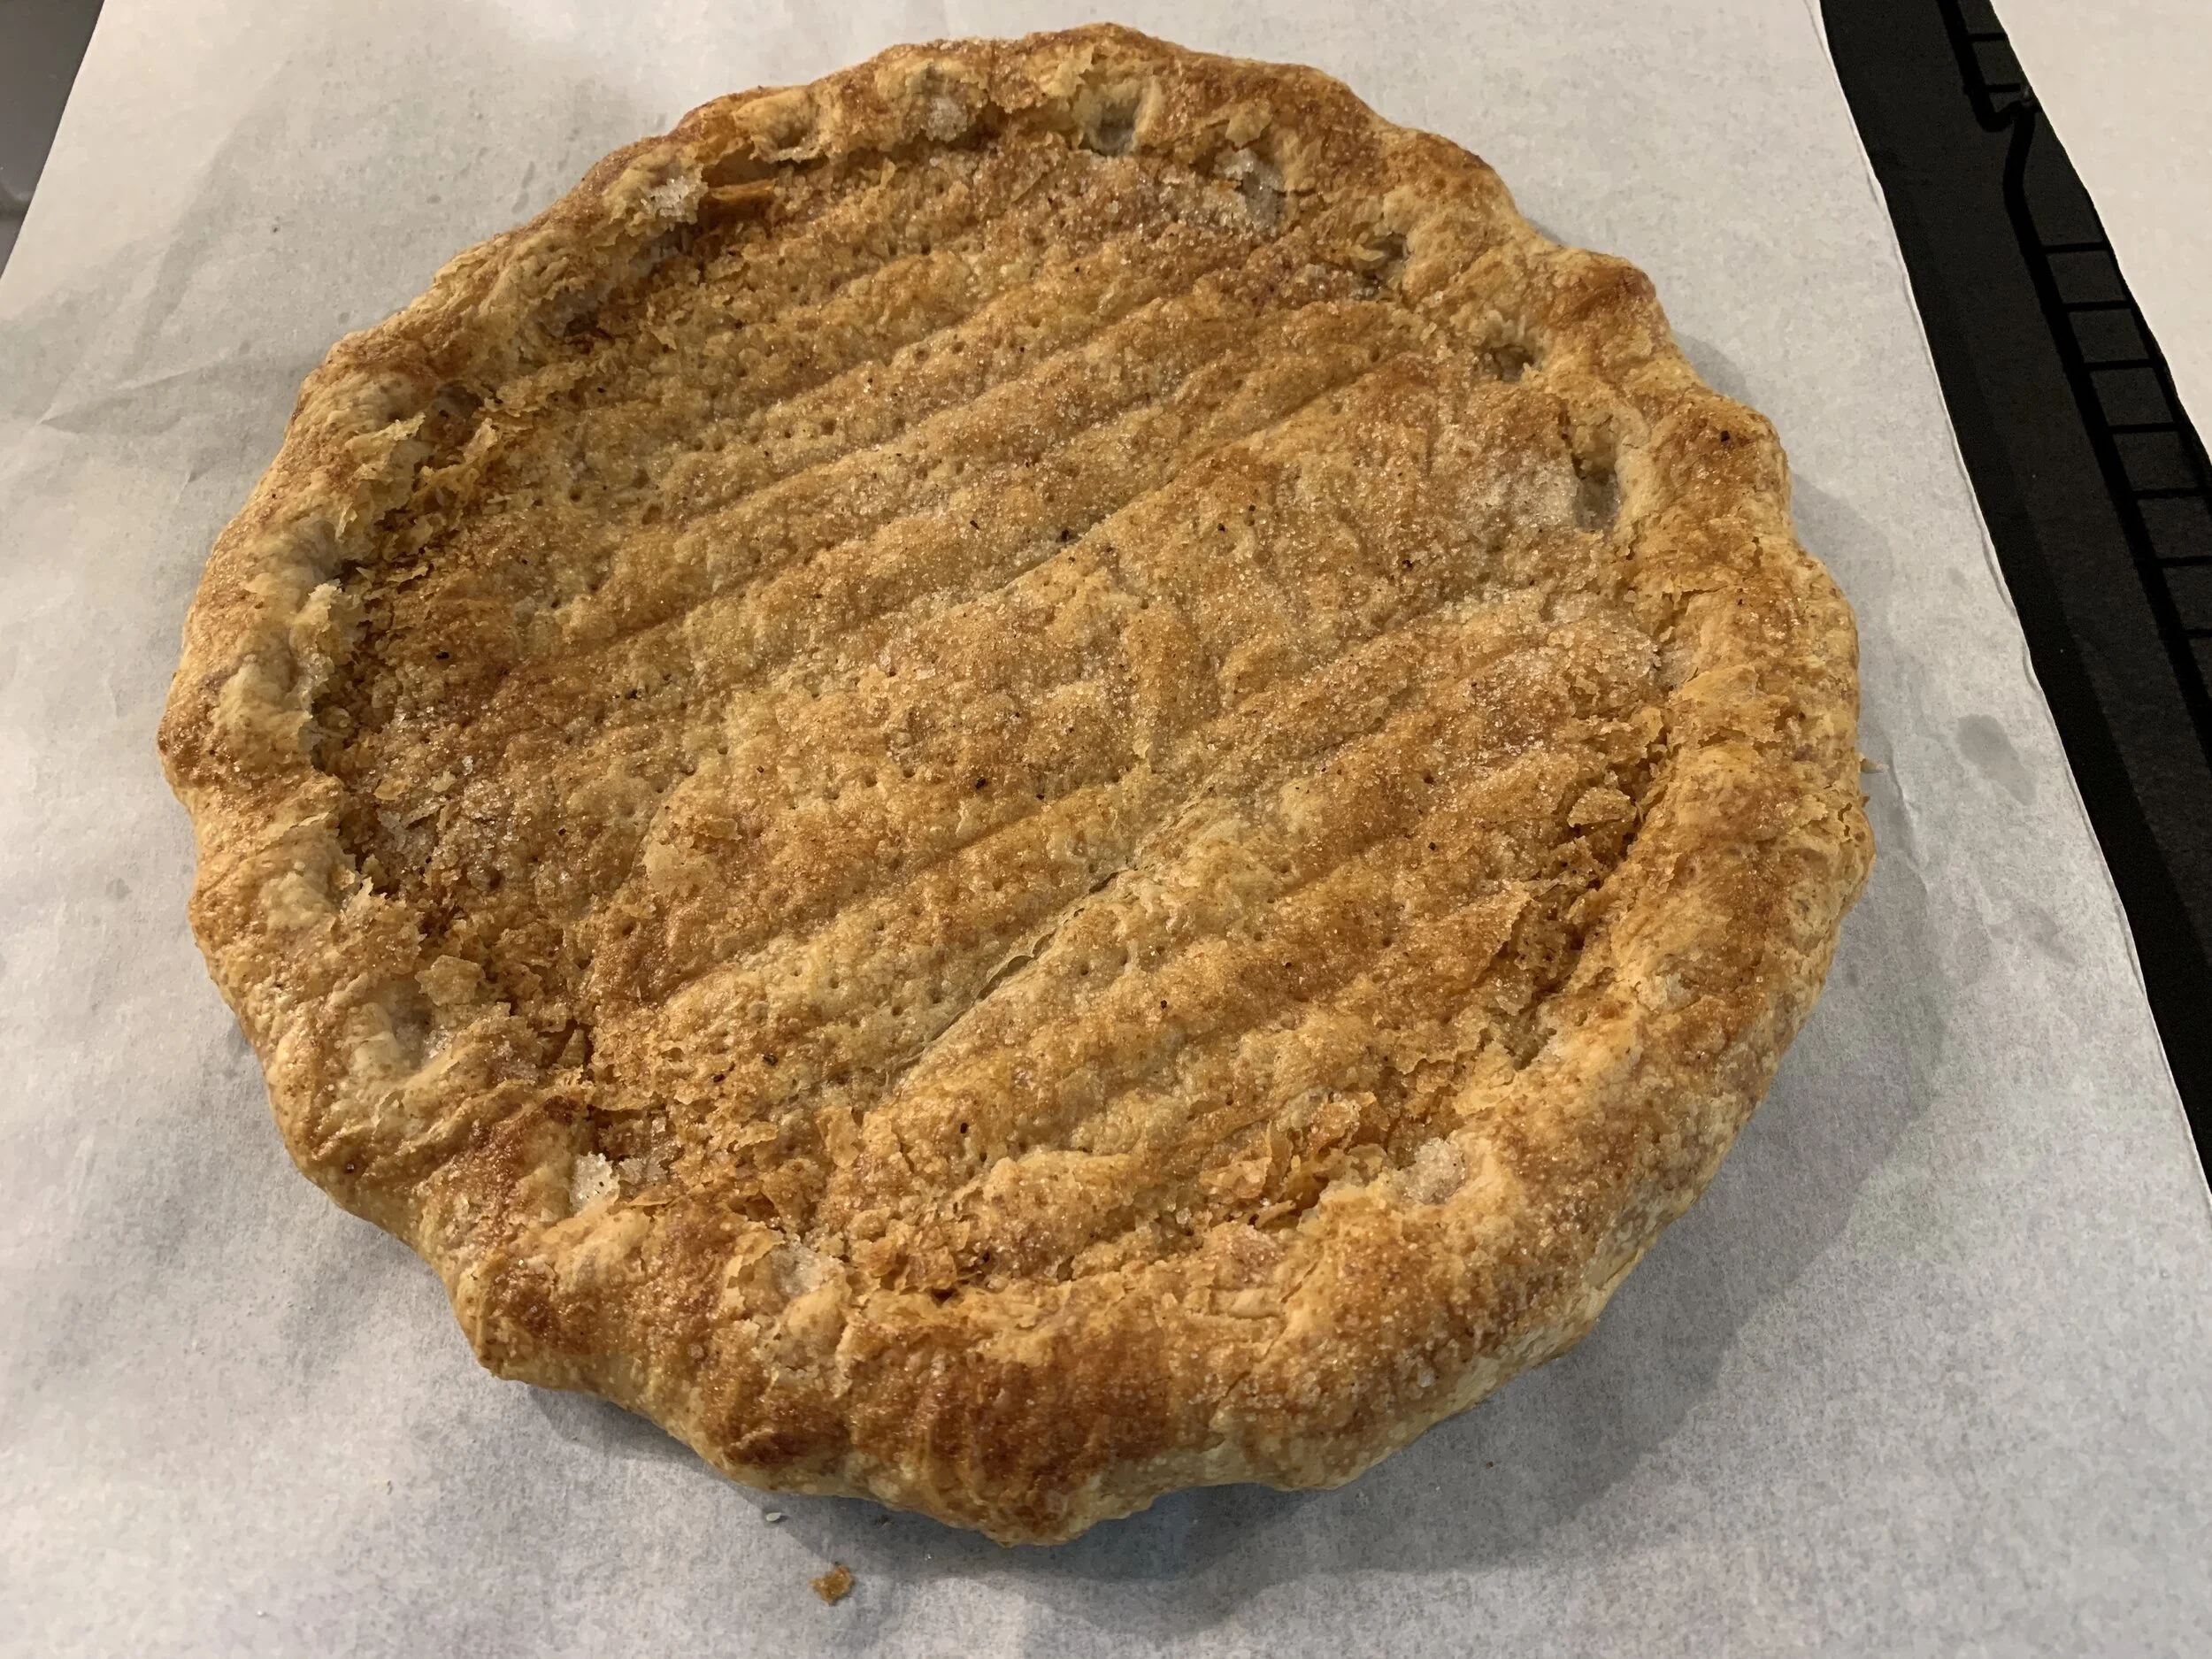
Bake 20 minutes, remove from the oven and gently lift out the parchment/weights. You want the edges of the dough starting to set. The bottom will still look wet but continue to bake without weights another 10-15 minutes until it looks dry.

Egdes set, bottom needs more time

OK now we’re on a roll

At this point you have the option to let it cool and refrigerate it overnight (or freeze for up to a couple of weeks) if you wish to complete the project later.

If proceeding with filling and baking, make the mascarpone filling. The shell does NOT have to cool completely before filling with the custard and baking.

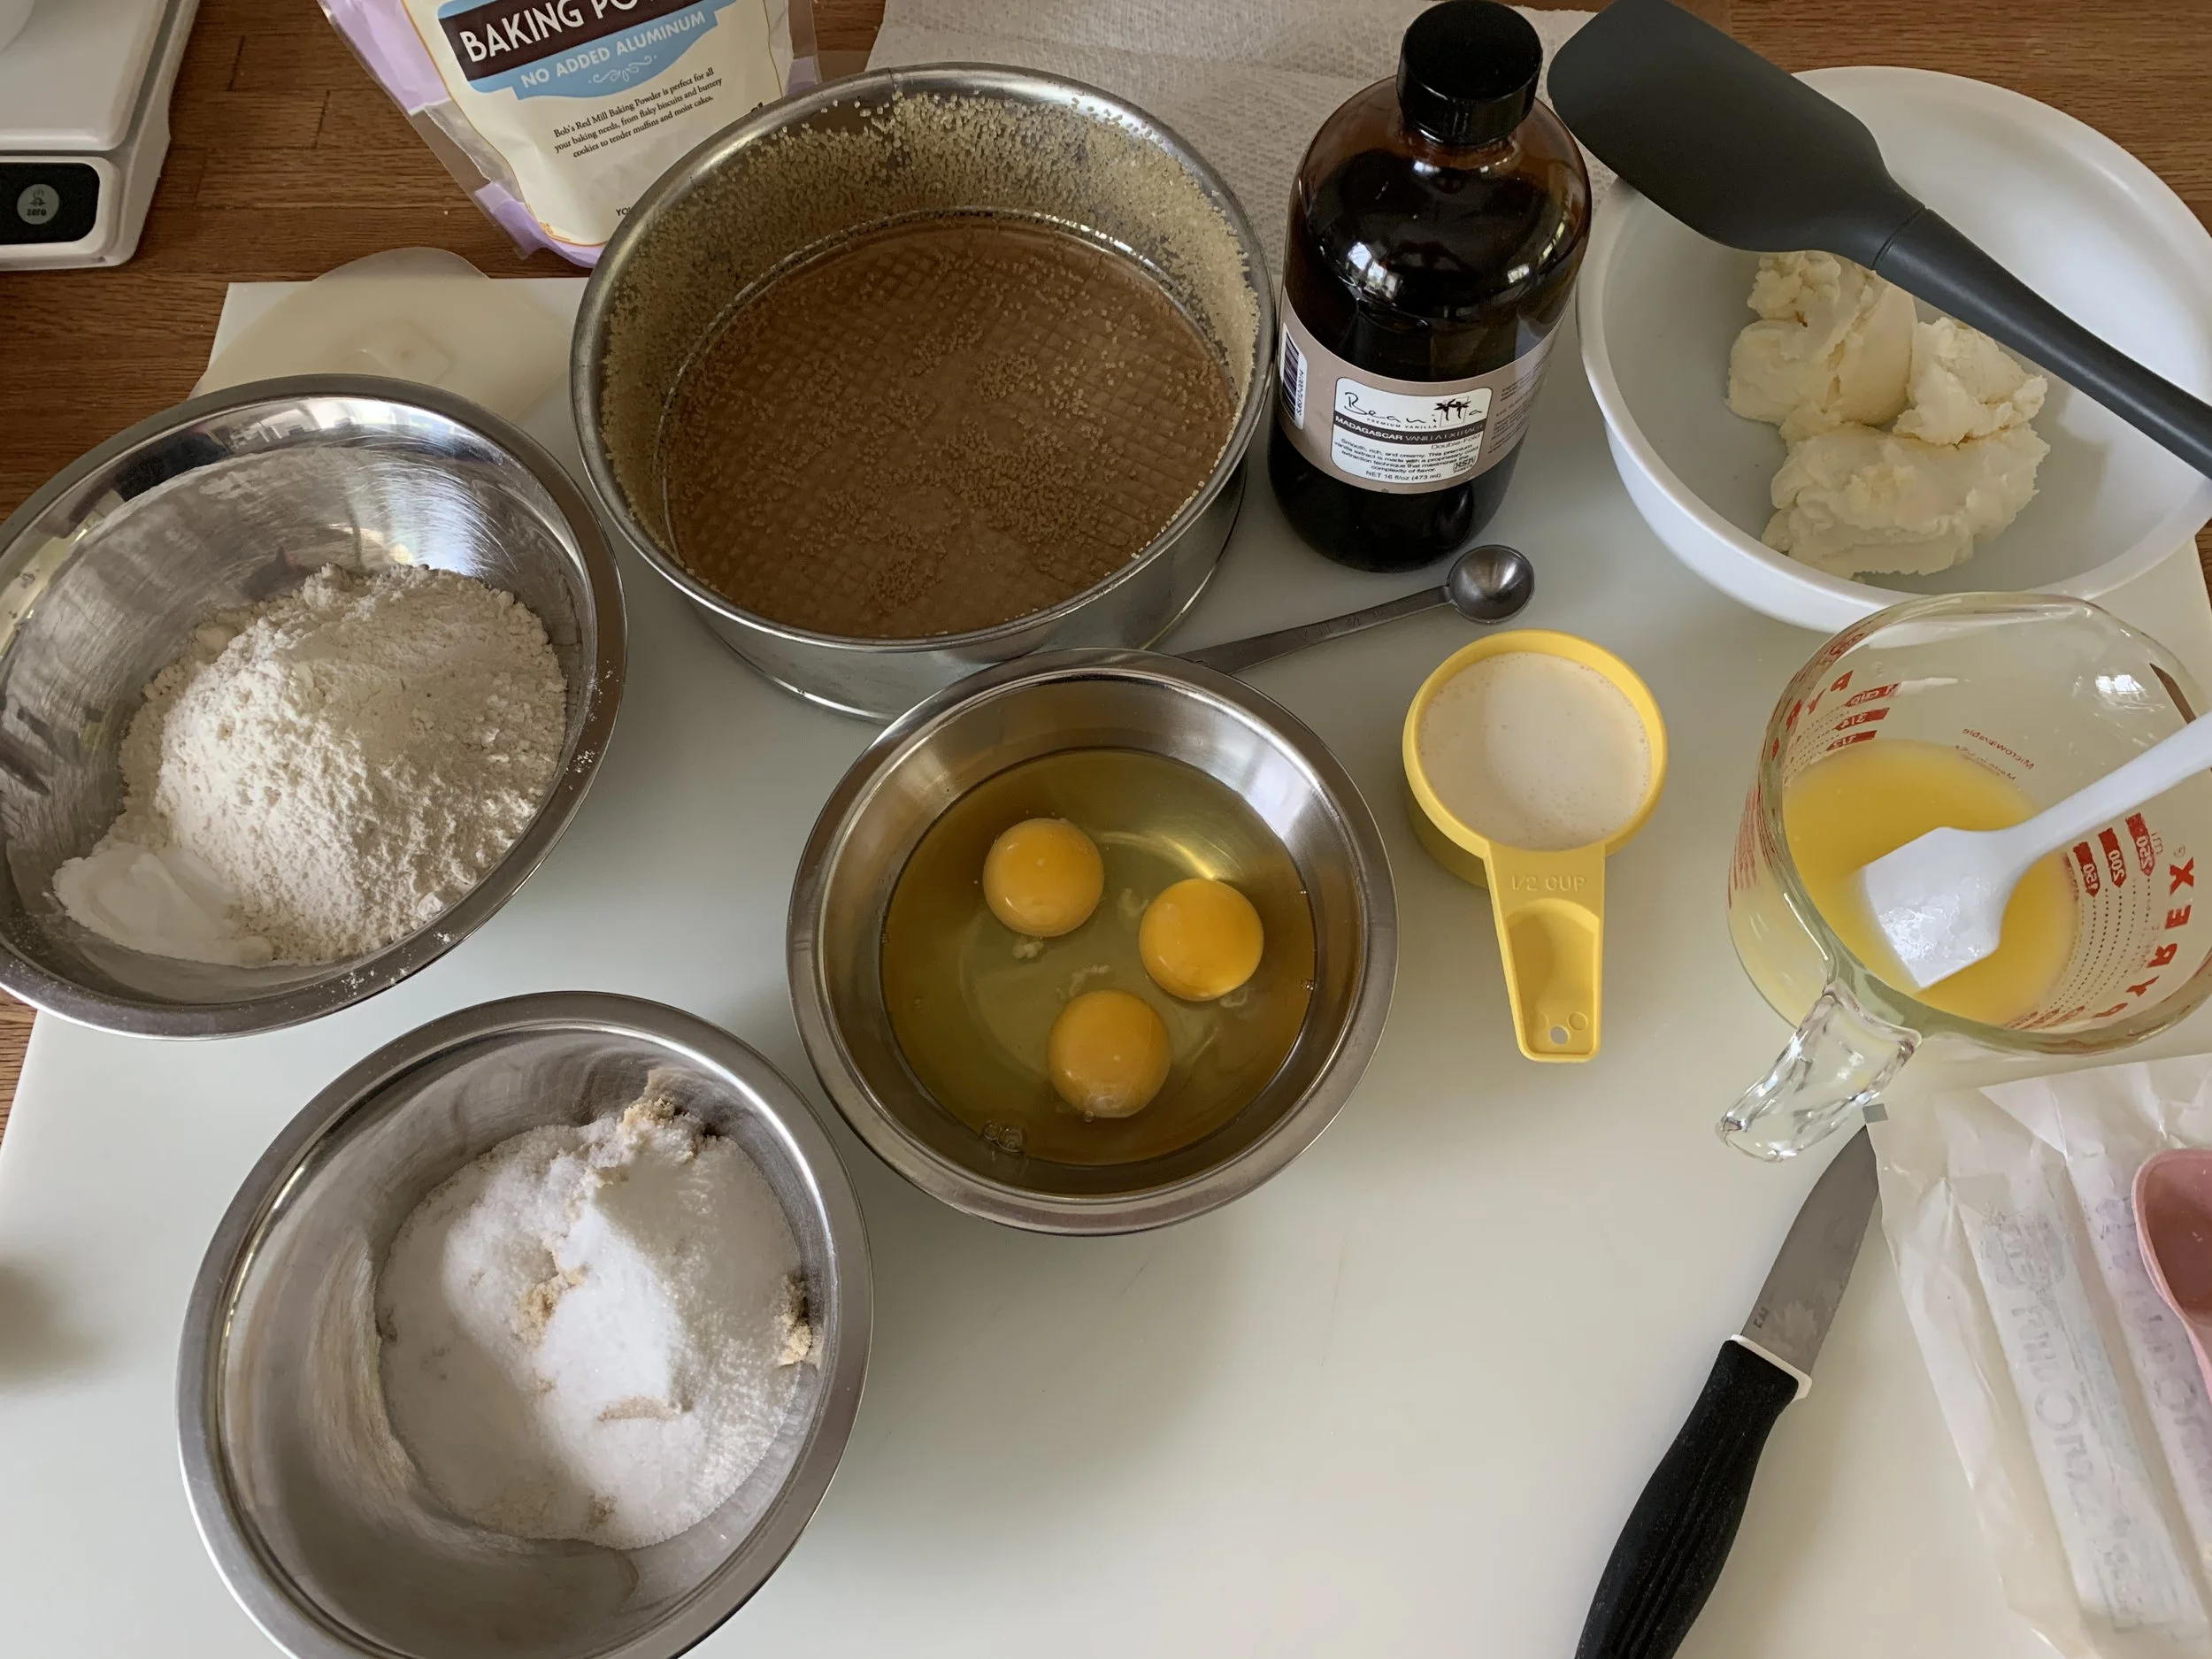
Here’s the mise for the filling . . . . I didn’t use lemon zest in this one.


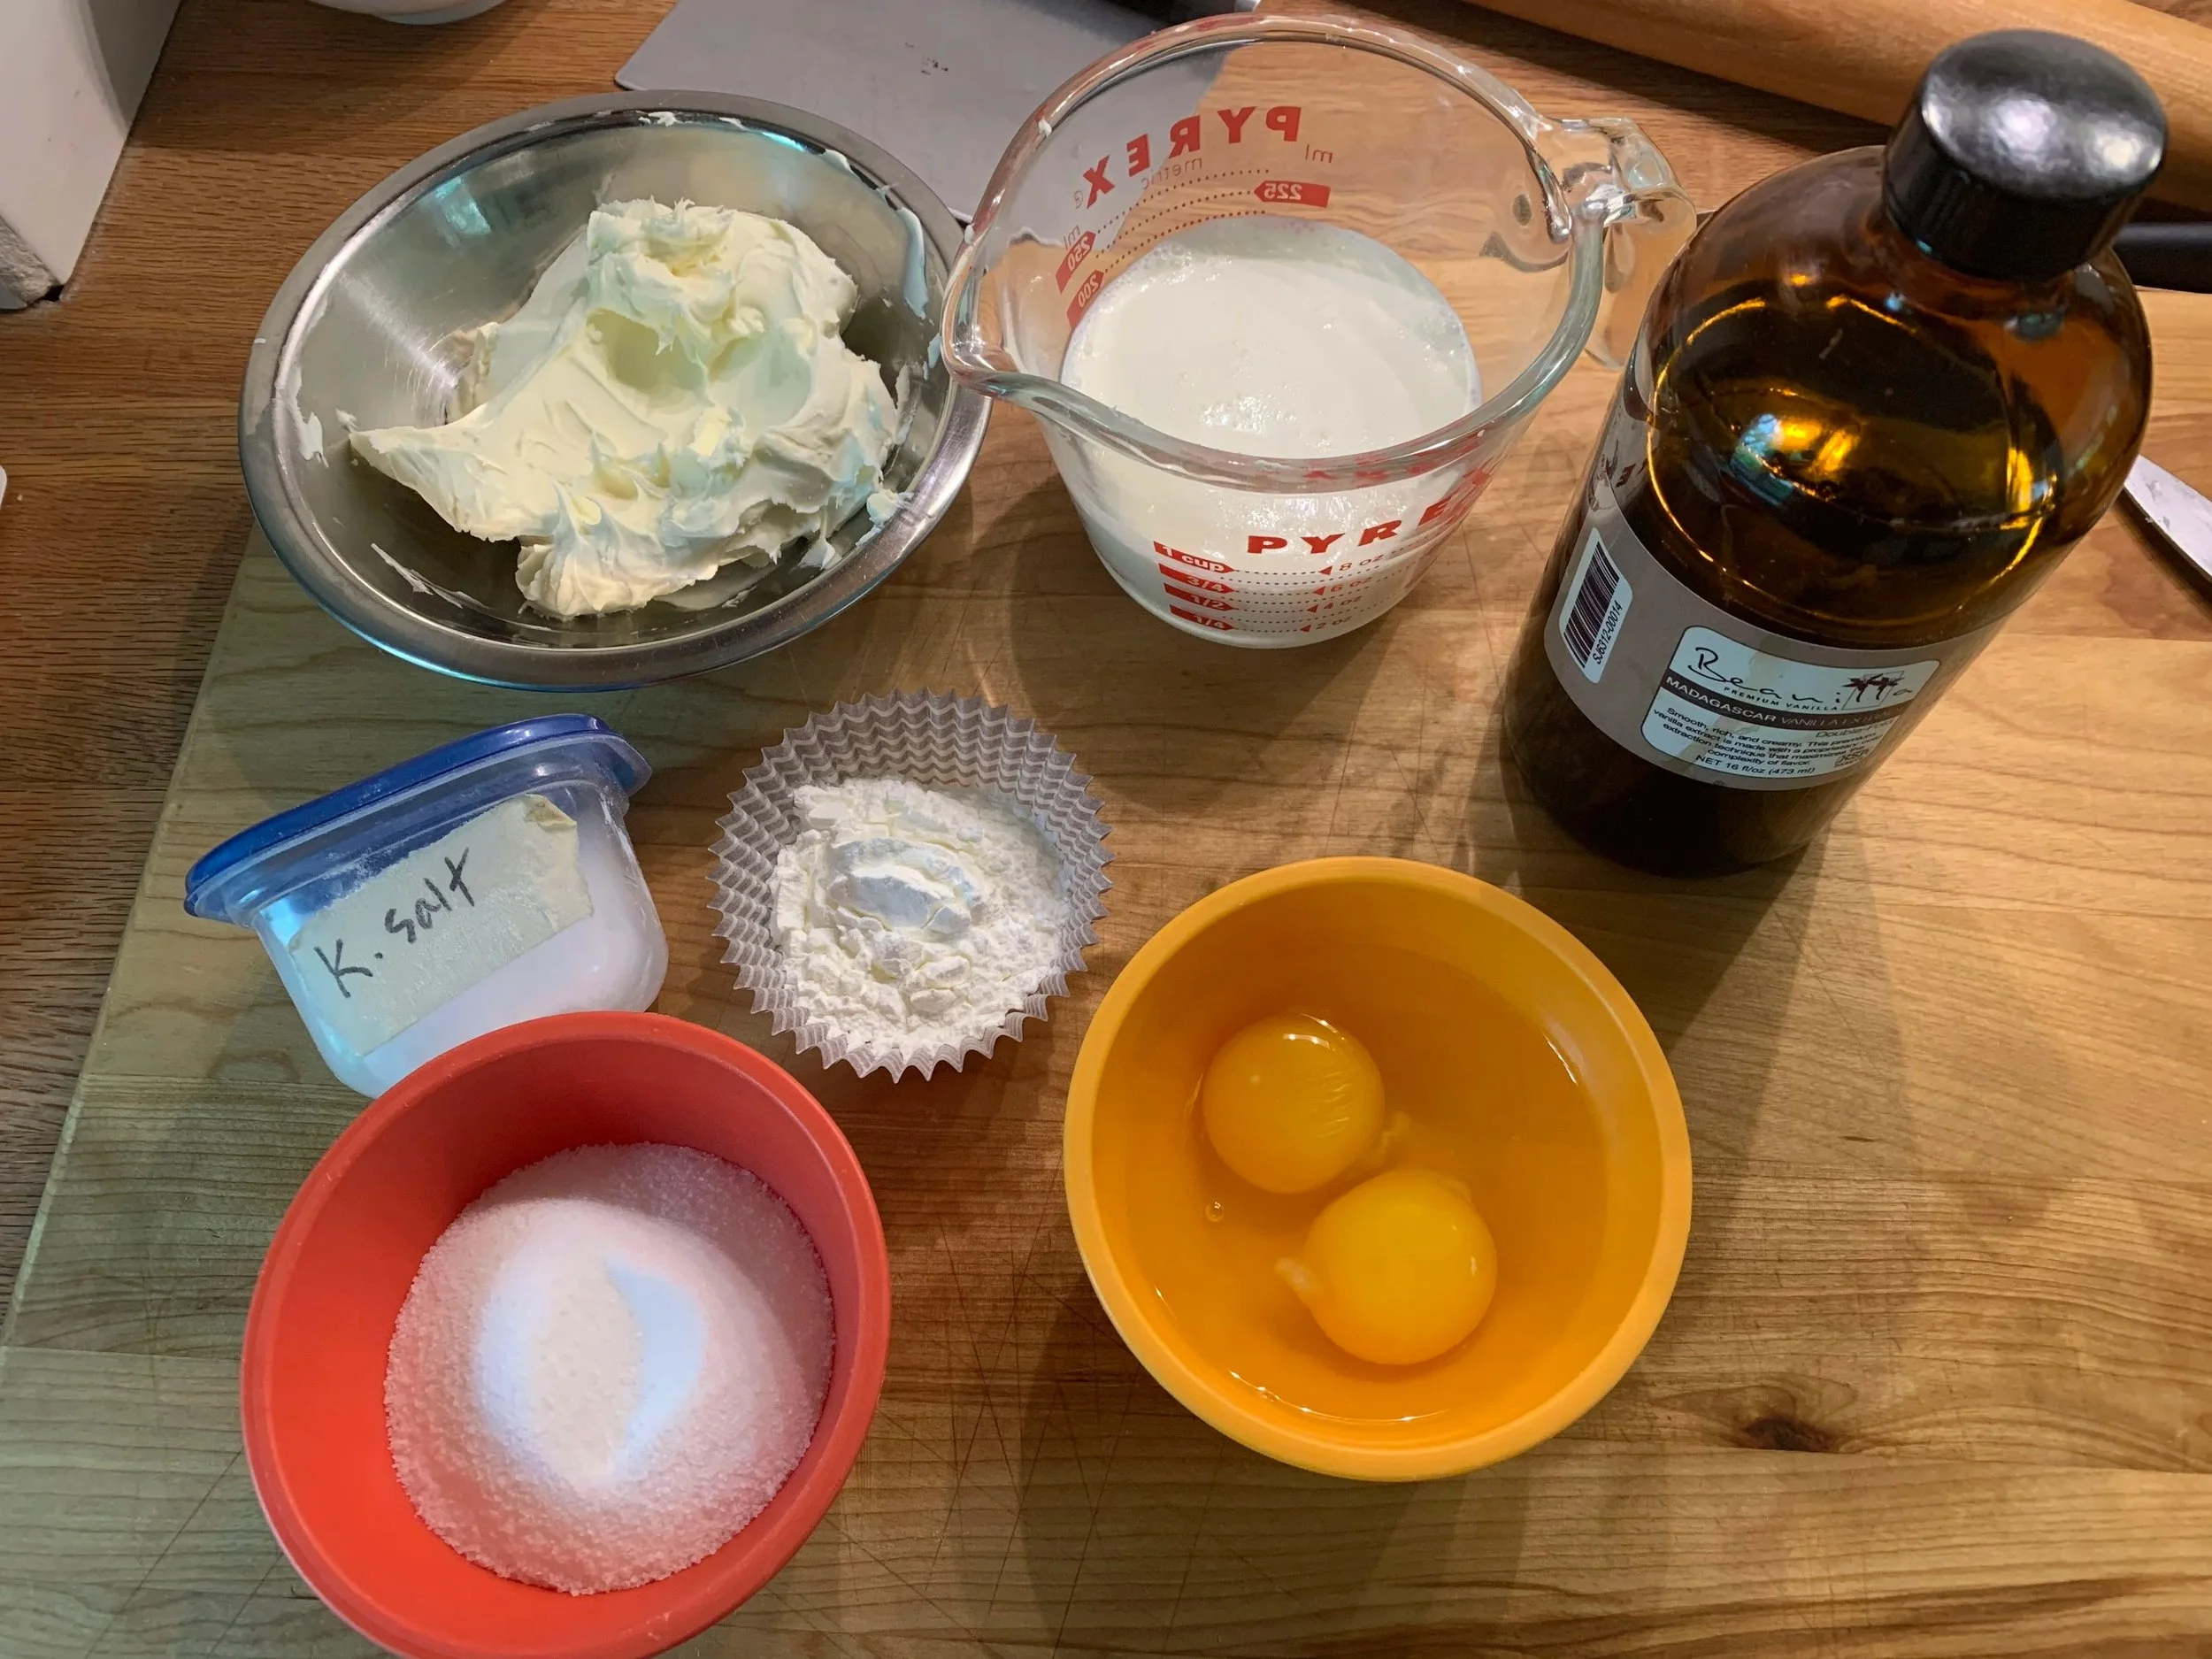
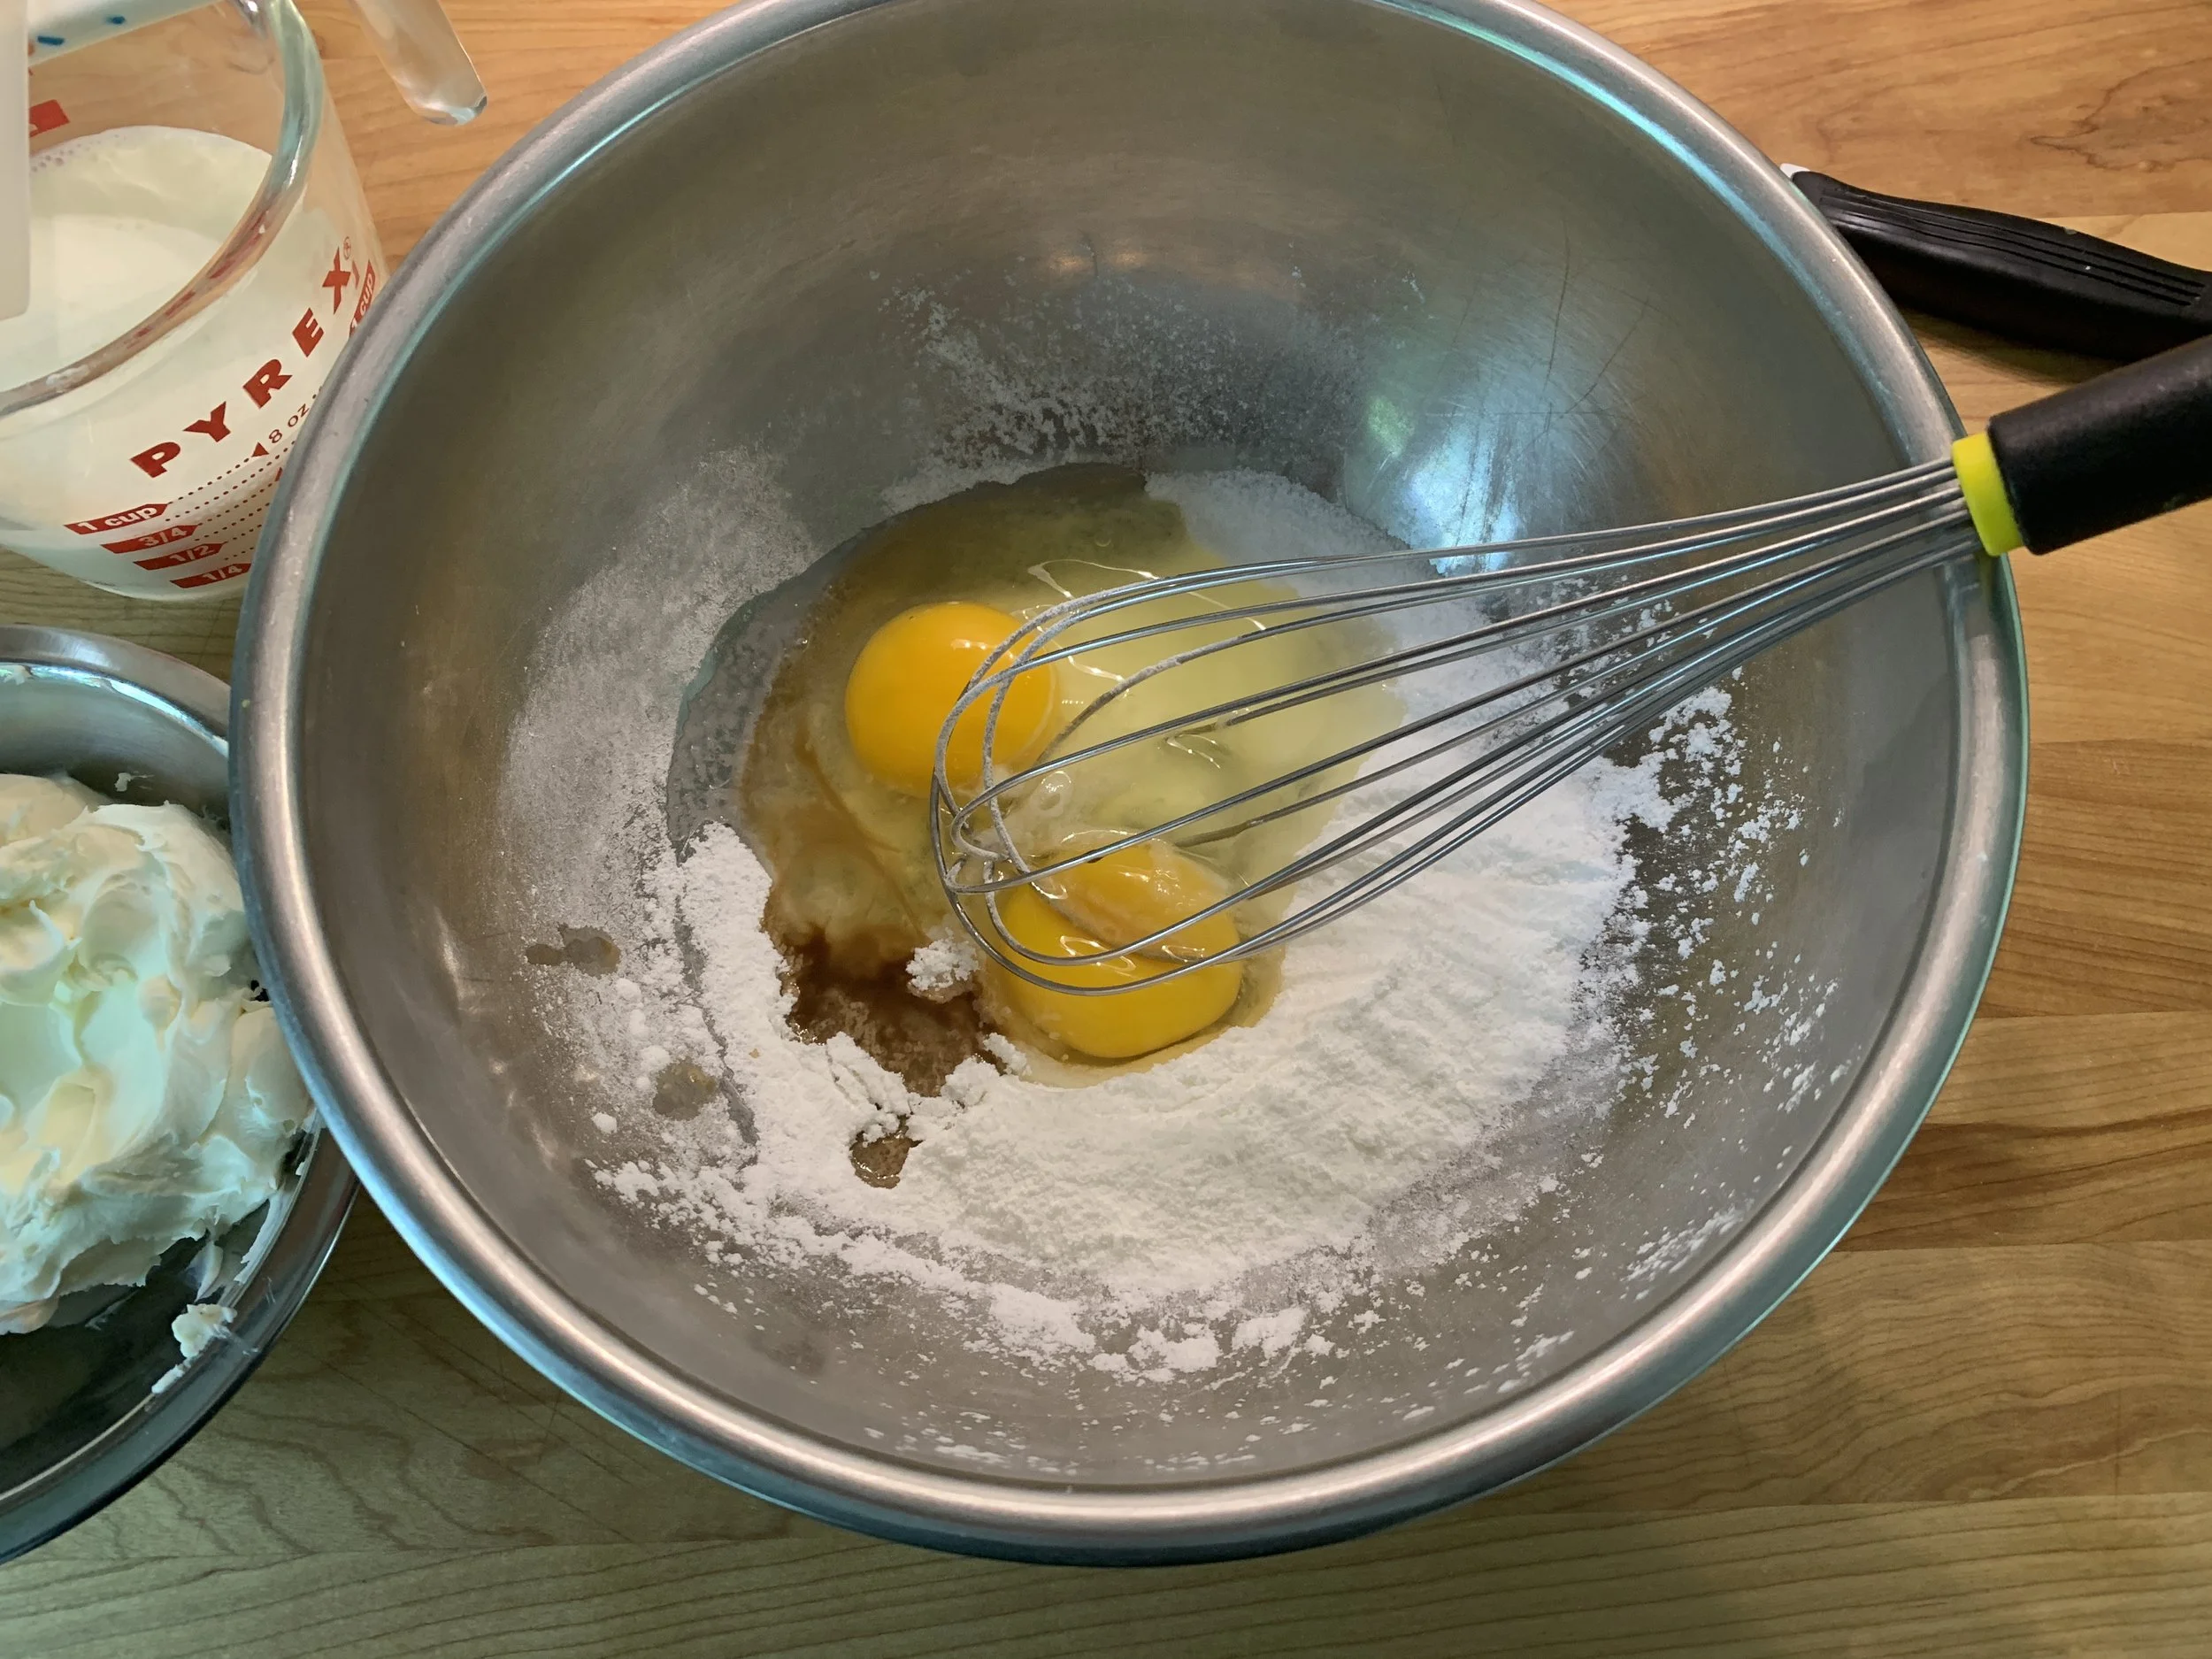
In a medium bowl blend 75 g / 1/3 cup + 2 teaspoons sugar with 3 tablespoons cornstarch and a pinch of salt. Whisk in 2 large eggs and 3/4 teaspoon vanilla. Lemon zest is an option and would be added here as well.


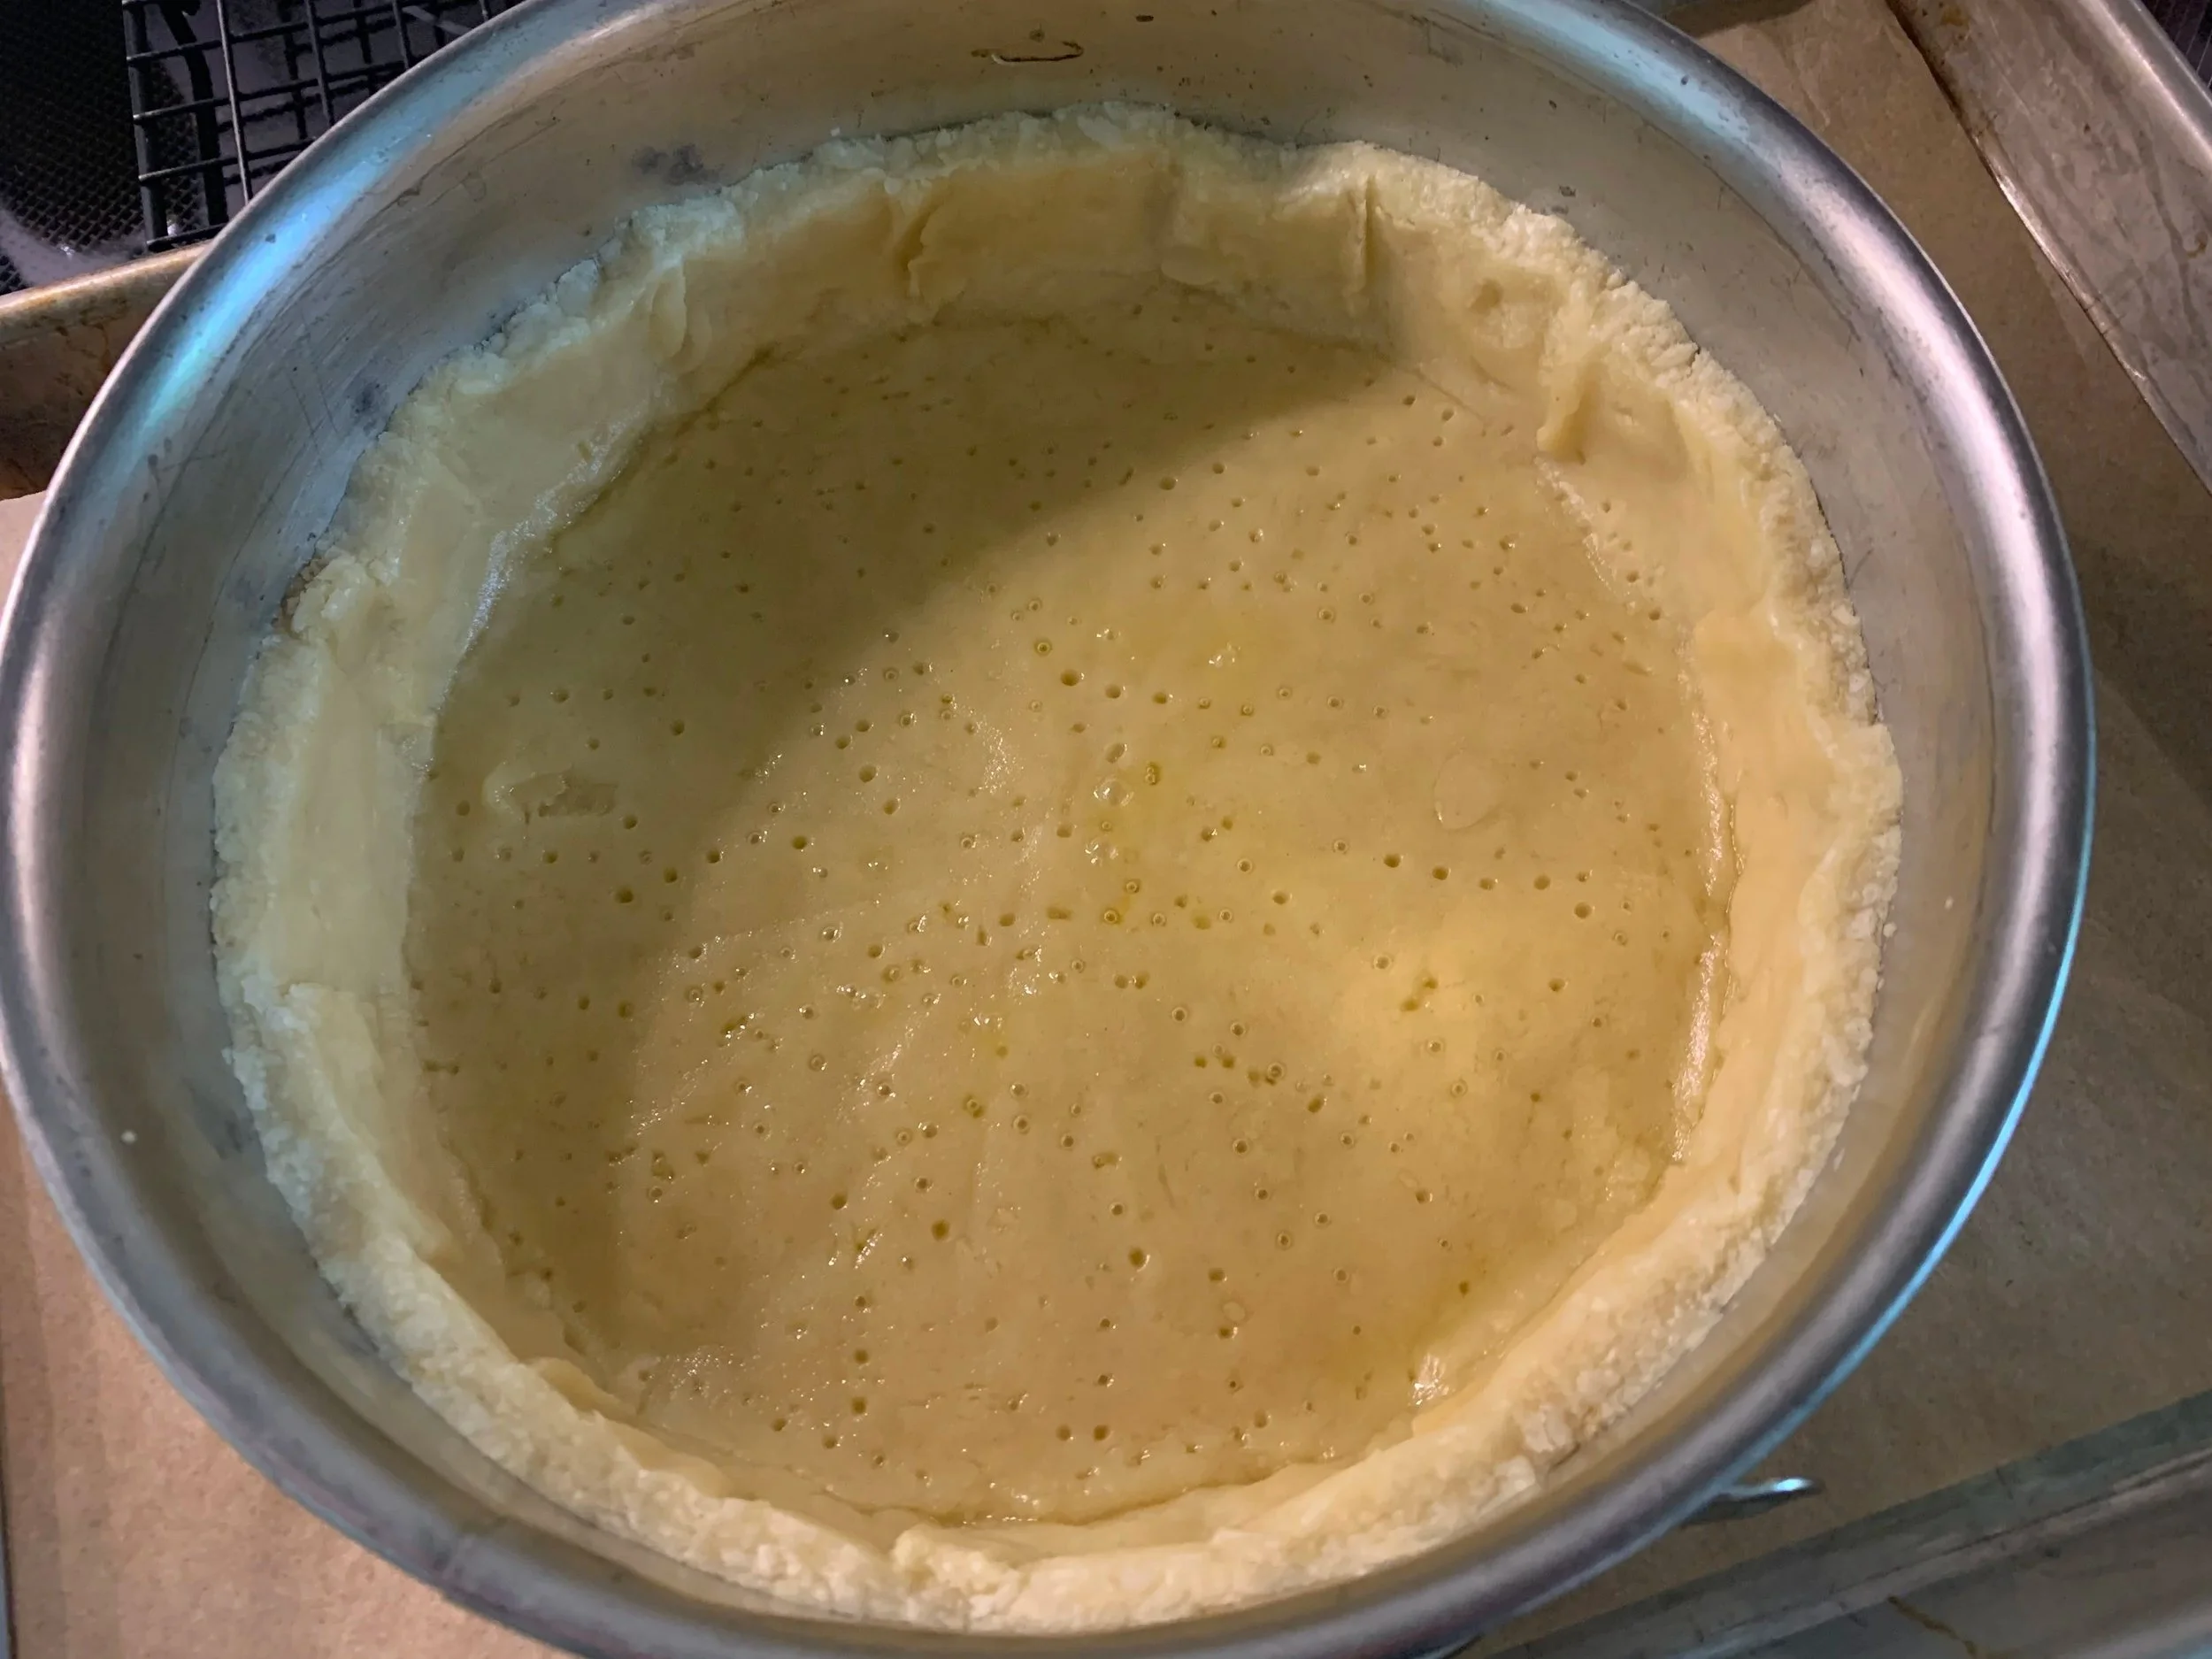
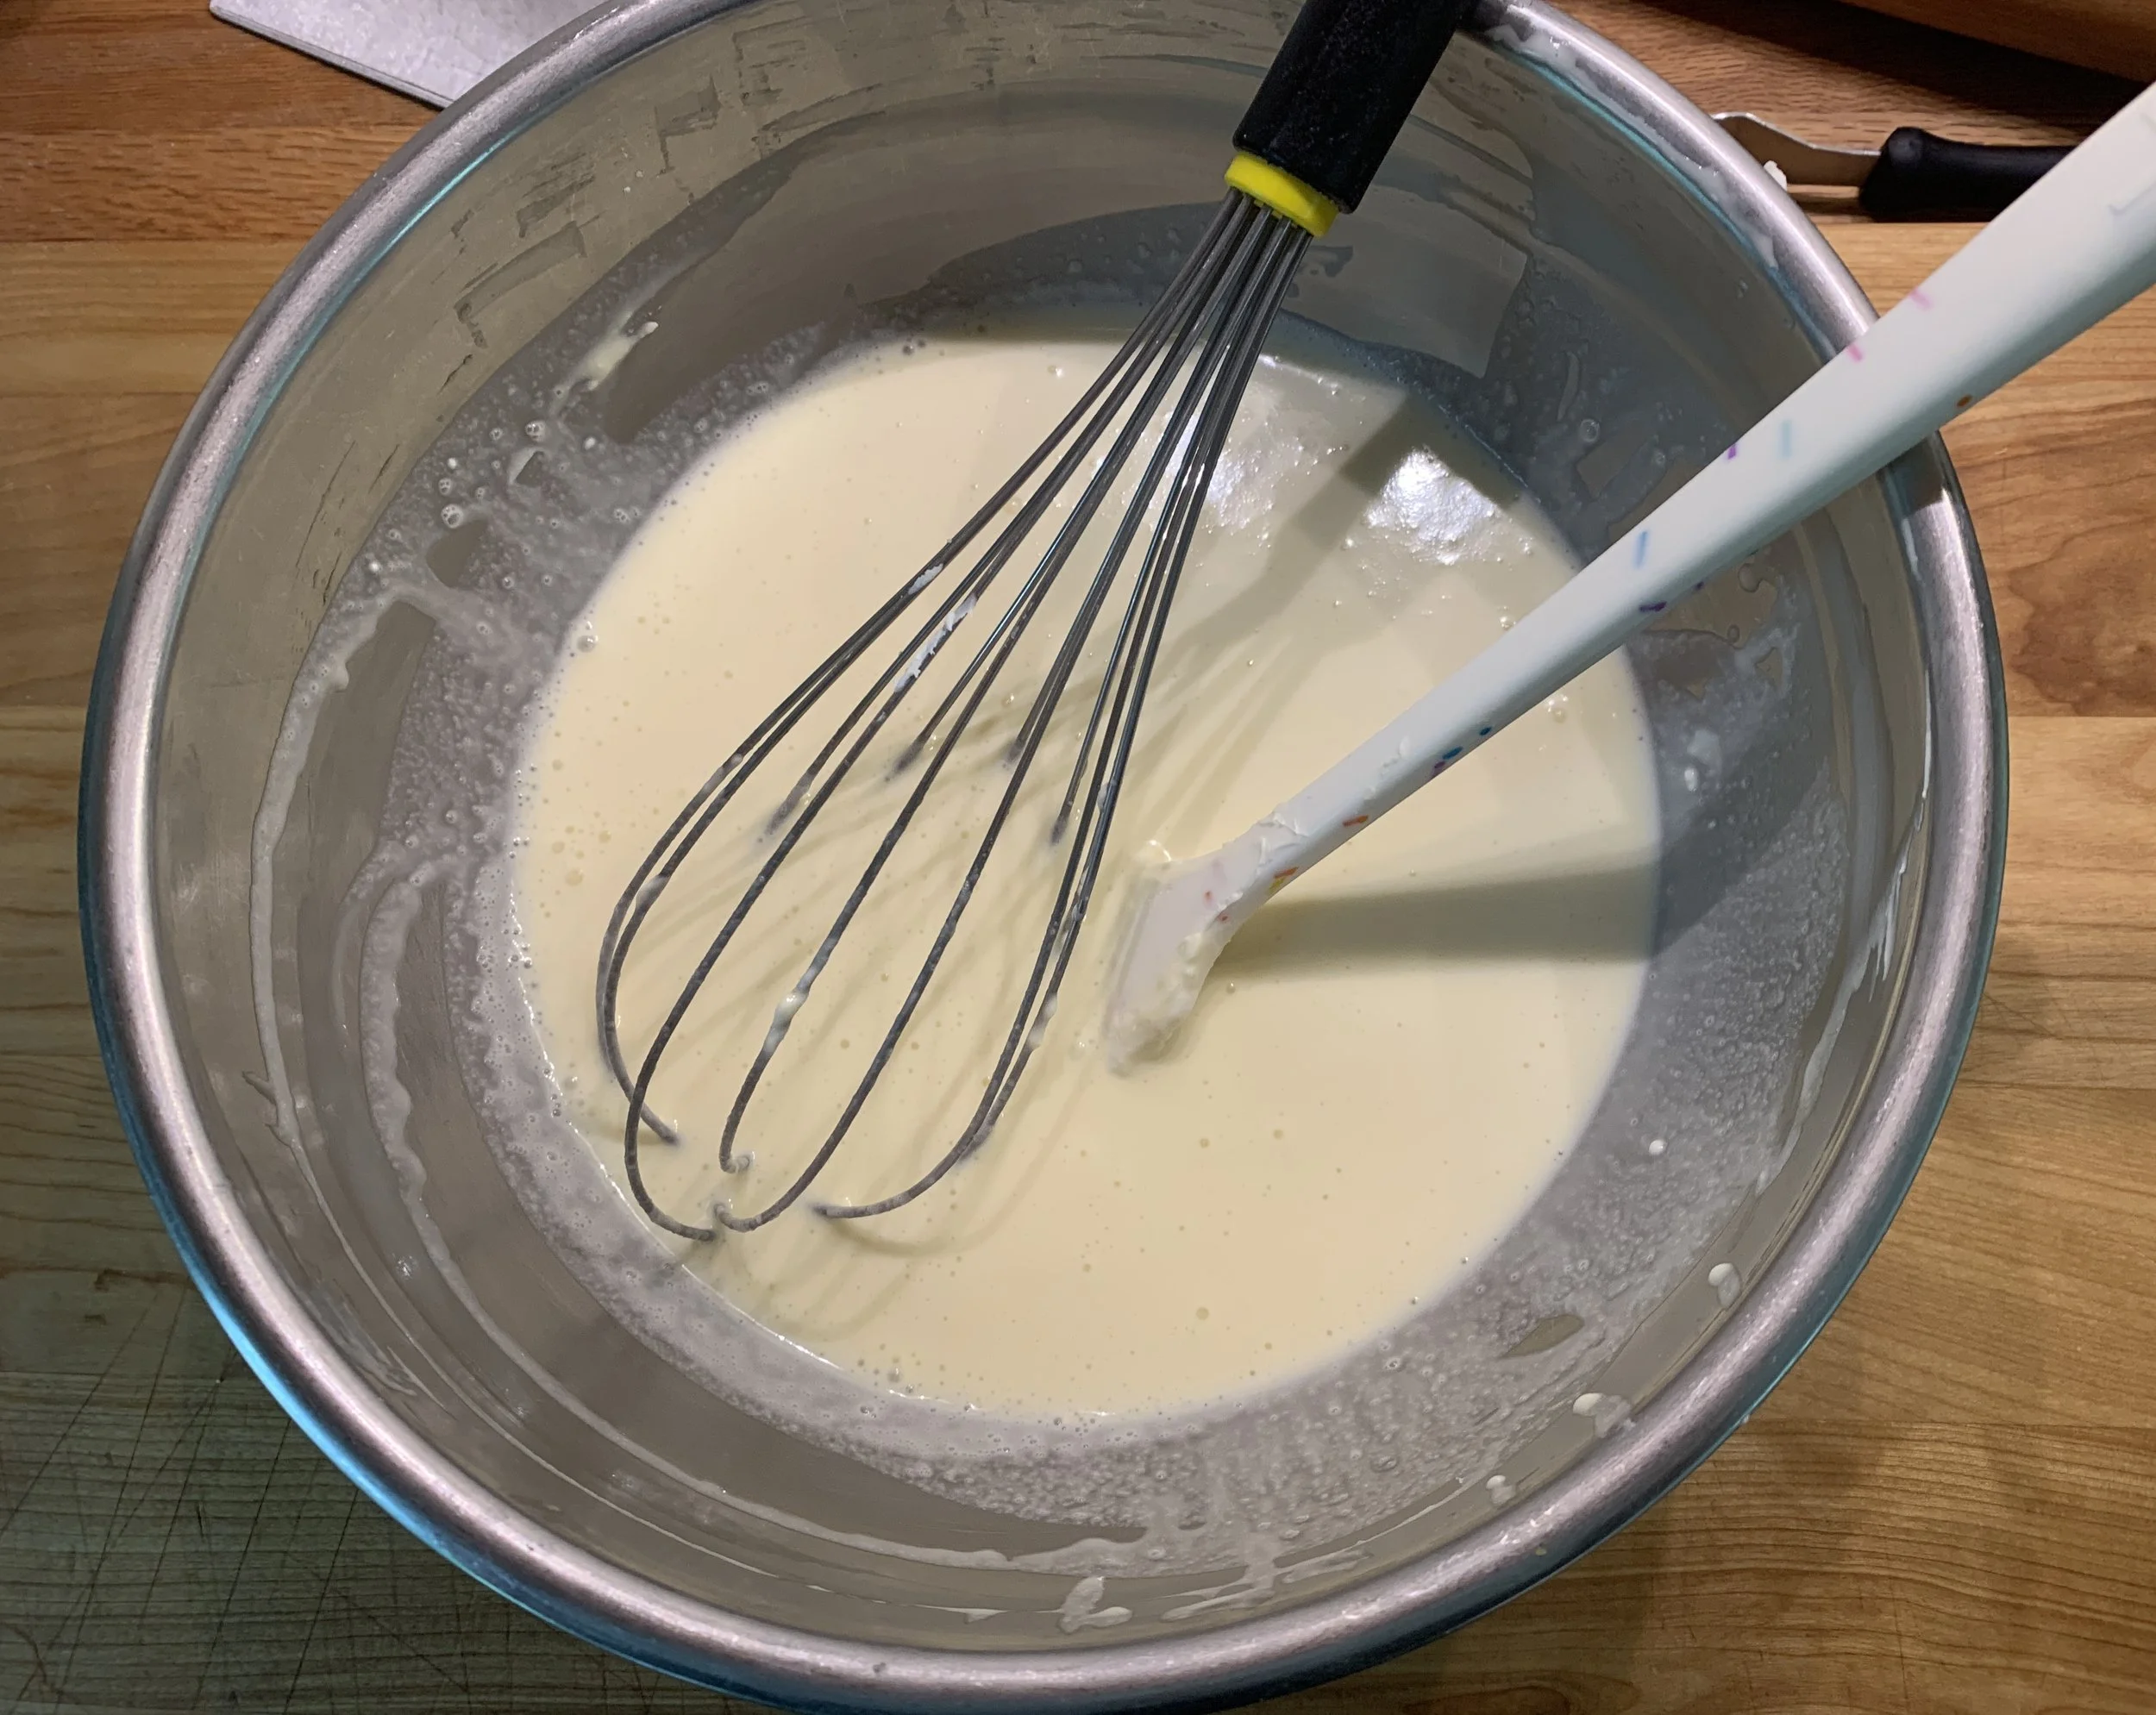
Blend in 170 g /3/4 cup mascarpone and 170 g /3/4 cup heavy cream


You can make the filling a day or several hours ahead and hold it in the fridge. Simply stir it back up to re-blend before pouring into the blind baked shell.
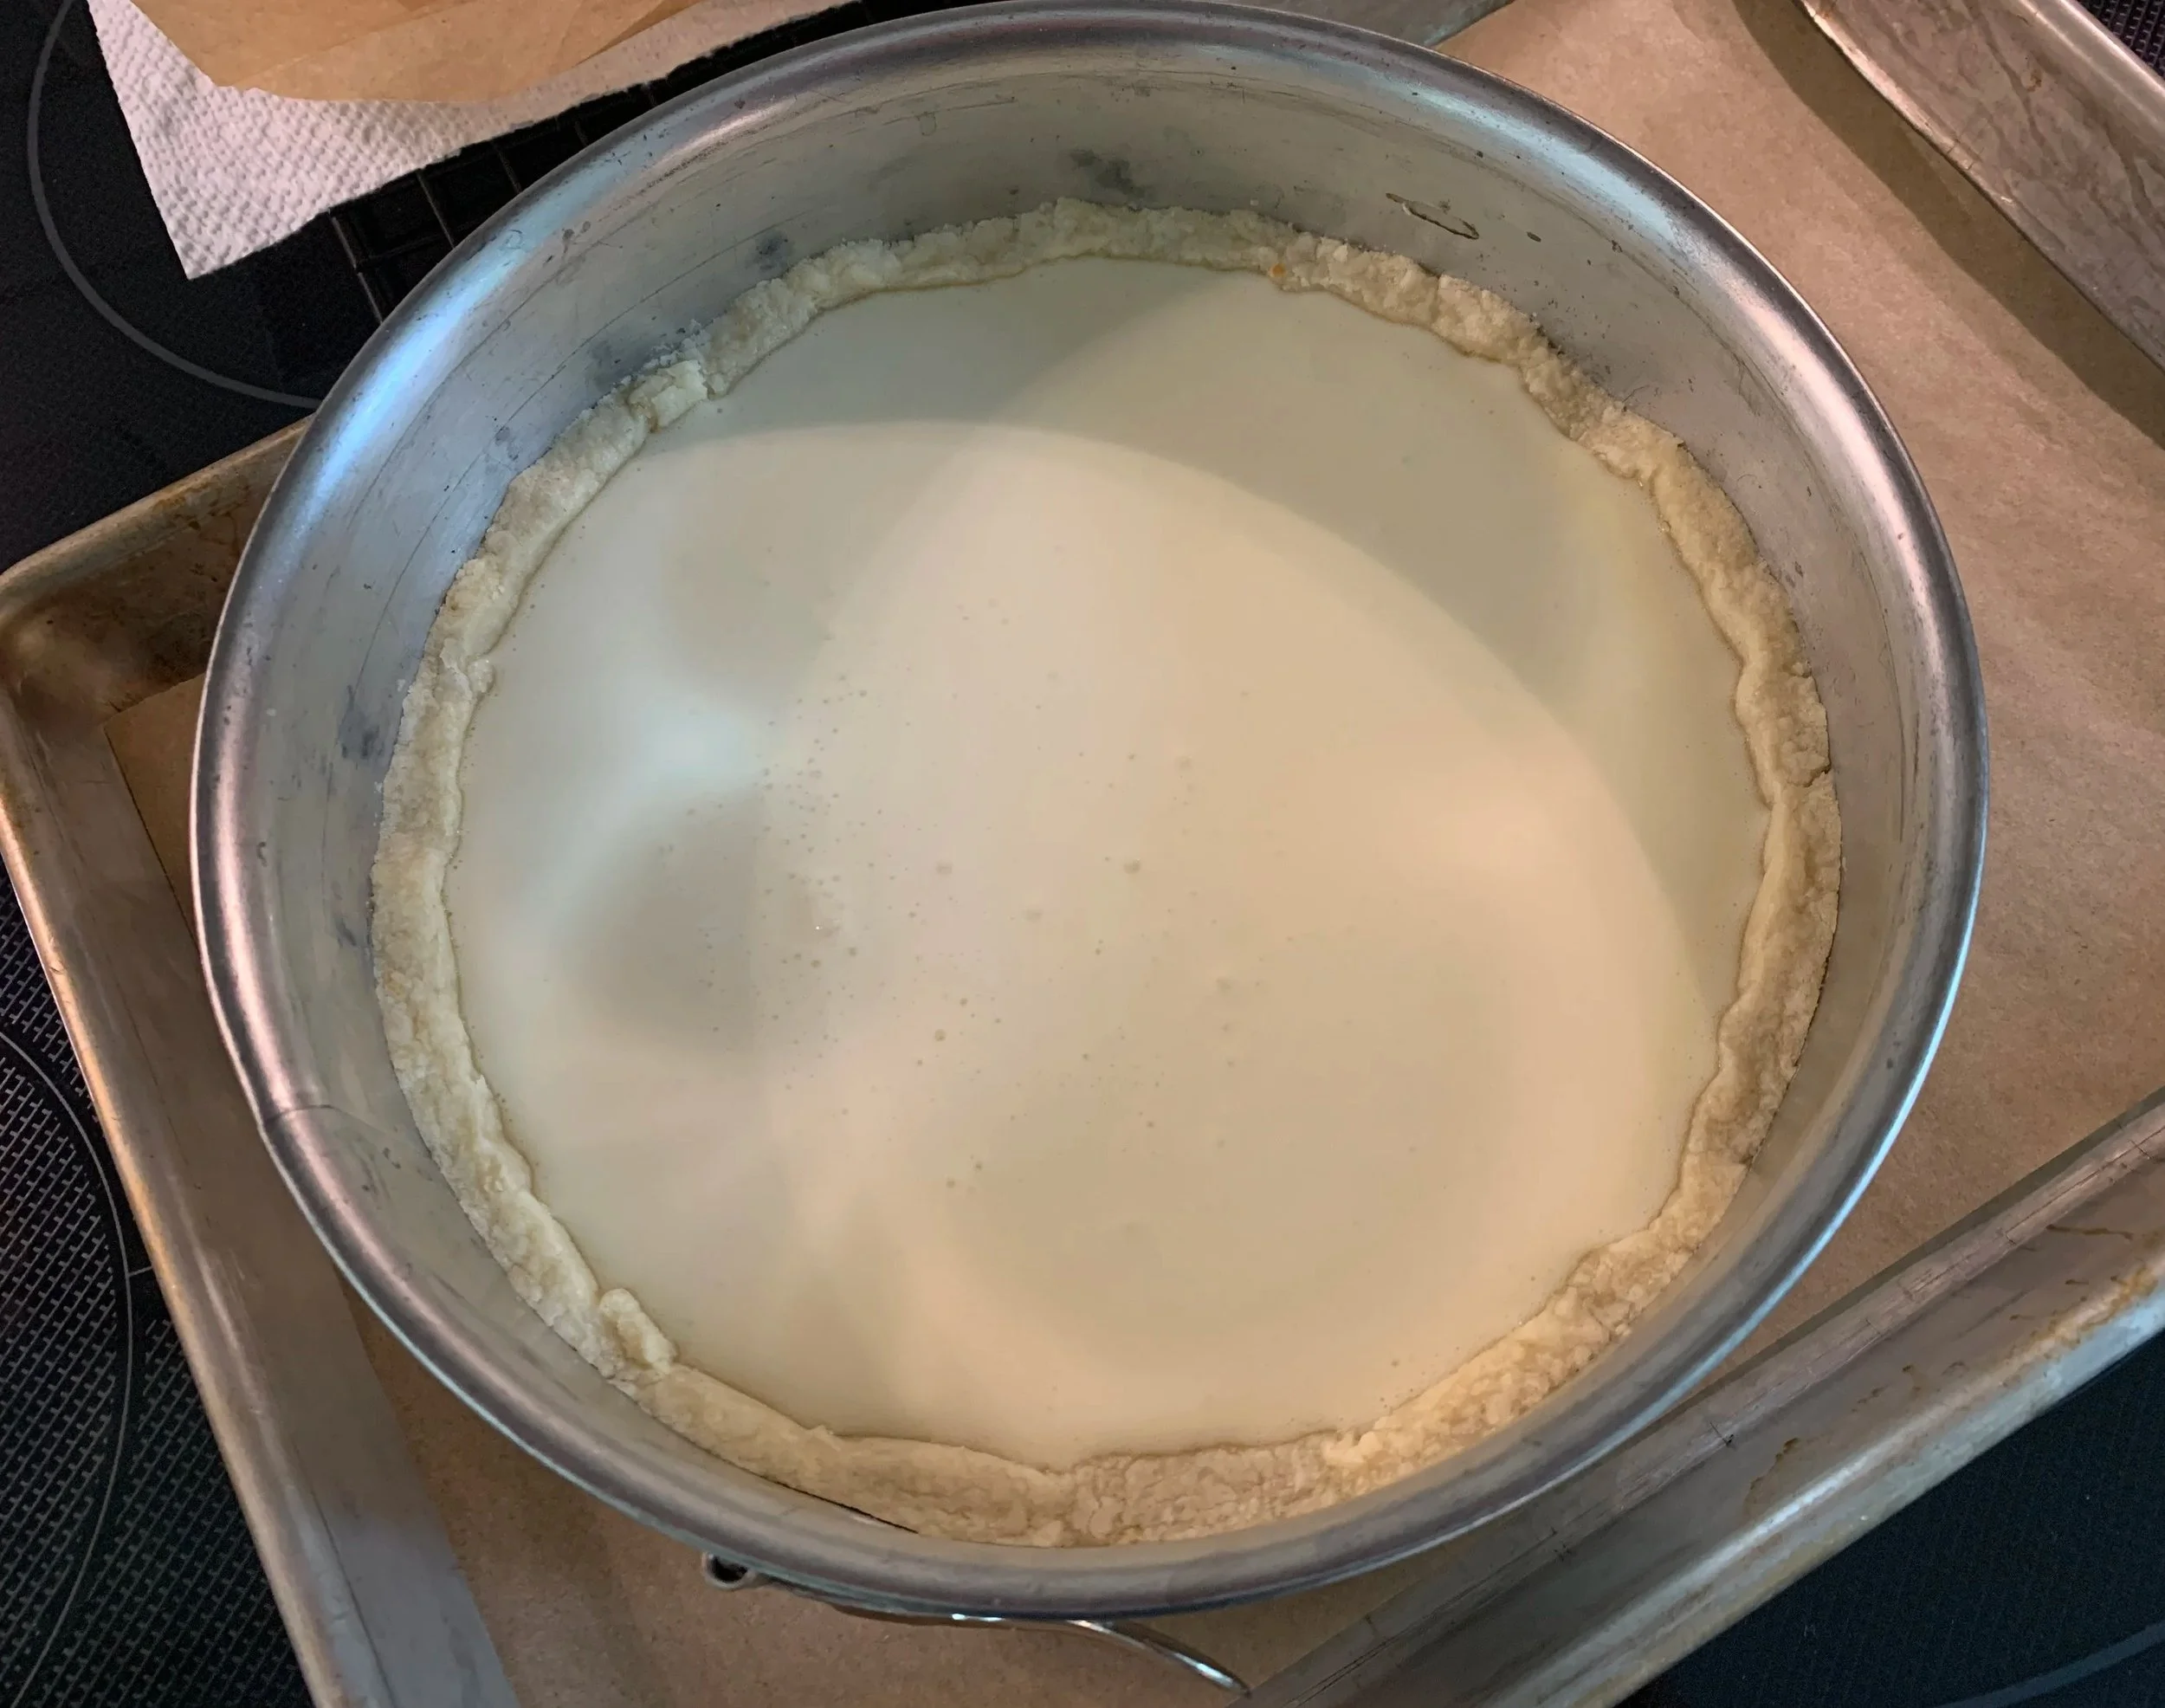
 

Ready for the oven

Bake at 350ºF (325º convection) about one hour - start with 25 minutes (it will still be quite jiggly), rotate the tray, allow another 25 minutes (should be setting around the edges and browning), rotate again then finish with another 10 minutes or so. Look for a nice golden brown surface and only a hint of jiggle in the center.
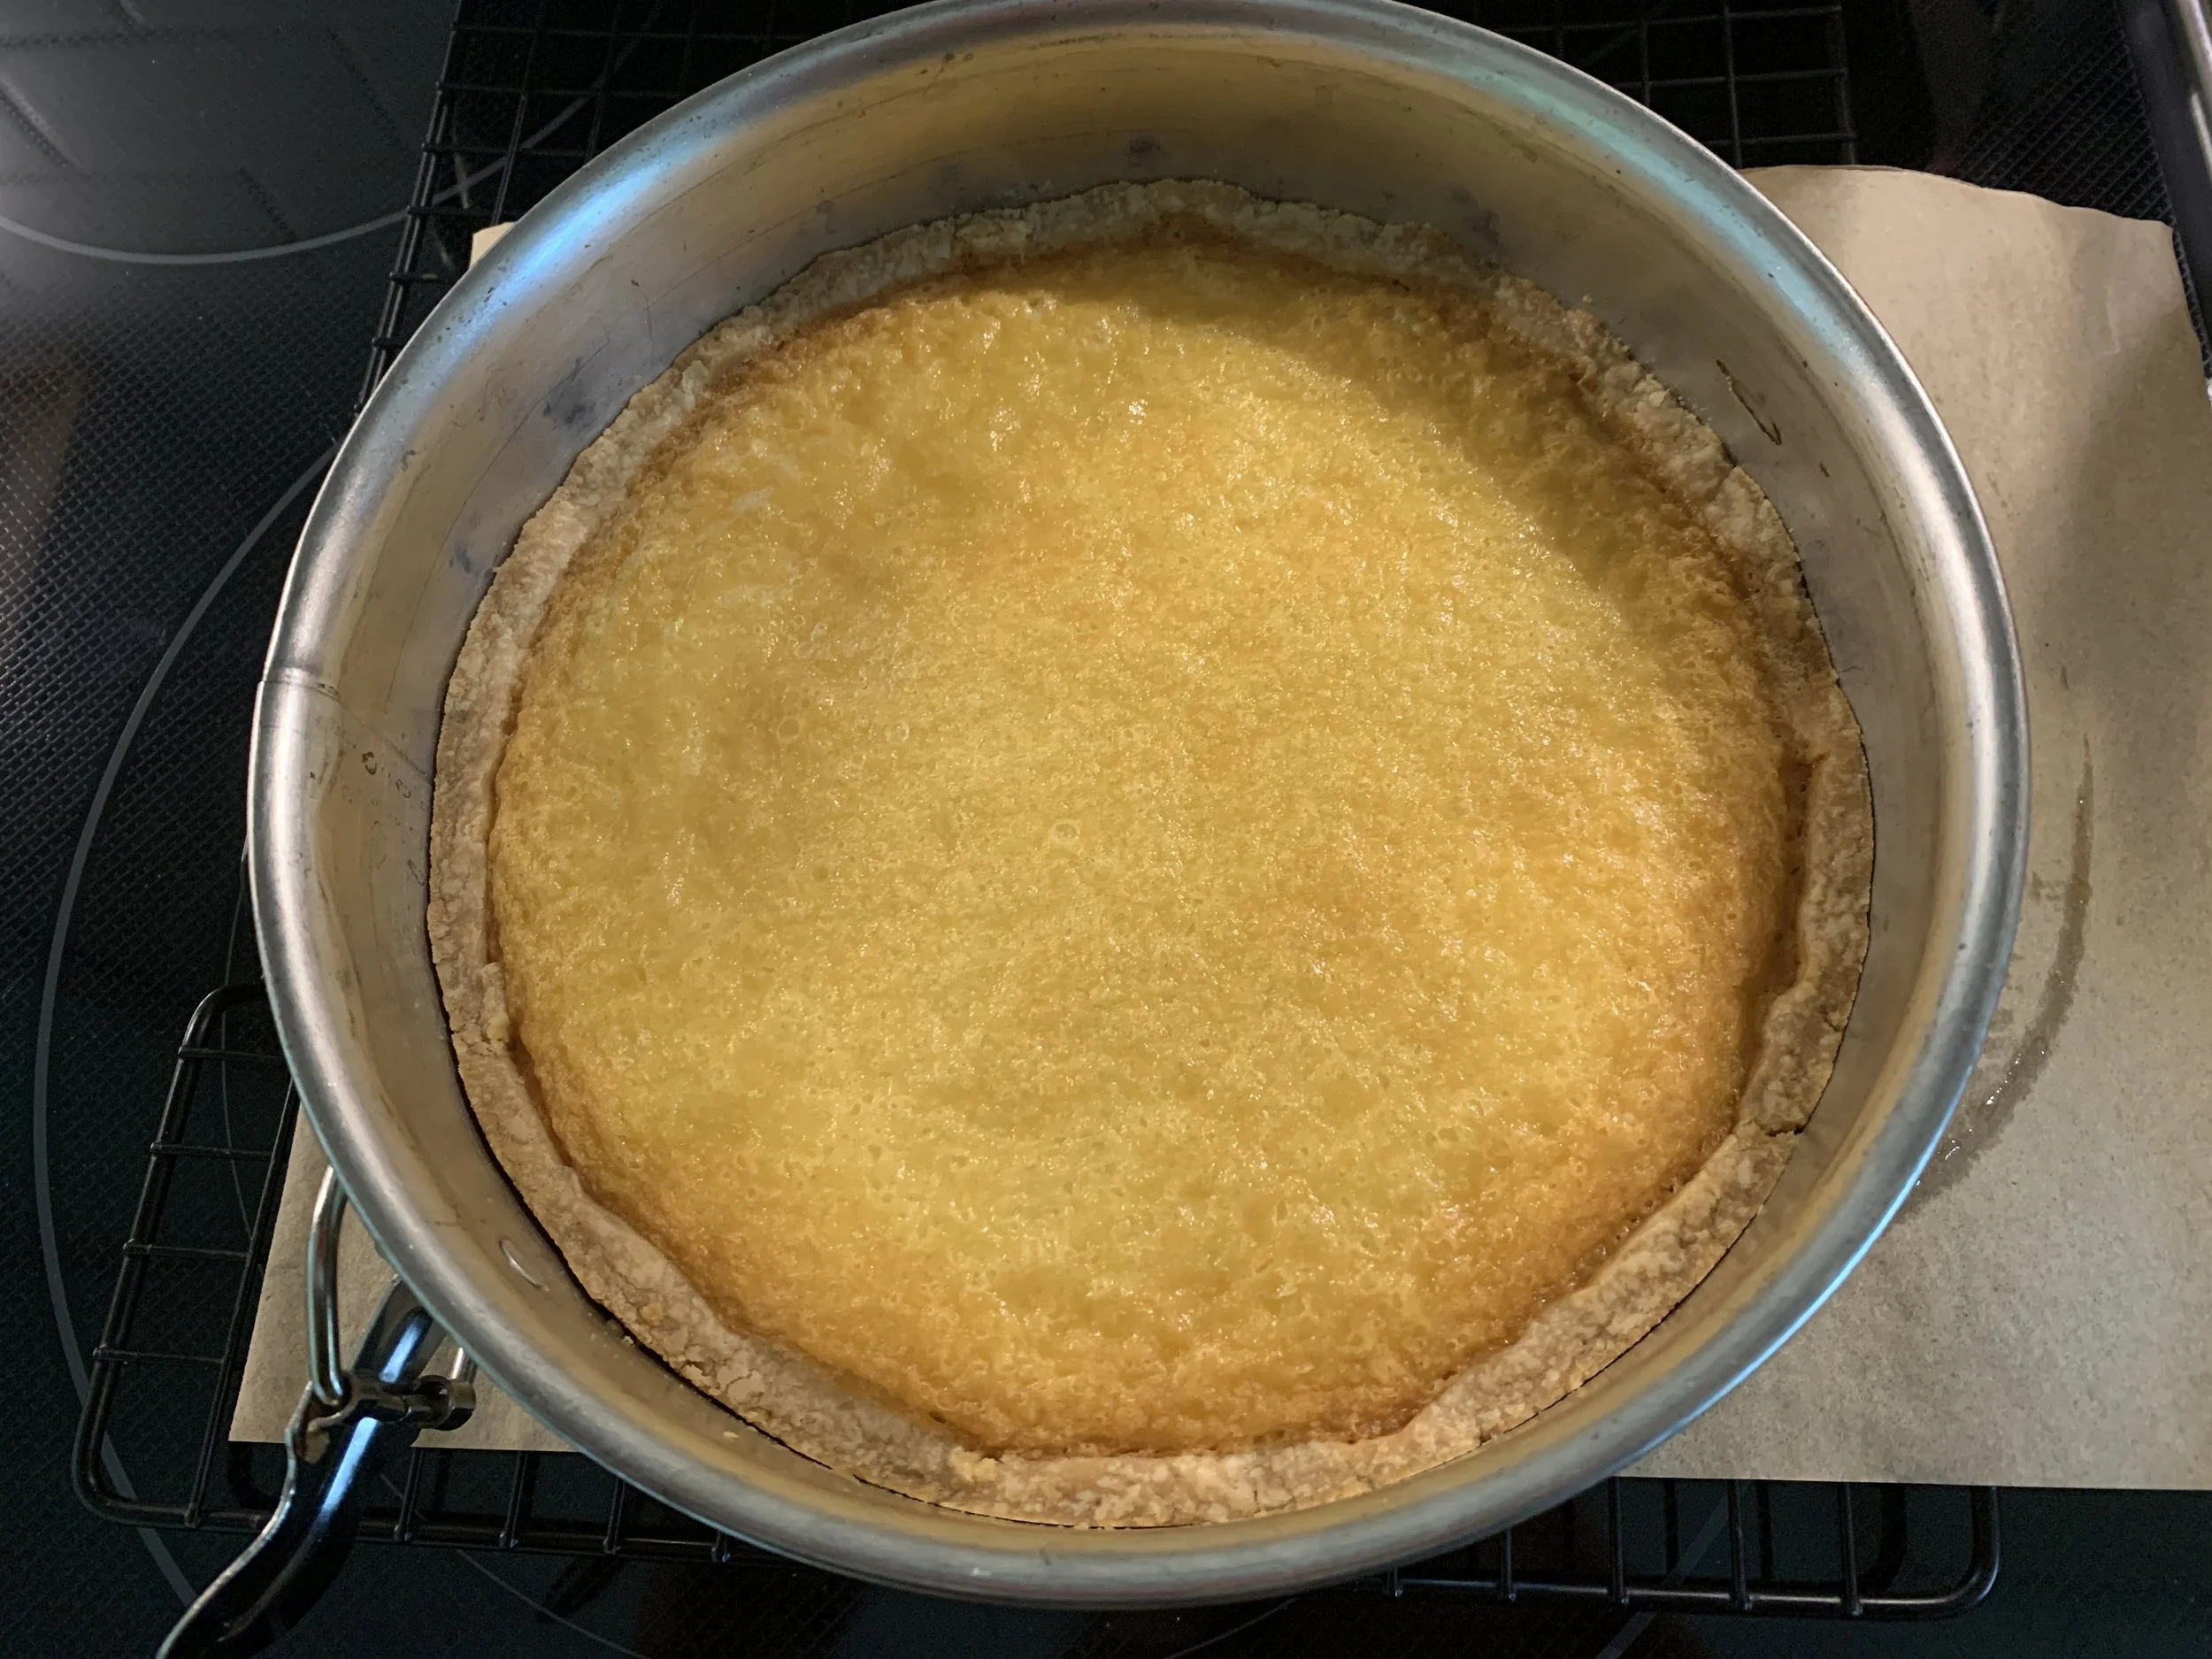
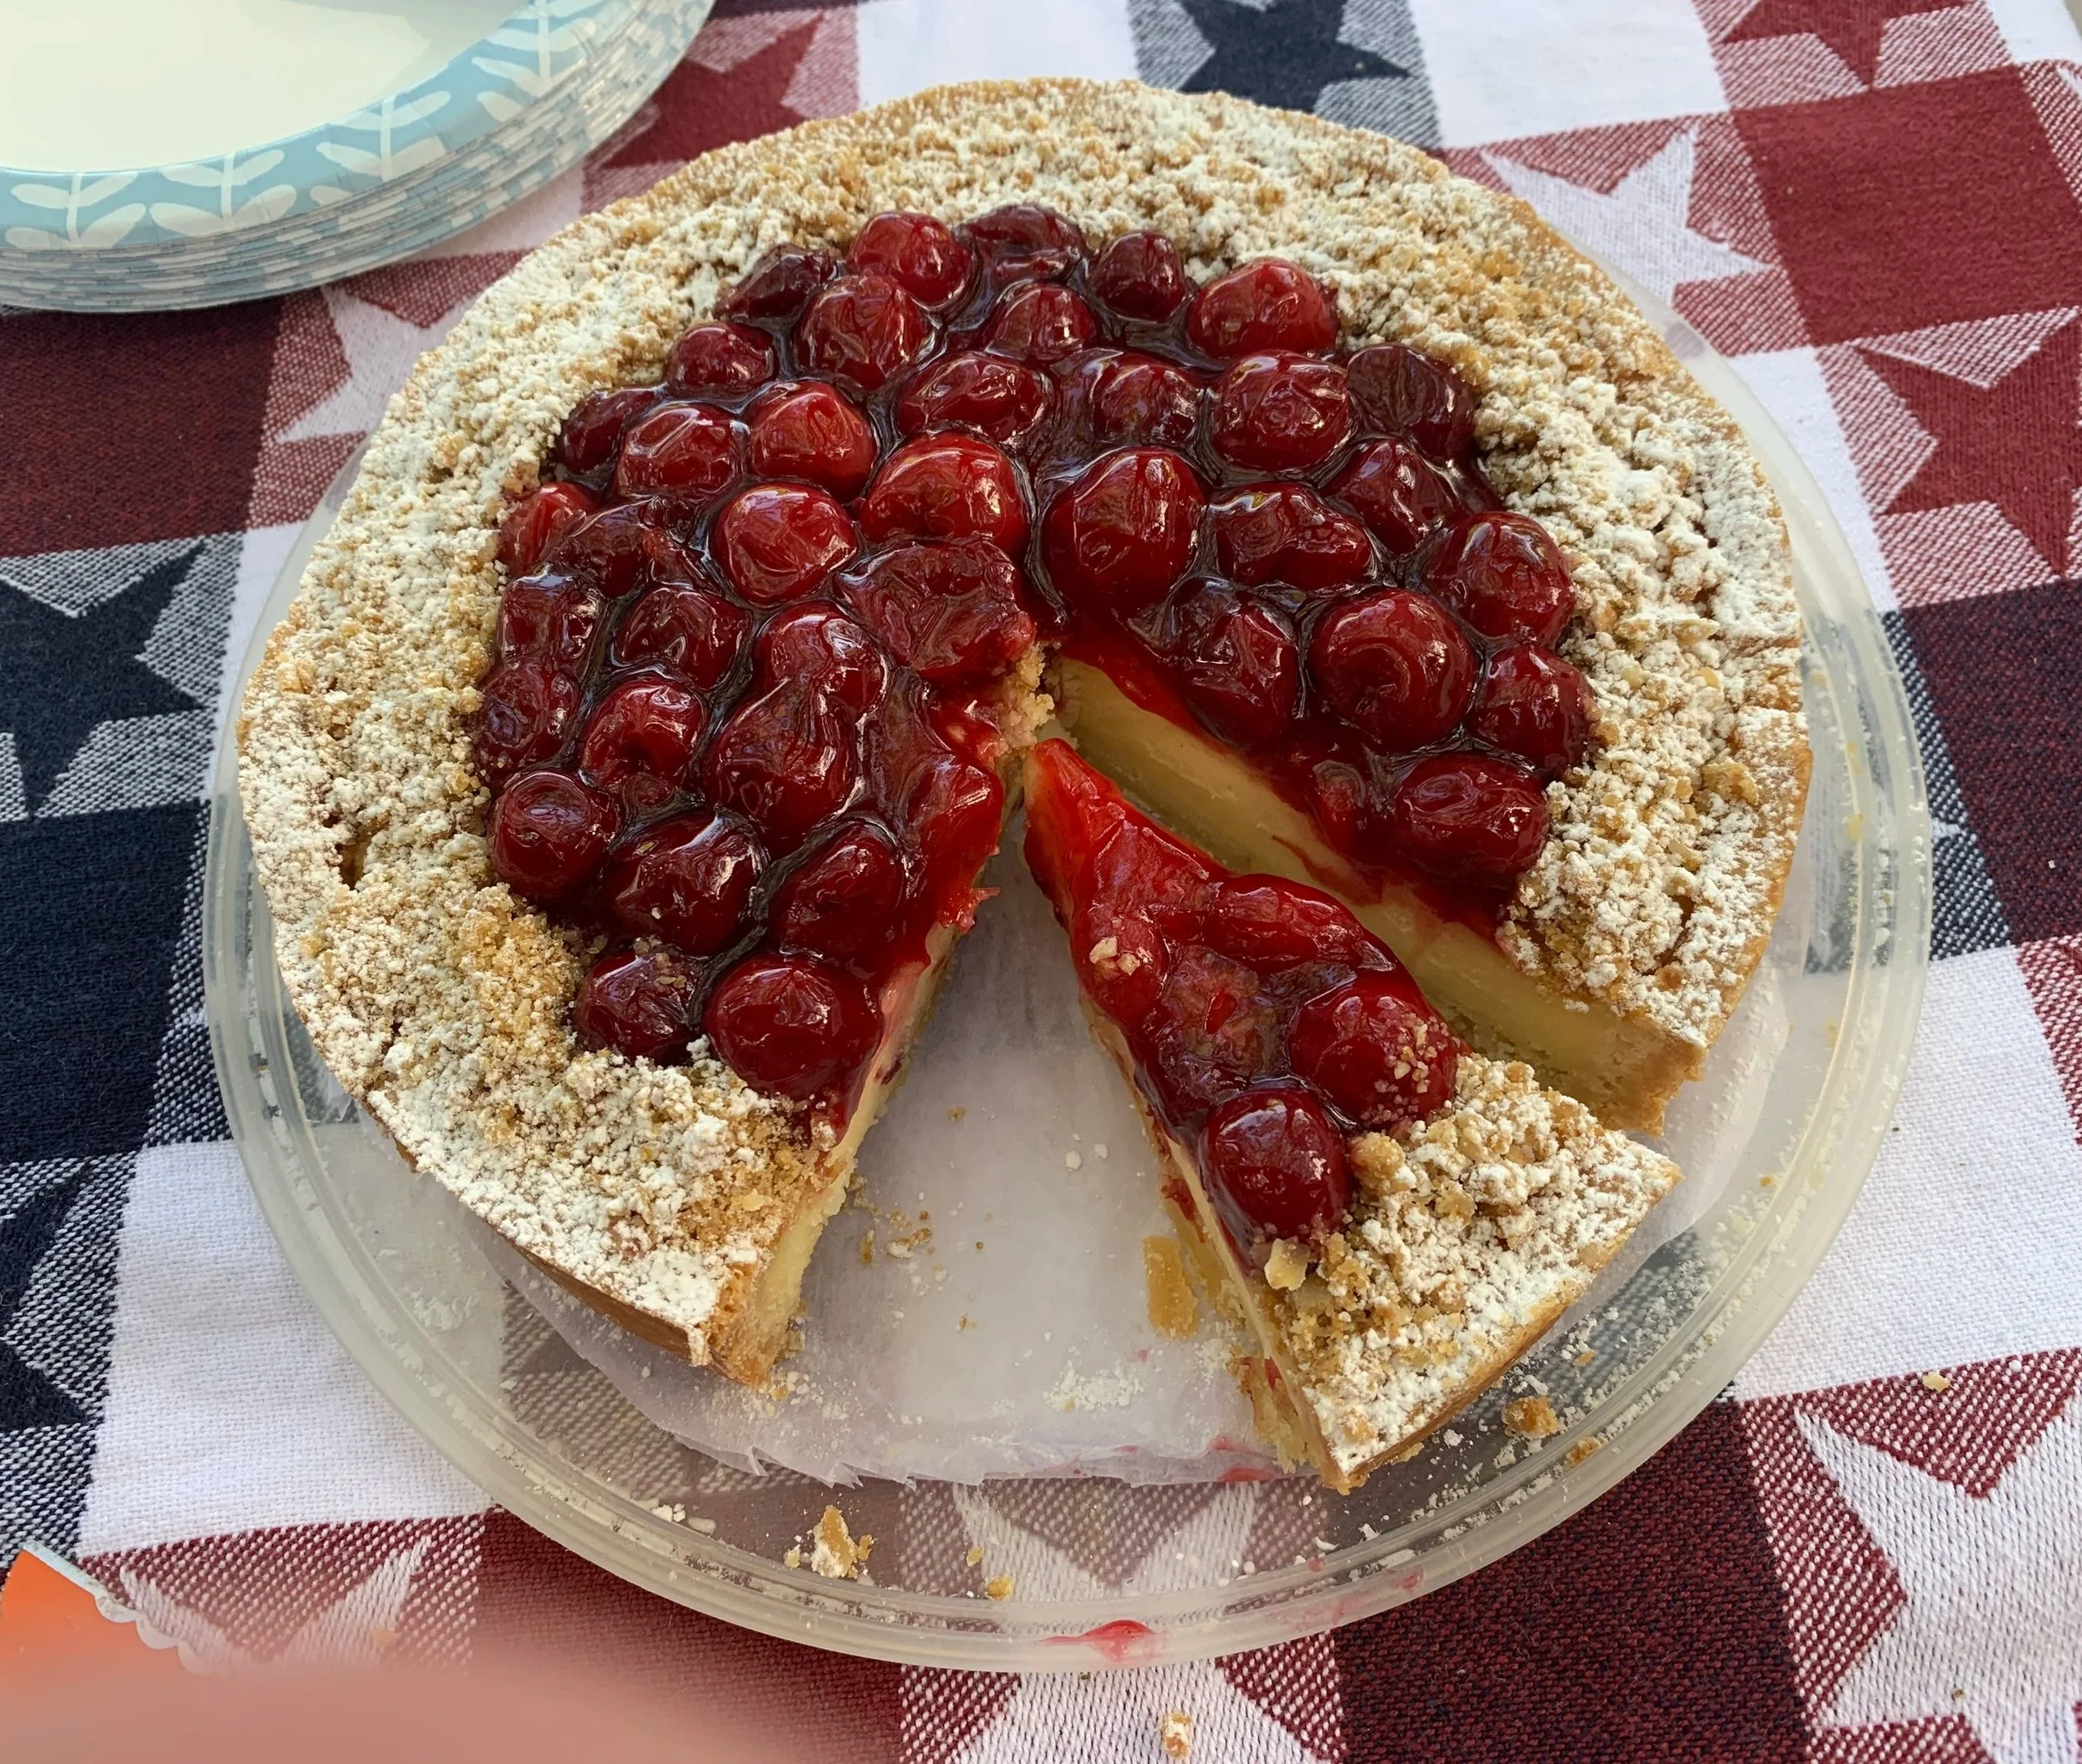
Now we’re talking!

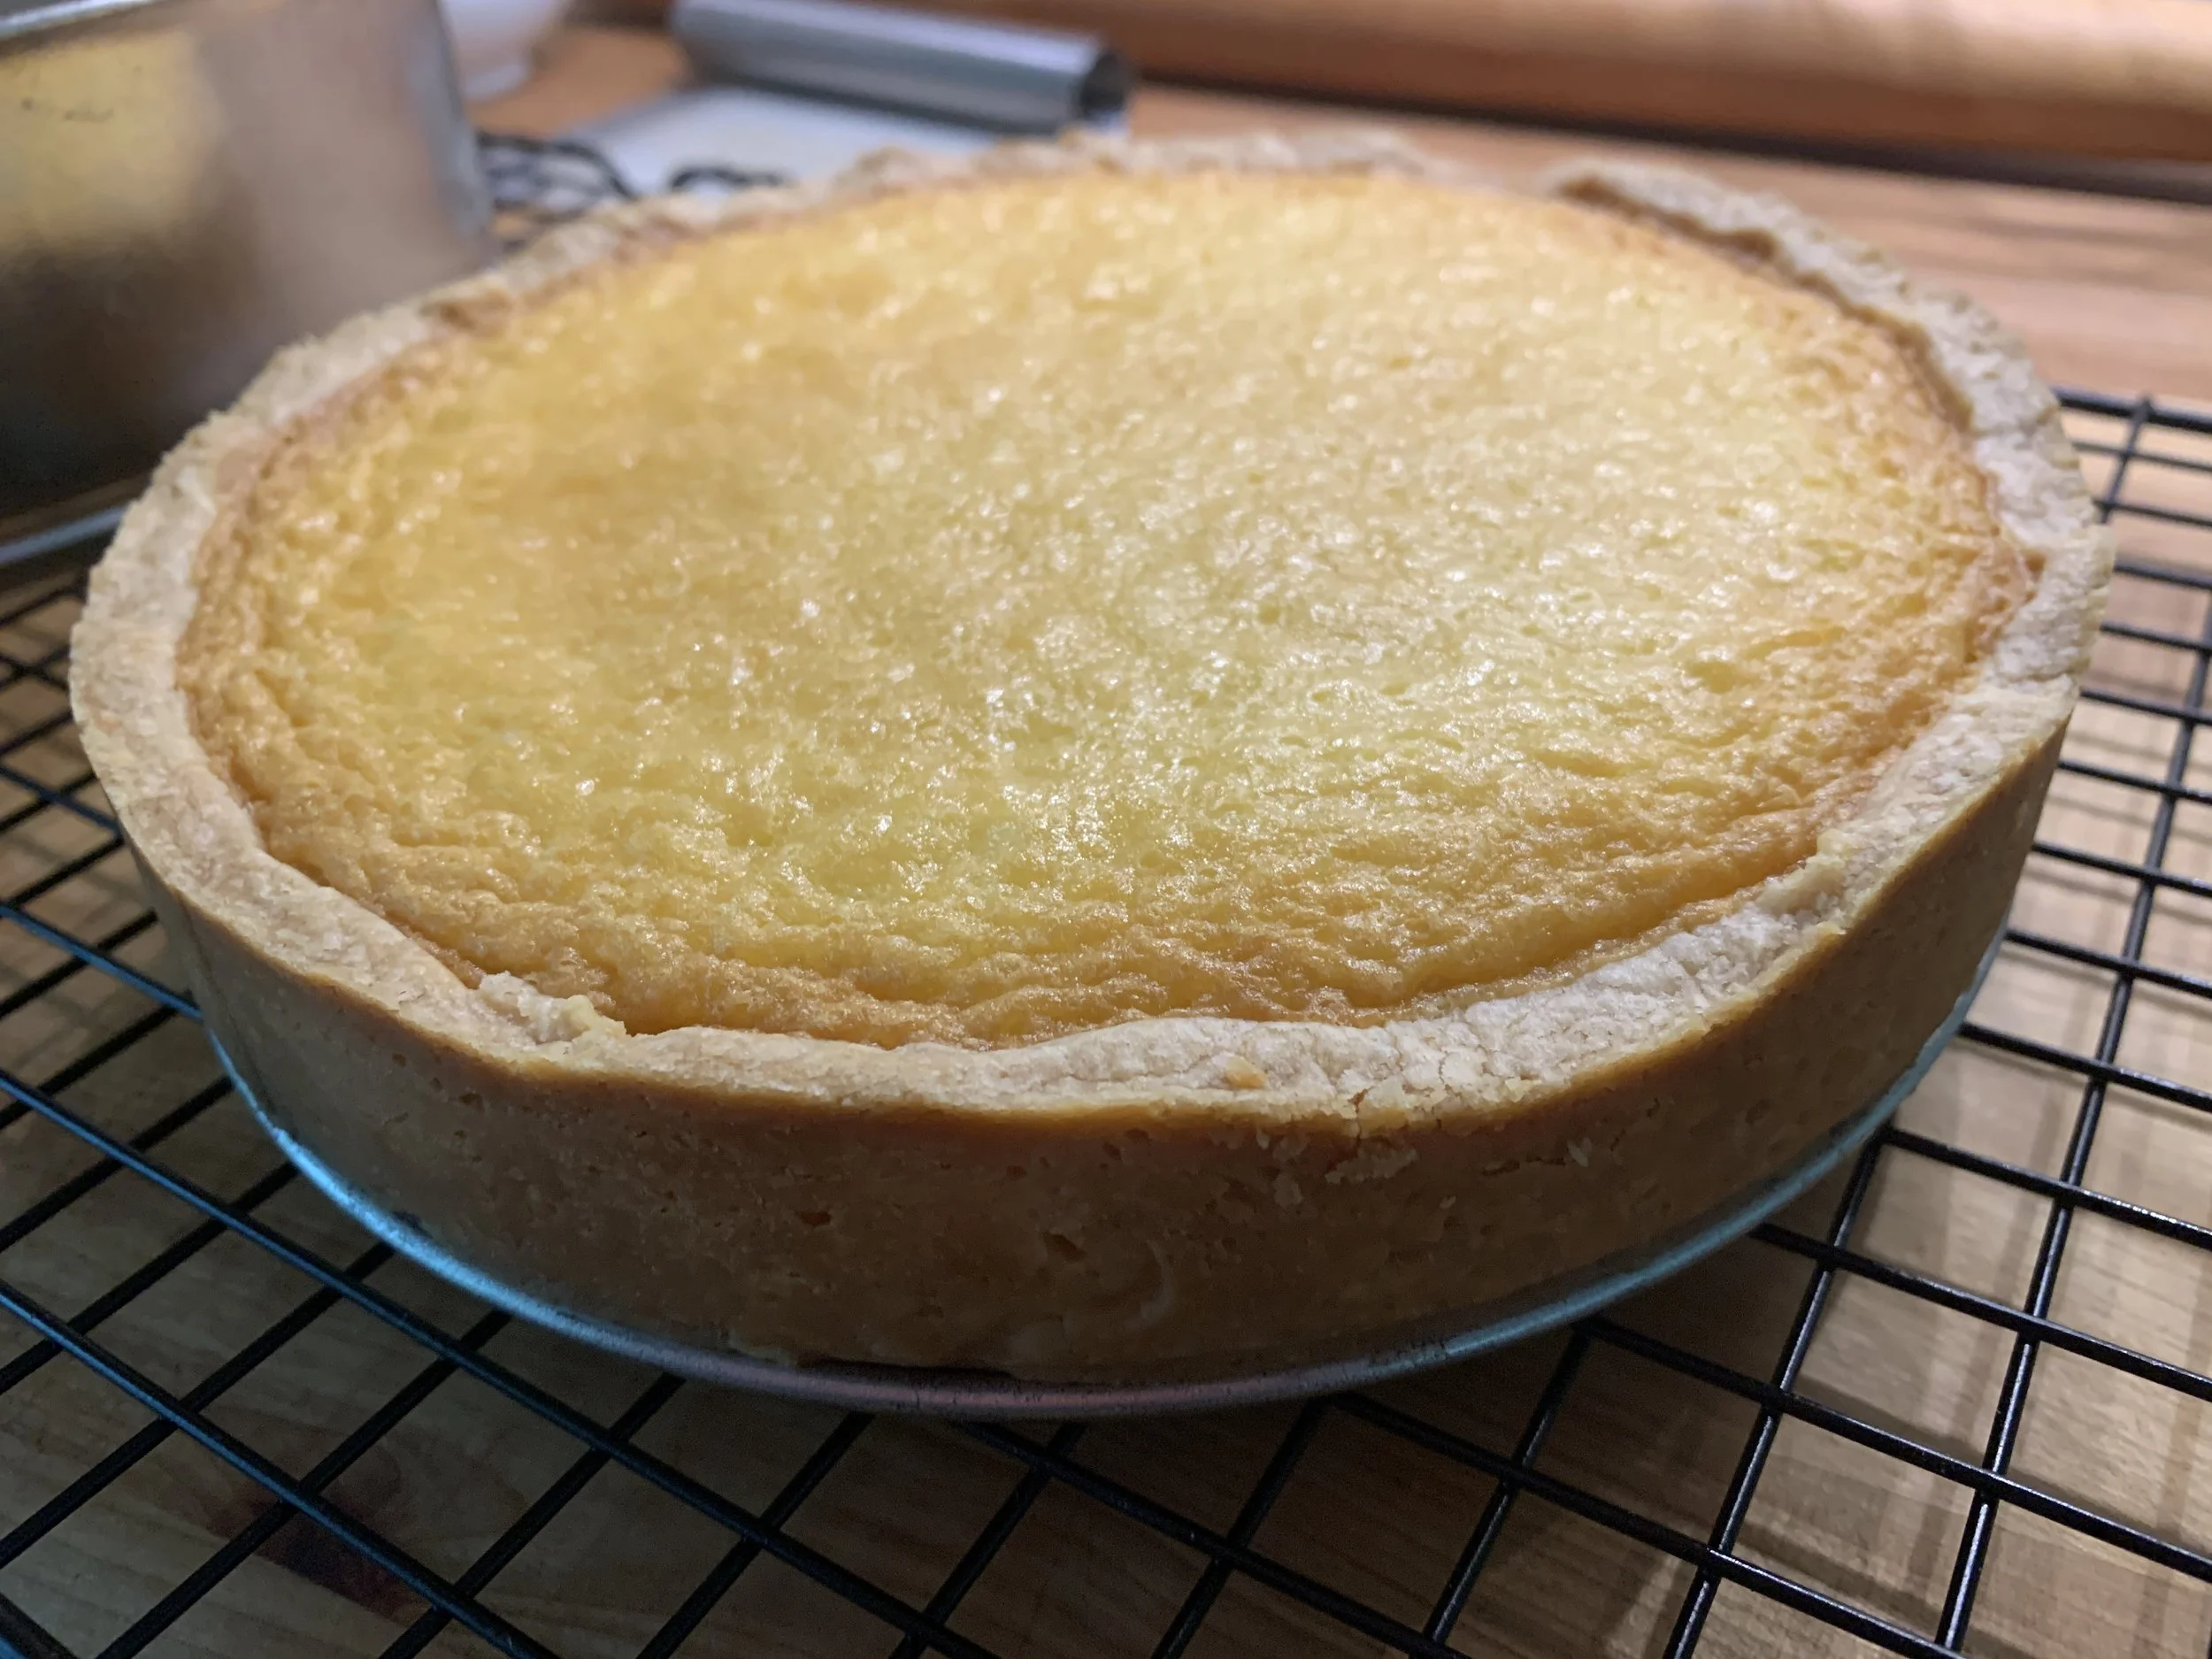
I loosen the outer ring of the springform and let the torta cool to room temperature. Remove the ring. You can hold the torta in the fridge until the next day if you’re not ready for garnishing.


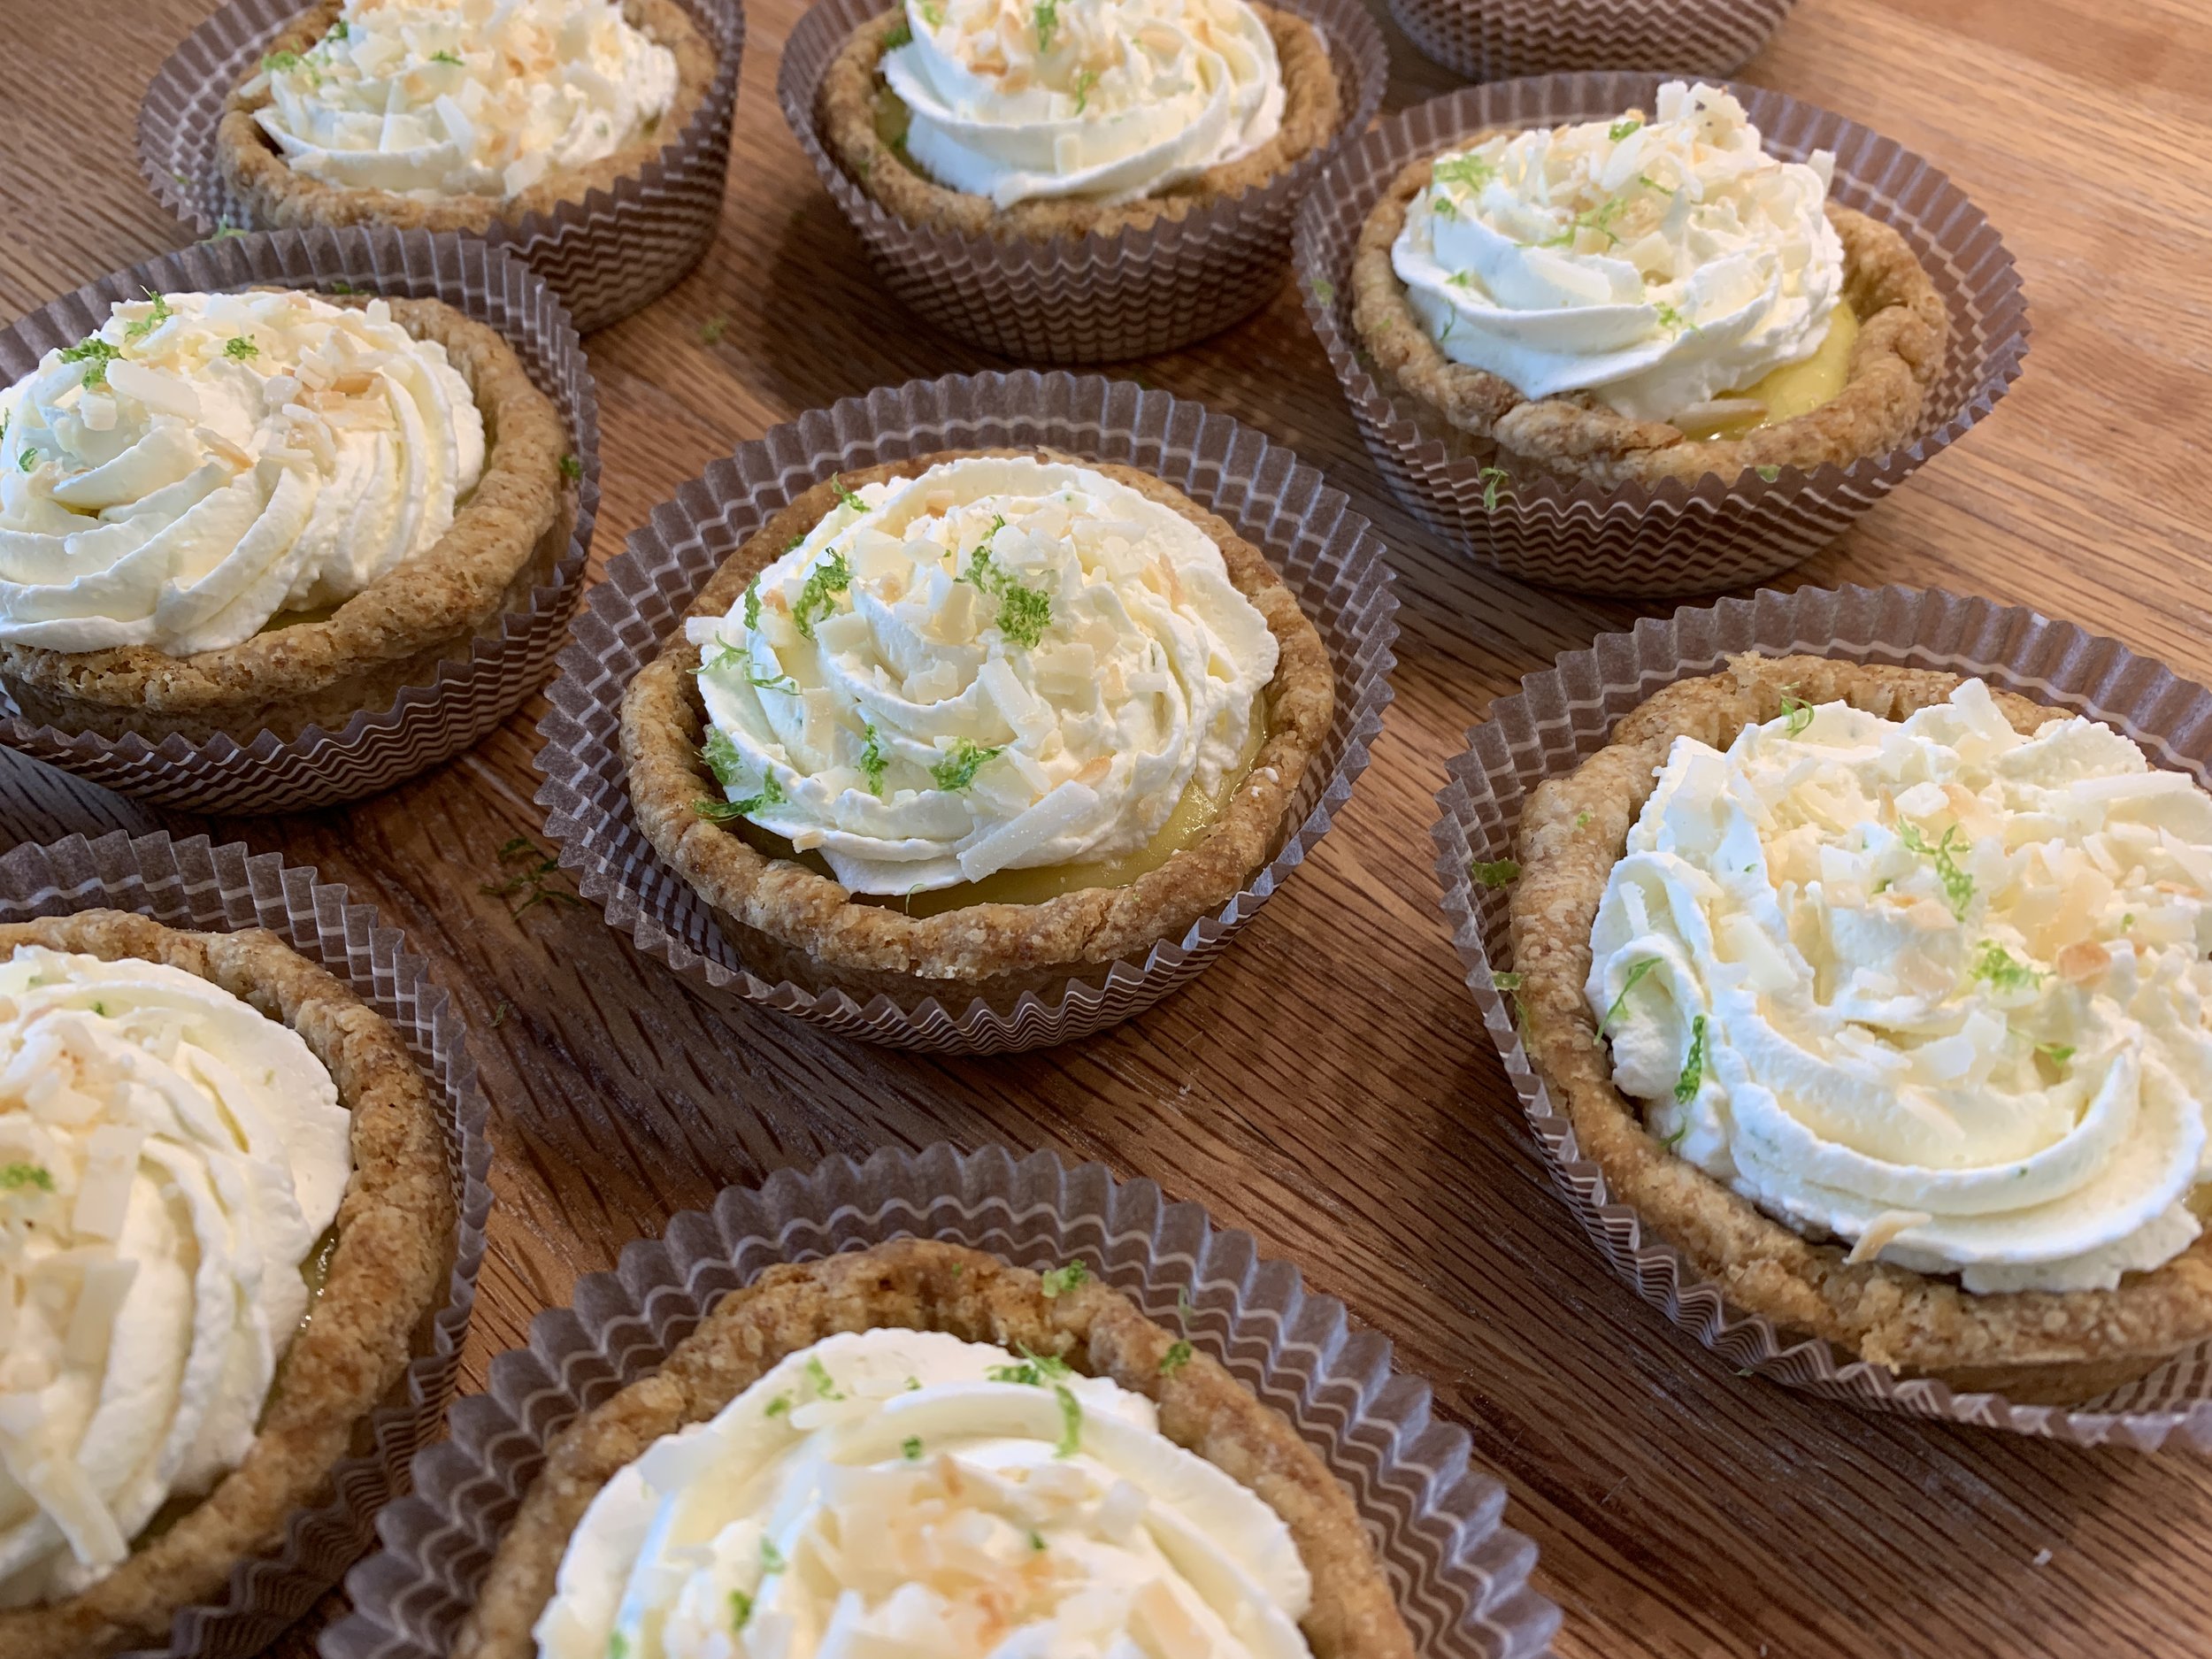
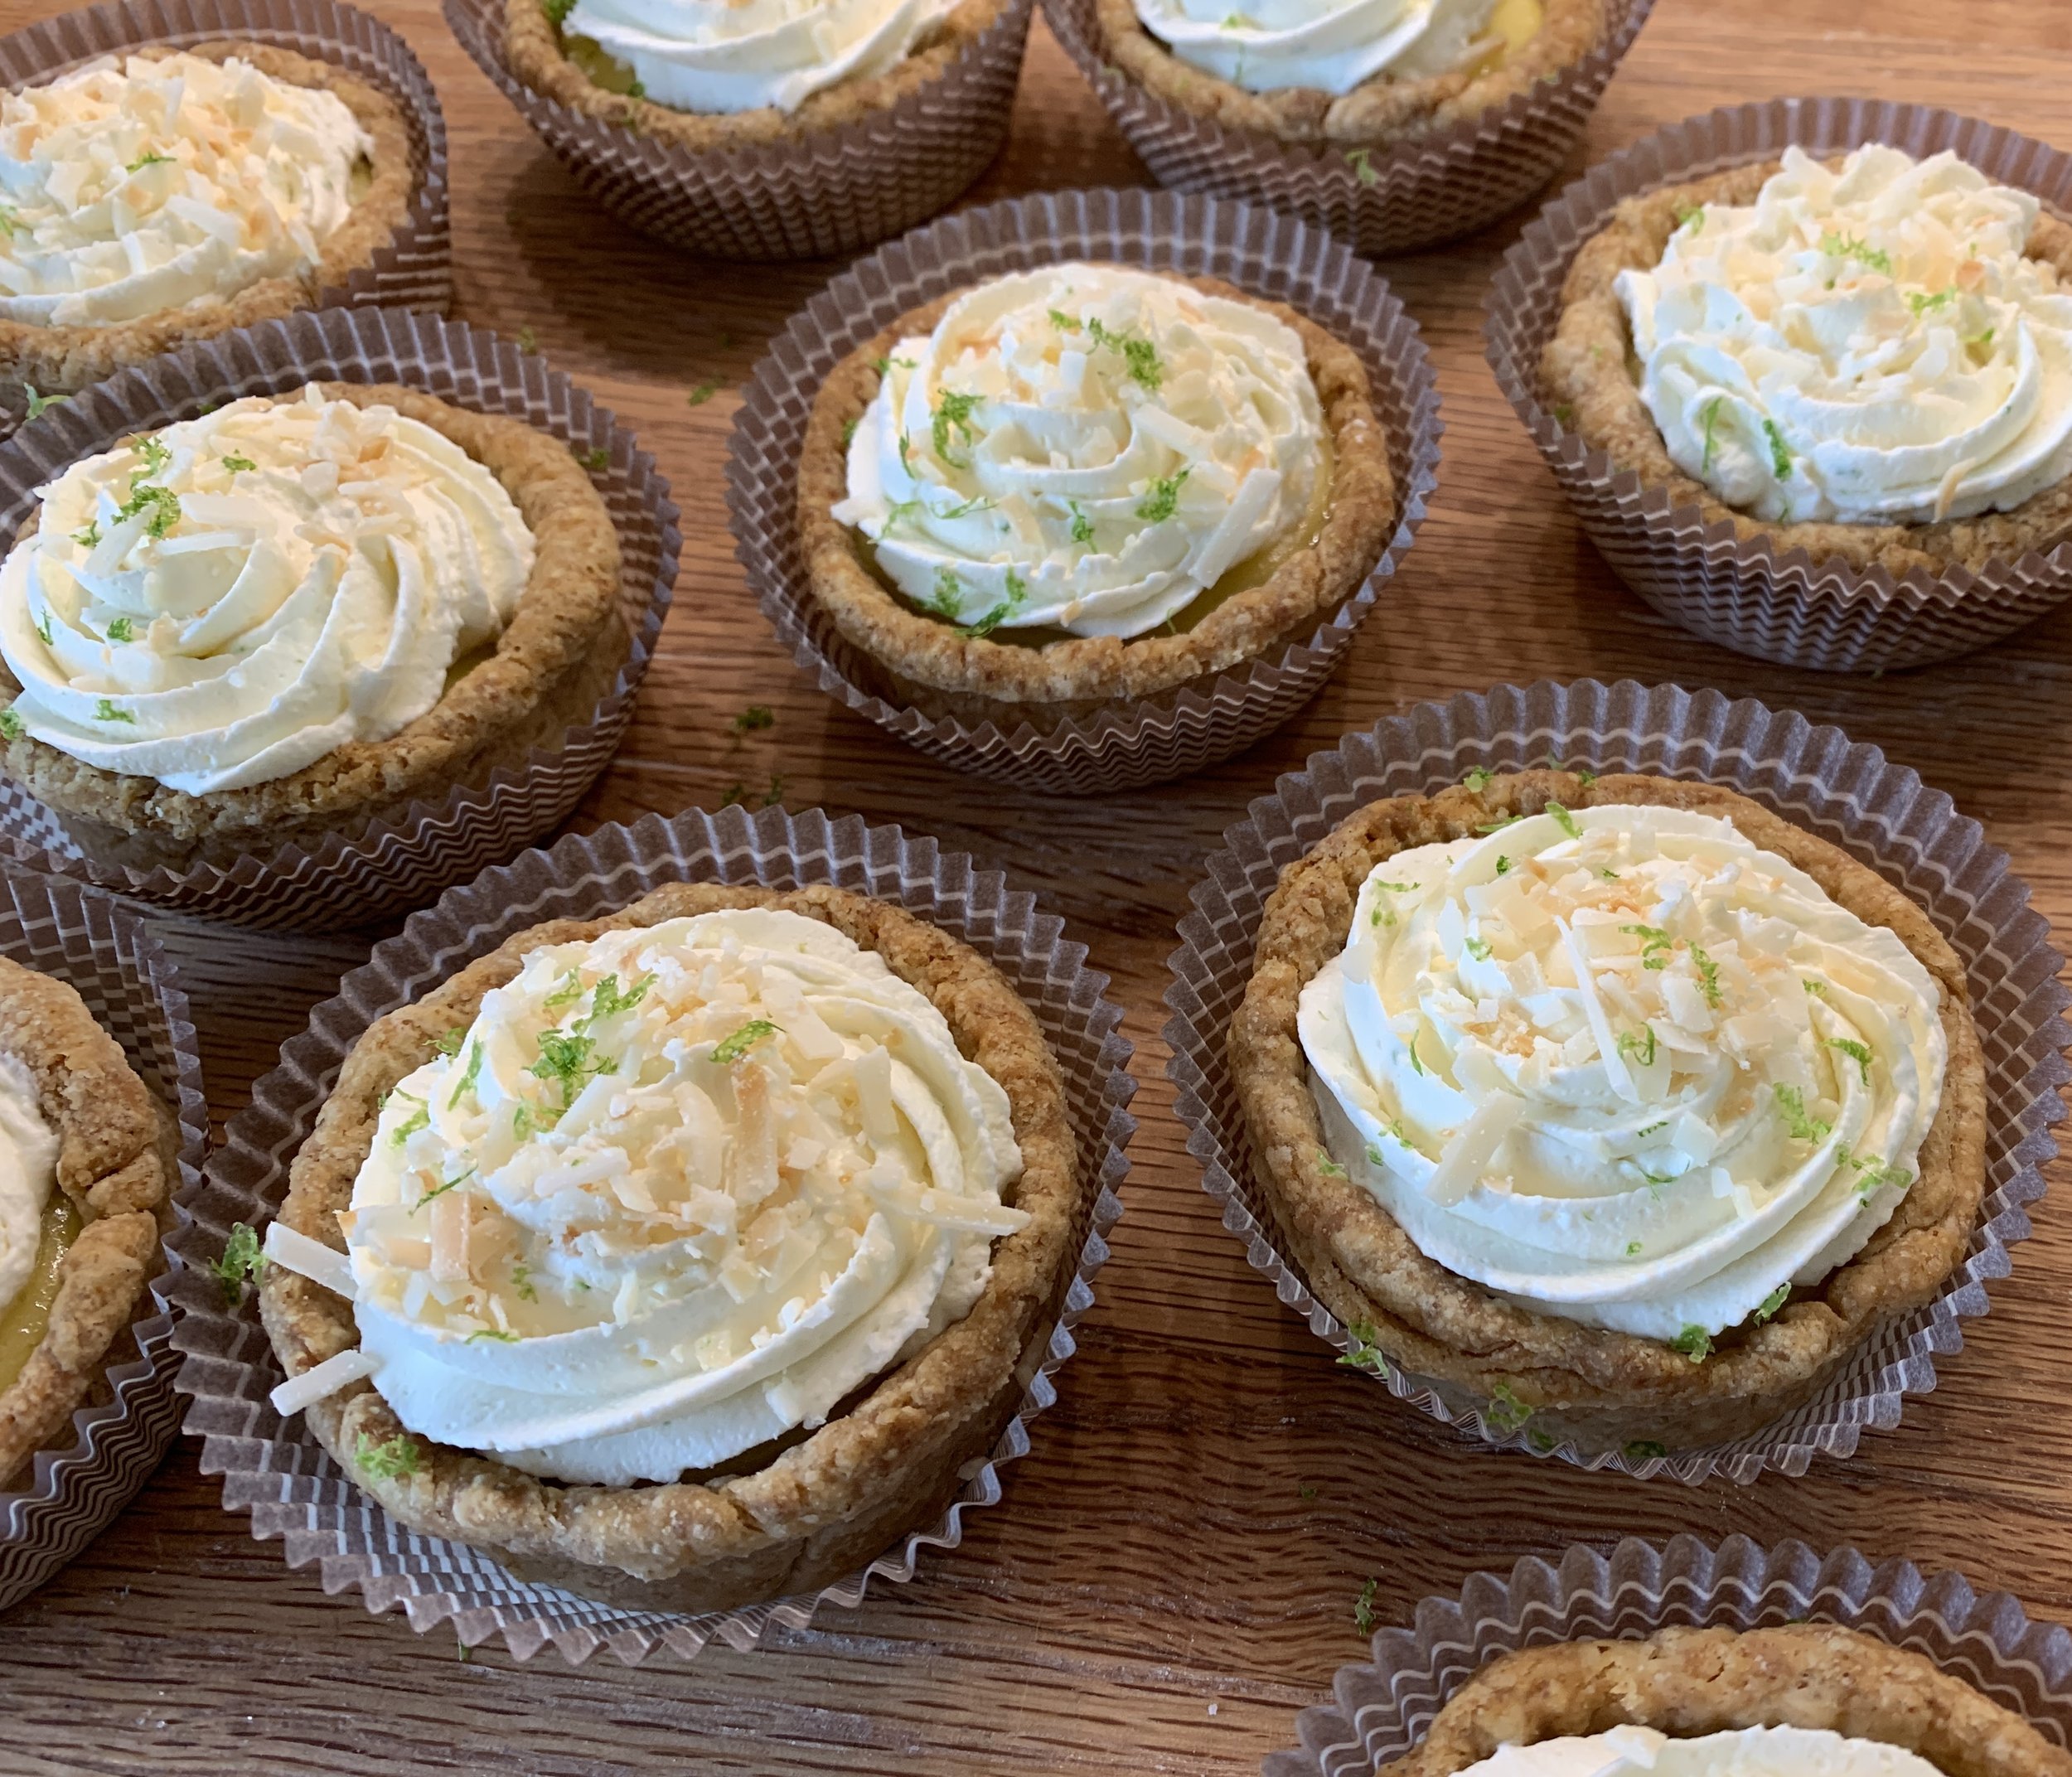
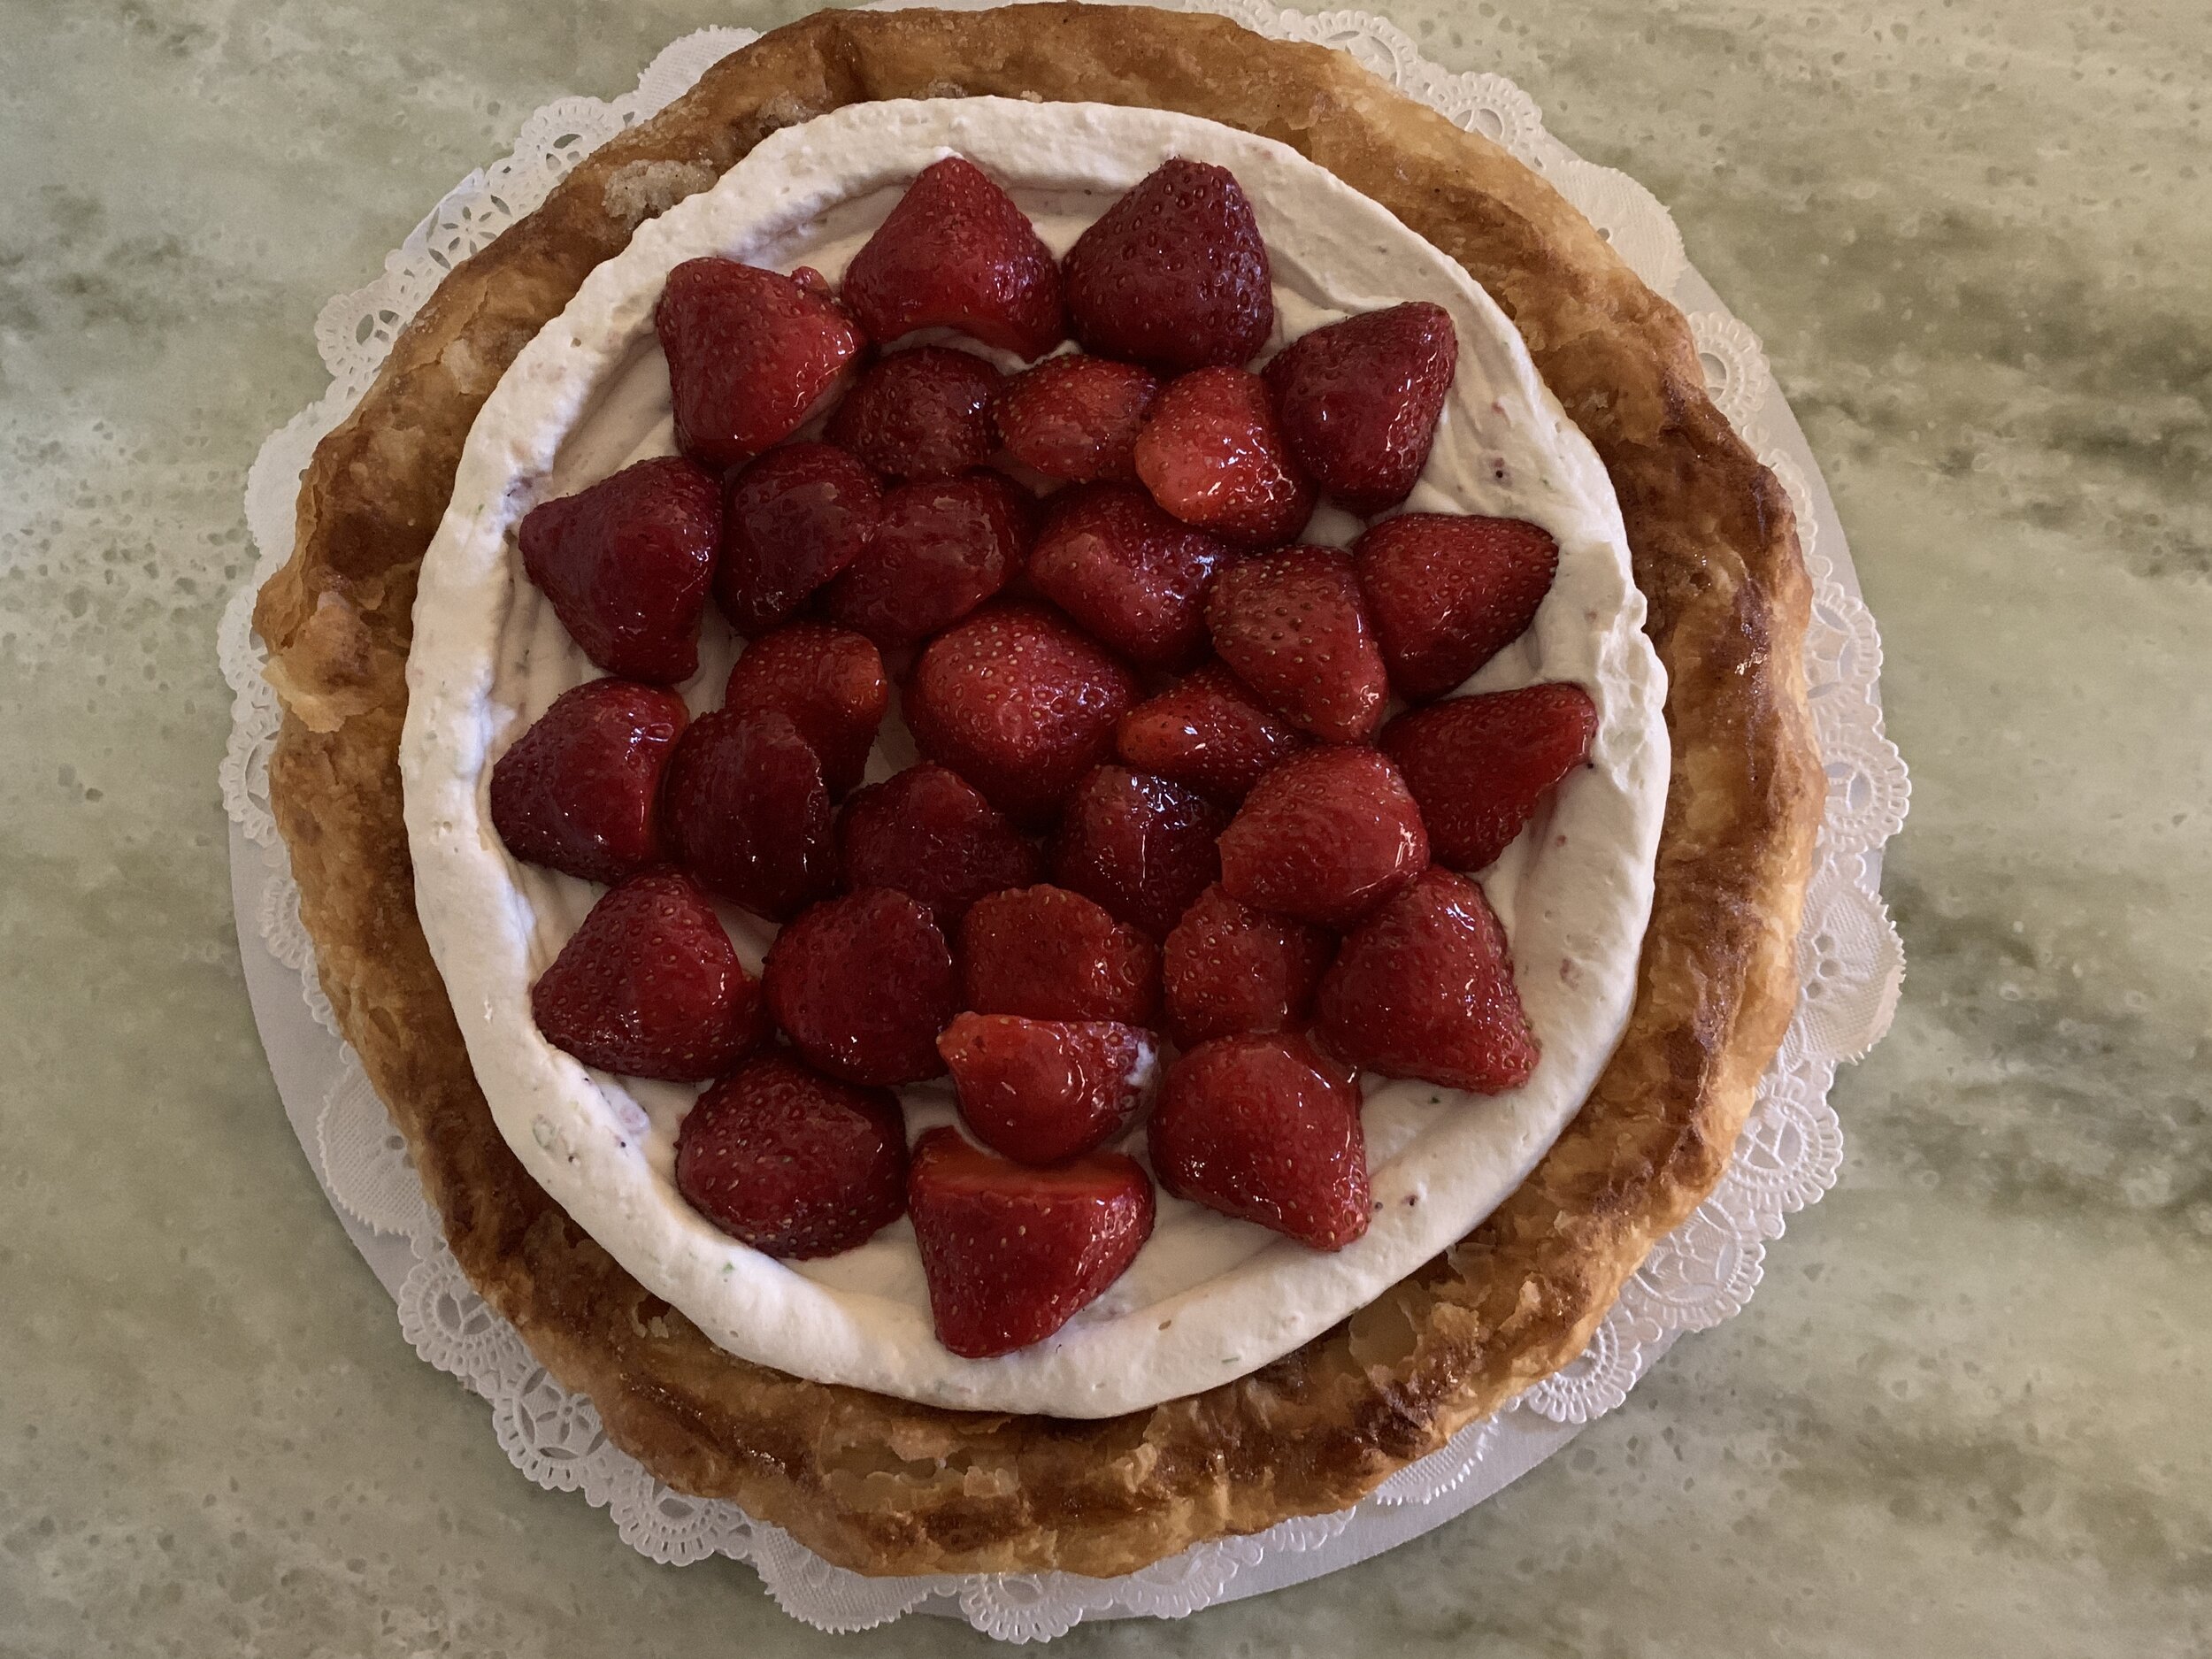
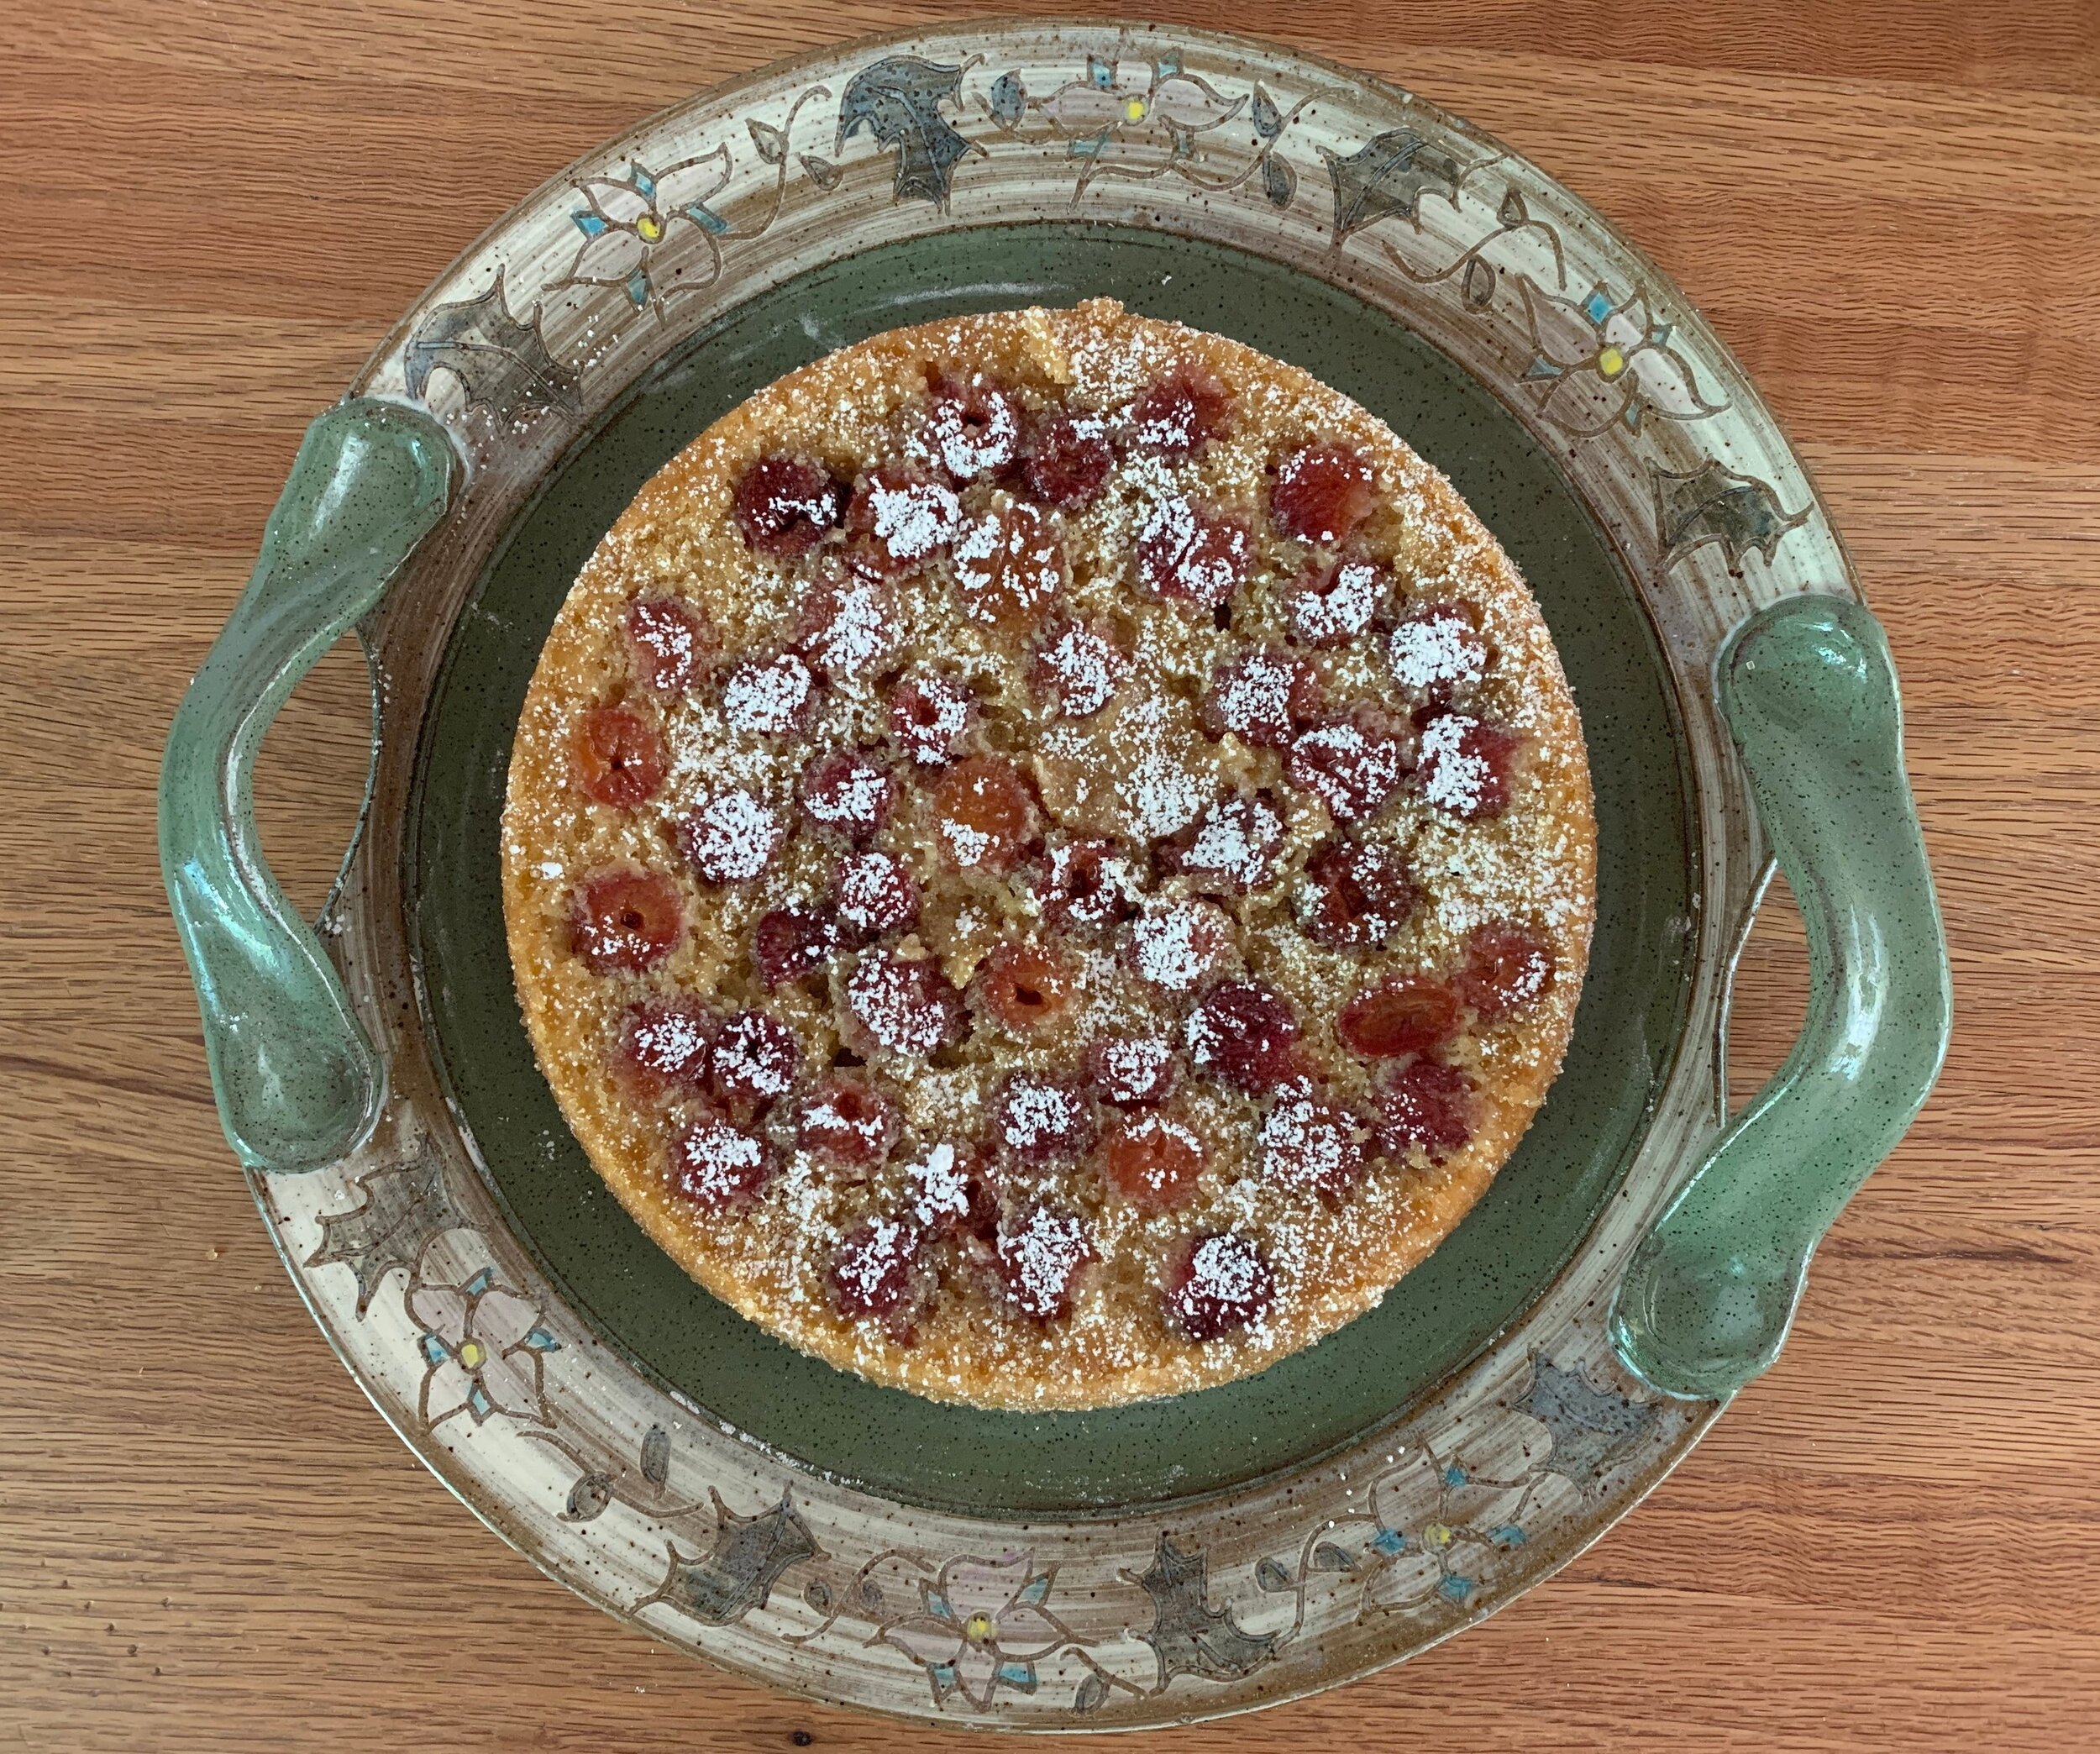
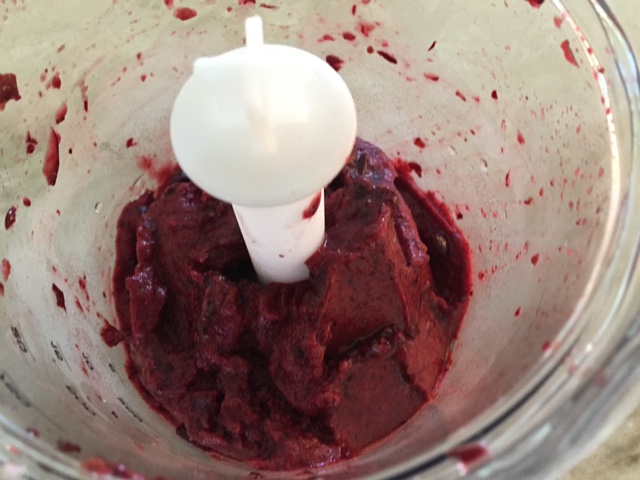
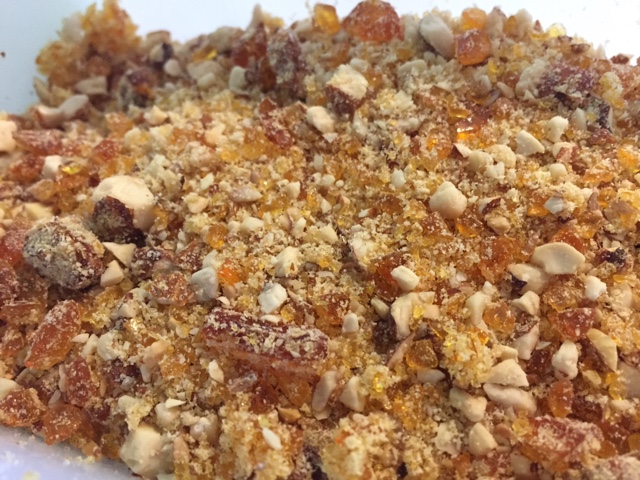
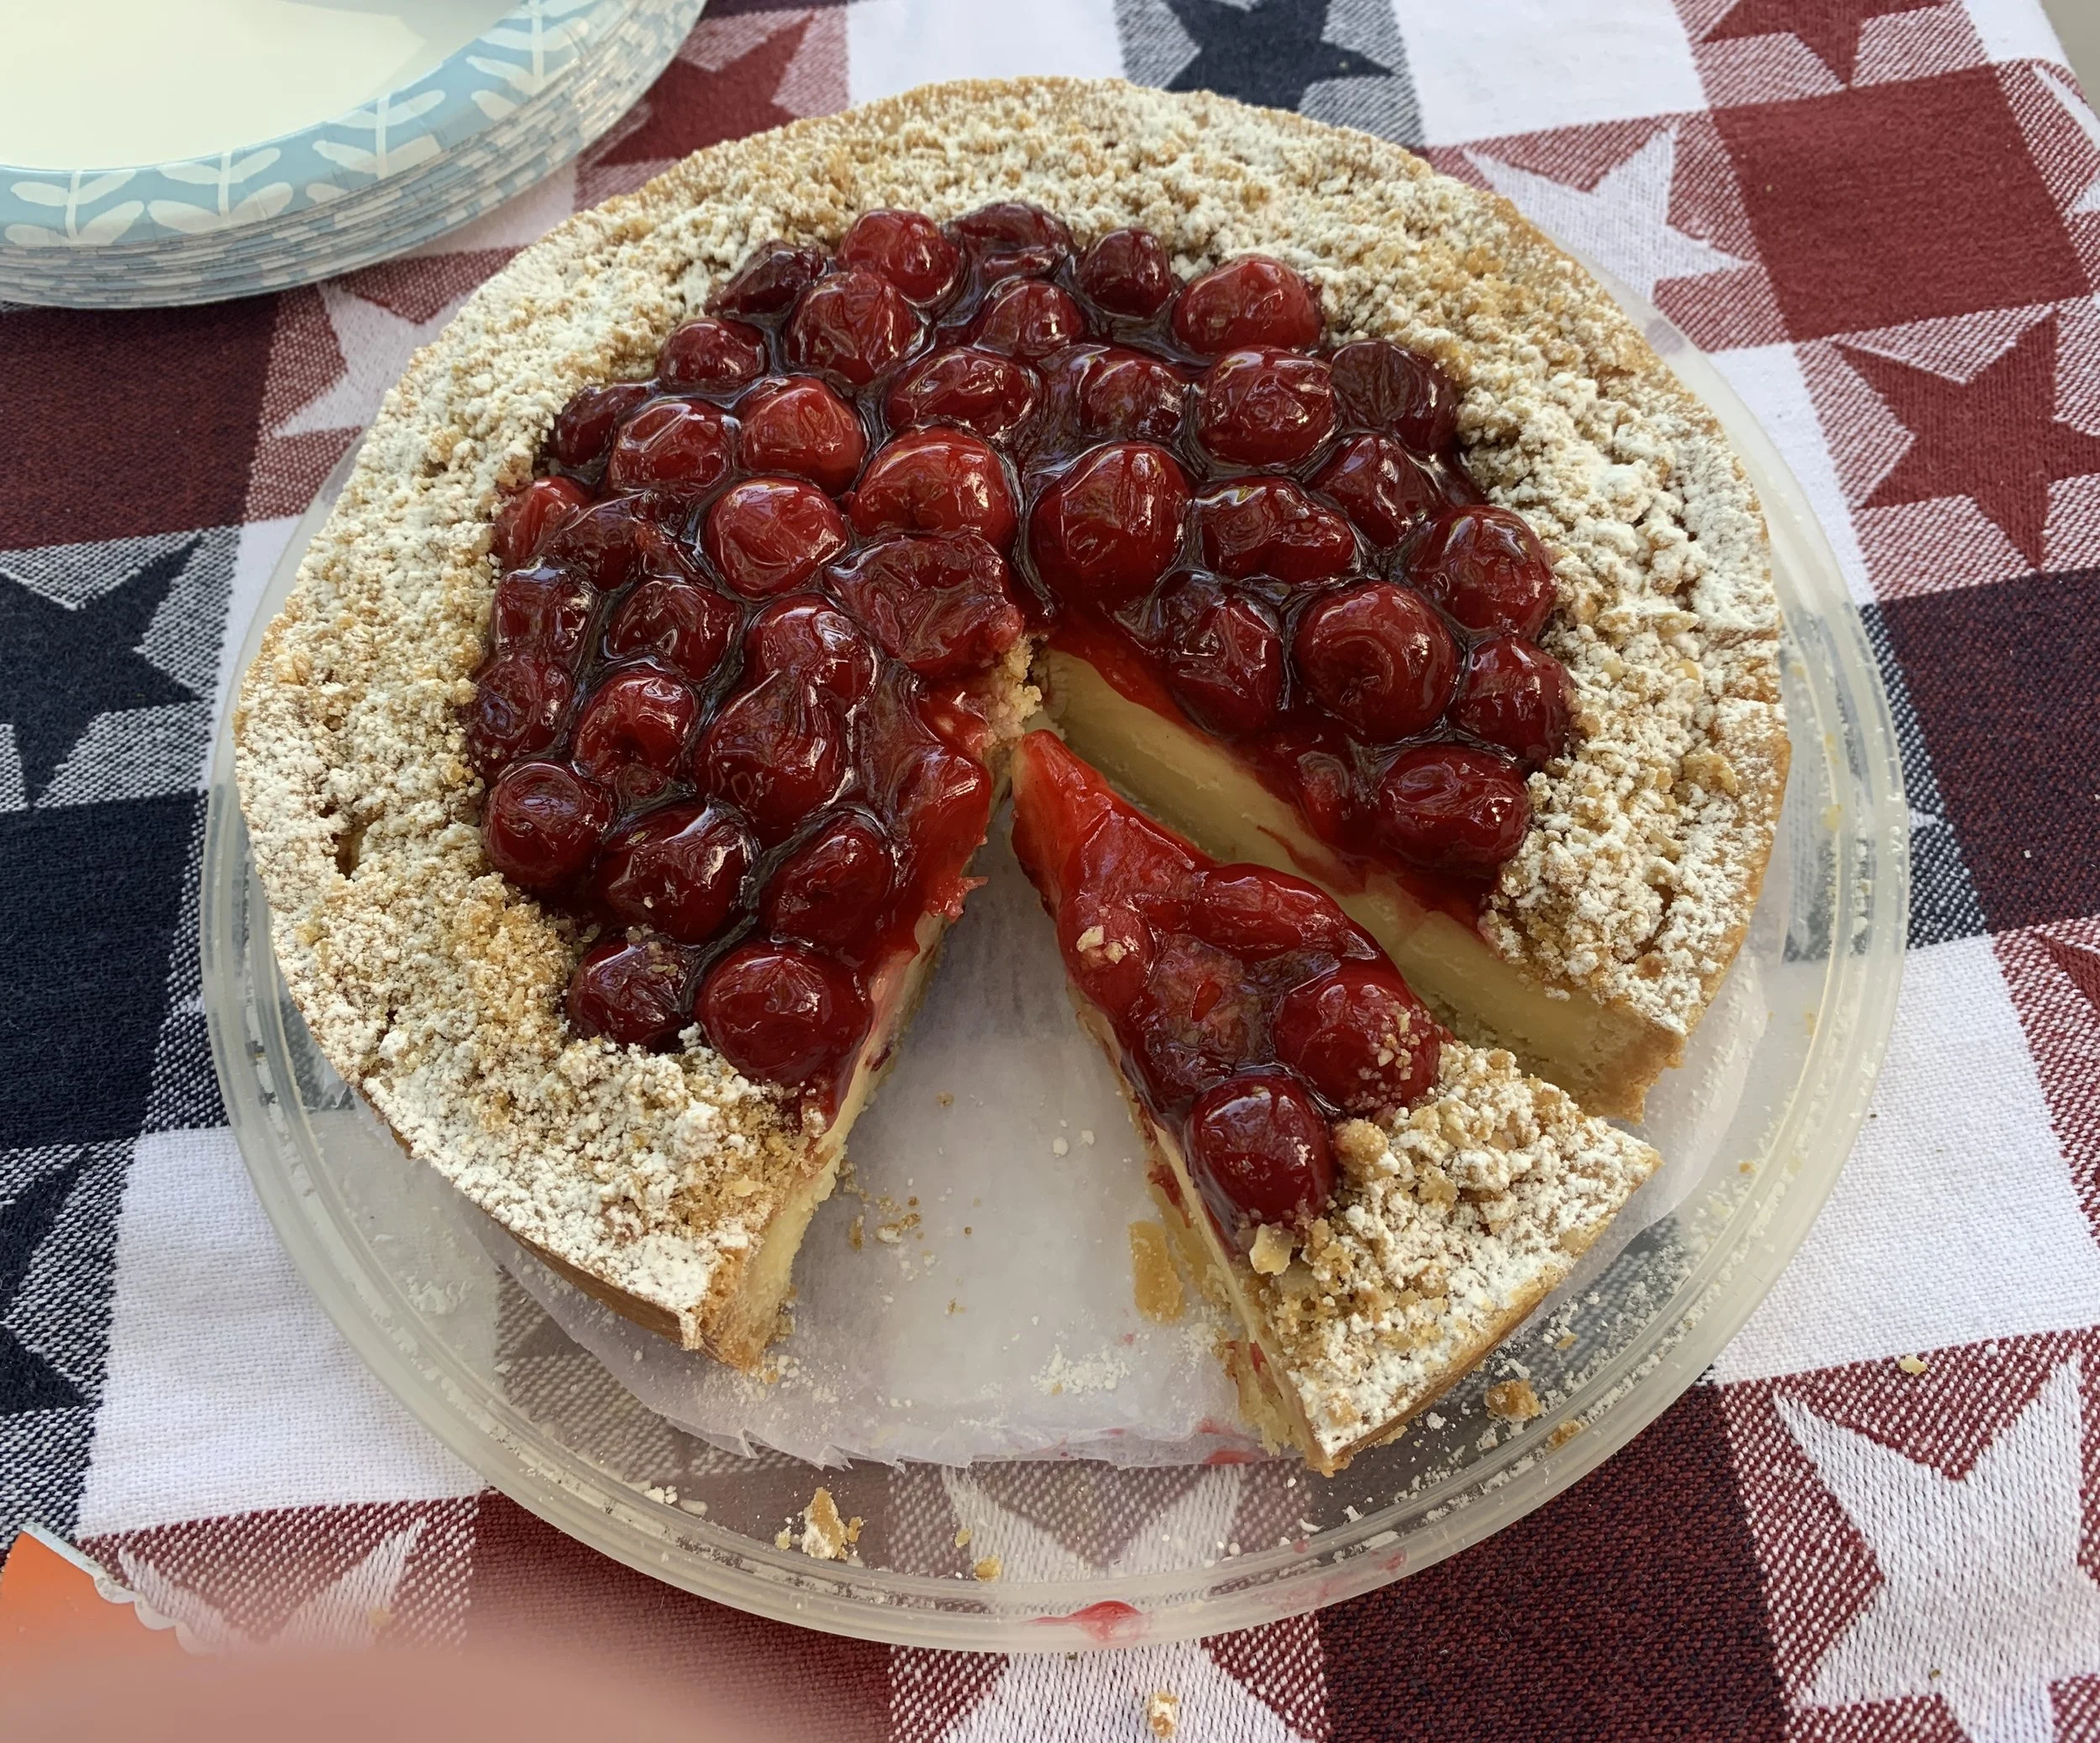
I make my cherry filling earlier in the day or the day before and keep it refrigerated. Spoon a layer of cherries over the center of the torta, leaving an inch or so clear around the edges. Sprinkle oat crumble around the edges then dust that with powdered sugar. TIP: hold a small bowl over the cherries while you dust - keeps them nice and cherry-y.


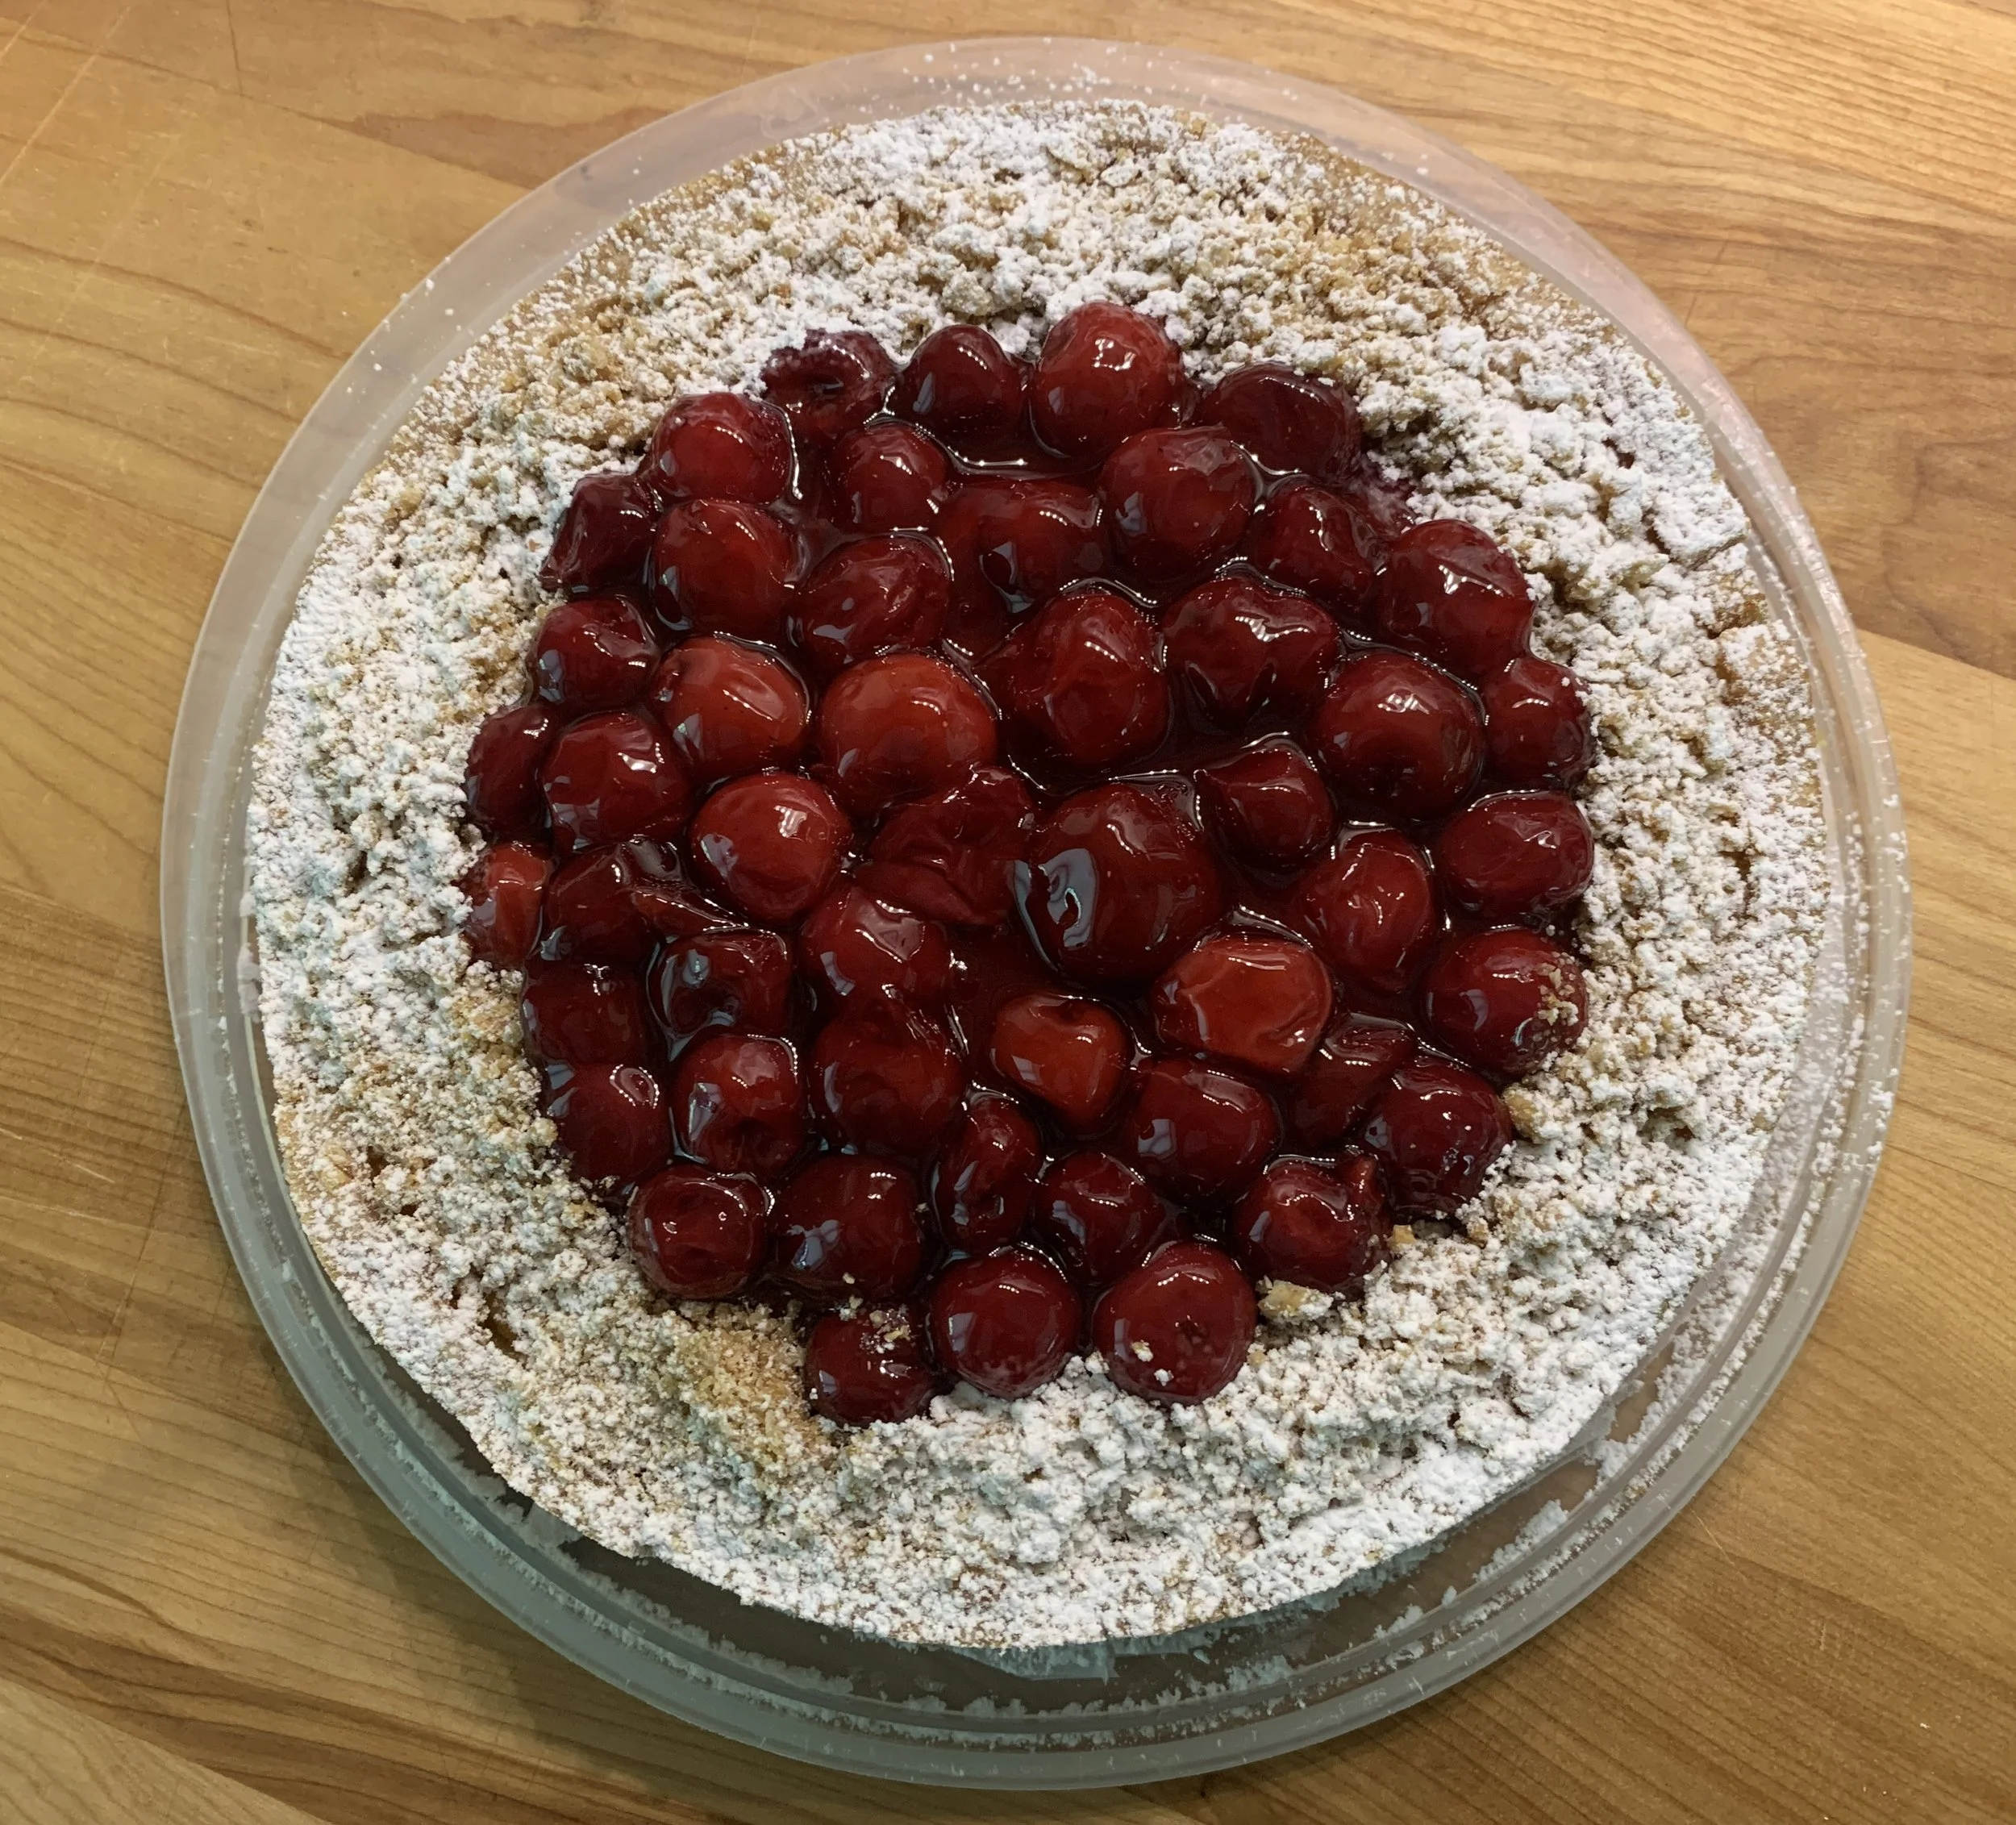
Slice and serve . . . . . the marriage of tart cherries, crunchy crumble, creamy filling and buttery crust can’t be beat.

Leftovers will keep for a couple of days in the fridge although the cherry topping/sauce may get a tad more runny.

Yum!

Whoa! That one went on didn’t it! But there’s one more thing.

To help you use up any of your own mascarpone here’s a straight forward mascarpone cake that serves as a great blank canvas for adding fruit, nuts, and/or topping with various swirls of delight. The recipe makes one 8” or 9” cake or about 30 small teacakes.

As many of you know, I prefer baking petite teacakes versus a large sliceable cake. These do not disappoint.

For these babies I turned back to an oil based mascarpone recipe I originally found at “An Italian in My Kitchen” about seven years ago. The site is chock full - the section on cakes alone will knock your socks off.

I’ve made it a number of times over the years, tweaking ingredients here and there (e.g. melted butter for the oil; different combos of mascarpone/yogurt/heavy cream; adding chopped nuts and/or fruit). It’s quite adaptable.

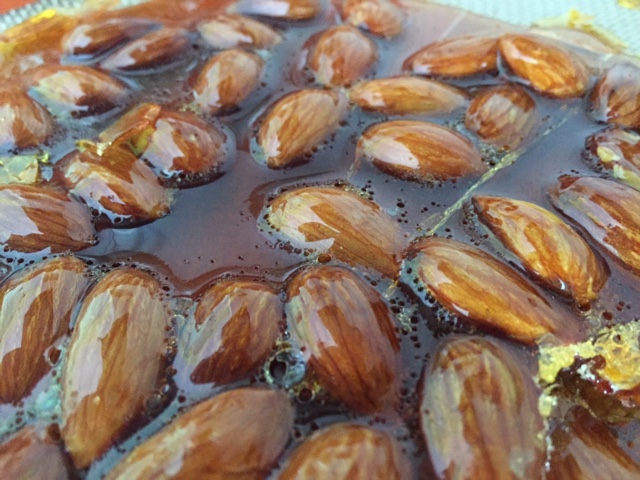
Below is the mise for my current iteration of the recipe. Don’t let the 8” springform distract you - I ultimately topped that one with a lovely thin-ish layer of lemon Swiss meringue buttercream and a few chopped candied pistachios. Darn - I didn’t take photos. Sometimes I simply get lost in the moment.

No worries. The mise remains the same for the teacakes - recipe makes about 30.


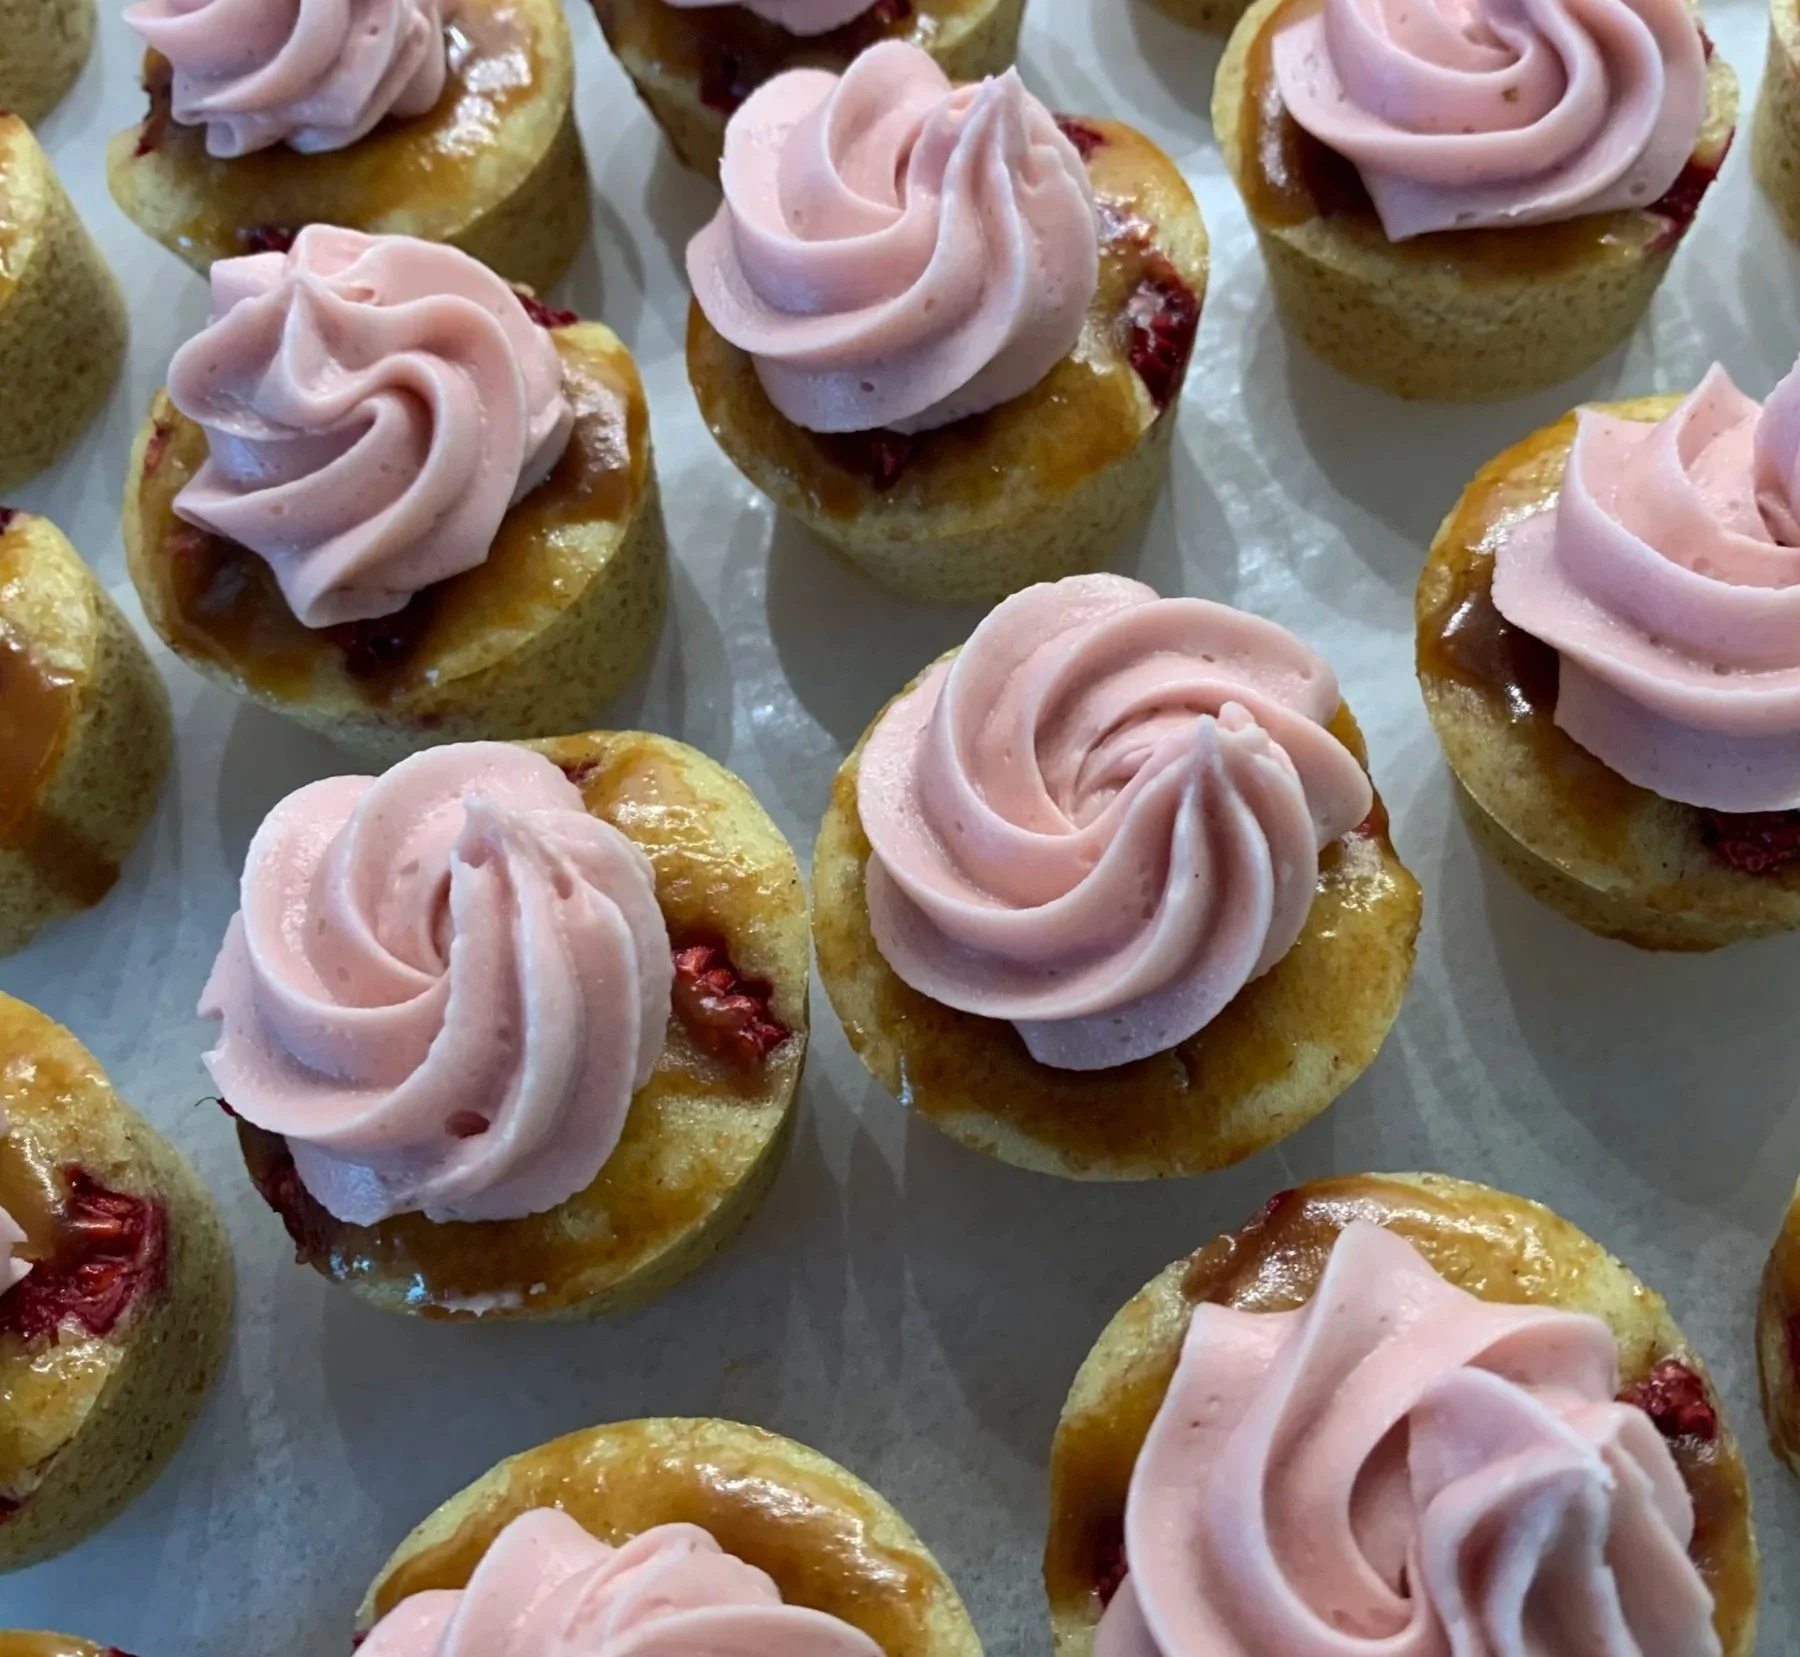
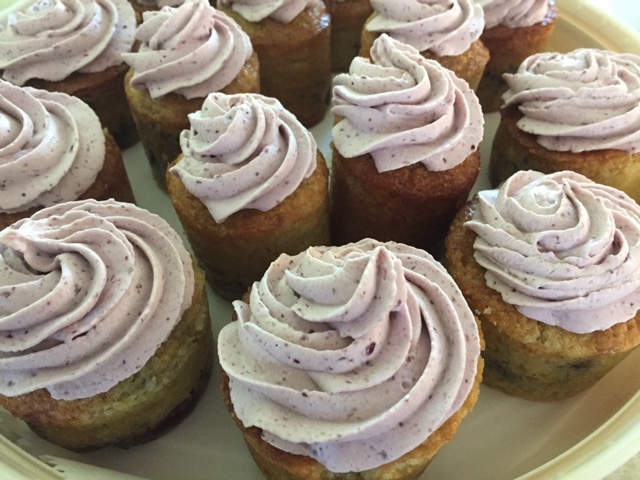
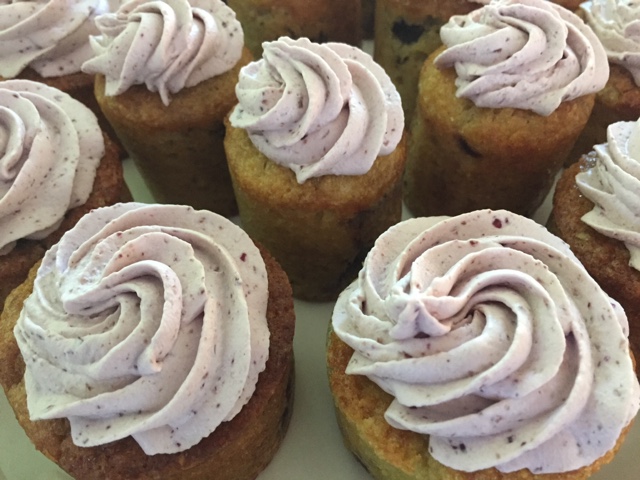
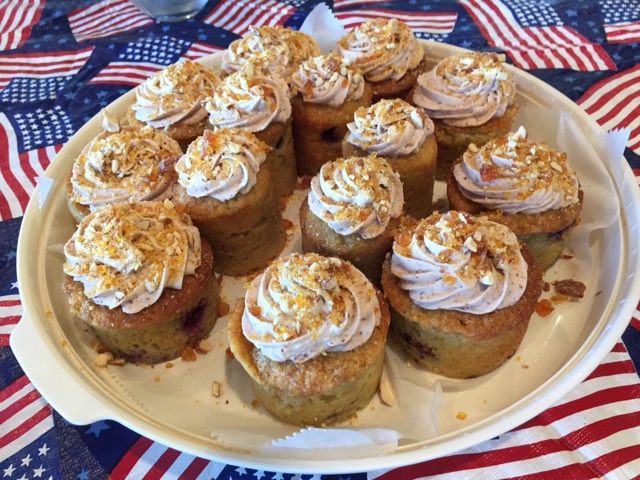
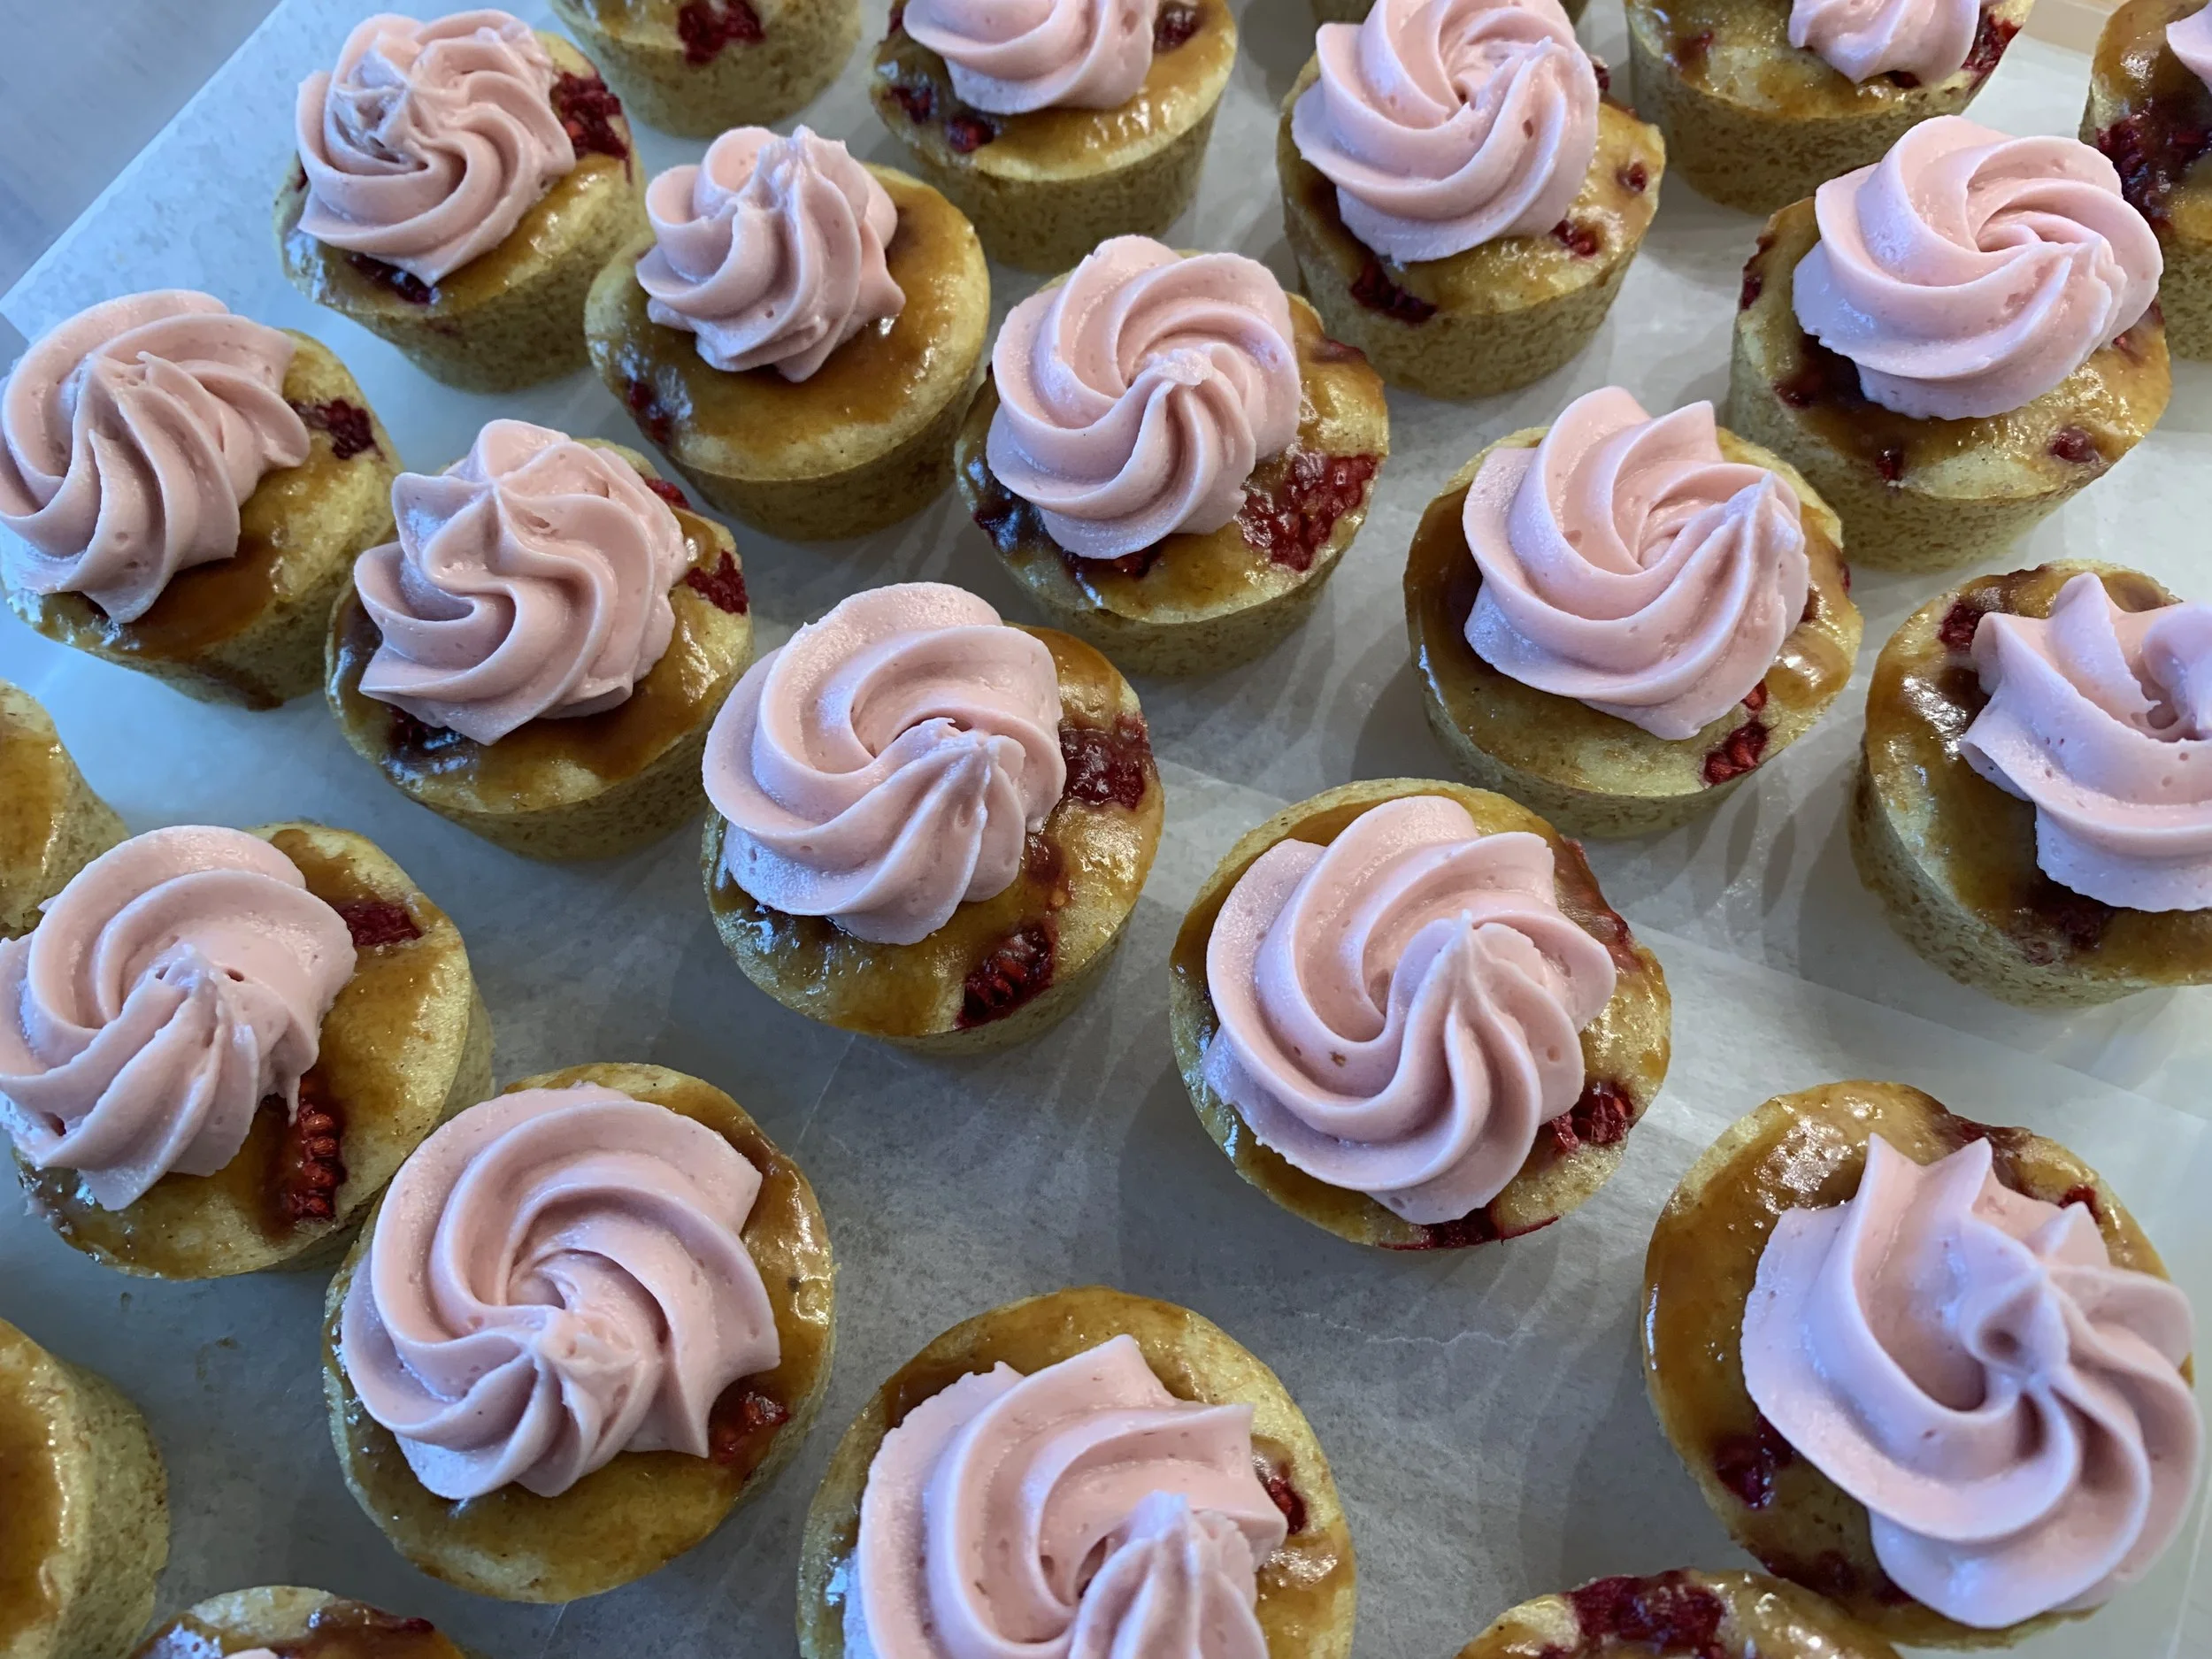
I’ve thrown enough at you so I won’t take you through the steps - just follow the recipe and create your own version. For these I piped the batter into flexi mini muffin molds, pressed some frozen raspberry pieces in and baked ‘em. If you’re not ready to garnish and serve them, they keep very well in the freezer for a couple of weeks.

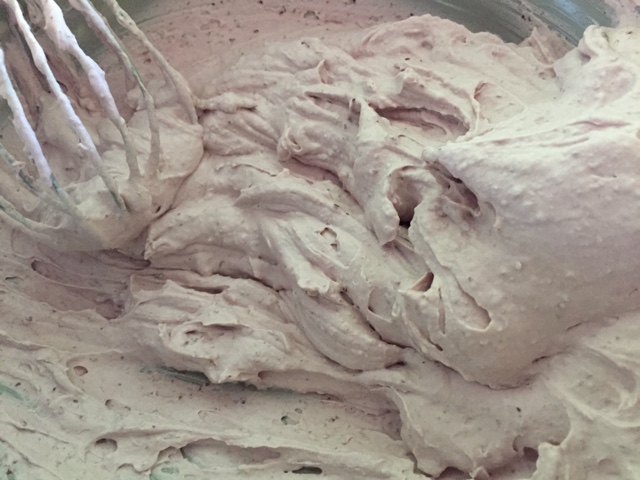
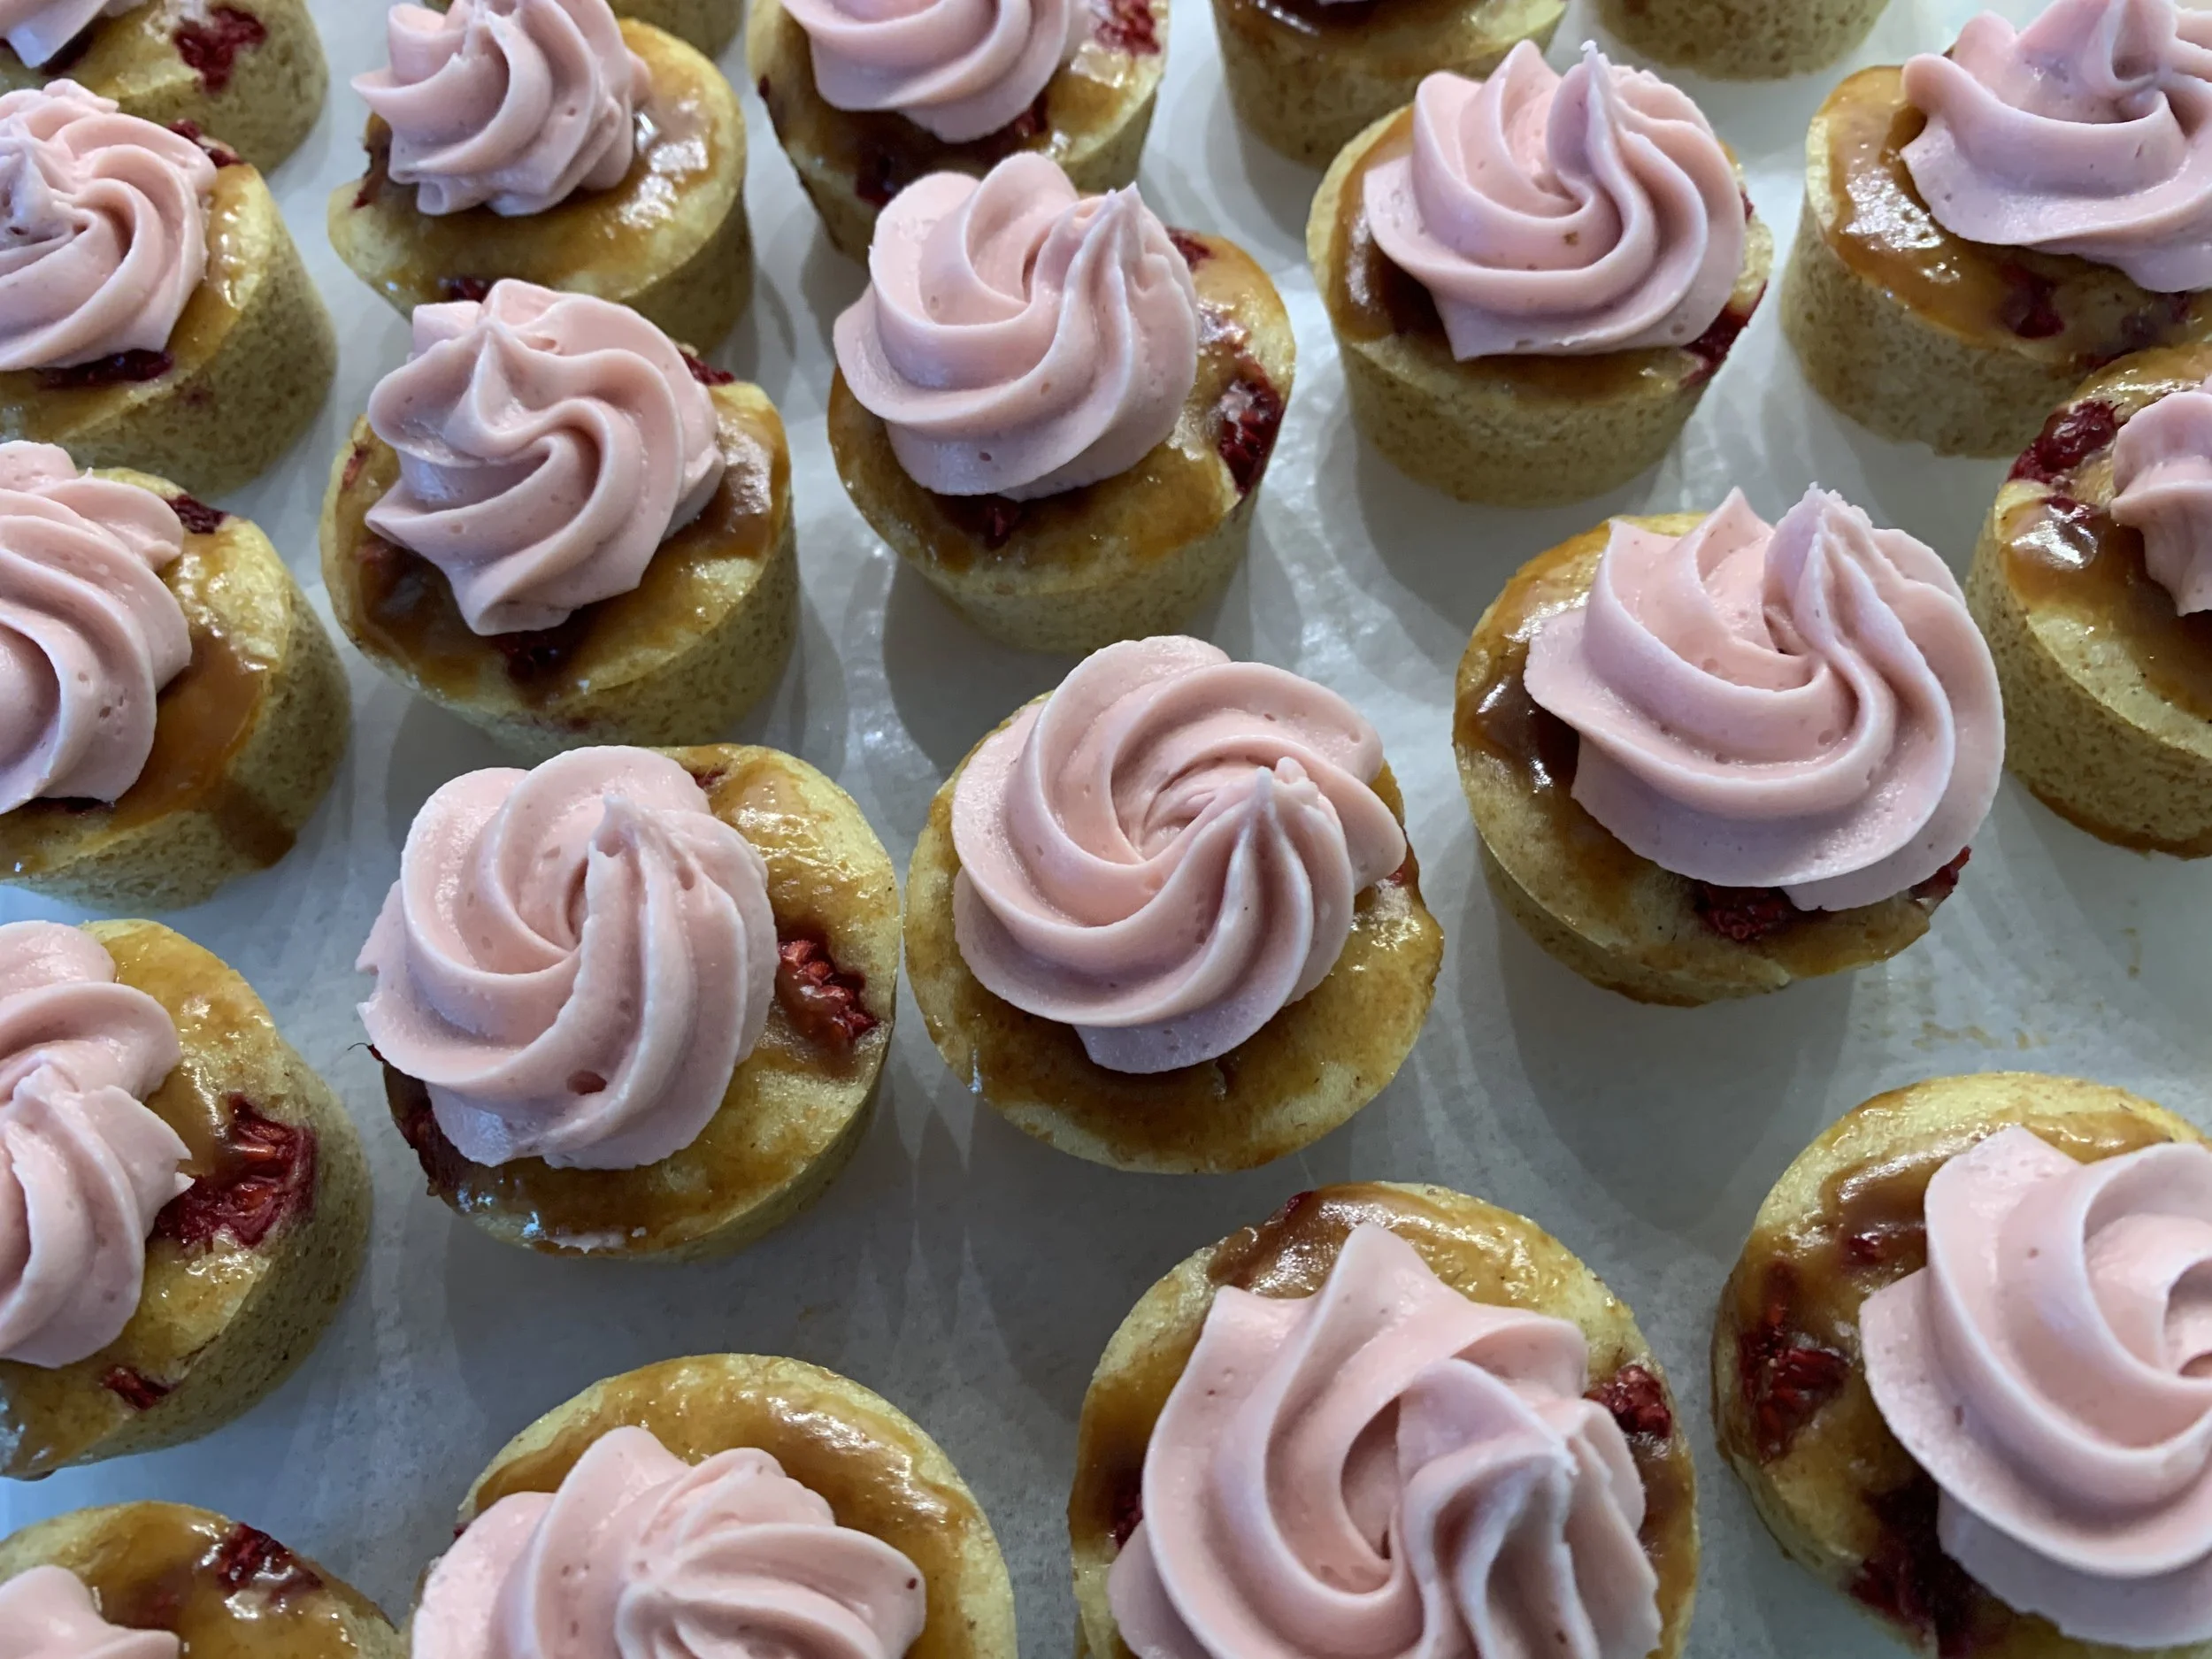
When you’re ready, thaw and garnish as you wish. Here I drizzled them with caramel then gave them a nice cap of raspberry/tart cherry Swiss meringue buttercream. You could even sprinkle on some chopped pistachios.


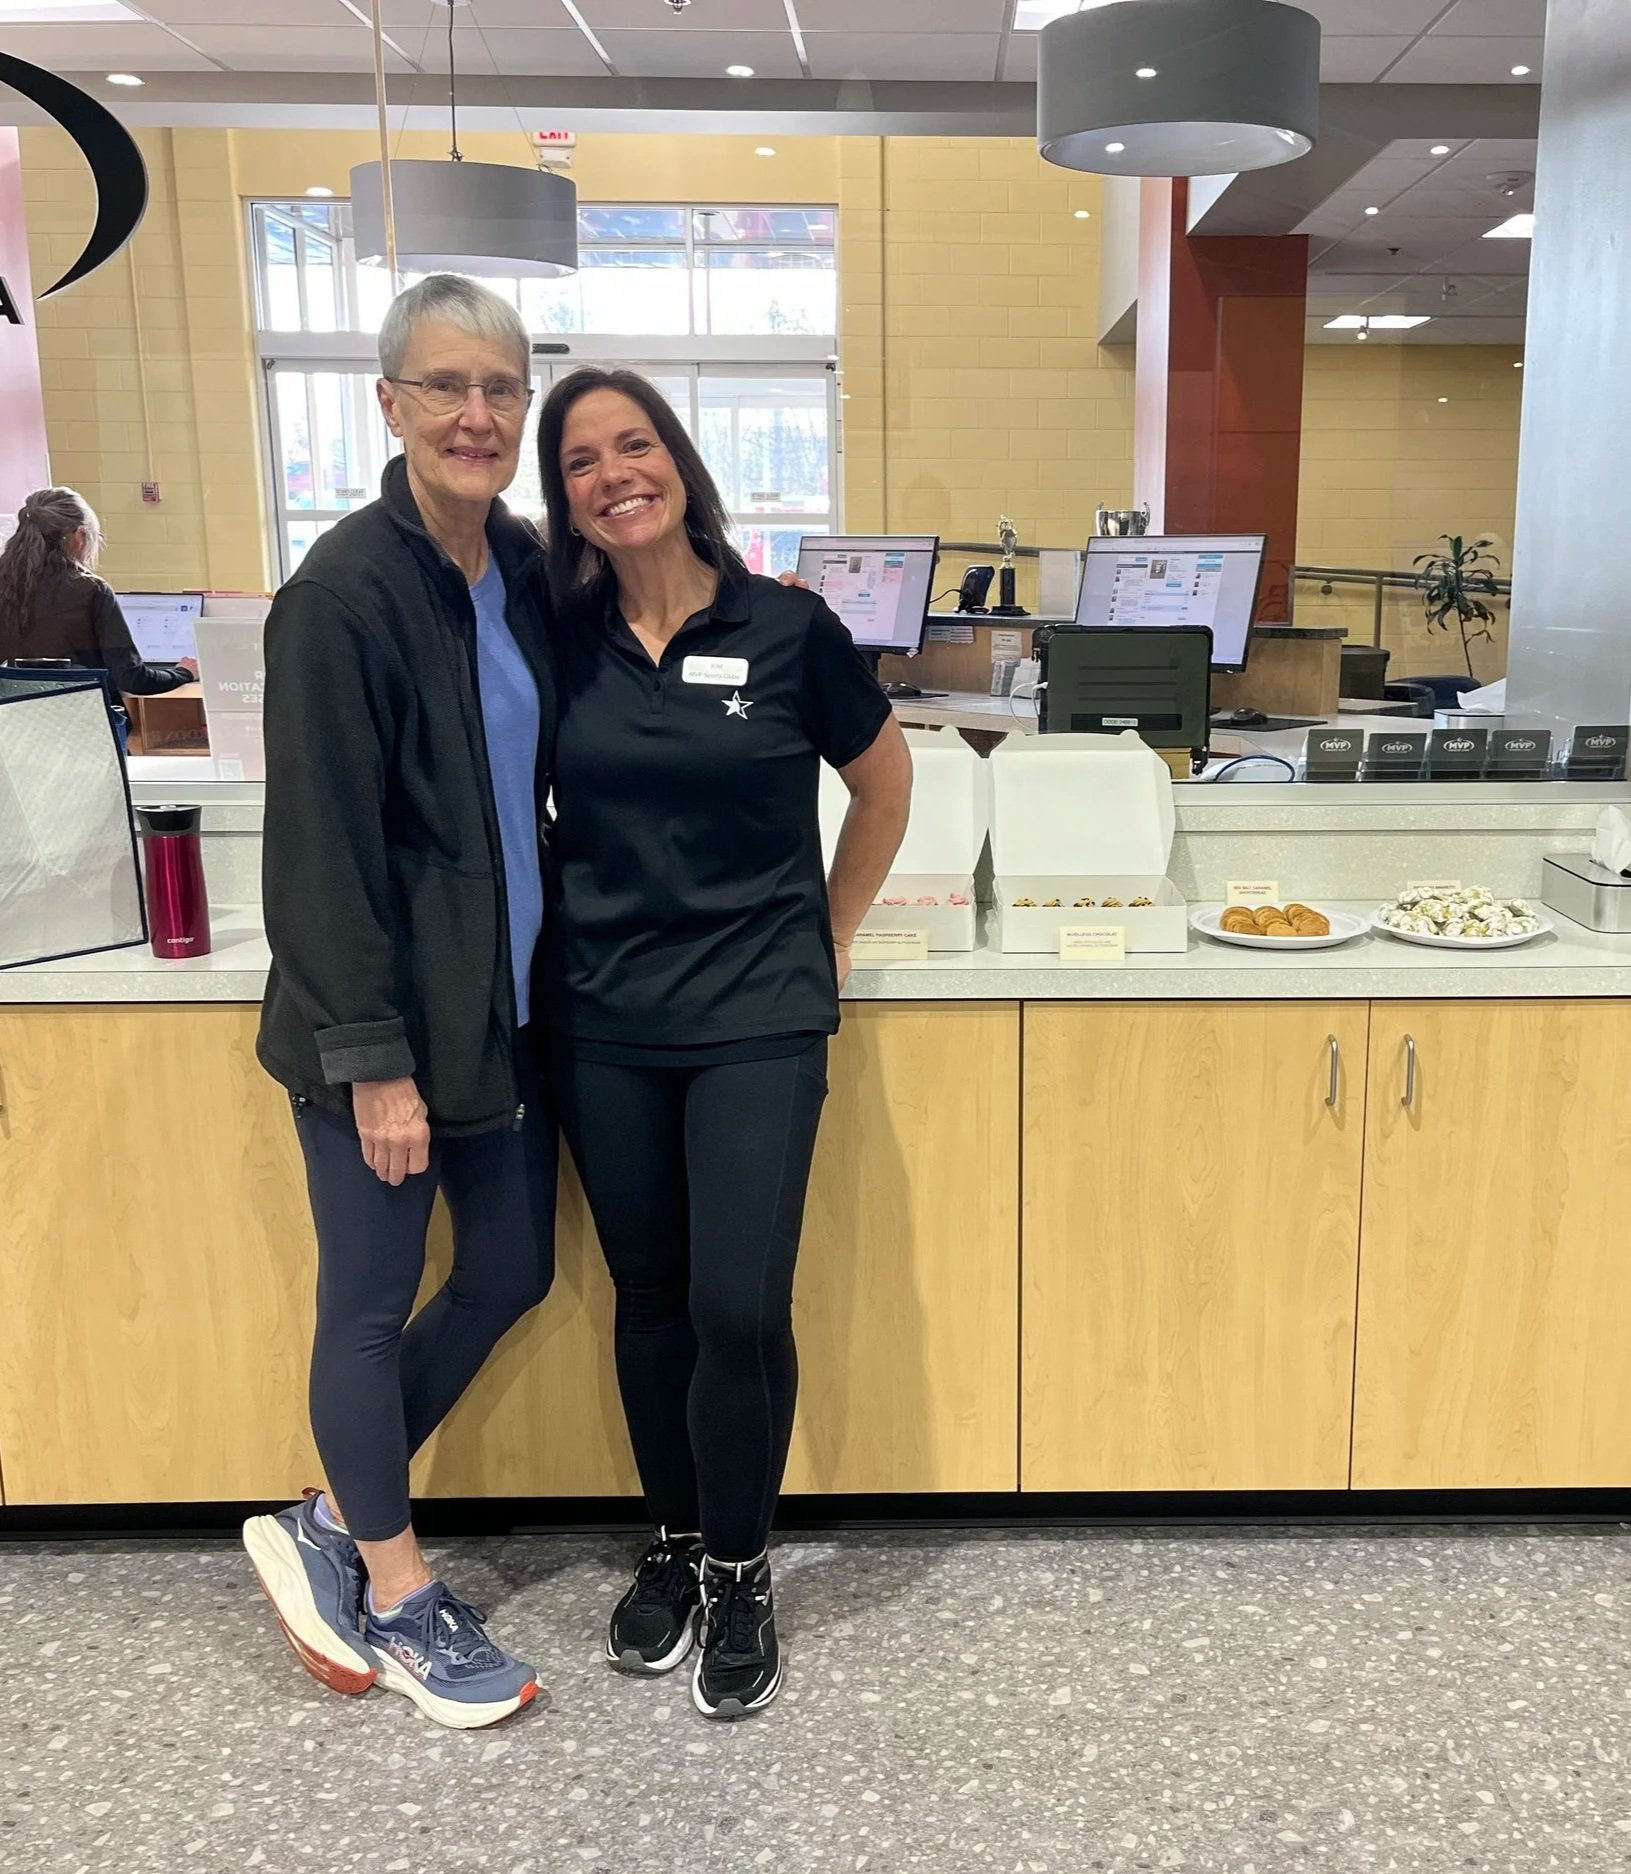
I served these at our exercise facility as a treat for friend Kim’s last day working there. We miss her!


Until next time! Ciao.

French apple cake

I mentioned this cake in passing ONE YEAR ago (!) in one of my update posts. I had baked the first test batch back in autumn of 2023 in preparation for a demo session I did at an assisted living facility - it was a big hit. I’ve made it several times since and added it to my to-do list for the blog. Well here goes! Plus, you’ll have time to make it for your own New Year’s celebration!

Inspired by a recipe in Aleksandra Crapanzano’s book “Gateau”, I did some quick research and found a number of recipes for this rum scented classic French cake. While AC’s ups the ante a bit with adding rum soaked raisins to the batter along with the apples, the bulk of recipes on line follow a simpler approach.

When I did my stages in 2007 at Pâtisserie Pascal Pinaud in Paris’s 5th arr., Golden Delicious apples were the go to for apple tartelettes and apple cakes. They have a lovely flavor and hold up well when baked without getting all mushy. I still like using them but also find Fuji, Granny Smith and Jonagolds great for baking. Of course, one can play around with a mixture of favorites too!

I’ve made the base recipe in a 9” cake pan, two 6” cake pans and silicone muffin type molds (using molds with 3 ounce/85 g wells yields about 14 cakes). Silicone molds don’t require buttering but the pans should be buttered and lined with parchment - I like to butter the parchment and inner sides of the pan and dust with raw sugar. It gives the outer edges a nice hint of crunch. Below is a nine inch pan ready to go.

I add a couple of my favorite spices (coriander and nutmeg) to the batter and dot the top with diced butter and raw sugar sprinkle early in the bake.

Here’s my recipe. Eggs and butter should be at room temperature. In the foreground of the photo below is organic golden cane sugar, a Costco find that I’ve been using as my “house” sugar for awhile now. On the right are my diced butter and raw sugar for the top.

mise en place

I probably sound like a broken record, but the process here is very much like many cake recipes out there. Here’s the recipe again.

Prep your pan. Heat the oven to 350ºF.

Peel, core and cut apples into 1/2” cubes.

In a separate medium bowl, whisk together 130 g / 1 cup all purpose flour, 1 teaspoon baking powder, 1/2 teaspoon ground coriander, a few grates of fresh nutmeg and 1/4 teaspoon kosher salt.

In the bowl of a stand mixer with paddle attachment cream 113 g / 4 ounces unsalted butter and 130 g / 2/3 cup cane sugar on medium high about three minutes until light and fluffy.

Blend in the eggs, one at a time, scraping the bowl down after each addition. Blend in 1 teaspoon vanilla extract and 45 ml / 3 tablespoons dark rum.

Add dry ingredients and mix until just combined. Fold in apples.

Ready to pan up!

Transfer batter into your prepared pan and level the top. Lots of apple chunks goin’ on!


Bake for 10 minutes then remove from the oven and top with diced butter and raw sugar.


Place back into the oven and bake another 30 minutes, checking half way through and rotating the pan 180º. Look for a golden top and a tester coming out clean.

Looks good (and smells good too!)

Let the cake cool in the pan 10-15 minutes before gently turning out onto a cooling grid. If you’re using a springform pan or a removable bottom cake pan like the one above, it’s very easy to release the cake. You can then let it fully cool resting on the pan bottom. Then, once cooled, carefully slide an offset spatula under the cake to separate it from the parchment and place on your desired platter for serving.

I made this for a Thanksgiving family gathering so for transport (and to give it a hint of decor) I set it on a doily topped cardboard cake round and stashed it in a covered cake carrier for the road trip. Simple.


To snazz it up a bit I went with my favorite whipped mascarpone topping, dolloped on and spread into swirls. Whip 56 g / 2 ounces mascarpone with 4 ounces / 1/2 cup heavy cream, a teaspoon of vanilla and 2 tablespoons (or to taste) of either confectioners sugar or caramel (my preference here - so good with apple desserts).


A sprinkle of oat crumble sets it off.

Hmmmm . . . good!

As mentioned earlier, I’ve also made these in silicone muffin style molds. I’m a big fan of the mascarpone/oat crumble garnish!

The recipe also works well in two 6” cake pans. If you’re serving just a few people, you can freeze one of them for later. Not a bad deal.

You still have time to make this for your New Year’s Eve or New Year’s Day gathering so get into that kitchen of yours and go for it!

Here’s to new adventures in baking and in life for 2025!

Lemon lime toasted coconut tartelettes

Spring’s celebrations always bring out a wave of lemon, lime and coconut themed recipes, and I’m certainly one who hops on the band wagon tout de suite. I made these for Easter as well as for a spring pastry event right down the road - a big hit.

After our return from a late spring trip to New England and Nova Scotia, I was determined to write at least a bit about these, since, even with summer upon us, there’s always room for citrus.

So delicious!! Plan ahead friendly! Tart lemon lime filling baked in an already blind baked pâte brisée shell then garnished with whipped lemon mascarpone cream and toasted coconut. Yum. Yum. Yum.

I know I go on (and on and on) about the classic bases of pastry and these babies fit the bill big time. Using three of the top components on my A list, the result is a match made in heaven. I like to think of tart preparation as a build-your-own process in which you can change up your chosen dough, filling and garnishes to suit your tastes and occasion.

If you already have pâte brisée in your freezer, you’re one step ahead. If not, make the dough and chill it a few hours or overnight before rolling it out, lining your chosen rings/molds then blind baking the shells. TIP: wrap and freeze the dough up to a couple of months for even more plan ahead fun.

Check out this post for so much more on pâte brisée.

example of rings lined for blind baking

The lemon-lime curd is a favorite based on Yotam Ottolenghi’s recipe in “Sweet”, a book I highly recommend. It can be made several days ahead and holds well in the fridge - another win-win for planning. If I have leftover curd, I’ll add it to whipped mascarpone as I’ve done here. It’s also great added to Swiss meringue buttercream, ice cream base during processing or blended into crème pâtissiére to fill choux puffs.

If you prefer, you can make the filling while the shells are baking. I then typically fill the blind baked shells immediately with the warm curd then pop them into a 325ºF oven for about 10-15 minutes to set with a hint of a jiggle left. Cool at room temperature about 30 minutes then chill completely before adding your chosen garnish.

Some may wonder why I bake the filling since it’s already cooked. While not absolutely necessary, I find it makes for a more luscious, creamy mouth experience by taking that extra step.

Option - chill the curd separately then fill the baked/cooled shells, garnish and enjoy .

In the image below the two tartelettes at bottom left and right are examples of the option just mentioned. You can appreciate a looser texture than the others that have been baked which have a certain sheen and appear more set.

Before the final garnish

Whichever way you do it, the final task is the garnish - whipped mascarpone cream which I prep just ahead of use. In this case I used half of the base recipe, adding lime zest and 3-4 tablespoons (or to taste) of lemon-lime curd to the cream as I whipped.

Decorate the tarts with your favorite swirl pattern and top with a bit of lime zest and toasted coconut. You’ll be so happy.

One more thing - Steve and I can attest to the staying power of these lovelies in the fridge for 4-5 days. Whoopee!!

Enjoy and have fun with it!

Tarte aux fraises fraîches et à la crème

930BCED4-2B0F-405C-A6C9-75B3166CC6C8.jpeg

It’s fresh strawberry season here in west Michigan! It doesn’t last long so we have to enjoy it while we can and what better way than nesting these succulent gems atop a whipped lime mascarpone cream in a flaky, buttery puff pastry base. Now that’s summer!

DAC727EA-C736-4E3B-B19E-130F0CEF2F16.jpeg

This is yet another great example of putting together a couple of favorite base recipes to create a delectable dessert. In this case I made a batch of rough puff pastry using 1/2 spelt and 1/2 ap flour. You can make the dough ahead and keep it frozen, well wrapped, for at least a couple of months. Thaw it in the fridge overnight the day before you want to use it.

It’s best to work with the dough cool so if your kitchen is pretty warm as can happen during these summery days, don’t be shy about popping it back into the fridge or freezer for a few minutes to keep it chill during any rolling session.

Using about 275 g of finished dough, roll it out to an approximately 11” inch square or as close to a circle as you can. Using a 9” tart form as a guide, trim the dough to a 10” circle; fold the edges under about an inch to form a lip, flute them if you’d like, brush it all with cream and sprinkle with vanilla sugar. Give it a good fork pricking, then into the freezer it goes for a least 30 minutes (while your oven is heating). Cold dough into a hot oven makes for good puffing. You can also roll and shape the dough ahead and hold it frozen for a day or two before baking (bake right out of the freezer - no thawing needed).

Remember when rolling out the dough, give it a rest for a few minutes a couple of times along the way before you finish to your desired size. It gives the dough a chance to relax (something we all need now and then) and will hold its shape better during baking. Give it a final rest before cutting - if you’re in a hurry, your dough may shrink back and loose it’s lovely shape.

799756C9-829E-41CF-A1E5-DABA6E0BB8FC_1_201_a.jpeg

For this tarte the crust is fully baked before adding the mascarpone cream and strawberries. I heat the oven to 425ºF to give my freezer stashed puff a nice hit of heat to start the puffing process. I place overturned wire grids across the sheet pan to give the puff an even rise and bake for 10 minutes before turning down the temp to 400ºF.

37C49C85-6778-4357-8C51-4D08D8FBD760.jpeg

After another 5-8 minutes I remove the wire grids, decrease the temp to 375ºF and continue baking until nicely golden brown, another 5 minutes or so. Don’t be afraid to tweak your oven temps as you watch what’s happening in there. You be the judge.

All baked up

All baked up

Once cooled, I take a sharp knife and develop a border to delineate where my filling will go, gently pushing the puff down in the center (not too much!).

3BA7813E-F54E-468B-AA30-34690F9592CA.jpeg

Make the mascarpone filling and either pipe it or spread it over the crust, leaving the border free. For this size tarte a half recipe is just right. I used caramel as my sweetener, added the zest of a lime and a dollop of roasted strawberry purée to give it that special something.

A7D7EF68-9BA1-43B6-8B95-14C6677F9239_1_201_a.jpeg

The big challenge is how to arrange the fresh strawberries. While my heart tells me to be devil-may-care about it, my orderly personality makes me reluctant to throw caution to the wind. I made several of these for Father’s Day gatherings and created three different versions just because.

The first one, at least around the edges, reminds me of the humps along a cartoon dinosaur’s back . . . . . or a multi-pointed star.

One

One

The second is the most jumbled of the three - I sliced whole strawberries and while keeping the slices together tucked the berries rather higgle-dy/piggle-dy over the cream. Hmmmm . . . not sure about this one but there’s no going back now. Let’s remember it still tastes delicious!

Two

Two

The third is simple yet classy (Steve’s favorite).

Three

Three

I used some strawberry jam diluted with a bit of water and strained to give a light brushing over the berries for a bit of shine. It makes all the difference.

I had also assembled a small test tarte for us to sample, refrigerating it all day before tasting so as to assess how the puff would hold up. We finished it off the next morning after continued refrigeration over night, and I’m here to tell you that it handled it very well. Yay! I’m a stickler for serving things as freshly made as possible, but it’s always good to know when there’s some staying power to provide a bit of timing leeway.

At any rate, summer is officially here and I wish all of you a fantastic reopening full of good times ahead.

Smile!

67DC8FF0-B602-467F-B51E-9BE865996D5E.jpeg

Mid-July update

IMG_1149.jpg

Seeing Queen Anne’s lace in bloom is a sure sign of summer’s march into August and beyond. Still plenty of time for outdoor enjoyment, fresh air and sunny skies.

As we come to grips with the fact that (whoa!) it’s already mid-July, would any of us have foreseen all that’s happened in the past four months?! No sir.

Lately we’ve had quite a string of hot days, punctuated over this past weekend with pleasant days, cool nights and clear, low humidity skies. Baking is happening in waves, and now seems as good a time as any to share a few of the things I’ve been making in recent months.

Cinnamon oat crunch scones

Cinnamon oat crunch scones

A number of projects were done with an eye toward becoming blog posts and are currently in their draft phases. I’m working on them bit by bit, often side tracked by various other at-home activities that seem to take precedence. Time has taken on a much different sense, don’t you think?

Some of these goodies go into the freezer for future enjoyment, some are shared with neighbors and family and some go into the occasional pastry order that pops up every now and then.

Chocolate hazelnut swirl brioche loaf

Chocolate hazelnut swirl brioche loaf

Gateau renversé aux cerises (cherry upside down cake)

Gateau renversé aux cerises (cherry upside down cake)

Mixed berry mascarpone trifle

Mixed berry mascarpone trifle

Swedish cardamom buns

Swedish cardamom buns

Baguette

Baguette

Croissant

Croissant

Stay tuned! Baguette! Brioche! Swedish buns! Yippee!!

Meanwhile enjoy summer, be kind and helpful. It works.

Cherry almond cornmeal cake and pecan toffee shortbread stars

OK. I admit I've been on a cherry kick lately, but we're in Michigan, it's summer and there are lots of fruits to be had. Yum.

Enough said perhaps? Probably not, cuz we're in blueberry heaven right now along with currants, raspberries and blackberries. And we still have peaches, plums, apricots and more coming!


Before July comes to a close I wanted to share the goodies I had made for our July 4th celebration out at Clear Bottom Lake, one of our regular family gathering spots. Better late than never, right?.

With cherries on the brain I opted for my own cherry almond cornmeal cake topped with cherry mascarpone cream. And why not!

As if that weren't enough, I was in the mood for delectable all butter shortbread cookies, thinking stars would be just right for the classic American holiday. Sandwiched with orange honey buttercream? Absolutely!


First the cake. 


A straight forward preparation very reminiscent of many cake recipes one can find out there in the baking world, this one includes almond flour and cornmeal with the all purpose flour so there's a nice hint of crunch going on. Plus there's some buttermilk to add just the right tang. And of course some chopped sweet cherries are folded into the batter.

I baked the cake in individual silicone molds and decided to dress these babies up with cherry mascarpone cream and caramelized almond crunchies.

I puréed some cherries . . . .


and folded the purée into a half and half mix of mascarpone whipped with heavy cream. A bit of added powdered sugar and vanilla gives it just the right light sweetness.


Pipe a nice swirl of cream on the cake and voila!


I made some almond nougatine by cooking 3/4 cup sugar with 2 tablespoons of water to an amber caramel, then stirring in 3 ounces of toasted almonds and spreading the mix out on a Silpat to cool.  Then grind it all up and you have a delicious crunchy addition to almost any dessert you can imagine.

It makes plenty for this purpose, but leftovers can be frozen in a zip top bag for other uses.


Now the cookies.


These shortbread came about as a result of my receipt of some leftover pecan toffee crumbs from Patty, the owner and chocolatier of Patricia's Chocolate in Grand Haven MI.

I used a similar base recipe to my standard shortbread, adding in a hint of cinnamon as well as the pecan toffee crumbs. Boy oh boy these are good! 

I wanted to gussy them up and happened to have some orange honey buttercream in my freezer. And thus it was that a stunning combination was born.


Delicious.

Now for the recipes.

Cherry almond cornmeal cake with cherry mascarpone cream and almond crunchies.

Cake:
  • Heat oven to 350º. Butter a 9" springform pan or use individual silicone molds of choice.
  • Stem and pit 3/4 pound of sweet cherries then cut into quarters. Set aside.
  • Melt 113 g (one stick) unsalted butter, let cool a bit then in a medium bowl whisk together with 1/2 cup buttermilk, 2 large eggs and 1/4 teaspoon almond extract.
  • In a separate bowl whisk together 130 g all purpose flour, 32 g almond flour, 70 g cornmeal, 2 teaspoons baking powder, 1/4 teaspoon baking soda and 1/2 teaspoon salt and 1/2 teaspoon ground coriander.
  • Blend the wet ingredients into the dry. Fold in the cherries.
  • Transfer batter to prepared pan or pipe into silicone molds.
  • Bake until a toothpick inserted in the center comes out clean, 45-55 minutes. NOTE: if using small silicone molds baking time will be decreased. 
  • Let cool.

Mascarpone cream:
  • Blend 113 g/4 oz mascarpone with 120 ml/4 oz heavy whipping cream. 
  • Add 1-2 tablespoons powdered sugar and a splash of vanilla extract. 
  • Whip as you would whipped cream to achieve medium soft peaks. Don't over whip or it will become grainy. 
  • Blend in 90 g puréed cherries. 
  • Refrigerate until ready to use.

Almond crunch: 
  • Cook 3/4 cup sugar with 2 tablespoons water to an amber caramel. 
  • Stir in 3 ounces toasted almonds. 
  • Spread out on a Silpat to cool then grind in a food processor.

Pipe decorative swirls on cake tops. If serving later, refrigerate and remove from fridge 30 minutes before serving to allow cake to come to room temperature. Sprinkle with almond crunch and serve.


Pecan toffee shortbread cookies:
  • In a mixer bowl blend 212 g room temperature unsalted butter with 75 g granulated sugar.
  • In a separate bowl mix 260 g all purpose flour, 1/2 teaspoon cinnamon and a pinch of salt.
  • Add flour mixture to butter/sugar mixture and blend until it comes together.
  • Blend in 100 g pecan toffee crumbs (a gift from Patty so I don't know the exact recipe for these!) In a pinch you could substitute a mix of toasted, chopped pecans and some chopped Heath bar.
  • Wrap dough and chill at least an hour then roll out and cut shapes of choice.
  • Bake on parchment lined sheet pans at 325º for about 12-15 minutes (watch your oven!)
  • Let cool then fill with desired filling. You'll find many recipes on line for Swiss meringue butter creams - use your flavor imagination and create your own!!
Whew! That was a mouthful. Literally.

Both treats were enjoyed by the group at Clear Lake, especially the pecan toffee shortbread. Yes.

Happy VERY belated 4th everyone!!


Thanks for reading Baking with the French Tarte. See you next time around.