French Tarte Faves (FTF) No. 4: Tarte aux noix et au caramel

Wow! My last FAVES post was over four months ago!! Well here’s No. 4 in the line up - my caramel nut tarte.

I see these FAVES as a way of doing a deeper dive into some of my favorite bakes. Read/scroll through as you wish. This one includes the nitty gritty details of figuring out ingredient quantities for different sized tartes as well as changing up the nuts you might want to use for your own version. You can even opt for chocolate dough too!

Mind you, I haven’t made this particular FAVE for quite some time. The caramel nut tarte was a staple for me back in our Providence days, particularly in my shop where I sold individual sizes, made full sized versions for special orders/holiday times and even petite ones for yummy treat assortments.

As I searched through my posts and photos, I found this one from back in autumn 2022. I think that’s the last one I made! It’s all gussied up with crème Chantilly and sesame brittle and boy was it good.

An autumn wonder!

Of course I do realize it’s spring, a season when our baking (and eating) thoughts are more likely to turn to citrus and fruity, lighter fare rather than nuts and caramel. But, since Steve requested a caramel nut tarte for his April 25th birthday dessert, what could I do but comply.

On a side note, while in Lyon on our recent France trip, we passed a pastry shop where Steve spied a tarte écureuil in the window. Écureuil is French for squirrel - awww, how clever - a squirrel tart! Get it - nuts, squirrels - hah! When we went in to purchase a small one, Steve asked for a “tart squirrel” and the woman behind the counter laughed and understood right away. Even though the tart was shallower and more meagerly filled than the one I typically make (and not nearly as good I must say), the birthday dessert idea was launched.

Petite versions from my archives

The process is a good one for planning ahead. Three components make up this creation: dough, filling and a mix of lightly toasted nuts all of which can be prepared and stored separately until you’re ready to go. Here’s the recipe PDF including all the components in one document. I’ll go through the steps below.

Since I was making so many different sizes of this tarte back in the day, being little Miss detail, I created a list with the portions of each component I would need for each size plus the number of different sizes that one recipe of filling would fill. Yes, I know what you’re thinking . . . . .


Let’s review the components.

I typically use a favorite pâte sucrée d’amande for this tarte. I can make a batch (or 2 or 3) of dough ahead and refrigerate or freeze it. I can even go so far as to think about what sizes of tarte I might want to make, portion out the necessary dough and have it at the ready (as you’ll see in a bit).

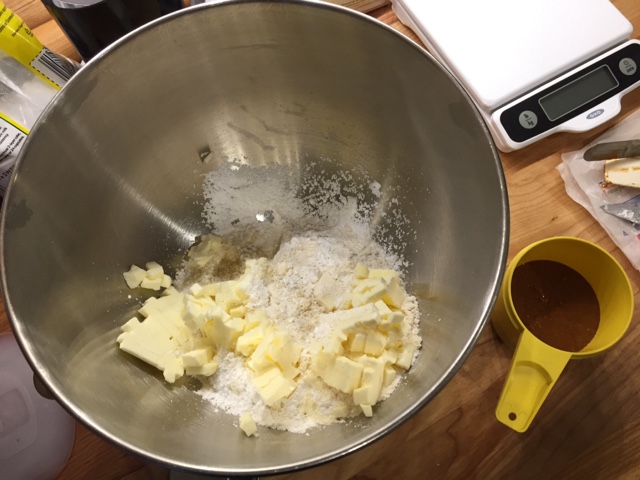
The dough is straight forward to make, either using a mixer or by hand. If I’m doing a single batch, I often just do it by hand using a medium mixing bowl. First cube up 137 g / 9.5 tablespoons cold unsalted butter and set aside as you prepare the other ingredients. You want the butter to remain cool so don’t dilly-dally. You can also do that part ahead, hold the cubed butter in the fridge then take it out 10-15 minutes or so before you want to mix everything.

Weigh out 227 g / 1 3/4 cups all purpose flour, 85 g / 3 ounces (a generous 3/4 cup) powdered sugar, 28 g / 1/4 cup almond flour and place them in the mixing bowl along with a scant 1/2 teaspoon fine salt.

Have one large egg and a teaspoon vanilla extract ready on the side.

Now work the butter into the mixture with your fingertips until you achieve medium fine crumbs. You can still see some butter pieces in the image below. NOTE: if opting to use a mixer, set it on low and let the paddle do the work. I find it takes maybe 4-5 minutes to get to the nice crumbled butter stage.


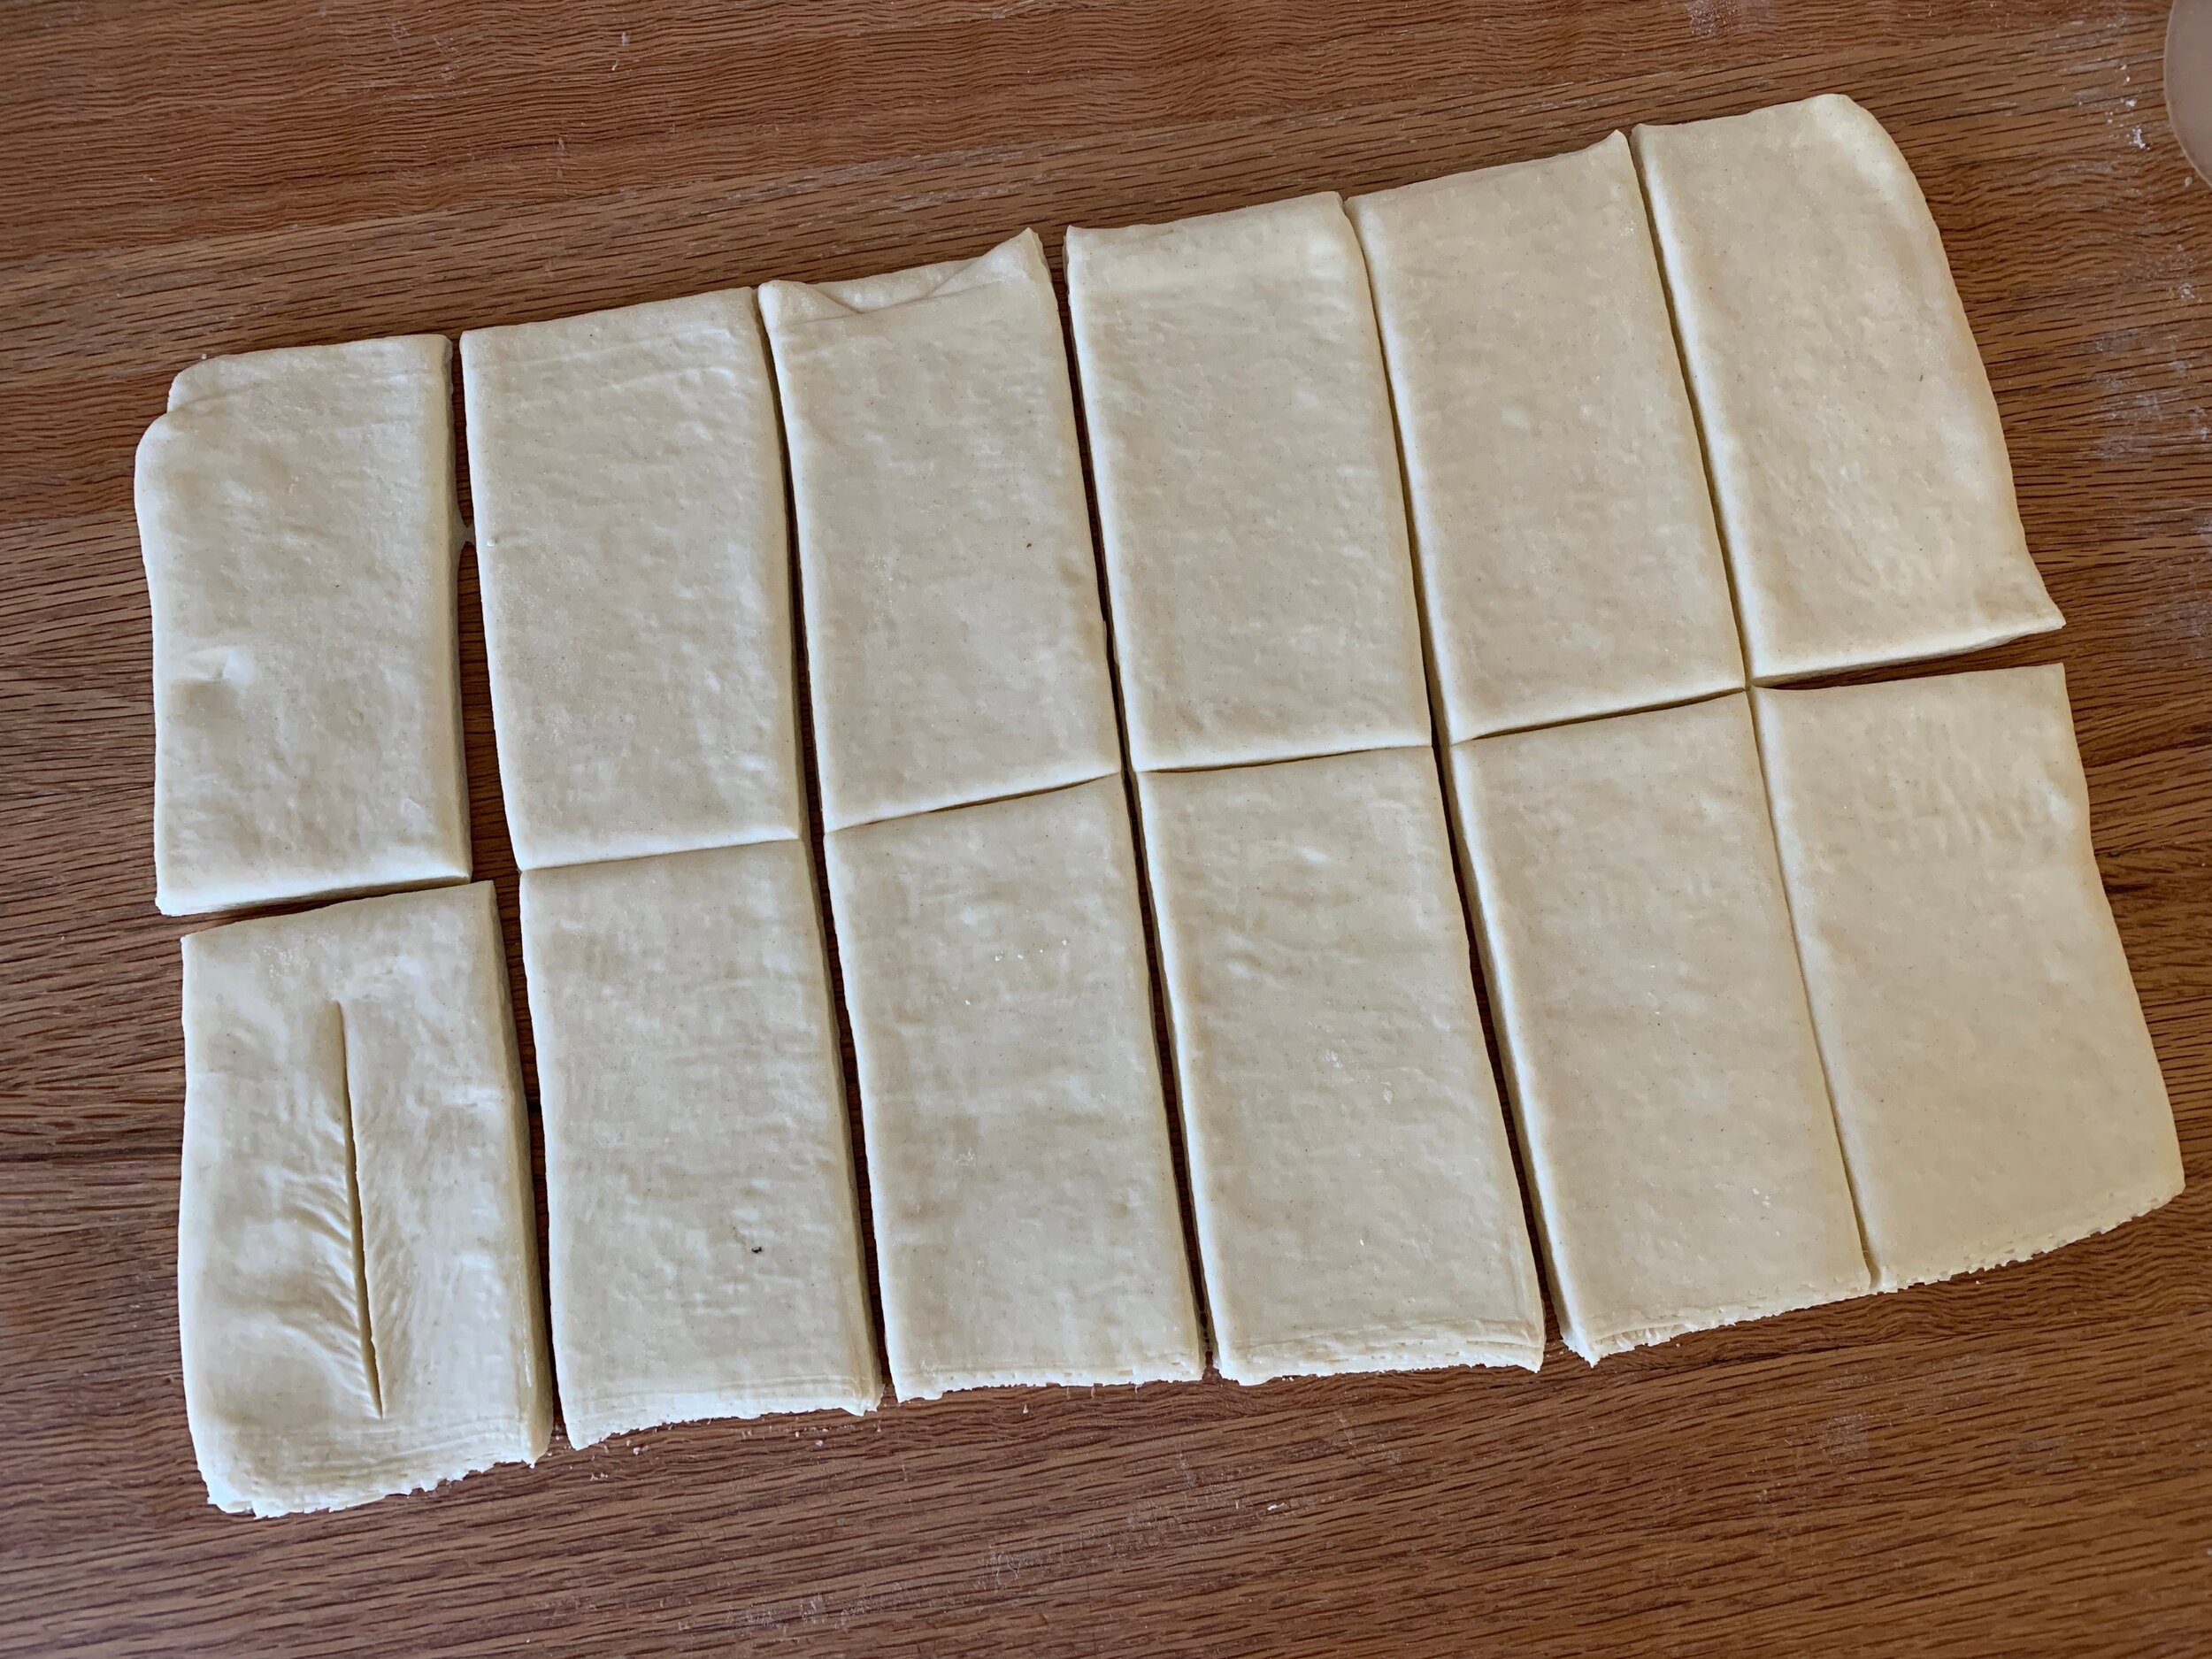
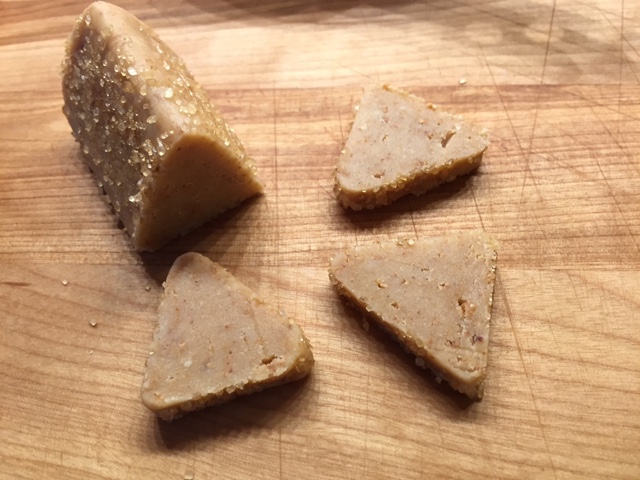
Add the egg and vanilla, toss it up with the fork to get the mix started. I then switch to my fingers and a bowl scraper to toss and smear the mixture until it comes together in the bowl. If you’re making one full size tarte, divide the dough in two and wrap one half to freeze for later. Chill the other half for a good couple of hours or overnight.

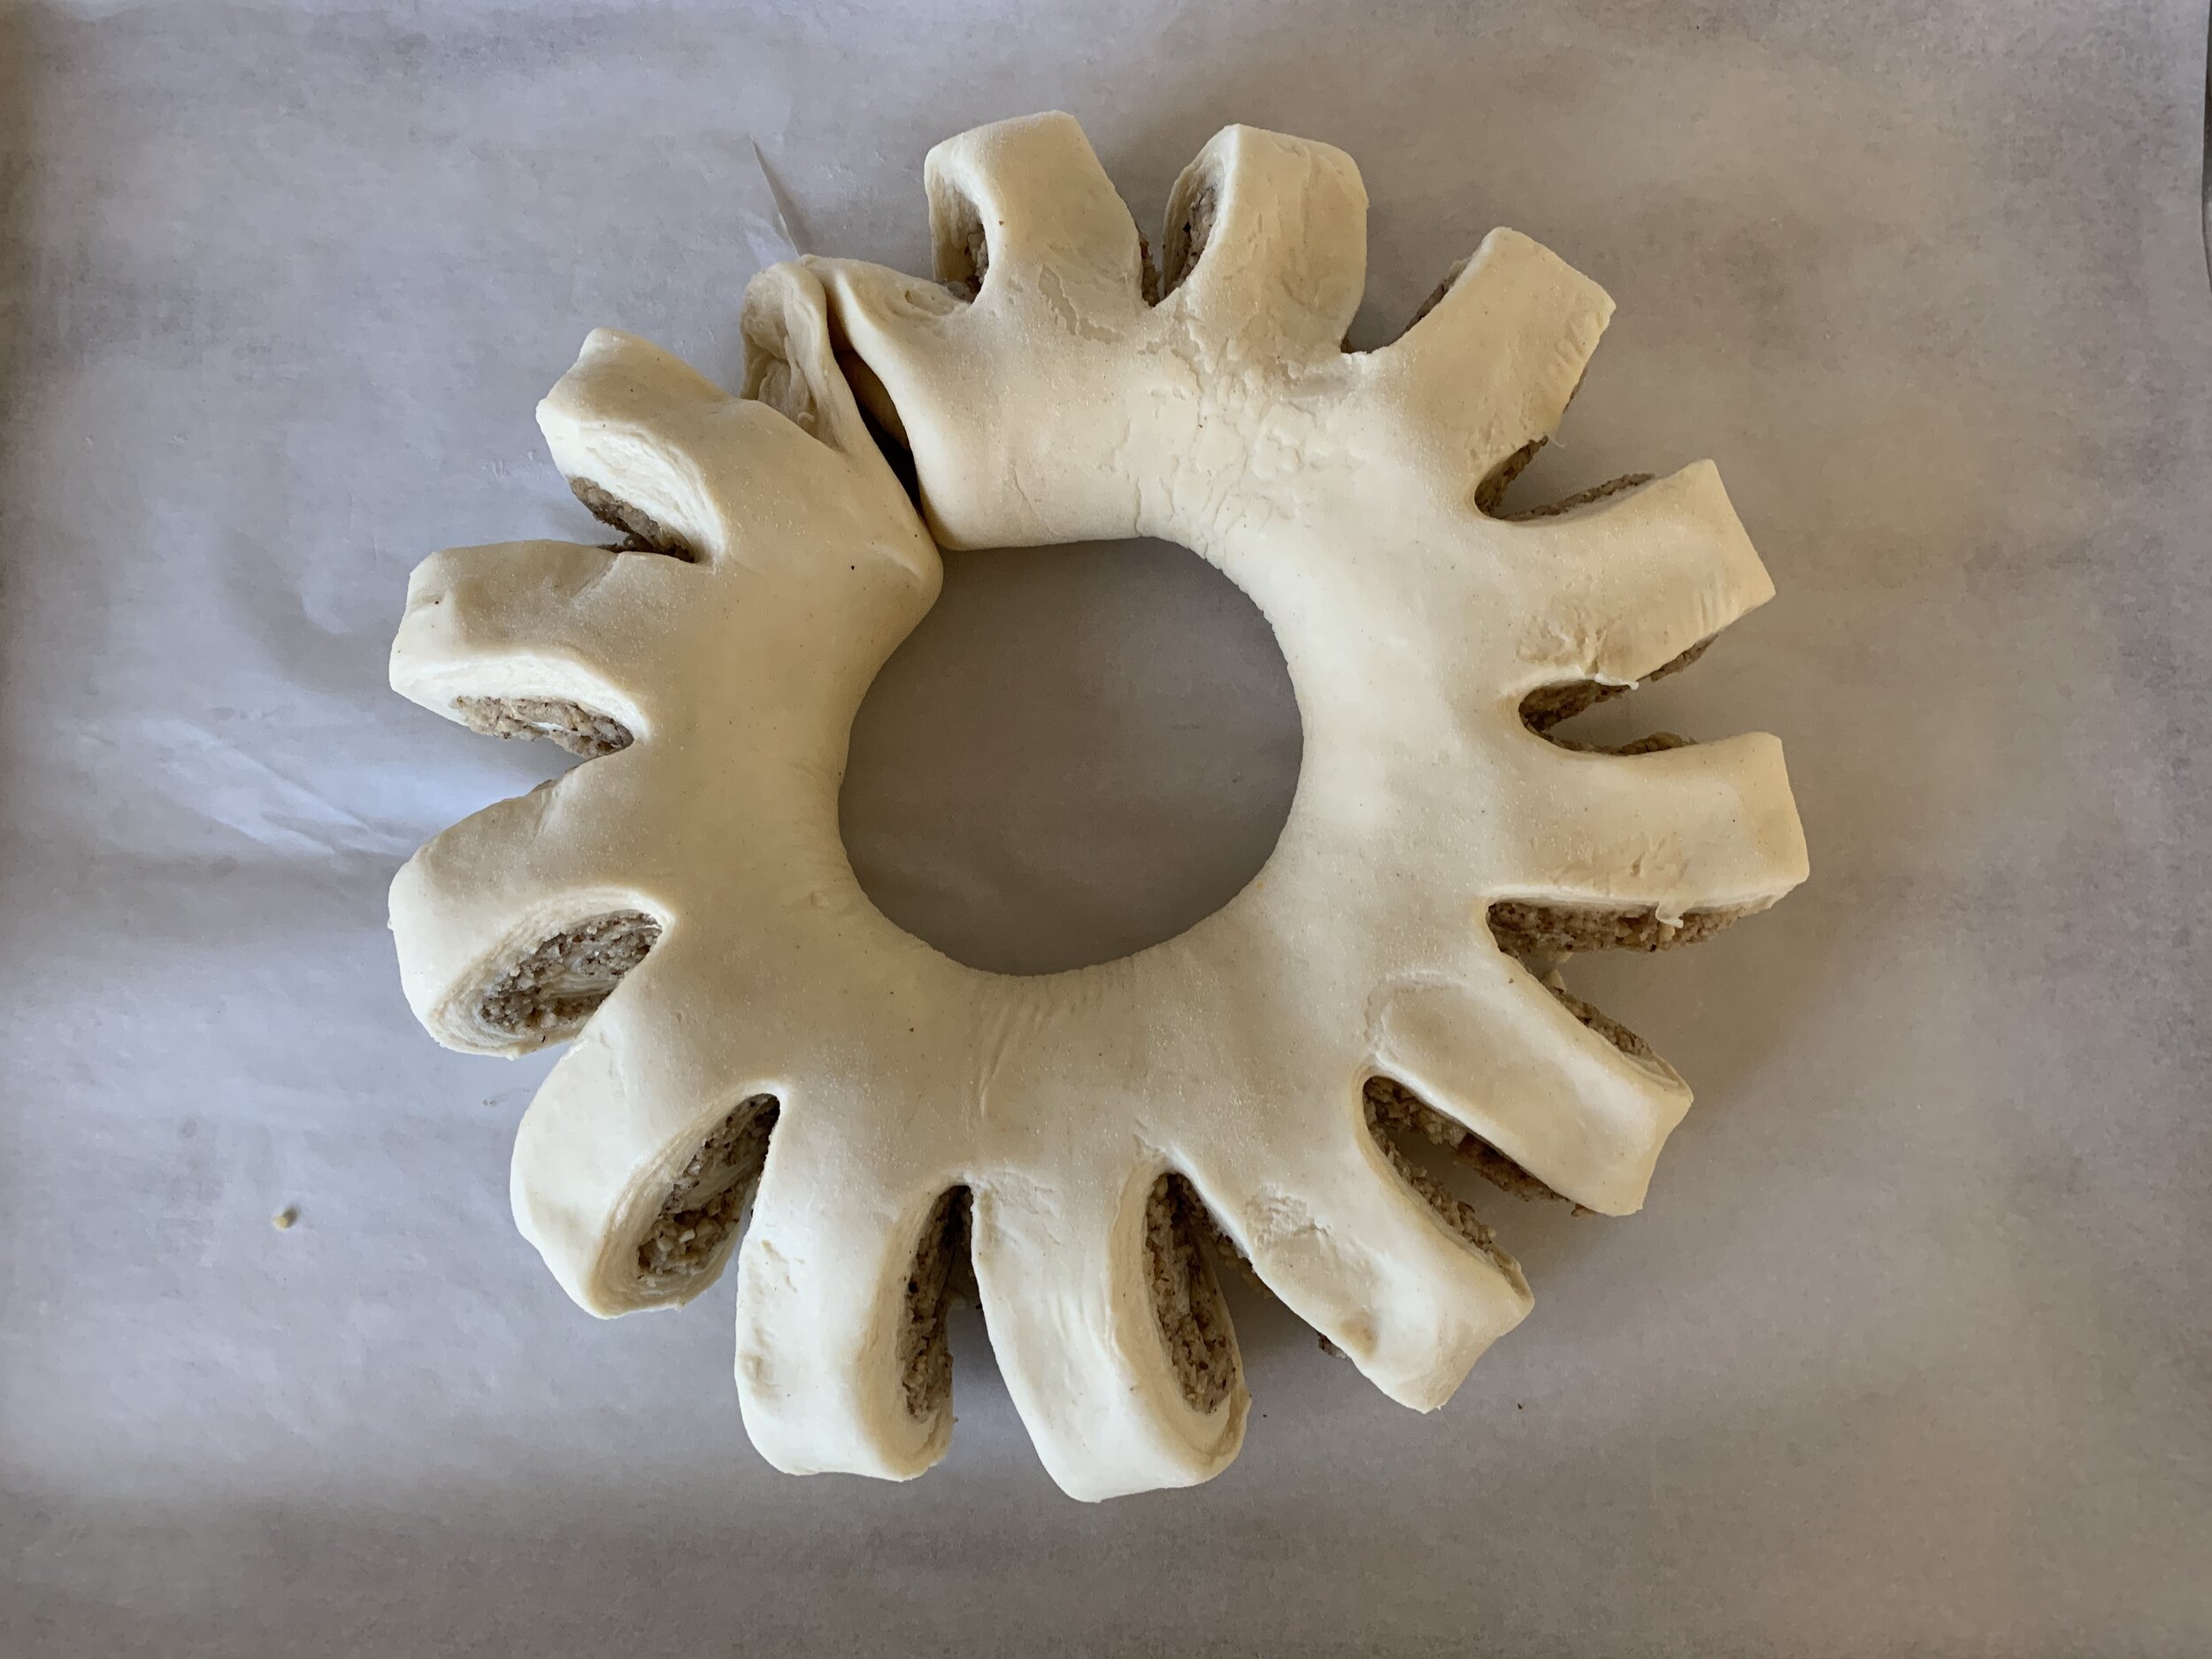
I planned a small version for the birthday dessert - on the right below is a 140 mm (~5.5”) ring and the 110 g of dough needed to line it. The other two I’ll freeze for the next round.


Remember - full recipe here!

The day you wish to proceed, make the caramel/butterscotch filling. NOTE: you can make this a couple of days ahead, keep it refrigerated then gently warm it for use.

Mise for caramel filling

Place 140 g / 10 tablespoons unsalted butter, 200 g / 1 cup dark brown sugar, 110 g / 1/3 cup honey and 50 g / 1/4 cup granulated cane sugar in a medium saucepan. Melt on low then increase the heat, bring to a boil and simmer a couple of minutes.

Bubble bubble toil and trouble!

Take the pan off the heat and blend in one tablespoon vanilla and 45 ml / 3 tablespoons heavy cream. Careful - it’s hot! Transfer to a stainless bowl and set aside until you’re ready to assemble/bake.

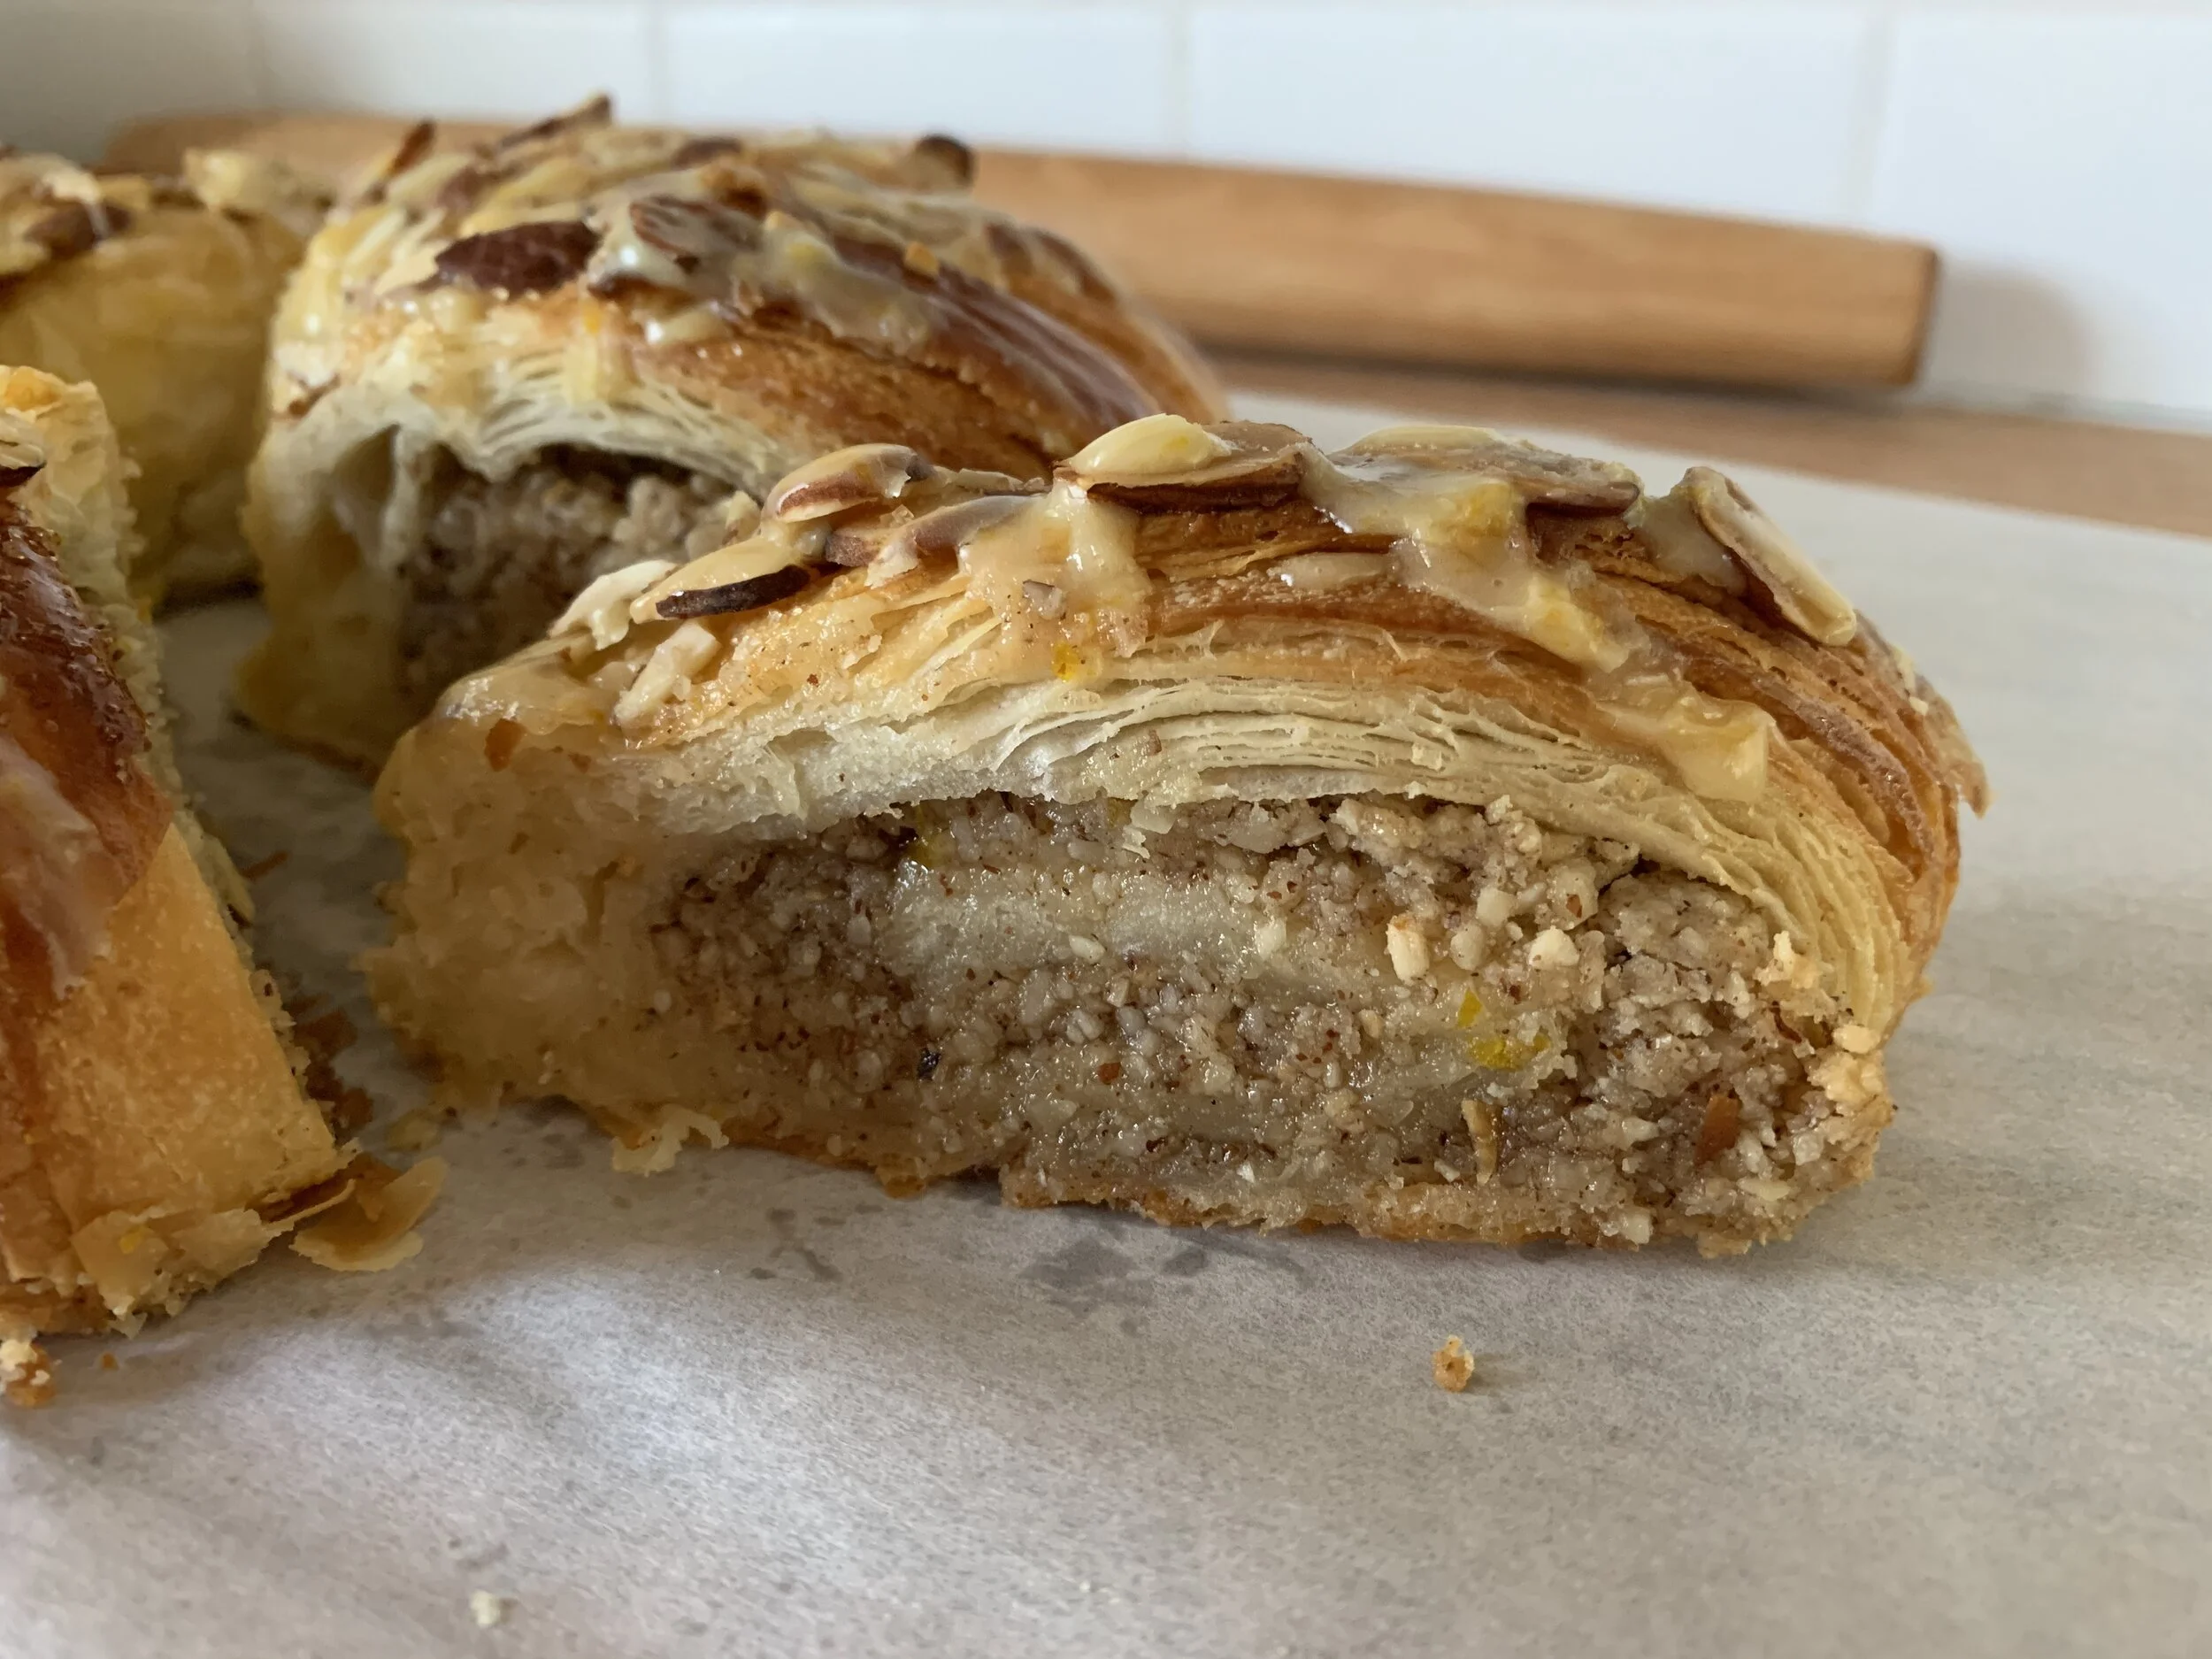
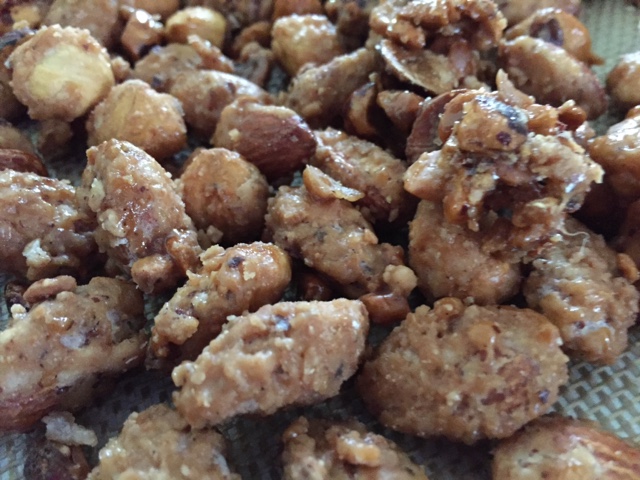
For the nuts, choose your favorites. I like a 5-nut mixture but you can use only pecans for example or create your own mixtures. For a full size 9” tarte I use about 4 cups of nuts. A cup of nuts generally weighs anywhere from 4 - 5 ounces depending on their size, but don’t get hung up on weights here - precision isn’t that important. Simple measures will do the trick.

Here’s my usual mixture: 1.5 cups / ~210 g whole natural almonds; 1.5 cups / ~170 g walnut halves and pieces; 1/2 cup / ~66 g hazelnuts, 1/4 cup / ~32 g pecans, 1/4 cup / ~32 g pistachios. Depending on the size of the tarte you’re making, you might coarsely chop the nuts for smaller sized tartes so they tuck into the space better.

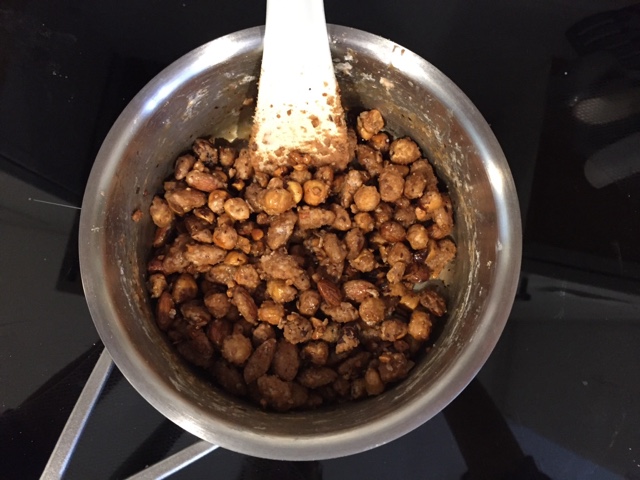
A bit more about nuts: I generally use raw nuts and lightly toast them before use to bring out their flavor. Since some nuts tend to burn faster than others, I toast almonds and walnuts at 325º - 350ºF about 10 minutes then decrease to 300º - 325ºF for pecans, hazelnuts and pistachios for 8-10 minutes. Back during my Rhode Island shop days, I would toast up a whole bunch of nuts and keep them in a covered container, using them as needed over time. Once nuts are toasted, their shelf life is longer than when raw. If I’ve opened bags of raw nuts and haven’t toasted them, I then freeze them until I need them for their intended purpose. I hope that makes sense!


Lately I’ve been purchasing almonds, walnuts and pecans at Costco for a very good price. I tend to use less of hazelnuts and pistachios so I buy smaller bags of those at Trader Joe’s. If TJ’s doesn’t have raw nuts in stock, on occasion I buy their unsalted, dry roasted versions. Just sayin’.

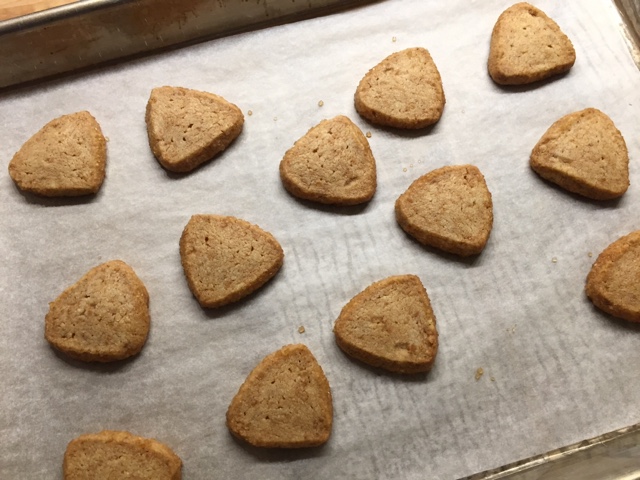
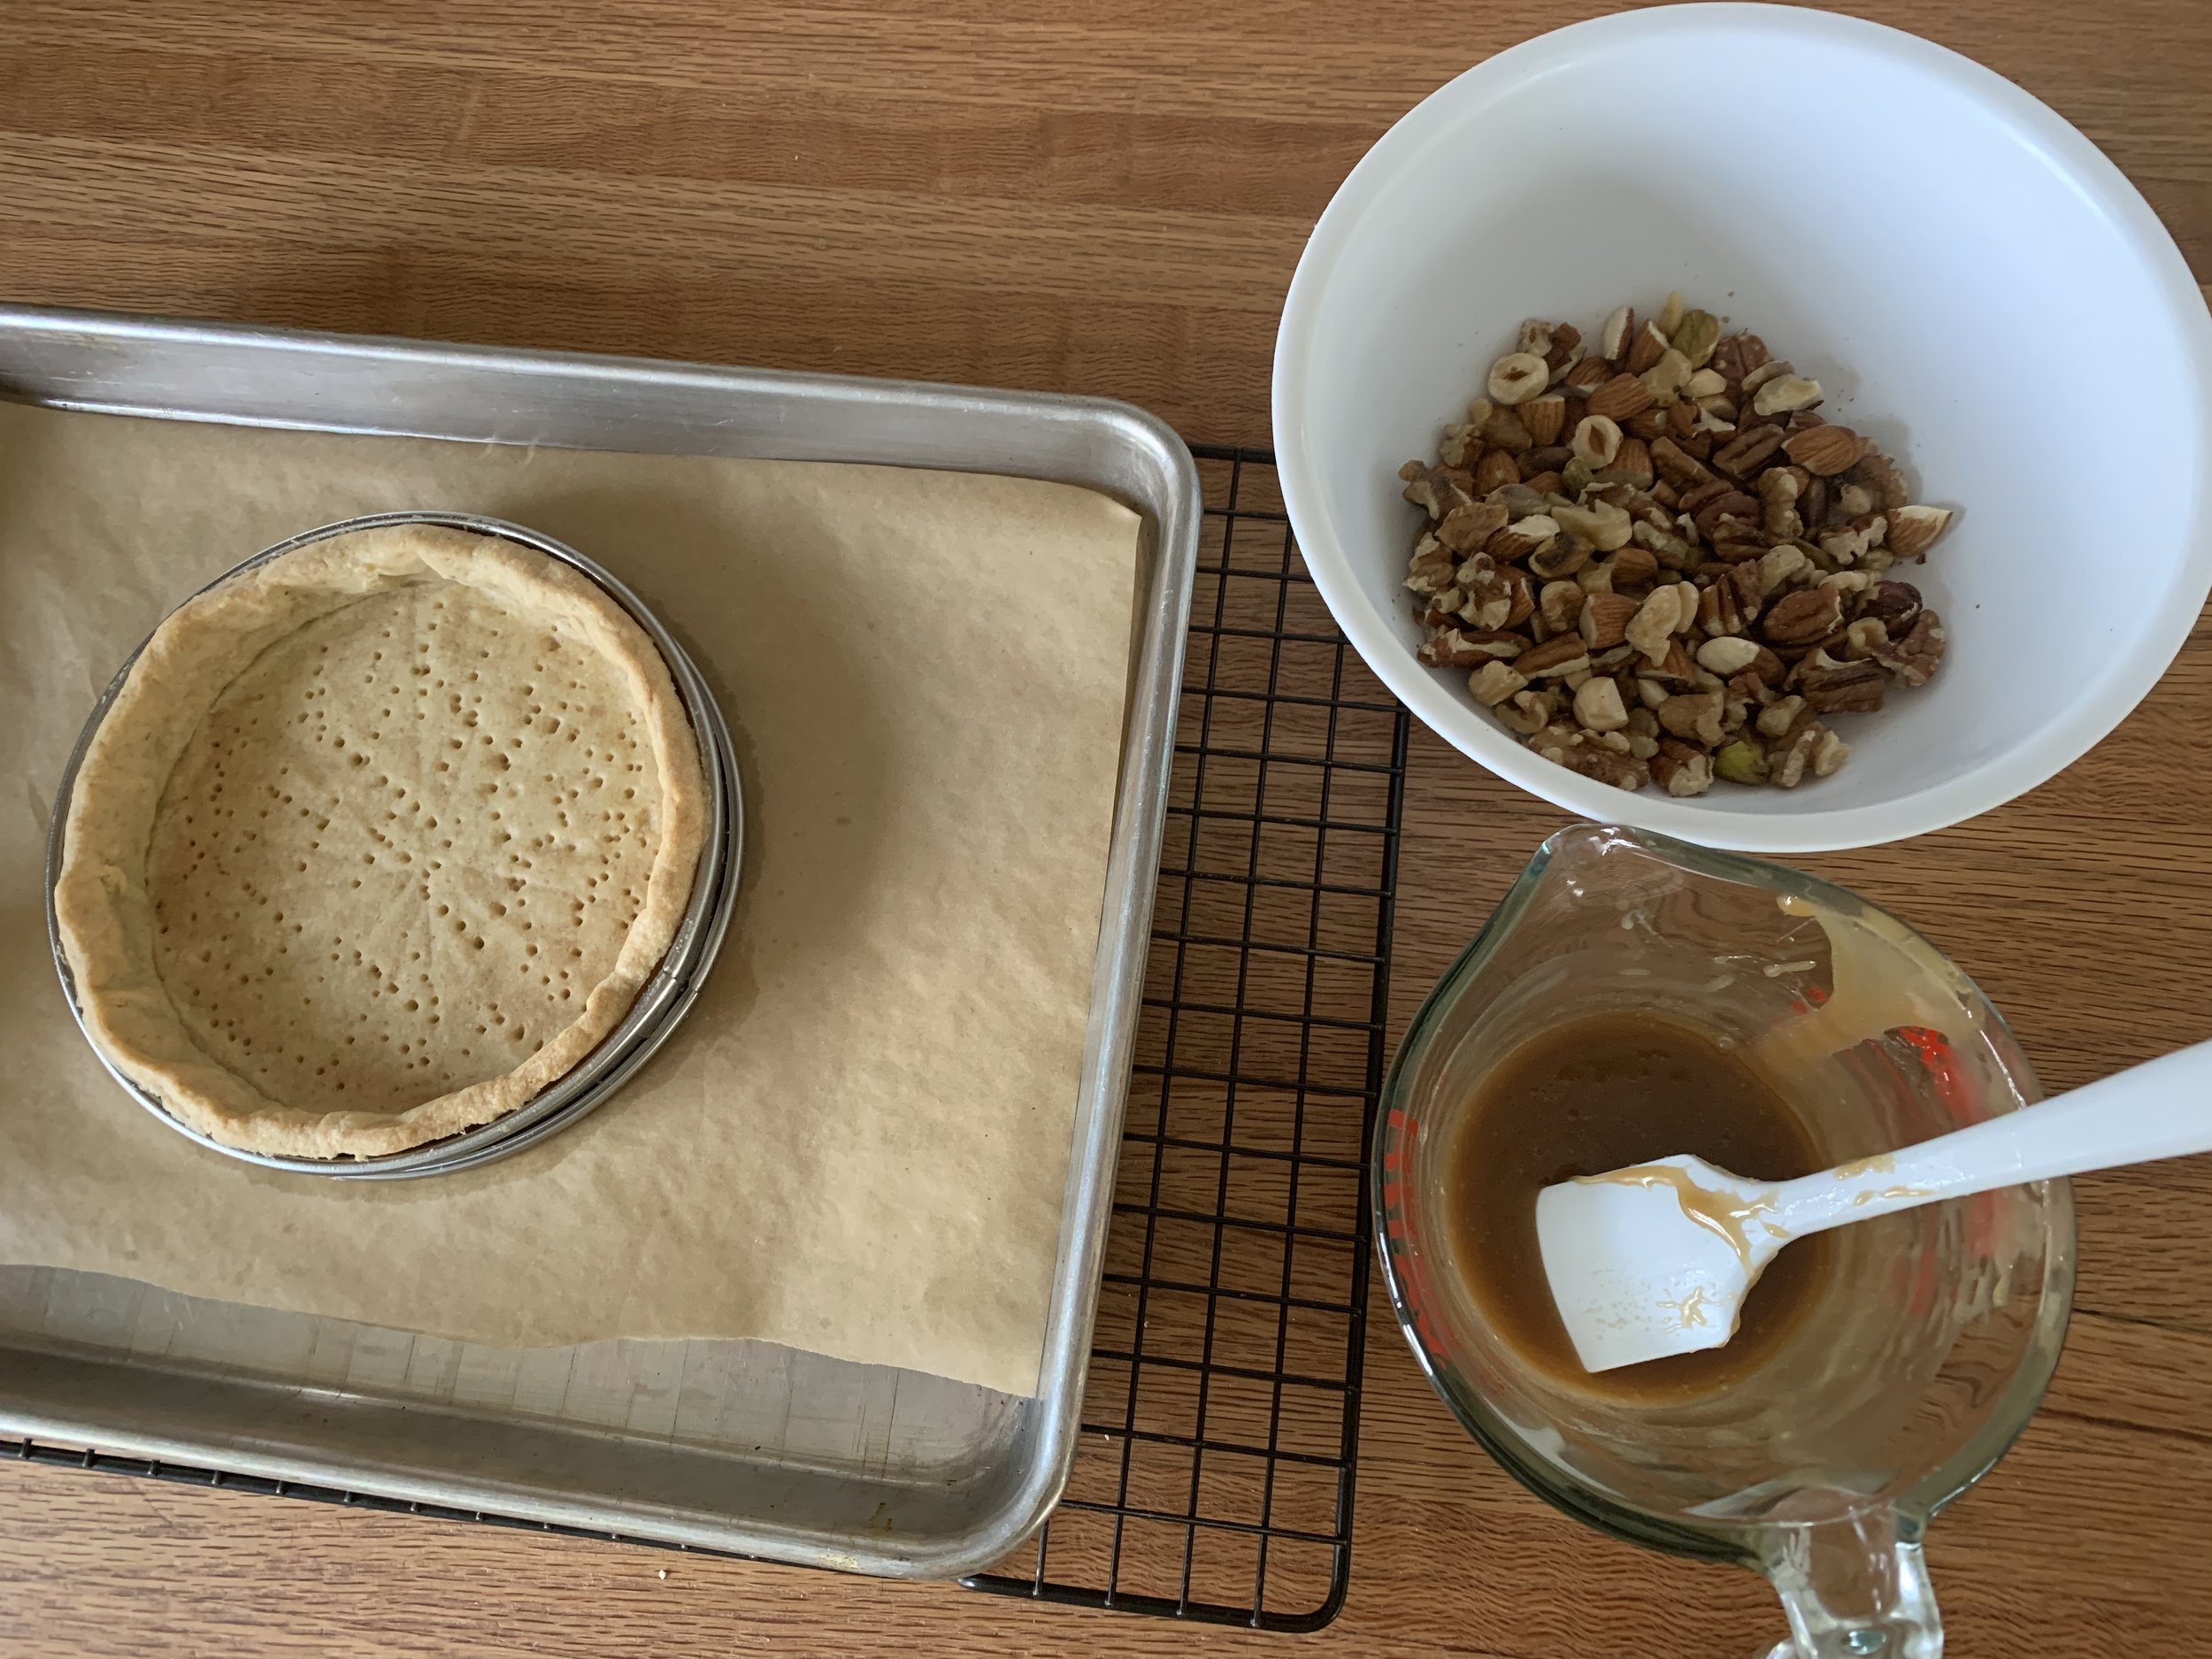
We’ve talked about dough, caramel filling and nuts - now let’s do this. When you’re ready to actually make your tarte, roll the dough out to about 4 mm thick and line your chosen ring (s). Place the lined ring on a parchment lined sheet pan, prick the bottom all over with a fork and place it in the freezer while you heat the oven to 350ºF.

One example of a lined tarte ring

When the oven is ready, remove the lined ring/sheet pan from the freezer, line the ring with parchment paper and fill with dried beans or ceramic weights.

Lined and weighted

Bake for 15 minutes with weights, remove from the oven and lift the parchment and weights out. The crust should be starting to set but won’t be fully baked yet. The bottom will still appear “doughy”.

Partially baked after weights removed

Place back in the oven for another 5-10 minutes until the dough is set, golden and appears dry (see below). Cool on a wire grid.

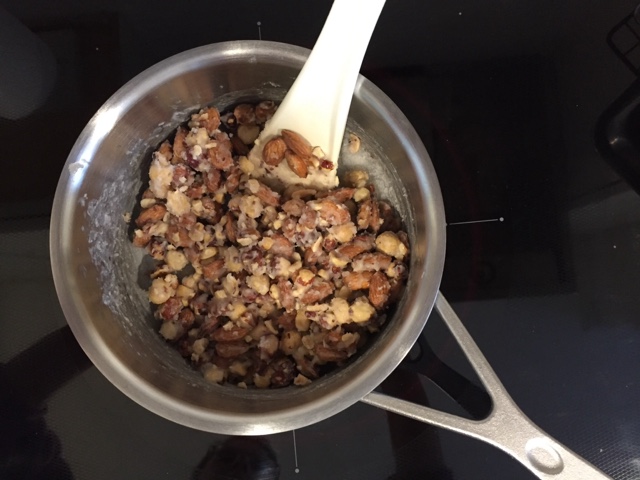
Measure out your chosen nuts and portion out the caramel filling. Below are the components for the small tarte I made for the birthday boy. For this size I use 1/3 cup caramel and 2/3 cup nuts. You should be able to appreciate the blind baked crust being set, dry and lightly browned.


Blend the caramel into the nuts and fill the tarte shell evenly.

Ready for the oven

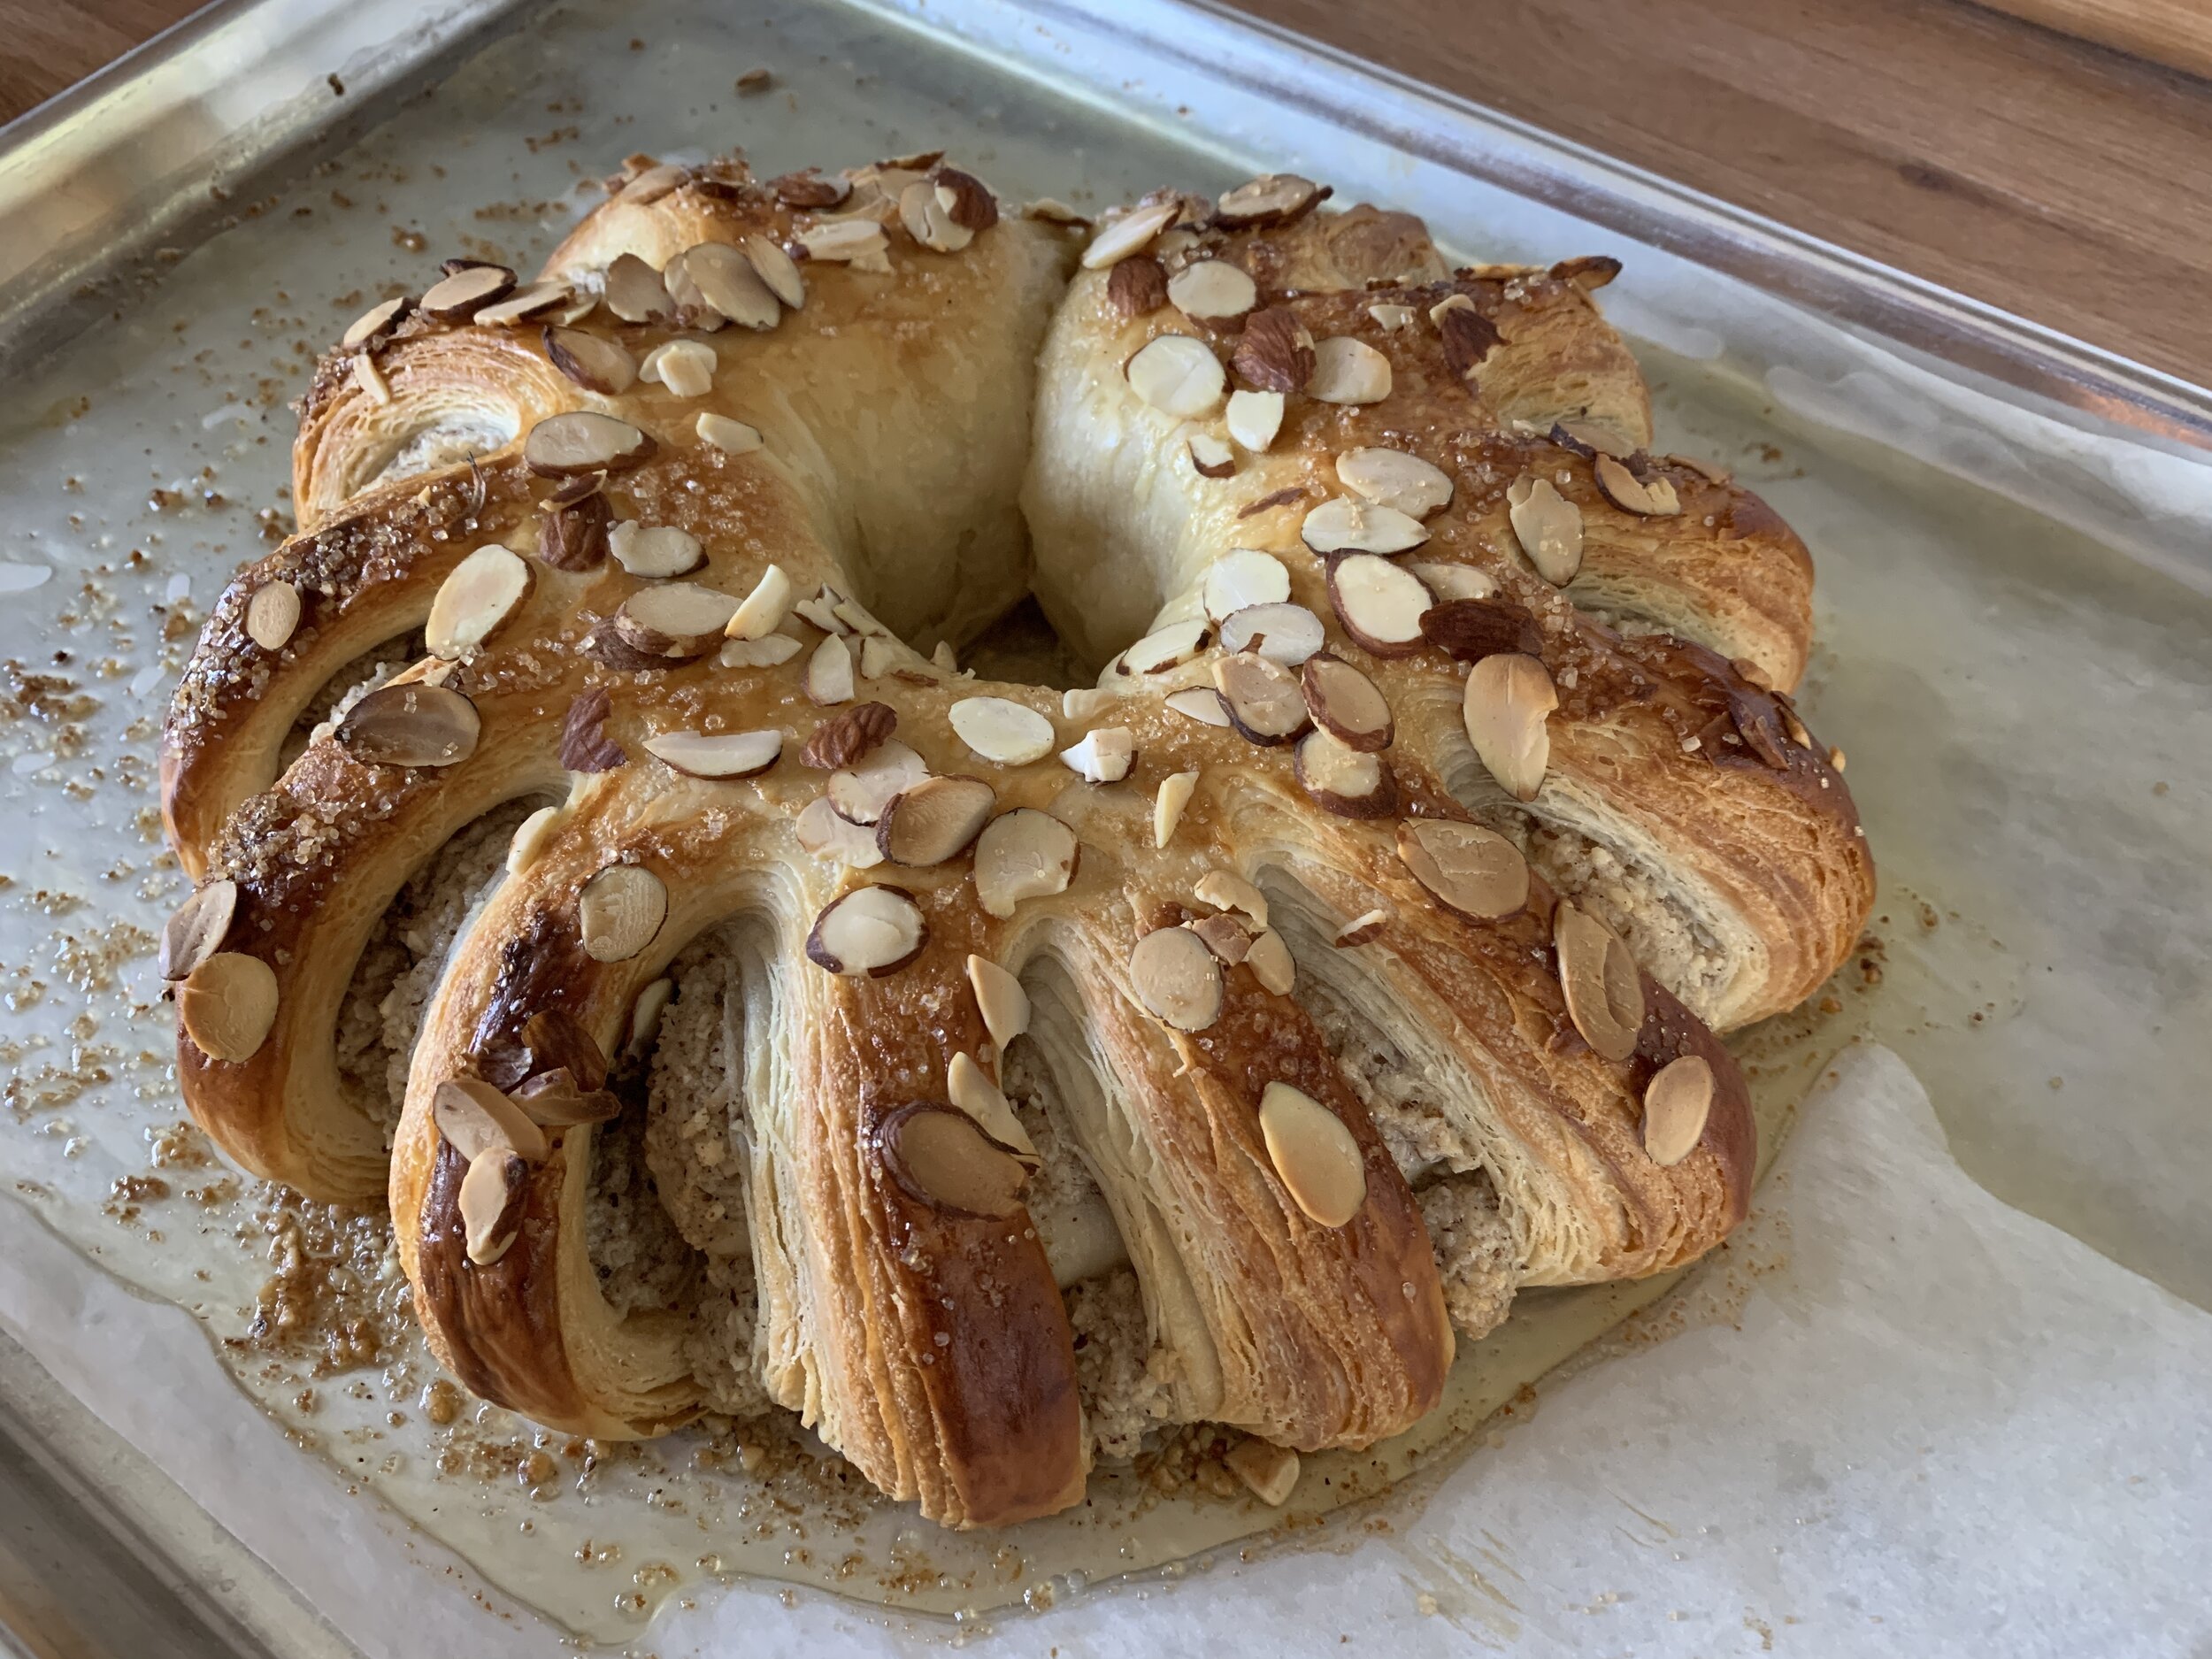
Here’s the age old reminder - every oven is different. Depending on the size of the tarte, the bake time will vary. I look for the caramel to become bubbly and call it a day. This may take about 20 minutes and up for larger tartes. The main thing is just keep checking!

Just out of the oven, filling bubbly

Let cool on a wire rack. The bubbly-ness will subside as it cools. Gently lift the ring off after the first 10 minutes or so, then cool completely.

I did a followup baking session recently to use up the dough/nuts/caramel that I had already prepared. I made three different sizes (180 mm / 7”; 160 cm / 6.3” and 120 cm / 4.7”) - with an eye to giving the two larger ones to a couple of our neighbors who I felt needed/deserved them. The smallest one I saved for us. They were the perfect sizes to use up the ingredients I had. Love it!

Ready for filling

All baked up

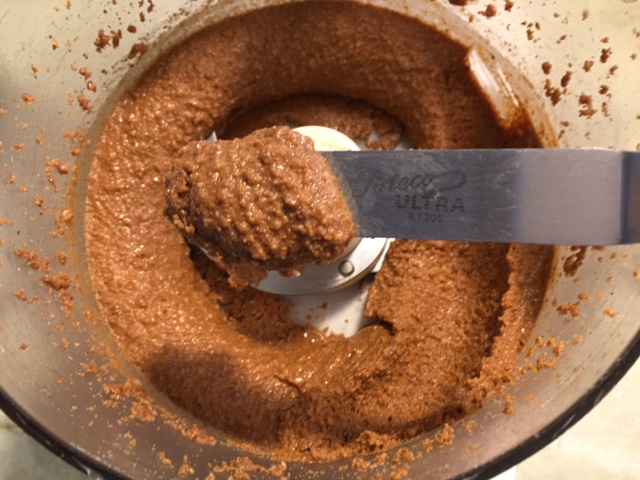
As if you haven’t had enough already - another delicious way to use up ingredients is to fill a blind baked shell about 2/3 full with the caramel/nut mixture (eyeball it), bake that and cool completely. Then pour a 1:1 dark chocolate ganache over it and let cool until set. You can’t beat it. Oh my.

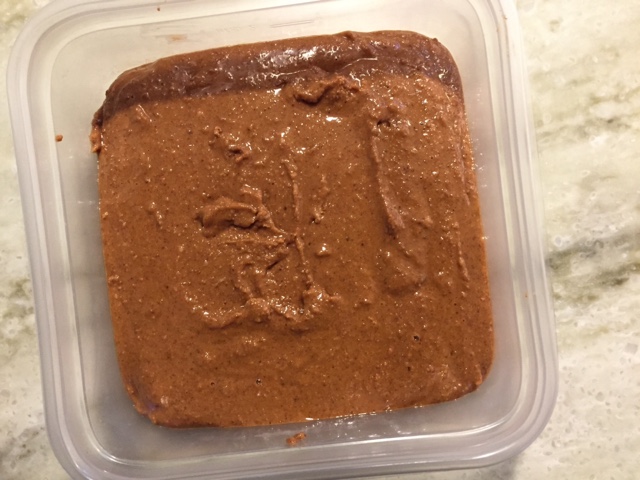
For a large tarte I’d make the ganache somewhere in the realm of 100-150 ml cream and 100-150 g chocolate which should be plenty. You can eyeball how much you want to pour over the nut filling, even leaving some nuts peeking out. And if you have extra? Fridge the leftovers and use later as desired (macaron filling anyone?)


Steve and I enjoyed his birthday version with a small scoop of vanilla ice cream over a petite slice (remember, everything in moderation). So good. This tarte keeps well over 2-3 days, covered at room temp.

Nothing fancy but deelish!

We are now enjoying the most beautiful sight from our north facing window.

Flowering crabapple


Up close and personal

Take care until next time.

La Praluline de Pralus

Thanks to blog reader Pete, Steve and I popped back over to Vieux Lyon on our last full day in the city. Our goal - to stop at the Pralus chocolate/pastry shop to purchase La Praluline de Pralus. The link should take you to the shop page in English if you’re interested in reading more about François Pralus, a winner of France’s coveted Meilleur Ouvrier de France, MOF (essentially a best in their field designation).

Having been generally disappointed with the various praline rose items we tasted (except the tarte from Paul Bocuse), I was given a push by Pete to give La Praluline a try. OK! We headed over the river to the old town on Good Friday afternoon - LOTS of folks out and about on a beautiful sunny day.

Photo compliments of Steve Soper

These babies were literally flying out the door of the shop. We could see the ready and waiting inventory both on the front counter as well in the back kitchen. The sales folk were efficient and friendly, one being the wrapper/bagger and one taking payment with barely a moment to spare until the next customer stepped up.


Once I opened the package I found an informative insert all about this regional specialty. A buttery brioche loaded with chopped pink pralines which, at Pralus, are made with BOTH almonds and hazelnuts chosen from the best producers. I’m in.


Looks like some kind of meteorite or moonscape!

We shared a small slice mid-afternoon just to get a taste (didn’t want to spoil our appetite for dinner, don’t ya know). Crunchy, buttery and delicious.

Just loaded with pralines rose

Due to the brioche butteriness, this keeps well for several days and doesn’t mind a short warm up in a medium oven for a few minutes. If you’re ever in Lyon, give it a try.

Here’s another vision of spring to make you smile.

Couronne aux amandes et aux noisettes . . . . and more!

IMG_0629.JPG

During our weeks of staying home and sheltering in place I’ve been doing a variety of baking projects with an eye toward using ingredients I have on hand (hmmmm . . . this is starting to sound old). That also includes croissant dough sitting in my freezer waiting for just the right moment.

Wouldn’t you know I had two batches of said dough that were nearing their “use by” date - I don’t like unbaked yeasted dough to sit for longer than 6 weeks in the freezer since after that the yeast starts dumbing down and the dough doesn’t rise well at all. Trust me - I know.

Time to create! Get ready for it!

I decided to make four different pastries: a bit more than half of one batch for a couronne (can be translated as crown or wreath), the remainder of that batch for petite pain au chocolat, another half batch for apricot twists and the final half batch for what I refer to as cherry cream cheese “flip throughs”. Oh boy!

First up is the hazelnut and almond couronne which is shaped in a pretty cool way. A good rule of thumb when rolling this type of dough, no matter what you’re going to shape, is to aim for a finished piece of dough that’s about 1/4” thick. If you start getting much thinner than that, you’ll lose some of the discrimination of your layers and won’t have as lovely of a laminated finish.

I rolled ~680 g of croissant dough into a 8”x14” rectangle. I had my hazelnut filling ready to go - very much like remonce (which I wrote about in the recent Danish Kringle post), it combines equal weights of almond paste (I’m loving Mandelin premium), sugar and butter followed by the addition of three times that weight in toasted, finely ground hazelnuts - e.g I used 100 g EACH of almond paste, sugar and butter plus 300 g toasted, ground hazelnuts. Cinnamon or other spices can also be added.

My couronne required 340 g of filling so I had leftovers which I wrapped and froze for another day.

IMG_0599.JPG

Spread the filling over the dough and roll it up into a log.

IMG_0602.jpg

Once rolled, cut slits about 1 inch apart along one side, not quite all the way through.

IMG_0603.JPG

Then form the log into a circle, joining the ends. Twist each sliced portion outward so you see the filling.

IMG_0605.JPG

Brush lightly with egg wash and let rise about 1.5 hours. Toward the end of the rising time heat the oven to 350ºF.

Do a second egg wash and sprinkle with sliced almonds.

IMG_0621.JPG

Bake about 45 minutes until golden brown. I always check about half way through and rotate my tray to promote even baking.

IMG_0624.JPG

I decided to gussy it up a bit by making a simple orange scented glaze with some orange zest, confectioner’s sugar and fresh orange juice and drizzled it all over.

IMG_0627.JPG

Once cooled I sliced a section for testing and loved it! I’m a big fan of hazelnut and orange anyway, so this definitely did the trick. And the almond/hazelnut combo took it up a notch too. A big thumbs up!

IMG_0631.JPG

The petite pain au chocolat portion of the program was straight forward, a process I’ve done many times. A simple image will do this time around. Hmmm . . . . I’m getting low on chocolate batons.

IMG_0609.JPG

Next up - apricot twists. Using a half batch of croissant dough, I rolled it out to 12”x 14” rectangle with the long side facing me, parallel to my work surface. Brush the dough with melted butter then sprinkle on about 1.5 tablespoons of vanilla sugar (cinnamon sugar if you like). Roll lightly with a rolling pin to help the sugar stick.

IMG_0610.jpg

Fold the dough in half from one side so that you end up with a 12”x7” piece. Roll the dough to seal it and slightly stretch it.

Now cut seven strips, each 1” wide.

IMG_0612.jpg

Holding each strip at the ends, stretch it as you twist it several times then coil it up into a spiral.

IMG_0613.jpg
IMG_0614.jpg

Place on a parchment lined sheet pan, brush lightly with egg wash and let rise about an hour.

IMG_0615.jpg

I often use my cold oven as a proof box, placing a pan of warm water on the bottom shelf. However, if my oven is in use, I tuck my tray in a safe spot, place a small glass of warm water on the tray and cover with an overturned clear tote bin to provide moisture and a hint of warmth.

Once risen - they should look more pouf-y and the laminations appear more prominent. Brush again with egg wash, push down at a couple of central spots with your little finger tip or the end of a wooden spoon or chopstick and do your best to direct some apricot jam in there. Don’t fuss over it - just go for it. I added a sprinkle of vanilla sugar too.

IMG_0622.jpg

Bake at 375ºF for about 17-18 minutes until golden.

IMG_0632.JPG

To bring up the rear, last but not least are my “flip-throughs”. Once again using a half batch of croissant dough, I roll it out to ~8” by 13.5” and cut 12 pieces, each 4” by 2.25”. Each rectangle gets a slit down the center leaving the ends intact. I consider these my medium size - you can make them smaller or larger - just cut any size rectangle you’d like!

IMG_0617.jpg

Now take one short end, roll it downward then bring it up through the slit, essentially flipping it through to the top as the sides naturally twist. Looks kinda like a bowtie - just straighten the rectangle a bit and they’re ready to rise. The first time I did this way back when, I found it helpful to cut a piece of paper or felt and practice - you can visualize it immediately.

IMG_0618.jpg

Place on a parchment lined sheet, lightly egg wash and let rise about an hour. Egg wash again and top with your chosen filling - lemon curd, almond cream and jam are just some of the possibilities.

One of my favorite ways to finish these off is with a basic cream cheese filling made by blending 227 g / 8 ounces cream cheese with 57 g / 1/4 cup sugar, 3 tablespoons cornstarch, some lemon and/or orange zest, 1/2 teaspoon vanilla; beat on medium with the paddle until light and smooth; blend in 2 large egg yolks until fully incorporated. This made plenty for my purpose here but you can certainly double the recipe if you’re doing a larger batch of pastries.

NOTE: After the rise the center should fill in but sometimes there’s still a gap between the twisted sides. Just blob your filling/jam more along the edges if need be, otherwise just dollop a blob along the center and top with jam of choice - in this case cherry.. Once they bake it all blends in.

IMG_0637.JPG

Bake at 375ºF about 17-20 minutes until golden and the filling is set.

IMG_0639.JPG

Planning for properly timed rises and taking turns in the oven for each type of pastry made for a busy baking day and resulted in a wonderful assortment of goodies that I ended up divvying up amongst a number of our neighbors. A great way to use croissant dough that would have soon been over-the-hill after too long a stay in the freezer.

The neighbors were most happy!

Have fun, stay safe and keep on keepin’ on folks.

Reine de Saba

IMG_3998.JPG

Reine de Saba (Queen of Sheba) is essentially a chocolate almond torte and reportedly one of Julia Child’s first French gateau experiences - one that helped launch her into what would become a fantastic culinary adventure for life.

There are a bevy of different recipes out there for this one - most involve melting dark chocolate with butter, separating the egg whites and yolks, whipping the whites with a portion of the sugar to create a meringue, adding almond flour along with your choice of a small amount of all purpose flour or alternate flour like teff and folding everything together.

After my review of a half dozen or so recipes I ultimately landed on two of Alice Medrich’s - one from “Seriously Bittersweet” and one an alternate grain version from “Flavor Flours” which uses teff flour (gluten free!) in place of all purpose. Dense, dreamy, creamy yet light and chocolate-y all at the same time. That woman KNOWS her chocolate boy oh boy! Thanks A.M.

IMG_3990.jpg

In “Seriously Bittersweet” A.M. dedicates a page to the “versatility and the role of ingredients” in creating these chocolate gateaux. She says “This type of torte is essentially an extremely buttery chocolate egg custard given texture with ground nuts and maybe a little flour. The basic ingredients are standard, but the quantity of each is almost infinitely flexible”.

She goes on to explain how the eggs (whether separated or not) help bind the rest of the ingredients whether you use 3, 4 or 5 eggs; how even a small amount of flour adds a smoothness to nutty tortes by affecting the way the eggs cook; how nuts can be used un-blanched , blanched, toasted or raw as well as in different quantities - a lower measure of nuts will give you a less cake-y and more mousse-y custard like torte, while whole ground nuts will provide a coarser texture than more finely milled nut flours.

Butter adds flavor, contributes to texture and provides moisture as well. Brewed coffee or different liqueurs or spirits like rum, bourbon, kirsch, Frangelico or Amaretto add flavor too. So many possibilities.

While each of these two recipes uses practically identical ingredients, the teff version (below) keeps the eggs whole and everything is blended together in one bowl - easy-peasy. You can even use a hand held mixer. Ms. Medrich points out that the secret to a fluffy batter for this one is chocolate not too warm, butter not too soft and eggs cold!

IMG_3961.JPG

Here goes!
Heat the oven to 375ºF. Butter the bottom of an 8” springform pan then line the bottom with parchment.
Mix 70 g almond flour with 35 g teff flour and set aside.
Melt 170 g dark chocolate (70% recommended) over a barely simmering water bath, set aside and let cool to lukewarm.
Have 150 g sugar, 140 g unsalted cubed butter softened (not too!), 1/8 teaspoon salt and 4 cold large eggs at the ready.
Add almond-teff flours, sugar, butter chunks and salt to the chocolate and beat on medium with the hand held mixer until well blended and the batter thickens and lightens in color.
Beat in the eggs one by one then beat on high speed for a minute or so until fluffy and lighter in color, like chocolate frosting.
Scrape batter into the prepared pan and spread evenly.

Looks like chocolate frosting to me!

Looks like chocolate frosting to me!

Bake 30-35 minutes until a tester inserted in the center comes out with a few moist crumbs.

IMG_3964.jpg

Slide a thin knife or small offset spatula around the sides to allow the cake to sink slightly as it cools. Cool completely.

IMG_3967.JPG

For the more traditional version using all purpose flour, the process involves separating the eggs and whipping them separately with portions of the sugar. Rather than almond flour, whole natural almonds are processed with the flour to a coarse texture, giving the end result a toothy, nutty-textured chew.

IMG_3968.JPG

For the second version heat the oven to 375ºF, butter the bottom of an 8” springform pan and line it with a round of parchment paper.

Place 170 g coarsely chopped chocolate (66-70%) and 140 g unsalted butter in a medium heatproof bowl set into a wide skillet with barely simmering water. Stir periodically until melted then, off the heat, stir in 3 tablespoons brandy (optional - I added some vanilla extract instead), 1/8 teaspoon almond extract and 1/8 teaspoon salt. Set it aside.

Pulse 70 g unblanched whole almonds and 15 g all purpose flour in a food processor to a cornmeal-like texture. Set aside.

Separate 4 large eggs: in a large bowl whisk the yolks with 100 g sugar until well blended then stir in the chocolate mixture.

In a clean, dry bowl whisk the whites and 1/8 teaspoon cream of tartar on medium to soft peaks then sprinkle in 50 g sugar and beat at high speed to stiff but not dry peaks.

Now place 1/4 of the egg whites and all of the nut/flour mixture on top of the chocolate batter and fold them in with a large rubber spatula. Fold in the remaining egg whites.

Combining everything

Combining everything

Spread the batter into the prepared springform pan. Can you see the nut particles?

Ready for the oven

Ready for the oven

Bake 25-30 minutes until a tester inserted into the center is still moist but one inserted ~1.5 inches from the edge is almost clean (whoa - talk about nuance!)

All baked up

All baked up

A light dusting of confectioner’s sugar sets off the dark chocolate nicely.

IMG_3993.jpg

As usual, Steve and I did our mandatory taste test. We first tried the teff version which had a great chocolate flavor and smooth, creamy texture. But we gave the nod to the second version, enjoying the melt-in-your-mouth custard like center and the mouth feel of the coarser nuttier texture. Deelish!

Served with a honey-tinged Scandinavian yogurt and some fresh strawberries it was, in my estimation, superb (even though Mr. Steve is not a big yogurt fan).

IMG_3996.JPG
IMG_3998.JPG

The longer you bake, the more you begin to realize how much variation and play can happen from recipe to recipe. Even though we accept the fact that not everything always turns out as we had hoped, it’s a beautiful thing to try your own version and make it fun!

Happy summer!!

A couple of autumn tarts

IMG_3305.JPG

Apples! Pears! Berries! What better way to celebrate autumn, eh?

On the prowl for a couple of Sunday desserts, as well as a way to use some of the local Michigan pears and apples I had on hand, tarts were definitely on my mind. Natch! This project involved two versions of tart, one apple/pear/blackberry with classic brown sugar crumble topping and one apple/pear/raspberry with crunchy almond topping. Ooooohhh how delicious.

IMG_3297.JPG
IMG_3291.JPG

I’ve been a fan of Bosc pears for some years now, and, on the apple side of things, this season I’ve taken quite a shine to Jonagolds too.

I typically poach my pears soon after purchase as a way to avoid the ripening wait as well as to hold them in the fridge for use when needed. But after reviewing some of my numerous pastry books I opted for the slice/dice/sauté in a little butter and sugar approach. Works like a charm!

For a couple of full sized tarts I peeled, halved, cored and thinly sliced about 4 pounds of apples. That would normally be a decent quantity for one tart, but, since I was mixing in pears and berries, it worked very nicely for two.

Then on medium heat melt 2 ounces/56 g unsalted butter in a sauté pan or Dutch oven large enough to hold all of the apples, then stir in the slices until coated. Add 100 g dark brown sugar, a large pinch of salt, the zest of one lemon and a large squeeze (a tablespoon or so) of lemon juice, increase heat to medium high and stir about a minute.

Now here’s where I took Elisabeth Prueitt’s advice from her “Tartine all Day” book - cover the pan, reduce the heat to low and let the apples cook for about 10 minutes until softening and juice-releasing has happened. Then scoop the apple slices out with a slotted spoon (I placed them in a large strainer over a bowl to allow dripping then transferred them to a clean bowl) and cook down the juices for a few minutes until very thick - apple caramel! Mix the thickened juices in with the apples and you’re good to go. You can add a little cinnamon and nutmeg here if you’d like - I kept mine au naturel. Set aside to cool until you’re ready to fill your tart shell.

For the pears, again using about 4 pounds, I peeled, halved, cored and diced them into 1/2 inch cubes then followed a similar sauté approach in butter and sugar. For these, simply cook them over medium high heat until they start to soften and become lightly caramelized (maybe 5-8 minutes) then set them aside to cool until ready to fill the tarts. No juice reduction here.

I used two of my favorite tart doughs - pâte brisée for the blackberry version and pâte sucrée for the raspberry - blind baking them before filling. Once baked I brushed the bottom with egg white and popped ‘em back in the oven for a couple of minutes to “dry”. That provides a seal to the dough and reduces the chance for a soggy crust.

Pear apple blackberry waiting for assembly

Pear apple blackberry waiting for assembly

I mounded the apple/pear mix in first then tucked my blackberries into the various nooks and crannies. These were plump frozen berries that I broke up into pieces for more efficient cranny-ing.

IMG_3294.JPG
 

The brown sugar crumble is equal weights flour, brown sugar (you can use light or dark, whichever you prefer) and diced cold butter sanded into the dry ingredients. I usually make a bunch and store it in a zip-top bag in the freezer to use at a moment’s notice.

Loaded with crumble!

Loaded with crumble!

Since the crust is already baked and the fruit “cooked”, the primary task here is to brown the crumble and get the fruit to juicy-up. Bake at 350ºF for 20-25 minutes until the crumble is golden and some juicy bubbling is visible.

IMG_3296.JPG
 

The approach to the raspberry version is pretty much the same. Fill the blind baked crust with the pear/apple/raspberry mix.

IMG_3288.JPG
 

But this time the topping is made with 2 large egg whites, 100 g/1 cup confectioner’s sugar and 125 g/1.25 cups sliced almonds all mixed together and spread over the fruit.

Ready for the oven

Ready for the oven

This one also bakes at 350ºF for about 25-30 minutes until the nuts are browned and have taken on a certain luster and there’s some fruit juiciness visible around the edges.

IMG_3290.JPG
 

Talk about a treat! Whether it’s crunchy toasty almonds or a more classic crumble that melts in your mouth, both of these tarts delivered with the lovely fall flavor of pears, apples and berries. And a side of vanilla ice cream doesn’t hurt either!

Now don’t hesitate to make your own version of a delicious autumn tart.

Happy baking!

IMG_3302.JPG

Cran-oat-almond shortbread

Before we jump in, don't forget to check out this month's specialties - Valentine's goodies and my favorite chocolate ganache tart!

cranoat

Recently inspired by Yotam Ottolenghi and Helen Goh's book "Sweet", I put together these absolutely wonderful shortbread cookies (or biscuits as the Brits would say) full of cranberries, oats and almonds. You can choose whether you'd like a white chocolate garnish or prefer them au naturel. Either way they are SO GOOD.

cranoat

Some of the ingredients require a bit of prep before putting the final dough together - chop cranberries and soak them in OJ; toast, cool and chop almonds; have butter at room temp - that kind of stuff. Simple but requires some planning on your part. It comes back to that important and well worn advice - always read the recipe through at least twice before you begin.

cranoat

I tweaked the recipe, which calls for both all purpose and whole wheat flour, to create my own version using white whole wheat flour and whole wheat pastry flour. As I continue to experiment with different whole grain flours, it's fun to learn about the various nuances of each.

White whole wheat flour is ground from hard white whole wheat, whereas whole wheat pastry flour comes from whole grain soft white wheat. Each contains all the nutrients that come from the whole grain, including the outer bran full of fiber, B vitamins and trace minerals and the small central germ containing antioxidants, vitamin E, B vitamins and healthy fats.

Whole wheat pastry flour is softer and thus lends itself well to things like scones, biscuits, flaky pie and tart crusts and fluffy pancakes. I'll be playing around with different combos and variations as time goes on. Cool. Always so much to learn.

cranoat

Now for my version of the recipe and many thanks to Yotam and Helen!

1. Heat your oven to 350ºF. Have a couple of 1/2 sheet pans lined with parchment at the ready.
2. Chop 125 g dried cranberries in half (unless they're already chopped), place them in a microwave safe bowl in 25 ml of orange juice and zap for about 10 seconds. Let them soak while you're getting other things ready. 
3. Place 150 g natural raw skin-on almonds on a baking sheet and toast for 10 minutes. Let cool, rough chop and place in a large bowl.
4. Add 175 g white whole wheat flour, 50 g whole wheat pastry flour, 150 g old fashioned oats and 1/4 teaspoon salt to the bowl with the almonds. Set aside.
5. Put 227 g room temperature unsalted butter, 100 g granulated sugar into which you've rubbed the zest of one or two large oranges (use two for that extra citrus zip!) into a mixer bowl with the paddle attachment. Beat on medium about 2 minutes until blended and light.
6. Add the nut-oat-flour mixture and beat on low to bring it together.
7. Add in the cranberries along with the orange juice and combine on low to mix in.
8. Turn the dough out onto a lightly floured work surface, bring it into a ball and divide in half. Roll each half to about 1/4 thick. I find it works well, particularly with a slightly sticky dough, to roll between two pieces of film wrap - keeps things neat!
9. Chill the dough for an hour or so before cutting out. Choose whatever shape and size you'd like, cut and place on the parchment lined sheets. As you can see I tried some different versions.
10. Bake about 18 minutes until lightly browned. Cool completely.

cranoat

If you choose to garnish your cookies with white chocolate, either drizzled, edge-dipped or spread in a layer, I found it worked best for me to microwave my Guittard wafers at half power for 30-45 second bursts, stirring until melted. My results are rustic for sure, but I. LOVE. THESE. COOKIES.

cranoat

Praliné et sablés

Some of you know how much I love shortbread cookies (les sablés, en français) and am often playing around with new flavors and ingredients to create something unique and tasty.


There is an ingredient in the pastry world called praliné which consists of toasted nuts coated in caramel that are then cooled and ground into a paste. It is often made with hazelnuts or a 50/50 mix of almonds and hazelnuts, although any nut (nuts in general are referred to as fruits sec, en français) or combination thereof can work.


One of the first sets of recipes we were given in the basic pastry course at Le Cordon Bleu contained a recipe for do-it-yourself praliné or praline paste.  One can buy this particular delight ready made in fairly pricey tubs from companies like Valrhona, but I thought it was high time I made it myself.  Why not?!

What inspired me to take on this project was a recipe for sablés au praliné from Thierry Mulhaupt (a well known patissier chocolatier in the Alsace region) recently published on the French blog La Cuisine de Mercotte.  The recipe for les sablés contains a link for DIY le praliné and I went for it!

Toast 125 g almonds and 125 g hazelnuts in a 325º oven for about 10 minutes. Make a sugar syrup with 165 g of sugar and 45 g of water and cook it to 121ºC (250ºF).  Off the heat stir the warm toasted nuts into the sugar syrup until the sugar crystallizes.  


Then put the pan back on medium heat and stir continuously until the crystallized sugar melts and caramelizes to a golden amber.

I must admit that I should have cooked mine a little longer to bring ALL the sugar to a beautiful caramel stage, but sometimes impatience takes over.  Still - the nuts were looking pretty good.


Turn them out of the pan onto a Silpat, spreading them into a single layer and separating the nuts as much as possible.

Once cooled place them in the bowl of a food processor and whiz away!  


Still a bit grainy above, but I gave it a few more minutes of processing and was pretty happy with the result. All in all it takes a good 8-10 minutes to arrive at the end result.


This stuff will keep in a covered container at room temperature for several weeks.

Next comes the cookie dough.


Dice 300 g cold butter and sand it into a mixture of 300 g all purpose flour, 65 g almond flour and 65 g powdered sugar. Add 175 g praliné and a large pinch of fleur de sel and blend to create a smooth dough.


Divide the dough into five 180 g pieces and form logs about 25 cm long. I made mine into triangle logs for something a little different. Wrap and chill.

When it's time to bake, heat the oven to 325ºF.  Brush the logs with a bit of water, roll in raw sugar and slice into 7-8 mm slices. NOTE: the recipe actually suggests 15 mm slices, however I was going for a thinner cookie.


Place cookies on parchment lined sheet pans and bake about 16 minutes until nicely browned.


I must say these are tasty little morsels. Although the nuttiness is subtle, the butteriness is superb and the texture is melt in your mouth.  And the raw sugar crunch adds just the right touch.


Of course, making the praline paste is a time commitment which I suspect many would choose not to take on, and going the "store-bought" route is fairly prohibitive cost-wise. 

For me it was worth the effort to make my own, especially since so much of this stuff is about tackling something new, experiencing the process and enjoying the tastes that come along with it.

The good news is that once you make it you can use it for other things like ganache or as an addition to mousses or creams.  And remember - it keeps!  Only you can decide.