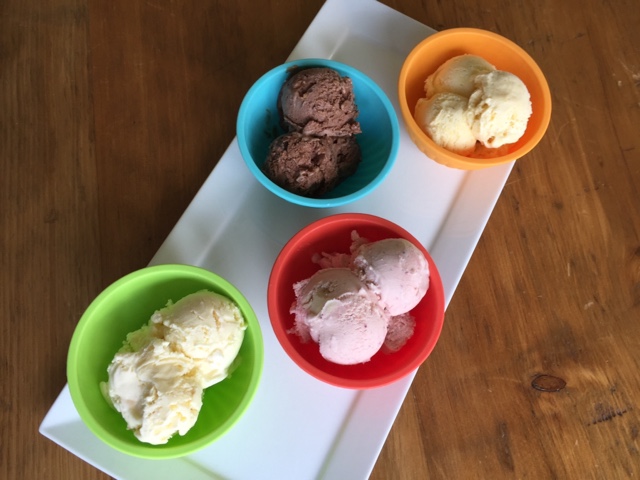
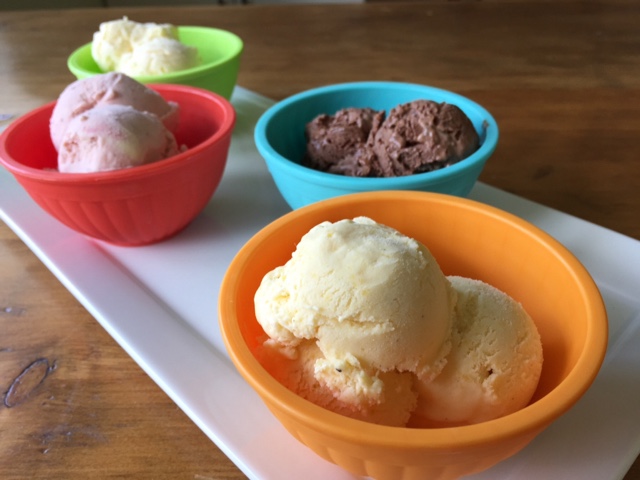
Ice cream! Glace aux pêches, chocolat-amande, framboise-fraise, noix de coco-citron vert

Summer has certainly been in full swing and what better way to enjoy the season than to make some homemade ice cream. Absolutely!

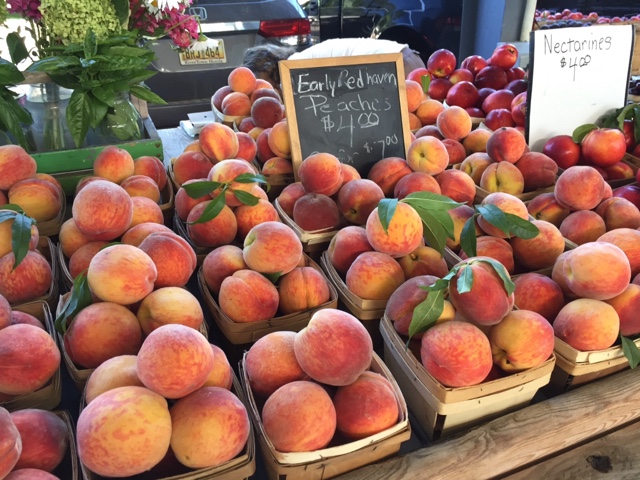
I was on a major roll with this project, that's for sure. Part of it was spurred on by the fresh peaches and berries available at our favorite Fulton Farmer's Market.

Another part of it was the realization that family was coming to visit for my mom's 90th birthday celebration. Having several flavors of ice cream in the freezer seemed like just the thing for any impromptu dessert needs.

I've mentioned in previous posts that I've been using an ice cream base recipe from David Lebovitz for many years now. It's so straight forward and allows one to come up with all sorts of flavor options. He talks about infusing flavors, add-ins before the churning step and mix-ins at the end. SO GOOD.

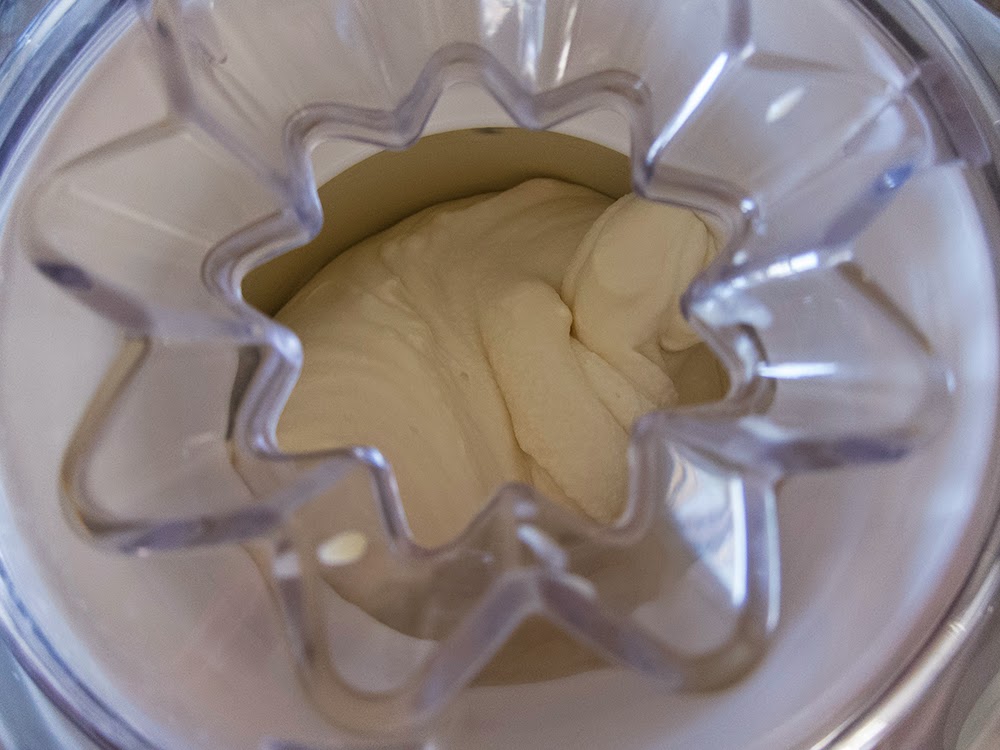
The base contains 2 cups cream, 1 cup milk, 5 large egg yolks, 155 g sugar and a pinch of salt. The preparation method is that of a basic crème anglaise, cooled over an ice bath and then refrigerated for some hours or over night until ready to process. I love making the bases a day or two ahead so they can cure and thicken in the fridge, plus I have two canisters for my Cuisinart ice cream maker always at the ready in my freezer. Bring it on!

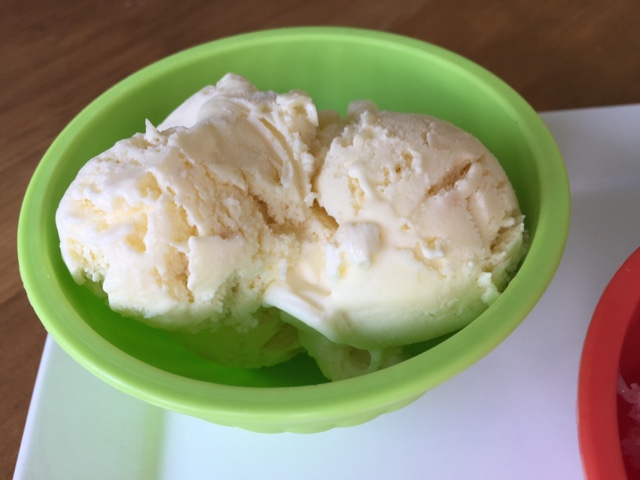
Peach was definitely at the top of the hit list.

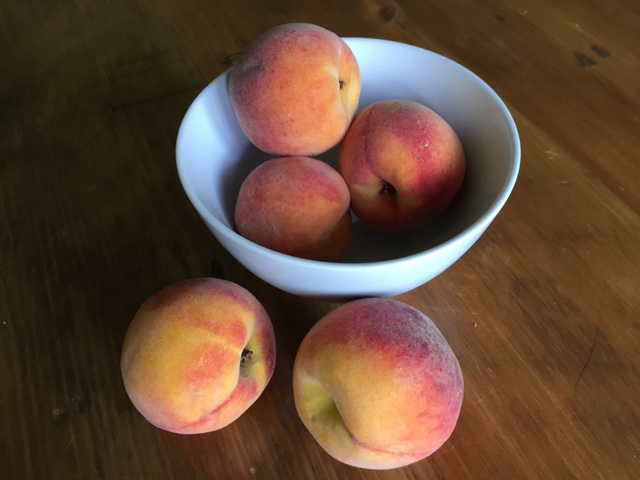
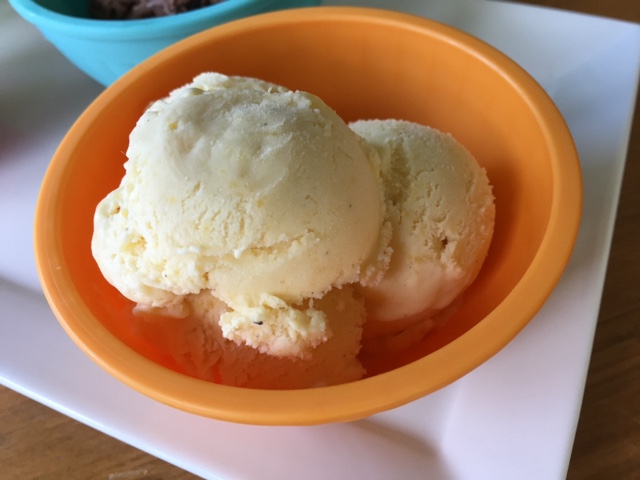
When incorporating certain fruits in ice cream there's the possibility that the end result may be a bit icy. David suggests peeling and slicing the peaches, cooking them until they're nice and soft then puréeing them. I added just a whiff of sugar and a splash of lemon juice to what started out as a pound-and-a-half of peaches (before the peeling/pitting and slicing) and was very happy with the end result. Once my chilled base was ready to process, I blended in the cooled peach purée and churned away.

The peach flavor comes through nicely in this creamy, fresh summery treat. I served this one with my from-scratch angel food cake (YUM!) and some sliced fresh peaches. How can one go wrong with that combo?!

Of course it's great on it's own, one luscious spoonful at a time.

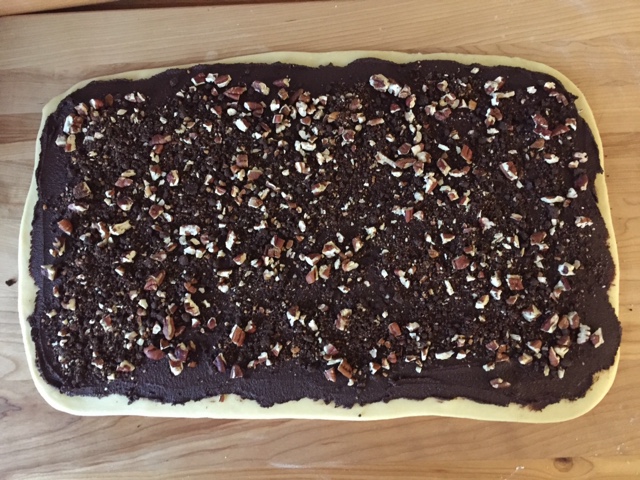
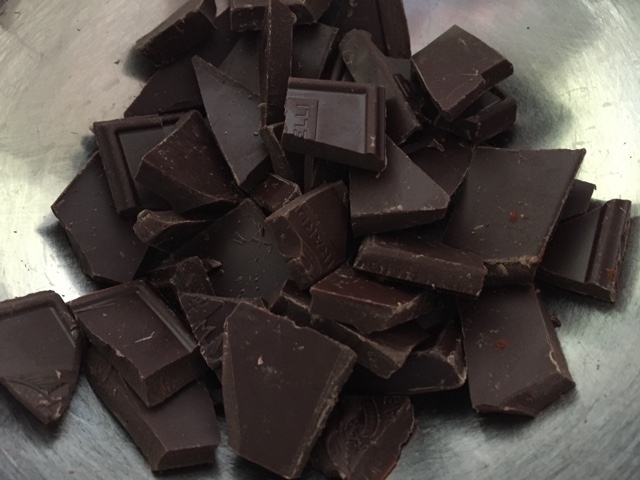
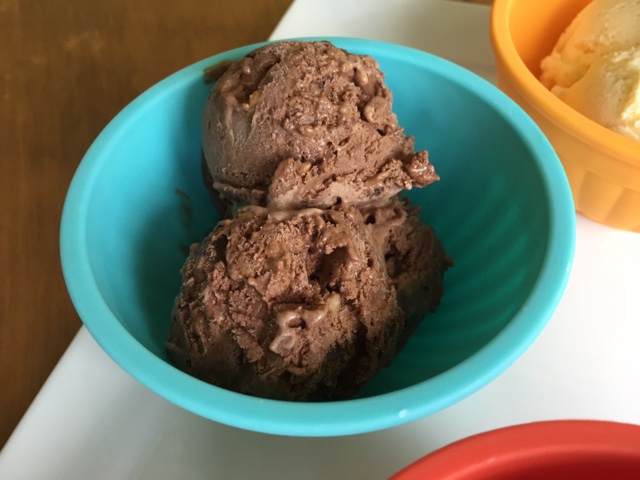
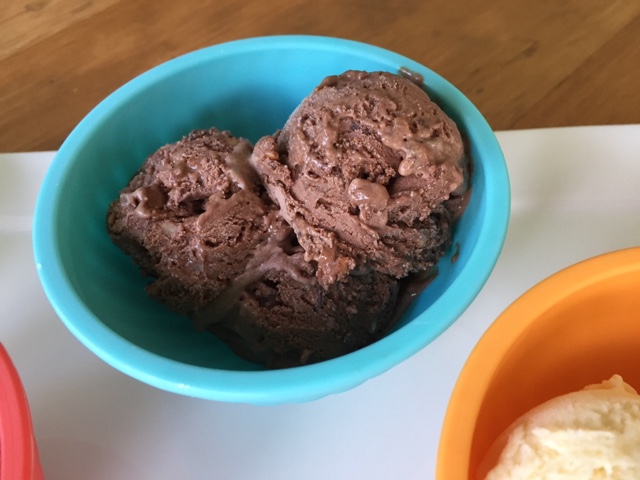
Now for chocolate almond, two of the most lovely flavors that one might put together, whether it's in ice cream or some other delectable baked good or chocolate confection.

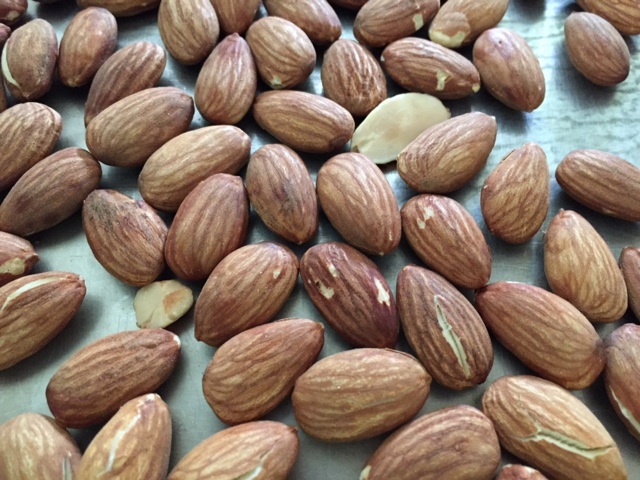
This version took a little more time since the warmed dairy is first infused for an hour or so with a cup and a half of coarsely chopped toasted almonds. The only downside is that the almonds are discarded after the dairy is strained. Kind of sad.

BUT!! There's hope after all. Next time I'll rinse 'em, soak 'em in water overnight and make my own NUT MILK! I've been dying to try it. And an even more beautiful thing is once the almonds and water are ground and the milk is strained through cheese cloth, the almond meal can be spread out on a baking sheet, dried in the oven and used in baked goods. Now THAT'S a good deal all the way around.

In this case, once the ice cream base is cooked to the anglaise stage, 4 ounces of chopped and melted bittersweet chocolate (at least 60% is recommended) and 1/4 cup Dutch process cocoa are added to the warm mixture before cooling.

In addition, after the ice cream was processed, I mixed in coarsely chopped Ghiradelli 60% chocolate chips and some of my ground almond nougatine.

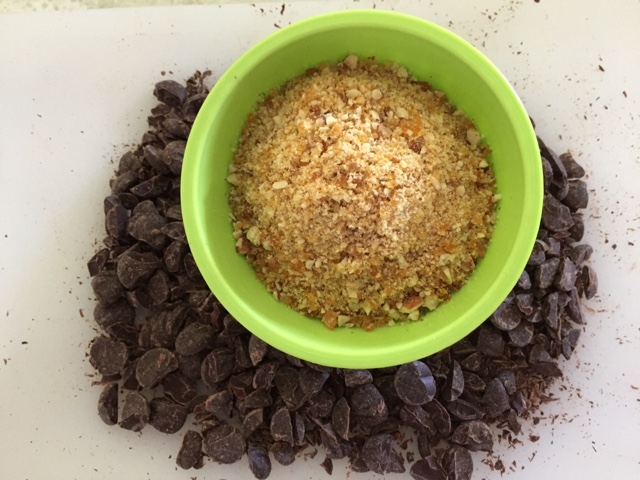
Now THAT made for a delicious finished version of creamy, chunky delight.

Next up - framboise-fraise!

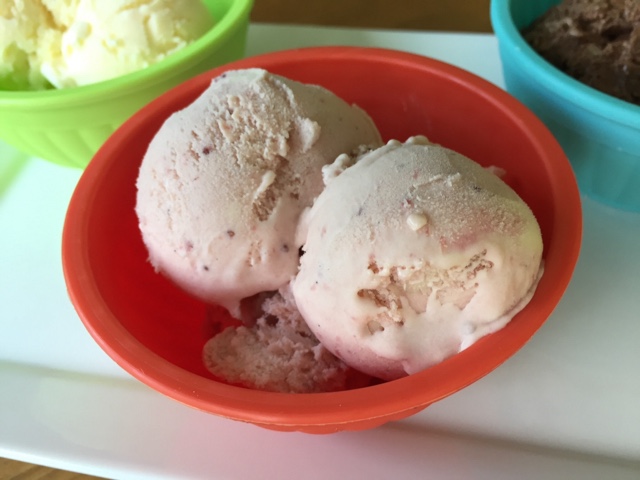
With this version I prepared the strawberries in a similar fashion to the peaches mentioned above. Hull and cut up about 3/4 pound strawberries, add a couple of tablespoons of sugar and a splash of lemon juice and cook them on the stove top until somewhat thickened and jam-like. Then purée them and chill.

Since I was going for a strawberry-raspberry combo, I also puréed and strained about 8 ounces of fresh raspberries and added them in to the chilled base along with the strawberry purée. Then it's simply a matter of processing to a shear perfection of summery, berry goodness. YES.

Last, but not least, (although this was Steve's least favorite of the bunch, don't ya know!) is coconut lime.

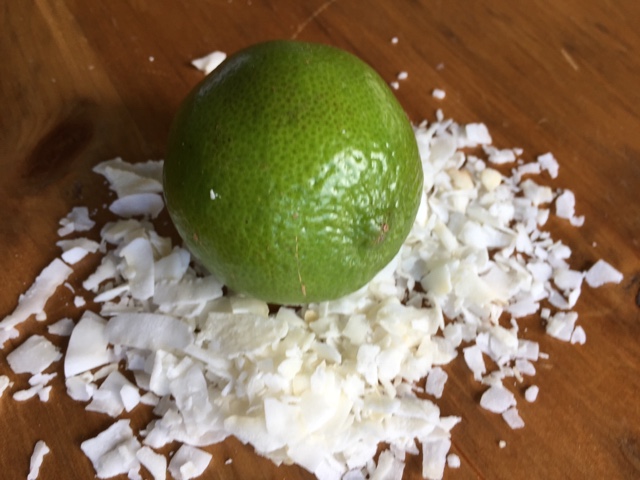
For this version I infused the dairy with 170 grams of toasted coconut and the zest of two limes. After straining, proceed with the usual base prep, chill it over the ice bath and blend in 1/4 cup of freshly squeezed, strained lime juice. 

After churning, this one also got a mix-in of additional crushed toasted coconut to add another dimension to the mouth-feel experience. Quite frankly, in spite of Steve's lack of excitement, I found it nicely lime-y and coconut-y. I gave it a thumbs up.

There's just nothing like homemade ice cream! Now YOU come up with your own favorite flavor combos. You can do it!

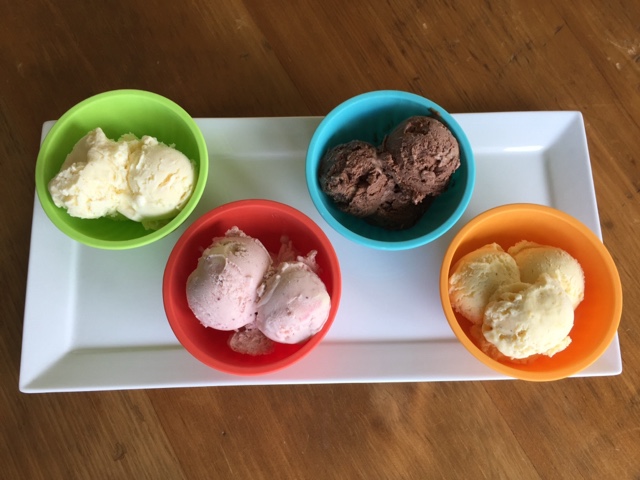
Happy summer everyone!

Babka trial Part 2 - chocolate pecan


Not to be deterred by a less than stellar result with my first pistachio version babka, I decided to jump right back on the horse and give it another go.  This time - chocolate pecan.

Before attempting this again I scoured books and online sources and reviewed babka (or kranz
cake) recipes from Yotam Ottolenghi's "Jerusalem", Packer and Srulovich's "Honey & Co. The Baking Book", as well as David Lebovitz's version of the Honey & Co. babka.  I had already done Peter Reinhart's dough with a "Bake from Scratch" pistachio filling.

I was ready.


I ultimately followed David Lebovitz's version of the Honey & Co. recipe with a few tweaks of my own based on all the recipe versions I had reviewed.

I'm not here to outline the recipe but to talk about my experience with the process.  The dough came together nicely and felt absolutely wonderful! So soft and pillowy with a hint of what the end product might bring.


I formed it into a ball, placed it in a lightly oiled container covered with plastic wrap and put it in the fridge overnight.


Below is what I had after the overnight rise - looks a bit puffier.  Remember this is a sweet dough and the rise may not be as pronounced as with a lean bread dough.


While the dough was warming up a bit I made the chocolate filling by melting 100 g unsalted butter in a saucepan, adding 150 g granulated sugar and blending to (mostly) dissolve the sugar. Off the heat I added 85 g chopped chocolate (70%), stirred to melt, then blended in 40 g Dutch process cocoa powder and a teaspoon of Vietnamese cinnamon. 

Please note!  The filling has to cool to room temperature so it's more paste like and easily spreadable on the dough, so plan ahead for that.

I decided to use pecans (rather than any of the other great nuts one might choose) so toasted and chopped 65 g of those.  I also followed David Lebovitz's path of using 65 g of my home made cocoa wafer cookie crumbs. Yum!

I rolled the dough out into an approximately 12" x 20" rectangle, spread the cooled, spreadable chocolate filling on, then topped that with the chopped pecans and cocoa wafer crumbs.  This was starting to look good.


This time I worked a bit harder at rolling a tight log.


Then I sliced it lengthwise down the middle and formed my braid.  Whew!  That went pretty well.


I was concerned that the braid was longer than my parchment paper lined loaf pan, but I plowed ahead and squidged (did I make that word up?) it into the pan to fit. By the way - this seems to be de rigueur in the various approaches I reviewed.


Will this turn out??!! Seems like a good deal of weight that has to poof up,  n'est-ce pas? 

During the two hour rise I went out for my daily walk and was happy to return to a decent looking pan of risen babka (or so I thought). 


I heated the oven to 350ºF (I used convection) then popped the loaf in for the recommended 30 minutes.  I generally check my goods about half way through the baking time and turn the pan to promote even baking.  It was looking pretty good.  After the 30 minutes I had my doubts as to how well the interior had baked.  I gave it another 5 or 10 minutes and thought the outside had browned quite nicely.

Even though my skewer placed into the middle of the loaf came out clean I was still a bit skeptical as to the extent of the bake - difficult to tell due to the chocolate filling/dough spiraled layers. But I took it out of the oven nonetheless.


Once out of the oven I brushed it all over with simple syrup which I had made a bit earlier with 100 g sugar, 125 g water and one tablespoon honey brought to a boil, boiled for about 4 minutes, then set aside to cool to room temperature.


I gave it a good 90 minute cooling before lifting it out of the pan by the parchment lining.  By that point the center of the loaf had collapsed, not usually a good sign.  Oh, oh. 

Slice into it I did and indeed found the center to be doughy and under baked.  Disappointing to say the least, but let's remember - it's all about learning.

I did have to wonder though - how DO those thin layers of dough and chocolate filling have the room to rise up under the weight of it all?


The good news is that I was able to salvage the exterior and end portions of the loaf so Steve and I could give this project a decent tasting.  In a word - delicious!!

The chocolate filling with the cocoa wafer crumbs was absolutely scrumptious, and the layers of dough were moist but not overly sweet.


I stored all the decently baked portions in a Tupperware container and we enjoyed them over the next couple of days - oh so tasty for a little sweet treat after lunch or for a mid-afternoon gouter with a cup of coffee or tea.

All in all not bad.  I'm considering one more babka go - they say the third time's the charm, right?

Why not - let's go for it!


Glace à la ricotta et macarons craquelé aux noisettes

Making ice cream at home is a special treat, and now that spring weather has finally appeared here in Providence, it seemed right to make a batch of creamy goodness.


Hurray!!

For those of you who aren't familiar with them, many basic home ice cream makers (lets call them ICMs) come with a special insulated canister that has to be frozen before use.  I like to pop it into the freezer at least 24 hours ahead of when I intend to use it - it has to be brrrrrr cold.

My first ICM (many moons ago) was a Donvier brand, hand-crank version that had a simple handle that fit into the top and required turning every few minutes over the 20-25 minutes it took for the ice cream base to firm up.  It was a work horse and delivered some delicious stuff, but, of course, I couldn't wander off when I was supposed to be turning the crank.  Then I moved up to (and continue to use) a Cuisinart electric version that plugs in, turns on and churns the mixture for you.  It's been great.

But enough about that.

I had a container of ricotta in my fridge that was just begging to be used.  After considering a ricotta cake of some sort, a little light bulb went on . . . .  how about ice cream?!

For some years now I've been using a basic ice cream base recipe from David Lebovitz - it's delicious and can be "doctored" to create whatever flavor you might want.  He describes a ricotta version of it in a 2014 post, and I decided to run with it.

The base calls for 5 egg yolks, which means there are egg whites to be used later!!  Time for some rustic macarons to go with that ricotta ice cream.  Yes indeed.

First the ice cream.

les ingredients

David's standard base calls for 2 cups of cream and 1 cup of whole milk, whereas this ricotta version calls for 1 cup of cream and 2 cups of whole milk ricotta.

Start by making a basic crème anglaise.  Have 5 egg yolks ready in a separate bowl.  Warm 1 cup heavy cream with 1/2 cup sugar and a pinch of salt just until you see small bubbles forming around the edges.  Temper the warm mixture into the egg yolks then return it all to medium heat.  Cook while whisking until little bubbles form around the edges and the mixture just begins to thicken.  Don't boil!

Strain into a clean bowl placed in an ice bath and let cool, whisking periodically.


Once the mixture has cooled blend in 2 cups ricotta (see note below), 1/4 cup honey and a teaspoon of vanilla.


A note about ricotta - store bought varieties tend to be grainy, so to smooth it out I whizz it in my small Salton processor for a few minutes.


before whizzing
after whizzing
Still a bit grainy but definitely smoother.

Pour the finished mixture into a covered container and refrigerate.  I like to make my base a day ahead of the actual processing step - it thickens and matures in the fridge.


cover and pop into the fridge

When ready to "spin" the ice cream (as they say in the biz), just pull the canister from the freezer, set up the ICM, stir a teaspoon of fresh lemon juice into the base mixture . . .


pour it in and turn 'er on!


and away we go!

In about 20 minutes it becomes a lovely, thickened, creamy ice cream.  Yes.


et voila!

Planning for the use of my 5 egg whites and continuing to pare down my supply of hazelnut flour, I decided to make a rustic version of macarons.  I have always found the classic French macaron process to be fussy and often frustrating, so I definitely prefer a more "rough and tumble" end product that doesn't have to be so pristine and perfect.

Some years ago, while I was in the thick of macaron making at Gracie's, I purchased Stéphane Glacier's book un amour de macaron.  


After paging through the options I chose to make a noisette version of macaron craquelé aux amandes to accompany the ricotta ice cream.


Let's go.


les ingredients

Egg whites mount better when warm so I weighed out my 150 gm and let them sit a while in the mixing bowl at room temp while preparing the other ingredients.

Weigh out 125 gm powdered sugar and 125 gm hazelnut flour and whisk them up, breaking up any lumps with your fingers (alternatively you can sift the two together to achieve the same goal).

Weigh out 42 gm sugar in a small bowl, have a pinch of salt and 3/4 teaspoon lemon juice ready (for the egg whites).

Whisk the whites with the salt and lemon juice on low-med speed until they start to get foamy.  Then add the sugar and whisk on high to softly firm peaks.


love those peaks

Blend the dry ingredients into the whites in two steps, gently folding until just incorporated.


ready to pipe

Since I wanted a finished base on which to scoop the ricotta ice cream I piped out approximately 3 inch rounds on one sheet pan . . .


and smaller rounds (that would later be sandwiched with chocolate) on a second pan.


Into the oven they go (350º for about 15 minutes) until lightly browned and set.


little cuties
The beauty of these goodies is they hold extremely well in the freezer.  I made them a couple of days ahead of serving, so into the freezer they went.

On the day that I planned to serve this dessert, I sandwiched the little ones with a chocolate glaze (113 gm chocolate and 42 gm butter melted together over a bain marie).


I wanted some additional crunch so I baked up some honeyed hazelnuts for garnish.


It's time for dessert!

The ice cream was pretty firm, so I had to soften it up a bit for scooping.  Into the bottom of the bowl went a macaron round, followed by the glace à la ricotta (which got a little softer than I intended) and then a mixed berry and crunchy honeyed hazelnut garnish.  A couple of dainty chocolate sandwiched macarons along side and the deed was done.


et voila!
Now I'll admit that I snuck a taste of the ice cream right after processing it and, while the flavor was good, the texture was a tad grainy.  But somehow it smoothed out after a rest in the freezer for a day or two.

The final verdict - deeeeelicious!  The combination of fruity, nutty, crunchy and creamy was superb.  Just goes to show ya that it never hurts to try something new.