Saying goodbye to Paris


We had a wonderful adventure this go around, starting with our visit with the MacDs in Lille, our WWI sites tour with Richard and Pauline and finally 10 days in Paris focusing on cemeteries for Steve and pastries for me.  And of course we were able to do a fair amount of flaneur-ing as we strolled around some of our favorite spots.

Our last day in Paris was a beauty - 60s, sunny, breezy and oh so lovely.

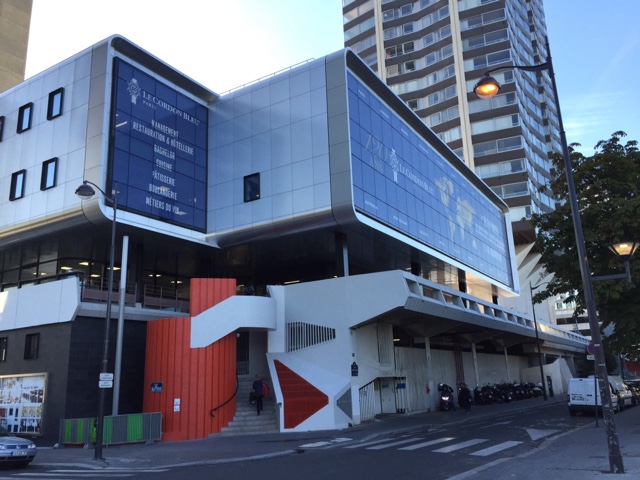
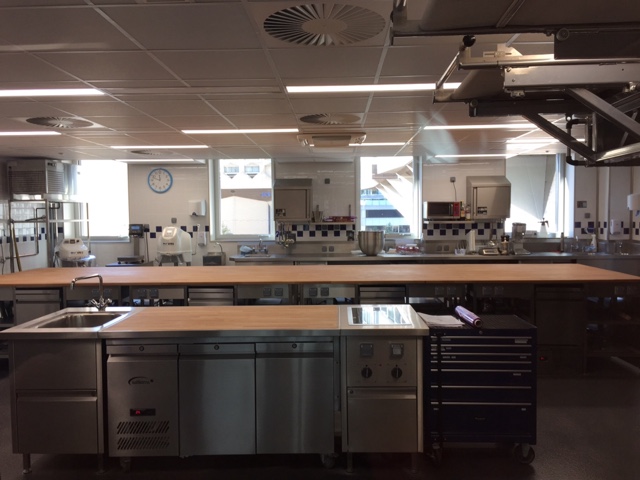
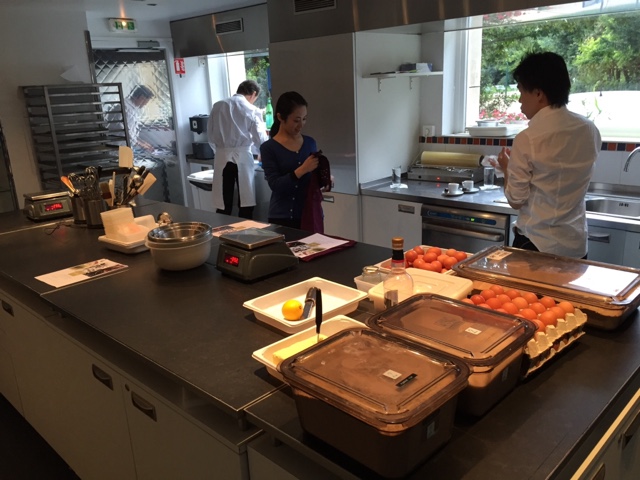
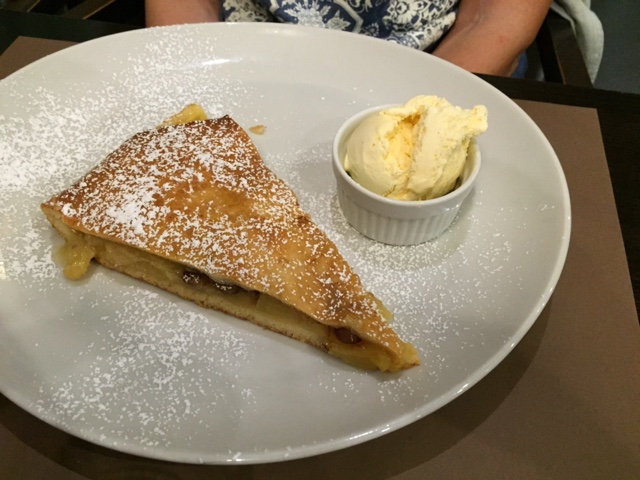
That morning Steve had a cemetery visit to make and I visited the new LCB Paris. We then connected at metro Sèvres-Babylon and strolled to rue du Cherche-Midi for lunch at Cuisine de Bar.  For years I've been enamored of this spot for dejeuner, right next to the Poilâne boulangerie, but this time we were unimpressed.  The  main server didn't seem able to get his act together, even though this is a small place and it wasn't very busy.  Finally we were served our tartines (open face sandwiches) made with Poilâne bread and, in our case, topped with a curry chicken.  It was tasty I must admit, but the place has lost it's appeal, and I suspect we won't go back again.

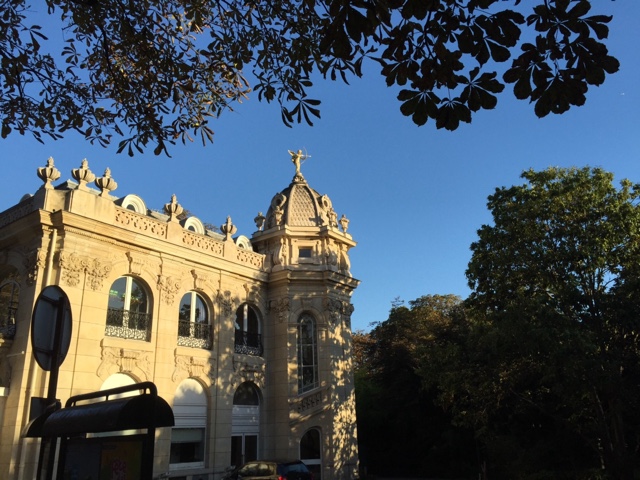
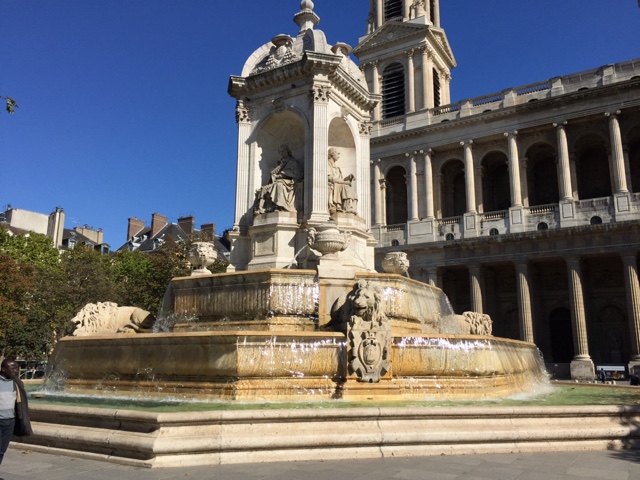
We meandered over to Saint-Sulpice with its impressive statue and fountain . . . .


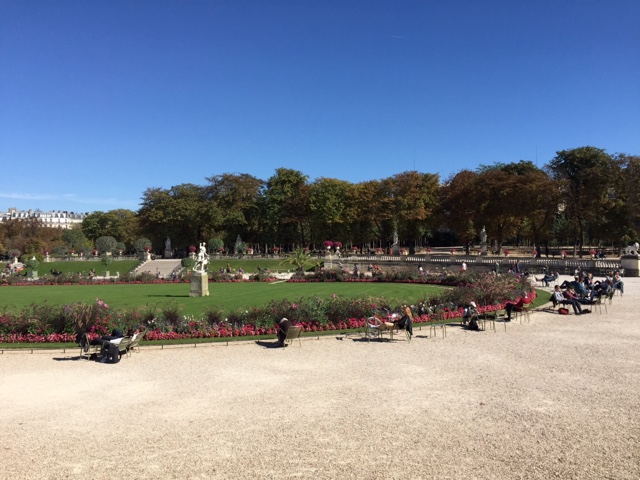
and then wandered over to the nearby Jardin du Luxembourg, one of the best places to hang out in Paris if you ask me.  Since it was such a beautiful day many people were sitting in shorts and shirtsleeves soaking up the autumn sun in an attempt to extend their summer tans.


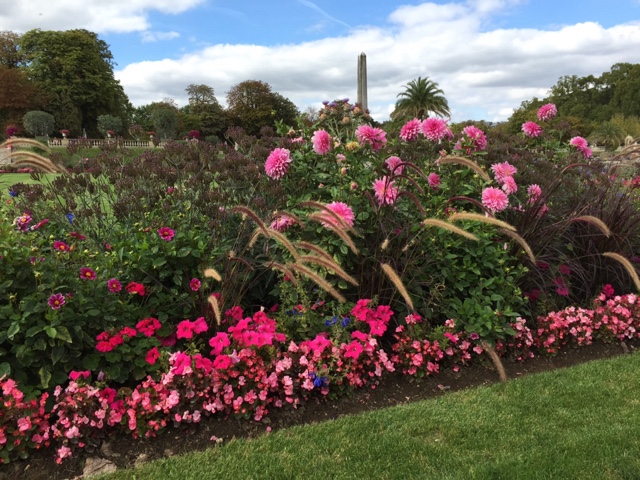
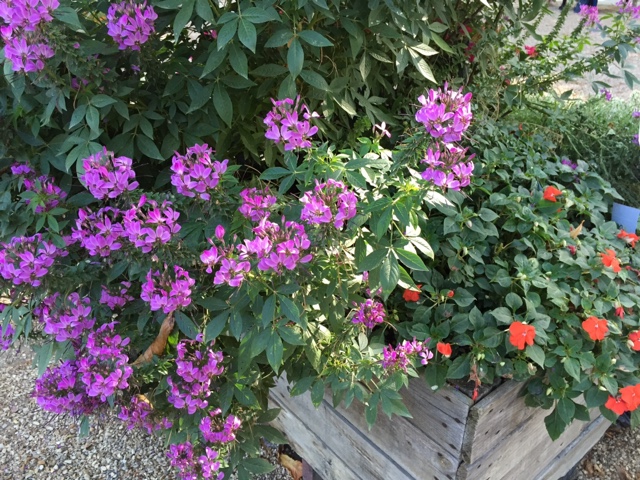
So many beautiful flowers!


We headed back to our apartment so I could start tackling the packing before going back out early in the evening for an aperitif and then dinner on rue Saint Anne, the Asian restaurant hot spot in Paris.

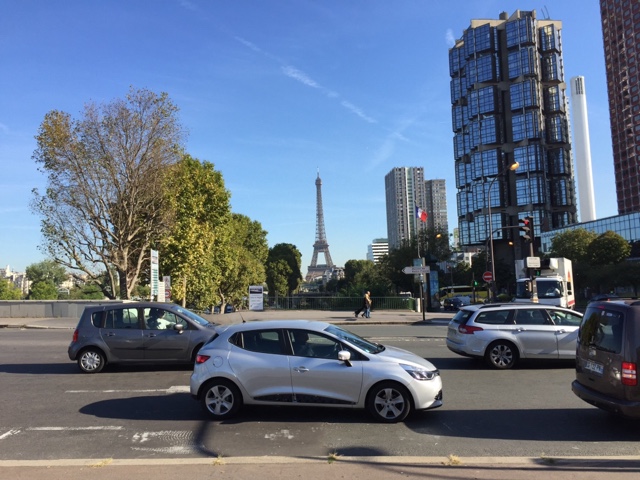
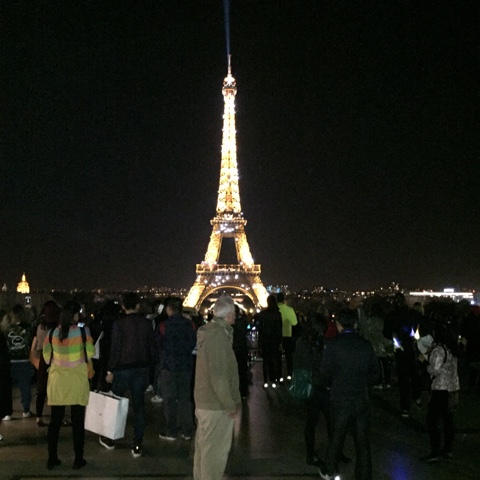
And finally we just had to finish up on the Trocadero to see the Eiffel Tower in all its twinkling glory!


So long Paris. Until next time.


A visit to the new Le Cordon Bleu in Paris

It was our last day in Paris before heading back to the US of A - what to do, what to do.  Steve had a cemetery investigation project on his hit list, and I had been wanting to visit Le Cordon Bleu, so off I went to do just that.

I had learned not too many months ago that LCB Paris had built a brand new facility on the Quai André Citroën in the 15th arrondisement, right down the street from the Eiffel Tower and in sight of the Statue of Liberty (the French have the original you know) sitting in the middle of the Seine.


Lady Liberty

I found the school without difficulty, although it is a bit of a metro ride on the 10.  A quick walk down Quai André Citroën and I was there.


Somewhat spaceship like in appearance, it's a far cry from the old LCB with its unassuming facade and entryway.  My, those were the days.

One enters via the stairway next to the orange structure you see above.  The space inside is light, spacious and airy with a friendly woman at the reception desk asking how she could help.  When I explained that I'm an alum and would love to see the new school, she promptly called to see if someone was available to give me a tour.


Philippe Rocheron is the school's public relations man and served as my guide.  He and I had actually communicated by email some months ago when I was expressing some interest in their new Diplôme de Boulangerie.  It was nice to put a face with the name.  

There weren't any classes actively in progress for us to visit, but there were a lot of students sitting out in the open areas having their lunch before going into the practical kitchens a bit later.

I was particularly interested in the boulangerie kitchen and was impressed by the wooden topped work tables (my favorite surface on which to work with dough!) and the well equipped space.  Ahhhh - maybe someday.


On the main level there is a small cafe that sells goods made by the chefs at LCB.  As the students become more savvy about production and become more accomplished at things like laminated dough, their end results also go into the case.


My how things have changed - and for the better I might add.

Thanks for the tour Philippe!

A walking tour of Montmartre with Clotilde Dusoulier

For those of you who aren't familiar with Clotilde Dusoulier, she is a Parisian food blogger and author extraordinaire who has been writing the blog "Chocolate and Zucchini" for 13 years now (not to mention her other numerous contributions to the food world).

Back in 2009 on a 2 week trip to Paris Steve and I used Clotilde's book "Edible Adventures in Paris" as our sole guide for all things food related - restaurants, bistros, boulangeries, pâtisseries, épiceries, chocolateries etc.  Each spot we either visited or dined in was absolutely up to par, and nary a disappointment in the bunch.

I've also emailed Clotilde a couple of times over the years with various questions, and she has always replied promptly and cheerfully.  Whenever we see her picture, we think of a pixie - smiling and friendly.

Sooooooo . . . . . When we decided to make this trip to Paris, we thought what better time than to meet Clotilde in person.  We booked a two hour food related walking tour of Montmartre with her, and here's the story.

We met her at the Abbesses metro stop and set out from there down rue des Abesses.  At various stops Clotilde purchased goodies for us to sample.  Nice.


Our first stop was a fruit and veggie vendor where everything was set out artistically, full of color and variety.  We tasted fresh green and purple figs - perfectly ripe, as sweet as honey and oh so good.


Our next stop just a little way down the street was a boulangerie/pâtisserie that has won the "best baguette" or meilleure Baguette de Tradition de Paris competition not only once, but twice!  It turns out each year's winners can't compete again for four years, so after a win in 2010, the chef entered again in 2015 and won a second time!  Pretty unheard of according to Clotilde.


We sampled one of the baguettes and experienced a just-right crisp crust, an open almost buttery interior with a certain softness (NOT doughiness) to the crumb (you had to be there!) and a delicious, natural flavor.


From there we wended our way over to rue Caulaincourt and the pastry shop of Gontran Cherrier.


M. Cherrier holds the prestigious honor of winning the meilleur croissant de Paris award and so, of course, we had to sample one of his croissants absolument!


I'm not quite sure how to describe this.  Perhaps because I've spent so much time researching croissant recipes, trying different butters, tweaking my folding techniques and resting times and sampling different finished products, my mind has become cluttered with the characteristics of a really, really good croissant.

For me, there has to be that cascade of crispy shards from the exterior as you pull it apart or bite into it.  The interior should be buttery, but not too, with a texture that's a cross between bread and flaky pastry, with perhaps a hint of chew but not too dense or heavy.

This croissant had beautiful, well defined laminations and a delicious flavor, but the exterior didn't have that shattering shard quality and the texture seemed just a tad dough-y to me.  But who am I to say?

Nonetheless, Steve and I finished it off with aplomb.

We meandered back to rue Lepic where we visited  L'Épicerie du Terroir, a shop full of all sorts of food goodies - oils, herbs, spices, specialty salts, peppers, nougats, mustards, jams and on and on and on. 

Clotilde suggested that this is a great place to pick up food gifts to take back home, however we weren't in the market for anything in particular so we simply looked and savored the possibilities.


Right next door was a fascinating tart shop, Les Petits Mitrons, full of rustic, simple tarts.  Unfortunately they didn't allow photos to be taken inside the shop, and the glare of the sun on the front window made it impossible to get a decent photo from outside. Bummer with a capital B!!


We did have a slice of the apricot-plum tart - basically fresh fruit baked on a sablé crust which is somehow coated in sugar and caramelized.  Clotilde is working on figuring out just how they accomplish this feat.  I'd certainly like to know!

Alas we'd already taken a few bites before Steve snapped this photo.  Delicious!


Throughout our strolling and tasting we chatted about various things, including my love of shortbread and tarts.  We were getting close to the end of our tour so Clotilde gave us the option of visiting a fromagerie vs. a biscuiterie (cookie shop for you English speakers).  Of course I was all for the second option, so off we went to the relatively new shop of Gilles Marchal known as Compagnie Générale de Biscuiterie Montmarte.  Now that's a mouth full!


We chose an assortment of delightful sablés, financiers and palets Bretons which were displayed simply in cookie tins.  One can buy mix and match flavors starting at a minimum of 100 grams (about 14-15 petite cookies) in a cellophane bag or choose a larger assortment lined up nicely in a tin.

The shop also has other types of biscuit already packaged up for sale - arlettes (caramelized puff pastry crisps), dacquoise, macarons rustique to name just a few.

This place is right up my alley.


After sampling just a few of our biscuit it was time to say goodbye.  We gave Clotilde our hearty thanks, strolled down rue Lepic to the Blanche metro stop and headed back to our apartment. 

We thoroughly enjoyed our time with the Parisian pixie from Montmartre.  Thanks so much Clotilde!

Succès class at Le Nôtre

Succès au praliné, a classic French dessert, was the subject of my third and final class at Le Nôtre Paris.  It requires some planning and make-ahead preparation, which stands one in good stead when it comes time to assemble this particular delight.

There were again three of us in the class. In addition to myself, a young 20-something Parisian woman (no English) who does a bit of baking at home and attended the class thanks to a gift certificate, plus a Japanese woman (no French) who makes pastries in Japan.  This was another interesting dynamic with the chef at times speaking English to the French woman and French to the Japanese woman - a bit confusing to say the least.

Nonetheless there were lots of smiles and head nodding going around as we worked our way through the recipe.


I recall making succès during pastry school at Le Cordon Bleu and having my crème mousseline improperly set and oozing out of the sides - not a pretty picture.

However this time the whole process felt pretty straight forward, something that 10 years of professional experience under my belt aided tremendously.

The base of this dessert is essentially a meringue made with egg whites, sugar, almond flour, powdered sugar and a bit of milk.  It's piped in two rounds and baked low and slow, resulting in a light, airy and crisp meringue.


It is filled with crème mousseline (blend of crème au beurre and crème pâtissiére) mixed with nougatine (chopped caramelized almonds).  Separate preparation is required for the various components, and it all comes together in the end.

A note on crème au beurre:  typically made with Italian meringue to which butter is added, Le Notre's recipe involves making a crème anglaise which is whipped until cool, then butter is blended in and finally the Italian meringue is added.  It makes for quite a light (believe it or not) and delicious mixture.

Below is the large bowl full of crème mousseline and the chef working on his assembly.


After the crème is sandwiched between the two rounds of meringue, the edges are coated with more crème and then covered with pralinettes (more caramelized chopped almonds - yum!).

Crème coating underway . . .   


and pralinettes going on!  Just pick up handfuls and press lightly.


We all assembled and coated our respective succès, dusted them with powdered sugar and that was that!


The amazing thing about this cream filled meringue, so full of butter, is how light in taste and texture it actually is. Incroyable!

And guess what?  Surprise, surprise, surprise - Steve loved it!


Les Tartes class at Le Nôtre


My second class at Le Nôtre's Pavillon Elysée was, of course, one of my favorite topics - tartes!

Same place, same kitchen, same chef, different group.  My classmates were two women of similar vintage to myself, one Parisian and one American married to a Frenchman.  They had both previously attended classes with the same chef instructor so there was some chitchat about how they spent their summer etc. 

The class was pretty much all in French and, while I understood most, there were times when my head was in a fog and was putting up roadblocks to my comprehension.  But, all in all, it went well.

On the docket:  tarte tatin, tarte bourdaloue, tarte au chocolat.

Our first task was to peel and cut up apples and tuck them into a round pan that would ultimately go into the oven.  We could choose apple halves standing on end or, as the chef demonstrated, apple quarters in two layers.


Next the chef prepared a large batch of caramel which included a bit of pectin. This was a new twist for me, and the chef explained that it helps the caramel set once the tarte comes out of the oven. Interesting.

The caramel was poured over the apples and the mélange was baked for about an hour until the apples were nicely baked through.


Then a round of puff pastry was placed over the cooked apples and the whole she-bang went back into the oven for another 20 minutes or so until the puff was nicely browned.


We didn't turn these out of the pans until the end of class to avoid the puff from getting soggy whilst having caramel-y apple goo sitting on top of it.

Below are the final results. The top right one is the chef's - he did two layers of apple quarters, and I really prefer the look of that one.  Note to self!

Mine is the bottom left and should have had the apples packed in more tightly - too many gaps methinks, at least on the left side.


The tarte bourdaloue is a variant of the classic pear almond tart, the big difference with this recipe being that the almond cream filling also contains a hefty dose of heavy cream. This made for a much more liquid mixture so when we tried to artistically place our thinly sliced pear halves on the filling, they swam around a bit.


Once baked however, everything seemed to be in good position, so it all worked out in the end.  A bit of glaze and some toasted sliced almonds et voilà!


The tarte au chocolat was made with the same pâte sablée as the bourdaloue, first blind-baked then filled with a mixture of chocolate ganache, eggs and vanilla and baked until set. 


Once cooled we gave it a finishing chocolate glaze.

At the end of class we tasted the tarte bourdaloue which I found delightfully light with good pear flavor and a crisp crust. We boxed up our three 7" tarts for tasting at our leisure i.e plenty of dessert for several nights to come (Steve is in heaven).

The main thing I took away from this class was the chef's method for lining the open tart rings (which we did for both the bourdaloue and chocolat).  While hard to describe it here, it differed slightly from the way I've been doing it since the days at Pascal's, and I found it quite rewarding.  So three cheers for learning new techniques!  

That's why I continue to take classes when I come to Paris - even though the topic/recipes may be something I've made before, there's always a tip or technique I come away with that makes my baking life a bit more enchanting. And so it goes.

Brioche class at Le Nôtre Paris

Heading over to Le Nôtre's Pavillon Elysée from our 20th arrondissement apartment rental took a bit of metro planning but it worked out quite nicely.  A brisk 10 minute walk to the Alexander Dumas stop on line 2, change over to line 1 at Nation and take it to the Champs Elysée Clemenceau stop.

I love getting off there - you see the great Charles DeGaulle statue as you exit, then turn around to see the Grand Palais rising above you.  And then you see the Arc De Triumphe as you're crossing the Champs Elysée!  Not bad.


The Pavillon Elysée is easy to spot, and I learned that the angel sculpture on top is one of Gustave Eiffel's creations


One enters through an unassuming door . . . . .


and is invited inside by pleasant staff ready to serve you coffee, water or whatever.

The kitchen space is fairly small but well laid out for classes of 3-8 people.


My first class was Kouglofs et Brioches which was also attended by a young Japanese couple.  Chef Pierre Prevost was the instructor for the 3 of us.  There was a mix of English and French going around, but it all seemed to work out.  Interesting how that happens. 

We made two different brioche doughs, each with slight variations in the quantities of butter, sugar, yeast and water - one earmarked for kouglof with rum soaked raisins and one for brioche Parisienne and whatever other shape we might want to do.  

This is what we ended up with:  kouglofs individuel, brioche Parisienne and a pretty standard ring of brioche buns.


Pretty tasty too!

The new thing I took away from this one is the recipe for an almond syrup made by cooking a mixture of equal parts almond flour and powdered sugar (the French call this tant pour tant) in a simple syrup.  We dipped the warm kouglofs in this stuff and put them back in the oven for a minute or two to dry the syrup.  Deelish!

All in all a good day.

Gateau au chocolats from Des Gateaux et du Pain

The other day we visited with our friends Val and Hubert, along with their beautiful and delightful children Arianne and Gabriel.  Since we were going to be at their apartment during the le gouter time of day, we stopped at a nearby patisserie to pick up something delicious to share.

We had visited Des Gateaux et du Pain once before some years back and were struck by the art gallery like arrangement and presentation of the pastries.  As I recall we had tried one of their croissants (OK) as well as a petit pain aux cereales (delicious), but ultimately we were put off by the snobbish behavior of the staff and the fact that they did not allow any photos to be taken. 

This time I wanted to give it another try, partly because the pastries are indeed works of art, but also because the chef happens to be a woman.  Let's hear it for the ladies!

And so we went.


We opted for the gateau au chocolats, a triple (or even quadruple!) chocolate creation from chef Claire Damon - a base of biscuit au chocolat, then a ganache layer topped with chocolate mousse and finished off with chocolate glaze.  Wow.  

It was delicious!  Luscious and chocolate-y yet light and oh-so-good.

While we made a pretty good dent into it, there was plenty left over for a split between Val and Hubert and us to take back to our apartment.  Oh boy - dessert for the next couple of nights!


On a final note, as an accomplished shortbread creator and taster, I simply to had buy some of Claire's sable au caramel et fleur de sel.


These were a disappointment.  The texture and flavor just weren't there.  Sorry Claire!

Café gourmand


Even though we never made it to Sunday brunch at Méert in Lille, I've made up for it by trying a few desserts during our dining adventures in Belgium and northern France.

A very popular choice in this part of the world for ending one's meal is the café gourmand - a combo of coffee and a selection of petite treats. At Markt 38, a traditional restaurant in Poperinge Belgium, I went for it. It was an interesting melange of fresh fruit, petit eclair, Chantilly cream with crunchy chocolate beads, panna cotta, eggnog straight up, ice cream and, last but not least, chocolate mousse. You get the idea.

Our friend Richard had a local specialty that was reminiscent of a rhum baba, served with ice cream and topped with some type of crispy tuile. 


Richard's wife Pauline had the house version of apple pie which was more like a thick crepe filled with apples and raisins with vanilla ice cream on the side.


We all enjoyed our treats as well as the chance to discover a taste of true local cuisine.

Paris here we come!

Méert pastry shop in Lille


Steve and I arrived in Lille France yesterday to visit niece Christina and her family for the next few days.  I had seen and heard a number of "must visit" comments about Méert, the well known Lillois patisserie, and it was one of the first stops on our hit list.

It turns out the shop is literally around the corner from Glen and Christina's apartment, so once we were up and about and had enjoyed our delicious morning coffee compliments of G&Cs Nespresso machine (with frother I might add!), we headed out the door.

As is true of pretty much all pastry shops in France, the window displays are mouth watering.  Méert's is no exception, although I won't even begin to try and tell you the names of all this stuff!


The viennoiserie case held the classics - brioche, palmier, chausson aux pommes, croissant, pain au chocolat and more.


Christina, Steve and I each sampled a treat and were more than content. We hope to return and experience the salon de thé portion of the shop - we're shooting for Sunday brunch with the MacDs (with more photos to come!).

As an end note, here's a pleasant little travel story - as we were standing in line at the shop, a Lillois woman entered and started chatting with us, giving me a much needed chance to practice my French. Of course, Steve was throwing in some Italian with which she seemed quite delighted.  She spoke English as well, telling us of her travels to the USA in the past - California, TX/LA and New York. She confirmed that our dining out choice for tomorrow night was excellent and gave Christina more tips about places to visit and/or eat. She and I exchanged contact info, and she even suggested we connect via Skype or FaceTime periodically so I could practice my French.  Now isn't that interesting?!

You never know the paths that might cross in life, eh?

Peach blueberry buttermilk cake

A short note this time.  We're remembering 15 years ago today.  Peace be to all mankind.

As Steve and I have been anticipating our departure for France on September 12, we've had an eye toward using up ingredients and leftovers in our fridge.

I happened to have some roasted peaches and buttermilk on hand, so for the Labor Day holiday last weekend I made a peach blueberry buttermilk cake.  Summer fruits are still available at the Fulton Market, and one simply can't ignore that fact!


Enough said.

More coming soon once we reach France - first stop Lille!

A bientot tout le monde!

Cherry-berry feuilleté and peach buttermilk ice cream


The summer annuals are showing off their colors here in Grand Rapids MI . . . .

lovely coleus in our little garden courtyard

and the summer peaches are out in full force!


Fresh Michigan peaches are one of my favorite fruits.  So of course I've been thinking of the many wonderful ways to use them.  This time I was inspired by a peach buttermilk ice cream recipe from "Food and Wine" magazine.


I followed the recipe for my usual ice cream base (2 cups heavy cream, 1 cup whole milk, 3/4 cup sugar, 5 large egg yolks, pinch of salt) replacing the cup of whole milk with buttermilk.  I blanched 1.5 pounds of peaches, then peeled, pitted, sliced and blender-ized them with a squeeze of lemon juice, folding the purée into the cooled base.

peach purée at the ready

ice cream base finishing its chill down

I usually chill my base in the fridge for a day or two, then process in my ice cream maker and transfer to a freezer container several hours before serving.

I also wanted to use some cherries and blueberries I had on hand to complement the peach ice cream in a dessert I was planning for a family meal.  And, to top it off, there was some reverse puff pastry in my freezer just waiting to be made into something oh-so-delicious.

The beauty of the feuilleté preparation is that I can roll, shape and bake them ahead of time and hold them either at room temperature if using the same day, or in the freezer for a number of days if planning a bit farther ahead.


When ready to fill them, I simply push down the center layers of puff to make room for the fruit mixture that will be mounded in the feuilleté.

I mixed 4 cups of fruit (cherry/blueberry combo) with a teaspoon of fresh lemon juice, 3-4 tablespoons granulated sugar (I like my fruit on the tart side) and 1 tablespoon cornstarch. I then cooked this concoction on med-low heat until bubbly and thickened.

Note:  this quantity of fruit filling was enough for 7-8 feuilletés about 3.5 inches square.

Then I scooped a mound of filling in the center of each feuilleté and baked at 350ºF for about 10-15 minutes.  Since the puff pastry is already baked and the filling already cooked, it's really just a matter of heating everything up.

Once cooled, I topped each one with previously baked matcha crumble (really more for color contrast than taste) and gave them a light powdered sugar dust.

the end result!

I know I've mentioned crumble before in this blog.  It's a great thing to have on hand and is so easy to make.  Make as much or as little as you'd like.  

Simply mix equal weights flour and sugar in a medium bowl, sand in the same weight of cool, diced butter to form coarse crumbs.  In this case I added some matcha powder with the flour and sugar (you don't need much).

Spread the crumbs out on a parchment lined sheet pan and bake at 325ºF, stirring and breaking up clumps every 5 minutes or so until lightly browned and crisp, 10-15 minutes total.  Let cool.

Store in a zip-top bag in the freezer and use at will!

For serving I simply placed a scoop of peach buttermilk ice cream atop each feuilleté (no muss, no fuss) and handed 'em out.

Mmmmmm!

While the ice cream was a bit more icy in texture than I had hoped (I suspect due to using low fat buttermilk rather than whole milk, plus the water content of the fruit purée), the contrast of the tangy peachy coolness with the tart cherry-berry filling and buttery, flakey puff was oh-so-good indeed.

Three cheers for summer fruits!  Hip hip hooray . . . .


Pavé aux amandes

Sum-sum-sum-sum-sum-sum summer time!  It's been a good one so far.  Teaching classes at the new Sur La Table here in Grand Rapids and baking croissants, pain au chocolat and croissant aux amandes for Nonna Cafe have been keeping me busy (not to mention a little gardening, family visits and the odd day trip here and there).


Periodically looking back at some of the classic recipes from pastry school, I recently decided to make a classic French pavé aux amandes, a moist, dense-but-not-heavy almond cake.

I think of this as one of the many treats that kids might enjoy for le gouter, the traditional afternoon snack time in France, usually around 4 pm.  And of course adults wouldn't mind it either with a nice cup of coffee or tea.

Top it with a delicious whipped mascarpone cream and some fresh seasonal fruit and you have yourself a tasty dessert!

It's a simple and straight forward recipe, baked in a 9" square shallow pan lined with parchment, buttered, then sliced almonds layered on the bottom.


les ingredients

Cream 125 gram softened butter with 200 grams sugar until blended.  I do this in a medium bowl with a spatula, but you can also use a stand mixer with the paddle - just don't cream too long since you really don't want to aerate this batter.  It's meant to be a dense cake.

Then blend in 250 grams egg (about 5 whole eggs) followed by 250 grams blanched almond flour.

Note: for a bit of variation add some orange zest and a splash of vanilla and/or almond extract to punch up the flavor.  Yum.

And that's it!  How easy is that, eh??

The trickiest part of this whole thing is transferring the batter to the prepared pan.  Do it carefully - I place blobs of batter over sections of the pan, then gently spread so as not to dislodge the almonds on the bottom.

evenly spread and ready for the oven

Bake at 325ºF for about 45 minutes until the top is golden brown, there is no jiggling in the center and it feels firm to touch.  You'll see a few moist crumbs if checking with a skewer or cake tester.


Carefully run a knife around the edges of the cake and turn it out onto a cooling rack.


Once cooled, dust the top with powdered sugar and dig in!


The flavor is subtly almond, the texture is dense yet light and the crumb oh-so-moist.

And guess what - Steve liked it!!  Yay!!!

Cherry hazelnut clafoutis tart

More Michigan cherries comin' your way!


As the season continues and other stone fruits and blueberries are starting to show their faces, I just had to make something using Michigan cherries before they're no longer available.

We were slated to attend a Bastille Day celebration put on by the GR chapter of L'Alliance Française, and I had promised to bring a dessert.  Cherry clafoutis came to mind, this time as a tart.

I lined a 240 mm tart ring with a standard pâte sucrée and blind baked it first.

going into the oven

The filling is very straight forward.

les ingredients
 
Place 3 large eggs into a bowl; whisk in 100 grams sugar, 25 grams almond flour, 150 ml heavy cream, 25 grams melted butter, 1/2 tablespoon vanilla extract, 1/2 tablespoon flour and 30 grams hazelnuts (coarsely chopped).

Place 300 grams pitted and halved cherries into the blind baked shell . . .


pour the egg/cream mixture over them . . . .


and bake at 350ºF for 30-40 minutes until the filling is set.

et voilà!

For serving I topped the tart with a hazelnut crumble which I had baked ahead of time and had in my freezer.


FYI:  a basic crumble is equal weights flour, sugar and cold, diced butter - make as much as your heart desires.

Add in the same weight of your favorite chopped nut (or less as you see fit) and you have a delicious crunchy topping to complement your tart.

Or add in some citrus zest and your choice of spice like cinnamon, coriander, cardamom or  nutmeg - you get the idea.

Baked or unbaked, you can freeze it to have on hand for lots of things.

Here's to a beautiful summer in Michigan and lots more fruit to come!!  Yes.


Happy July 4th!!!

Here's to a wonderful Independence Day for all!

It's a beautiful day here in West Michigan and Steve and I look forward to celebrating the holiday this afternoon at Clear Lake with the extended TenHave clan.

Cherry-berry cobbler is on the dessert menu.


I'll give you a quick narrative (hmmm - do I ever do anything quickly in this blog?) of the recipe, my take on a peach blackberry cobbler from Emily Luchetti's book "Four-Star Desserts".

And since this is, after all, a classic American holiday, I'm giving you the ingredients in traditional American measures.

The cobbler topping is a delectable cornmeal dough made by combining 3/4 cup all purpose flour, 1/4 cup cornmeal (I used fine yellow), 2 tablespoons granulated sugar and a pinch of salt.

Sand in one stick (4 oz) cool, diced butter to coarse crumbs, toss in 1-2 tablespoons ice water and mix just until it comes together.  Easy-peasy!!

Roll the dough out between sheets of parchment or plastic wrap to a thickness of about 1/4 inch then chill in the fridge.

Cut desired shapes (I opted for a stars and stripes motif bien sûr) and hold them in the fridge or freezer until ready to use.

Heat your oven to 350ºF.

For a 9x13 clear Pyrex dish I prepped about 8 cups of fruit, about half of which was a combo of Rainier and dark sweet cherries that I had purchased at the Fulton Farmer's market.  Blueberries and raspberries filled out the mix.


Toss the fruit with a mixture of 1/2- 3/4 cup granulated sugar (see NOTE), 4 tablespoons cornstarch, a large pinch of salt and a half dozen or so grates of fresh nutmeg.  I also added about 1/4 teaspoon ground coriander.  Squeeze a bit of lemon juice in to help brighten the taste of the fruit.

NOTE:  when adding sugar, consider the natural sweetness or tartness of the fruit you are using; start your sugar addition on the lower end of the scale and add as needed to taste.

As you can see above, I have my dough cut and ready to go.

Place the fruit mixture in the Pyrex dish, drizzle 6 tablespoons melted butter over it and top with the dough shapes.

Egg wash the dough and sprinkle with sugar.  I like raw sugar - it gives the finished product a nice crunch.

ready for the oven

Bake at 350ºF for about 40-45 minutes until the topping is golden brown and the fruit filling is bubbling.

et voilà!

You can be sure we'll be enjoying this later in the day with some vanilla ice cream, oh yeah.


And a Happy July 4th to all!!

Michigan cherry charlotte

It's Michigan sweet cherry season!


There are so many delicious things to make with sweet cherries, and, since I had some petite lady fingers in my freezer, my mind turned toward a cherry version of a classic charlotte.


A charlotte is a dessert assembled in a mold lined with lady fingers, sponge cake or bread and then filled with a fruit mousse, Bavarian cream, whipped cream or custard.

I remember making a pear version in pastry school and recall it was quite tasty indeed.  I don't believe I've made one since.

It was time.


First a brief note about lady fingers.  They belong in the category of sponge cake and are really quite straight forward to make.

To prepare for piping the lady fingers I marked a half sheet pan in 3 inch wide increments as a guide for my piping.  You can make your lady fingers any size your little heart desires!


The base recipe we used at Le Cordon Bleu calls for 4 eggs, separated; 125 grams sugar and 125 grams all purpose flour.

The egg whites are whipped to medium stiff peaks along with half the sugar.  The yolks are then whisked with the other half of the sugar until pale and thickened and are folded into the beaten whites.

beaten yolks and whites plus flour ready to be added

Then half the flour is gently folded into the egg mixture, followed by the second half of the flour just until blended.  Don't overwork it.


all folded and ready to pipe

Pipe the batter in rows . . . . .


and dust with powdered sugar before baking in a 375 F oven for 15-20 minutes until lightly browned.

ready for the oven
Et voila!


I had served some of the lady fingers sandwiched with lemon curd and strawberry jam at a recent demo presentation, but the rest went into the freezer (they freeze very well!) just waiting to be incorporated into a luscious, creamy charlotte.

I used a 16 centimeter round ring mold for my charlotte assembly and opted to bake a round of tart cherry shortbread as my base.


ready for the oven

Once the shortbread base was baked and cooled, I lined the ring rather rustically with waxed paper sheets, put the shortbread base in and coated it with a brushing of chocolate ganache.  This was meant to protect it from the soon-to-come cherry mousse filling and keep it crisp.


I then lined the ring sides and base with the lady fingers and imbibed them with vanilla simple syrup.


I wasn't quite ready to make my cherry mousse so I popped the assemblage into the freezer to await the final stages.

For the mousse I needed cherry purée, whipped cream and Italian meringue (boy, I haven't made THAT in forever!!).

I puréed 130 grams of pitted and halved cherries with about a tablespoon of sugar, a generous squeeze of lemon juice and a couple of teaspoons of water.

yup - looks like a purée

I made a small batch of Italian meringue by cooking 50 grams sugar and 20 ml water to 118ºC . . . .


then pouring the sugar syrup over one whipped egg white and whipping until cooled and nicely shiny and stiff.

(Note to self - plan ahead for various uses and make a larger batch of Italian meringue next time!)

Then I whipped 150 ml heavy cream to soft peaks.

Below are all three components ready to be blended.


Once the mousse was blended I filled my lady finger lined charlotte ring and smoothed the top.


I placed the charlotte into the freezer to set.

For my garnish I used 120 grams of pitted and halved cherries, cooked them with a little sugar, cornstarch and lemon juice until thickened, then let them cool.


Once the mousse was set (after an hour or so in the freezer), I topped it with the cooled cherries and added a rim of crushed chocolate shortbread cookies to give it a bit of flair.

Michigan cherry charlotte
Mom came over for a delicious summer supper of grilled chicken, fresh green beans with broccoli and sliced almonds thrown in for good measure, and couscous (all prepared by head chef Steve!).

And, of course, for dessert we three simply had to sample the cherry charlotte.


We agreed that the mousse was SOOO . .  light with a clear taste of cherries.  The shortbread crust, cherry topping and dashes of chocolate all made for a tasty combination.

And after an overnight in the fridge it was still delicious the next day - yessirree!

Here's to summer!!

Back to basics - pâte brisée

now THAT's flaky

In the wake of a tart class that I taught a few months back, when my apple tarts baked with pâte brisée came out soggy and under baked, I was determined to revisit the techniques involved in making this classic dough. (SIDE NOTE: in my defense the apple filling prepped by an eager culinary student was way too soupy, and the oven I used was not familiar to me, but I still felt the need for a refresher!)

Known to pie and tart bakers as flaky pie dough, pâte brisée can cause the most confident baker to question why, why, why doesn't this dough come out perfectly EVERY time?! Some years ago I compared a number of recipes and methods for pâte brisée and came away with a version that was delicious and seemed to be just the thing. But since then, even though I've used the same recipe and technique every time, I've had my share of less than stellar results. Maybe it's just me, eh?

I proceeded to look at recipes from Christophe Felder (one of my favorite tart makers) and Thomas Keller of French Laundry/Bouchon Bakery fame. In addition I obtained the recipe that the bakers at Nonna Cafe in Ada use (I've had their quiche many times and the crust is always deeelish!). The last addition to my test quartet was the recipe I've been using for years.

Truth be told, many pâte brisée recipes are very similar, but what intrigued me about these four was the difference in ratios of butter to flour, how much water is added and how the ingredients are brought together.

Here we go!

Pâte brisée is simply flour, cold butter, salt and ice water (some recipes add a bit of sugar too). In the photo below I've provided the amounts of butter and flour for each of the four recipes. From left to right you see the following ratios plus baker’s percentages for the butter: Felder (CF): butter:flour at 1:2 (50%); Keller (TK) 1:1.35 (74%); me (SV): 1:1.44 (69%); Nonna (N): 1:1.18 (85%) (getting much closer to 1:1!).

In this test I'm using Challenge unsalted butter made in California with the claim that it is from cows not treated with growth hormone rbST. I've been using it for some months now and it's good.

I've discovered over the years, working with various tart and shortbread doughs, that the closer the weight of butter gets to the weight of flour in the dough (butter weight is typically about 2/3 flour weight), the more tender and delectable the end result.

At any rate, this promised to be interesting.

Below are the four finished doughs with all ingredient amounts listed. The Felder recipe makes a larger quantity than the other three, but you can still appreciate the ingredient ratios.

Just a note - the TK, SV and N recipes are typically double (enough for two 9" tarts or pies) what I note below.  I made smaller recipes for testing purposes.

So how are these all put together, you might ask? I've always followed the "flaking" method when making pâte brisée by hand.This involves working pieces of cold butter into the flour and salt, purposely leaving large "flakes" or flat pieces of butter in the mixture. Cold water is then added in increments and mixed lightly and quickly until the dough holds together. The dough is then wrapped and chilled before rolling it out for use.

Here are the differences in technique for the other three doughs.

Felder calls for soft butter to which is added the salt, sugar and flour. The mixture is sanded by hand to coarse crumbs, then 120 gm ice water is added and mixed gently until the dough comes together. The amount of water to flour is much higher in his recipe. He claims that this dough holds very well after baking, doesn't soften and is great for juicy fruit fillings.

Keller's method involves mixing half the flour with the salt, adding butter pieces on low speed in a mixer until NO butter is visible. Then on med-low speed the remaining flour is added, followed by the water. Mix until just combined, wrap and chill.

Nonna's dough is made with a food processor, although I chose to sand the butter in by hand. Place the flour and salt in the bowl, pulse in the cold, diced butter to achieve coarse crumbs, then add the ice water and pulse just until it comes together. Wrap and chill.

All just a little bit different!

Once the four doughs were chilled I rolled them out to make 80 mm filled and baked blueberry tarts and blind baked then filled lemon tarts.

Here are the rings lined for the blueberry tarts.

Here's what I observed when rolling these doughs.

The Felder dough, even after a good chill, felt weirdly spongy and soft (NOT in a good way). It was sticky and didn't hold its shape well when lining the ring.

The Keller dough was smooth, firm and tight, rolled beautifully and held very nicely when lining the ring.

My SV dough felt a bit rougher and drier than the others, although rolled well and held when lining the ring.

The Nonna dough felt soft (in a good way) - not too wet, not too dry - rolled nicely and held well when lining the ring.

I popped the lined rings into the freezer to firm up before baking.

First the blueberry tarts. I sprinkled some fine, dry bread crumbs in the bottom of the tart shells - this is meant to create a barrier between the filling and the crust to help reduce the chance for sogginess. Then I filled each with fresh blueberries that were tossed in a little lemon juice, sugar and flour ( for four 80 mm tarts I used a generous 3 cups of berries with 1-2 teaspoons lemon juice, 4 - 6 tablespoons sugar (or to taste) and 2 tablespoons of flour).

Heat the oven to 425 F. Here they are ready to go in.

I gave these 5 minutes then decreased the oven temp to 400 F. Continue baking another 20-25 minutes or so until the berries are bubbly and the crust is nicely browned.

I sprinkled vanilla sugar atop the blueberry tarts once out of the oven.

I also rolled out some scraps of each dough to bake all by themselves. I wanted to see how they puffed and tasted sans filling. A sprinkle of vanilla sugar gave them just the right something.


It's a bit difficult to see from the photo above, but all of the scrap pieces puffed up nicely, except the Felder dough. Here’s the Nonna dough, beautifully flaky.

Now for the blind baked tarts with oven temp at 400ºF.

Freeze the lined rings for 10-15 minutes then fill with parchment rounds and dry beans.

Bake with weights for 15 minutes, remove weights and bake an additional 5-8 minutes until nicely browned. Always pay attention to what's going on inside your oven!!

All four doughs held their shape pretty well during baking with the usual amount of shrinkage away from the rings.

After reducing the oven temp to 300ºF I filled them with my current favorite lemon filling and baked them until the filling was set, about 10-15 minutes. Check out my post from 2/16/16 on lemon-lime tart and here’s a link to two of my favorite tarte au citron recipes.

Now for the tasting. Steve was on hand for the event, my ever present tasting guru. First the blueberry.

I realize you can't appreciate the difference in the doughs visually, but the first thing I checked was how they all felt when portioning them with a serrated knife, followed by how easily they cut with a fork.

Felder's crust was tough, both when slicing with a knife and when cutting with a fork. It was chewy in the mouth, not flaky or tender and the flavor was dull. No thanks.

Keller's cut very easily with both knife and fork, was tender and crisp with a pleasant and agreeable flavor.

Mine was just a tad resistant to cutting compared to Keller's, slightly less tender but crisp in the mouth with good flavor.

Nonna's cut easily with great flavor and texture.

All of the above observations held when tasting the plain baked scraps of dough. Felder's was chewy and tough, broke apart with a bend rather than a crisp snap without any flakiness. The other three were flaky, crisply tender and delicious.

When cutting and tasting the lemon tarts, the same observations held true. (Love that lemon filling!)

Felder was the obvious loser. However the other three were all good, leaving me with the question - now what?!

As if you haven't already had enough, I decided to do just a bit more reading and research and came upon one more technique that sounded promising. I'll credit this one to Kristen Rosenau who writes the blog "Pastry Affair" (http://www.pastryaffair.com).

First I tweaked my recipe (it's coming at the end, I promise!) by increasing the butter to bring the butter:flour ratio to 1:1.25 (80%), in between TK and N.

In Kristen's by-hand method she takes half of the diced cold butter and sands it into the flour and salt. Then she adds the other half of the butter in larger diced pieces and "flakes" them, leaving flat pieces of butter visible. Add the ice water incrementally and once the dough holds together, turn it out onto a piece of parchment or plastic wrap. There may very well be some crumbly pieces at the edges. Don't worry.

Using the plastic wrap as an aid, fold the dough in three.

Flatten and turn it 90 degrees then fold in three again (basically a rustic version of puff pastry).

Flatten, wrap and chill for a good hour or more.

I then performed the same steps as with the quartet of doughs already described, making a filled and baked blueberry tart, a blind baked and filled lemon tart and baking a piece of the dough all by itself.

Ready for the oven above and all baked below.

Here’s the au naturel dough all baked up.

And the finished lemon tart.

Of course while the blueberry and lemon tarts were cooling, I just had to snitch a taste of the plain crust - YUM!  Tender, flaky and all around delicious.

Once they were cooled, Steve and I tasted the blueberry and lemon versions and found the crust to be wonderfully tender, flaky and buttery. And, to top it off, they were still delicious the next day!  I like that.

So here's my version that I intend to use from this day forward.

Pâte brisée (makes approximately 645 gms of dough, MORE than enough for two 9" tarts; just freeze what you don't need). Click here for a printable PDF version.

325 grams all purpose flour
3/4 teaspoon salt
OPT: one tablespoon granulated sugar
260 grams cold, unsalted butter (1/2 small-dice, 1/2 large-dice)
60 ml (4 tablespoons) ice cold water

Mix the flour, salt and sugar (if using) in a large bowl.
Sand in the small-dice butter with your finger tips to achieve coarse crumbs.
Flake in the large-dice butter leaving flat, largish pieces in the mixture.
Add 1/2 the water, toss with a fork then toss and gently squeeze with your hands. Add additional water by tablespoon until the dough holds together.
NOTE:  if the dough still seems dry and too crumbly to hold together (as it might on a cold, dry winter's day), continue to add additional tablespoons as needed but don't exceed 120 ml (8 tablespoons).
Place the dough onto a piece of parchment or plastic wrap; using the wrap as an aid, flatten the dough and fold into thirds. Turn 90 degrees, flatten and fold in thirds again. Flatten, wrap and chill for at least an hour or overnight.

If you don't intend to use the dough for a couple of days, freeze it well wrapped for up to 3 months. A day before you wish to use it remove it from the freezer and place in the fridge to thaw overnight.

While this may not have been the most scientific of studies, it was indeed illuminating. I love experimenting and learning, especially when I get to work with dough. Yeah.

Have lots of fun folks!!

Croissants revisited

Always eager to try a new technique or two when it comes to croissant making, I opted to give Thomas Keller and Sebastien Rouxel’s recipe from “Bouchon Bakery” a try. With its decidedly French flair and way of doing things I figured what could be bad about that, eh?

I haven't made croissants in some months, and, now that our kitchen remodel is finished (a much improved and fantastic work space!), it was definitely time.

I looked back to my October, 2014 croissant post written soon after I first started this blog.  At that time I compared my usual method with Philippe Conticini's of Pâtisserie des Rêves and found his sorely lacking, both in process and in final product.

This time I compared Keller/Rouxel's method with the one that I had developed for myself some years ago.

WARNING!  Technical stuff coming up!!

Here are just a few things in the Bouchon recipe that vary from my usual method:  a pre-ferment (poolish) that sits for 12-15 hours; water instead of milk; higher butter:flour ratio; slightly higher in sugar; long kneading time (20 minutes!); different technique to envelop the butter; freezing the dough for 20 minutes in between all steps; different shaping technique; lower oven baking temperature - whew, that's a lot!

This post is geared to those of you who are familiar with the steps of croissant making.  If you've never made croissants, there are tons of resources available that will help you understand the process.

Let's go through some of the steps in pictures.  Once past the poolish steps I show comparisons between Bouchon's dough and mine.

Bouchon poolish

poolish after a 15 hour overnight

lengthy knead of Bouchon dough

smooth, tight Bouchon dough vs. my more lax and open structured dough

Below are two commonly used ways of enveloping the butter - what I like to think of as rectangle vs "baseball diamond".  They both work, so you choose.

ready to envelop the butter

packages ready to roll

first turn completed

second turn completed

The Bouchon dough on the left is smoother and tighter than mine, however rolling it was a more arduous task since it was more elastic and required more rolling pressure.

Freezing the Bouchon dough for 20 minutes in between each step didn't seem detrimental, but I must admit that I prefer my usual method of resting the dough in the fridge as opposed to the freezer. For me the primary issue is that the butter be cool yet malleable and not too cold and hard to break apart during the rolling.

Once all turns were completed I divided each dough into two in preparation for final rolling and shaping.  Check out the layers below.

The Bouchon dough is tighter and the laminations look more precise . . . .

Bouchon dough

whereas my dough looks more rough.

my dough

Once the doughs were rolled out and cut into triangles, I shaped them using the approaches below.  I had never seen the Bouchon method of turning the corners IN before rolling the croissant.  Interesting.

Here are the rolled up end results.

I egg washed and proofed . . . .

ready for the oven

then egg washed again and baked just a few of each (the remainder of the shaped and unbaked croissants went into my freezer).

Unusual for me was the 325ºF oven temp recommended for the Bouchon version, whereas I bake my croissants at 400ºF.  I was taught that the hotter oven temp helps the initial oven rise when baking laminated dough.

The Bouchon version required 40-45 minutes before I was happy with the degree of browning.  Mine looked good after the usual 20 minutes or so.

Bouchon on left, mine on right

The size difference is due to the fact that Bouchon's recipe is a slightly larger amount of dough cut into 16 portions, whereas mine is cut into 12 portions, yielding larger croissants.

Once cooled it was time for cutting and tasting.  The Bouchon croissants felt heavy.  What a disappointment when I found the interior to be doughy with flat layering and a vacant space in the center!

Bouchon version

My version felt light to the touch and exhibited a honeycombed, airy interior.  While I would like to see more distinct laminated layers, the appearance still beat Bouchon's.

my version

While the Bouchon version had a crisp, shard producing exterior and a decent flavor with a hint of sweetness, the texture was doughy and unpleasant, and the croissant left a greasiness on my fingertips and lips that suggested too much butter for my taste.

Bouchon version

My version had some decent crisp exterior shards, although not as impressive as Bouchon's.

my version

When all was said and done, it was clear to me that I should stick with what I know.  I'd still consider tweaking my approach with perhaps a slightly longer kneading time, but otherwise I'll move forward with my standard recipe and technique.

I always love experimenting - it's one of the best ways to learn!!

And remember - there's never an end to the story.

Petite Pavlova


For last weekend's Mother's Day a friend asked if I would make a Pavlova with fresh berries for her Sunday dinner celebration with family.  As I was in the mode, I decided to make some small versions for my own use.  Et pourquoi pas?!

Pavlova, reportedly named after the Russian ballerina Anna Pavlova who danced in the late 19th and early 20th centuries, is a baked meringue that is typically filled with whipped cream and topped with fresh fruit of choice.


The French also use the word vacherin (NOT the cheese) for a similar meringue based dessert, often filled with ice cream and topped with fresh fruit.  Ice cream?  Whipped cream?  Either one works, so you decide!

A general meringue formula uses approximately 2 parts sugar to 1 part egg white, often with a pinch of salt or cream of tartar added to help the mixture hold its shape once whipped.

My base recipe for an 8-9 inch Pavlova calls for 4 large egg whites, a pinch of salt and a cup of superfine sugar whipped to glossy peaks.  Since I was making an 8 inch-er plus a bunch of small ones I made 1.5 times the recipe.  Plenty for my needs.

There are three methods of making meringue.

The French method, which I use here, involves whipping sugar and room temperature egg whites to glossy, stiff peaks, piping out shapes and drying them in a low oven to achieve a crispy exterior with a somewhat chewy interior.

love those peaks!

The Swiss method involves heating the sugar and whites over a barely simmering bain marie and then whipping them until cooled, glossy and peaked.  This version is more stable and can be piped and shaped.

Side note:  I used the Swiss method when I made "Baked Rhode Island" (a Kenyon's white cornmeal cake/coffee ice cream version of "Baked Alaska") at Gracie's in Providence many years ago.  I piped a lot of those little babies!  Reminds me of a hedgehog or sea urchin!

Gracie's "Baked Rhode Island"

And last but not least is the Italian method.  This calls for boiling a sugar syrup to the soft ball stage (240-245ºF), cooling it slightly, then pouring it over stiffly beaten whites while continuing to whisk until completely cool and glossy.  This is the most stable of the three and can be used alone or as a base for buttercream for cake icing or folded into mousses and creams to lighten them.  Some French macaron recipes call for Italian meringue as well.

Let's get on with the petite Pavlovas!

Once my French meringue was nicely whipped I blended in a mixture of 1.5 teaspoons each of cornstarch, water and vanilla extract.  This served to add a bit of flavor from the vanilla as well as enhance the crispy tenderness of the meringue.

For piping I used a simple trick that I had learned back in 2007 during my stage at Pâtisserie Pascal Pinaud in Paris - use a round cutter or tart ring dipped in confectioner's sugar to provide a size guide for your desired shapes.  Pretty nifty!


Psst!  I prefer to bake meringues (macarons included) on Silpats - they pop off very easily once baked.

I piped simple circles with a star tip while my oven was heating to 300ºF . . . .


. . . popped them into the oven, turned the temp down to 250ºF and left them in to bake (i.e. dry) for 1.25 hours.  Then I turned the oven off and let it cool down before removing the meringues.


all dried out

 Invariably there will be some cracks in the finished product, but that's par for the course.  Don't worry.


These will keep for several days in a covered container in a cool, non-humid environment OR can be frozen for several weeks.  Just pop a few out as you need them!

I chose to fill my petite Pavlovas with a whipped ricotta cream (one cup ricotta whipped with 1/2 cup heavy cream) to which I added seeds scraped from a vanilla bean and my homemade caramel sauce.  What's not to like!

see those vanilla bean specks?


I must confess that I'm not a big meringue fan (sorry you macaron lovers), but I found this combination quite pleasing.  The meringue was crisp with a hint of chew inside and the ricotta creamy and luscious with vanilla and caramel.  Yum.  And, of course, you simply CAN NOT go wrong with fresh fruit.

And to top it off, as a test I put several of these (uncovered no less) in my fridge for a day.  Boy oh boy, were Steve and I pleased!  The flavor was superb, the exterior of the meringue still crisp, the interior had softened to near gooey-ness and even the fruit was none the worse for wear after a day sitting next to leftovers.

Yes indeed.

And wouldn't you know I still have several meringues in my freezer and some freshly churned lemon ice cream waiting to go?

Now what do you think of that?!

My first afternoon tea menu

I've finally done it!   My first afternoon tea menu has been created, implemented and served - yay!!

le menu

I created this tasty tea assortment as the result of partnering with Kim Murphy, the activities director at Heron Manor, a local assisted living facility just down the street from my home.

Kim contacted me several weeks ago with the idea of putting on a royal tea for the residents in commemoration of Queen Elizabeth's 90th birthday.  I was all ears.

la table

I was responsible for all the food planning, preparation and set up, and Kim kindly provided the tables, linens, assorted tea cups and saucers (many of which belong to a 97 year old resident there!), place settings, tiered servers and rose nosegays.

Everything but the fig spread and the strawberry jam was made by my own two hands.  I love that. 

orange currant and lemon scones

finger sandwiches

sweet treats

salted caramel, chocolate and lime ginger shortbread
It was a grand time.  There were a handful of men in the largely female audience of 25 attendees.  Some of the ladies donned lovely hats or tiaras in addition to dressing up for this queenly occasion.

Kim had chosen Earl Grey tea with vanilla and lavender, as well as a lemon herbal tea to serve alongside the goodies.

I spoke briefly about the practice of afternoon tea, and Kim presented some interesting facts about Queen Elizabeth along with showing a series of royal photos covering her life and reign.

A lovely afternoon with even more lovely people.


And so it has begun.


Strawberry pistachio feuilletés


Forever scheming about ways to use ingredients I have on hand, whether in the freezer or cupboard, I hit upon feuilletés, puff pastry cases filled with whatever your little heart desires.

Our local grocery store, Meijer, has recently started carrying local Michigan, greenhouse-grown strawberries, which look world's better than the usual year round California giant, and often anemic looking, berries.

not bad for "out of season" fruit

I also had some pistachio paste on hand and decided on a pistachio pastry cream filling topped with fresh strawberries and pistachio crumble for this particular adventure.

I rolled out my puff, cut squares and fashioned the turned-corner feuilletés as seen in the photo below.  I popped them into the freezer while heating the oven to 425ºF.


Once the oven came up to temp, I brushed them with a little milk, sprinkled on some vanilla sugar and baked them with an overturned cooling grid across the top of the sheet pans - this technique keeps the puff even as it rises.

After about 10-15 minutes I removed the cooling grids and continued baking until nicely puffed and golden brown (another 10 minutes or so).

just out of the oven

love those layers!

I had made a classic crème pâtissiere au pistache earlier that day.  I added a bit of whipped cream to lighten the chilled pistachio cream.

Once the feuilletés were cooled, I simply pushed down their centers to make room for the filling, piped in some pistachio pastry cream and topped them with slices of strawberry.  Pistachio crumble finished them off, along with a dusting of powdered sugar.


Et voila!


These made for a delicious flaky, buttery, creamy, fruity, crunchy treat after a traditional Easter dinner of ham, cheesy potatoes, asparagus, strawberry spinach salad, carrot souffle and more.

Tasty.  Now just get into YOUR kitchen and create your own version of feuilletés!

Yes indeed.