Cherry almond Bakewell tartelettes

C2BBB01E-CAE0-4B10-9E6D-82D4F8E19828.jpeg

Let me just say that there’s nothing like the satisfaction of making a stellar tart. Just the right well baked, crisp and golden crust, the beautiful marriage of fruit with almond cream and a tempting garnish of toasted nuts. Mmmmmm!

Anything with almonds (or nuts in general) is a winner in my book. There are various almond based fillings that one may come across in the baking and pastry world, particularly in Scandinavia, Britain and Northern Europe. Many regions of the globe have their own love affair with almonds and the goods you can create with them.

The terms frangipane and almond cream (crème de amandes en Français) are often used interchangeably but, depending on where you are, they might mean slightly different things. In my Parisian schooling we were taught that frangipane is actually a blend of crème d’amandes and crème pâtissière (used for example in galettes des roi), whereas the term in Britain and Italy (and I’m sure many other countries) refers to what the French call crème d’amandes on its own.

Both will work nicely when making fruit or jam almond tarts, although more typically it’s crème d’amandes that fills the bill (or the tart shell - ha!).

51349C67-2871-4013-9C81-A033CD1B148D.jpg

Of course there are beaucoup des tartes one might create - anything from chocolate ganache to zesty, pucker-y lemon-lime as well as the classic almond cream/fruit combos that one sees in most pâtisseries In Paris and beyond. Think pear, fig/raspberry, plum (the mirabelle is a favorite), cherry, apricot or essentially any fruit or combo thereof you might imagine. So many tarts, so little time!

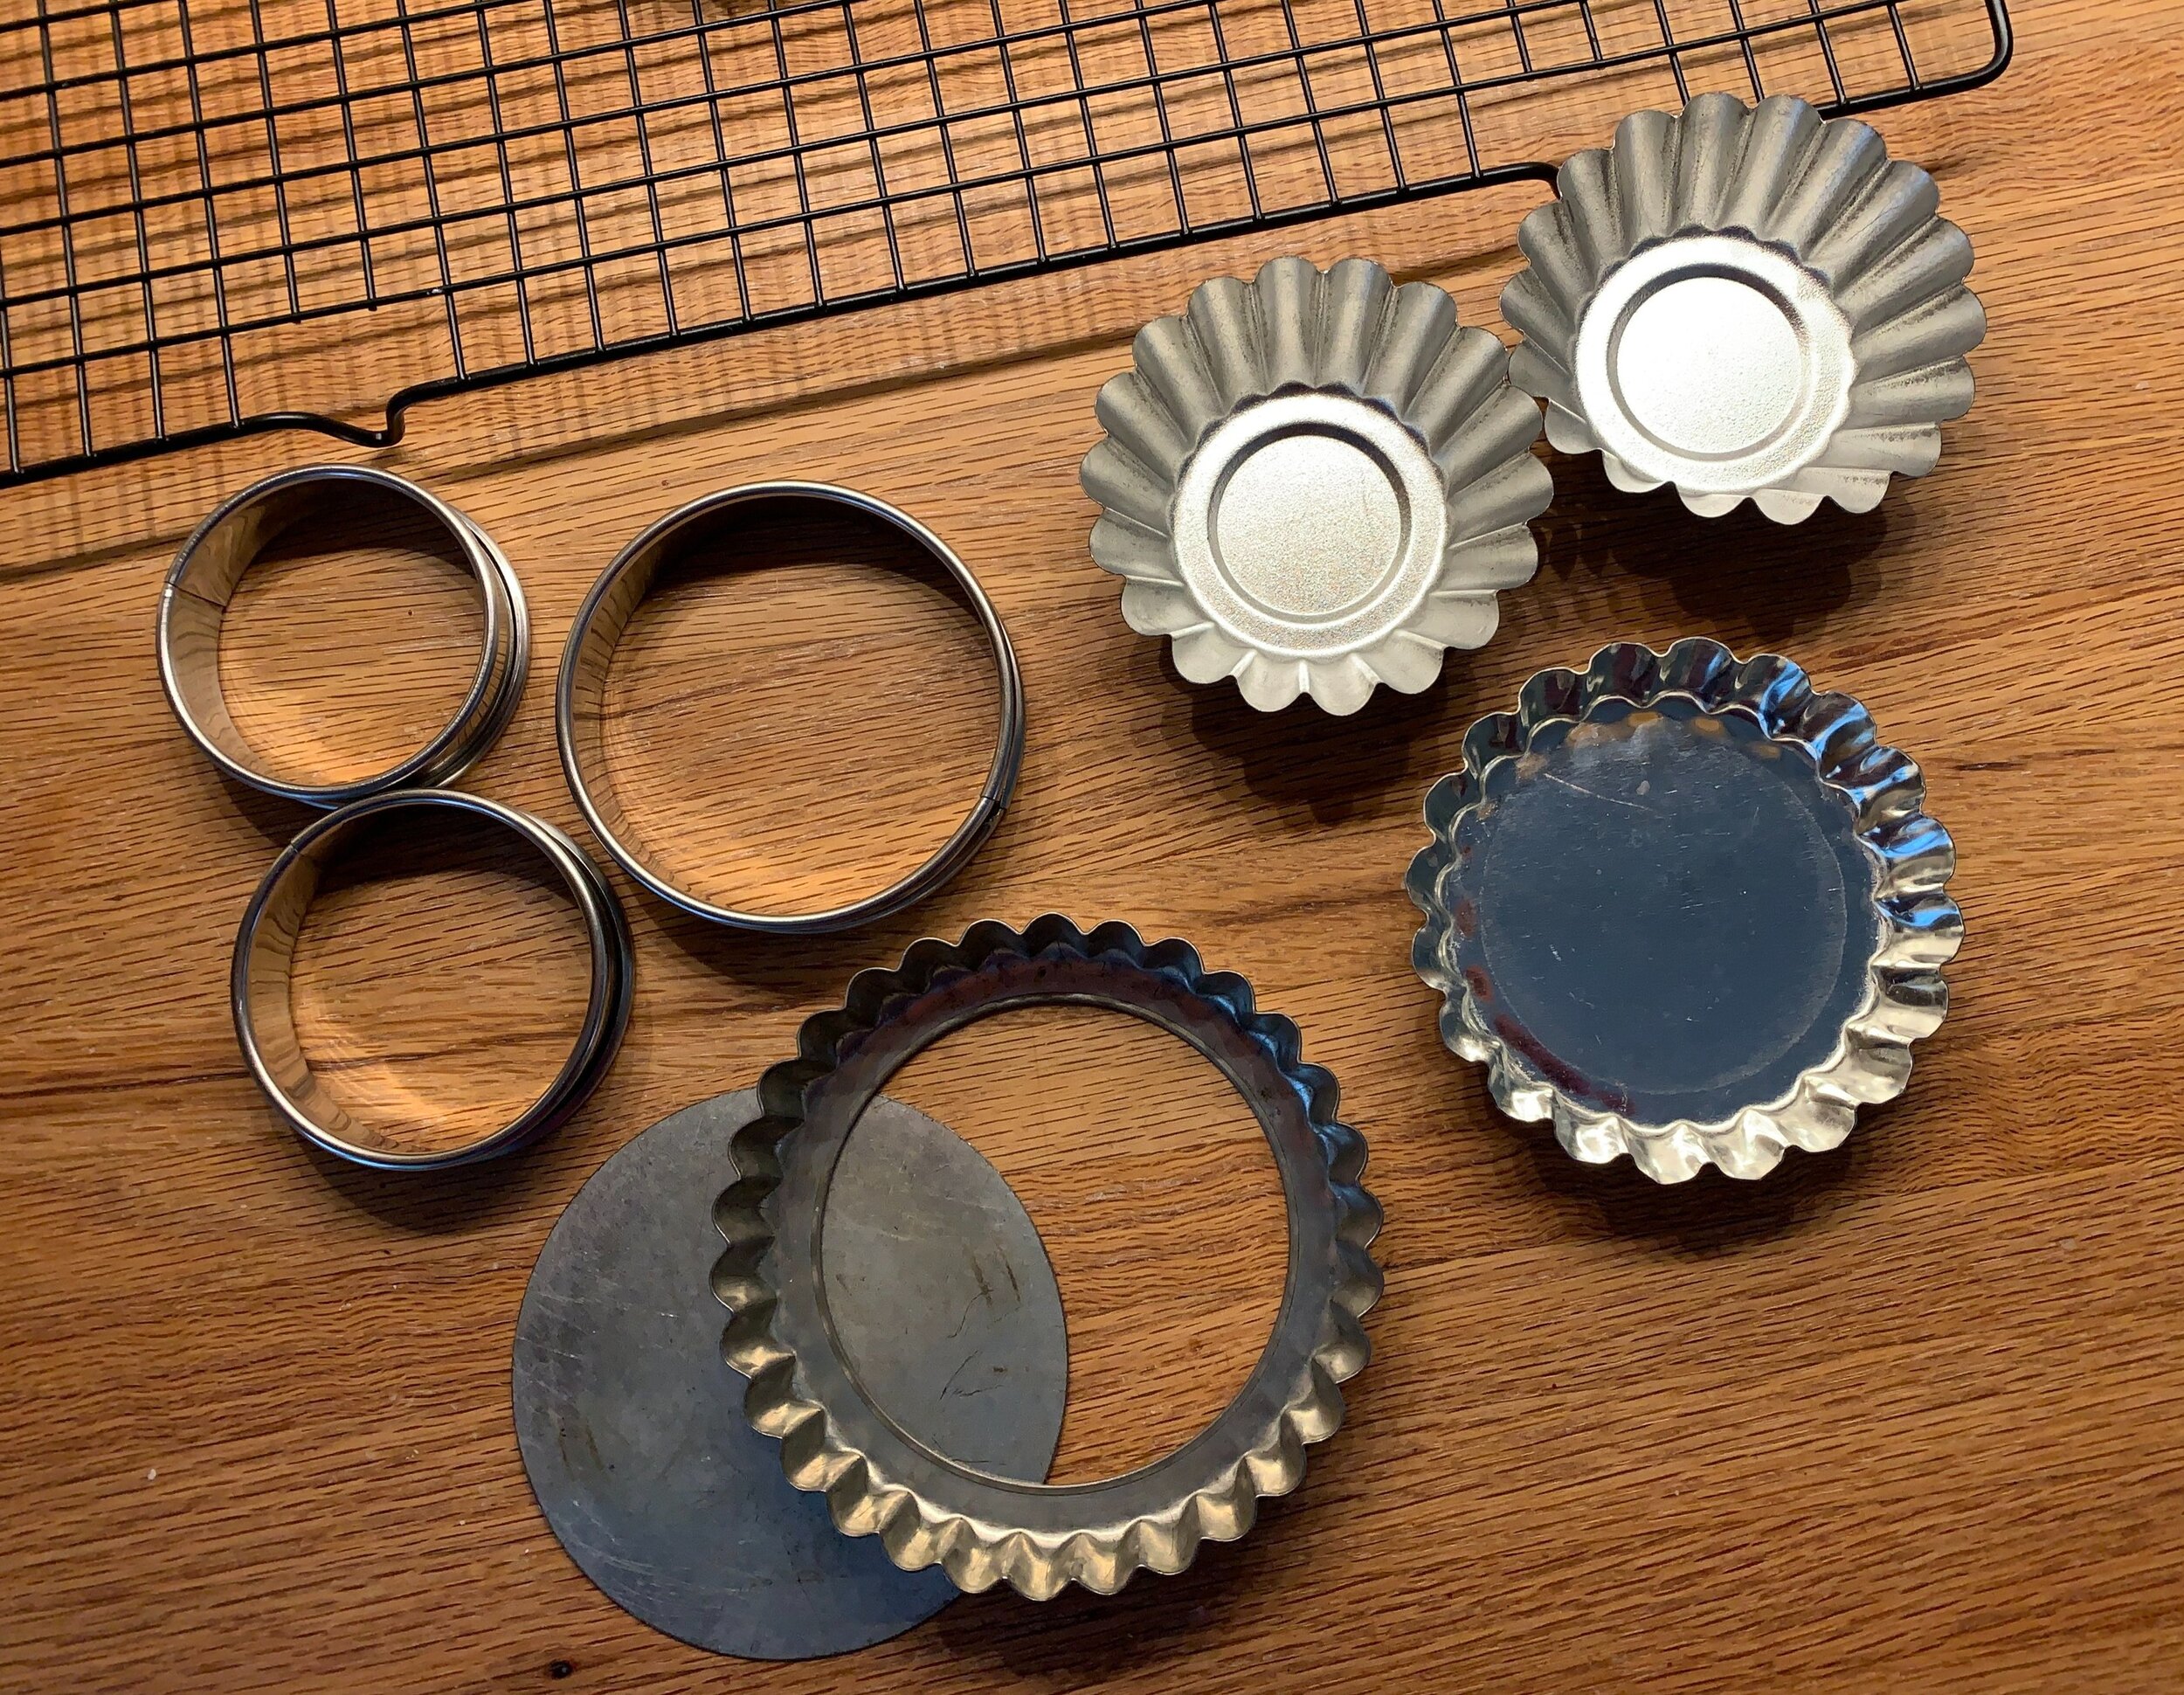
I usually bake tarts, whether large or small, in smooth edged open tart rings. The absence of a metal base allows for more thorough baking of the crust which is better exposed to the oven heat. Plus I like the simplicity of the straight sided, smooth finished tart. It speaks to me.

Buuuut . . . . . If I’m in the mood for a fluted edge, I have the option of removable bottom tart forms vs. solid bottom versions, in which case, depending on the filling, blind baking may come into play. While I love small brioche type tins for tarts, a well baked bottom can be elusive unless you blind bake first then fill and bake to finish.

News flash! I’ve had a Eureka moment in preparation for this post - the oven stone - yay! Prior to this recent discovery, my tendency was to use the open rings or remove the bottom of the fluted pans so as to be sure that my bottom crust baked thoroughly. My experience has shown, particularly with the almond fruit type tarts, that led to a successful bake. Can’t have a soggy bottom now, can we.

B69559DC-5F46-42AF-8535-619F7A0D9C21.jpg

The Bakewell tart is generally associated with England and the town of Bakewell in Derbyshire. Many say it’s a variation on the Bakewell pudding which has more of a jam/custard filling baked in puff pastry or a bottom sponge type cake. The tart version is typically made with an all butter short crust (as the Brits would say) and a jam/almond cream filling. Many recipes use raspberry jam but I decided on cherry from my favorite jam maker Bonne Maman.

I intentionally approached this one to see how well my pâte sucrée would bake in both closed bottom brioche tins and open tart rings. For my first go, I lined my forms and assembled the tarts with a dollop of jam in the bottom and almond cream piped over it. Don’t overfill since the almond cream does puff up during baking.

I baked them on my heated baking stone on which I had also heated a second sheet pan, thinking this would give even better heat transference. Ahhhh . . . . not so.

58D0F830-9B1E-495A-9108-D063FBE9016D.jpg

After a 20-25 minute bake at 325ºF (convection), the almond cream was set and lightly golden and the crust edges looked browned.

B33CA05E-65EB-49D5-8CF6-732E2FE7AACF.jpg

The bottom crust of the open ringed tarts was nicely browned, however, the solid bottom brioche tin tart bottoms were not baked all the way through (take my word for it). Fortunately I removed them from the tins and popped them back into the oven, baking another 5-10 minutes for well baked bottoms.

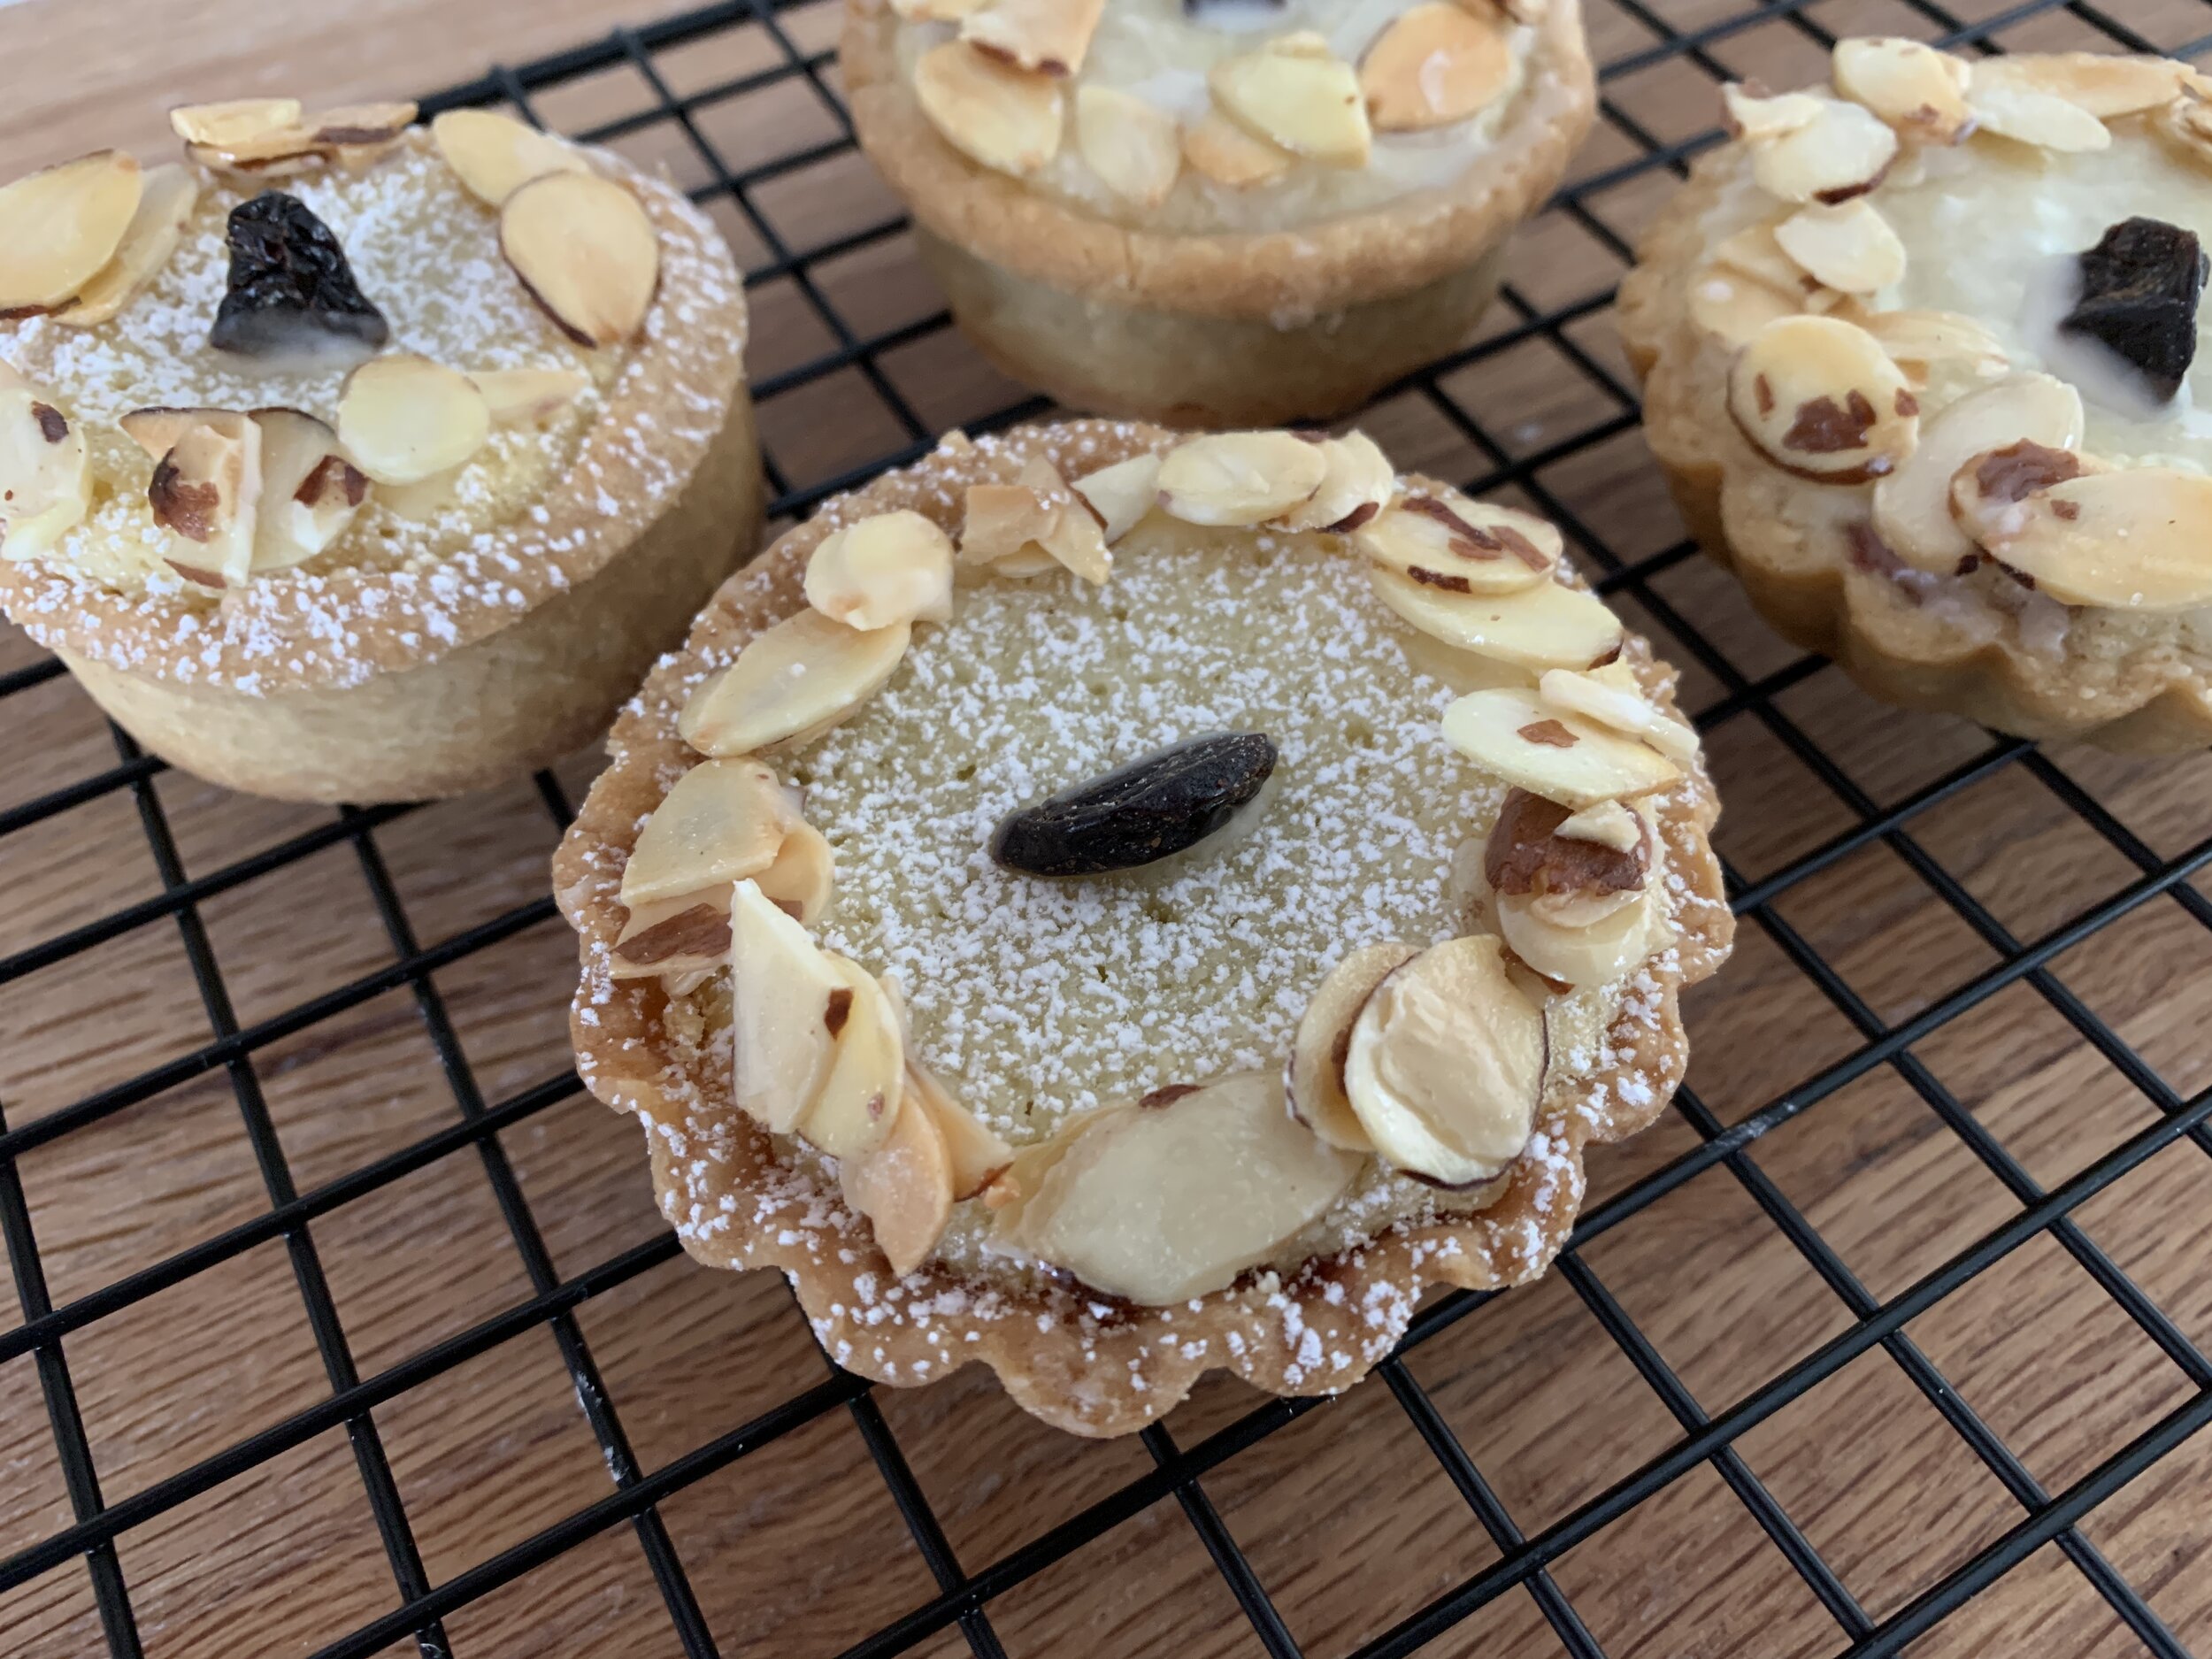
A confectioner’s sugar glaze, a ring of lightly candied sliced almonds and some tart dried cherry bits in the center finished them off.

EB4F7AED-280E-4804-998E-65589D847E05.jpeg

I have one word for you - delicious. While I thought the glaze was too sweet for our tastes (I admit I put it on a bit too thick), this is one stellar tart. Just the right marriage of jam and almond goodness; and the crunch of the candied almonds gives it that wonderful textural contrast.

6D4446FE-681A-4B01-B31B-7EF12A0458AD.jpg

But wait! Not quite finished. My results pushed me to give it one more go. This time I blind baked both an open ringed crust and a closed bottom brioche tin crust. Once cooled, I panned those up with non-blind baked versions. The assembly and baking were the same with one exception - I ditched the second baking sheet and put my sheet pan directly on the heated baking stone.

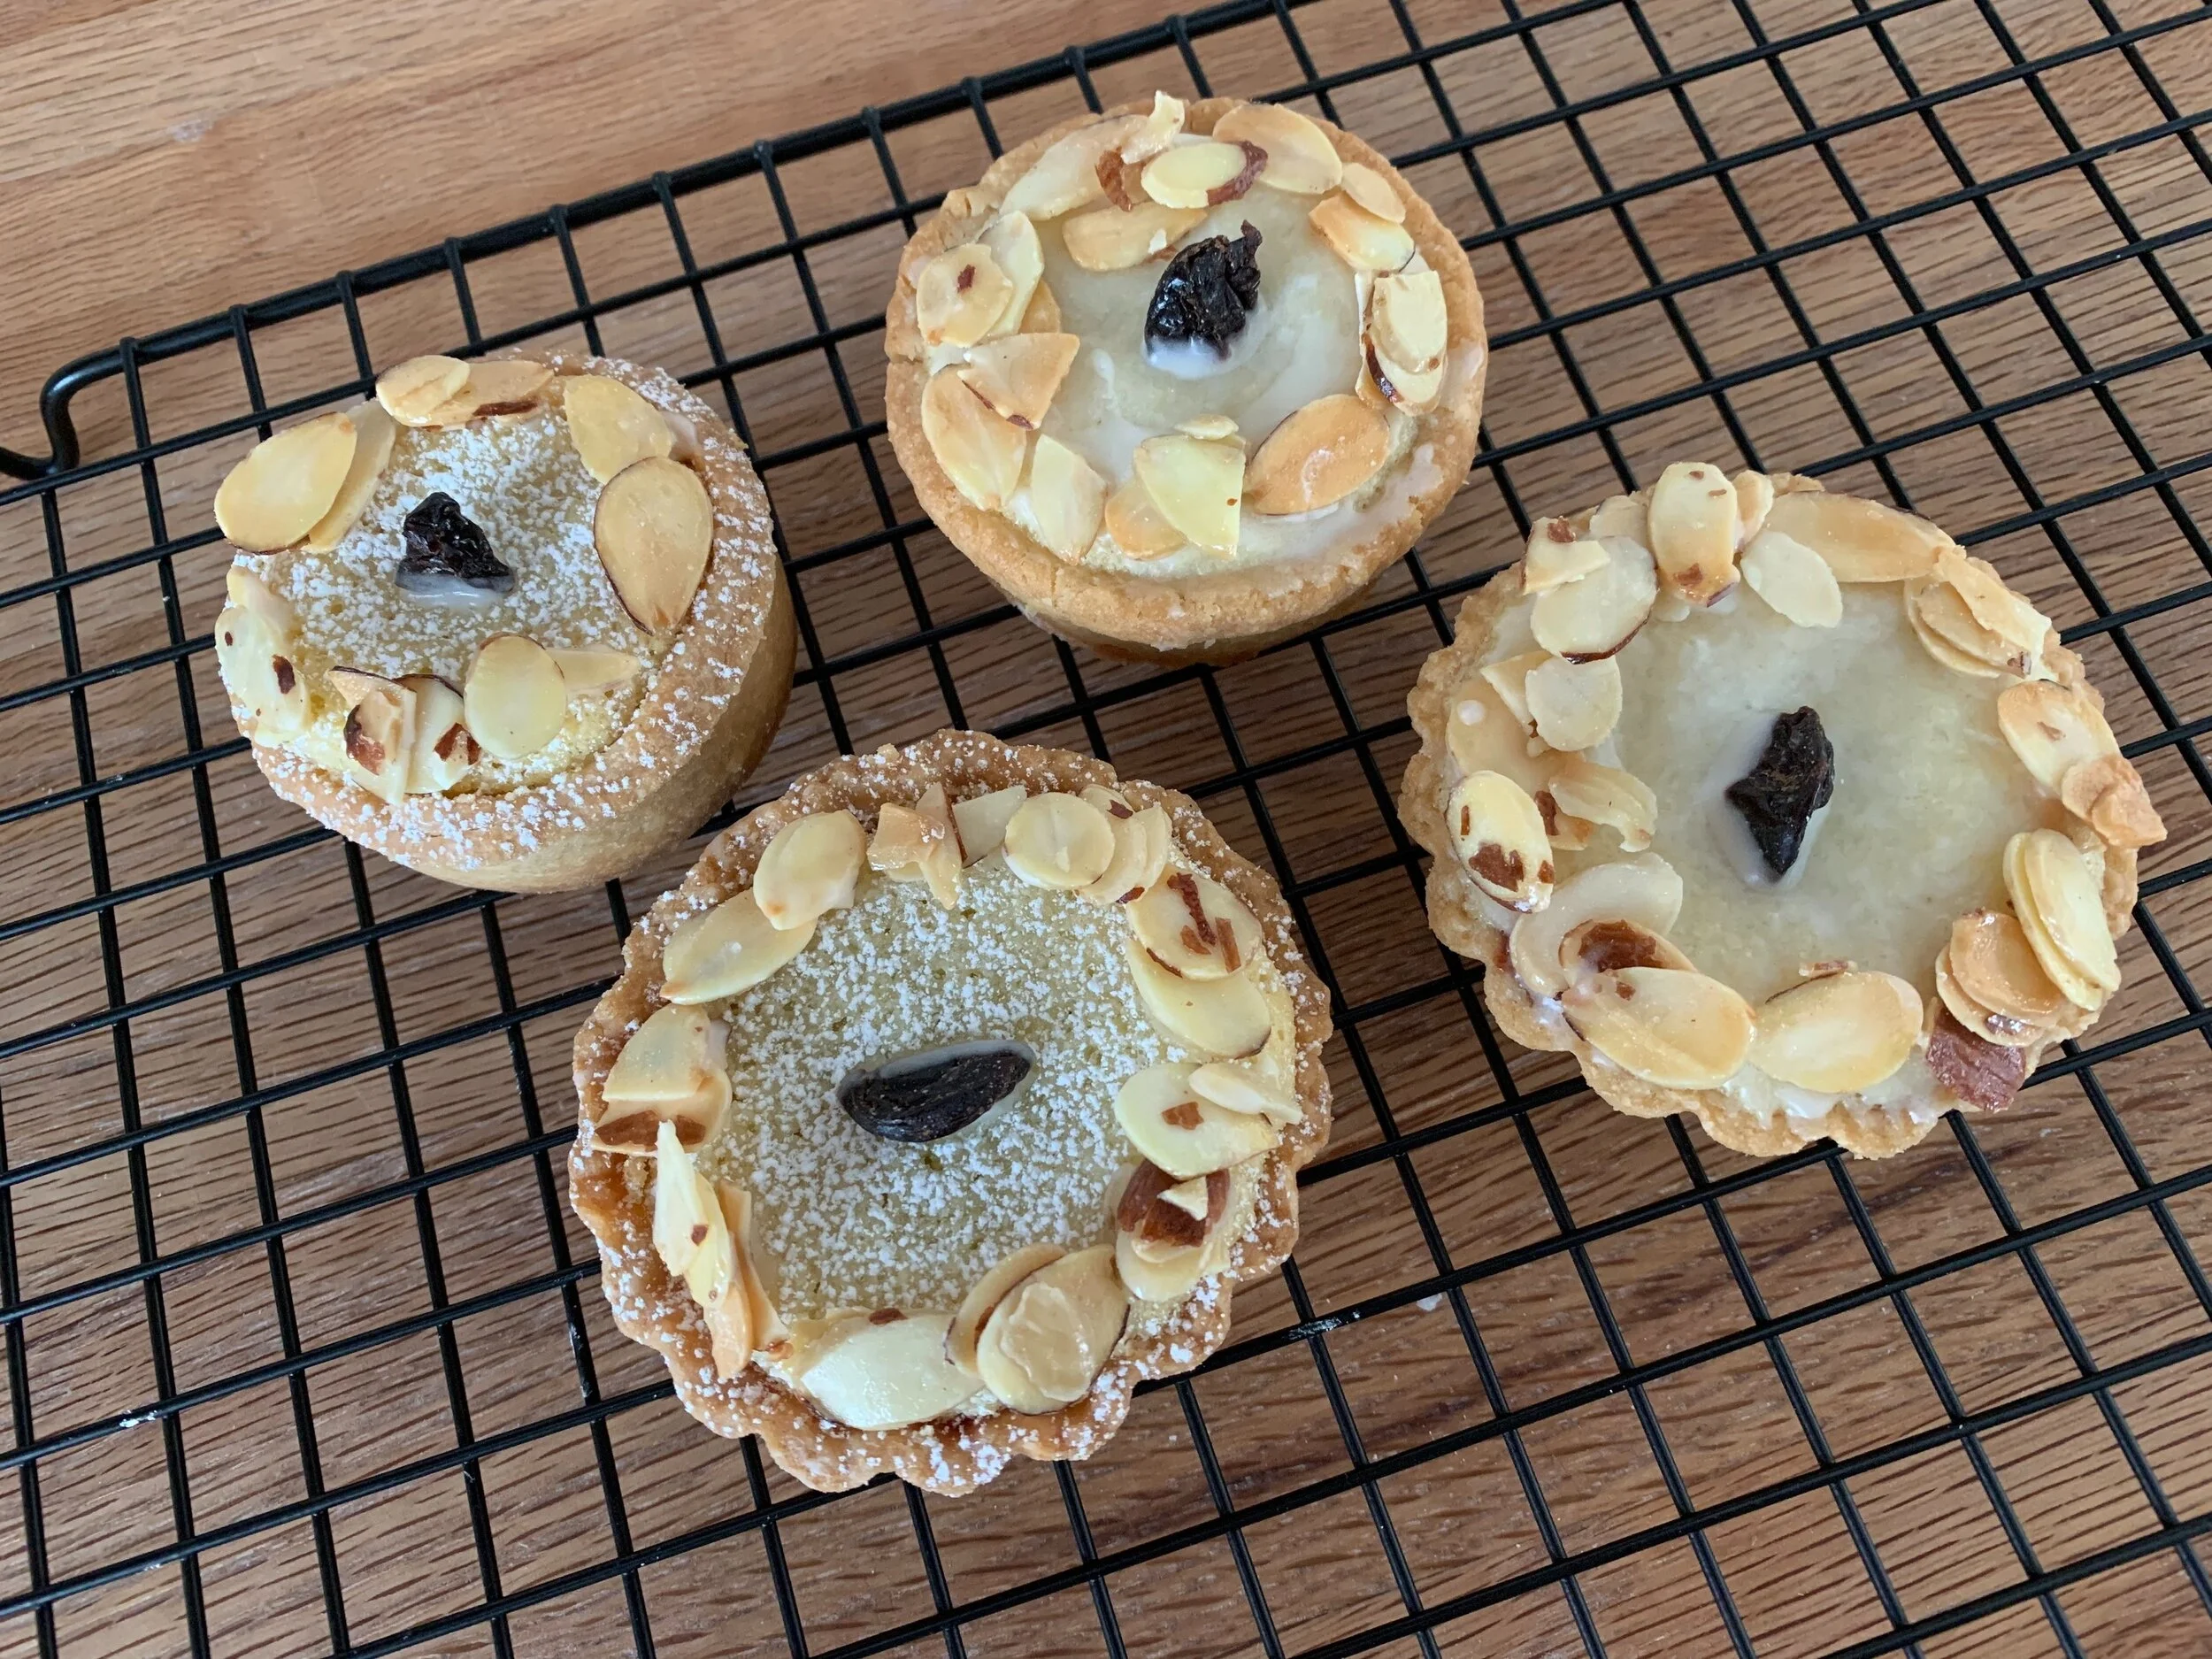
Here are the results. The blind baked crusts on the left are a bit browner but the other two look pretty darn good too.

CF47BCB7-D018-408D-A5B7-B1A81A6E1EA3.jpeg

And check out the bottoms! Not bad at all - no barely baked bottoms here.

5E76E66D-4C2A-4AEE-B444-EBC613289D8F.jpeg

This time I lightened up my glaze, giving two of the tarts just a light brushing. For a bit of visual comparison the other two got a light dusting of powdered sugar. I stuck the candied almonds around the edges with a bit of glaze et voilà! Steve and I liked these just as much as the first batch.

The lesson: no need for a second sheet pan heated on the stone - it actually seems to have reduced the heat transference, leaving my brioche tin crusts under baked.

The second batch benefited from the consistent heat coming from the baking stone allowing for excellent browning even without first blind baking. Yippee!

One quick note: in general, when baking a tart with a very loose or liquid-y filling, I typically blind bake first. The oven stone may change that perhaps?? We’ll see.

1B975BAF-2A2D-4232-A2B4-F9C3BA078AC9.jpg

I’ll leave you with a final wintry scene looking out our front door. That’s our metal sculpture, Clarence the praying mantis, peeking out of the snow.

Be safe, remain steady and let’s make it to spring in good shape!

4233F6A0-C443-4480-A2F9-3D67A18E20C6.jpeg

More fun with croissant dough - berry flan buns and bourbon glazed pecan spirals

FF561A7A-8D28-41AD-A160-D35006742333.jpeg

I typically have croissant dough in my freezer just waiting to be formed into something delicious. As it turns out, I had a couple of batches that needed to be used for fear that they would soon be over-the-hill soooooo . . . . .

I baked one batch as standard croissants destined for the ever popular twice baked croissant aux amandes.

Freshly baked all butter croissant

Freshly baked all butter croissant

Twice baked croissant aux amandes

Twice baked croissant aux amandes

I divided the other batch in half with two goals in mind - flan buns and pecan spirals. First up - Kouign-amann style berry flan buns. Many of you know about this caramel-y, layered Breton specialty that continues to be very popular in the US. There are specific recipes for K-a dough that differ somewhat from croissant dough, buuuuuuut - you can use croissant dough too! As a matter of fact, it was Chef Xavier Cotte at Le Cordon Bleu Paris who demo’ed Kouign-amann to our class using croissant dough all those years ago. What a treat that was.

Did you realize that Kouign-amann was the subject of the very first post I wrote for this blog back in the fall of 2014! Wow, how time flies.

While I use muffin tins, individual cake pans and ring molds to bake the various twists, spirals and twirls that I make with croissant dough, I love making these in buttered and sugared ring molds. I find they brown much better in the open rings. These are 80 mm (3 inches) in diameter and 2.54 cm (1 inch) high, taller than the usual open tart rings I use for tart making. They’re perfect for this use as well as for other pastries like the aforementioned spirals, twists or twirls.

062F9859-37EA-4ED3-BB29-091018B79E5C.jpeg

For a half batch of dough I go for a yield of 9 pastries, rolling the dough out (on a sugared rather than floured surface) to a 12” x 12” square, then cutting nine 4” x 4” pieces. Do your best to keep the corners square, although a little curve never hurt a thing. As you roll, flip the dough from front to back, sprinkling more sugar on as you go. Don’t be shy.

4E2C31FD-0CC5-494A-8187-4FE24A094B5A.jpg
428A26EA-F78E-44B2-8CA2-AB18C838998B.jpg

Now simply fold the corners of each piece up, kind of pleating the sides, and set the dough into the buttered/sugared rings. Easy-peasy!

48832A33-7C53-4030-92D3-7E24059F3CB5.jpg

Cover lightly with plastic wrap and give them a 45-60 minute rise - you should see more definition of layers and a general pouffy-ness. Meanwhile heat the oven to 375ºF.

You can bake these au naturel, but here I piped a blob of pastry cream into the center (hence the “flan” label), added some blueberries/raspberries and topped with another blob of cream and a sprinkle of raw sugar. I usually have berries in the freezer and add them frozen to avoid the mushiness and wateriness that happens if they’re thawed first (don’t do it!). It’s also helpful that frozen raspberries are easy to break up into smaller pieces for placement in a smallish space.

Sheesh! I forgot to grab a pic after assembly so shot a quick one after going into the oven. Kind of a cool perspective.

6F8D5FC4-F4F9-40D2-822E-ABB033EA9A5F.jpg

Bake about 20-25 minutes until the pastry is golden and the cream set. Once out of the oven I leave them on the sheet pan but gently lift off the rings - they come off much more easily when still warm, before the caramel-y sugar cools.

A4699DAA-6168-491C-98E8-9B680E42D70E.jpeg

They’re deelish still slightly warm, but you can also finish cooling them on a wire rack and enjoy the same day.

You can freeze them too. If you do, plan for a treat with morning coffee by heating your oven to 325ºF, take them right out of the freezer, place on a parchment lined sheet pan and thaw/warm for about 15 minutes. If they’re still a bit cool inside, give them another 5 minutes or so. You be the judge.

B62027F8-23B0-4337-9D5D-1BCFF963DB58.jpg

Next up - crackly glazed pecan spirals.

21872DD6-8FC4-4F6B-9033-1AA771EE47F3.jpg

I’ve previously posted a version similar to this using laminated brioche dough, but here I’m using a slightly different filling and opted for a bourbon butter glaze like the one I used on pound cake a while back. I won’t spend a lot of time on this but just want to share it with you.

For a half batch of croissant dough I’m going for 8 or 9 pastries - just depends on how things roll out.

For the filling blend 28 g/ 2 tablespoons soft unsalted butter with 70 g brown sugar (light or dark, either way). Add a generous teaspoon of spices if you wish - cinnamon or a mixture of your favorites like coriander, cardamom, cinnamon and ginger.

Roll the dough to about a 10”x10” square, spread the filling over it, top it with finely chopped pecans (eyeball it) or your own favorite nut, then roll it up into a log. Cut ~3 cm slices and place them in the center of buttered and sugared rings. You might notice below that I have wrapped two shallower rings together with foil. Since my flan buns were occupying my higher rings, I created my own!

F3180075-E06A-4F70-8A63-246E7946C2B1.jpg

Cover lightly with plastic wrap and let rise about an hour. I hope you can appreciate in the image below the increase in fullness of the dough compared to above.

8D130DE2-1E89-4A52-9903-EA13286C8B88.jpeg

Bake at 375ºF for about 20-25 minutes until golden brown, which gives you time to make your glaze.

Here you go: heat 2 tablespoons bourbon with 28 g / 2 tablespoons unsalted butter to melt, then stir in 50 g / 1/4 cup granulated sugar, stirring to dissolve. Once the sugar is dissolved bring to a boil for one minute. Remove from the heat and blend the mixture with 50 g / 1/2 cup confectioner’s sugar and 2 tablespoons of crème fraiche.

Once out of the oven, remove the rings (sooner than later is always best).

B41B7A9B-D1A4-45D3-82F4-EFF1890CD356.jpg

Brush the glaze generously over the spirals. Now pop the tray back in the oven for about 2-3 minutes. The heat makes the glaze crackle and bubble up, although you can certainly omit this step if you prefer a smooth glazed look.

0E139C82-A5CE-44DA-B5B8-C79F64CB4342.jpeg

Smooth or crackled, they’re tasty either way.

Have fun creating your own treats using croissant dough. You can do it!

F2A51C92-04B4-41F8-AE24-EE72EF47C3CA.jpg