
A chocolate génoise entremet
/When we're invited to someone's home for a weekend supper, I always (almost) volunteer to make dessert. Thus it was that I was on the hook again to provide something tasty and not too heavy for the meal's finale.
My dessert leanings tend to veer towards a simple tarte (classic apple, fruit/almond, lemon, caramel nut, ganache to name a few) or something custardy like pots de crème, perhaps served with some buttery shortbread. But, every now and then, I like to create a layered entremet.
The word entremet is actually translated as "between servings" and can refer to a small dish served between courses or to a dessert. In the modern pastry world it most often refers to a layered dessert made with some type of cake along with various creamy, crunchy textural components. The possibilities are pretty much limitless - just look in any French pâtisserie window and you'll know exactly what I'm talking about!
Since Steve and my brother Dick are both chocolate lovers (truth be told Dor and I don't mind the stuff either), I focused on a chocolate plan. I had it in the back of my brain to utilize the leftover "duja" (a mixture of chocolate and ground hazelnuts) that I had made for the sablés au praliné post on 1/25/15, so I popped it out of the freezer and into the fridge for an overnight thaw.

Whenever I have a cake question or need ideas for the type of cake I might like to make, I turn to Rose Levy Beranbaum's The Cake Bible. The information in this book is exhaustive - just in the section on génoise alone, you'll find many variants with detailed explanations about the differences.
Génoise belongs to the sponge cake family and is typically made with eggs, sugar and flour. It tends to be on the dry side and thus is imbibed with a syrup to moisten it before being layered with cream or mousse of some sort.
I chose the "moist chocolate génoise", a recipe I've made several times before. It calls for bittersweet chocolate, so I got out my favorite array of chocolates. I like to mix and match, combining different percentage chocolates to achieve about a 60-62% result.

This recipe utilizes an interesting technique with the chocolate (described below) - Rose says this releases the chocolate's flavor.
The ingredient portions here are for 1/2 recipe since I only wanted to make one cake (the full recipe makes two 9" cakes). In the picture below you see the chocolate mixture in the forefront, made by pouring 120 gm (1/2 cup) boiling water over 113 gm chocolate, then simmering it until it achieves a pudding like consistency. It has fully cooled and is ready to go!

Remember - this is 1/2 recipe! Beat 4 eggs and 100 gm sugar in the mixer using the whisk on high speed until tripled in volume, about 5 minutes.

Amazing how eggs and sugar transform from a yellow, grainy mixture to a light, pale and airy froth of goodness!
Sift 75 gm of cake flour over the mixture and fold it in gently. The flour has a tendency to fall to the bottom, so pay attention so you don't have lingering clumps of flour in your batter. Then fold in the chocolate mixture until incorporated.
Pour the batter into a 9" cake or springform pan that has been lined with parchment then buttered and floured.
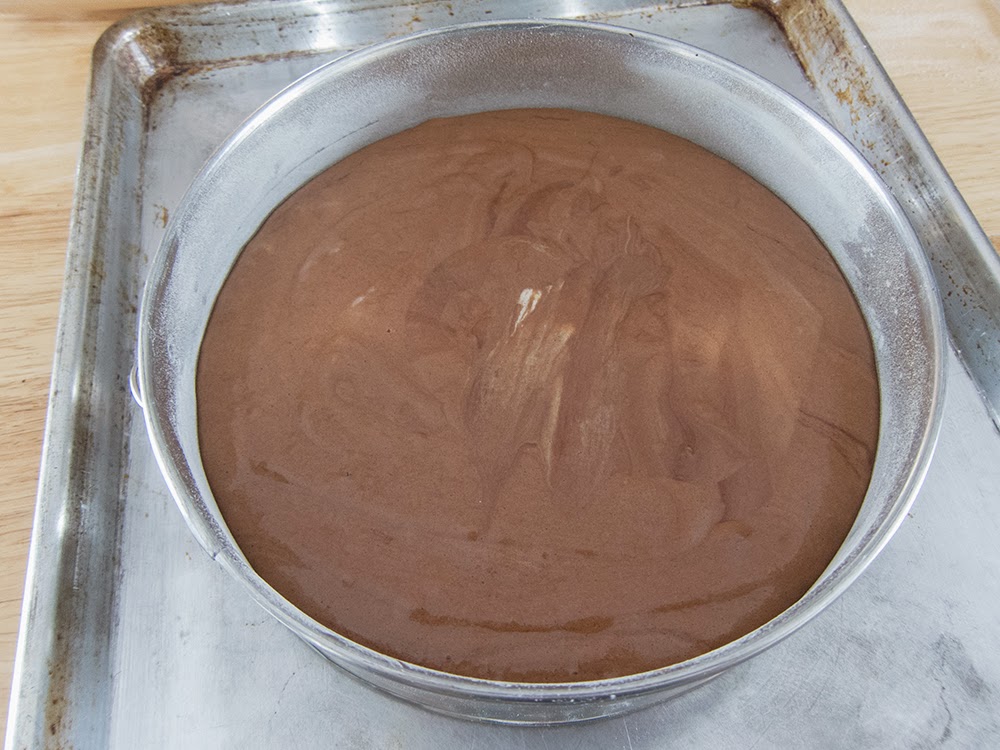
Bake at 350º for about 30-35 minutes. I use the touch-the-center technique to decide if the cake is done - it should feel firm, set and spongy (get it? Sponge cake!). I also gently jiggle the pan, and if there's movement in the center, it needs more time.

Loosen and remove the outer ring of the springform (if that's what you've used) and let cool on a wire rack.

Then invert the cake onto a rack, remove the pan bottom and re-invert. Once cooled you can wrap it and hold it at room temp or in the fridge for a couple of days OR freeze it for a month or so.
Earlier in the day I had made my go-to ganache-for-whipping using 3 parts heavy cream to 1 part dark chocolate (240 gm cream and 80 gm chocolate in this case). Once the mixture is chilled it is whipped to a spreadable consistency and ready for layering.
I also created a thin round with the chocolate/hazelnut ("duja") mixture by softening it over a bain marie along with a tablespoon or so of butter, then spreading it in a 220 mm circle on silpat. Into the freezer it went until assembly time.

Now it's time for assembly. My components, seen below, are the genoise (split in two layers), vanilla simple syrup, the "duja" round, whipped chocolate ganache, plus a mixture of hazelnut nougatine and chocolate crumbs that I had in my freezer from previous projects.

First a layer of genoise; brush it with simple syrup; top it with the round of "duja".

My thin round is a tad too big, so I took my kitchen scissors and trimmed around the edge.
Then I spread a layer of whipped ganache . . .

topped it with my crunchy mixture . . .

then my second cake layer topped with more ganache and crunchies.

Looking good!

The assembly can be completed a day before serving - just store the entremet covered in the fridge.
One can take this a step further and coat the sides with additional whipped ganache and crunchies, but I decided to leave it au naturel. Nothin' fancy here.

Now slice it up and enjoy!

The consensus was all thumbs up on this lovely blend of chocolate and hazelnut, not too heavy and not too sweet - just delicious!
OK, so I admit I didn't go the extra mile as far as any garnish for this dessert, but some great accompaniments would be a dollop of chantilly, some chopped candied hazelnuts and a flourish of candied orange rind.
Or how about a nice pool of apricot coulis and a drizzle of caramel? Or a dose of warm créme anglaise and some fresh raspberries?
You get the idea. Now get into that kitchen of yours and create your own entremet!
