Moulins à vent

This next recipe in La Pâtisserie des Rêves by Philippe Conticini brings home ever more clearly the importance of proper recipe testing and editing.

Remember, I'm using this book as a springboard for discussions regarding recipe interpretation, techniques and dos and don'ts.  It is NOT my intention to follow the recipe to a T!  Au contraire!  I use what I've learned over the years to adjust the recipe and its steps in a manner that makes sense to me.

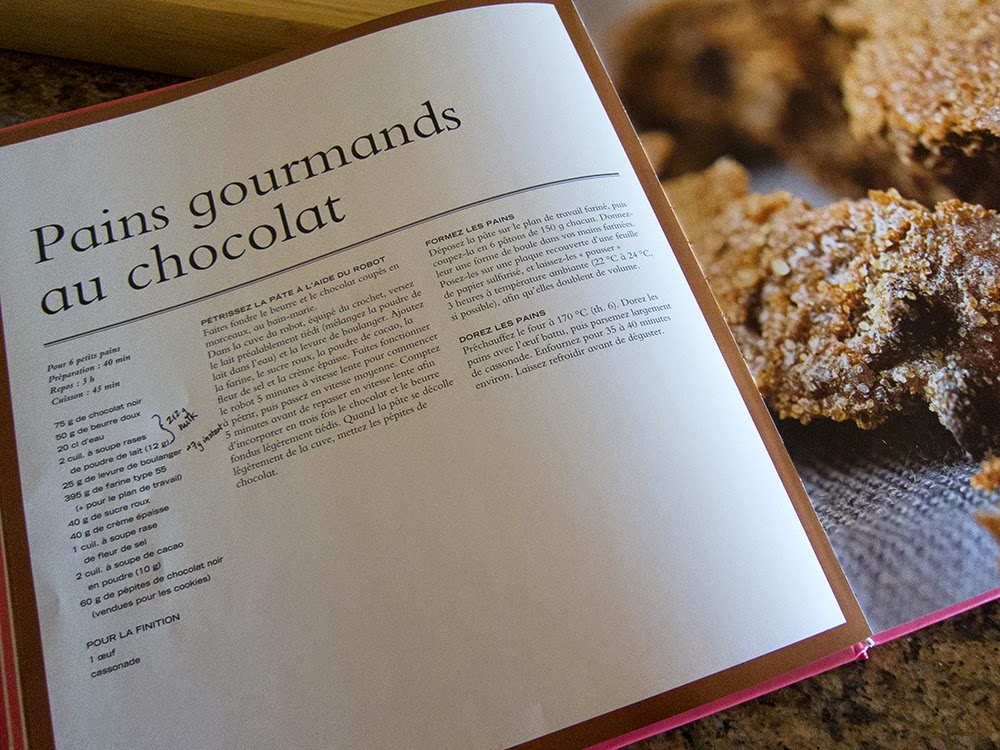
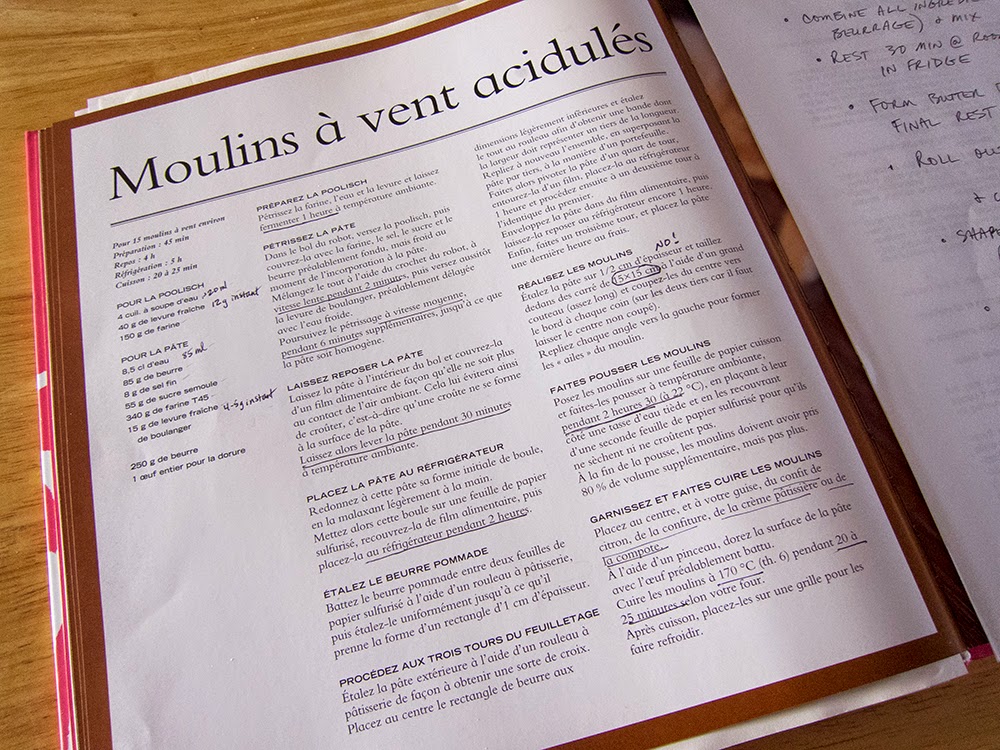
Here's the page from the book: 

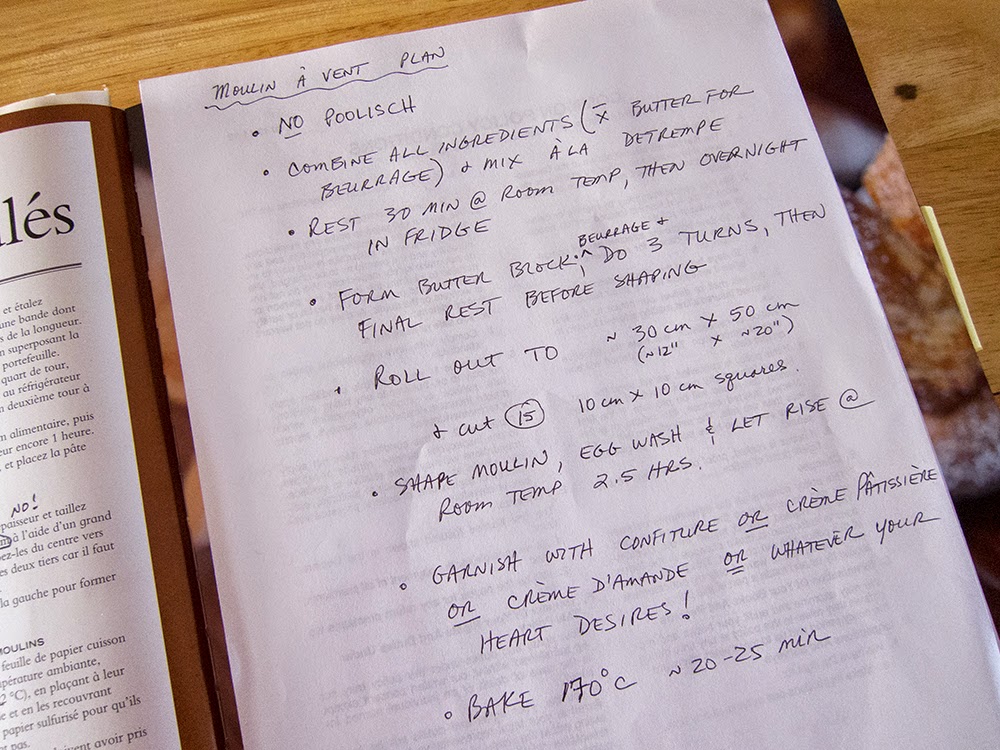
Here is the plan I developed based on my experience with similar doughs:

Rather than using a poolisch I made the dough as I would a détrempe for croissants, basically combining the ingredients for la poolisch and la pâte and reducing the total amount of yeast to 8 gm of instant.  I also had to add more water than the recipe indicated in order to moisten the obviously dry dough mixture.

I gave it a good overnight rest in the refrigerator (where it develops some of its structure and flavor.)

The butter block is ready:

The dough is rolled out into a diamond and the butter placed in the center.  I found this dough to be a bit stiff and dry, even with the additional water I added during mixing.  Ultimately it did hold together OK, but see how the edges are somewhat cracked?.

The butter is enveloped by the dough:

Then rolled out into a rectangle:

And the first three-fold and turn is done:

I found this dough to be similar to that in les croissants recipe - stiff, not easy to roll and the butter tending to break through. 

This dough gets two more turns and a final rest in the fridge before rolling it out for cutting and shaping.

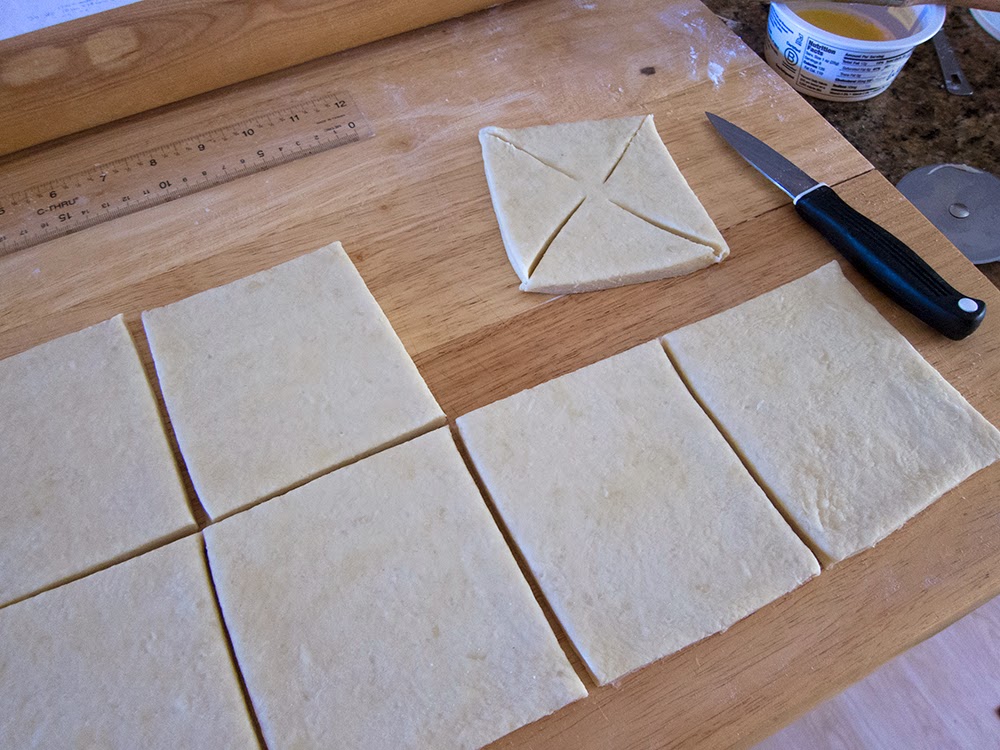
Now, here's a major flaw with this recipe.  It states the yield is 15 moulins and instructs that each piece be cut into a 15x15cm square.  In order to roll this quantity of dough out to create that many pieces of that size, you would have to roll it far larger and thinner than the 1/2 cm the recipe instructs.  Plus 15x15 cm is HUGE for an individual pastry!

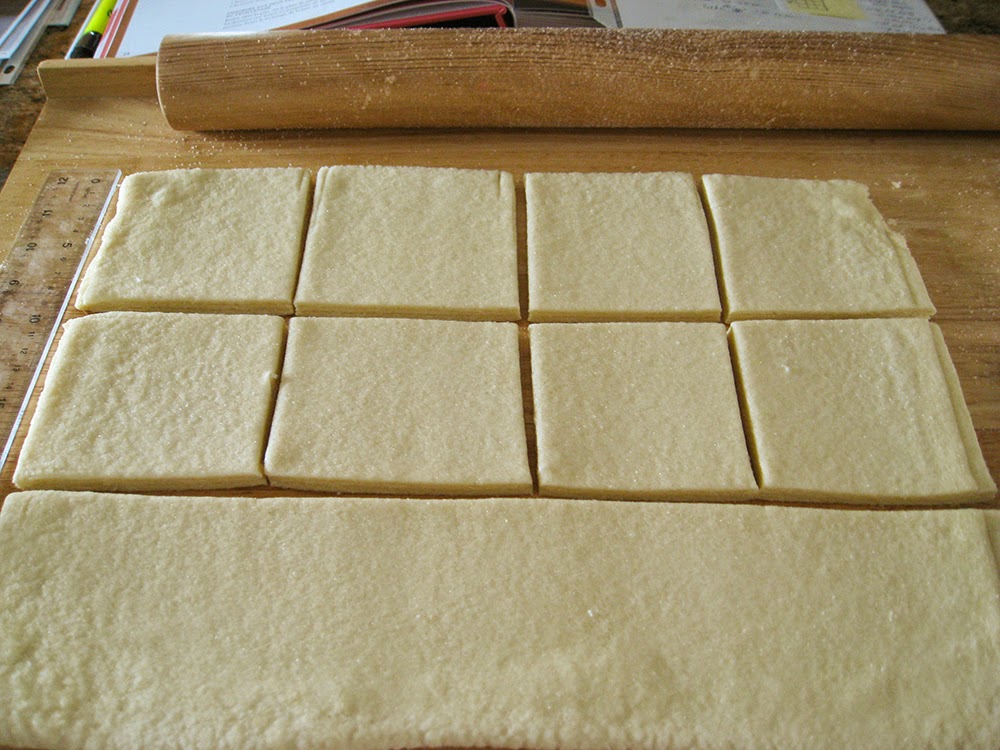
I opted for 10x10cm squares (just like when making Kouign-amann), a much more reasonable size for this quantity of dough, as well as for the finished pastries.  Here are a couple of paper templates to show you the difference in sizes.

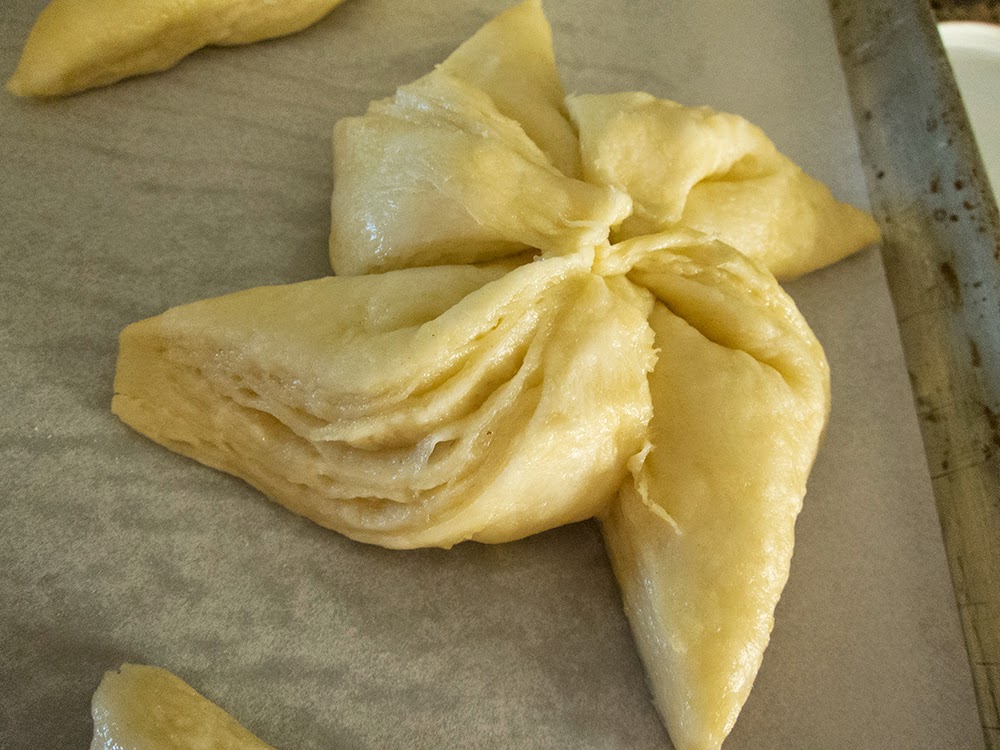
The dough is rolled out, cut into 10x10cm squares, slits cut to the corners, leaving the center intact.

Every other corner is folded into the center to create the lovely moulin pattern.  It takes me back to my quilting days!

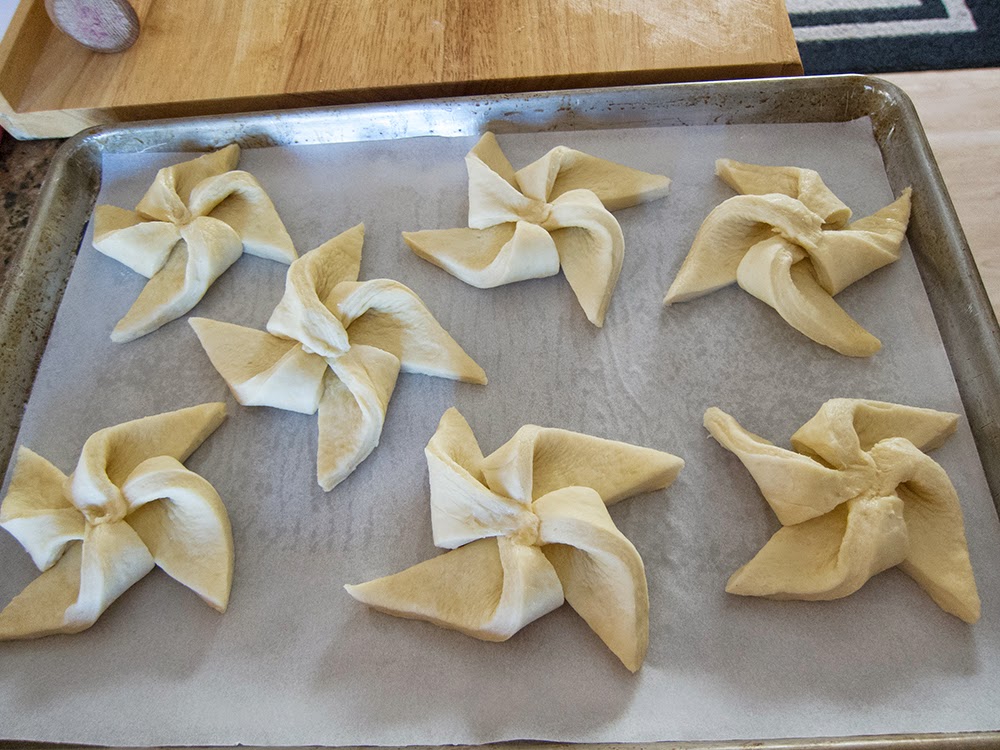
I used egg wash on the dough tips to stick them down.  As you'll see, it wasn't that successful!

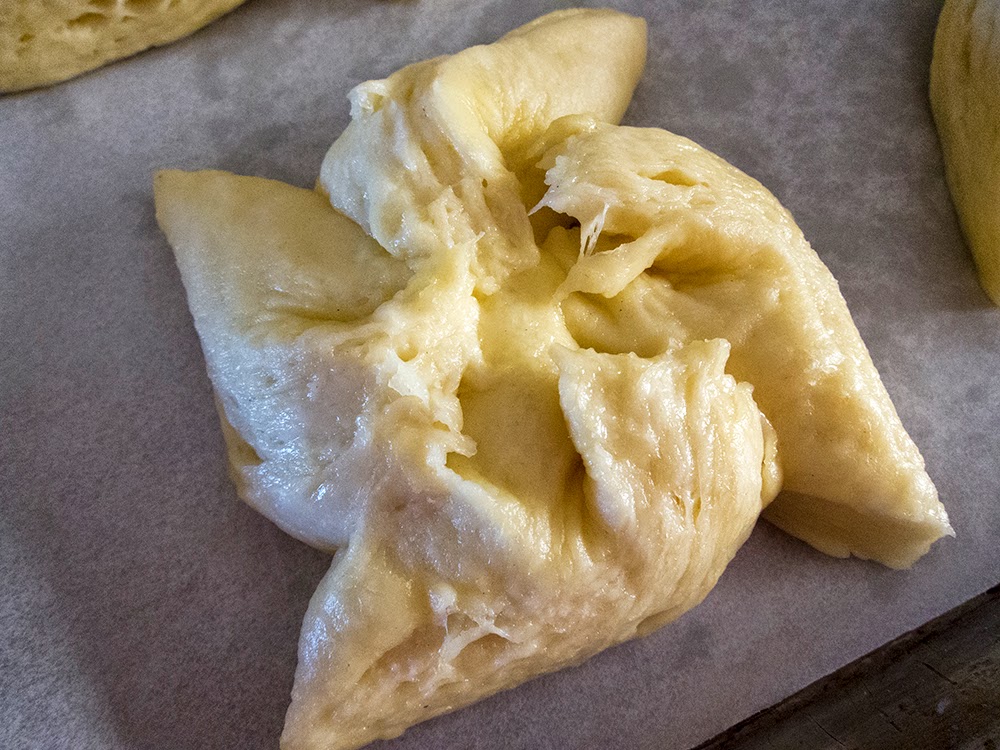
Now for a 2-2.5 hour rise at room temp.  Notice how the tips have pulled away from the center, especially in the second picture - quite a mess!

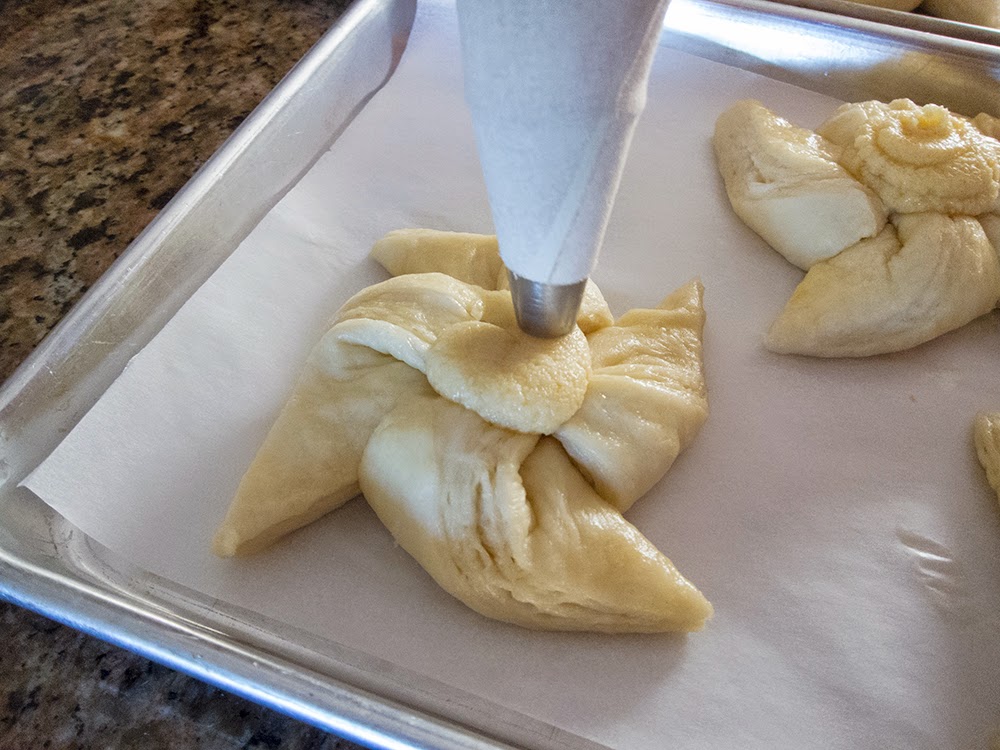
Before I garnished these with a mixture of crème d'amande and apricot jam I had to gently push the tips back into the center - not an easy task with already risen dough.

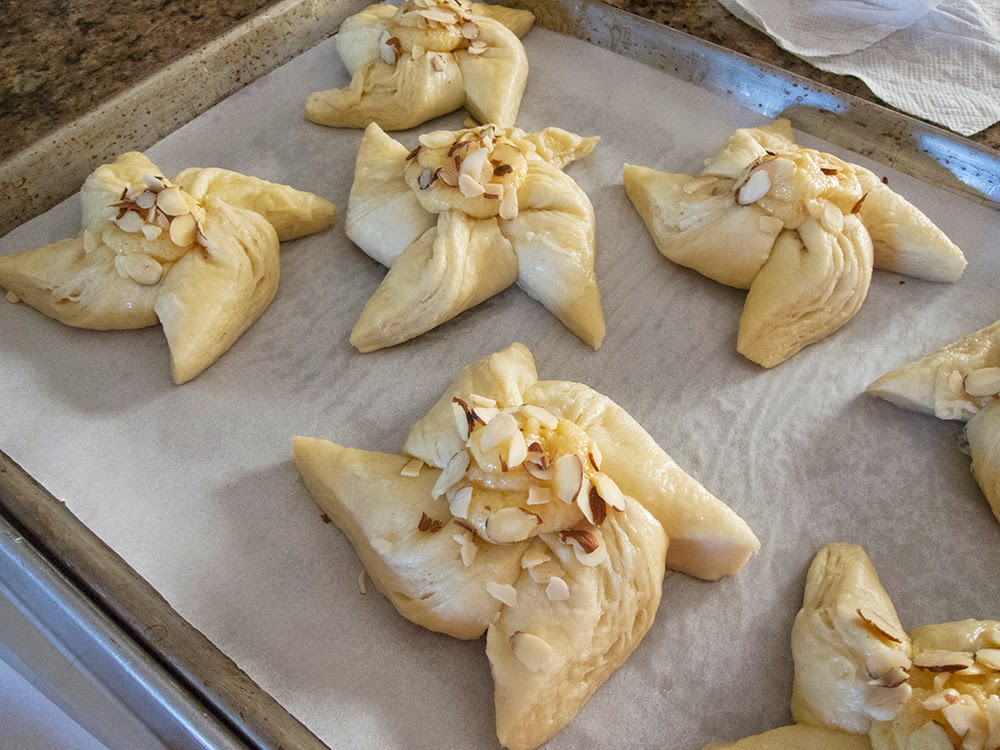
Add a sprinkle of almonds et voila!

Next time I would roll my dough a bit thinner before cutting the squares since I ended up with 10 pieces  instead of 15.   I should have let it rest and relax a bit more before rolling it to my originally planned 30x50 cm rectangle.  Patience, patience Susan!

The baking time of 20-25 minutes was pretty consistent with the recipe.  Always watch how the browning is progressing and adjust your oven temp up if too pale and down if browning too fast.
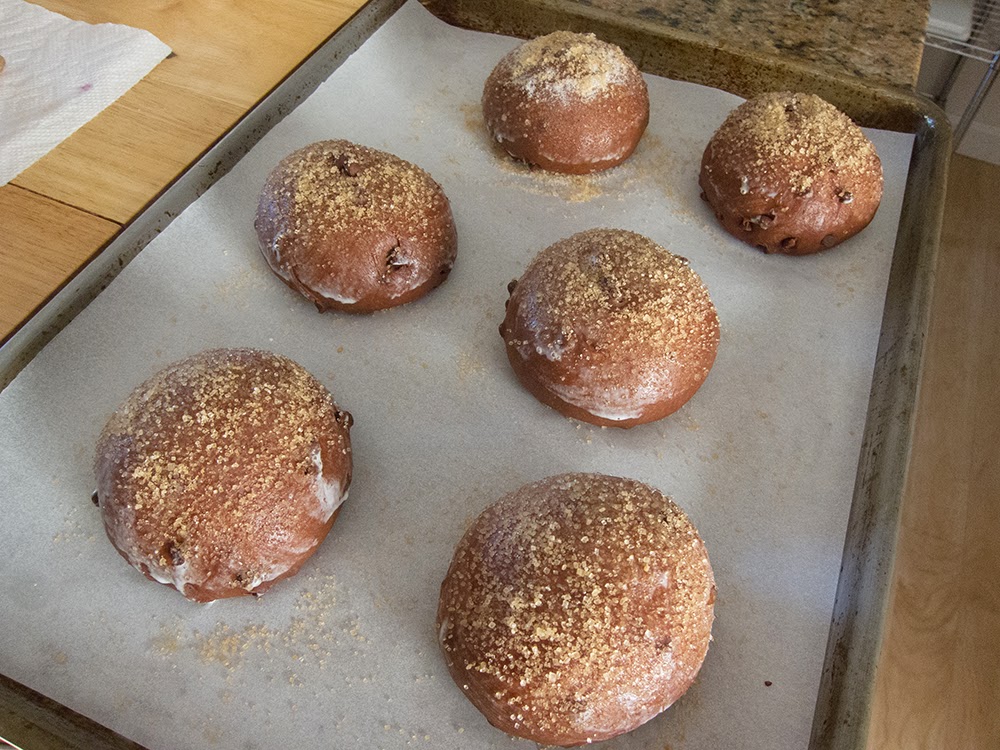
And here they are!

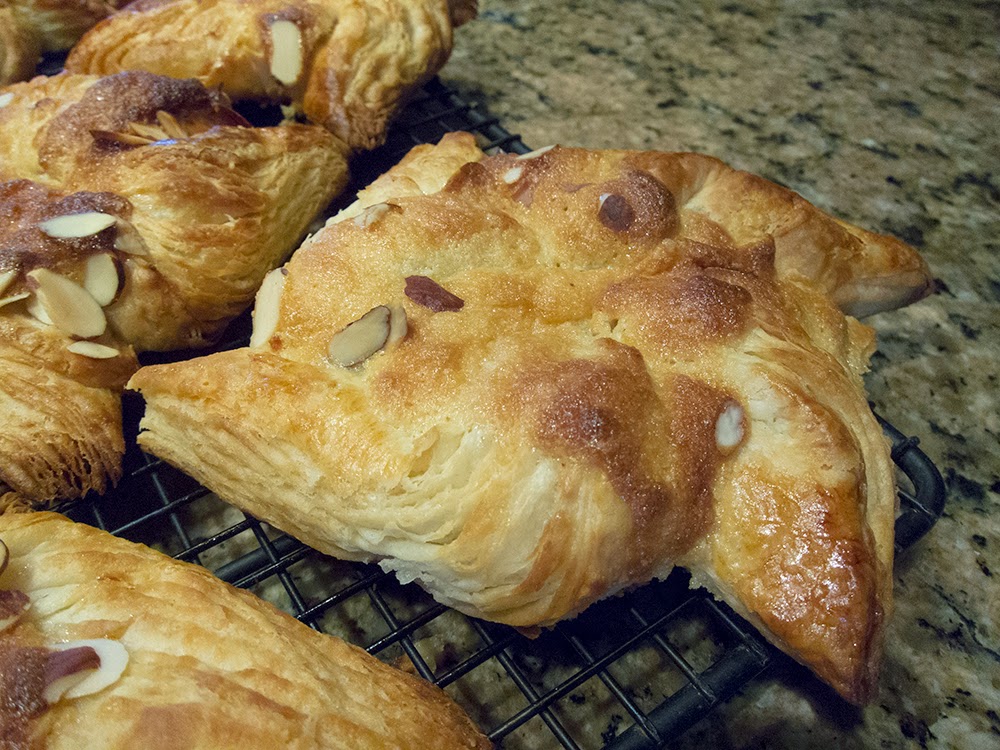
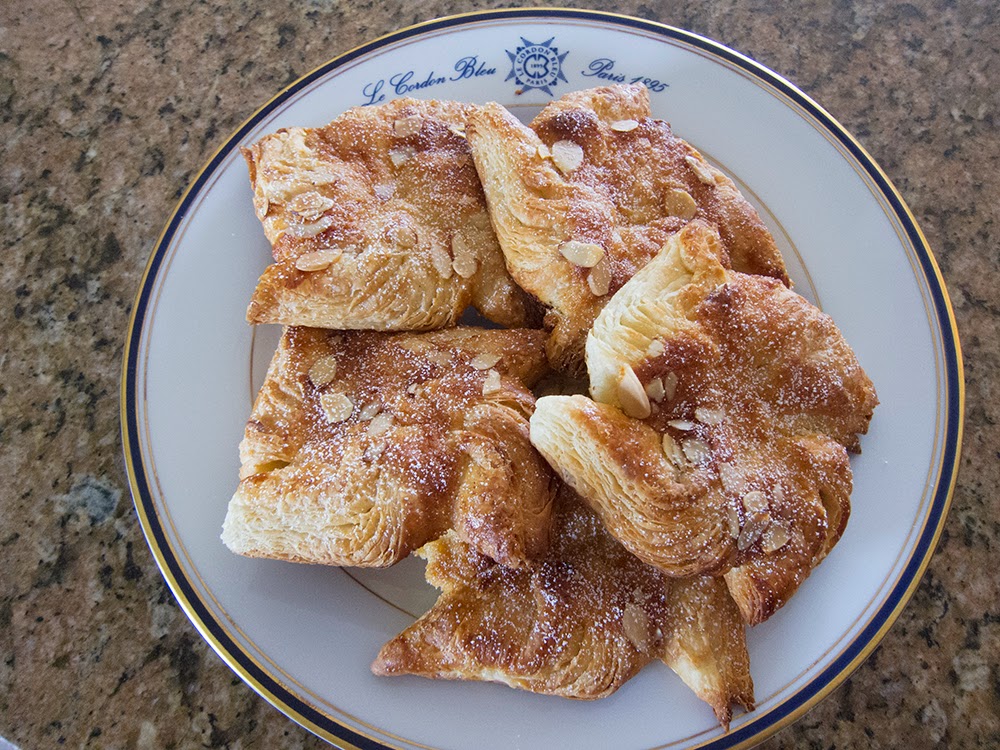
I had hoped my windmill shape would have remained more distinct, but instead the tips kind of melded together during baking.  Perhaps rolling the dough thinner would help that.

The flavor was good, although Steve and I thought they needed a little something, so we added a schmear of apricot jam to liven things up.

All in all this was another good learning experience.  I am less and less enthralled with the book La Pâtisserie des Rêves due to the inconsistencies and poor editing I have encountered (leading me to believe that these recipes were authored by different people.)

For example, these moulins are made with laminated dough, the techniques for which should be consistent from recipe to recipe.  Yet, the instruction for the beurrage (the enveloping of the butter in the dough) for this recipe is completely different than in les croissants, which uses the same technique.  The author even forgets to tell you to fold the dough over the butter before you start rolling it out!

I'll put Philippe Conticini's book aside for awhile, although it continues to hold some allure with more enticing sections like goûters d'enfance, les classiques, et les tartes de saison, just to name a few!

In the meantime this coming week I'll be in Norwich, Vermont taking a 4 day artisan bread class at King Arthur Flour.  What a great getaway and perfect blogging opportunity!

Pain gourmand au chocolat

This was my first attempt at making pains gourmands au chocolat, the second recipe in La Patisserie des Reves by Philippe Conticini, and what a pleasant surprise!

Here I'll share a bit about the process and offer some ingredient suggestions. The recipe is straight forward, the dough easy to prepare and handle, and the final product a lovely roll with a small crumb, nice texture and smooth chocolate flavor.  What a great addition to a special breakfast, weekend brunch or afternoon tea.

Here's a brief synopsis of the process:  melt the chocolate and butter over a bain marie and let cool until tepid.

Mix the rest of the ingredients (except for the chocolate chips) and knead on low for 5 minutes and then on medium for 5 minutes.  Turn back to low speed and add the tepid chocolate-butter mixture in three additions, blending after each addition until incorporated.

As you can see my 6 qt KitchenAid can handle this amount of dough very easily.  See how the dough has cleaned the sides of the bowl.  Now add the chocolate chips on low speed.

And here's the dough, all chocolate chipped, ready to be divided and shaped into boules.

Above: boules ready for a 3 hour room temp rise.

Below: after the rise, egg washed and sprinkled with raw sugar

Just out of the oven . . . . .

and time for a taste!

Steve and I sliced into one for a first taste sans garniture, then followed that with a dollop of raspberry jam, which was delightful.

The wheels are already turning with other possibilities - how about sandwiched with layers of chocolate ganache and caramel mascarpone cream?  Or a chocolate version of Bostock with chocolate almond (or hazelnut!) cream and lightly spiced poached pear?  Or a delicious bread pudding with tart cherries, pecans and chocolate chunks?  Just imagine!

Now for a few ingredient notes: when the recipe calls for chocolat noir, sucre roux, fleur de sel, cacao en poudre, I use the following:  Valrhona Manjari 64%, coarse raw sugar, Beanilla's vanilla fleur de sel (one of my favorite things!), and Penzey's Dutch process cocoa powder. 

It is not uncommon for French recipes to call for water and powdered milk in some viennoiserie doughs. When I see those two ingredients, I replace them with whole milk, e.g. 200 ml of water and 12 gm of poudre de lait = 212 gm of whole milk in my book.

This recipe calls for farine type 55 which is a French flour often used for both bread and general baking. Based on online research, as well as some experimentation of my own while in Paris, when type 55 is the recommended flour, here in the USA I use all purpose flour, but replace a percentage (15-20% by weight) with bread flour to yield a decent equivalent of French type 55. Oh, and I use King Arthur!

A note about yeast: many French recipes call for levure boulanger or fresh yeast. I use instant dry yeast and convert by taking 30% by weight of the amount of fresh yeast called for in the recipe.  e.g.  25 gm fresh yeast = ~7 gm instant. The beauty of instant yeast is longer shelf life (fresh has only 2 weeks at most) and no need to hydrate or "proof" it before adding it into your dough.

I followed the recipe instructions to divide the final dough into six approximately 150 gm boules, but since I generally prefer smaller portions, next time I'd consider 60-80 gm pieces, shaping them into rolls or loaves, depending on what I plan to do with them.

Next up - Chausson Napolitain!

Kouign-aman

As I was pursuing my pastry studies in Florence and Paris in 2006, I never imagined all of the adventures I would have, from being a stagiaire in a Parisian pâtisserie, to baking in a Maine café, to creating desserts in a Providence fine dining restaurant and, finally, to starting up and running my own petite pastry studio at Hope Artiste Village in Pawtucket, RI.

Inspired by the many pâtisseries in Paris and the innumerable pastry books on the market, I’m always eager to learn more, try new recipes or even tweak some tried and true favorites. One never knows what great little tip or new technique you might come across as you explore the world of baking and pastry.

This is my way of sharing some of the things I’ve learned (and continue to learn!) along the way.  Happy baking!

Kouign-aman

Inspired by Philippe Conticini’s pastry shop and book La Pâtisserie des Rêves, I hope to bake my way through his wonderful collection of recipes. I use the French edition, but it’s also available in English through Amazon.

First up is Kouign-amann léger. Ever since Chef Xavier Cotte at Le Cordon Bleu in Paris demonstrated his version of Kouign-amann to our pastry class, I’ve wanted to recreate this delectable caramelized, buttery treat. Over the past couple of years I’ve compared and tested recipes for this traditional Breton specialty from the likes of Alain Ducasse, Philippe Conticini and Pierre Hermé (just to name a few).

Below is my recipe copy with my notes and musings - seems to be a lot going on.

As Kouign-amann (hereafter referred to as K-a) becomes increasingly well-known and available in the United States, many recipes can be found on line and in print. You can find all sorts of variables in proportions of ingredients, kneading times, resting and rising times and even oven temps and baking times. My intent is not to present the recipe per se, but to highlight a few tips for success in making this laminated dough.  It’s all about planning and timing!

If you’re not familiar with the techniques for laminated dough, there are many publications and online sources that will take you through the steps.

OK, so the first step is to make the dough: the key here is to mix the ingredients (flour, salt, yeast, water, a bit of soft butter and usually a bit of sugar) just until they come together, followed by 30-60 seconds of low speed kneading. Avoid prolonged kneading at this stage, since you don’t want to develop a lot of gluten and have your dough become tough.

Let the dough rest for 30-60 minutes, covered with plastic film at room temp, followed by 1-2 hours wrapped in plastic in the fridge. That gives it enough time to relax and cool before incorporating the butter.

Next comes the butter. Some chefs recommend using European style butter, which is higher in butter fat and lower in water content than our American butter (which is why the French refer to it as “dry butter”). I’ve been using Cabot’s standard unsalted butter for years with excellent results. Working with butter at about 65-68ºF is ideal for me. It still has a cool feel to it, and it’s malleable and able to be shaped easily. As long as your work environment is cool and you work efficiently, once your butter block is shaped you can even go right to the beurrage step (encasing the butter in the dough) without having to re-chill the butter. Just remember that if the butter becomes soft, warm and squishy, it’s time to chill it before you continue!

Once you’ve completed the beurrage, give your dough-butter package a 20-30 minute chill before starting the turns. Even after that short chill the butter can tend to crack a bit as you begin to roll, so I tap the dough with my rolling pin to make sure everything is malleable again before starting the turns.

On a lightly floured surface roll the dough out to a rectangle about 3 times longer than it is wide. Do one three fold (also known as a business letter fold), turn the dough 90º and repeat. Wrap the dough in plastic and rest for 30 minutes in the fridge. Do 2 more three folds, turning the dough 90º after each, this time rolling in sugar rather than flour. As you roll, continue to sprinkle sugar on your dough and keep rolling it in – and don’t skimp on the sugar!

Important tip: Chef Franck Geuffroy at Alain Ducasse’s école de cuisine in Paris was kind enough to share his K-a recipe with me, and this tip has made a huge difference:  after the two turns with sugar let the dough rest at cool room temp for 30 minutes, NOT in the fridge (I wrap it lightly in parchment).

If the dough sits in the fridge at this stage, even for 30 minutes, the sugar starts to melt; the first time I made K-a I was faced with a soupy, sugary mess when rolling the dough out for the final shaping. You still have to work efficiently after a room temp rest, but there is much less of a syrupy mess to deal with.

Now, once the dough has rested, you’ll want to roll it into a rectangle for cutting. As you roll be sure to give it a break every now and then, so it’s relaxed before you actually cut it. Your squares will hold their shape better.  Dredge both sides of your square with more sugar, fold up the corners and place them in your buttered rings or pans.

Rising times vary from recipe to recipe, anywhere from 30-90 minutes. I've found that a good 60 minute rise at warmish room temp (75ºF or so) is adequate. As is true of laminated doughs in general, if you let them rise at too warm a temp (over about 82-85º) the butter will start to melt out, pool on the baking sheet, and you'll lose some of the buttery layering you've worked so hard to achieve.

I’ve baked K-a in both open tart rings and traditional muffin tins, and I prefer the end result with the muffin tins. While the open tart ring version is still delicious, the sugar on the bottom of the K-a can over caramelize and burn if you’re not paying attention.

Which brings me to baking times and temps.  Learn your oven and understand that recipes are guidelines. It is SO important to use all of your senses to help you determine when something is done:  ahhh the aroma; ooohhh what a lovely golden crust; wow, that feels done!  And, of course, taste is the piéce de resistance!

So choose a recipe and GO! Bon chance tout le monde!!