What? Vegan raspberry dessert!


Steve and I met up with some of my old high school chums for dinner earlier in the summer. I was on the "what to bring" list for dessert and was up to the challenge when I learned that one couple is vegan and another long time friend is following a very restrictive diet, including no gluten. So what's a French style pastry chef to do?! Create of course.

On to the internet to research some options. I decided on a riff of a raspberry lemon chia "cheesecake" from the "Love and Lemons" blog. Curiously enough I also recently taught a vegan class at Sur La Table and found many similarities between this dessert and the one we made in class. The more I read about vegan desserts, the more I realize there are a number of ingredients that act as the base for many recipes. Cashews and Medjool dates are two of them.  While I don't plan to make many vegan desserts, it's good to understand the approach and what goes into them. It's all about learning.

This is basically a three layer dessert, and everything is raw. NO BAKING INVOLVED! Perfect for summer.

It's assembled in a basic 8"x4" loaf pan lined with parchment paper with a 1" overhang on each side.

First the walnut crust. 


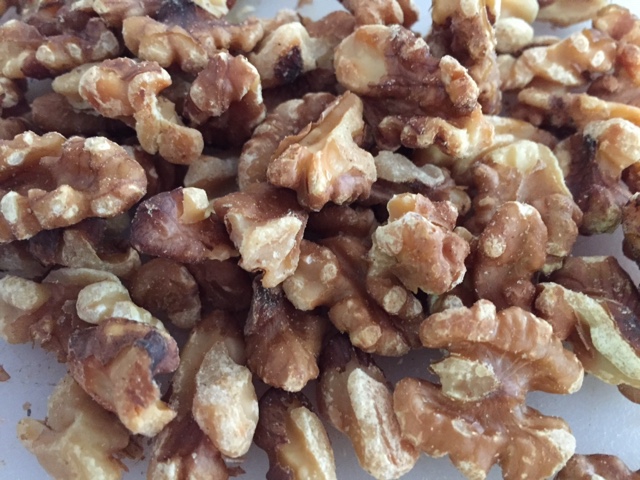
This called for Medjool dates, but I used dried apricots instead (had 'em in the house, don't ya know). It's very simple. Measure 1 cup walnuts, choose 4-5 dried apricots and pop them in a food processor with 1/2 tablespoon coconut oil and 1/4 teaspoon sea salt. Process until crumbly then press into the lined loaf pan.


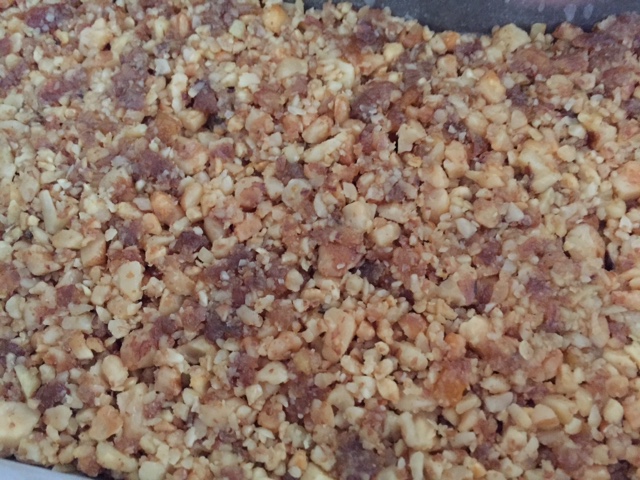
Pop the pan into the freezer while you make the "cheesecake" layer.

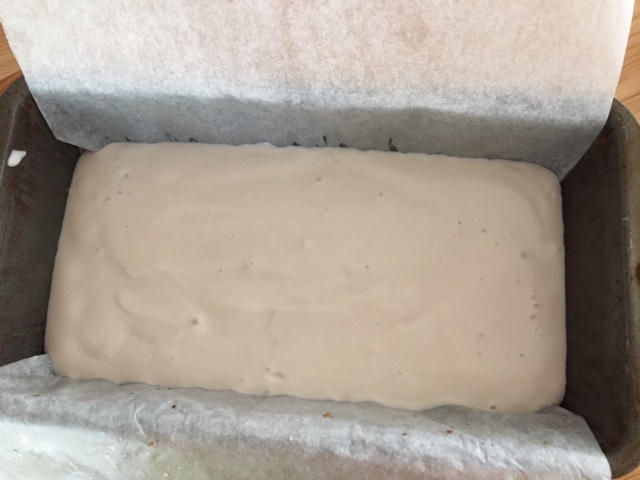
"Love and Lemons" gives two options for this layer. The first involves raw cashews soaked for 4 hours, drained and blended with a variety of other ingredients similar to option two. I chose the second option which utilized a store-bought vegan cream cheeze in place of the cashews.

Blend 8 ounces plain vegan cream cheese with 1/2 cup full fat coconut milk, 1/4 cup maple syrup, 1/4 cup fresh lemon juice, a tablespoon lemon zest and a teaspoon of vanilla extract.


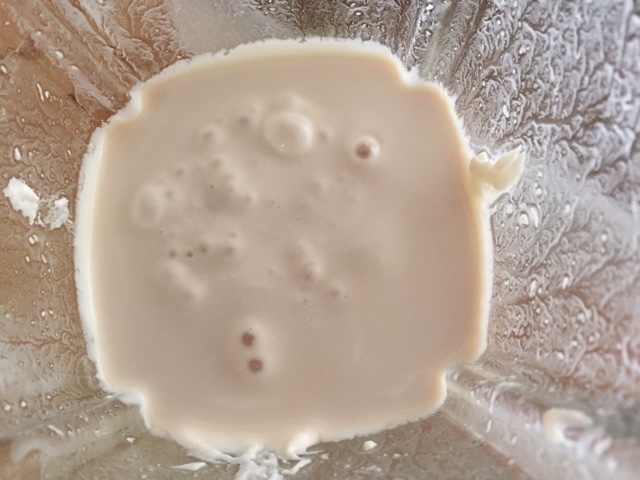
Pour the filling over the walnut crust and freeze until firm, at least 2 hours.


The raspberry layer is thickened with chia seeds, but, since I didn't have those in my larder, I researched other ways to set a vegan dessert. Coconut flour is one of those thickening options, and guess what? I had some coconut flour at the ready.

Combine in a blender 12 ounces raspberries (fresh or frozen, either way), 1/2 teaspoon lemon juice, 2 tablespoons maple syrup and 2 tablespoons coconut flour mixed with an equal amount of water. Blend until smooth and pour over the frozen "cheeze" layer.


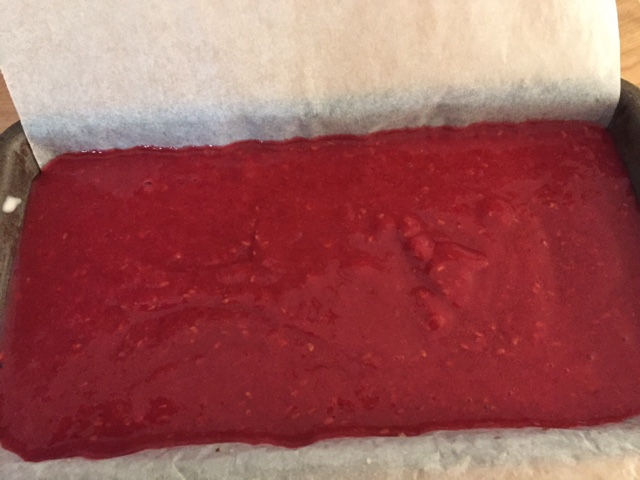
Freeze 4 hours or overnight.

When ready to serve, remove from the freezer about 20 minutes ahead, allowing it to thaw a bit. Lift it out of the pan by the parchment lining, slice and place on plates, letting the slices thaw another 15 minutes so they're not icy.


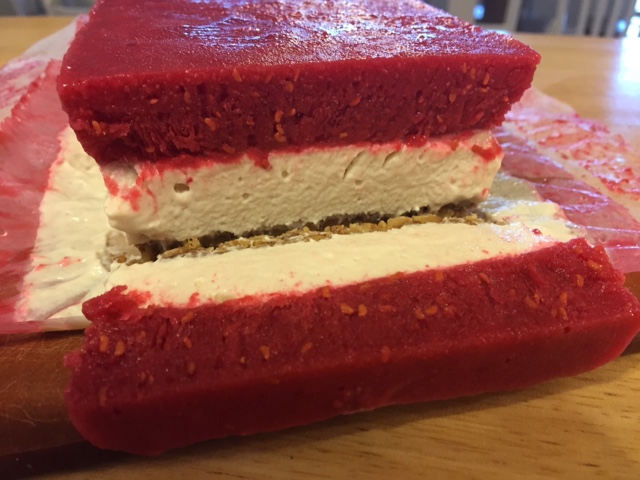
I must admit this was delicious! Cool and creamy with a nice lemony berry tang. And the group loved it too!  

Enjoy!


Some new flour ingredients


Thanks to my recent discovery of Alice Medrich's book "Flavor Flours", I've been playing around with recipes using a variety of alternative flours - and I've only begun to scratch the surface.

They happen to be gluten free, although that was not the primary reason for my experiments.  I'm intrigued by the many options now available to both the baking and pastry enthusiast and pastry professional.  Always learning, always testing, always trying new things.  That's what it's all about!

First off - coconut flour.

This recipe is for a tart crust, and it is, in a word, DEElicious - very reminiscent of the quintessential American coconut macaroon.

It's easy to put together.  Combine 40 g coconut flour, 100 g shredded unsweetened coconut, 1/4 teaspoon baking powder, 1/2 teaspoon salt, 85 g soft unsalted butter, 100 g sugar and 1 large egg white in a bowl.  Mix until the ingredients are blended then press evenly into a 9" fluted, removable bottom tart pan, making the sides thicker than the bottom.


Heat your oven to 350ºF, set the lined tart pan on a parchment lined baking sheet and bake 18-20 minutes until nicely browned.


Let cool for 15 minutes or so then push the bottom up to free the crust from the pan and loosen the sides. Finish cooling for 2 hours before filling.


Now here's where I leave the filling up to you.  

I filled mine with coconut pastry cream made by replacing the whole milk in my standard recipe with coconut milk - yum.  Then you have the option of topping the tart with mango slices, mixed tropical fruits, mixed berries or whatever your heart desires.

Or how about a nice chocolate ganache filling topped with a sprinkling of toasted coconut?

Or fill the crust with some toasted, chopped nuts of choice mixed with some homemade caramel then cover with a whipped milk chocolate cream.

Or perhaps a luscious lemon-lime curd with some finely diced crystallized ginger?

You decide.

Next up - oat and rice flour.  This one is an oat sablé recipe (and you know I'm a sucker for shortbread!).


Whisk together 140 g oat flour, 55 g white rice flour, 1/4 teaspoon salt, 1/8 teaspoon baking soda in a large bowl. Add 130 g sugar, 60 g chunked up cream cheese, 170 g chunked up soft butter and 1 teaspoon vanilla extract and mix with a fork or spatula to blend into a smooth dough.

Form two logs about 1.5 inches in diameter (or whatever diameter you wish), wrap tightly in wax paper or film wrap and refrigerate for at least 2 hours or overnight.  You may also freeze the dough for up to 3 months.

First I did the log approach.  I sliced rounds and baked at 325ºF for 12-15 minutes until nicely browned.


The cookies did spread a bit, something I'm suspect has to do with the difference in structure of a non-gluten dough. Plus the ratio of sugar to the total flour is higher than my typical shortbread and could also contribute to more spread during baking.  It's a learning curve to be sure.

Next I took a portion of dough, formed small nuggets and baked those.


They had a more faceted look and were rather pleasing in the small-bite sense of the word.

These are GOOD - a nice crunch, butteriness and delicious flavor all the way around. Yes.

And now - teff! 

An ancient Ethiopian grain, teff is loaded with calcium, iron, Vitamin C, fiber, protein and more.

I chose a chocolate sablé recipe for my first trial with this healthy and interesting ingredient. I know - more shortbread.


Place 150 g teff flour, 60 g white rice flour, 35 g unsweetened cocoa powder, 135 g sugar, scant 1/2 teaspoon salt and 1/8 teaspoon baking soda in a large bowl and whisk to blend.

Add 170 g unsalted chunked up soft butter, 60 g chunked up cream cheese, 1 tablespoon water and 1 teaspoon vanilla extract to the dry ingredients and mix with a fork or spatula until blended into a smooth dough.

You can form logs as with the oat sablés but I chose to wrap and chill the dough then simply form rough ball shaped pieces sprinkled with a little sugar. I placed them on a parchment lined sheet pan and held them in the freezer while the oven was heating.


Heat your oven to 325ºF and bake for about 25 minutes until firm to the touch.  While it's hard to tell if they've browned, I found they looked more dry with a bit of cracking on the surface as a reasonable sign that they were done.


These babies did not disappoint!  Nice chocolate flavor, a texture with just a hint of fine graininess (not a bad thing, by the way), plus deliciously crisp and buttery. And Steve liked them too!

"Flavor Flours" is divided into sections by type of flour, including not only the ones I've used so far, but also chestnut, sorghum, buckwheat, corn and nut flours.

There is definitely another world out there folks! Here's to new tastes and textures. Yes indeed.