Have a cheery, peaceful and happy holiday season!

Holiday shortbread all boxed up

It’s been a busy time these past few weeks and blogging has taken a back seat. BUT . . . . I’ve tried a couple of new cakes from Aleksandra Crapanzano’s book “Gâteau” which I hope to share with you in the upcoming weeks.

One is a classic French apple rum-scented cake which I’ve made several times now. The first time around was for a demo I did back in October at a nearby assisted living facility during which I made two 6” smaller cakes. The time frame required a shorter bake than for a full 9” cake and it worked out just fine. The residents LOVED it!

six inch french apple cakes

I’ve also made both standard “muffin” sizes (seen below at another assisted living gig) and petite teacake versions topped with whipped caramel mascarpone and oat crumble. Yum!


The other day I made a chocolate, spelt, crème frâiche, coffee enhanced loaf that I will definitely try again. The recipe calls for a 9”x5” loaf pan, but I used my mom’s Mirro pan that’s longer and more narrow than a standard loaf. I’ve done that a number of times with other cake recipes that call for a standard loaf but this time the batter was WAY too much for the pan, spilling over the ends like lava. I ended up scooping some of the batter out early on in the bake and then let it finish. Boy did I have my doubts.

Not a pretty picture - sunken right down the middle like a trough. All puckered up! Just goes to show ya that things don’t always end up as you might hope.


But wouldn’t you know it - it’s delicious! Deep cocoa flavor, moist crumb with just the right level of coffee flavor.


I’ll let you know how the Christmas dessert I hope to serve comes out. Slices and/or chunks of this cake with a vanilla/orange scented ricotta custard, some chocolate ganache and something crunchy to set it off. Maybe a nutty crumble or chopped candied hazelnuts or walnuts. Mmmmmm . . . sounds good!

Cheers and good wishes to all! Catch you later.

My vermont memories window display (No white christmas here!)

It’s baking season!

Zion lodge and the afternoon light

Yes, it’s officially autumn as of 2:50 am today, September 23! My absolute fave time of year, and baking is on the agenda. Even though It’s time to polish up my recipes and game plans for a number of classes and demo presentations on the fall calendar, there are other things I can’t ignore. Every now and then it’s fair game to veer off course a bit, eh?

If you’ve followed this blog for awhile, you know my penchant for sharing the beauty of nature. I love baking, but I also love walking and seeing the flora changing from season to season, whether in someone’s garden I happen to pass or out along the paths where wildflowers grow.

Roadside asters near the grand canyon

Back in 2020 Steve and I were planning a trip to Zion, Bryce and the Grand Canyon but had to postpone due to COVID. Well guess what - we just returned from that SW trip as a prelude to launching into fall activities. What grandeur and spectacular beauty. Pictures can certainly give you a hint, but you really have to see it in person to soak it all in.

OK - I admit this post isn’t really about autumn baking (although I’ll mention a couple favorites toward the end) but about experiencing just some of the different trees and flora of the SW. Prickly pear, juniper, scrub oak, desert holly, all of which tolerate dry conditions and are much more rugged and tough than plants in the midwest.

Prickly pear cactus

Juniper Berries

Desert Holly I think

Another oft seen bloom, particularly in Zion, was datura, a large white trumpet flower. Turns out this one is highly poisonous, belonging to the nightshade family, also referred to as jimsonweed, moonflower and thornapple. Whoa!

Datura - watch out!

Zion was my favorite - you gotta go!

So what are you thinking about baking this fall? Apples, pears and berries are all fair game.

Go as simple as a pâte brisée lined open tart ring, load in apple slices tossed in a squeeze of lemon juice and just a bit of sugar and flour, bake until golden then drizzle some cider caramel over the top. Add a scoop of vanilla ice cream and you’re good to go.

Don’t forget pumpkin, nuts, chocolate. How about a delish pumpkin financier?

Pumpkin financier

Or a buttery, crumbly pumpkin scone? And that’s just scratching the surface.

Pumpkin scone

Scroll through my blog for more ideas and have a blast with your own autumn baking. I know I will.

Lovely dahlia at nearby meijer gardens

Hazel-chocolate spirals plus croissant squiggles

Back on our stage once again - it’s time for more fun with croissant dough! Some weeks back I came across an article about the various ways that many baking and pastry folks are shaping their laminated dough - eye opening to say the least. I wanted to give one of those shapes a try in addition to making some spirals for a group event.

First let’s review the classic spiral process (here’s one version), using one of my favorite fillings - hazelnut remonce topped with chopped chocolate for a match made in heaven.

A quick sidebar: I first made remonce about 3 years ago based on Brontë Aurell’s recipe - 100 g each of almond paste (preferably 50% almond/50% sugar), sugar and butter. As I thought about that mix, I realized it’s essentially 50 g almond, 150 g sugar and 100 g butter. After my lovely class experience in Copenhagen in May of 2022 where we made remonce with 100 g each almond flour, sugar and butter - essentially créme d’amande without any egg or flour - I tweaked the almond paste version to 100 g almond paste, 50 g almond flour, 50 g sugar and 100 g butter for a more almond, less sweet version than Aurell’s. Add 300 g of toasted, ground hazelnuts to the mix for the hazel version. Did you follow that?? It’s all in the details.

As many of you know, the spiral is what we all use for cinnamon rolls - roll out a rectangle of dough, spread or sprinkle your filling on, roll it up into a log, slice, pan up, proof, bake and enjoy! There are tons of filling options, either sweet or savory, so use your imagination and go for it.

I’m using a half batch of croissant dough here - roll to about an 8” x 12” rectangle (20 cm x 30 cm).

Ready for the filling

Spread 227 g / 8 ounces hazelnut remonce filling over the dough and sprinkle with 50 g chopped chocolate. I use Guittard 61%.

Ready to cut

Cut ten 3 cm wide strips, roll ‘em up and place each in a standard sized baking paper. PSST - this is a new approach for me. Rather than tucking them in a pan cheek-by-jowl or setting them openly onto a sheet pan without any ring or form, the papers give them just enough of a boundary to allow for rising/spreading and baking very nicely. Yes!

Rolling, rolling, rolling


Cover lightly with buttered plastic wrap and let rise 1.5 to 2 hours. Not to confuse you, but I cut two additional strips from the half batch of dough I was using for the squiggle test (coming up) to give me an even dozen as you see below.


Toward the end of the rise heat the oven to 400ºF. Bake 10 minutes, rotate the pan and check the browning. If browning too quickly, reduce temp to 375ºF and bake an additional 10-15 minutes until nicely browned.


For a little shine I brush them with some simple syrup and then give ‘em a sprinkle of coriander sugar. Yum.


Time for the new shape! Squiggles. They remind me of fleur-de-lis.


Using a half batch of dough, I rolled it out to an 8” x 12” rectangle, this time with the short side parallel to the edge of the counter. I have only six 80-mm square tart forms so six pastries resulted from this experiment.

Butter and sugar the tart forms which serve as the boundary for the dough to keep it in check, so to speak, as it proofs and bakes. Cut six 30 cm (12”) long and ~ 2.5 cm (1”) wide strips. My cutting eye was a bit off and a couple came out a bit narrower - going forward I’d cut them all a tad wider, ~3 cm each.


Shape each strip into a squiggle (I had practiced with a strip of paper first and figured out the curves I was going for), tuck each into a prepped form at an angle as seen below and sprinkle with some coriander sugar.


Cover lightly with buttered plastic wrap and let rise about 1.5 hours.


Bake at 375ºF about 20 minutes until nicely browned. I also gave these the simple syrup, coriander sugar treatment.


All in all, a fun time in the baking kitchen! I hope you’re having fun too!!

Summer marches on.

Macaron musings

True confessions - I’ve had a love-hate relationship with French macarons over the past 17 years. When I first tasted these popular delights in Paris in 2006, I found them way too sweet for my taste. No thanks.

However, as is often the case in life, things changed. Having finished my pastry schooling in 2007, I began working at Gracie’s in Providence RI and was asked to start making these little cookies that were, still are and will probably continue to be, all the rage. I generally had the best results with my chocolate version filled with a basic chocolate ganache, but there were times, boy oh boy, when they came out mottled or too sticky or cracked or whatever. Frustration!

After leaving Gracie’s I taught some well received macaron classes in my shop at Hope Artiste Village in Pawtucket RI. Yet once I turned that business over in anticipation of our move to Michigan, I put macarons aside to focus on my true loves - tarts, puff, croissants, brioche, shortbread, choux and financiers/teacakes just to name a few. My heart simply wasn’t pining to make les macarons.

raspberrry white chocolate ganache filled

Fast forward a few years later - Steve and I had settled back in Grand Rapids and I started teaching pastry classes at the newly opened Sur La Table (sadly closed after the early months of the pandemic - bummer!). Wouldn’t you know one of the most popular class offerings was les macarons!! And so I taught many classes on these babies - sometimes they turned out beautifully and sometimes not so. The questions were always the same - what went wrong??

And so began another period of research, recipe comparisons, trials and macaron making. I even wrote a couple of blog posts about the different types of macarons out there, hoping to open peoples’ eyes to how easy some of the varieties are to make.

macarons de nancy

Yet the so called “jewels” of the pastry case remain on most budding and seasoned bakers’ minds.

chocolate all the way around!

After a number of tests and tweaking the weights of the confectioner’s and granulated sugars, I’ve finally landed on a recipe that’s been working well for me. I’ve always made macarons using the French meringue method as opposed to what I view as the more fussy Italian version, and I continue to be most comfortable with that approach.

Multitudes have written about macaron making, citing factors like low humidity, aged/room temperature egg whites, freshly opened almond flour and blitzing/sifting the almond flour/confectioner’s sugar as all being important to success. I take all of that into consideration for sure, but for me what stands out is the actual process - making the meringue, then the macaronage and finally the macaroner.

In a squeaky clean bowl (I give mine a quick wipe with vinegar or lemon juice) start whisking room temperature egg whites and a pinch of salt on low to medium-low speed until the mixture changes from a straw color to more white with foamy bubbles. Then gradually shower in the sugar over a couple of minutes - the egg whites accept the sugar more readily that way.

here’s where you start adding the sugar

The next important step is whisking the meringue to the proper stiffness (think bec d’oiseau or bird’s beak). Once the sugar is fully added to the whites, increase to medium speed, allowing some time to watch the lovely shiny, stiff meringue develop. It may be 3-4 minutes before you see some thickening and then a few minutes more to reach your goal. Remember always check sooner than later!

In days past I used to amp up the mixer to full speed right away, but I have since adopted this lower and slower approach - breath deeply.

Now the macaronage - with a spatula blend the dry ingredients into the meringue in three additions - it should look thick and a bit rough . . .

then work the mixture to the lava like stage (macaroner) during which it becomes smooth and glossy, ribboning off the bowl scraper or spatula. Here it’s important not to take it too far. Too loose and things will spread in a way that will make you unhappy.

Pipe evenly in circles of about 1.25”, leaving room for the mixture to settle. If you pipe too much, the mixture will spread more than you’d like. In other words, smaller footprint, less spreading, better result.

vanilla speckled

You’ll find fillings ranging from confitures (too sweet for me) to almond paste/butter/flavor mixtures to ganache but frankly, what I’ve really gotten into is Swiss meringue buttercreams paired with ganache to fill the macaron shells. So many choices. One of my faves is a chocolate ganache center ringed by roasted strawberry SMBC. Oh so good.

BTW - notice the plain shells below. I like my shells au naturel, preferring to avoid the use of artificial colorants. Not to worry - there are ways to work around that.

roasted strawberry SMBC/Ganache center

You can dress ‘em up with a dusting of strawberry powder for some color. Fruit powders are available from various online sources, but you can also find freeze dried strawberries and raspberries at Trader Joes. It works well to crush them through a fine strainer/sieve as you dust away.

A few other ways to add some color - use ground pistachios or hazelnuts in place of half of the almond flour for a a nice speckled look. Use espresso, cocoa or fruit powders like raspberry with the dry ingredients to add some color. Add in a bit of spice (cinnamon or coriander anyone?) or ground tea whisked in with the dry ingredients. Top the piped shells with finely chopped nuts, ground cocoa nibs, fine coconut or crushed gavotte crêpe crumbs before allowing the shells to dry before the bake.

pistachio speckled with apricot honey SMBC/raspberry coulis center

chocolate shells/white chocolate sesame pistachio ganache

I admit these next shells are kind of messy - it was harder then I expected to sprinkle some crushed gavotte crêpes evenly but what the heck, eh? Hmmm . . . I wonder if crushed corn or rice chex would work? Great with something blueberry me thinks.

gavotte crêpe topping

I do keep a few concentrated gel colors on hand mainly for class purposes, and on occasion I’ll use a schmear to fit the project. I recently made a batch with lemon-lime SMBC/ toasted coconut and did tinge the shells with a bit of yellow. Looks pretty nice- and tastes good too!

When using concentrated colors, go small - you can always add more. Here’s one instance where I got more heavy handed than I intended but the recipient of these strawberry macs reportedly said “These would make a dead man get up and speak French”.

more roasted strawberry smbc/ganache center

I’ve also taken to heart the importance of letting the filled macarons sit in the fridge for a day or two before enjoying (although many find that difficult!). It’s amazing what that cool rest can do for the texture of this little cookie.

I usually store the baked shells in the freezer, especially if they seem a bit sticky when attempting release from the Silpat. Once frozen they lift off nicely. Then I can fill them when I’m ready.

Even after filling, the freezer is my go to for storage where the texture continues to improve. You can move them into the fridge a day or two before enjoying or give them just a few minutes out of the freezer and enjoy right then and there. It works.

These days, as I look back, I’m a firm believer that attitude and being zen with it all makes a big difference. Ahhh . . . . the pastry gods can look favorably upon us.

It’s tulip time!

Religieuse - fun with pâte à choux

Steve LOVES anything made with choux paste, and coffee religieuse (French for nun) is at the top of his list. He’s been asking me to make these for awhile now, and what better time than during the down days of January as we catch our collective breaths and ease into 2022.

Pâte à choux takes me back to Le Cordon Bleu school days and my stage at Pascal Pinaud’s in Paris’ 5th arr. (15 years ago this month!!). My task each morning was to fill and garnish the èclairs and religieuses for the day. As a matter of fact, the job I was given that very first morning oh so long ago was to make a big batch of traditional crème pâtissière (and make it I did!). Yes, I can do this!!

Chocolate and coffee crème pat (in Brit speak) are de rigueur for the fillings, with fondant of each flavor used to garnish. In recent years dedicated choux shops have popped up in and around Paris with all manner of flavors available.

Even though fondant is typically used to cap the choux buns, I felt no joy when working with the stuff and have avoided it ever since. I choose to use a lovely ganache instead when dressing up my ladies. The collar consists of buttercream piped in a ruffle fashion, another morning job for which I was often chided when not piping perfectly. Looks like I still have a ways to go on the perfect ruffle. Live and learn. BTW - you’ll see all manner of ruffles if you search the internet for religieuse. Lots of variations.

For the filling I used my base crème pâtissière recipe. Since I planned to make just a few religieuse, I divided out 200 g of the warm cream and blended in 30 g of chopped milk chocolate and some coffee extract to taste to go the mocha route.

Let’s do a quick run through of the choux making process. Here’s the recipe - I’ll highlight what I feel are the important things to notice through the steps.

Have your flour and eggs ready in separate bowls. Place the milk/water/butter/sugar/salt in a medium saucepan on low heat. You want the butter completed melted before you turn the heat up.

Up the heat to medium high and bring it to a boil. Have the flour at the ready.

Remove from the heat and dump the flour in all at once, stirring quickly to incorporate. It will look kind of clumpy at first like rough mashed potatoes.

Move it back onto the heat and stir vigorously to release some steam and dry it out for a minute or two. Look for the paste to start forming a smoother ball and there will be a light coating on the pan bottom.

Transfer the paste to the bowl of a stand mixer and let it sit a minute to release some more steam. With the paddle attachment on low add the first egg and blend on medium to incorporate completely. It will look gloppy and will seem like it doesn’t want to come together. Don’t worry.

Note: you can blend the eggs in by hand with a sturdy wooden or silicone spoon - you just have to have enough elbow grease to bring it together!

As you add each egg and blend it in, the paste will become more uniform and smooth. The base recipe I use calls for four large eggs. Here’s the paste after three eggs have been added.

Before I proceed I assess by checking the mixture. It should hold, not tear, and start ribboning down as you lift the paddle and let it hang in a “v”. Not quite ready.

I break up the last egg and add about half, blending and reassessing. I don’t consider myself superstitious but it usually works out for me that about 3/4 of the last egg is just right to call it good. Here’s the “v’ coming off the paddle. Notice the paste has more of a smooth, luscious looking sheen too.

Time to pipe! I pulled out a couple of round cutters to help me eyeball what size I wanted my heads and bodies. I forgot to include my trusty ruler in the shot, but in the image below I’m using a quarter sheet pan which measures 8x12”. That gives you some scale. I used a round tip for the bodies and a star tip, just because, for the heads (which you can sort of appreciate in the final analysis, but a round tip is just fine).

Here they are all baked and cooled. I had an extra head which I filled with a bit of mocha cream and ate. Gotta test the product.

Match the heads and bodies and shave enough top off the bodies to give a flat surface on which to perch the head.

When ready for the filling portion of the program, I give the chilled cream a good smoothing out in the mixer with the paddle or in a bowl with a spatula, then fold in a dollop of whipped cream to lighten it. I learned early on that Parisians are none too happy if their choux aren’t properly filled. There has to be a certain heft to show that the job is done well.

I have a basic one to one dark chocolate ganache on hand for dipping (once made, let it cool a bit so it doesn’t run down the sides). Fill first, dip second.

Poke holes in the bottoms of the heads and bodies then pipe in your cream. As you hold the choux with your non-piping hand, you’ll appreciate the heft as you fill. Fill until some cream starts to ooze out, a sign that you’ve filled adequately. You can scrape off the excess and have a snack.

Set the buns upright and dip both bodies and heads in ganache to give a nice cap. Set the heads on the bodies - the ganache will hold them together.

Once assembly is complete, I usually hold them in the fridge until I’m ready to do the collar. I used sea salt caramel Swiss meringue buttercream for my ruffles, piping with a small star tip.

I think of these nuns as roly-poly with a mock turtleneck look.

As you might imagine, Steve was a happy camper. Filled choux will keep well in the fridge for a couple of days to give you some time to savor the treats.

Here’s a cross section - you can see they are chock full of cream. The Parisians would be happy.

Coming soon! More choux fun with Paris Brest.

Stay warm and stay healthy. Ciao for now.

Chocolate babka buns

3B564E9B-75EC-46B6-BE88-1E49DA77C0B2_1_201_a.jpeg

These are NOT the prettiest pastry in the case BUT! They are dee-licious. Mmmmmm!!

I was on a mental chocolate bun kick, trying to decide what chocolate-y goodness I might create for “Pastry Friday” at a nearby assisted/independent living facility. Thinking of something twisty or swirled, babka came to mind as the basic idea but this time in individual bun form.

I wrote a series of babka posts during the spring of 2017 but haven’t returned to that particular pastry for awhile now. It’s time.

I had a chocolate babka recipe in my files from Sur La Table teaching days - it was one we never ended up making in class, but I saved it nonetheless. The filling looked very intriguing but different from other filling iterations I’ve seen. The ingredient portions had me wondering so I went to the “trusty” internet to google “best chocolate babka filling”. And what to my wondering eyes did appear? A NYT article/recipe on chocolate babka by Melissa Clark that was EXACTLY the same as this particular SLT version. My oh my, how intriguing is that?

At any rate, I decided to go for it and go for it I did.

The dough is a brioche like number that gets a first rise and then an overnight in the fridge - gotta develop that flavor! Compared to my usual brioche recipe in which I keep ingredients cold, Melissa’s is less enriched with half the milk (slightly warmed), one less egg and about half the butter (egg and butter at room temperature.) Vanilla and nutmeg add some wonderful flavor too.

Here’s the dough after initial mixing;

A513BC37-F037-4D25-9B93-C37CF3F182F5_1_201_a.jpeg

and after a 2 hour rise.

43BEF7DB-6207-48A4-A33C-DBCC08485C79_1_201_a.jpeg

Gently deflate, form a ball then wrap and refrigerate overnight.

3F21B2CB-C431-4C9C-9ABE-16A2E407B833_1_201_a.jpeg

There are three more things that have to be prepared for assembly and final garnishing. They can all be prepared the day before and refrigerated, but I found it easiest to do it the day of baking.

The filling is fudge-y and oh so tasty. Make it 30 or 40 minutes ahead of taking the dough out of the fridge, since it has to set up a bit to make it perfectly spreadable. I reduced the sugar in Melissa’s recipe from 100 g to 50 g. Here’s how it goes: medium saucepan; 50 g sugar, 180 ml heavy cream, pinch kosher salt; simmer, stirring on and off for 5 minutes to dissolve sugar; scrape into a bowl and blend in 170 g chopped dark chocolate (66% is nice), 113 g unsalted butter (cubed and at room temp) and 2 teaspoons vanilla extract until smooth; cool to room temp.

The chocolate streusel is for final garnishing just before the bake so you can put that together easily during the proof. Here’s how it goes: stir 60 g all purpose flour (or whole wheat pastry if you have some), 45 g granulated sugar, 11 g cocoa powder (Dutch processed is my go to) and 1/2 teaspoon kosher salt together in a bowl; stir in 64 g melted butter with a fork to form large moist clumps. Melissa adds 50 g mini chocolate chips too but I left those out. Set aside.

Next is a simple syrup that will be brushed on after the bake. Here’s how it goes: combine 2/3 cup granulated sugar with 2/3 cup water in a small saucepan; bring to a simmer and simmer a few minutes to dissolve the sugar. Set aside.

When ready to proceed with roll out and assembly, remove the dough from the fridge and divide it in half (it won’t have risen much). Going for a yield of 18 portions, I had my 3” Fat Daddio cake pans buttered and coated with raw sugar standing by. P.S. I have only 12 Fat Daddio pans and used 6 ramekins in addition.

4EAB6249-6954-4053-AA40-E50A18694B61.jpeg

The next few steps are the same as if you were making classic babka in loaf pans. Work with one half at a time, keeping the other half in the fridge until ready.

Roll each half into a 9”x18” rectangle.

2D5509E8-3C5A-41A2-BF50-7B12EEA493C3_1_201_a.jpeg

Spread half the chocolate fudge mixture on each. Heaven.

15A3A31A-1E42-4C95-9CF4-E241AECC8A94_1_201_a.jpeg

Roll into a tight coil then place on parchment and into the freezer for 15 minutes or so.

Rolling, rolling, rolling . . .

Rolling, rolling, rolling . . .

Place the chilled log on your work surface, seam side down, and slit it right down the middle, turning the pieces outward to expose the filling. I used my trusty bench scraper.

6C393F37-46FB-4700-A98C-01C3211816D2_1_201_a.jpeg

Now twist the 2 pieces around each other, keeping the filling facing up.

I gave the twist a good final snugging up before dividing.

Here’s where I veer away from the classic loaf babka. I cut each twist into nine 2” lengths for a total yield of 18 portions. Tuck each piece into the prepared pans.

Cover with lightly buttered film wrap and let rise for 1 to 1.5 hours. At about an hour in, heat the oven to 350ºF.

They won’t achieve a significant doming and filling the pan type of rise but you should appreciate puffiness.

Just before going into the oven, divide the streusel over the tops of the buns using a fork and your fingers to separate clumps a bit.

Bake about 20-25 minutes, rotating the trays half way through. NOTE: if you’re making two full size loaf babkas, baking time is 40-50 minutes.

I look for browning of the dough edges and a tester coming out clean. It’s a bit messy with the chocolate and streusel so aim the tester into dough (rather than chocolate goo) as much as possible.

Just out of the oven, brush with simple syrup as best you can. The streusel and chocolate on top makes it a bit tricky, but I tried to focus the syrup on the obvious browned dough edges.

Let sit about 10 minutes then ease out of the pans/ramekins with a small offset spatula, running it around the edges to loosen the crunchy bits.

At first I was afraid these would fall apart like a pull-apart roll but as I gently released them and placed them on a cooling grid, they held their shape just fine.

Once fully cooled they maintained their integrity very nicely. Whew!

Taste test time!!

Based on the exterior appearance, I thought I’d find more chocolate inside. Not so, but the subtle swirls in the oh so tenderly textured dough, the hint of saltiness in the streusel and the all around delicious flavor of the whole are a winner in my book - and Steve agrees!!

You can use the same approach with your own favorite brioche or cinnamon roll type dough. Just go for it!

Meanwhile, autumn colors are finally appearing much later than usual. Here are a few images from some of the colorful inside displays at nearby Meijer Gardens.

Enjoy and I’ll “see” you next time around.

Baking with Dutch process cocoa powder

Ganache dipped, Swiss meringue swirled cocoa cakes

Ganache dipped, Swiss meringue swirled cocoa cakes

Dutch process cocoa powder is one of my standby ingredients, always on hand and at the ready. I’ve been using it for years, not only for my standard brownies that are perennially available for the Steve-meister for his regular evening treat, but for MOST recipes calling for unsweetened cocoa powder. Such wonderful flavor.

NOTE: I say “most” because there are some guidelines for using natural vs Dutch processed that have to do with acid/alkali and using chemical leaveners (baking soda, baking powder). Here’s a great summary for you from Serious Eats (a great resource by the way!).

Dutch process you ask? It’s all thanks to Dutch chemist and chocolatier Conrad van Houten (1801-1887) who figured out how to alkalize the acids in cocoa powder to create a more mellow taste experience. I’ve been using Bensdorf high fat Dutch process cocoa powder for some years now (I am of Dutch heritage after all!) and find the end results so tasty. It’s available through a variety of sources which you can easily find online.

Many say that the decision to use natural cocoa powder vs Dutch process is purely personal and indeed a matter of taste. While the natural version may offer a more enhanced and complex chocolate flavor, the “dutched” version is smoother and, in my estimation, more delicious.

French Tarte “O”s

French Tarte “O”s

As I review the things I generally bake with cocoa powder (brownies, financier, shortbread, meringues, fudge cookies, flourless sponge and more), I realize that, at least in my current armamentarium, the only one that contains a chemical leavener is Bouchon’s version of that popular chocolate sandwich cookie lining grocery store shelves. I did a bit of research to try and figure out why one would add baking soda to a shortbread cookie since they don’t typically rise like, let’s say, a classic chocolate chip cookie. From the scientific standpoint, the alkaline baking soda seems to contribute to a more even bake, tenderness and even enhances color and flavor.

OK - enough science. Let’s look at some more ways to use Dutch process cocoa powder. along with a couple of straight forward recipes for you.

Cocoa cakes

Cocoa cakes

This tasty babies are from Yotam Ottolenghi and Helen Goh’s book “Sweet”. Not unlike financier, the batter is made with similar ingredients but doesn’t involve browning the butter which one would normally do for financier. They are a dream to put together and bake so nicely in individual silicone molds from very mini to larger “muffin” sizes, depending on your mood.

This Silikomart mold (SF022) is one of my favorite ones for simple small cakes - just the right size to enjoy a few bites without feeling you’ve overdone it. Remember - everything in moderations folks!

The wells each hold about 48 g/1.7 ounces (if full) - I get about 15 cakes out of the recipe below. You can easily double the recipe for more!

3FD69FD3-253A-4E5B-99BD-9274B99024E7.jpg

Heat the oven to 375ºF. If not using silicone molds, buttered mini or regular muffin tins work well. Yield will vary depending on the mold/pan you use.

Melt 140 g/5 ounces unsalted butter (I use a pyrex glass cup on medium power in the micro) and have it at the ready.

In a separate bowl, sift together 40 g all purpose flour, 40 g almond flour and 50 g Dutch process cocoa powder.

Place 120 g (4 large) egg whites in the bowl of a stand mixer fitted with the whisk attachment along with 160 g granulated cane sugar and beat on medium-high for a couple of minutes until thickened and glossy.

Continue on the same speed and drizzle the melted butter down the side of the bowl, beating until combined. Scrape down the sides.

On low speed blend in the dry ingredients. I usually take the bowl off the mixer and finish the blending by hand - you want to make sure none of the dry stuff is sitting on the bottom.

Fill molds about 3/4 full (you can scoop but I prefer piping for more equal portions and less muss) and bake about 15 minutes or until center looks set and springs back when touched. Baking time varies depending on mold size.

Let cool in molds about 10 minutes then turn out onto wire rack to finish cooling.

Once cooled I dipped the tops in ganache (seen above), popped them in the fridge to set the ganache, then gave them a nice swirl of dark chocolate Swiss meringue buttercream. Yum. Steve loves these!

2FB91D89-DB9C-4230-881F-948D02AD6A07.jpg

Next up - flourless walnut fudge cookies, a François Payard recipe from FOOD52’s “Genius Desserts”. This is an eye opener folks. Plus you can change up the nut choice as you wish - pistachio, pecan, macadamia and more. Nuts and chocolate are a marriage made in heaven if you ask me.

FBD11C1C-0A02-47B6-BF33-0DD79A7E4C0D.jpeg

Heat your oven to 350ºF. Line two 1/2 sheet pans with parchment or silicone mats. Place 4 large egg whites in a bowl and allow to come to room temperature (place the bowl in a slightly larger bowl of warm water to speed it up).

Toast 275 g / ~2.75 cups walnuts or nuts of choice on a parchment lined sheet pan for about 10 minutes. You’ll smell the aroma and you’ll know. Let them cool, then chop ‘em up.

Mix together 350 g confectioners sugar, 70 g Dutch process cocoa powder, 1/4 teaspoon salt and the chopped nuts in the bowl of a stand mixer with the paddle. Give a quick low speed mix to combine then add the egg whites and a tablespoon vanilla extract with the mixer running. Mix on medium about 3 minutes to thicken.

I prefer smaller cookies so I used my tablespoon scoop to portion the dough out. Place pans into the oven then reduce the temp to 325ºF and bake about 15 minutes until tops lightly crack. Rotate your pans half way through the bake.

Slide cookies with the parchment onto cooling racks. Remove from parchment once cooled (tip - if sticking, lift parchment up and gently peel it off cookies from the bottom OR brush a little water on the undersurface of the parchment and the moisture makes for easier release.)

B01478A5-C16E-4379-A9E3-C88F73F88F86.jpg

Mmmmmm - what a delightful chew, wonderful nutty flavor and all around tasty experience. Thanks to François Payard and FOOD52!

To wrap it up, I want to share one more way I’ve used Dutch process cocoa in recent weeks. I often speak of twice baked croissant aux amandes, one of Steve’s and my favorite treats (and a lot of other people too, let me tell you).

I made a chocolate hazelnut version by replacing the almond flour in my basic crème d’amandes with hazelnut flour, left the all purpose flour out and added a hefty tablespoon of Dutch process you-know-what.

It goes like this: take croissants a day or two old; slice them as though you’re going to make a sandwich; dip the whole thing in vanilla simple syrup to moisten and give it a squeeze (don’t worry, it’s great fun!) to get rid of excess.

Now open the croissant, pipe a line of hazelnut-cocoa cream, throw a few chunks of chopped chocolate (something in the 60-ish % ballpark) on the cream, then close the sandwich and pipe another line of cream on top. You can add a sprinkling of chopped hazelnuts too.

I usually assemble my twice baked croissants and hold them in the freezer until baking. Heat the oven to 325ºF (I use convection) and put them in right outta the freezer. Bake about 20-25 minutes - you want the cream nicely golden and set. Cool and enjoy. A nice dusting of confectioners sugar gives them that certain je ne sais quoi.

A0397812-0A1D-4DE1-BAB4-CF31411DD0DA.jpg

Our taste test was so enjoyable! The inside had just the right amount of chocolate to accompany the hazelnut cream. Of course we tried one while still slightly warm which only enhanced the experience. Yum. Yum. Yum. And just as good the next day. Yes!

294398A8-0ADC-4030-8F16-A50BF53D9750.jpeg

Have fun creating your own chocolate goodies. Until next time - stay safe, stay healthy and get vaccinated when you can!

Mid-July update

IMG_1149.jpg

Seeing Queen Anne’s lace in bloom is a sure sign of summer’s march into August and beyond. Still plenty of time for outdoor enjoyment, fresh air and sunny skies.

As we come to grips with the fact that (whoa!) it’s already mid-July, would any of us have foreseen all that’s happened in the past four months?! No sir.

Lately we’ve had quite a string of hot days, punctuated over this past weekend with pleasant days, cool nights and clear, low humidity skies. Baking is happening in waves, and now seems as good a time as any to share a few of the things I’ve been making in recent months.

Cinnamon oat crunch scones

Cinnamon oat crunch scones

A number of projects were done with an eye toward becoming blog posts and are currently in their draft phases. I’m working on them bit by bit, often side tracked by various other at-home activities that seem to take precedence. Time has taken on a much different sense, don’t you think?

Some of these goodies go into the freezer for future enjoyment, some are shared with neighbors and family and some go into the occasional pastry order that pops up every now and then.

Chocolate hazelnut swirl brioche loaf

Chocolate hazelnut swirl brioche loaf

Gateau renversé aux cerises (cherry upside down cake)

Gateau renversé aux cerises (cherry upside down cake)

Mixed berry mascarpone trifle

Mixed berry mascarpone trifle

Swedish cardamom buns

Swedish cardamom buns

Baguette

Baguette

Croissant

Croissant

Stay tuned! Baguette! Brioche! Swedish buns! Yippee!!

Meanwhile enjoy summer, be kind and helpful. It works.

Chocolate pot de crème fudgesicle

IMG_1046.JPG

Just think about this - one delicious base and two ways to use it - classic pots de crème and a creamy, frozen, reminiscent-of-childhood treat. What a great way to create a luscious chocolate-y summer dessert duo with a minimum of oven work involved. Even better, to make it more enticing, it’s a make ahead project too!

This takes me back to Gracie’s days. At the restaurant I used to make these chocolate pots de crème in small brown espresso cups topped with a dollop of lightly sweetened Chantilly cream and served with a baton of delicious vanilla shortbread. Just enough to satisfy an after dinner sweet tooth with rich, cool and creamy luxury.

Then one day I discovered that I could take any leftover custard base I had in the fridge, pour it into silicone molds and freeze it. After all, the mixture is essentially crème anglaise (dairy, yolks and sugar), the same base used to make ice cream. So why not!

The perks of silicone molds are not only the many, many shapes and sizes out there but also their oven safeness and their freeze-ability and flexibility. Once frozen, simply push the treats out onto a plate or into a bowl when ready to serve.

The grey cube shape here (thanks Chef Joe) is an Elastomoule made by the French company De Buyer. The majority of my silicone molds are the Italian brand Silikomart which I typically buy through Kerekes, a NYC based company with a great selection of all things pastry plus great customer service.

IMG_1051.jpg

The first time I sampled one of these, my taste buds took me back to the fudge-sicles of childhood (without the stick!) but with a creamier, richer smoothness that blew them out of the water! Since with this approach the custard is what’s referred to as “still” frozen rather than churned in an ice cream maker, it isn’t aerated and thus has a denser texture. Mmmmm!

IMG_1049.JPG

Before going on to the recipe, here’s a quick back story. In 2009 I had the good fortune to spend some time in Paris pursuing professional development courses at Le Cordon Bleu and language study at L’Alliance Français. Needless to say, I was regularly out and about on the metro as well as being a flâneuse, strolling along les rues. I used to love going to les grand magasins, the big department stores like Galeries Lafayette and Bon Marché to browse all manner of things. A feast for the eyes!

On one visit to Galeries Lafayette I came upon these crinkled, colorful little espresso cups from Revol the French porcelain company (they still make these “crumpled cups” in three sizes!!). Easy to pack and a perfect addition to the different sizes and shapes of ramekins I so easily fall for. I’m a sucker for baked custards so why not have some cool oven safe receptacles in which to bake them.

IMG_1053.jpg

The full base recipe fills 8 to 10 four-ounce ramekins. Obviously your yield will vary depending on what you’re filling. Smaller portions, greater yield.

For this project I made 2/3 of a recipe (4 yolks) with a yield of six of my cute Revol cups and ~ten 42 g/1.5 oz frozen cubes. I love small portions.

Don’t let the image below confuse you - just pretend there are 6 yolks in that bowl! The recipe quantities given are for the FULL recipe using 6 yolks.

IMG_1016.jpg

Finally - here we go.

Place 113 g / 4 ounces chopped dark chocolate (I like a 60-66% range) in a bowl or a glass Pyrex measuring cup. Heat 4 cups heavy cream and a pinch of salt in a saucepan, bring it to a boil over medium heat then pour it over the chocolate and blend until melted. Note: You can reduce the fat content somewhat by using 2.5 cups cream and 1.5 cups whole milk if you’d like.

In a separate bowl whisk (with gusto!) 6 large egg yolks with 100 g / 1/2 cup granulated sugar to thicken and lighten them, a minute or two. Temper the hot chocolate mixture into the egg yolks and return all to the saucepan.

Cook over medium heat while stirring (I go back and forth between a silicone spatula and whisk) until beginning to thicken.

When making crème anglaise you don’t want the mixture to boil. You’re shooting for a temp of 180- 185ºF (82-85ºC). If you don’t have a thermometer, there are several signs to help you. You should feel a bit more drag as you stir the mixture. Look for tiny bubbles forming around the edge of the pan and steam coming off the surface. Coat your spatula with the mixture and run your finger through it - it should hold the track and not run. The more you do it, the more you just know.

Strain the mixture and fill whatever ramekins you’re using for pots de crème, leaving about 1/4 to 3/8 inch space at the top. Place ramekins in an oven safe dish and fill the dish with hot water to a level about 1/2 way up the ramekins’ sides. Cover loosely with foil and place in a 300ºF oven. Bake about 30-40 minutes until almost completely set but with a jiggle in the center. I always check at about 20 minutes then every 5-8 minutes or so until I’m happy with the jiggle status. They will set more as they cool and chill.

I filled my 6 Revol espresso cups which hold about 2 ounces. The rest of the base went into the fridge to chill before transferring to silicone molds and the freezer.

IMG_1019.JPG

See the before-oven (liquid) above and after-baking (set) difference below?

IMG_1020.JPG

Once out of the oven, lift the ramekins out of the hot water bath and place on a rack to cool fully. Then cover with plastic wrap and refrigerate to chill thoroughly, at least several hours. They’ll keep for several days - remember the planning ahead approach? It’s a good one.

If you’ve made your custard base with an eye to both pots de crème AND fudgesicles, refrigerate the rest of the base for a day or two where it should thicken nicely. Fill your flexi-molds to the top, using a small offset spatula to smooth and remove any excess, then place the molds on a sheet pan and into the freezer to firm up. Once frozen I cover the surface directly with plastic wrap - the molds can stay in there for days up to a couple of weeks.

When you’re getting close to serving, give yourself an extra 10-15 minutes or so once you’ve popped them out of the molds. At least with my “deep” freezer, they freeze very firmly and do well with a bit of softening before enjoying their luscious goodness.

Serve them along side the pots de crème on small plates as I did or by themselves in a bowl with your favorite ice cream type toppings.

I love a dollop of whipped cream, cookie crumbs, caramel sauce and chopped toasted or candied nuts, but you could also choose a bit of finely diced crystallized ginger, toasted coconut or raspberry or cherry coulis all of which complement chocolate so nicely. Valrhona chocolate crunchy pearls aren’t bad either.

IMG_1047.JPG

Dense, chocolate-y, creamy and oh so delicious. Yes.

Please be safe out there. We still have a long way to go.

It’s officially summer - there’s still plenty of time to pot up some assorted annuals and make yourself smile!!

IMG_1061.jpg
IMG_1066.jpg
IMG_1069.JPG


Petits gâteaux part one - sesame crunch gâteau de Pâques

IMG_2641.JPG

For our recent Easter dinner at cousin Jennifer's lovely home in the woods on Clear Bottom Lake, I created a couple of bite size gâteaux for the occasion. I've been on a sesame kick lately, having discovered a terrific way to create sesame brittle, compliments of Yotam Ottolenghi and Helen Goh. More about that in a bit.

IMG_2614.JPG

Rather than cramming a lot of recipe info into one post, I'm doing a two-parter, one part for each little cake.

First up is gateau de Pâques, a classic chocolate biscuit for Easter that I've made a number of times and have never found wanting.

The French word biscuit generally refers to a cake in the sponge family that's made with eggs that are first separated, then the yolks and whites are beaten separately before combining various components at the end to make a light and tasty cake.  On the other hand, biscuit sec usually refers to a cookie.

In English the word biscuit has a completely different connotation. While the Brits call cookies biscuits (as the French do biscuit sec), we Americans think of shortcake à la buttermilk biscuits or biscuits and gravy. Language is so cool and fun to figure out, don't you think?!

IMG_2626.JPG

For this fun little cake I used one of my favorite square savarin fleximolds from Silikomart, which allows me to fill the "dent" with something good before garnishing with a swirl of another something good.

IMG_2633.JPG

And then adding another something even better!

IMG_2635.JPG

That sesame brittle is oh-so addicting - just ask Steve.

Let's do the recipes!

First the sesame brittle, so you'll have it ready to go for the garnish. And it keeps for a number of days.

IMG_2356.JPG

Sesame brittle (makes plenty!)

The beauty of this brittle method is you don't have to use a candy thermometer or worry about reaching a certain temperature. I LOVE that!

  1.  Toast 125 g sesame seeds (mix of 1/3 black and 2/3 white or all white like I did) either in the oven at 325ºF for about 10 minutes until nicely brown, stirring occasionally, or in a skillet on medium-low on the stove top. Do what you're most comfortable with. Set aside. Increase the oven temp to 350ºF.

  2. Have two half sheet pans and four pieces of parchment at the ready. 

  3. In a medium saucepan put 100 g granulated sugar, 100 g light corn syrup, 50 g unsalted butter and 1/8 teaspoon salt. Stirring constantly on high heat, blend the mixture and bring to a boil. Remove from the heat and stir in the toasted sesame seeds.

  4. Put two pieces of parchment (or Silpat!) on a heat proof surface (I used two overturned half sheet pans) and pour half of the sesame mixture on each. Cover with the other parchment pieces and roll with a rolling pin until about 1/8 inch thick. 

  5. Slide the paper with the sesame caramel onto half sheet pans and remove the top layer of parchment. Peel it back gently and push down any caramel that might stick. Bake for about 20 minutes until nicely browned. Remove from oven, cool and break into shards.

  6. Stores nicely in single layers between pieces of parchment or waxed paper in a well sealed container. The first batch I made lasted a couple of weeks and served as garnish for a number of goodies!

IMG_2616.JPG

Gateau de Pâques (for one 8-9" cake or multiple small cakes) - find recipe PDF here

  1. Heat your oven to 350ºF and have your molds of choice at the ready. Butter and flour a 8-9" cake or springform pan OR you can use any shape multi-well silicone flexi-mold (no butter/flour needed) or mini-muffin tins lined with decorative papers. You decide.

  2. Melt 200 g dark chocolate (I used 61%) and 200 g unsalted butter gently over a bain marie. I like to do this over very low heat and once the melting has begun, I turn the heat off and let the residual warmth finish the melting process. Stir the mixture every once in awhile as it melts.

  3. Once you have that going, separate 4 cold eggs. NOTE: Eggs separate best when cold so do that at the beginning of your prep. The whites will be beaten separately and whip best when warm so it's all part of planning ahead!!

  4. In a large bowl whisk the 4 yolks with 150 g sugar until thickened and more pale. Blend in the melted chocolate/butter mixture.

  5. Blend in 100 g all purpose flour.

  6. In a clean bowl beat the 4 egg whites with a pinch of salt to soft peaks. Gently fold the whites into the the above mixture.

  7.  Pipe or scoop the mixture into your chosen molds and bake. Your baking time will vary depending on the size of your molds. An 8" cake may take about 30 minutes, whereas mini cakes may take about 10. Look for a more dry appearance to the surface of the batter without gooey centers. 

  8. Let cool and unmold. Garnish with ganache or whatever you'd like! I made a basic 1:1 dark chocolate ganache to fill the wells, then piped a swirl of whipped white chocolate ganache (1:1 cream to chocolate, chilled then whipped) on top and added some shards of sesame brittle. Whew!

IMG_2634.JPG

The texture of these cakes is light and oh so smooth. And the whipped white chocolate ganache and sesame brittle finished 'em off so deliciously. You gotta try these, I'm telling you now.

Stay tuned for Part 2: toasted coconut lime cakes!

Mocha custard tart

mocha.JPG

Fall is definitely in full swing here in west Michigan, even though we've had some unseasonably warm days of late. But we'll take it! Winter will be here soon enough.

This weekend's dinner for the Galloway household consisted of Steve's layered onion/carrot/garlic/chicken/potato dish oven-cooked low and slow in our Staub enameled cast iron cocotte. Mom contributed a spinach strawberry salad, and I opted for a tart recipe I've had my eye on for awhile. I mean really, it's all about tarts for The Tarte!

I believe I've previously mentioned Alice Medrich's book Flavor Flours which I discovered in our local library some months ago. I've since purchased my own copy and am so satisfied with the recipes I've made so far. The book focuses on a number of alternate flours like teff, sorghum, chestnut, rice, oat and corn as well as nut flours (which I am totally on board with!).

The tart recipe calls for a GF teff chocolate crust, but I opted to use my stand-by chocolate short dough from the CIA's Baking and Pastry book. It was the first book I purchased after completing my Diplôme de Pâtisserie and mon stage in Paris in early 2007. Even though it's an older 2004 edition I still turn to it time and time again for all sorts of tips, techniques and recipes.

And I've been using this chocolate short dough ever since. 

Tart ring lined and ready to bake

Tart ring lined and ready to bake

After fork-pricking the dough all over, chill the lined ring in the freezer for 15 minutes or so while heating the oven to 325ºF. The chill stabilizes the butter and helps the dough keep its shape during blind baking. Line the firm dough with a round of parchment, fill it with dried beans and bake for 12-15 minutes with weights, then another 5-8 minutes without weights. The crust should be set and look dry. Remember - it's your job to watch what's going on in that oven!

All baked and ready to fill

All baked and ready to fill

Lower the oven temp to 300ºF for the next phase of the project.

Just a note here. If you'd like to change things up a bit, you can use any pie or tart dough your little heart desires - choose your favorite pâte brisée or pâte sucrée (and it doesn't even have to be chocolate) or even a chocolate wafer or graham cracker or toasted coconut crumb crust. Add some chopped nuts if you want - you decide. Just remember to blind bake it first.

The KEY part to this tart is THE FILLING, and, once you make it, you'll know what I mean. So easy and so deliciously smooth it involves heating 1.5 cups heavy cream, 130 g sugar, 35 g cocoa powder (Dutch process or natural) and 55 g unsalted butter in a saucepan on the medium heat, stirring until everything is blended and it starts to simmer around the edges.

Remove from the heat and whisk in 1 teaspoon instant espresso powder and 3/4 teaspoon pure vanilla extract. Set aside.

Once the blind baked shell is out of the oven, whisk 1 large egg plus 1 yolk into the cream mixture and pour the filling into the hot crust. It's pretty loose so steady yourself for gentle placement into the oven without sloshing. You can do it.

Filled and ready for the oven

Filled and ready for the oven

Bake for 10-15 minutes or even longer. I baked mine around 18-20 minutes before I was content with a nice wiggly/jiggly custard without waves rippling across the surface.

Cool on a rack and serve slightly warm or at room temperature. Here's my cooled tart - kinda reminiscent of a moonscape don't ya think? 

mochatart.JPG

While Alice dusts her tart with cocoa powder I was going for a bit more pizazz. I usually have some baked cookie or streusel crumbs in my freezer to use at a moment's notice whether it's to top ice cream, add a crunchy layer to a cakey-creamy type of concoction or to garnish a tart. Yup.

Out came the chocolate shortbread cookie crumbs which I sprinkled over the top of the tart, leaving a clear edge around the periphery.

mochatart.JPG

Next up -crème Chantilly! But of course. Steve claims that anything is better with whipped cream on it, and, in this case, he was absolutely right. But then I pretty much knew that already.

For one cup of heavy cream I add 1-2 tablespoons powdered sugar and a splash of pure vanilla extract. Whip to medium soft peaks, enough so it will hold its shape, and spread or pipe as you wish.

mochatart.JPG

Soft, pillowy mounds of cream like a string of rustic pearls entice us to dig in. And dig in we did.

mochatarat.JPG
mochatart.JPG

This is one of the BEST fillings I have had in a long time. Smooth, luscious, creamy yet light with just the right intensity of chocolate and a hint of espresso - aaaaahhhhh. And the chocolate short crust, chocolate crumbs and whipped cream provided just the right marriage of textures and flavors. Oh boy.

mochatart.JPG

Yes there were leftovers but the good news is this will keep covered in the fridge for a couple of days. Don't waste a bite of this one folks.

Before I leave you I'd like to share a few autumn images from our corner of the planet. Enjoy the season wherever you are and take care.

Pistachio and chocolate butter cake from Samantha Seneviratne

A post holiday gift to myself was the book the new sugar and spice - A RECIPE FOR BOLDER BAKING by Samantha Seneviratne.

Many of the recipes have caught my eye.  My first trial from the book, coffee cardamom shortbread, was a definite success.

Next up is the cover recipe for pistachio and chocolate butter cake, highlighting the use of pistachio paste, cardamom and chocolate chunks (and butter, of course).


The butter, eggs and milk should be at room temperature.

Butter a 9" springform pan and heat the oven to 350º.

Do your ingredient mise en place . . . .

les ingredients
and let's go!

Whisk 223 grams flour, 7 grams baking powder, one teaspoon freshly ground cardamom (hard to see, but it's there on the left side in with the flour) and 1/2 teaspoon salt in a medium bowl.

Cream 113 grams/1 stick room temperature, unsalted butter with 75 grams granulated sugar with an electric mixer on medium speed until light and fluffy.

Add two eggs, one at a time, then blend in 198 grams pistachio paste.

Add the flour mixture alternately with 120 ml milk in three additions, beginning and ending with the flour.

Fold in 85 grams chopped dark chocolate (I used a mixture of 56% and 72%).

Put the batter into the springform pan and smooth.  Sprinkle 35 grams coarsely chopped pistachos over the top.

A very straight forward cake batter preparation.

ready for the oven

Bake for about 30-40 minutes.

just out of the oven

How did this work out?  Well, this is one case where it's important to pay attention to what's going on in your oven.

I baked this for a good 50-55 minutes since the center was still loose after the first 30-40 minutes.

At that point all the signs of doneness were there - a tester inserted in the center came out with moist crumbs, the top was nicely browned, there was no central jiggling when I lightly shook the pan, and it felt firm in the center.  Plus the aroma was enticing!

BUT!  Once this cake cooled it sank significantly in the middle and was still not thoroughly baked through in the center.  Disappointing.  You pay attention, you think it's done, but then . . . .

Perhaps the fact that my springform pan was sitting on an insulated cookie sheet kept the oven heat from getting properly into the center - who knows!

However, all was not lost.  I simply cut out the center goo, sliced the cake and served it with Samantha's roasted banana ice cream (see my next post!).  Pretty tasty indeed.

The cake is dense and buttery with a lovely cardamom-pistachio-chocolate thing going on.

If I were to do this recipe again, I would bake the cake in small flexi-molds or individual cake pans.  The baking time would be less, and the smaller portions would bake through more evenly.

Live and learn.  That's what it's all about.


Mille-feuille chocolat - chocolate puff and other stuff

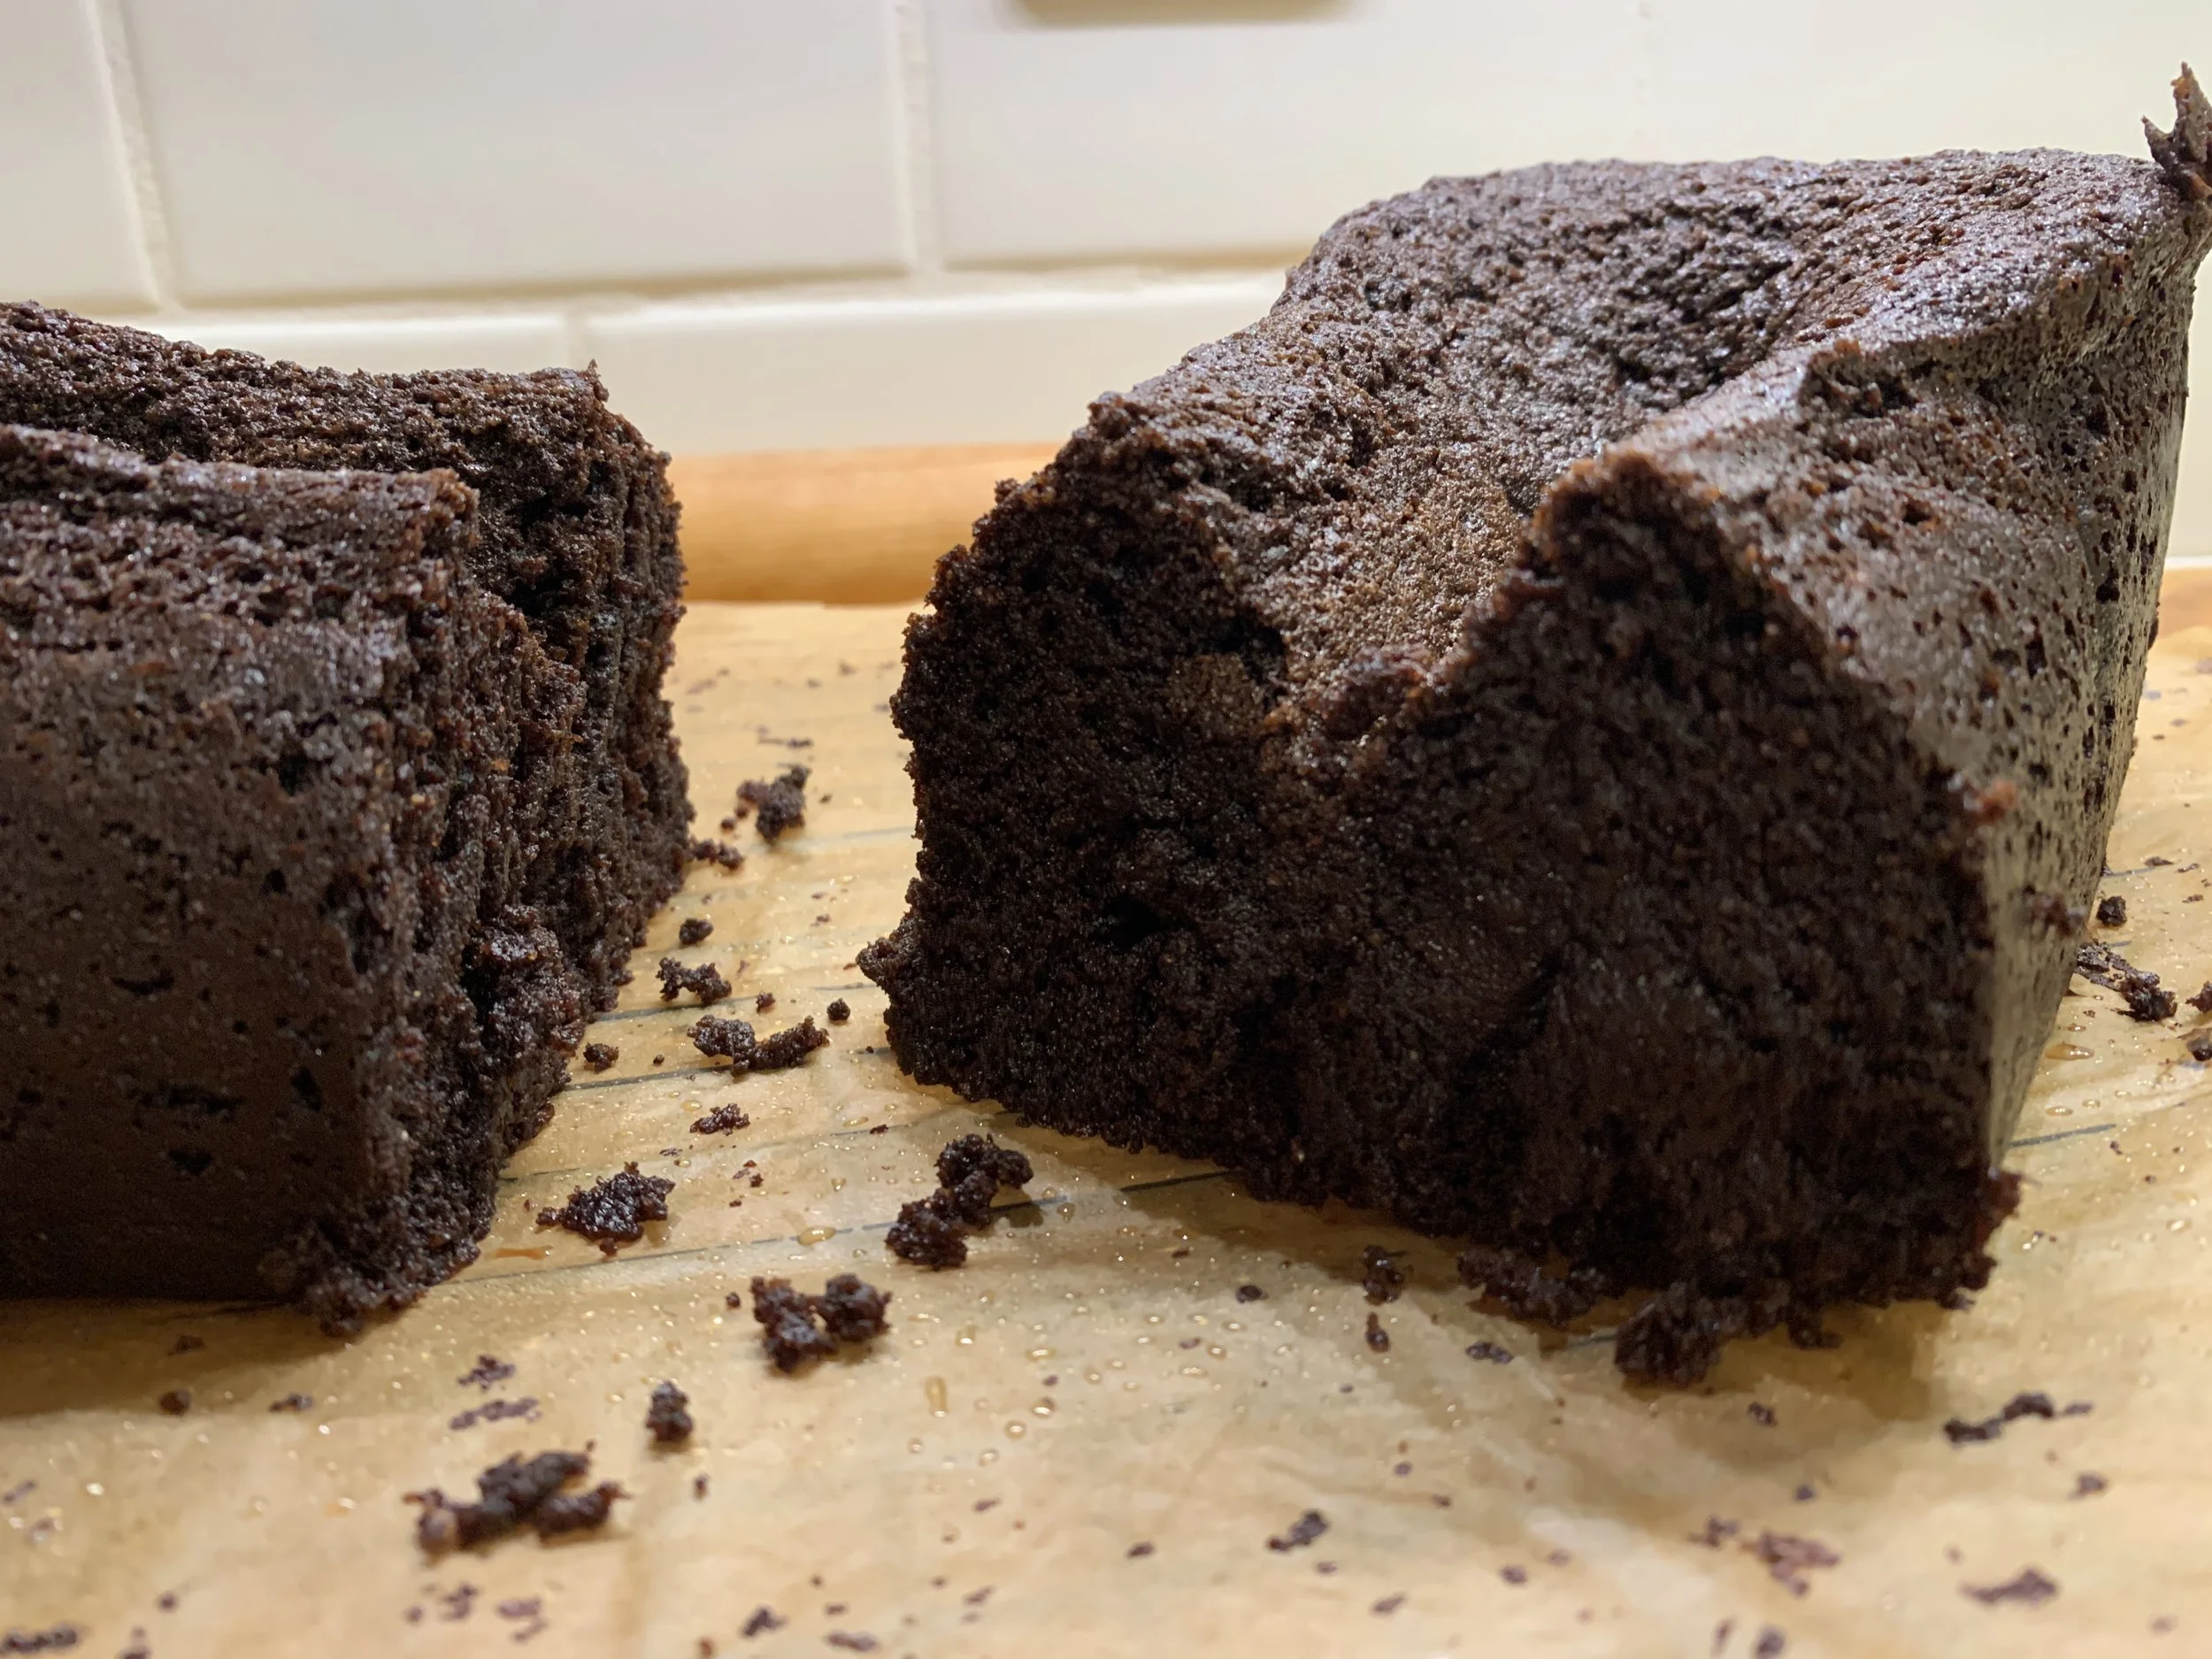
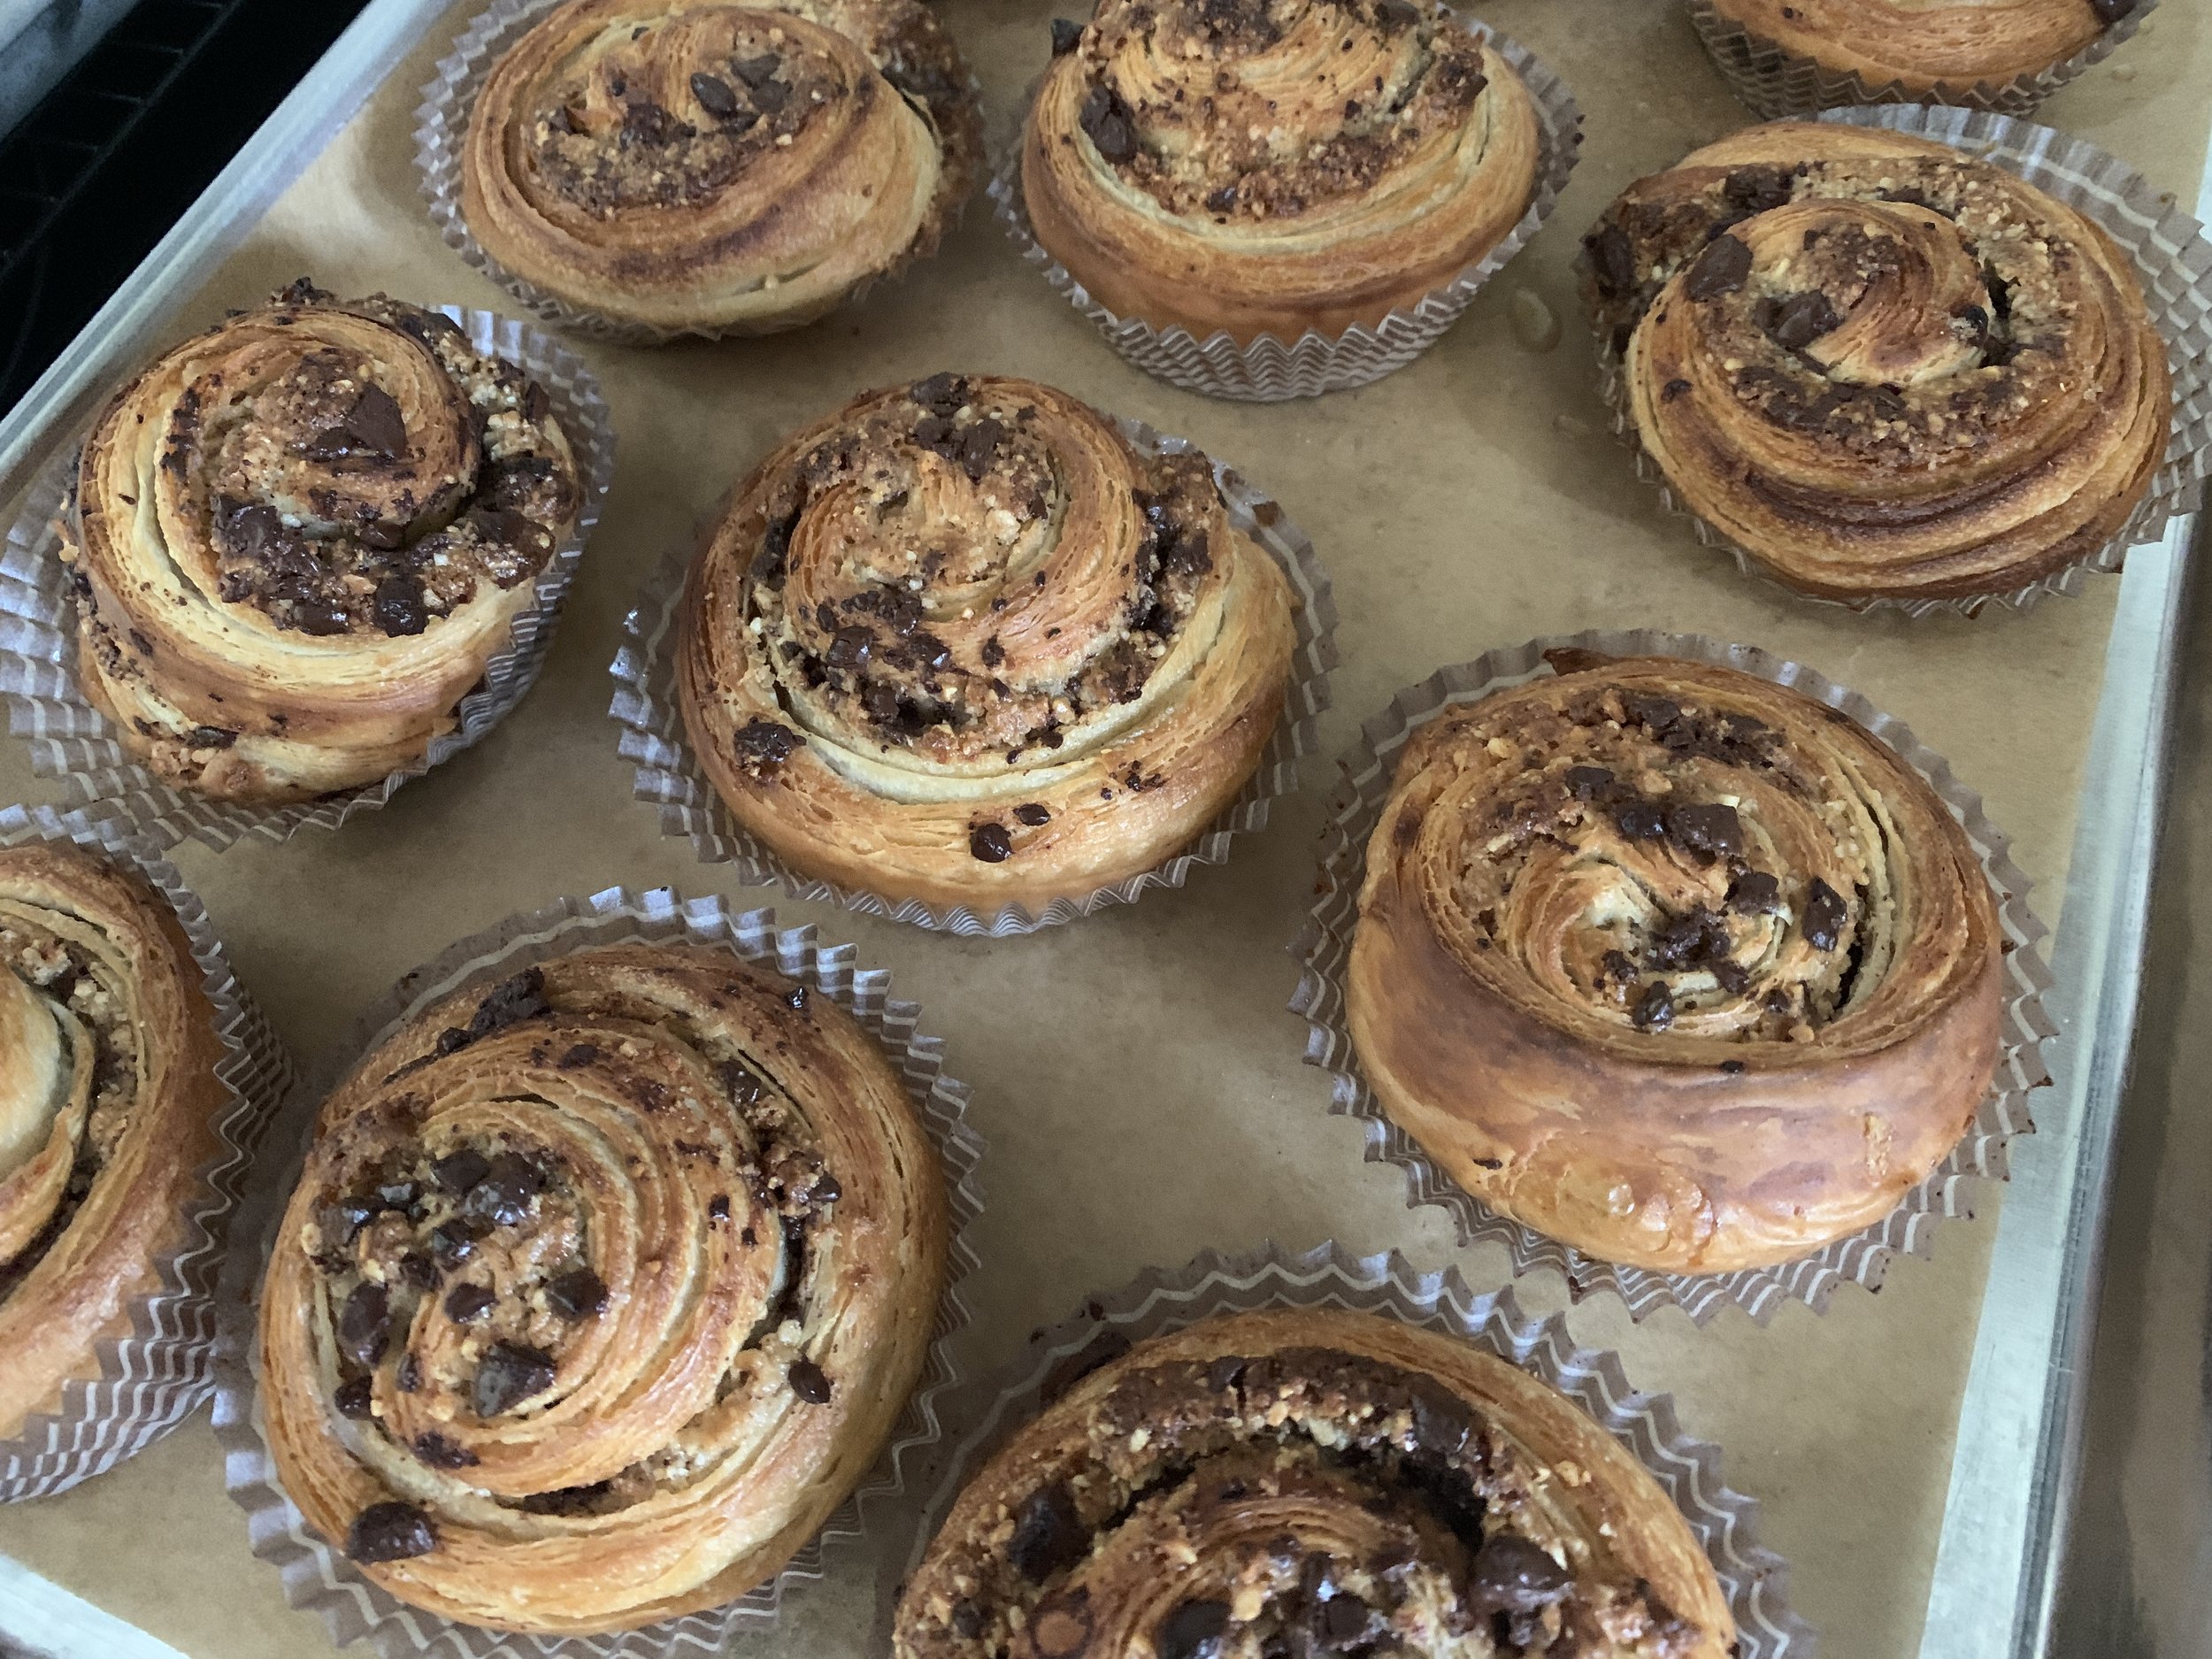
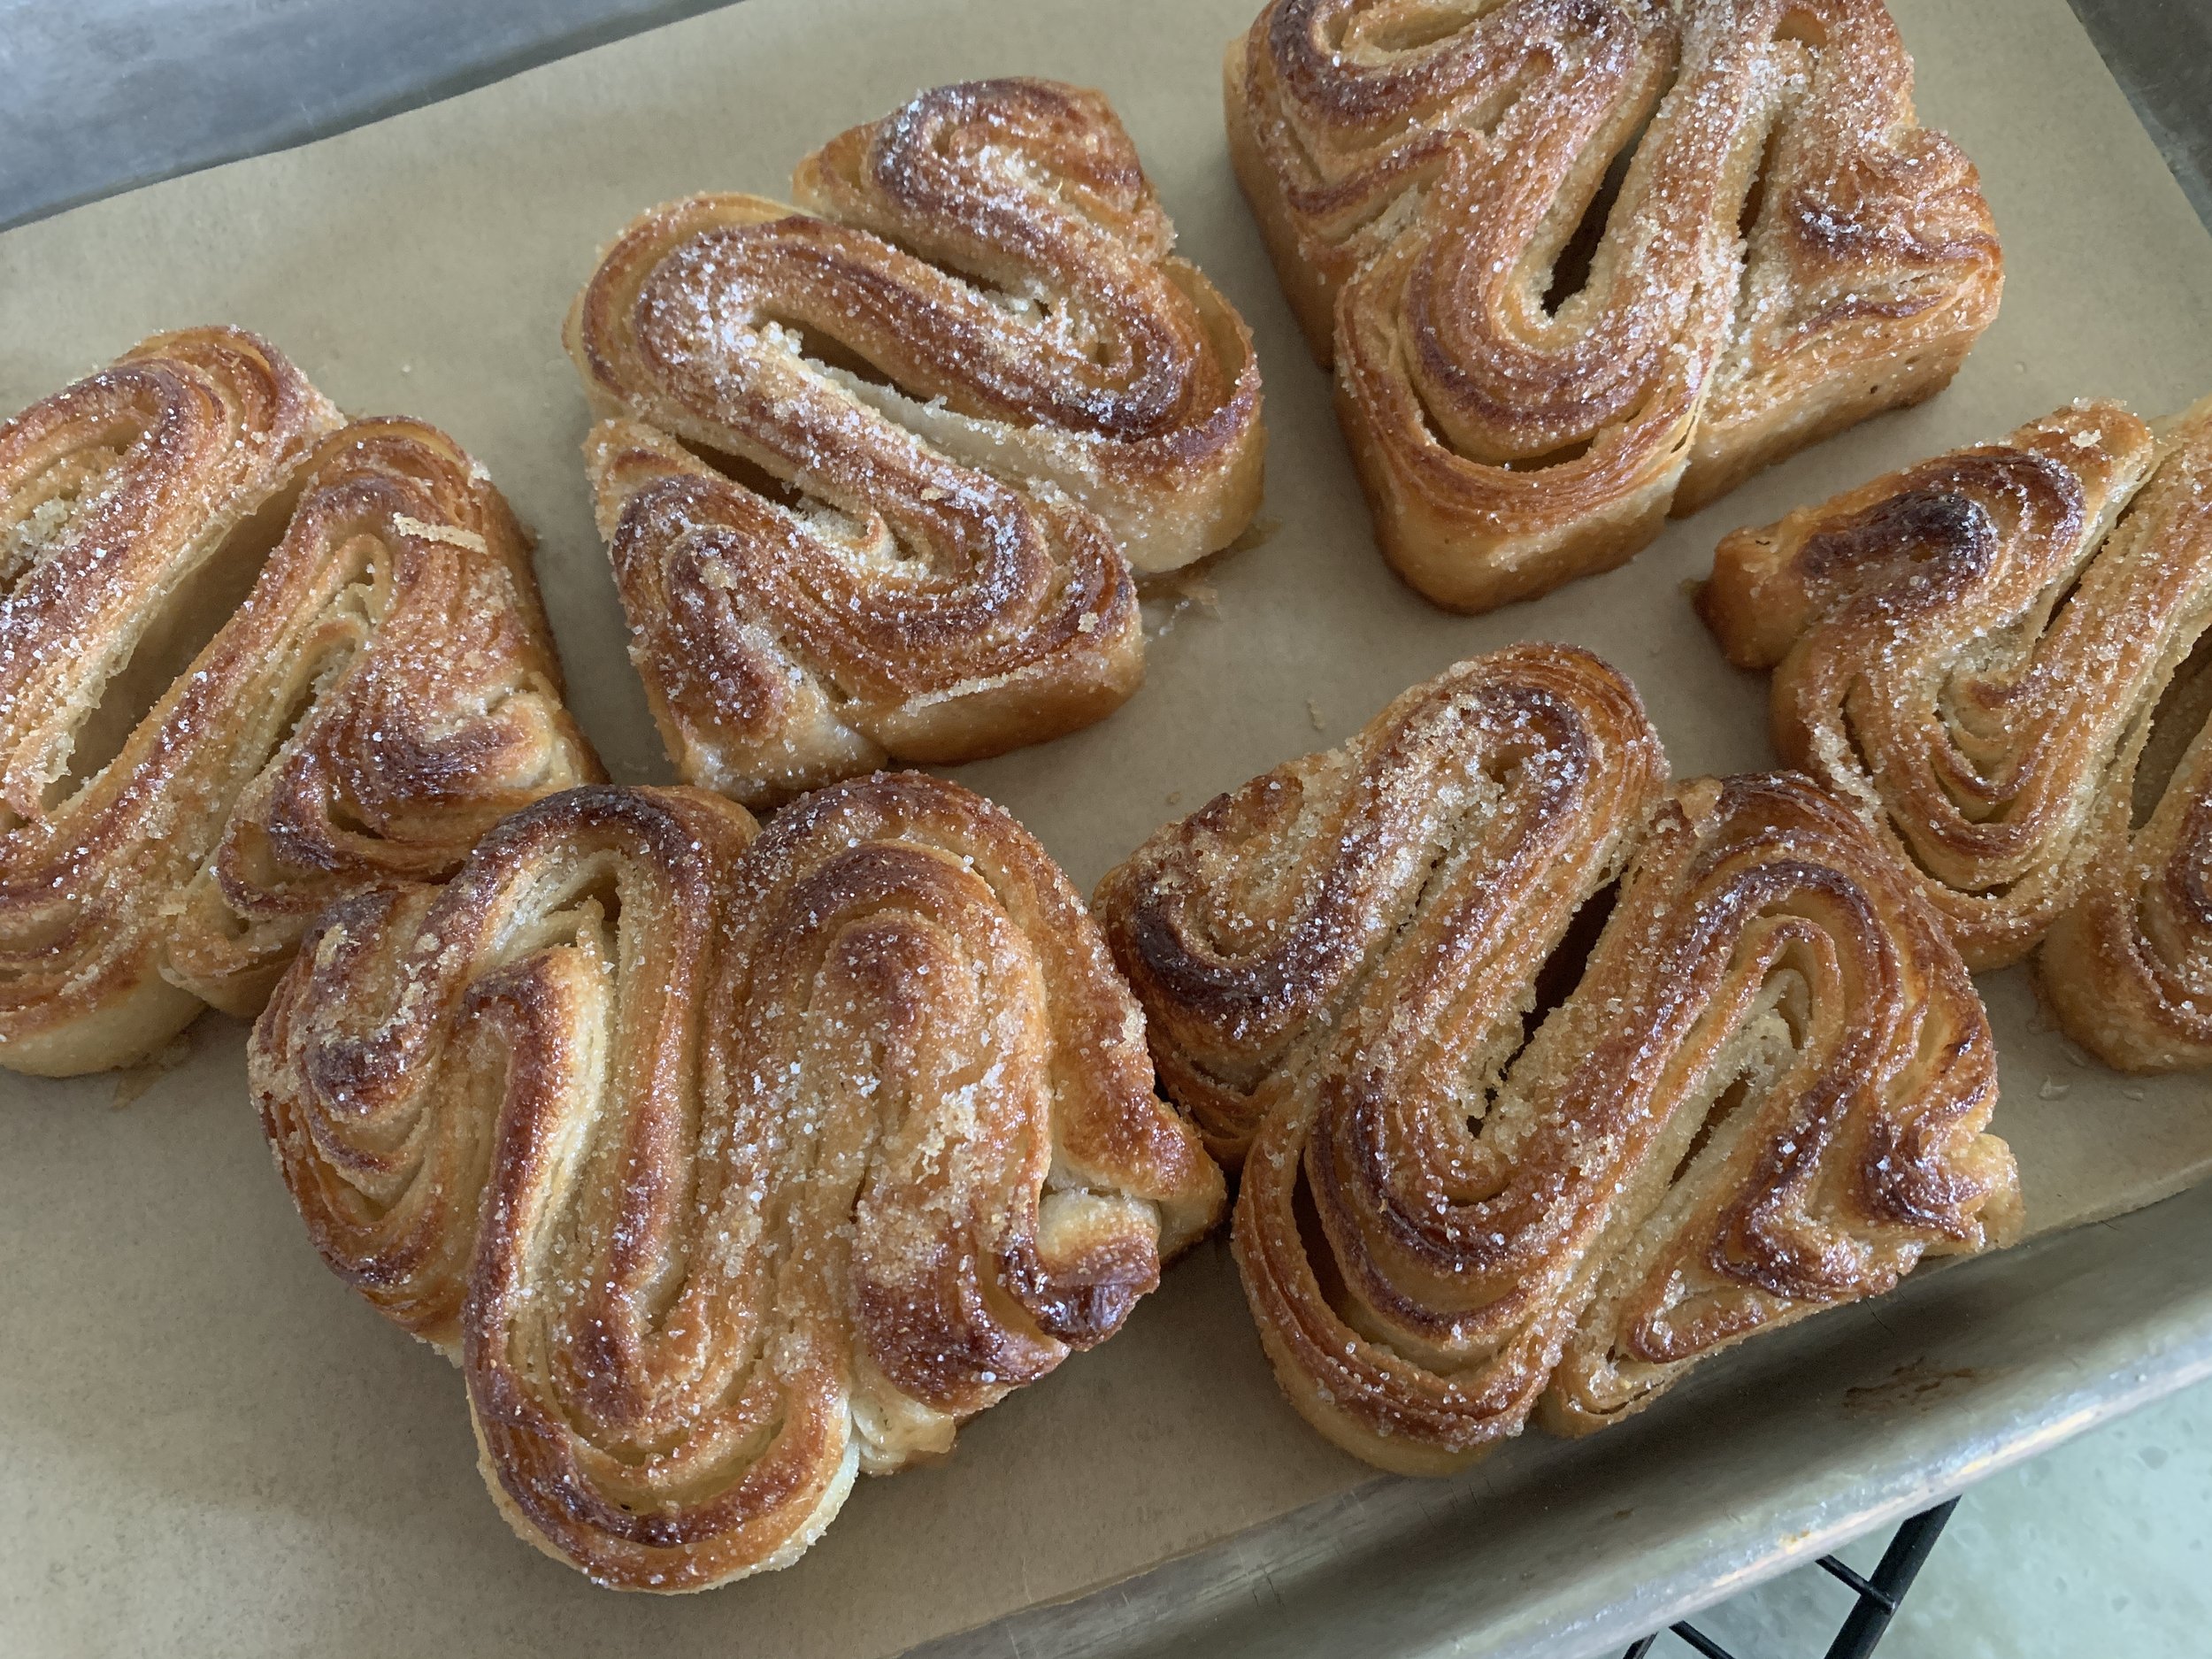
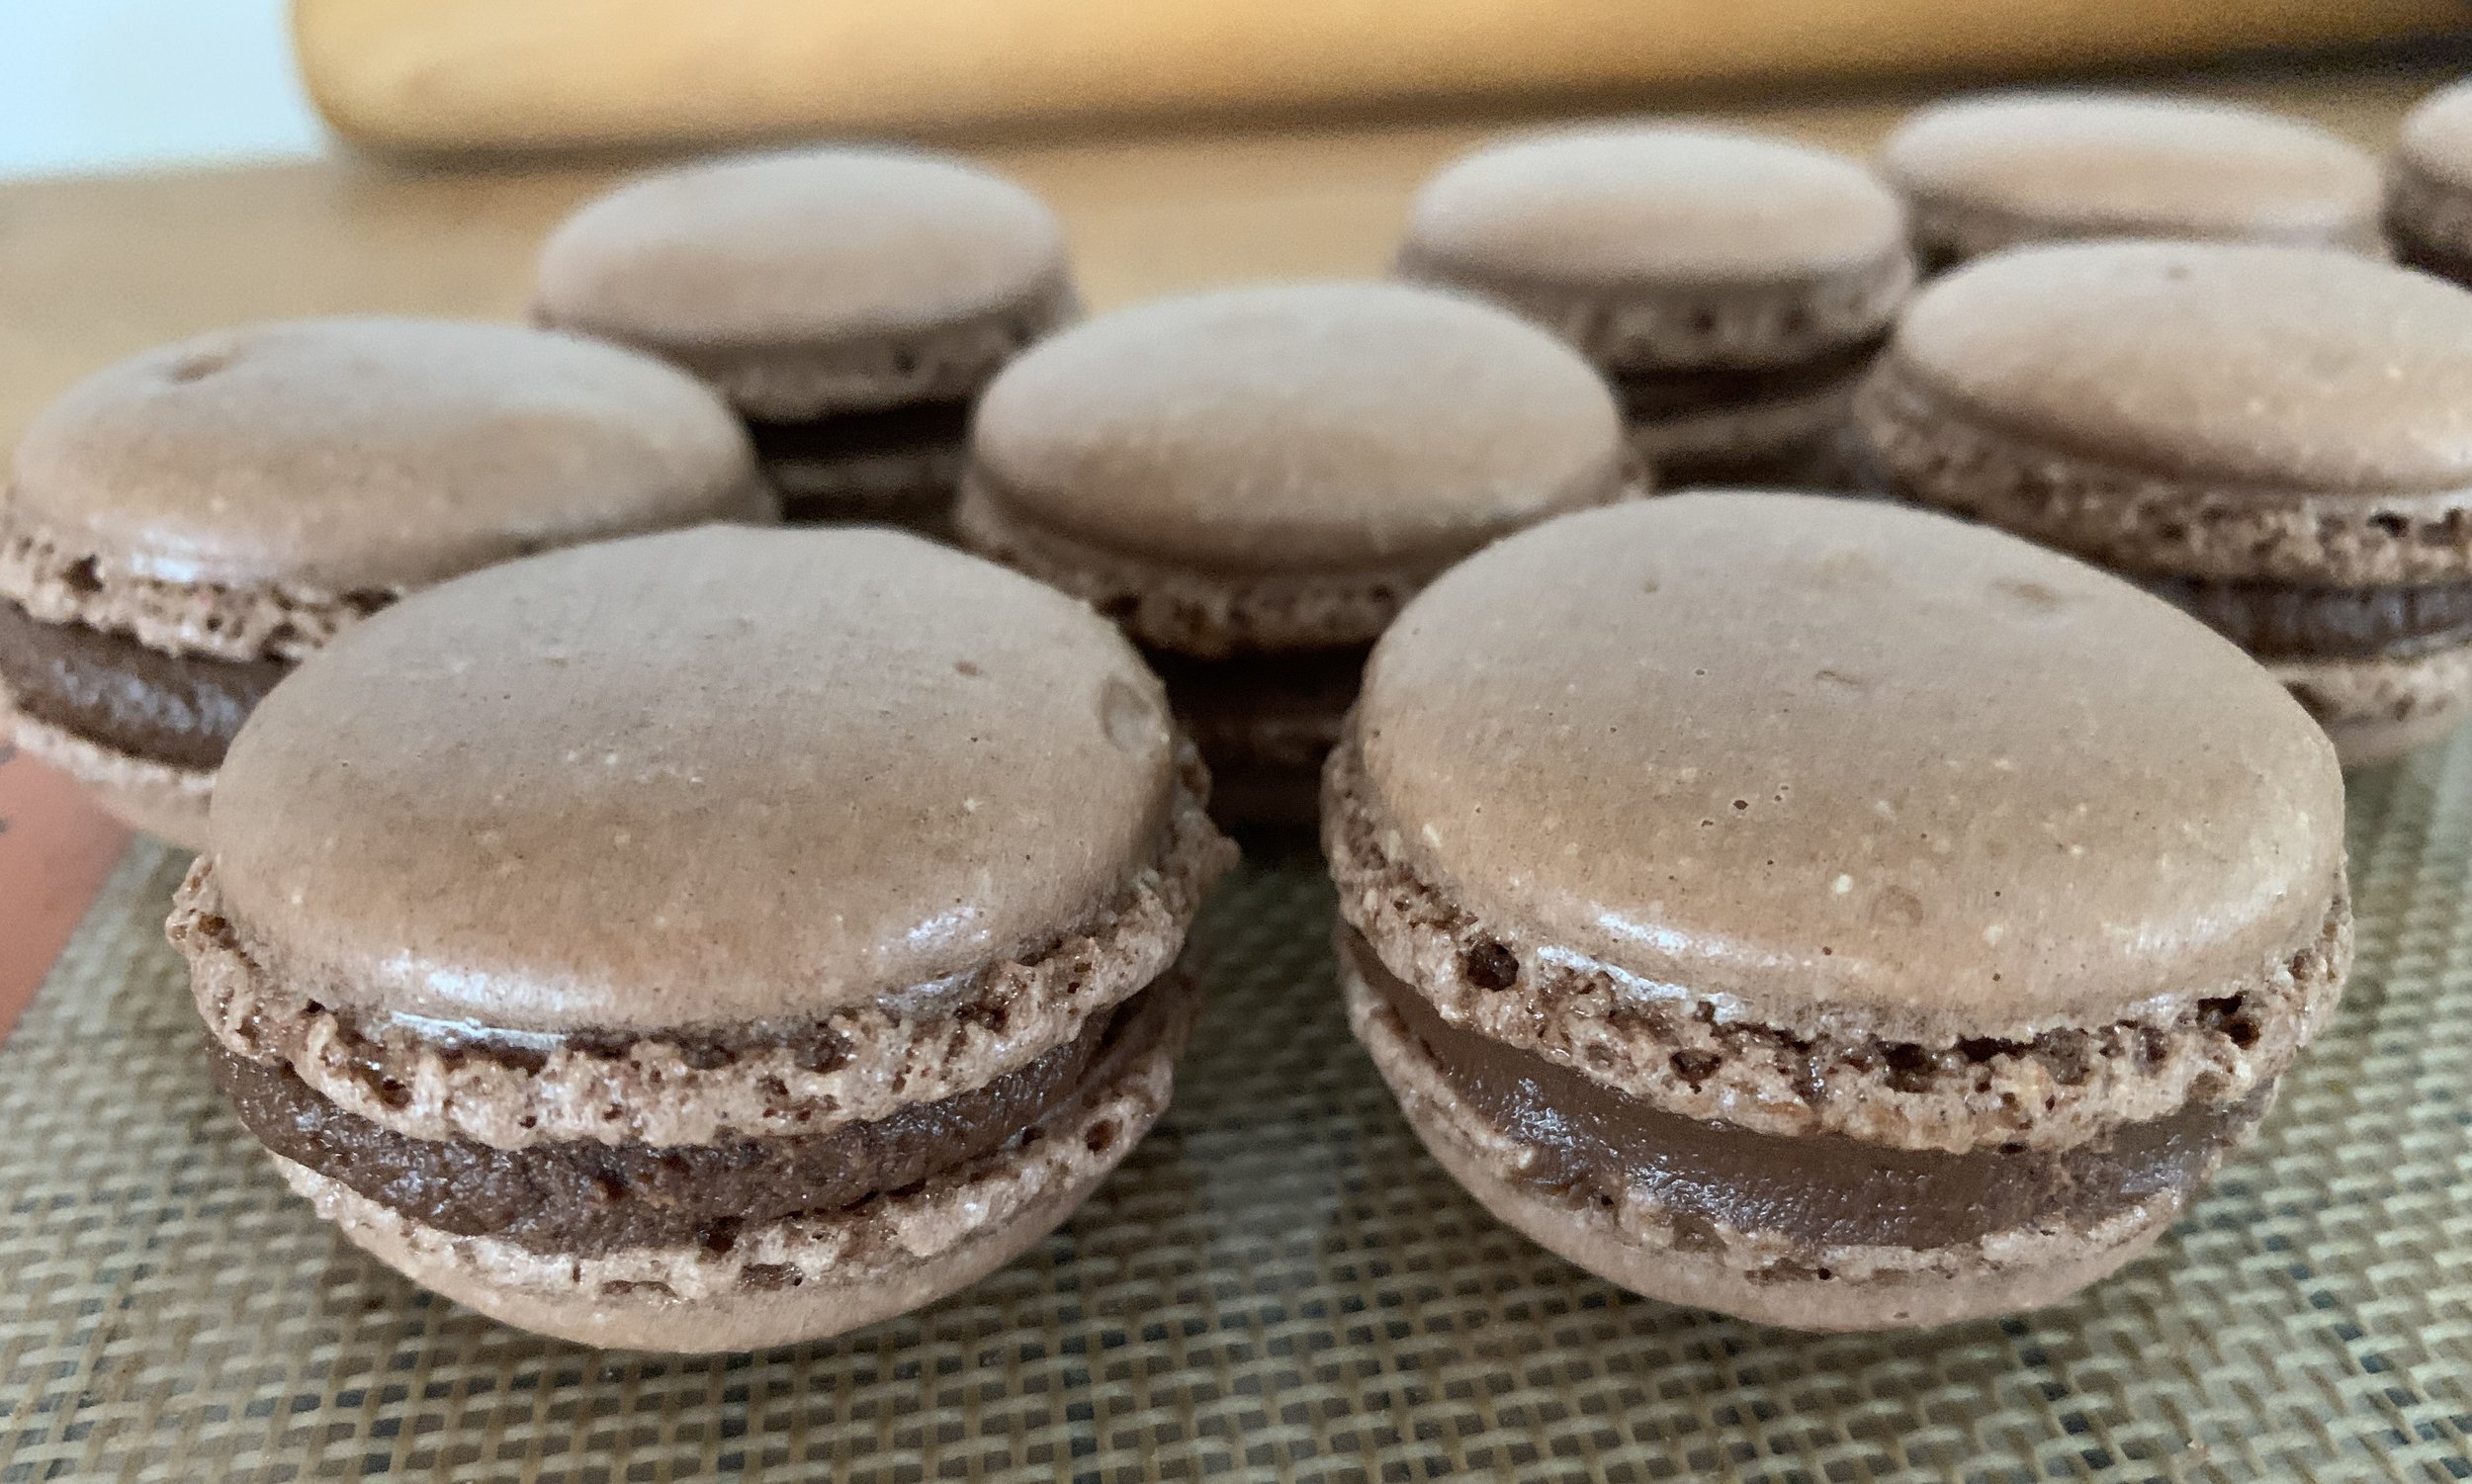
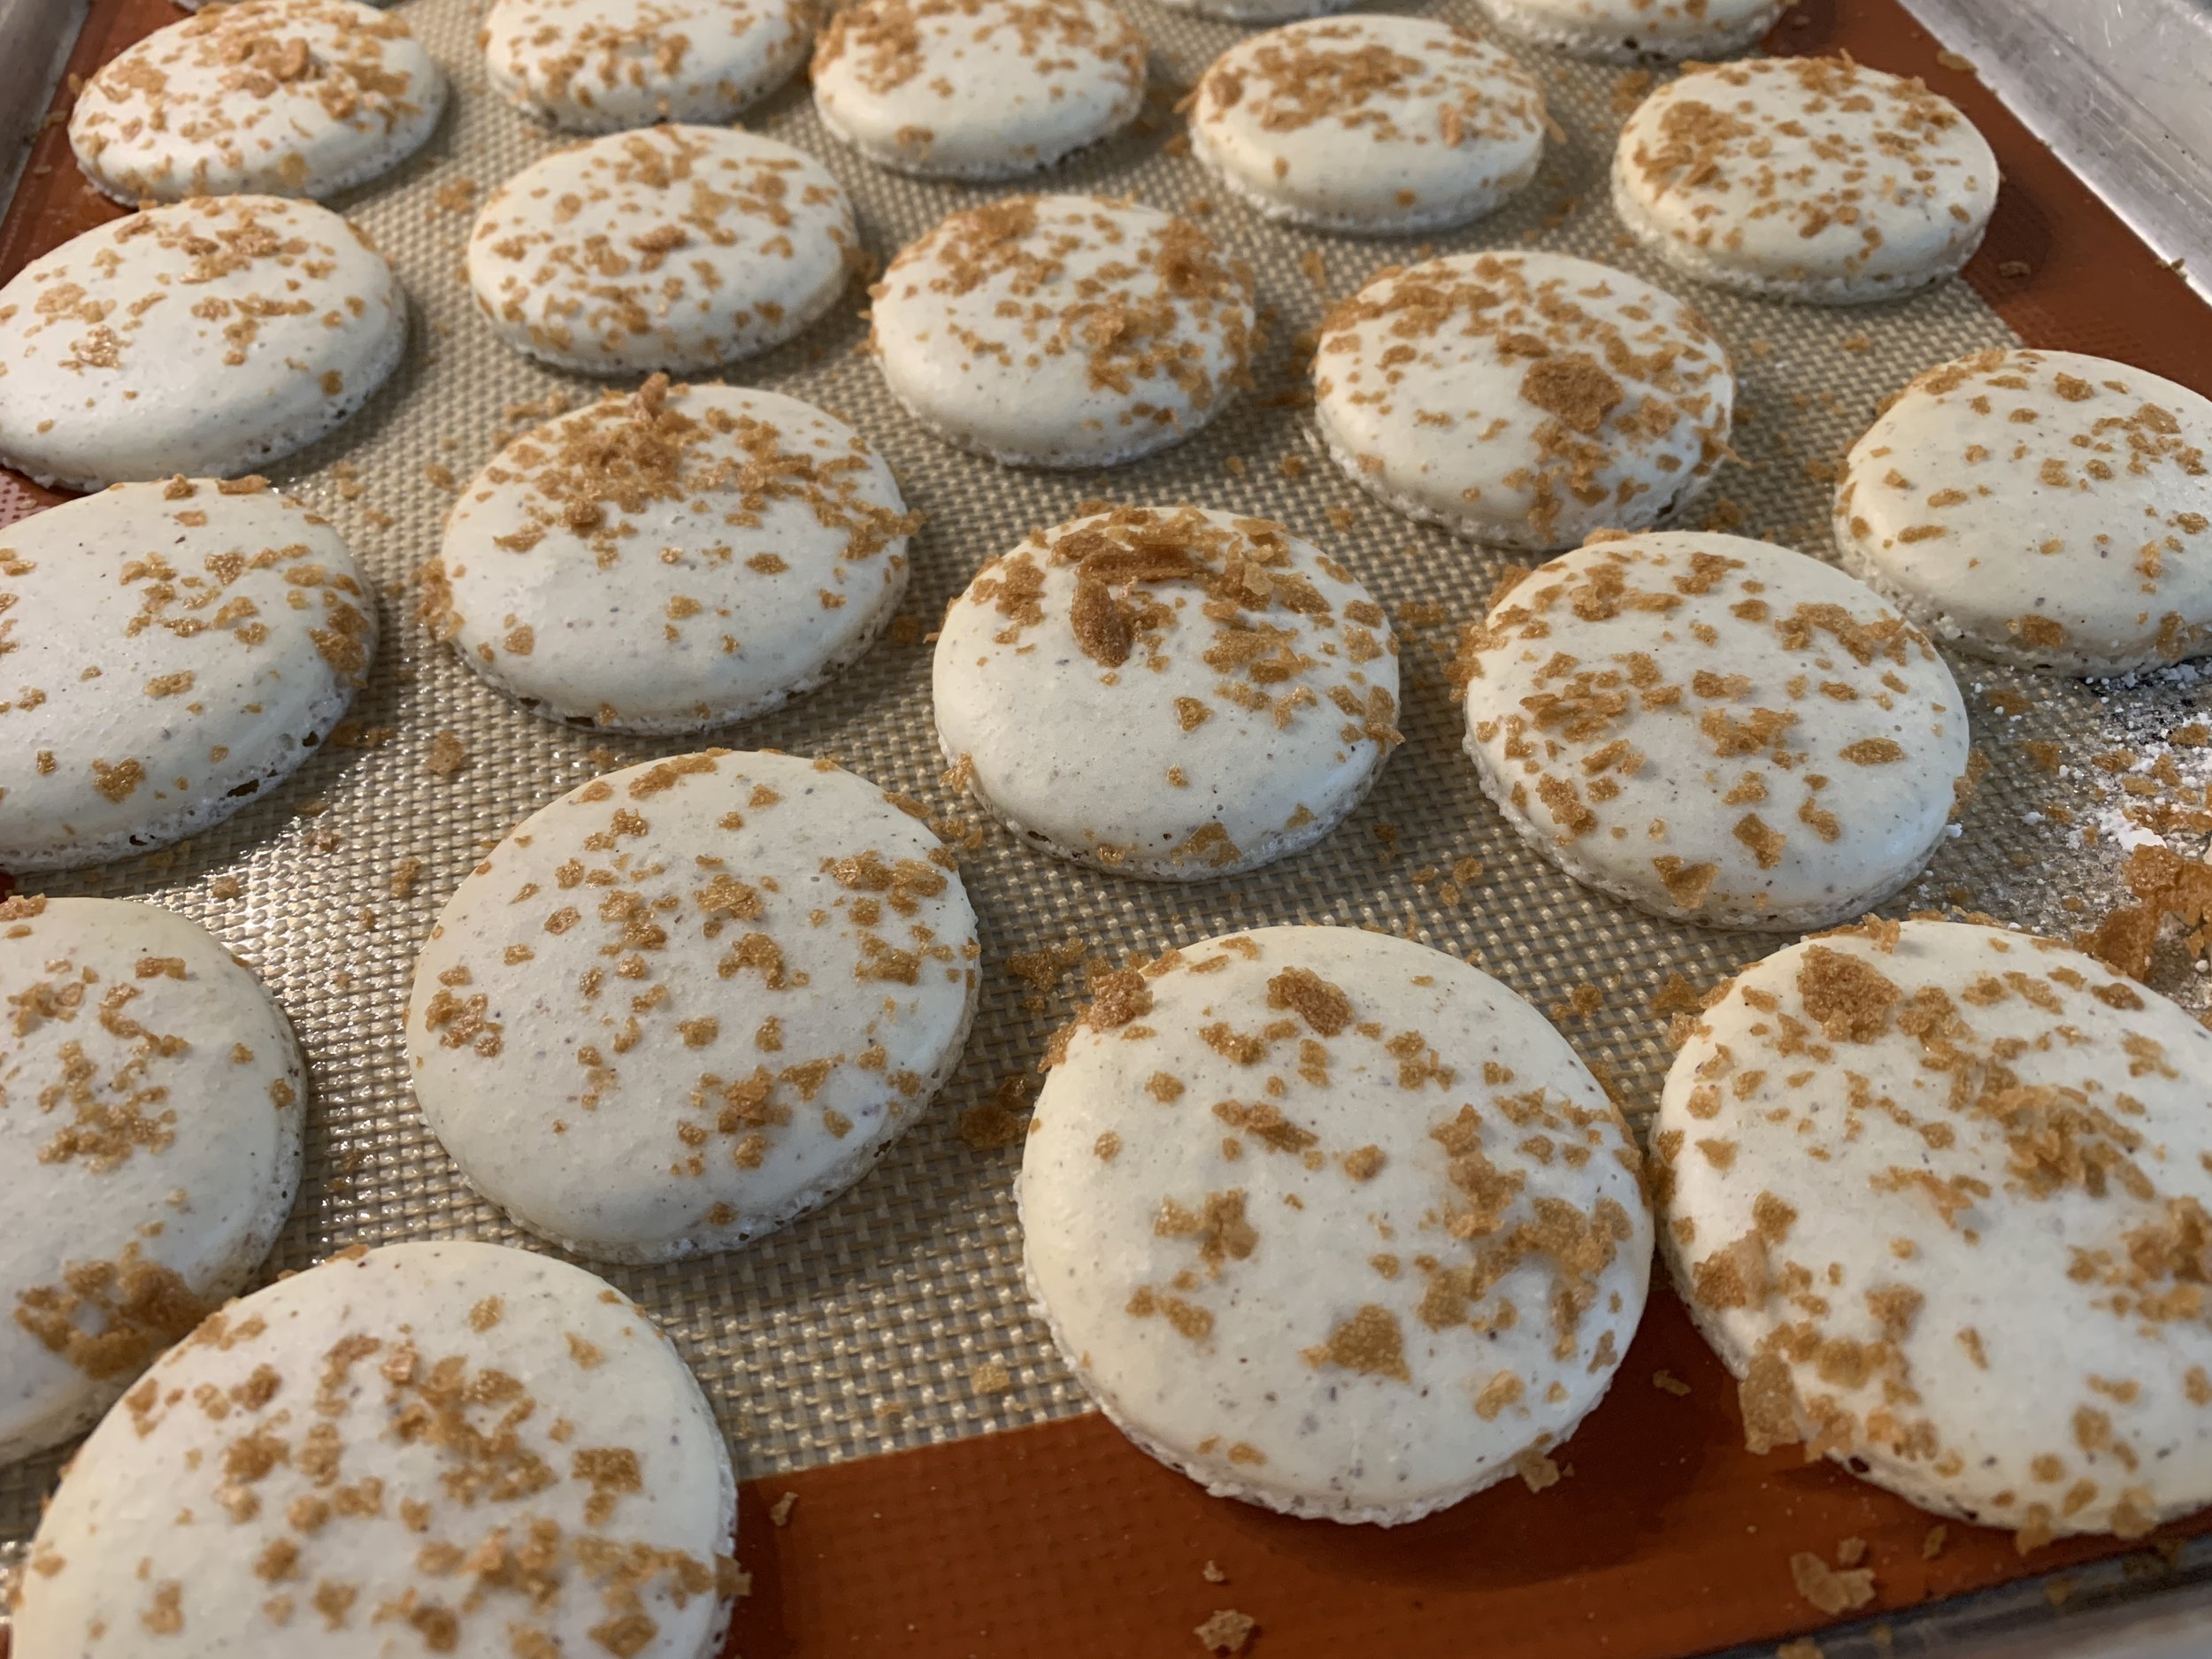
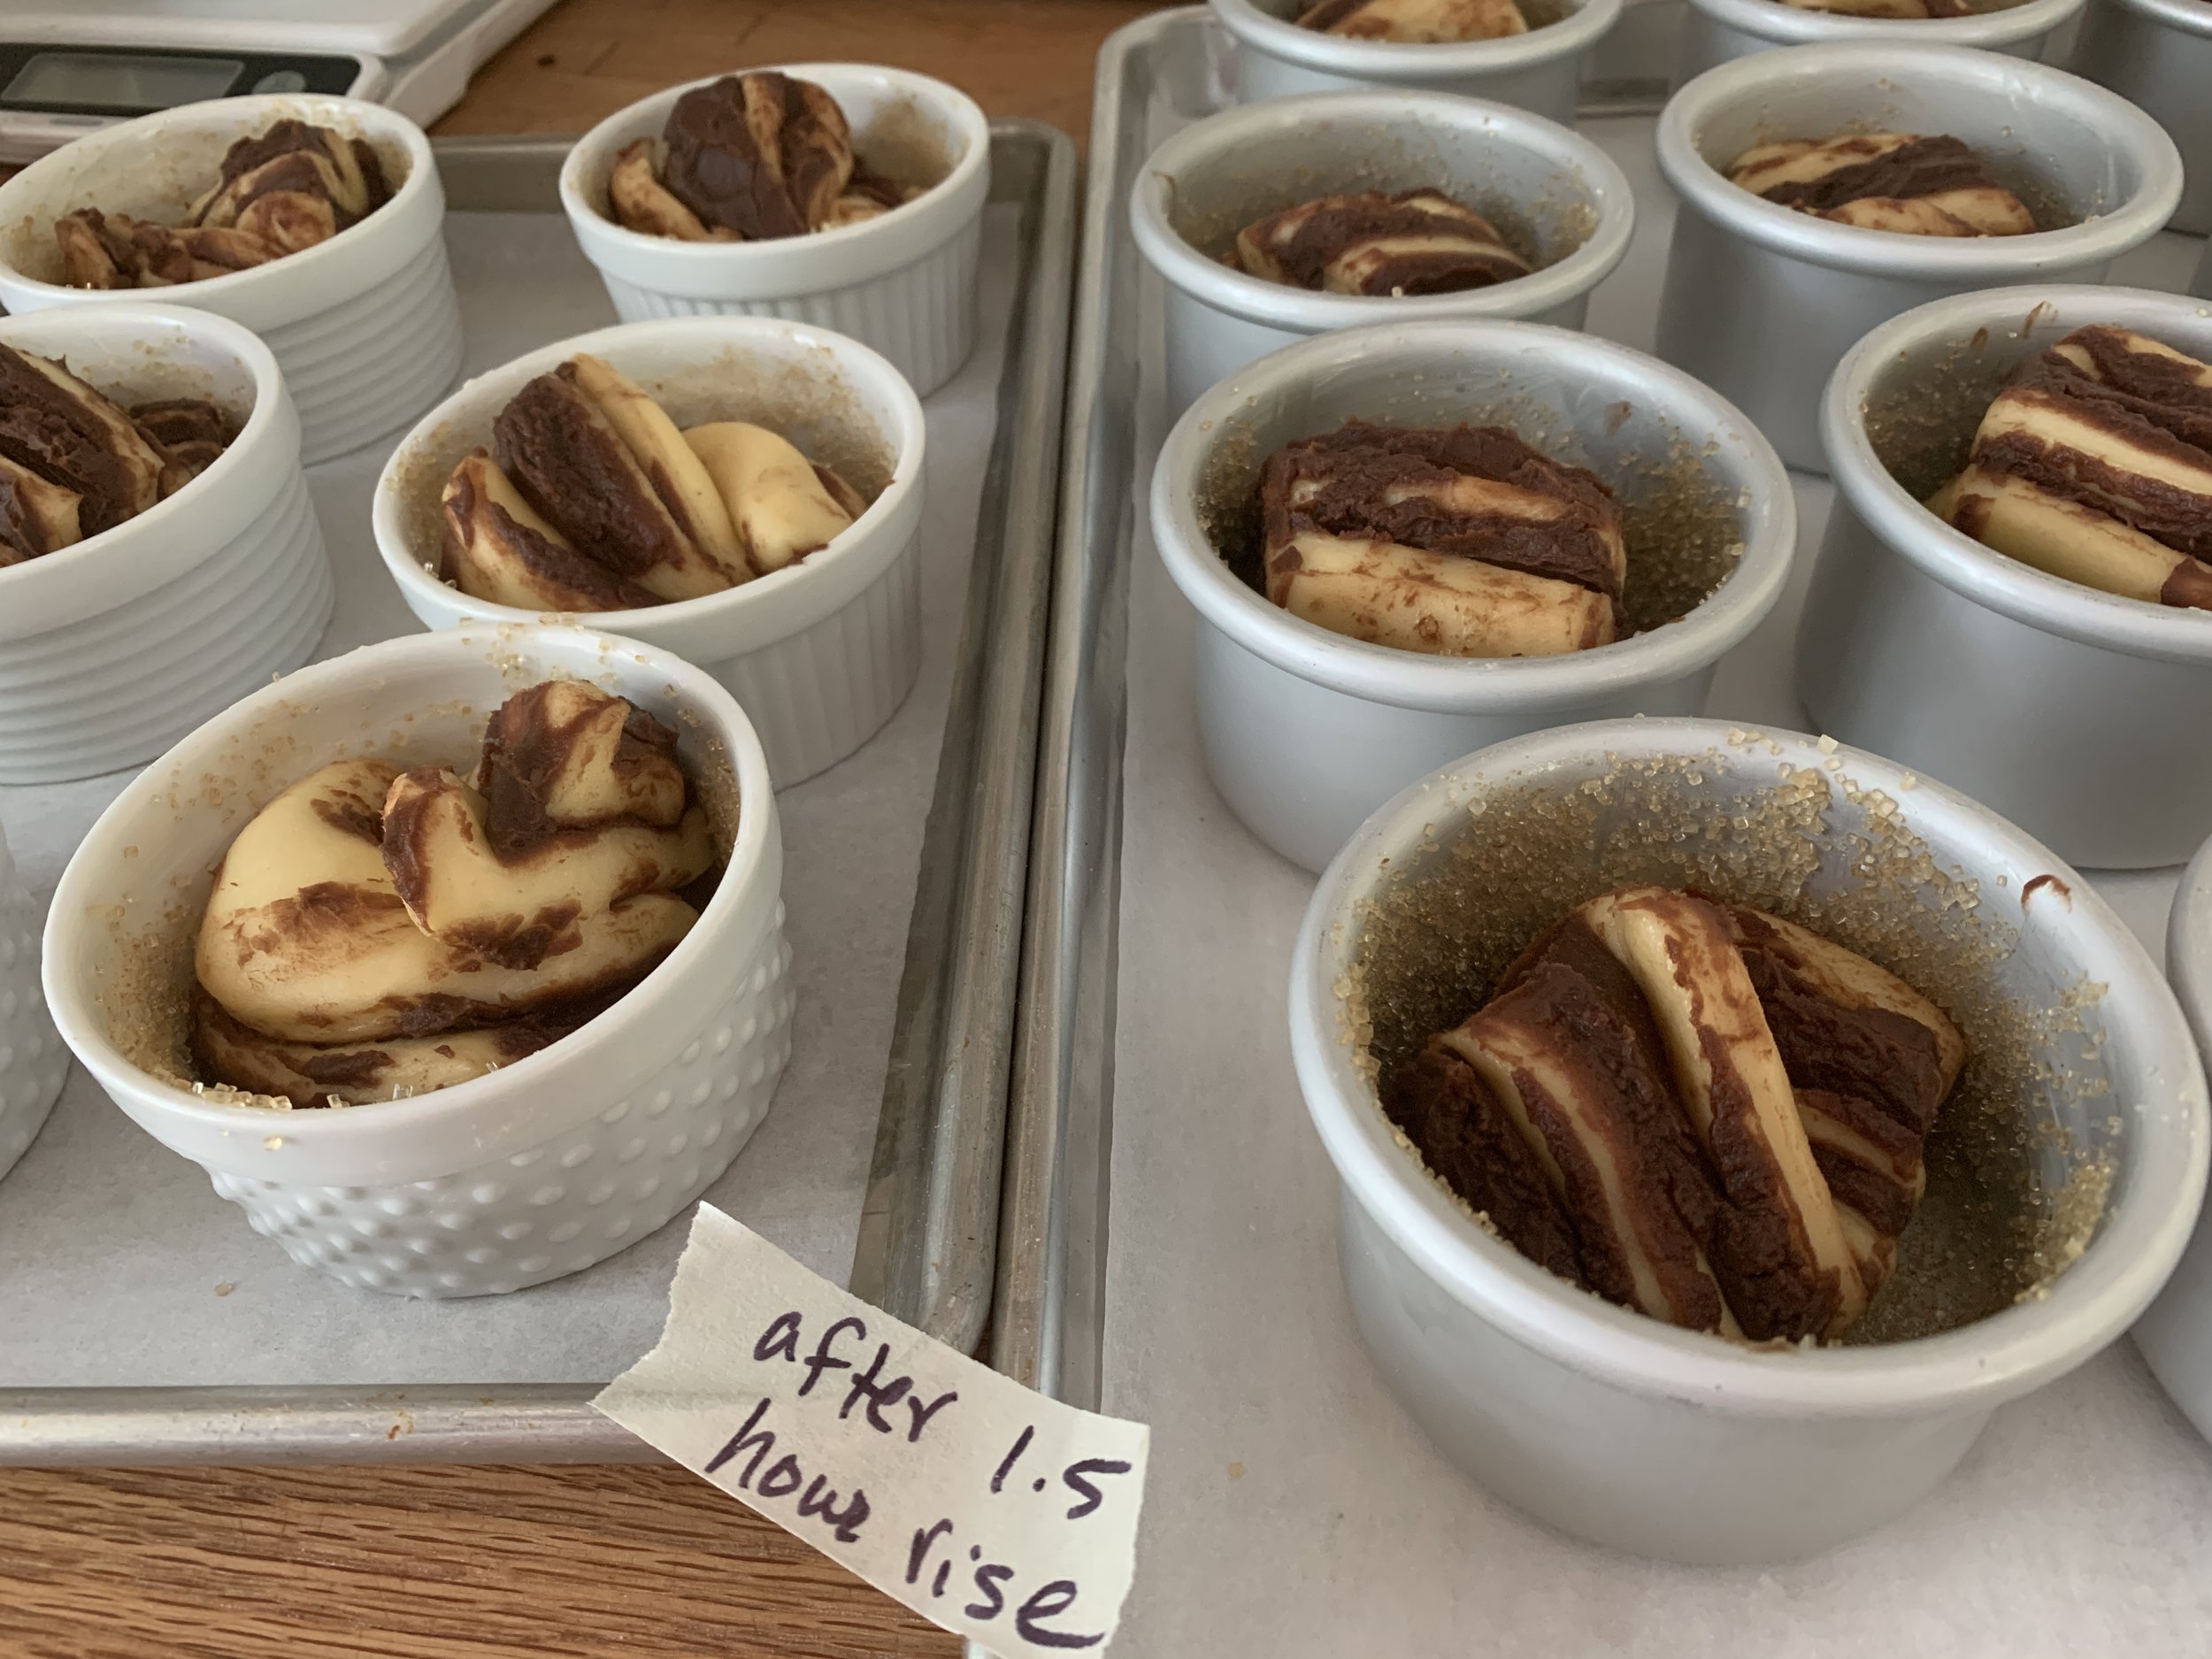
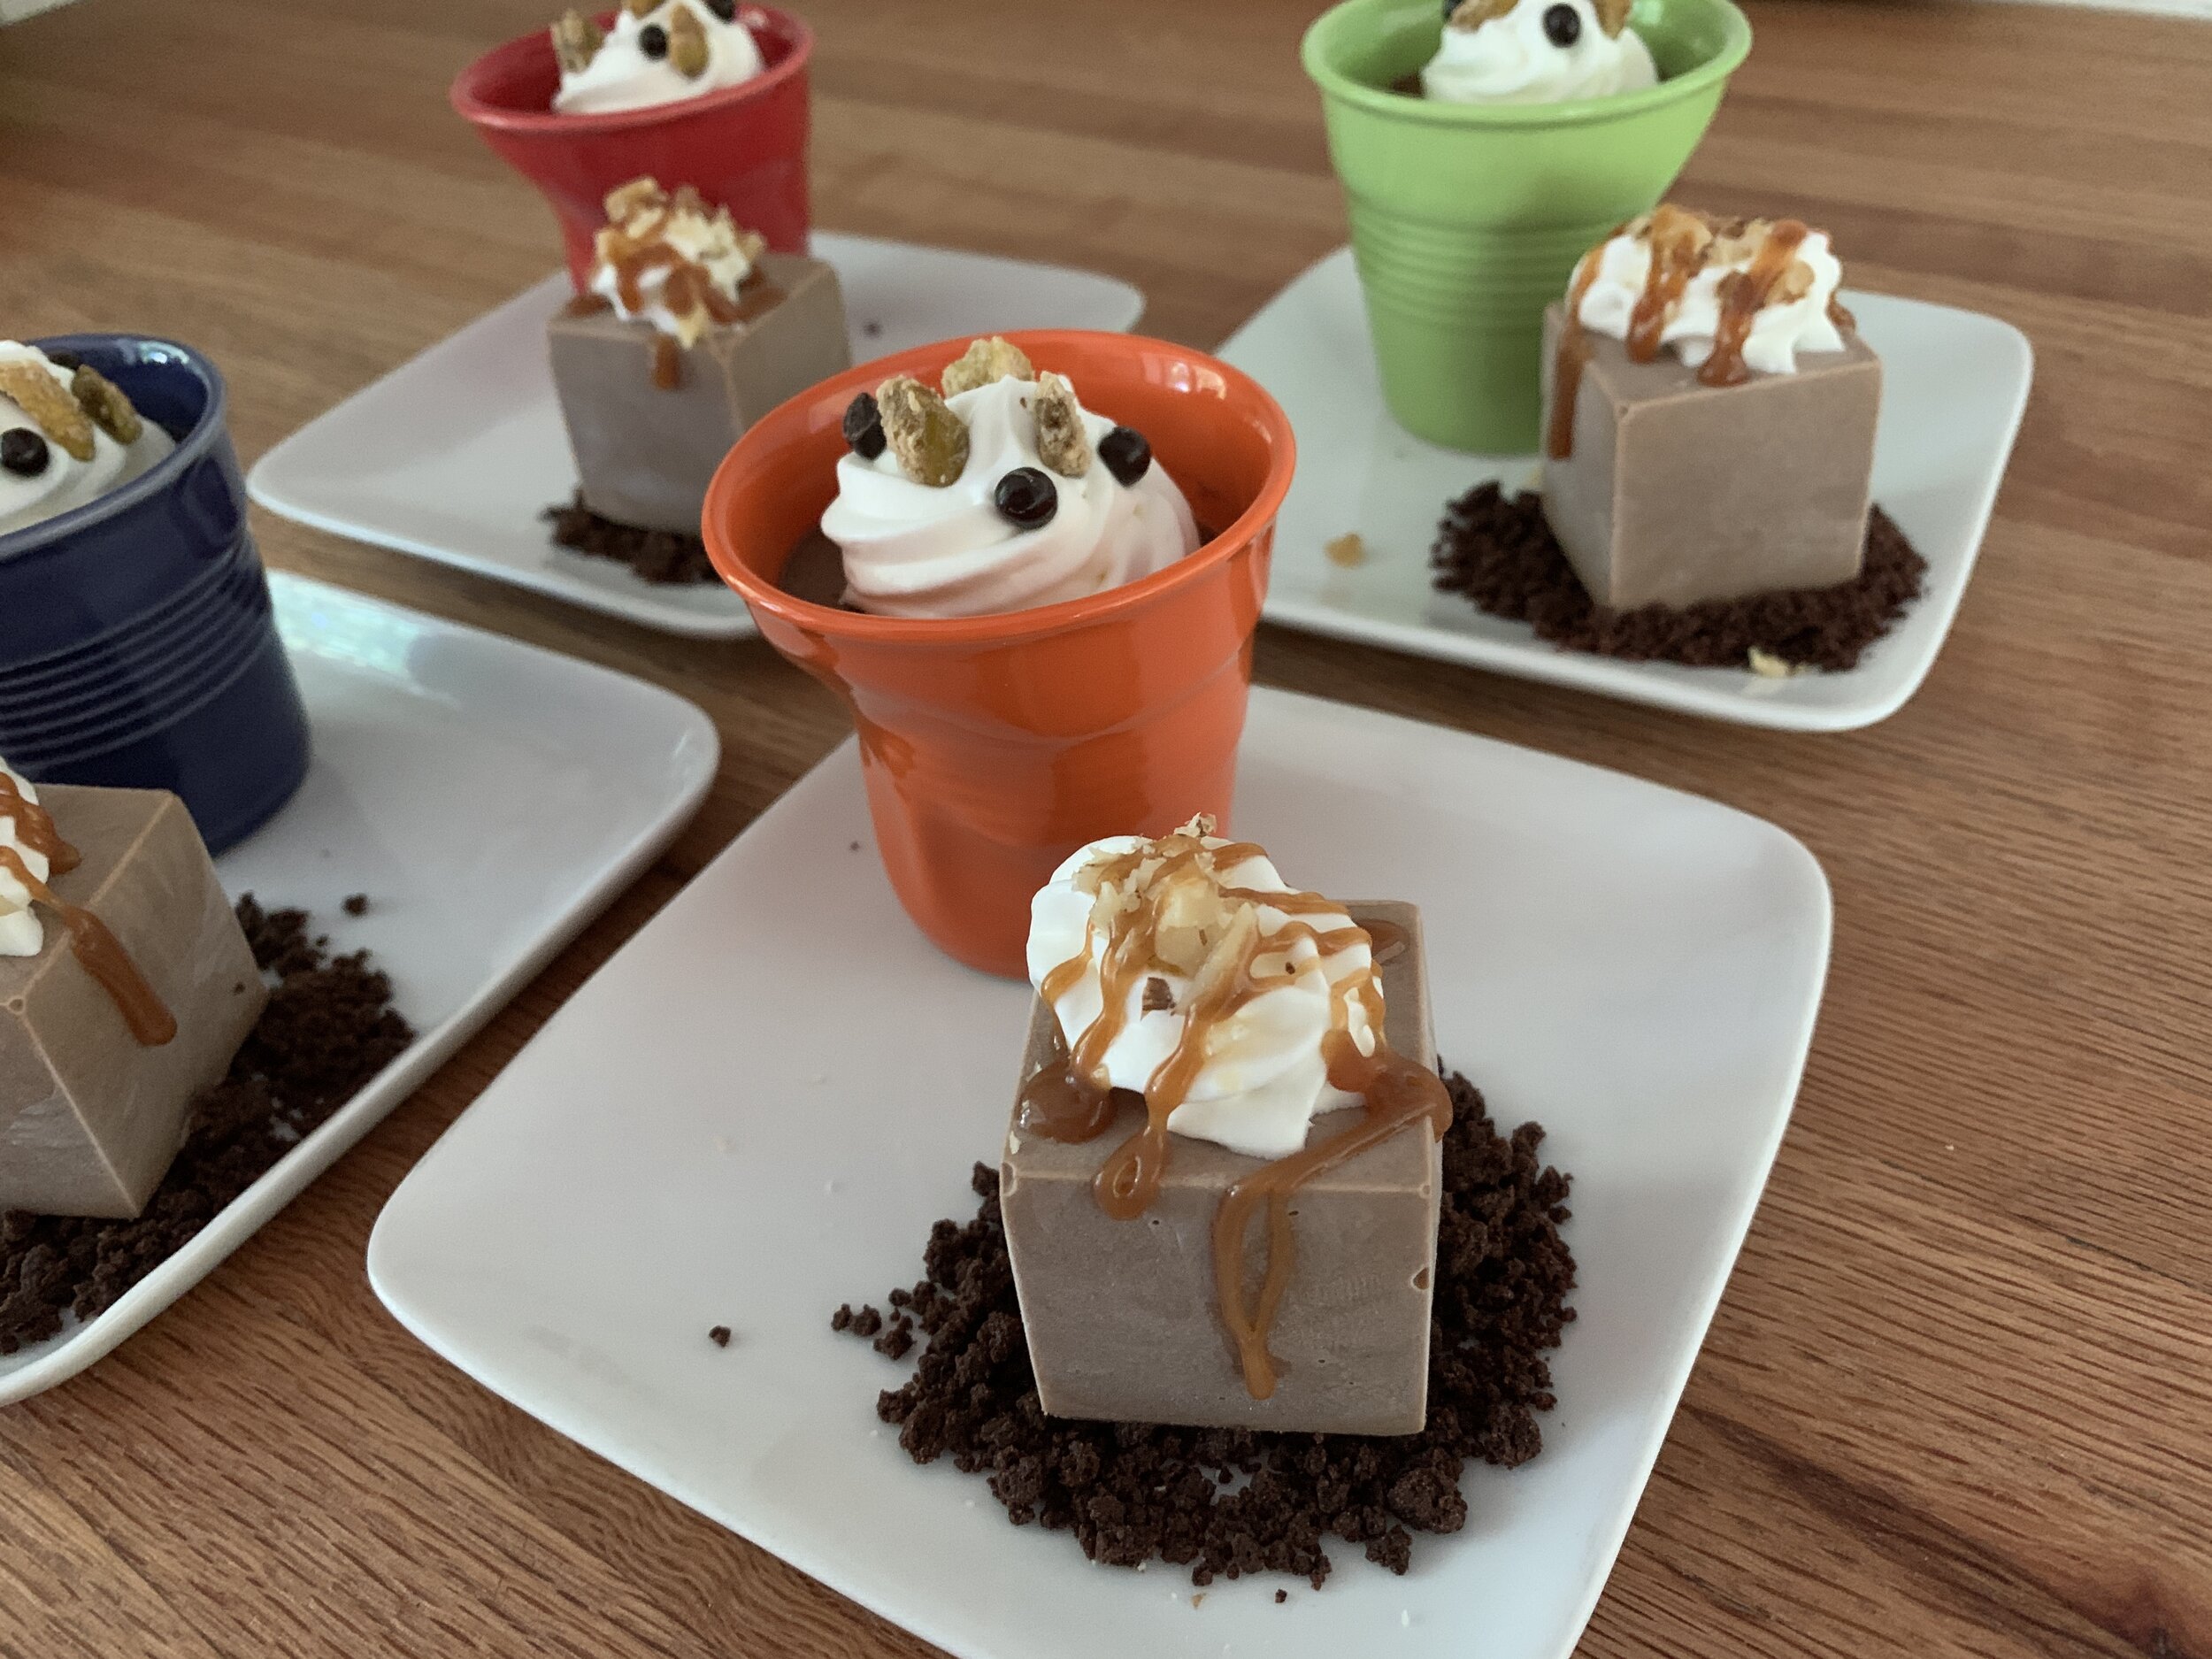
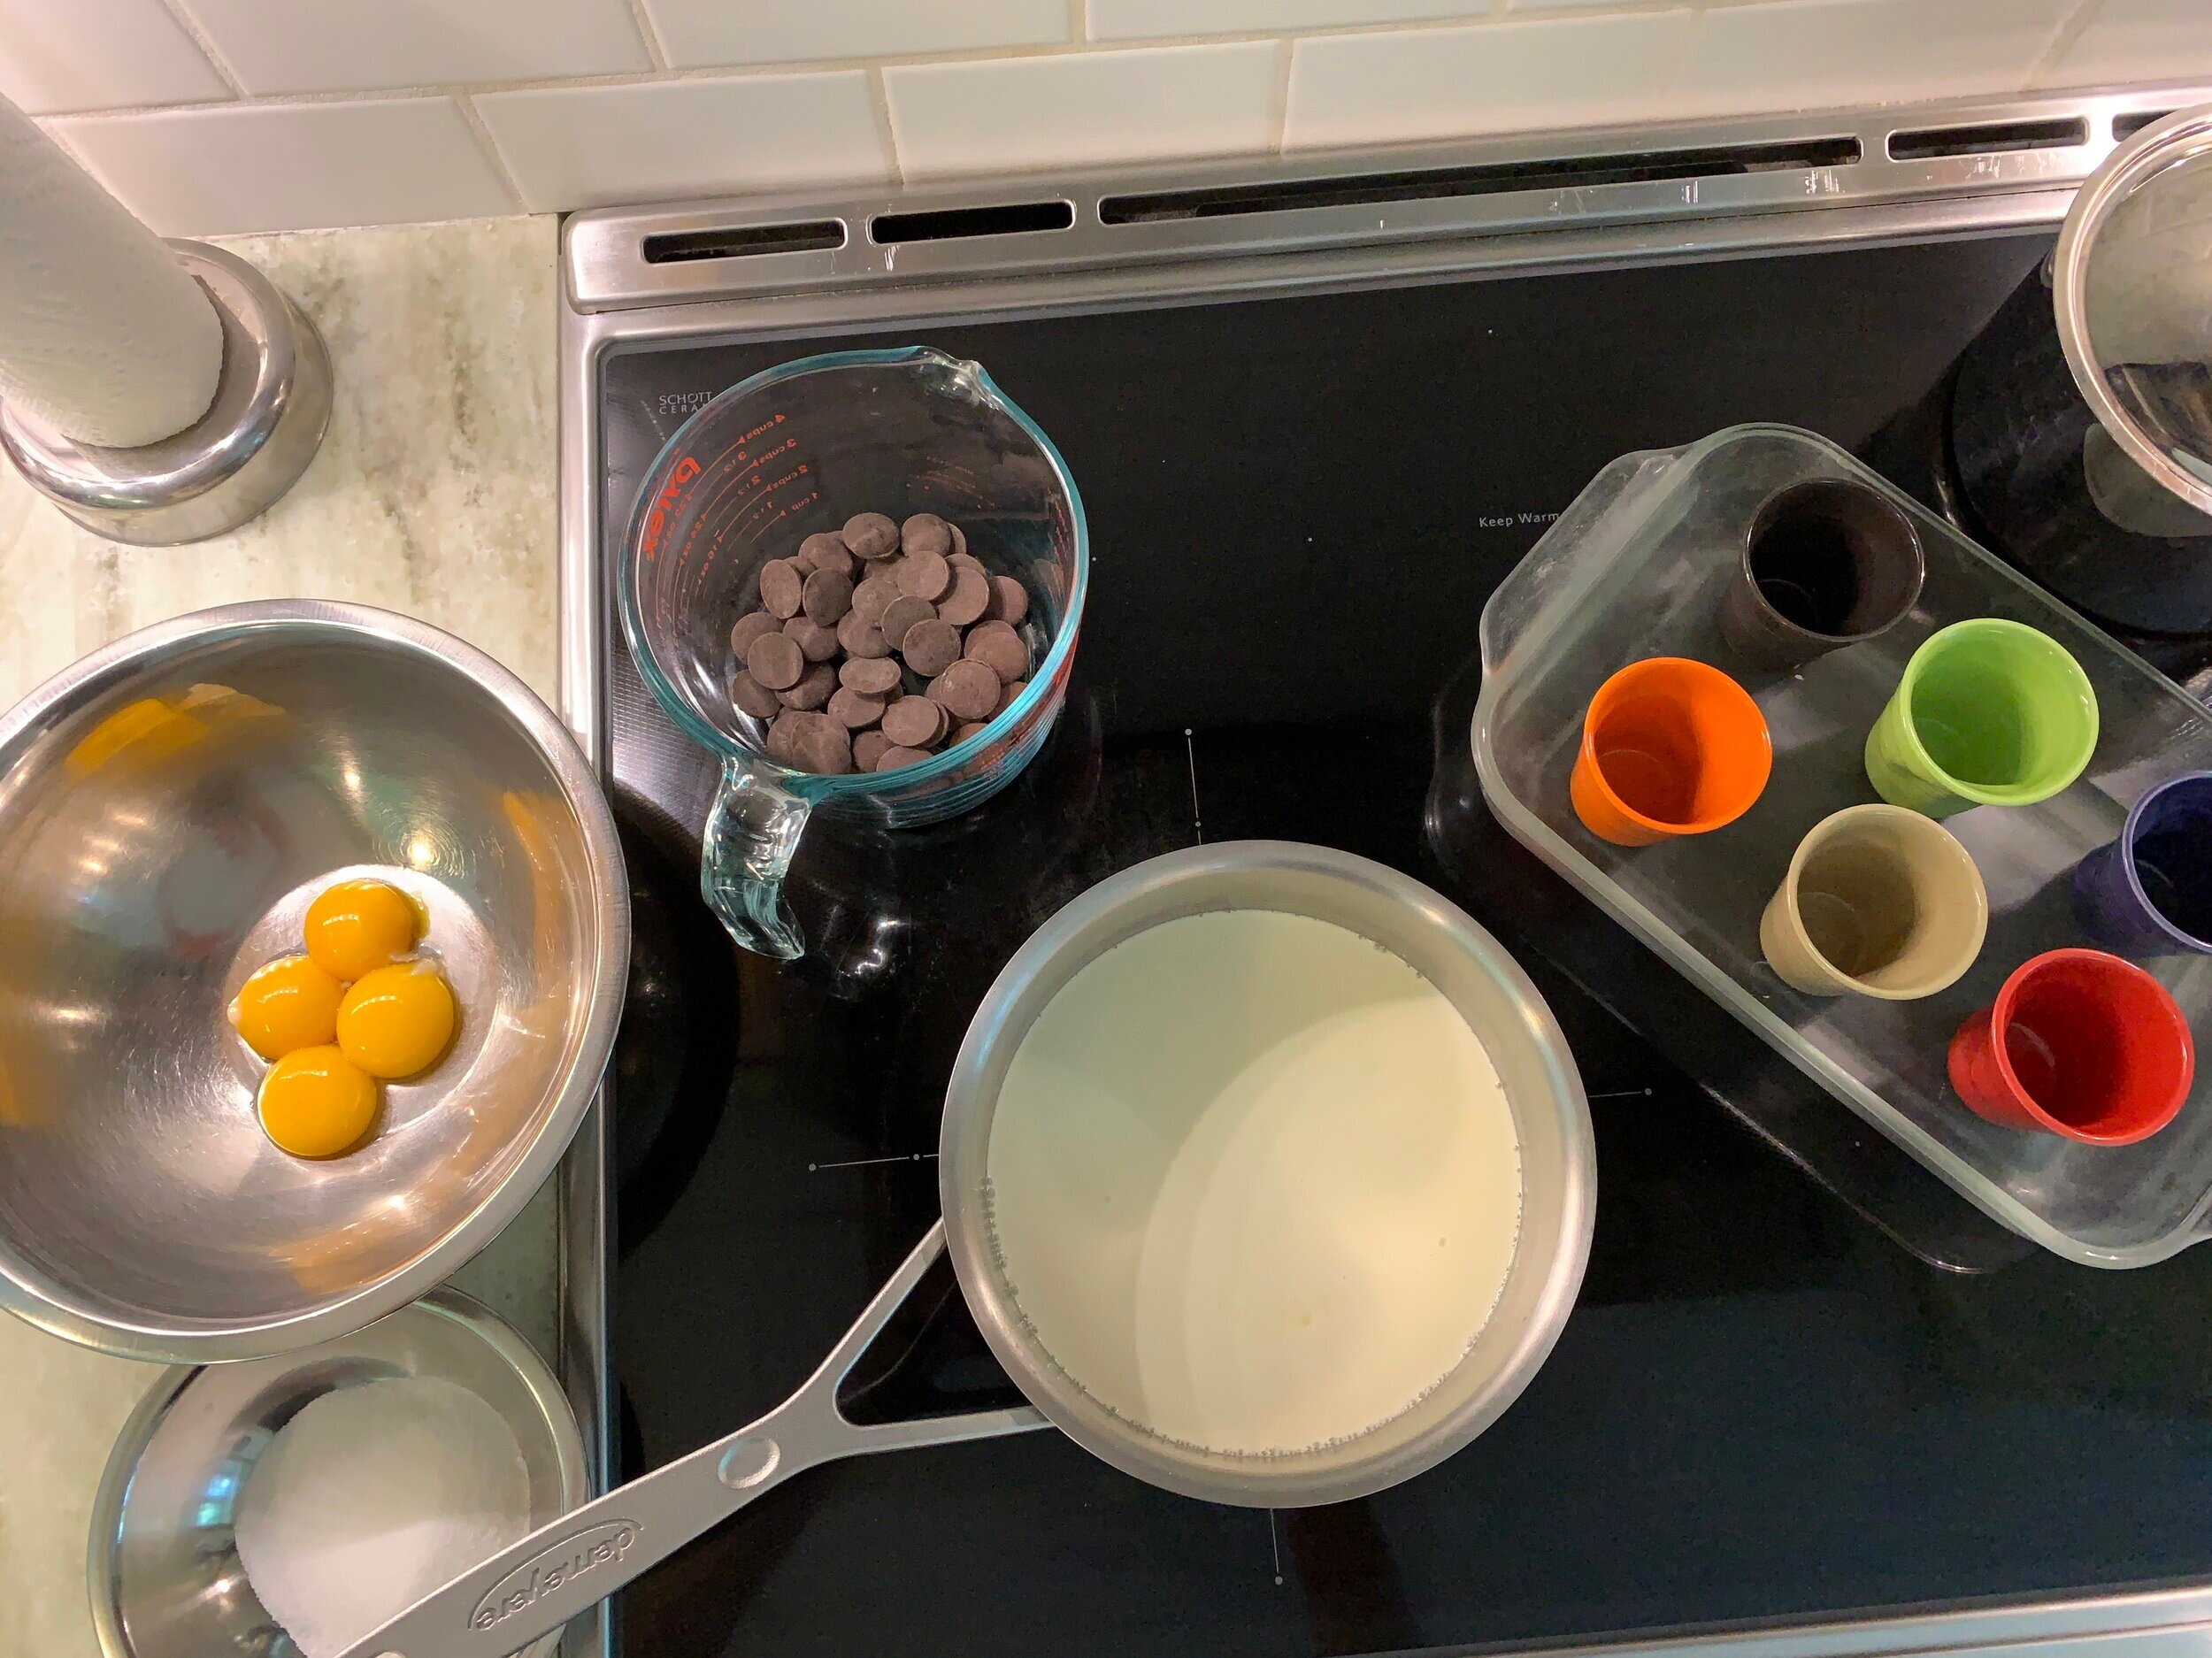
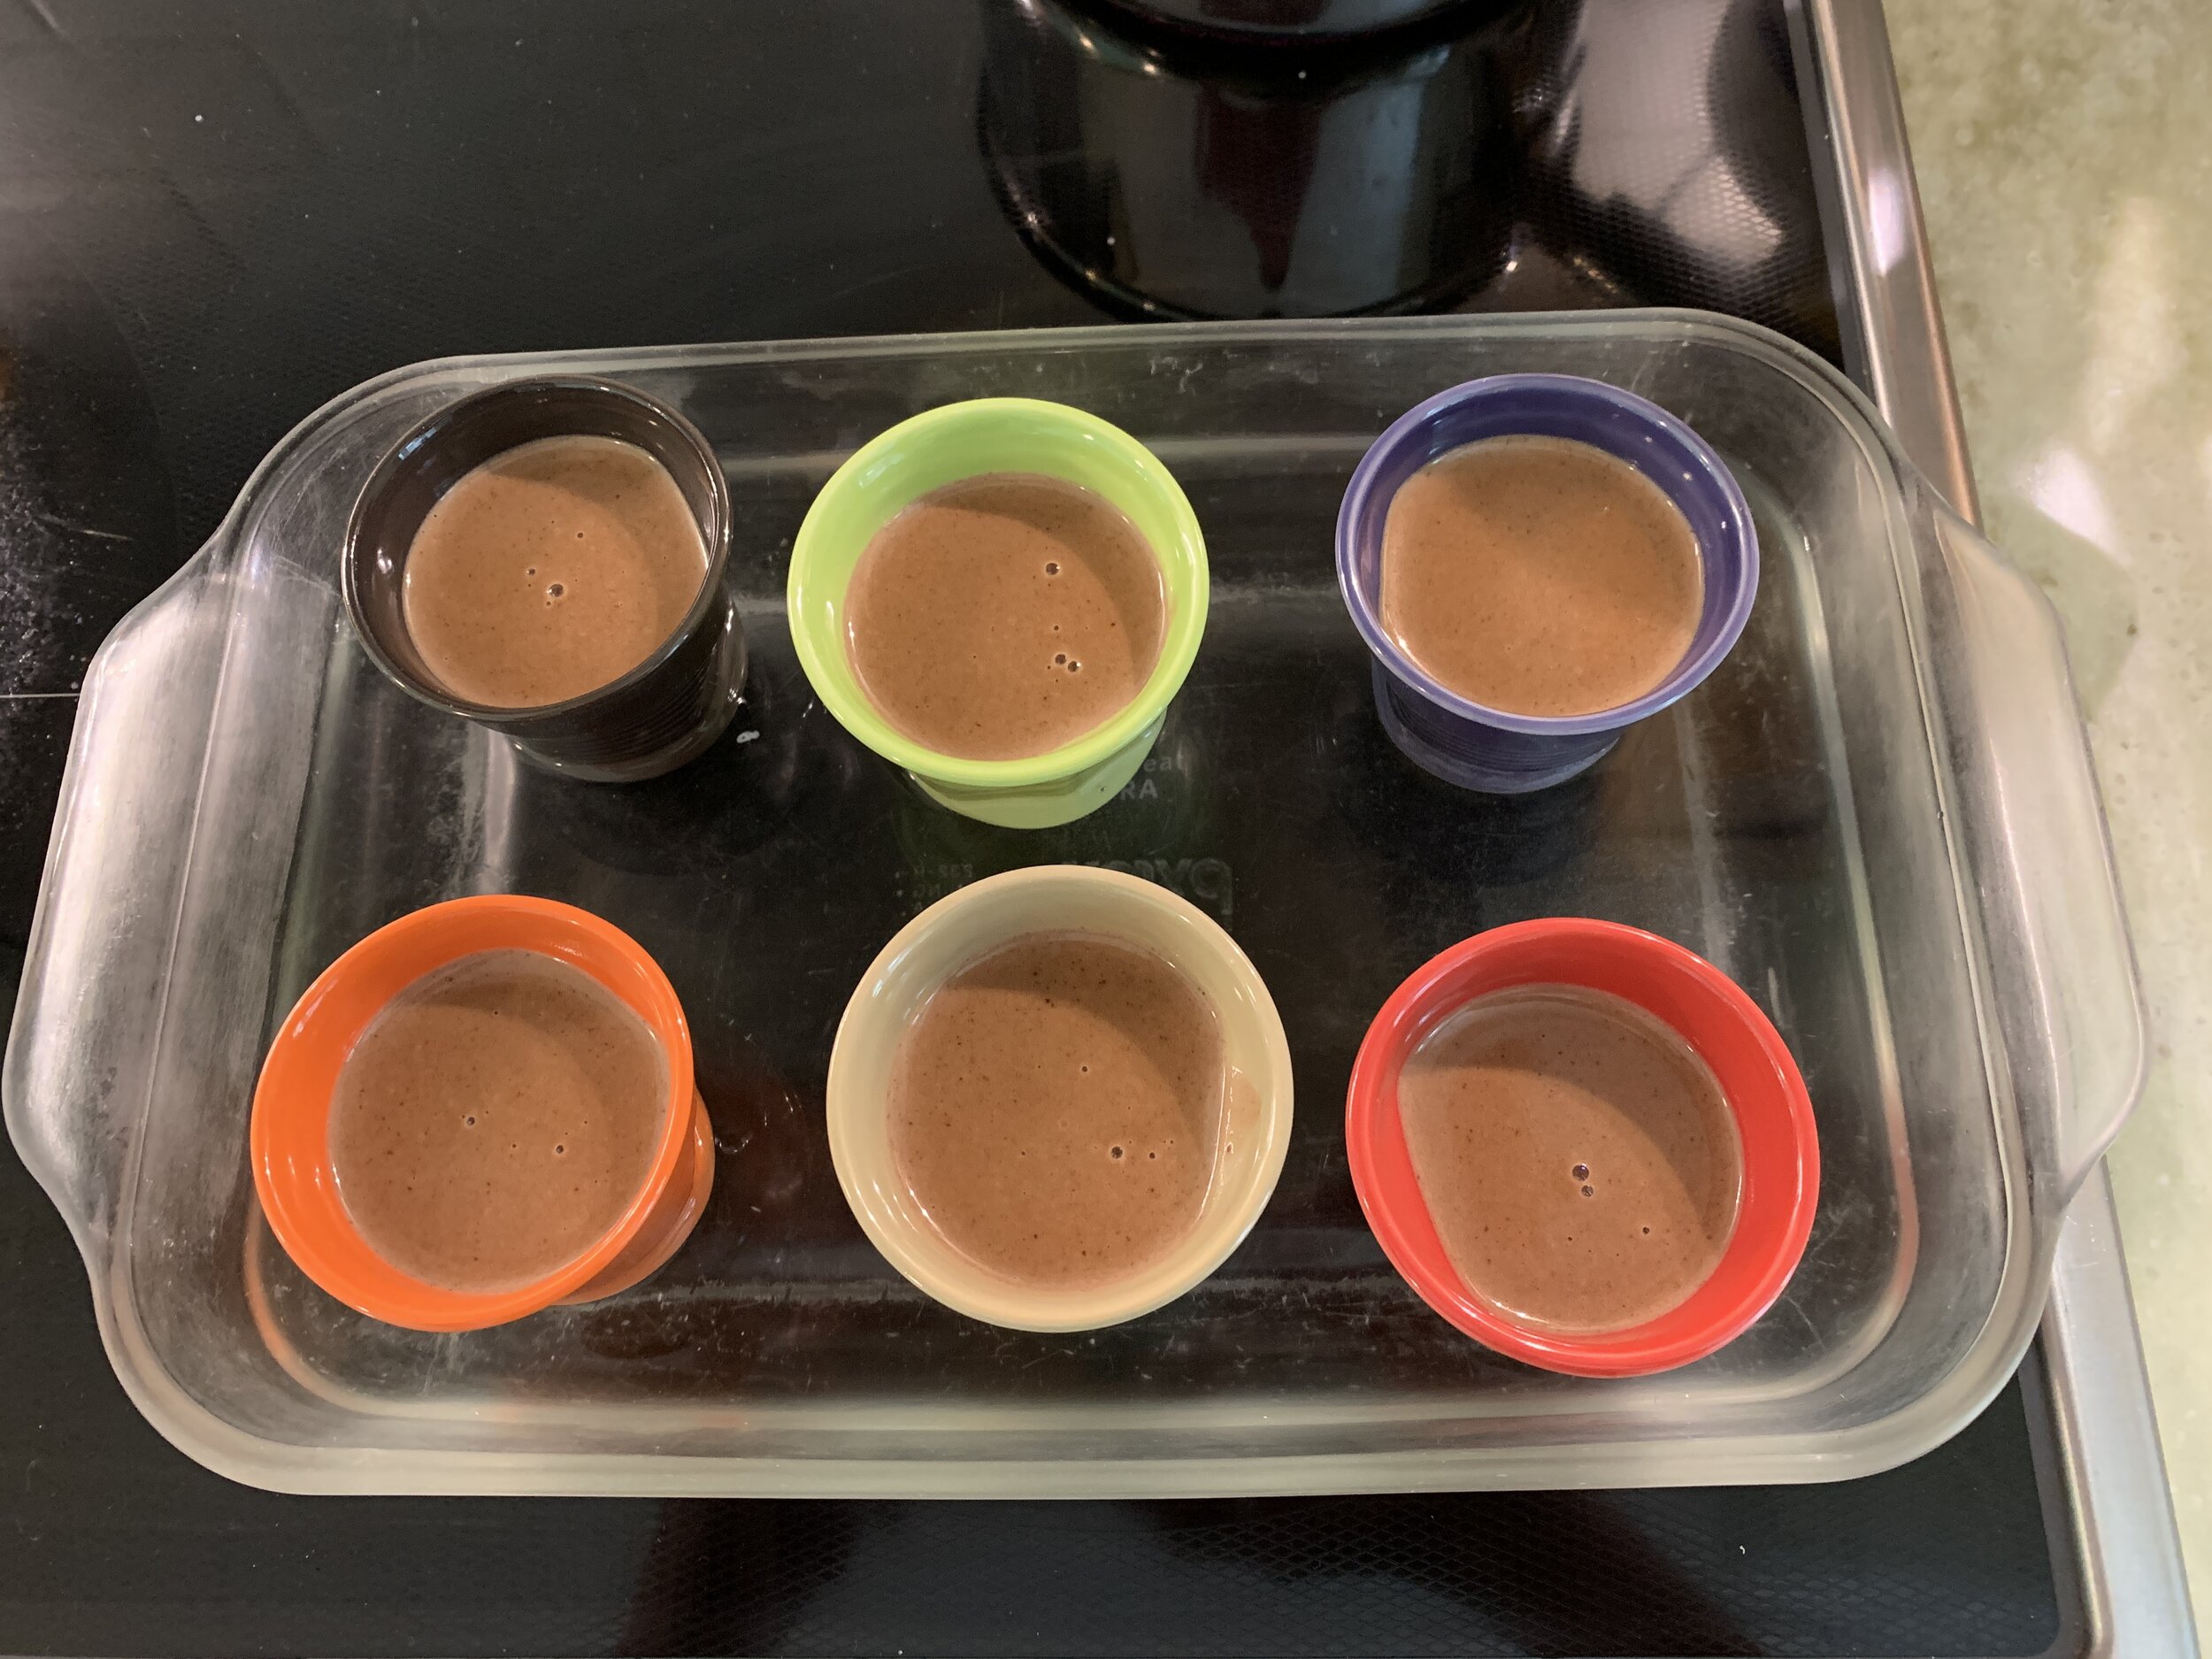
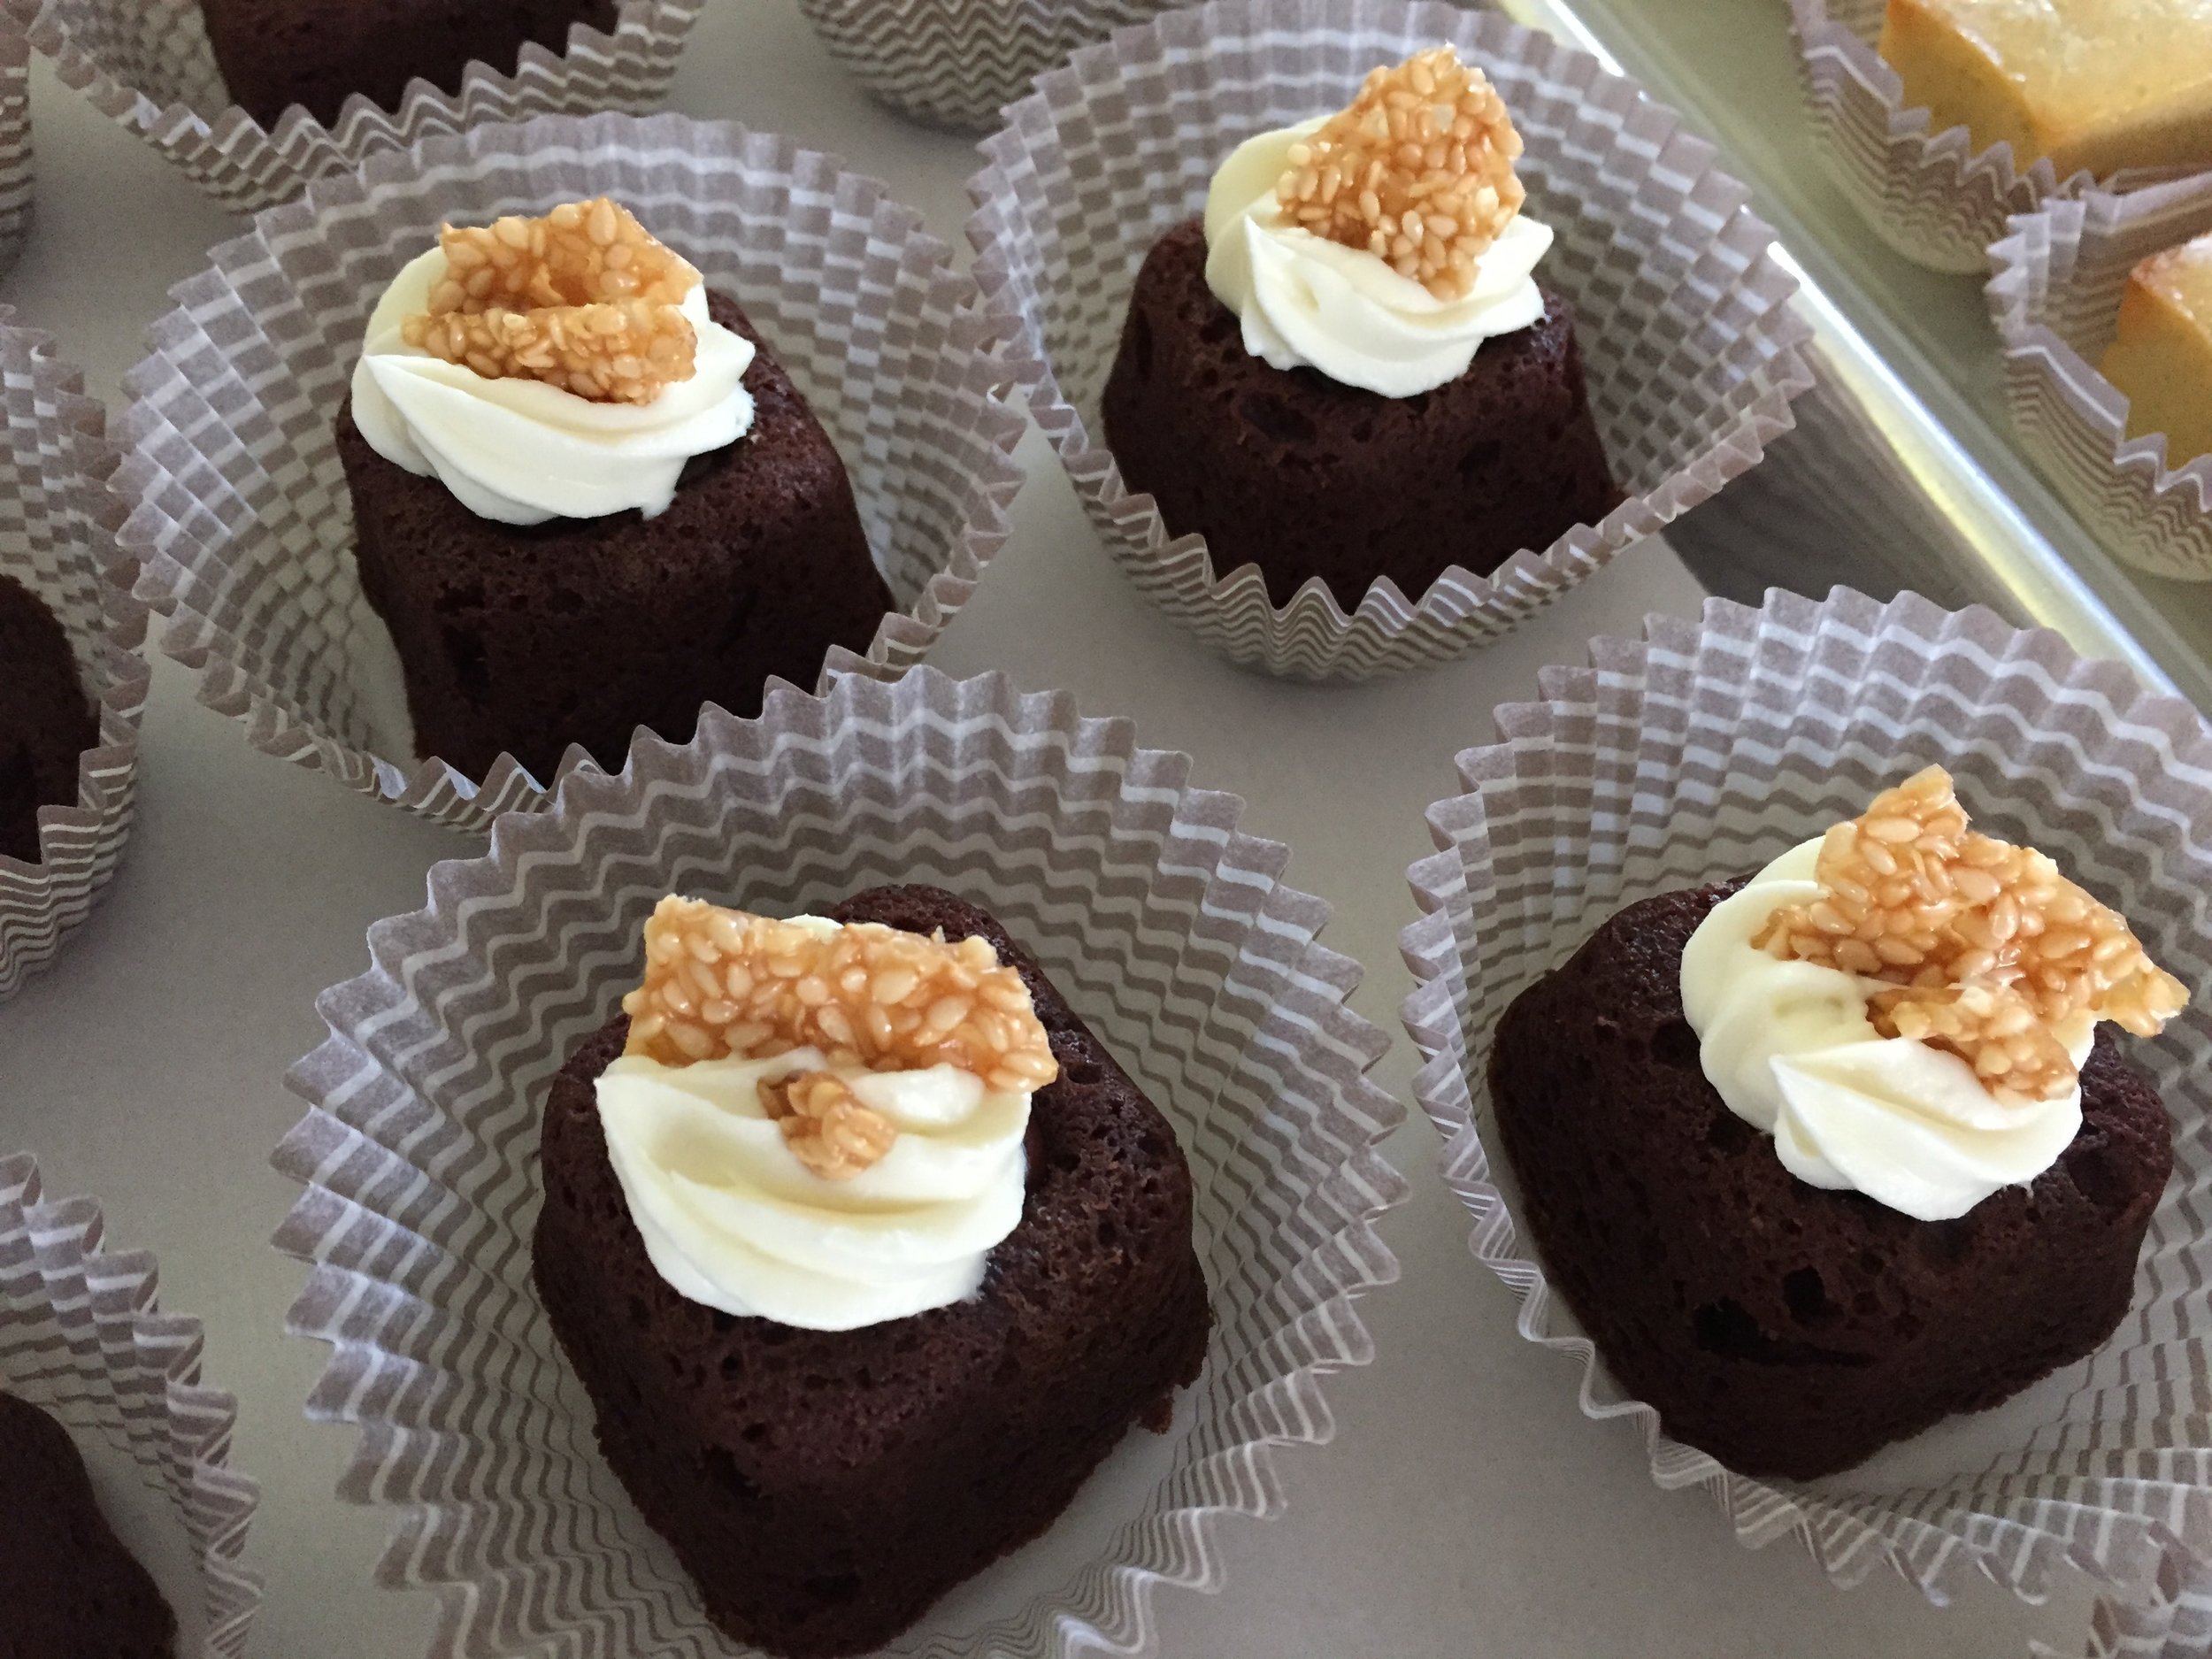
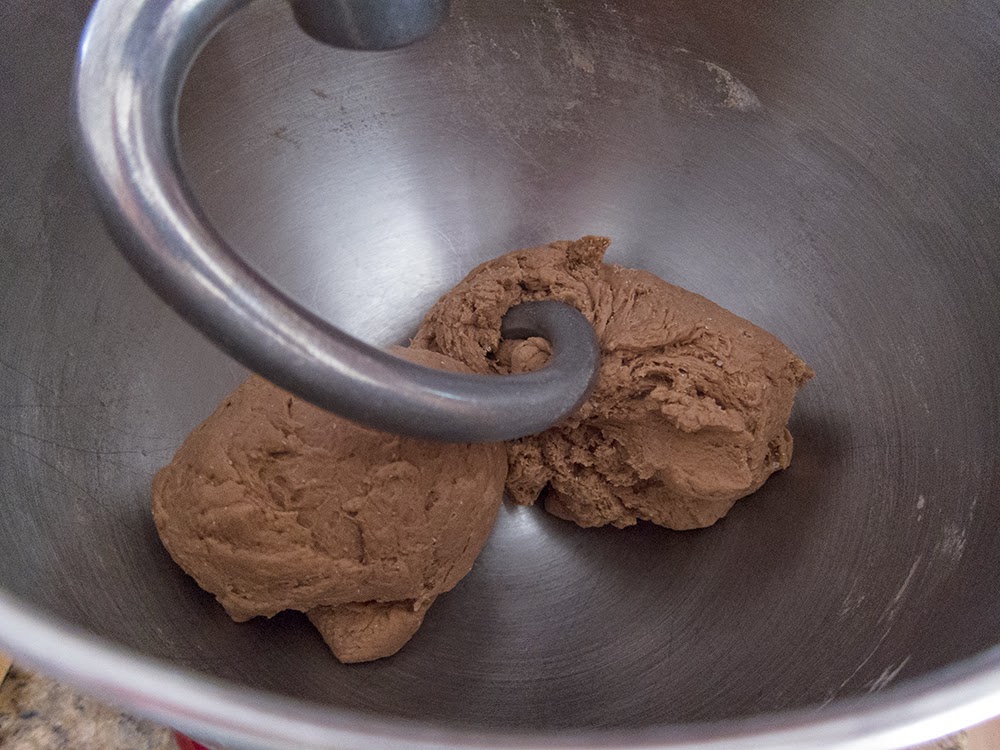
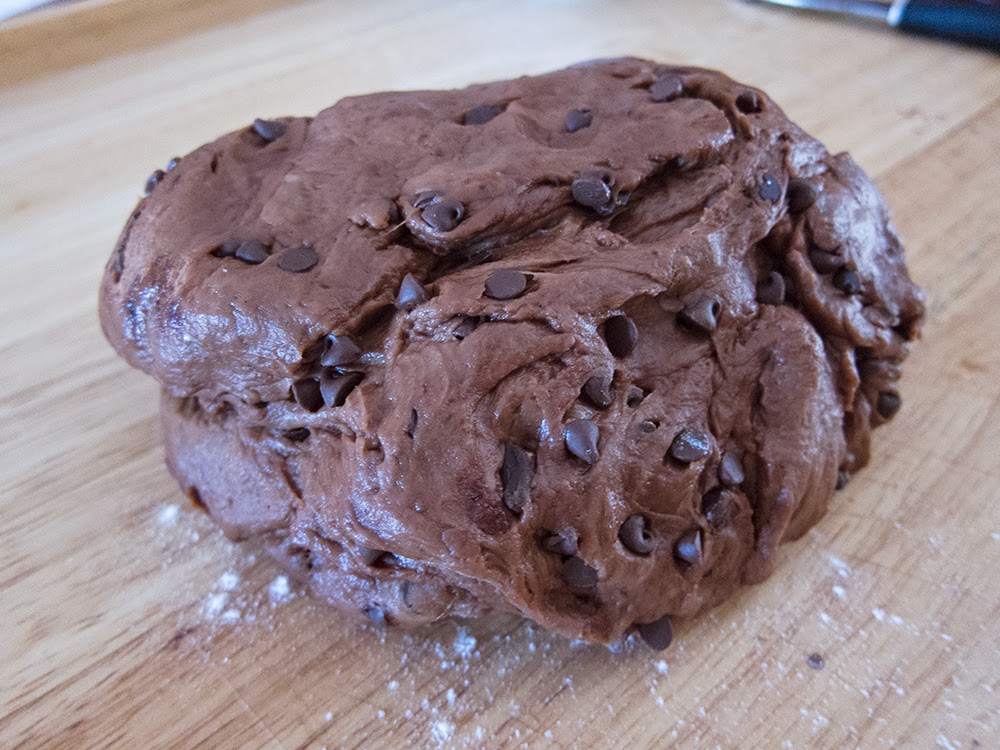
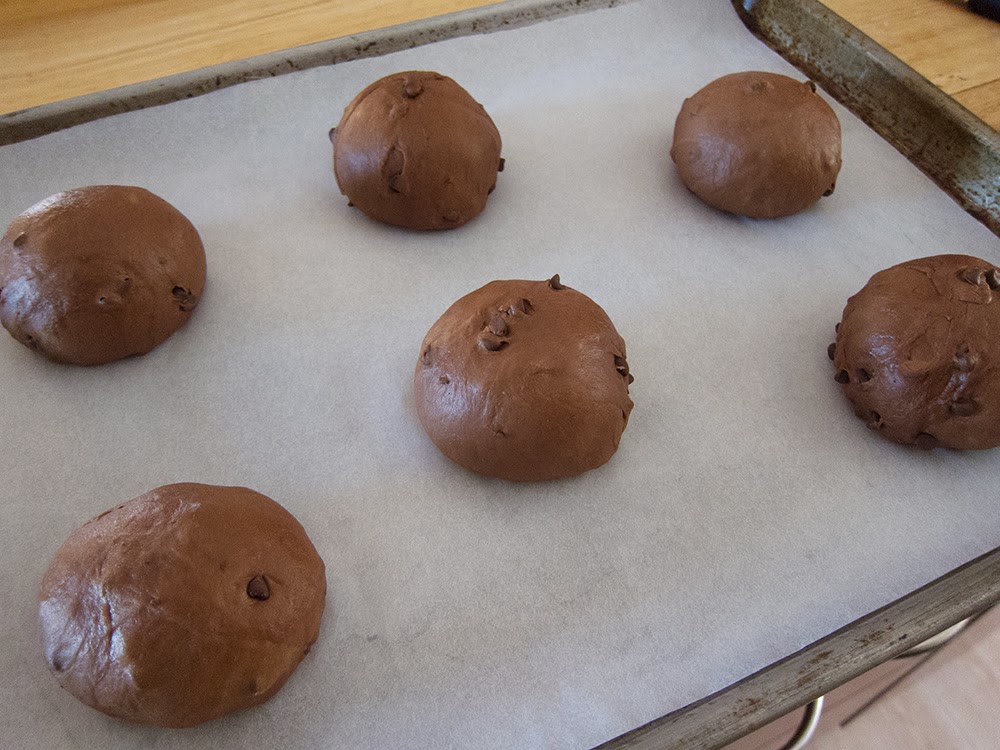
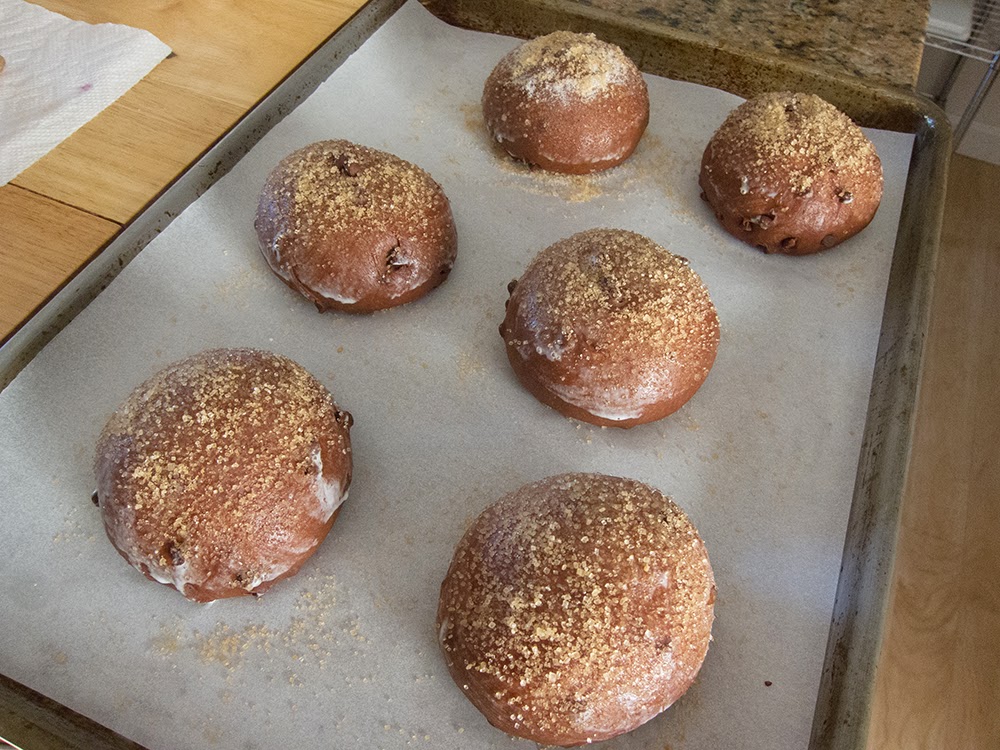
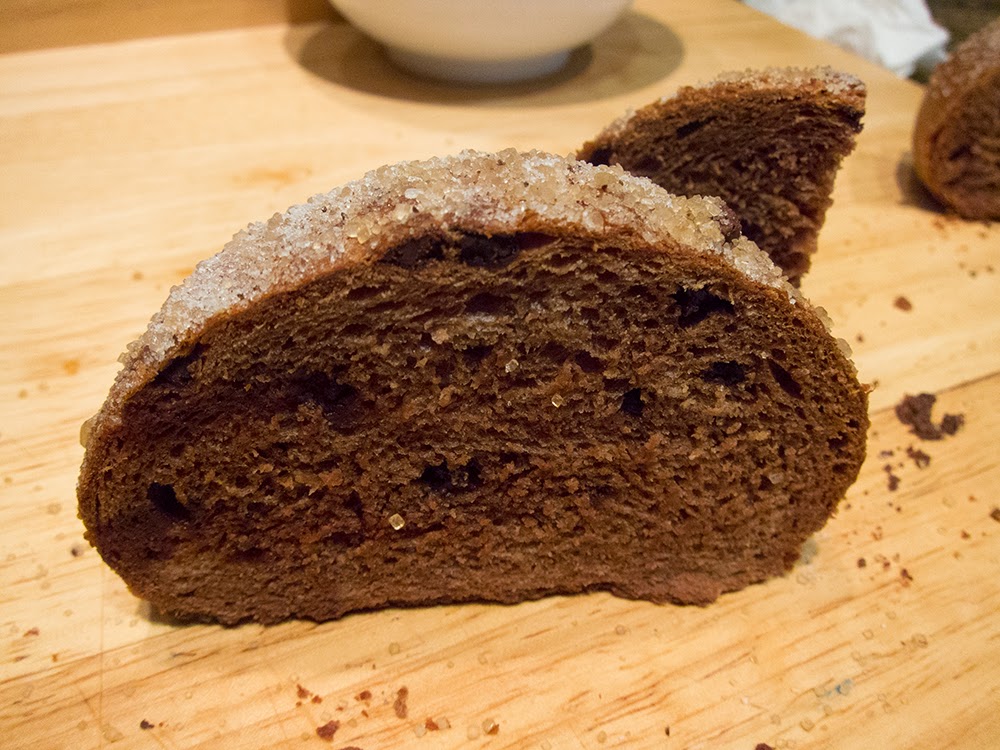
Before I start on the topic at hand, here are some pics of the delectable chocolate bread pudding I made using the left over chocolate croissant spirals from my last post.  I diced up the spirals, poured a basic chocolate custard over the pieces in my favorite square C&B ramekins, sprinkled on some vanilla sugar and baked 'em in a water bath.


just out of the oven

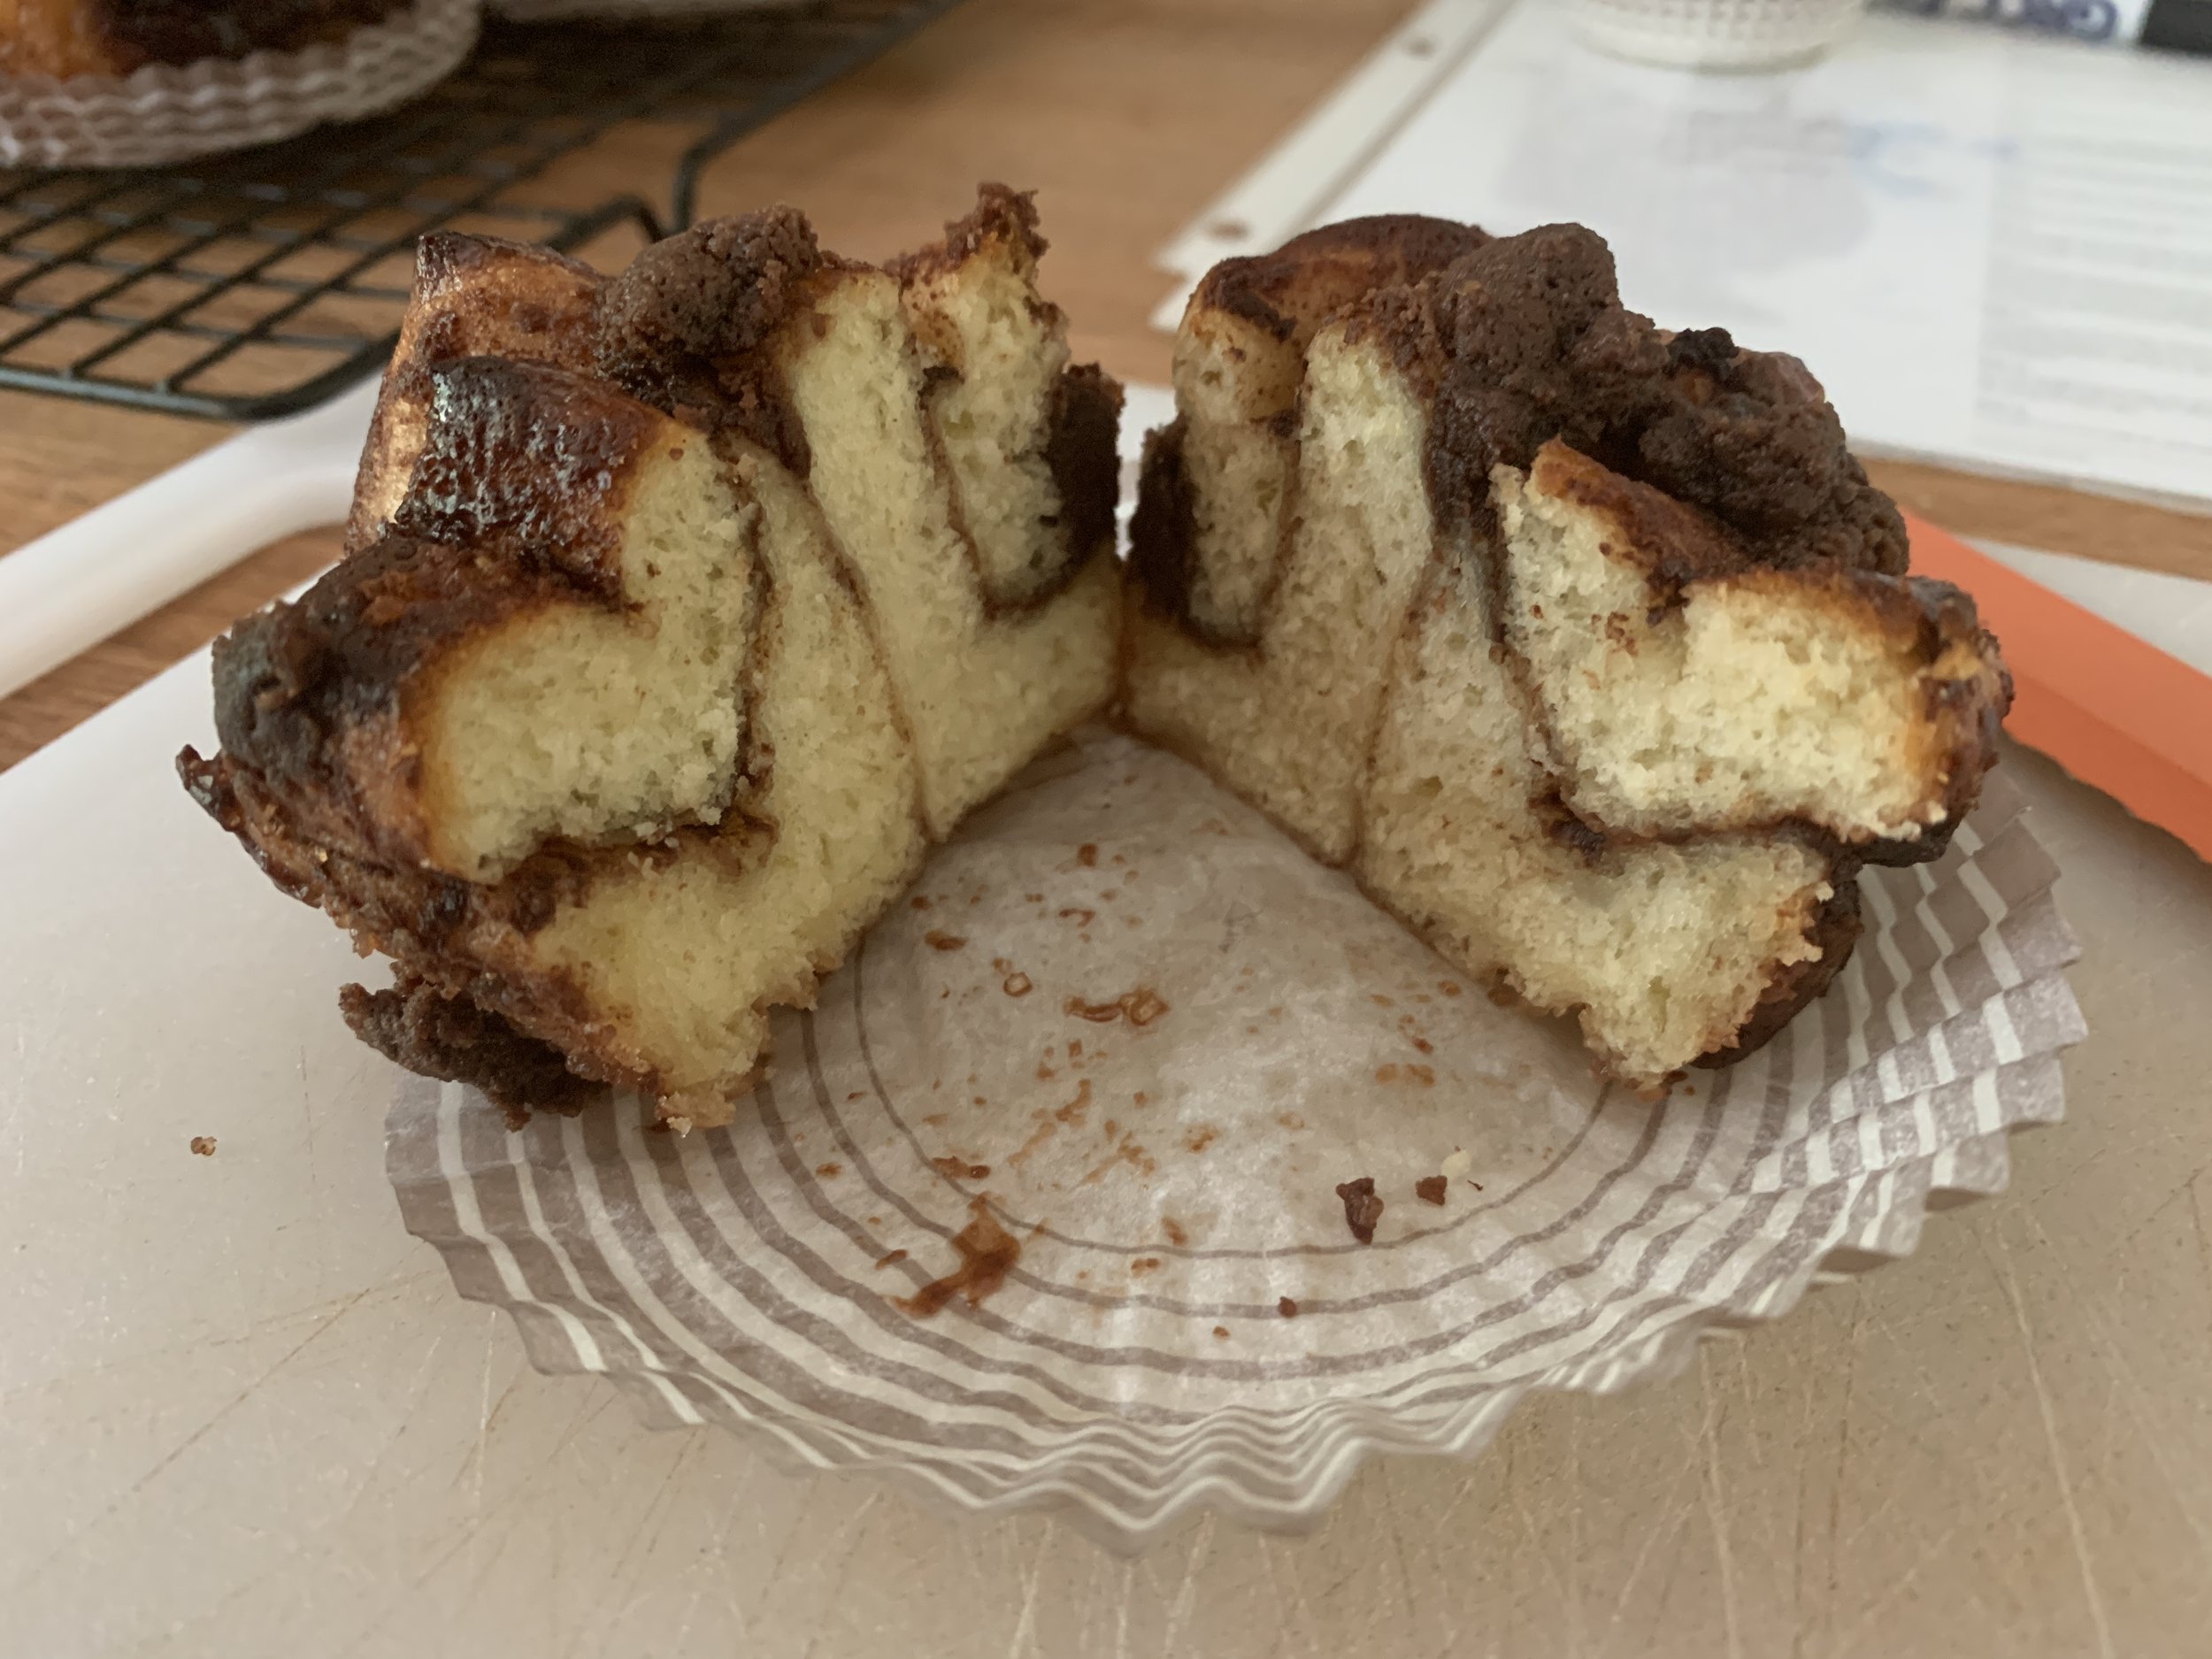
Just imagine one served warm with a scoop of vanilla ice cream.  Yes, indeed.

Now on to the task at hand.  What most of us know as napoleon, mille-feuille (literally "a thousand leaves") is that classic combination of puff pastry layered with vanilla pastry cream.  Of course, as is true of pretty much any classic you can think of, there are a multitude of ways to create variations on the theme.

Years ago, before pastry school was even a gleam in my eye, I made versions of this dessert using good old Pepperidge Farm puff pastry sheets, cut into squares and baked, then simply layered with a cream or custard and fresh fruit and/or a fruit coulis.  Always good.

Once pastry school was under my belt and I experienced what Paris had to offer, mille-feuille was often on my tasting hit list.  During my stage at Pascal Pinaud's shop on rue Monge in the 5th, raspberry-lemon mille-feuille was offered as a special treat only on Sundays.

When done well, the combination of crisp, flaky, buttery puff and smooth and creamy custard can't be beat.

Flash forward to the spring of 2013 when I took a class at Christophe Felder's school in Paris on mille-feuille chocolat.  I purchased his pastry tome Patisserie! and have been drawn into it lately to refresh myself on the classics as well as get inspiration for some new ideas (new tart coming up soon!).  My eyes lit up at the recipe for mille-feuille chocolat and off I went on a trip down feuilletage chocolat lane.


This recipe calls for cocoa powder added to the détrempe, just as in my recent chocolate croissant experiment.

les ingredients

I made half a recipe:  250 gm flour, 30 gm cocoa powder, 130 ml cold water, 43 gm melted butter and 5 gm salt mixed together just until everything is incorporated.


the creature from the Black Lagoon!

The détrempe felt dry, and it looked a lot more blotchy than when I make regular puff pastry.  I gave it a couple hour rest in the fridge and prepared the 168 gm butter block.


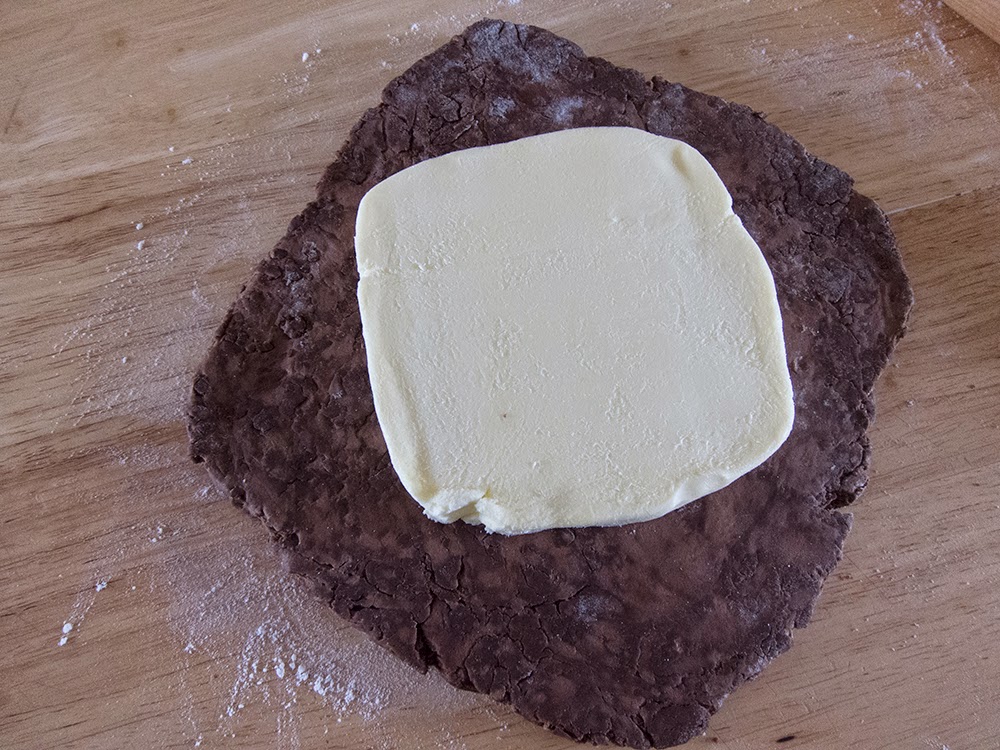
ready for the beurrage

Once I completed the beurrage and started the folds/turns the dough in general started to look a little better, but still blotchy.


after the first two turns - yikes!

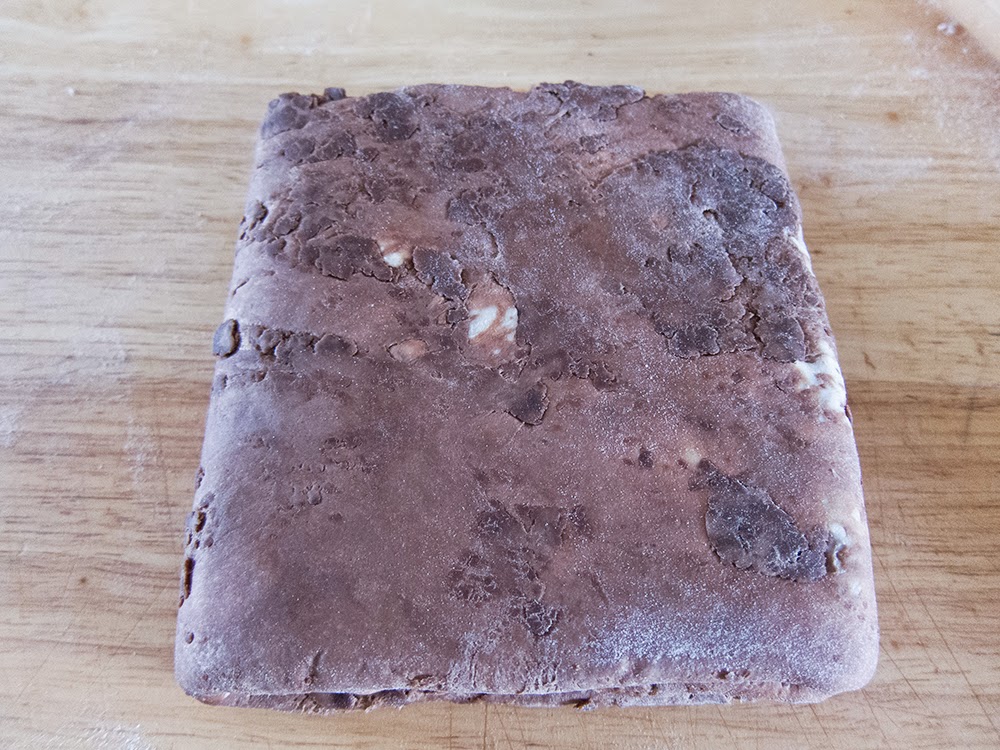
But once all the turns were complete the dough looked and felt better - there was hope after all.


after six turns

I held the dough in the fridge overnight for use the following day.  Otherwise I would typically pop it into the freezer for another time.

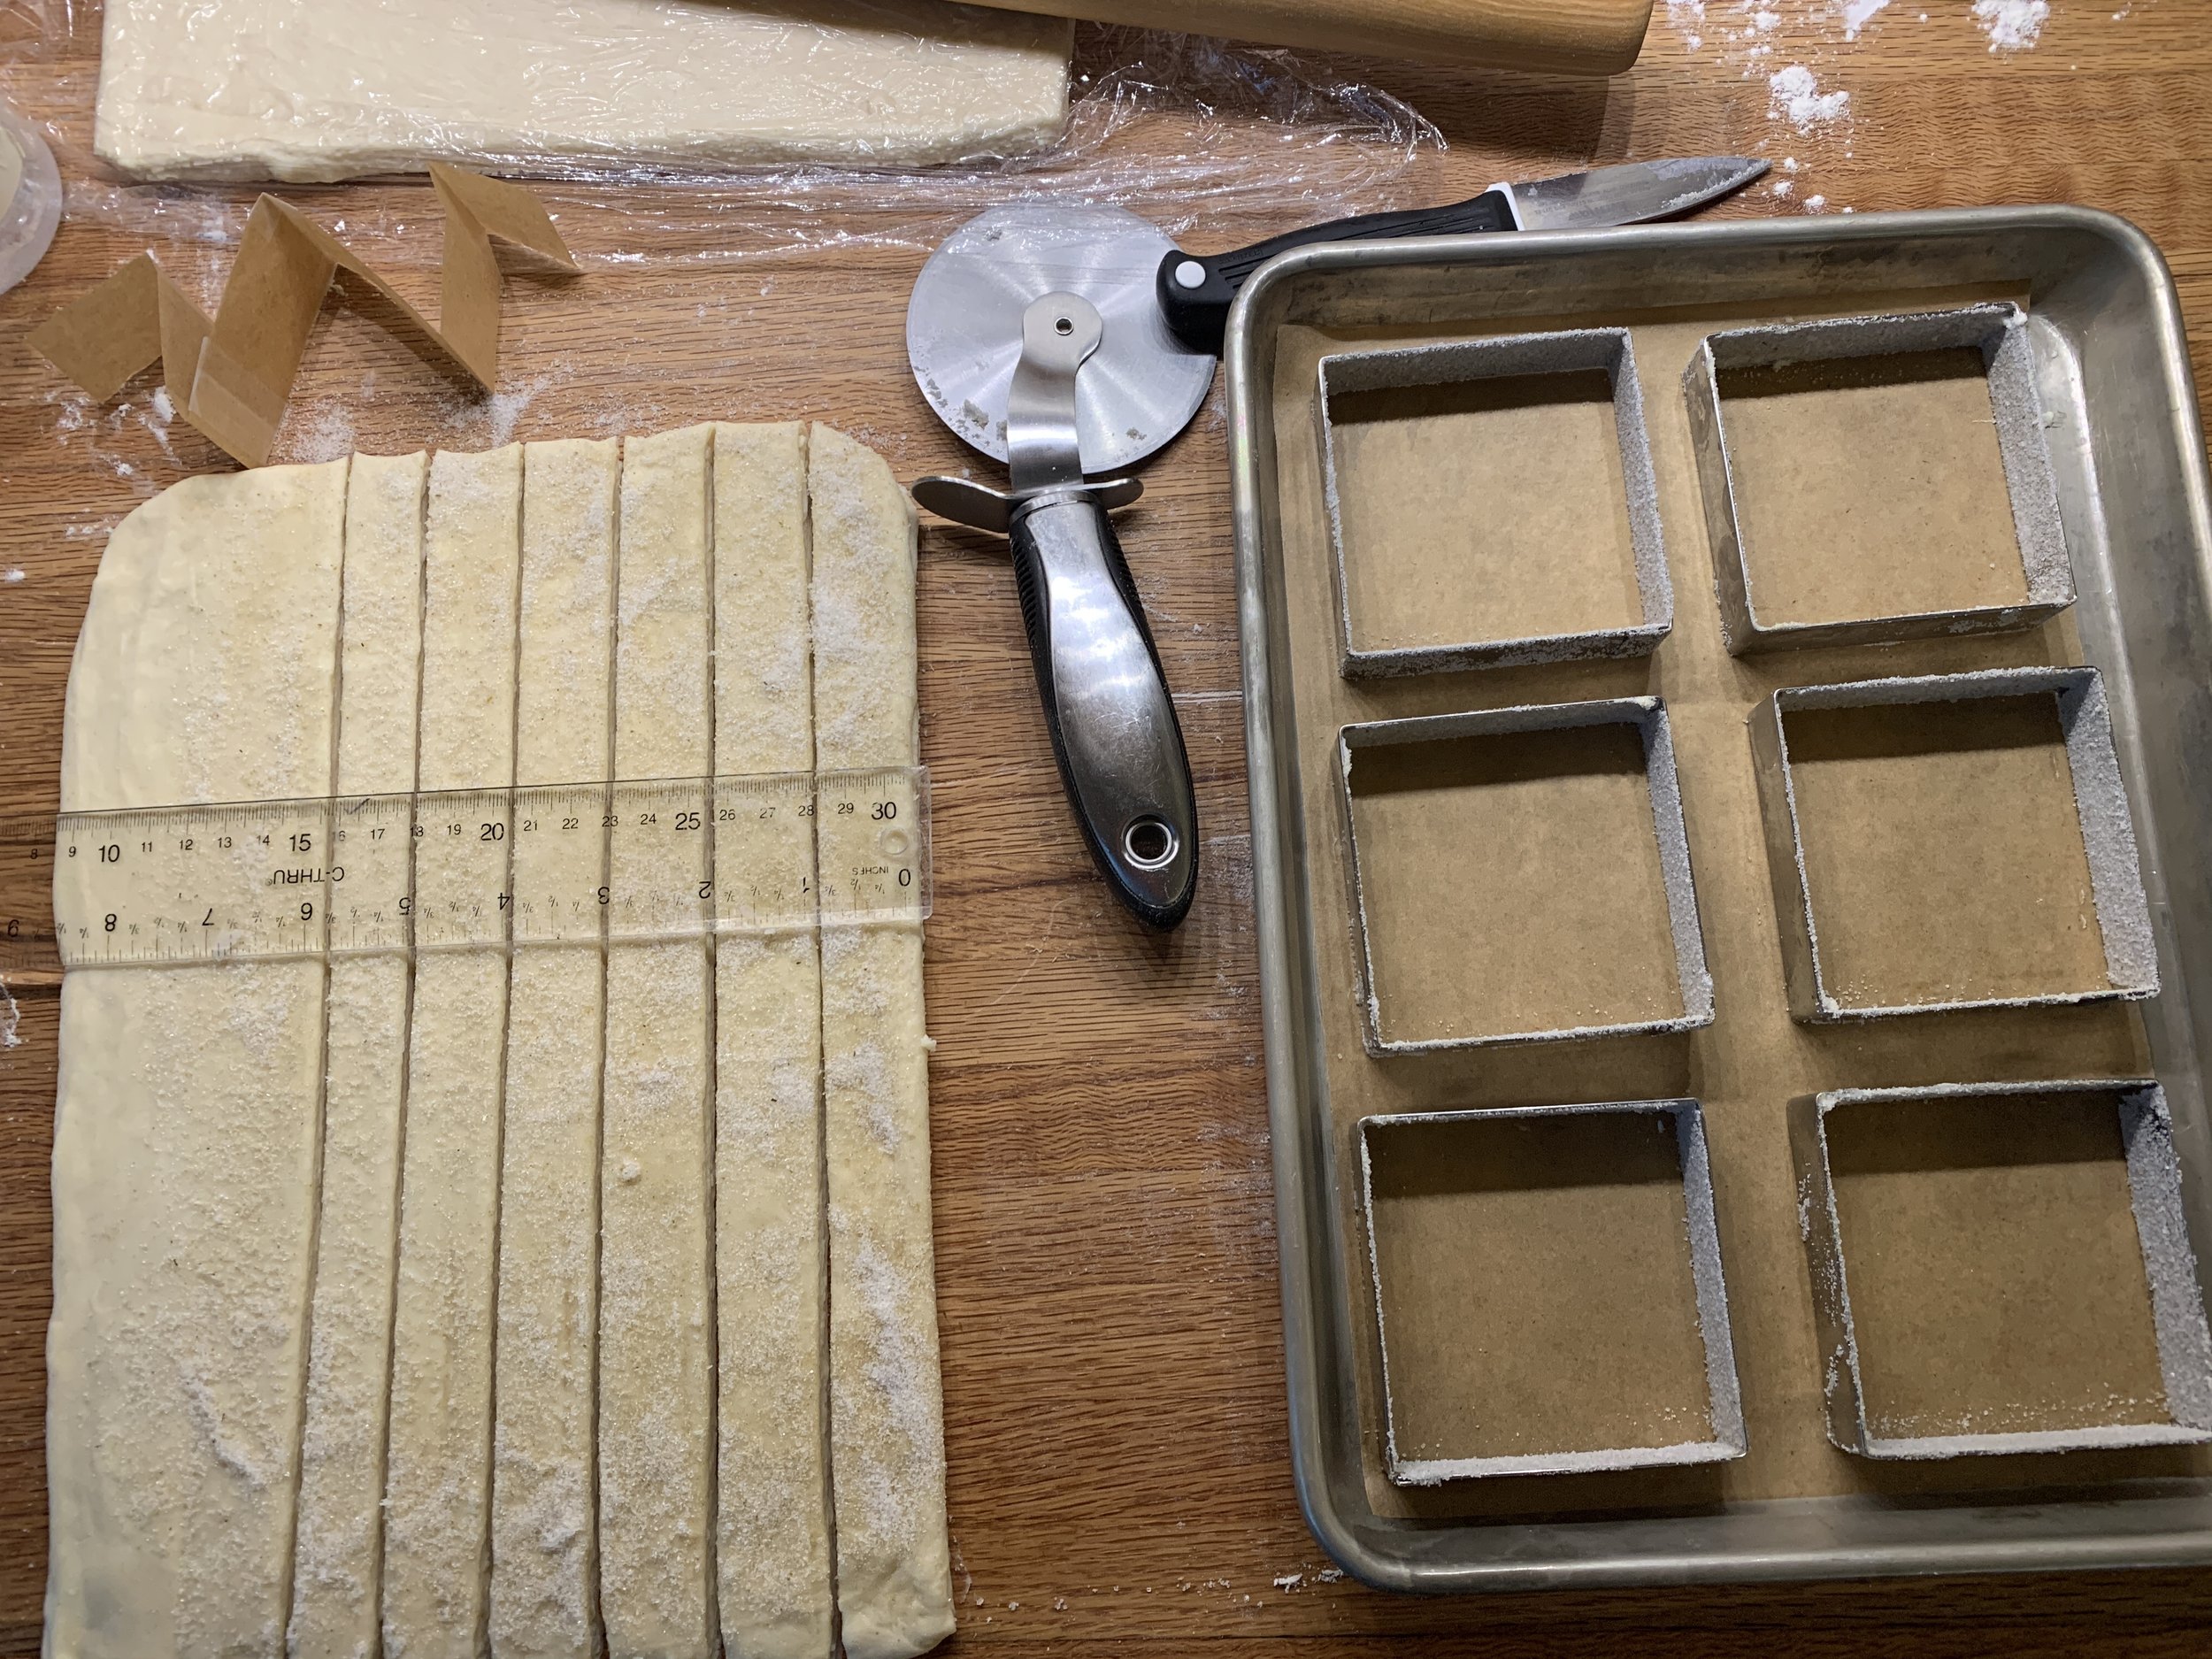
When rolling out the puff for mille-feuille, it's important to roll it about 2-3 mm thick.  I divided the dough in two and rolled each piece to fit a quarter sheet pan.

It's important to let the dough rest - otherwise it shrinks when baking (as you'll see in the upcoming pictures).  It's also a good rule to freeze the rolled out puff for 10 minutes or so before baking to help stabilize the dough.


ready to bake

For comparison I baked one quarter sheet with a cooling grid over the pan (seen above) to help limit the puff's rise and the second one topped with a piece of parchment and a second sheet pan to weigh it down (the generally recommended method to keep puff under control).

I did NOT prick either one with a fork, having found instructions on line with and without (Felder's approach) fork pricking.

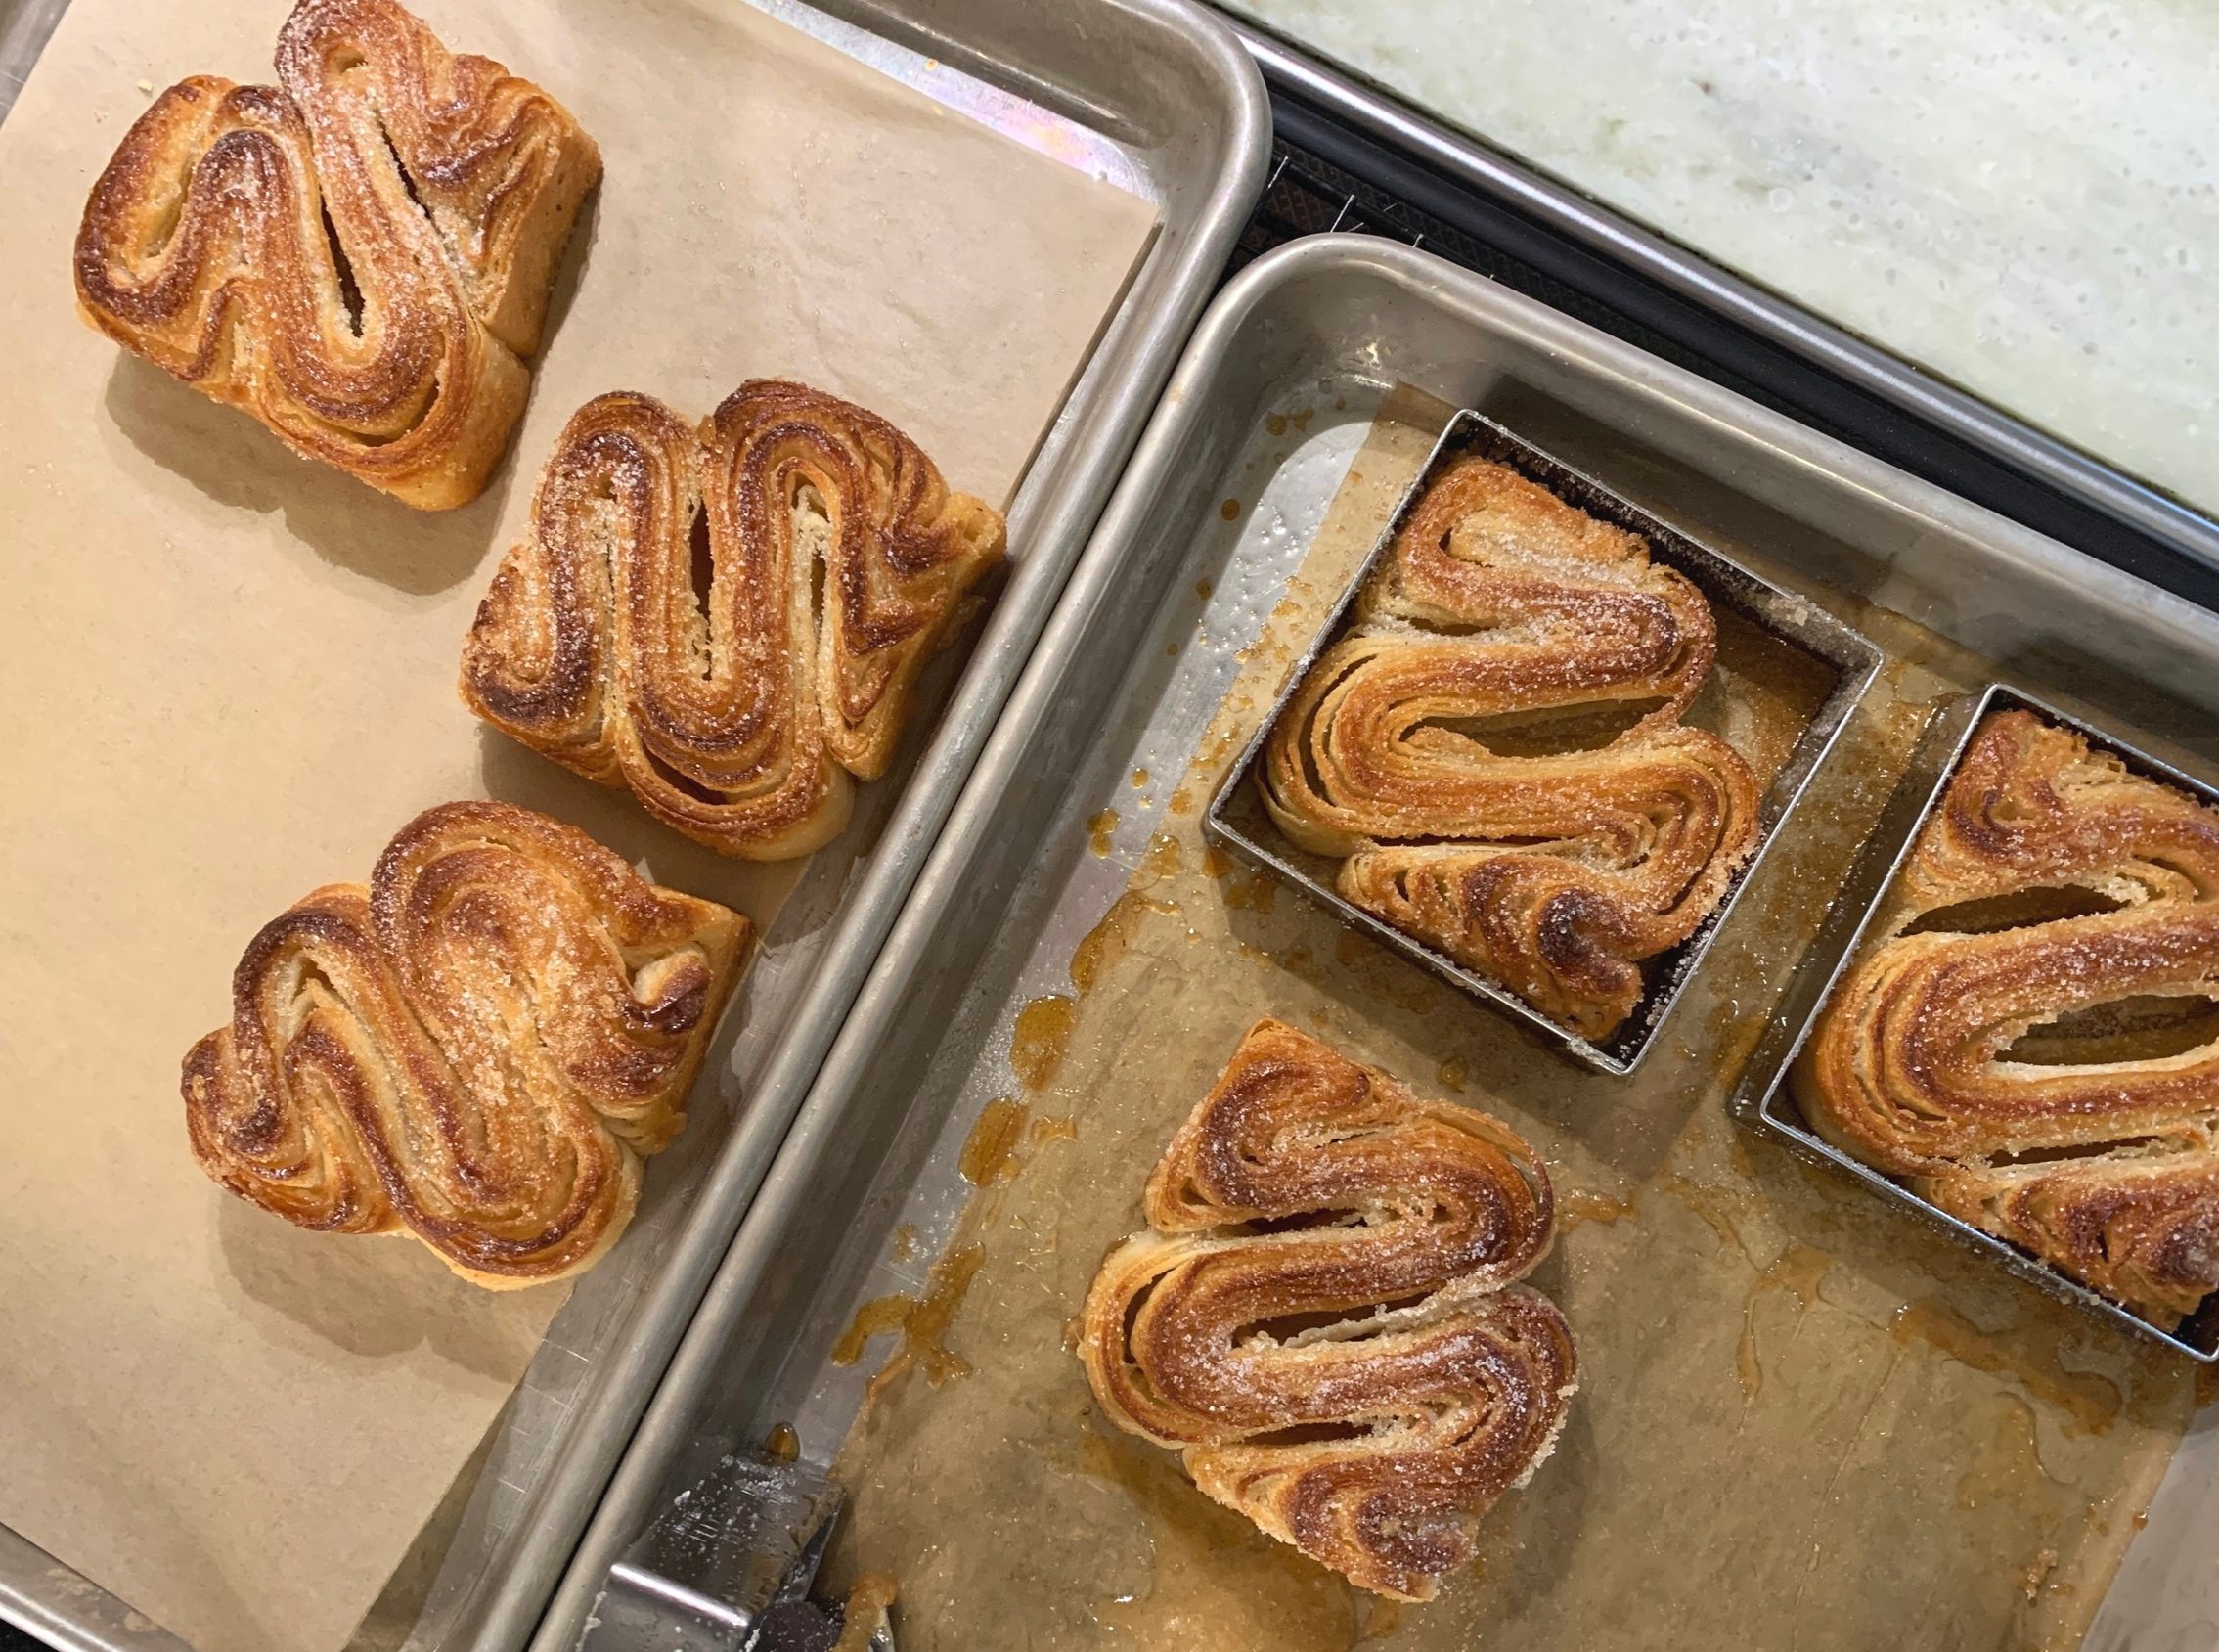
What really happened in the oven?  The weighted down version puffed anyway, and I actually pushed it down a couple of times during baking to try and keep it flat.

The one with the grid over it puffed up to the limits of the grid, but it ended up more irregular with undulating waves across the surface.

And both of them shrank.


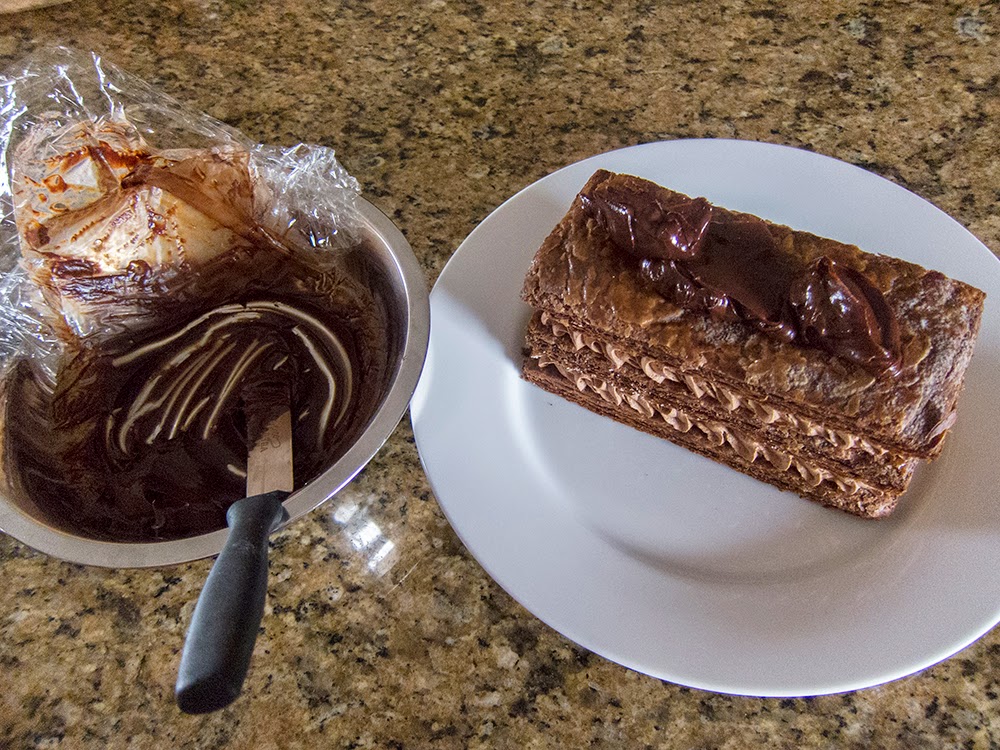
Having chosen the weighted down piece for my assembly, I trimmed the edges and cut it into thirds,


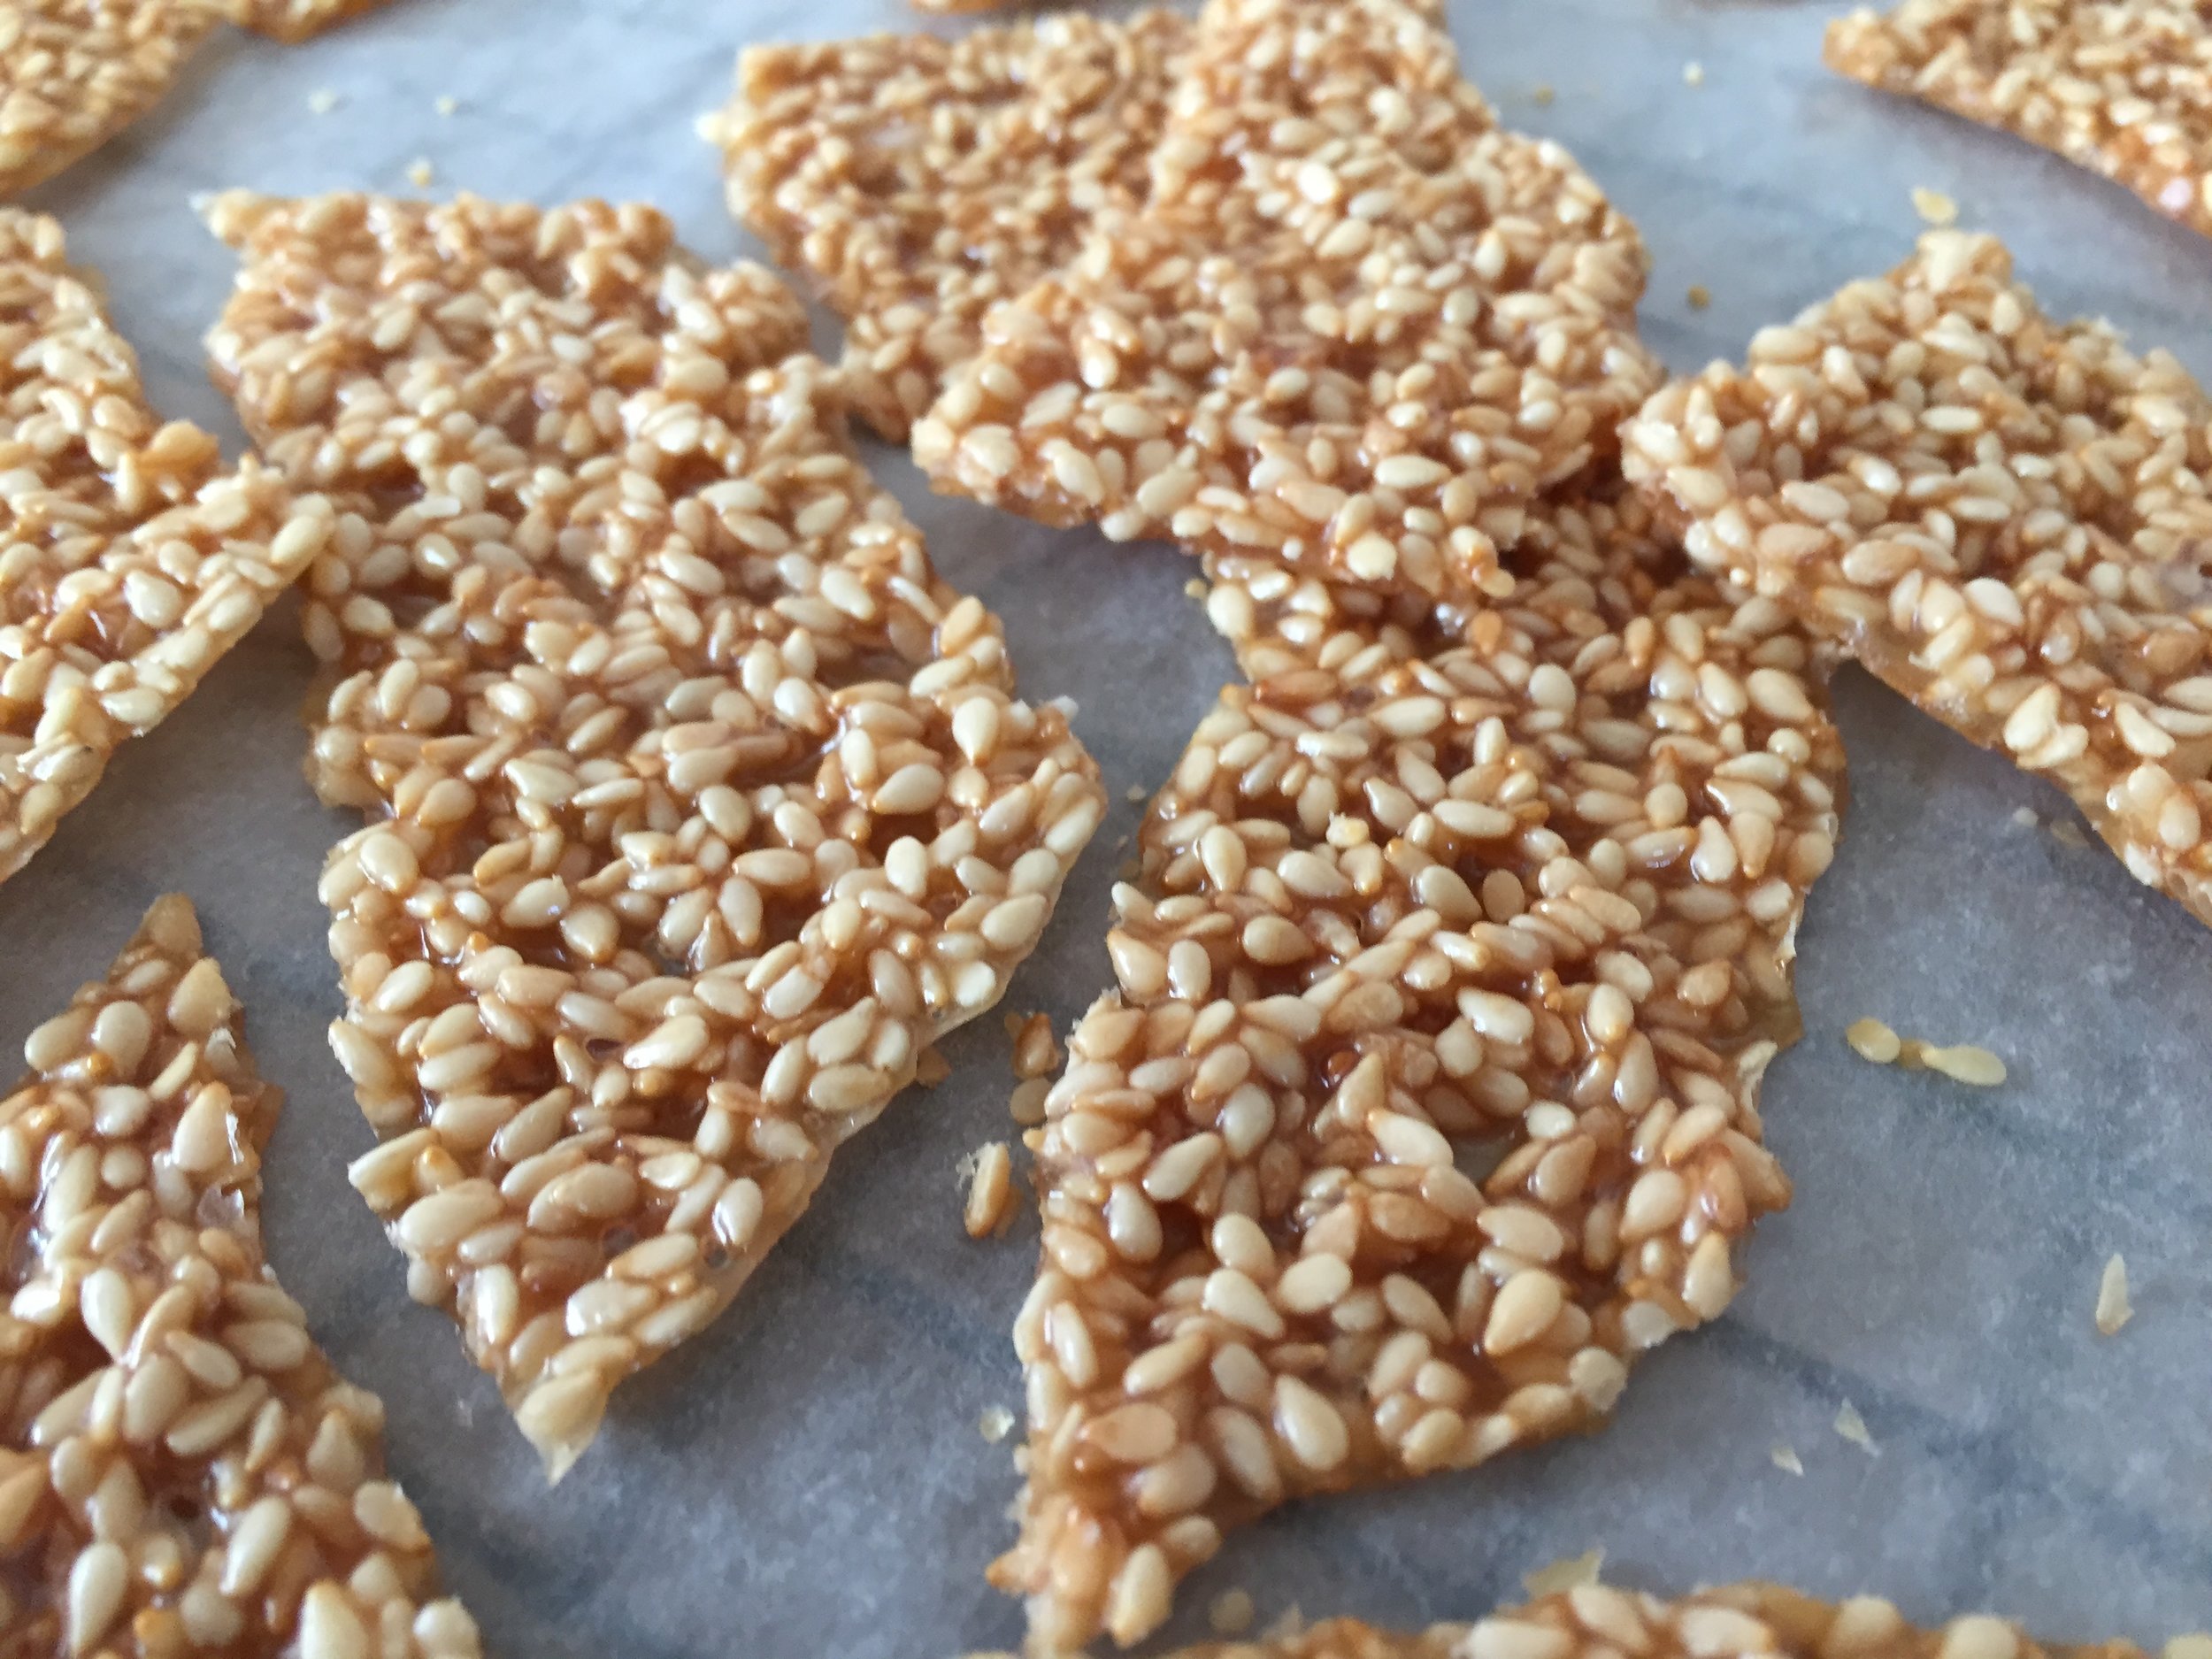
and then a dust of powdered sugar and under the broiler for a couple of minutes to caramelize.


On to the assembly!

I made a simple whipped ganache filling using 250 gm heavy cream and 70 gm chocolate.  While I was piping the first layer I was reminded of the radiatore pasta Steve and I had just eaten a couple of nights before - ruffles!


first whipped ganache layer


second puff layer


second whipped ganache layer


completed layers

Once all the layers were assembled I popped the whole thing into the fridge for 30 minutes before topping with a basic 1:1 ganache.


getting ready to spread the ganache

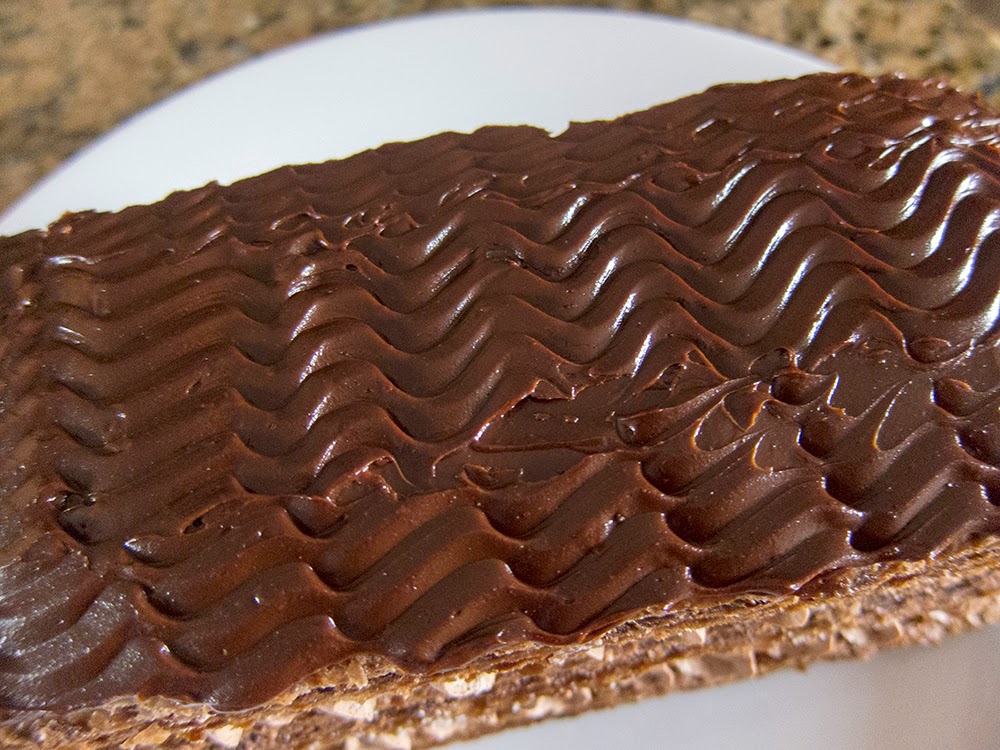
used a decorative comb for design

The result looked pretty cool, but the flavor of the puff was disappointing - rather boring and not terribly chocolatey.  I also felt the puff layers were too thick and should have been more crisp and flakey.

What would I do differently next time?  Use standard puff pastry (not chocolate), roll it more thinly, let it rest longer so as to reduce shrinkage, and prick the dough with a fork before weighing it down and baking it.

Steve's reaction?  "What's so special about mille-feuille?"

OK, OK - back to the drawing board!


Pain gourmand au chocolat

This was my first attempt at making pains gourmands au chocolat, the second recipe in La Patisserie des Reves by Philippe Conticini, and what a pleasant surprise!

Here I'll share a bit about the process and offer some ingredient suggestions. The recipe is straight forward, the dough easy to prepare and handle, and the final product a lovely roll with a small crumb, nice texture and smooth chocolate flavor.  What a great addition to a special breakfast, weekend brunch or afternoon tea.

Here's a brief synopsis of the process:  melt the chocolate and butter over a bain marie and let cool until tepid.

Mix the rest of the ingredients (except for the chocolate chips) and knead on low for 5 minutes and then on medium for 5 minutes.  Turn back to low speed and add the tepid chocolate-butter mixture in three additions, blending after each addition until incorporated.

As you can see my 6 qt KitchenAid can handle this amount of dough very easily.  See how the dough has cleaned the sides of the bowl.  Now add the chocolate chips on low speed.

And here's the dough, all chocolate chipped, ready to be divided and shaped into boules.

Above: boules ready for a 3 hour room temp rise.

Below: after the rise, egg washed and sprinkled with raw sugar

Just out of the oven . . . . .

and time for a taste!

Steve and I sliced into one for a first taste sans garniture, then followed that with a dollop of raspberry jam, which was delightful.

The wheels are already turning with other possibilities - how about sandwiched with layers of chocolate ganache and caramel mascarpone cream?  Or a chocolate version of Bostock with chocolate almond (or hazelnut!) cream and lightly spiced poached pear?  Or a delicious bread pudding with tart cherries, pecans and chocolate chunks?  Just imagine!

Now for a few ingredient notes: when the recipe calls for chocolat noir, sucre roux, fleur de sel, cacao en poudre, I use the following:  Valrhona Manjari 64%, coarse raw sugar, Beanilla's vanilla fleur de sel (one of my favorite things!), and Penzey's Dutch process cocoa powder. 

It is not uncommon for French recipes to call for water and powdered milk in some viennoiserie doughs. When I see those two ingredients, I replace them with whole milk, e.g. 200 ml of water and 12 gm of poudre de lait = 212 gm of whole milk in my book.

This recipe calls for farine type 55 which is a French flour often used for both bread and general baking. Based on online research, as well as some experimentation of my own while in Paris, when type 55 is the recommended flour, here in the USA I use all purpose flour, but replace a percentage (15-20% by weight) with bread flour to yield a decent equivalent of French type 55. Oh, and I use King Arthur!

A note about yeast: many French recipes call for levure boulanger or fresh yeast. I use instant dry yeast and convert by taking 30% by weight of the amount of fresh yeast called for in the recipe.  e.g.  25 gm fresh yeast = ~7 gm instant. The beauty of instant yeast is longer shelf life (fresh has only 2 weeks at most) and no need to hydrate or "proof" it before adding it into your dough.

I followed the recipe instructions to divide the final dough into six approximately 150 gm boules, but since I generally prefer smaller portions, next time I'd consider 60-80 gm pieces, shaping them into rolls or loaves, depending on what I plan to do with them.

Next up - Chausson Napolitain!