Lemon ricotta blueberry tarts

IMG_4129.JPG

It’s definitely blueberry season here in West Michigan - love it! We’ve been deep into it for the past few weeks and they’re still coming. Of course I simply had to create something with these luscious orbs so I turned to some of my favorite base recipes.

IMG_4139.JPG

I love choosing my components and flavor profiles while giving myself plenty of time to make each part, assembling the final result when I’m ready to serve and enjoy. The freezer plays an important roll here folks and is one of the most useful tools in the baking and pastry armamentarium. Hip hip hooray for freezers!

I recently purchased a set of 80 mm square perforated tartlet forms that came with a 6-well silicone mold to create fillings that fit oh so nicely in or atop the tart shell. They’re made by my favorite Italian silicone flexi-mold maker Silikomart. What a cool way to create a composed tart - right up my alley. And let’s not forget - soooo many possibilities.

Of course I’ve been itching to try them out and what better way than creating a blueberry lemon flavor combo to help celebrate our summer’s berry bounty.

IMG_4118.jpg

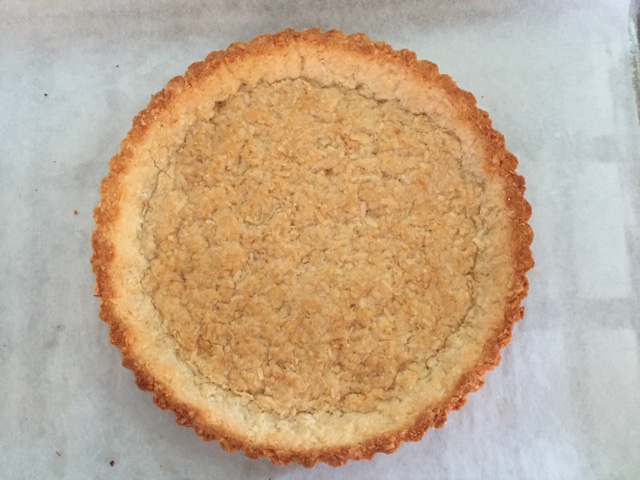
Perforated tart forms have been available for some years now, the idea being that the tart crust will brown ever so golden-ly since the dough is exposed to more oven heat via the numerous little holes.

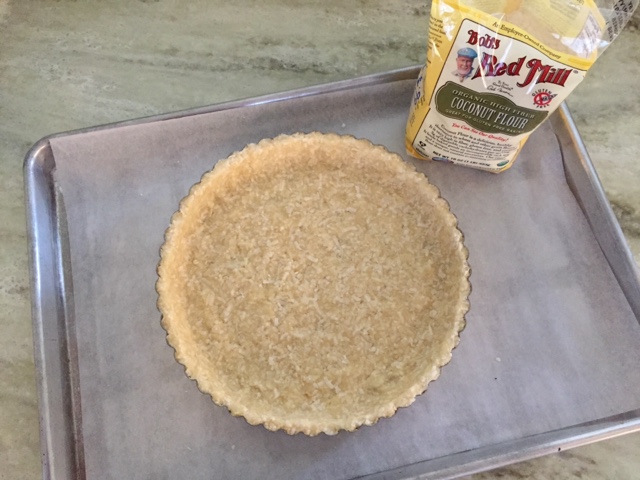
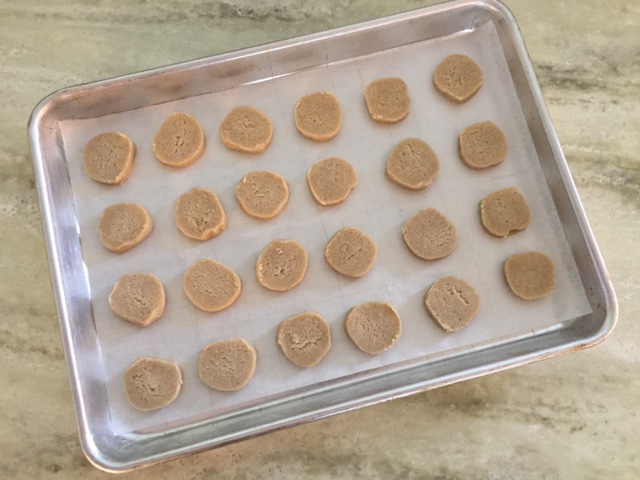
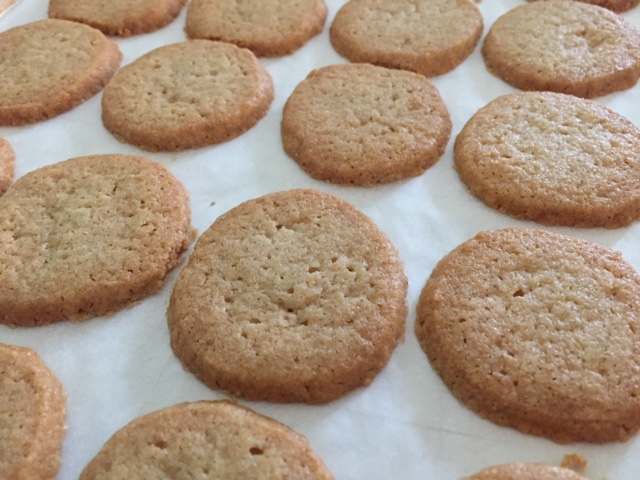
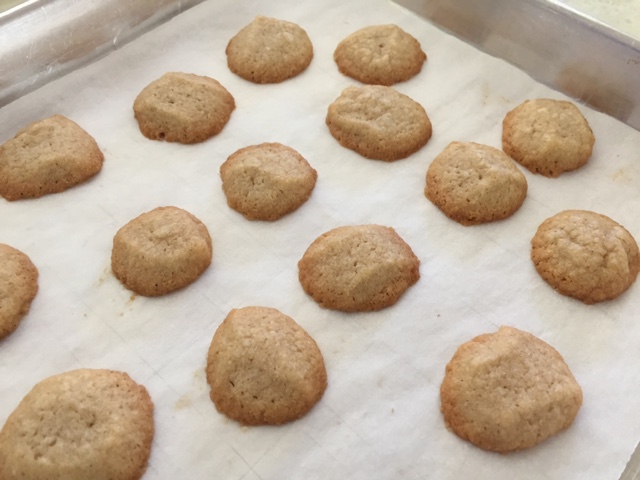
For this project I started with a version of pâte sucrée based on a Claudia Fleming recipe from her book “The Last Course”. It’s very reminiscent of a honey graham cracker: cream 227 g (2 sticks/8 ounces) unsalted softened butter with 50 g granulated sugar and 50 g dark brown sugar until smooth; add 84 g (1/4 cup) honey and beat until well blended; in a separate bowl mix together 195 g (1.5 cups) all purpose flour, 125 g (1 cup) whole wheat pastry flour, 1 teaspoon salt, a pinch of cinnamon and some freshly grated nutmeg; add the dry ingredients to the butter/sugar/honey mixture in two additions and blend just until the dough comes together. Wrap in plastic wrap and chill at least an hour before rolling out.

NOTE: this makes more than needed for the six square tarts; the extra dough will be OK wrapped in the fridge for a couple of days (if you have another use for it soon) or in the freezer for several months. If frozen, thaw overnight in the fridge before using.

I lined my square tart forms, blind baked them and filled them with my favorite lemon tart filling á la Jacques Genin, pouring the still warm mixture into the baked shells (note: the baked shells don’t have to cool all the way before adding the lemon filling). Bake at 300ºF for about 10-15 minutes until the filling is set (look for just a hint of jiggle in the center). Let cool and store covered in the fridge for a day if you’re planning on serving them soon or freeze for several days or up to 1-2 weeks. If frozen, you can top with the ricotta custards right out of the freezer (more on that coming up!).

IMG_4121.jpg

It’s all about the components - work on them step-by-step then put it all together for the pièce de resistance!

Now for the lemon ricotta filling (makes plenty for six 80 mm square tarts plus a number of additional flexi-mold shapes of your choice - I did a bunch of ingots which are just waiting in my freezer for the next creation!).

IMG_4122.jpg

Blend 2 cups whole milk ricotta with 150 g (3/4 cup) granulated sugar, 1 tablespoon cornstarch, 1 teaspoon lemon zest (or lemon/lime zest combo), 1 teaspoon vanilla and 3 large eggs. In this case I also blended in 1/4 cup of leftover lemon tart filling to add a bit more tang.

Heat the oven to 325ºF. Fill your chosen flexi-molds and place the mold(s) on a sheet pan. Carefully pour hot water around the base of the molds so as to create a shallow water bath around the molds. Bake about 20 minutes until set.

Remove from the oven, gently lift the flexi-mold(s) and place on a wire grid to cool. Once cool, place the molds in the freezer to firm up, at least 4 hours or overnight.

When ready to assemble, pop the frozen ricotta custards out of the molds and place on top of the lemon filled tarts.

IMG_4123.jpg
IMG_4124.jpg

Once this step is complete, place the assembled tarts in the fridge for several hours to allow the ricotta custards to thaw. The custards will hold their shape in the fridge and be ready for the blueberry topping for serving. Yes!

IMG_4128.jpg

For the blueberry topping: place 2 cups fresh blueberries, 50 g sugar, 2 tablespoons water and the zest of a lemon in a saucepan over medium heat until the berries pop (4-5 minutes). Cook another few minutes to jam-ify a bit, transfer to a clean bowl, stir in a splash of lemon juice and chill. When ready to garnish your tarts, stir in an additional 1 cup fresh blueberries and spoon the topping over the chilled lemon tarts. You’ll have plenty - the leftovers will keep in the fridge in a covered container for 2-3 days (hmmm . . how about on top of your favorite vanilla or berry or peach ice cream?). Sounds deelish.

Et voilà! You are ready to enjoy a delicious summer treat. The combo of the honeyed whole wheat crust, tart and tangy citrus filling, smooth ricotta custard and luscious berries is absolutely stunning!

And yes - Steve gave it a thumbs up!

IMG_4130.JPG

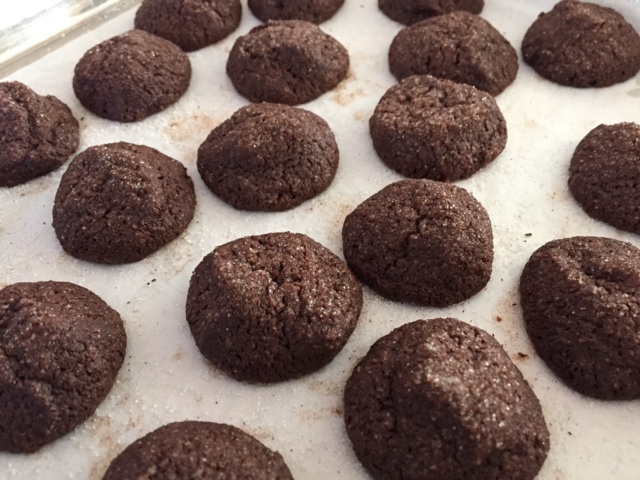
Ooooo - next time how about chocolate pâte sucrée, dark chocolate ganache filling, topped with an orange hazelnut custard and garnished with crunchy hazelnut praline? Sounds like a great autumn/winter project to me!

Mocha custard tart

mocha.JPG

Fall is definitely in full swing here in west Michigan, even though we've had some unseasonably warm days of late. But we'll take it! Winter will be here soon enough.

This weekend's dinner for the Galloway household consisted of Steve's layered onion/carrot/garlic/chicken/potato dish oven-cooked low and slow in our Staub enameled cast iron cocotte. Mom contributed a spinach strawberry salad, and I opted for a tart recipe I've had my eye on for awhile. I mean really, it's all about tarts for The Tarte!

I believe I've previously mentioned Alice Medrich's book Flavor Flours which I discovered in our local library some months ago. I've since purchased my own copy and am so satisfied with the recipes I've made so far. The book focuses on a number of alternate flours like teff, sorghum, chestnut, rice, oat and corn as well as nut flours (which I am totally on board with!).

The tart recipe calls for a GF teff chocolate crust, but I opted to use my stand-by chocolate short dough from the CIA's Baking and Pastry book. It was the first book I purchased after completing my Diplôme de Pâtisserie and mon stage in Paris in early 2007. Even though it's an older 2004 edition I still turn to it time and time again for all sorts of tips, techniques and recipes.

And I've been using this chocolate short dough ever since. 

Tart ring lined and ready to bake

Tart ring lined and ready to bake

After fork-pricking the dough all over, chill the lined ring in the freezer for 15 minutes or so while heating the oven to 325ºF. The chill stabilizes the butter and helps the dough keep its shape during blind baking. Line the firm dough with a round of parchment, fill it with dried beans and bake for 12-15 minutes with weights, then another 5-8 minutes without weights. The crust should be set and look dry. Remember - it's your job to watch what's going on in that oven!

All baked and ready to fill

All baked and ready to fill

Lower the oven temp to 300ºF for the next phase of the project.

Just a note here. If you'd like to change things up a bit, you can use any pie or tart dough your little heart desires - choose your favorite pâte brisée or pâte sucrée (and it doesn't even have to be chocolate) or even a chocolate wafer or graham cracker or toasted coconut crumb crust. Add some chopped nuts if you want - you decide. Just remember to blind bake it first.

The KEY part to this tart is THE FILLING, and, once you make it, you'll know what I mean. So easy and so deliciously smooth it involves heating 1.5 cups heavy cream, 130 g sugar, 35 g cocoa powder (Dutch process or natural) and 55 g unsalted butter in a saucepan on the medium heat, stirring until everything is blended and it starts to simmer around the edges.

Remove from the heat and whisk in 1 teaspoon instant espresso powder and 3/4 teaspoon pure vanilla extract. Set aside.

Once the blind baked shell is out of the oven, whisk 1 large egg plus 1 yolk into the cream mixture and pour the filling into the hot crust. It's pretty loose so steady yourself for gentle placement into the oven without sloshing. You can do it.

Filled and ready for the oven

Filled and ready for the oven

Bake for 10-15 minutes or even longer. I baked mine around 18-20 minutes before I was content with a nice wiggly/jiggly custard without waves rippling across the surface.

Cool on a rack and serve slightly warm or at room temperature. Here's my cooled tart - kinda reminiscent of a moonscape don't ya think? 

mochatart.JPG

While Alice dusts her tart with cocoa powder I was going for a bit more pizazz. I usually have some baked cookie or streusel crumbs in my freezer to use at a moment's notice whether it's to top ice cream, add a crunchy layer to a cakey-creamy type of concoction or to garnish a tart. Yup.

Out came the chocolate shortbread cookie crumbs which I sprinkled over the top of the tart, leaving a clear edge around the periphery.

mochatart.JPG

Next up -crème Chantilly! But of course. Steve claims that anything is better with whipped cream on it, and, in this case, he was absolutely right. But then I pretty much knew that already.

For one cup of heavy cream I add 1-2 tablespoons powdered sugar and a splash of pure vanilla extract. Whip to medium soft peaks, enough so it will hold its shape, and spread or pipe as you wish.

mochatart.JPG

Soft, pillowy mounds of cream like a string of rustic pearls entice us to dig in. And dig in we did.

mochatarat.JPG
mochatart.JPG

This is one of the BEST fillings I have had in a long time. Smooth, luscious, creamy yet light with just the right intensity of chocolate and a hint of espresso - aaaaahhhhh. And the chocolate short crust, chocolate crumbs and whipped cream provided just the right marriage of textures and flavors. Oh boy.

mochatart.JPG

Yes there were leftovers but the good news is this will keep covered in the fridge for a couple of days. Don't waste a bite of this one folks.

Before I leave you I'd like to share a few autumn images from our corner of the planet. Enjoy the season wherever you are and take care.

Some new flour ingredients


Thanks to my recent discovery of Alice Medrich's book "Flavor Flours", I've been playing around with recipes using a variety of alternative flours - and I've only begun to scratch the surface.

They happen to be gluten free, although that was not the primary reason for my experiments.  I'm intrigued by the many options now available to both the baking and pastry enthusiast and pastry professional.  Always learning, always testing, always trying new things.  That's what it's all about!

First off - coconut flour.

This recipe is for a tart crust, and it is, in a word, DEElicious - very reminiscent of the quintessential American coconut macaroon.

It's easy to put together.  Combine 40 g coconut flour, 100 g shredded unsweetened coconut, 1/4 teaspoon baking powder, 1/2 teaspoon salt, 85 g soft unsalted butter, 100 g sugar and 1 large egg white in a bowl.  Mix until the ingredients are blended then press evenly into a 9" fluted, removable bottom tart pan, making the sides thicker than the bottom.


Heat your oven to 350ºF, set the lined tart pan on a parchment lined baking sheet and bake 18-20 minutes until nicely browned.


Let cool for 15 minutes or so then push the bottom up to free the crust from the pan and loosen the sides. Finish cooling for 2 hours before filling.


Now here's where I leave the filling up to you.  

I filled mine with coconut pastry cream made by replacing the whole milk in my standard recipe with coconut milk - yum.  Then you have the option of topping the tart with mango slices, mixed tropical fruits, mixed berries or whatever your heart desires.

Or how about a nice chocolate ganache filling topped with a sprinkling of toasted coconut?

Or fill the crust with some toasted, chopped nuts of choice mixed with some homemade caramel then cover with a whipped milk chocolate cream.

Or perhaps a luscious lemon-lime curd with some finely diced crystallized ginger?

You decide.

Next up - oat and rice flour.  This one is an oat sablé recipe (and you know I'm a sucker for shortbread!).


Whisk together 140 g oat flour, 55 g white rice flour, 1/4 teaspoon salt, 1/8 teaspoon baking soda in a large bowl. Add 130 g sugar, 60 g chunked up cream cheese, 170 g chunked up soft butter and 1 teaspoon vanilla extract and mix with a fork or spatula to blend into a smooth dough.

Form two logs about 1.5 inches in diameter (or whatever diameter you wish), wrap tightly in wax paper or film wrap and refrigerate for at least 2 hours or overnight.  You may also freeze the dough for up to 3 months.

First I did the log approach.  I sliced rounds and baked at 325ºF for 12-15 minutes until nicely browned.


The cookies did spread a bit, something I'm suspect has to do with the difference in structure of a non-gluten dough. Plus the ratio of sugar to the total flour is higher than my typical shortbread and could also contribute to more spread during baking.  It's a learning curve to be sure.

Next I took a portion of dough, formed small nuggets and baked those.


They had a more faceted look and were rather pleasing in the small-bite sense of the word.

These are GOOD - a nice crunch, butteriness and delicious flavor all the way around. Yes.

And now - teff! 

An ancient Ethiopian grain, teff is loaded with calcium, iron, Vitamin C, fiber, protein and more.

I chose a chocolate sablé recipe for my first trial with this healthy and interesting ingredient. I know - more shortbread.


Place 150 g teff flour, 60 g white rice flour, 35 g unsweetened cocoa powder, 135 g sugar, scant 1/2 teaspoon salt and 1/8 teaspoon baking soda in a large bowl and whisk to blend.

Add 170 g unsalted chunked up soft butter, 60 g chunked up cream cheese, 1 tablespoon water and 1 teaspoon vanilla extract to the dry ingredients and mix with a fork or spatula until blended into a smooth dough.

You can form logs as with the oat sablés but I chose to wrap and chill the dough then simply form rough ball shaped pieces sprinkled with a little sugar. I placed them on a parchment lined sheet pan and held them in the freezer while the oven was heating.


Heat your oven to 325ºF and bake for about 25 minutes until firm to the touch.  While it's hard to tell if they've browned, I found they looked more dry with a bit of cracking on the surface as a reasonable sign that they were done.


These babies did not disappoint!  Nice chocolate flavor, a texture with just a hint of fine graininess (not a bad thing, by the way), plus deliciously crisp and buttery. And Steve liked them too!

"Flavor Flours" is divided into sections by type of flour, including not only the ones I've used so far, but also chestnut, sorghum, buckwheat, corn and nut flours.

There is definitely another world out there folks! Here's to new tastes and textures. Yes indeed.