Cheers to all!

As we get ready to say goodbye to 2022, another interesting year to be sure, here’s a quick note to say hi, wish you all good cheer and offer up a toast to many happy baking experiences to come.

It’s been weeks since I’ve posted. The time just goes! Family visits, teaching classes, baking cookies and cakes, simply moving from day to day as we continue to navigate through life - and now here it is Christmas Day. Wow.

Having finished up various holiday baking projects and staying hunkered down during our recent snow storm, yesterday I turned back to bread baking - English muffins and simple loaves for our larder. As they say, bread is the staff of life.

Peace to all and a Happy New Year!

Late autumn update/menu is back!

After a recent hard frost

Baking season is definitely here and autumn colors are gone for the most part. Holiday menus are already being planned and there’s more of an itch to get into the kitchen. For me it’s still about crisp fresh mornings, heavy frosts, bright blue skies with longer shadows and perhaps just a hint of the first snowflakes that might soon appear.

My menu page has been resurrected for those of you locals who might be interested in some goodies over the next couple of months.

I’m in the throes of planning for a class on afternoon tea with treats the likes of scones, shortbread, financiers and madeleines. Oh boy!

Pumpkin scones

I’ve baked up some delightful autumn pastries for Kim and her peeps down the street.

Pumpkin pecan Danish

Cinnamon swirl buns

My bread project is slowly coming to a finale as I draft a post about the dough that has become my fave of late. Mmmmm!

Sesame knots and simple butter brushed rolls

The Fulton farmer’s market has wrapped up the spring/summer/autumn season.


Enjoy the days ahead everyone.

On an end note, let me share just a few more images of autumn’s last breaths.

Fairy hair?

A few weeks ago

Frosted growth along the walking path

I hope to be back soon with more baking goodness!

Brioche craquelin encore

A16C22CD-914E-4EB8-B6C4-7ABA09A66B09.jpg

I first wrote about Thomas Keller’s version of this pastry back in February of 2015 - many moons ago - and a lot has happened since, that’s for sure. I’ve been churning this through my mind for awhile and decided that autumn is a good time to write about it.

Some time back, earlier in the pandemic days, I received an email from a gentleman in NYC who was searching for tips on how to create a version of craquelin that he used to enjoy at one of François Payard’s pâtisseries (closed for several years now). He described it as having the perfect crunchy almond top that gave the orange scented brioche just the right je ne sais quoi.

Hurray! I had a project to research. Challenge accepted. I’ve puttered with it on and off and am finally getting around to setting pen to paper as it were.

1A19482D-29FC-4CAB-9436-C50E7DB45ED2.jpeg

I made two different versions in my quest to replicate his memory of this treat. The first made three full sized rounds in well buttered cake pans (I had two 9-inch and one 8-inch).

The process: using my freshly prepared base brioche dough, I mixed 100 g / 1/2 cup of brown sugar with a bunch of orange zest (probably 3 or 4 oranges - I eyeball it) . . . .

sprinkled half of it over the flattened dough . . . .

folded it in three as I attempted to work the filling into the dough, turned it 90 degrees, stretched it back out a bit, sprinkled the second half over it and folded it in thirds one more time.

Then into the fridge covered for an overnight rise.

Before the rise

Here it is the next morning.

I divided the dough into three pieces, about 400 g each ( a tad more for the two 9-inch and a tad less for the 8-inch), formed rounds and placed them in the prepped pans. Note the aluminum foil wrapped around the 9-inch pans. They have removable bottoms so I wanted to avoid any butter leakage during baking.

Cover with lightly buttered plastic wrap and let rise for 1.5 to 2 hours. Remember brioche is very enriched and requires a good rise for the hoped for fluffy and light end result.

Toward the end of the rise heat the oven to 350ºF.

After the rise

I used three topping variations just for comparison’s sake. Have some toasted sliced almonds at the ready. Make the crunchy sugar topping by blending 6 tablespoons granulated sugar with 1.5 teaspoons vanilla and 1 tablespoon water (this is enough for the three pans).

Drizzle about a third of the sugar mixture over each brioche. I left one without further adornment, topped one with sliced almonds and the third with both sliced almonds and some crushed raw sugar cubes.

Bake 35-40 minutes, rotating pans half way through, until nicely golden brown.

Sugar drizzled

Sugar drizzled with almonds

With added crushed raw sugar

Let sit about 10 minutes before un-molding and placing on racks to finish cooling.

I must say all were pretty tasty, but, being a sucker for crunchiness, I really enjoyed the sugar drizzle/almond/crushed sugar cube version.

The crumb was light and nicely flavored with the orange zest.

OK good! Now on to the second version for which I followed Joanne Chang’s approach from her book “Flour: Spectacular Recipes from Boston’s Flour Bakery + Cafe”.

I knew that Joanne had worked at Payard’s in NYC back in the beginning of her baking career, so what did I do? I sent her an email asking about the process they had used! She kindly directed me to her book (link above) which I found at our local library and delved into the steps.

A few differences: individual brioche, adding candied orange rind (like Keller does) with crushed raw sugar and a slightly different topping. I can do this.

Thin slice two oranges and poach the slices in simple syrup until softened and more translucent. Let them cool and drain on a wire rack then chop into small pieces. You can do this ahead and hold in the fridge for several days if need be.

I had about a cup of rind in the end. Crush raw sugar cubes to yield about 1/2 cup of rough pieces.

For a yield of nine ~ 80 g portions: using 720 g of cold brioche dough after its overnight fridge rise, roll the dough into an approximately 10” (25 cm) by 18” (45 cm) rectangle.

Distribute the chopped orange rind and crushed sugar over the top 2/3 of the dough.

Fold the bottom third up over the middle third.

Fold up again to cover the top third.

Cut nine slices, each about 1 3/4 inches (4.5 cm) wide. You can trim up the ends first if you like - I left mine au naturel.

Place spaced apart on a parchment lined cookie sheet, cover with lightly buttered plastic wrap and let rise about 1 1/2 to 2 hours.

Before the rise

Toward the end of that time frame heat the oven to 350ºF.

After the rise

Make a slurry by mixing one large egg, 50 g granulated sugar and 50 g sliced almonds in a medium bowl. Spoon the mixture over each brioche.


Bake about 30-35 minutes until golden brown. You know my mantra - always check sooner than later!!

Cool, dust with powdered sugar and enjoy!

Here’s a cross section - lovely pockets of orange flavor, nice crumb and pretty darn good crunchy top too!

Just goes to show you how you can create variations with your own favorite brioche or sweet bun dough. Have fun with it!

Beautiful colors are popping and fall is definitely in the air! Enjoy!!


Autumn update

Morning pastries

As we head into official autumn (calendar-wise), I wanted to share a few things I’ve been baking lately - scones for my mom’s assisted living facility; pastries for a neighbor’s morning gathering; French macaron trials for classes I’m teaching through our local school district’s adult enrichment program; late summer fruit torte - all good stuff!

Cinnamon oat crunch scones

Sometimes it’s nice to simply show you what I’ve been up to without all the steps and recipe details. I know we all like to experiment and see how things go. That’s me for sure. I’m always here to answer any questions you might have and share tips and techniques. All you have to do is ask.

Don’t forget to check out my recipe page for all kinds of base recipes to get your creative juices flowing. Or set up a class for yourself and a few friends.

One important baking project was spurred on by a neighborhood cookout to celebrate Carla and Jay’s recent marriage. Carla’s husband Daryl died suddenly 2 years ago and Jay’s wife had died 7 years ago. C and J met a year or so ago and realized that they should be together - and so they are. Congrats to Jay and Carla!!

I made my favorite financier cakes with a mini tiered/roasted strawberry butter-creamed affair surrounded by individual petite cakes and fresh Michigan blueberry garnish. Yummy!

For another neighbor’s morning pastry request I went with almond blueberry Danish, tart cherry feuillitées and orange pecan crumble pull-apart buns. Triple yum!

Almond cream blueberry Danish

Tart cherry filling in puff pastry, topped with oat crunch

Orange pecan crumble pull aparts

Here’s another one - I needed to use up some laminated dough in my freezer before it was too late. That yeast doesn’t last forever you know. Using half a batch of dough (the other half became another Danish-y cream thing), I rolled it out to about a 10”x10” rectangle, spread it with a mixture of 2 tablespoons (28 g) soft butter, 70 g brown sugar, a couple of ounces (~60 g) of toasted ground walnuts and 2 teaspoons espresso powder, rolled it into a log, then sliced ten 1-inch slices. I baked them in buttered/sugared individual 3-inch cake tins/ramekins and then rolled them in espresso sugar (mix espresso powder into granulated sugar to your liking) once out of the oven. Pretty tasty I’d say!

Espresso walnut buns

In preparation for some upcoming French macaron classes I’m teaching, I wanted to do a couple of test batches. I’ve been tweaking my recipe and hope to share it soon. I’ll admit that macaron making has been out of my baking life for awhile. Dough is my passion, but I feel challenged to jump back in and get it juuuuuuust right! So many variables.

These are a pistachio version with an apricot honey Swiss meringue buttercream filling and a central dot of reduced raspberry purée. Yup.

Another version with roasted strawberry buttercream and a center of dark chocolate ganache. Double yup.

Isn’t baking wonderful?!!

Oh - and one more. A peach blueberry version of Marian Burros’ classic plum torte.

Ready to bake

All baked up

Talk about delicious! We enjoyed this torte for dessert topped with vanilla ice cream at cousin Jen’s recently. Triple yup.

Autumn is all about spices, nuts, pears, pumpkins, apples, maple, chocolate, custards and more - get into that kitchen and bake up some goodness!

Bacon cheddar corn scones

So much sweet corn this year - gotta try something a little different. Why not savory scones!

Steve’s been buying up batches of ears, cutting the kernels off and freezing a lot of it, but he’s also grilled some ears and cut off the grilled kernels for adding to stir fries, frittatas, fried rice, corn chowder - you name it!

I went with a slight variant of my cheddar scone recipe and added grilled corn kernels and bacon bits to the mix. A small pinch of cayenne gives it the right hint of heat without being overwhelming (you can always add more if you’re into the heat factor). If you’d like to make these, here’s a PDF of the recipe fully written for this particular project.

Remember - cold butter and cold cream/egg, work quickly and efficiently to bring it all together.

Place dry ingredients into a large enough mixing bowl to accommodate your hands; work cold butter into the mix by flattening the butter between your fingertips and “flaking” the butter into the flour mixture. Leave visible pieces of butter which will help achieve a light and tender crumb.

Place grated cheese (I like a combo of gruyère and cheddar), corn kernels and bacon on top of the dry ingredients. Pour the cold cream/egg mixture into the center and toss it all with a fork to moisten. Bring everything together quickly with a bowl scraper then turn out onto a lightly floured work surface to gently knead a few times to incorporate any dry bits.

This recipe yields about 900 g of dough. I divide it in two, form each half into a 5”-ish round about 3/4 inch thick and cut into 8 wedges for a yield of 16. I happen to prefer the petite sizes, but if you’d like larger scones, cut each round into 6 wedges (yield 12) or even 4 (yield 8) for a pretty generous sized serving. It’s all up to you.

Once the scones are placed on a parchment lined sheet pan, brush with a little milk and sprinkle more cheese on top.


I pop the tray into the freezer and place a second sheet pan in the oven while heating to 400ºF.

Place the scone pan onto the heated sheet pan, bake 10 minutes, rotate trays and bake another 10 minutes until nicely browned. Reduce oven temp to 375ºF half way through if browning too quickly. If I’ve said it once, I’ve said it a thousand times - all ovens are different!

Enjoy slightly warm or cool fully before serving. Hint - a drizzle of honey adds a nice touch.

Crispy outside, moist and studded with goodness inside. You bet.

Work your own wonders with fresh sweet corn. Time’s a wasting!

Happy autumn!!

Peach melba crêpe cake

Happy September everyone! Autumn is my favorite season and the bounty of summer is still with us - peaches, blueberries, corn, tomatoes and more. Gotta love it.

On the heels of a savory crêpe making demo at a nearby independent living facility, my mind started thinking about a crêpe cake using late summer fruits - peaches and raspberries to be exact.

I was spurred along by both the memory of a chocolate crêpe cake I made back during our Providence days as well as dessert planning for a family meal at cousin Jen’s. Peach melba crêpe cake it is!

Many have written about the story of peach melba - classically vanilla ice cream, lightly poached peaches and raspberry sauce - a match made in many heavens if you ask me. It was created in the late 1800s by Auguste Escoffier in honor of the Australian soprano Nellie Melba. And the rest is history as they say.

As I planned my creation, along with the obvious crêpes, I went with peach caramel mascarpone cream and raspberry coulis for the assembly. Here’s the full recipe for the dessert - I’ll take you through the steps now. You can prepare the components ahead and assemble it all either the day before or the day of serving.

I did my crêpe cooking a couple of days ahead and held them wrapped in the fridge. I prefer these French pancakes nicely browned unlike some who claim they should be light in color. Nuh-uh - not me.

A friend had gifted me one of those cool wooden crêpe tools that help spread the batter out thinly with rounded (sorta) edges - it takes a bit of practice. It took a couple of tries to get the wrist motion just right, and it worked nicely on the non-stick pan I used. Actually I ended up trimming the thin pancakes to 8-inch rounds for stacking so I didn’t really care if my edges were goofy.

The peach purée can be made a couple of days ahead as well. Here I peeled, stoned and sliced 3 medium-ish Red Havens (the BEST Michigan peaches!), mixed with a couple of tablespoons sugar, a pinch of salt and a squeeze of lemon juice.

I blended it all up with my immersion blender then brought it to a boil over medium heat to dissolve the sugar. Simmer for 10-15 minutes to reduce by about half.

Reducing

Well on the way to concentrated flavor

The initial weight of the un-prepped peaches was about 500 g and in the end, after peeling, pitting, slicing, cooking and reducing, the purée yield was about 200 g.

In a similar vein, to create my raspberry coulis I puréed about 400 g raspberries, pressed the mix through a sieve to separate the seeds, leaving me with about 200 g of lovely-ness. Once I’ve puréed and strained fruit, I typically add about 10% by weight of sugar (in this case about 20 g), a pinch of salt and a squeeze of lemon juice.

Bring to a boil to dissolve the sugar then either cool and refrigerate for later or reduce it down a bit for flavor concentration.

My 8-inch open tart ring worked like a charm to trim all the crêpes to 8-inch rounds, and Steve and I snacked on the trimmings!

The mascarpone cream is a combo of 8 ounces mascarpone, a cup of heavy cream, 1/4 cup of caramel sauce and a teaspoon of vanilla extract. Whipped up to medium soft peaks, it’s a delicious layering and garnishing cream. I finished it off by blending in about 120 g of my peach purée. Yum.

Let’s assemble! One crêpe down on the plate, a layer of mascarpone spread over, a drizzle or dotting (artistic license here) of raspberry coulis and repeat, repeat, repeat . . . .

I had just enough cream for 18 layers of crêpes as well as a top coating.

Making progress

As you layer this kind of tower, it helps to use your flat palms to press gently on each crêpe layer (before you add the next spread of cream) to try and keep things even. Mine ultimately came out a bit tilted but it still tasted wonderful.

I used my handy small offset spatula to clean the sides up but you don’t really have to do that since this is a rather devil-may-care process for a rustic finish.

Once assembled, refrigerate it at least a couple of hours before serving. Alternatively you can have it ready a day or even two ahead of time.

Dessert time! A pool of raspberry coulis on the plate, a slice of cake topped by fresh peach chunks.

The group loved this! The tart raspberry sauce and just-sweet-enough juicy peaches gave a perfect balance to the creamy crêpe layers. Yes.

And the leftovers weren’t too shabby either!

As we move through September and beyond don’t forget to appreciate the beauty around you. There’s something about petite sweet peas poking out of the undergrowth that always makes me smile.

And you can’t beat this gorgeous contrast! Here’s to autumn!

Summer baking - peach blueberry cobbler and a bit more

Peach blueberry cobbler

Recently we had a lovely cool-in-the-50s day with a gentle/sometimes heavy soaking rain that lasted ALL day! Somewhat unusual for August, It was nonetheless much needed and I could tell the earth was so happy.

I puttered in the kitchen using up some fresh Michigan peaches that I hadn’t otherwise had time for and fresh blueberries from one of our great local markets.

A couple of years ago I had purchased Lindsey Shere’s “Chez Panisse Desserts” but have only tried a smattering of recipes, most notably the almond torte. I turned to and checked out the cobbler dough - biscuit like (no egg which I normally use to make my scones), it comes together in a bowl, by hand, with cold cubed unsalted butter and cold cream added to all purpose flour, baking powder, salt and a bit of sugar. You can create whatever shapes that delight you - I went for rough diamonds - or should I say diamonds in the rough?

Here’s my version of the cobbler dough: in a medium bowl blend 195 g/1.5 cups whole wheat pastry flour (Lindsey uses all purpose), 1/4 teaspoon fine sea salt, 2 1/4 teaspoons baking powder and 1.5 tablespoons sugar; blend in 85 g/6 tablespoons cold, cubed butter with your fingertips to create coarse crumbs but leaving some flattened pieces of butter visible in the mix; with a fork quickly mix in 3/4 cup of dairy consisting of half cold buttermilk and half cold heavy cream (Lindsey uses all heavy cream); bring together with a bowl scraper then turn out onto a piece of plastic wrap and bring in any remaining dry flour with your hands.

Fold the plastic wrap over the dough leaving enough space to lightly roll the dough between the plastic into a rectangle about 7”x10” and 1/3” thick. Chill until ready to use - that makes it easier to handle and to cut into your desired shapes.

SIDE NOTE: here’s a cobbler post a few years ago using another delicious topping dough.

Yum!

For this smallish sized cobbler I used about 4.5 to 5 cups of fruit - about 3.5 cups sliced peaches (peeled and de-stoned) and 1.5 cups blueberries - tossed with 3 tablespoons sugar and 1.5 tablespoon flour. Spread into a small Pyrex 7-ish by 10-ish casserole, I dotted a few bits of butter all over, placed my cobbler pieces on top, brushed them with milk and added a sprinkle of raw sugar.

Bake at 400ºF for 20-25 minutes until the fruit is bubbly and the topping golden brown. If you’re happy with the bubbly-ness of the fruit but need a bit more top browning, reduce the oven to 350ºF and give it another 5-10 minutes.

Serve warm, slightly warm or at room temperature and don’t forget either a dollop of whipped cream of a scoop of vanilla ice cream. Even a sprinkle of sliced, toasted almonds adds just that extra something. Creamy, crunchy, fruity and delicious.

Pretty tasty

Because it’s still blueberry season I had an itch to make Joanne Chang’s maple blueberry scones again too. Boy they’re good!!

I scoop them out in a more petite version than Joanne does. Lightly glazed, a cross between a scone and a muffin, the texture is wonderful. Best of all they hold up to a couple of days’ shelf life wrapped loosely in parchment paper at room temperature. A short 10 second microwave warm up is just the ticket before enjoying. They freeze well too!

Our neighbors were getting ready to drive their daughter up north to return to school so I gave them a fresh boxful for the road. Another neighbor is recovering from an injury so guess what - she was also a recipient.

Of course I did keep a couple on hand for morning coffee and savored every bite.

Summer marches on and I’m dreaming of cooler weather and autumn days bustling in the kitchen. Can’t wait!

Black-eyed Susans along the walking path

Cherry chocolate ganache teacakes

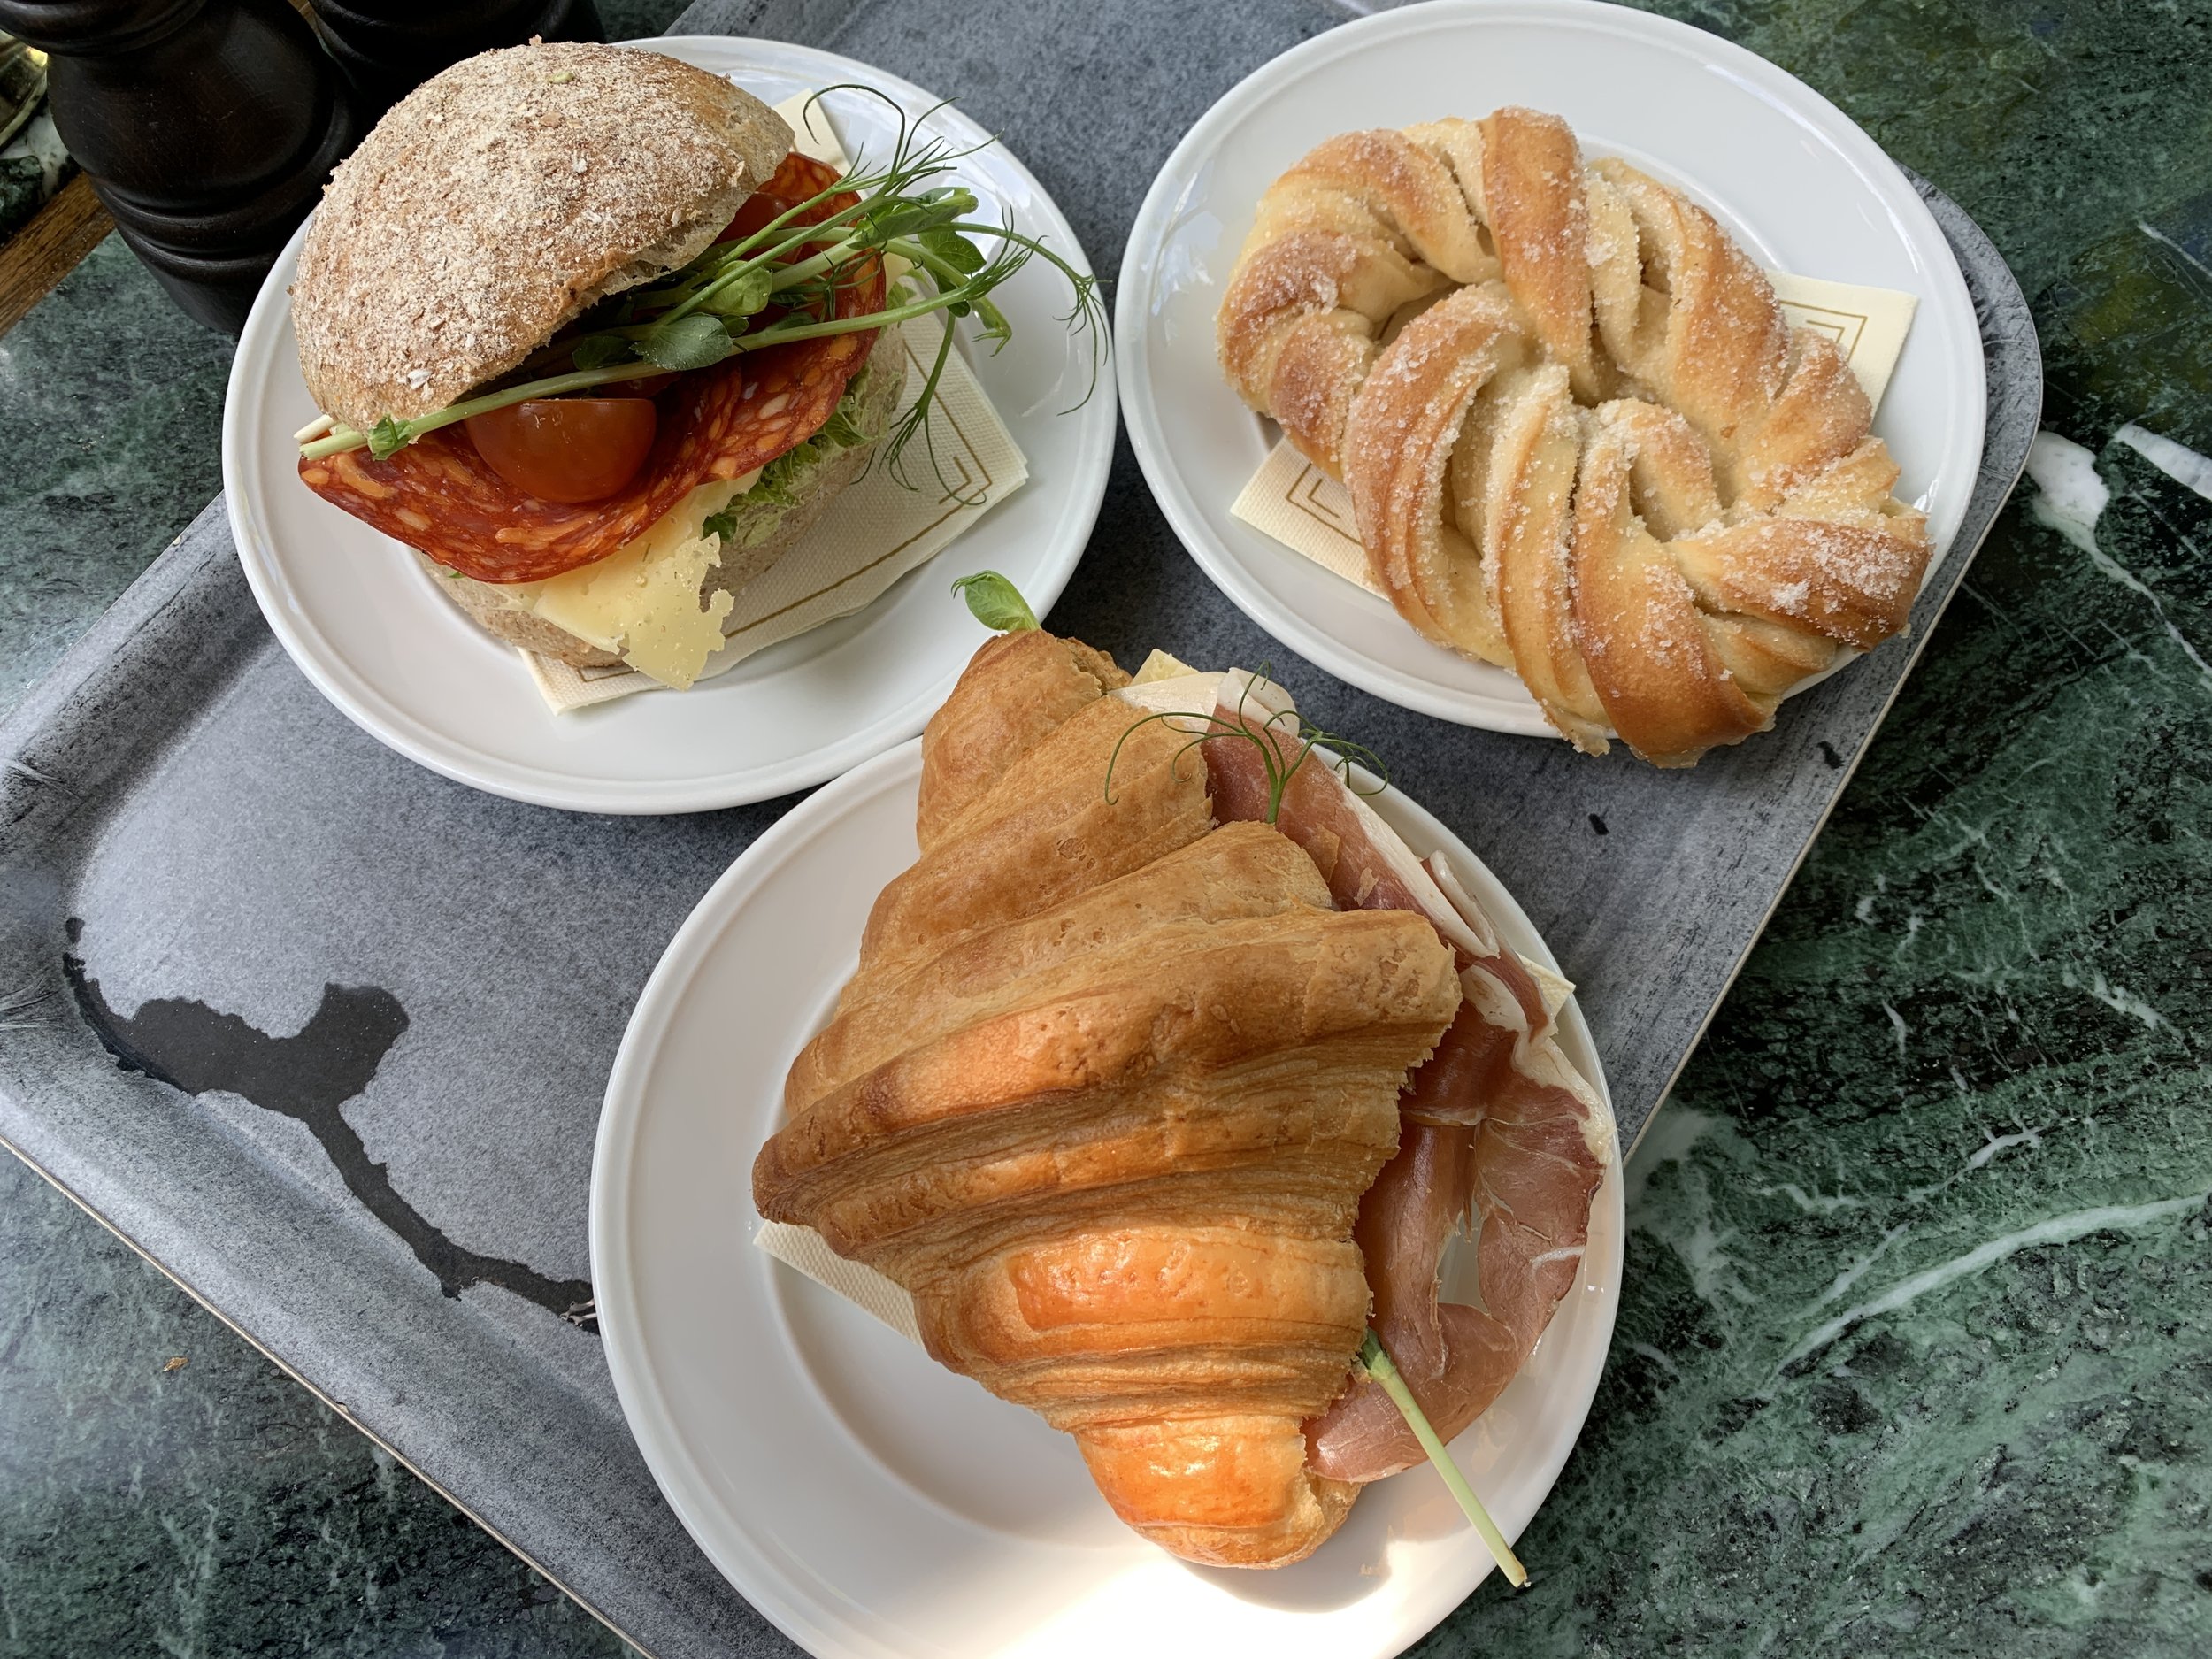
Hi all! It’s been a bit busy lately with some family birthday and anniversary celebrations which means any new baking projects and blogging have taken a back seat. Not to mention some pretty hot days here and there which haven’t inspired much kitchen activity.

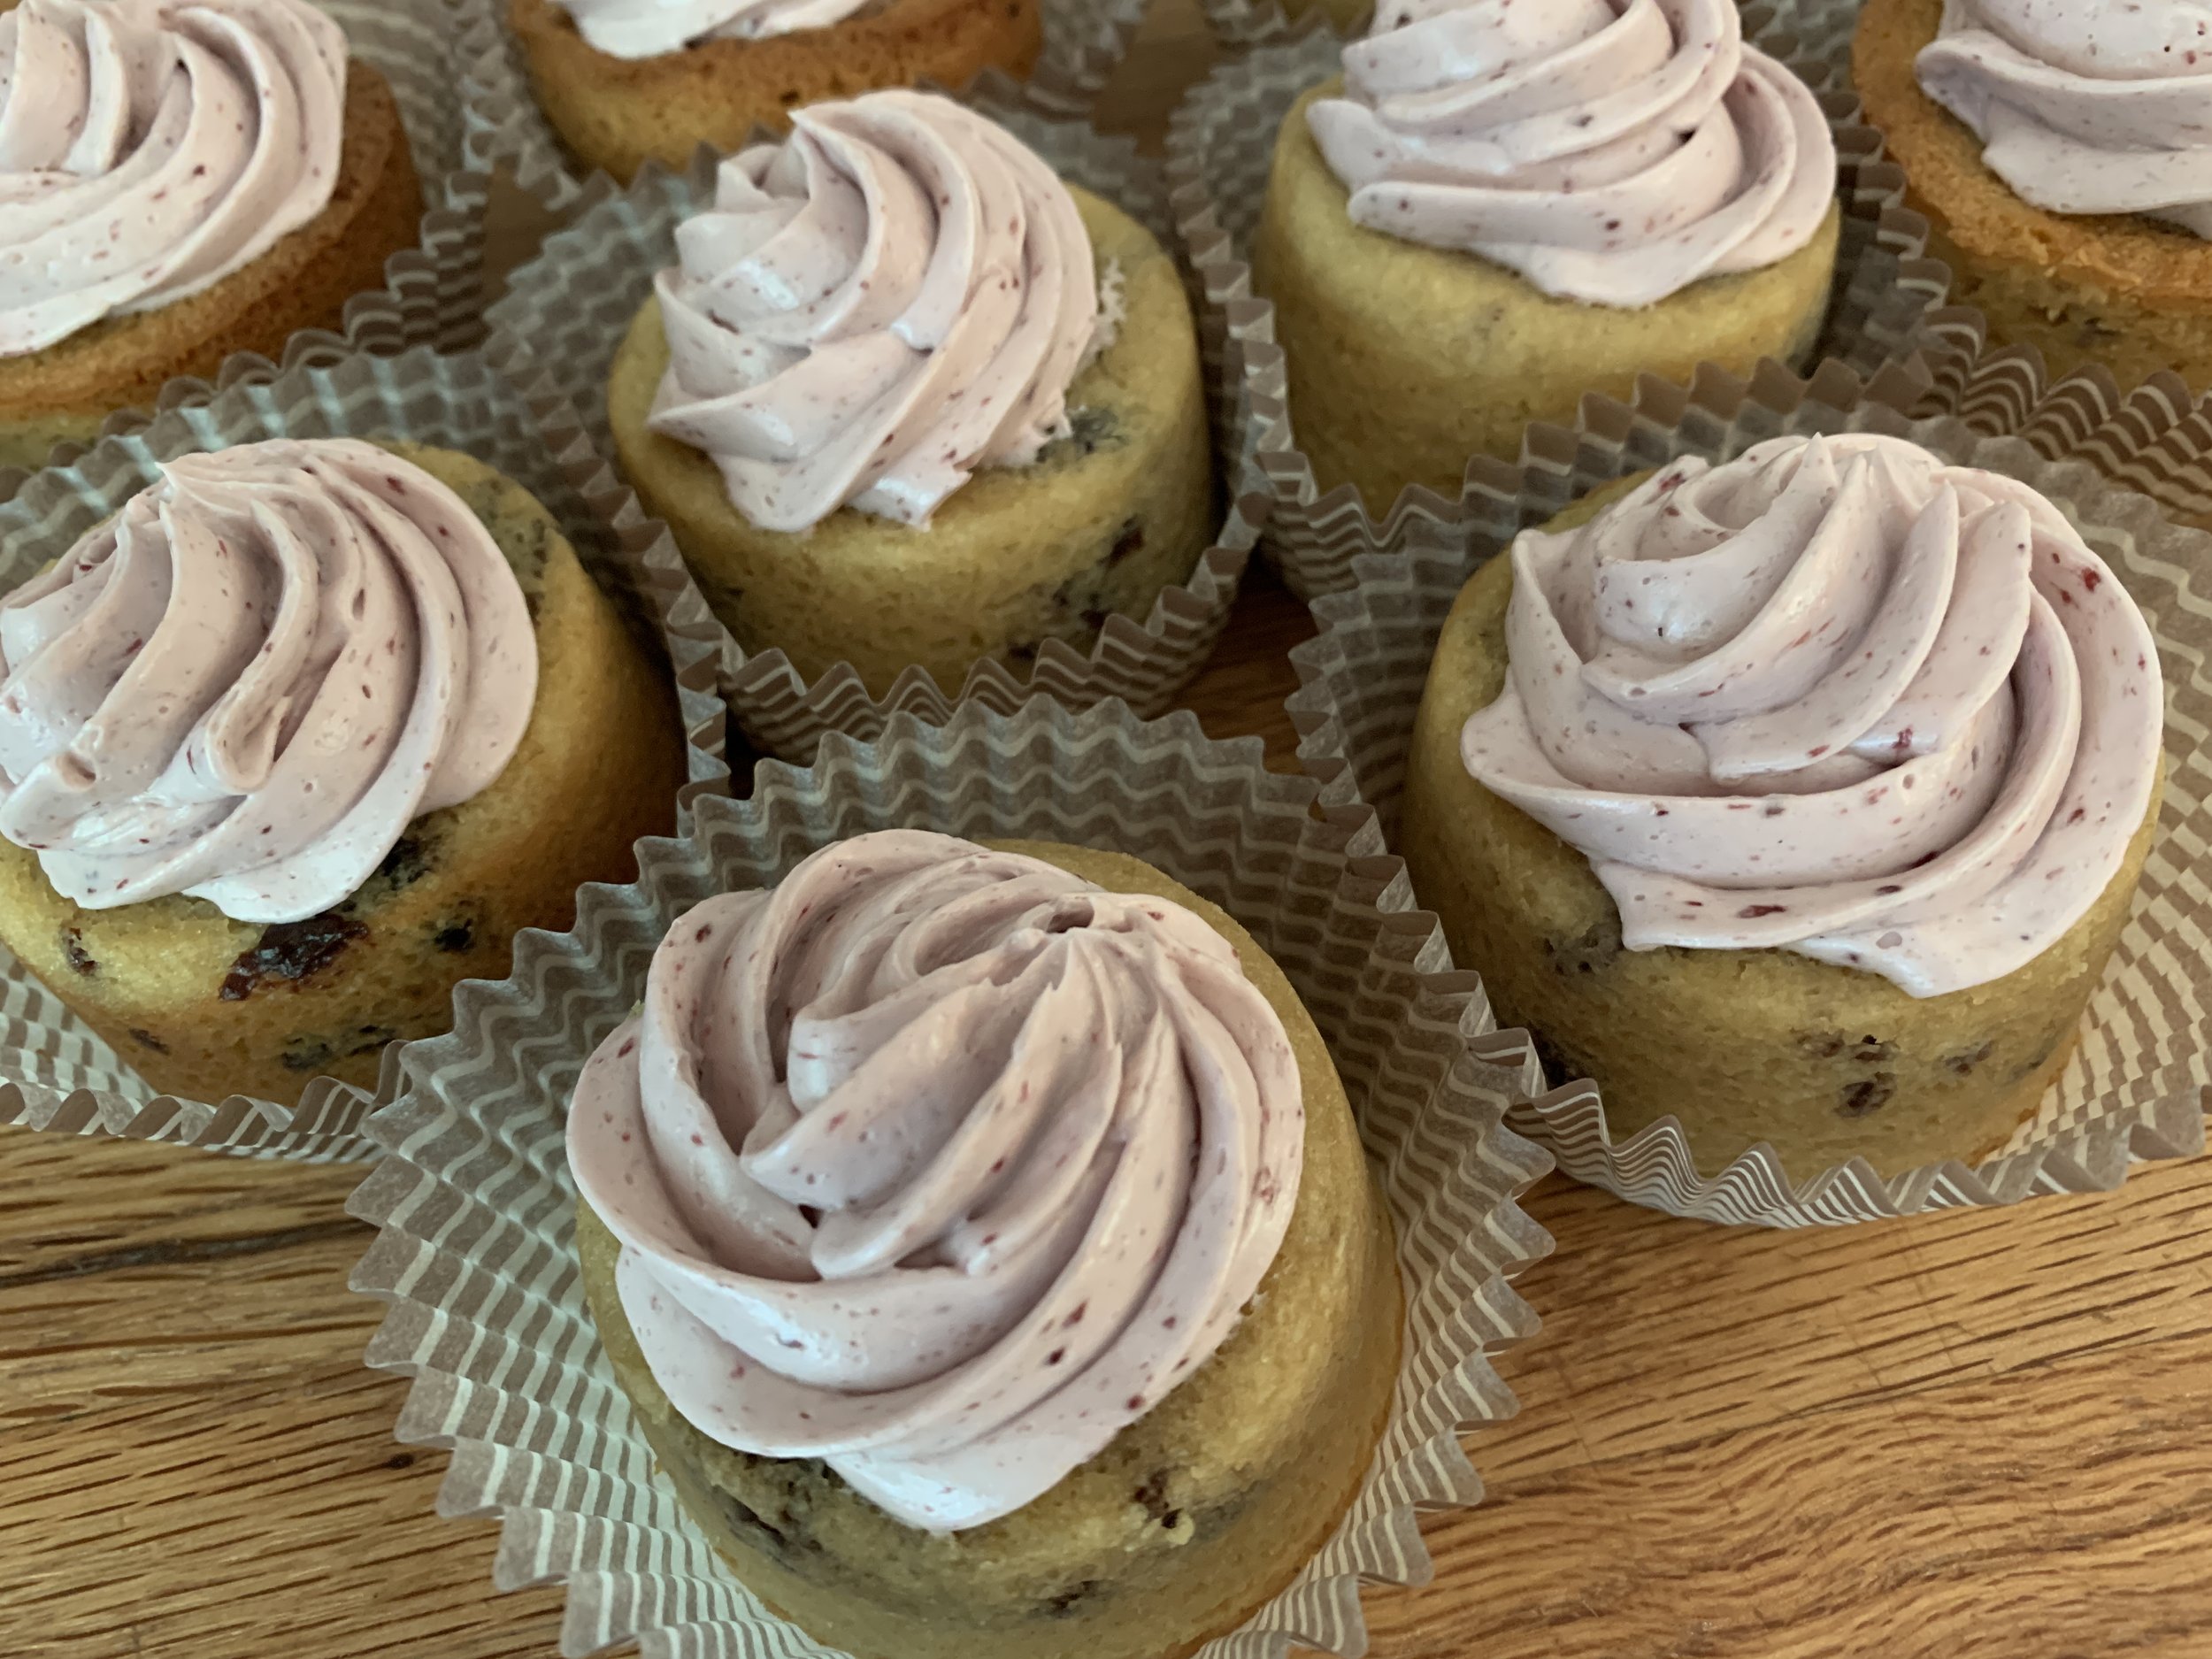
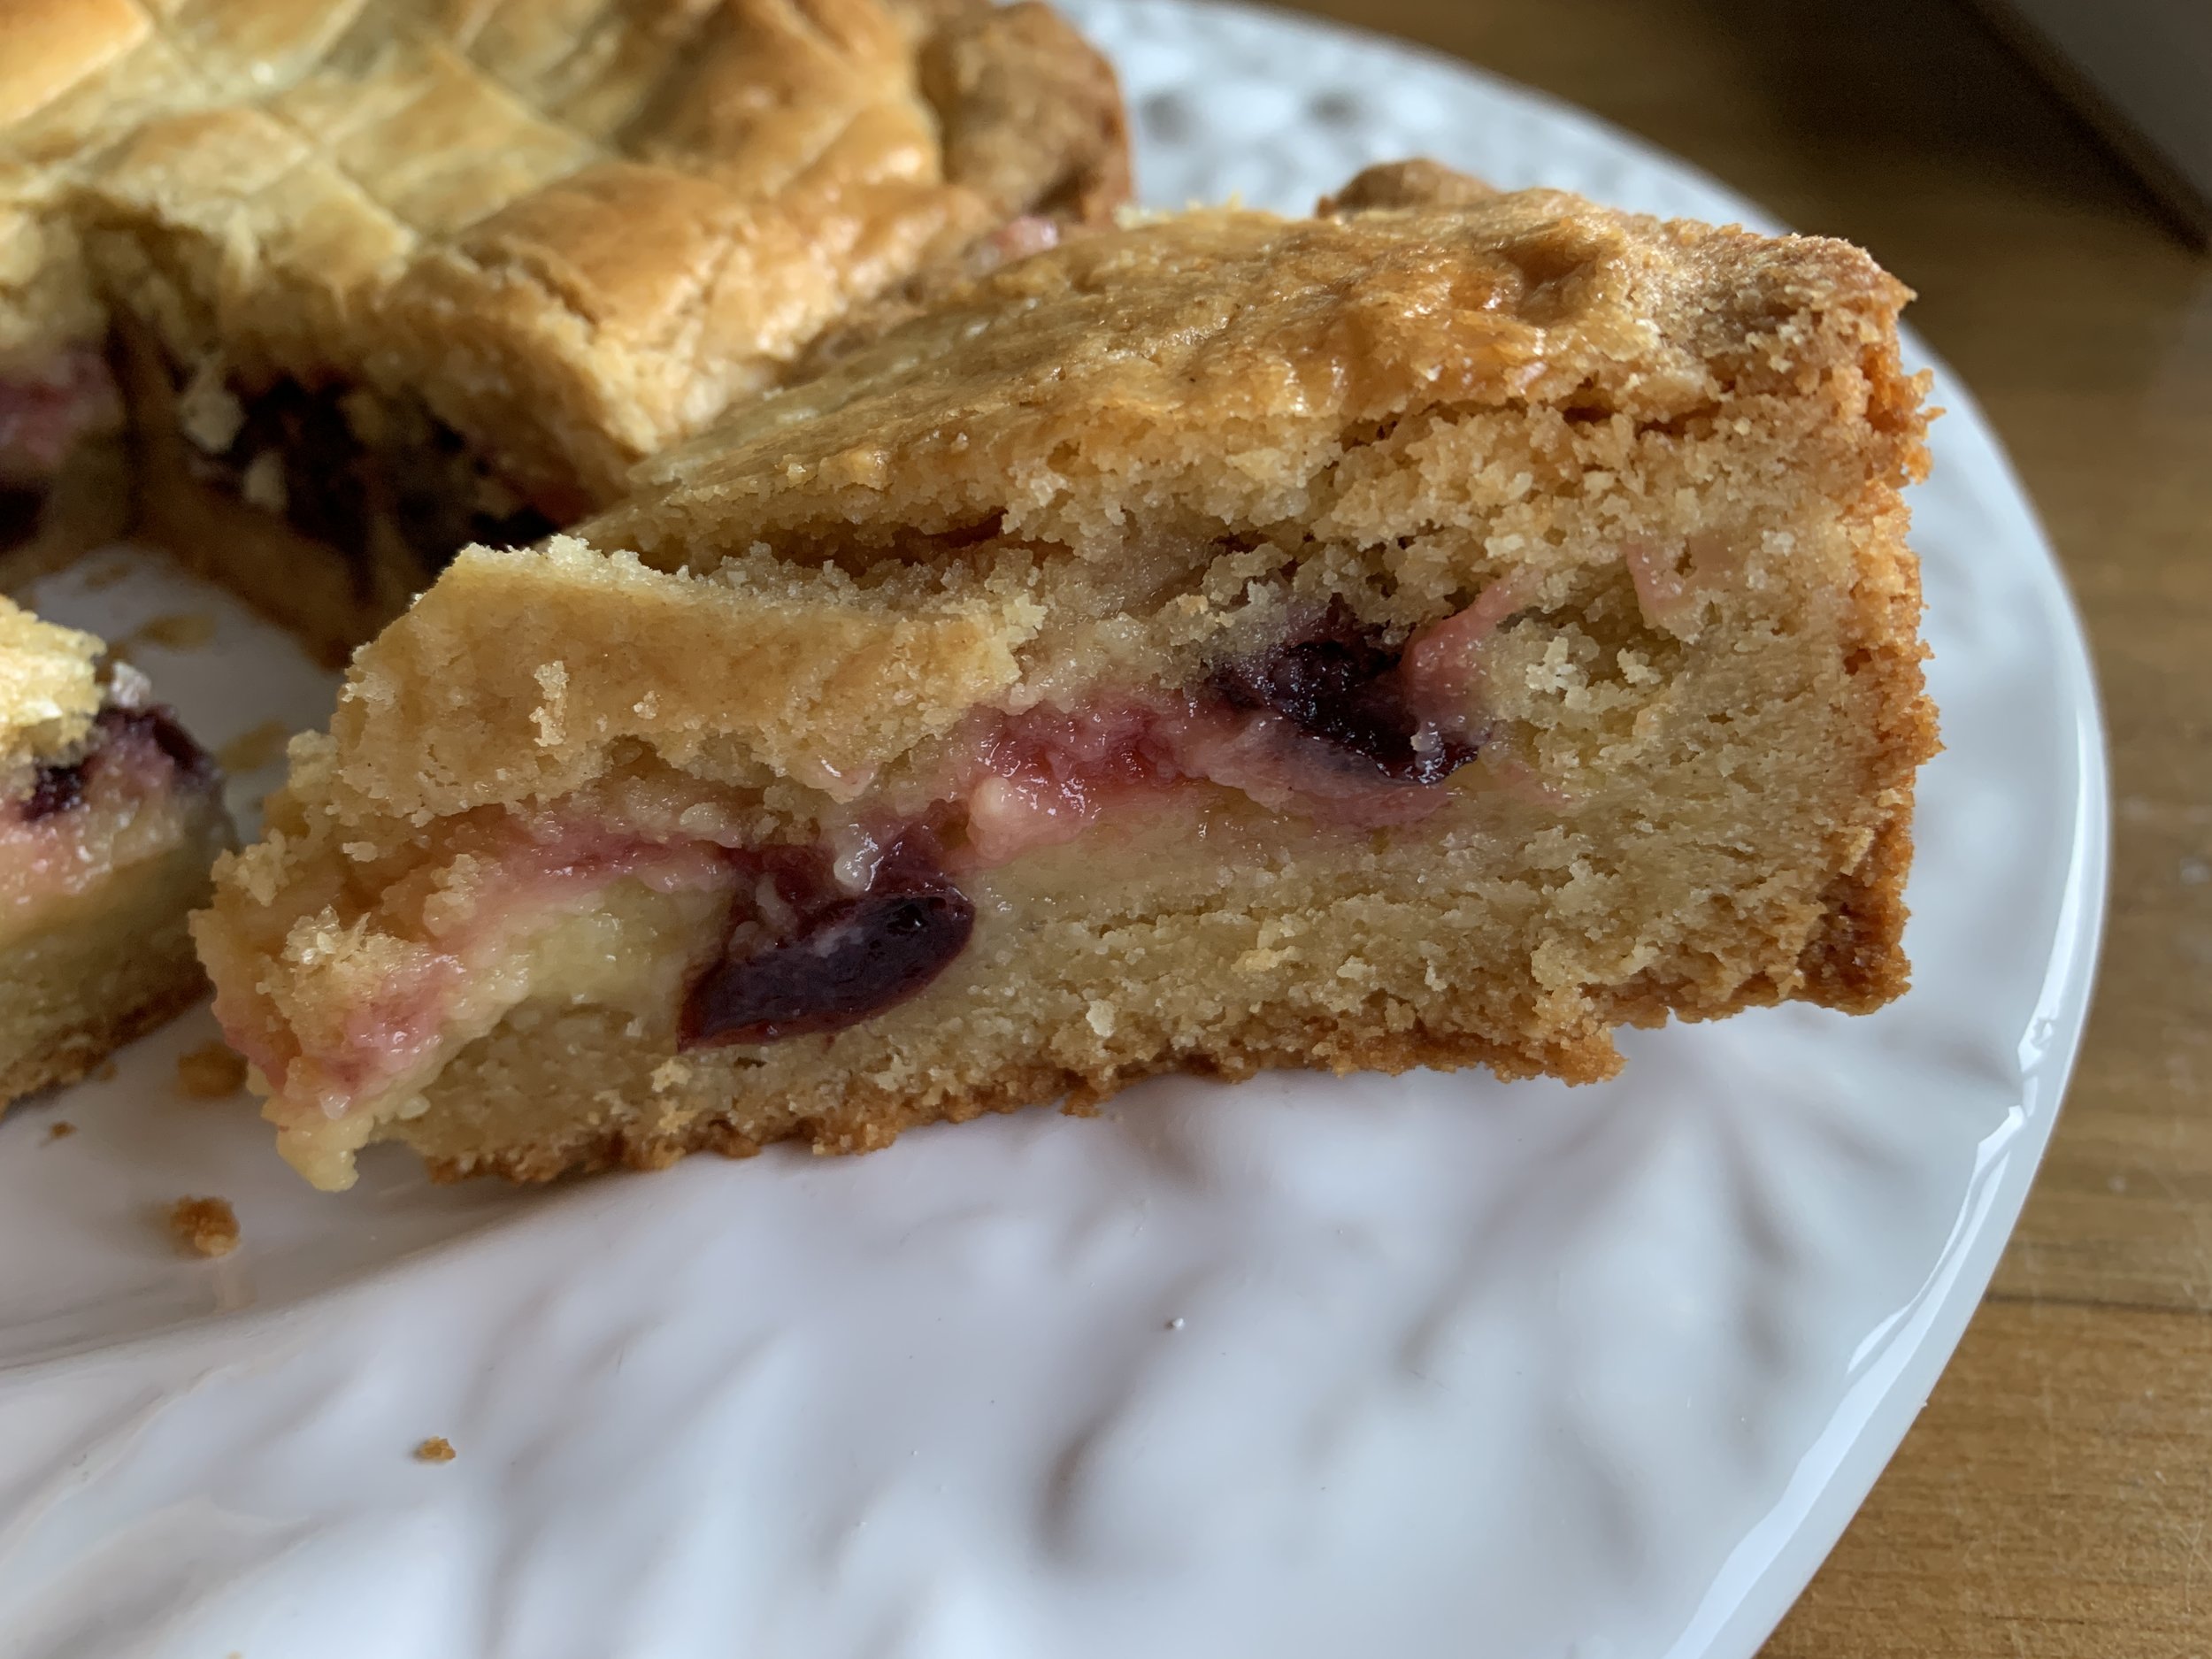
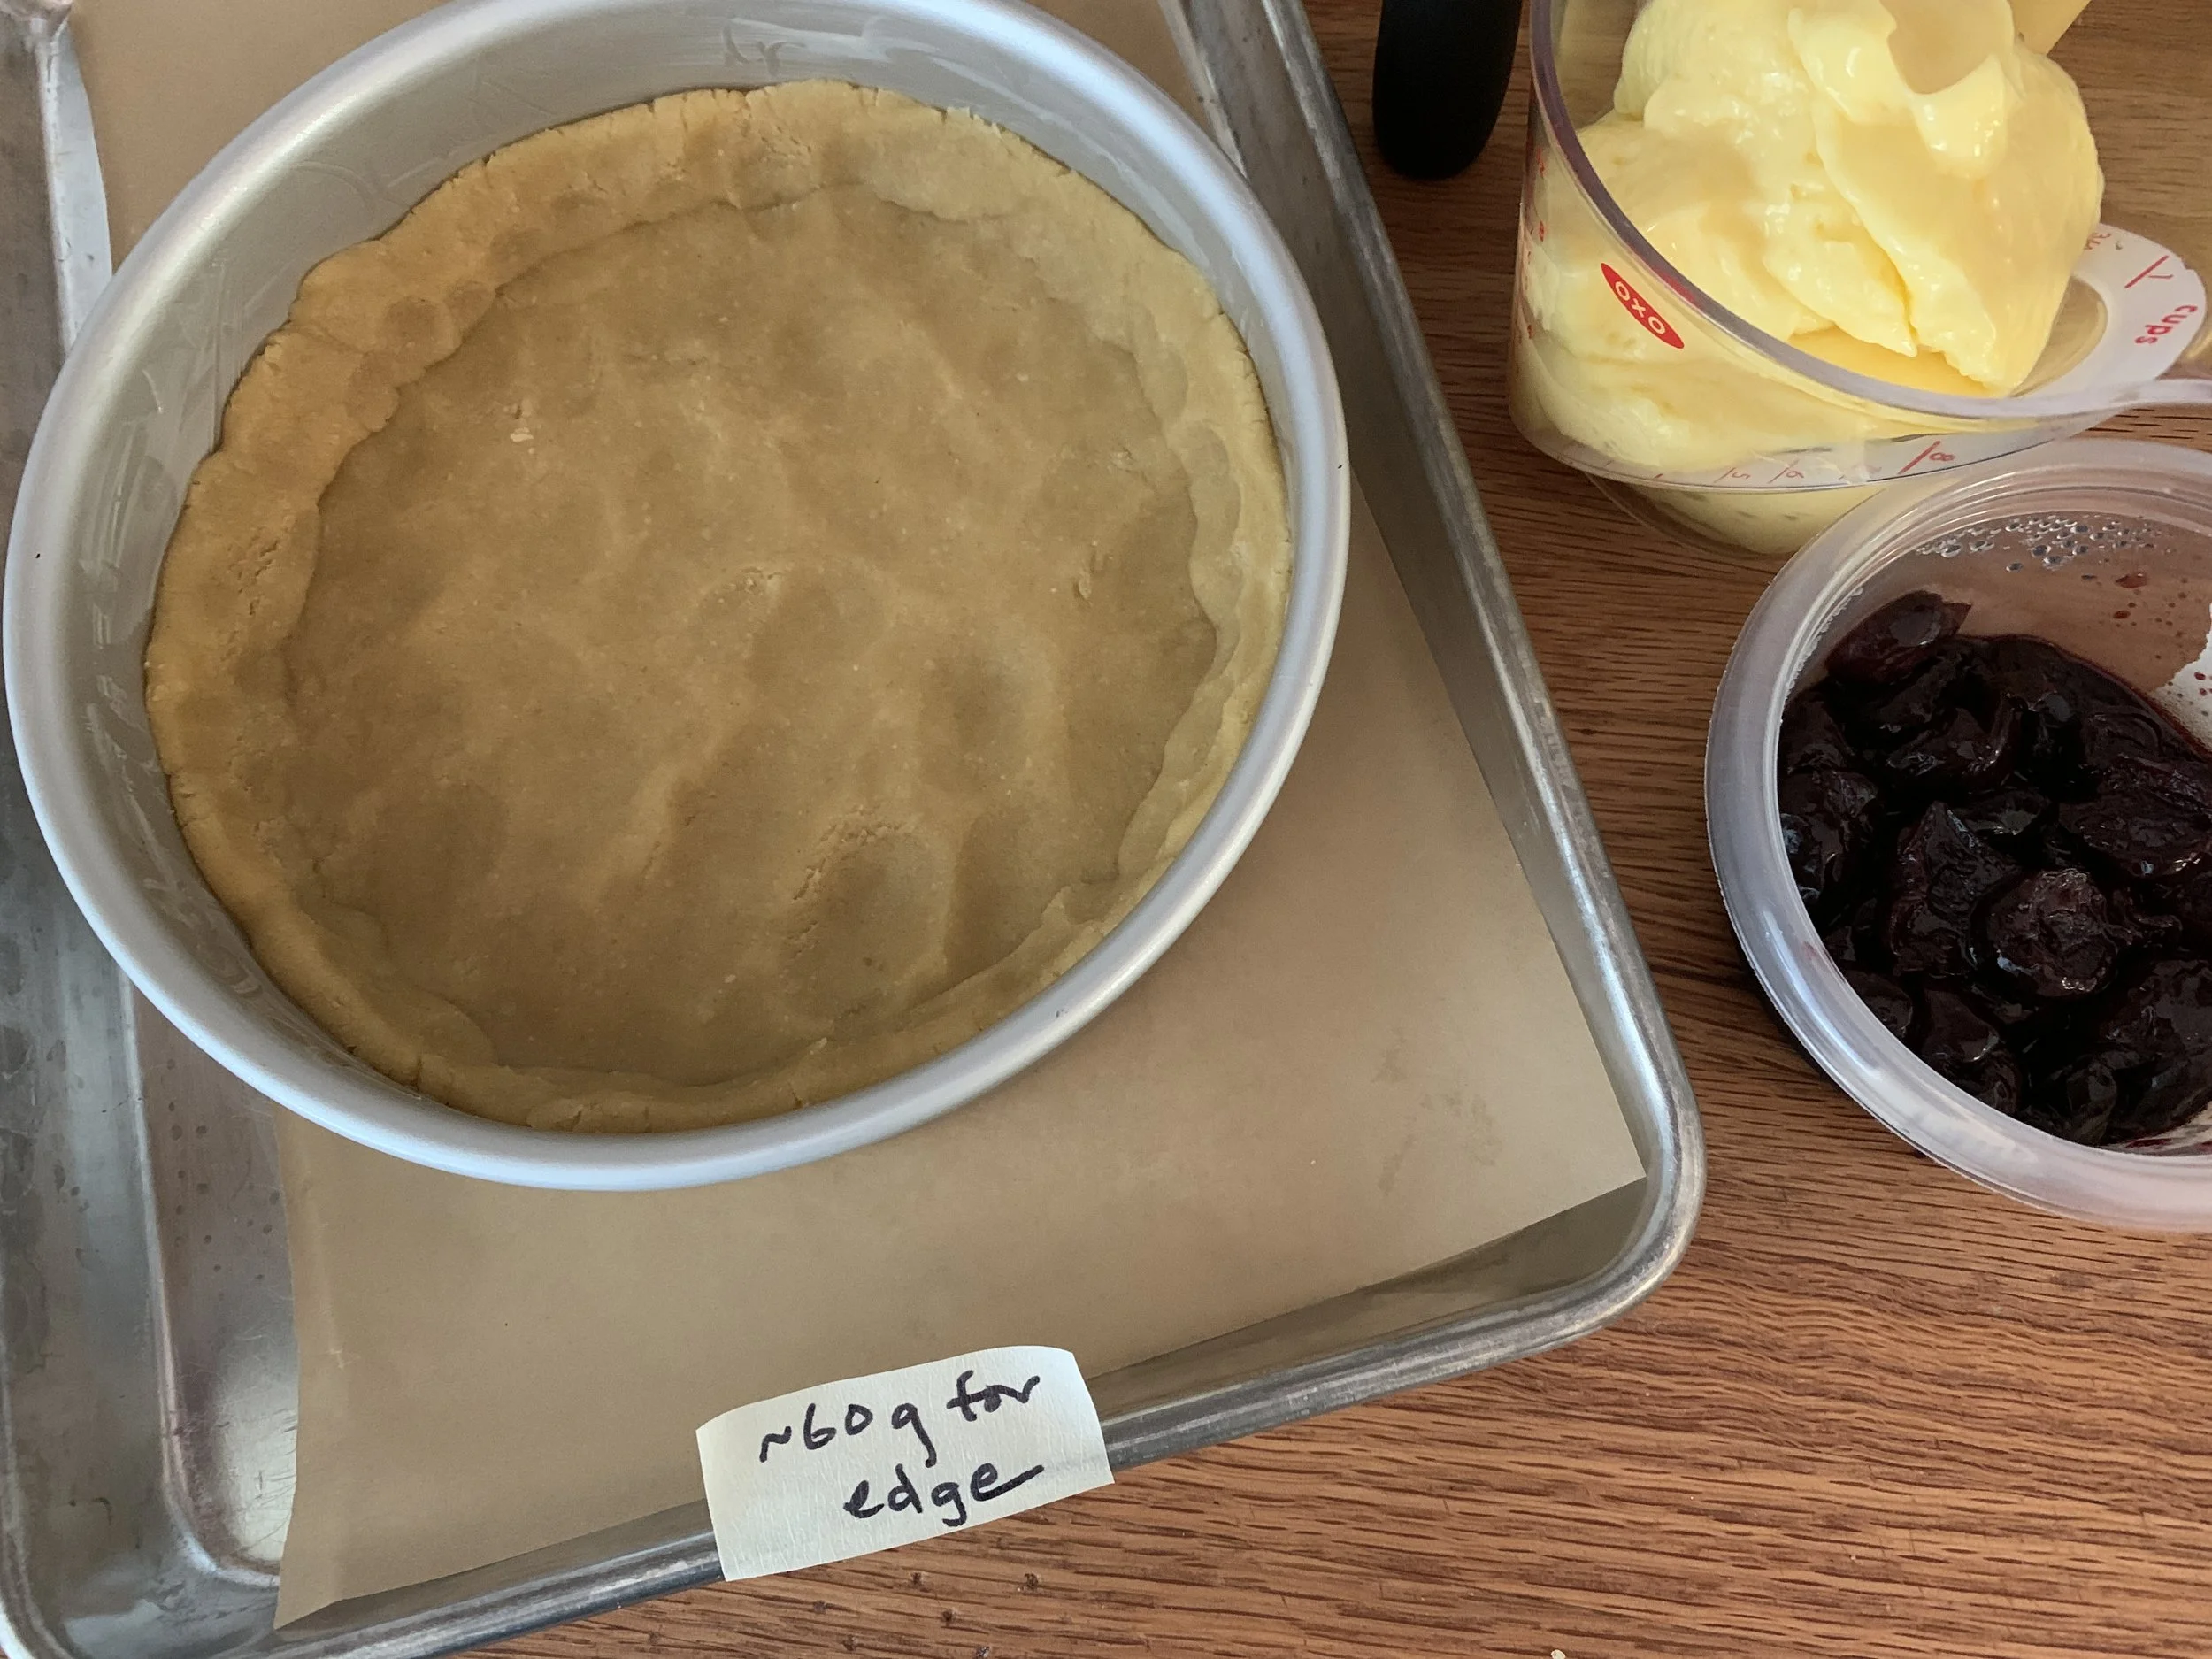
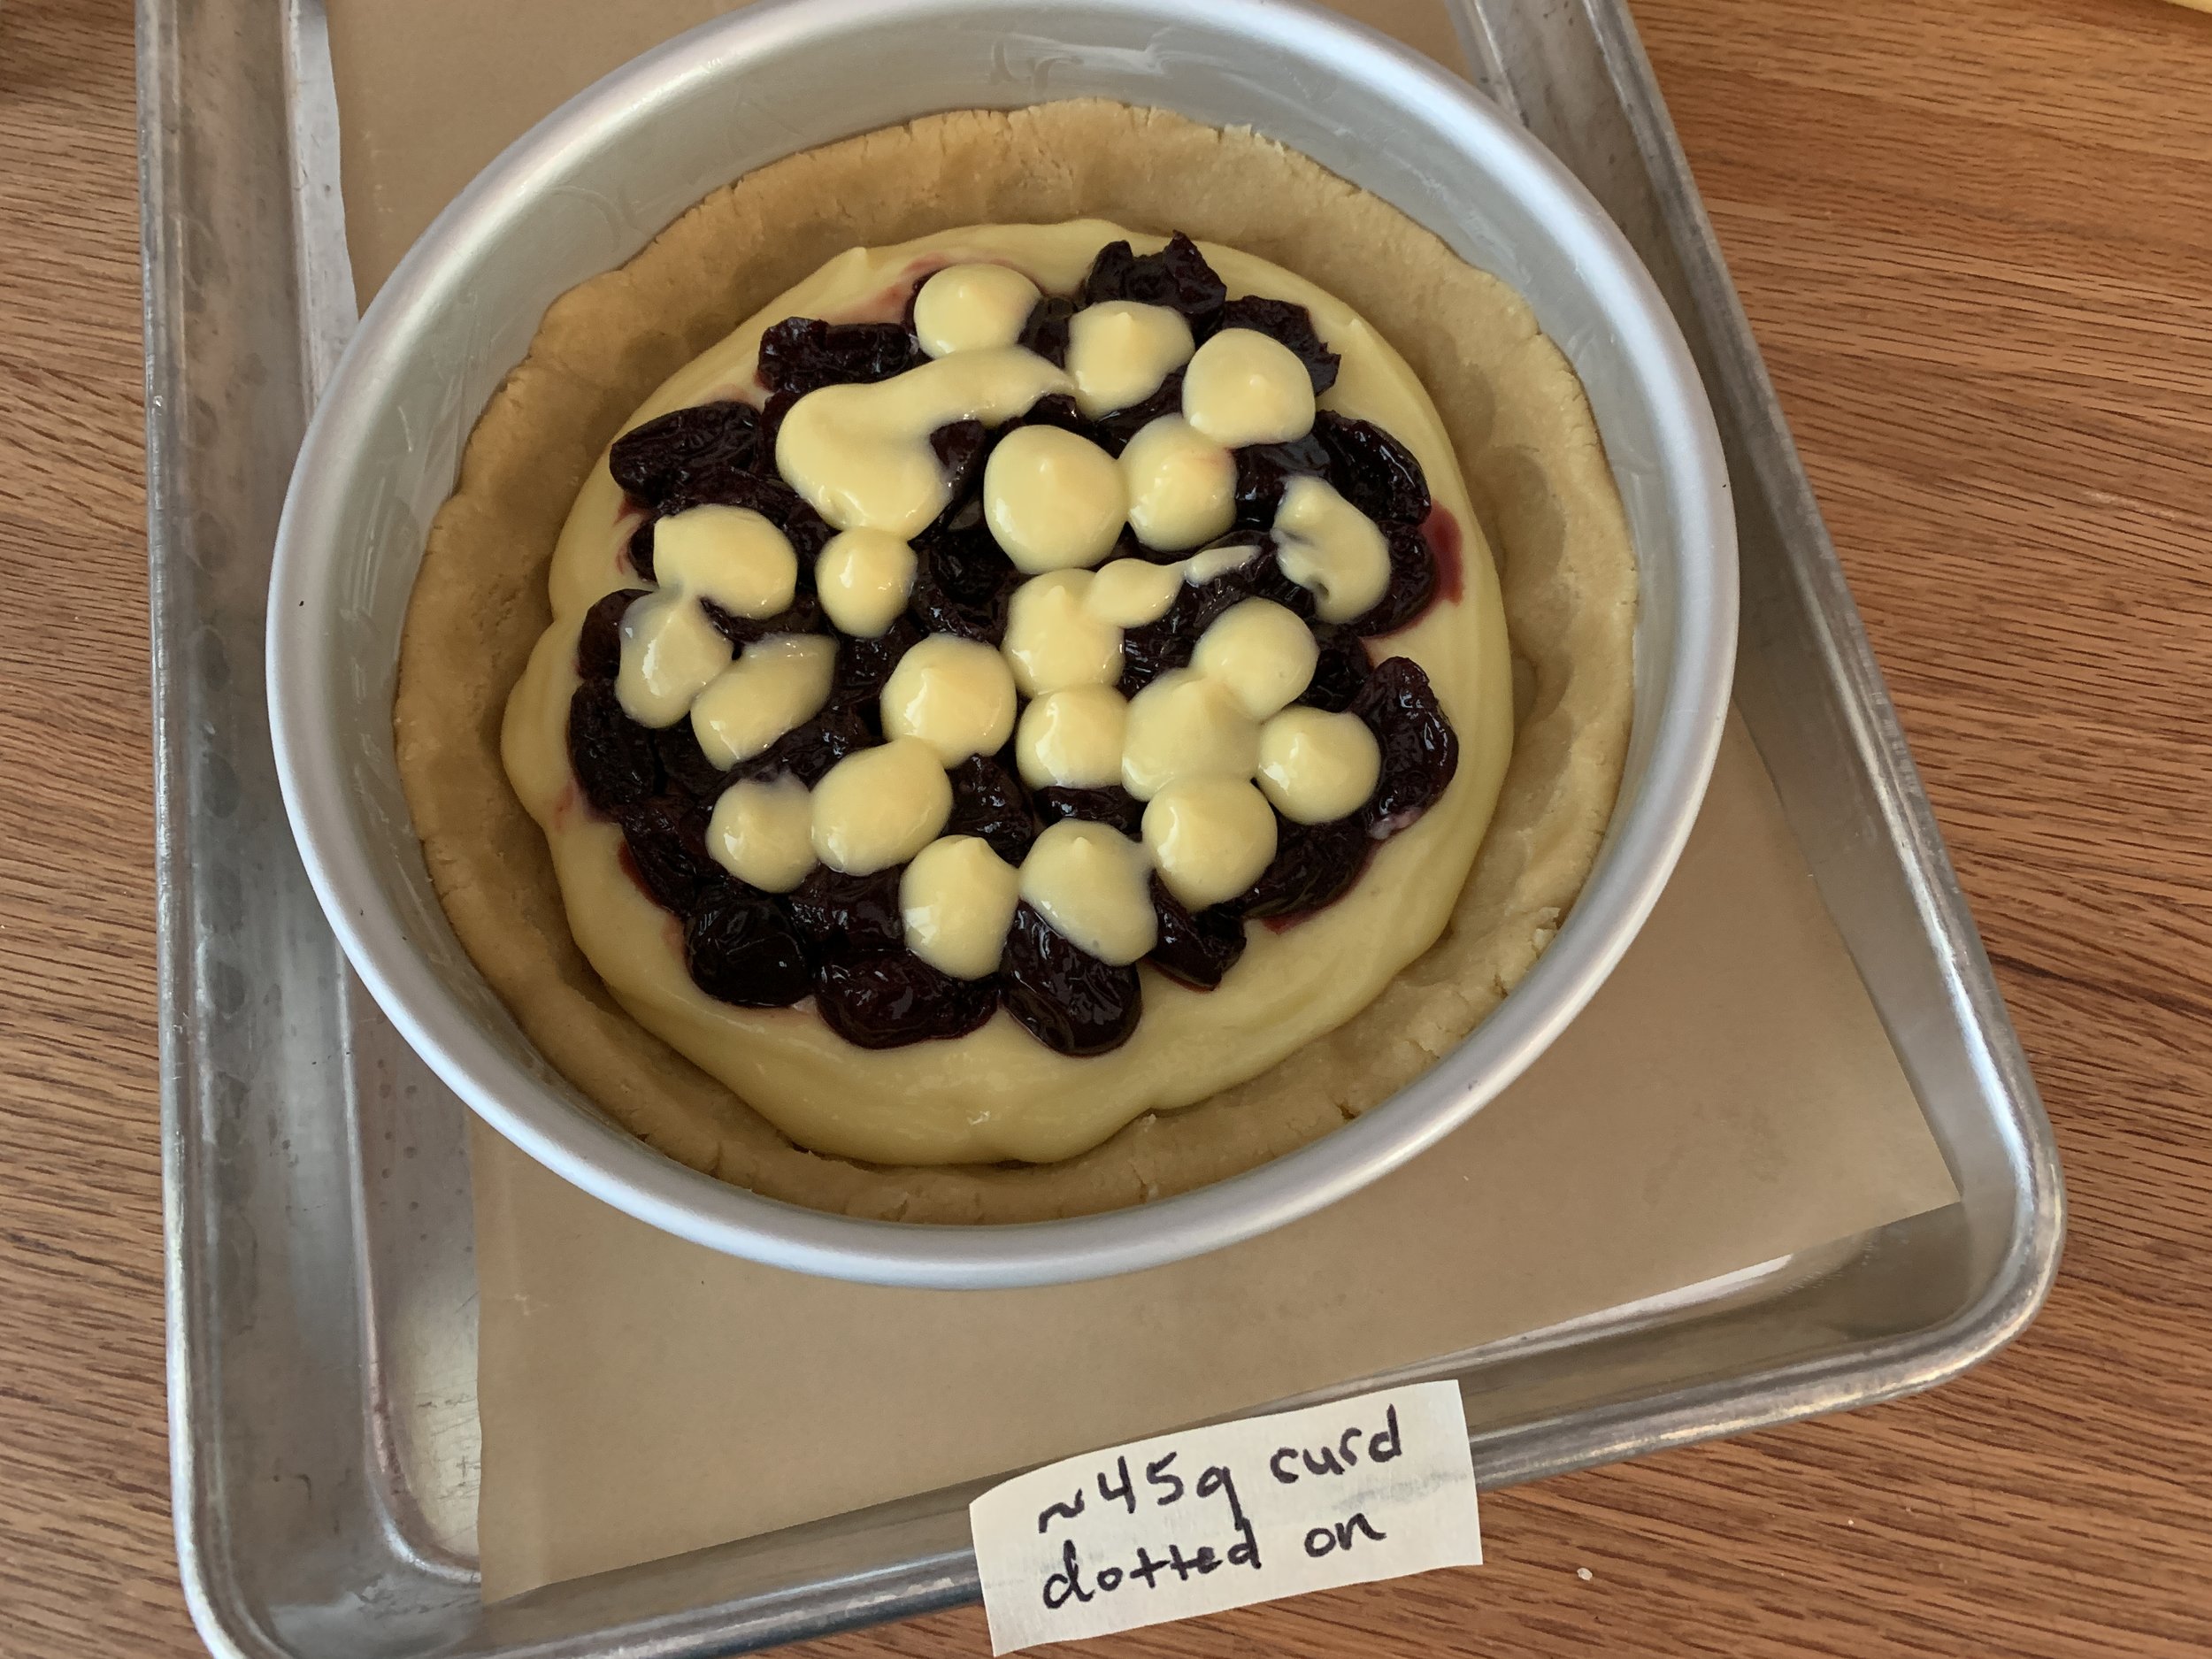
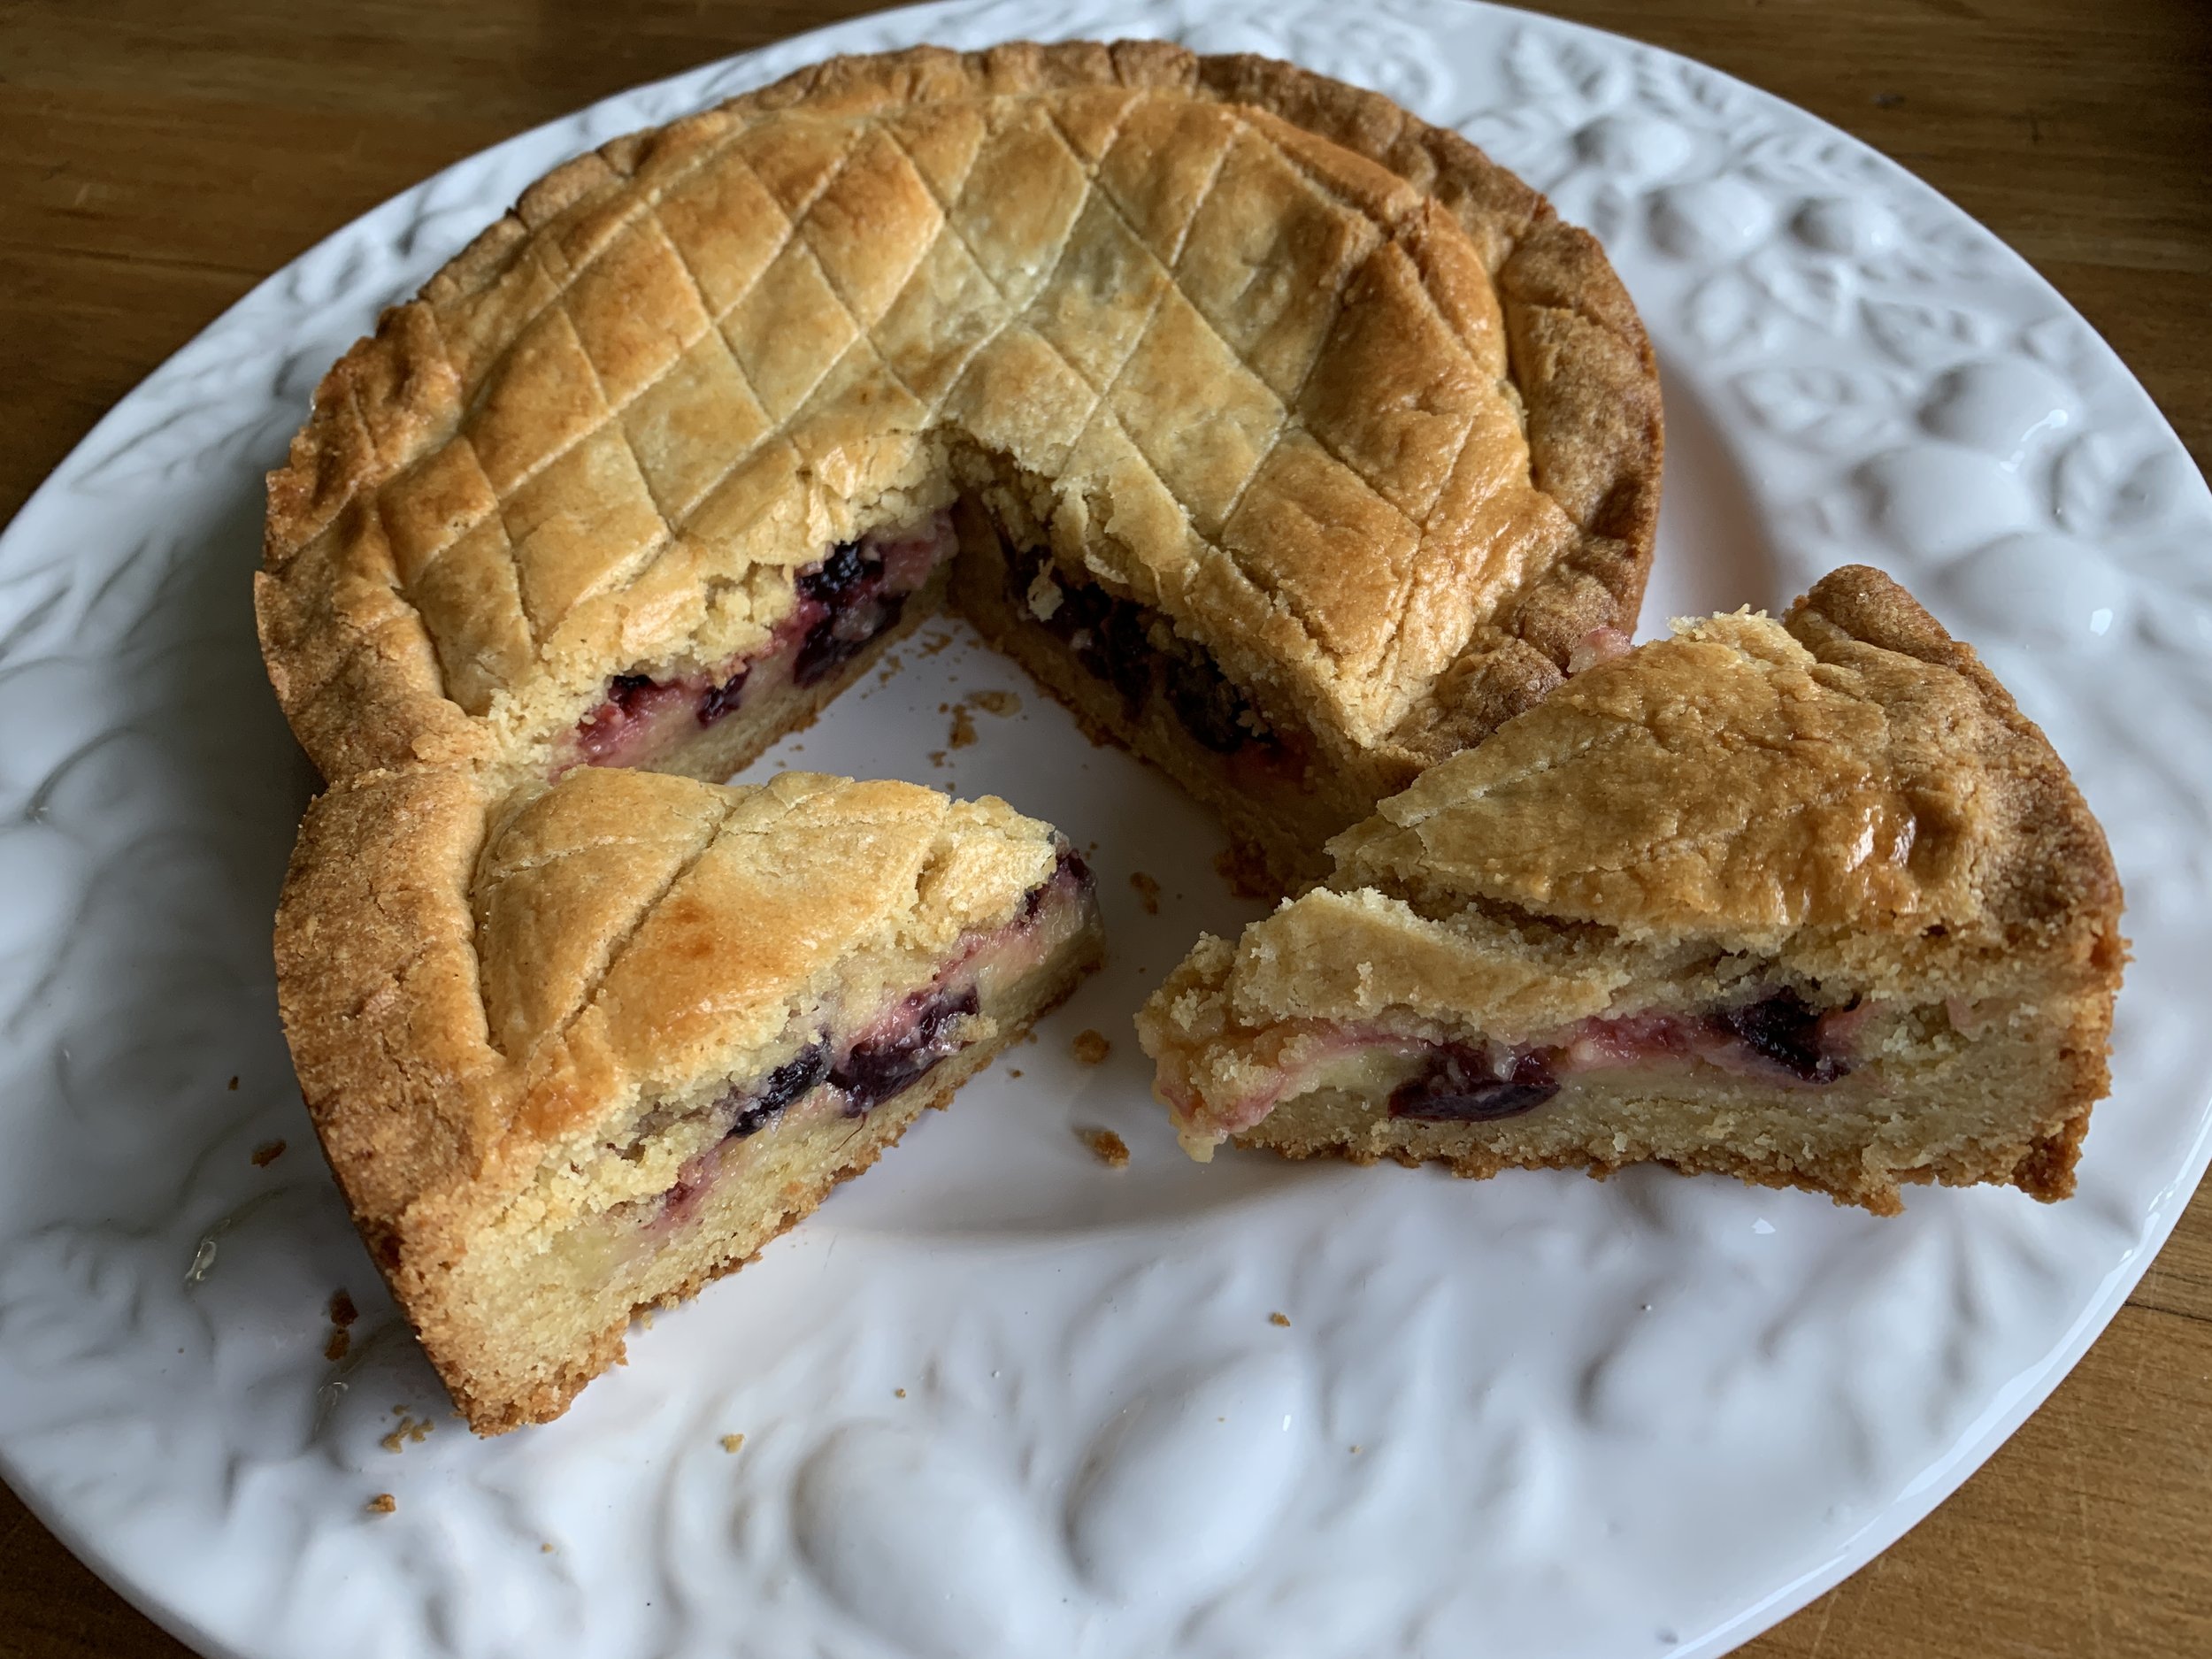
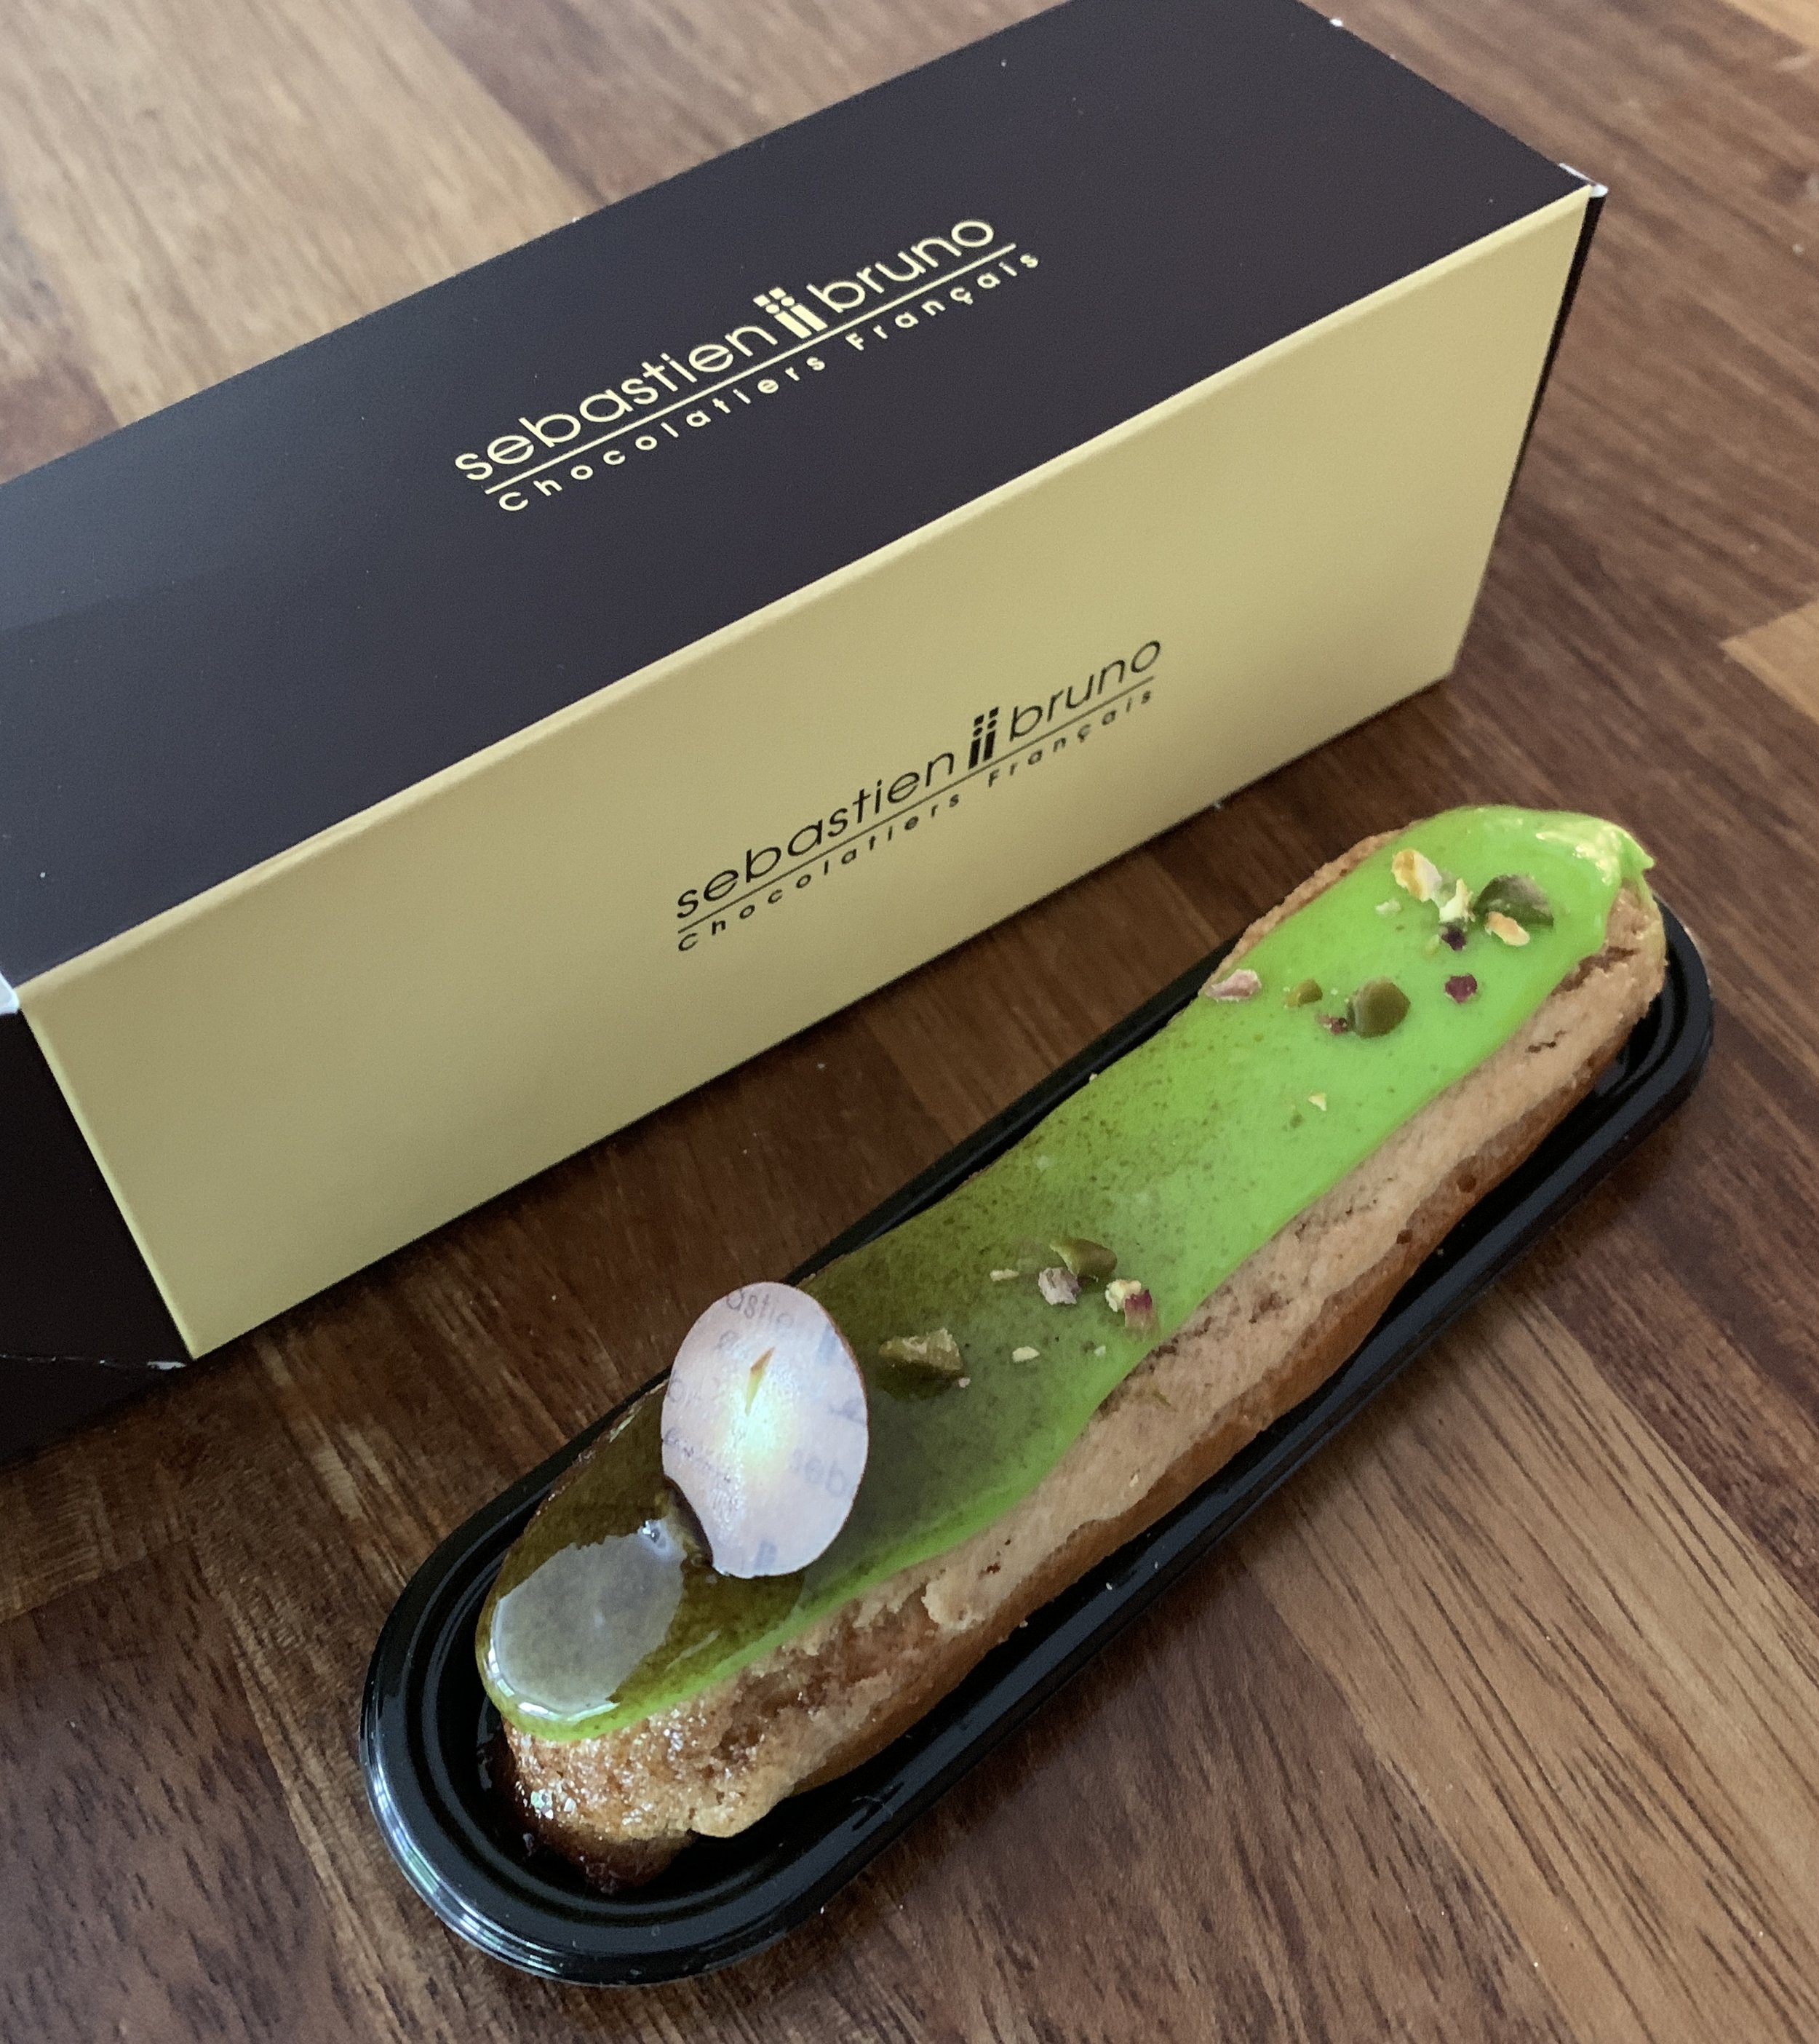
I recently wrote about my cherry lime Breton version of a Gateau Basque in which I described roasting sweet cherries and puréeing some of them for cherry chocolate ganache (AND cherry Swiss meringue buttercream!). First let me just say - ganache is one of the best things ever!!

As I’m sure most of you know, ganache is a combo of heavy cream and chocolate, created using different ratios of those two ingredients depending on the final consistency you’d like. Place chopped chocolate (or feves, discs or wafers) in a heat proof bowl; bring the cream to a boil either on the stovetop or in the microwave; pour the cream over the chocolate and gently blend until smooth. I’ve been using Guittard’s Lever du Soleil 61% wafers as my house chocolate - love it for ganache, almond bark and whatever else might come along.

Here are a few ganache examples: a medium or 1:1 ganache is made with equal weights of cream and chocolate. Use it while it’s still warm to glaze a cake; let it set up a bit and pipe it into your French macarons; chill to firm and scoop it into truffles. So many possibilities.

Change up the ratio by using more cream, let’s say 2.5 cream to 1 chocolate by weight, for a softer ganache. Chill it and then whip it up just like whipped cream. What a great way to layer/garnish a delicate chocolate cake or top a layer of chopped toasted nuts and caramel on the bottom of a blind baked tart shell. Yum.

Go the other direction using more chocolate than cream for a firmer ganache. Get the picture?

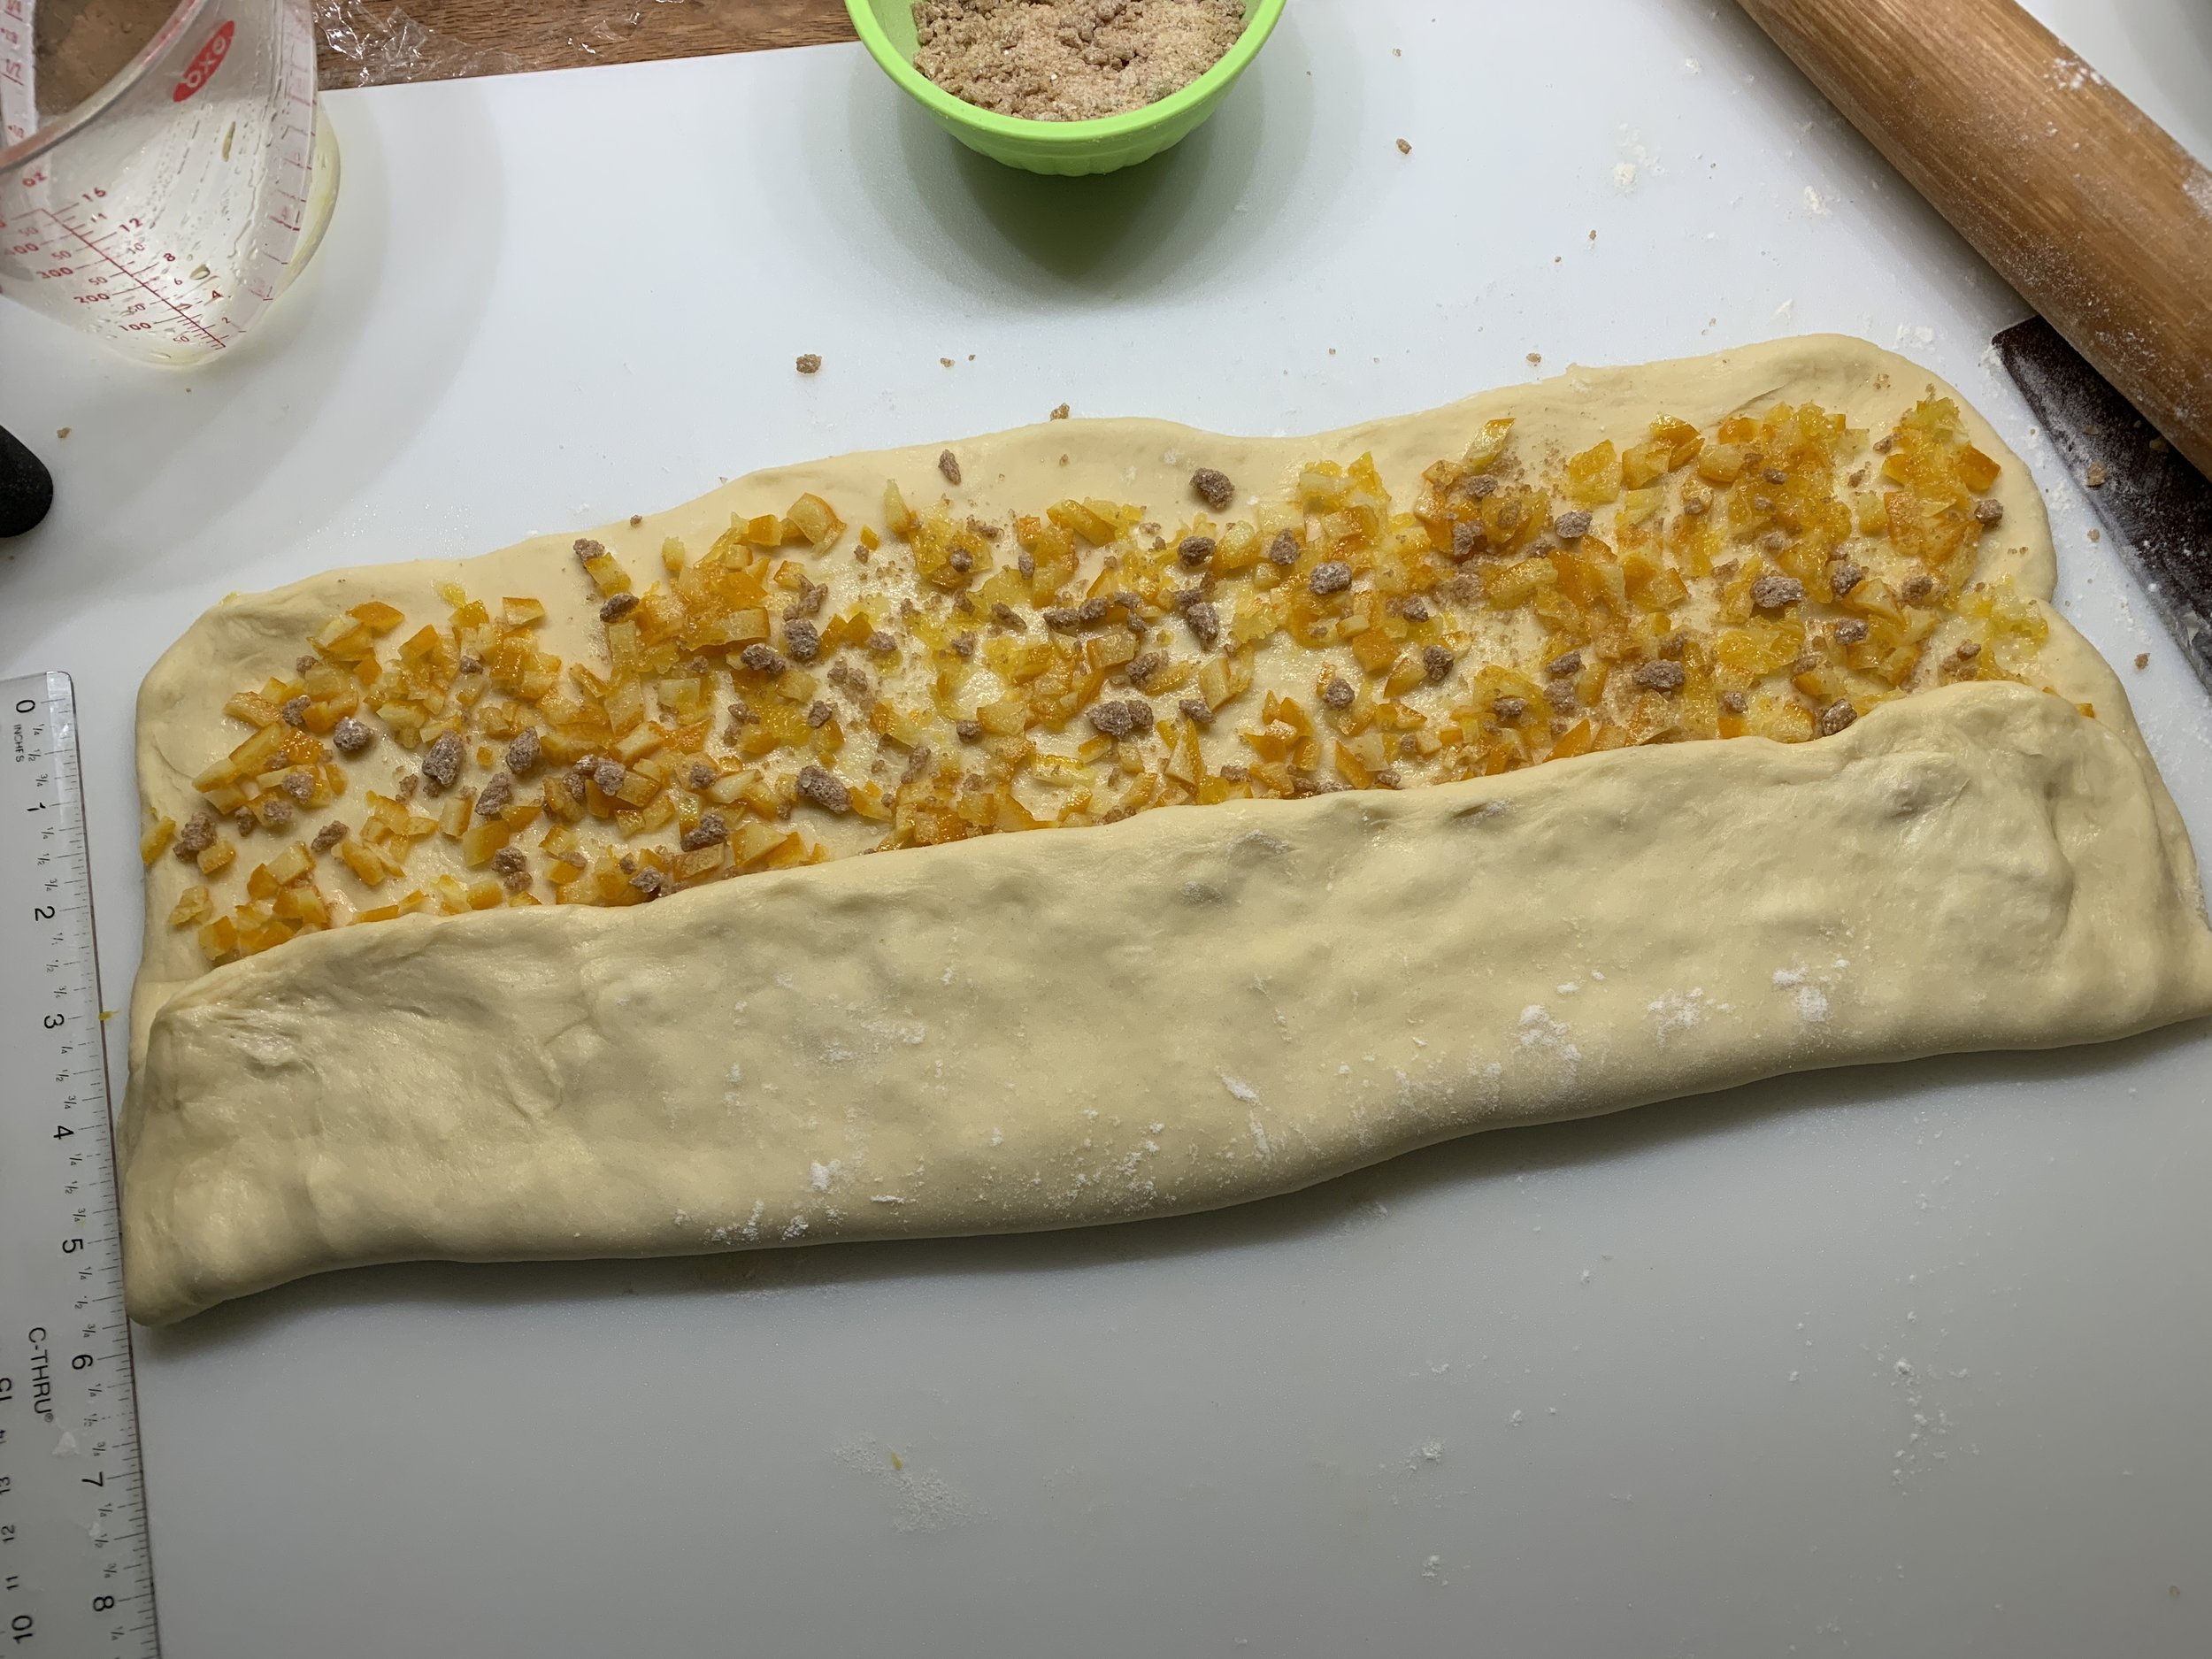
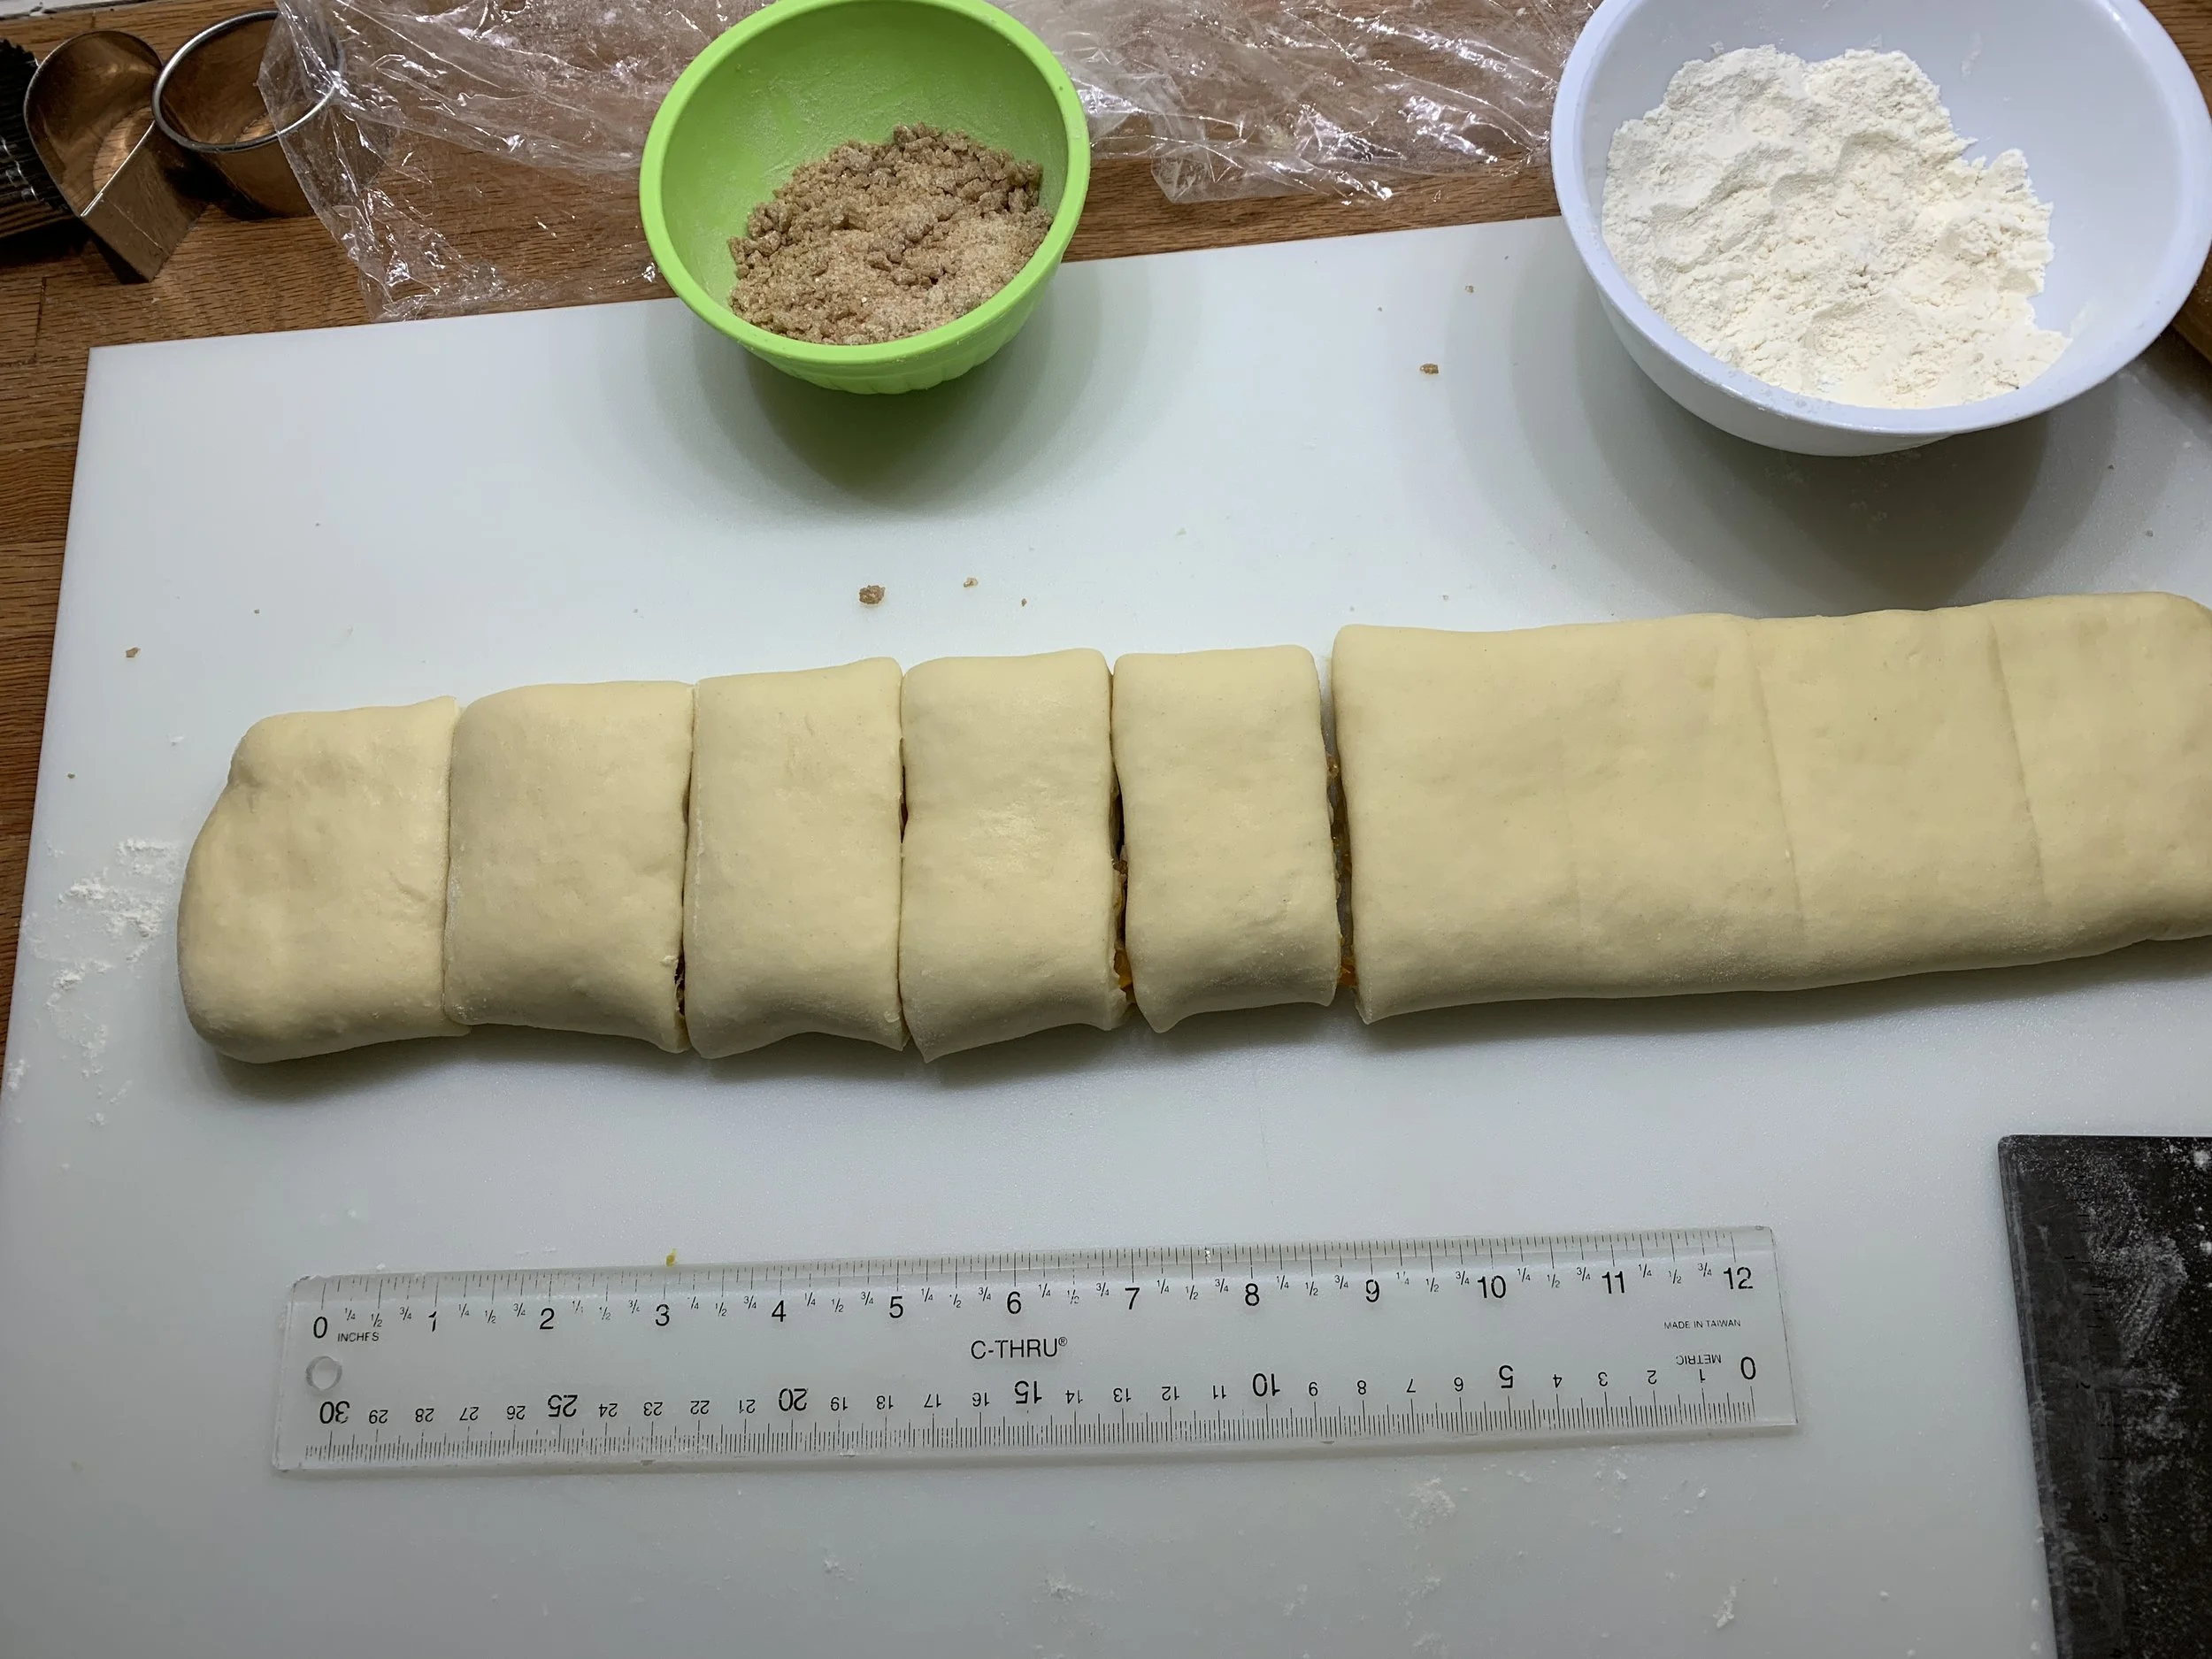
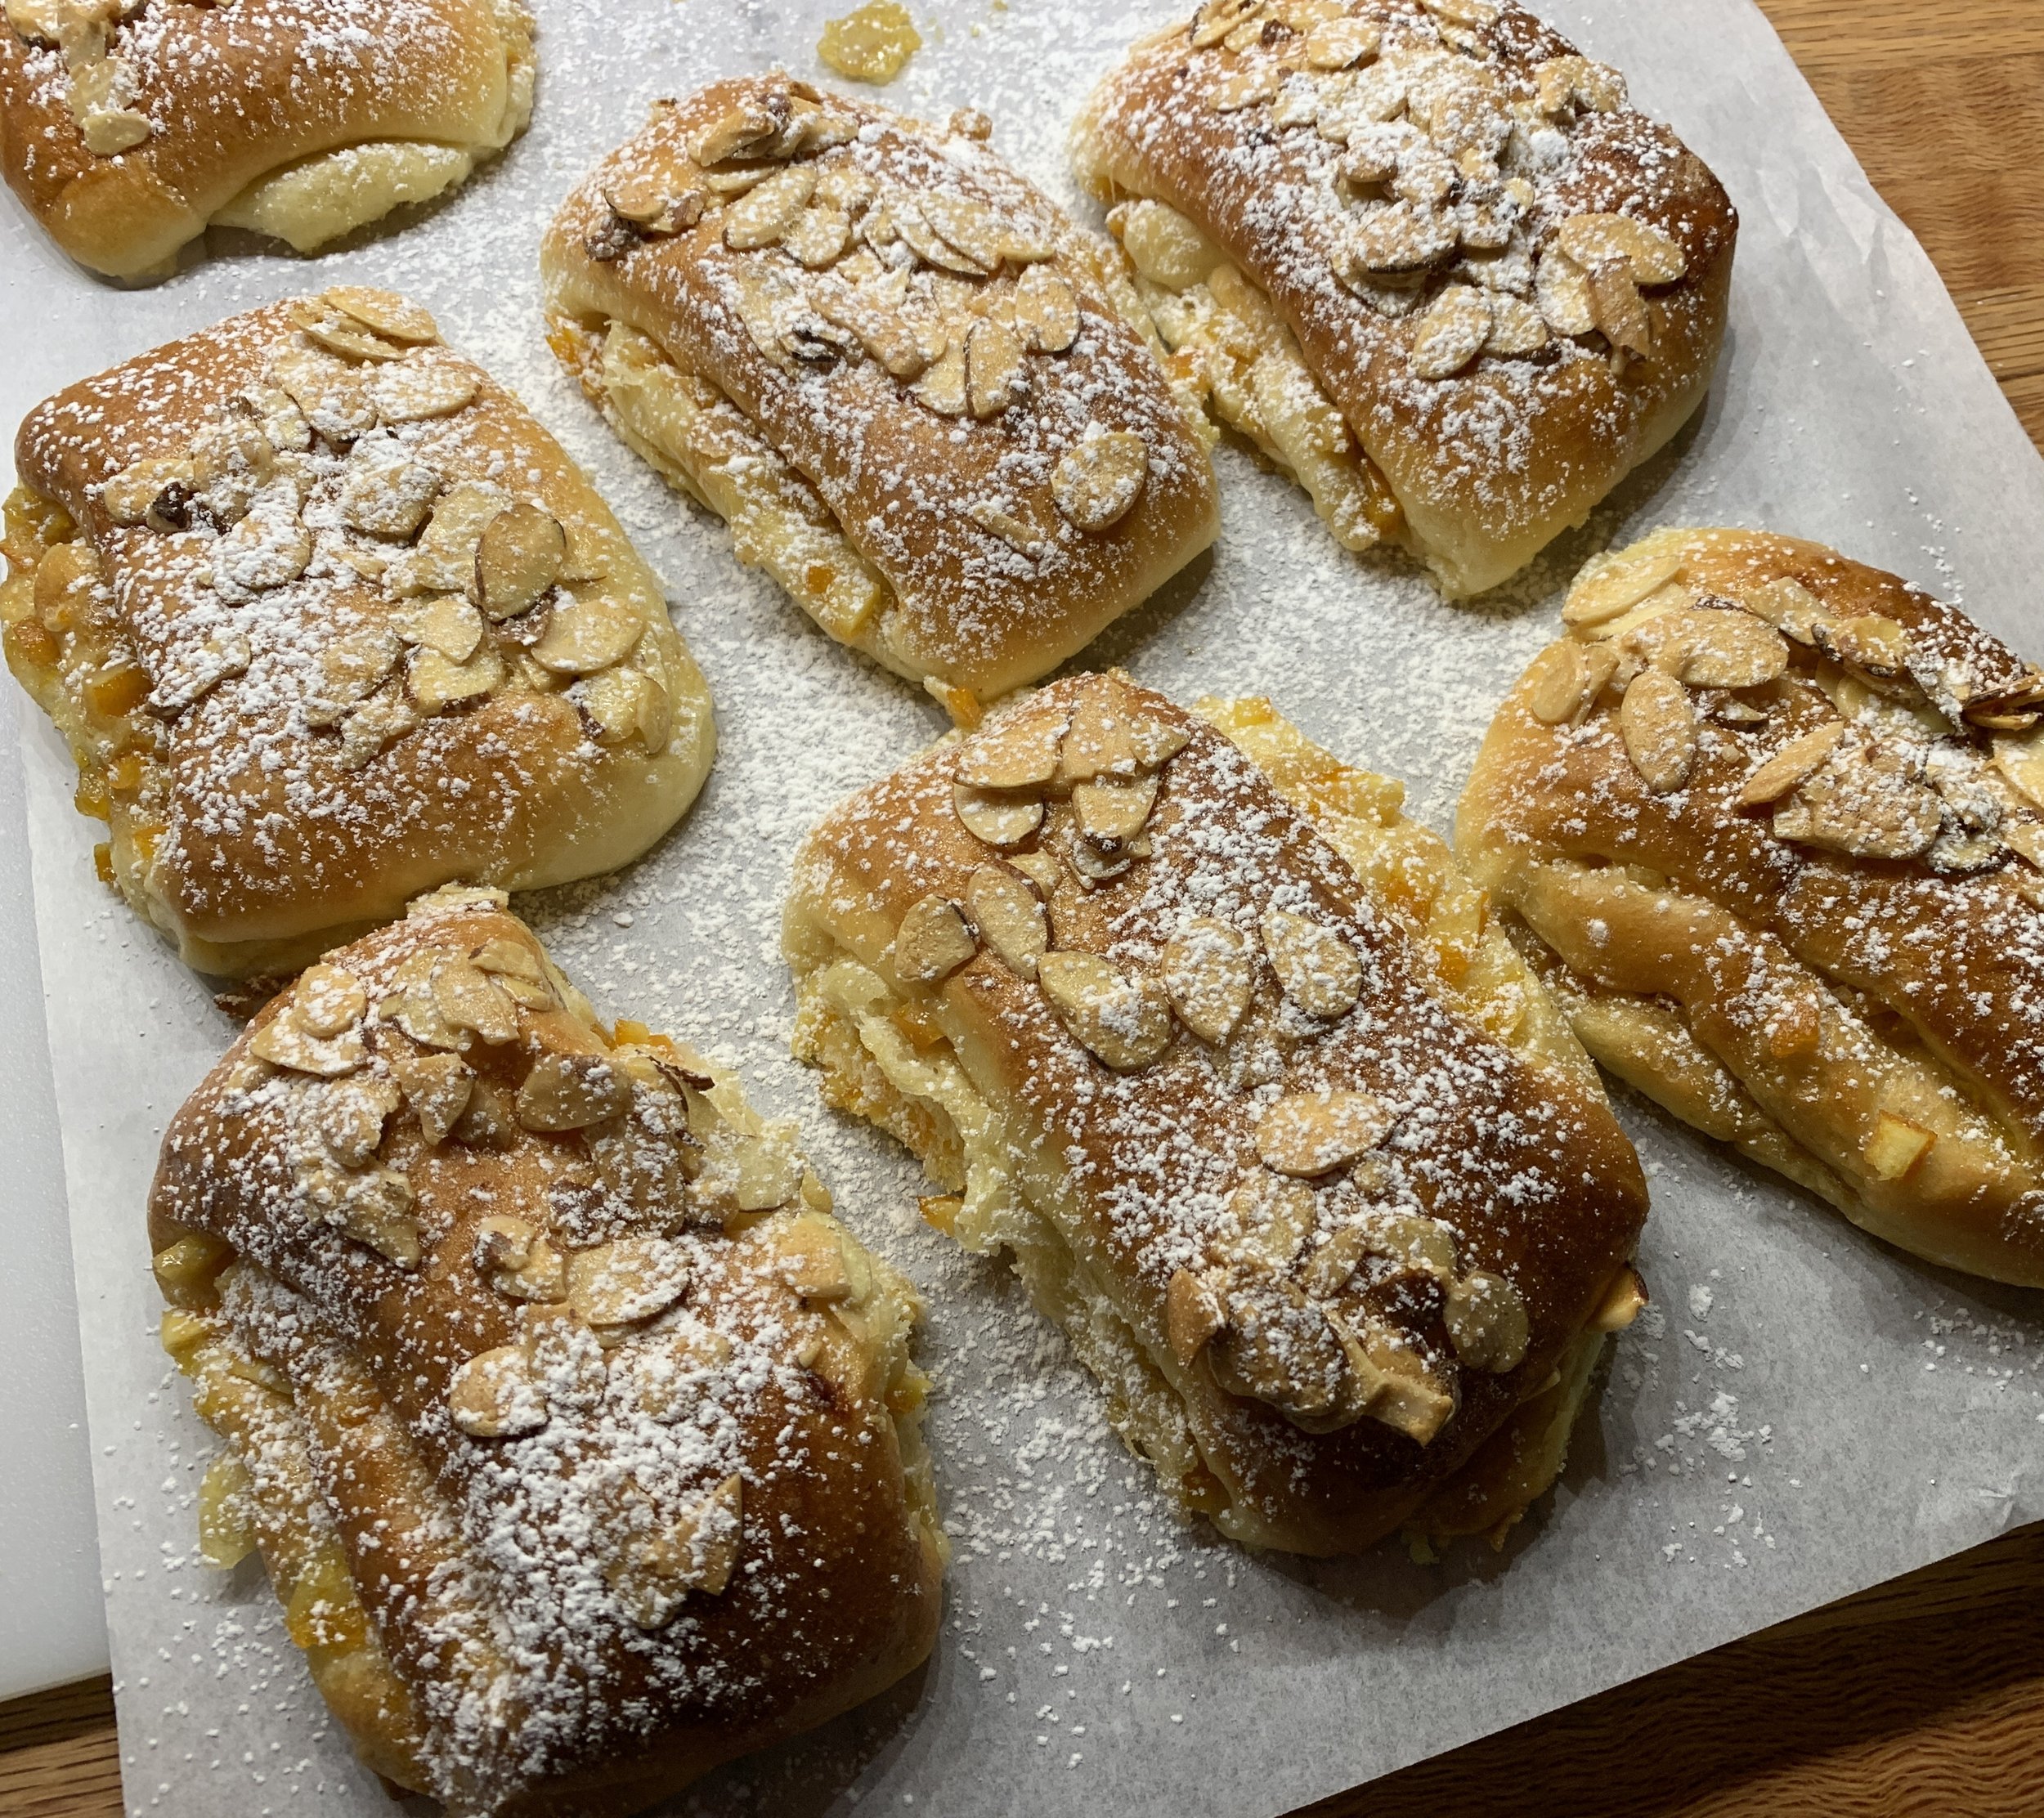
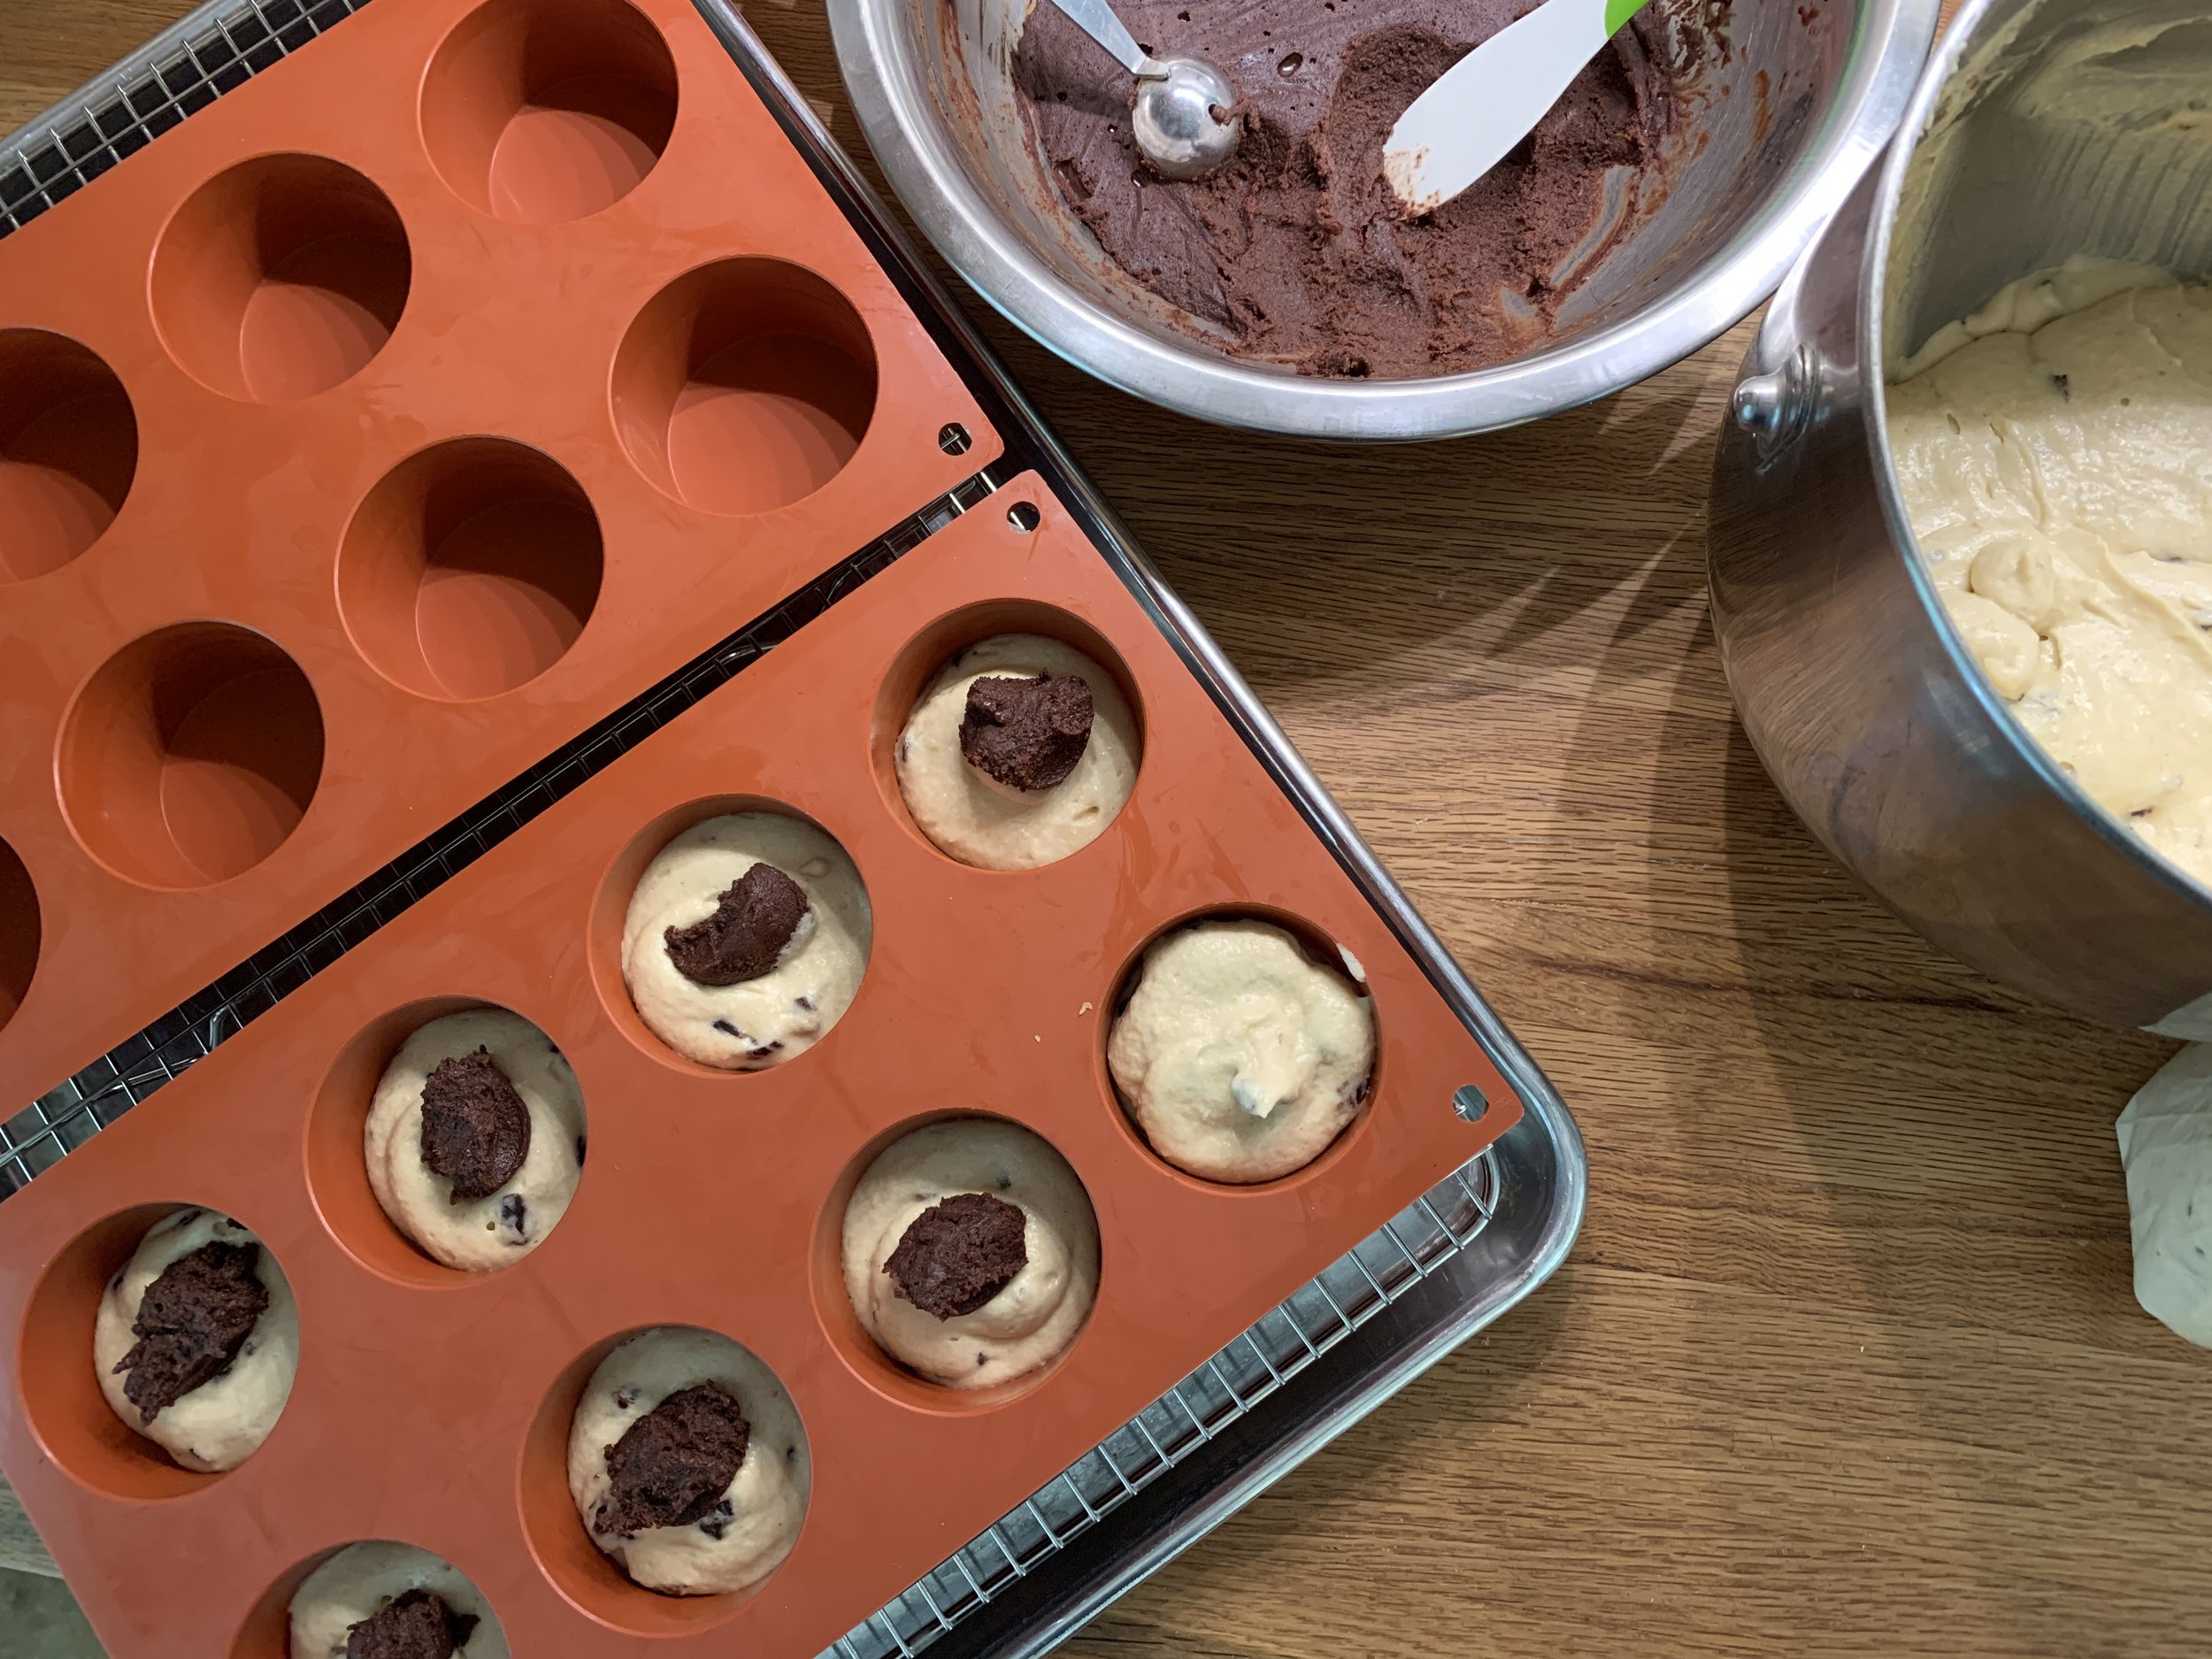
Let’s get on to the project at hand.

I’ve made raspberry chocolate ganache in the past as a financier garnish and found it quite delightful. But frankly I don’t often think about making fruit ganache as a rule. This time I had in mind a tart cherry, brown sugar version of a favorite cake based on the recipe in Yotam Ottolenghi’s book “Sweet” and thought what the heck; why don’t I put a of dollop of ganache in the center before baking and see what happens!

When making fruit ganache, simply replace some of the cream with your chosen fruit purée (I used half cream/half purée). I wanted my ganache to be on the slightly firmer side of medium and came up with 180 g chocolate (in this case a third milk, cuz I wanted to use up what I had, and two thirds dark), 70 g heavy cream and 70 g roasted sweet cherry purée. This turned out to be plenty for the 16 cakes I baked, and the rest went into the fridge for another time. Hmmm . . . . maybe to sandwich macarons or my favorite chocolate shortbread cookies!

BTW - ganache keeps very well in the fridge for at least a couple of weeks and can also be frozen.

I approached it two ways. First: layer of batter/blob of ganache/topped with additional batter to cover the ganache. Second: batter/blob of ganache on top.

Bake at 375ºF for about 20 minutes until set and golden.

Here they are out of the oven.

Let them cool about 5-10 minutes in the molds then turn out onto a cooling rack. You can place them top or bottom side up - whichever speaks to you. I did some of each. You can see the batter/ganache/batter version below in the background, bottom side up, the ganache having settled on the bottom (which is now the top!)

The ganache on batter version is in the foreground, top side up - the chocolate behaved nicely and nestled right into the batter.

Once cooled I gave most a nice swirl of roasted sweet cherry Swiss meringue buttercream, handed a bunch out to neighbors and of course sampled a few ourselves over several days. I also froze some ungarnished to enjoy at a later date.

Steve has always been a bit leery of fruit and chocolate combos so these weren’t his fave, BUT I found them delightful with the ganache nestled in the tart cherry cake and the wonderful creaminess of the buttercream. So tasty!

Mmmm - creamy goodness

Take good care until next time.

Here’s a little trip memory - in the botanical garden in Copenhagen.

Sneak peek - sesame braid and more!

This is one delicious dough folks! First time around I did the sesame braid. Second time around I doubled the recipe and made two standard loaves - great for sandwiches and morning toast.

I have a couple additional versions up my sleeve and look forward to sharing them and the recipe with you in upcoming weeks. We’ve had some lovely Michigan summer days interspersed with heat and humidity so I’m planning my baking projects around the weather. Ahhh - summer.

Here’s a bit of nature for you - the light, the shadows - Steve says I could be an impressionist!

Summer whites - landscaped

Summer whites - natural

Teasel - intriguing to be sure!

Gateau Breton aux cerises et la crème de citron vert

Always looking for ways to use my favorite Breton dough, this one is a take on Gateau Basque, the classic butter cake from the Basque region in southern France/northern Spain. It’s typically baked with pastry cream and/or fruit (cherries, apricots, prunes are options) inside. It turns out that many regions of France have their own version of butter cake, Brittany being one of them, so I opted to use the Breton dough for this project. The Basque dough recipe I use from my Le Cordon Bleu days is indeed very similar to a gateau Breton so why not switch it up a bit.

Since it’s cherry season here in western Michigan and I had some lime juice in my freezer, I opted for a roasted sweet cherry/lime curd combo for my gateau.

For about a pound of pitted and halved Bing cherries, I sprinkled them with a couple tablespoons dark brown sugar, stirred ‘em up, spread them out on a silicone mat lined half sheet pan and gave them a low and slow roast in a 275ºF oven for about an hour or so, stirring them around every 10-15 minutes. I didn’t (forgot to!) do an after roasting final weight for the batch but I can tell you I used about 105 g intact cherry pieces for my 7” size gateau and pureed the remainder (yield a tad over 3/4 cup) to use in both a batch of Swiss meringue buttercream as well as a cherry chocolate ganache (more on that later).

Ooooh!

I had made a batch of lime curd (just sub lime juice for the lemon) the day before, using about 240 g for this gateau and freezing the rest for another as-yet-to-be-determined project. Hmmm - how about lime curd toasted coconut ice cream or lime curd Swiss meringue buttercream? We’ll just see about that.

I already had my Breton dough made as a result of a tart class I recently taught and figured out that a 7” cake pan would be perfect for the 515 g of dough I had on hand.

Let’s assemble this baby, eh? Start your oven heating to 350ºF.

Butter the bottom and sides of the pan well, line the bottom with a round of parchment and butter it too. Press 275 g of dough evenly into the bottom.

Next create a narrow rim to build up the edges using 60 g of dough.

Next pipe in or spread a layer of lime curd (about 190 g) over the bottom keeping it inside the rim.

Now nestle the cherries over that, leaving yourself a rim of curd uncovered by the fruit.

Dollop the remaining curd over the cherries.

Top with 180 g dough, sealing the edges. Remember this is pretty rustic so don’t fuss too much about it.

Lightly brush the top with egg wash or milk for a bit of sheen and some in-oven enhanced browning. With the tip of a paring knife create a cross hatch pattern (or whatever pattern you want) - I went for diamonds.

Bake at 350ºF for 20 minutes then decrease the temp to 325º and bake an additional 25-30 minutes. I rotate my pan about half way through. You’re looking for a nicely golden brown crust.

Remember every oven is different so use your judgement. It’s not easy to assess the interior of this kind of gateau but remember the curd and cherries have already been “cooked” as it were, so you don’t have to worry about a raw center. The cream/curd tends to kind of meld into the dough too.

Ooooh - that’s looks great!

Let it cool in the pan about 10 minutes then, using a small offset spatula, run it just inside the edge of the pan to loosen things. Hold an overturned cooling rack across the top of the pan, lift pan and rack together and flip ‘em over. You should be able to lift the pan right off the gateau.

Now flip it back right side up the same way. Et voilà!

Let it cool, slice and enjoy at room temperature with perhaps a dollop of crème Chantilly, some additional cherries if you have them and some toasted sliced almonds. We sampled it au naturel and gave it a thumbs up.

It stores covered in the fridge for several days. We enjoyed a small slice here and there with afternoon coffee or as a small after dinner treat. Not bad.

On a final note, check this out!! On my daily walks I occasionally swing through a nearby township park and discovered this interesting natural sculpture in the wooded edge. The first time I noticed it was last October right around Halloween - how cool! I call it the tree witch and thought you might like to see it.

Keep on keepin’ on folks. Enjoy summer - it’s not over yet!

Afternoon tea at Hôtel de Crillon

We’ve been back home in Michigan for a few weeks now, and I want to share one last adventure from our European travels. I’ve been mulling over how to describe this one since it didn’t quite live up to our expectations, particularly after the generally stellar teas we enjoyed in the UK in autumn of 2019. Well here goes!

We had planned to meet an old friend for afternoon tea while in Paris, and, after a bit of research, we settled on Hôtel de Crillon, a 5 star spot right on Place de la Concorde that reopened several years ago after undergoing a 4 year renovation. With all the hype and the reputation of the place we were pumped to experience it. I recall during my pastry school days that the hotel was a very sought after spot for students to snag their place as a stagiaire - a real feather-in-one’s-cap kind of deal on the pastry chef resumé.

There’s a lovely lounge area soon after entering with luscious purple flowers and cushiony seating, but we were slated for Le Jardin d’Hiver, an outdoor terrace/courtyard venue for lunch and afternoon tea which lacked much luster or natural beauty - some greenery here and there and otherwise a white theme. Perhaps some might consider it calming, although we thought it pretty tame after the interior sumptuousness.

Entry lounge area

We had a quiet corner where we could catch up on the last few years (6!!) since we had seen Diane. After a lot of chatting (and staff periodically milling about wondering when we might order) we finally put in our requests for tea (me), coffee (Steve) and hot chocolate (Diane) to accompany our tiered tea assortments.

Two classic French cookies, langues du chats and lunettes with raspberry jam, came next. I gave them a thumbs up - crispy and flavorful, just as lovely shortbread type cookies should be.

We each received our own tiered server and could choose EITHER brioche or scones (the EITHER made very clear by the wait staff) which came perched above the sweets and savories. Heaven forbid we could have chosen one of each. Diane and I chose the scone pair (plain and fig/cranberry) and Steve went with the brioche (vanilla cream and strawberry/rhubarb). Truth be told, he’s not a big scone fan and he ordered the brioche simply so I could try it. Isn’t he wonderful?

Scones and sweets

Let’s check out the savories - the menu included focaccia/grilled veggies/olive cream; lobster roll on brioche with lime; goat cheese and pea toast (English muffin like) with radish. We all agreed the pea toast took first place but felt the lobster roll lacked any level of pizazz and the focaccia was one dimensional.

Savories

Before moving on to the sweets, I sampled the fig/cranberry scone which was flavorful but more cake-like than the light, fluffy crumbly scones I prefer. I then stole one of Steve’s brioche (vanilla cream) and found it absolutely superb and what would in the end be my favorite for the day. A hidden stash of vanilla cream in the bottom was perfect with the buttery, light brioche and its crisp exterior. Alas the other brioche (strawberry rhubarb) went uneaten since Steve and Diane showed no interest and I had to save room for other things. Awwww.

Steve’s brioche

The sweets plate

The sweets offerings included a lovely fresh strawberry and orange blossom tart which was tasty indeed (save for the slightly less than crisply fresh crust). Can you imagine slicing and arranging those strawberries just so? It’s a lot of work believe you me.

We were disappointed in the rhubarb dill number - while the cream cheese mousse base was good, the rhubarb dill concoction simply didn’t do it for us.

The third sweet, milk chocolate mousse with pink grapefruit jelly, was odd and quite jiggly. Oh well, ya gotta try some new things right?

In the end it was more about chatting and enjoying each other’s company. The icing on the cake, as it were, was receiving the news through a message from Diane’s husband back home that the COVID testing requirement to get back into the USA had been lifted! She was slated to fly home the same day we were and all of us couldn’t have been happier with the news.

Now we’re back to life as usual, whatever that really means. Since being home, I’ve taught a summer tart class through our local school system and look ahead to occasional pastry activities on the horizon. We’re back in a very casual at home mode for the most part and wondering when all the turmoil around the world will wane. It’s anybody’s guess.

Meanwhile my annuals are potted up, I’m back to regular walks and swims and working on staying calm.

Enjoy summer!

Gelato on Ile Saint-Louis and au revoir Paris

While Berthillon usually gets all the hype when it comes to ice cream in Paris, we discovered Amorino’s gelateria on rue Saint-Louis en l’ile some years ago. It had been a LONG time since we enjoyed their naturally made creamy goodness so on a lovely early summer day with just the right feel in the air it was time. Gelato here we come!

Believe it or not, this was our first strolling-around-let’s-get ice cream/gelato experience on this entire trip, save for some lemon sorbet I had enjoyed with a meal in Stockholm (and I kind of remember a small bit of ice cream with one of the rare desserts we ordered somewhere along the line). Steve, being the ice cream maven, was more than ready.

Amorino has a number of locations around Paris and beyond, so it’s easy to find no matter where you are in the city.

Classic cups

We each went for the smallish “classic” cup size. They allow you to choose as many flavors as you want, all of which go into this cup (or cone if that’s your thing). You can add a macaron on top if you like. We chose three flavors each, sans macaron: I had fruit de la passion, noix de coco et pistache; Steve chose stracciatella (chocolate chip - his favorite from our Italy days), caramel and inimitable, a chocolate hazelnut wonder. Mmmmm!

Lots of flavors to choose from

We sat in the shade at a small table with bar type stools and thoroughly enjoyed our treats. Gotta love it!

Our last few days in Paris gave us a great visual of the moon as it was approaching full status. Below it’s just over half full in the waning evening light after the sun has gone down.

A half moon lit sky

On our last night it was approaching full - I was up about 1 am and shot this one.

Getting close!

News flash - we are now home in Michigan after a wonderful adventure for the past 2 months. We couldn’t even begin to comprehend how much we’d be able to see and experience, both in places we had never visited as well as Paris, familiar as an old shoe.

We’re settling back in and looking forward to a quiet summer of calm, simplicity and of course a little bit of baking here and there - and let’s not forget homemade ice cream. Steve will be so happy.

Take care until next time.

Place Monge, 5th arr. and a bit about brioche

Friday market at Place Monge

We made a visit to our old stomping grounds on rue Monge on a beautiful Friday morning. It just so happens that Pâtisserie Pascal Pinaud, where I did my two stages after pastry school, is located just a few steps from the market. Back then it was often the task given to me (the gofer) on market day to buy whatever produce might be needed for the shop.

Market culture in Paris is very interesting. Parisians have their favorite vendors and will patiently stand in line awaiting their turn. Once they’re up, they take as much time as they need as the vendor picks out (with the customer’s guidance of course) their strawberries, tomatoes, melons, haricots verts, mushrooms or whatever is on their list for the day. It’s all so very orderly.

Back in the day at Pascal’s I was told in no uncertain terms which vendor stand I should visit (seen in the photo below) so I would patiently wait my turn to buy the pommes (Golden Delicious was the go-to) for tartes or chaussons, the berries and currants for garnishing the gateaux/entremets or to tuck into a layer for millefeuille aux citron et framboises and even the occasional lettuce for the daily baguette sandwiches. The stall is still in the same place and it looked like some of the same people were manning it. Fifteen years later!

Waiting in line

We snapped up some beautiful looking haricots verts and luscious fresh fraises for the weekend and strolled around admiring the fresh flowers, cheeses, seafood, saucisses, specialty honeys and so much more.

Fresh from the market

We popped into Pascal’s shop to say hi, Steve hoping to score some pâtes des fruits (they had none - awwwwww.) Chef Pascal wasn’t in, but his wife, who basically runs the front of the shop, remembered me and, in addition to the few pastries we bought, she gave us a small kougelhopf as un cadeau! How thoughtful.

Kougelhopf

Our haul included une tarte aux abricots, un èclair au café, un boule de campagne (country bread) and the gifted kougelhopf which I didn’t hesitate to slice into for a sample. There was un pain au chocolat in the mix but guess what - Steve scarfed that baby down tout de suite! BTW - we thought mine are better - just sayin’.

Treats from Pascal’s

A word about kougelhopf. It’s a traditionally Alsatian speciality with some Austrian ties as well. You can read more about it here. A rich brioche dough baked in a fluted mold, imbibed with a rum syrup and holding rum soaked raisins inside, it’s a treat enjoyed by many.

Working at Pascal’s was my chance to get a real handle on making brioche dough and for years I used the recipe from Pascal’s. He used to chide me if I added the butter pieces too quickly - they needed time to be blended into the dough. Over the years as I did more of my own comparisons and research, I now use a recipe that I find very satisfying. Because the dough is enriched with butter and eggs, the mixing and rising times are important to achieve the light crumb at the end. Nothing worse than a heavy brioche. Ouch!

Pascal’s brioche is indeed a fine example of a well made dough but, truth be told, I’m not a big fan of rum/raisins, and the imbibing syrup made for a soggy mouth feel. Don’t get me wrong - it’s a very well made kougelhopf, but I prefer a nicely baked, un-soaked brioche (a bit of lemon zest anyone?) with a schmear of jam and maybe some fresh fruit on the side. Yes.

Kougelhopf

Steve enjoyed the èclair as his after dinner treat. I loved the tarte aux abricots with my coffee the following morning, and we both thought the whole wheat boule de campagne made for great toast with a bit of butter and good cheese (or jam or PB or . . . . .)

A big thanks to the vendors at Place Monge and to Pâtisserie Pascal Pinaud. Those were the days my friends.

YUM!

Market flowers at Place Monge

Paris reverie

Paris. One word that conveys so much. For those of you who’ve been, this image of rooftops, chimneys, trees and beautiful evening light will speak to you. While not necessarily what most people think about when they hear that one word, the feeling I get from this image is one of calm, contentment and feeling at home.

Odd isn’t it? Steve and I lived here for 9 months during my Le Cordon Bleu pastry schooling and have been back a number of times over the years. Our last trip was 4 years ago, our return this time much longer than anticipated thanks not only to COVID but to life events in general. Things are always changing aren’t they.

Rows of plane trees in Le Jardin des Plantes

During those months, we lived in an apartment on rue Poliveau in the 5th arr, just down the street from Le Jardin des Plantes, the city’s primary botanical gardens. I took regular walks through the Jardin and along the Seine, always anticipating the vision of Notre Dame in front of me as I passed under the Pont de la Tournelle. Now undergoing restoration after the devastating April, 2019 fire, it is a much different image than the one that would always take my breath away a little bit every time it came into view. There’s something about it.

Restoration underway

Here are just a handful of images that help define Paris for me.

Wallace fountain on rue Jeanne d’Arc in the 13th arr

Small city garden at Place Louis Armstrong 13th arr

Streets named for artists like Edouard Manet (one of Steve’s faves!!), Rubens and Watteau.

Iconic art noveau metro signage - nearest line 5 station to our AirBnB

Fountains - this one is near the foot of rue Mouffetard in the Latin Quarter

One of Steve’s favorite pastries - Paris Brest from Maison Landemaine on rue Monge

Boat rides on the seine - Musée d’Orsay from the water

Lovely flowers on a neighboring balcony

Baguette from nearby pâtisserie/boulangerie La Gobelinoise on Av. Les Gobelins, 13th arr

Sailboats at Le Jardin du Luxembourg

Fruit stands - C’est la saison des cerises! Near rue Mouffetard.

Vintage shop signs at Musée Carnavalet

Do I have to say it??

There’s so much more - I’ve barely scratched the surface. It’s good to be back.

Stay healthy and enjoy summer!

Charles DeGaulle statue on Place Clemenceau

Cheese, siroopwafels, windmills and canals

As we were planning this trip, we knew the Netherlands would be on our itinerary. We considered staying in Utrecht, Rotterdam or Delft but our decision to make Gouda our stopping point came about on a bit of a whim after we read a NYT article about the place some months back. Known for its delicious cheeses (we’ve had our share of them from our favorite Cheese Lady shop in Grand Rapids), it seemed right to go directly to the source and check it out.

Let’s launch right into the food portion of the program.

't Kaaswinkeltje (Dutch for “the cheese shop”)

't Kaaswinkeltje was just down the street from our hotel and boy do they have LOTS of cheese. The center pile is mostly variations of Gouda but the case in the rear holds all manner of cheeses from many countries. Tasting is available and encouraged! We ended up with a shrink wrapped hunk of Beemster Gouda, one of our Cheese Lady faves, that would accompany us to Paris. Baguette anyone?

In addition to cheese, another Gouda food draw is the locally produced siroopwafels (or stroopwafels as they seem to be called by most). The Kamphuisen brand claims theirs is the original recipe, but we certainly saw many other labels selling a similar product. A thin, crisp, waffle-like cookie sandwiched with a skosh of caramel syrup and a hint of cinnamon, they’re pretty darn good with a cup of coffee or tea.

There are plenty of bakeries in town too. Curiously I noticed some identified as bakkerij and some banketbakkerij so I had to ask “What’s the difference?”. A quick search told me that the former is likely to focus on the daily breads, rolls, cakes and cookies while the latter will also offer finer pastries, chocolates and confections which require another level of production.

At a nearby banketbakkerij Steve just had to pick up some assorted pâte de fruits, a treat he fell in love with during my pastry school days in Paris nearly 16 years ago.

Our haul

A quick note about the word banket - for those of you not familiar with it, it’s a traditional Dutch almond-paste-filled pastry log that my Mom (and many other’s moms) made every Christmas for many years (always a big hit with the kids and grownups as well!). It can be baked in the shape of a letter signifying the recipient’s initial or made simply as a straight log. Great memories. (None of the shops are currently selling it since it’s a holiday offering).

Other than the items in the photo above, we didn’t indulge at all in sampling some of the other local baked goods. One needs a break every now and then, eh?

In addition to the many shops, the pedestrian and bike friendly central old town is picturesque with churches, the old town hall and market square, windmills, bicycles, canals and boats. It’s decked out for the town’s 750th anniversary too!

Gouda town hall (photo courtesy of Steve Soper)

Worn down from weeks of traveling, we spent our first couple of days in Gouda in a very low key fashion, relaxing, strolling, browsing the Saturday market and, of course, taking to the water. Wherever we travel, if there’s water nearby and a boat trip available, we jump at the chance; seeing a place from the water gives one a wholly different perspective on things.

Saturday market strawberries

Canal cruise in Gouda

Along the canal

We’ve been using Eurail passes for our train travel throughout this trip, and we found it especially easy bopping from city to city in the Gouda area. Steve has become a master of setting the trips up on our iPhones. When we’re ready to go, we head to the train station, scan in the QR code to get us through the turnstiles, find our platform and wait for the train. Slick!

One day we headed to Delft, an 18 minute ride from Gouda to Rotterdam Centraal where we then easily changed trains for a 12 minute leg to Delft. So easy and so much better than driving, finding a place to park etc, etc, etc! If only we lived where we didn’t have to depend on cars all the time. Wouldn’t that be fantastic?

Approaching the Oude Kerk

Delft is a beautiful city - canals, churches, shops, lovely streets and a pleasant vibe indeed. We visited both the Oude Kerk (above - it’s been leaning for centuries) where Johannes VerMeer is buried and the Nieuwe Kerk where the Dutch royal family members are buried. It’s mind boggling to realize how many centuries these structures have been in existence.

We stopped at Stads-koffyhuis for lunch, a popular spot that I had discovered online somewhere. It’s been in business for many years and gets good reviews. Let’s go!

Steve treated himself to a vanilla milkshake and a roast beef sandwich while I went for a perfectly sized bowl of cheesy tomato soup which came with a tasty dark roll. Delicious! Of course, I had to sample one of the offerings from their baking kitchen and, after a bit of thought, chose the strawberry tart - tis the season after all.

The crust was a bit chewy (in a very good way), reminding me of my favorite Breton dough. Filled with a light strawberry cream topped with fresh berries, my expectations were more than met. An equally tasty crisp almond cookie accompanied my cappuccino. Aaaah.

Our last day trip took us to Utrecht, another easy 18 minute train trip from Gouda. The Dom Kerk is usually on the agenda for many traveler’s with the Domtouren a goal. What had once been a connected structure, the church and the tower are now completely separated by an open courtyard space as a result of a severe wind/rain storm back in the 1600s that destroyed a section of the building. The tower is currently undergoing massive maintenance and is covered in scaffolding. We visited the church and were particularly struck by the peaceful calm of the old cloisters and gardens.

Being once again driven by the presence of water, we took another canal cruise which allowed us to view parts of the city periphery that we wouldn’t have seen during our very short visit to Utrecht. It’a bustling popular university town with a lot of territory to cover and we barely dipped our toe in, so to speak.

Utrecht canal

Time to say goodbye to the Netherlands and head for Paris. See you in France!

Bergen, Bryggen, funicular, (more) pastries and (more) fjords

Our focus in Bergen after 5 weeks of travels hither and yon was to enjoy several days of respite. Whew! Arriving late afternoon our first day, we scooted out to pick up some groceries and vino and settled in for the evening.

Feeling it necessary to set aside the tourist push to visit museums, churches and fortresses, we opted for strolling, relaxing, enjoying a boat trip or two, sampling some local pastries, dining on light home cooked meals and soaking in the ambience of the place with its natural beauty and interesting history - all good stuff.

Our first outing was on a rainy morning when we hopped on the funicular to get a view of the city. Our AirBnB was practically at the doorstep of the funicular ticket office - easy peasy. Given the weather, we didn’t spend too much time up top but certainly got a good view of the city and harbor. You can see the funicular tracks to the right in the image below.

Rainy day view of Bergen center/harbor from the funicular

Happy flowers outside the funicular shop

We strolled over to Bryggen, the popular Unesco World Heritage site (and jewel in Bergen’s crown) consisting of a community of commercial wooden buildings connected by wooden passageways. Currently you’ll find them housing shops, museums and restaurants but there’s a lot of history that goes back centuries. You can read more about it here.

View of Bryggen

Between the buildings

Of course, after our Flåm experience, we had to give boller another try from a well thought of bakery right on our street. How handy is that! Two different fillings this time - the almond version (mandelbolle) had a nutty almond filling layered in the dough in addition to the pastry cream in the center; the fyltbolle contained a mix of pastry cream and blackberry jam. Interestingly fyltbolle translates simply as filled bun. My brief search tells me that the jam/cream combo is common, buuuuut . . . . I suppose you could fill ‘em with whatever tasty filling your heart desires.

We found the dough too soft and not as good as those in Flåm. The almond bun needed a bit longer baking time methinks, being on the pale side for our tastes. Plus, I prefer my pastries on the smaller side - not too big, not too little. That’s it - no more boller for us.

Mandelbolle and fyltbolle from a nearby Bergen bakery

A couple of our mornings/early afternoons were taken up by cruises - one a short cruise of the Bergen harbor and the other a longer cruise through the Osterfjorden to Modalen, said to be the second smallest municipality in Norway. It was established in 1910 and wasn’t accessible by road from Bergen until 1976.

A slice of Bergen from the harbor

Stunning waterfall on the Osterfjorden (photo courtesy of Steve Soper)

View of Modalen (photo courtesy of Steve Soper)

Otherwise our city strolling led us to discover various interesting sculptures as well as lovely spring flowers.

Hmmm . . . . homeless?

It has certainly been tulip time in Scandinavia!

On a bit of a whim Steve, the choux paste lover, picked up a pistachio èclair from a Parisian style shop (Sebastien Bruno) in the center shopping district. We also snagged a croissant and a pain au chocolat from a bakery in Bryggen to enjoy with our morning coffee (by now you should know that we invariably include pastry sampling in our itinerary.)

Over priced èclair

We agreed on a so-so rating for all. Steve deemed the choux OK but without enough pistachio flavor, too sweet overall and très cher.

We gently heated the viennoiserie in the oven the following morning and upon first bite found the taste to be sort of metallic and not pleasant. We couldn’t put our finger on it, but I suspected it was some aura from the oven that did it. After a few minutes and another bite, the off flavor seemed to have dissipated. In general they were otherwise light, crispy and very well laminated so the flavor issue was odd. Who knows.

Nice croissant lamination

Time to say goodbye to Bergen. Gouda here we come. Let’s hear it for cheese!

Bergen’s festplassen

Flåm, boller and fjords

We had planned our visit to Flåm for the purpose of seeing the fjords from both land and water but were also anticipating catching our breath with the peace and quiet of the mountains. We had plenty of time upon our arrival in this small ville to visit the TI office, check into fjord cruises/local eateries and generally get a lay of the land.

After a leisurely breakfast on the first of our two mornings in Flåm, we picked up our fjord cruise tickets and then headed for the Flåm Bakeri which we had heard about through the local vibe. We would enjoy our treats later.

Note the yellow and red paint colors above - we saw many buildings of similar colors dotted throughout the countryside.

The pastry case

While Steve worked on some photos and blog notes, I went for a brisk walk in and around town - something I’ve been missing during our days of city sightseeing. Gurgling streams, picturesque homes, gorgeous mountains - lovely.

Just around the bend from town - our hotel is the brown building complex (center of photo)

Typical Norwegian homestead

Babbling stream

Looking across the water from our room

Time for pastries! We had chosen two different boller/bun versions from Flåm Bakeri. First is Solbolle, literally translated as sun ball or sun bun - a cinnamon (not always) swirled yeasted dough topped with pastry cream and baked. It’s reportedly one way Norwegians (particularly above the arctic circle) celebrate the return of the sun in late January after the sunless dark days of winter.

Second is Skulebolle/skolebolle or school bun - sweet yeasted bun (not unlike the solbolle) filled with pastry cream, iced and coated with shredded coconut. I hear it’s a favorite to celebrate the last day of school. Oh - by the way - boller is the plural of bolle.

Solbolle and Skule (or skole) bolle

We shared these goodies a little before we headed out for our fjord cruise and pronounced them both delicious! Nicely textured bun (not too soft, not too chewy), smooth vanilla scented cream and great flavor all around. Steve especially liked the skule/skolebolle for its coconut-ness.

Quick note - after doing a search about Norwegian buns there are many variations out there folks. Later in our travels we came across another place that sold fyltboller which basically translates as filled bun - talk about a blank canvas! At any rate any type of bolle/bun rules in Norway!

Let’s hit the fjord!

Boarding our cruise boat

The day was pretty perfect - breezy, 60s, sunny with scattered clouds - time to cruise. Though once we got out onto the water it was more chilly, especially on the shaded sides of the boat, and we had to jockey for just the right position to have a good view as well as stay protected and warm. Here a few scenic images for you.

Small village on the fjord

Motoring along

Snowcaps

Laegdafossen - the most stunning waterfall along the route (foss is Norwegian for waterfall)

The boat landed in Gudvangen where we hopped on a bus back to Flåm. A good trip indeed.

Next up - Bergen! I’ll be back.

These make me smile

From fire to ice in Scandinavia

Sunset in Stockholm

Taking a break from the pastry side of things, I’d like to show you a peek at the natural beauty we’ve seen in Scandinavia. On our last night in Stockholm we were treated to this amazing sunset display. Starting out with the sun peaking through the clouds as it went down, the sky morphed into an amazing display of orange shades with tints of fuchsia and purple. Wow!

Oslo offered us vistas of sunshine, swirling clouds, sparkling water and islands along with ferries moving to and fro. Even the big cities can’t keep Mother Nature from showing off her finery.

View from the Akershus fortress in Oslo

We were in for unexpected scenes on the train from Oslo to Myrdal as we climbed into blue-iced and snow covered expanses. Though in the image below it looks grey and overcast, at points the snow cover was so vast as to be literally blinding. Photos just can’t do it justice - you had to be there!

From the train on our way to Myrdal

We peaked at an altitude of 1222 meters (4000 ft) at Finse before we descended to Myrdal’s 866.6 meters (2837 ft) to catch the Flåmsbana down to Flåm.

Above the tree line at Finse

On the Flåmsbana on our way down to Flåm

More to come! - I’ll be back!

A glimpse at the Aurlandsfjord in Flåm

Fika in Stockholm

I believe I’m probably the gazillionth person to mention the Swedish tradition of fika which is essentially a coffee (or tea) break during the day when folks get together to set their cares aside, chit chat and enjoy a piece of cake or pastry. Much like the French le gouter or British afternoon tea, it’s a lovely tradition enjoyed by so many.

For our Stockholm visit we met up with British friends Richard and Pauline and enjoyed getting to know the city and see some of its many sights. One beautiful day we visited Skansen, a large park/zoo/open air museum on the island of Djurgården, just one of the many in the archipelago.

In one of the historic buildings in the town quarter we discovered a small cafe serving coffee and baked goods and decided to go for it. With a rustic cozy flair and a lovely outdoor space it offered us a chance to rest ourselves for a bit.

All four of us snagged a cup of coffee, Richard had a slice of rhubarb cake with crème anglaise and Pauline and I chose the almond cake option with a side dollop of whipped cream. Aside from the coffee, Steve abstained.

I wanted to see how the almond cake stacked up to the one(s) I had made and written about in this post a couple of years ago. Although somewhat disappointed (feeling my efforts had yielded a much more tasty result!), the topping had some crunch and the almond cake base was okay save for the rather dry edges. It was still a worthwhile comparison though. You never know unless you try!

Our treats were served on different patterned plates, and we enjoyed them out in the sunny courtyard garden before continuing our exploration of the Skansen grounds.

On another day of strolling from island to island in central Stockholm, we stopped at Thelins Grand Cafe on the Kungstradgarden, an outdoor gathering space with gardens at one end, cafes flanking and lots of people about. It was obviously a popular spot with a line out the door and outdoor tables at a premium.

Just A glimpse of the pastry case

In addition to the intriguing items in the case, my eye spied the variations of bullar, classic intricately twisted buns such as cinnamon and cardamom. Once again I was eager to sample a true Scandi version of bulle (the singular of bullar) after my own attempts at cardamom buns a while back. There was a lighter version that appeared to be sprinkled with a bit of sugar (top rear below) - I chose that.

Some of the cafe’s treats

We were happy to grab a table inside since it was pretty breezy and cool that day.

Richard and Pauline chose savory sandwiches and Steve continued to exert great will power and abstained except for a sparkling drink.

I anticipated that perhaps my bulle had a thin schmear of almond filling since it’s so commonly used in many Danish pastries, but, alas, I couldn’t really confirm that as I ate. It was tasty nonetheless with a light sweetness, simple lovely bun texture and delicious with my large cup of hot chocolate.

Here’s to the fika traditiion and all it stands for. Thanks Sweden!!

Danish pastry class in Copenhagen

Update note 3/06/23: please note that I am NOT the owner/operator of the Terrible French Pastry School. I’ve had several people who plan to travel to Copenhagen email me requesting class sign ups. You must contact the school (link below) to set up any classes with Chef Fred. You’ll be happy you did!!

Always up for another baking adventure, particularly one involving one of my favorites, laminated dough, I checked out various pastry/baking classes that might be available in the cities on our travel itinerary. What better subject to tackle than Danish pastries (aka wienerbrød) in Copenhagen, the capital of Denmark! Yes please.

The site of said class was at the Terrible French Pastry School (hmmm . . . . the name gives one pause) located in the Frederiksberg section of Copenhagen. The school is owned and operated by Frédéric Terrible, a Frenchman by birth, Dane by assimilation, who has been running the school for about 10 years now, following a long career in the pastry world. Classes are generally available in Danish and English (“for the tourists” says Fred) and can also be arranged with French as an option. His “open” classes are available for general sign up, and he also accepts requests for private events.

Turns out it was an easy Metro ride + short walk from our digs on a coolish, sunny beautiful morning, perfect for working with the layered, buttery dough. The building is set back off the street situated on a small cul de sac and the entrance very unassuming with a small gold “Terrible” plaque to the left of the door (Steve snapped this photo of me working on taking my own photo).

The kitchen/teaching space is perfect for groups of 10-12 people with a line up of working stations topped with dusting flour and necessary tools in the center. Ovens, mixers and assorted supplies are appropriately placed along the windows and periphery of the space.

Recalling fondly my own commercial kitchen during our Rhode Island years, I appreciated its spaciousness and organization.

Chef Fred had his base dough recipe hanging up for all to see and would review the steps of dough making later in the class. I appreciated his insight into some of the differences in the dough when one uses water (crispy) or milk (less crispy), egg (softer) or no egg (less soft), different types of flour - all details that I’ve reviewed, compared and tried a number of times when deciding on a base recipe. So much to take in and everyone has their own favorite way of doing things.

While we didn’t actually perform all of the dough laminating steps in class, he reviewed the different approaches to doing the folds (noted on the right side of his chart). He makes a lot of dough for his Danish and croissant classes ahead of time using a professional sheeter which yields more precise layers than when rolling by hand as we homebodies do. So cool!

We worked in pairs (my mate was Naomi from the UK), each pair having an oven available to bake the various pastries we created. We sat comfortably while Chef Fred made some introductory remarks about the class flow and then it was time to push our chairs back and get rolling!

Any laminated dough class I’ve attended or have taught myself typically starts with completed dough that the chef makes ahead - otherwise one could not accomplish all that one hopes to in the allotted time frame. We proceeded to roll out four different dough portions (6 pastries from each), cutting and shaping them in various ways.

Demo to get us started

First up - 12x12 cm squares cut with a pastry bicycle cutter, a useful tool for even portioning. I’ve never owned one but certainly realize how helpful they can be. Please note: I have NO affiliate links with Amazon or anyone else; the link simply shows you what this tool looks like.

Also known as spandauer (traditionally remonce filling and a topping of custard or jam), we piped a just right dollop of remonce (equal weights almond flour, sugar, butter) - not too much and not too little - in the center.

Bring 2 opposite corners to the center and push down very firmly with your fingertip, all the way down through the dough and the cream to the paper. Whoa! This was one of those ah-hah moments. Typically I push/press but this is much more dramatic with very firm pressure. It’s all about being in charge of the dough.

Repeat with the other 2 corners. Yes!

Quick note - even with the firm pressure, once proofed some corners might unfurl - just press them back into the center before topping with custard and baking.

We rolled out the next dough portion and cut 6 rectangles about 10x15 cm each. Fold in half and make 5 cuts along the open edge . . . . .

Open each piece up and pipe a strip of remonce (not too much, not too little, not too close to the edges) down the center; top with chocolate chips.

Proceed with the braid (of sorts) by crisscrossing alternating strips from top to bottom, kind of like this Danish braid.

Chef Fred gave us a demo - here’s the start of his.

Once all wrapped up, press the side of your little finger across the open top to seal it and tuck the bottom ends underneath. Voilá

As we completed each tray of pastries, they went into the oven for proofing. Chef had given the ovens a whiff of warmth and kept an eye on the temps so they hung between 25ºC (77ºF) and 28ºC (82ºF). Too warm and the butter will start to melt, resulting in pools of butter and less than stellar texture after baking.

Note that European style butter with higher butterfat content can stand up to warmer proofing temps than run-of-the-mill butters so be forewarned! When in doubt I plan for a lower temp (70 - 75ºF) and longer rise (instead of 1 to 1.5 hours, go 2 to 2.5 hours) to avoid the butter leak issue.

We continued on with cinnamon spirals and sesame/poppy seed twists to complete the morning’s foursome of pastry treats.

Another ah-hah moment - to keep the cinnamon spirals from unfurling during proofing/baking, simply lift the end away from the coil a bit and fold/tuck it underneath the center. It’s now trapped on the bottom. Then press two fingertips in the center of each spiral and stretch it out, also flattening the whole thing (lower center below). This essentially tells the dough to bake outward not upward for a nicely shaped end result.

Amazing what one never read about or witnessed anyone do before. Cool.

The sesame poppy twists came about after rolling a rectangle of dough, spreading a thin layer of remonce over it then folding it in half. We coated one side with sesame seeds and the other with poppy then cut and snugly twisted the strips.

Press the ends of the twists firmly onto the parchment to hold them in place (and don’t be afraid to really smoosh them down!). Notice the bicycle cutter below.

Once the proofing was underway Chef Fred gave a quick demo on making crème pâtissiére, one of the essentials of French pastry.

When we were ready to bake, we piped pastry cream on the center of the spandauer (not yet accomplished in the image below), egg washed them and added a sprinkle of pearl sugar. The almond/chocolate chip braids were adorned with the pearl sugar and slivered almonds.

All proofed

Let the baking begin! We rotated trays in and out of the oven until all were baked to golden perfection.

We sampled our wares and also boxed some up to take home. Steve was a happy camper indeed!

After the class Chef emailed all of us a detailed recipe pack with great diagrams of various Danish shapes - can’t wait to try a few others!

All in all a great morning and lots of fun. If you’re planning to be in Copenhagen and feel the baking bug coming on, I highly recommend Terrible French Pastry School. Thanks so much Chef Frédéric (who BTW is cool with me writing and sharing this).

Later that day Steve and I strolled through popular Tivoli Gardens where we found the flowers simply divine. Enjoy!