Favorite garnishes part 3: easy brittles (and Happy New Year!)

Moelleux chocolat/mascarpone cream/sesame brittle

I freely and proudly admit that I’m a dough loving gal in the pastry kitchen. Give me tart dough, puff pastry, croissant and Danish dough, yeast breads (lean and enriched) and shortbread and I’m a happy camper.

Other than the occasional chocolate nut bark or cluster, soft caramel or chocolate truffle, candy making isn’t something I do often. But, particularly when it comes to a tasty garnish, there’s nothing like a snappy brittle to brighten up one’s day. Not only great for a small snack when you’re craving a hint of sweet crunch, they’re a wonderful way to dress up small cakes, custards, ice cream, tarts . . . . . . . . I think you know where I’m going with this.

Here I’ll focus on what has become my go-to-perfect-for-garnsh brittle recipe, compliments of Yotam Ottolenghi”s book “Sweet”. So straight forward with nary any muss nor fuss with candy thermometers or sugar cooking stages. Let’s keep it easy!.

Ottolenghi’s sesame brittle

Here’s a previous post with the recipe and one of the ways I’ve used it. And here’s the recipe again.

  1. Toast 125 g sesame seeds (mix of 1/3 black and 2/3 white or all white like I did) either in the oven at 325ºF for about 10 minutes until nicely brown, stirring occasionally, or in a skillet on medium-low on the stove top. Do what you're most comfortable with. Set aside. Increase the oven temp to 350ºF.

  2. Have two half sheet pans and four pieces of parchment (or two parchment and two silicone mats) at the ready.

  3. In a medium saucepan put 100 g granulated sugar, 100 g light corn syrup, 50 g unsalted butter and 1/8 teaspoon salt. Stirring constantly on high heat, blend the mixture and bring to a boil. Remove from the heat and stir in the toasted sesame seeds.

  4. Put two pieces of parchment (or Silpat!) on a heat proof surface (I used two overturned half sheet pans) and pour half of the sesame mixture on each. Cover with the other parchment pieces and roll with a rolling pin until about 1/8 inch thick.

  5. Slide the paper with the sesame caramel onto half sheet pans and remove the top layer of parchment. Peel it back gently, using an oiled silicone spatula to push down any caramel that might stick. Bake for about 20 minutes until nicely browned. Remove from oven, cool and break into shards.

Oiled spatula to hold the brittle down while removing the parchment

Bubbling away in the oven

Out of the oven

Pumpkin custard tart with sesame brittle from a Thanksgiving past

I also made a HALF recipe of a cocoa/cacao nib version by subbing cacao nibs (60 g in this case) for the sesame seeds and adding 10 g sifted Dutch process cocoa powder into the sugar/butter mixture along with the nibs. It’s another great addition to teacakes and ice cream as well as a garnish or crunchy layer for desserts, particularly when you need a bit of chocolate-ness.

Note: the cacao nibs I use are pretty chunky so I put them in a zip-top bag and pound them with the smooth side of a meat mallet to crush them up. It works!

Cacao nib version

These brittles come out thin and crispy without fear of any tooth-sticking pull. They store nicely in single layers between pieces of parchment or waxed paper in a well sealed container (ideally in a cool/non-humid environment) and can also be frozen for several weeks.

Get creative with your own version. I’ve done one with puffed rice. Finely chopped nuts of choice are always an option and crushed pumpkin seeds aren’t bad either.

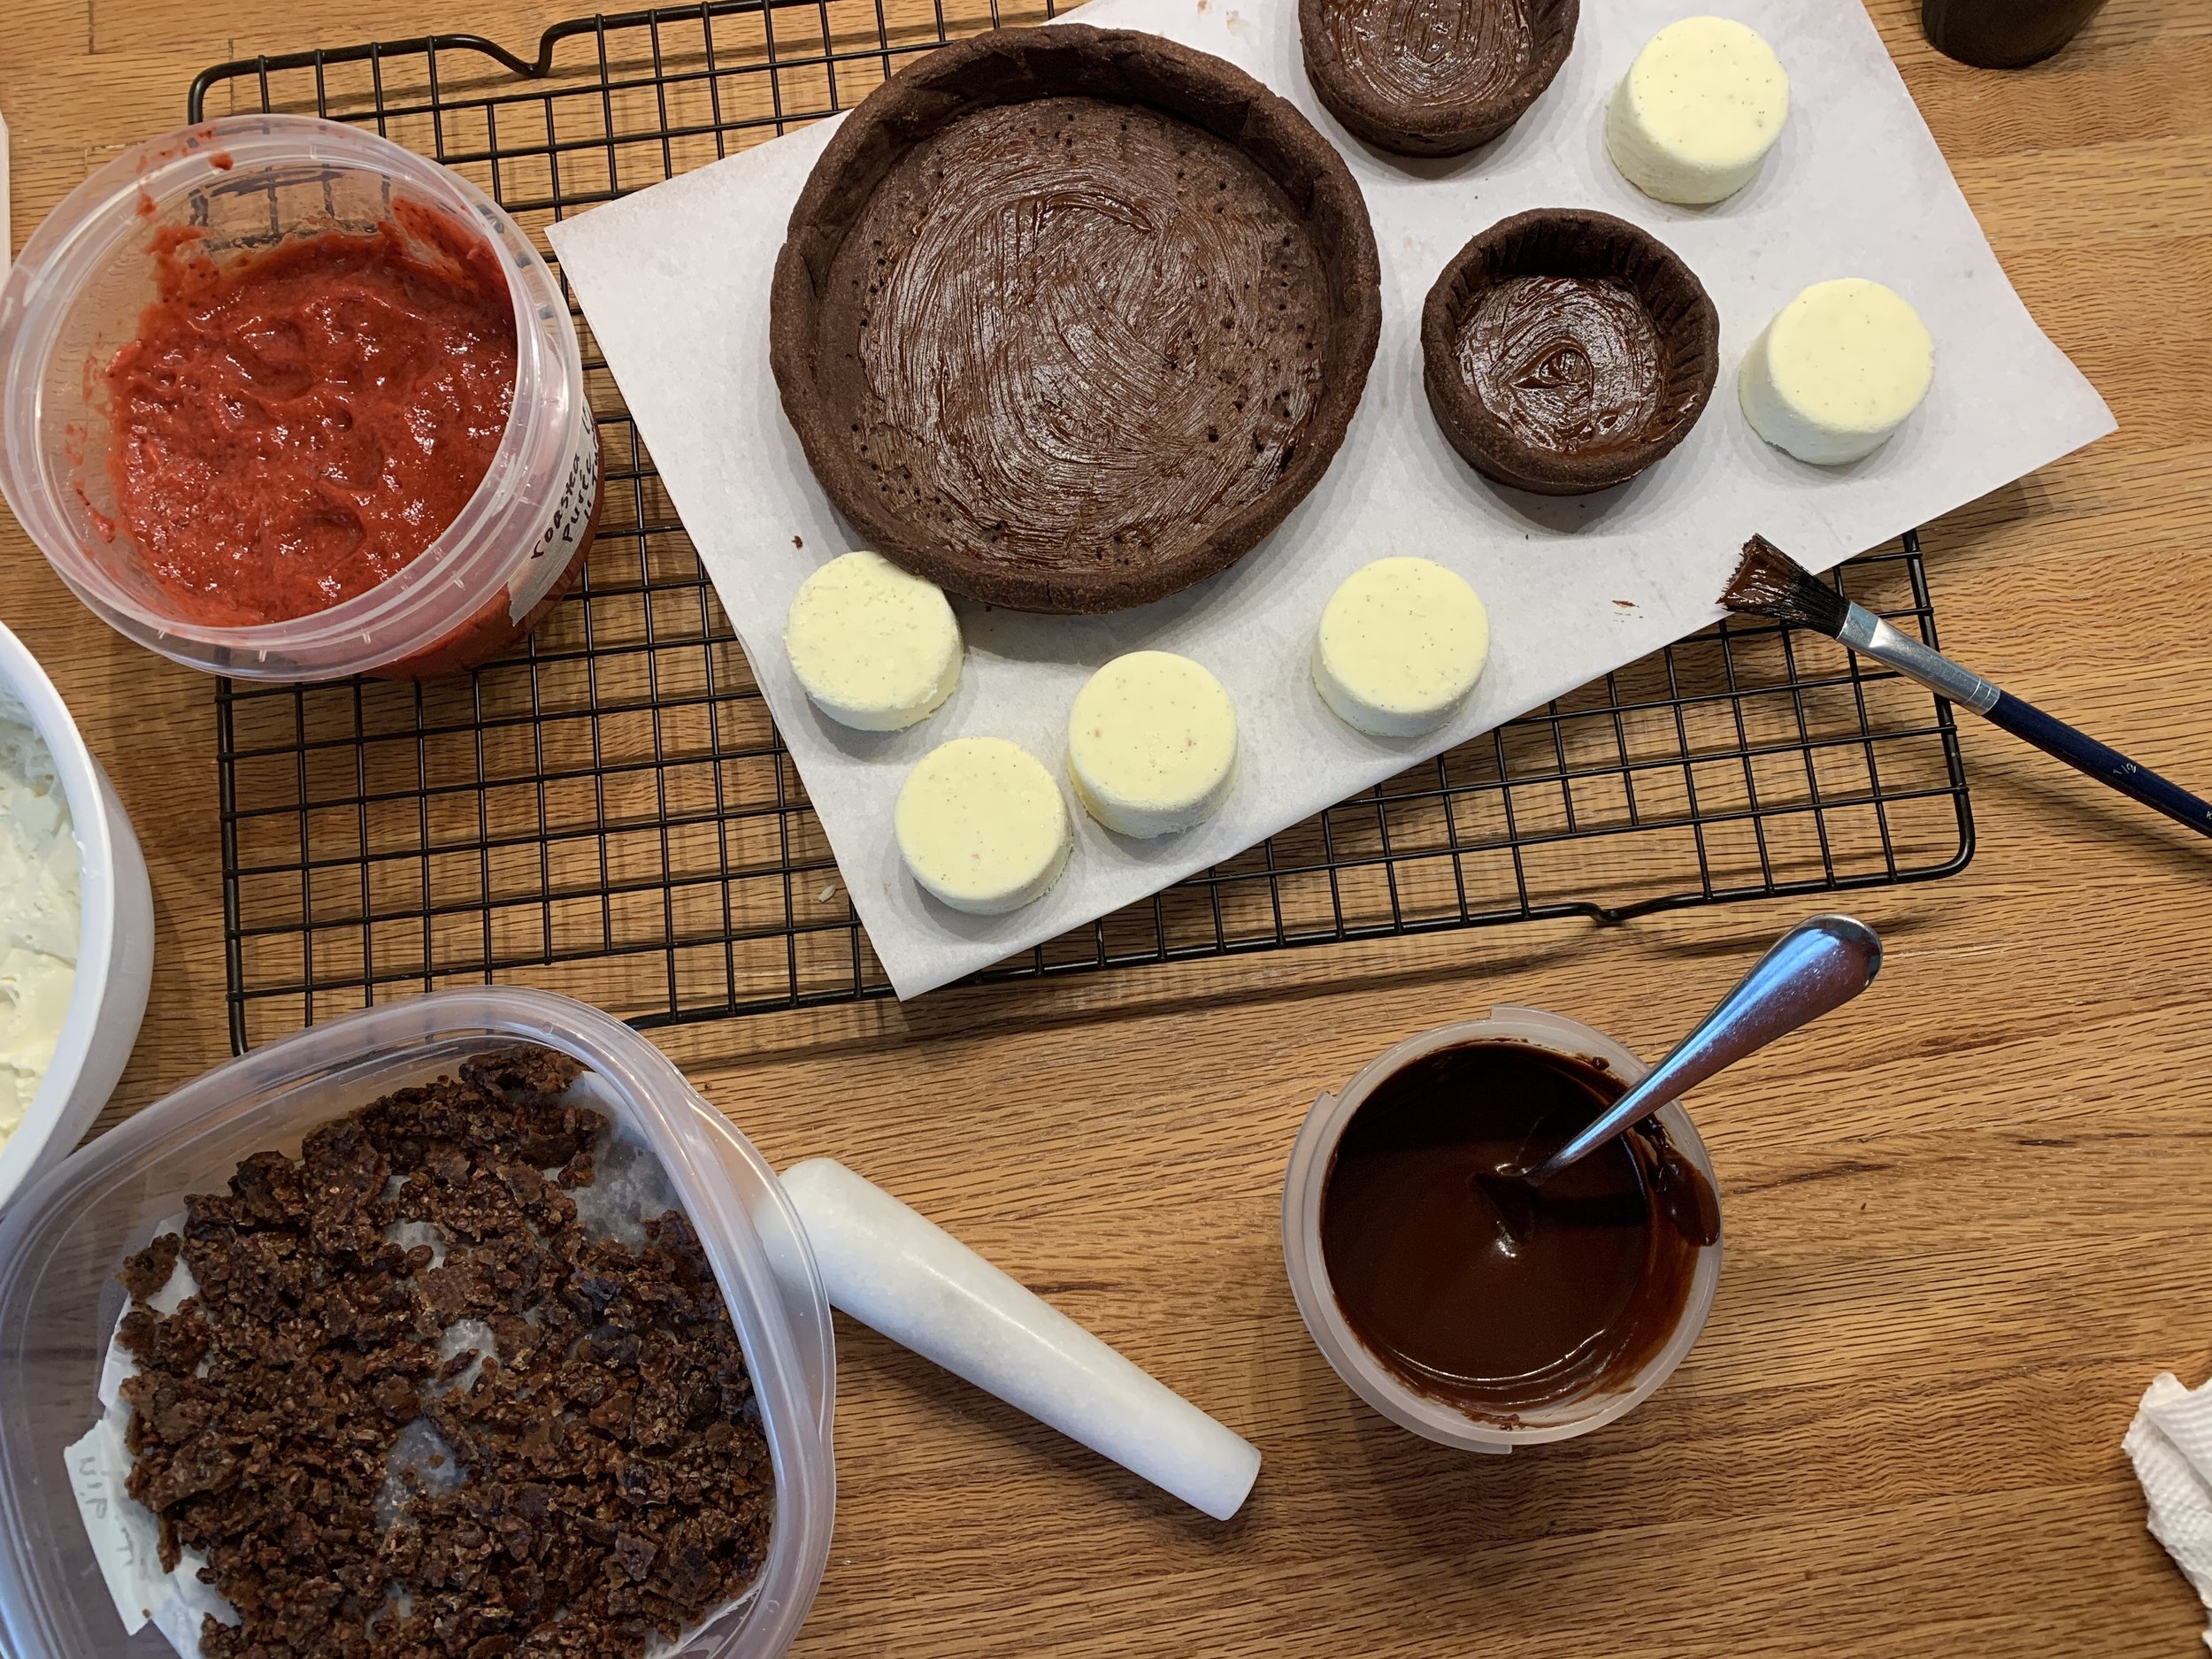
Before I go, here’s a quick tart project I did to use up some leftover components in my fridge and freezer. I had enough dough for a few small tarts; some dark chocolate ganache (3 parts cream to 2 parts chocolate); a handful of petite, frozen ricotta custard rounds from an earlier project; some thawed roasted Michigan strawberry purée that I had used for our Christmas Eve dessert (more on that later); a little bit of white chocolate to make a loose ganache for whipping; plenty of cacao nib brittle.

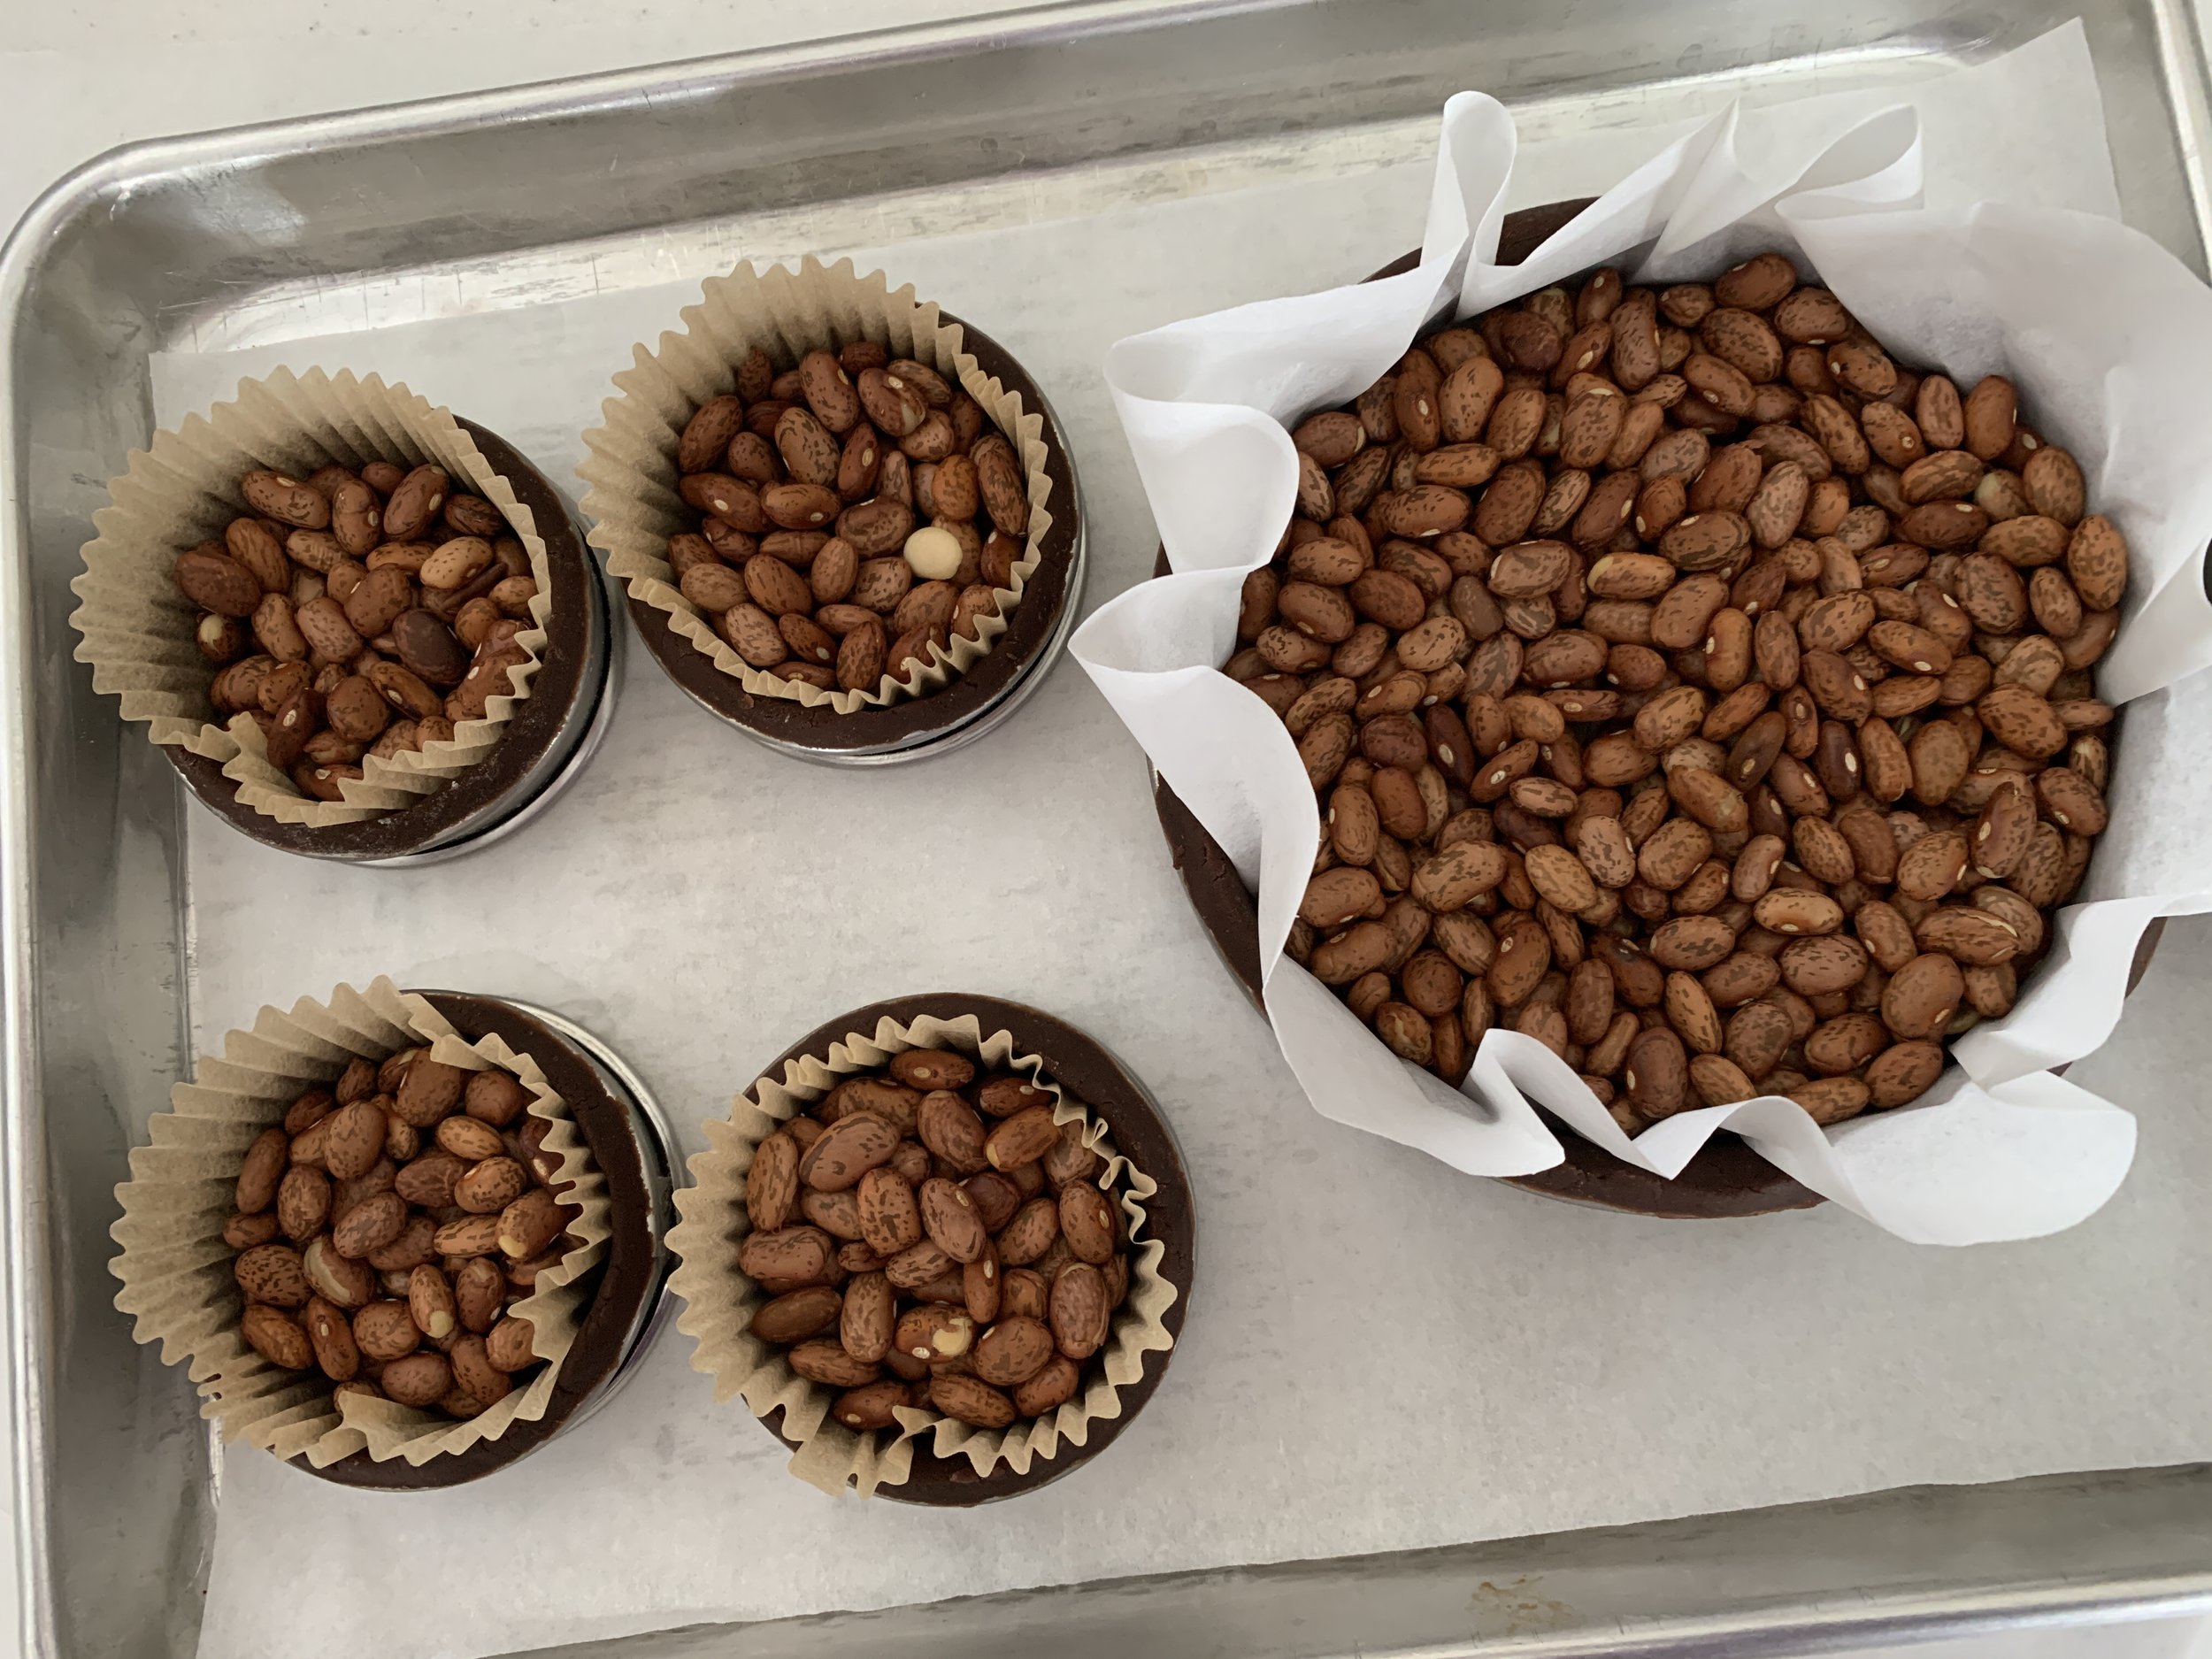
I blind baked some chocolate tart shells with my favorite chocolate tart dough - one 140 mm “sharing” size and four 65 mm individual sizes. TIP: this is a good plan ahead step since you can freeze blind baked tart shells for days.

Two of the smaller tarts served as a quick dessert after the Christmas holiday, filled with ganache, topped with whipped cream and crushed nibs. So tasty.

For the remaining tarts I brushed some dark chocolate ganache on the bottoms . . . . . .

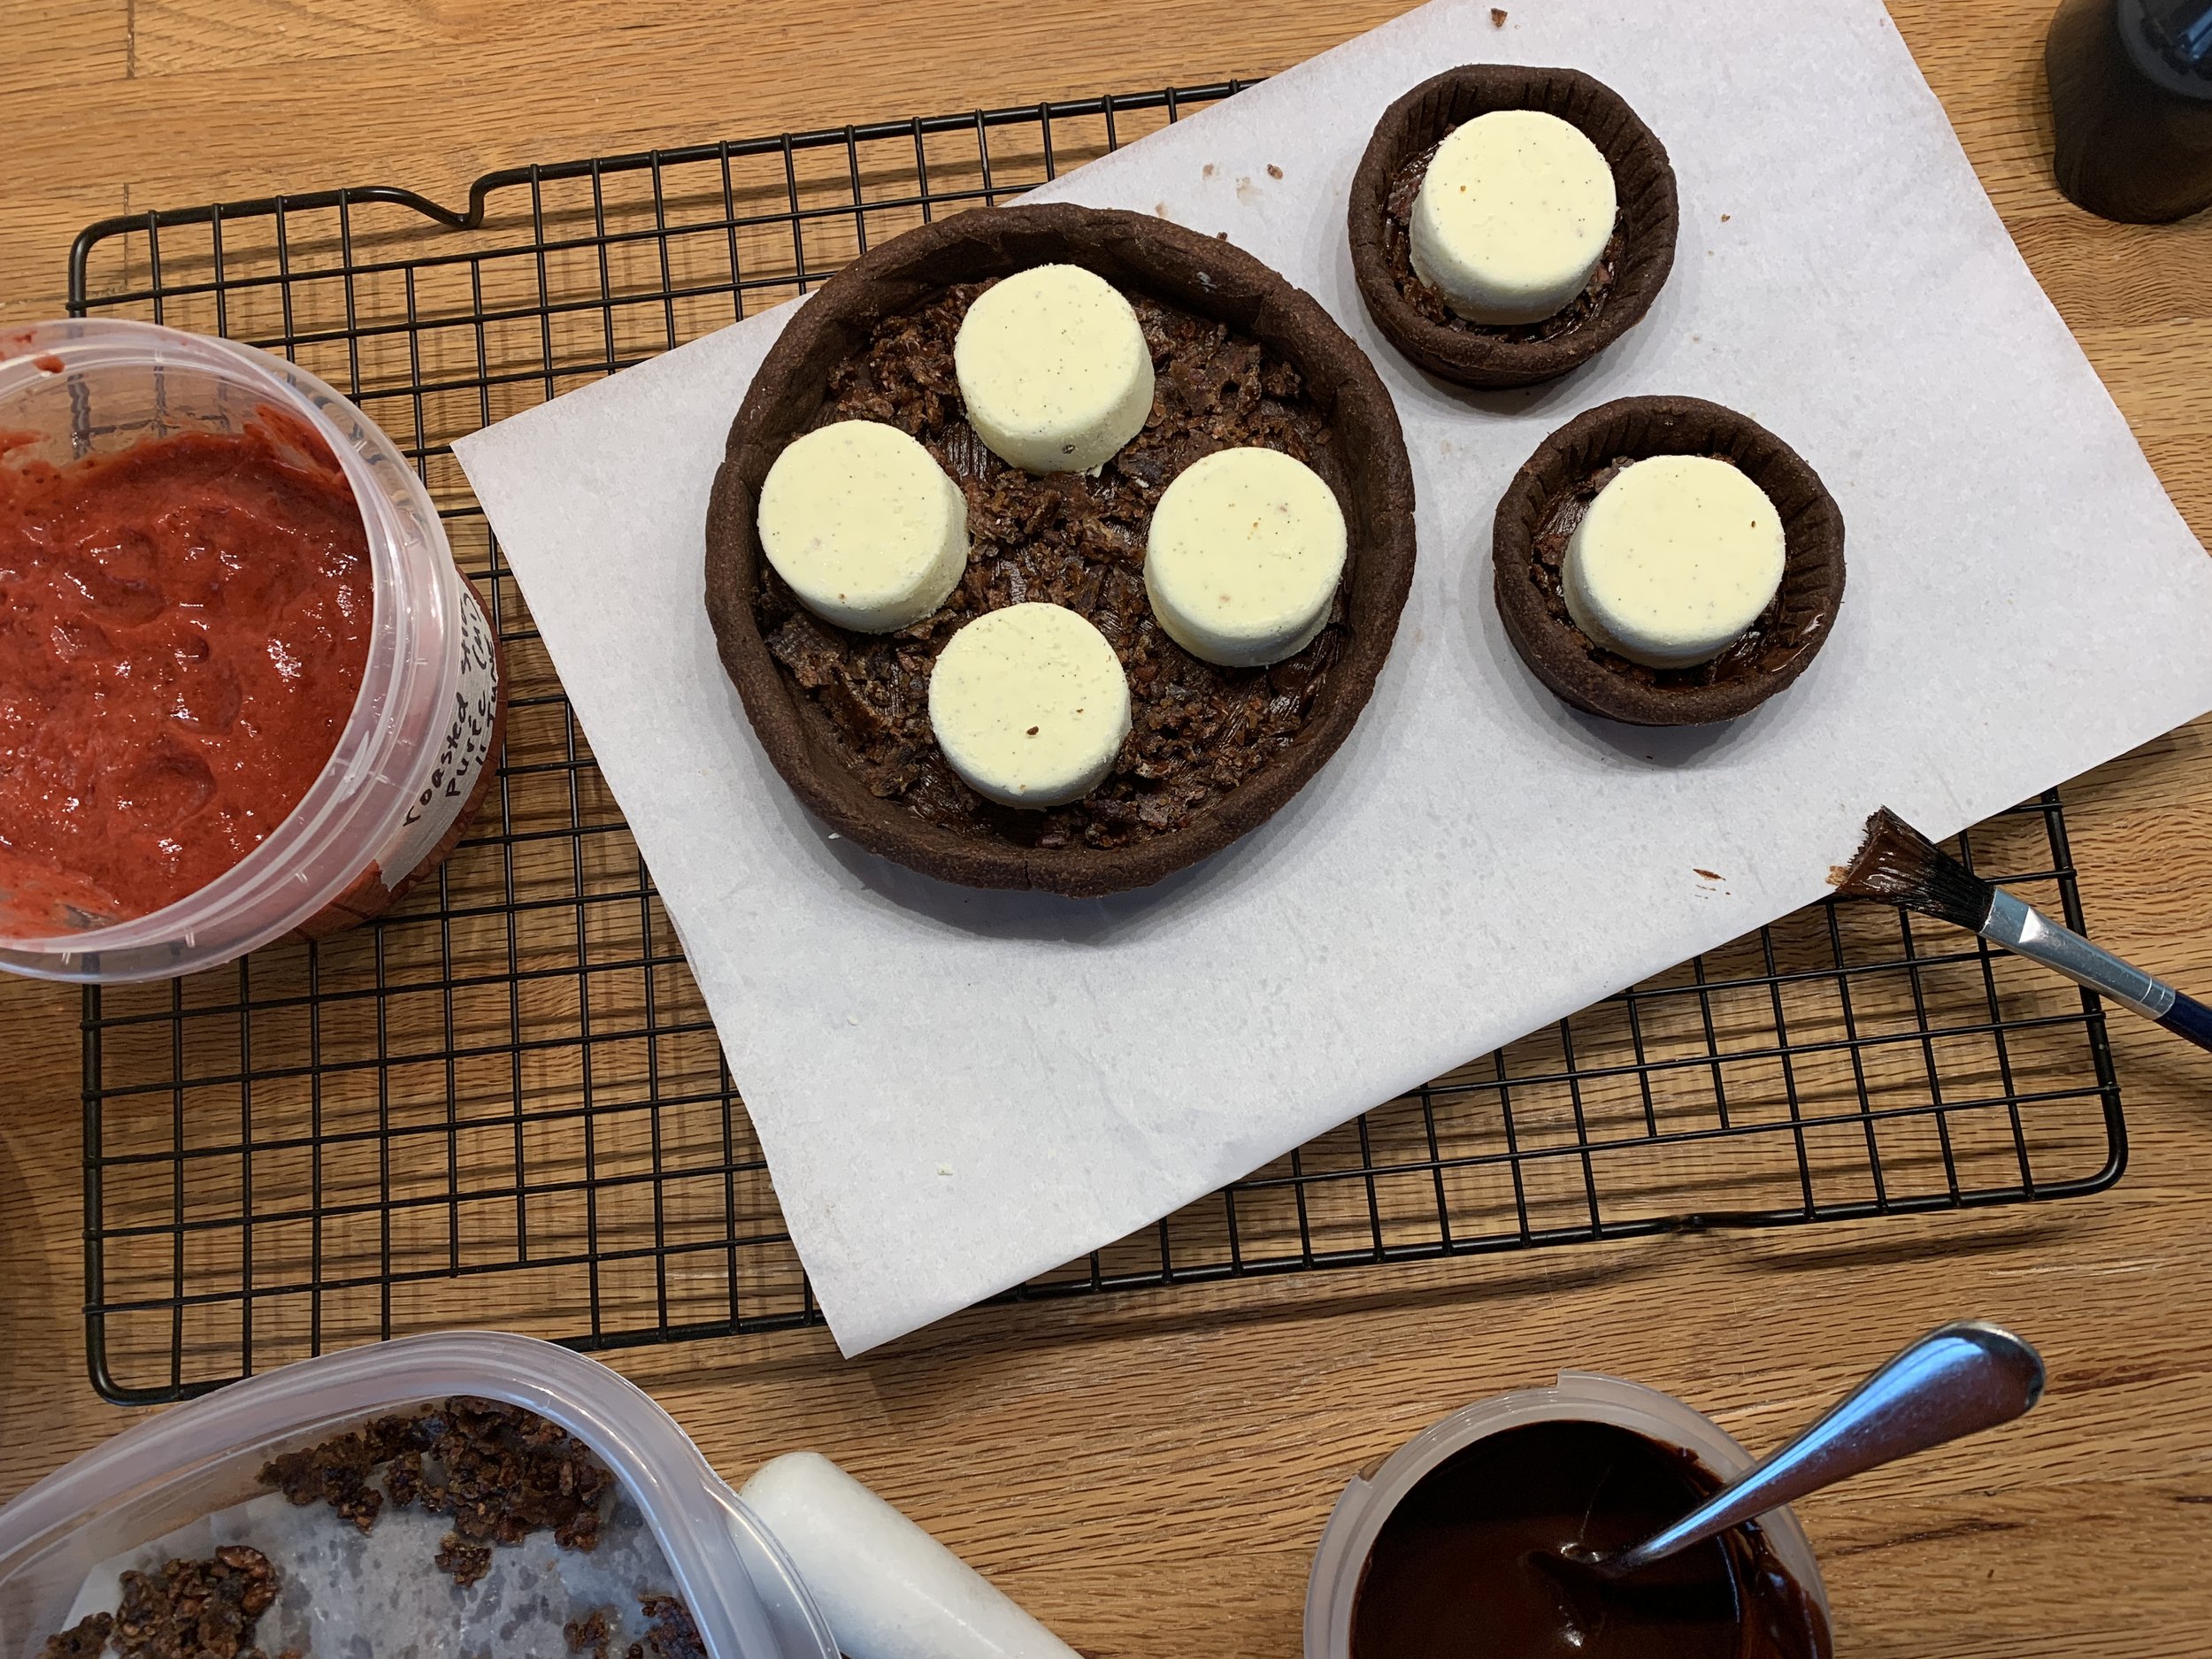
then sprinkled crushed cacao nib brittle over the chocolate and popped in the frozen ricotta rounds (they thaw pretty fast but hold their shape).

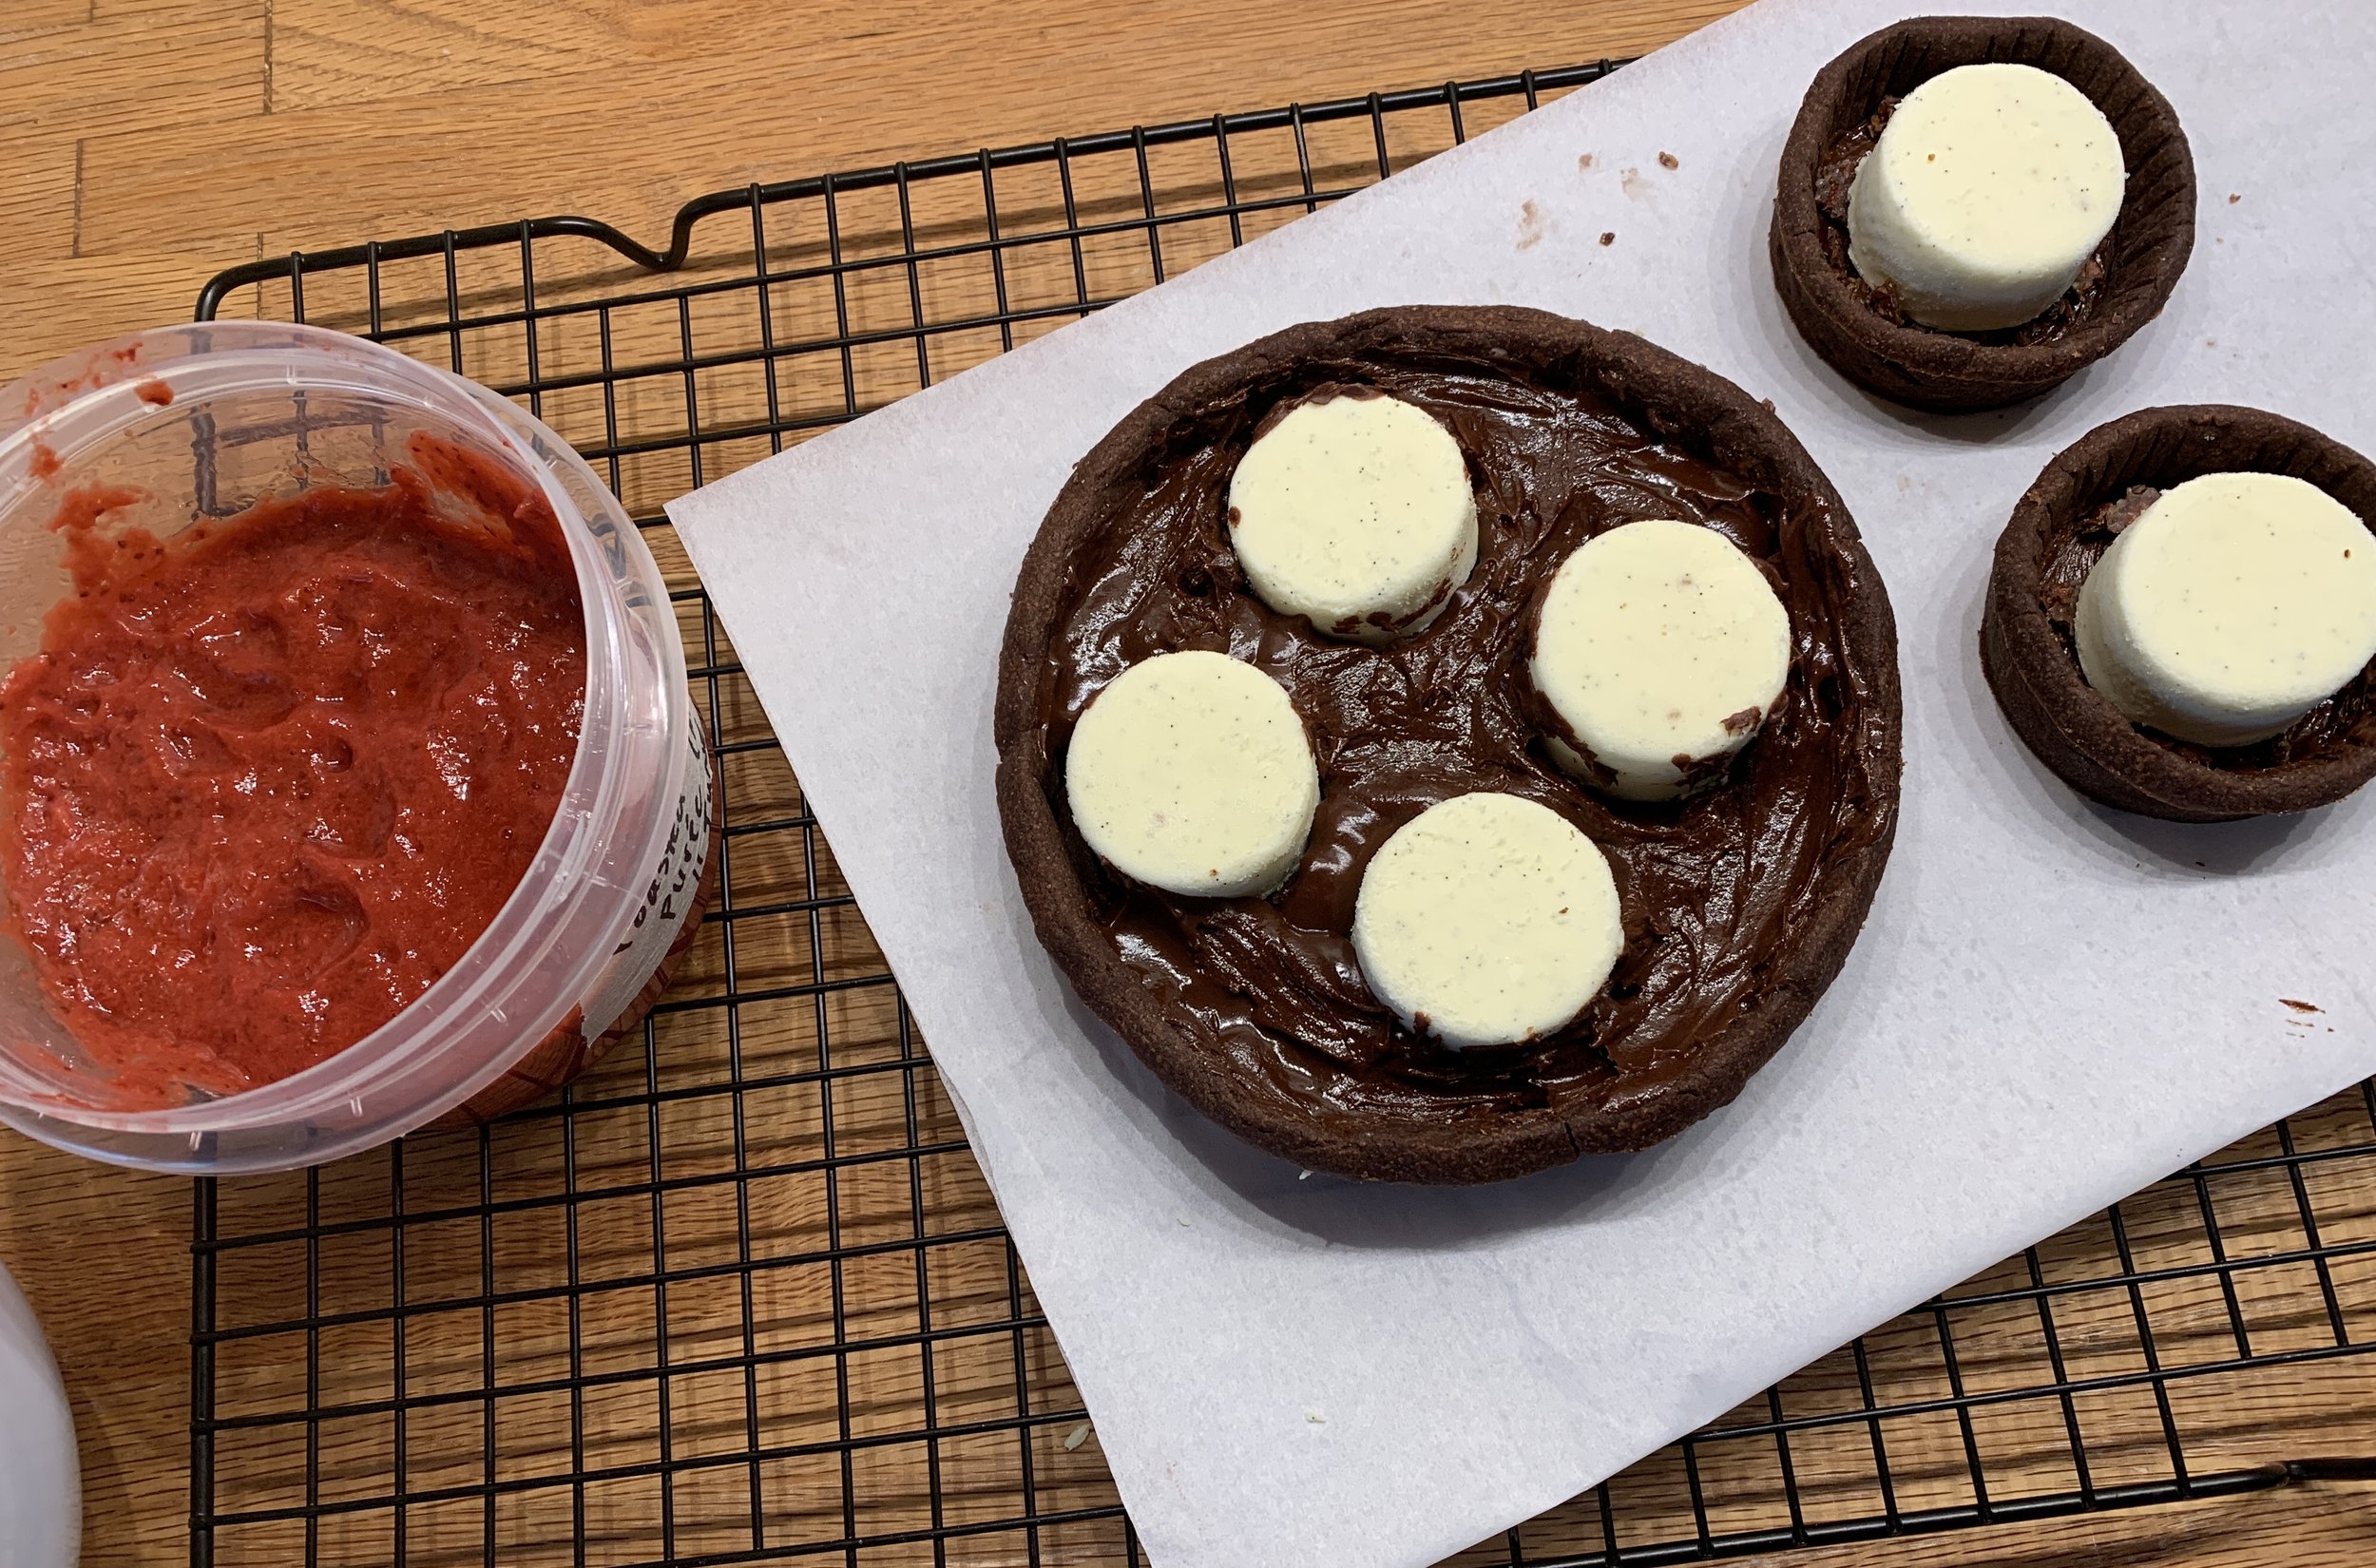
I spooned the ganache around as best I could. It’s a tad messy but will be covered up so no one’s the wiser. You could pipe it in too but I wasn’t in the mood.

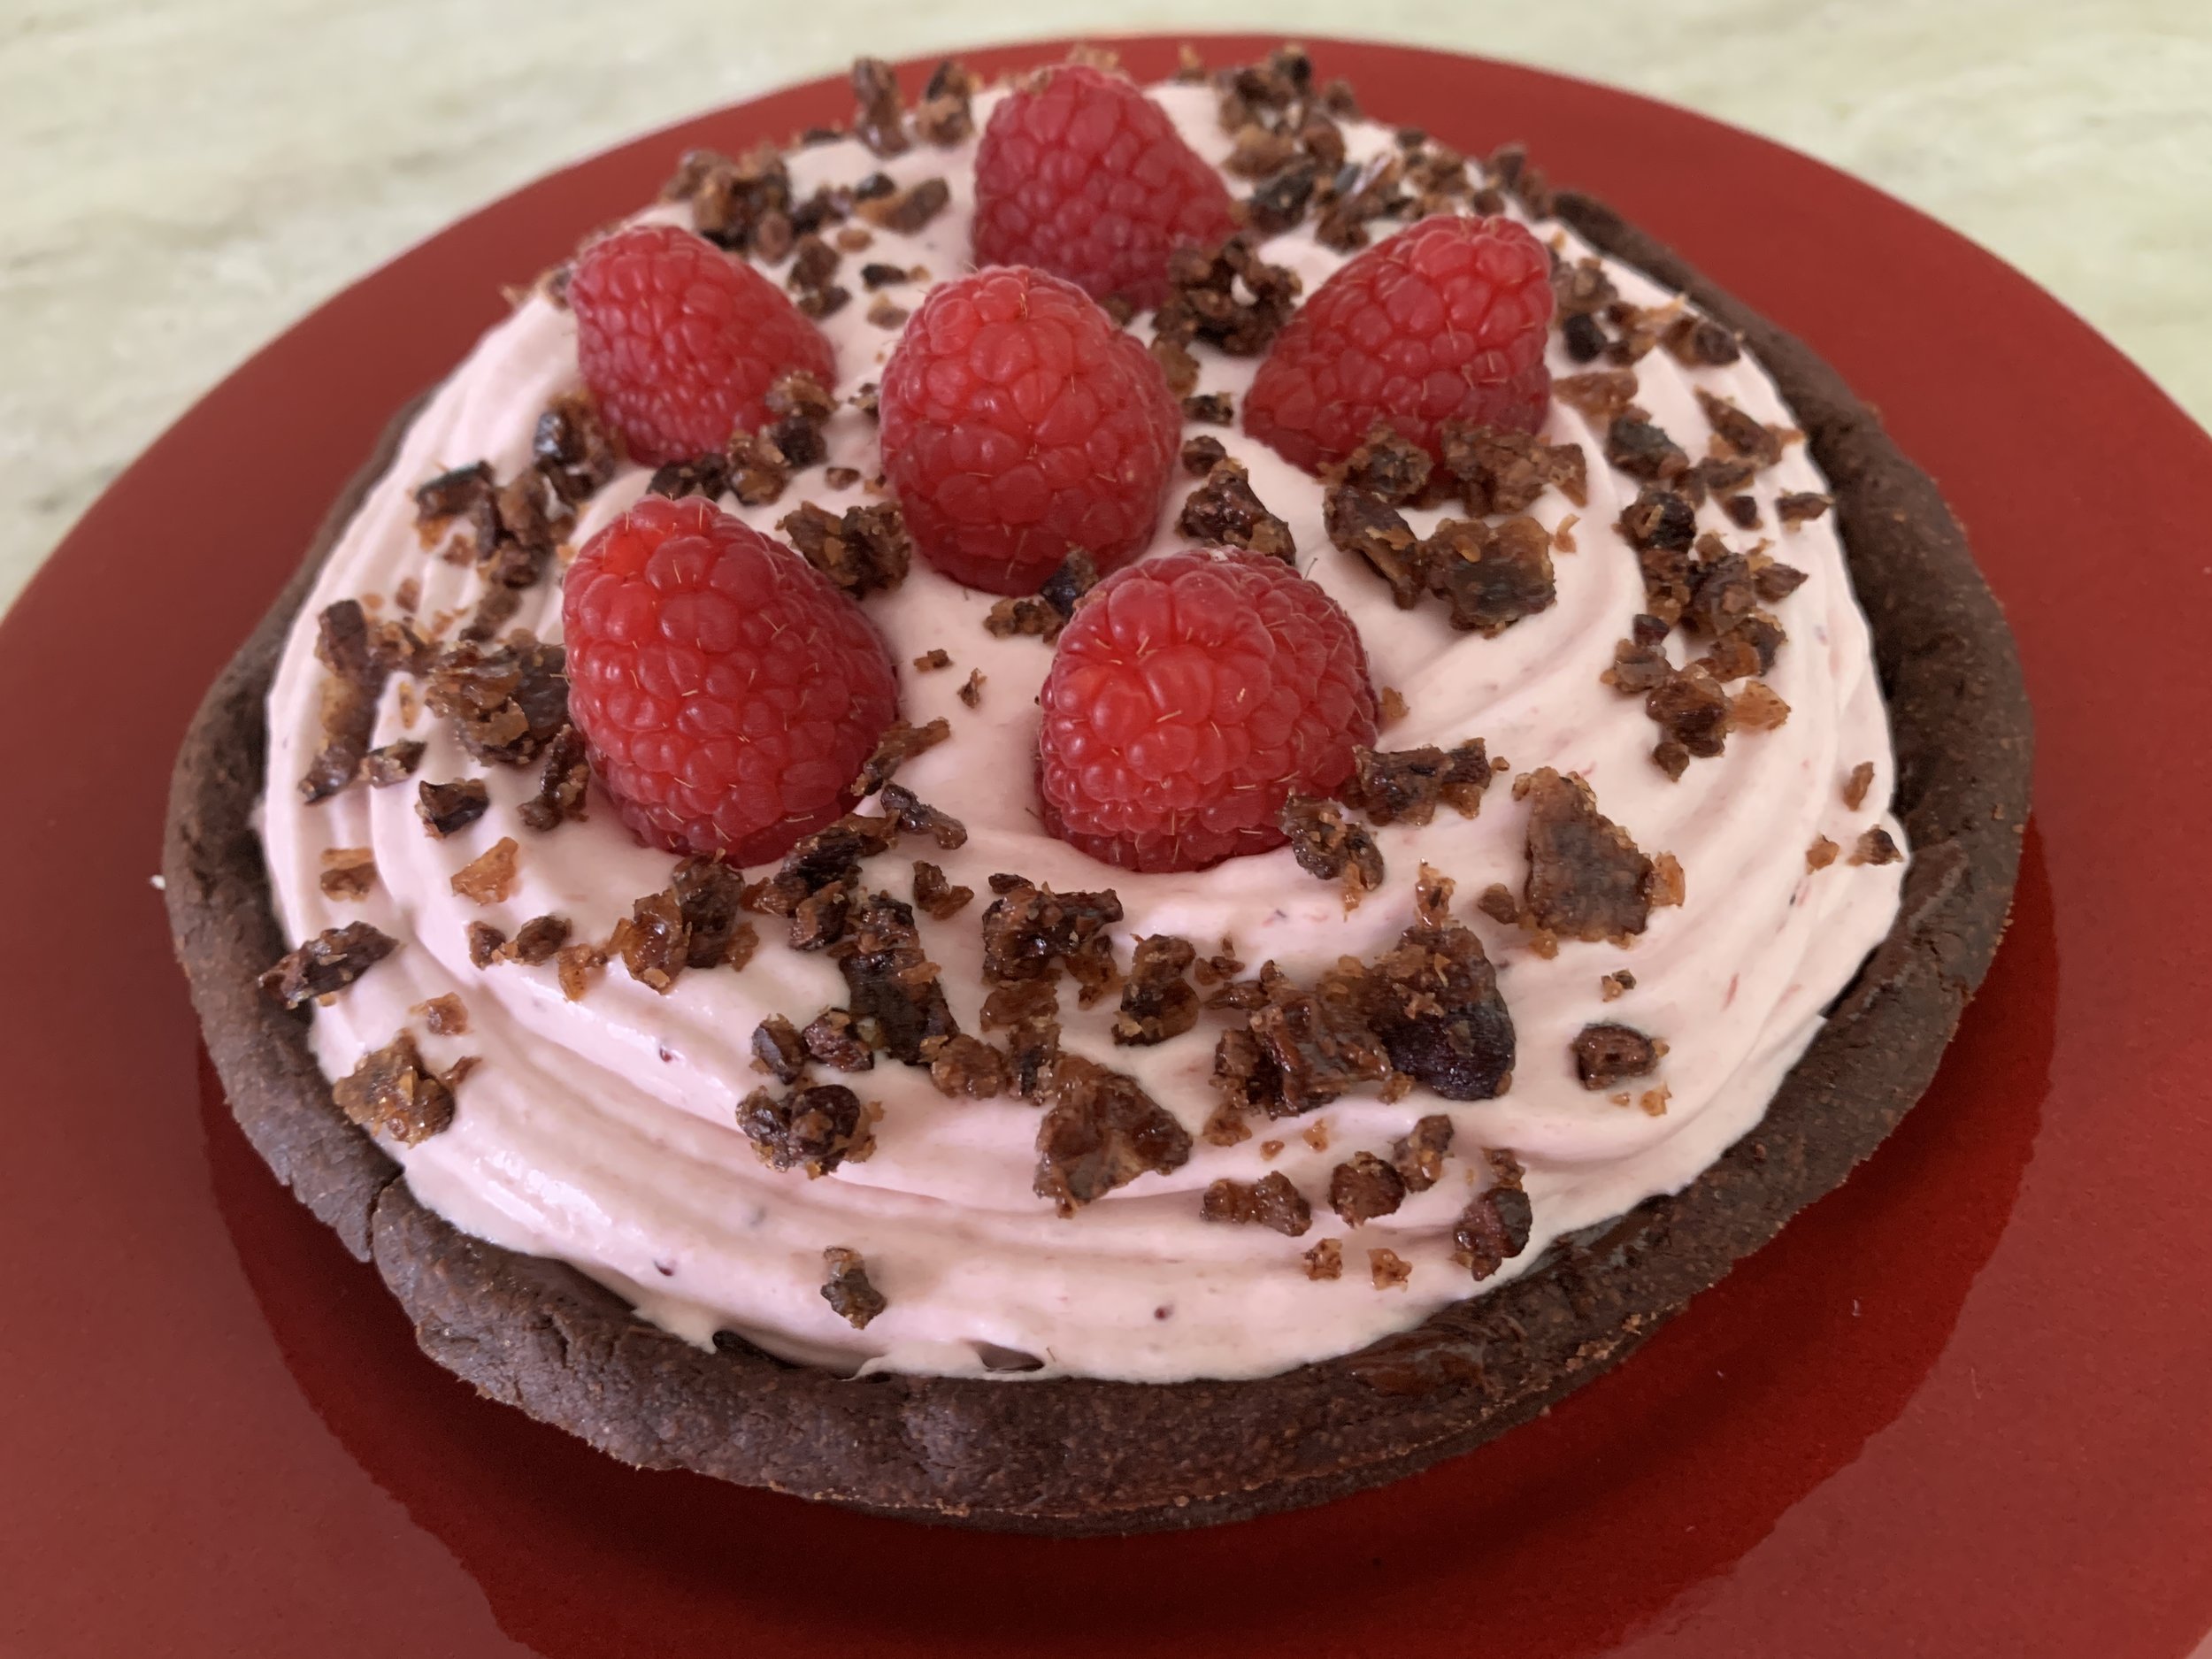
I added a generous soup spoon full of strawberry purée to the chilled white chocolate ganache (used 120g heavy cream to 40 g white chocolate) and whipped it up to soft peaks. For the sharing size tart I piped the cream around and over the ricotta discs then topped with fresh raspberries and more crushed nib brittle.

Et voilà - our New Year’s Eve dessert!

Triple chocolate tart with berry cream

Psst . . . . the smaller tarts were used as taste tests. I was able to spread the softened ricotta flush into the tartelettes then top with a bit of berry cream and nib brittle for a midday snack that Steve and I so enjoyed. Yum - the chocolate crust and ganache with the smooth ricotta custard, hint of berry cream and crunchy nibs is just divine.

Happy New Year everyone and may 2022 bring us new adventures and peaceful, happy days!

I’ll leave you with just a hint of the lovely holiday displays at nearby Meijer Gardens


Swiss meringue buttercream

IMG_0771.JPG

Ciao everyone! It took me a bit of time to get this post together, but here it is at last. You’d think with all the extra time on our hands during our staying at home (11 weeks and counting), I’d have knocked this baby out in a few days. I decided to take some extra time to add some recipes for some base components that are great ones to have in your baking armamentarium, and you’ll find links for those throughout the post.

Remember - you can also go directly to my recipe page for a list of base recipes with links to their PDFs and in some cases to blog posts on that particular topic.

Let’s go for it.

Never a big sweet frosting lover, I usually turn to a simple lightly sweetened Chantilly cream, a flavored whipped mascarpone or a basic ganache to give my petite cakes a swirl of panache. Buuuuuuuuut . . . . . . in recent years I’ve become a huge fan of SMBC. So light, airy, buttery and not cloyingly sweet, it’s rife with flavor possibilities. Let’s take a look at just a few and see what you can create to tickle your taste buds.

The beauty of this process is that the base remains the same - egg white, sugar, butter - with flavor added once all the butter is incorporated. Depending on what I plan to use the buttercream for, I’ll do a full batch as a single flavor or divide it in two and create two different flavors. The half batches work well for my small portion cake projects in which a nice swirl or dollop per un petit gâteau is all that’s needed. How efficient is that?

It’s the perfect make-ahead component too since it holds well in the fridge for several days and in the freezer for months. Just remember to thaw and bring it completely to room temperature before rewhipping and using for its intended purpose. It’s most commonly used for filling and decorating layer cakes, garnishing petite cakes or for sandwiching French macarons. A squiggle on an èclair or choux puff might not be bad either!

I reviewed a number of recipes from different sources and found many variants in terms of sugar to egg white ratio (anywhere from 1:1 up to 2:1) as well as differences in the amount of butter added e.g. when using 6 large whites, the butter quantity can range from 340 g / 12 ounces up to a full 456 g / one pound or even more!

Here’s my full batch base recipe (includes flavor variations!) which makes about 4.5 cups of buttercream - generally plenty for a 2-layer eight or nine inch round cake with leftovers for decorating, or just the ticket for some dozens of small treats. And remember - you can freeze the leftovers!

Getting ready to go!

Getting ready to go!

On the day you want to make your SMBC, plan ahead and weigh out 370 g unsalted butter and cut it into 1/2 to 1 inch cubes. The butter needs to be at room temperature before adding it to the meringue!

Have your flavor ingredients ready to go too - from a pinch up to 1/4 teaspoon of salt to taste, 2 teaspoons vanilla (or other extracts) plus your chosen additions like caramel, fruit purée, melted/cooled yet liquid chocolate or lemon curd.
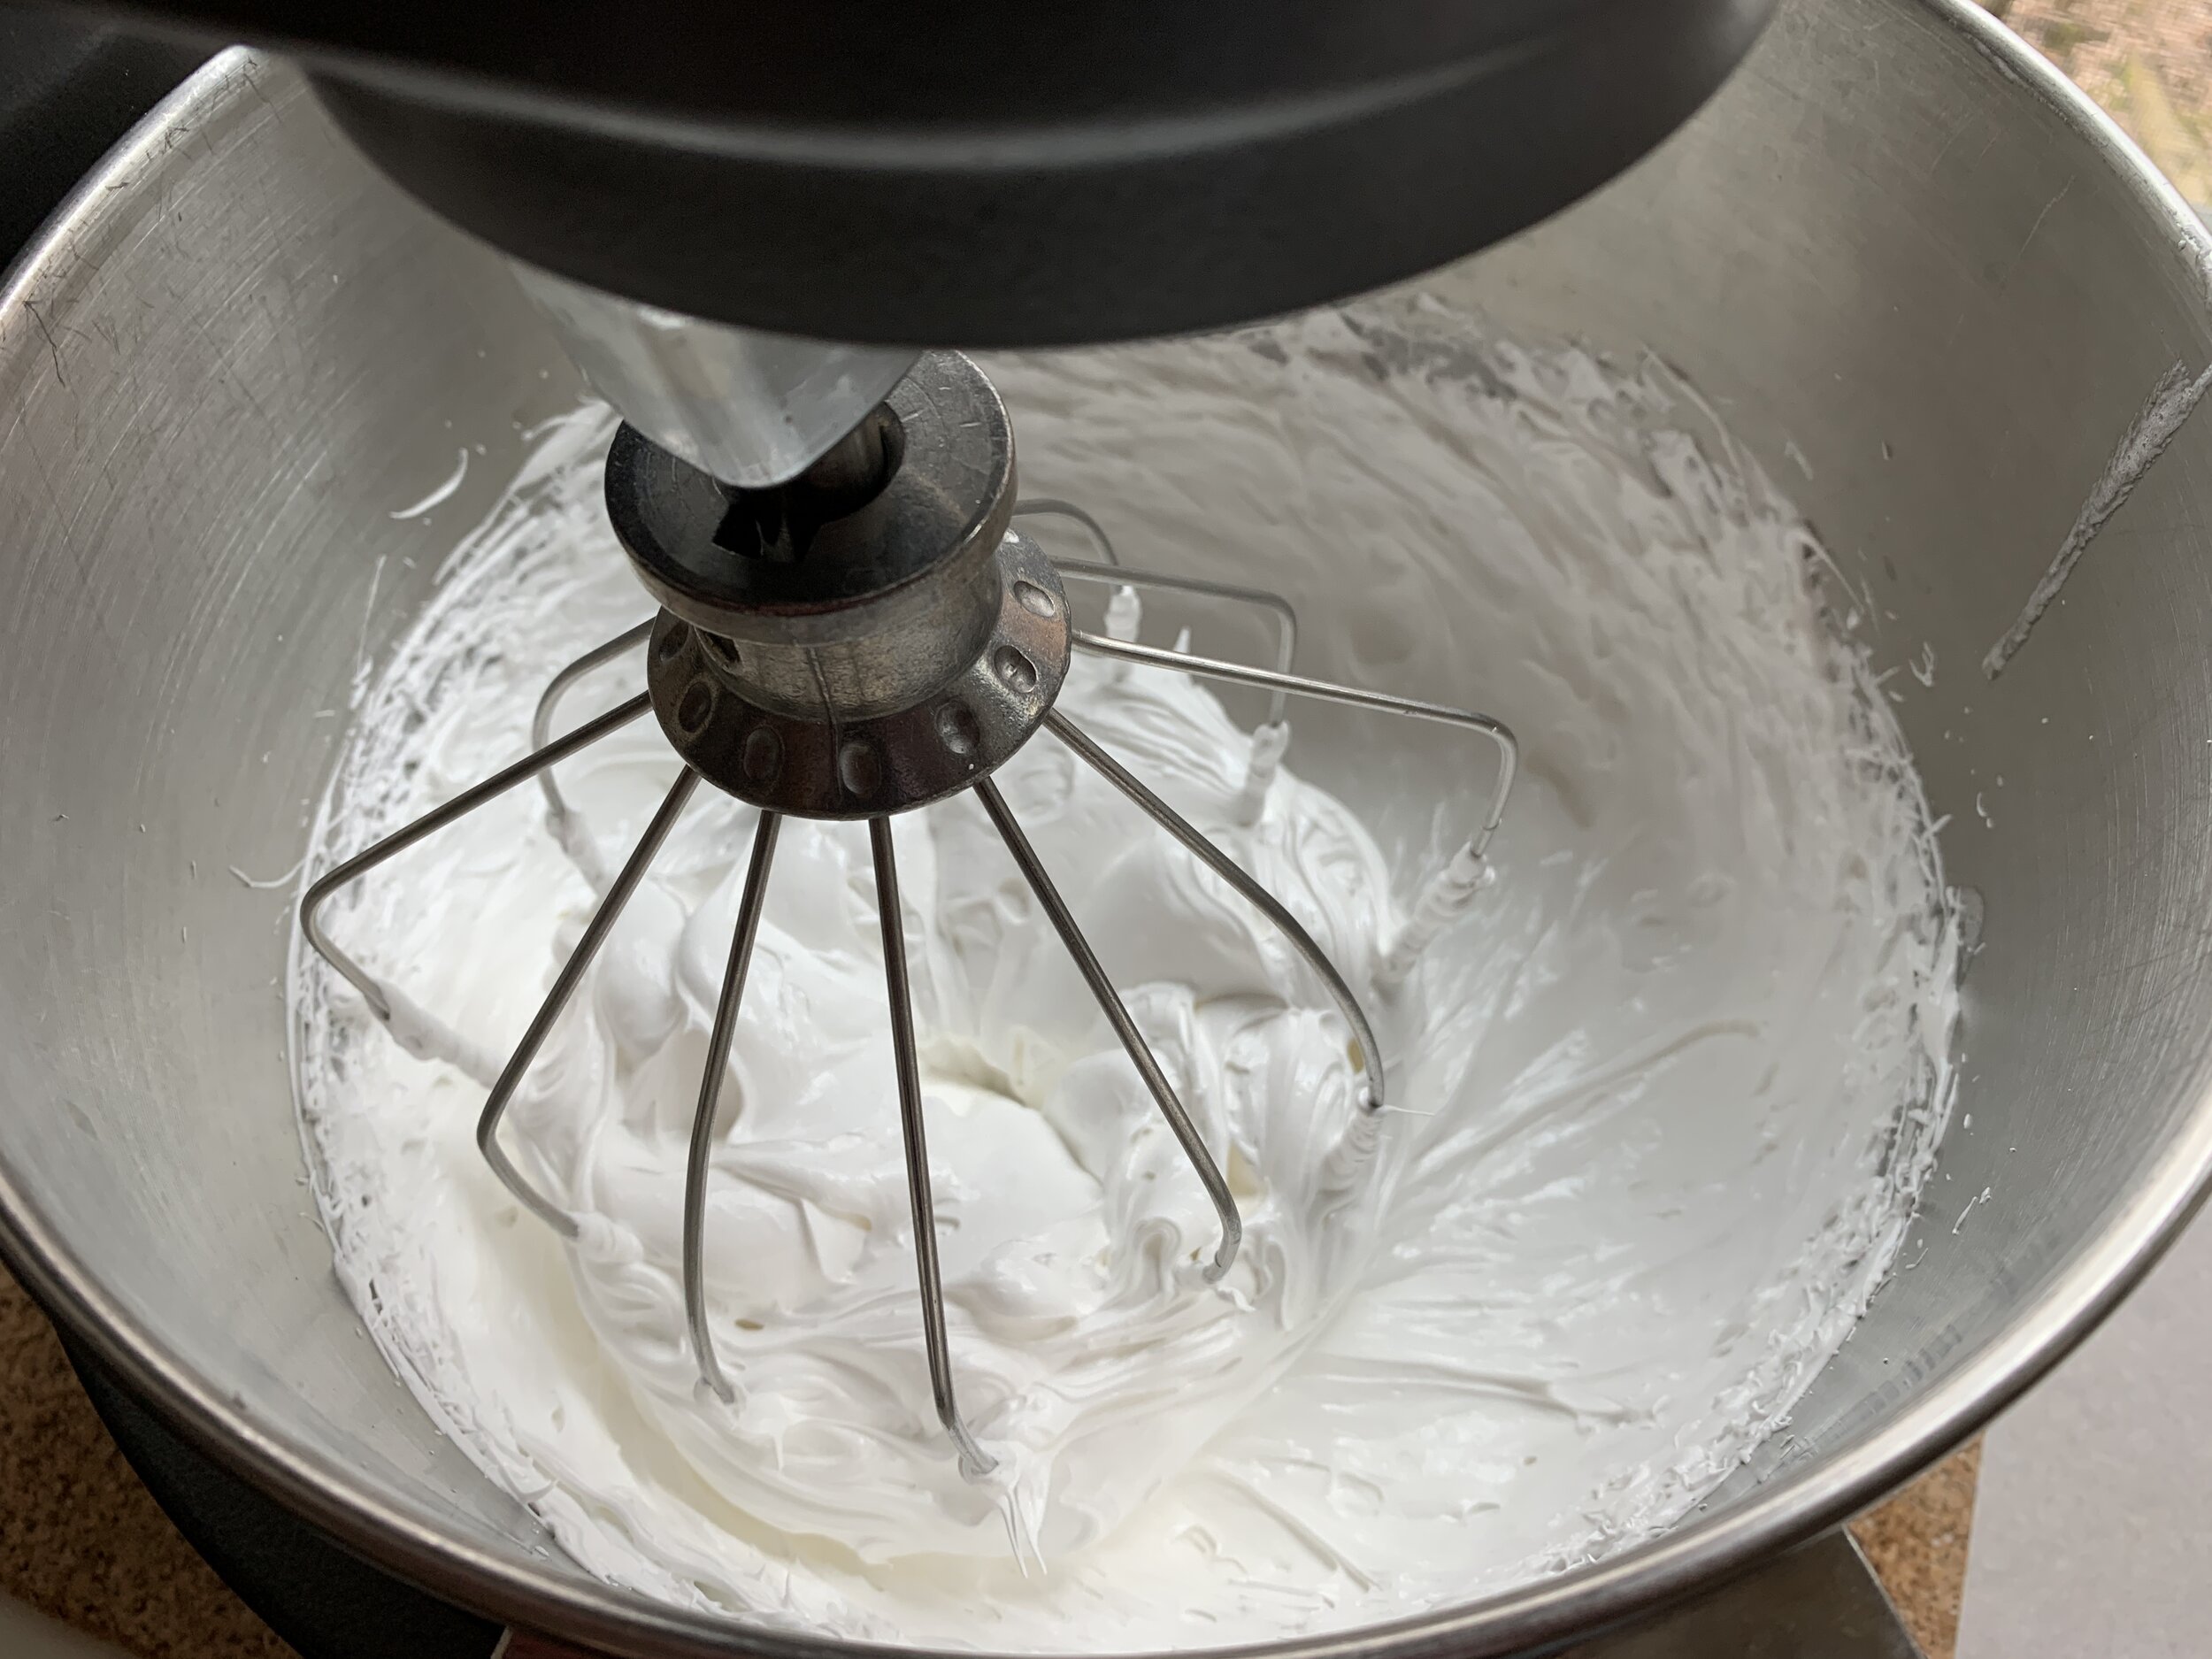
For the meringue place 6 large egg whites and 300 g sugar in a bowl over a steaming bain marie whisking constantly until the mixture reaches a temperature of anywhere from 145-155ºF. Transfer the mixture to the bowl of a stand mixer fitted with the whisk and beat on high until completely cool and marshmallow-y. I plan on a good 10 minutes for that.

Realize that the bottom of the mixing bowl may still feel a tad warm to the touch due to the heat of mixing. I test the meringue by putting a dab on my wrist - if it feels cool, I start adding the butter. You want to avoid adding it too early or you’ll end up with a soupy mess.

IMG_0572.JPG

Add the butter several pieces at a time, blending completely after each addition. The mixture should thicken and become smooth and creamy by the time all the butter has been added. If it’s too loose, pop it into the fridge or freezer to firm it up and then rewhip.

Butter added - just waiting for flavor additions

Butter added - just waiting for flavor additions

When incorporating flavor components, they should be at room temperature, added slowly and blended on medium low with the whisk attachment to keep the buttercream from separating. Then scrape down and give it a final high speed whisking for a couple of minutes. Some folks switch to the paddle to give it a final fluffing up.

For a full batch of apple cider caramel blend in 1/4 teaspoon salt, 1 cup caramel sauce with 2 tablespoons boiled cider (available from King Arthur Flour) and 1 teaspoon vanilla extract or vanilla bean paste.

Apple cider caramel

Apple cider caramel

For white chocolate mocha have ready 170 g white chocolate, melted and cooled yet still liquid, plus 2 tablespoons instant espresso powder dissolved in 2 tablespoon hot water and cooled. Blend it in. Yum.

White chocolate mocha

White chocolate mocha

Oh man - yes I know this isn’t gelato but these images remind me of those mounds of creamy, cold goodness on display in all the gelaterias in Italy!

In addition to the two above (let’s call them richer flavors), I also went for the lighter, springier choices of lemon, mixed berry and honey orange. You can find details on the flavor additions here.

Now what exactly might I do with all this buttercream?? Small cakes of course!

First a quick word on piping tips. Just three tip shapes - round, star and French star - can create a bevy of designs for you. For years I’ve relied on my round and basic star tips (closed or more open like the one in the rear) to pipe the simple designs I prefer, but the French star - oh my. It has finer spacing which creates more of a seashell or tighter spiral look. I LOVE it. The only one I have is the one you see below, but I think a couple more sizes would do me just fine. Yup.

BTW just so you have a sense of size, the round tips range from 6 mm at the bottom of the image up to 12 mm (~1/2 inch) at the top.

IMG_0871.jpg

I chose pecan cakes for the apple cider caramel SMBC, baking them in petite tinned steel brioche tins. NOTE: it’s very important to butter the tins thoroughly and pop the cakes out within a few minutes of coming out of the oven to avoid sticking. One could also use mini muffin tins like I did in a previous post where you’ll find the pecan cake recipe. Silicone molds would also work well although I think the cakes brown and crisp better in metal molds.

My small round tip served nicely to pipe a daisy like design to compliment the fluted ridges of the cakes. Pretty simple stuff.

Apple cider caramel on pecan pie cake

Apple cider caramel on pecan pie cake

For the white chocolate mocha SMBC a classic moelleux chocolat seemed just right, baked in one of my favorite square savarin silicone molds. The French star tip yields a lovely scallop like swirl. Those are some Valrhona dark chocolate crunchy pearls on top. Delicious.

White chocolate mocha on moelleux chocolat

White chocolate mocha on moelleux chocolat

The lemon cake is essentially financier batter to which lemon zest has been added. I baked these in mini-muffin silicone molds. So simple and nice.

Lemon on citrus financier

Lemon on citrus financier

Since I made a batch of lemon curd to add to the lemon buttercream, I also used it to create a center flavor burst in the cake before topping with the final flourish. Using a round tip I cut out a core piece (for snacking of course), filled it with the curd and finished it off with a star tip swirl.

IMG_0768.jpg
IMG_0770.jpg

For the mixed berry use your favorite base muffin recipe and fold in an assortment of berries like blue, red and black. I generally avoid adding fresh strawberries to cakes or muffins due to their water content and mushiness after baking. Once again a star tip provides the luscious ridges. Create different looks as you swirl, twist and lift your tip.

Mixed berry on triple berry muffins

Mixed berry on triple berry muffins

For the honey orange SMBC I again used my base financier batter, replacing 1/2 the almond flour with finely ground pistachios and adding orange zest for a lovely citrus touch. Similar to the lemon cakes above, I used my favorite mini-muffin silicone mold for the cakes and the star tip swirl for the top flourish with a few pistachios tucked in the center for a tasty treat.

Honey orange on orange pistachio financier

Honey orange on orange pistachio financier

For a different look I used another favorite ingot rectangular silicone mold which gives me a linear canvas for the buttercream using the French star tip. Same financier, more orange zest in the buttercream for a deeper orange color and a ridge of scallops or stars on top. Remember it’s all about how you twist, swirl and lift! Candied pistachios add just the right crunch. So deeeelicous!

IMG_0942.jpg

Have fun creating your own treats with luscious buttercream the Swiss way!

As spring moves into summer do your best to keep a positive outlook, stay safe and healthy. That’s what counts.

Giant allium

Giant allium

White lacecap Viburnum

White lacecap Viburnum

Fragrant lilac -oh the aroma!

Fragrant lilac -oh the aroma!

A merry season to all

Caramel almond moelleux chocolat

Caramel almond moelleux chocolat

Blogging has taken a back seat due to December’s whirlwind of activities from teaching and baking to selling my 92 year old mom’s condo and moving her into a new apartment. Whew!

As was true during my days working in emergency medicine, baking continues to serve as a respite for my heart and soul. The feel of the dough, the lovely aromas wafting from the kitchen and the taste of that oh-so special treat - you can’t beat it!

To help say adieu to 2019, I’d like to share a few of the goodies I’ve been baking of late.

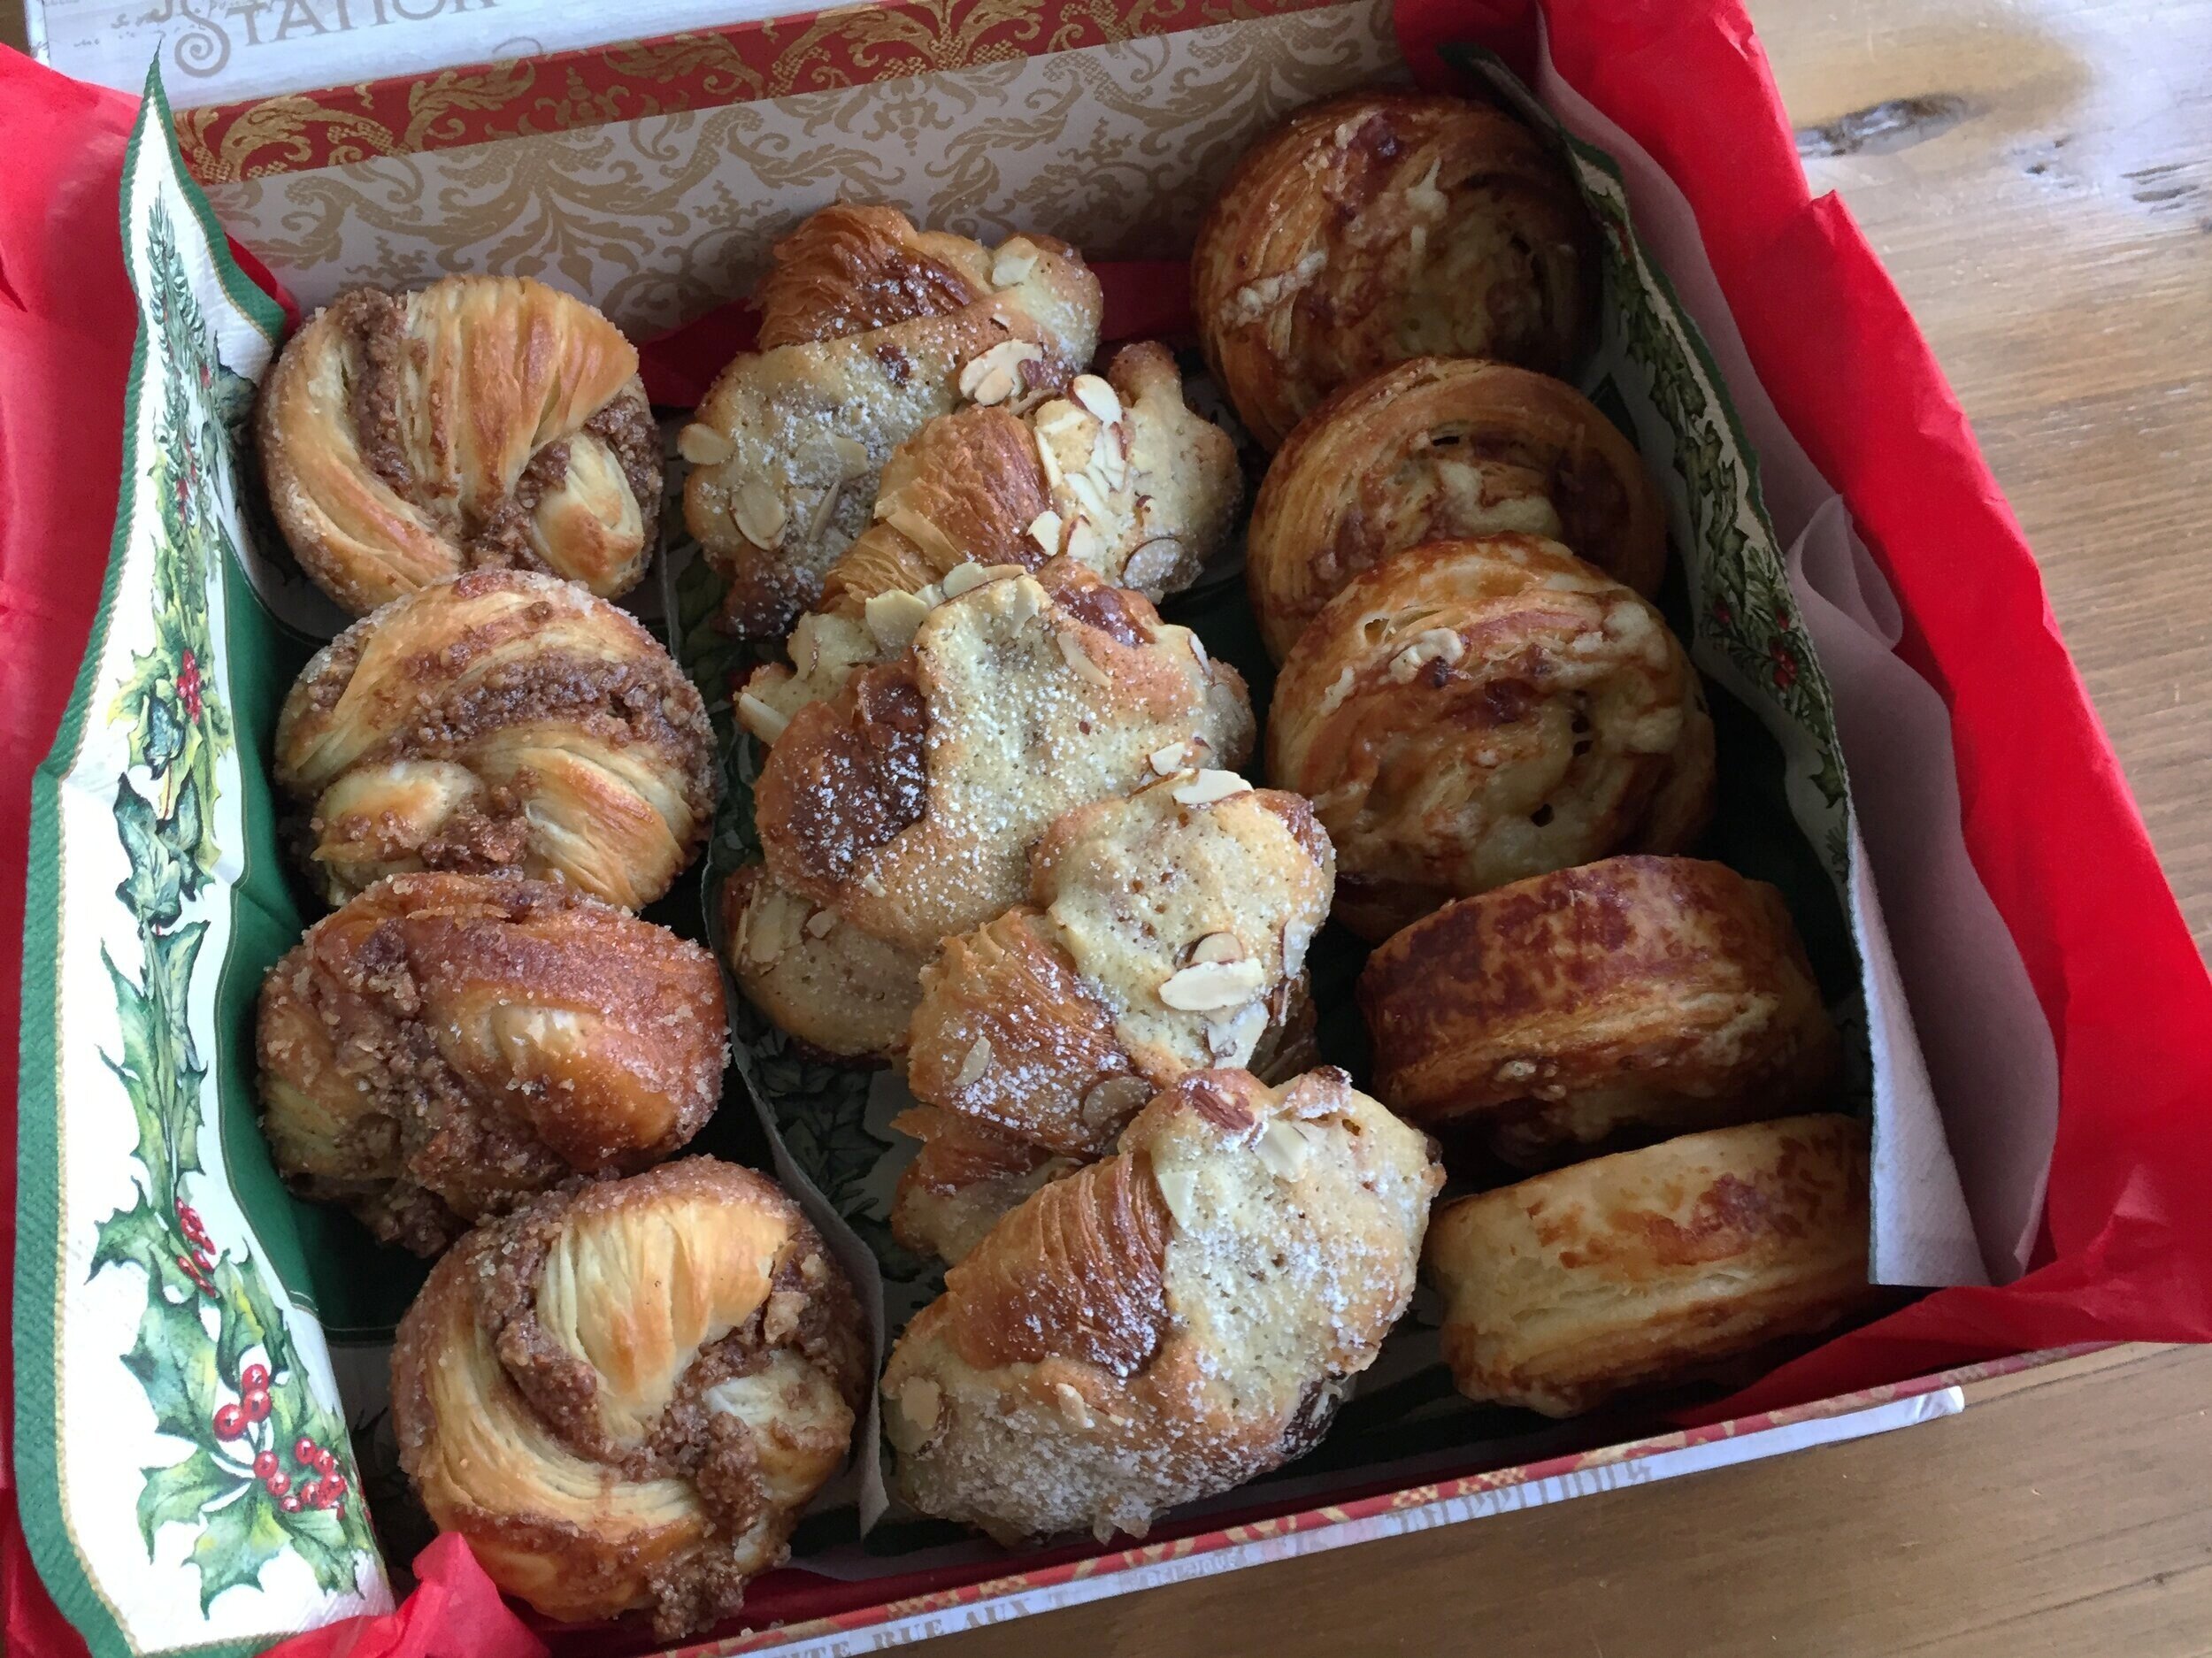
Pecan twirls, almond croissant, ham and cheese spirals

Pecan twirls, almond croissant, ham and cheese spirals

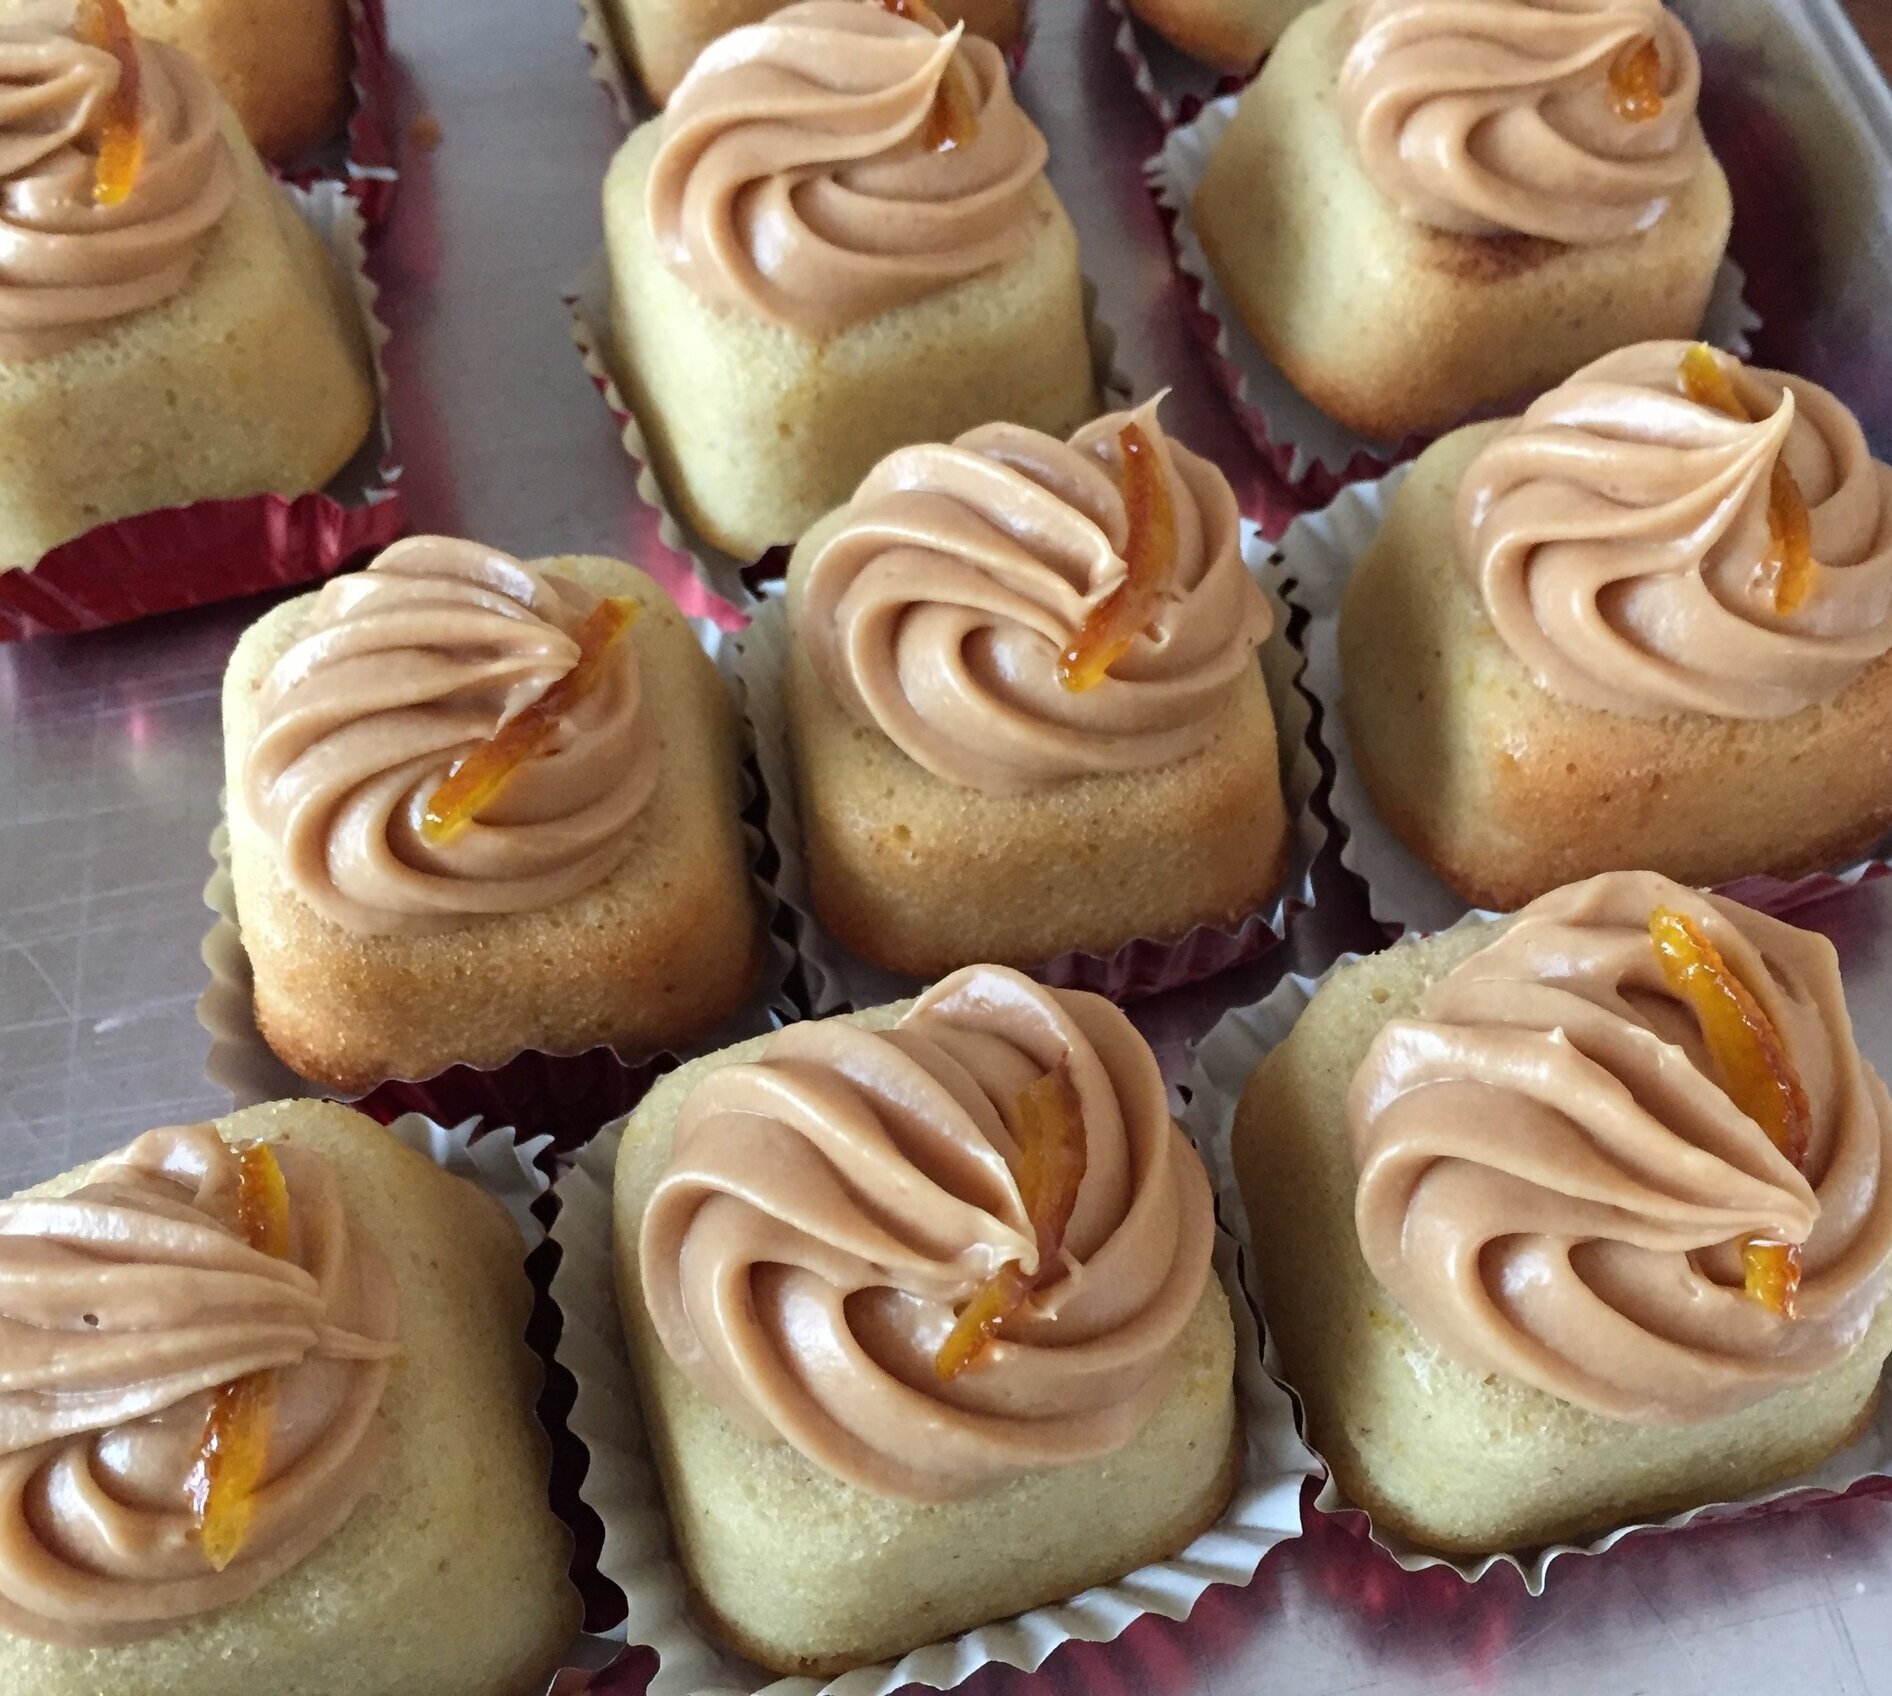
Orange financier with salted caramel buttercream

Orange financier with salted caramel buttercream

Pumpkin pecan crunch brioche

Pumpkin pecan crunch brioche

White chocolate raspberry crispy rice almond bark (now that’s a mouthful!)

White chocolate raspberry crispy rice almond bark (now that’s a mouthful!)

Sending warm holiday greetings to all and may the upcoming year bring you many good things.

Autumn baking and an afternoon tea medley

Once again it's been a long time since I've posted here - moving, unpacking, getting settled, painting rooms, figuring out our flow in the kitchen - it all takes awhile.  But now it's officially autumn and yes - it's baking season!!!

The weather here in western Michigan has been pristinely fall of late - cool, breezy, bright and sunny with leaves starting to turn those beautiful reds and oranges that make this time of year so gorgeous.

My last post in early August focused on a rustic peach crostata, and, at the risk of sounding like a broken record, I've continued on in a rustic galette vein (in Italy it's crostata and in France galette) since there have still been late season peaches and berries available at the Fulton Farmers Market.

A few weeks ago I made two galettes for a friend for her Sunday family dinner, and then recently taught my first "guest chef" class at the GR Downtown Market.  And guess what we made - individual galettes - yeah!  So easy and soooooo delicious.

On a different note I continue to contemplate how I'd like to pursue my pastry metier here in Grand Rapids. Aside from teaching classes, afternoon tea is still on my brain - where might I be able to offer such a calming, delicious experience - time will tell, right?  I'm making some connections and working at it "slow by slow" as brother-in-law Jim is fond of saying.

Speaking of afternoon tea, I was invited to share that experience with a former surgical mentor and colleague just the other day.  Of course I HAD to make an assortment of goodies to bring to the occasion.  And, to make that adventure even more enjoyable, our new Kitchenaid range is delivering perfect baked goods!

So it was moelleux chocolat, matcha financier, pear almond tartlets, sablés au miel et herbes de provence, sablés Earl Grey thé and cherry scones with lemon curd that accompanied me to my teatime with Dr. T.

pear almond tartlet, shortbread and scones

It was an enjoyable hour spent chatting about what the years have brought, hopes and aspirations and even how important it is in the medical world today to treat patients as people, not statistics.  I'm on board with that!

So now my head is swimming with ideas for upcoming blog posts, getting back to baking croissants, tarts and shortbread and putting aside (at least temporarily) the unpacking, sorting, organizing, arranging and painting that has been taking up so much of my attention in recent weeks.

It's fall after all!

A trio of treats for Sunday lunch at Mom's

Steve and I are currently in Grand Rapids spending time with my mom through the Mother's Day weekend.  She had planned a Sunday luncheon for a group of 12 lady friends so, of course, I had to make something for dessert!

The plan - blueberry financier, moelleux chocolat and Breton shortbread with orange mascarpone and fresh citrus garnish.

lovely colors for the plate

working on the plating

All in all pretty straightforward - chocolate, moist almond cake, buttery Breton, a bit of fruit and some orange zested cream.  What's not to like?

the final medley

It's always fun to put a trio together!

Sportskage finale and then some!

I've been off the blog schedule for a bit, so today is the day for catching up. This past weekend Steve and I had an uneventful drive across the eastern US and Canada from Providence, Rhode Island to Grand Rapids, Michigan to spend the Christmas holiday with my mom. We enjoyed a night's stay at a B&B in Niagara-on-the-Lake, a lovely town on Lake Ontario at the mouth of the Niagara River.

Prior to our departure I had a busy week preparing goodies for a 50th birthday bash, including the final rendition of the Danish specialty sportskage (you can read about the trial preparation and assembly in my 12/7/14 post.) Early in the week I had prepared the various components (choux puffs, nougatine and dacquoise), and since I was making two of these creations, I opted to make one almond and one hazelnut.

The choux puffs are to be dipped in caramel which you see cooking on the stovetop below.

The whipped cream is the one component that has to be done just before assembly, so I made sure I had everything at the ready, including my well chilled cream.

The nougatine is folded into the whipped cream and then formed as a domed mound on top of the dacquoise base.

Next up is the part that was making me apprehensive - piping more whipped cream decoratively over the mound. I started with a small star tip and piped vertical lines around the base of the mound (reminded me of piping the collars of buttercream on the religiueses at Pascal Pinaud's à Paris!)

Then, using a petal tip, I finished it off . . . .

Hey, that actually went better than expected - hooray!!

Next I placed caramel-dipped choux puffs over the surface, pressing them in ever so slightly . . .

and the deed was done - whew!!  I will say this is one of the most interesting things I've made over the years.  Never let it be said that I won't accept a challenge, yessir, you betcha.

In addition to the Danish "cakes" and seven different flavors of shortbread (salted caramel, espresso, pistachio, orange hazelnut, honey herbes de provence, toasted coconut and lime ginger), I made three versions of moelleux chocolat - espresso . . . .

orange rosemary . . . . .

and raspberry.

Also several tarts:  chocolate ganache, caramel nut, pear almond and Breton pistachio-raspberry.

It was a busy, but organized and enjoyable week of planning and preparation - a lot of what the pastry world is all about!

Now it's time for some Christmas relaxation, being with family and friends and scheming about new projects for 2015!  Joyeux Noël, Buon Natale and Merry Christmas to all!