Chocolate ganache tarte

The holidays are here and, as each day brings its own tasks to be tackled or projects to delight us, I want to send all of you my wishes for a very peaceful season.

And what better time to talk about chocolate!!

This ganache tarte is one of my all time faves. The more I consider all of the goodies I’ve created and written about over the years and the things I so enjoy making, the more I realize that the simplest things are usually the best. This delicious treat has been often requested and frequently made, but, believe it or not, even though I’ve perhaps referred to it in various iterations over the years, I’ve never given it top billing. So here goes.

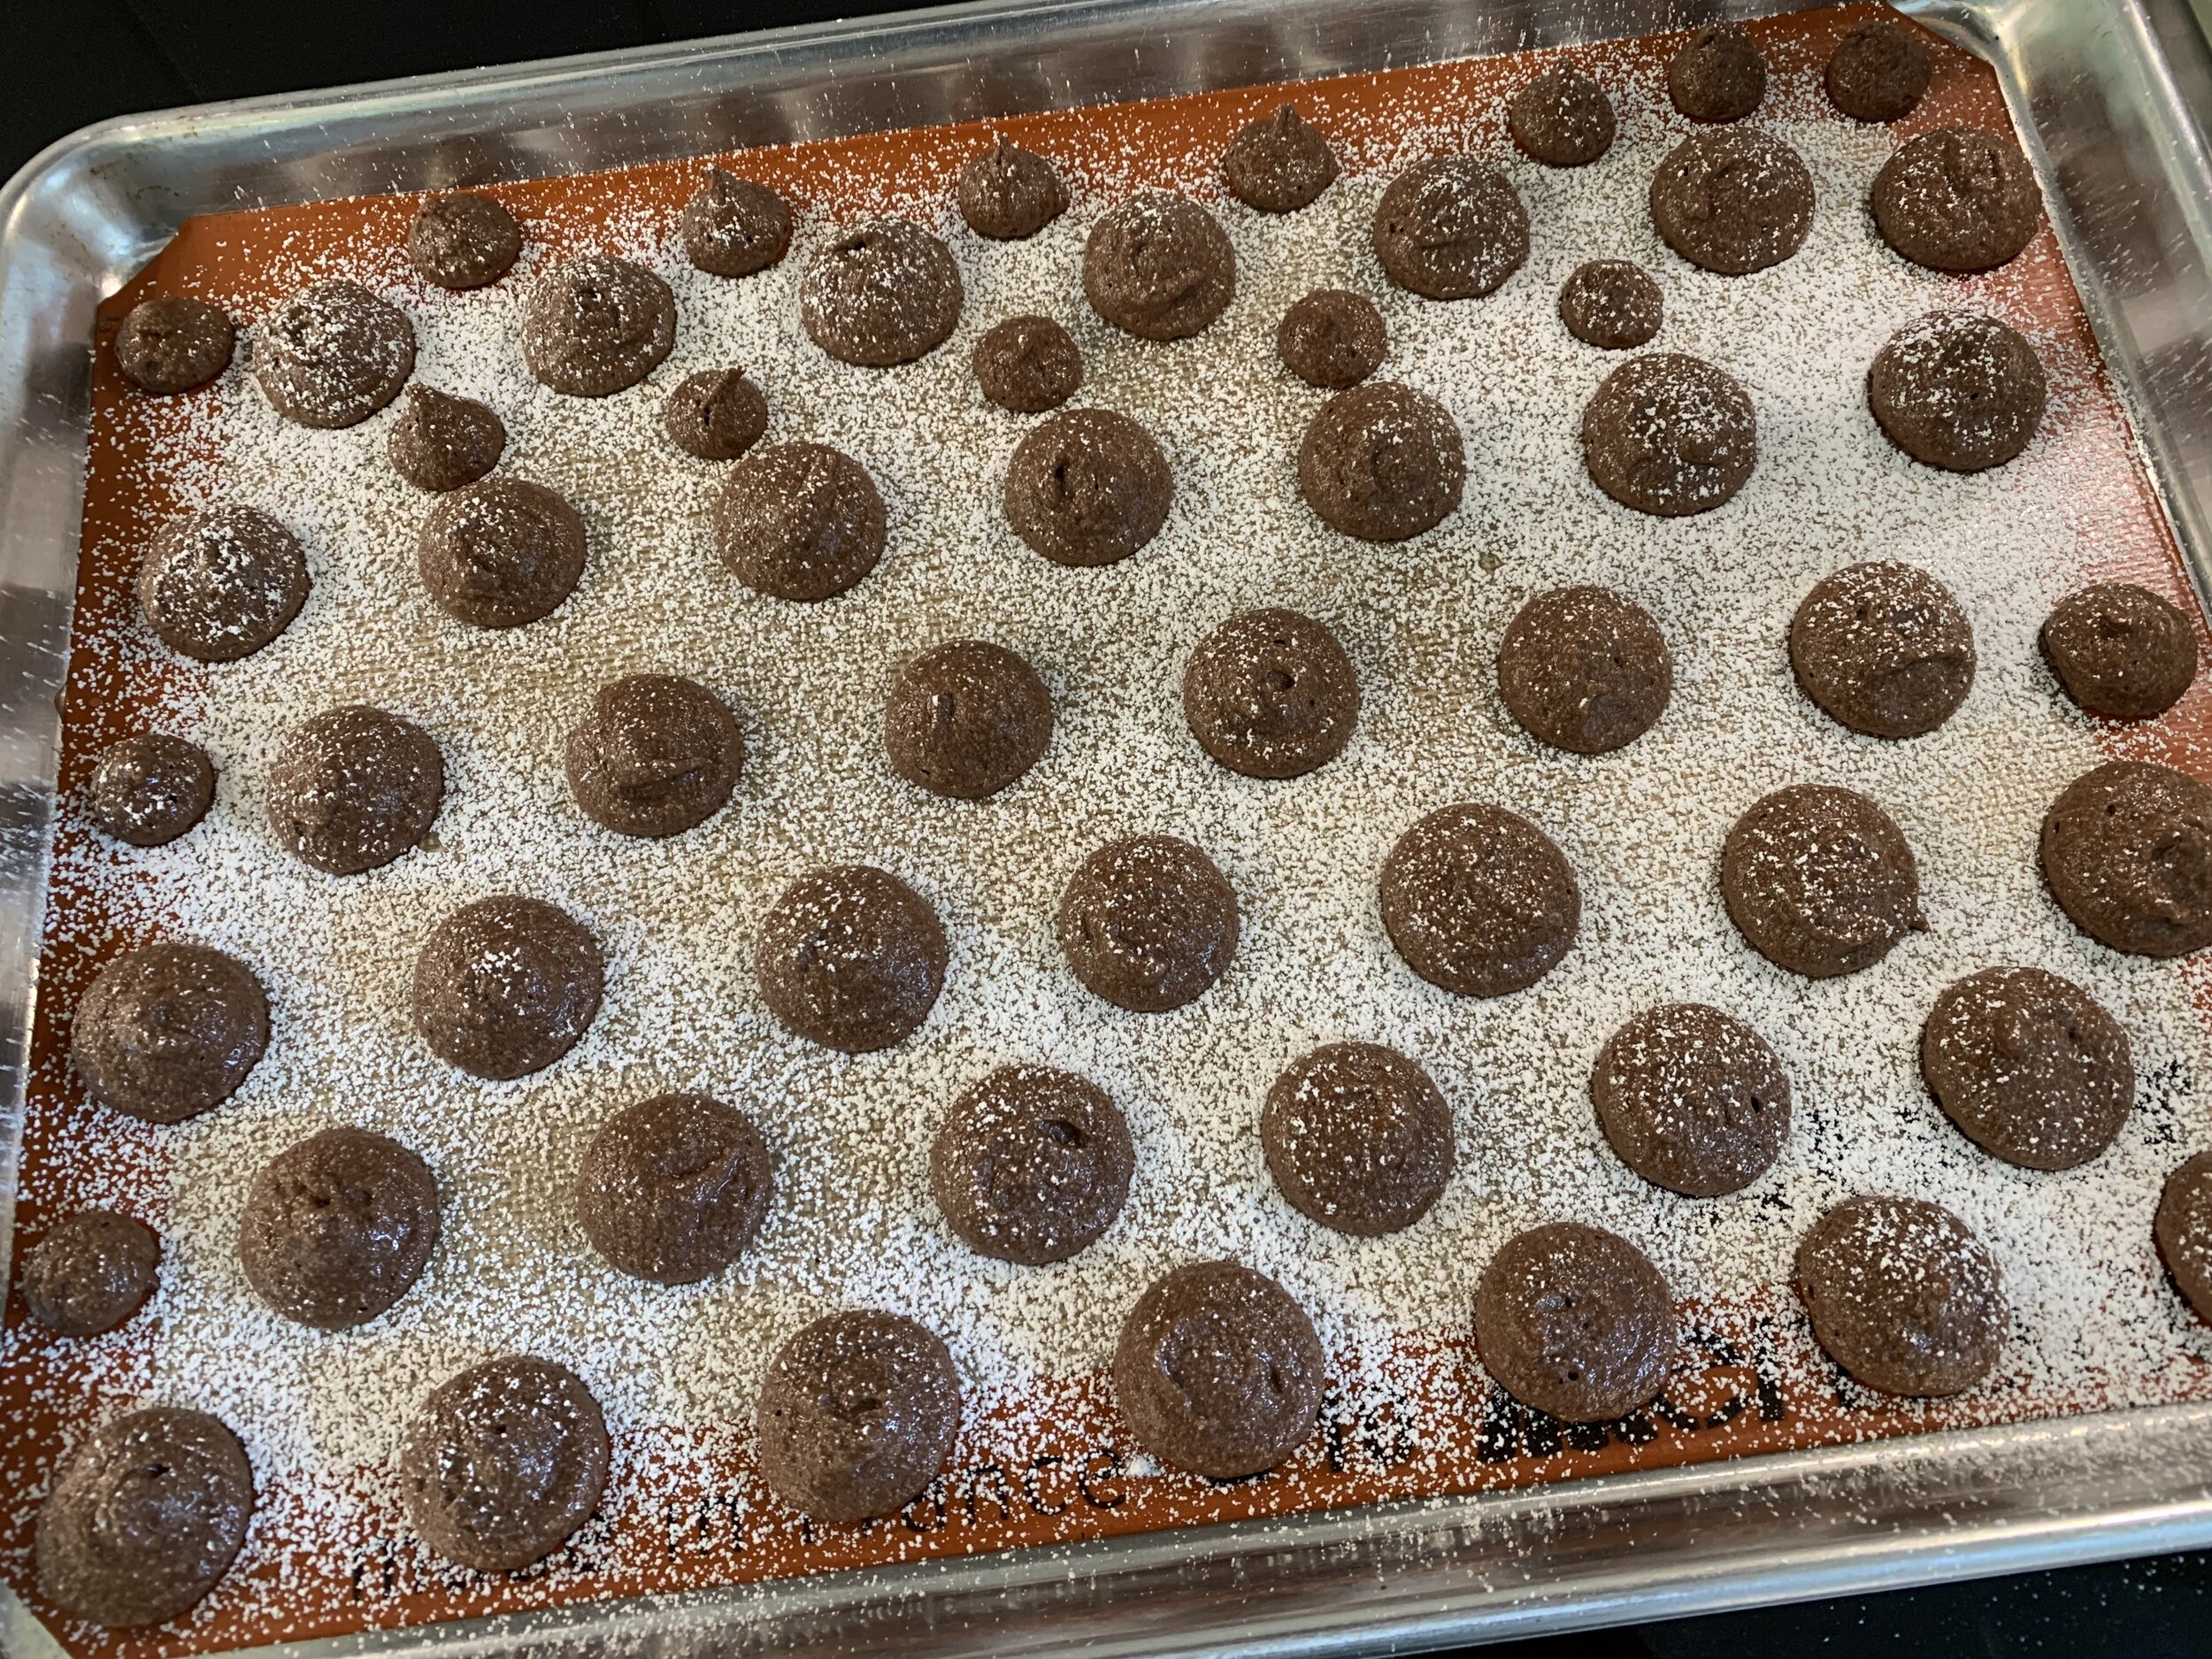
During my Providence/Pawtucket days I made 80 mm individual versions for my retail space, keeping ‘em clean with a sprinkle of chocolate crunchy crumbs and a dusting of confectioner’s sugar. Plain and delicious. Then it’s up to the buyer to leave it au naturel and eat it out of hand or dress it up for serving - dollop on some whipped cream and a few fresh raspberries (for you fruit and chocolate lovers) or top with crunchy candied nuts or some sesame brittle.

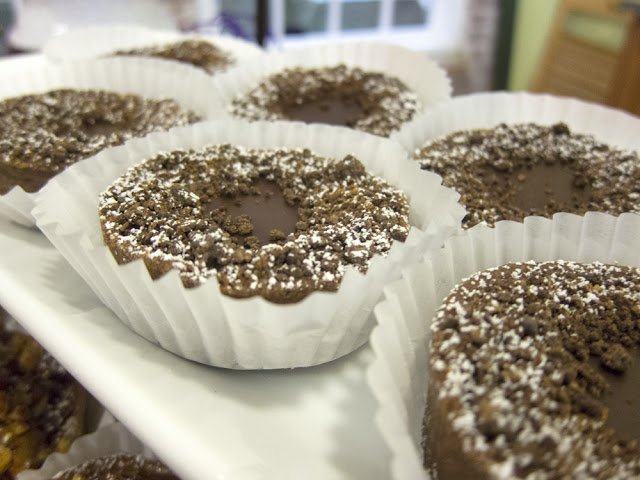
Individual ganache tartes

The process utilizes some of the basics in tarte making - cooled blind baked shell; ganache filling poured in and cooled; garnish as you wish; serve and enjoy. Pretty straight forward. You can use either a pâte sucrée au chocolat or a standard pâte sucrée.

As an aside, I’m not intending to overwhelm but to explore options with you for creating your own version of a delicious ganache tarte!

As for planning ahead, be sure you make your chosen dough either the day before or early enough to allow an hour or two for the dough to chill in the fridge before rolling it out. An even better plan-ahead step is to make a double or triple batch of dough a week or two ahead, divide it into approximately 260-280 gram / 9-10 ounce portions and hold them in the freezer well wrapped. The dough keeps for months. Just thaw it in the fridge overnight before using.

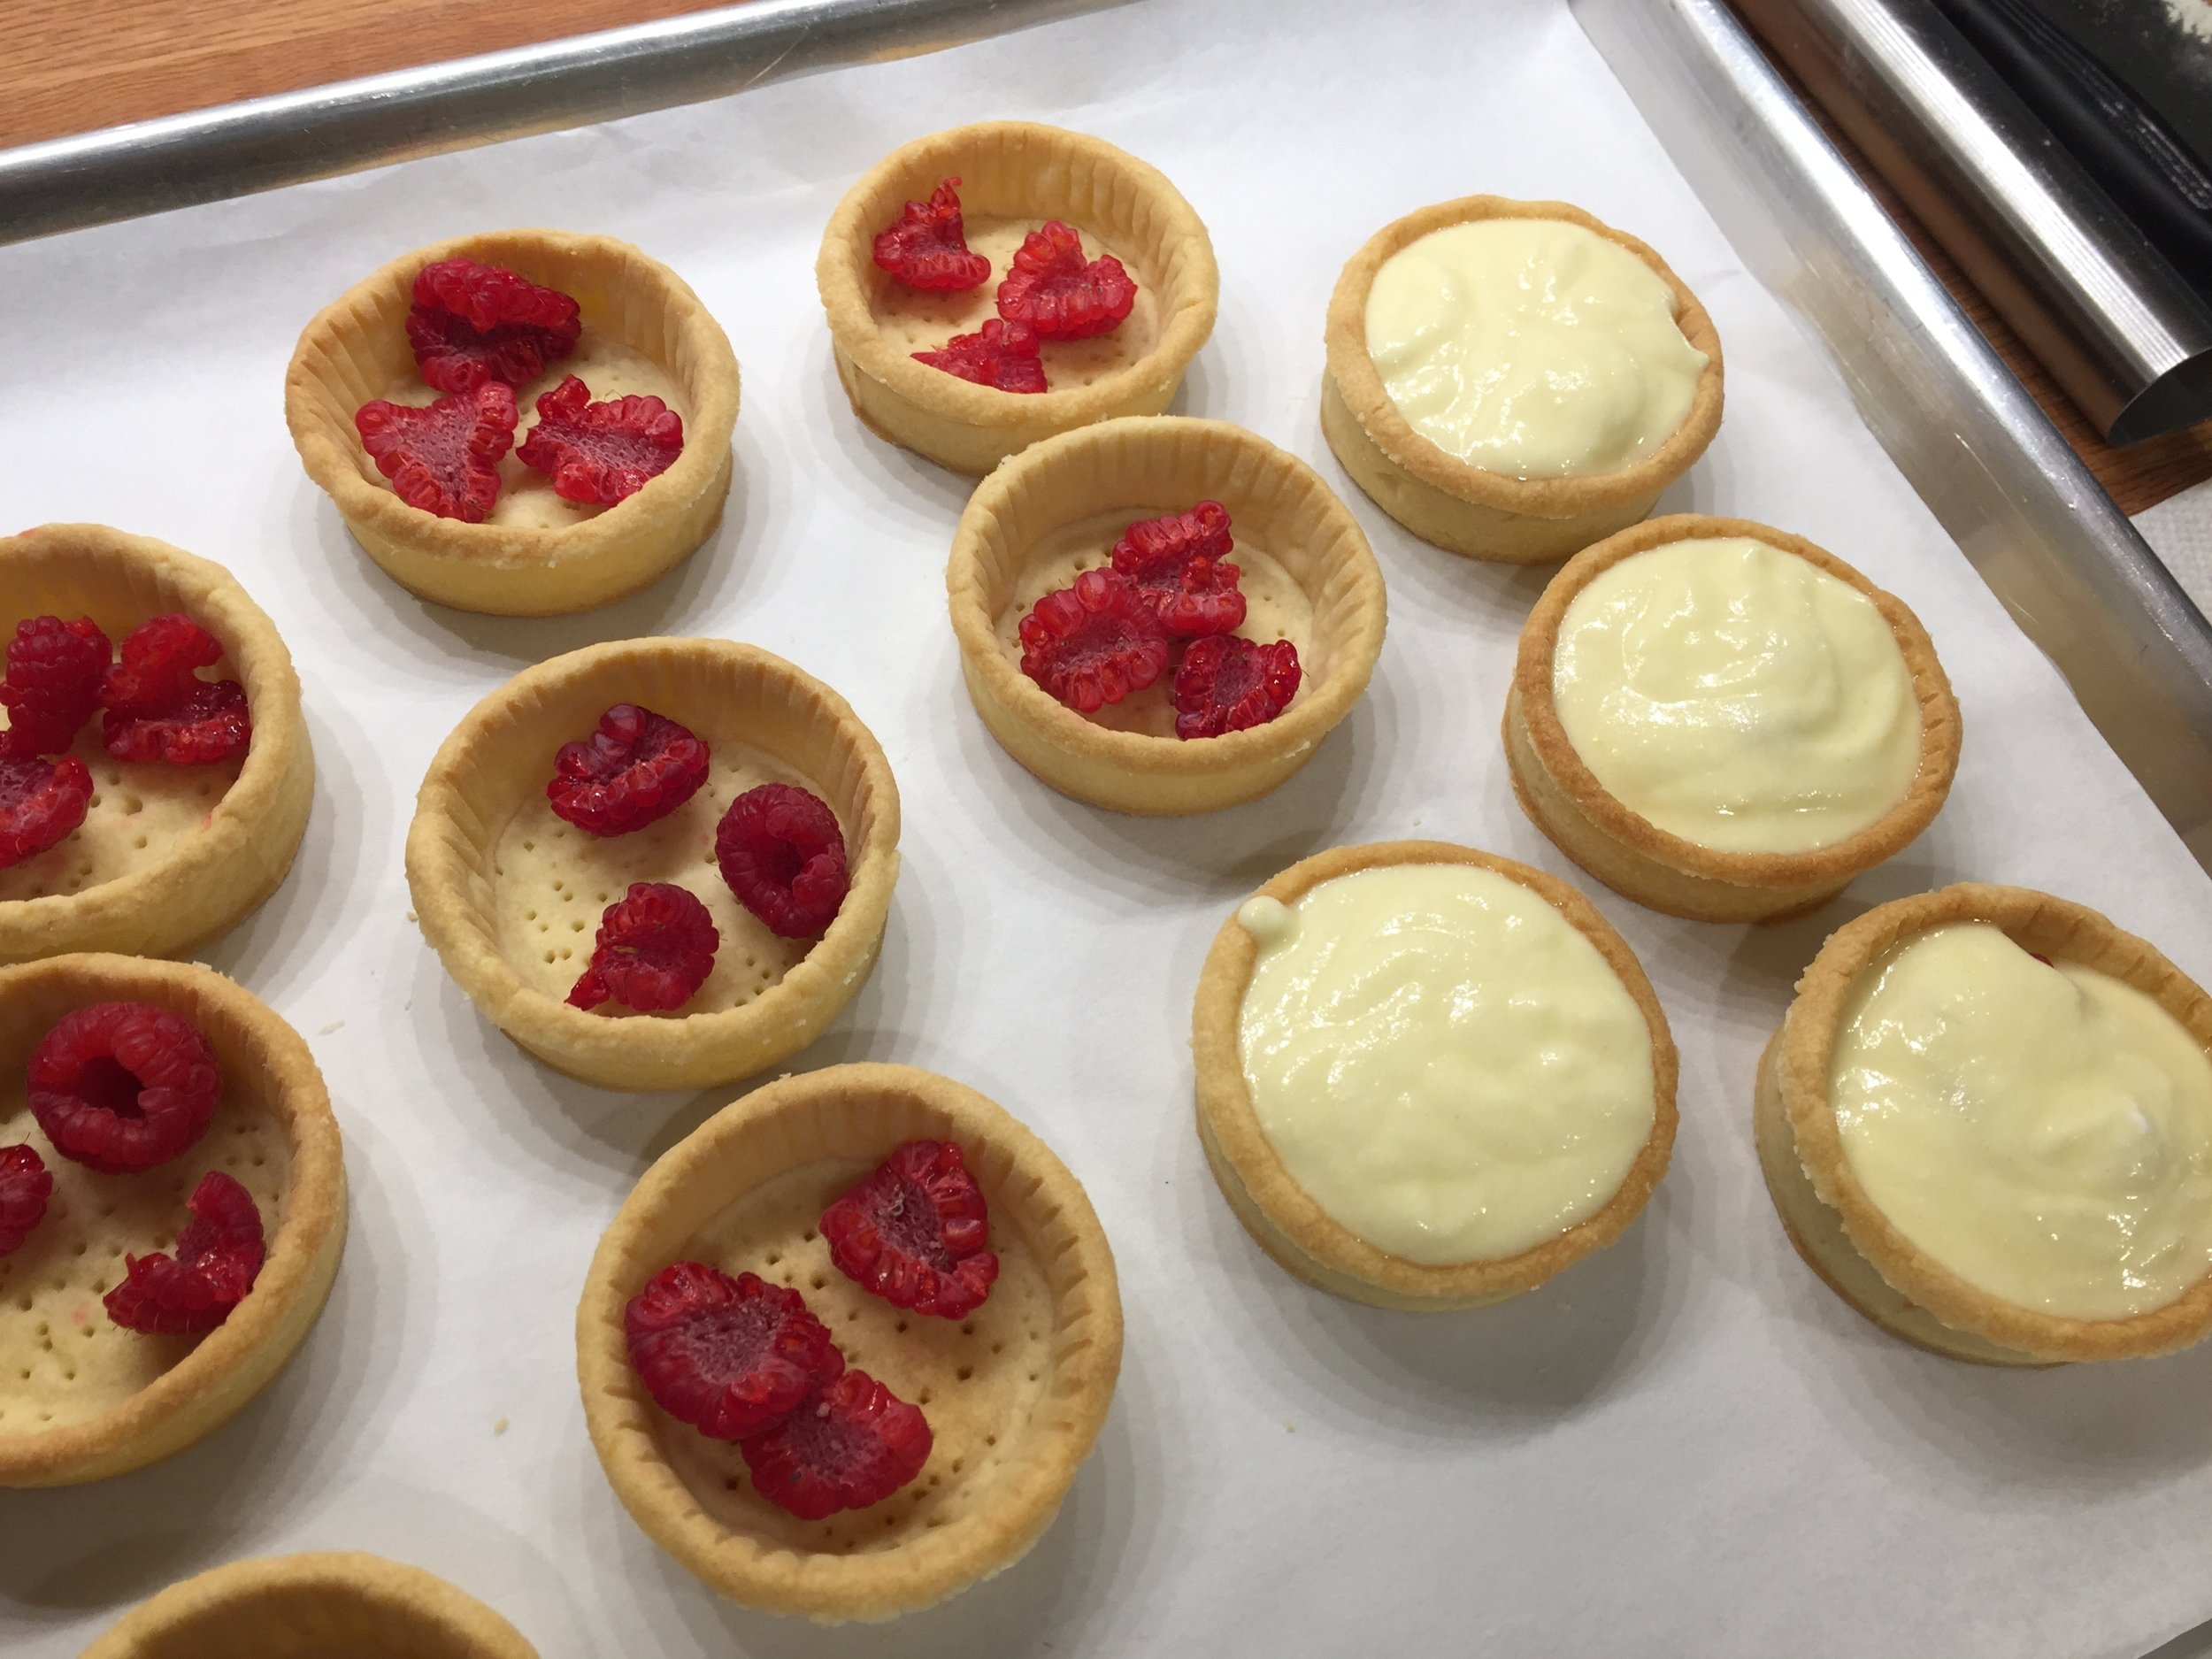
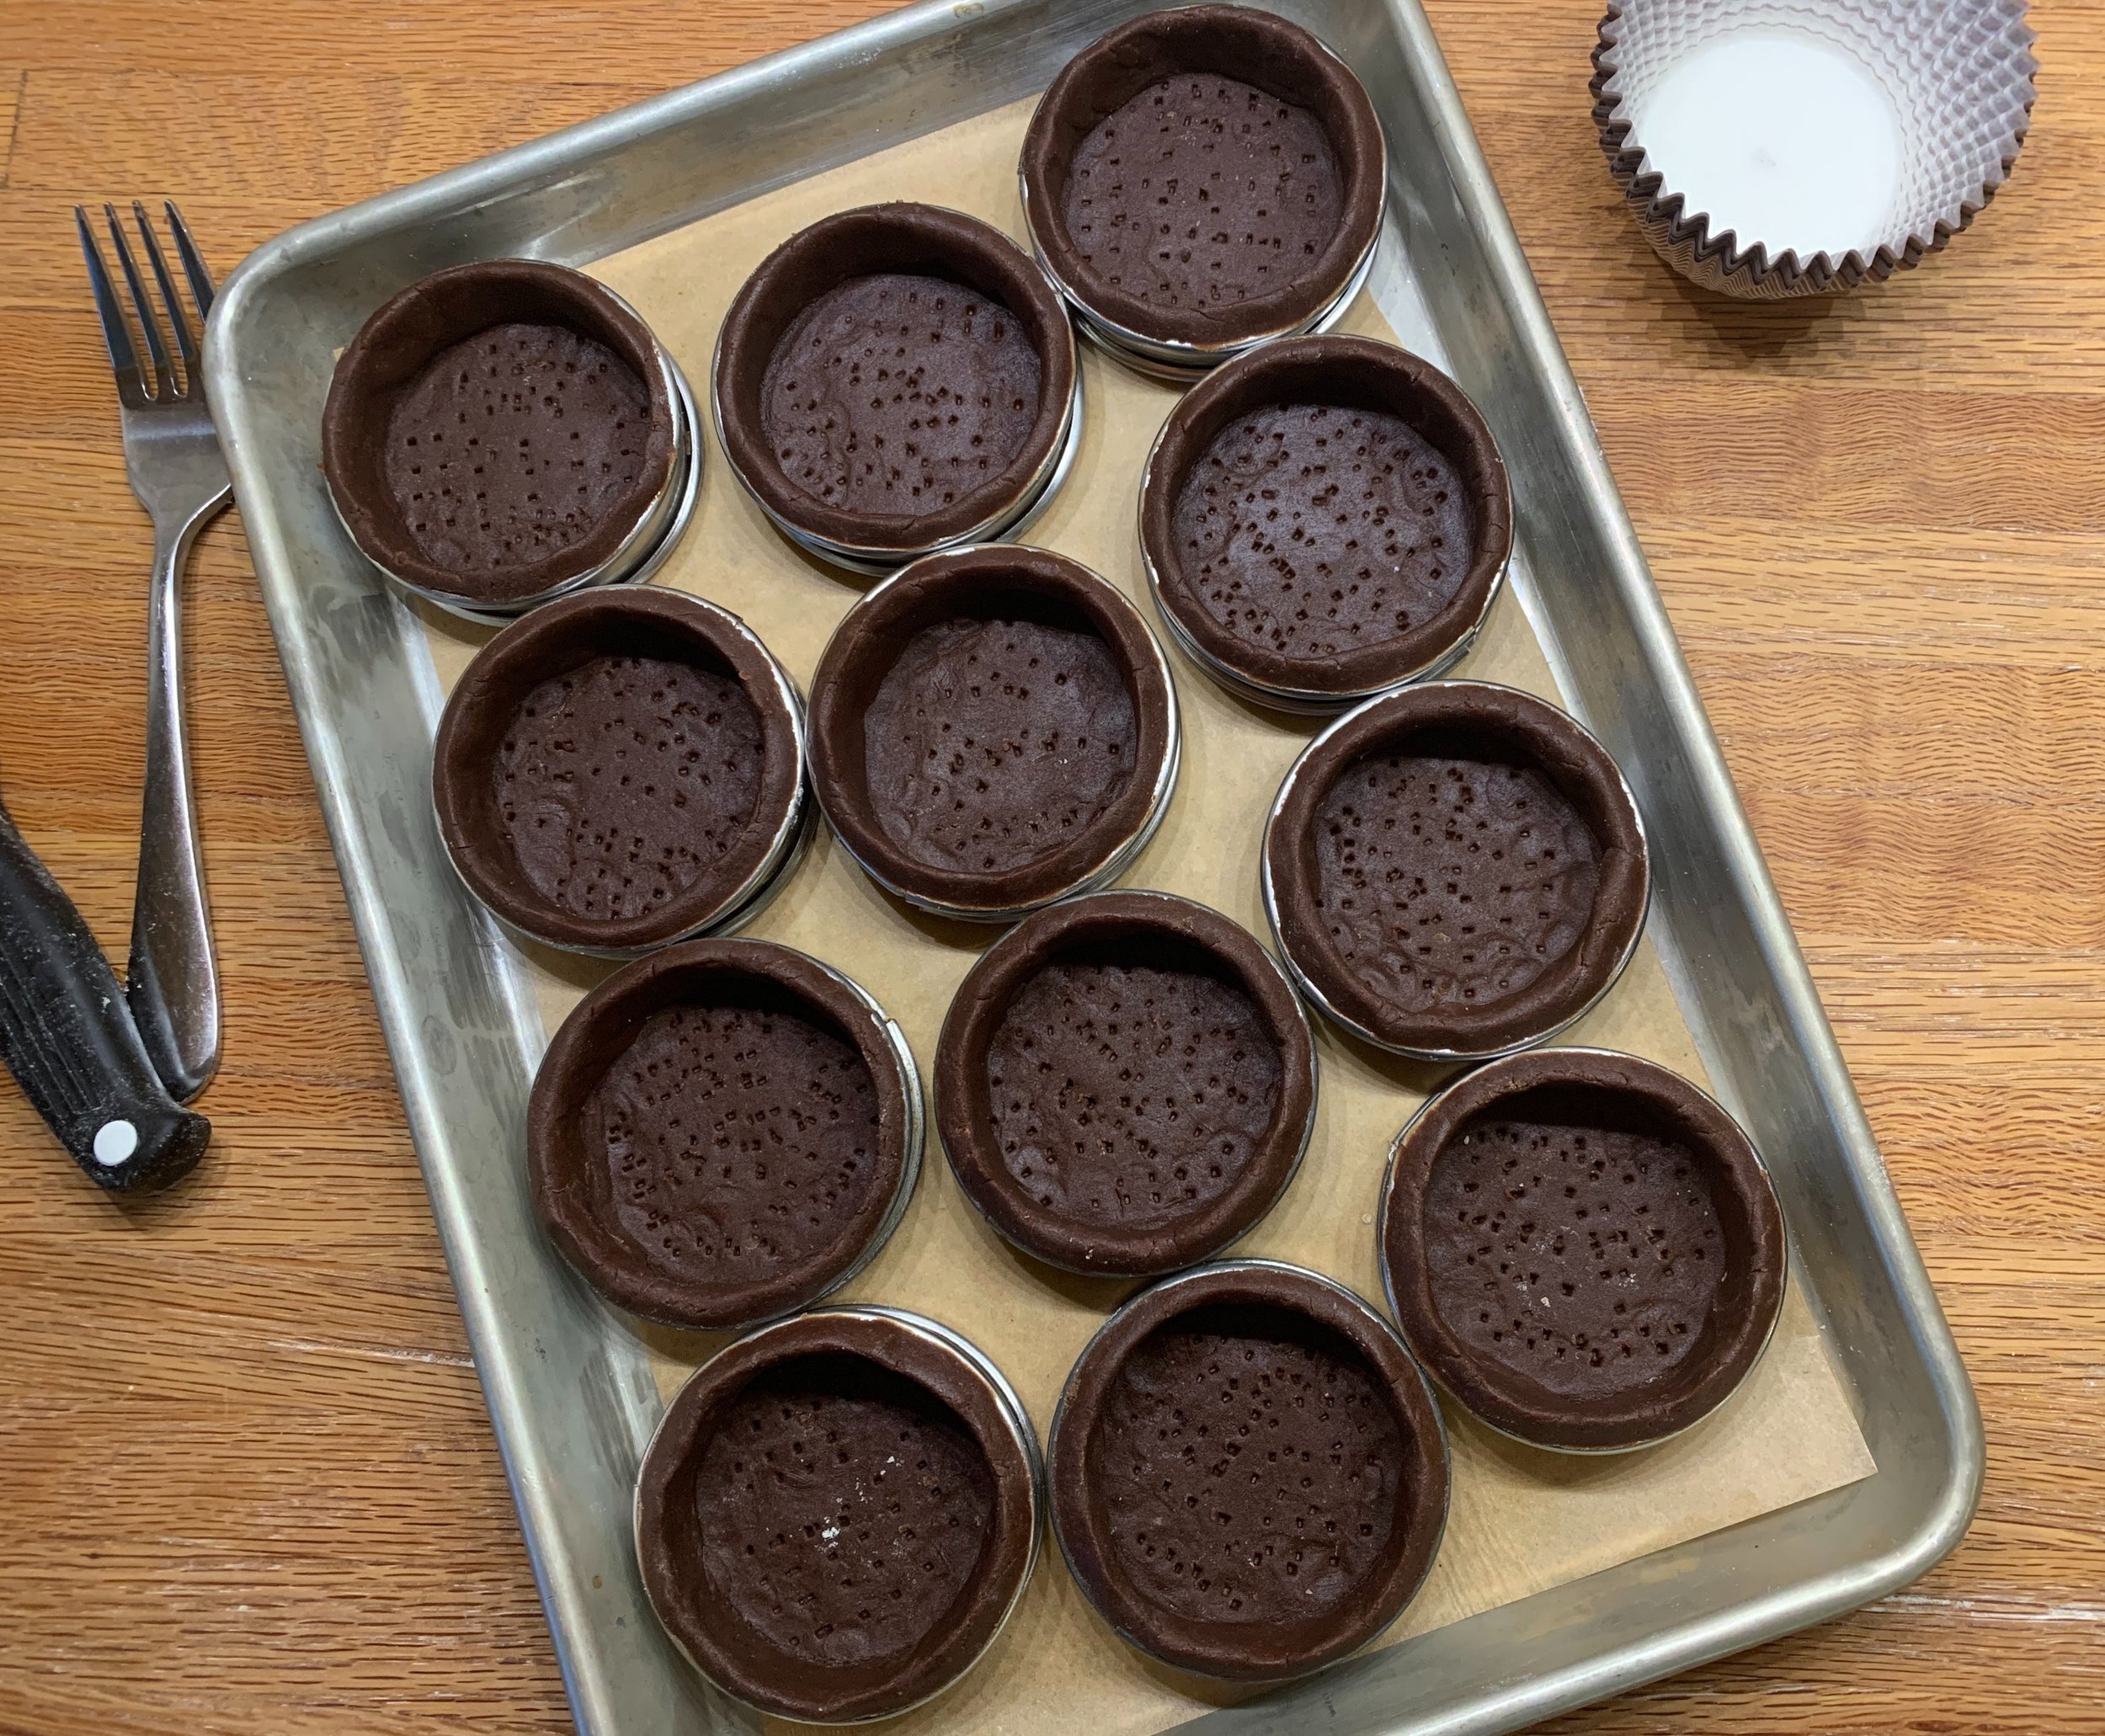
You’ll fully blind bake the tarte shell first. When you’re ready, roll out the dough (generally about 260-280 grams / 9-10 ounces for a 9”) and line a 9” tart ring or fluted pan. Place it on a parchment lined sheet pan, prick the bottom all over with a fork and pop it into the freezer for 15-20 minutes to firm it up.

I often do various sizes for different venues. Roll with it (hah! - get it?). You’ll learn to figure out how much filling will work for certain sized tartes. I gauge a double batch of filling should fill the rings below (not including the little brioche tins).

So many choices!

My favorite 65 mm rings - perfect!

7 inch and 5.5 inch rings

You can actually do the lining step a day or two ahead and hold it in the freezer until baking day. No need to thaw it - just line with a round of parchment, fill with weights or dried beans. Bake at 350ºF for 12-15 minutes, then lift out the weights and parchment and bake an additional 5-8 minutes to fully bake/dry the bottom. Cool completely before filling.

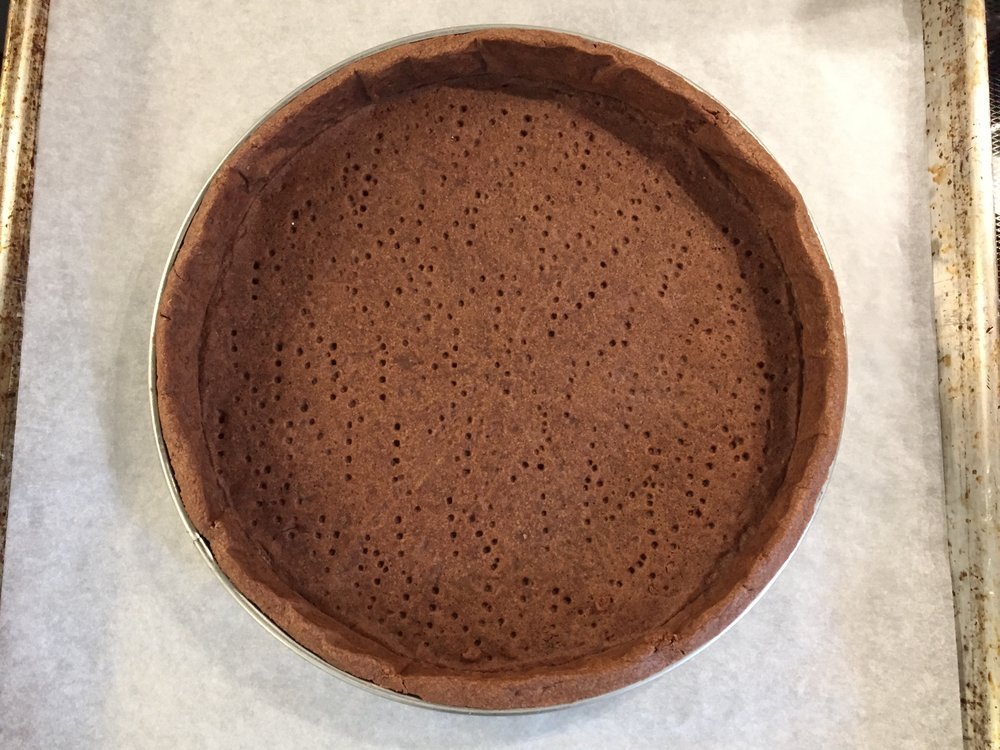
Fully blind baked shell

As if there weren’t enough options for this tarte shell, here’s one more way to help with the plan-ahead process. You can freeze the fully baked shell too! There have been times that I’ve had a baked shell in my freezer for several weeks before I decided it was time to fill and enjoy it. So many possibilities!

The ganache filling is as simple as ganache can be. Place 227 g / 8 ounces of chopped dark chocolate or discs/feves in a medium heat proof bowl along with 28 g / 2 tablespoons unsalted butter. Heat 360 g / 1.5 cups heavy cream to boiling then pour the hot cream over the chocolate/butter. Let it sit a minute then gently blend with a whisk or spatula until smooth. Don’t be aggressive with the mixing - you don’t want to aerate it. Blend in 30 ml / 2 tablespoons brewed espresso - I often make a mix of 1/4 cup hot water with a half tablespoon espresso powder as a substitute for the brewed and use 30 ml of that.

Once the ganache is made, pour it directly into the blind baked shell.

Let it sit out at room temperature uncovered for an hour or so to let the heat dissipate before placing it into the fridge (again uncovered) to fully set. If you put it in the fridge right away, you’ll get condensation on the surface - not attractive, believe you me. Plus chocolate doesn’t like that.

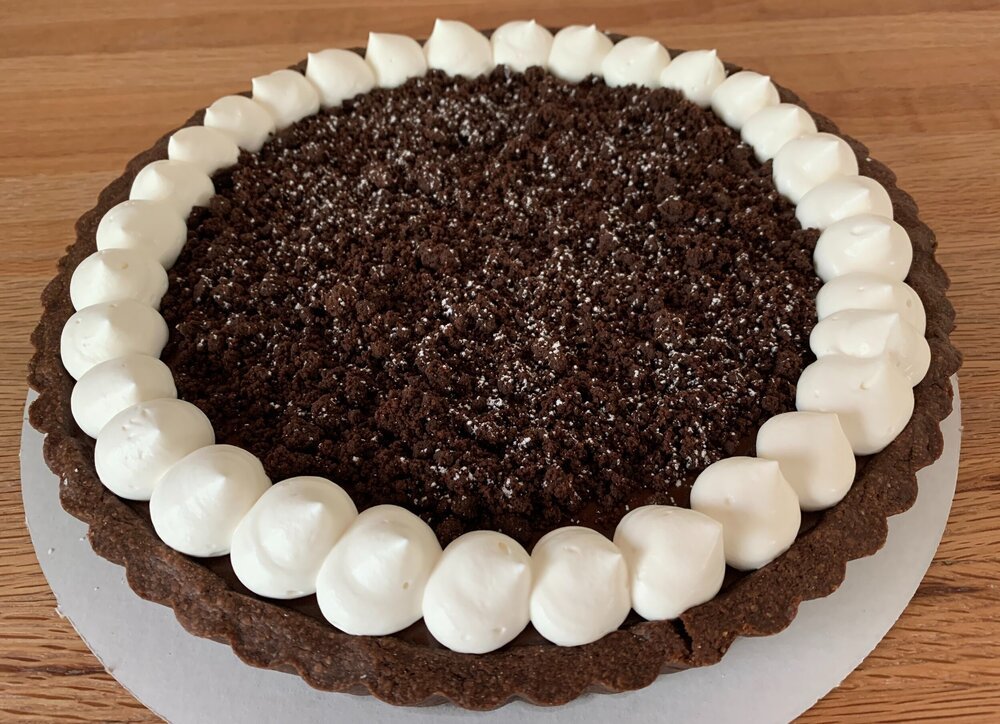
Once chilled, garnish away! Crunchy chocolate crumbs, a light confectioner’s sugar dust, whipped cream and voila! It keeps covered in the fridge over several days so don’t feel like you have to eat it all right away!

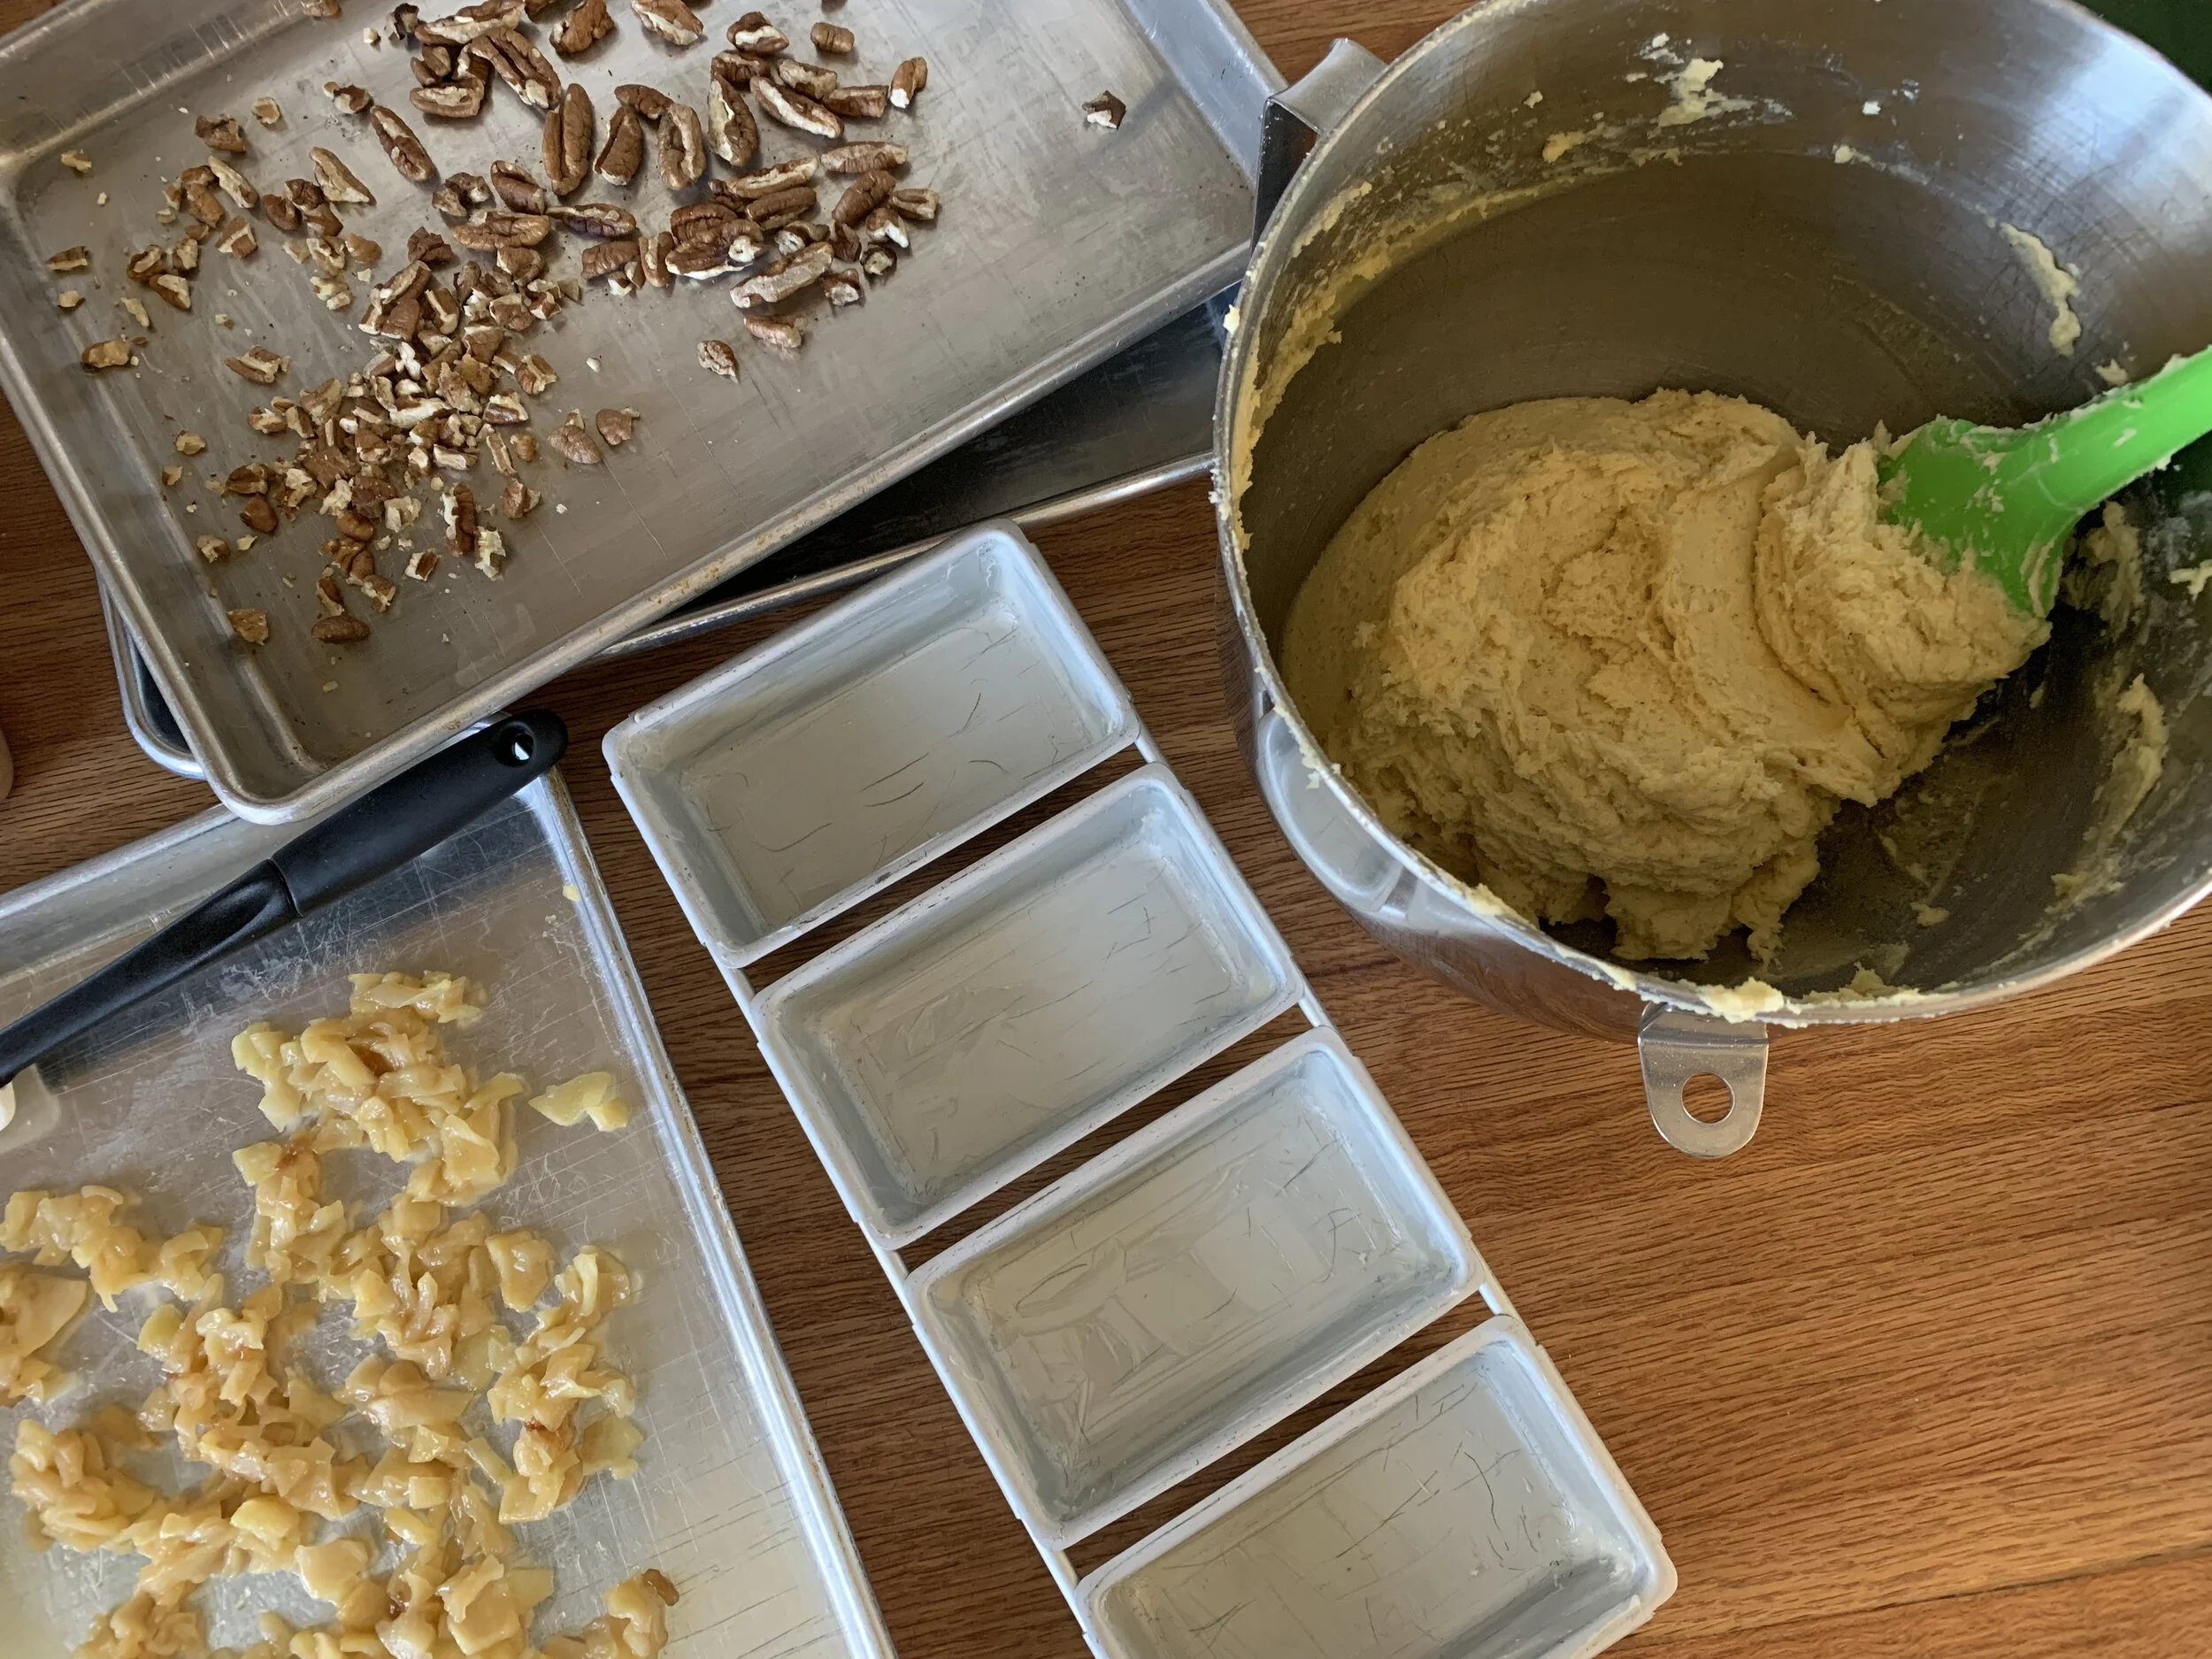
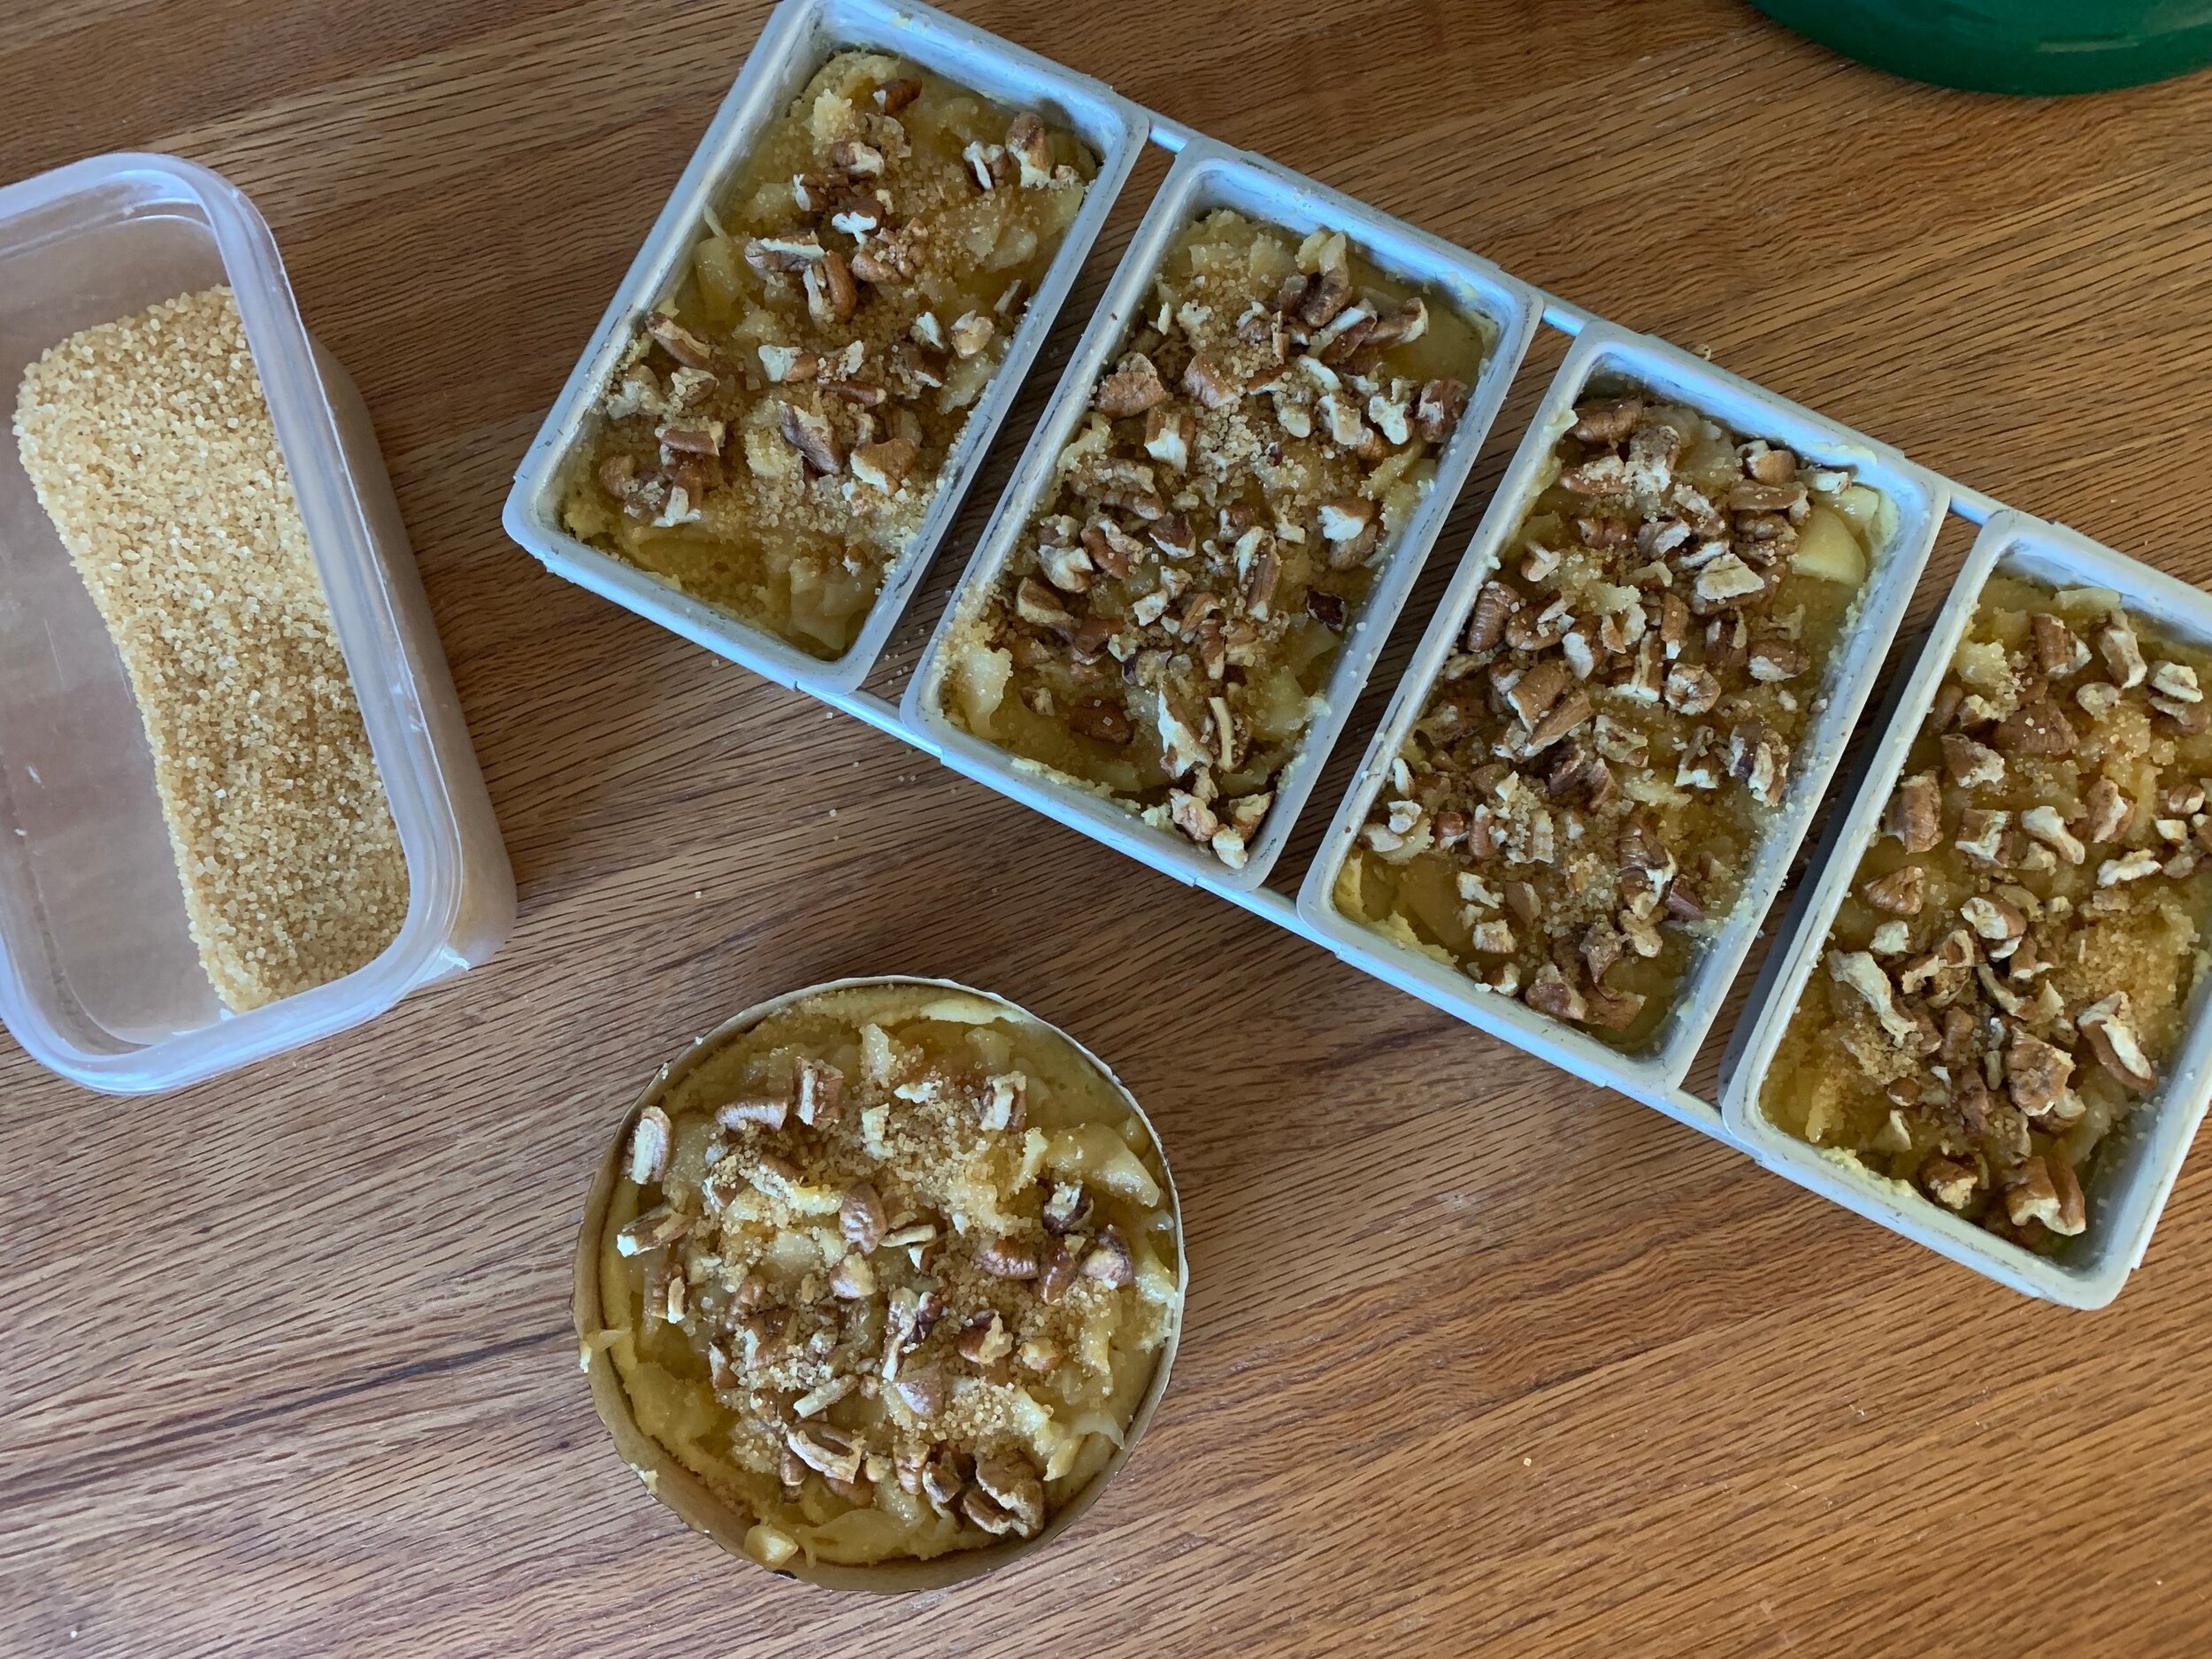
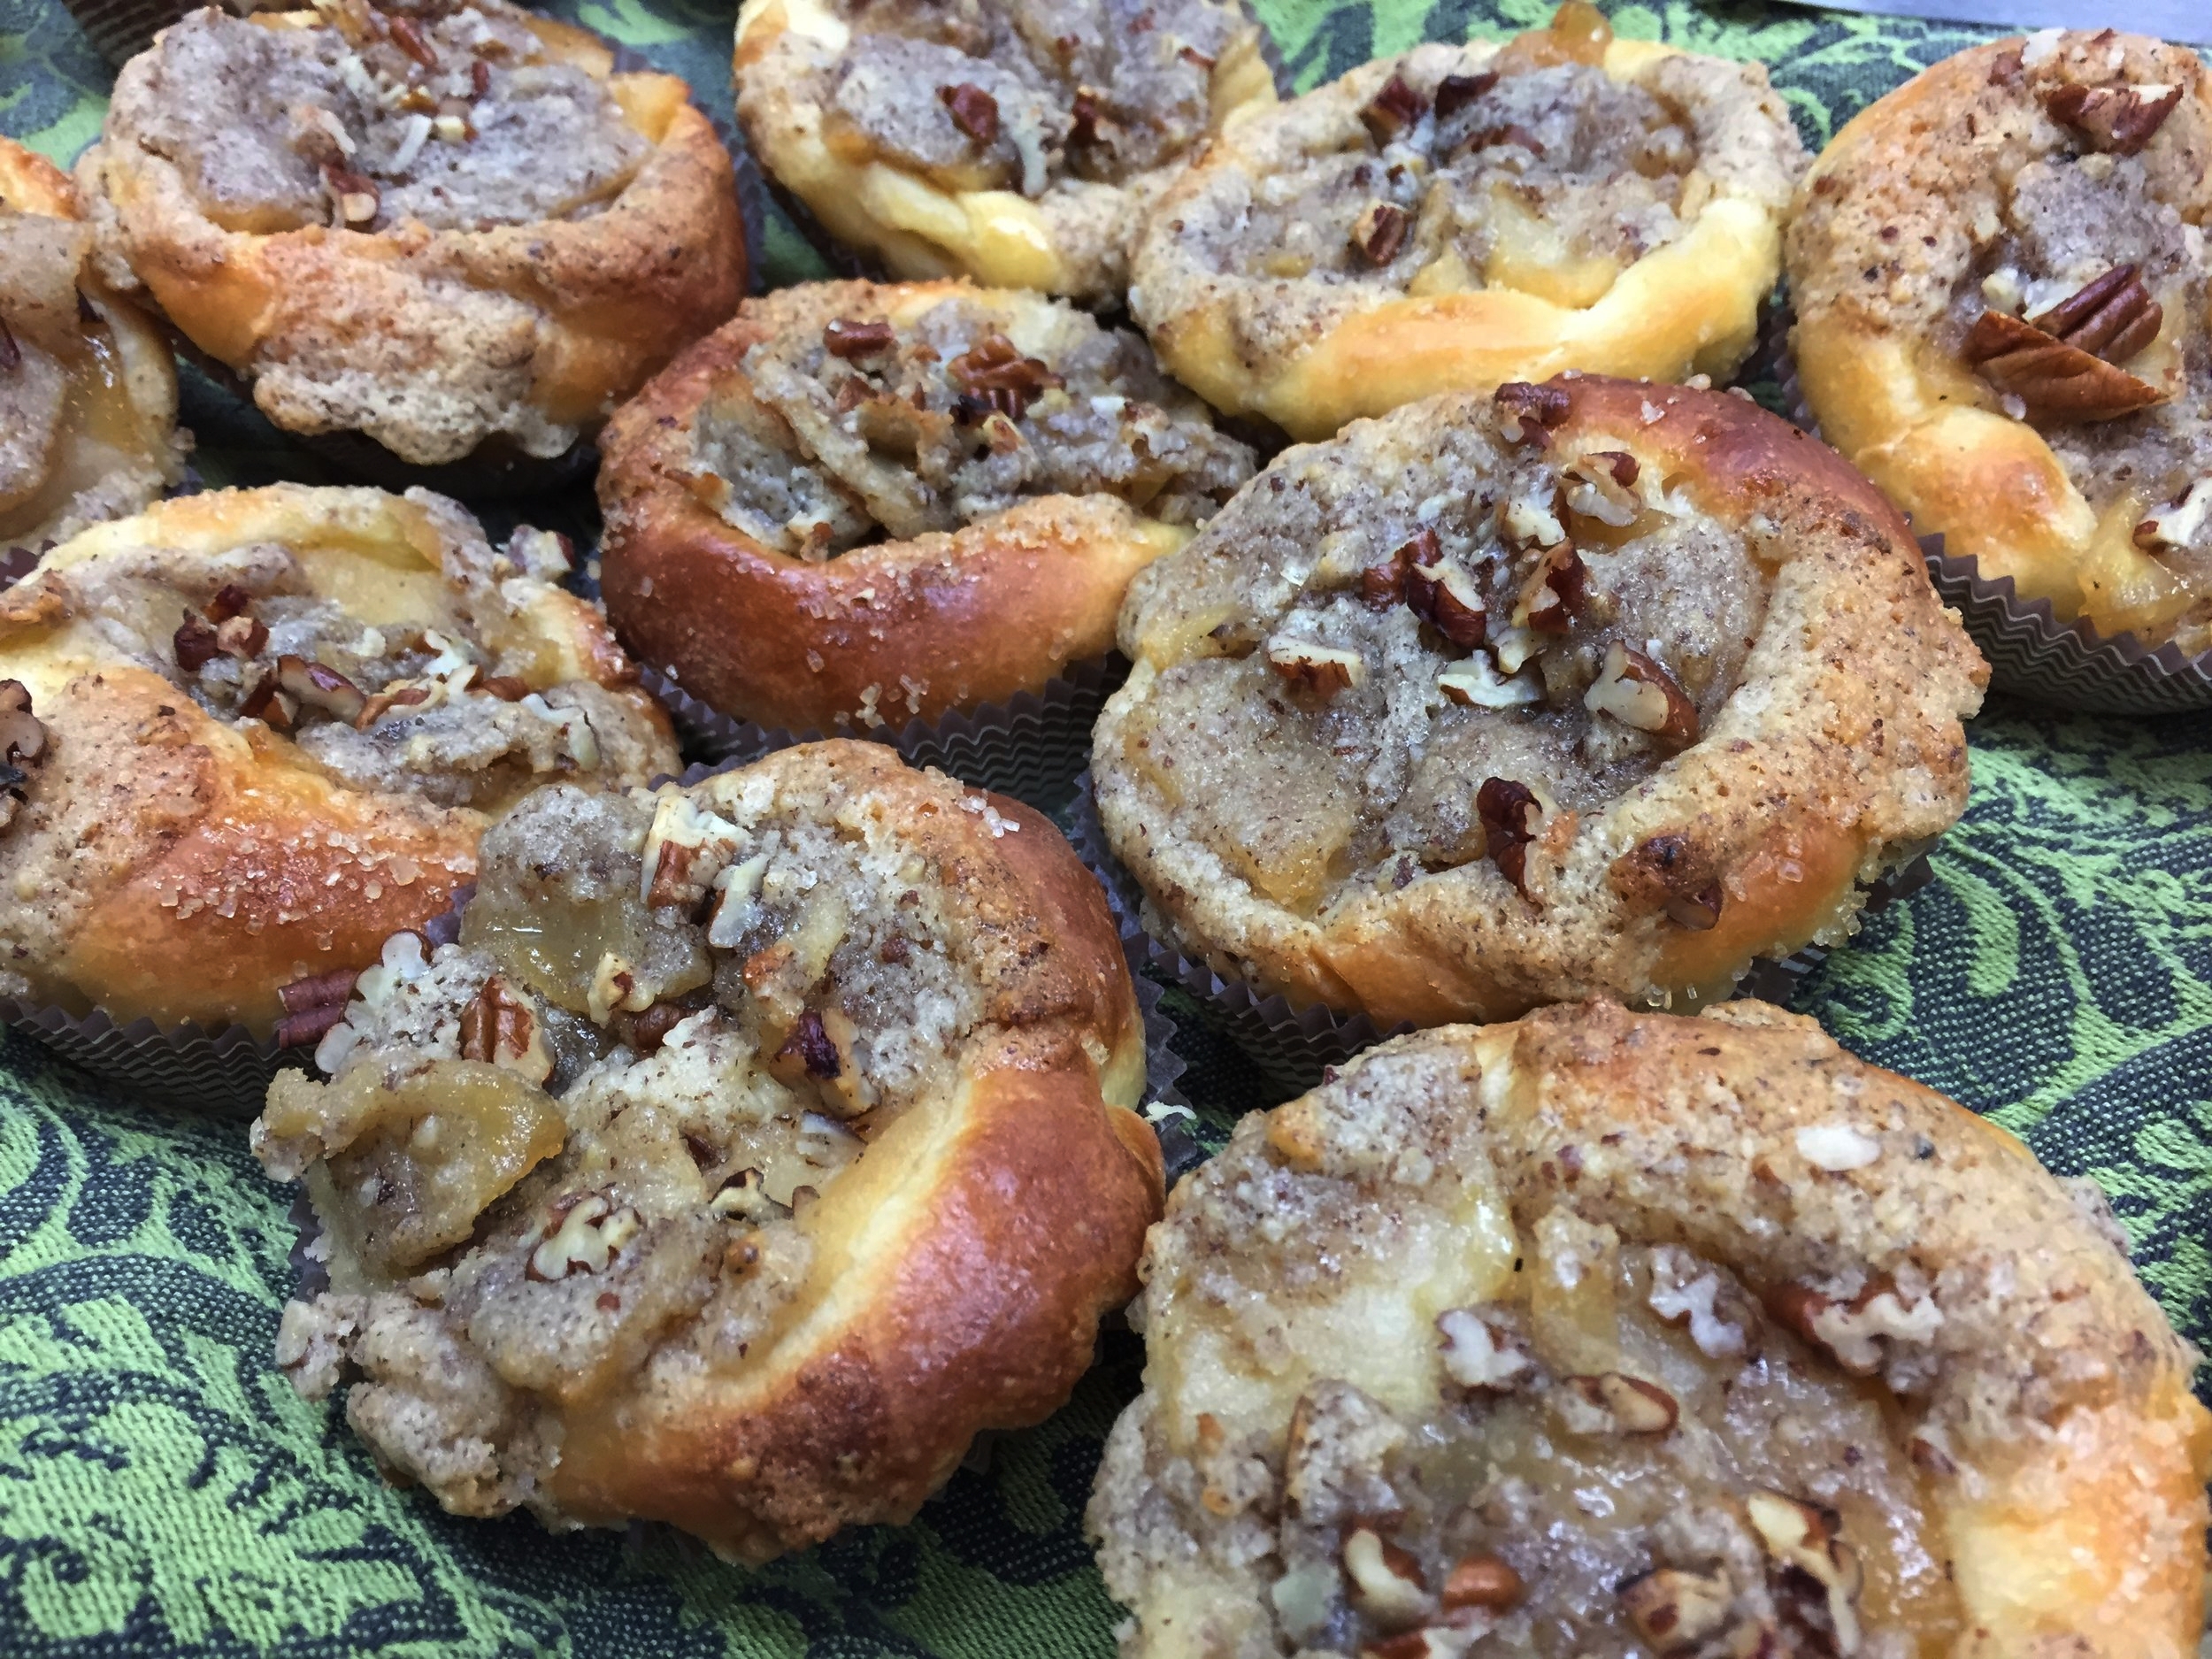
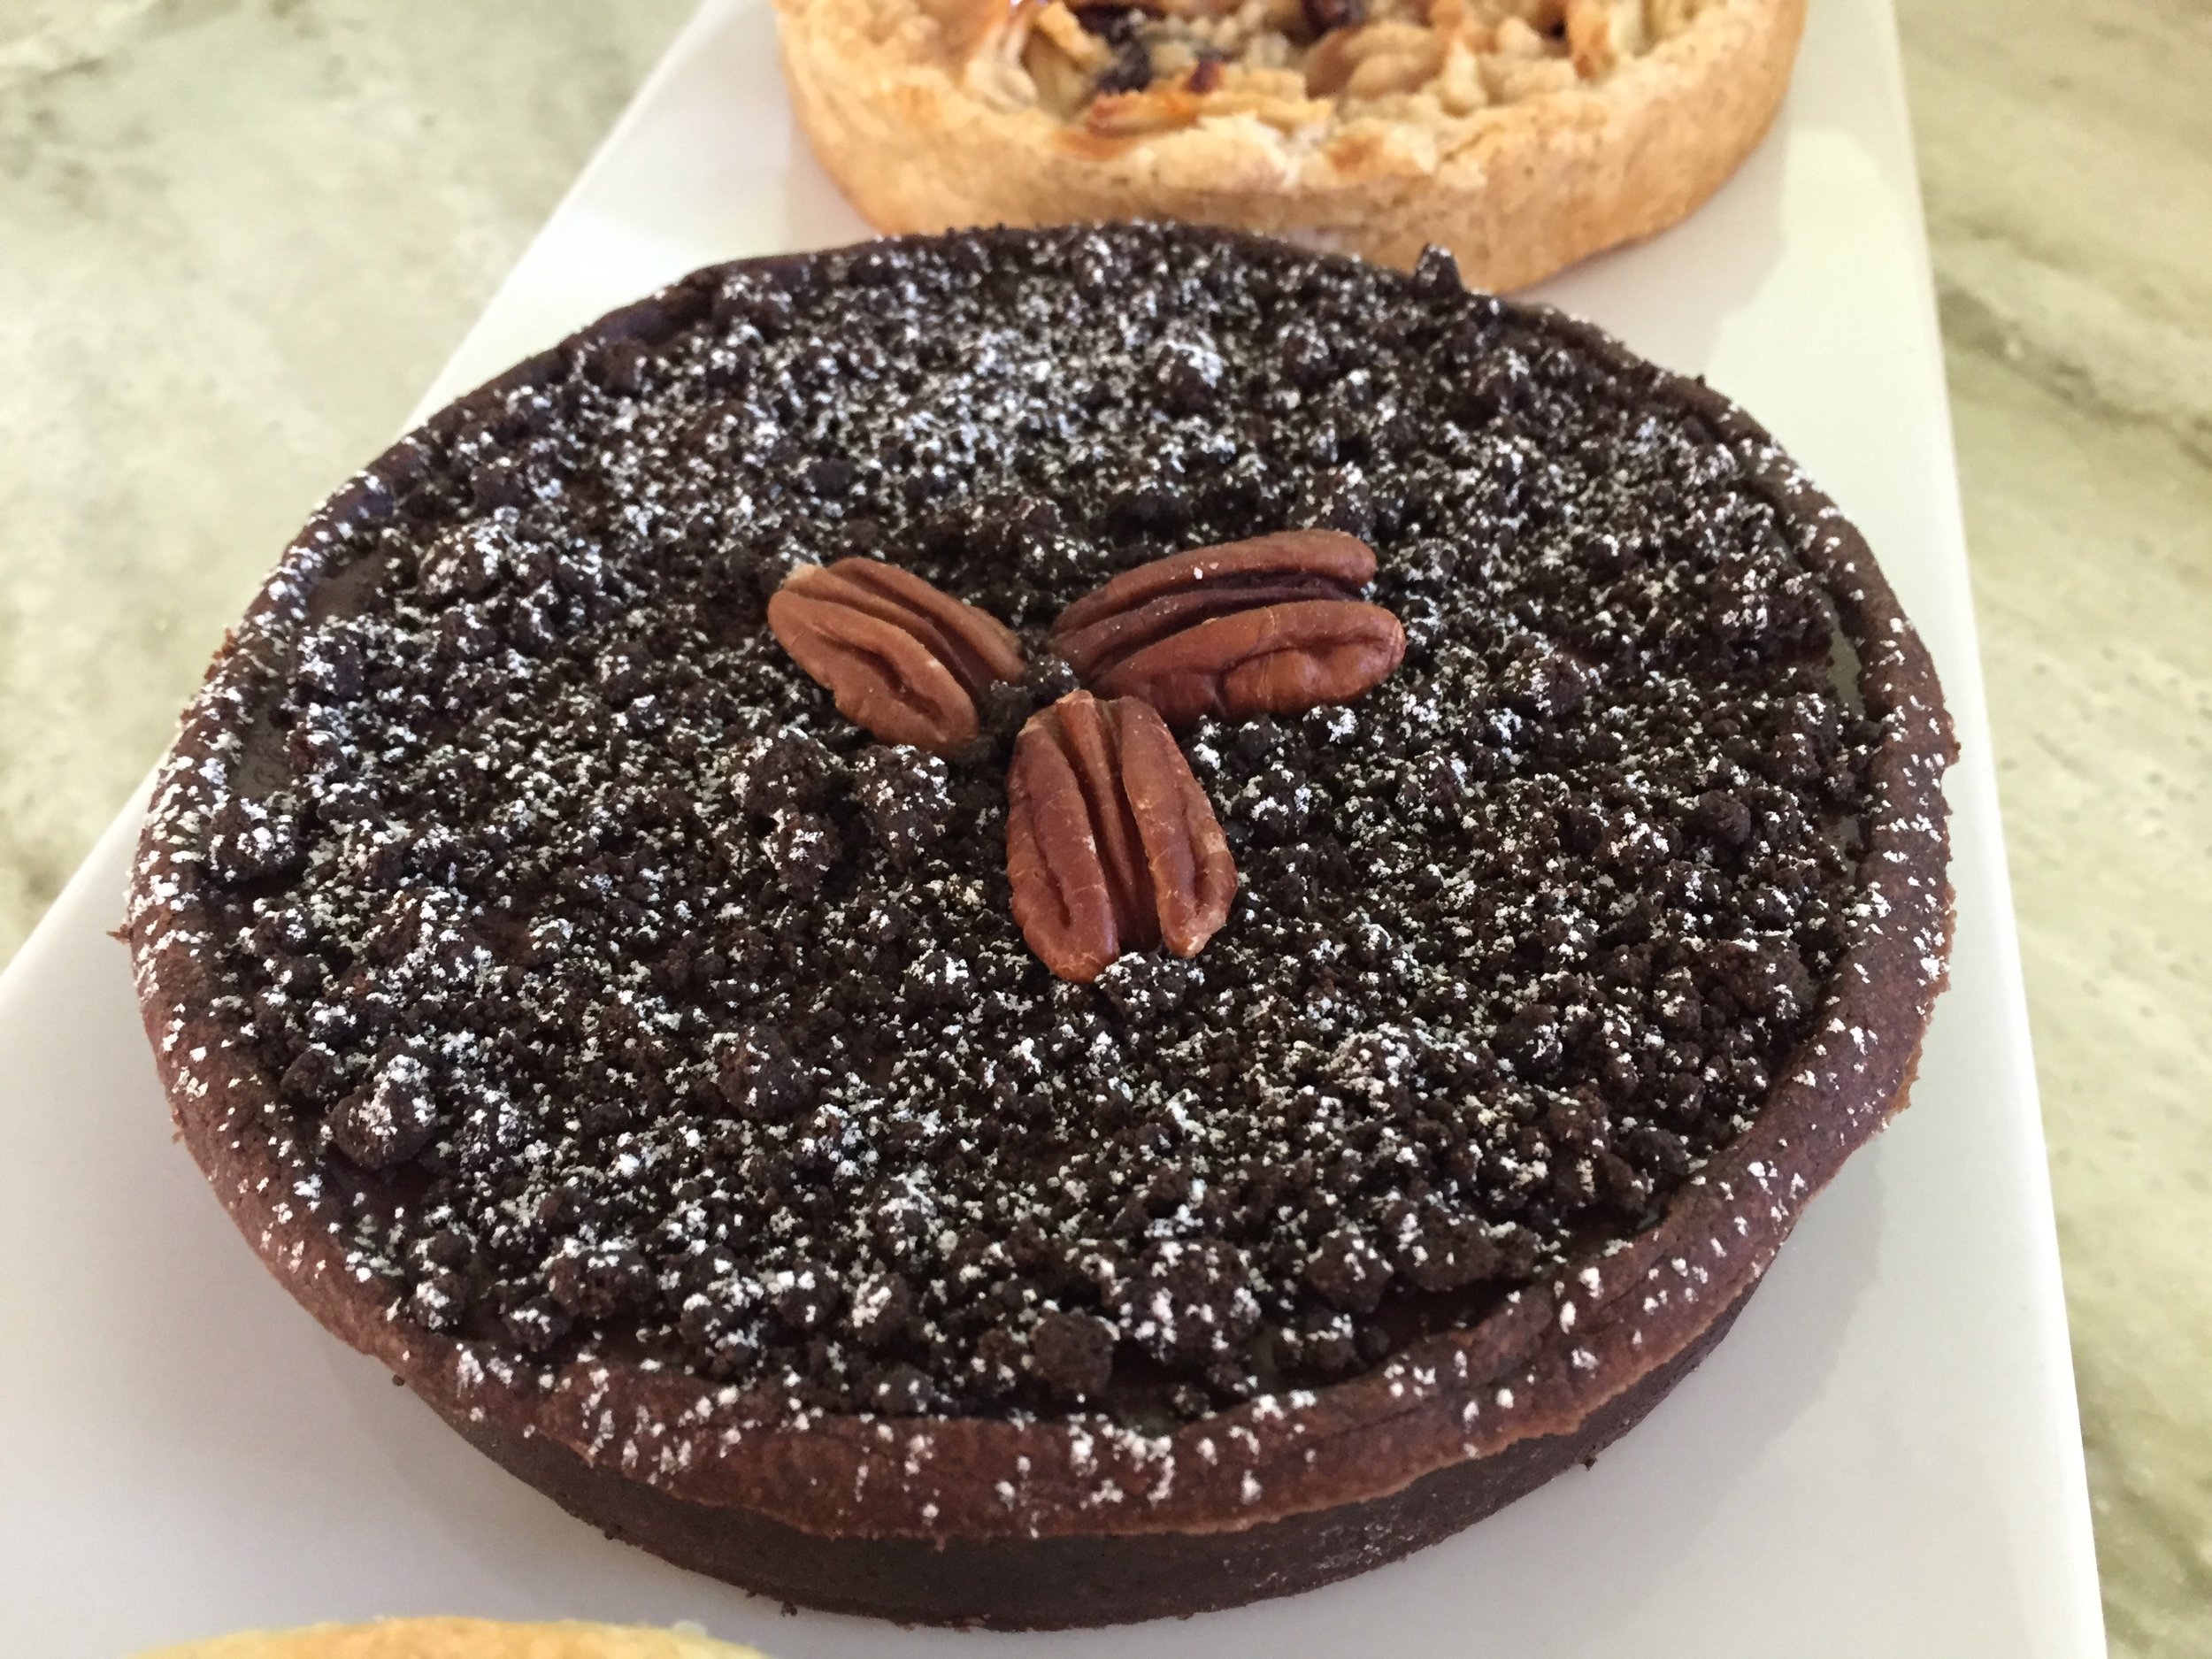
An option for you nut lovers out there is to spread some toasted chopped nuts of choice coated in caramel on the bottom and pour the ganache over them. You can do fewer nuts and more ganache or more nuts and less ganache. Below are images of a few different sizes I experimented with for Thanksgiving a few years ago.

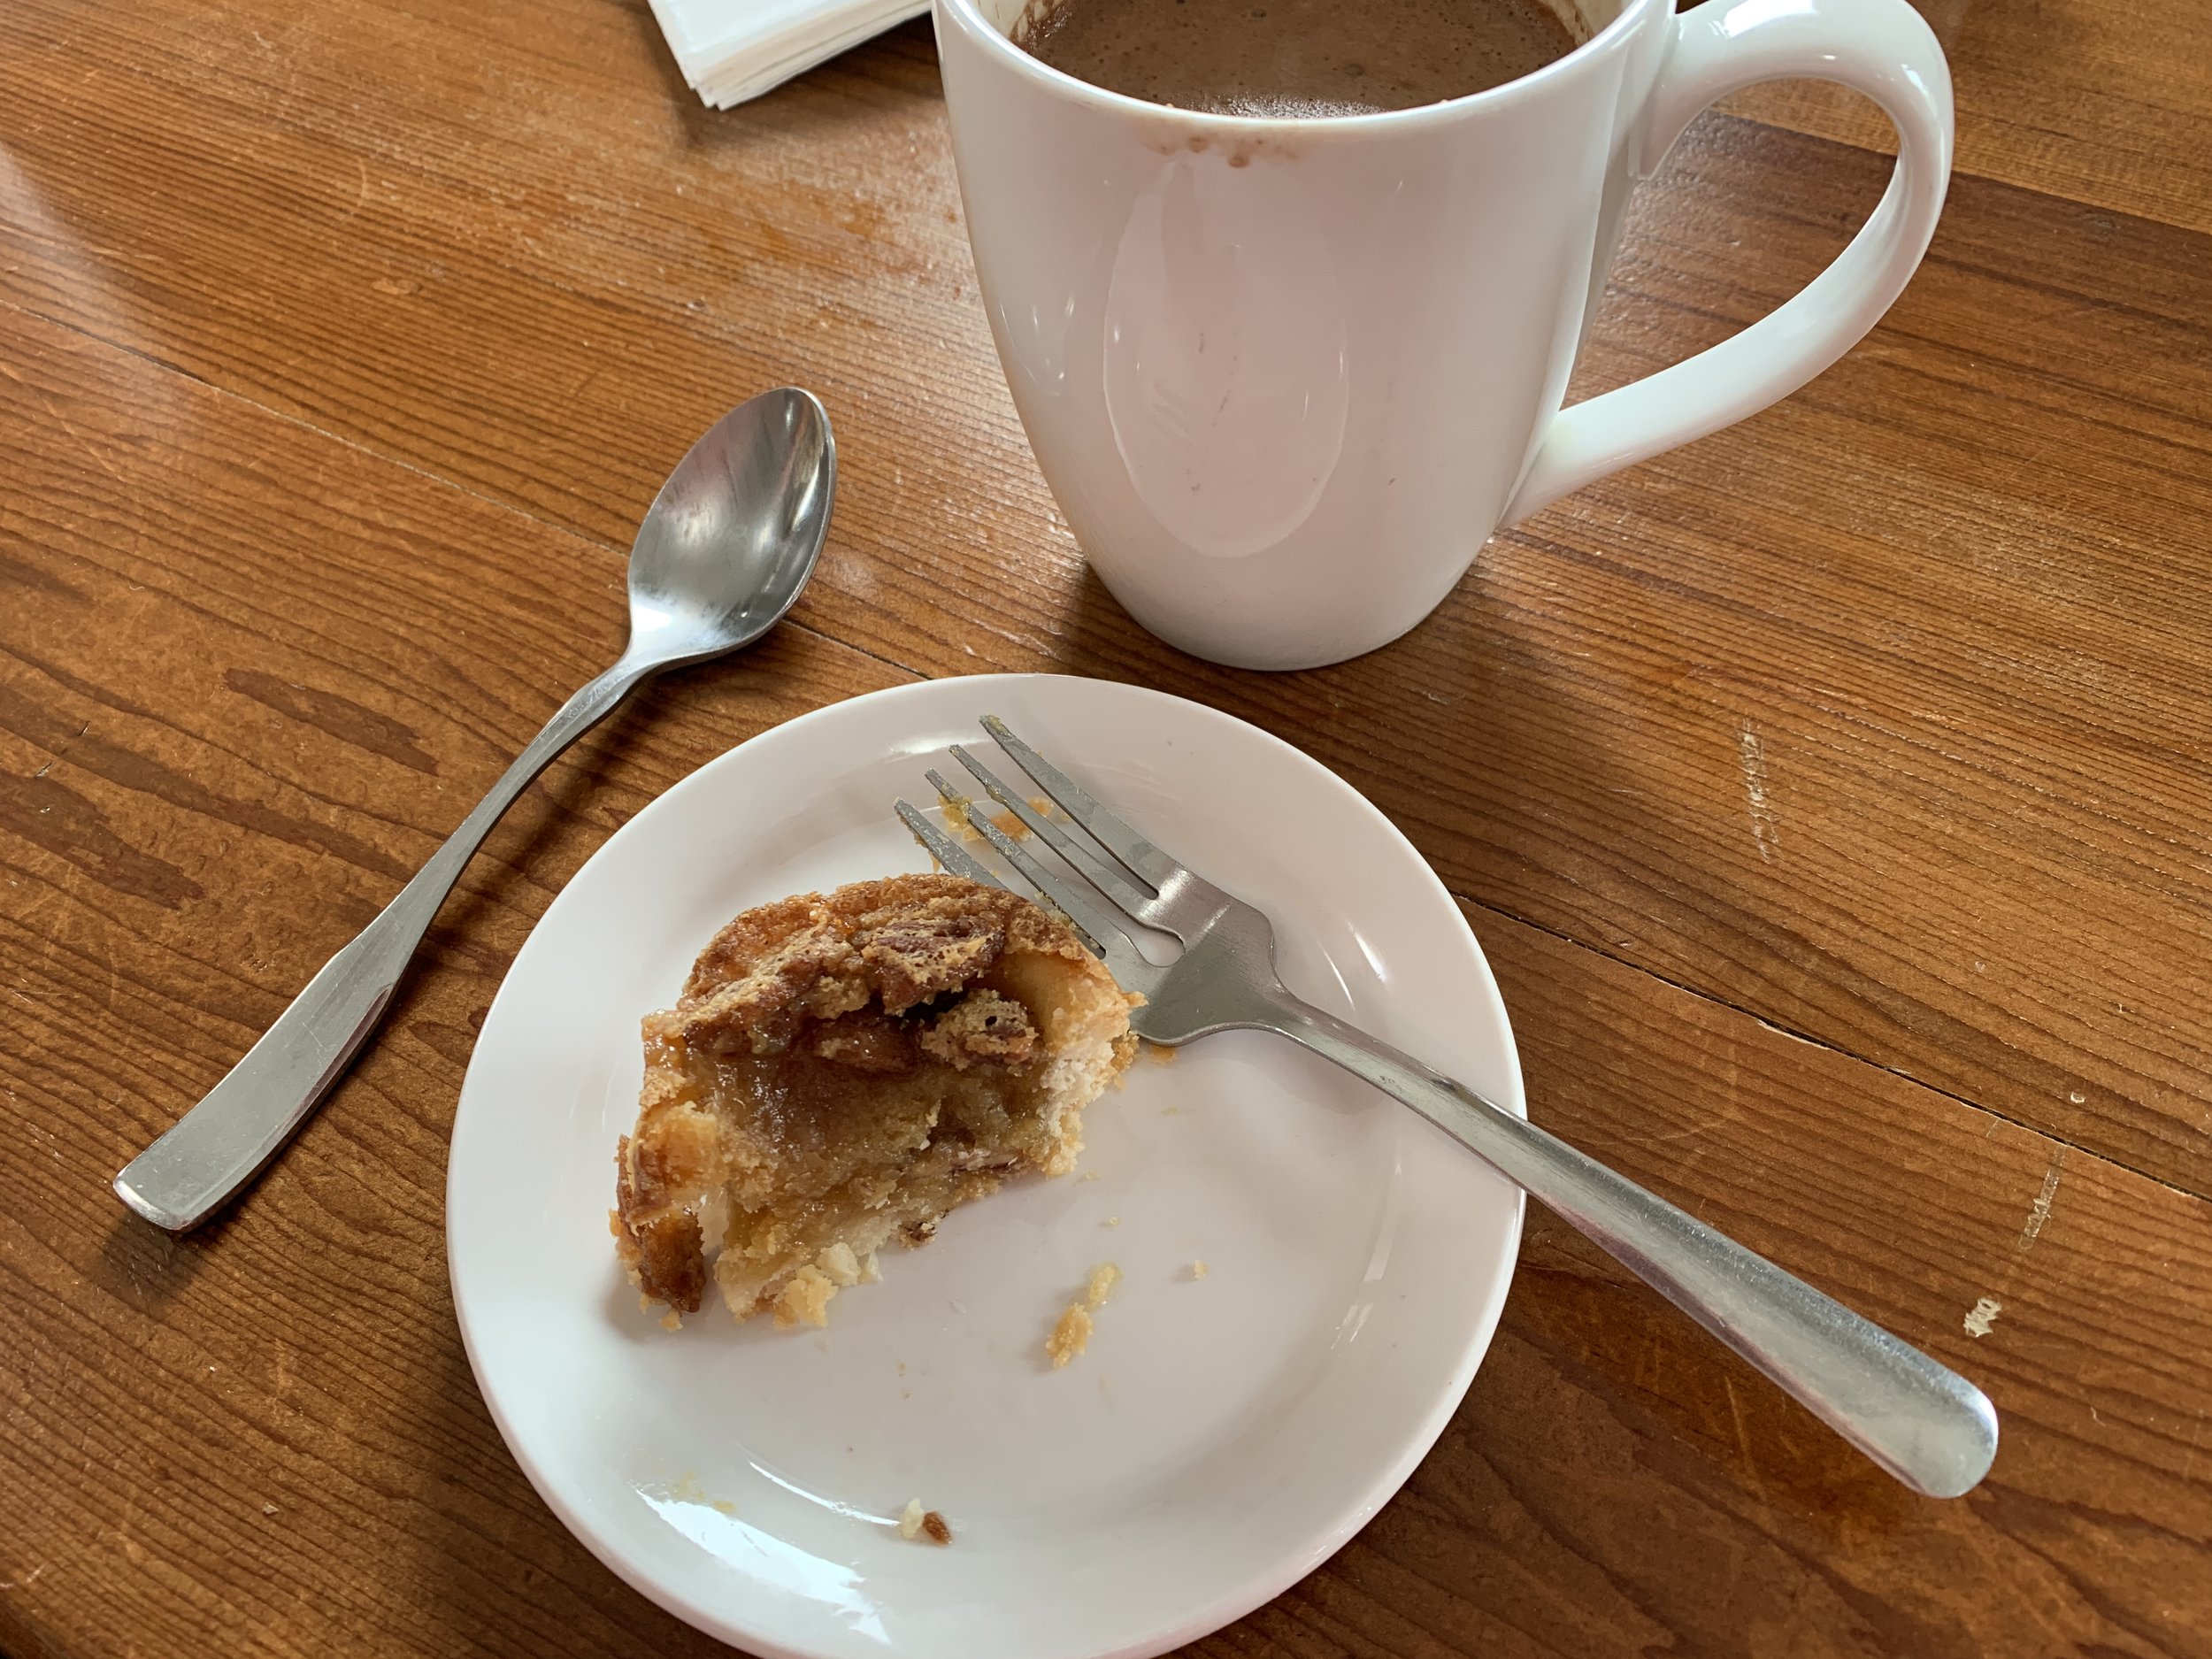
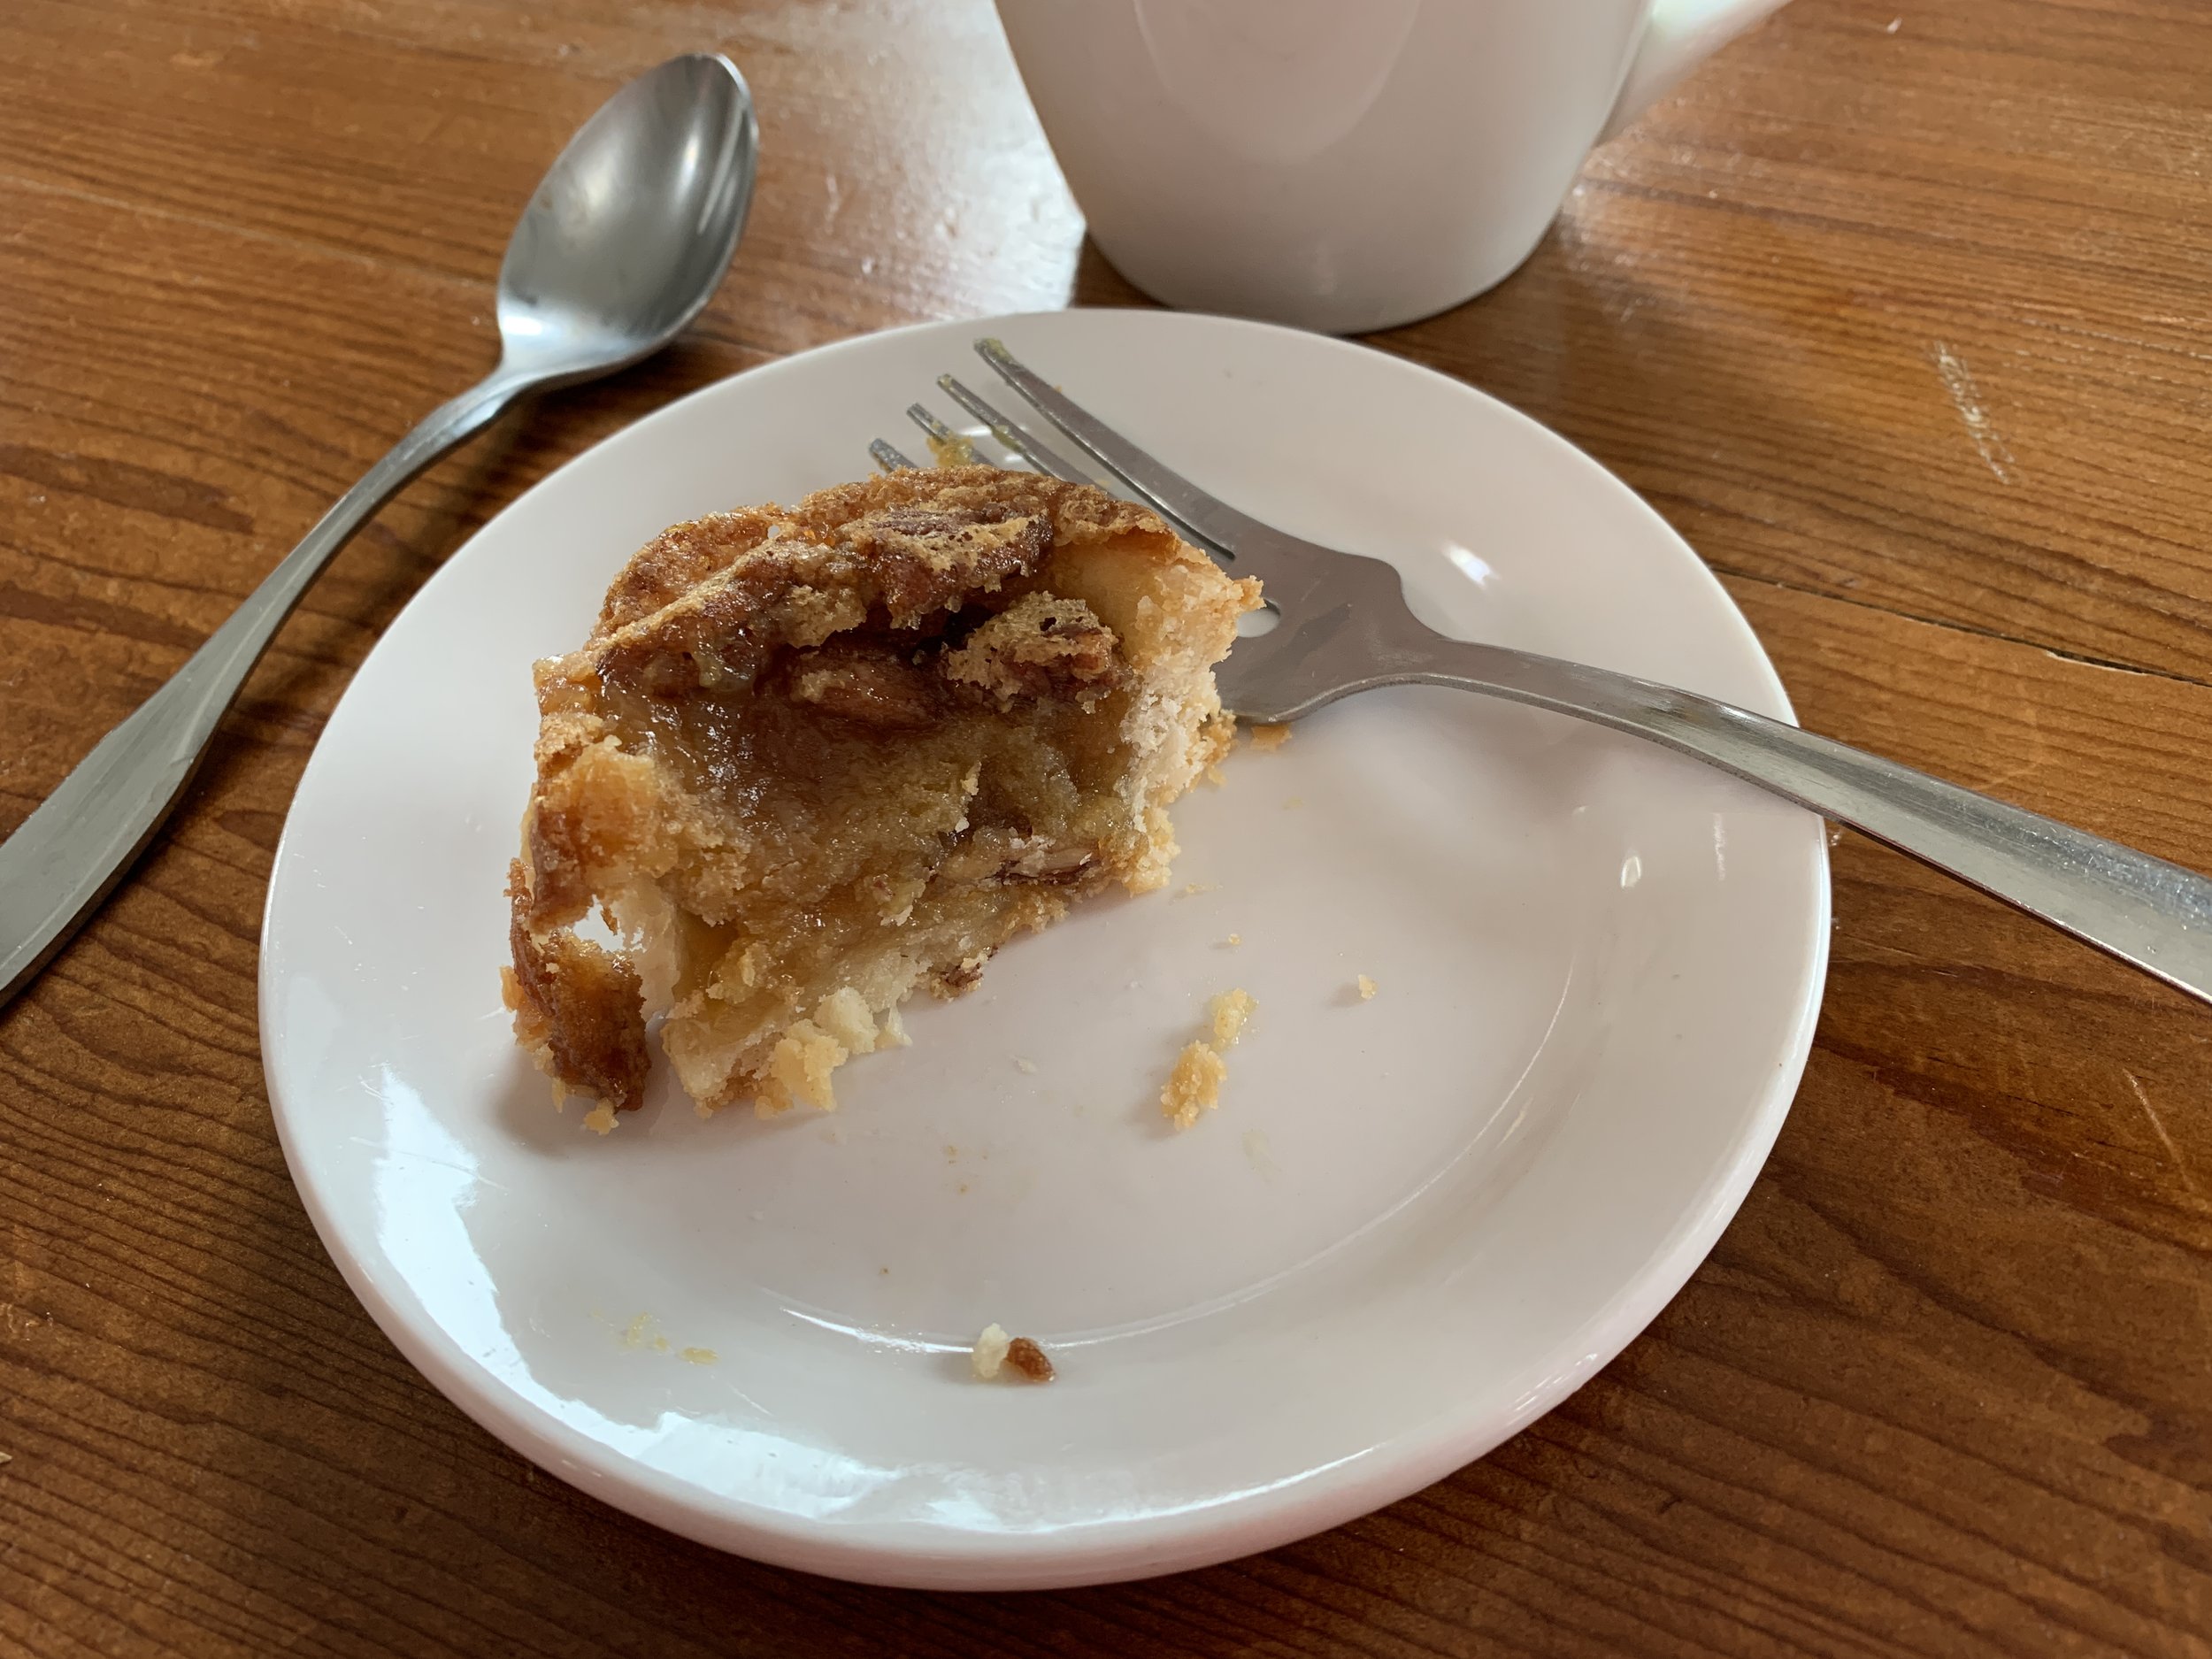
Pecans and caramel nestled in

Ganache poured over, ready to set

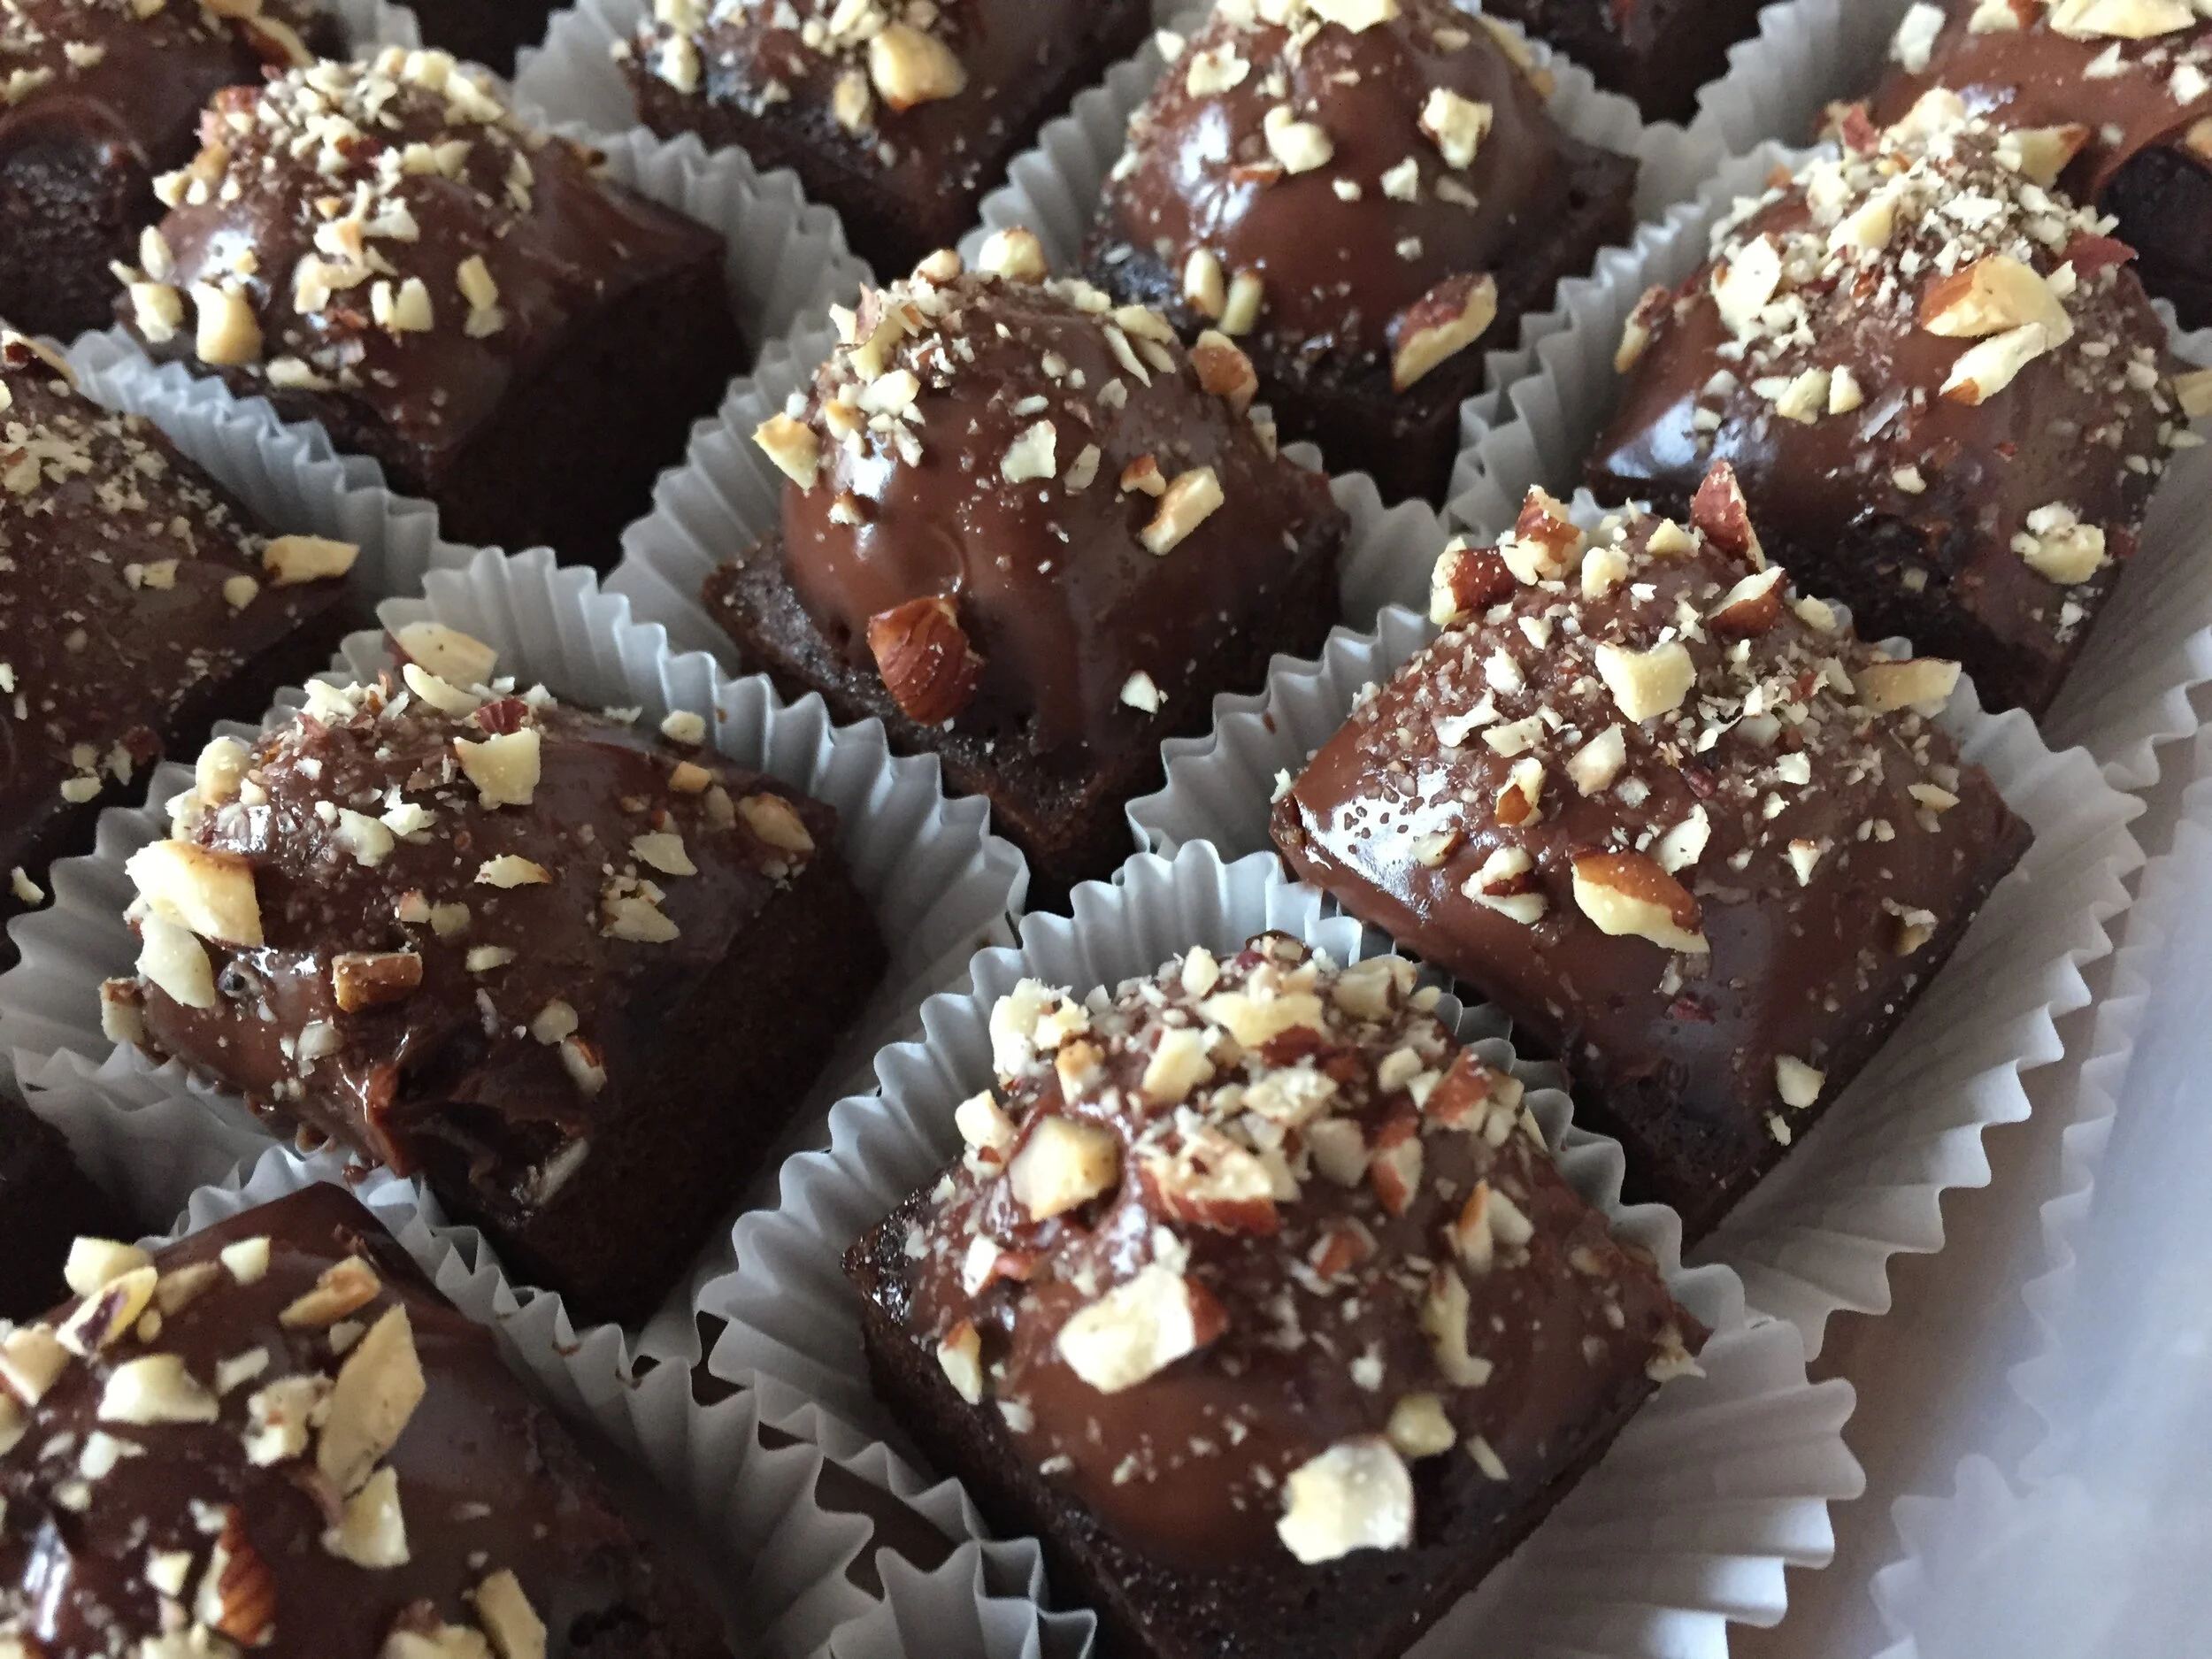
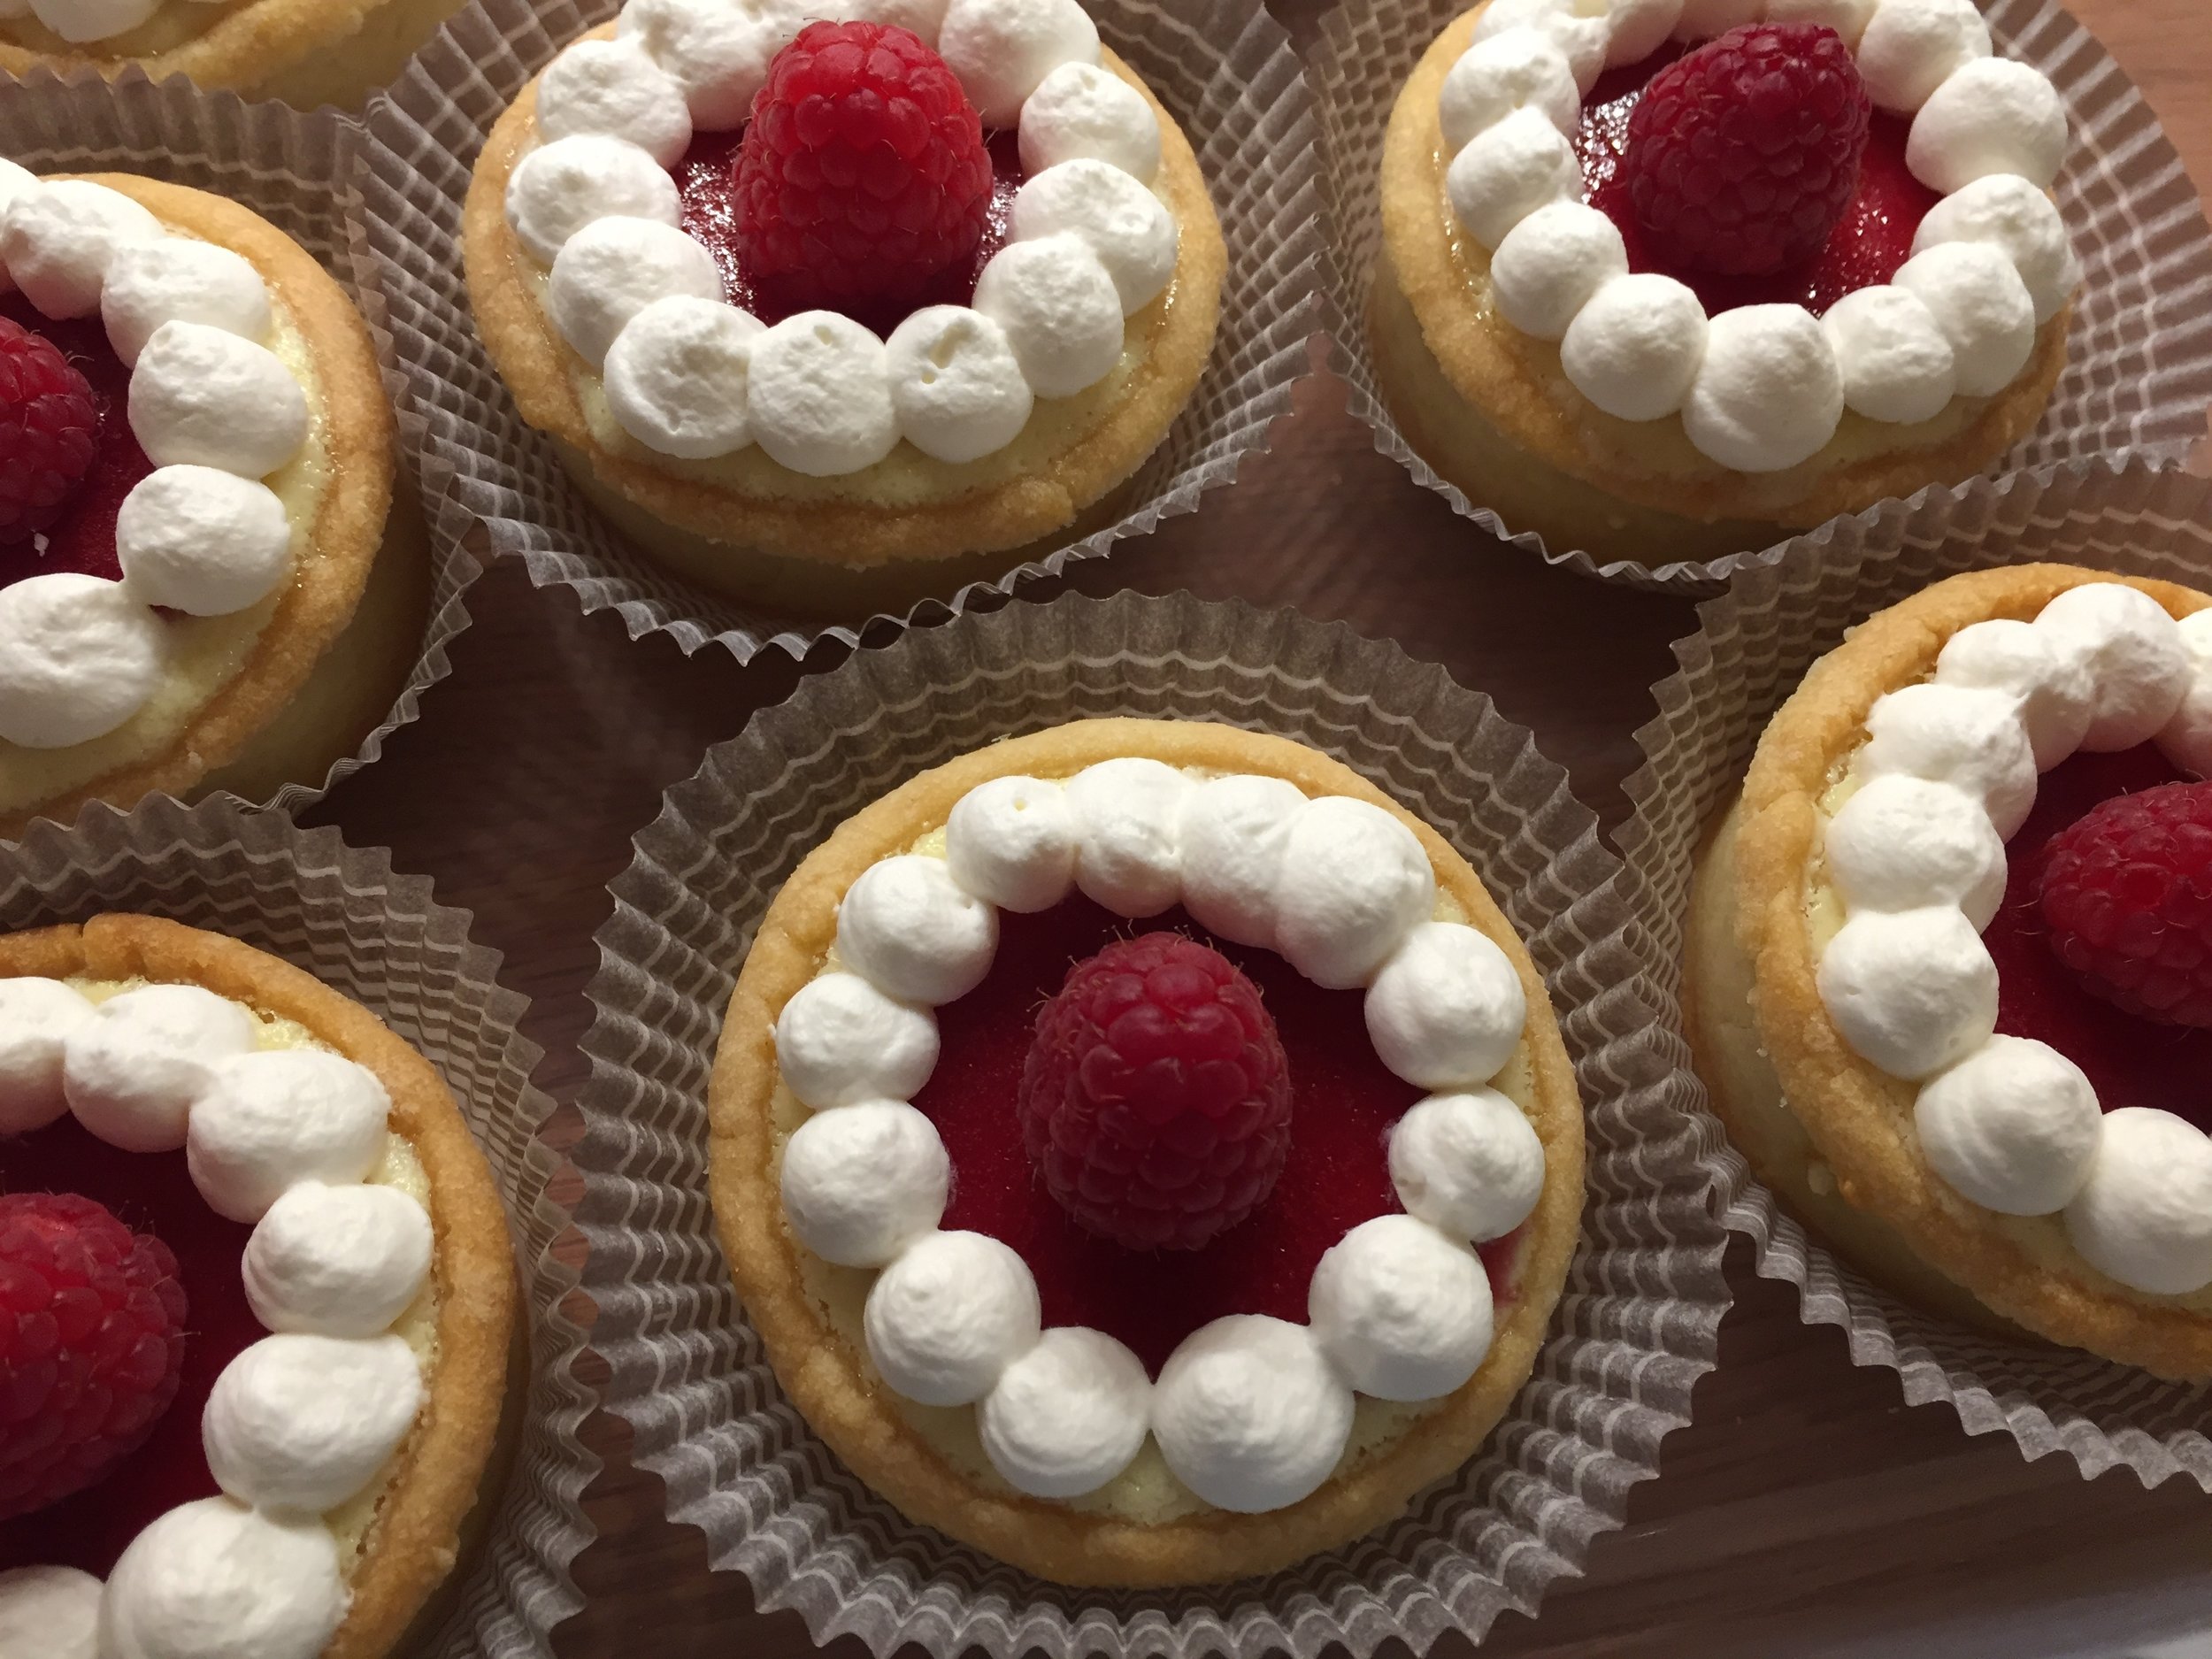
As for how you’d like to garnish your tarte, keep it simple by dolloping some Chantilly cream on each slice and adding some fresh raspberries. The pecan/caramel version below received a layer of chocolate crunchy crumbs, a dusting of confectioner’s sugar and a simple trio of toasted pecans. Yum.

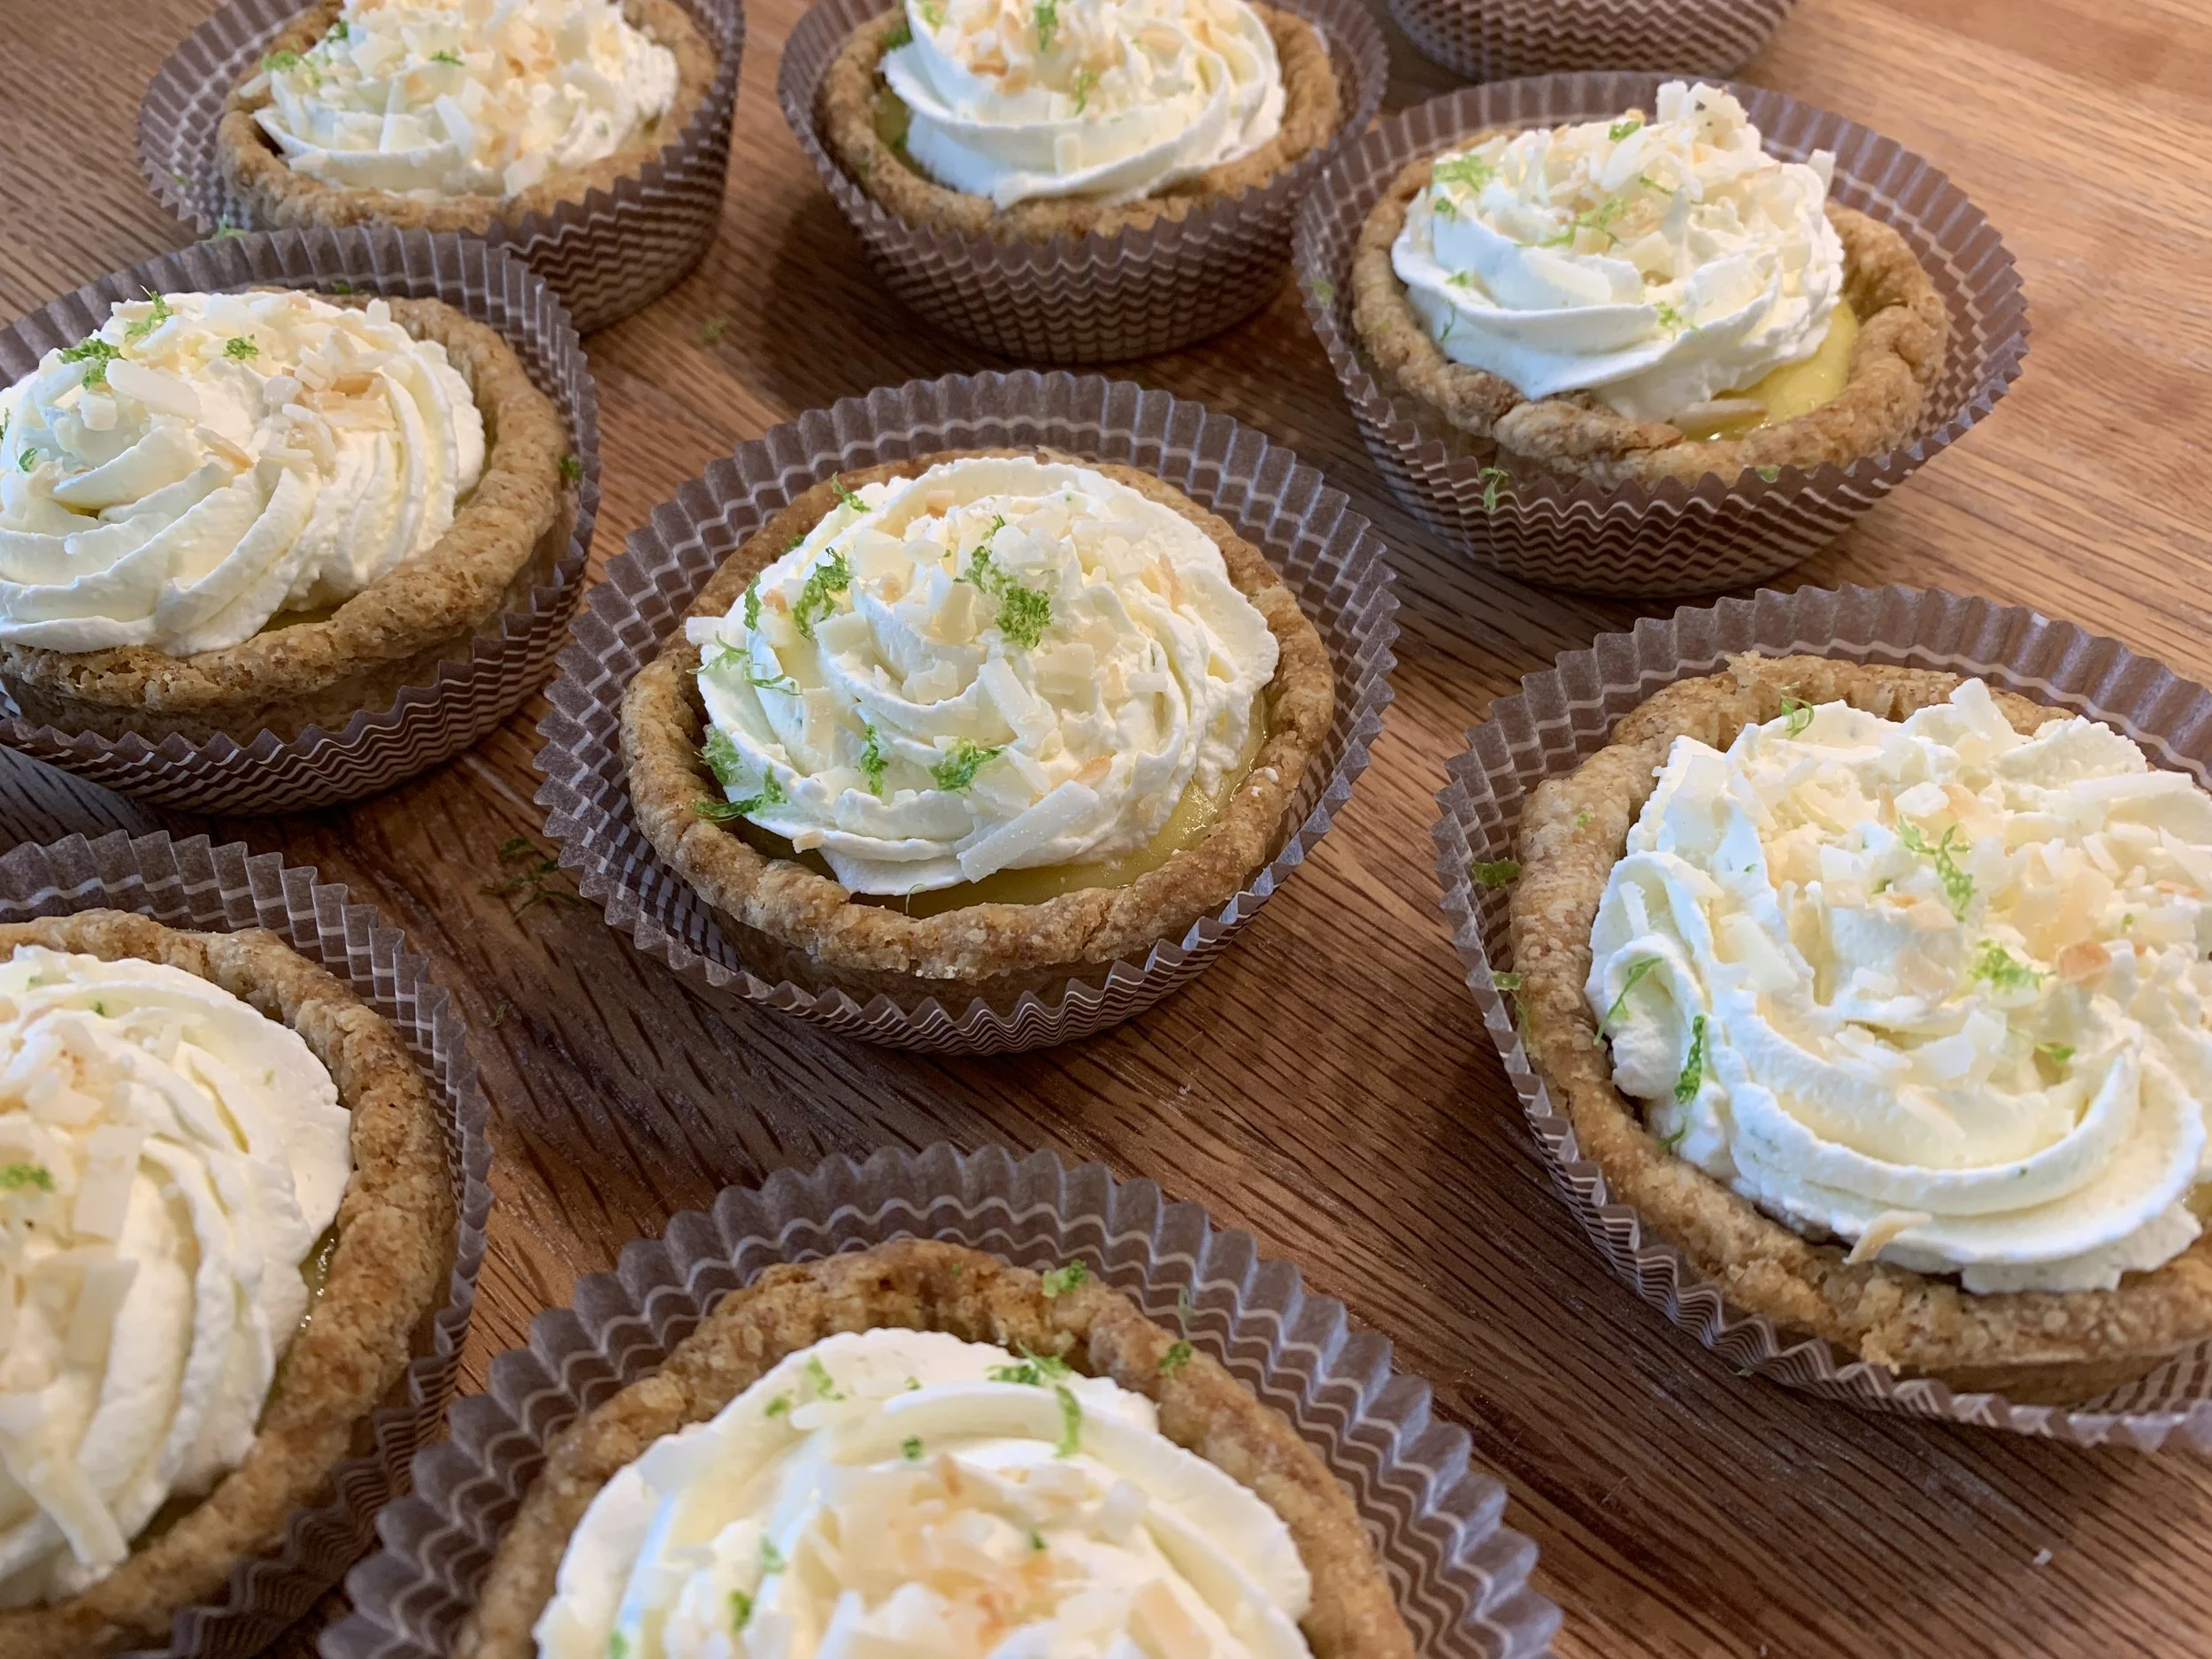
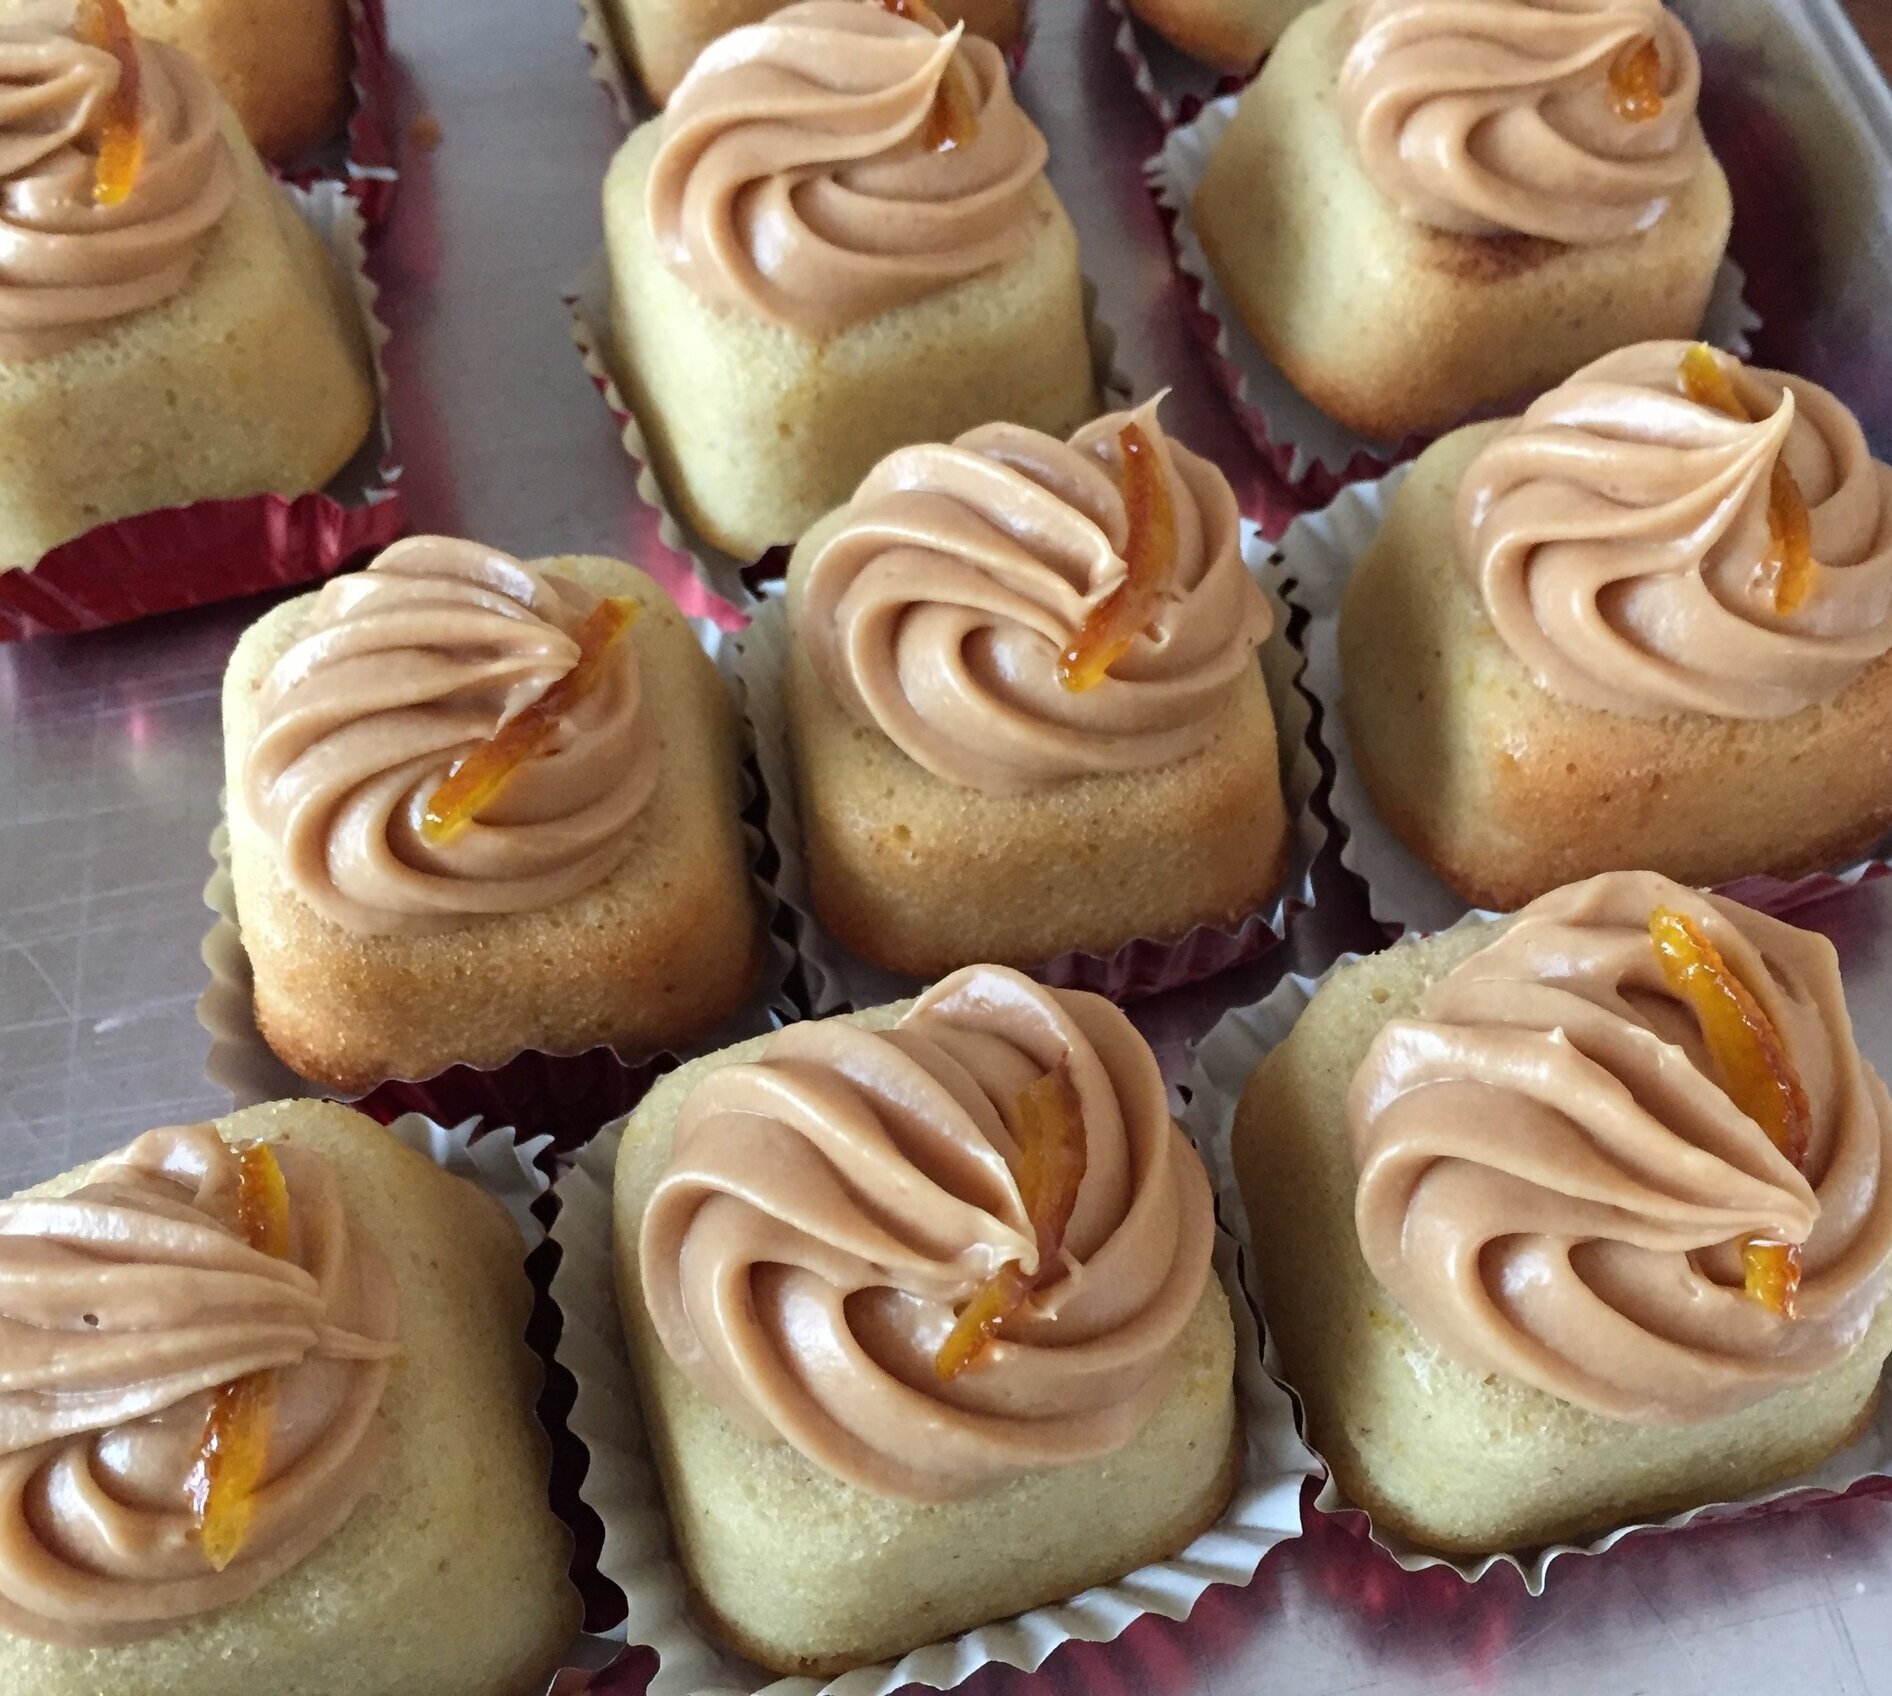
For petite tartelettes, top the already set ganache with a lighter whipped version of chilled 2.5 parts cream to 1 part chocolate ganache and add a simple chocolate disc as decor.

Check out my ganache tips for more fun with ganache.

Petit fours tartelettes

Nothing like a day late and a dollar short. These images are from late October but I had to share a bit of seasonal beauty with you. They say snow’s a comin’!

Bejeweled burning bush

Late season color after a first snowfall - October 31, 2023

Here’s to comforting and grateful days, keeping our spirits and hearts bright, staying active and healthy and hoping for calm around the world. Cheers and, as always, happy baking!

Butter tarts in Nova Scotia

For those of you who follow this blog you may remember my post on making Canadian butter tarts back in July of 2021. Well I’m here to tell you that I’ve now enjoyed the real deal on a recent trip to Nova Scotia.

Steve and I met up with our British friends Richard and Pauline in Halifax from whence we drove to Cape Breton Island to explore the local beauty and culture. Lo and behold, on the Atlantic side of the Cabot Trail we came upon the Clucking Hen café and bakery - a perfect stop for a morning coffee and a pastry. And what to my wondering eyes did appear? Butter tarts, both raisin and pecan versions.

Steve abstained but Richard opted for the raisin version and Pauline and I went with the pecan. While butter tarts can be (and are!) quite sweet, this version was superb based on my limited experience. The crust was oh so buttery and flaky, a huge win in my book.

The filling was butterscotch-y with just the right balance from the pecan. Oh my!

Now that we’re back from our travels to New England and Nova Scotia, I have more posts up my sleeve - hmmm - how about focaccia or toasted coconut lime tarts? Sounds good to me.

Focaccia

Toasted coconut lime tarts

I admit that not all thoughts turn to baking this time of year but, even so, bake I must in some way, shape or form. Meanwhile, taking my morning walks and tuning into nature is oh so grand.

Be careful out there and have a grand summer!

Cheerful blooms along the walking path


Early summer update

Maple glazed pecan Danish

Maple glazed pecan Danish

Though it’s not officially summer by the calendar, it certainly feels like it here in West Michigan. Hot and humid! The inspiration to bake is low on the priority list at the moment, but I can certainly dream, plan and write about baking, can’t I!

It’s been a bit since I’ve posted so I wanted to take the time to share a few of the goodies I’ve made in the past couple of months. Relying on favorite base recipes is de rigueur for me, and where appropriate I’ll share links to those recipes and give you any little changes I might have incorporated.

Chocolate dacquoise bites

Chocolate dacquoise bites

First up - I refer to these as rustic macarons. Made using my standard dacquoise base (remember my last post on vanilla-chocolate dacquoise?), I added 30 gm Dutch process cocoa powder to the almond flour/confectioners sugar to create a chocolate version, piped/baked simple rounds then sandwiched ‘em with salted caramel buttercream. The result is less sweet than the ever popular French macaron, a characteristic I prefer.

The buttercream is basically a combo of about 1 3/4 cups stove top caramel sauce whipped until cool then blended with 113 g (one stick) cubed/room temperature unsalted butter. Add the butter cubes bit by bit as you whip, just like you would when making Swiss meringue buttercream (you could make a caramel version of that instead if you prefer).

These freeze extremely well and can be eaten pretty much as soon as you take them out to enjoy.

Chocolate caramel dacquoise bites

Chocolate caramel dacquoise bites

These treats became part of a small gift box for a volunteer at a nearby assisted living facility, combined with Breton cherry/pistachio tartes topped with tart cherry Swiss meringue buttercream and candied pistachios. Yum.

547781AD-1060-42C1-96D5-AF9560A64093.jpeg

For the Breton tartes, use this dough recipe and add some chopped tart dried cherries and chopped pistachios to the dough (just eyeball it). I use about 40 g of dough for my 65 mm / 2.5” open tart rings (buttered). There are so many options one can create!

Next - maple glazed Danish buns.

05092172-07DC-4578-96F9-4B07477E212A.jpeg

I had a couple of batches of laminated Danish dough in the freezer and decided to create a few things with them: cherry cheese Danish, Danish almond braids and these buns for which I used a half batch of dough for a yield of 9 buns. Roll the dough out to a 12” high x 9” wide rectangle (for a full batch of dough roll to 12” high x 18” wide).

Make a filling (double it for a full batch) by blending 50 g almond flour (or sub in toasted and ground pecans for extra pecan-ness), 43 g dark brown sugar, 30 g egg white (1 large), 15 g maple syrup plus 1.5 T unsalted butter and a tablespoon all purpose flour. Spread it over the rolled out dough then sprinkle toasted, chopped pecans over, pressing them down to help them adhere.

Roll it up cinnamon roll style then slice into nine 1” rolls. I decided to bake these in a buttered and sugared 9x9 pan (again cinnamon roll style) rather than individually placed on a baking sheet. It’s easiest if you line your lightly buttered pan with parchment with an overhang on two opposite sides then butter and sugar the parchment.

After an hour or so rise, they baked up beautifully! Once baked you can simply lift the whole thing out, no muss, no fuss.

Mix 3/4 cup confectioners sugar with 1-3 tablespoons maple syrup to a thin-ish, brush-able consistency and give the buns a good coating.

1836FE29-7D0A-4042-821A-8CFE0B373996.jpeg

Let cool completely or feel free to gently pull them apart and try one still warm. You won’t regret it! So good.

C0D4750B-1E2A-4A01-A322-D228880855FB.jpeg

Next - roasted garlic/dill/cheddar bread created using a poolish approach. It came out pretty tasty although I’d like to tweak the hydration level and kneading/rising times to create a more chewy, rustic style bread. I hope to post about that adventure later this summer.

Roasted garlic/dill/cheddar boule

Roasted garlic/dill/cheddar boule

E94AC5B2-B77E-49CC-A924-961AF2207B33.jpeg

I don’t want to keep you much longer in describing my kitchen shenanigans. There’s always something going on in my head or in my oven so stay tuned for Canadian butter tarts and more.

Meanwhile we have a couple of sandhill cranes hanging out nearby, and we’re just waiting for a baby or two to appear.

Stay cool and calm and enjoy summer!

Mom or Dad??

Mom or Dad??

240A9599-639A-4988-9CD7-B80432E8E3F9.jpeg

In the holiday cookie kitchen - pocky and a few more!

A08BB8CE-0FEB-4EC4-8893-94C3210672F4.jpg

This is the time of year when many bakers and pastry chefs turn to cookies. What is it about Christmas cookies anyway? I certainly remember decorating the traditional sugar cookies that many moms made during our childhoods. Since then there have been so many variants thrown at us during this lead up to the December holiday time, including magazines devoted solely to holiday cookie baking. Snowballs, rugelach, pfefferneuse, ricciarelli, gingersnaps, thumbprints just to name a few - cookies from all corners of the planet. Pretty amazing.

Pocky is a new one for me. I came across small boxes of these traditional Japanese stick biscuit cookies in the checkout line at a local craft store. Who knew? Coincidentally I became aware of a recipe for the homemade version of these intriguing cookie sticks through NYT’s holiday cookie recipes. I had to give ‘em a try.

The dough is easy to put together - you can do it by hand or in a food processor or in a mixer - you decide. I used the stand mixer approach.

Combine 160 g/1.25 cups all purpose flour, 45 g/3 tablespoons cane sugar, 1/2 teaspoon baking powder and 1/4 teaspoon salt in the bowl of a stand mixer; add 56 g/2 ounces cold diced unsalted butter and mix on low several minutes to coarse crumbs (or sand in by hand); add 45 ml/3 tablespoons whole milk mixed with 1/4 teaspoon vanilla extract and mix on low to bring the dough together.

Place the dough on a lightly floured surface and roll it out to form a 5.5”x8” rectangle about 1/4” thick. Wrap in plastic and chill at least an hour or up to several days.

When ready to proceed, heat the oven to 350ºF.

Cut the chilled dough into 1/4 inch thick strips about 5.5” long.

32211C97-0C4F-4EFD-96FF-2CAD93BE5F6B.jpg

With the palms of your hands roll each strip out to about 7-8 inches long. For me it took a bit of time to get a feel for how this dough wanted to behave. Bottom line - use decisive, firm pressure to keep the dough compacted while rolling it out, doing your best to keep the pieces straight. Pop your pans into the freezer for 10 minutes or so before baking.

A5DF55A1-0C8D-4A80-93DD-0FC365744838.jpg

Bake about 15 minutes until golden brown. Cool on wire racks.

951CB125-F7EF-4EE3-81E5-6A8734D0DD67.jpeg

Some of mine were a little curvy but in general these baked up into rustic looking sticks with a certain charm. They taste to me like the animal crackers we used to eat as kids or some kind of teething biscuit - the Brits might call them a digestive biscuit. The flavor is good - simple and straight forward.

I’ve never tasted the Japanese massed produced version, but I’ve looked at the ingredients and have to say - nuh uh.

For decorating I went with microwave melted, tempered white chocolate, raspberry dust and chopped lightly toasted pistachios . . . . .

AA7558B8-D8E8-49F9-B37E-86DA7508F640.jpeg

and dark chocolate with chopped pecans.

CEFB0711-4C06-4F9A-8223-9D70E27DD0EE.jpg
B7ADAAEA-1BF0-4DCE-9B92-CB553FB59E0E.jpeg

Let’s just say that making pocky is something good for a day when you have little else to do and don’t feel rushed. Puttering with chocolates, nuts or whatever you decide to use to make your own version is good for the creative spirit. Calm and patience - that’s it.

7DAA6FBC-CDA4-42DE-AF07-FA47077E4831.jpg

Next up - white chocolate chai buttons using one of my favorite base shortbread recipes. Blend 75 g cane sugar with 200 g room temperature unsalted butter; blend in 250 g all purpose flour, a tablespoon chai spice mix and 56 g/2 ounces finely chopped white chocolate until the dough comes together. Wrap and chill before rolling/cutting shapes of choice or portioning out with a scoop.

For a more nutty/caramel-y taste change the dough up a bit by subbing in dark brown sugar or coarsely ground raw sugar for the cane and sub 50-60 g of whole wheat pastry flour (one of my FAVE ingredients!) for that amount of all purpose. You’ll like the result.

I made my chai mix with a teaspoon each of cinnamon, ginger, cardamom and coriander plus a few grates of fresh nutmeg and some grinds of black pepper. There are different DIY chai mixes out there - some might also contain allspice or star anise or cloves. When making your mix, ramp up the quantities to 3 or 4 times the base so you’ll have plenty on hand for next time. Plus you can add it to other things like cakes, butter creams, ice cream base or your own chai beverage.

Heat the oven to 325ºF. Scoop out tablespoon sized rounds and bake on parchment lined sheet pans for about 20-25 minutes until nicely browned. Some of my cookies spread at the edges just a tad so I cleaned them up with a round cutter while still warm just out of the oven. I like things to be neat - it’s how I operate.

823ECF90-130E-48CF-A12D-6EBF8670A647.jpg

Once cooled give them a drizzle of white chocolate and let set.

300C201D-177A-46B8-9E93-3A84D22DD829.jpeg

Here’s a sampling of some of the other cookie treats I’ve been making this month. I’m pretty sure many of you have your favorite holiday recipes plus there are sooooo many to be found out there in books, magazines and online. Pretty overwhelming actually.

These are always a favorite - almond thumbprints!

53760CC9-B471-49D8-8F2A-B76558A17E84.jpeg

For gift boxes for a nearby independent/assisted living facility I made cinnamon sugar kids . . . . .

7AF1C822-1348-436A-AAC9-167B3EAB95CB.jpeg

and cocoa trees with a bit of raw sugar crunch and a sprinkling of granulated sugar for that oh so natural woodsy look.

0ADA9DFD-2638-4524-9378-F7164E4F89F2.jpeg

Lots of cute packages for the residents!

0916A85C-92FE-4B51-9C7F-F85E72AF28D5.jpg

Here’s another boxed assortment I put together for the assisted living residence where my mom lives. I like to drop treats off there every now and then to say thanks to the staff, particularly with all they have to do to keep everyone safe during the pandemic. My hat’s off to all of them.

In addition to thumbprints, chai buttons and pocky I added my classic shortbread flavor assortment (to the left of the pocky) of vanilla bean, sea salt caramel, butter pecan and tart cherry. In the forefront are chocolate dipped Earl Grey shortbread made with ground Earl Grey tea, all purpose and hazelnut flour and added orange zest. Chocolate and orange is such a great combo.

E69AB16B-1FDD-4DE4-A7D4-5C2580ED9D52.jpg

Even though Christmas is arriving soon, I may have a few more cookies up my sleeve for this holiday time. Perhaps more gift boxes to hand out to folks for the New Year. Why not!

I’ll leave you with this floral image. We received this orchid from cousin Jen and extended family nearly two years ago after my Uncle John died. It is now blooming for the FIFTH time since then. This time it’s the most prolific with 10 flowers and continues going strong after four months in it’s current bloom. It gives me peace and joy.

May you feel the same as we look ahead to a new year of stability and health for our world.

B2FE7B5B-9C66-4244-83C9-7CEA673DF5B1.jpg

Butter pecan ice cream

IMG_1341.jpg

Happy Labor Day weekend to all of you!

I recently made a batch of butter pecan ice cream and thought I’d say a quick hello and share it with you. So good!

But before I do I’d like to share this link with you. I recently received an email from Heather Langford of Gold Coast Ice Cream in San Diego USA. She writes about ALL things ice cream. I’m talking ingredients, ice cream makers, utensils, recipes - and that’s just the tip of the iceberg. If you love making and eating ice cream (and who doesn’t), you should check it out.

Heather has also written a guide to ice cream making that’s straight forward and easy to understand.

For this butter pecan treat I use my standard base recipe with these changes: browning 70 g/5 tablespoons of unsalted butter starts the process; use dark brown sugar (same amount 150 g) instead of granulated; a cup of lightly buttered and toasted pecans are mixed in at the end of ice cream processing.

IMG_1337.jpg

Here’s a quick review of the steps:

Have your egg yolks ready in a medium bowl and place one cup of cream in another bowl over an ice bath with a strainer at the ready.

Start by browning the 70 g butter in a medium saucepan, the same one you’ll cook the custard base in.

Once the butter is browned, blend in the brown sugar and a pinch of salt on medium heat to get the sugar melting.

Add the cup each of cream and whole milk and continue to heat to completely dissolve the sugar.

Temper the warm dairy into the yolks, return all to the heat and cook to the anglaise stage, stirring all the while.

Strain into the cold cream over the ice bath, blend in a teaspoon vanilla extract, let cool then refrigerate for up to three days before processing.

IMG_1344.jpg

You’ll have plenty of time to prep the buttered pecans. Heat the oven to 350ºF. Blend one cup pecans with one tablespoon melted butter and a pinch of salt, spread out on a parchment lined sheet pan and toast about 10 minutes. Cool. Roughly chop and blend into your churned ice cream base. Hold in your freezer until it’s time to enjoy! Yay!

A delicious treat, as ice cream always is.

Take care of yourselves.

IMG_1341.jpg


Swedish sand cake (sandkaka) - apple pecan version

IMG_0506.JPG

This one’s an eye opener folks. As I continue to work toward using up some less frequently needed ingredients I have on hand, potato flour is one that prompted further investigation. I originally bought it with an eye to making potato dinner rolls (which I did!), but of course I had some left. Sooooo . . . . . now what?

I did some online research and found this Swedish sandkaka recipe compliments of Jennifer Rao and Around the World in 80 Cakes. It also happens to be gluten free for those who are interested in that sort of thing.

I realize my flavor profile speaks more of autumn than the bursting out of spring but wouldn’t you know I had some sliced apples in the freezer left over from a mid-winter apple tart project? Vermont boiled cider and rum also remain at the ready, a combo I’m becoming very fond of.

Typically baked in a standard loaf pan, I opted to use my 4-well mini loaf pan (buttered) for a more petite cake offering. After a bit of calculation I figured the batter would fill 4 minis with some left for a 4” round panettone paper mold (no buttering needed here!).

Planning ahead: as you prep for this one, you want your eggs and butter at room temperature. I’m adding a mix of warming spices too so I shelled about 15 green cardamom pods then lightly toasted and finely ground the cardamom seed. It’s all about being ready, right?

IMG_0485.JPG

I also diced my thawed apple slices ( I had the equivalent of about a medium apple’s worth) and sautéed them in a bit of butter and sugar then added a tablespoon each of rum and boiled cider until reduced and the apples were golden and caramel-y; set aside until ready. I toasted up ~80 g pecans, then cooled and coarsely chopped them.

Heat your oven to 350ºF.

For the batter: sift 173 g / 1 cup potato flour and 2 teaspoons baking powder into a medium bowl. Add 3/4 teaspoon ground coriander, scant 1/2 teaspoon ground cardamom, 1/4 teaspoon cinnamon, 1/4 tsp salt, and 1/8 teaspoon allspice. I also threw in a large pinch of vanilla powder just because I could.

In the bowl of a stand mixer fitted with the paddle cream 227 g / 8 ounces unsalted butter with 150 g / 3/4 cup granulated sugar, 50 g / 1/2 cup confectioner’s sugar and 1 teaspoon vanilla extract. Beat on medium high for 3 minutes until light and fluffy. Scrape down the sides of the bowl.

Add eggs one at a time on low, blending about 30 seconds after each and scraping down. Then add the potato flour/spice mixture in thirds alternating with a mix of 2 tablespoons rum/2 tablespoons boiled cider. Scrape sides and blend well as you go.

Have the pecans and sautéed apples at the ready.

IMG_0486.JPG

For my purposes I divided the batter amongst the 4 mini-loaf pans and the panettone mold but feel free to use a standard loaf pan if that’s what you have available.

IMG_0488.jpg

Top with apples . . . . . .

IMG_0490.jpg

and finish off with chopped pecans and a sprinkling of raw sugar.

IMG_0492.jpg

I put the pans and paper mold together on a sheet pan - easier to grab when rotating or pulling them out of the oven. Bake about 20-25 minutes until the edges are nicely browned and a tester in the center comes out clean. (Note: if you are using a standard loaf pan, baking time is 40-45 minutes).

IMG_0503.JPG

Let cool 10-15 minutes then gently nudge out of the pans with a small offset spatula and finish cooling on a wire rack. Although a bit crumbly around the edges, they came out pretty well after all.

IMG_0504.JPG

This is good cake! It’s really hard to describe but it IS like sand believe it or not. I’m not saying that I eat sand but the texture of this brings that very thing to mind. Weirdly so, it’s dry yet moist and the flavor, along with the apples, nuts, spices and boiled cider tang, is delectable in my book. How about serving it up with your favorite vanilla or butter pecan ice cream? Yeah baby, why not!

Actually I enjoyed a small slice with my morning coffee for several mornings in a row (gotta have a little treat every now and then) and found that the cake held up well in a covered container for a few days.

Now you know - don’t hesitate to go for this gluten free Swedish treat (no apples and pecans necessary) when you have potato flour at the ready. Mmmm good.

Keep up the good work on the home front and stay safe!

IMG_0507.JPG

A merry season to all

Caramel almond moelleux chocolat

Caramel almond moelleux chocolat

Blogging has taken a back seat due to December’s whirlwind of activities from teaching and baking to selling my 92 year old mom’s condo and moving her into a new apartment. Whew!

As was true during my days working in emergency medicine, baking continues to serve as a respite for my heart and soul. The feel of the dough, the lovely aromas wafting from the kitchen and the taste of that oh-so special treat - you can’t beat it!

To help say adieu to 2019, I’d like to share a few of the goodies I’ve been baking of late.

Pecan twirls, almond croissant, ham and cheese spirals

Pecan twirls, almond croissant, ham and cheese spirals

Orange financier with salted caramel buttercream

Orange financier with salted caramel buttercream

Pumpkin pecan crunch brioche

Pumpkin pecan crunch brioche

White chocolate raspberry crispy rice almond bark (now that’s a mouthful!)

White chocolate raspberry crispy rice almond bark (now that’s a mouthful!)

Sending warm holiday greetings to all and may the upcoming year bring you many good things.

This year's Thanksgiving tarts

IMG_3376.JPG

Thanksgiving is fast approaching and now’s the time to decide what you’d like on your holiday dessert table!

This year I’m offering pumpkin custard with sesame crunch, pecan caramel chocolate truffle and apple cranberry with brown sugar crumble in both 9-inch and my “sharing” 5.5 inch size (seen in the photos above and below) for those of you who might prefer petite portions or are hosting or joining a smaller group for the holiday this year.

IMG_3375.JPG

Let’s take a look at how these babies are put together, shall we? BTW - even though the images depict smaller tarts, the discussion is for making standard 9 inch tarts.

First up is pumpkin custard. Use your favorite pate sucrée recipe and add about 30 g toasted sesame seeds at the end of the dough prep. Blind bake the crust at 350ºF and set it aside while preparing the filling. Note: tart dough recipe is enough for two 9” tarts - wrap and freeze any extra for another time.

Reduce the oven temperature to 325ºF.

Make your favorite crème pâtissiére, adding 1-2 teaspoons or so of pumpkin pie spice mix (I use my own made-up mixture of spices) to the milk base. At the end of cooking blend in 1 cup pure pumpkin purée, 4 tablespoons of butter and two teaspoons vanilla extract. This base is more than enough for one 9 inch tart but you can use leftovers to make a bunch of mini-tarts or fill cream puffs. You can even divide what’s left into ramekins and bake them in a water bath for a lovely pumpkin custard for after the holiday.

IMG_3360.JPG

Fill the blind baked tart shell with the warm pastry cream, just barely shy of the rim and bake for about 20 minutes until set with a hint of a jiggle in the center. I did several test batch sizes as you can see below.

IMG_3366.JPG

Let cool then store covered in the fridge until ready to serve. In my case I garnished with whipped honey mascarpone cream and a sprinkling of sesame crunch. For a slightly different approach, change out the sesame seeds in the tart dough with toasted, finely chopped hazelnuts, almonds or pecans and use the same nut as a simple garnish with lightly sweetened whipped cream. Or simply leave out any dough additions and create your own version of topping.

Pumpkin custard tart

Pumpkin custard tart

Next up - pecan caramel chocolate truffle tart. And remember - this is for a nine inch tart. The approach is much the same: blind baked pate sucrée, cooled and waiting on the sidelines. For a chocolate crust, just add 30 g (~1/3 cup) unsweetened cocoa powder to the flour in the recipe.

Toast 100 g/scant cup pecans and either leave the halves whole or break them up coarsely. Blend them with a scant 2/3 cup caramel sauce (I make my own, although you can use a good quality purchased product from your local supermarket or specialty food shop).

Place 85 g dark chocolate (I use Guittard 61% discs) and 21 g unsalted butter in a heat proof bowl. In a separate heat proof container (I use a pyrex measuring cup) bring 120 ml heavy cream to a boil. Pour over the chocolate/butter and blend gently until smooth. Blend in 3/4 teaspoon pure vanilla extract. Note: double or triple your recipe to have more ganache on hand for your next truffle tart project!

IMG_3368.JPG

Layer the nut caramel mixture in the bottom of the baked shell. Once again I made some small trial versions - for taste testing, don’t ya know?!

IMG_3369.JPG

Pour the ganache over - start slowly to let it nestle into all the nooks and crannies and continue pouring until it’s to the rim edge. Some bubbles will invariable pop up to the surface - just pop ‘em with the tip of a paring knife.

IMG_3370.JPG

Leave at room temperature until the ganache has set and cooled. If you put it in the fridge before that, there’s a greater chance that beads of moisture will form on the surface - you don’t want that! Once cooled you can go ahead with any garnish or cover/refrigerate and garnish later.

I top mine with chocolate shortbread cookie crumbs, a light dusting of confectioner’s sugar and a few pecans in the center. Pull the tart from the fridge 30-60 minutes before serving to let it temper and bring out the flavors more fully. Feel free to add a dollop of lightly whipped cream atop each portion.

Pecan caramel chocolate truffle tart

Pecan caramel chocolate truffle tart

Last but not least - apple cranberry! A straight forward pâte brisée dough filled with a mixture of lightly sweetened sliced apples and dried cranberries and topped with a brown sugar crumble.

Heat the oven to 425ºF.

I typically line my tart rings, fork-prick the dough and hold them in the freezer while preparing the fruit. For a nine inch tart I plump 100 g dried cranberries in warm apple cider for 20 minutes or so while I peel, core, halve and thinly slice 4-4.5 cups of Jonagold apples (another good mix is Macintosh and Granny Smith). Drain and paper towel dry the cranberries and mix the fruit with a squeeze of lemon juice, 1/4 cup sugar (use brown if you’d like) and 2 tablespoons of flour. Then I mound the fruit into the lined ring. In this case Mr. Steve had reduced down a bunch of apple cider for me, creating a delicious apple cider caramel. I drizzled some of that on the fruit once the lined ring was filled. Yummy stuff.

IMG_3362.JPG

You might notice the scrap of rolled out dough on the sheet pan - I bake one every now and again just to see how the crust tastes au naturel. (In case you’re wondering, it was flaky, buttery and melt-in-your-mouth good.)

IMG_3363.JPG

Top with a standard crumble mixture of equal weights flour, brown sugar (light or dark is fine) and diced butter and cover the fruit with the mixture. Not a very thorough covering job on those small tarts, eh? As I’ve mentioned in previous posts over time, I like to make a bunch of crumble, bag it up and stash in the freezer where it’s at the ready to be used.

IMG_3365.JPG

Bake on the bottom rack for 10 minutes then reduce oven temp to 400 and move up to the middle rack. Give it another 10 minutes then ratchet down to 375 and continue baking for another 10-20 minutes (all ovens are different so pay attention!) until the crumble has browned and you see some bubbling around the edges. Cool a bit and serve slightly warm or at room temp with your favorite ice cream or whipped cream. Yippee!

apple cranberry tart

apple cranberry tart

IMG_3382.JPG

And there you have it! A delightful trio of seasonal tarts just waiting for the Thanksgiving table. Have a calm and peaceful holiday everyone.

Meanwhile here in west Michigan there are lots of rustling leaves along the pathways and the burning bushes are still burning brightly, even though many trees are now bare. Tis the season - and we may even see our first snow this weekend. Oh boy, oh boy!

IMG_3386.JPG

World egg day!

Maple pot de crème

Maple pot de crème

How many of you knew that October 12 was World Egg Day? I wouldn’t have known if it hadn’t been for Kim, the activities director at Heron Manor/Woods just down the street from our home.

It all started in 1996 when the International Egg Commission set the second Friday in October as World Egg Day to increase awareness of the benefits of eggs and how important they are in human nutrition. Who knew?

Needless to say, eggs are utilized in many different ways in the baking and pastry world. For a morning event this past Friday, October 12, I decided to really go for it in the egg department.

Never one to turn down pot de crème, I thought others would enjoy a maple version of this unctuous delight, topped with maple mascarpone cream, a sprinkle of walnut praline crumbs and a petite maple walnut shortbread cookie on the side. So lovely and so delicious.

The base is essentially a crème brulée type custard made with cream, yolks and sugar (maple syrup here). I used 3 ounce ramekins which I find to be a perfect portion for a just right taste.

To yield 14 portions, whisk together 9 yolks, 3/4 cup REAL maple syrup (don’t you even dare use “pancake syrup“!), 3/4 teaspoon salt and 3/4 teaspoon vanilla extract; heat 3 cups heavy cream to barely simmering and temper it into the egg/maple syrup mixture. Strain through a fine mesh sieve into a pouring measuring cup then fill the ramekins to 1/4” below the rim.

Bake in a water bath at 325ºF. I use a clear pyrex glass baking dish, set the ramekins in, pour hot water into the corner of the dish and fill to about half-way up the sides of the ramekins. Cover loosely with foil and bake about 30-35 minutes, checking it periodically - you want the custard just set with a hint of a jiggle in the center. Once out of the oven, lift them out of the water bath and cool to room temperature on a wire rack.

IMG_3255.JPG

Then refrigerate until chilled. Garnish with whatever you’d like! If not being consumed the same day, I cover them with plastic wrap to enjoy over the next few days.

IMG_3266.JPG

Now for a tart!

IMG_3253.JPG

As always, having some version of a tart in the mix is right up my alley and thus a ricotta custard raspberry tartlette was born - buttery blind baked short crust filled with a few raspberry pieces and an easy to make ricotta filling.

For the filling whisk together 2 cups ricotta/3 eggs/one tablespoon cornstarch/3/4 cup sugar/zest of a lemon/ 1 teaspoon vanilla. Et voilà, très simple!

IMG_3244.JPG

Bake at 350ºF until the filling is set and a bit puffy, about 20-25 minutes.

IMG_3247.JPG

To give these babies some panache I made a lightly gelled raspberry coulis and pooled it on the top.

IMG_3249.JPG

Then a nice string-of-pearls crème Chantilly rim and a fresh raspberry to top it off. Smooth and berry delicious !

IMG_3251.JPG

The World Egg Day table also held browned-butter pistachio crumb cakes (egg whites) . . . .

IMG_3263.JPG

. . . . and apple pecan brioche (we all know that has eggs!).

Note: more on revisiting brioche recipes later - it’s an ongoing task.

IMG_3264.JPG

An enjoyable egg day it was!! Can’t wait until next year.

Nutty rosemary and lemon/pistachio/sesame shortbread

IMG_2610.JPG

I LOVE shortbread! I think back to those childhood days of eating Lorna Doone cookies and how much I enjoyed their crumbly butteriness (was there really butter in those babies??). I've come a long way down the shortbread trail since then. Yes, I know I've gone on about this topic in the past, but good things deserve a little review every now and then, right?

Depending on what part of the world you hang out in, these cookies can be referred to as biscuits (thanks to the Brits), shortbread (more Scottish - think Walkers) or sablés (thanks to the French).

My approach follows the traditional Scottish method - a simple combo of sugar/butter/flour, and you're good to go. Typically along the lines of 1-2-3 dough, you weigh out 1 part sugar to 2 parts butter to 3 parts flour and mix 'em up. You can play around with the ratios (decrease the sugar and increase the butter a bit) to yield an even more buttery cookie.

I have two base recipes that I use regularly. One uses granulated cane sugar and one confectioner's sugar (gives 'em a slightly more tender texture?). You can play around with different sugars on your own and decide which gives you the texture you most enjoy.

And why do I use two different bases you might ask? Because I can and so can you!

Add in your favorite citrus zest, spices, chopped nuts, chopped chocolate, dried fruit - the possibilities go on and on.

There are two mixing methods: sanding and what I like to call blending (I think of this one as just short of creaming - you're not trying to aerate the dough, just blending everything together).

The first involves weighing your sugar and flour into a mixing bowl, dicing cold butter and sanding it into the dry ingredients to coarse crumbs. At that point you just press into a pan and bake it. You can take the mixing a step further, going past the coarse crumbs until the dough holds together, then wrap, chill and roll out later, cutting into any shape that suits your fancy.

Both methods result in a lovely crumbly/crispy/buttery cookie, although, with the sanding and press in method, the texture is a bit more crumbly and melt-in-your-mouth. I make mine both ways and enjoy them equally.

If you look at LOTS of shortbread cookies recipes, you may notice that many of the French sablés add egg (whole or yolk) to the dough as a binder. They're delicious too! 

Periodically I enjoy changing up my flavor offerings. This time I had pecans in the freezer and sesame seeds in the cupboard.

First up - rosemary pecan.

IMG_2492.JPG

Over the years I occasionally make rosemary roasted nuts, usually walnuts or pecans, that are absolutely delicious as an appetizer along with a cheese or two. For a savory cookie, I chop some of the already rosemary-ied nuts and add them into my dough. Yum. So delicious.

IMG_2609.JPG

Next - lemon pistachio sesame.

IMG_2545.JPG

This one adds in some toasted sesame seeds, lemon zest/juice and chopped unsalted raw pistachios. Once baked, I brush them with honey and pop them back into the oven for a few minutes to set the honey. Oh man are they good!

IMG_2538.JPG
IMG_2611.JPG

On to the base recipes (plus additions!)

Rosemary pecan:

  1. In a stand mixer with the paddle attachment blend 75 g granulated cane sugar with 200 g diced, room temperature unsalted butter. 
  2. Add 250 g all purpose flour and blend in just until the dough comes together. Note/tip: I've started replacing about 1/5 of my all purpose flour with white whole wheat for some added whole grain goodness. 
  3. For the rosemary pecan version, chop 75 g rosemary roasted pecans (recipe below) and add them into the dough. Wrap, chill for at least an hour before rolling out and cutting desired shapes.

How easy is that??!

Lemon pistachio sesame:

  1. In a stand mixer with the paddle attachment blend 75 g confectioner's sugar with 227 g diced, room temperature, unsalted butter (notice a slight bump in the butter content here).
  2. Add 1 teaspoon vanilla extract, the zest of two lemons plus 2 teaspoons freshly squeezed lemon juice and blend in.
  3. Add 260 g all purpose flour (or sub 1/5 of that as white whole wheat flour) and 1/2 teaspoon salt and mix just until it comes together.

Blend in 50 g toasted sesame seeds and 50 g chopped raw pistachios. Wrap and chill for an hour or so before rolling out and cutting desired shapes.

I bake my shortbread at 325ºF (convection) for about 15 minutes or until gently browned (watch what's happening in there!!). Don't forget - it's your job to learn your own oven. 

Now how about those roasted rosemary pecans, you might ask? Here's the recipe (you'll have PLENTY of nuts for your shortbread dough - feel free to halve the recipe OR, even better, make the full batch and have plenty for apps and snacks):

  1.  Heat oven to 325º F.
  2. In a microwave safe bowl melt 2 tablespoons unsalted butter. Add 2 tablespoons olive oil, 1/3 cup chopped fresh rosemary (or 2 tablespoons crumbled dried), 2 teaspoons kosher salt, 1 teaspoon paprika and 1/8 teaspoon cayenne.
  3. Place 4 cups nuts (walnuts, pecans or a mixture of the two) in a bowl and toss with the above mixture, coating the nuts evenly.
  4. Spread onto a 1/2 sheet pan and bake 15-20 minutes, stirring every 5 minutes or so, until browned and fragrant.
  5. Drain on paper towels, cool and serve at room temperature (or chop some up for your shortbread - yay!!).
  6. Store leftovers in an airtight container and enjoy for many days.
IMG_2493.JPG

Now get in that kitchen of yours and create your own version of delicious, crumbly, buttery shortbread. You can do it!