Challah

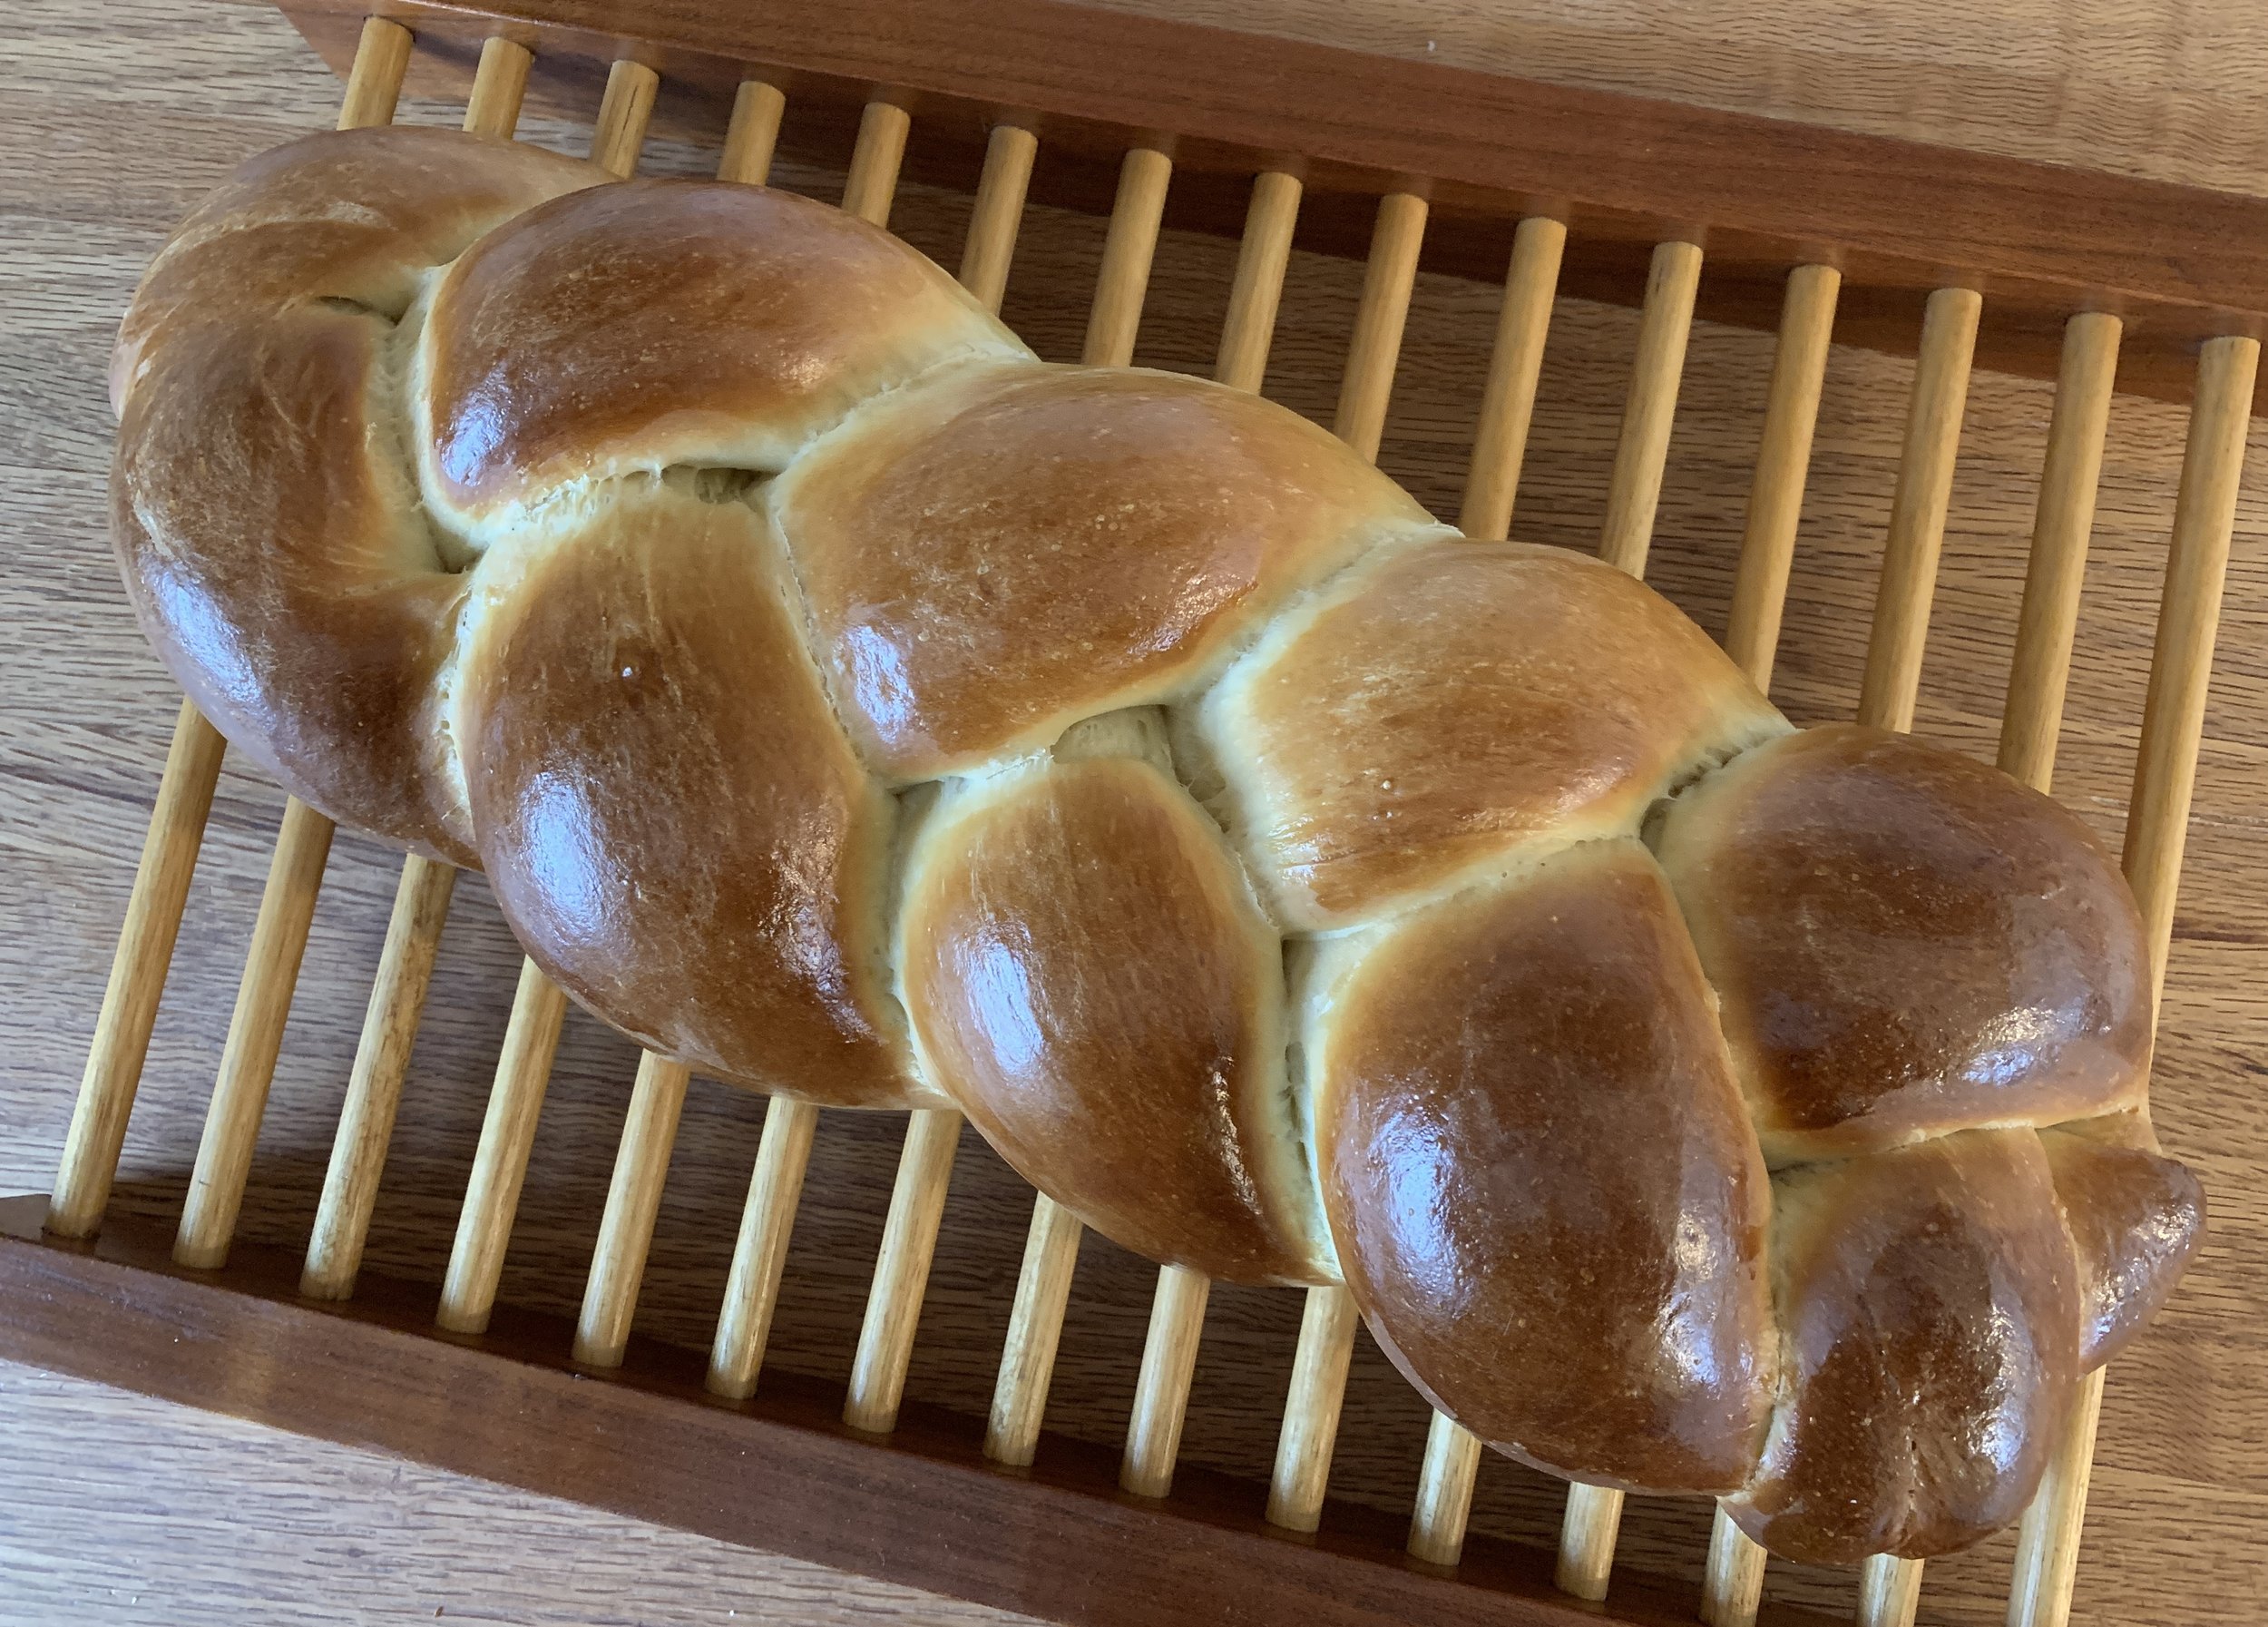
This is just one of the many times of year when these lovely shiny loaves appear. Steeped in Jewish tradition, served on the Sabbath and for holidays, this egg bread is also enjoyed by folks from many different backgrounds and parts of the globe. A very similar bread is also popular around Easter, often enriched with butter added to the dough (and maybe dyed Easter eggs tucked on top).

I embarked on this project after receiving a request from a friend for a pair of loaves as part of an egg related scavenger hunt she was planning for a group. Sounds like fun!

I’ve made challah on occasion over the years but have never posted on the topic. While there are tons of recipe variations and reams of information about its history and preparation, I barely skimmed the surface in deciding how to approach this. All purpose or bread flour? How many eggs? Whole or yolks? Honey vs sugar? Three or four (or six!) strand braid?

Particularly when I’m baking for an order, I want to be sure that the end result will be tasty. Of course that means a trial or two. I was inspired to do a test between a King Arthur recipe that I’d made in years past (to excellent reviews) and a recipe from a new book I purchased recently entitled “Breadsong: How Baking Changed Our Lives”. I’ve paged through the book’s recipes and am truly enjoying the story written dually by Brits Kitty Tait and her father Al Tait. It’s their story of Kitty’s journey through some difficult times in her young life with bread baking ultimately becoming her salvation. They now own/run “The Orange Bakery” in Watlington, Oxfordshire UK. Cool story.

test bakes

I won’t focus on recipe details yet, but, suffice it to say, both half loaf trials turned out OK. Kitty’s adds some butter to the dough but the recipes are otherwise quite similar. Both used two eggs for the full recipe unlike the one I ultimately went with.

Perhaps I over baked them a bit since they were a tad dry. With a fine, light crumb, both are excellent spread with a bit of butter/jam, especially toasted. I recommend either for bread pudding or French toast, easy and delicious ways to revive and repurpose.

After a bit more review, I went with an adaptation of the recipe I ultimately turned to - Jeffrey Hamelman’s challah in his book “Bread: A Bakers Book of Techniques and Recipes”. This one uses more egg than many recipes I reviewed along with the usual suspects - flour, vegetable oil, water, honey, salt, yeast.


Let’s get started! I’ll go through the steps, listing ingredients in gram weights but remember you can go to the recipe PDF for equivalent measures and read through it at your leisure.

First have all your ingredients mised out: 600 g all purpose flour, 300 g bread flour, 160 g honey, 2 large eggs plus 5 (or perhaps 6) yolks, 85 g vegetable oil like canola (EVOO is tasty!), 300 g water (tepid/coolish), 17 g instant yeast, 13 g kosher salt.

Place all ingredients in the bowl of a stand mixer fitted with the dough hook. My 6 quart Kitchenaid bowl works well for this. I may have mentioned this in the past but I have an 8 quart commercial Kitchenaid stand mixer. The beauty of it is that not only is the mixer’s motor more heavy duty than a 6 quart, the attachments are much more work-horse like, solid and heavy. And! - they work with my 6 quart bowl that fits on the 8 quart stand! The six quart is my go to size for most bread, croissant or large batches of shortbread or tart doughs. Love it.

All in!

I give it a stir up with a spatula to gets things moistened.

iinitial blend

Then blend with the dough hook on low speed (stir on a Kitchenaid) for several minutes to incorporate the ingredients.


Now knead on speed 2 for about 6 minutes to develop the gluten. The dough should ball up and pull away from the sides of the bowl.


Give the dough a couple of quick kneads by hand and round it up, then place in a lightly oiled bowl for the first proof.


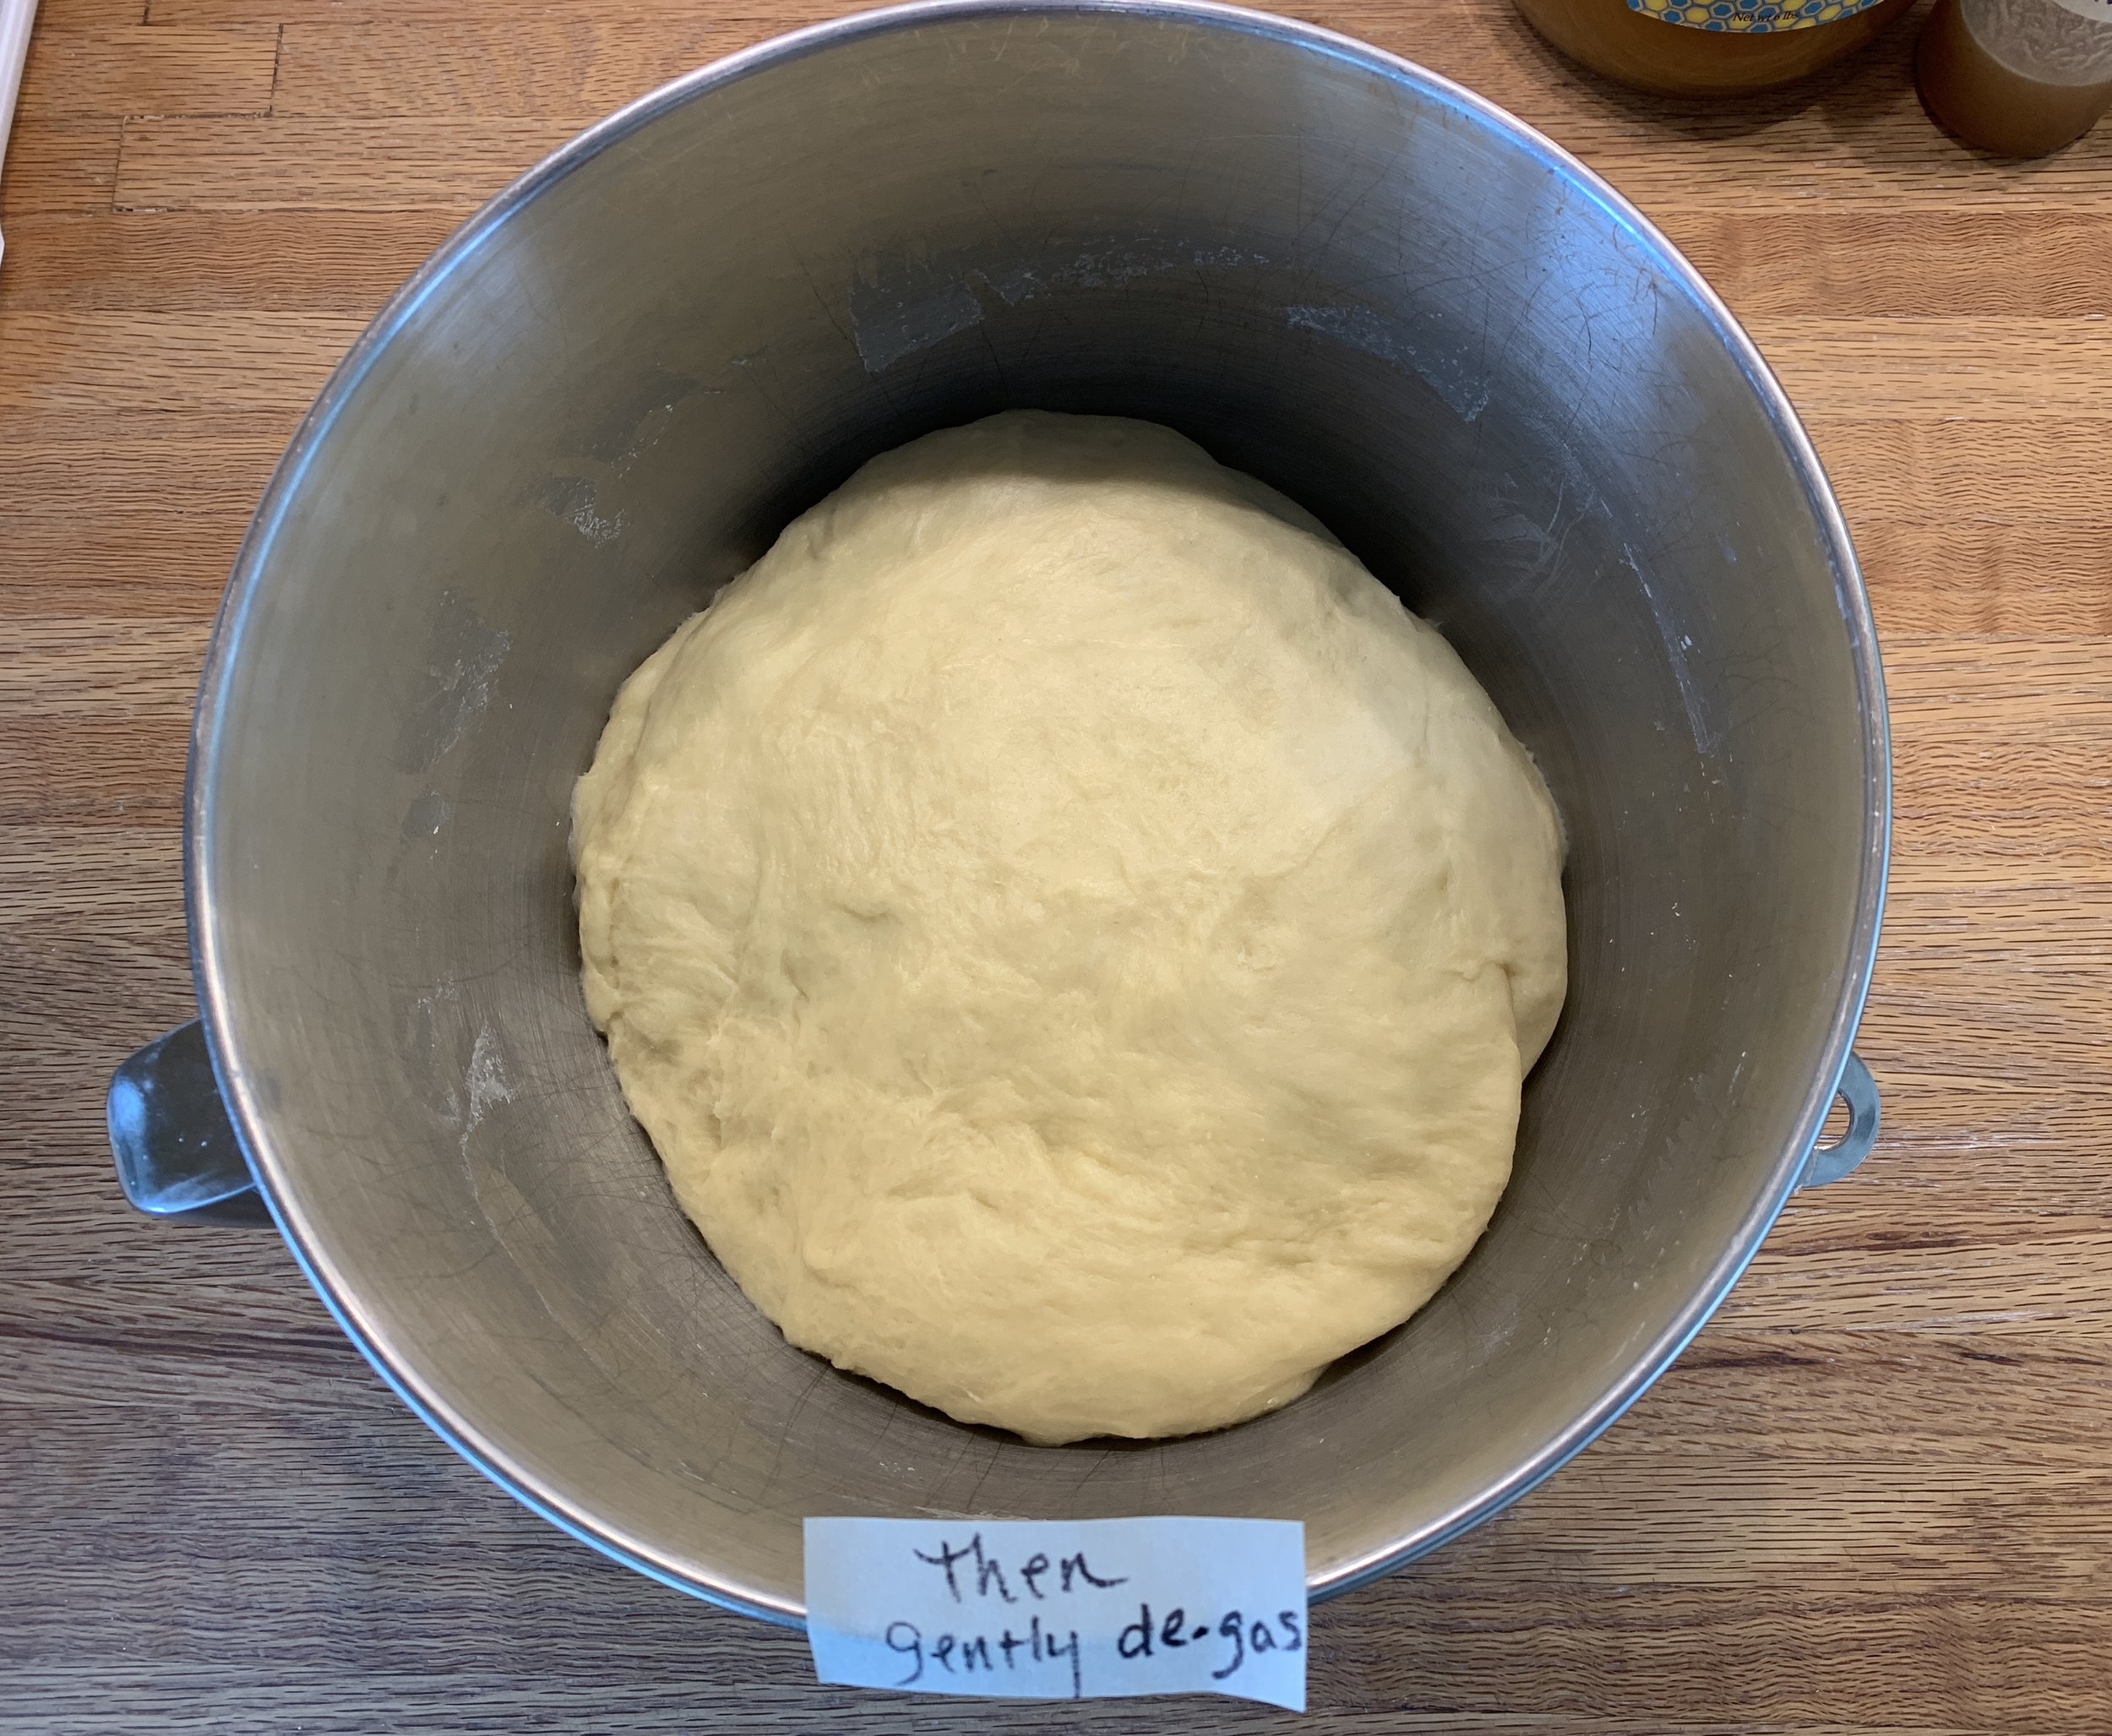
Let rise in a warm place for 1.5 - 2 hours, gently de-gassing at 1 hour. OPTION: after the first de-gassing, refrigerate the dough for several hours or overnight, de-gassing a couple of more times during the first few hours. The dough is easier to work with/shape when cool, plus you can create your own time table to mesh with your schedule.

For my project I de-gassed at hour one, then refrigerated the dough for an hour and a half (due to my schedule that day!). Then another de-gas and a 45 minute room temperature rise before shaping. Here are the visuals.


nice fridge rise!

dough is feeling good!


Place the risen dough on your work surface - you don’t need much flour at all for the dividing/shaping/braiding. Use a bit if needed, but the dough handles well without being sticky.

For two 3-strand braids, divide the dough in half then each half into three equal pieces. Do a rough, stubby torpedo pre-shape of each piece and let rest 20 minutes covered lightly with plastic. I made two 750 g braids and used the rest of the dough for a mini two strand twist so I could do a taste test.


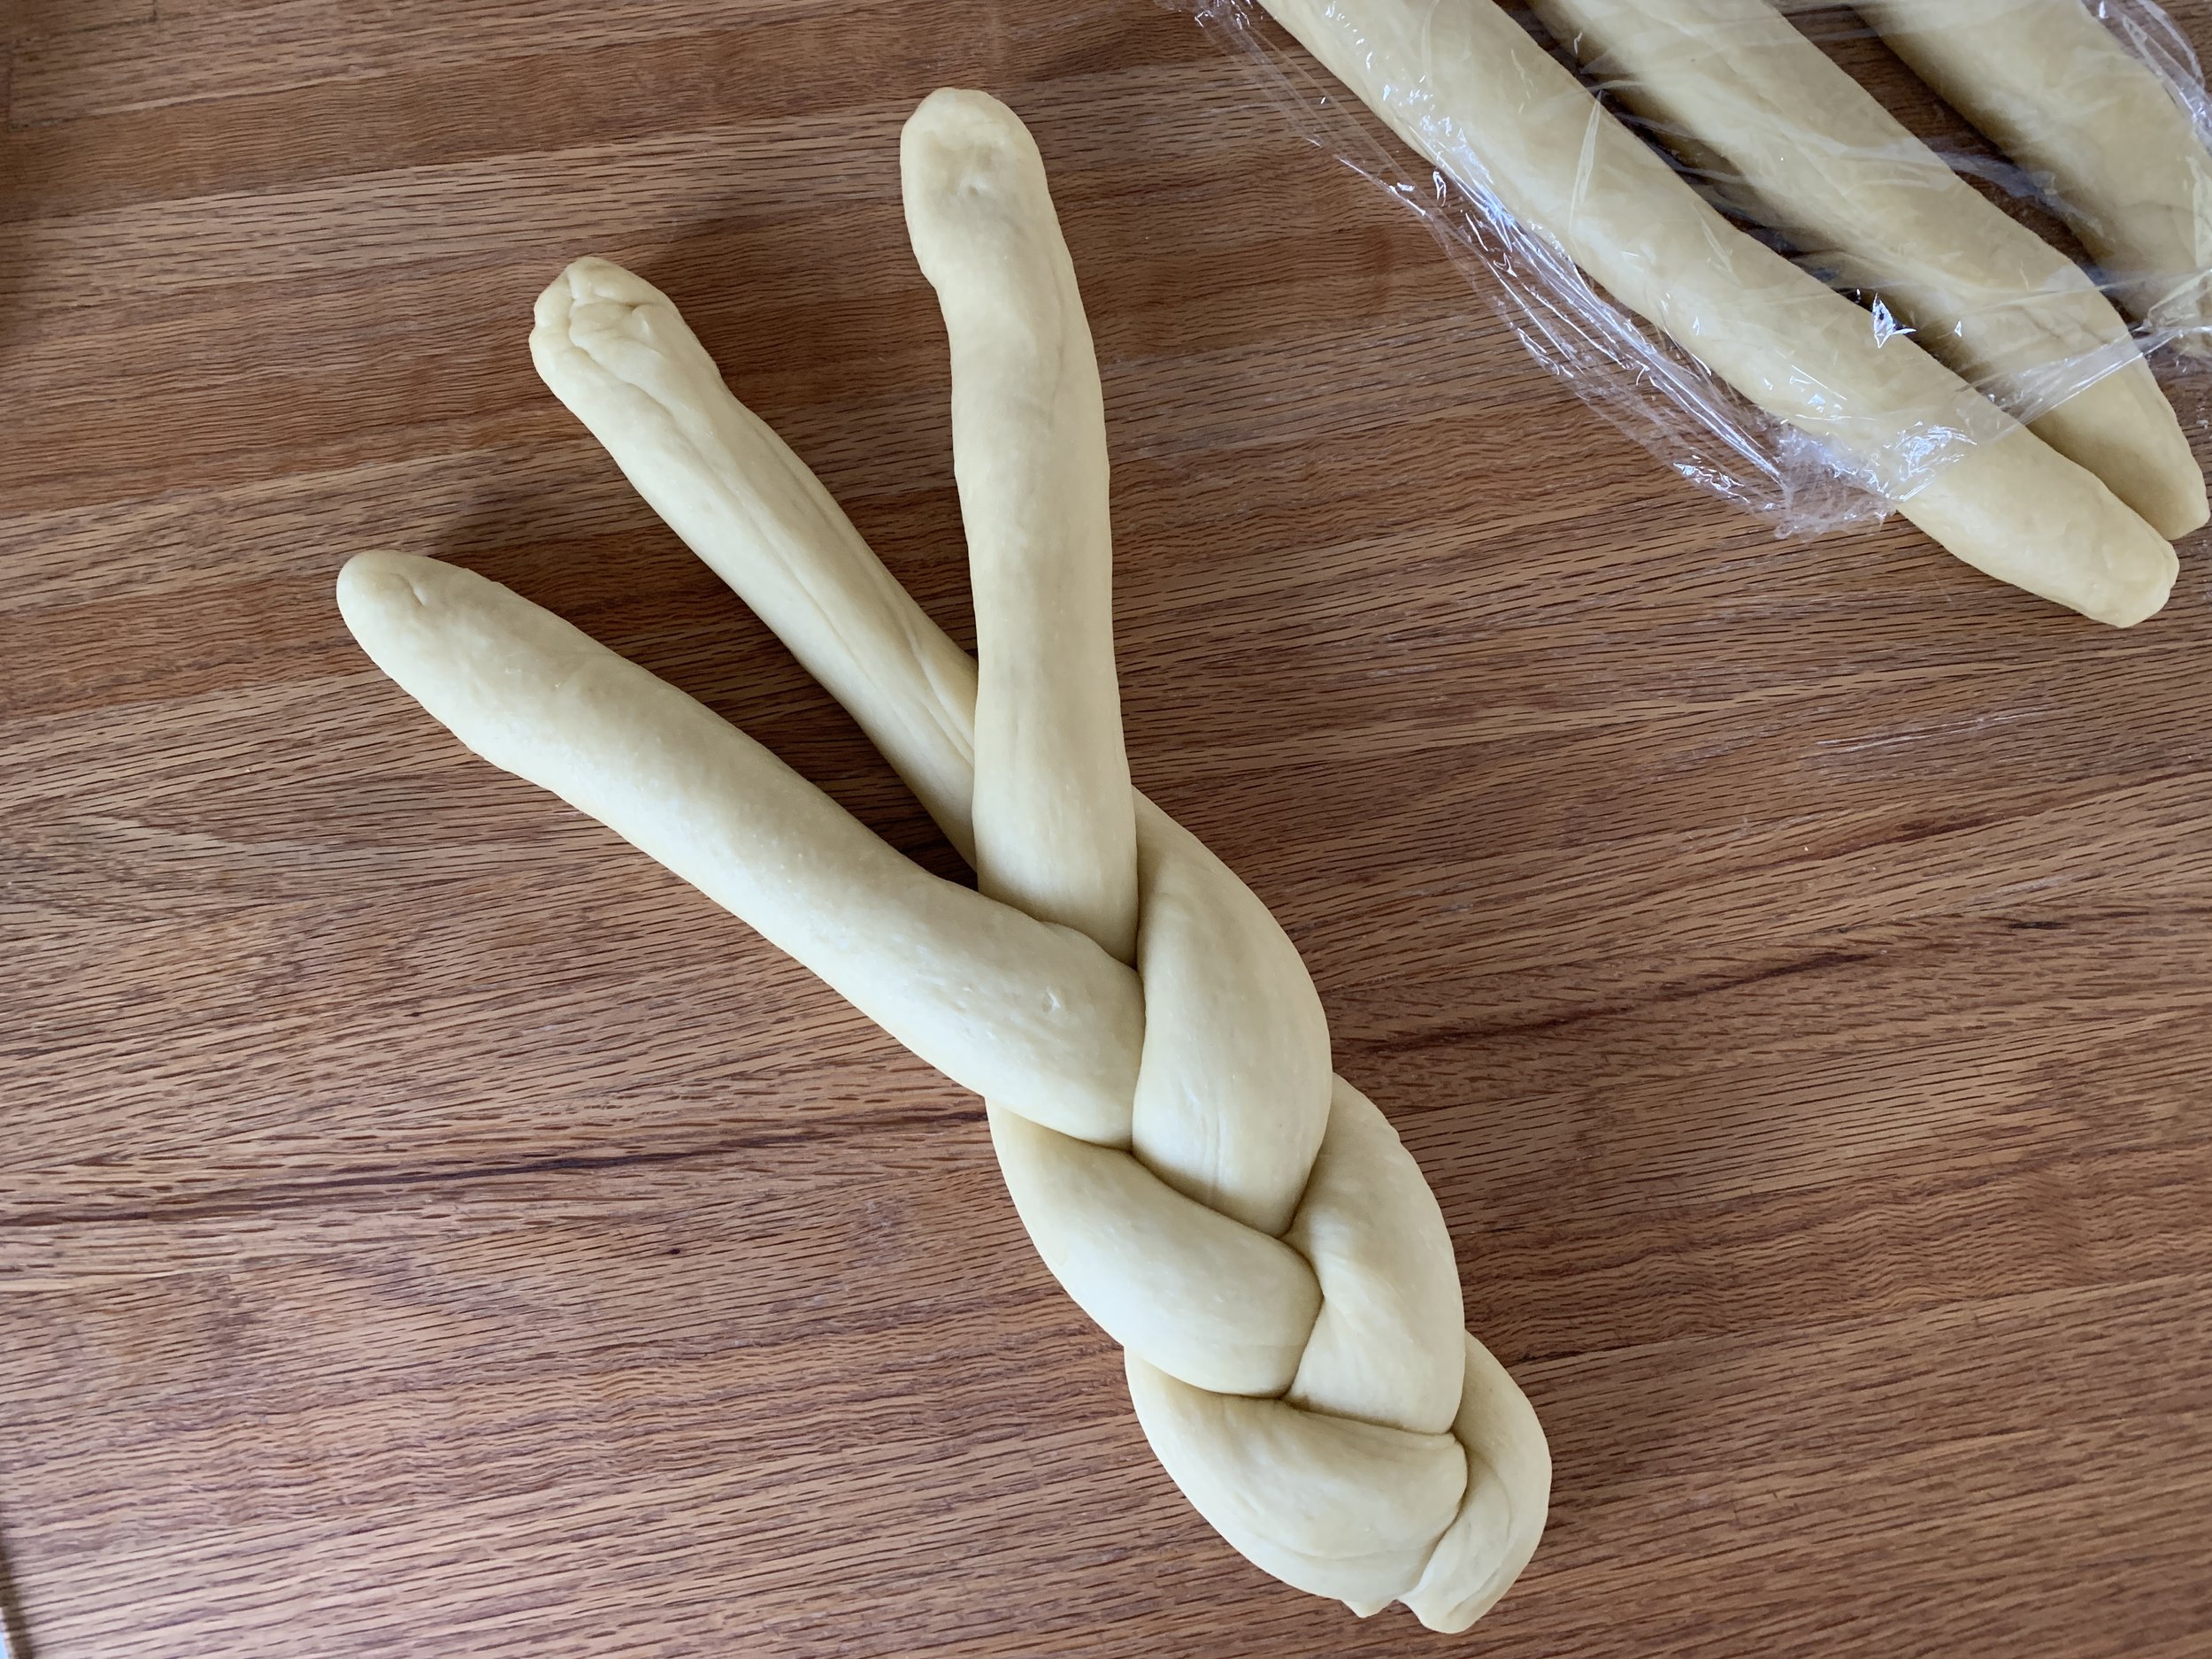
After the rest, roll each piece into a 14”-ish rope. Set up three pieces for your first braid.


One way to braid is to start in the middle, braid toward one end then flip it and finish braiding from the center to the other end.

first half complete


Tuck the ends under to clean things up

Once both loaves are braided, place them on a parchment lined sheet pan, lightly cover with a cotton towel and cover that with plastic wrap. This protects the dough from drying out but also reduces moisture accumulation between the braids by eliminating direct contact with the plastic wrap on the dough surface.

Let rise for two hours. Toward the end of the rise heat the oven to 375ºF.


These are looking great after the two hours. Thoroughly egg wash the surfaces.

You can see my mini twist on the right, sprinkled with poppy and sesame seeds.


Bake about 30 minutes until golden brown. Cool on grids.


Serve when ready. The challah loaves freeze well - remove from the freezer a couple of hours or so ahead to thaw at room temperature.

Here’s a look at my mini twist. I tried it with a schmear of butter and sandwiched it with a bit of ham and cheese. Good crumb, tender and tasty!


The report from those who received the full sized loaves was a thumb’s up. Good deal!


Just a final bit of nature for you. Happy spring!

cherry blossoms in le jardin des plantes, paris

Kouign-amann: Part 2


OK. Here we are in part 2 of my Kouign-amann review. Part 1 covered shaping two versions of individual pastries. This time it’s the full sized cake version, more traditional in Brittany for slicing and enjoying at breakfast or afternoon tea. Inspired by one of King Arthur Baking Company’s “Bake of the Week” recipes back in January, 2022, I’ve had it in my “I’m-going-to-try-this” pile ever since. My how time flies!

I ended up making two versions of this cake: the first (thanks to Andrew Janjigian and the above mentioned KA Baking Co) utilized a unique approach to the sugar/butter incorporation. I thought it rather messy and the end result not as flaky, lofty or tasty as that made with my usual recipe. If you’d like to give it a try, just click the link on Andrew’s name and you can learn about his approach/recipe. There are always different ways to do things!

my result with andrew janjigian’s version

For the second using my base recipe (enough for two full sized cakes), I used half of the dough for a single cake and the rest went toward cute small spirals that are absolutely delicious!! I simply couldn’t help it. They’re stashed in my freezer as we speak.

my result with my recipe


yummy spirals

Let’s create a full sized kouign-amann! We’re proceeding with the nearly completed dough, already put through three 3-folds rolling with flour. Now it’s ready for the last sugar-rolled 3-fold.

First prep an 8” cake pan by buttering the bottom and sides then lining with a round of parchment large enough to leave an edge above the pan’s rim. This makes it easier to lift out after baking. Then butter and sugar the parchment. You can do this ahead and set it aside.

pan all prepped

Roll the dough out length wise using sugar on the rolling surface as well as on top.

ready for last three fold with sugar

Once you complete the last fold, let the dough rest at room temperature (NOT in the fridge) lightly wrapped in parchment for 20-30 minutes and then proceed with shaping/proofing/baking.

Remember I’ve made a full recipe so I divide the dough in half, using one half for one cake. You can make two cakes if you want, but I took a different route.

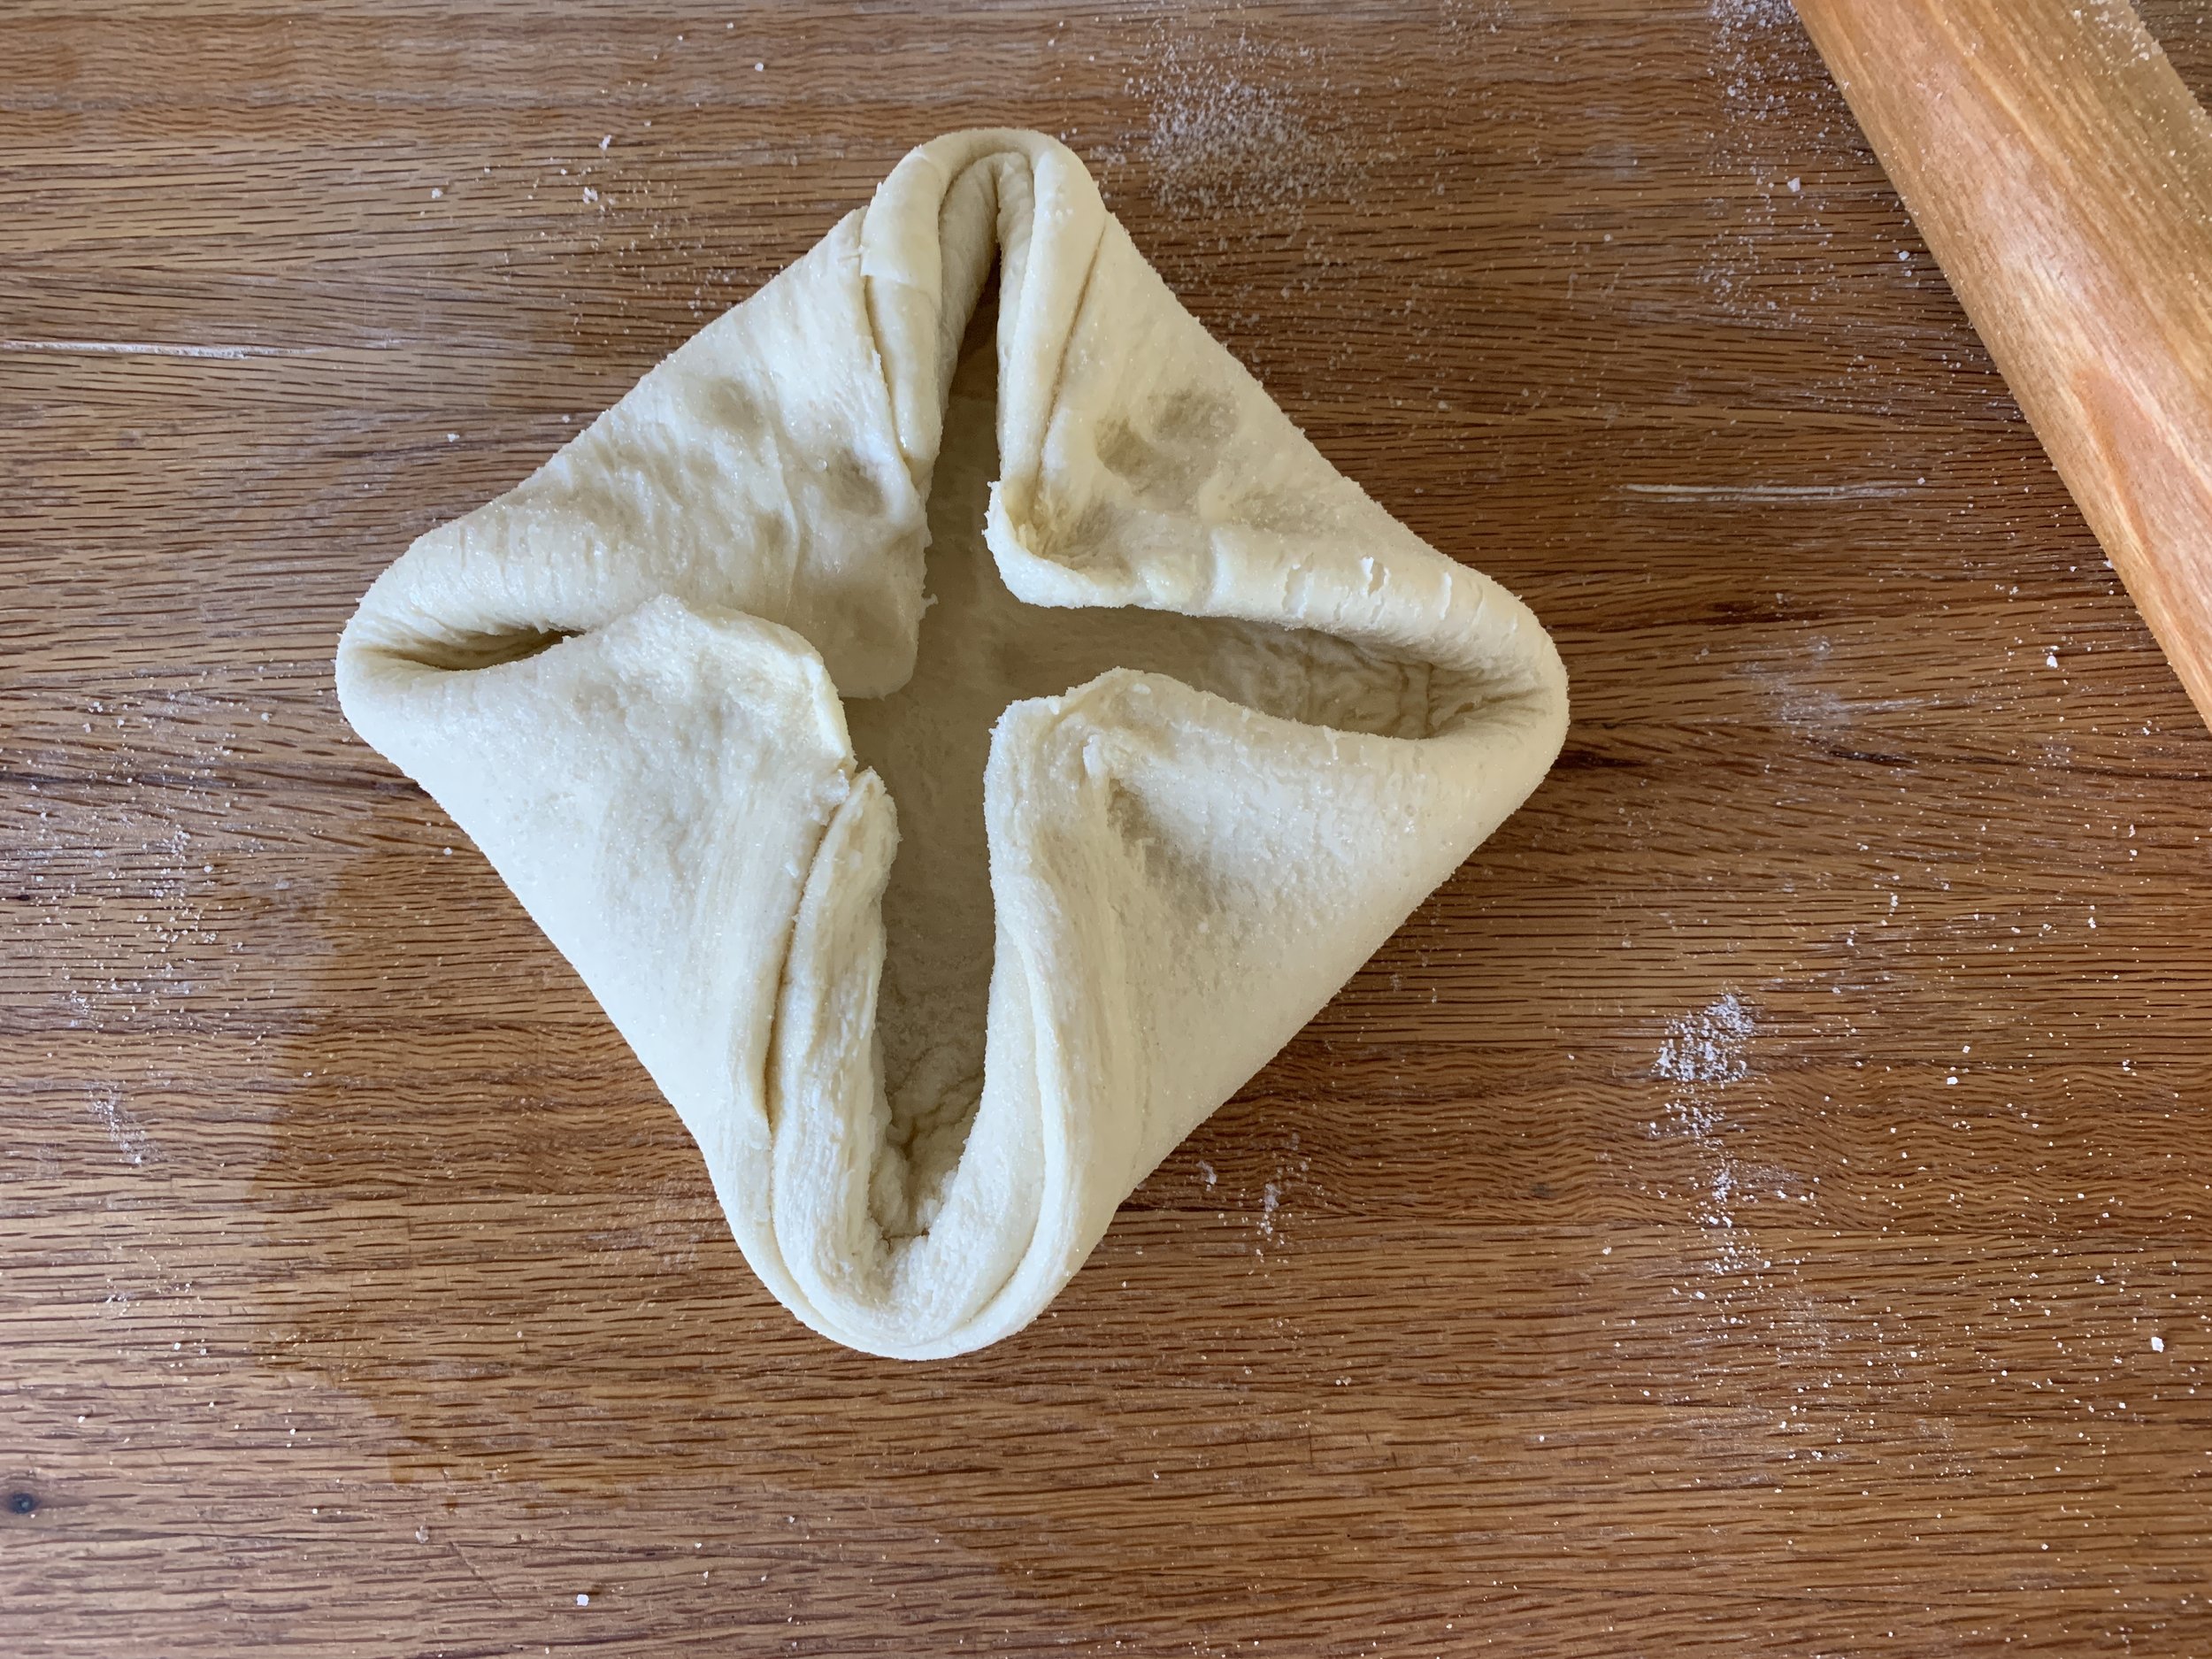
Roll a half portion into a rough-ish 8-9” square (still rolling in sugar) and fold the corners into the center.

corners in, ready to flip over

Turn the dough over onto the sugar dusted work surface so the corners/seams are down and roll out again (using sugar) to an approximately 8” squarish round. Don’t be too fussy about the shape - I figured it would spread out and bake into the confines of the pan, so I just went with it.


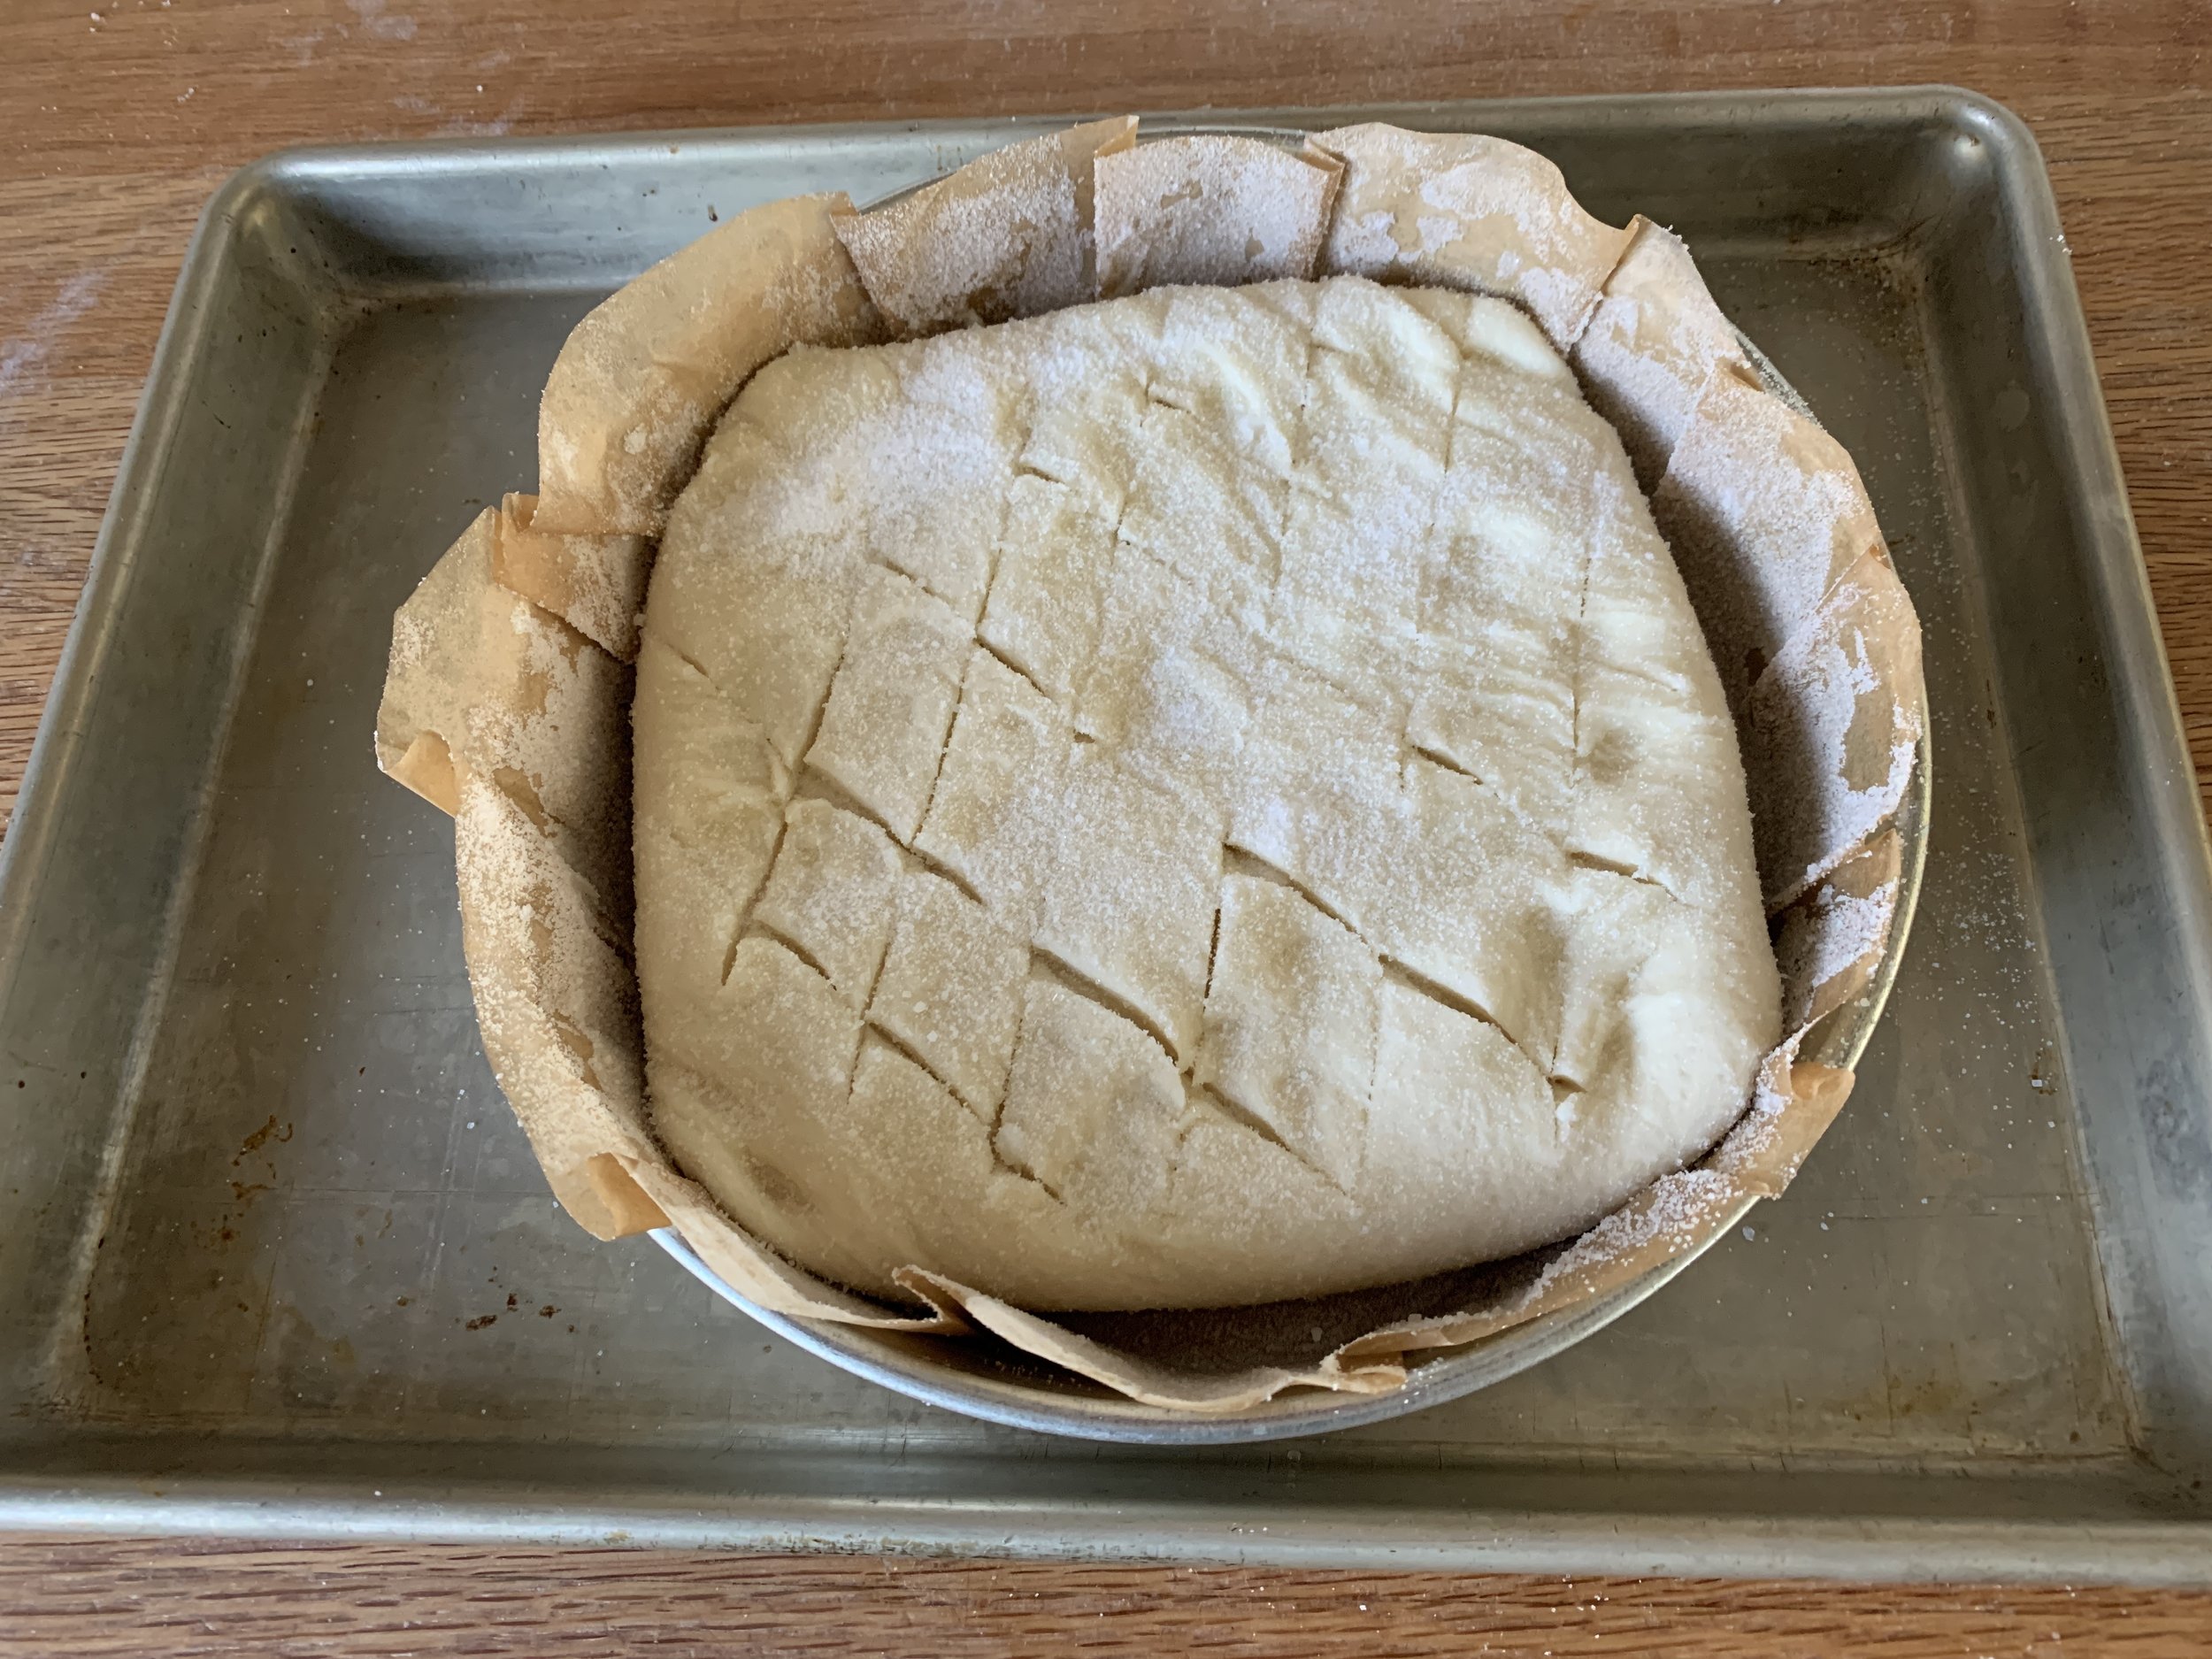
Lift the dough into the pan and tuck it in as best you can. Cut straight lines diagonally across the surface to create a diamond pattern and sprinkle with sugar.

ready to rise

Cover with lightly oiled plastic wrap or a damp towel and let proof 45-60 minutes. Meanwhile heat the oven to 400ºF (convection).

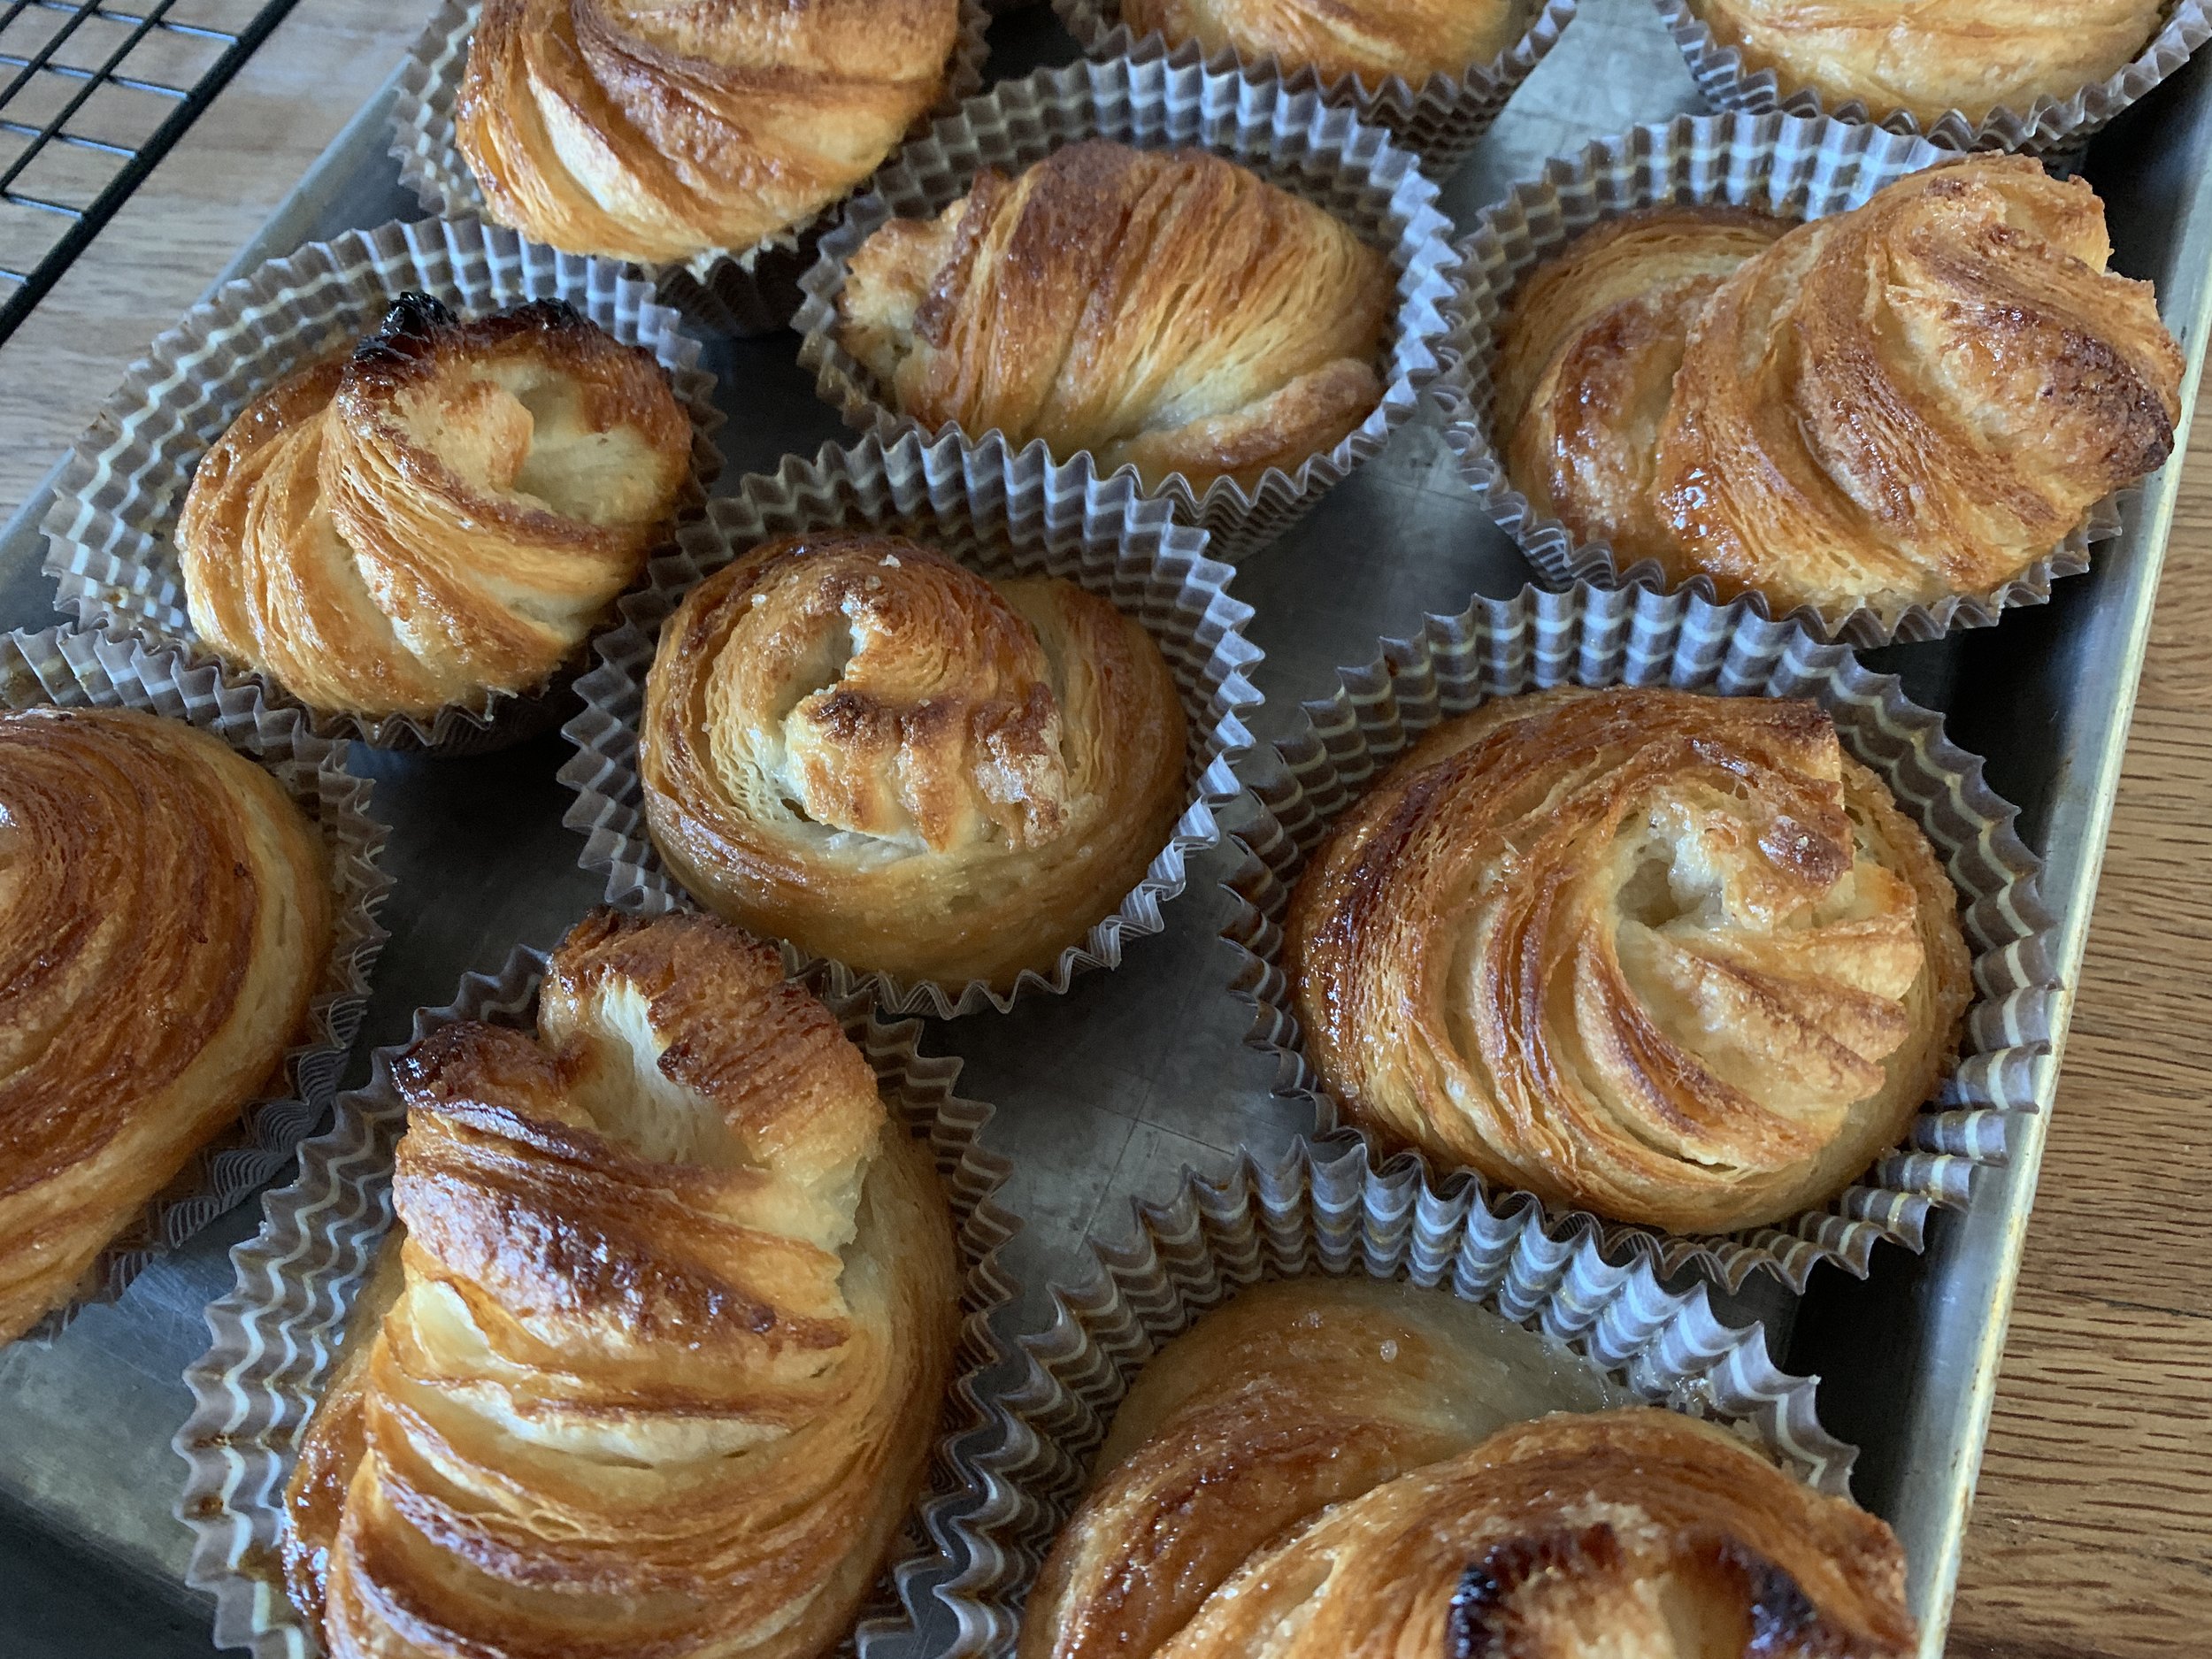
I used the other half of my dough to create a dozen spirals, rolling the dough out to about 10”x10”, cutting one-ish inch wide strips, rolling ‘em up and tucking into doubled paper baking cups rather than muffin tins. The paper cups give each a boundary so they don’t bake up against each other. My hope was they would bake more uniformly golden this way (I was right!).


just formed, ready to rise

My rise ended up at about 50 minutes. Time to bake!


I gave them 20 minutes, turned the temp down to 375ºF and rotated the trays. The spirals were well baked in another 3-4 minutes so out they came. I gave the cake an additional 10 minutes and then covered it with foil for another 10 minutes to avoid over browning. There were still some paler dough sections in the center that I wanted a bit more done.

If I’ve said it once, I’ve said it a thousand times: all ovens are different and it’s up to you to check on how things are going in there. You can do it. Let your recipe be your guide but your eyes, nose and touch be part of it too.

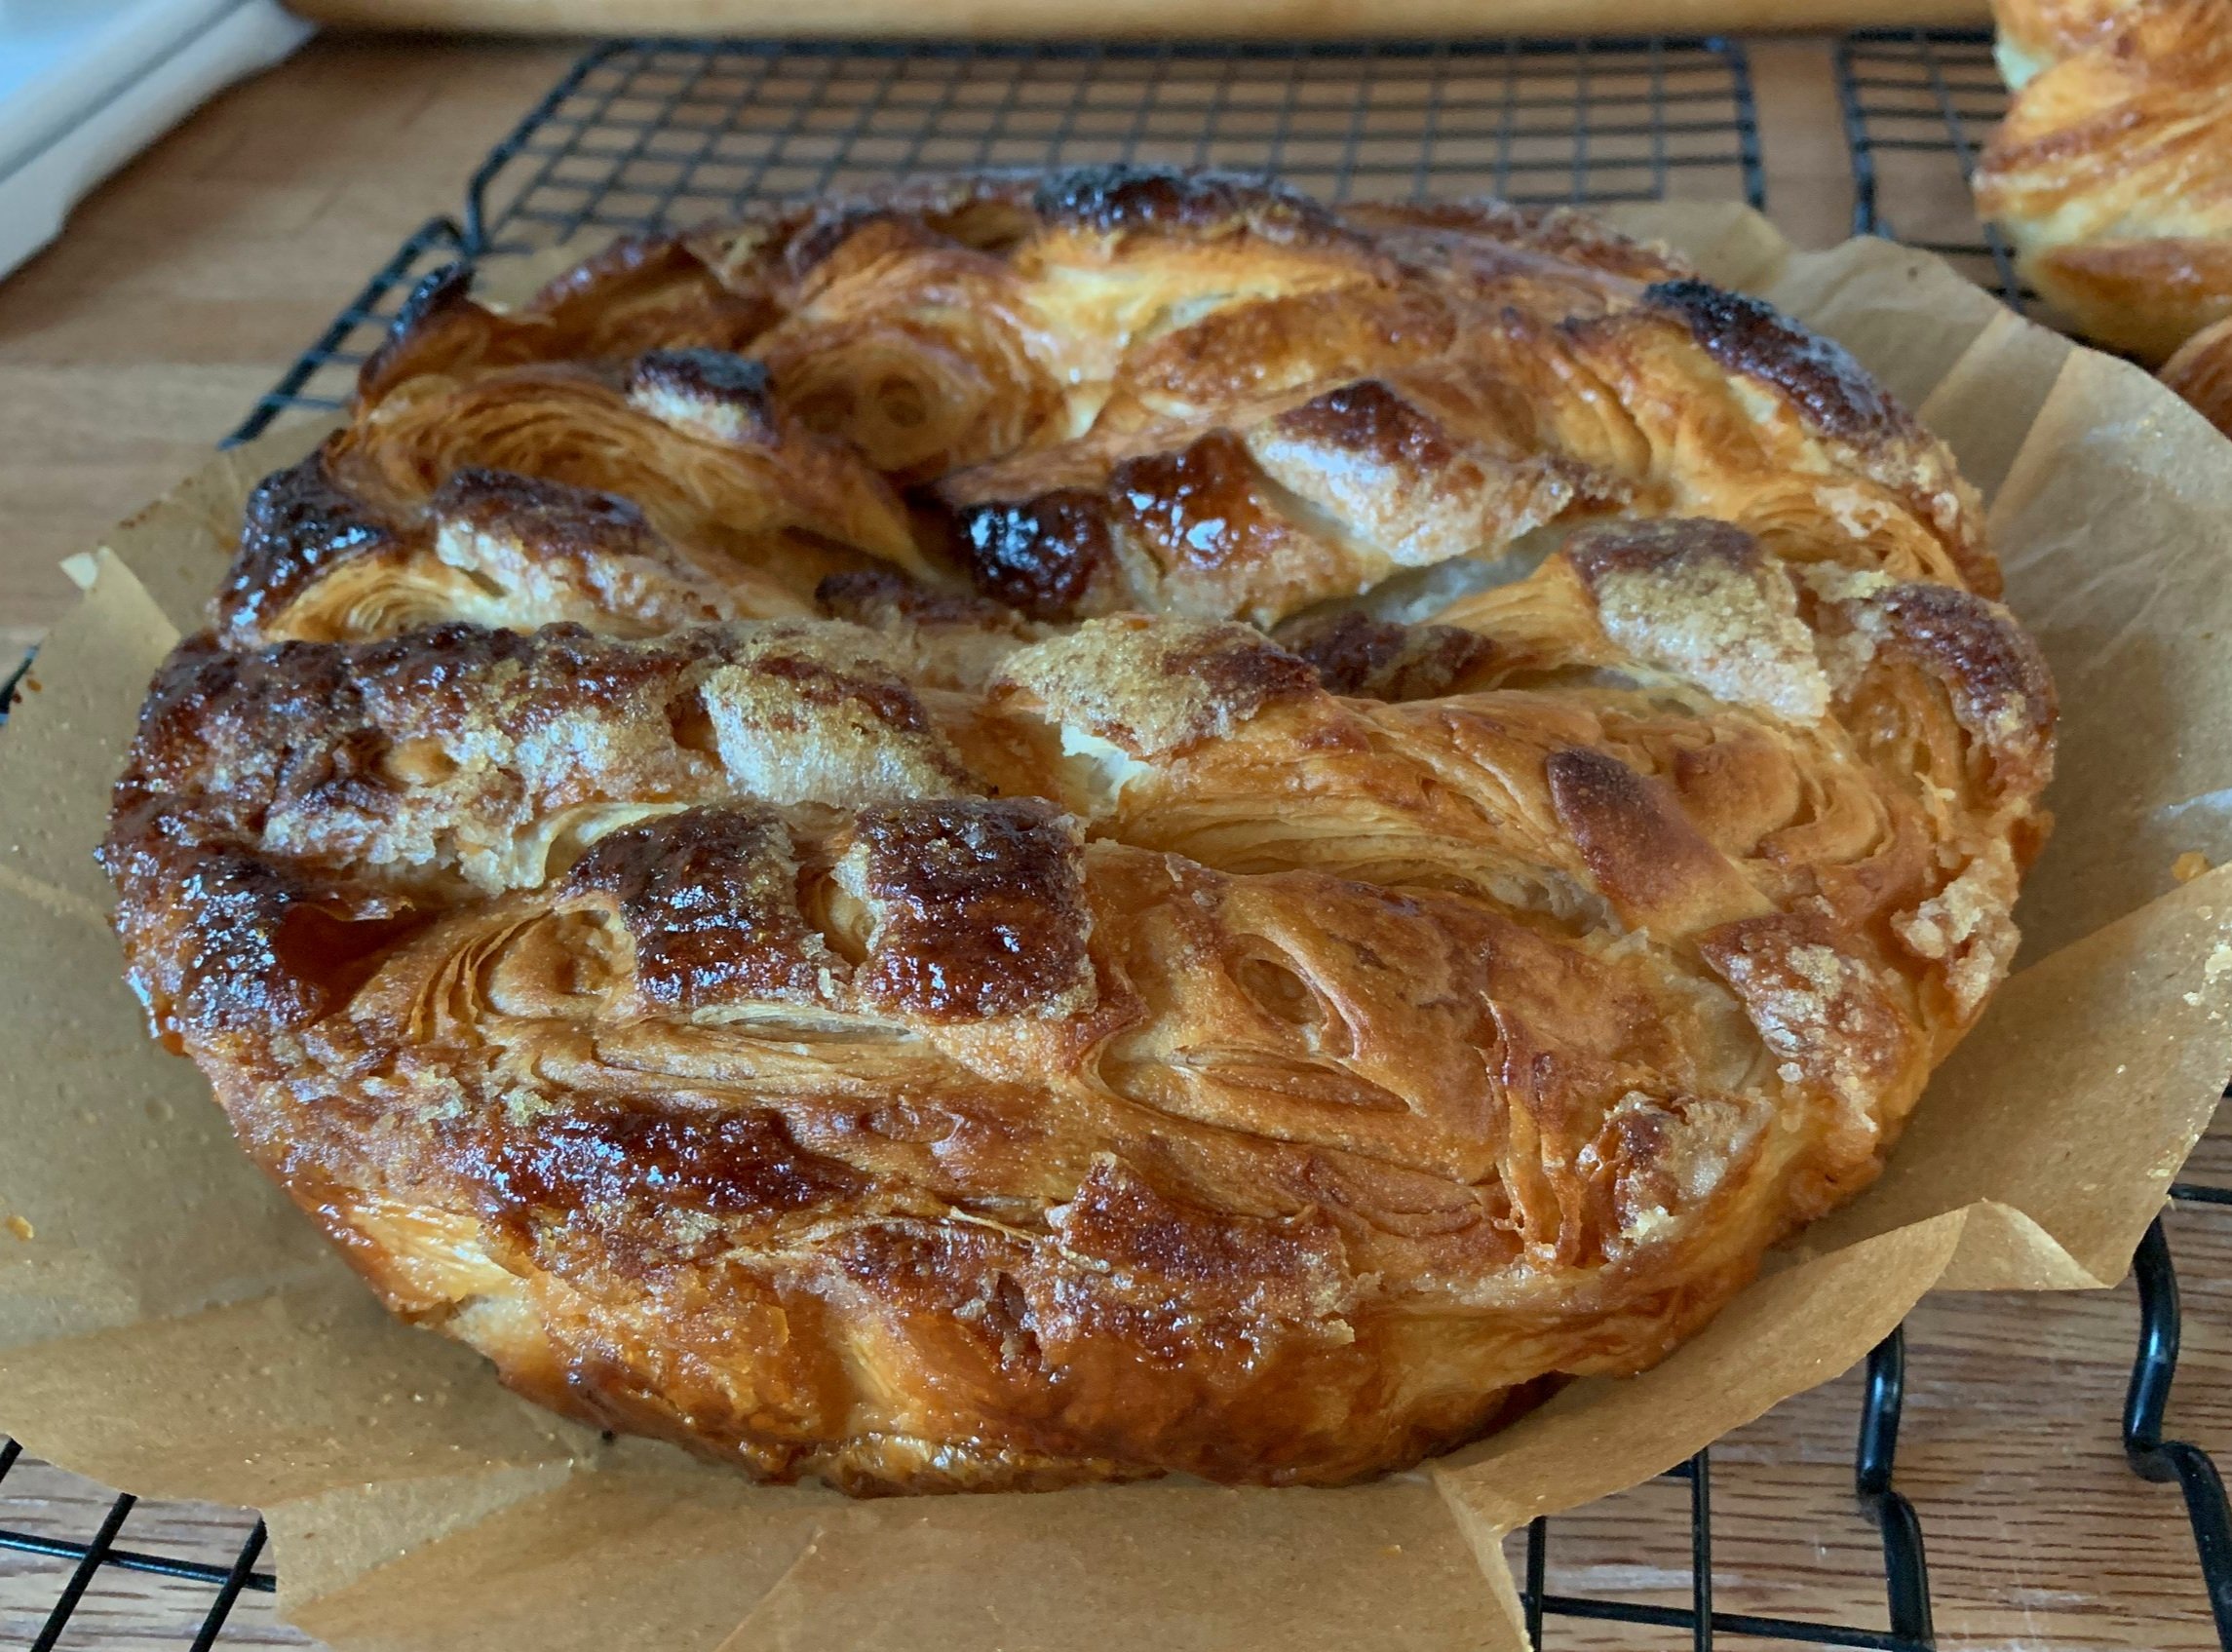
Oooh! Swirls and whirls of caramelized goodness. Reminds me of some of the rocks we saw in the southwest’s national parks last autumn.


Lift the cake out of the pan by grasping the paper edges and set it on a wire cooling grid.


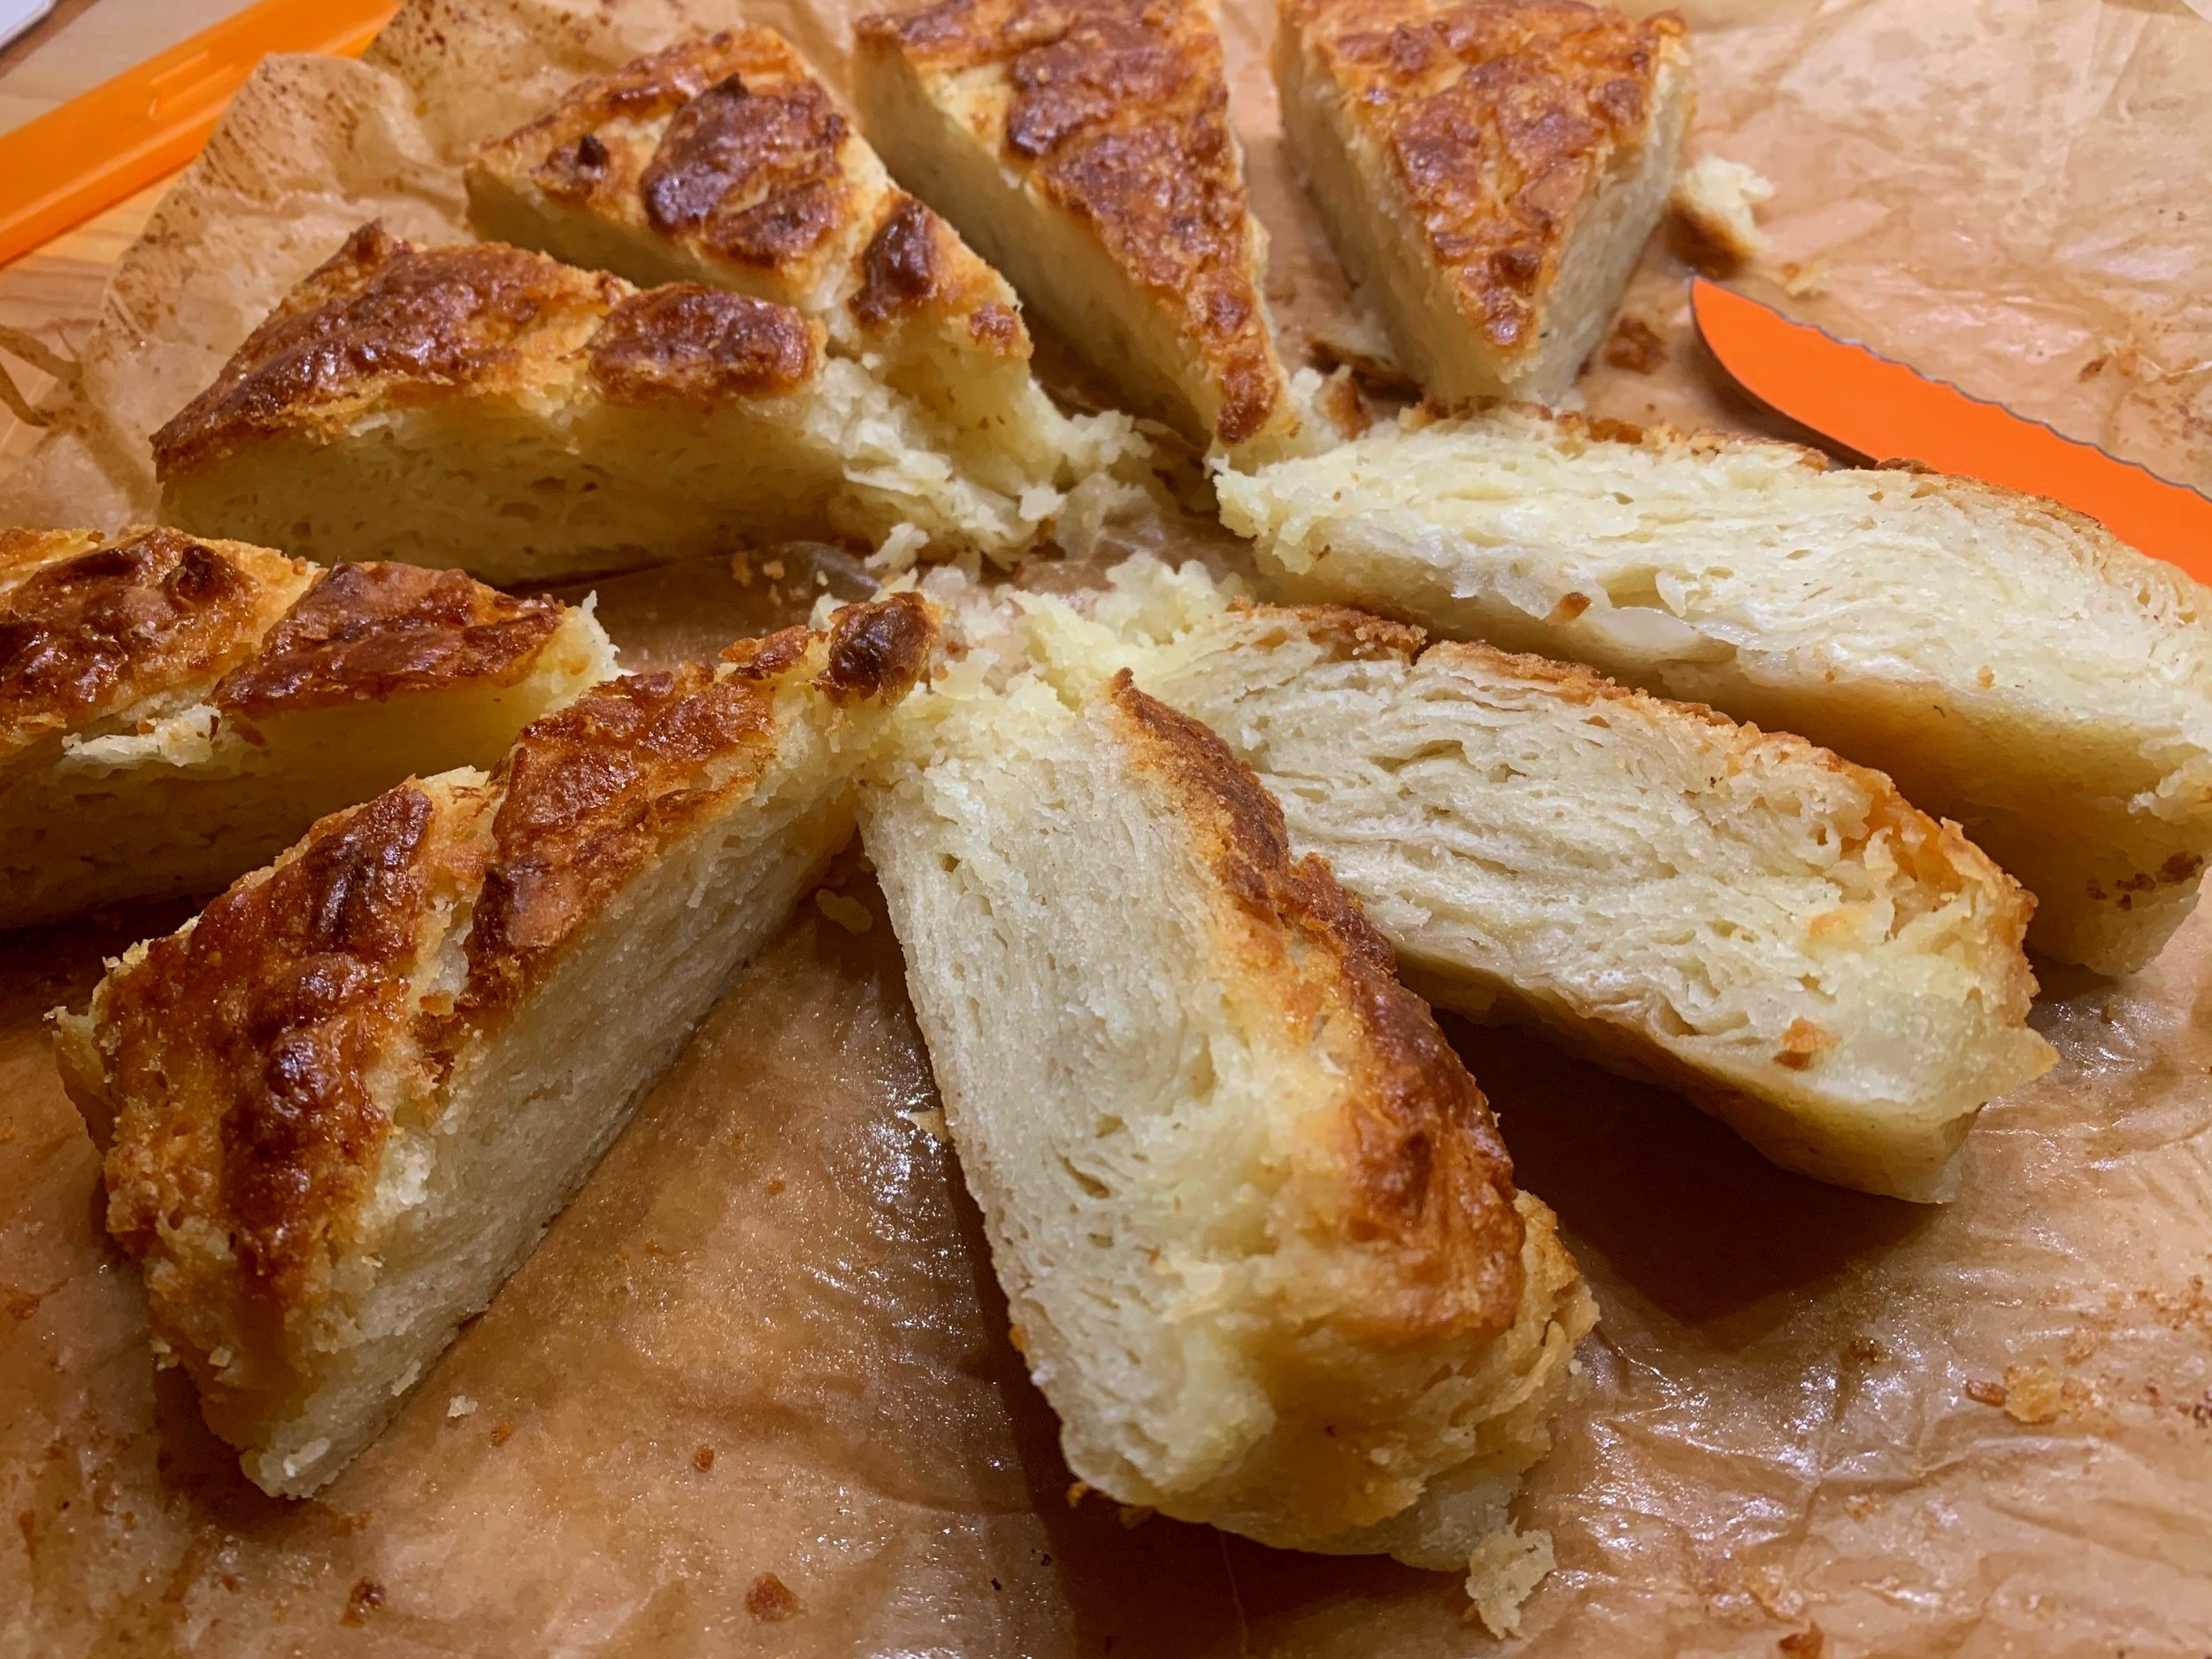
Let it cool a bit and then . . . . . the key for me when testing out any baked laminated pastry is the initial slice to check out the layers. Fingers crossed!


While my initial concern at first inspection was for a doughy under-bake, these layers came out with a certain creaminess that compliments the caramelized exterior - flaky, light and oh so delicious.

Of course, Steve and I had to have our requisite taste test, a decadent pairing of a slightly warm slice with homemade vanilla ice cream. Swoon!

The spirals baked nicely too and turned out just the right size for a delightful morning treat. I peeled them out of the papers pretty soon after baking so as to avoid caramel-y sticking.


love these - like a petite seashell!

Always itching to test out the staying power of baked goods, a few days later I pulled a few of the spirals out of the freezer for a morning oven warm up for family guests. Delicious. There were two left which we wrapped in parchment and dared to leave out at room temp until the next morning. Another short warm up and they were still great. Good deal!

I had some of my first Janjigian test slices in the freezer along with some of the K-amann slices made with my recipe so Steve and I did another test a couple of weeks later. After a thaw/warm up of about 15 minutes in a 325º oven, we found the first version (seen on the right below) greasy, tough and not very tasty. The second was flaky with a nice texture and all around better flavor.

Mine on left

On a final note, here’s a bit about cleaning the work surface after the sugar rolling. It gets pretty messy. I prefer butcher block (my fave for all things dough) but other surfaces like Corian, granite, stainless are all much easier to clean. I do have a large polycarbonate type cutting board that I can use too, but I opted for the wood this time.

ready for cleaning

NOTE: This is about the only situation in which I rinse my rolling pin quickly under warm water to get the gooey sugar off. Pat it dry and let it sit out on a counter to dry fully. Otherwise after usual dough rolling in flour I simple rub any dough particles and flour off the pin until the next time.

For the sugary surface I use my bench or bowl scraper to push off all the loose debris into a waste basket. Then rub the surface with pieces of lemon, sprinkle with kosher salt and even a little flour to help soak up the moisture and let sit for awhile.


Rub it around to give the surface a gentle scouring, then scrape all the stuff off with a bowl scraper, wipe with a damp cloth and let air dry. The butcher block likes a mineral-oiling once in awhile too, which I might do every few months.

Lemon TIP: when I’ve zested lemons for whatever purpose, I then juice them, pour the juice into ice cube trays and freeze. The cubes are great when you need a tablespoon or two of juice for a cooking or baking project.

I then chop up the zested lemons into chunks and bag them up for the freezer. Throw a few into the garbage disposal every once in awhile to freshen things up or use a few chunks for the above cleaning process.

I think I’ve said enough folks! Happy spring and happy baking!!

just one bluebird of happiness!

Sesame brioche rolls

Hmmmm . . . more sesame you say? This time let’s talk tahini brioche. While I don’t always have tahini on hand, once purchased and used for its intended project, it sits in the cupboard waiting. I think Steve and I bought a jar some weeks back to make a dressing or marinade for something. Fortunately the shelf life is good, but I don’t like to let it linger too long before figuring out ways to use it up.

Always up for trying a new brioche recipe, I thought I’d give this one a try. As was true of the sesame cumin crackers of which I wrote recently, the recipe comes from Sofra, the popular middle Eastern bakery/cafe in Cambridge MA. It was presented in the holiday 2018 issue of King Arthur Flour’s erstwhile magazine “SIFT”, a beautiful, glossy presentation of all things baking and pastry. Please note - all credit goes to Sofra and King Arthur - I’m simply here to share my experience as I went through the steps.

i love a buttery brioche and have tried and tweaked many a recipe. My current go to recipe involves the usual long mixing time for this enriched dough, followed by an overnight rest in the fridge before dividing, shaping and baking the intended rolls or buns or whatever. The primary difference with Sofra’s is the first step of making a sponge before mixing the final dough. A sponge belongs to the family of pre-ferments like poolish, biga, pâte fermentée and levain and is intended to give the dough a chance to develop more flavor as well as give it a longer shelf life.

After a quick review of pre-ferments in Rose Levy Beranbaum’s “The Bread Bible”, as well as a few recipes that utilize the sponge approach, I realized that the sponge in this brioche sits for a short 30 minutes. It seems that 1-4 hours at room temperature or even overnight refrigeration are more typical, buuuuuut . . . . . I opted to follow the recipe - you gotta try, right!

The image below shows my mise with the sponge not quite at the 30 minute stage (as you see above).

OK - let’s go through the steps. For the sponge blend together 60 ml / 1/4 cup tepid whole milk, 7 g / 2.25 teaspoons instant yeast, 1/2 teaspoon sugar in the bowl of a stand mixer; once the yeast has dissolved, whisk in 2 large eggs and stir in 130 g / 1 cup all purpose flour.

Sprinkle another 65 g / 1/2 cup all purpose flour over the top of the mixture.

Cover and set aside for 30 minutes until the top flour layer is cracked, a sign that the yeast has started its work.

Now add to the sponge: 227 g / 1.75 cups all purpose flour, 50 g / 1/4 cup sugar, 10 g / 2 teaspoons salt, 3 large eggs, 1 large yolk and 110 g /~1/3 cup well stirred tahini. Mix on low speed with the dough hook to bring everything together. Then increase to medium for 8-10 minutes until the dough starts forming around the hook.

Scrape down the sides and give it a high speed mix for a minute more.

On medium speed add half (100 g) of the cold, cubed butter; mix until incorporated; add the remaining 100 g butter and mix about 10-15 minutes more until silky smooth. Give it one more minute on medium high - you want the dough pulling away from the sides of the bowl.

Oooooooh - love that sheen!

Lightly butter a 3 or 4 quart bowl or container, place the dough in and press into a rectangle. Fold the edges in, turn the dough over and press again into a rectangle. Cover or tightly wrap and refrigerate 6 hours or overnight. Being such an enriched dough, it doesn’t tend to rise too aggressively.

Here it is the next morning. Rise and shine!!

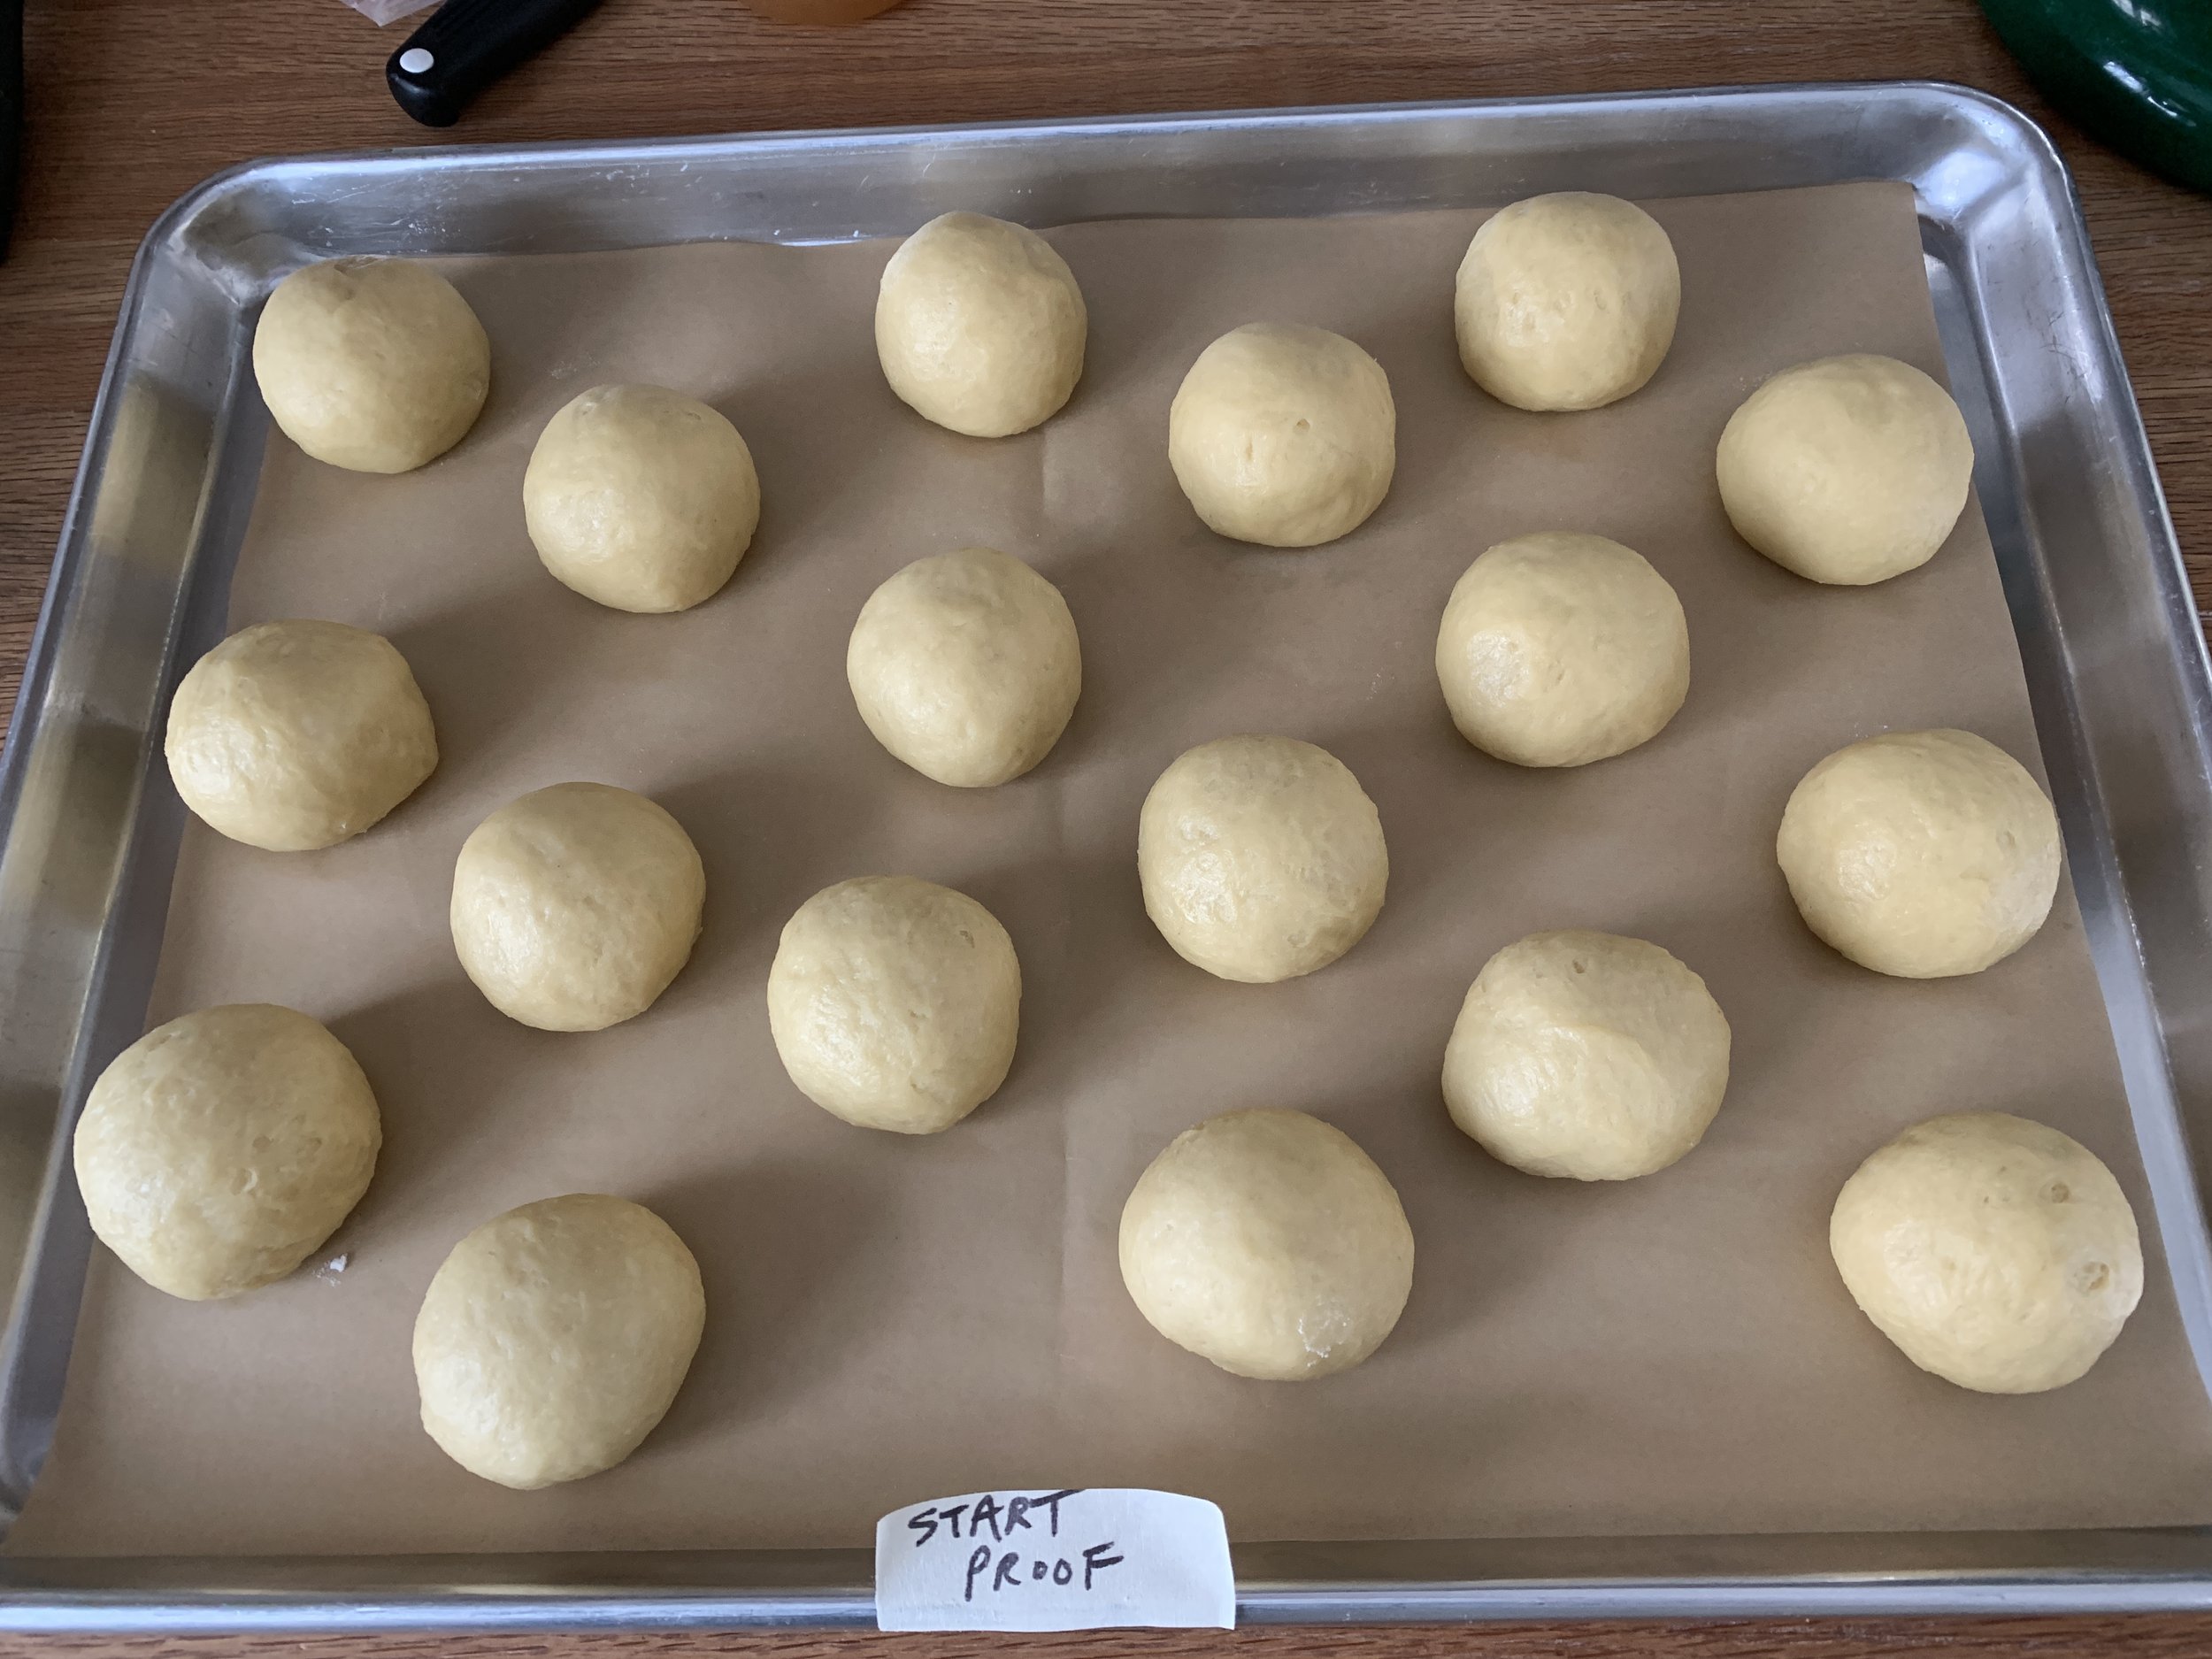
In general when shaping brioche dough it’s best to keep it cold, so leave it in the fridge until you’re ready to go. I envisioned a smallish roll so I figured about 60 g / 2 ounces for each piece (Sofra’s yield is a dozen rolls, making each a generous 90-ish g each). My total dough came to 1100 g; divide that by 60 g which yields 18 rolls. Sounds good to me.

Divide the dough and shape each piece into snug balls.

Place rolls on a parchment lined sheet pan. NOTE: Sofra’s recipe directs use of a buttered 9 or 10” springform pan, tucking the rolls in and ending up with pull-apart rolls.

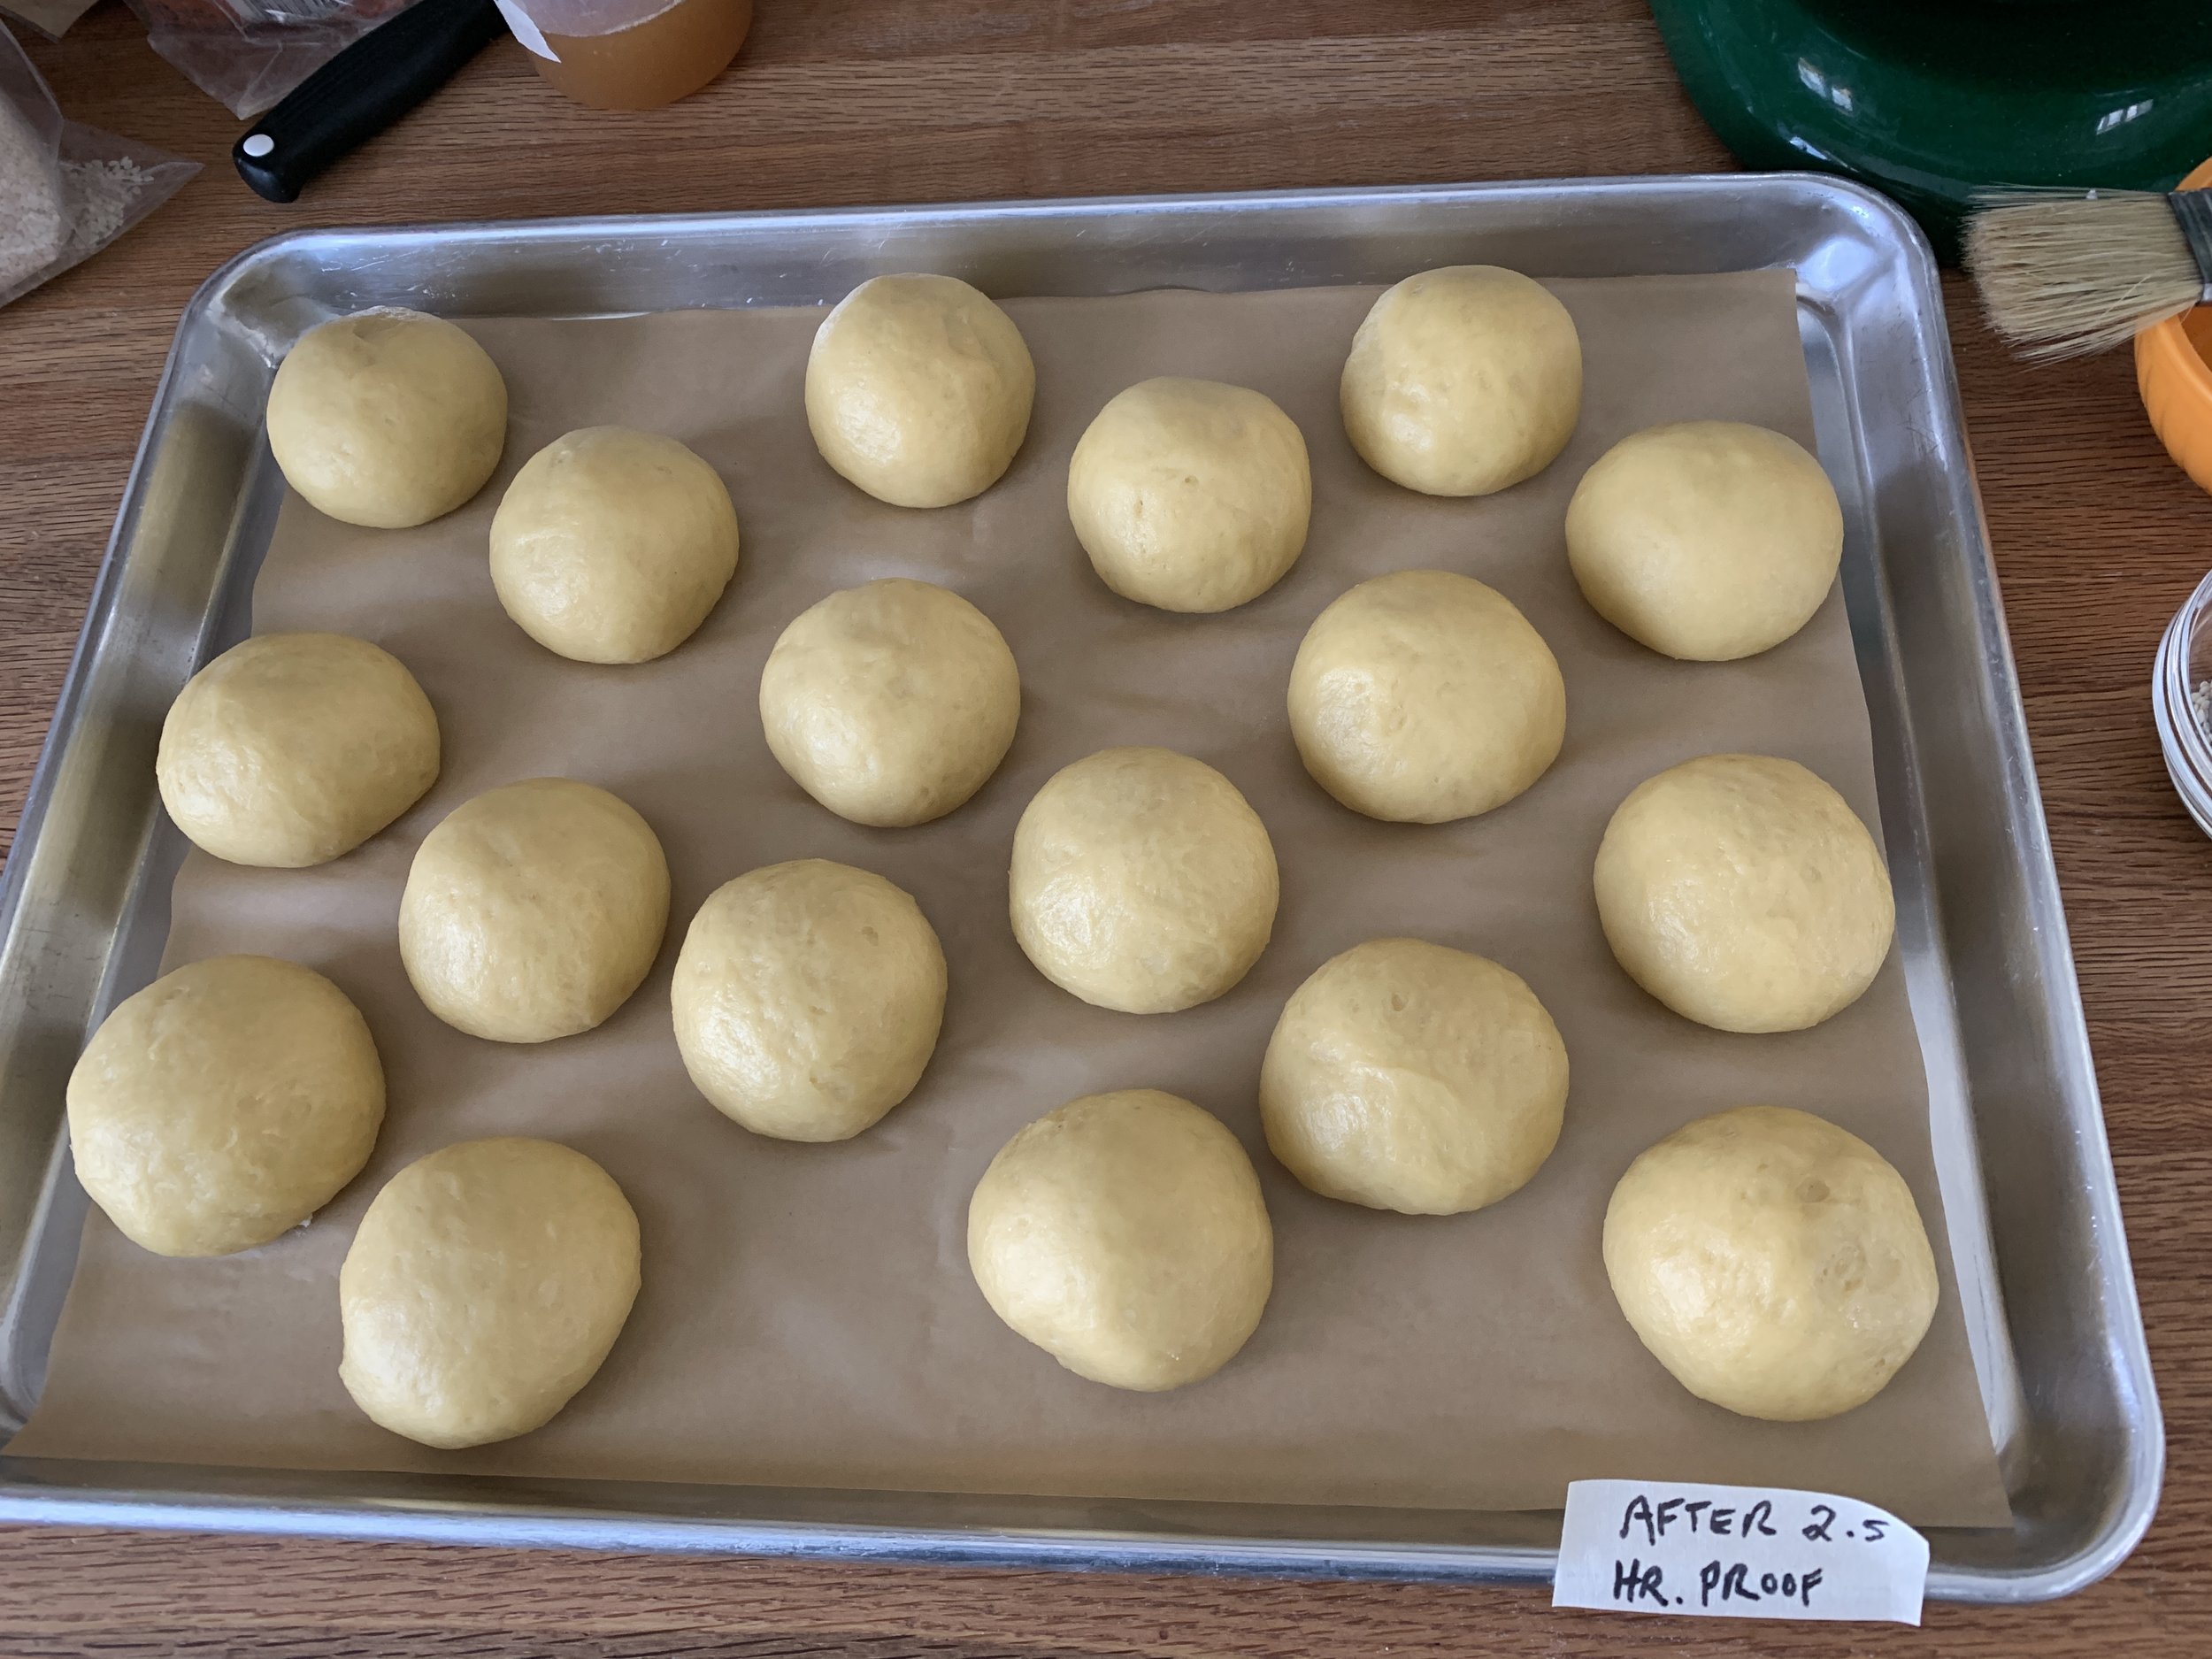
Cover with lightly buttered plastic wrap and let rise 2 to 2.5 hours. On a cold winter day and in my kitchen at 69ºF, I give them the longer rise. Since brioche is so enriched, it needs plenty of time and won’t appear to rise as robustly as lean yeasted doughs. Toward the end of the rise, heat your oven to 350ºF.

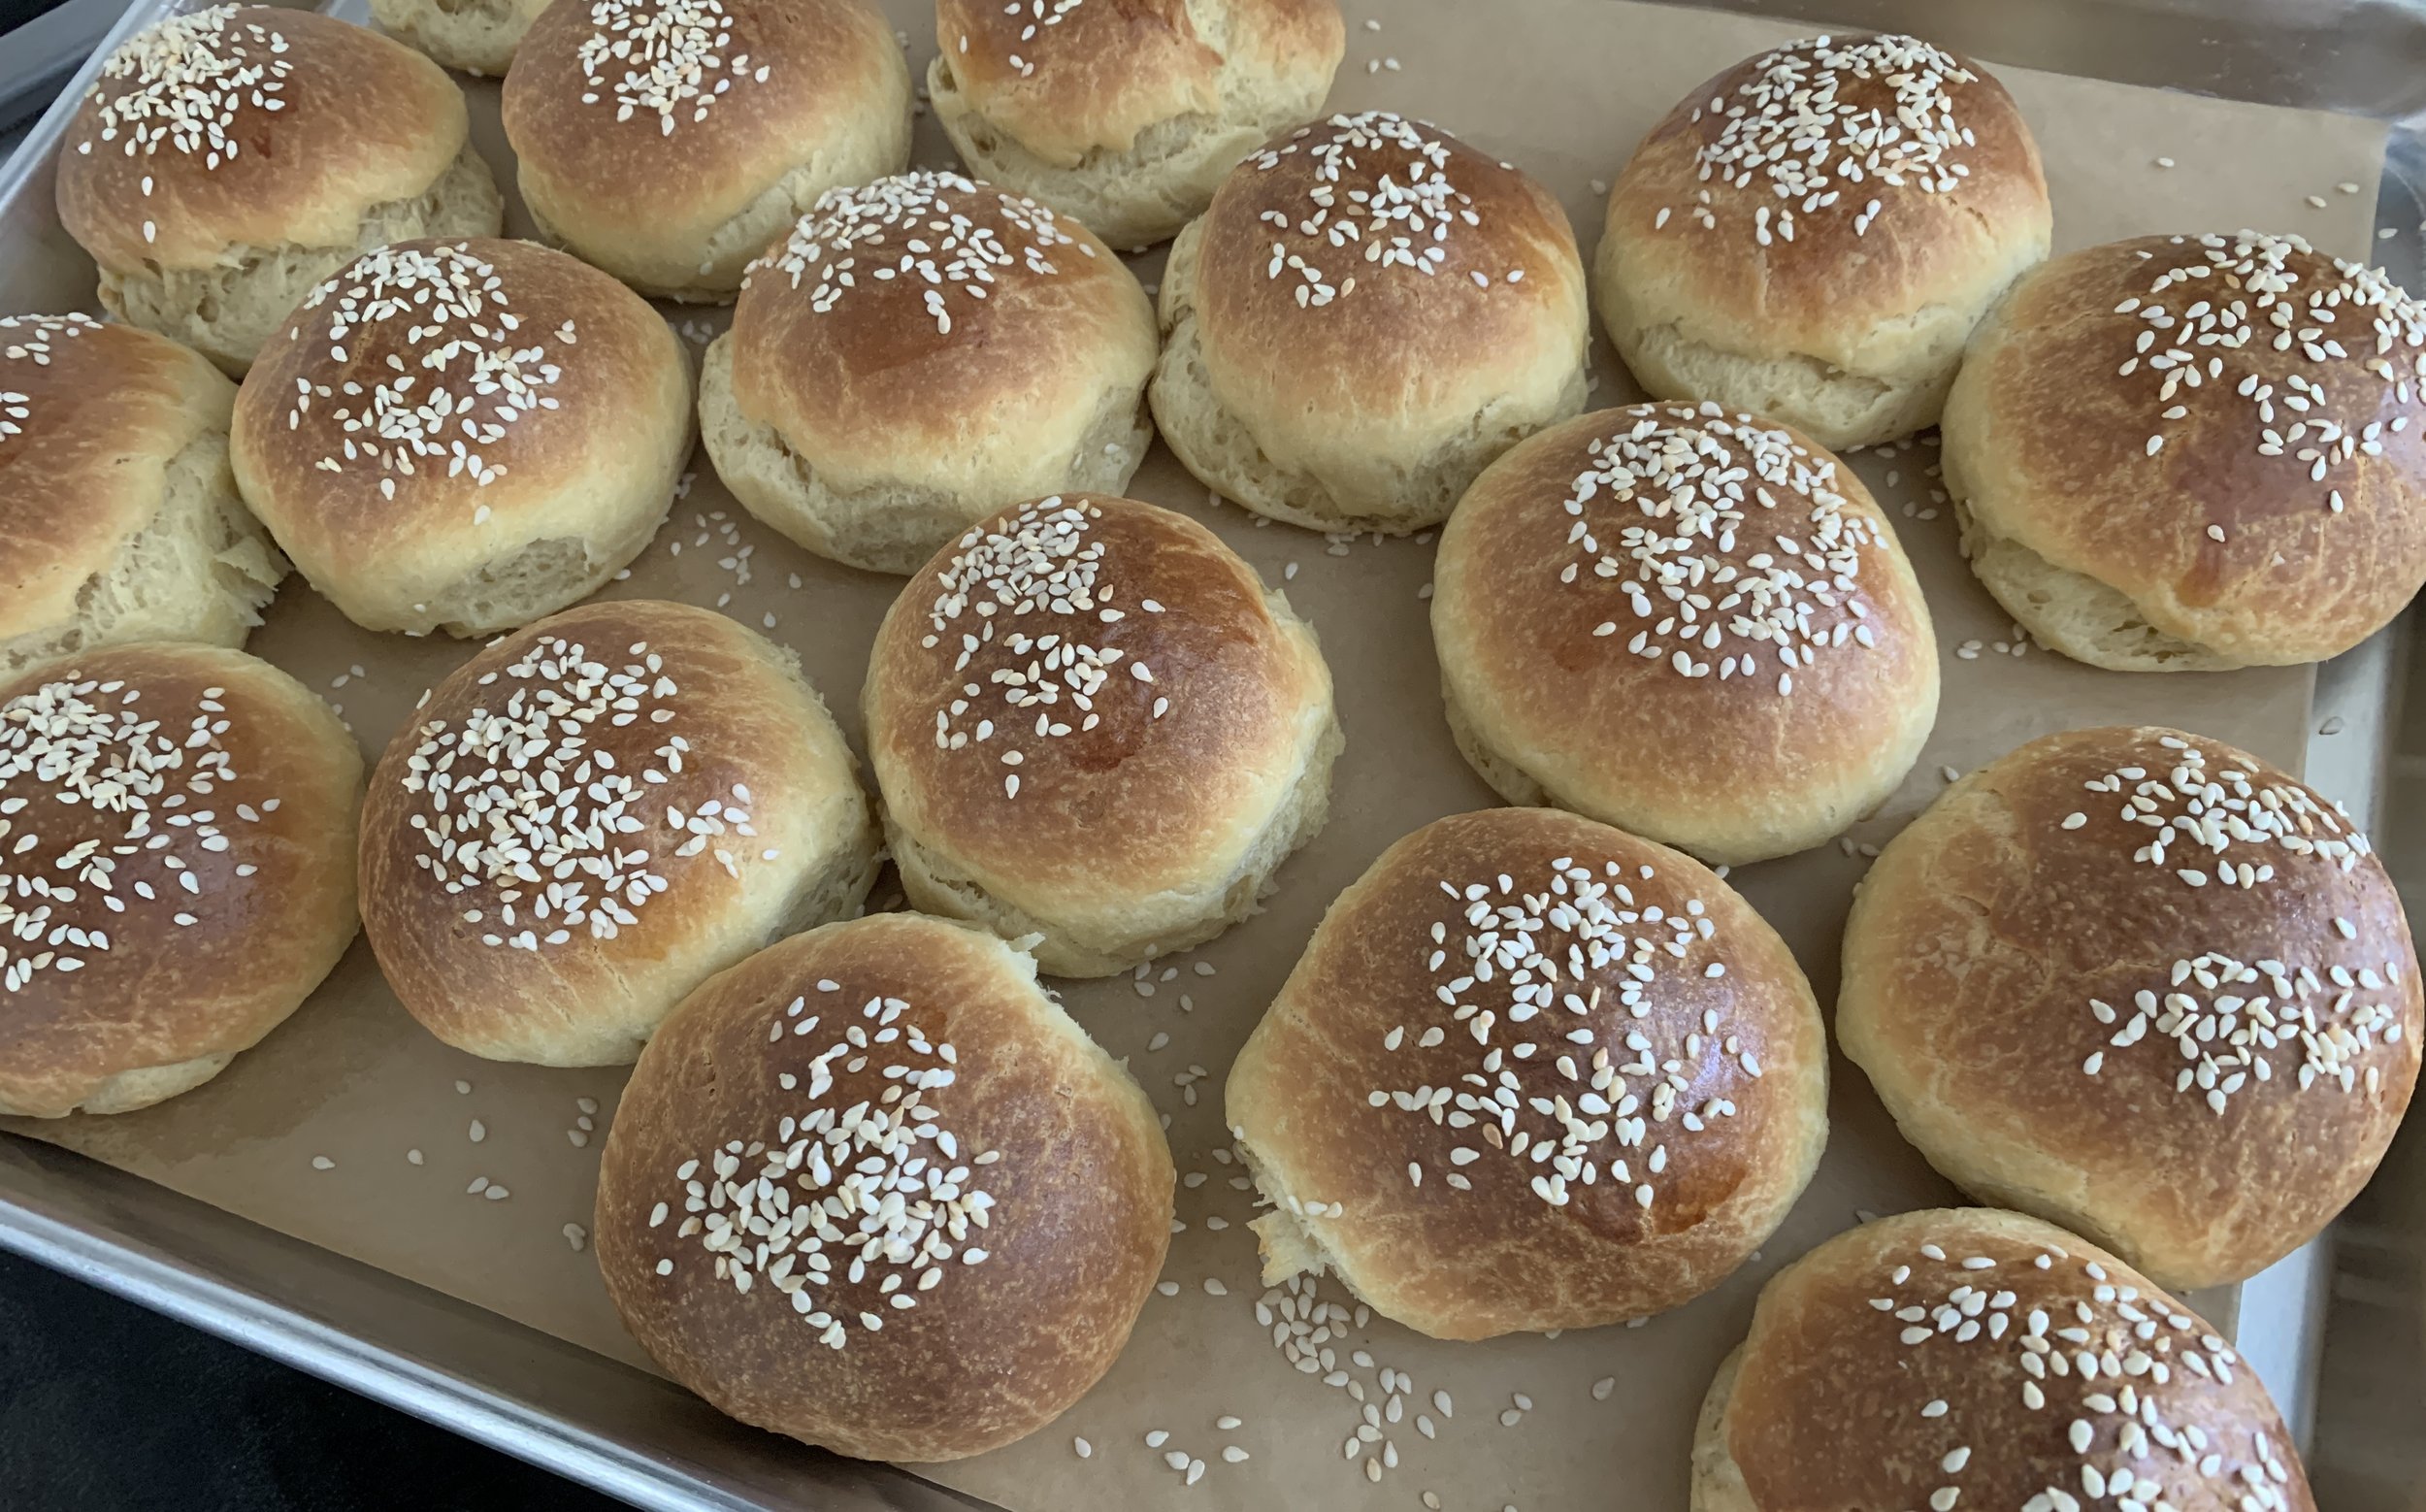
Brush the tops with a bit of egg white (or water or milk) and sprinkle with sesame seeds.

Bake about 30-35 minutes until nicely browned (internal temp 190ºF). Cool and enjoy!

Of course Steve and I had to taste test a warm roll with a drizzle of honey (good!) and followed that the next day with sliced/lighted toasted versions served along side (or sandwiched with!) Sunday morning scrambled eggs. Yummy.

These will keep for several days well wrapped but I chose to freeze the majority of my batch (dinner rolls coming up?). I’m imagining a tasty chicken salad sandwich or sliced/cheesed up and broiled to go along with some of the great soups Steve has been making lately. Yes indeed.

Meanwhile , in spite of winter’s attempts to hold on, we’re getting little whiffs of spring - red wing blackbirds, the sandhill cranes who hung around all last summer have returned, pussy willows are starting to open and there’s a different feel in the air. You just know it.

Take care until next time!

Sesame cumin crackers

Nothing fancy here folks but these babies are delicious! My first foray into baking with chickpea flour, I came across this recipe when browsing back through some old issues of SIFT magazine (Holiday 2018, No. 12) from King Arthur Baking Company (King Arthur Flour back then). The company published this beautiful magazine over 5 years, 3 issues per year, but, alas, they stopped with the holiday issue at the end of 2019. I have all of them except the very first and they tell me it’s not available. I did find an old press release with a PDF of the first 5 pages and also this link to what’s in that first issue if you’d like to check it out.

This cracker recipe comes from Sofra, the popular middle Eastern bakery/cafe in Cambridge MA. Steve and I have experienced some of their goods in past years, since it’s not far down the road from Mt. Auburn cemetery. During our Providence days, we would occasionally take a drive to stroll the beautiful grounds, enjoy the arboretum and pay our respects to the likes of Henry Wadsworth Longfellow, Dorothea Dix, Winslow Homer and Isabella Stewart Gardner. There’s a great view of Boston from the higher elevations, and birding is popular too. A calming place!

The dough is simple to put together but plan ahead since you roll out quarters of the dough, stack them between parchment and chill them for at least 4 hours or overnight before cutting and baking.

Here’s the recipe: In a small bowl blend 3/4 cup buttermilk with 2 tablespoons tahini (be sure and stir it up well first!). In the bowl of a stand mixer with the paddle combine 227 g / 1.75 cups all purpose flour, 50 g / 1/2 cup chickpea flour (I use Bob’s Redmill), 1 tablespoon sugar, 1 teaspoon kosher salt, 1 tablespoon ground cumin, 1/4 teaspoon ground allspice and 113 g / 4 ounces cold unsalted butter cut in 1/4” cubes. Blend on low until butter is in small pieces then add the buttermilk mixture and mix to a wet dough.

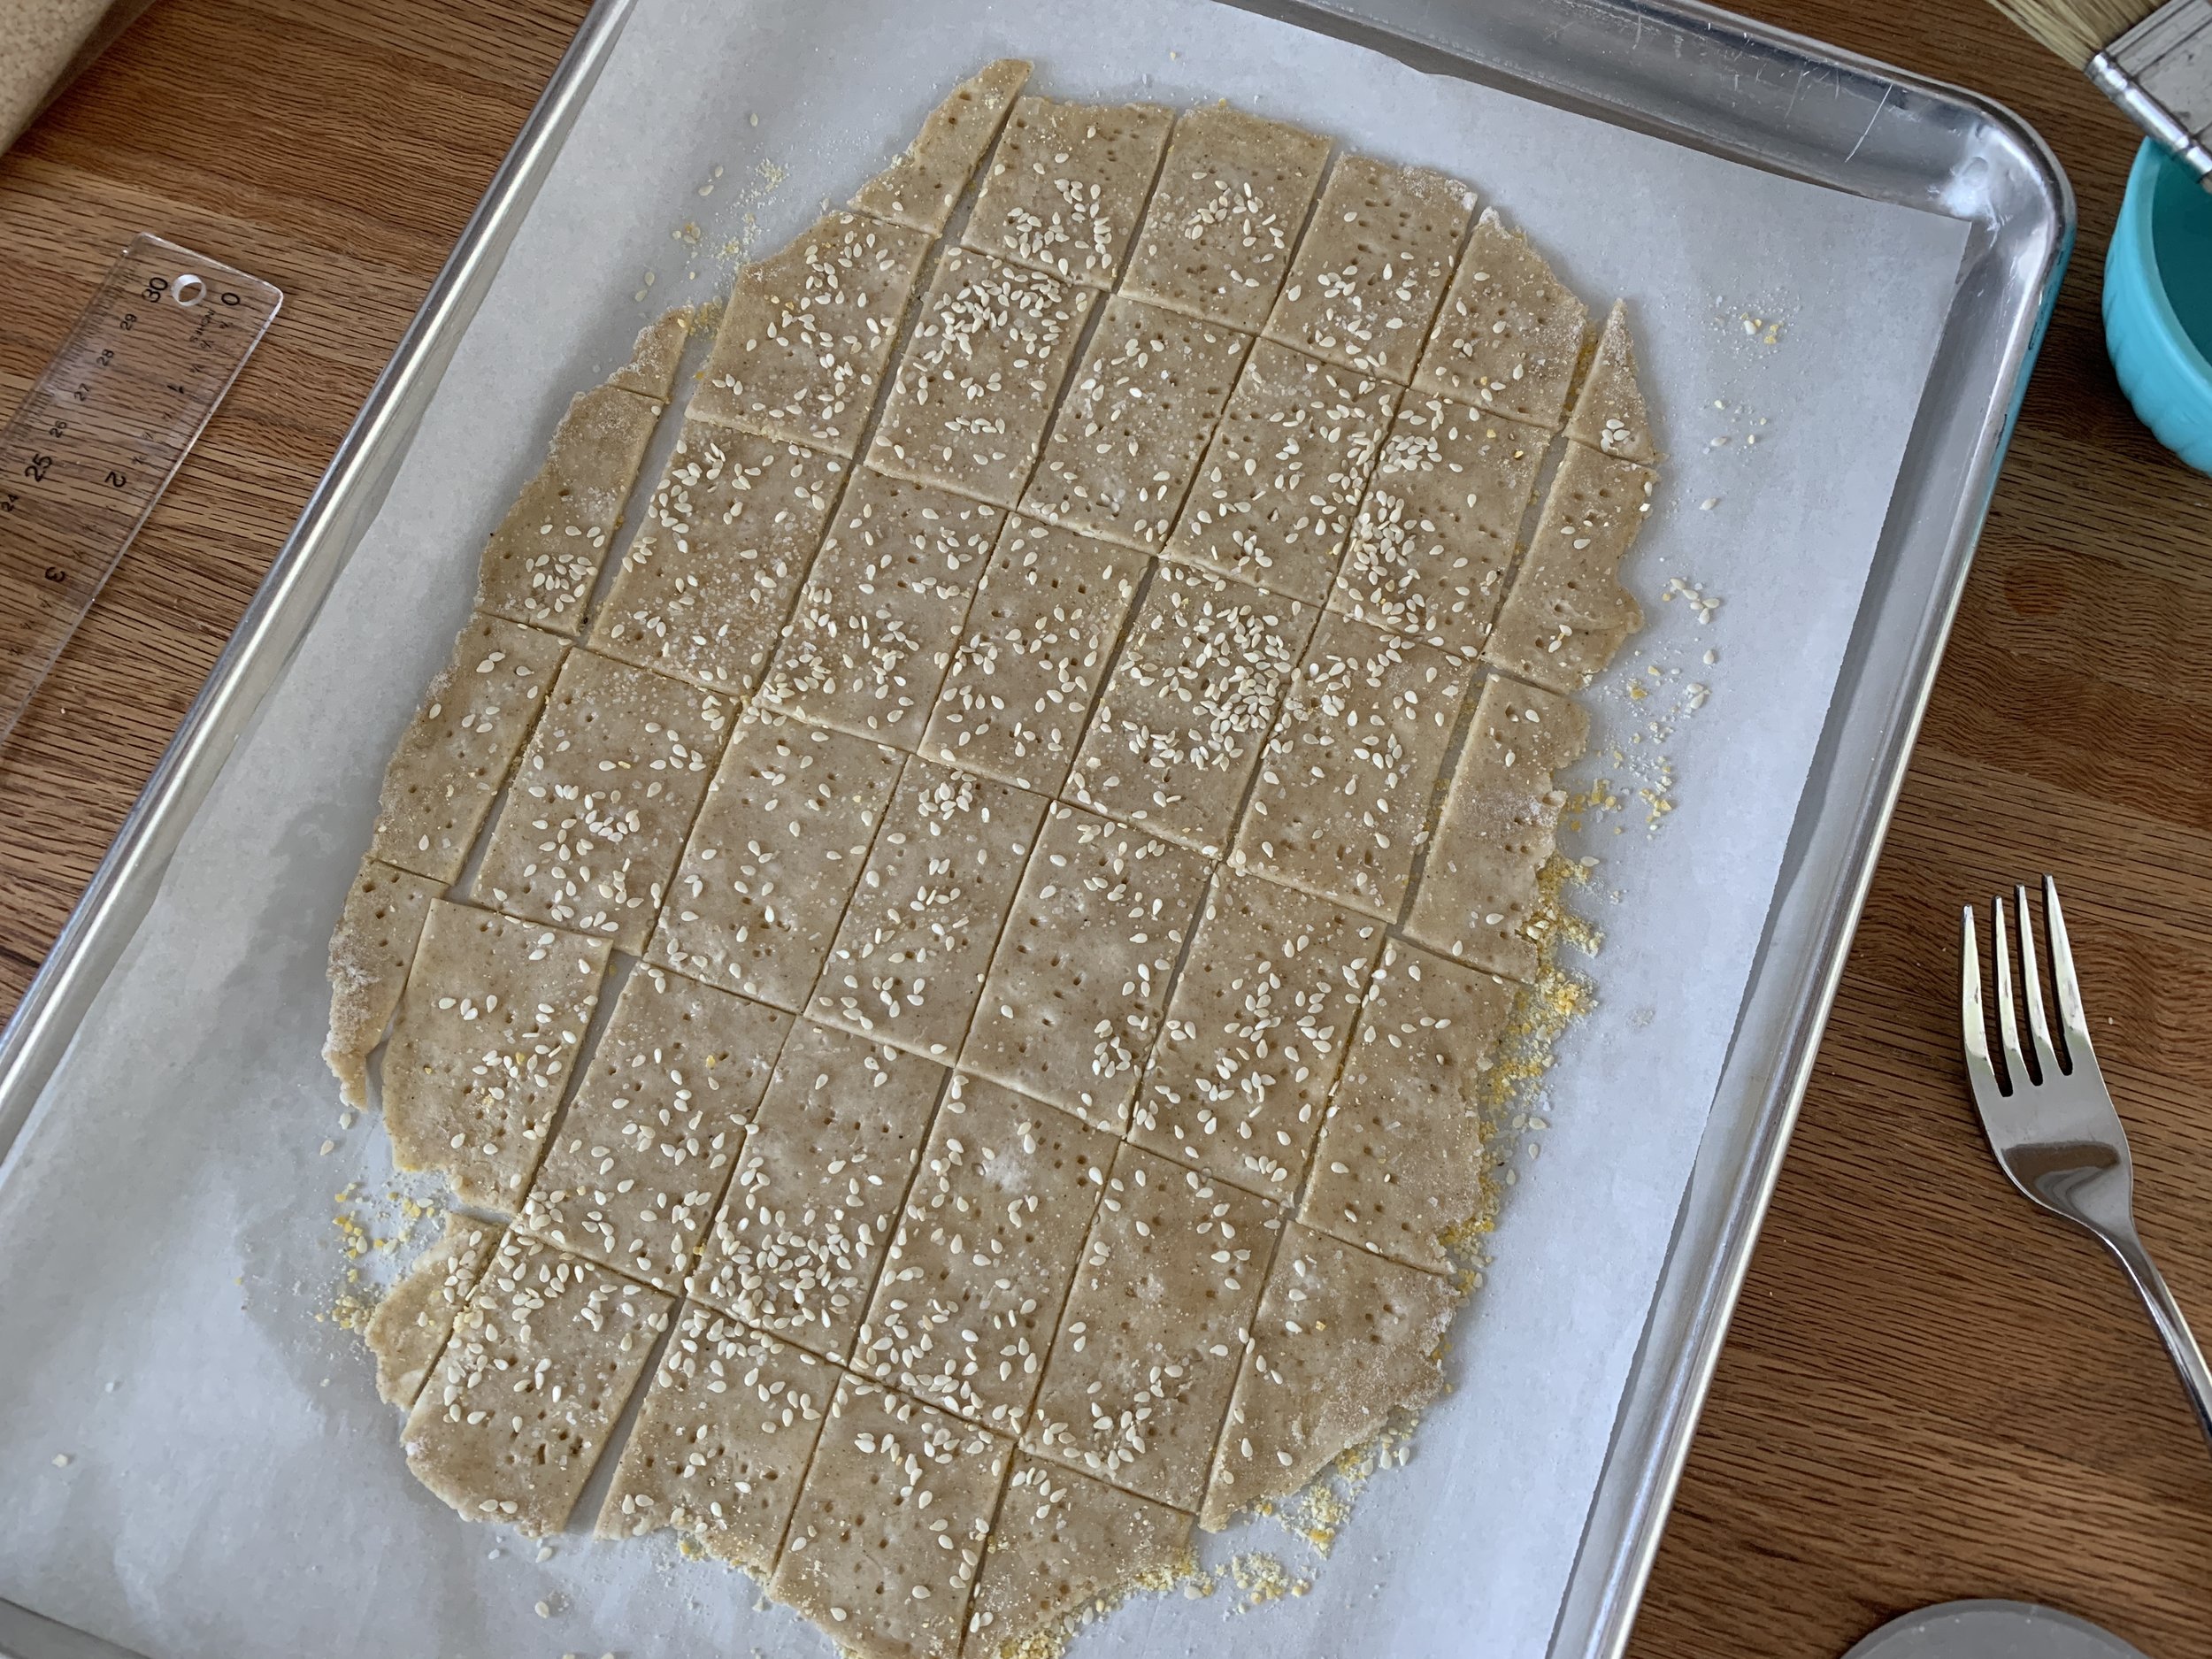
The dough is pretty easy to handle when the work surface is properly floured. Divide the dough in 4, keeping the waiting quarters in the fridge as you roll out one at a time. Roll each quarter to a 12”x13” (ish) rectangle - mine was pretty loose-y goose-y since I envisioned my crackers would end up in a variety of shapes and sizes, and I didn’t mind some rough edges. The main thing is rolling the dough nice and thin (1/16”) for better crisping up during the bake.

Line a half sheet pan with parchment, sprinkle with cornmeal (or semolina) and place the first rolled out dough quarter on it. Place a second piece of parchment on the dough, sprinkle again with cornmeal and place the rolled out second quarter on it. Repeat with the other two portions. Cover with plastic and refrigerate 4 hours or overnight. I chose overnight.

When ready to bake, heat the oven to 350ºF. Have a teaspoon of kosher salt and 2 tablespoons sesame seeds on hand. Lift one of the dough portions on its parchment onto an empty sheet pan. Fork prick it all over, brush lightly with water and sprinkle 1/4 teaspoon kosher salt and 1/2 tablespoon sesame seeds over the top. Cut into squares or rectangles (or whatever shape and size you’d like) with a pizza cutter.

Repeat the above with the next batch of dough on a second empty sheet pan. NOTE - I baked two pans in one go but if you prefer to bake one at a time, go for it.

If you only have one or two half sheet pans and need to rotate batches, pull the baked sheets off onto cooling grids and let the pans cool completely before you continue the above steps with the remaining dough quarters.

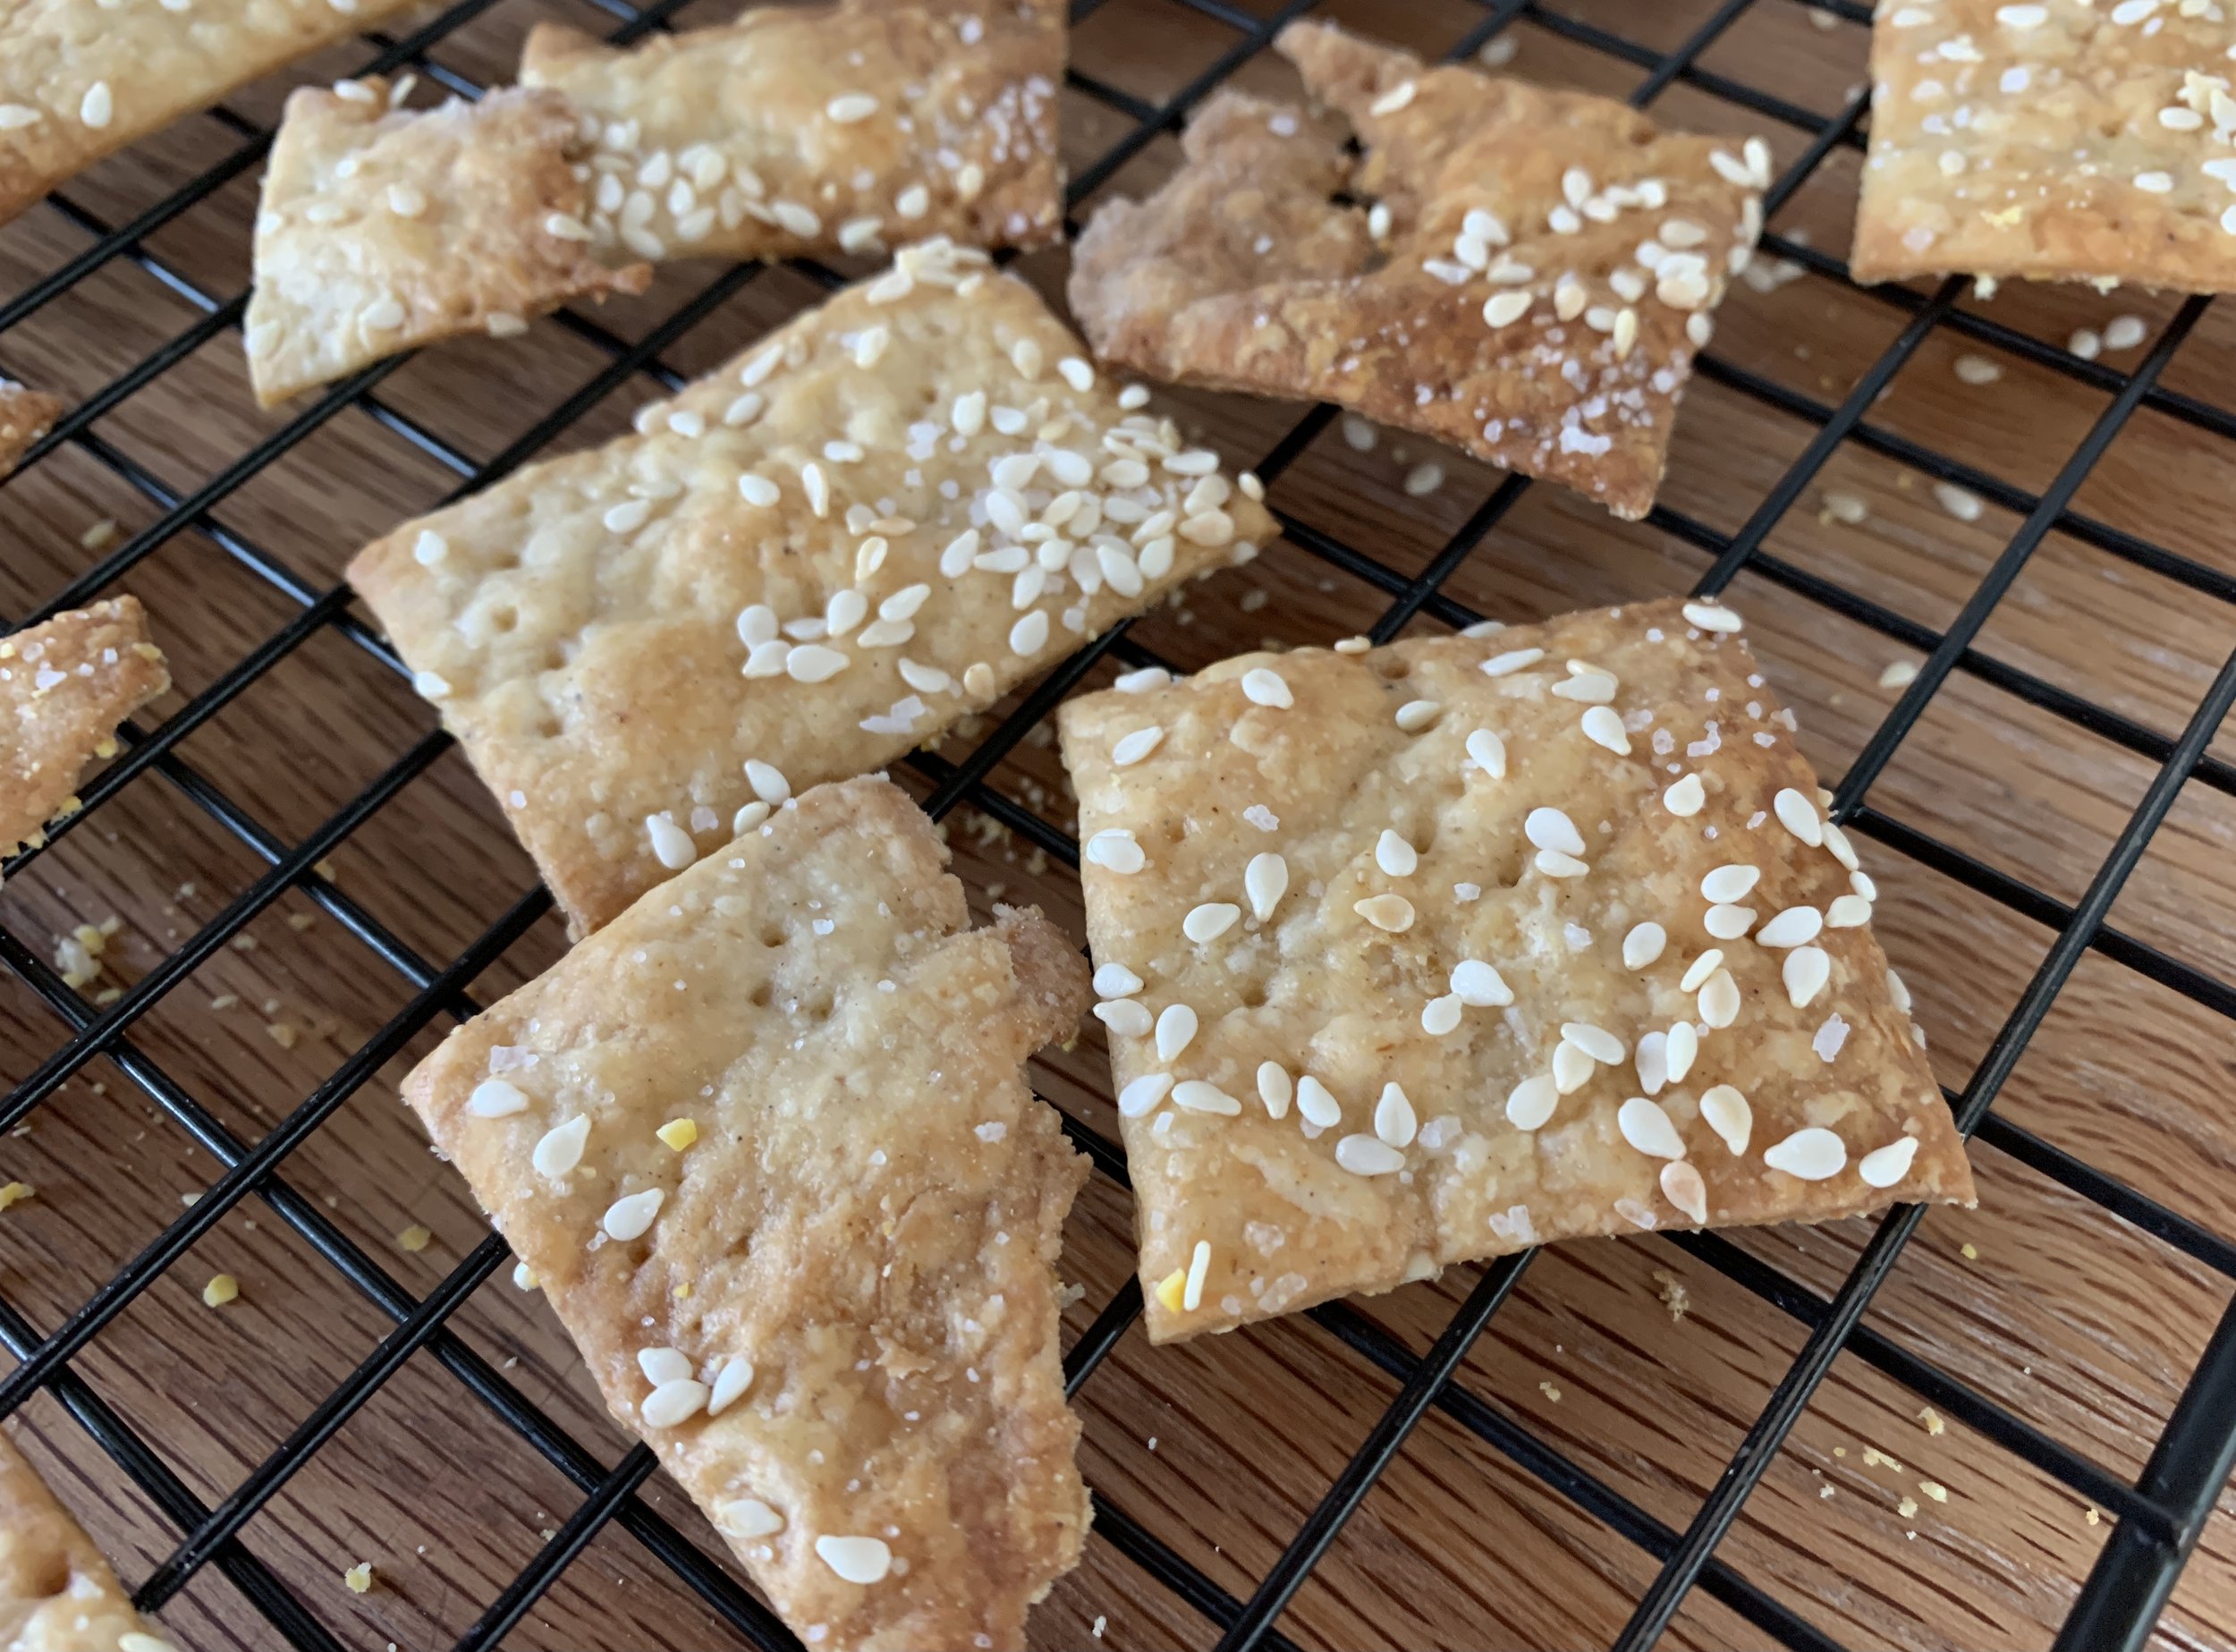
Bake about 15 minutes, rotating your pans half way through. I baked mine a bit longer since they weren’t deeply browned and crispy at the 15 minute mark. Remember - all ovens are different! Let cool then recut or break apart and enjoy.

Steve and I found them very tasty with a schmear of hummus or a nice slice of Cotswald cheese. Yum. One note - the medium grind cornmeal that I used for “dusting” the parchment sheets had too much coarse crunch for our tastes. I’d suggest using either fine-grind cornmeal or semolina to 86 that problem.

They keep well in a closed container for a good week. Try ‘em, you’ll like ‘em.

Have a wonderful week!

Baguette

IMG_0707.jpg

This is a long one folks - sometimes it’s just how I roll!!

Well it’s about time. Do you know I’ve never made baguette at home just for the two of us? The closest I’ve come was ficelle which is essentially a skinny baguette, and that was tasty indeed! Even though I’ve made many versions while attending various bread classes over the years and have also taught my own bread class to folks, I don’t know what took me so long to make this classic French bread for our own larder. Perhaps it’s the fact that I finally bought a baking stone some months back and felt it was time to put it to the baguette test.

What makes a good baguette you might ask? They say it should have a creamy, open crumb with a crust that crackles as it comes out of the oven. Yes indeed!

FA79284F-7EA6-403C-BDC8-8992C08F6AE8.jpeg

It’s taken me awhile to get this post together. I started the project back in April early in the pandemic with nothin’ but time on my hands. I chose three different recipes: King Arthur Flour, Le Cordon Bleu Paris and another from Paris boulanger/chef Benjamin Turquier of 134 RDT on rue de Turenne in the 3rd arr.

I had made both the KAF (now King Arthur Baking Company) and LCB versions in classes I attended at those establishments in recent years and since then to classes I’ve taught to others. The RDT recipe came from a France Magazine article that I saved from several years ago and has been sitting on my to-do pile ever since.

During my stage at Pâtisserie Pascal Pinaud in Paris, I can’t help but remember the early attempts at shaping baguette - not a pretty picture. It takes a while to develop a feel for the dough, rolling with just the right amount of pressure to elongate and keep it even with tapered ends.

0BCD1CB1-DA0B-4AC7-B842-2FEC287A2B9F.jpg

And the scoring? Oh my - that’s something I’m still learning! Just the right touch and don’t over think it - efficient, purposeful, a light hand, don’t drag and NO hesitation - those are the keys in my book. (Psssst . . . the texture of the dough makes a big difference - softer means more difficult to score, firmer means easier.) You may be able to tell the difference in the next two photos - the first shows a softer, more wrinkly dough and in the second the dough looks more firm and smooth.

KAF dough: hmmmm . . . not so good with too much drag and hesitation on the top loaf

KAF dough: hmmmm . . . not so good with too much drag and hesitation on the top loaf

LCB dough: much better - less drag, more purpose!

LCB dough: much better - less drag, more purpose!

On to the process!

This isn’t intended to be an in depth bread primer, but I hope it gives you a decent look at how baguettes are created. We’ll look at the steps and I’ll make a few comparisons amongst the three recipes. Spoiler alert - they’re ALL delicious!

When comparing recipes, especially for breads, it helps to sketch out the timelines for proper planning. Don’t get hung up on the nitty gritty details below, but you can see that the process can vary anywhere from 1 to 3 days. That made it much easier for me to accomplish the baking in a staggered fashion. Nice. I like that.

81D33DD8-4552-4811-89A1-A76F20F6A46C.jpg

Here’s a quick summary of the typical basic steps of bread making: Weigh ingredients. Mix. Knead. First proof. Pre-shape. Rest. Shape. Second proof. Score (sometimes). Bake. Cool. Enjoy!

Bear with me here - technical stuff coming up.

Now remember, a basic lean bread dough consists of flour, water, yeast and salt. I’m sure a number of you are familiar with baker’s percentages which uses the weight of flour in a recipe as the 100% ingredient. A typical straight bread dough made by the direct method (no preferments or long fermentations) will contain about 60% of the flour weight as water, 3% as fresh yeast (~1.5% dry yeast) and 1.5-2% as salt. Example: 500 g flour/300g water/7-8 g instant yeast/8-10 g salt.

So basically you can take any weight of flour you’d like and figure out the quantities of the other ingredients - pretty cool, eh?

Adjust the hydration factor upward and you’ll experience the different feel and ways of handling a wetter dough. The KAF recipe uses 72% hydration and thus is the wettest and stickiest of all three. It can be a challenge the first time you work with it so it bears repeating a few times to get the feel. With higher hydration dough you’ll often see the “stretch and fold” technique used to develop the dough’s structure. A tip: when working with wet dough, rather than dusting with flour, oil or wet your hands to reduce sticking.

The LCB dough hydration is 64% and the one I found the easiest to handle while the RDT comes in at 70% and is less sticky than KAF.

Both KAF and LCB involve making a poolish which combines equal weights water and flour with a small amount of yeast and allowed to ferment at room temperature (or fridge) for a period of time. The amount of yeast added depends on how long you wish your poolish to ferment - shorter time/more yeast, longer ferment/less yeast.

The RDT recipe doesn’t use the poolish approach but utilizes a step referred to as autolyse - flour and water are mixed then allowed to sit for 30 minutes or so to hydrate the flour. Then add yeast, knead, add salt, knead and rest 20-30 minutes before refrigeration of 10-48 hours. Longer fridge, more flavor development.

As is usual in the culinary and pastry worlds, there are so many sources out there explaining the nuances that it can become overwhelming. If you’re starting to deep dive into bread making, I highly recommend a couple of good bread tomes like Jeffrey Hamelman’s “Bread”, Rose Levy Beranbaum’s “The Bread Bible” and any of Peter Reinhart’s books. The list goes on and on and on . . . . . So much to learn.

Let’s focus more in depth on the recipe from Le Cordon Bleu which is a 3 day process and we’ll look at the basic steps too. Sound good?

1A6C57C4-BD54-4E40-BD7D-8266BABD616C.jpg

When starting with a poolish and planning a long fermentation, as with this LCB recipe, you’ll see the very small percentage of yeast used. The total flour in the full recipe is 1500 g yet the total instant yeast used is only about 5 g total which comes in at a paltry 0.3%. Buuuuuutttt . . . . . it’s the longer time that this dough ferments that makes all the difference. Give the yeast enough time to work and it WILL perform.

For this project I made half of the above LCB recipe since many home mixers are too small for the full quantity (the flour alone is about 11 cups total and the water almost a liter!). Note: my Kitchenaid 6 quart mixer managed the half recipe just fine.

In addition my oven (and home ovens in general) isn’t structured to bake 7 or 8 baguettes at one time on a stone. My baking stone is about 14” x 16” with 20” on the diagonal, and I use a piece of parchment on an overturned half sheet pan (12”x18”) as my peel. That limits the length I can make my baguette - best not to go longer than 16” - as well as the number of loaves I can fit on the peel and stone.

Even though this is a three day deal, the hands-on time is minimal compared to the resting and fermentation that occurs, so it’s easy to carve out a small niche in your schedule to get the process started.

For the half recipe: on day one make the poolish by mixing 250 g bread flour with 250 g cold water and a pinch of instant yeast. Whisk it 1-2 minutes, cover and refrigerate for 24 hours. Below is a good example of a developed poolish - poofy, bubbly and fragrant.

B9500B7D-42F4-4F46-8FA6-AE429583D3A6.jpg

On day 2 mise out 500 g bread flour, 232 g water, 14 g salt and 2 g (just a tad over 1/2 teaspoon) instant yeast then, in the bowl of a stand mixer fitted with the dough hook, combine these ingredients with the poolish. Knead on low speed for 10 minutes. Cover and rest 30 minutes then do a complete fold set (stretch and pull the dough up over itself from top, then bottom, then left, then right) then turn over, ball up, cover and refrigerate for 24 hours.

Day 3 - here’s the dough ready to divide and shape.

767B8525-545E-43C9-8D93-427937918A9A.jpg

I opted for 3 baguettes, each weighing about 408 g, knowing that I could make them an appropriate length for my oven/baking stone. In French boulangeries a baguette may be anywhere from 26 to 39 inches long - whoa - and the diameter is typically about 2.5 inches/6 cm. My baguettes turned out pretty chubby so next time I’ll do four loaves instead of three to achieve a slimmer result.

First shape the divided dough into rough boules and let them rest , covered, for 20 minutes.

2E1482C9-A0E2-4075-84F1-7DA7EDFF30D9.jpeg

Then one by one, flatten into a rectangle and shape a preliminary torpedo (lots of online resources on how to do that!). Give them a 10 minute rest then, starting with the first one you pre-shaped, place your palms in the center and gently but with steady pressure, roll as you move your hands outward to elongate and taper the ends. One down, two to go.

F51BFDE3-C367-4404-9741-46C67E3BD23B.jpg

Place the shaped baguettes on a floured tea towel or linen couche with a few inches between each, then pull the fabric up between the loaves to support them and avoid them sticking to each other.

6E72185B-12EB-4BAA-9B81-440037E87A88.jpg

Cover with another tea towel and let them proof 30-45 minutes. Meanwhile, heat your oven/baking stone to 480ºF (250ºC).

Now for a little bit of a tricky part. You have to gently roll your proofed baguettes onto a narrow wooden board (one by one) and then roll them back onto a floured or cornmeal dusted peel (I use a parchment topped overturned half sheet pan as my peel). Then score them and from there you slide them onto the baking stone (parchment and all if using my method). Whew! A bit unnerving at first but, just like scoring, be purposeful and without hesitation in your movements.

I happen to have a handcrafted wooden cheese board made by an acquaintance of ours - it’s about 15 inches long and was just the ticket for helping me perform this maneuver. I’ve also heard of folks cutting a piece of sturdy cardboard and covering it with some cheese cloth in lieu of a board. Sounds like a great idea!

Snug the board up along side a baguette, lift the towel gently from underneath and roll the baguette onto the board. (NOTE: the next two images are actually the KAF version - I use them here simply to show the board steps.)

ED6C160C-6F78-4925-94EF-C3D01A96C9C9.jpg

Once on the board, simply roll it off onto your peel or sheet pan. Be mindful of the space available to you!

Man oh man - maybe one day I’ll get into the whole video aspect of this stuff!!

Ready to roll off the board

Ready to roll off the board

Now score . . . . . . . . .

7B31BE59-5F42-4959-8B25-40B1BA616CD7.jpg

and slide the baguettes with parchment off the sheet pan and onto the stone with a decisive move. Bake with steam about 25 minutes.

NOTE: If you don’t have a baking stone, transferring board or peel, simply heat your oven with an empty half sheet pan on the lower rack to serve as your “stone”. Place your shaped baguette on a separate parchment lined sheet pan (no couche needed) to proof, covered lightly with a flour sack type towel (be sure there’s enough room between the loaves), then score and pop the sheet pan directly onto the heated pan in the oven. Voilà - no transferring necessary.

NOTE #2: I have a tray that slides onto the lower rack of my oven into which I can pour or squirt water as soon as I’ve placed the loaves onto the stone. That gives me my burst of steam which helps to create a crackling crust. You can also put an oven safe metal tray of some sort on the floor of your oven and pour a cup or so of hot water in it just as you place your baguettes in the oven. Close the door immediately to give that burst of steam.

Pull the loaves out onto a cooling grid and listen for the signature crackle - yes, it’s there. Hooray!!

As you can easily see my loaves baked a bit differently with the top one looking like a humpback whale. A sign of the need to be more purposeful with shaping to tighten the dough up.

My scoring was certainly variable, the middle loaf looking the best.

1FCDF0C5-0092-4FC6-A7B1-0F64650379B3.jpeg

Once cooled, either tear off a piece or slice it up and enjoy with your favorite cheese or jam or whatever floats your boat.

I jotted notes on each recipe. LCB: “great crackle; dough easiest to work with and most springy and elastic of all; nice crust and chew although perhaps a bit more doughy than the other two; wonderful flavor; next time shape more narrow and longer - would do four 312 g loaves rather than three 408 g.

F3111BC6-1DCE-49EB-B604-D4501D049033.jpeg

Here’s the KAF final result. Check out the difference in scoring between the top and bottom loaves.

C8A5E0F9-9997-413F-BCC5-276AA38182F6.jpg

My notes on KAF: highest hydration and stickiest dough thus hardest to work with (this one takes practice folks!); wonderful crackle and crust; deliciously creamy with open spaces.

37D8B886-F7F5-40EF-86D6-710D376D26DE.jpeg

Here’s RDT’s result. Pretty good scoring, eh? You can see the top one is shorter - another instance of not putting the proper pressure on when elongating. Still tasted great!

02247224-56E8-4473-8AC6-E8C040F704D7.jpg

My notes on RDT: 70% hydration; less sticky; scored easily; less crust crackle and not as crusty; delicious flavor, good chew and nicely creamy.

B06F14B3-0DC4-44F7-8167-B2557A3D8A83.jpg

My overall favorite is the LCB recipe primarily for its ease of preparation/handling, plenty of fermentation and flavor development time in the fridge and its wonderful crust and flavor. The half recipe makes about 1250 g of dough from which I made three 408 g baguettes. OPT: four 312 g for a slimmer end result.

In second place is KAF’s recipe which mixes a poolish of 150 g all purpose flour, 150 g cool water and a pinch of instant yeast, then is covered and ferments for 15 hours at room temperature. When ready, the poolish is combined with 311 g all purpose flour, 180 g cool water, 5 g instant yeast and 7 g salt and mixed into a shaggy mass. This is the one that takes some practice working with a sticky dough. The base recipe makes about 803 g of dough from which I made two 400 g baguettes. OPT: three 268 g for a slimmer result.

The RDT half recipe makes about 862 g of dough from which I made three 284 g loaves. Since I’ve come to prefer the poolish approach for this kind of bread, I won’t go any further with this one. Now it’s off the to-do pile.

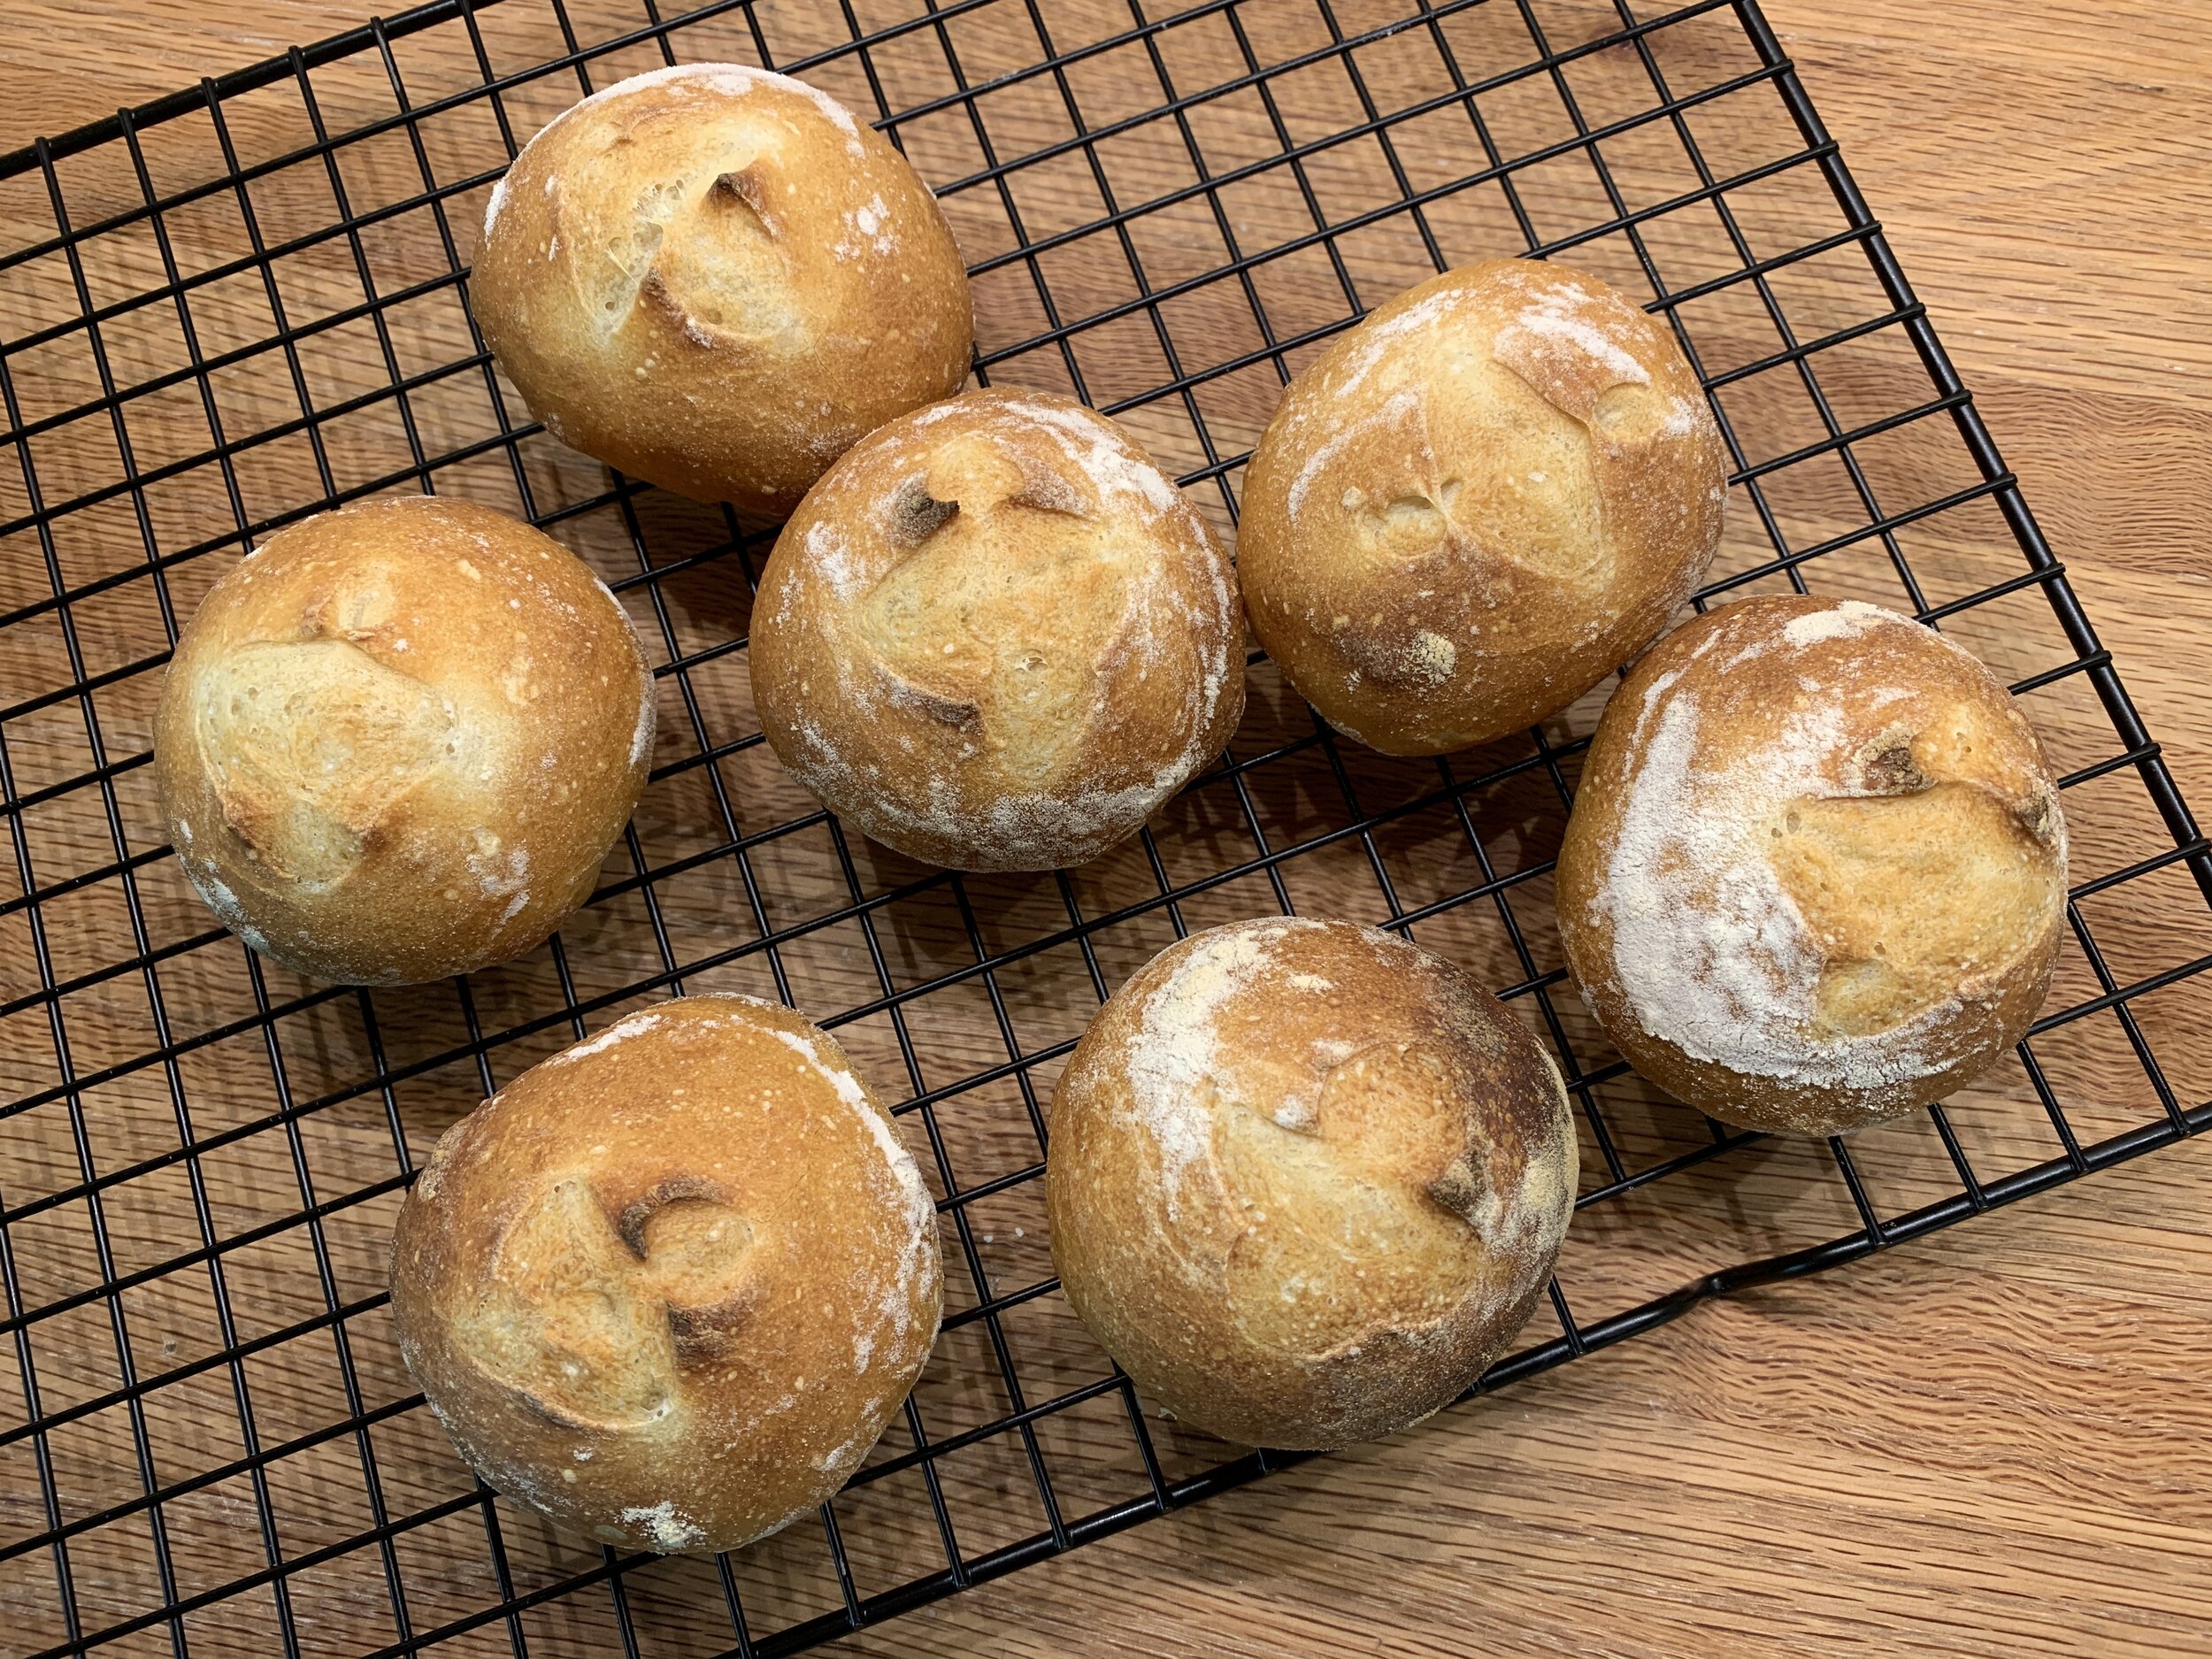
On one final note, I did another batch of the KAF recipe a month or so ago - upped it to 1.5x the recipe (which, BTW, brings it very close to the LCB half recipe aside from the hydration difference), made two 400 g baguettes and eight 50 g crusty rolls. Boy oh boy they were good! I’m still fine tuning the handling of the sticky dough, but next time may drop the hydration down a couple of percentage points just to see how it goes. Why not, eh?

Bottom line on size - going forward I’ll aim for 280-310 g per baguette. That just seems right to me. Why not play around with dough weights for minis or rolls too. Sure thing.

BB4AF680-7B11-4156-B91C-13AA33D62E29.jpeg

Thanks for reading and slogging through all of this. It barely even begins to scratch the surface of the world of baguette. I’m sure I’ve forgotten to include some important tidbits and please don’t hesitate to raise any questions or make any comments about your own experiences with this classic French bread.

Meanwhile stay safe, bake some bread and enjoy the last colors of autumn.

DF3DD905-282A-4E48-9E67-D872F0DBAAAA.jpeg