Kouign-amann: Part 2


OK. Here we are in part 2 of my Kouign-amann review. Part 1 covered shaping two versions of individual pastries. This time it’s the full sized cake version, more traditional in Brittany for slicing and enjoying at breakfast or afternoon tea. Inspired by one of King Arthur Baking Company’s “Bake of the Week” recipes back in January, 2022, I’ve had it in my “I’m-going-to-try-this” pile ever since. My how time flies!

I ended up making two versions of this cake: the first (thanks to Andrew Janjigian and the above mentioned KA Baking Co) utilized a unique approach to the sugar/butter incorporation. I thought it rather messy and the end result not as flaky, lofty or tasty as that made with my usual recipe. If you’d like to give it a try, just click the link on Andrew’s name and you can learn about his approach/recipe. There are always different ways to do things!

my result with andrew janjigian’s version

For the second using my base recipe (enough for two full sized cakes), I used half of the dough for a single cake and the rest went toward cute small spirals that are absolutely delicious!! I simply couldn’t help it. They’re stashed in my freezer as we speak.

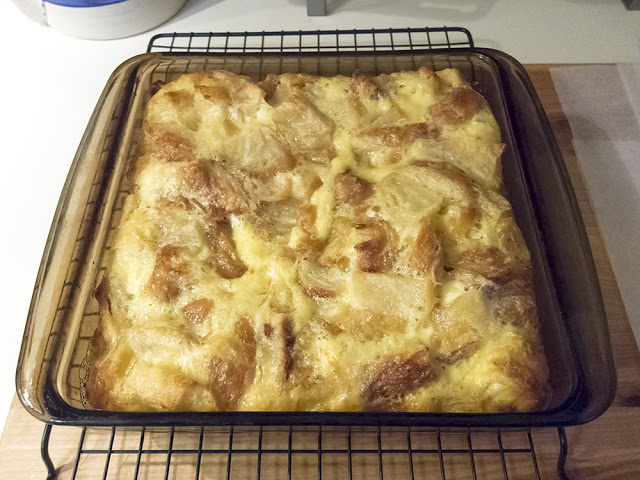
my result with my recipe


yummy spirals

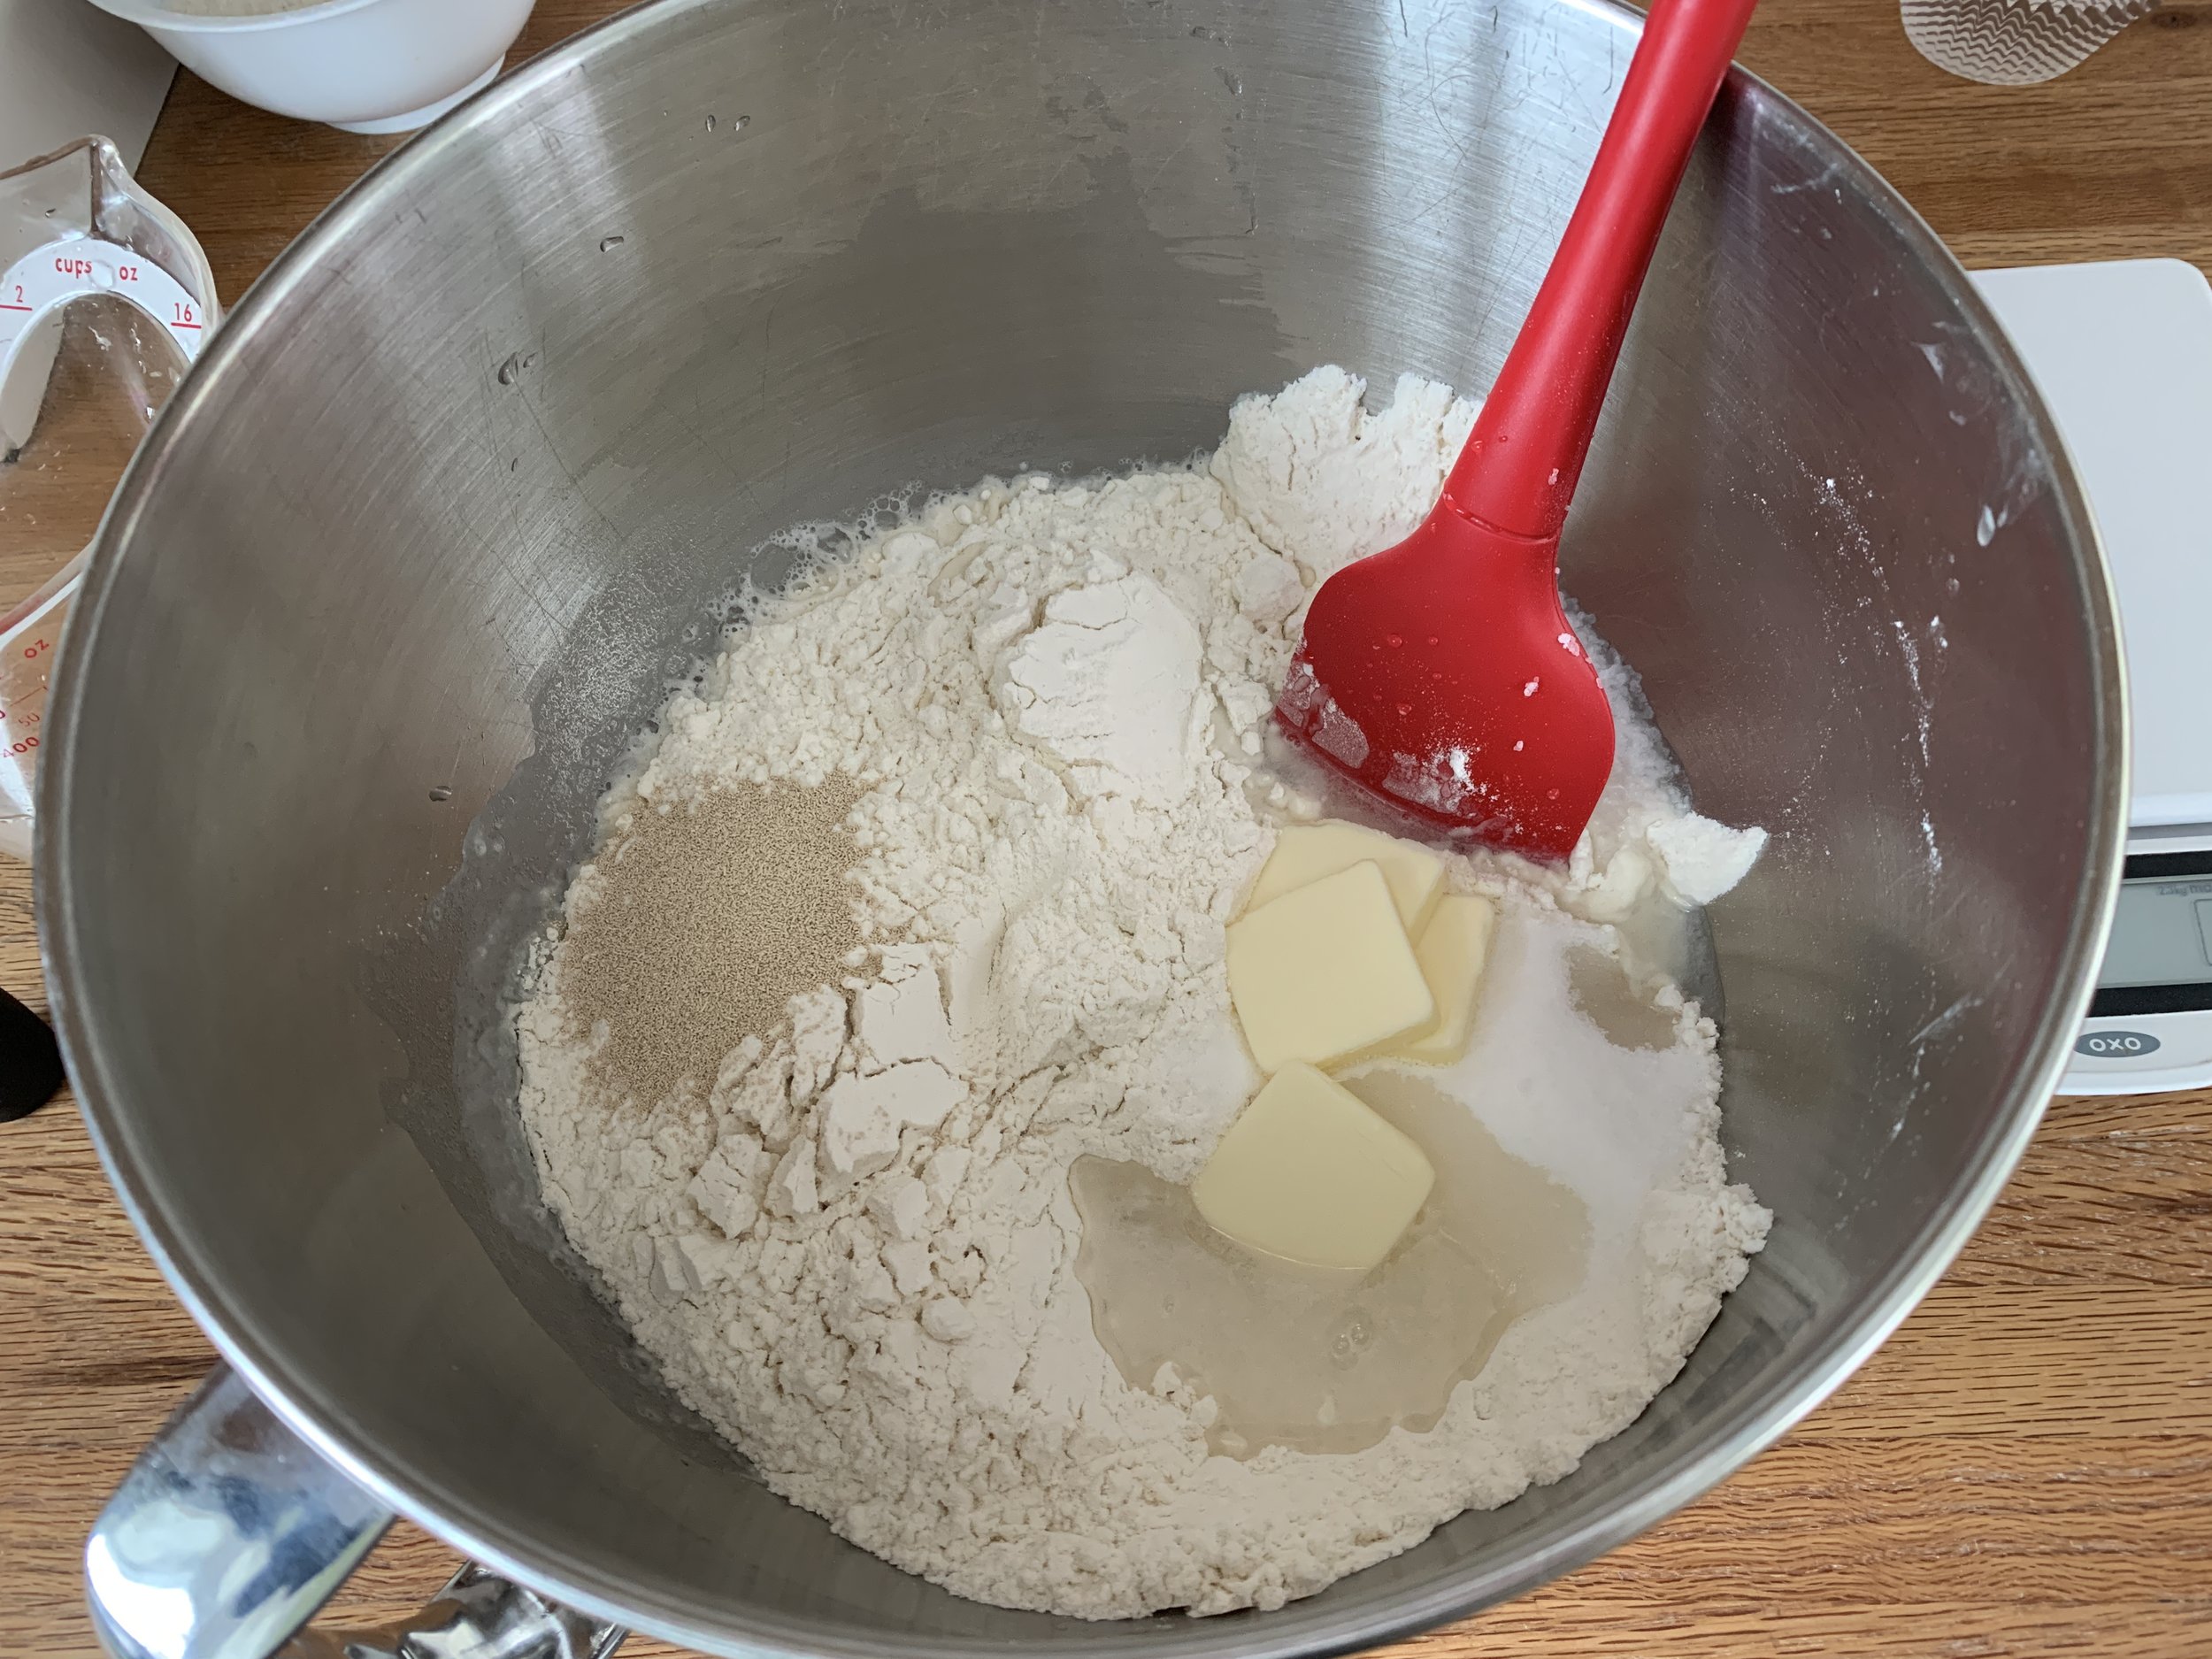
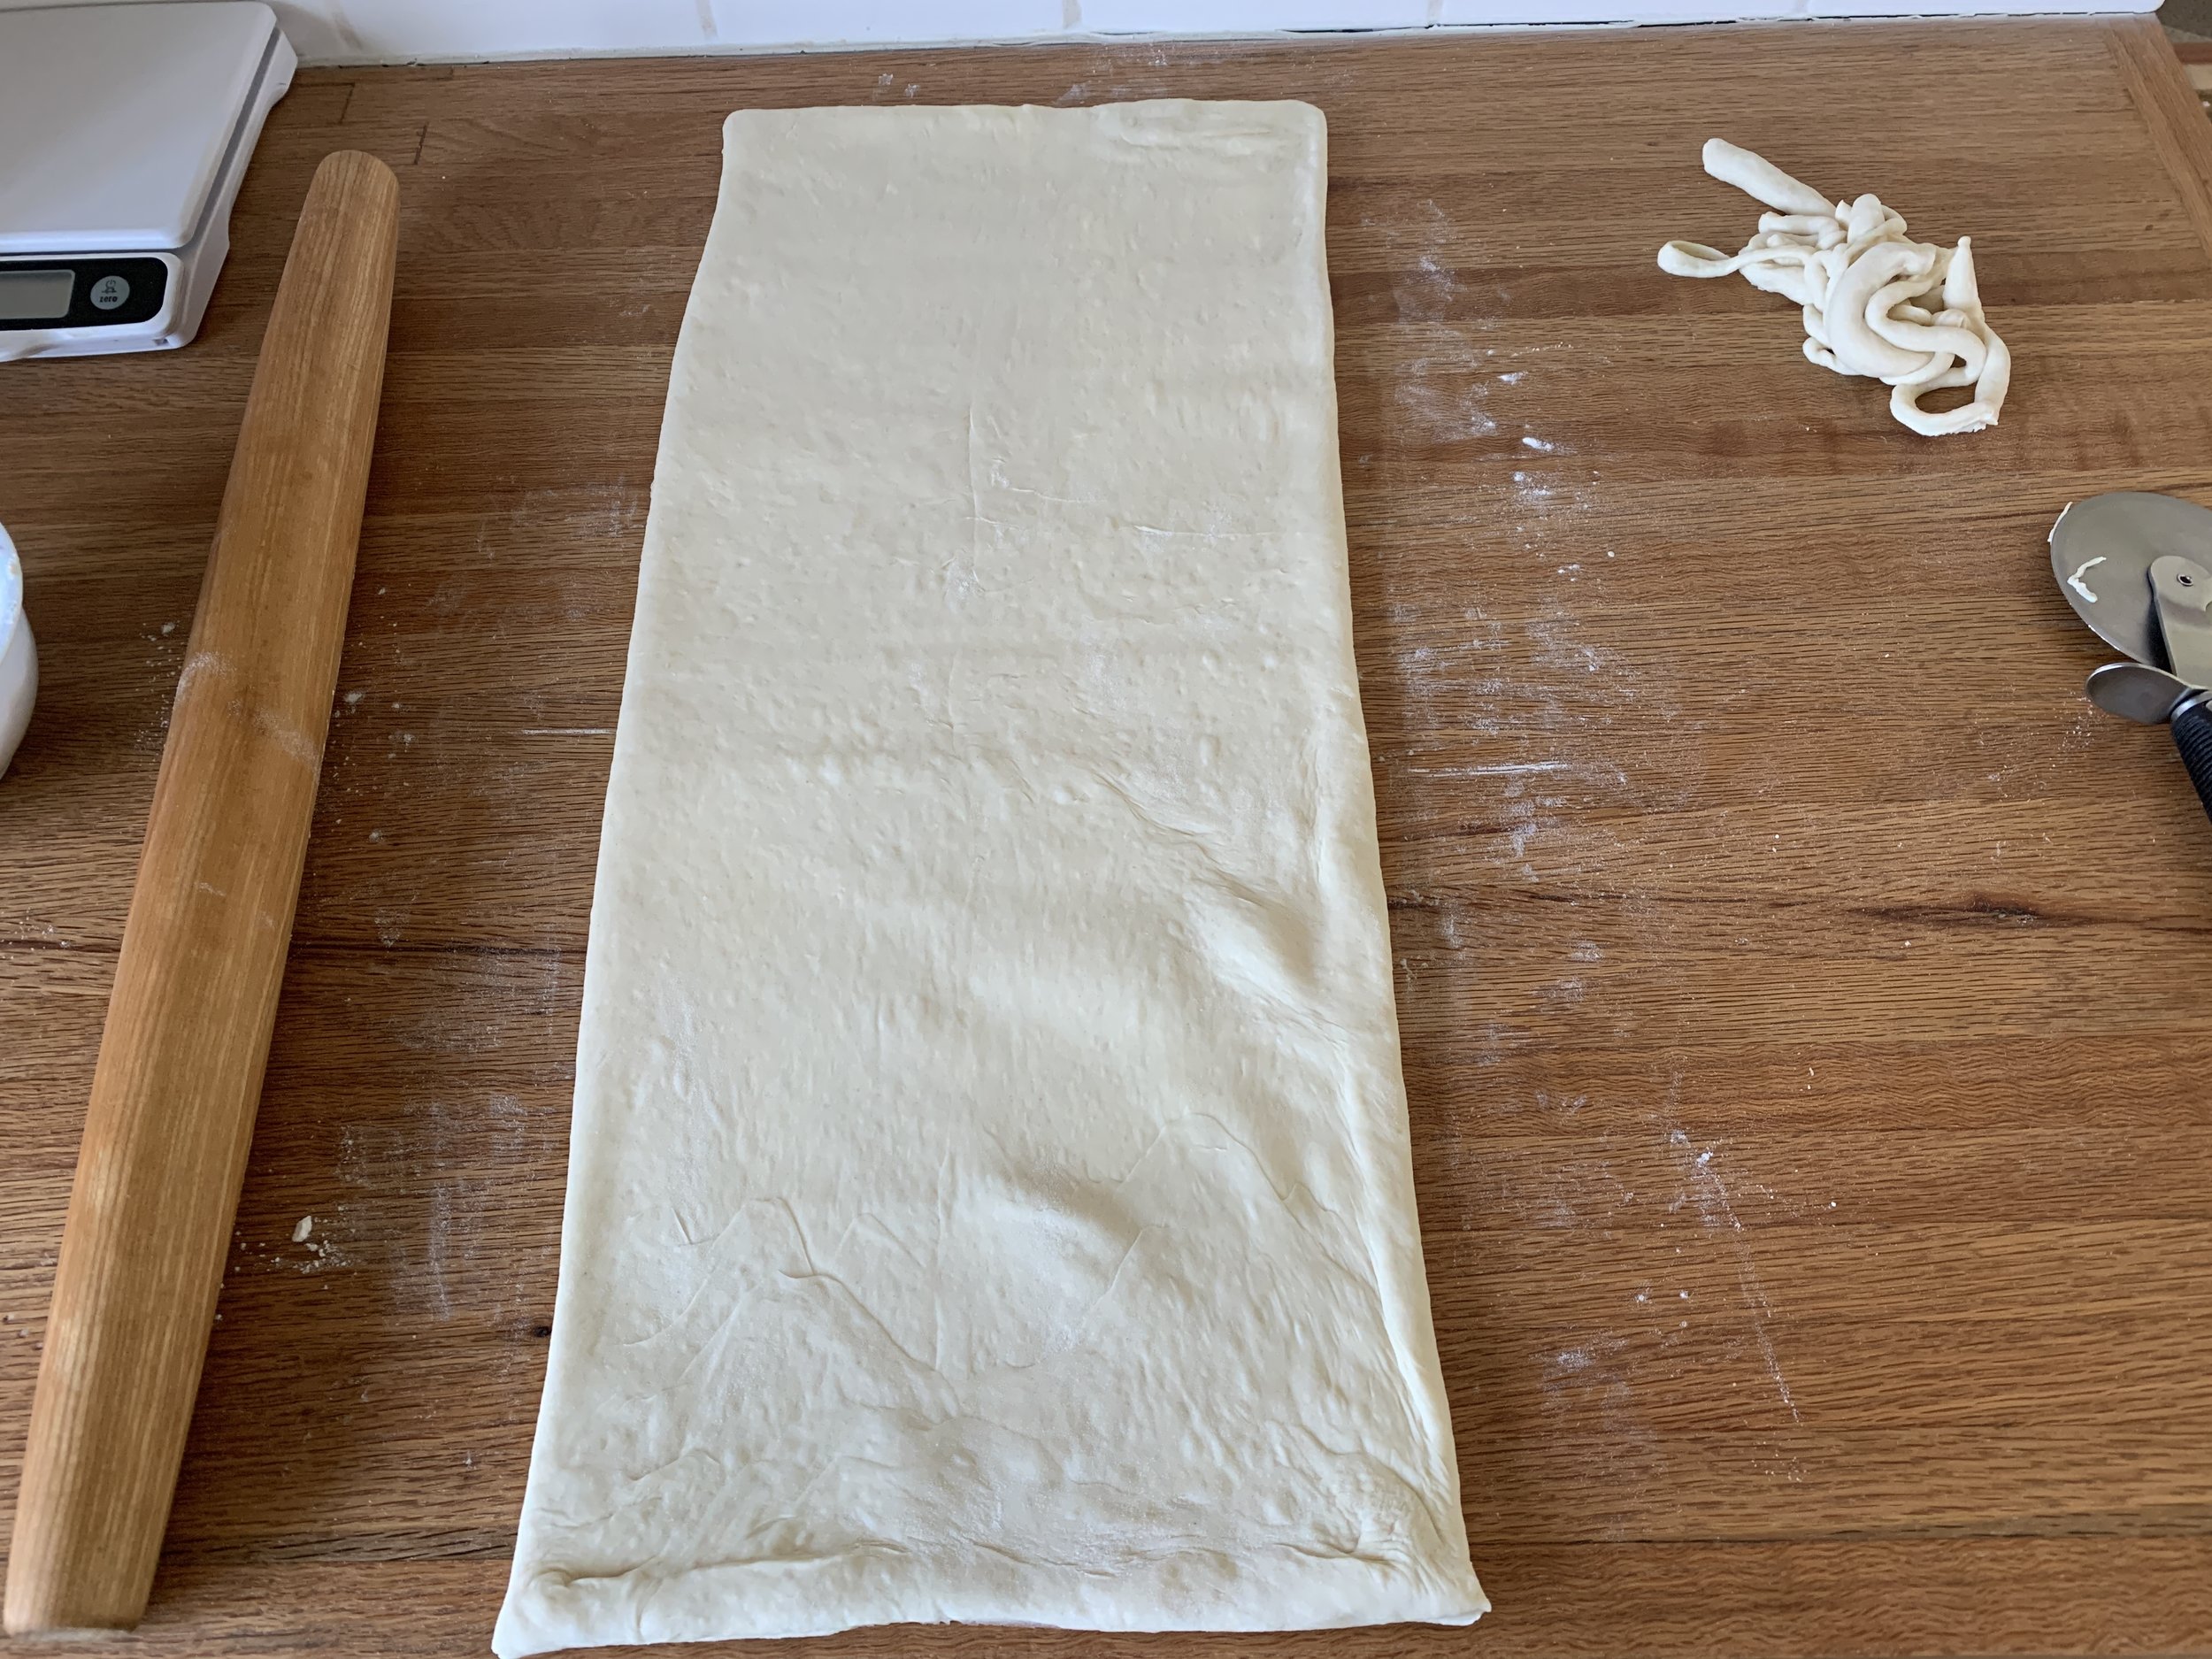
Let’s create a full sized kouign-amann! We’re proceeding with the nearly completed dough, already put through three 3-folds rolling with flour. Now it’s ready for the last sugar-rolled 3-fold.

First prep an 8” cake pan by buttering the bottom and sides then lining with a round of parchment large enough to leave an edge above the pan’s rim. This makes it easier to lift out after baking. Then butter and sugar the parchment. You can do this ahead and set it aside.

pan all prepped

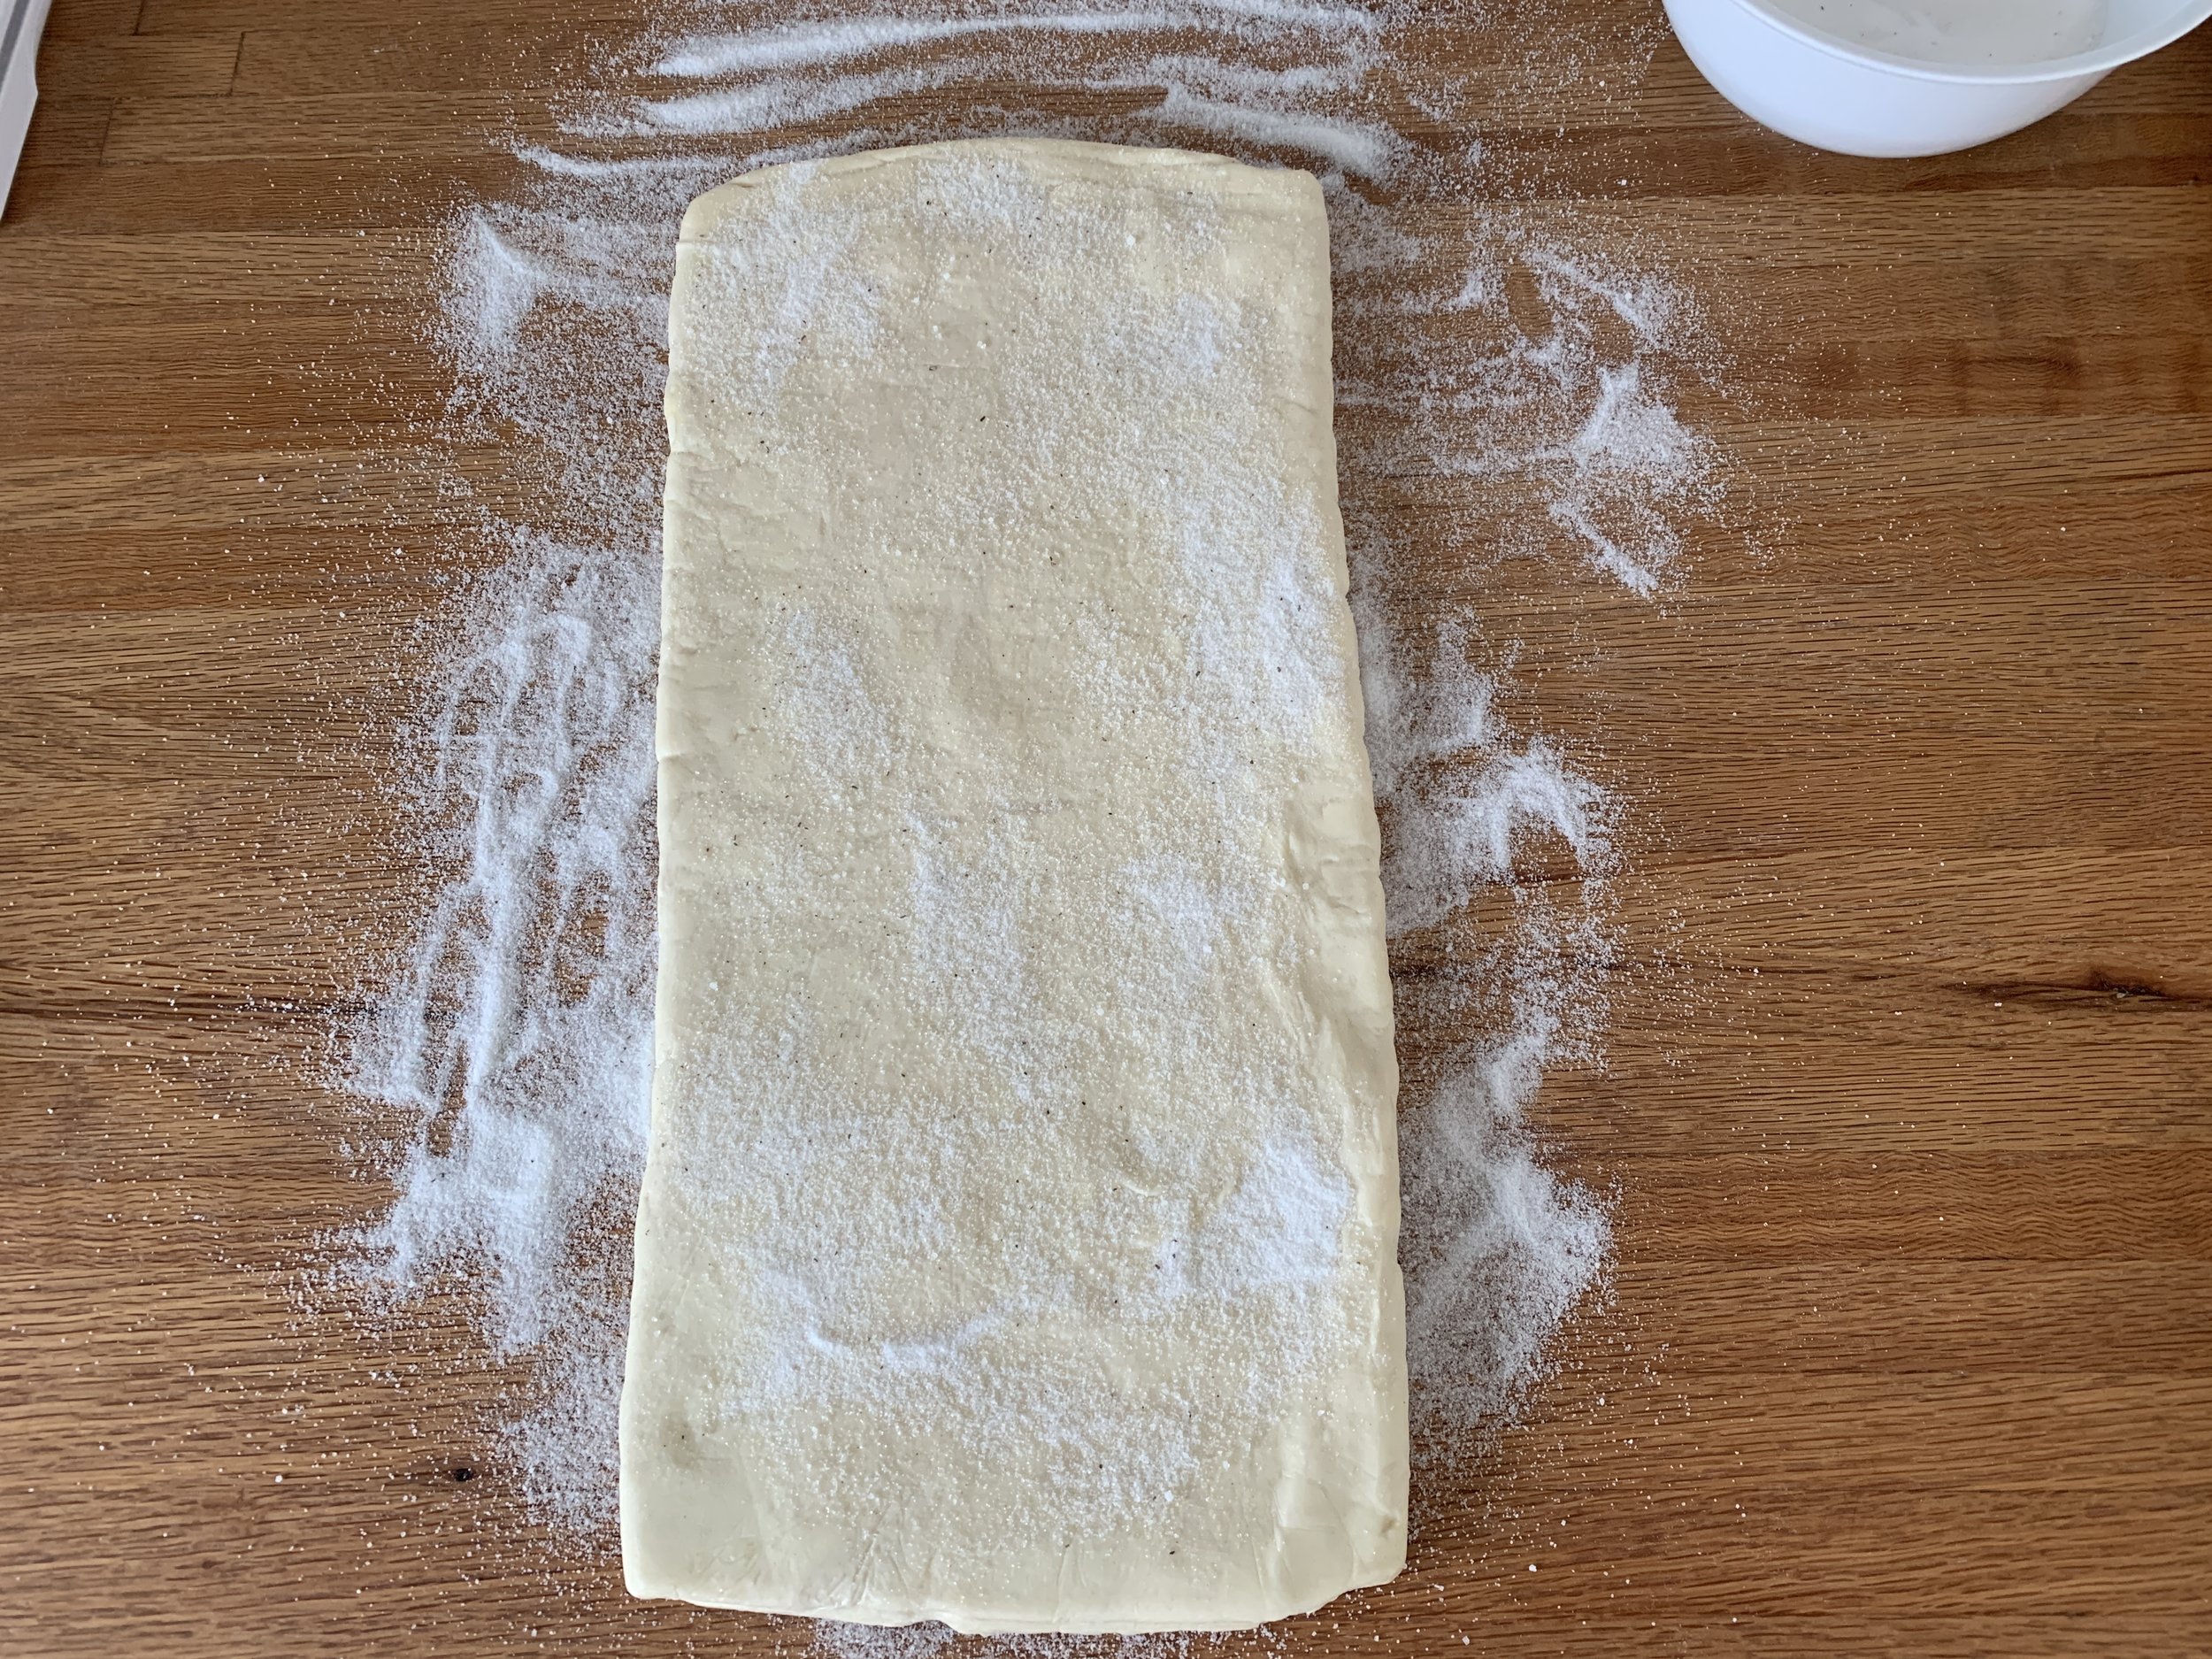
Roll the dough out length wise using sugar on the rolling surface as well as on top.

ready for last three fold with sugar

Once you complete the last fold, let the dough rest at room temperature (NOT in the fridge) lightly wrapped in parchment for 20-30 minutes and then proceed with shaping/proofing/baking.

Remember I’ve made a full recipe so I divide the dough in half, using one half for one cake. You can make two cakes if you want, but I took a different route.

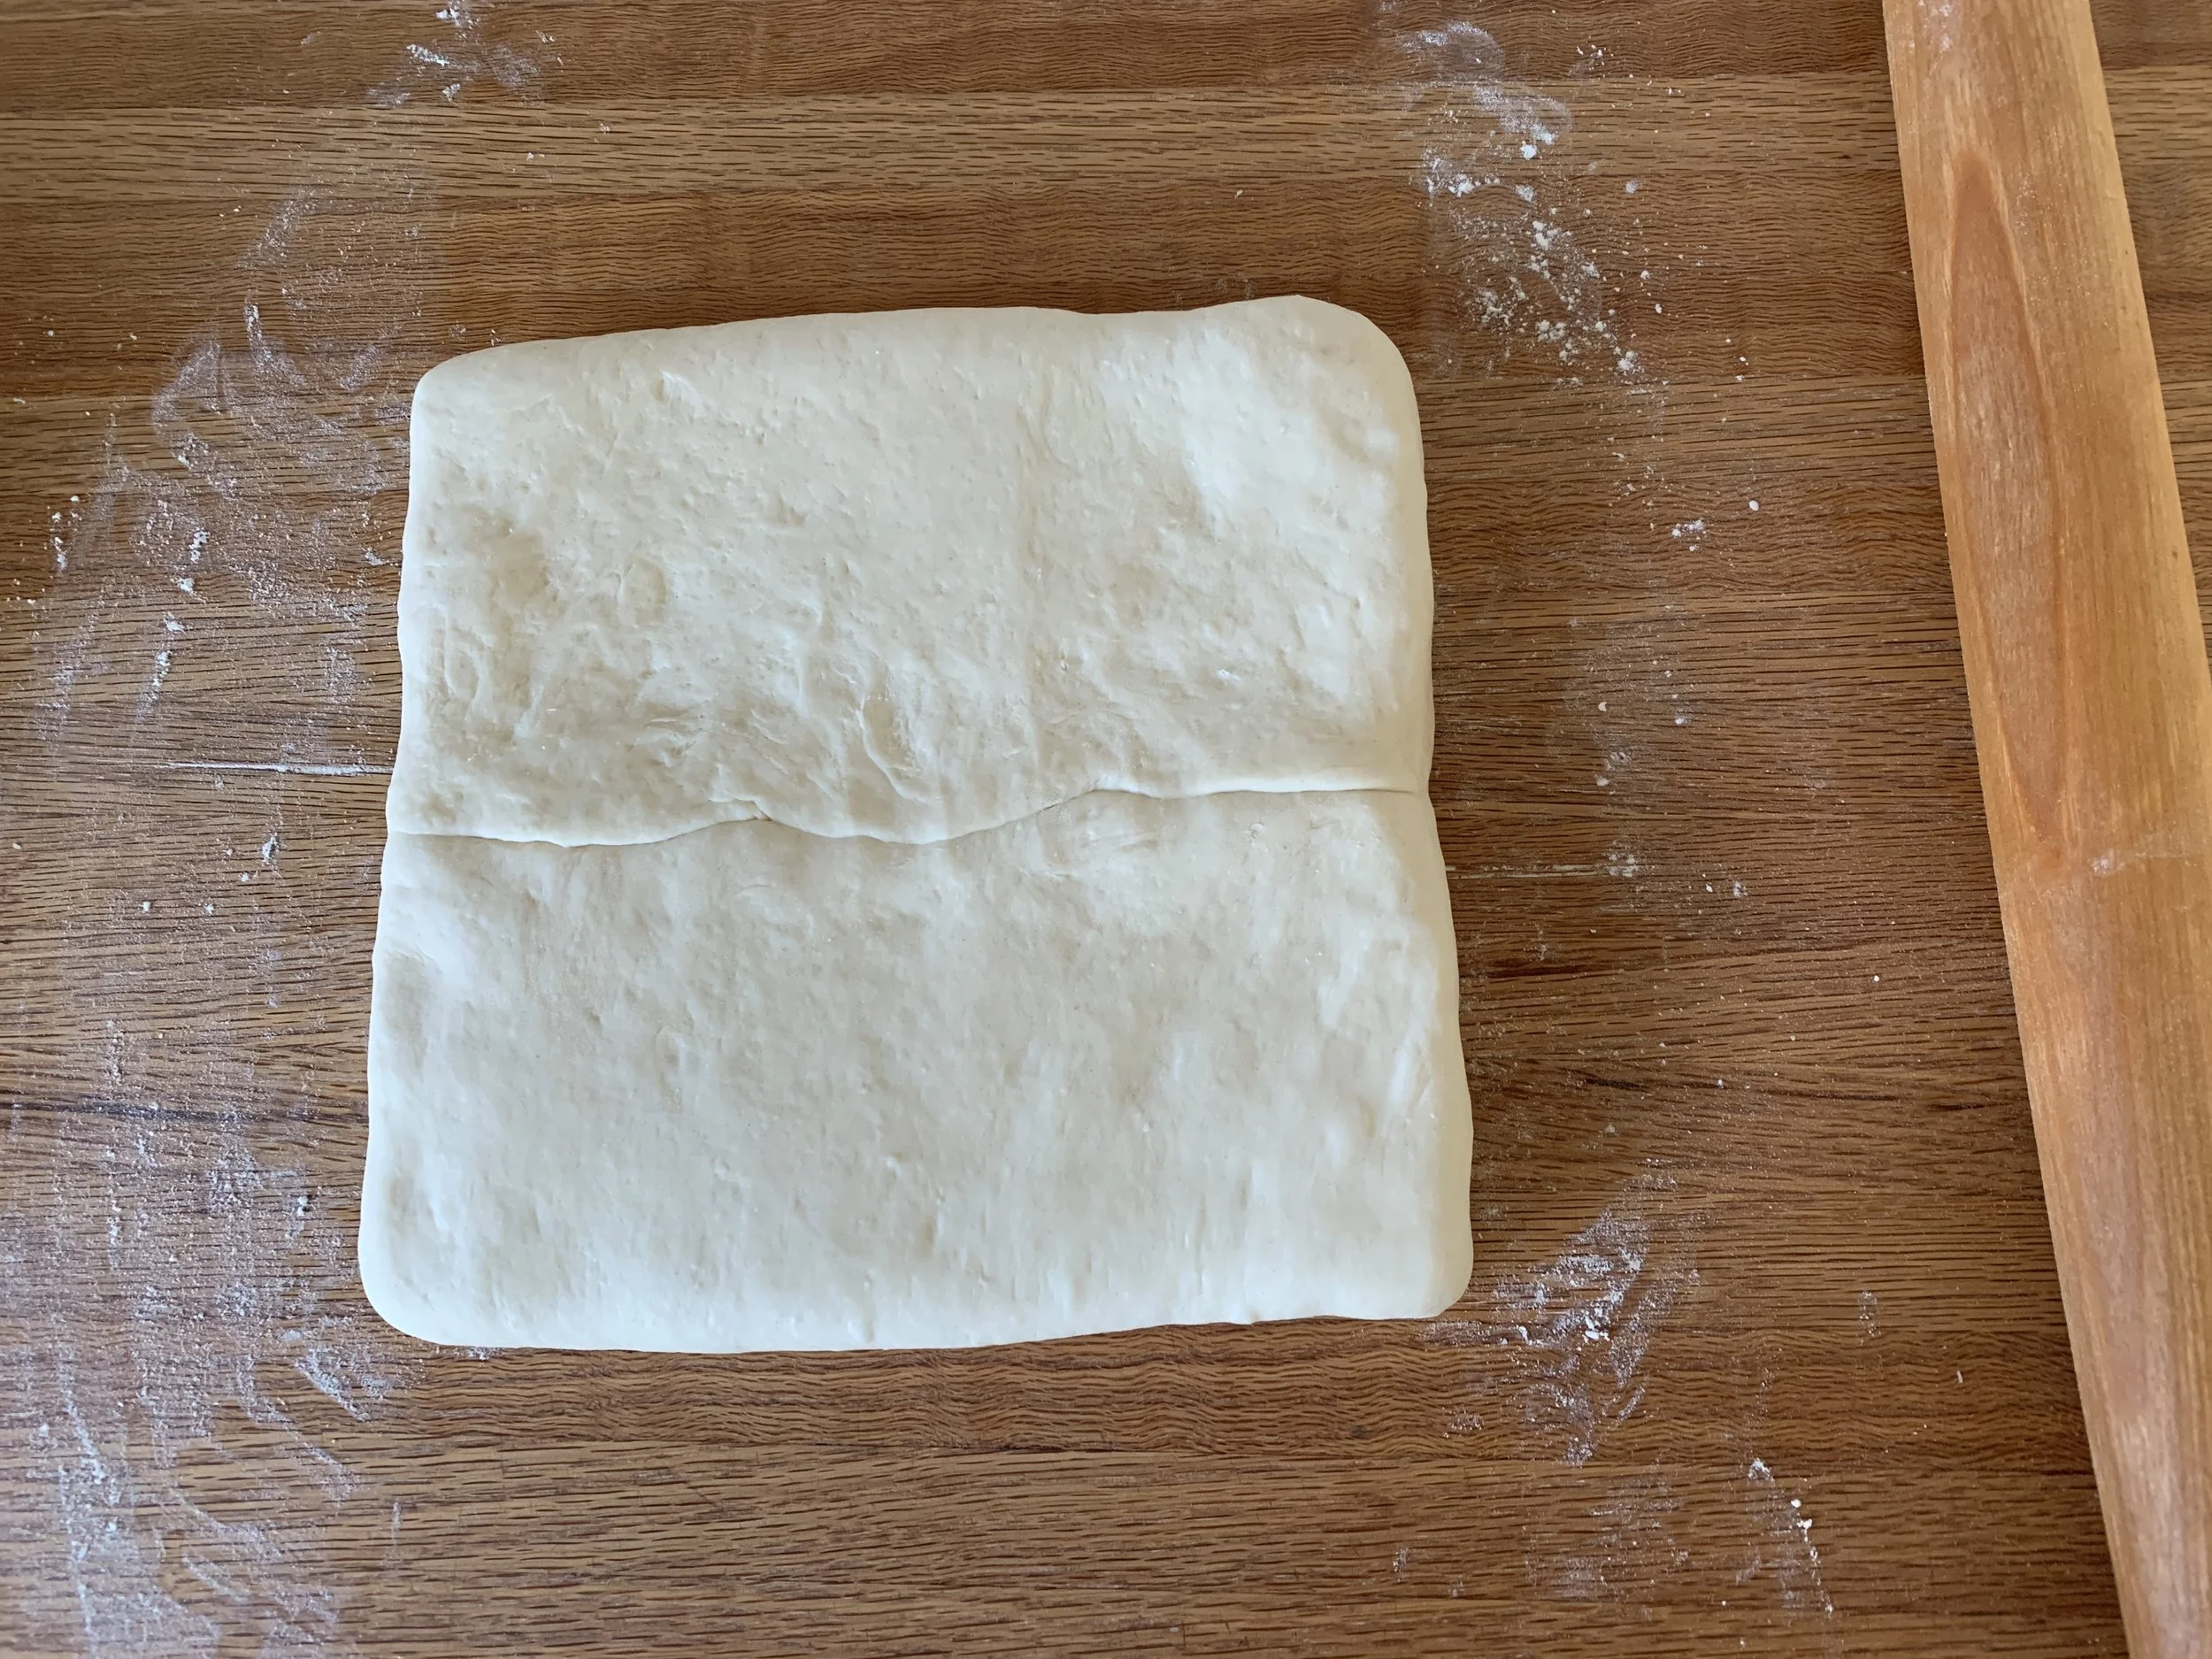
Roll a half portion into a rough-ish 8-9” square (still rolling in sugar) and fold the corners into the center.

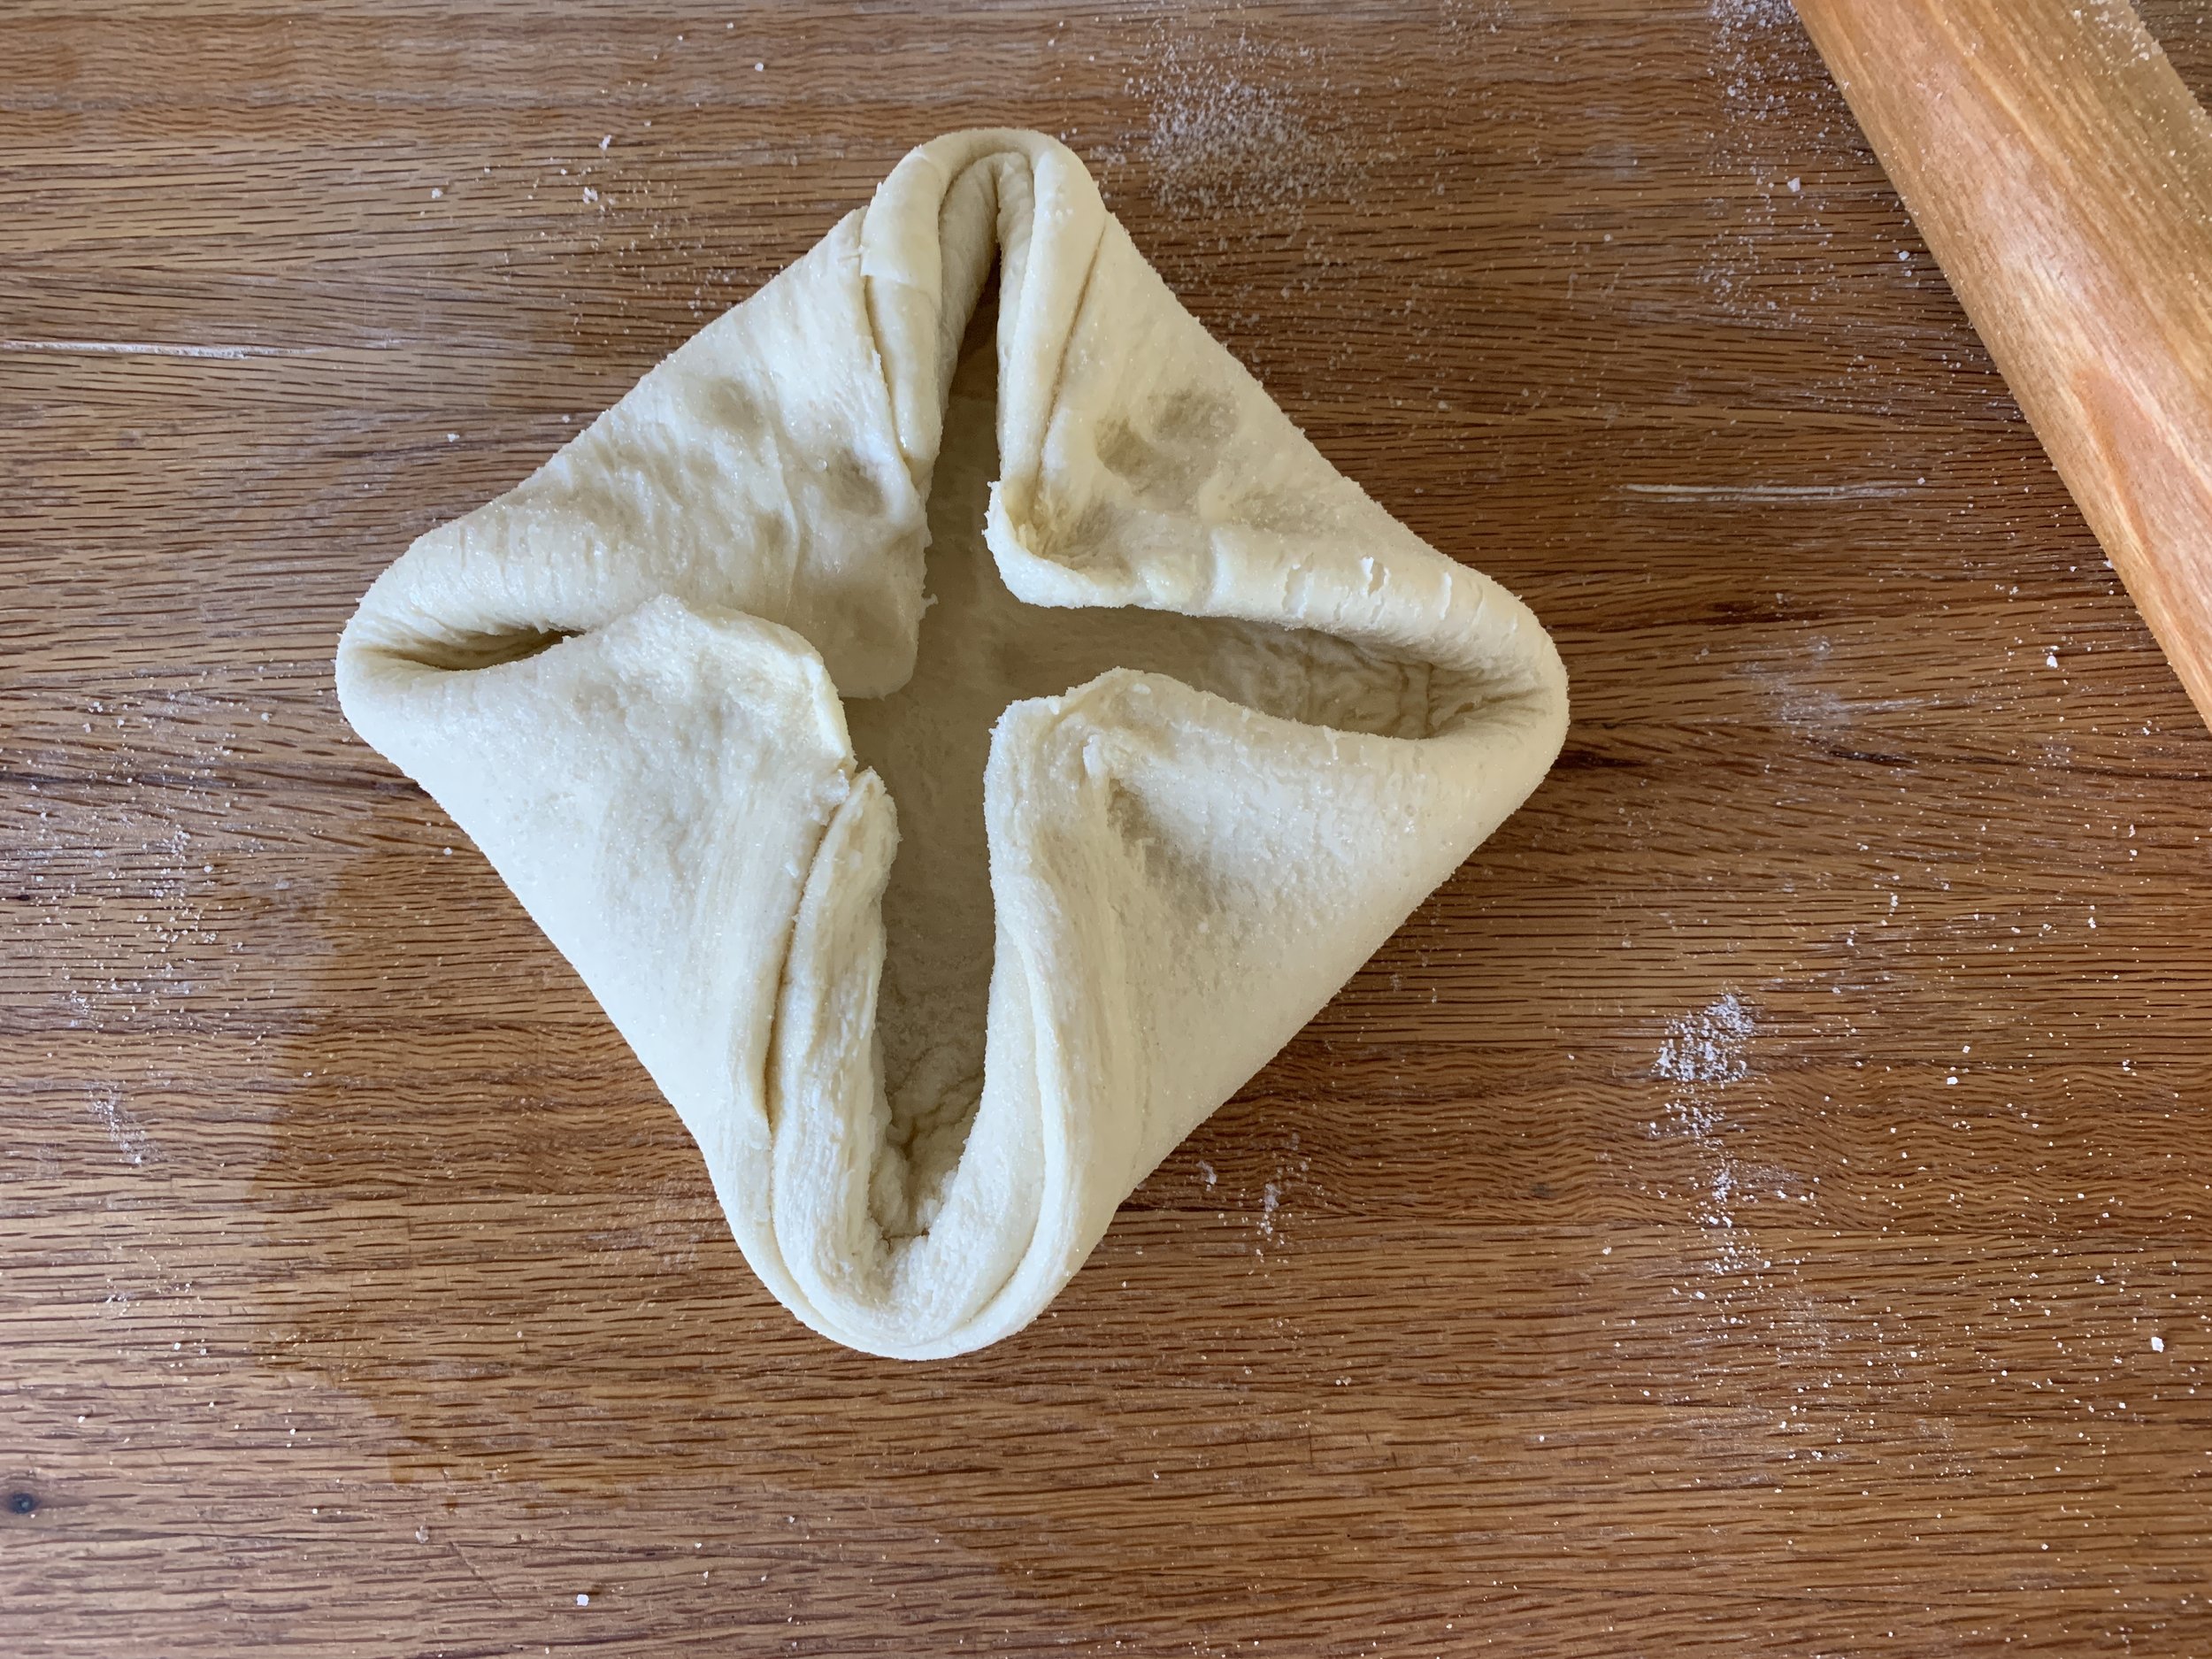
corners in, ready to flip over

Turn the dough over onto the sugar dusted work surface so the corners/seams are down and roll out again (using sugar) to an approximately 8” squarish round. Don’t be too fussy about the shape - I figured it would spread out and bake into the confines of the pan, so I just went with it.


Lift the dough into the pan and tuck it in as best you can. Cut straight lines diagonally across the surface to create a diamond pattern and sprinkle with sugar.
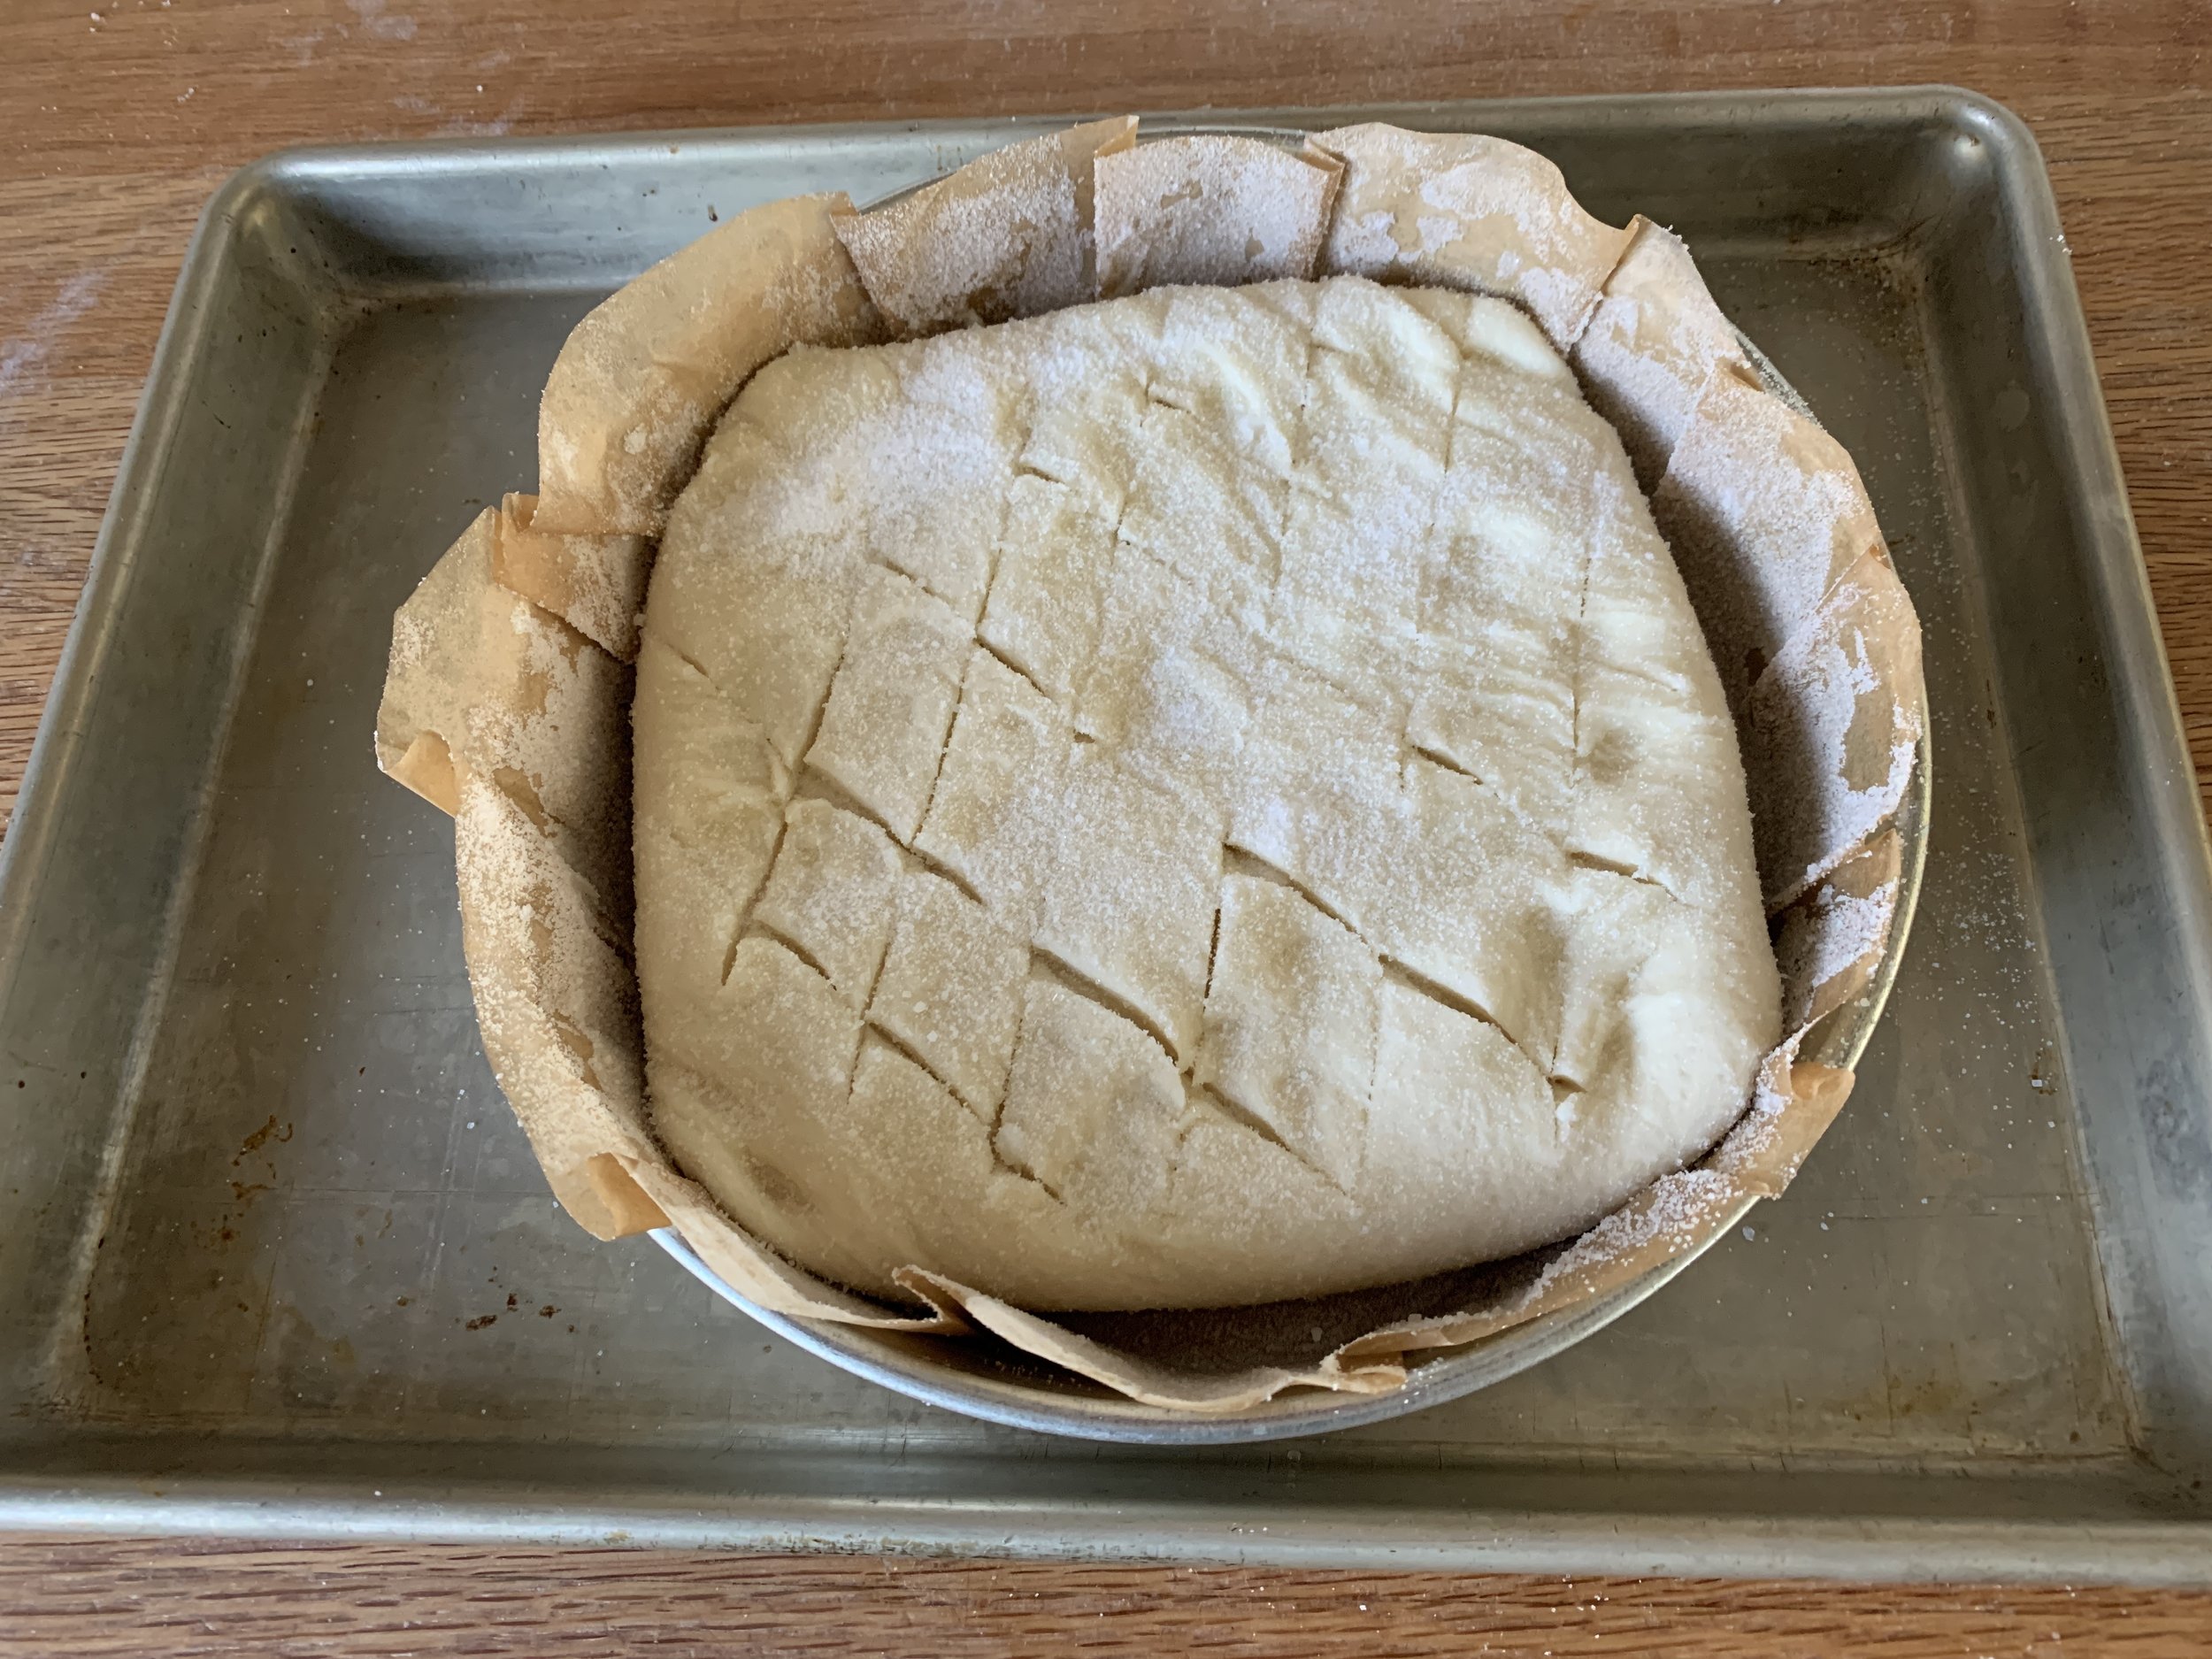
ready to rise

Cover with lightly oiled plastic wrap or a damp towel and let proof 45-60 minutes. Meanwhile heat the oven to 400ºF (convection).

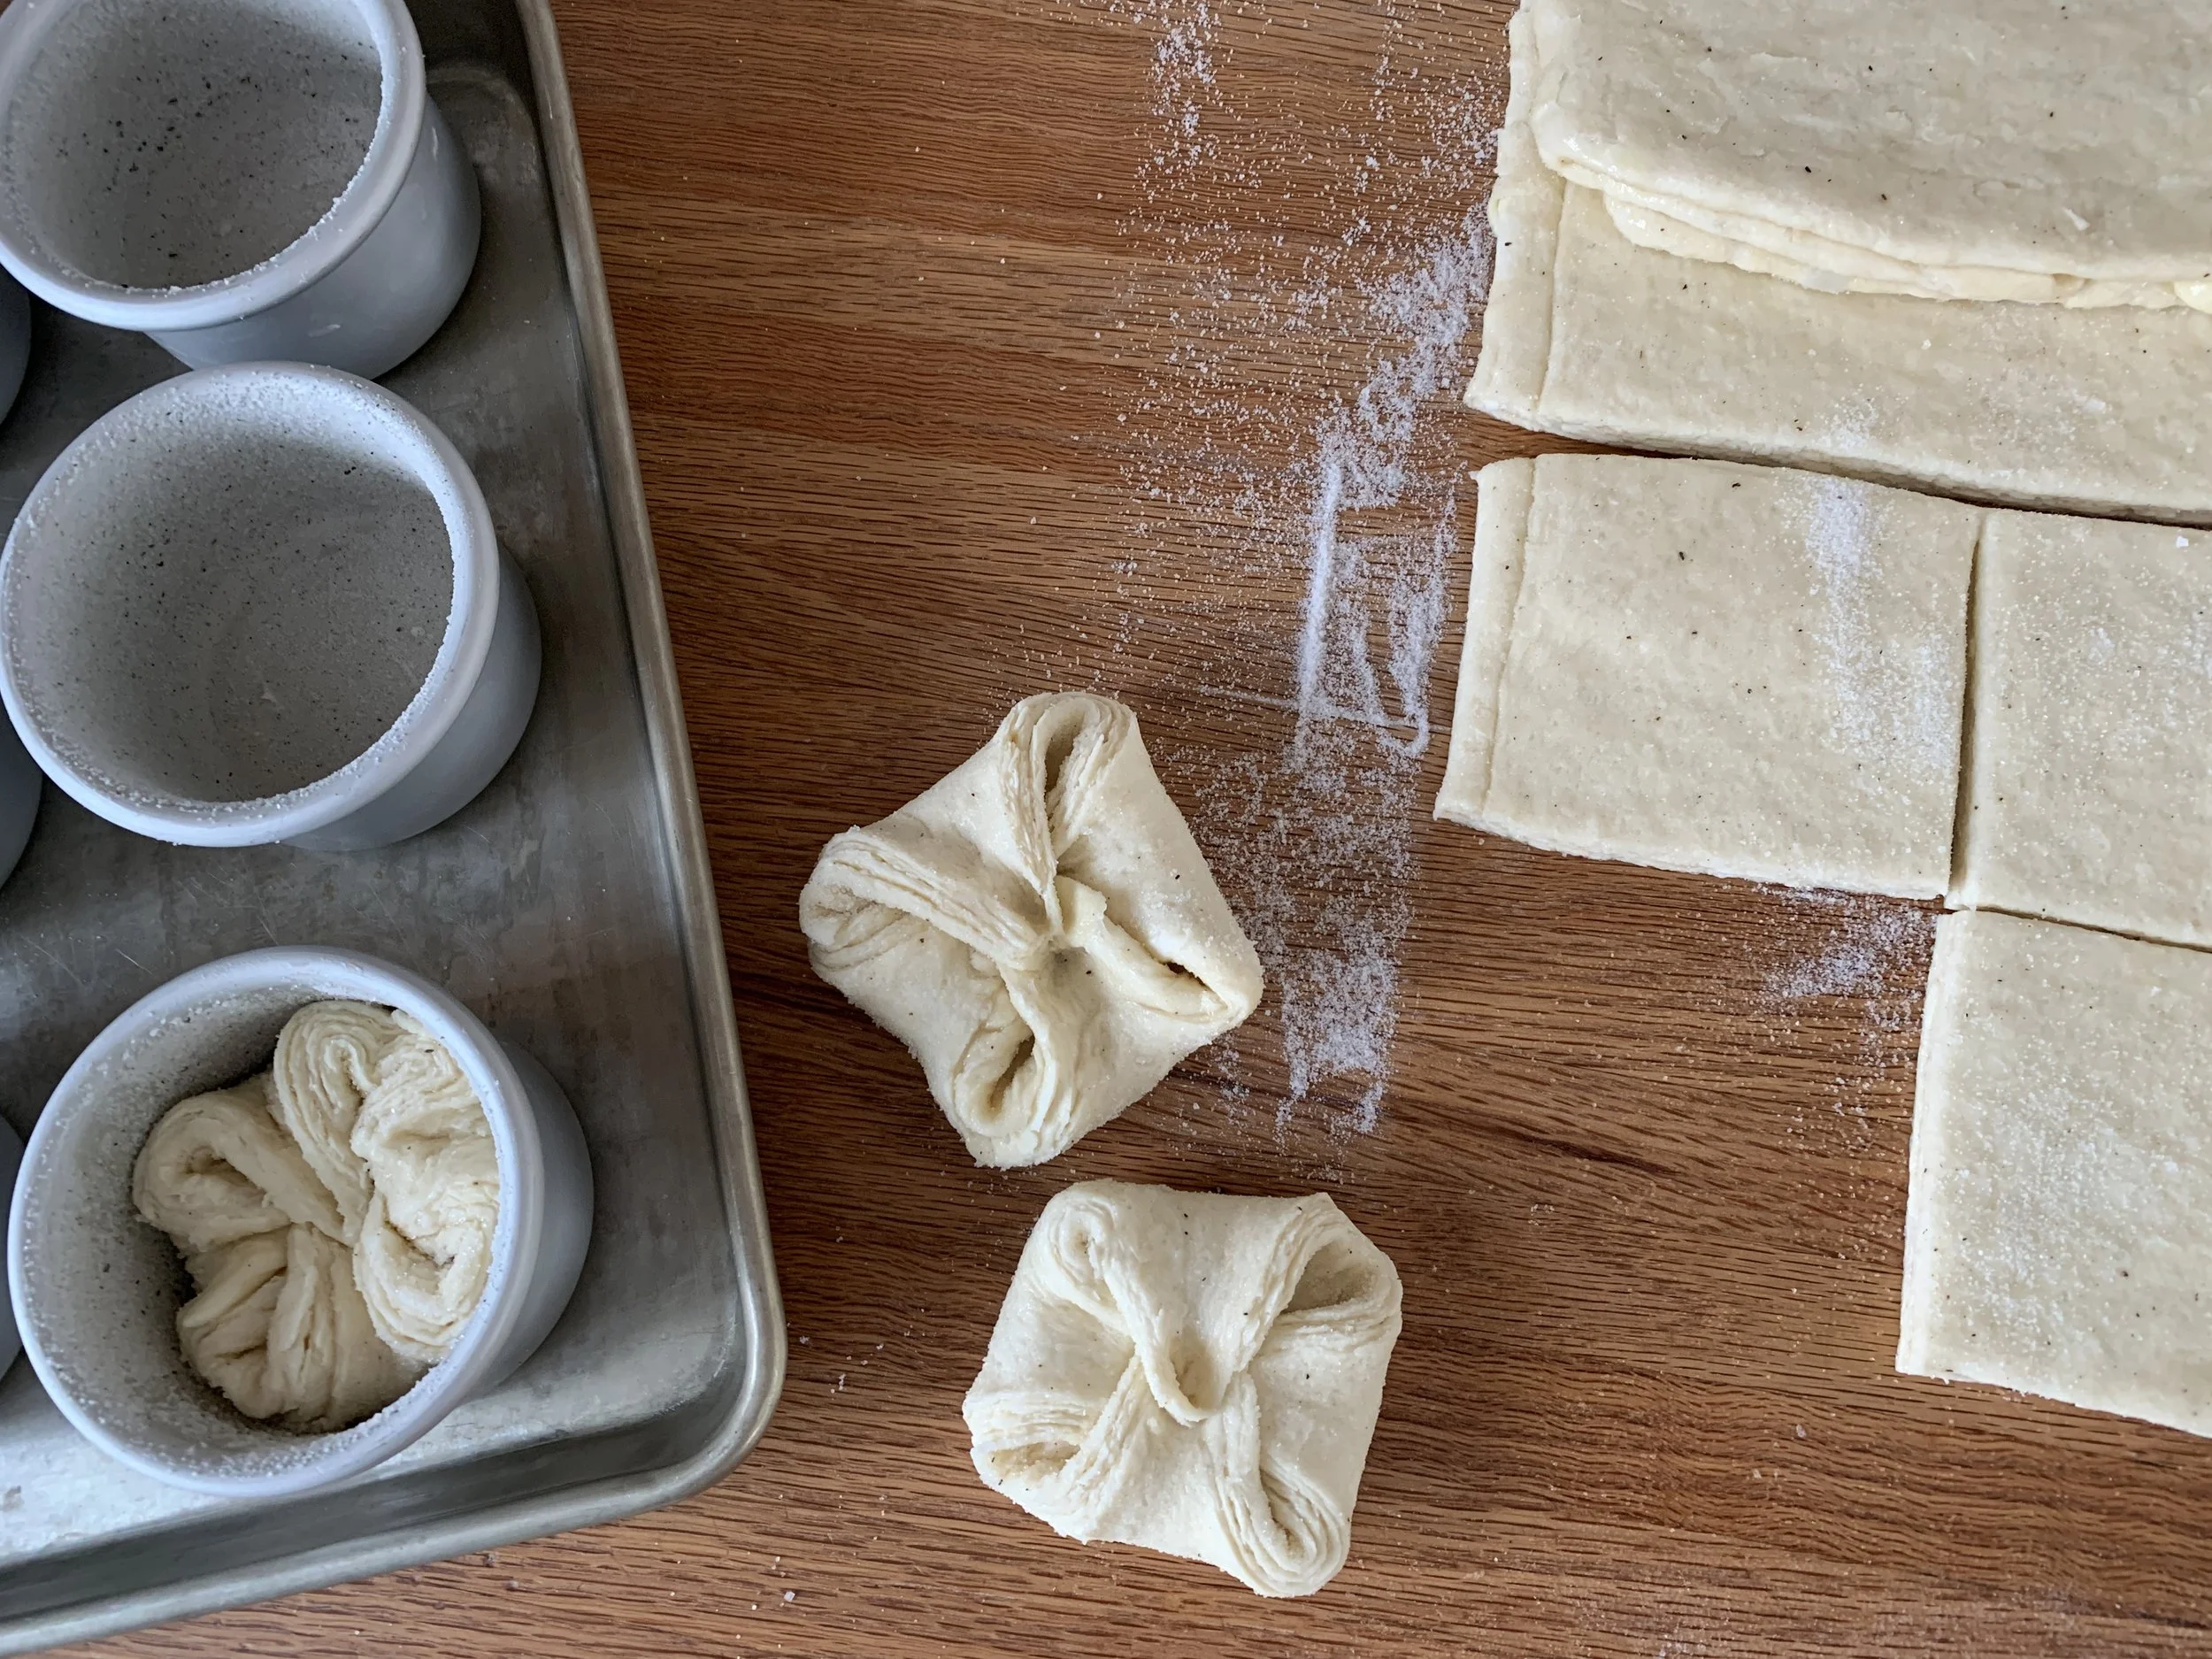
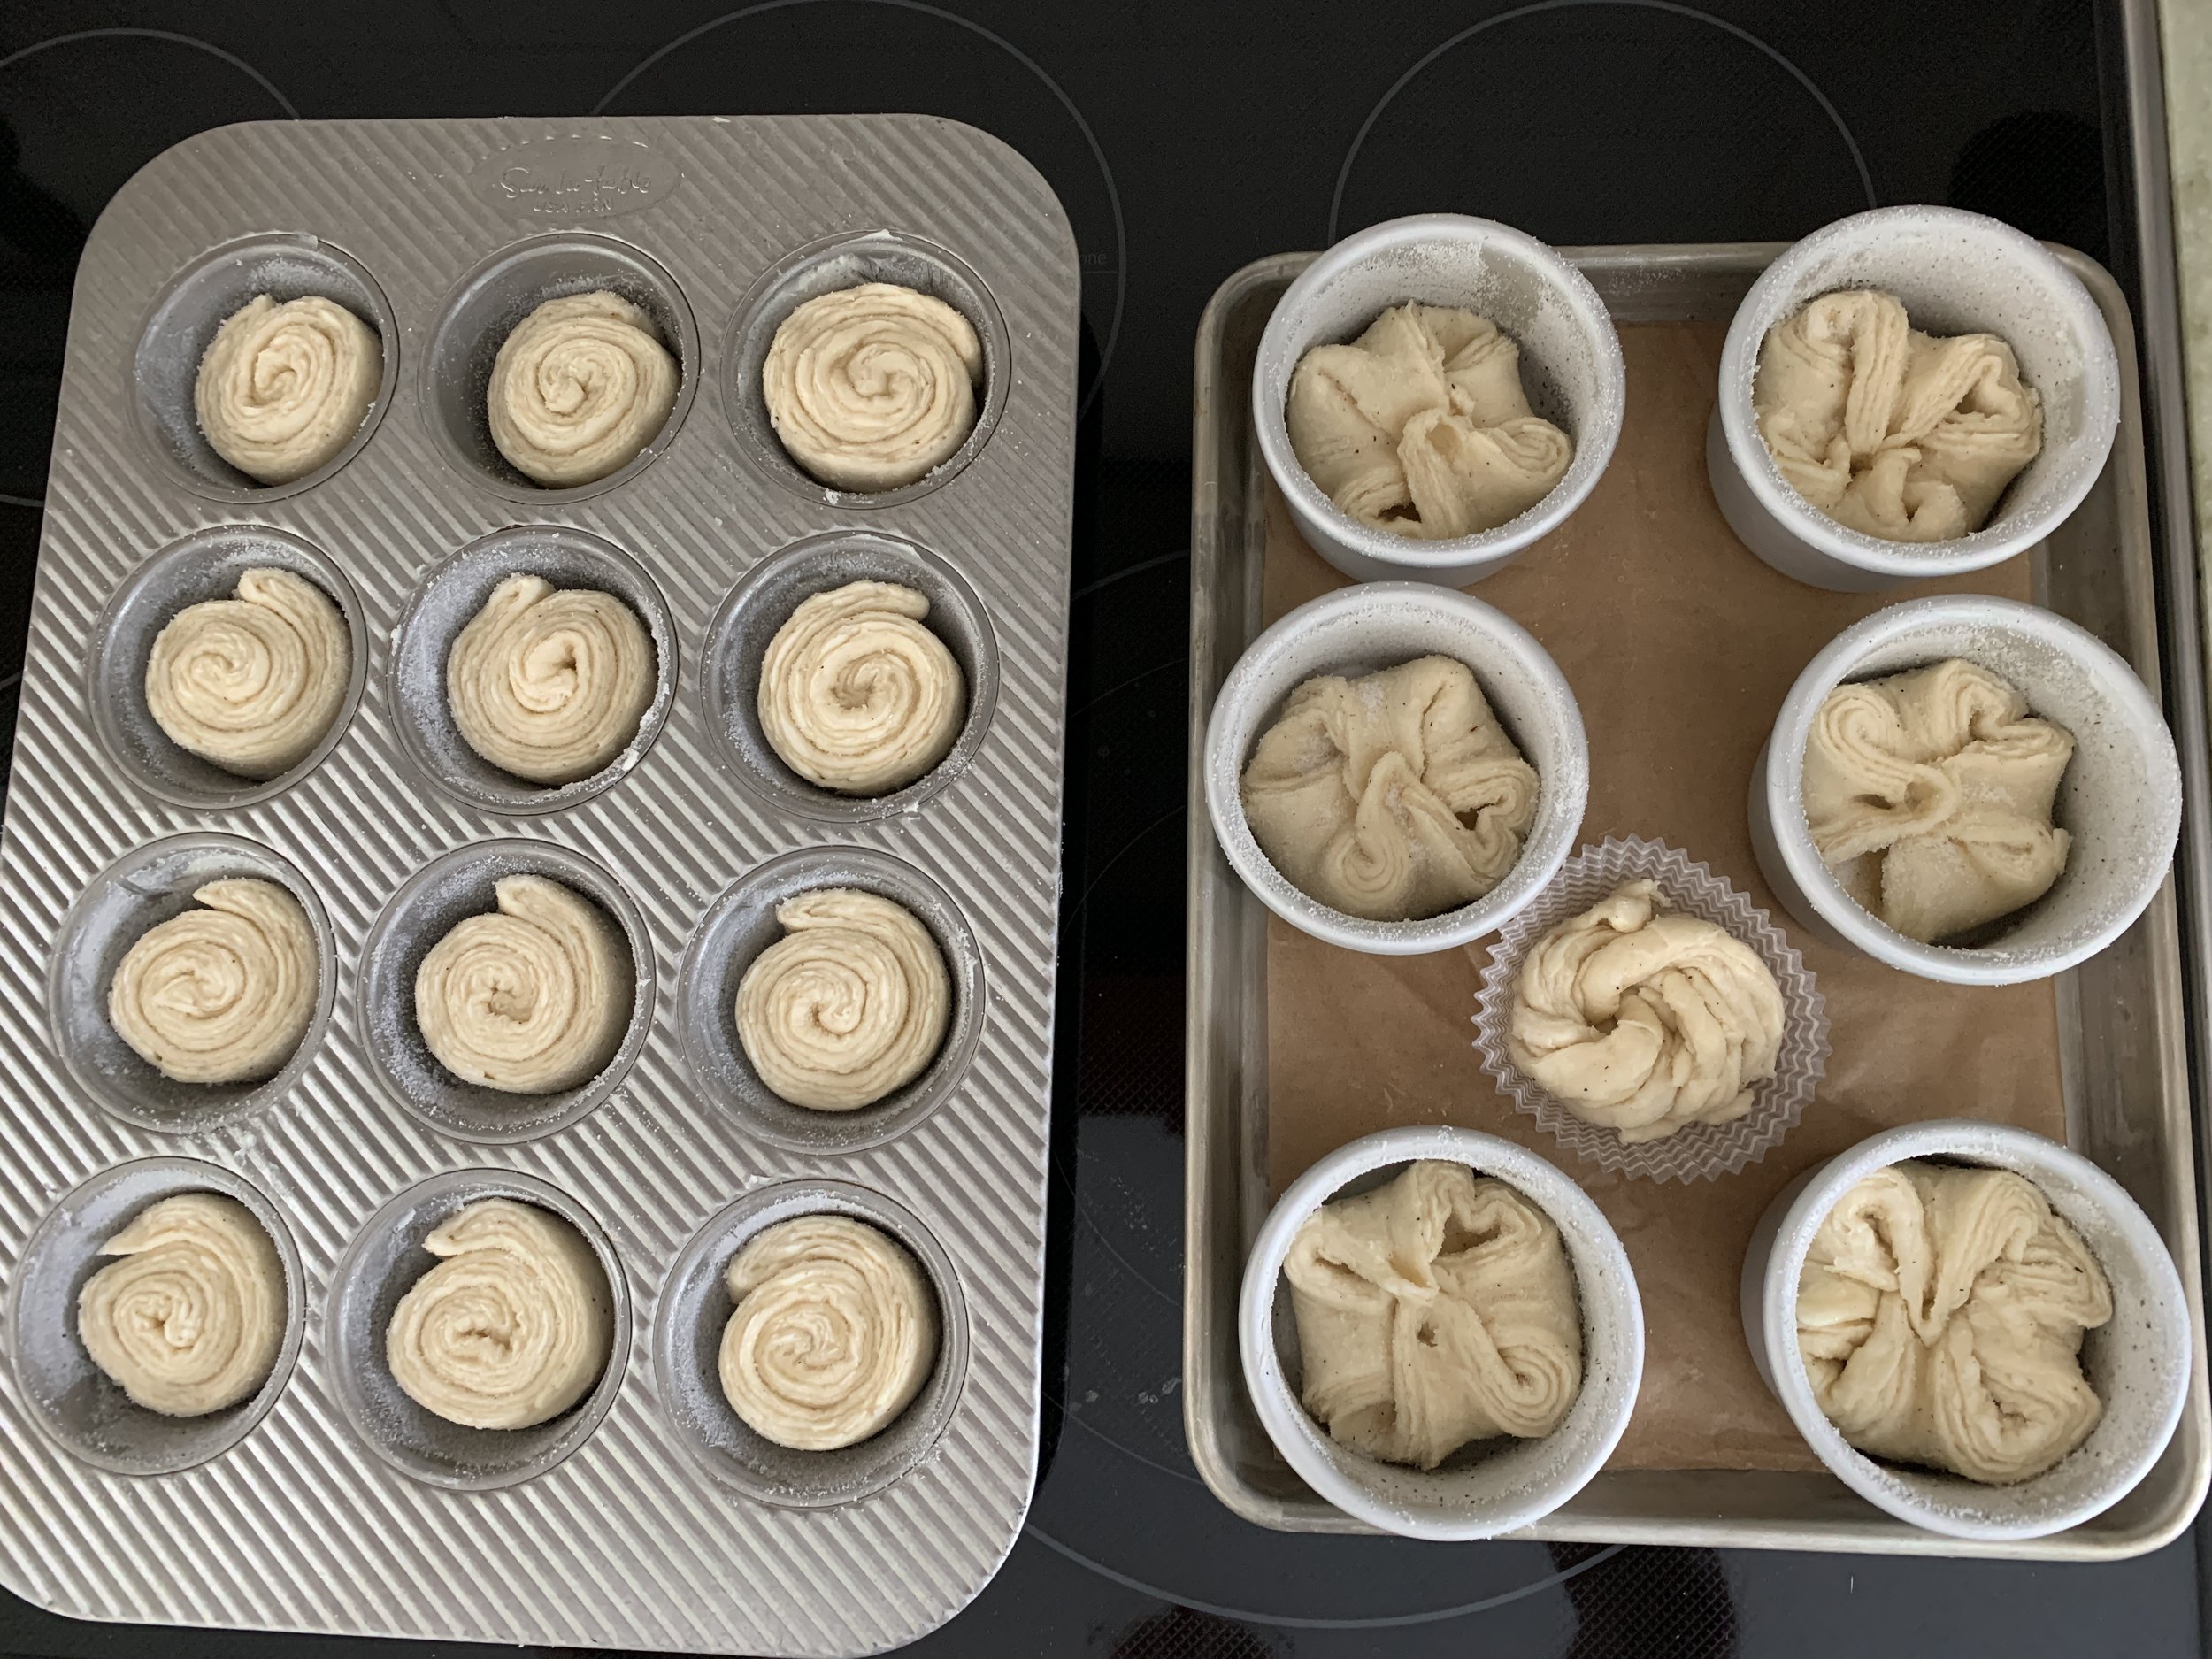
I used the other half of my dough to create a dozen spirals, rolling the dough out to about 10”x10”, cutting one-ish inch wide strips, rolling ‘em up and tucking into doubled paper baking cups rather than muffin tins. The paper cups give each a boundary so they don’t bake up against each other. My hope was they would bake more uniformly golden this way (I was right!).


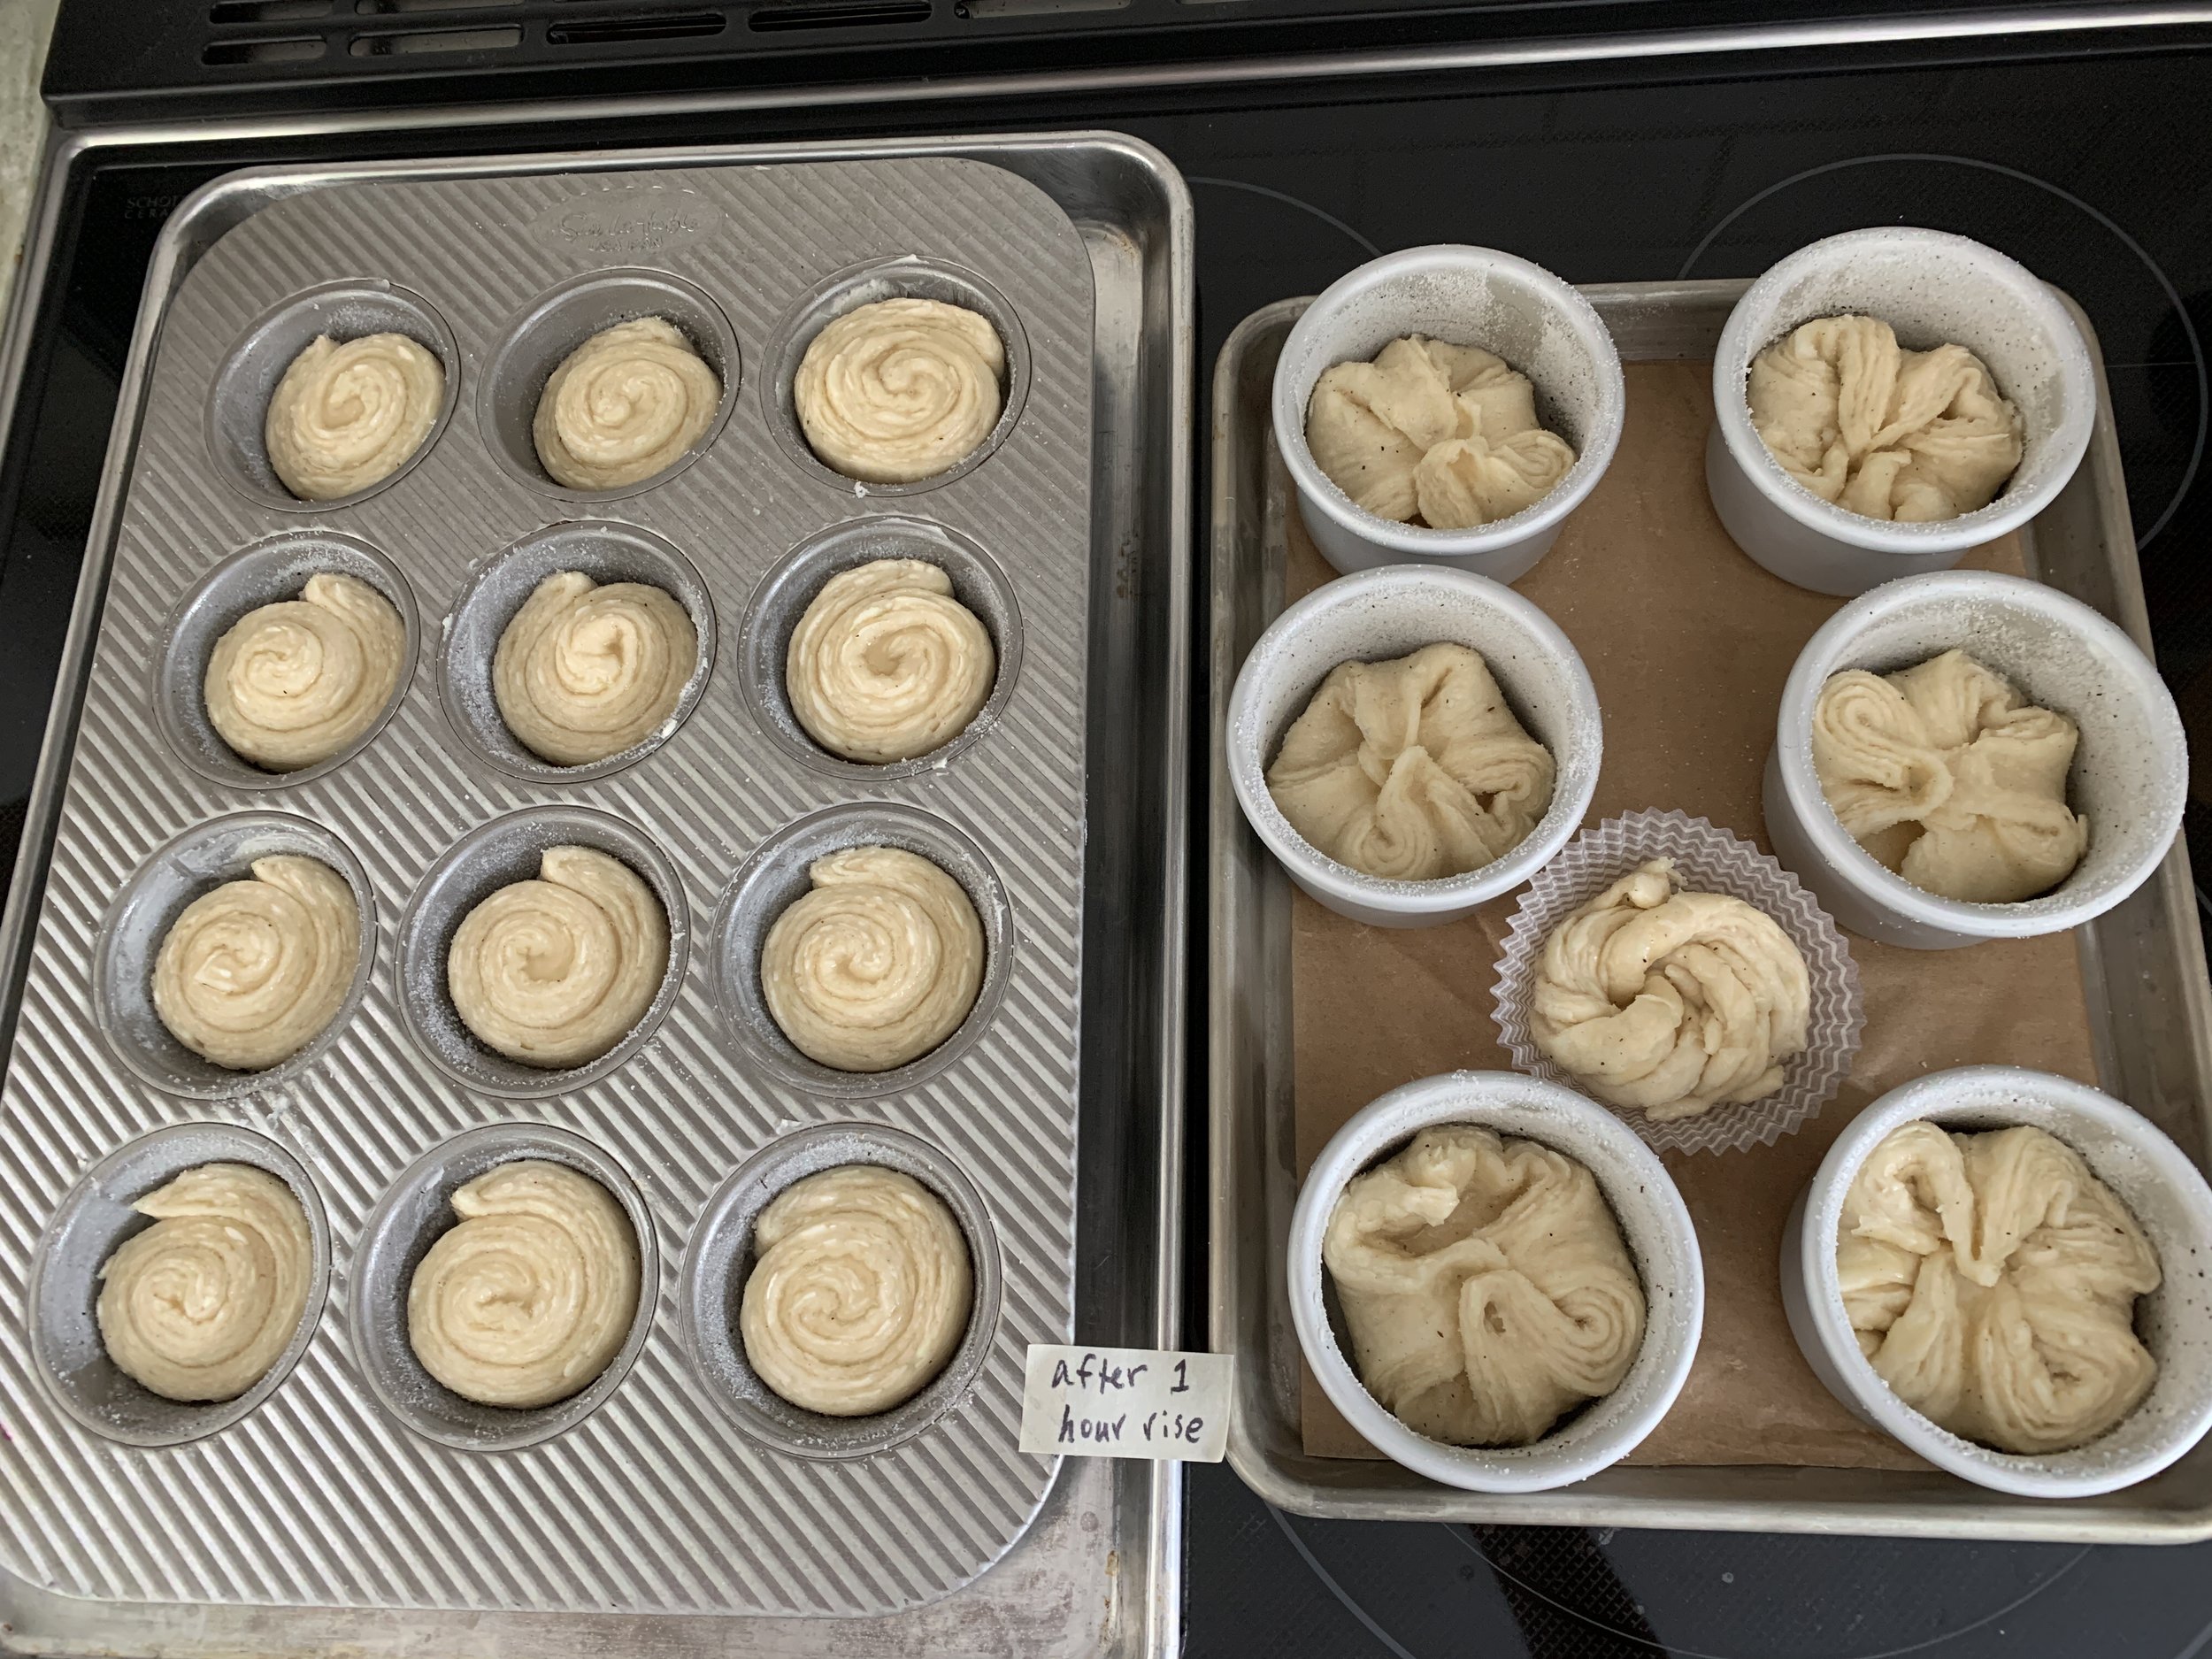
just formed, ready to rise

My rise ended up at about 50 minutes. Time to bake!


I gave them 20 minutes, turned the temp down to 375ºF and rotated the trays. The spirals were well baked in another 3-4 minutes so out they came. I gave the cake an additional 10 minutes and then covered it with foil for another 10 minutes to avoid over browning. There were still some paler dough sections in the center that I wanted a bit more done.

If I’ve said it once, I’ve said it a thousand times: all ovens are different and it’s up to you to check on how things are going in there. You can do it. Let your recipe be your guide but your eyes, nose and touch be part of it too.

Oooh! Swirls and whirls of caramelized goodness. Reminds me of some of the rocks we saw in the southwest’s national parks last autumn.


Lift the cake out of the pan by grasping the paper edges and set it on a wire cooling grid.


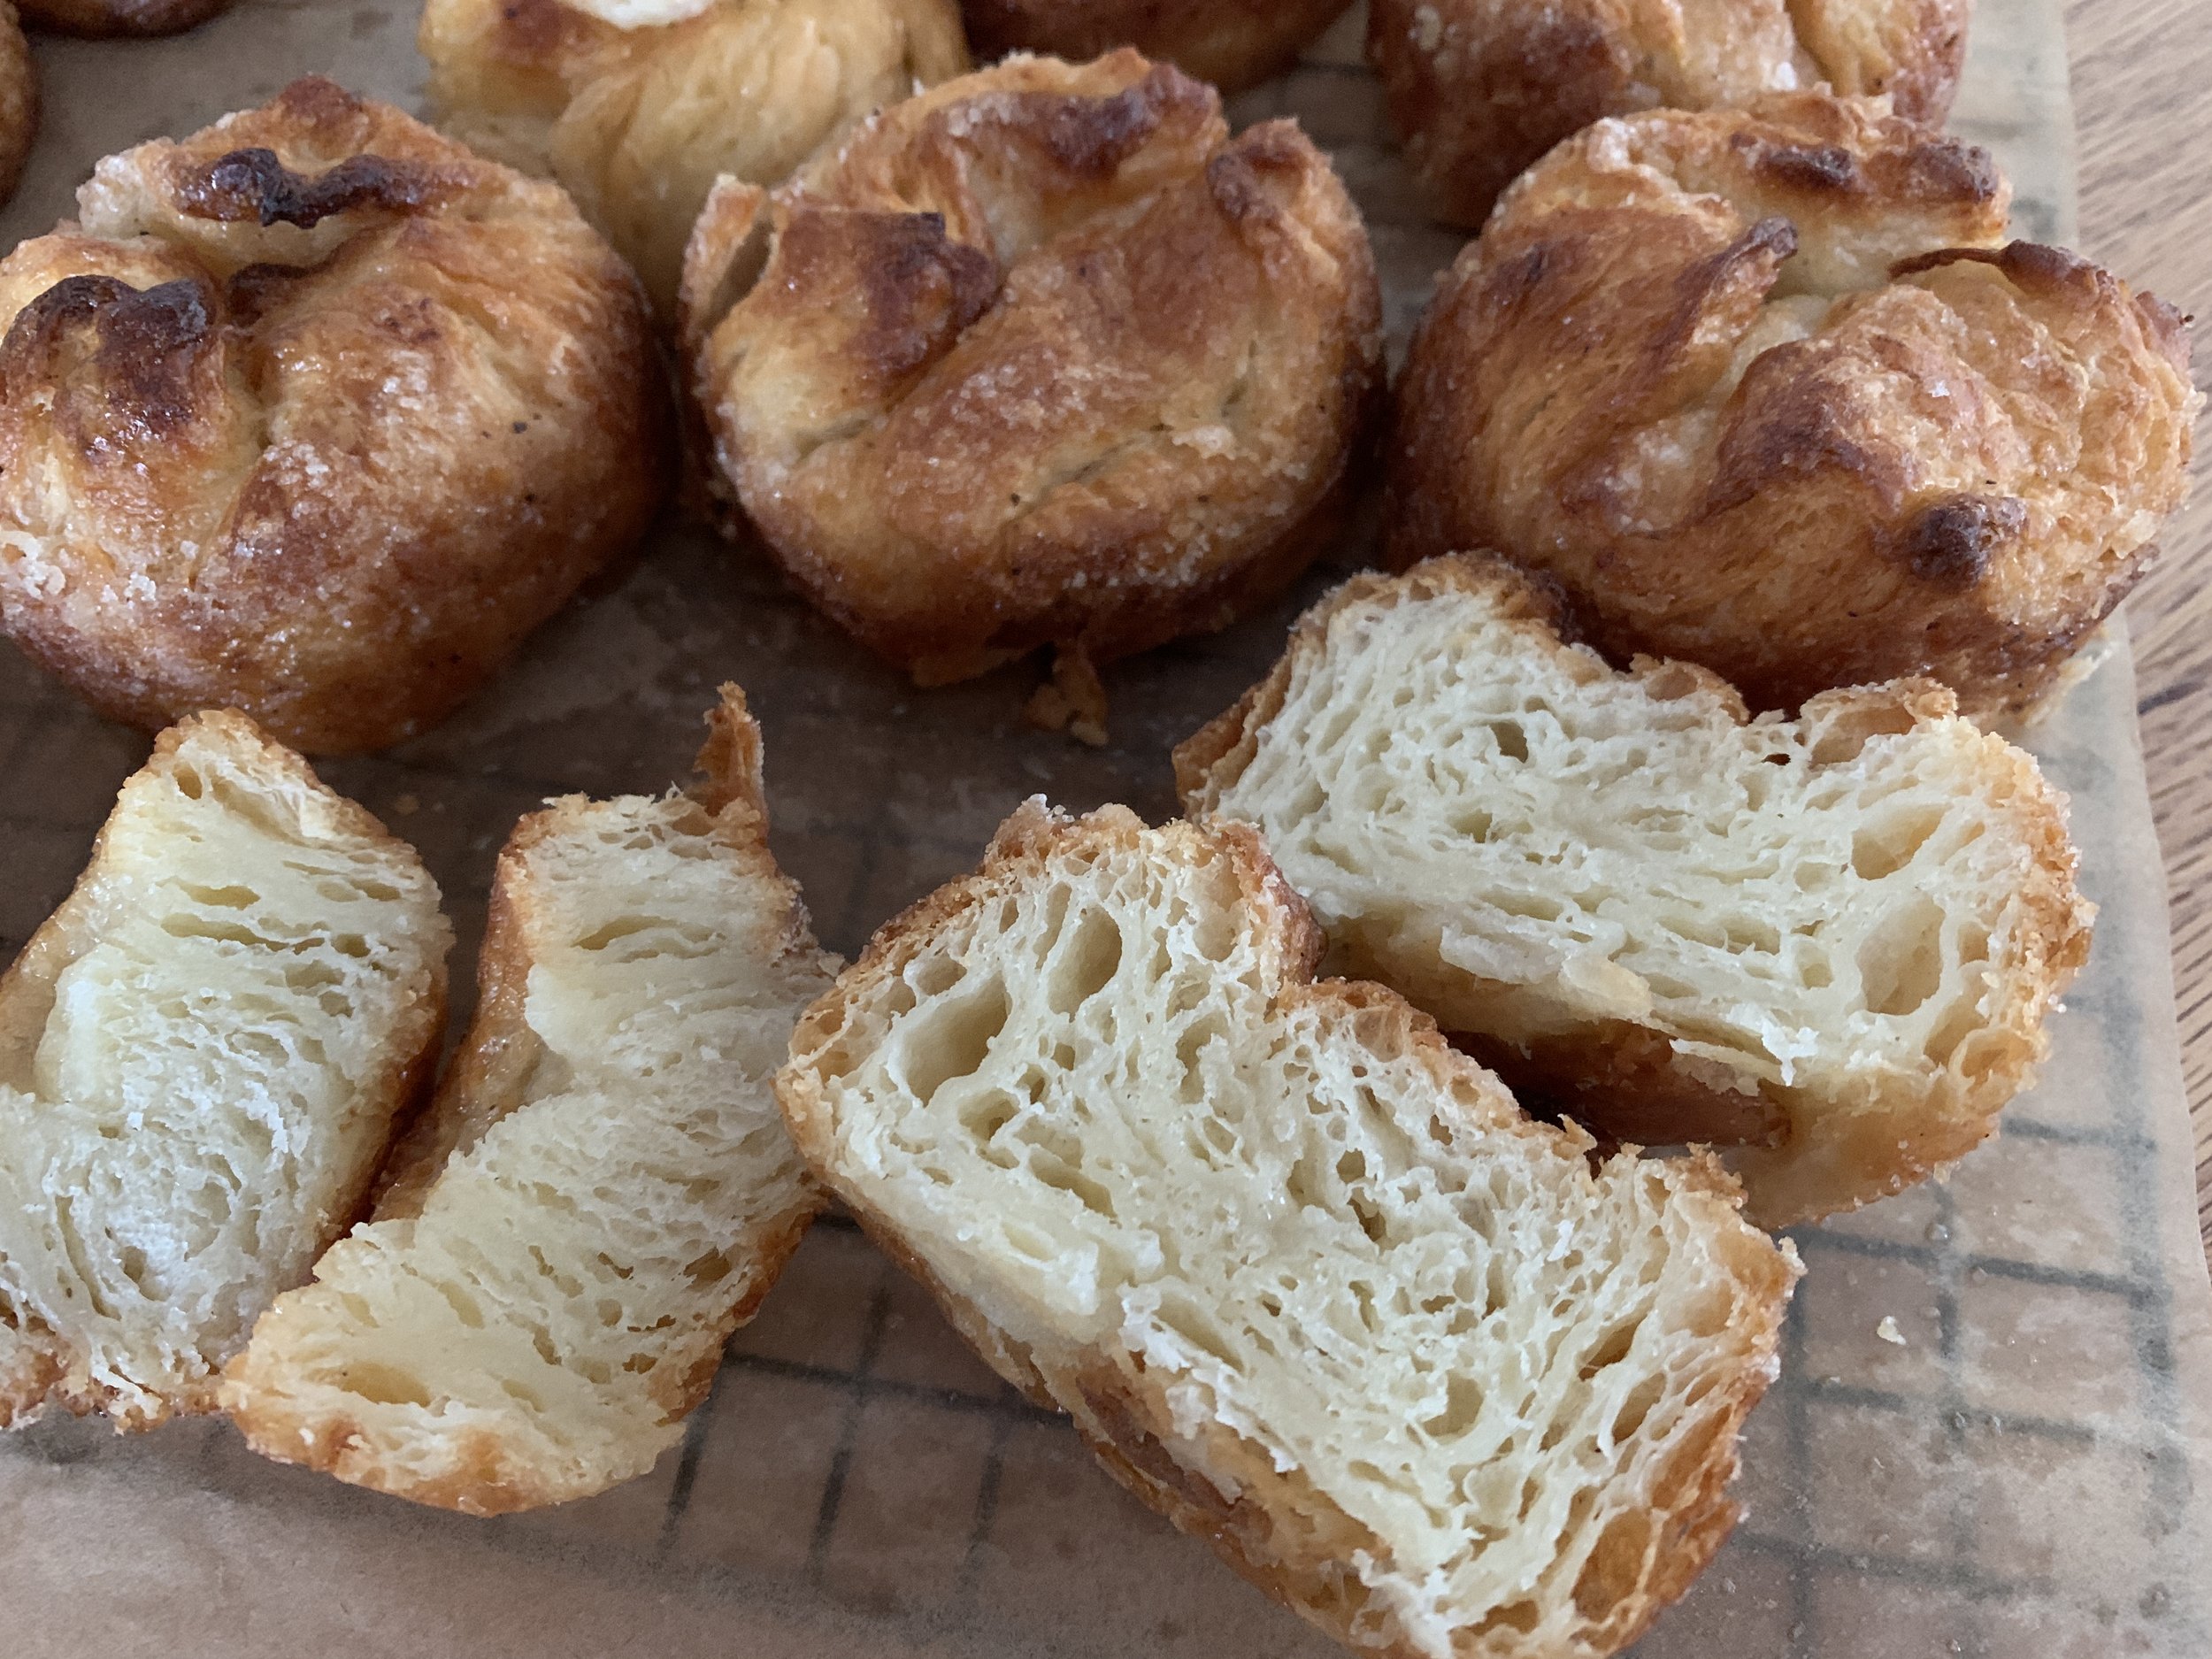
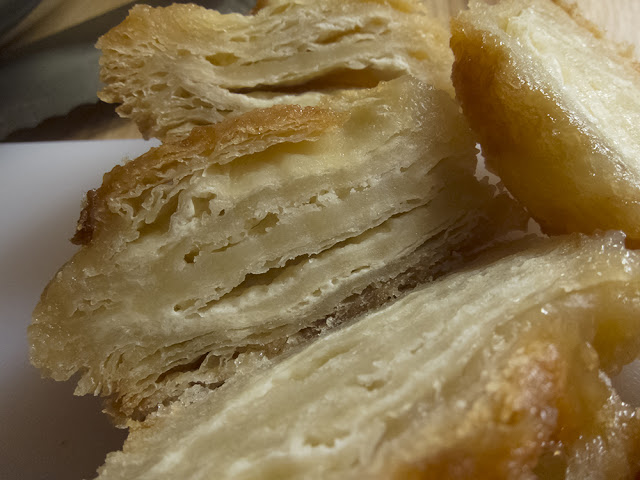
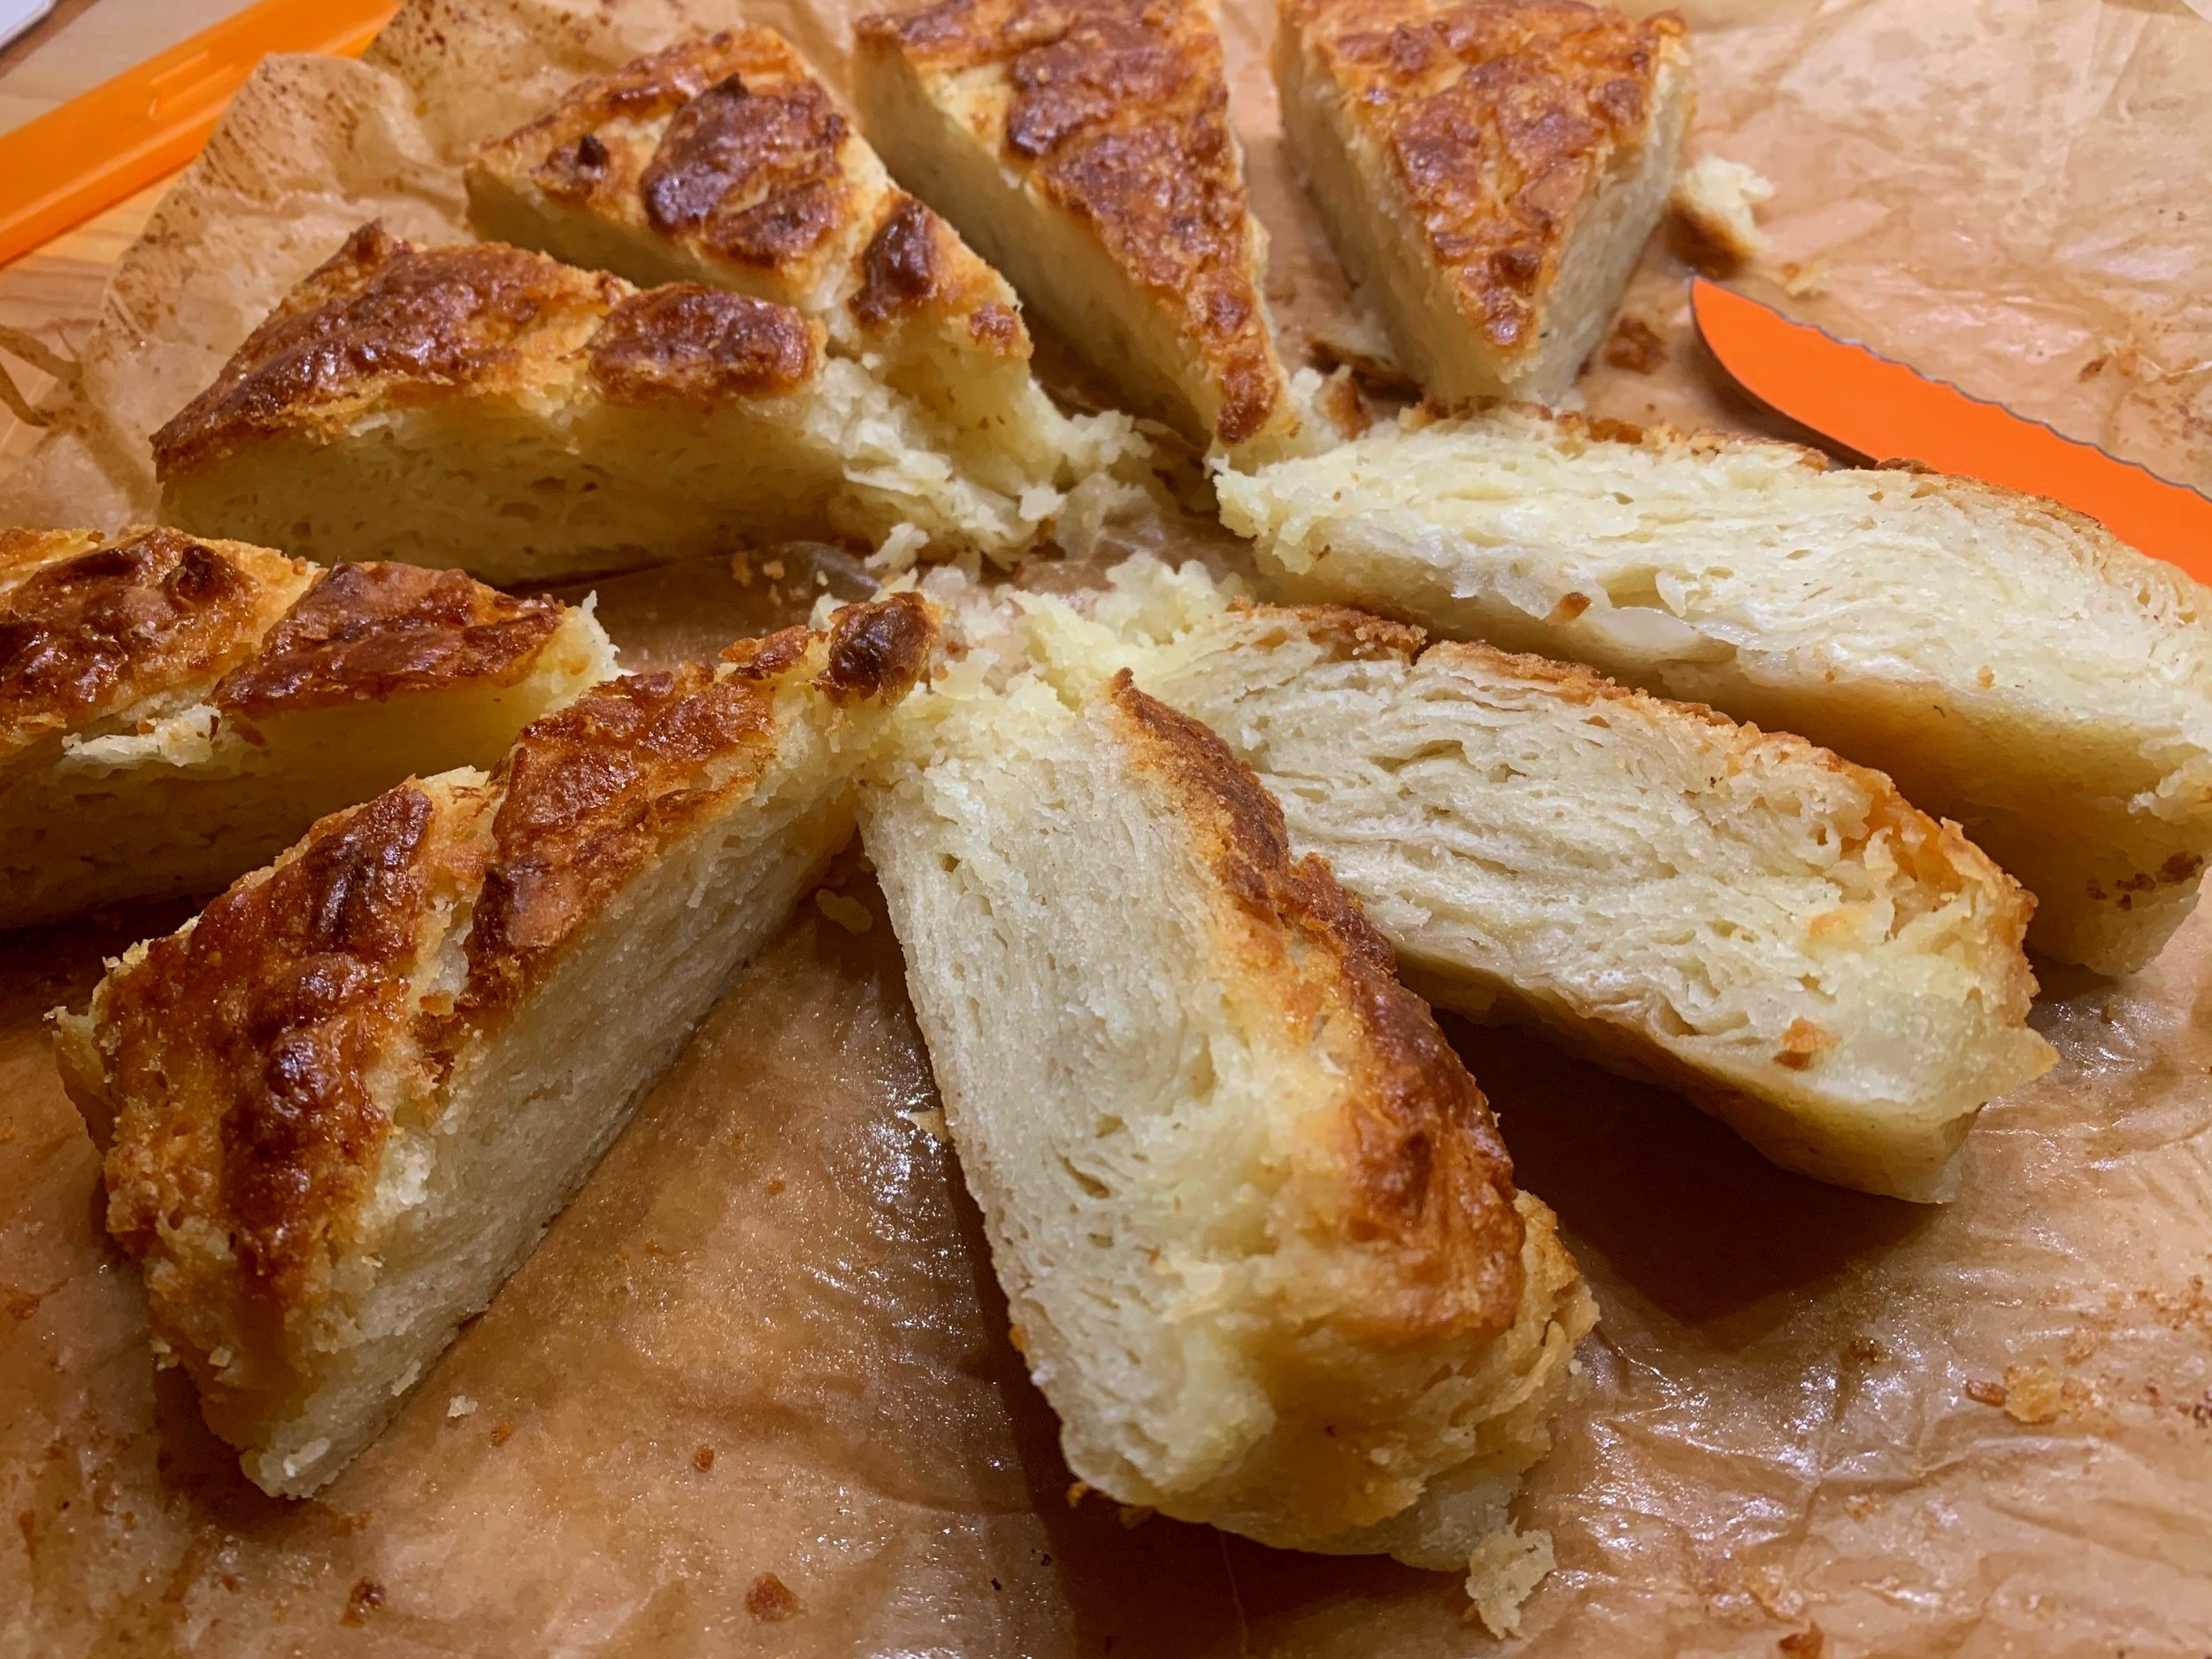
Let it cool a bit and then . . . . . the key for me when testing out any baked laminated pastry is the initial slice to check out the layers. Fingers crossed!


While my initial concern at first inspection was for a doughy under-bake, these layers came out with a certain creaminess that compliments the caramelized exterior - flaky, light and oh so delicious.

Of course, Steve and I had to have our requisite taste test, a decadent pairing of a slightly warm slice with homemade vanilla ice cream. Swoon!

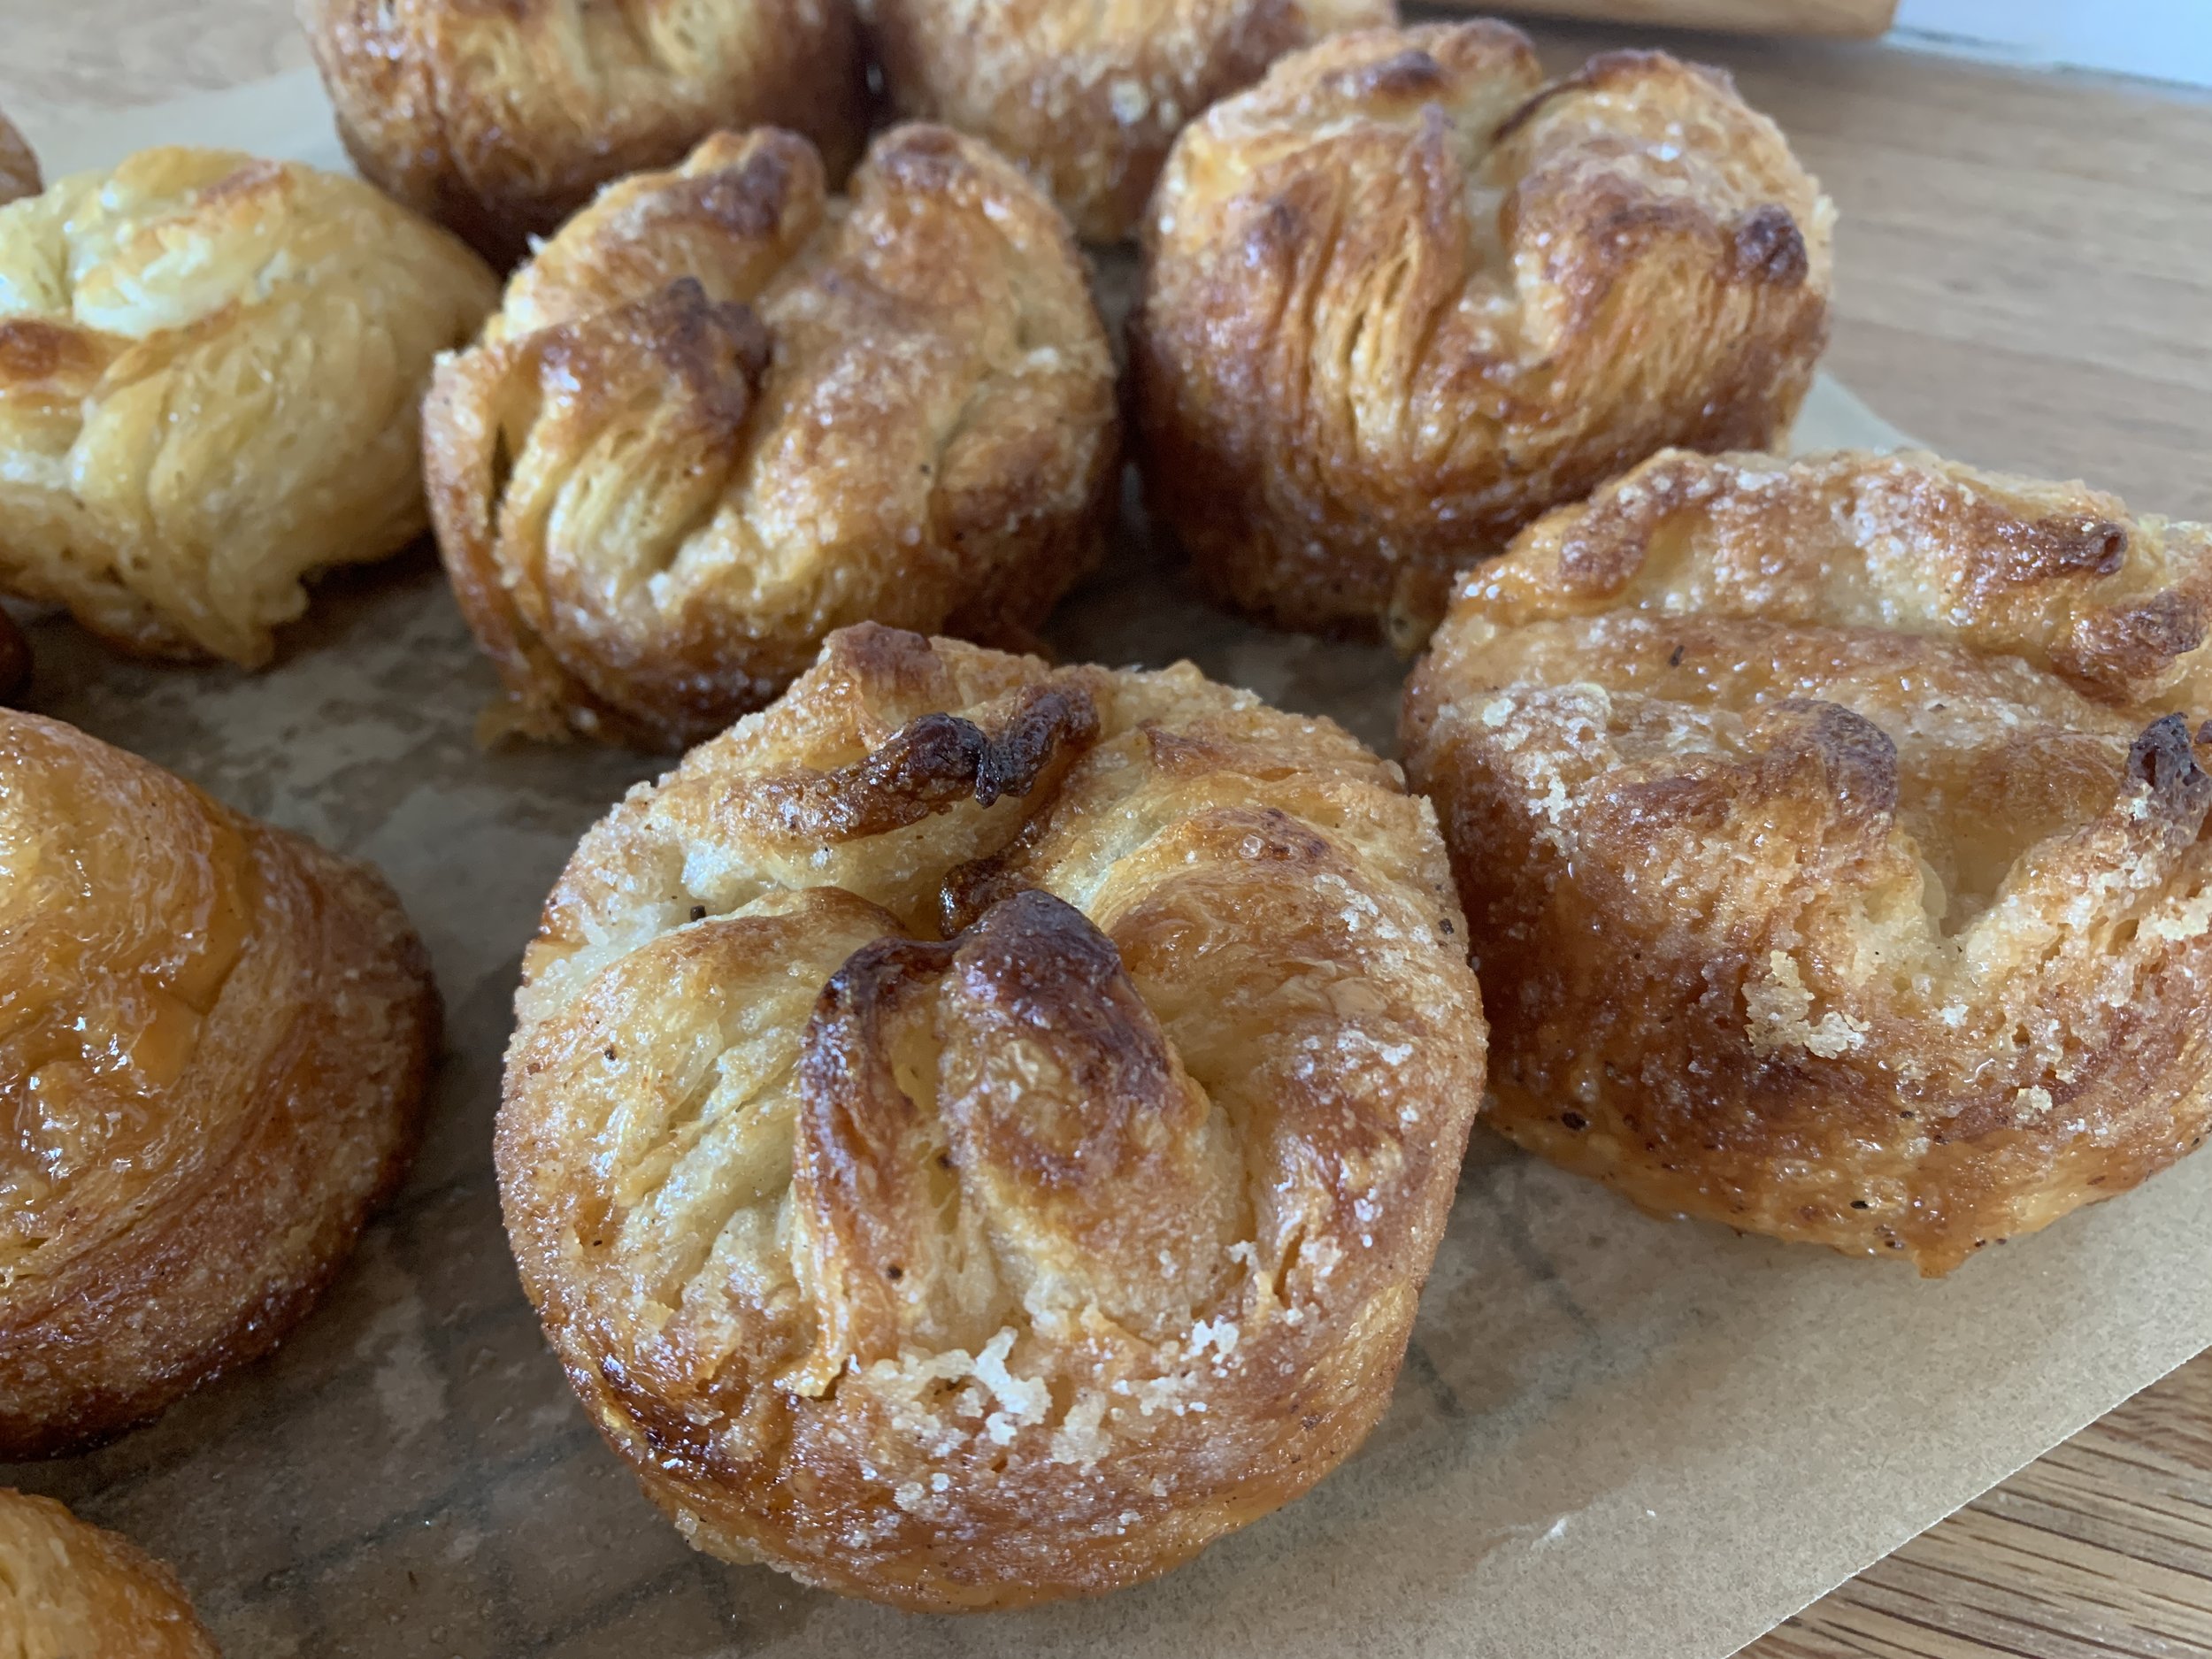
The spirals baked nicely too and turned out just the right size for a delightful morning treat. I peeled them out of the papers pretty soon after baking so as to avoid caramel-y sticking.


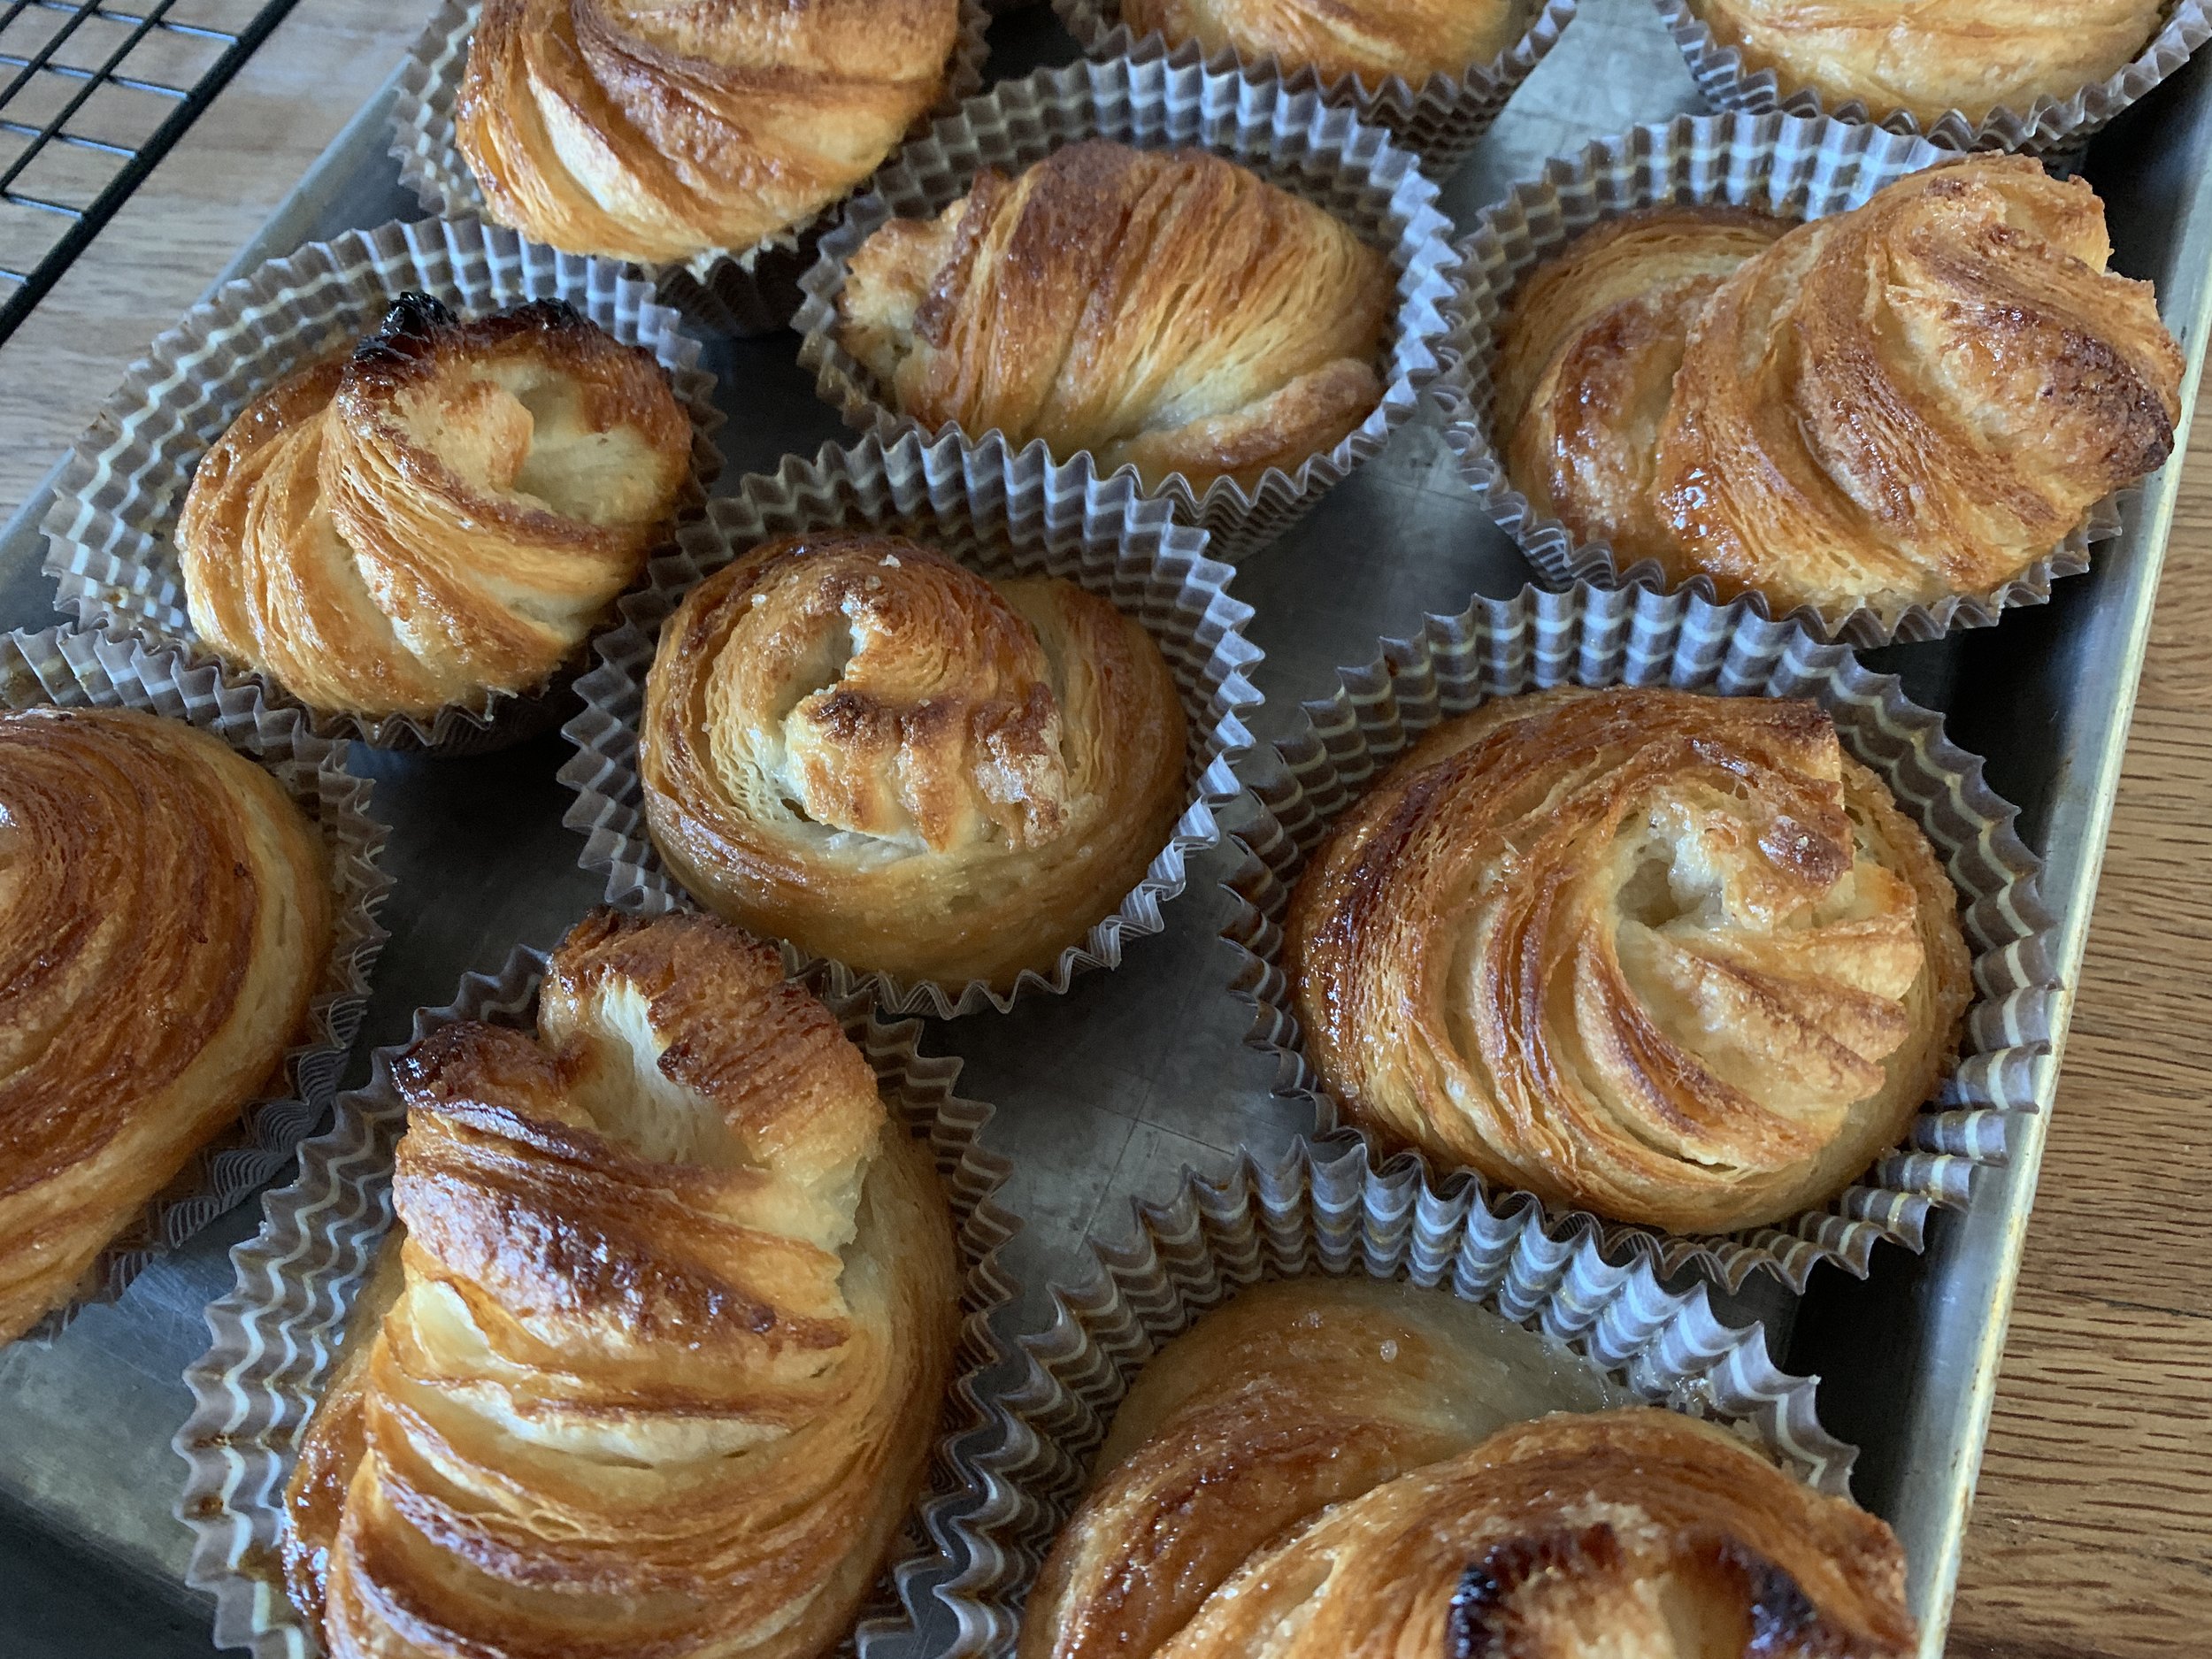
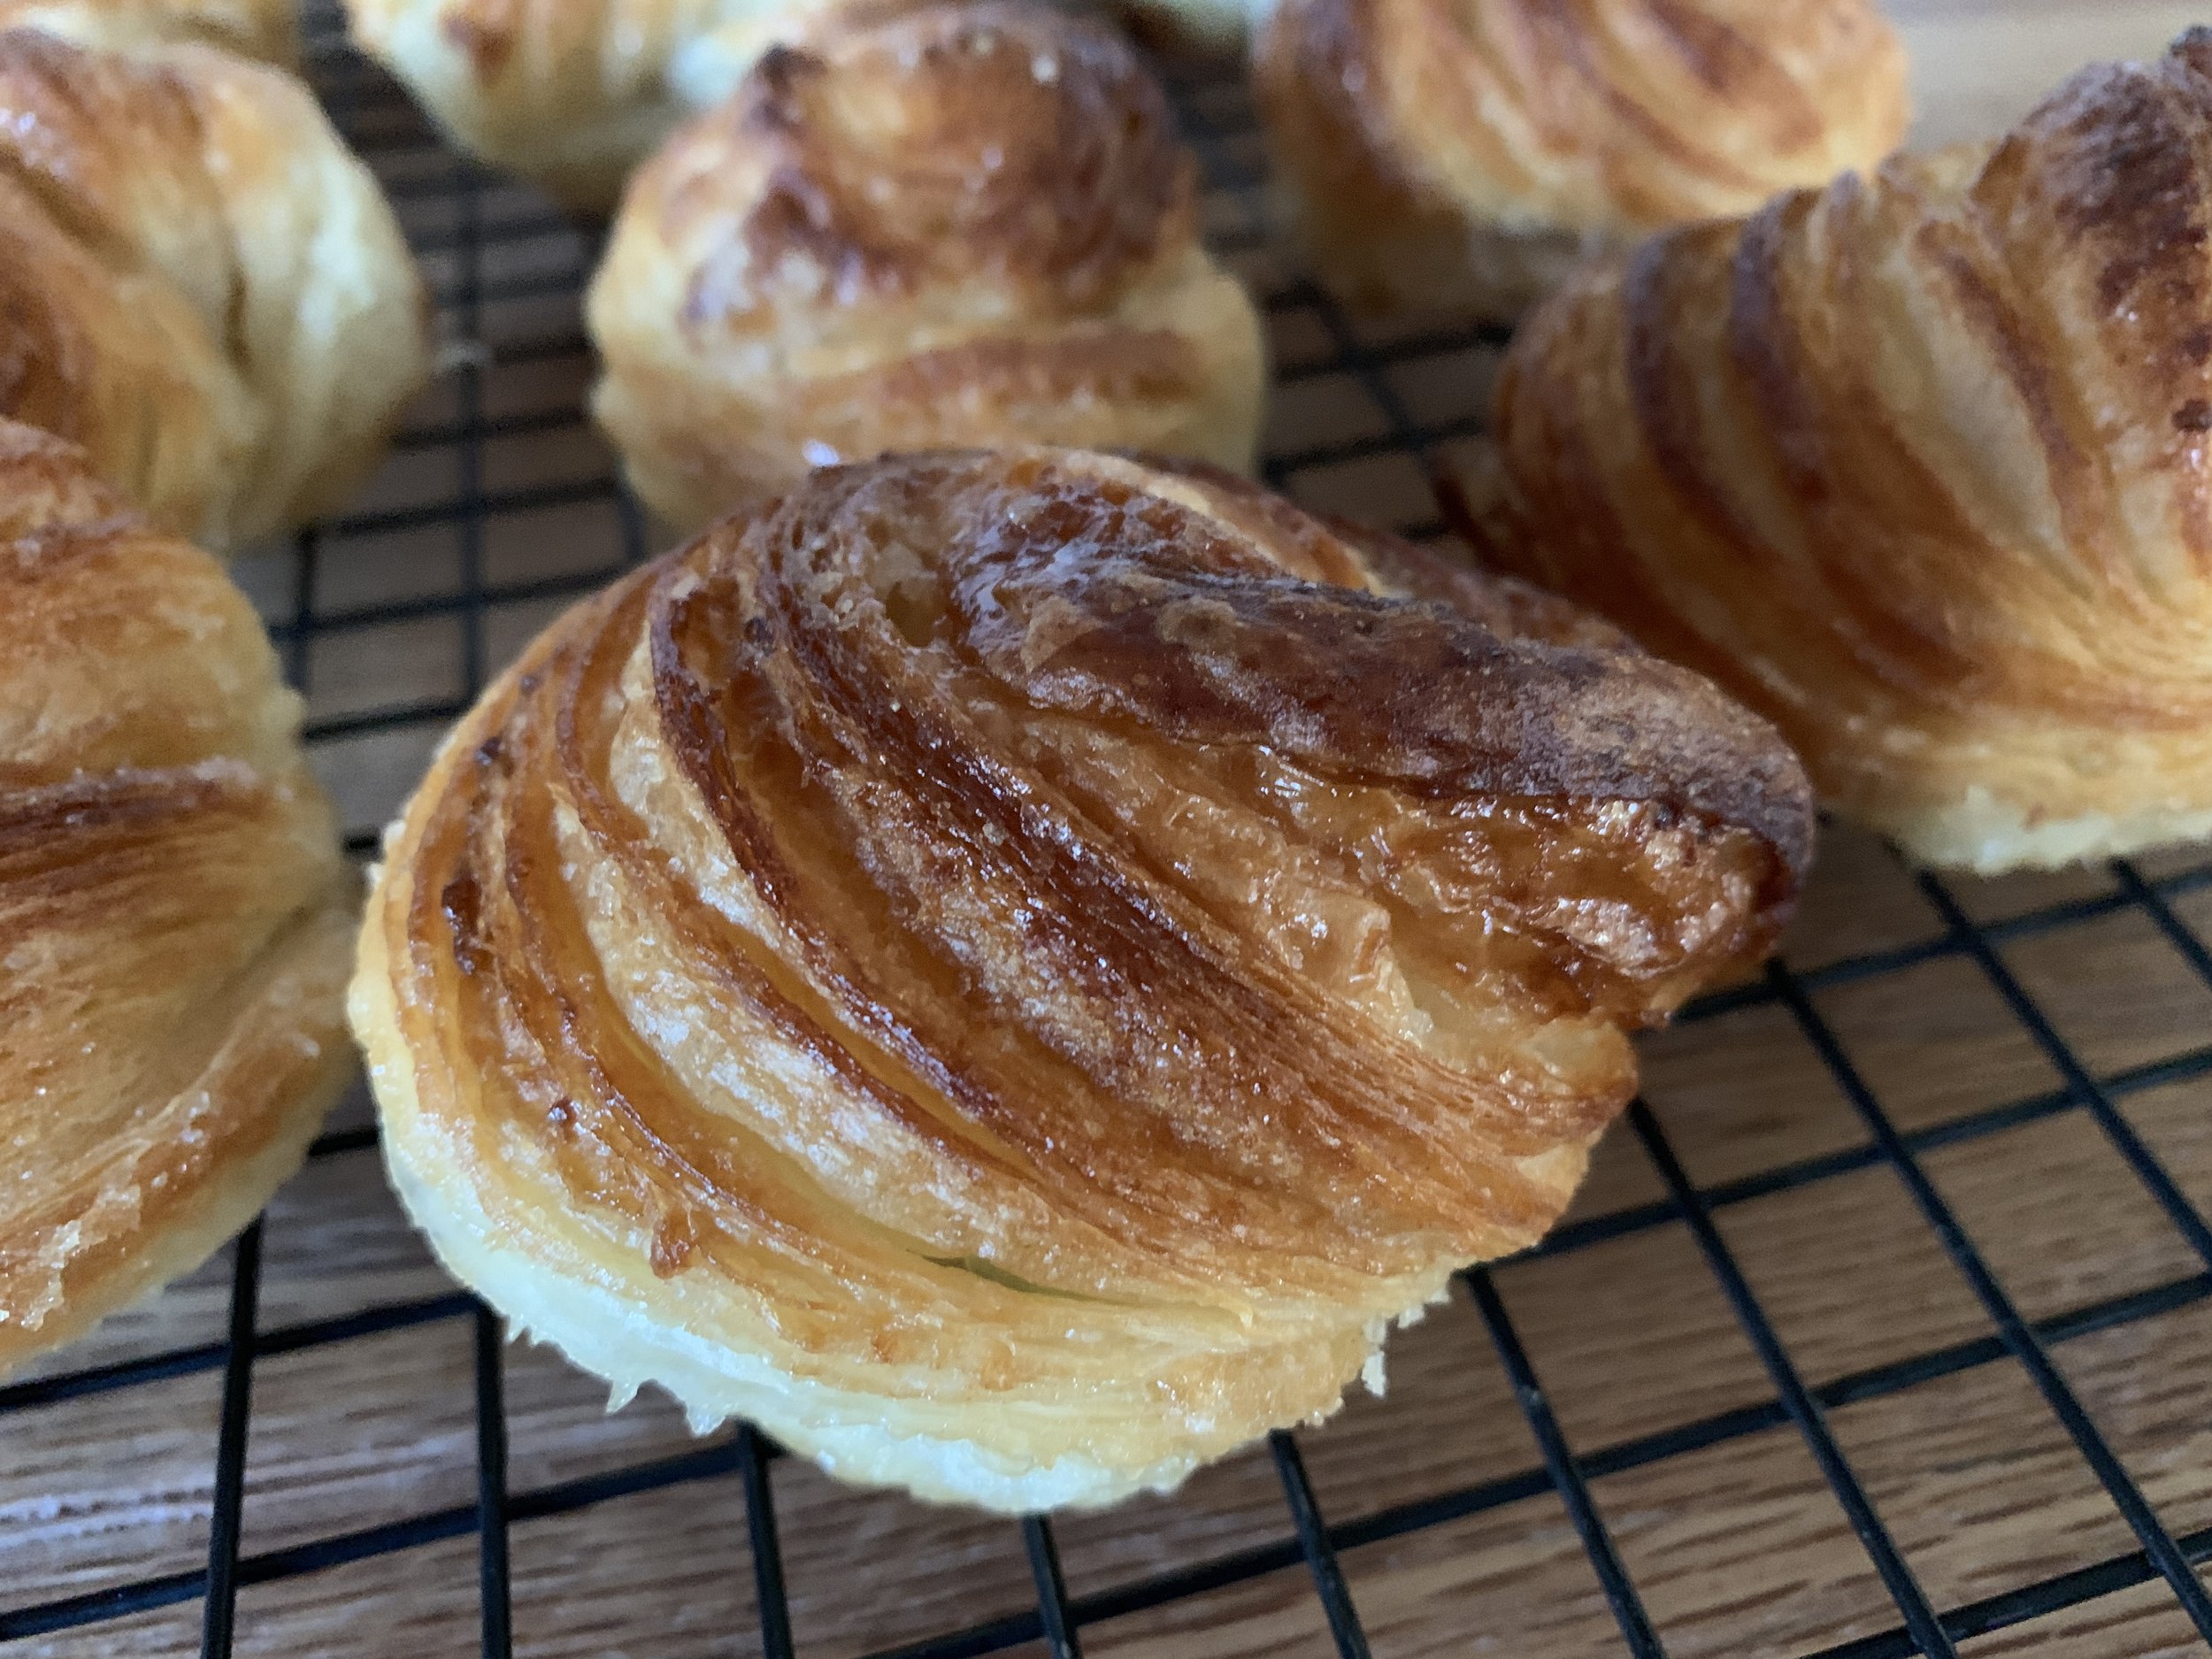
love these - like a petite seashell!

Always itching to test out the staying power of baked goods, a few days later I pulled a few of the spirals out of the freezer for a morning oven warm up for family guests. Delicious. There were two left which we wrapped in parchment and dared to leave out at room temp until the next morning. Another short warm up and they were still great. Good deal!

I had some of my first Janjigian test slices in the freezer along with some of the K-amann slices made with my recipe so Steve and I did another test a couple of weeks later. After a thaw/warm up of about 15 minutes in a 325º oven, we found the first version (seen on the right below) greasy, tough and not very tasty. The second was flaky with a nice texture and all around better flavor.

Mine on left

On a final note, here’s a bit about cleaning the work surface after the sugar rolling. It gets pretty messy. I prefer butcher block (my fave for all things dough) but other surfaces like Corian, granite, stainless are all much easier to clean. I do have a large polycarbonate type cutting board that I can use too, but I opted for the wood this time.

ready for cleaning

NOTE: This is about the only situation in which I rinse my rolling pin quickly under warm water to get the gooey sugar off. Pat it dry and let it sit out on a counter to dry fully. Otherwise after usual dough rolling in flour I simple rub any dough particles and flour off the pin until the next time.

For the sugary surface I use my bench or bowl scraper to push off all the loose debris into a waste basket. Then rub the surface with pieces of lemon, sprinkle with kosher salt and even a little flour to help soak up the moisture and let sit for awhile.


Rub it around to give the surface a gentle scouring, then scrape all the stuff off with a bowl scraper, wipe with a damp cloth and let air dry. The butcher block likes a mineral-oiling once in awhile too, which I might do every few months.

Lemon TIP: when I’ve zested lemons for whatever purpose, I then juice them, pour the juice into ice cube trays and freeze. The cubes are great when you need a tablespoon or two of juice for a cooking or baking project.

I then chop up the zested lemons into chunks and bag them up for the freezer. Throw a few into the garbage disposal every once in awhile to freshen things up or use a few chunks for the above cleaning process.

I think I’ve said enough folks! Happy spring and happy baking!!

just one bluebird of happiness!

Kouign-amann: Part one


Wowza! I can’t believe it will be 10 years this autumn since I launched this blog. In September of 2014 my very first published post was on Kouign-amann (literally translated as butter cake), that tasty caramelized traditional Breton pastry.

This 2-part post provides a fresh look at making three different versions of these treats. Part one - muffin-like with turned in corners (header photo) and spirals (below). Part 2 - full sized 9” cakes (not really cake at all, just layers of buttery goodness baked in a pan).

spirals all baked up

A bit of back story: during my pastry school days in 2006 I recall my fascination upon seeing Chef Xavier Cotte at Le Cordon Bleu Paris demonstrate the creation of this delicious buttery, caramel-y pastry (and my delight in tasting it!).

A few years later, in early 2011, as Steve and I were celebrating the New Year in Brittany with our British friends Richard and Pauline, we discovered one of Georges Larnicol’s shops where many flavors of petite kouignettes were on display. We picked up a few but were disappointed in their texture and flavor. It seems they were probably sitting in the case longer than they should have been. Even a brief warm up in the oven did little to revive them. Bummer.

When I opened my French Tarte pastry studio in Pawtucket RI in May of 2012, my focus was baking French classics like croissant, croissant aux amandes, pain au chocolat, financiers, tartes, profiteroles, sablês and more. It was a trip back to Paris a year later that brought me to Alain Ducasse’s Paris école de cuisine for a chocolate themed class. Our conversation turned to laminated dough and, when I learned that the class’s chef for the day, Geoffrey Franck, had just taught a Kouign-amann class, I asked for his recipe. Et voilà - he was kind enough to share it with me! I tweaked it just a bit and began baking these babies for my shop. Here’s the recipe I use.

Putting up the shingle


Kouign-amann

I moved out of the Pawtucket teaching and retail space in the spring of 2014 as Steve and I prepared to move back to Michigan. I was eager to stay active in the baking and pastry world and so began the blog. When I launched it in 2014, I had my sights set on working my way through the recipes in Philippe Conticini’s La Pâtisserie des Rêves, but, alas, I soon discovered a number of inconsistencies from recipe to recipe. I moved on to other baking adventures, many of which are chronicled in this very blog.

So here we are in 2024. Writing a new/updated post on the subject has been whirling around in my head for awhile now. I’ll review the steps, look at three ways to shape/bake K-amanns and offer some tips along the way based on things I’ve learned about the process.

Lots of stuff coming up so take your time or just browse as you wish.

I’ll start with individual pastries, either as spirals (kouignettes) or muffin-like with corners turned in. These are popular all over the USA and certainly in France and beyond. The 9” cake version (coming up in part 2) is a more traditional way to enjoy it by the slice when in Brittany. A quick web search confirmed that Georges Larnicol’s kouignettes remain popular, with many locations in Brittany as well as shops in Paris, Nancy and Bordeaux.

Individual kouign-amann, just shaped

As is true of most any recipe topic you review, you’ll find a multitude of variations in ingredient proportions, mixing/kneading times, rising and resting times, numbers and types of folds for laminated dough and on and on. You just gotta do it and make it your own.

Let’s start this thing! Don’t forget the recipe here. There you’ll see standard measures as well as gram weights (my preference).

Place 350 ml tepid water in the bowl of a stand mixer. Add 50 g bread flour, 500 g all purpose flour, 50 g sugar, 20 g soft butter in pieces, 12 g salt, 5 g instant yeast. Give it a stir up with a spatula to get things moistened.


Using the dough hook, mix on stir for a minute then on speed 2 for three minutes (Kitchenaid settings) to achieve a soft dough.


Just after mixing


Cover the bowl and let it rest at room temperature for an hour. The dough should appear more pouf-y. It may look like a subtle change in the photos but rest assured the dough has risen and is softer and more lovely in texture after the hour repose.


Ball the dough up and wrap it in plastic wrap, giving yourself some leeway to allow you to push the dough out into an 8” rough square within the confines of the plastic wrap.


Refrigerate the dough for at least 2 hours or up to overnight. I usually make the dough in the late afternoon then fridge it and plan to finish things off the next morning.

You can prepare the butter block ahead and hold it in the fridge until ready.

For the block: weigh out the butter (in this case 400 g), lay it out on a piece of plastic wrap to form a 5-6” square of butter (cut chunks as needed), wrap it up, leaving some leeway around the edges to provide a 7-8” final size. Let it sit at room temp to soften then tap with a rolling pin and smush it around within the plastic to get rid of seams (you want the butter block pretty uniform).

ready for smushing and shaping

Keeping it in the plastic allows you to manipulate it without getting your hands all buttery. I roll and push it around to work at getting rid of seams.


Push, flatten and then unwrap to regroup.


Rewrap leaving room to roll the butter out to a square about 7-8-ish”. Then roll it out, all the while keeping it in the plastic. Chill until ready to use.


Bottom line - the best way to create a smooth butter block is soften your butter enough so that you can easily form it within your parchment or plastic wrap into a uniform block without seams. Then chill it until you’re ready to proceed with the beurrage and folds.

If you have access to solid pounds of butter (no sticks!), even better. During my stage at Pascal Pinaud’s pâtisserie in the 5th arr. we cut slabs of butter off very large blocks when making large batches of croissants. Then during my Providence/Pawtucket days I used Cabot full pounds, both when pastry chef-ing at Gracie’s and in my French Tarte business. It’s much easier to portion out what you need and have no seams! Yay!!

When ready for the beurrage, take the butter out of the fridge about 20 minutes ahead to allow it to warm enough to make it malleable yet cool. You want it to bend, not crack.

NICE!

There are at least a couple of ways to perform the beurrage (envelop the butter in the dough). Below is an image using felt templates - it’s a good way to show the participants in my classes how it can be done.

Either form the dough into a square with the butter centered at an angle or roll out a rectangle and center the butter on it.

Get it?


Then fold the corners of the square over the butter OR fold the ends of the rectangle over the butter. The end result is essentially the same. A dough/butter package!


Here’s what I did.

Dough and butter components

Roll the dough out to two times the length of the butter block. Keep the butter wrapped and set it in place to be sure you’re happy with the size/position before unwrapping it. Looks good.


Unwrap the butter and set in place.


Fold the bottom up . . . . .


. . . and the top down to cover the butter. Pinch all the seams closed.


Turn the dough over seam-side down with the pinched ends at top and bottom. Press down with your rolling pin along the length to get the elongation under way and “set” the package. Always rolling to and from yourself, roll the dough out to about three times length to width. We all roll with different pressure so I periodically flip the dough lengthwise (top becomes bottom and bottom becomes top) to keep the thickness of the dough as even as possible.

And remember to lift and fluff the dough, re-flouring lightly as needed to prevent sticking. If the dough becomes too warm and soft, wrap it and chill in the freezer for 10 minutes or fridge for 15-20 minutes to firm things up.


As you roll the dough out, pay attention to the edges. The butter won’t always get out to the very edge so it’s recommended that you trim those edges to expose the butter. This makes for more precise laminations. Create scrape buns with the extra dough.

Doughy edge

Here’s the cut edge showing the exposed butter.


Time to start the folds. Here are some choices: three 3-folds (letter folds) with flour then a final 3-fold rolling in sugar (my choice). Or two 3-folds with flour and two 3-folds with sugar. Or one 4-fold (book fold) and one 3-fold with flour and a final 3-fold with sugar. You can play around with it.

Here’s the start of the first 3-fold. Visualize the dough in thirds. Notice my scraps - you’ll see those later in a squiggle bun I made. Just as for the beurrage, bottom up . . . .


. . . . top down.

First three fold complete


After each fold rotate the dough 90 degrees so the spine of the book is on your left. If your kitchen is cool and your dough is behaving you can go right ahead with the second 3-fold. Otherwise chill the dough for 45-60 minutes before proceeding with the next fold.

No matter what fold approach I’ve chosen, I label the package with types of folds I’m planning, then cross off after each fold. That’s particularly helpful if doing several batches of dough - easier to keep track of it all.

After my second 3-fold I wrapped the dough, froze it for an hour or so to retard the fermentation then put it in the fridge overnight with plans to finish the process the next morning. That timing worked for me this time but it can all be done in a day too.

The next morning I completed my third 3-fold with flour then wrapped/chilled the dough while I prepped my pans.

I’m using 3” individual Fat Daddio cake pans for my muffin-like/corners-in version and a standard muffin tin for my spirals. Butter and sugar them. NOTE: I didn’t do the two center muffin wells at first, since I thought I’d get 10 spirals from my dough, but I prepped them after my yield was indeed a dozen.


When ready for your last fold, have 200 g granulated sugar on hand. Sprinkle sugar on your work surface, place the dough down, sprinkle more sugar on top then roll it out lengthwise


Ready for final 3-fold

At each step sprinkle more sugar on. Once again, bottom up and top down.


At this point lightly wrap the dough in parchment and let it rest for 20 minutes or so. The best tip I received on this was from the previously mentioned Chef Franck who cautioned a room temperature rest rather than a refrigerated rest. Sitting in the fridge gets the sugar melting and boy can it get messy!

OK. Now it’s time to roll the dough out for cutting and shaping. I needed a piece of dough about 7” x 10.5 inches to give me six 3.5” squares for my Fat Daddio pans. The rest went to spirals.

I rolled the dough lengthwise, keeping the width at 7-ish”. Using the lower half or so of the dough, I marked out and cut my squares.


Fold the corners of each square into the middle starting with two opposite corners and finishing with the other two. Push the center down firmly with your fingertip. Place each in the prepared pans.


Roll the remaining dough out to about 8” high and 12” wide and cut twelve 1”strips. Roll each one up into a spiral and place them in the prepared muffin tin.


Notice my squiggle bun sitting amidst the pans on the right below. I rolled the scraps in vanilla sugar and rather randomly braided and coiled them.


At the start of the rise.

Cover pans with plastic wrap or a damp kitchen towel and give them a 60 minute rise.


AFter the rise

During the second half of the rise heat your oven to 375ºF.

Bake 20-25 minutes until golden brown and caramelized.


Taking great care not to burn yourself, turn out the baked buns onto a wire grid. Use an offset spatula to loosen the edges. If you wait too long, the caramel hardens and removal from the molds is difficult.

Notice below that some of the spirals aren’t as well baked as the others. I popped them back into the oven for 5-10 minutes to get them nicely browned.


Here’s the finished batch of both versions. Notice the scrap bun tucked in there.


After a short cool down (they’re deelish a bit warm!), Steve and I did a taste test. Yes!

Crisp exterior, caramel just right, light, airy yet buttery interior layers. We’ll take it!


Traditionally in Brittany you’ll see Kouign-amann served as a full 8-9” cake for breakfast or afternoon tea. Stay tuned for Part 2 - the full size version!


Mid-winter update

First and foremost I simply had to share this recent sunset that we viewed right from our living room windows. It’s been awhile since we’ve seen one this stunning here in west Michigan. It was a beauty and pictures don’t even do it justice.

Things are purring along here in GR with recent temps in the 50s and low 60s. Hard to believe it’s still February. Steve and I are going to fitness classes regularly which provide a wonderful boost to one’s physical and emotional well being.

I’m working on a Kouign-amann post which is becoming pretty exhaustive in scope. I’ll probably end up doing it as a two-parter. Watch for it in the next couple of weeks.

Kouign-amann Spirals

Otherwise January was pretty quiet, a time to take care of household stuff, get reorganized for the new year, take each day as it comes. My baking focused on some staples for our larder - scali (my fave bread for awhile now), focaccia and pizza dough.

Nephew Jon visited early in February so it was a simple caramel apple tarte with homemade vanilla ice cream for dessert.


It felt good to make croissants and pain au chocolat again after a several month hiatus in that department. These were requested by friend Kim, the activities director for an assisted living facility down the road.

Of course I made a few extra so Steve and I could have a little treat.


These are cherry almond scrap buns made with trimmings from the croissant dough.


Here’s a preview of the full sized kouign-amann cake I’ll be writing about.

Oh those buttery layers

Stay tuned for Kouign-amann!

Meanwhile, please enjoy a few more images - ahhhh . . . . the beauty of nature!


If pastry could change the world . . . . .

If only everything could remind us of love . . . . .

If we could all share fresh bread, cheese and wine . . . . .

If a simple and delicious apple tart could make each day better . . . . .

If a bright, flashy chewy macaron could shout “Be Happy”! . . . . .

If croissants could bring us together as one, multi-layered though we are . . . . .

If a buttery scone could make us giggle with delight . . . . . .

If creamy profiteroles could smooth out all the kinks amongst us . . . . .

If a shortbread sandwich cookie could hug each and every one . . . .

If caramelized Kouign-amann could roll us up in a big warm embrace . . . . .

Don’t you think the world would be a better place?

Kouign-amann pudding

Now here's a good one - essentially a bread pudding made with leftover Kouign-amann.  What?!


Of course some might argue that once Kouign-amann are made they'll be gobbled up and there won't BE any leftovers.

Not so in my case.  A couple of months ago I decided to make a batch of K-a, but, instead of baking them in open tart rings, I baked them in flexi-molds.  I thought it would lend itself to much easier release of the final baked goods from their sticky, caramelized holders.

Nuh-uh.  Because the dough was essentially "shielded" by the silicone molds, the K-a exteriors did not caramelize, the dough layers did not bake through and were pale and floppy.  It was a gooey mess.

Note to self: certain things bake and brown much better surrounded by metal.  Yup.

Some of the edges were actually OK and the flavor was there, so something wouldn't allow me to throw them all away and into the freezer they went.

After the holidays I was visiting Schuler Books here in Grand Rapids, looking of course at baking books, and was excited to find a recipe from Rose Levy Beranbaum's The Baking Bible (with Kouign-amann on the front cover no less) for "souffled French toast".

It uses day-old K-a baked in an egg, milk, cream, vanilla custard.  What's not to like.

I removed 480 grams of K-a from the freezer some hours ahead and let them thaw at room temperature.  Notice the misshapen K-a lumps in the photo below.


notice the doughy interior layers


Cut the K-a into cubes and place them in an 8"x8" glass baking dish.

Mix 6 large eggs, 160 ml heavy cream, 60 ml whole milk and 1 teaspoon vanilla extract.


Pour the custard over the K-a, cover and soak the mélange in the fridge over night.


ready for an overnight soak

Heat the oven to 350º F.  Bake covered with foil for 10 minutes, then remove foil and bake an additional 10 minutes or until the pudding is puffed, set and nicely browned.


We ate this for dessert au naturale, still slightly warm (when it's at its best, by the way).

I can just imagine it topped with a little chantilly cream, a drizzle of maple syrup and some fresh berries, either for dessert or for breakfast or brunch.  YUM.

So now you know what you can do with those leftover or not-so-perfect Kouign-amanns that you just might have lying around.

Thanks Rose.