Favorite garnishes part 1: candied nuts

Lightly candied sliced almonds

Lightly candied sliced almonds

Wow! It seems like this one’s been awhile in the making. Let’s just say that life has a way of taking us on a variety of paths and unknowns.

Now let’s talk about garnishes! It’s time to take your pastries and desserts to the next level with . . . . . . . Crunchies!!

Whether you choose cookie crumbs, candied citrus, nutty crumbles, brittles or candied nuts, they’ll all add that extra splash your creations deserve. Use as garnishes on top of ice cream, teacakes, baked fruit and custard desserts or tuck them into creamy layers between your favorite cake slices and you’ll be the happier for it. It’s the little things that make all the difference.

I’ve touched on many of these when writing about different projects over the years, but now I’ve attempted to organize some of my favorites in separate posts so as not to overwhelm with too much info.

Let’s talk nuts. I’ll explain three approaches to candied nuts. Generally you’ll need the stove top and in some cases the oven. I find silicone mats perfect for these projects - no sticking plus easy cleanup.

Start with a clean slate, as it were - use raw, non-salted, non-roasted nuts. I typically have almonds, pecans, walnuts, pistachios and hazelnuts in my larder and, unless I know I’m going to use them within a few weeks, I keep them in the freezer up to six months to preserve freshness.

Here we go. The first approach calls for making a syrup on the stovetop, stirring in your choice of nuts (whole or sliced) and then baking in the oven to crisp things up. Sounds good.

Heat your oven to 350ºF. In a small saucepan stir together 1/4 cup (50 g) sugar, 2 tablespoons water, 1 tablespoon corn syrup and a large pinch of kosher salt. Bring it to a boil over medium heat then remove from the heat and stir in 1.5 cups (~ 200g) of nuts until coated. Then spread the mix out on a parchment or silicone lined 1/2 sheet pan and bake for 5 minutes. Stir them up and bake another 8-10 minutes until golden brown. Let cool and store in an airtight container at room temp. They should last several weeks and are great for garnishing ice cream, custards, crisps, tarts or whatever your little heart desires. Even your morning oatmeal. And they’re not bad all by themselves!!

Cherry almond Breton tartelettes with almond crunchies

The next approach (which I refer to as the egg white method) uses a bowl, whisk, rubber or silicone (my preferred) spatula and the oven (no stovetop). I particularly love making pistachios this way, coarsely chopped and blended into my favorite Breton shortbread dough for just the right touch of crunch. Yum.

Halve or double the recipe to suit your needs. Prep note - you’ll be toasting and cooling the nuts first before blending them into the egg white mixture and then back into the oven. You can do the toasting a few days ahead of time and store the nuts at room temperature in a covered container.

Heat the oven to 300 - 325ºF depending on the nuts you’re using (325º for whole almonds, walnuts and hazelnuts; 300º for pecans and pistachios which tend to burn more easily). Spread 2 cups (about 227 g / 8 ounces) of nuts in a single layer on a sheet pan and toast them about 8-10 minutes to bring out the fragrance. Let cool. Keep the oven on at the same temperature at which you toasted the nuts.

If you’re like me and save your egg whites for various purposes, this is just one way to use ‘em. In a medium bowl whisk 1/2 or ~ 16 g (give or take) of a large egg white with about 75 g of granulated sugar and a pinch of salt until the mixture has thickened and looks like a loose meringue. Don’t fret about the egg white - using one large white will simply give you a frothier coating.

NOTE: change things up by using brown sugar instead of white and adding spices like ginger, cardamom, cinnamon or coriander (or a mix!) for a tasty option.

Blend the nuts into the mix and spread out on a parchment lined pan.

Bake 20-30 minutes, stirring every 10 minutes or so until the egg white mixture appears dry and crunchy, coating the nuts. Let cool and store in a covered container at room temperature for a couple of weeks.

Use whole as a teacake topper; coarsely crush/chop as a garnish for your favorite ice cream; pulse them up in a food processor and blend into buttercream for your favorite layered cake or dessert creation.

Cocoa hazelnut teacakes with white chocolate-mascarpone cream
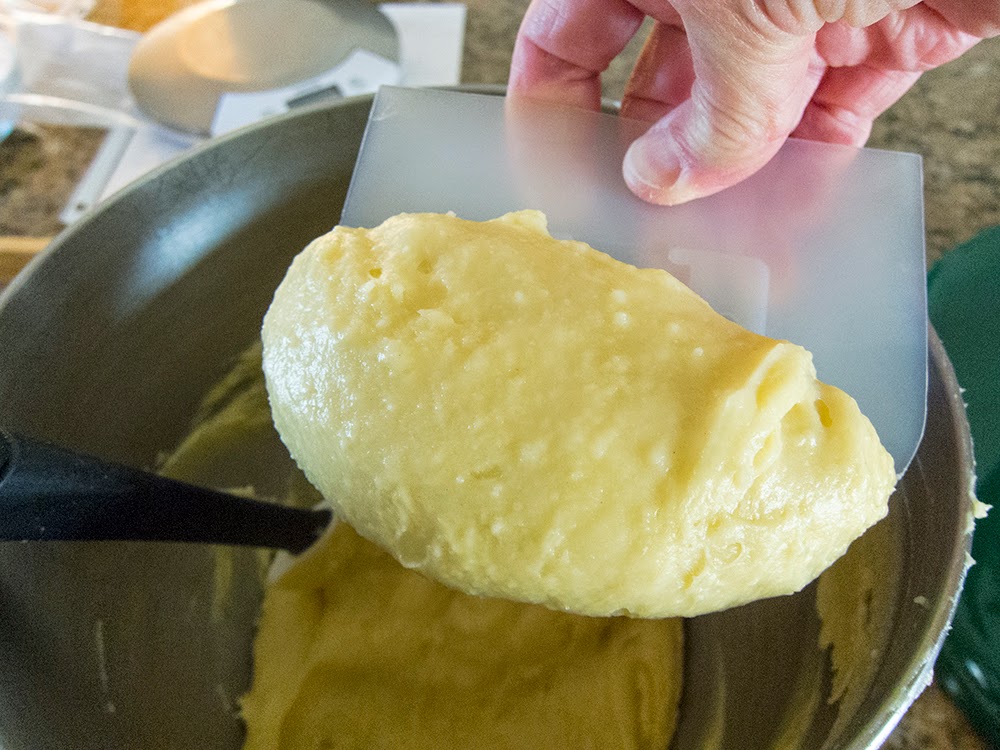
Buttercream anyone?

The last method also involves toasting the nuts first so have your oven ready. The nuts should be warm when blending them into the caramel for which you’ll need a medium-large saucepan. Have a silicone-mat-lined or buttered baking sheet on which to spread the caramelized nuts. This is akin to making brittle (coming up in a future garnishes post) but no baking soda here.

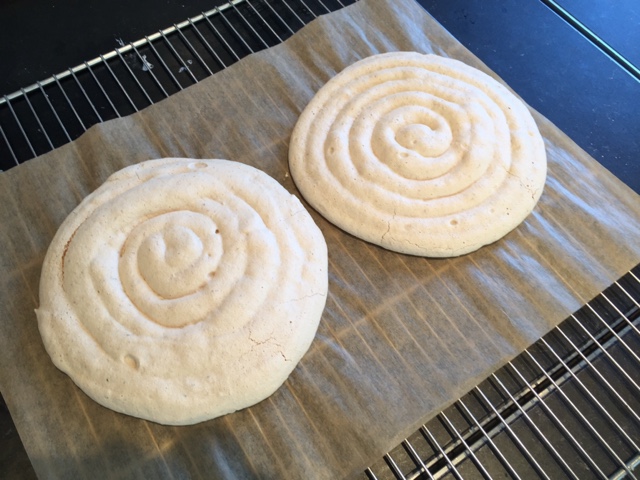
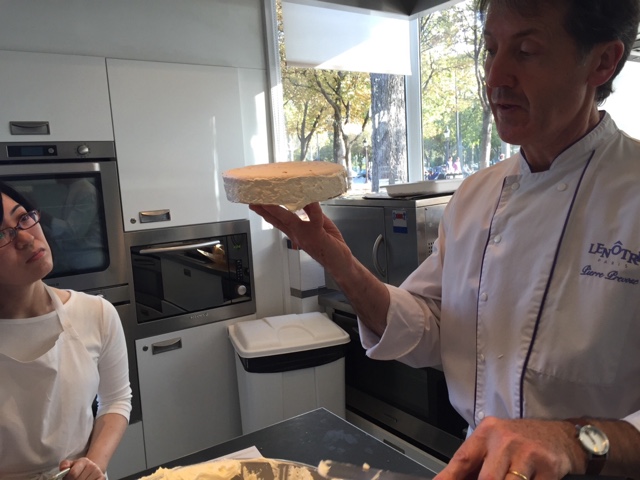
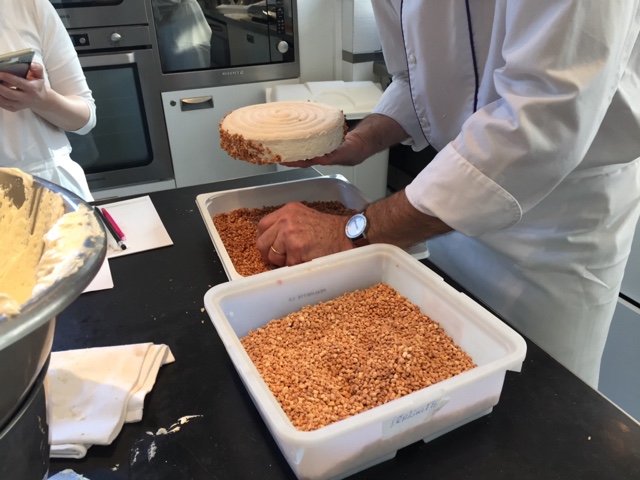
During my schooling at Le Cordon Bleu in Paris and internship at Pâtisserie Pascal Pinaud, we referred to this concoction as nougatine - caramelized nuts, spread out and cooled, then ground up into crunchy goodness for layering the many entremets that the French love to make and eat. Here’s just one entremet example.

I’m making a pistachio nougatine here. I’ve toasted 170 g / 6 oz pistachios and have them waiting warmly on the side. Have a silicon spatula lightly oiled at the ready.

Place 300 g / 1.5 cups granulated sugar and 60 ml / 1/4 cup water in your saucepan on low to dissolve the sugar.

Once the sugar is dissolved turn the heat up to medium high and bring to a boil.

Cook the sugar to a lovely medium amber. The image below is almost there. When I get close, I give it another 30 seconds or so to reach my desired color. Don’t wait too long - you don’t want burned sugar. After you’ve done it a bunch of times, you just know when to snatch it off the heat.

Remove the caramel from the heat and stir in the nuts with the oiled spatula. Scrape out onto the silpat lined sheet pan and spread into a single layer. Don’t hesitate - just do it.

Let cool. Your options now are to break it up into smaller pieces (a mallet is great for this!) as a topping for ice cream or process it to medium fine crumbs and use it as a garnish or layer for your chosen dessert.

Pistachio nougatine

WARNING! Please be careful when breaking this up since edges of caramel can be extremely sharp. Believe me, I’ve been there.

That’s it for now. You have a number of things in your dessert armamentarium that will add just that special touch. Go for it.

Next time - candied citrus . . . . . and more to follow that. All in due time.

On a final note, as noted at the beginning of this post, it’s taken me awhile to get this one finished. Life events tend to trap our attention when we least expect it. The main thing is to stay positive, stay safe and have a wonderful holiday season.

See you next time around!

A last gasp of bittersweet

Succès class at Le Nôtre

Succès au praliné, a classic French dessert, was the subject of my third and final class at Le Nôtre Paris.  It requires some planning and make-ahead preparation, which stands one in good stead when it comes time to assemble this particular delight.

There were again three of us in the class. In addition to myself, a young 20-something Parisian woman (no English) who does a bit of baking at home and attended the class thanks to a gift certificate, plus a Japanese woman (no French) who makes pastries in Japan.  This was another interesting dynamic with the chef at times speaking English to the French woman and French to the Japanese woman - a bit confusing to say the least.

Nonetheless there were lots of smiles and head nodding going around as we worked our way through the recipe.


I recall making succès during pastry school at Le Cordon Bleu and having my crème mousseline improperly set and oozing out of the sides - not a pretty picture.

However this time the whole process felt pretty straight forward, something that 10 years of professional experience under my belt aided tremendously.

The base of this dessert is essentially a meringue made with egg whites, sugar, almond flour, powdered sugar and a bit of milk.  It's piped in two rounds and baked low and slow, resulting in a light, airy and crisp meringue.


It is filled with crème mousseline (blend of crème au beurre and crème pâtissiére) mixed with nougatine (chopped caramelized almonds).  Separate preparation is required for the various components, and it all comes together in the end.

A note on crème au beurre:  typically made with Italian meringue to which butter is added, Le Notre's recipe involves making a crème anglaise which is whipped until cool, then butter is blended in and finally the Italian meringue is added.  It makes for quite a light (believe it or not) and delicious mixture.

Below is the large bowl full of crème mousseline and the chef working on his assembly.


After the crème is sandwiched between the two rounds of meringue, the edges are coated with more crème and then covered with pralinettes (more caramelized chopped almonds - yum!).

Crème coating underway . . .   


and pralinettes going on!  Just pick up handfuls and press lightly.


We all assembled and coated our respective succès, dusted them with powdered sugar and that was that!


The amazing thing about this cream filled meringue, so full of butter, is how light in taste and texture it actually is. Incroyable!

And guess what?  Surprise, surprise, surprise - Steve loved it!


Sportskage trial

I'm on a pastry detour to Denmark!  Who woulda thunk it?!

I recently received a request to make a sportskage (sports cake), which, as I've come to learn, is a classic "cake" created back in the late 1800's by La Glace, a pastry shop in Copenhagen, for the opening of a play entitled "Sportsmen".  It's been around ever since and continues to be a popular offering at the conditori.

It is basically whipped cream with chopped caramelized nuts (nougatine) folded into it, domed on top of an almond macaron type base, then topped with more whipped cream and caramelized choux puffs.  When I first saw photos of this pile of cream, I was curious, not only as to how one approaches the assembly, but also the slicing and serving of such a thing.  How does it hold its shape, I asked myself?

What better way to find out than to jump right in and make it.  My trial was underway!

Unlike the recipes I reviewed on line which use almond paste, egg white and sugar for the "cake" base, I opted to substitute one of my (and Steve's) all time favorite components.  Dacquoise is in the meringue family, made with ground nuts (almonds or hazelnuts or pistachios or walnuts - you name it), egg whites and sugar, much like the ever-so-popular French macaron.  

For me the beauty of a dacquoise is how much easier it is to make than the fussy macaron.  In this case I wanted to know if the small version of my go-to recipe would be enough for a 9-10" diameter base for the sportskage.

I decided on a hazelnut version and proceeded with my mise en place.  Very straight forward, no muss, no fuss.  When making a meringue I typically weigh out my egg whites and let them sit at room temp for an hour or so, since they mount better when no longer refrigerator cold.

Here I have egg whites (99 gm or about three), confectioner's sugar (75 gm), ground hazelnuts (99 gm) and granulated sugar (25 gm) at the ready.


Whisk the ground hazelnuts and confectioners sugar together . . .


Start the egg whites on low speed, using the whisk attachment, and, once they start to look foamy, add the granulated sugar . . . .

foaming up!

adding the sugar

then continue beating on high speed to firm peaks.


look at these peaks!

Now gently fold in the hazelnut/confectioners sugar mixture just until incorporated . . .


and pipe into a nice round!

ready for the oven
You can appreciate that my coil doesn't quite reach the periphery of my 240mm cake ring, so I might need a slightly larger recipe when it comes time for the real thing.  We'll see.

Out of the oven . . .


I was happy with the thickness, feeling it would nicely support the cream that would later be mounded on it.  But to give me a slightly larger base for the final dessert I'll consider a 15-20% increase in my base recipe.

Next I prepared the nougatine by making a standard caramel into which I stirred toasted hazelnuts. This mixture is poured immediately onto a Silpat and allowed to cool until hard.  BEWARE!  Hot caramel is dangerous!!  Wear protective oven gloves or hot mitts to prevent burns.  I know - I've been there.


I prefer blanched hazelnuts as a rule, but this time I used a mixture of blanched and natural hazelnuts. When I learned from my local nut vendor that blanched hazelnuts are currently very hard to come by and expensive due to a poor crop in Turkey, I opted for the skins-on version from Oregon to supplement the small supply of blanched nuts that I had in my freezer from earlier in the year.   I initially tried the toasting-in-the-oven/rubbing-the-skins-off technique, but boy-oh-boy, those skins did NOT want to come off, try as I might.  I just had to go with the flow and move forward, skins and all.

Once the nut/caramel mixture was cooled I ground it up to a coarse texture.  I want a nice crunch to the final dessert but am careful to avoid caramel pieces that are too big since they can be quite hard and difficult to chew.  No broken teeth allowed!


coarsely ground hazelnut nougatine

The next component is pâte à choux for the small profiterole style puffs that will be dipped in caramel (another CAUTION HOT!) and placed on the surface of the sportskage.  I used my usual base recipe (à la Michel Roux) which calls for 125 ml water, 125 ml milk, 100 gm butter, 1/2 tsp salt, 3/4 tsp sugar, 150 gm flour and 4 eggs.

I've found a number of recipes that use only water as the liquid, but I find the combo of water AND milk gives the puff a nicer flavor and more golden hue.  Granted the choux isn't really there to provide much flavor but serves primarily as the vehicle, whether for sweet or savory applications. Yet, it's good to have a puff with a bit of character, if you ask me!

mise en place for choux

The water, milk, butter, salt and sugar go into a saucepan on the cooktop and heated to melt the butter and bring to a boil.  Take it off the heat, stir in the flour in one fell swoop, then place it back onto the heat to dry the mixture out briefly.

You can mix the eggs in either by hand or in the mixer.  I opt for the mixer since it's easier.  Dump your hot panada (what it's called before the eggs are added) into the bowl and, using the paddle attachment, add the eggs one-by-one until each is incorporated.

This part of the choux making process is fascinating - with each egg addition the mixture looks all clumpy and lumpy, but it magically comes together, becoming a silky, shiny paste.

finished choux paste
OK, so mine looks a little lumpy, but it piped out beautifully and baked up just right!

piping choux

out of the oven, looking good

Most of the work is done!  As is the case with soooooo many baking projects, it's all about planning. The three components I've made so far can all be made ahead.  The dacquoise freezes beautifully, the nougatine will keep well in a closed container at dry room temp conditions for days, and the choux puffs can also be frozen. Now all I have to do is whip the cream and assemble.

For my test case I decided on a smaller version, so I cut my base down to 16 cm size.

ready to assemble
 I folded the nougatine into the whipped cream and mounded it on the dacquoise with nary a hitch.  It was much easier than I anticipated and certainly held its shape.

interesting, eh?

My puff garnishes were way out of proportion, since they rather dwarfed this smaller base version.  I popped a few on anyway and attempted piping "petals" of whipped cream. 

just think of them as profiterole "tumors"

kind of like weird layered growths on the bark of a tree
 
Yikes!!  Needs work.

Let's just say I have to practice this part for the final - kind of like studying for a test.  Decorative piping has never been a big interest of mine - I think of a piping bag as a practical tool for dispensing, since it gives one control and direction to get the product exactly were you want it.  But I'm game for some decor - just need the right tip!

At any rate I put the whole thing in the fridge and, several hours later, Steve and I did a mini tasting.  I was delighted that it sliced very easily and held its shape to boot.  And it tasted good - yes!

we had already popped all the choux puffs off and eaten them

This test run taught me a few things - make a slightly larger base to achieve my 9-10" diameter; make sure the nougatine isn't too coarse or caramel pieces too big; make the choux puffs smaller; practice "petal piping".  Shouldn't be too hard, right??

I hope to share pictures of the final finished product with you in a couple of weeks.  Stay tuned!

In the meantime stay warm, enjoy December and may visions of sugarplums dance in your heads.