Coriander buttermilk "bouchon"

4EB2E90F-732A-47F2-9372-9D24BF4EDB79.jpeg

If you’re dreaming of the perfect buttermilk pancake and donut hole rolled into one, this is it! Moist with hints of nutmeg, coriander and ginger, these small bites go down so smoothly that you’ll clamor for more. I first made these in 2012 in my small shop inside Hope Artiste Village in Pawtucket RI. When Steve and I saw them, we immediately knew what they should be called.

Bouchon is the French word for cork, and the champagne cork shape develops as they bake in small round flexi-molds. The key is to fill the wells enough so that the top poofs out over the edges as the cakes rise, giving that signature look.

C96BA31E-C45A-4E25-A209-745282A6BE15.jpeg

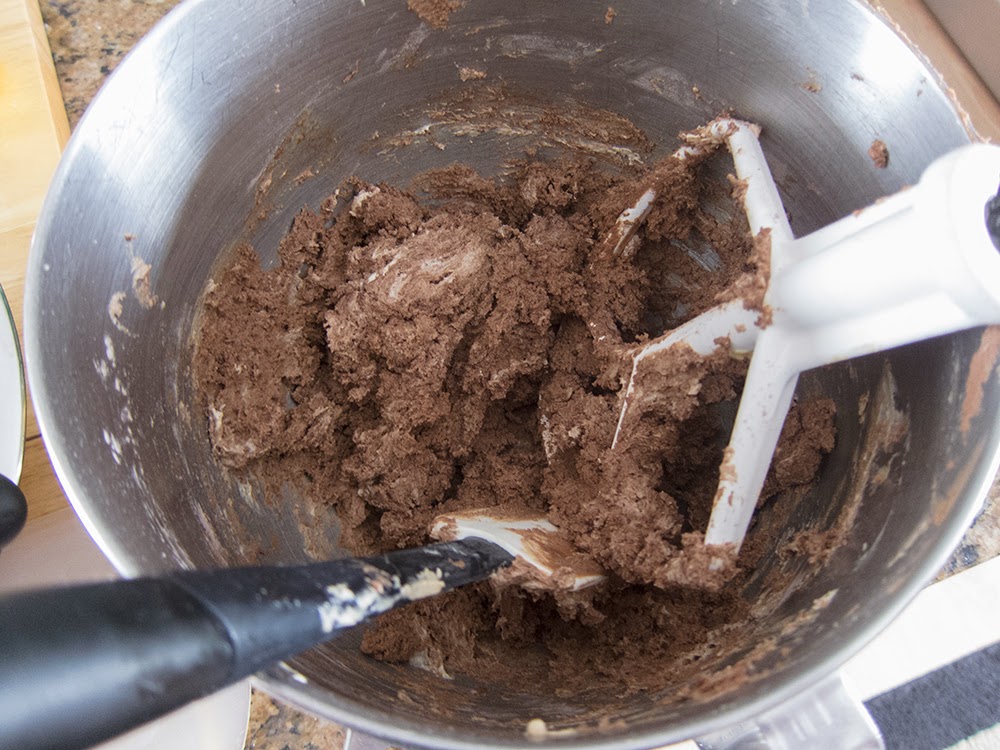
The process is your basic creaming method of cake prep. In a nutshell: cream butter and sugar, add eggs and vanilla, blend in dry ingredients alternating with wet (1/3 dry, 1/2 wet, 1/3 dry, 1/2 wet and end with 1/3 dry), scraping down after each addition.

In the plan ahead phase, bring 170 g / 6 ounces unsalted butter, one cup buttermilk and 2 large eggs to room temperature. While not a complete deal breaker, this will cut down on any curdling that can occur during mixing when things are too cold.

Heat the oven to 425ºF.

In a medium bowl whisk 200 g all purpose flour, 146 g whole wheat pastry flour, 3/4 teaspoon salt, 1.5 teaspoons baking powder, 1/4 teaspoon baking soda, 1 teaspoon ground coriander, 1 teaspoon freshly grated nutmeg (I eyeball it and probably end up using less) and 1/4 teaspoon ground ginger.

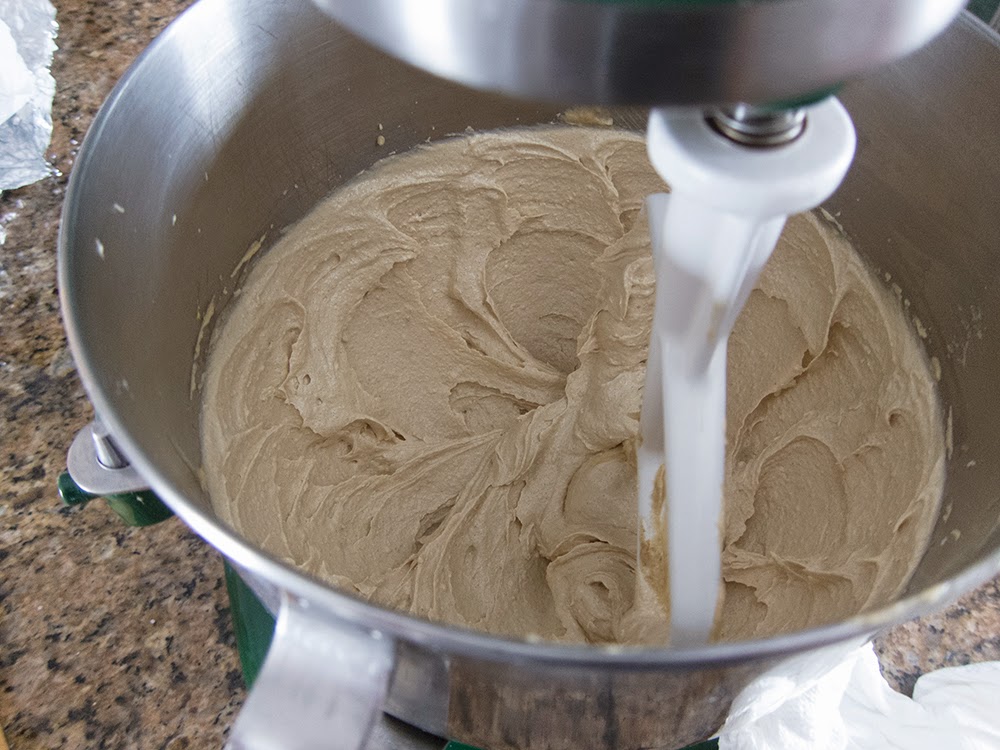
Place the 170 g room temp butter with 75 granulated sugar and 67 g dark brown sugar in the bowl of a stand mixer fitted with the paddle. Cream for 2-3 minutes and scrape down the bowl.

F6A292E1-B87B-4ADD-BCA7-89C3082631D9_1_201_a.jpeg

Add the eggs, one by one, as well as a teaspoon of vanilla extract. Do the dry/wet additions as mentioned above.

In the image above you can see the Demarle Flexipan mold 2266 I use for this - at purchase it is a 48 well mold, but I cut it in half to fit on a half sheet pan. I probably haven’t mentioned this for some time now, but I always set silicone flexi-molds on a wire grid on the sheet pan. This allows for better oven heat circulation and more even baking.

This cake batter is quite thick so I use a wide round tip (20 mm / 3/4” diameter) to pipe and hold my offset spatula in the other hand to cleanly “cut” the batter away from the tip as I go. Works like a charm.

1C7EFC8F-AE31-46CC-AB97-ECDAC5D20ACF.jpeg

Pipe the batter to nearly the top of each mold with a nice dome at the finish. Not having made these for some time, I had to fine tune my piping as I went. The yield varies but I typically get 32-34 cakes from a recipe. I ended up with 42 this time which tells me I need to be more generous with my piping for the next go. Gotta get those cork tops!

10882B23-27EA-4C10-AE5F-A41B616508ED.jpeg

Bake about 15 minutes until golden. The cakes should feel firm when gently pressed on top.

While the cakes bake, melt 4 tablespoons butter in a small bowl; in another small bowl mix 1/2 cup sugar with 1 teaspoon ground coriander, 1/4 teaspoon ground ginger and a few grates of fresh nutmeg.

Once out of the oven, let cool about 5 minutes then pop the cakes out onto the wire racks.

4C546743-233F-4898-AFA3-70A5F8E9D097.jpeg

Working in small batches, dip the tops in the melted butter, give them a couple of minutes for the butter to absorb and then dip/roll them in the coriander sugar mixture.

CD2DC2B3-368E-4767-BEA3-7DCE944F77C1.jpeg
4401CEBC-E22A-49F8-AF99-DC81818DC89E.jpeg

I didn’t dip and roll the whole batch since I wanted to freeze some au naturel to have on hand for later. You never know when a bouchon occasion might arise.

These babies are dense yet light, not too sweet and with just the right warmth from the spices.

B27D230E-B550-4F2A-97EC-F7F9E5FDBEDD.jpeg

My inspiration for making these after a number of years was two-fold: I was dreaming about them and just happened to have some buttermilk in the fridge, plus a weekend visit from sister Joyce for whom I had to have a little treat or two on hand. Thanks for your visit Joybell!

Oh - and let’s not forget that Steve loves them!!

47285A62-0BCD-4763-B726-E79C630FC89A_1_201_a.jpeg

Happy bouchon making everyone and here’s to more autumn baking adventures.

Ciao for now.

Not your mother's (or grandmother's) cherry pie: free form cherry puff pastry tart

6B3CBB64-6FEB-4983-A3D7-B1EAF59FB71B.jpg

Yum yum yum. On the heels of the mille-feuille that I recently posted on, I came up with a free form cherry tart for cousin Melissa’s husband Jeff’s 60th birthday. I had rough puff and my last bag of Michigan sour cherries from summer 2020 in the freezer. What better way to use them than to create a spur-of-the-moment dessert!

DD3DF47B-861A-4C0A-9E9E-2A2FCA615452.jpeg

I let my generous 2 cups of cherries (~350 g) thaw at room temperature for an hour or two then put them in a medium saucepan along with 100 g / 1/2 cup cane sugar and a pinch of salt. I opted for a few grates of fresh nutmeg, 1/2 teaspoon ground coriander too. Heat on low, with occasional stirring, until the cherries release some juice and the sugar dissolves. Blend a tablespoon lemon juice with 2 tablespoons cornstarch and stir it into the cherry/sugar mix. Bring to a boil then cook for several minutes until thickened. Add a splash of vanilla or almond extract if you like and let it cool. You can prep the cherry filling a day or 2 ahead and hold it in the fridge until baking time. Just look at these jewels!

1DE3C61D-E679-4FD4-9798-AA0F452092A9.jpg

The beauty of a free form tart is being able to make any size or shape your little heart desires. For this one I used about 300 g of puff, rolled it out to a 6-ish by 13-ish rectangle and put it on a parchment lined sheet pan. I then cut ~1/2” wide strips from each border and “glued” them around the edges with a brush of egg white. I had some scraps from which I cut small diamonds and spaced those along the edges too. Those touches give a bit of a border for the end result.

You can go even more decoratively as I did for this small savory tart some years back. Make it your own!

freeformpufftart.jpg

Brush the puff with egg white or wash, add a sprinkle of vanilla sugar over the dough and freeze the puff while heating your oven (helps keep down shrinkage), then bake fully at 400ºF for about 20-25 minutes until golden toasty brown (reduce oven heat as needed). I overturn a wire grid across the sheet pan to keep the rise even.

Reduce the oven temp to 325ºF. Let the pastry cool 5-10 minutes (so you don’t burn your fingers), gently push down the puffed center and layer the already cooked filling over the dough. I had just enough cherries for a single layer. Return to the oven for about 20-25 minutes to warm and set the filling a bit more.

7103DB85-40AA-481E-B885-9E3668DFBDF7.jpg

I had frozen a bunch of leftover baked puff scraps from the mille-feuille project so I crushed/cut a bunch of those up to use as a rustic topping.

1DE3C61D-E679-4FD4-9798-AA0F452092A9.jpg
2B8D7701-73E1-4F60-BB09-6E01F7C8D341.jpg
A49EF8C4-C587-4C4B-A458-1B2BC8B62A78.jpeg

A drizzle of caramel to top it off plus a dusting of powdered sugar before serving. Ohhh . . . . the tartness of the cherries with just the right hint of sweetness and spice. Love it!

It’s great au naturel but a scoop of vanilla ice cream wouldn’t hurt a thing. Your choice.

6B3CBB64-6FEB-4983-A3D7-B1EAF59FB71B.jpg

I saved some of the cherry syrup from the filling and used it to make a batch of cherry Swiss meringue buttercream which is currently residing in my freezer. Hmmm . . . I wonder what I’ll create with that! Time will tell.

Keep moving, stay safe, everything in moderation and enjoy spring wherever you are.

Orange pecan crumble pull apart rolls

IMG_0225.JPG

This one is great fun! Add some spices to your favorite sweet roll dough, let it rise, roll it out, spread with an orange zesty sugar/butter filling, cut it into squares and create your own pull-apart shapes. Top it off with a nutty pecan crumble and you’ll be happy you did!

The dough I used is easy to work with, soft and pillowy and quite delicious. The yield is either 7 or 9 rolls depending on how many squares of dough you use per roll to create your version (as you’ll see coming up). Note - the images below show ingredients and steps for my base recipe test batch with a 9 roll yield.

IMG_0158.jpg

Base recipe: put 120 ml / 1/2 cup whole milk in a microwaveable container (a 2 cup Pyrex measurer works well here), heat just to boiling then add 56 g / 2 ounces cubed, unsalted butter to the milk. Stir to melt the butter and let the mixture cool to tepid ( ~105ºF).

Now add 1 lightly beaten large egg and 1 tablespoon vanilla extract to the milk/butter mixture and keep it on standby.

In the bowl of a stand mixer combine 130 g / 1 cup all purpose flour, 130 g / 1 cup bread flour, 50 g / 1/4 cup packed light brown sugar, 5 g active dry or instant yeast, 1/2 teaspoon kosher salt, 1/2 teaspoon ground coriander, 1/4 teaspoon ground ginger, a pinch (or more to taste) of cinnamon and, in my case, I threw in some vanilla powder that I had made by grinding down and sifting some dried vanilla beans. Even though there’s vanilla extract in the dough, I figured a dash or two of the powder would only enhance the flavor.

Stir in the milk mixture and mix with either the paddle or a large spatula or wooden spoon until combined.

Fit the mixer with the dough hook and knead on low speed for about 6-7 minutes until smooth and elastic. Or knead by hand for about 12-14 minutes.

Place the dough in a lightly buttered bowl . . . .

IMG_0163.JPG

cover with plastic wrap and let rise for anywhere from 45 minutes to a couple of hours depending on the ambience of your room. You’re looking for about double in size.

IMG_0164.jpg

While the dough is rising make the filling by blending 66 g / 1/3 cup sugar, 2 tablespoons orange zest, 1/4 teaspoon kosher salt and 42 g / 3 tablespoons soft unsalted butter.

IMG_0165.jpg

For this test batch I wasn’t sure what pan/form would be best for what I had in mind, so I did some comparisons with standard muffin tin, individual cake pan and panettone paper.

Turn the dough out onto a lightly floured surface, gently de-gas then roll it out to a 9”x9” square. Spread the filling over it then cut into thirty-six 1.5” squares.

IMG_0167.JPG
IMG_0168.jpg
IMG_0169.JPG

Stack 4 squares together (for a yield of nine rolls) and tuck ‘em into buttered and sugared pans (FYI - no need to butter and sugar the panettone paper).

IMG_0170.jpg

Cover loosely with plastic wrap and let them rise for about an hour. About 30 minutes before you plan to bake, heat the oven to 375ºF.

Top with pecan crumble before baking.

Note: for the crumble combine 60 g all purpose flour, 60 g sugar and 60 g cold, diced butter. Sand the butter into the dry ingredients to achieve coarse crumbs and add in anywhere from 30 - 60 g toasted, then chopped pecans, depending on how nutty you like your topping. I usually double or triple any crumble I make so I can stash the rest in the freezer for another time. Nothing like planning ahead.

IMG_0176.jpg

Bake from 20-25 minutes until golden brown.

Each form yielded a slightly different end result. Not being rigid, the panettone paper roll skewed into an oblong pull apart, while the individual cake pan held the dough nicely in place.

IMG_0186.jpg

The standard muffin tin, being more shallow than the cake pan, allowed for more rising and flaring out of the dough, kind of like one of those wide curved balloon-y kind of kites that billow out into a big, rippled rectangle.

IMG_0191.jpg

Once out of the pan, they almost pulled themselves apart!

IMG_0190.JPG

The taste test received a big thumbs up from both Steve and myself, and I knew I wanted to make these again.

This time I doubled the dough batch (here’s the recipe PDF) and rolled out each HALF of the dough into the 9”x9” square, spread on the filling and cut the thirty-six 1.5” squares. NOTE: I found it easier to work with the 9” square portions then a full double batch of dough.

I had done a bit of calculating and decided to use 5 pieces for each pull apart (for a yield of 7 rolls per dough half or a total of 14), arranging them more as a flower than a rectangular stack. I buttered and sugared my individual cake pans and tucked the pieces in an overlapping, rough swirl fashion. Having a couple of extra squares of dough, I tucked those in where they seemed to be most needed.

Since I own only 12 of the aluminum Fat Daddio cake pans (which I LOVE!), I used 2 ramekins to fill the bill.

IMG_0207.JPG

After the rise they also received the pecan crumble top . . . .

IMG_0219.JPG

and baked up like a dream.

IMG_0221.jpg

After 5-10 minutes of cool time I gently loosened the edges with an offset spatula and popped them out onto a wire rack to finish cooling.

IMG_0225.JPG

Boy are these babies good! I made these as part of a pastry assortment for a neighbor’s Saturday morning gathering, and the followup reports were A+. Steve and I enjoyed some of the extras, plus a few went into the freezer for later. They kept well for a day or two in a covered container and were even better with a few minutes warm up in a 325º oven.

Love that pull-apart feature! I’m already planning another round soon.

In the meantime Steve and I are wishing everyone calm days and peaceful nights as we continue to try to understand what’s happening in our world day by day.

IMG_0227.JPG

Playing in the kitchen on a snowy day

A few days ago, during a bout of scattered snow showers, I was in the mood to play a bit in the kitchen.  First I wanted to try my hand at using puff pastry scraps from my freezer as though they were pristine pâte feuilletée (i.e. never been used), and, second, I had some unopened tahini that was dying to be put to use!

First up - the puff pastry project was to test how well puff scraps might actually puff on their second go around.  Up until now, when working with puff pastry or teaching classes on the topic, I've always followed (and given) the advice that one should use the scraps only for things in which you don't desire or need much of a puff factor.  Some good examples are cheese straws, palmiers, tart, flan or quiche crusts and even millefeuille, in which pâte feuilletée is one of the main components.

Chausson aux pommes is one of my favorite apple pastries to make, and since I had a couple of Granny Smith apples in the fridge, chausson was my choice for this test.  I love how the tartness of the apples marries so well with the buttery pastry.


I peel, core and dice the apples and sauté them in butter and vanilla sugar.  This time I also added some of my homemade caramel sauce, hoping to have a richer end product.


sauté under way

pretty nicely caramelized

I divided up my puff scraps and rolled each out into a rough circle.  After a short rest I cut rounds


which were then rolled out into ovals and topped with apples and an extra drizzle of caramel.


After egg washing the lower edge I close them up, press the edges to seal, egg wash and score the surface and sprinkle 'em with vanilla sugar.  Heat the oven to 450 and, meanwhile, pop the unbaked chaussons in the freezer to firm them up and stabilize the dough before they go into the hot oven.


ready to bake
I usually bake these for about 20-25 minutes, watching what's going on in the oven and ratcheting the temp down as I go to achieve a nicely browned surface and a fully baked interior.

And YES, they puffed!!


Now I will admit that some of my edge seals left a bit to be desired and some of the innards leaked out, but these guys were mighty tasty.  Just ask Steve.

The moral of the story - yes, puff scraps will rise again!

Next came the tahini challenge.  I had shortbread on the brain as a follow up to a tahini shortbread recipe I had tried several years ago.  That one was from Maura Kilpatrick, the pastry chef at Sofra Bakery in Cambridge.  I enjoyed the taste but wasn't quite sure how I felt about the texture - kind of like a PB cookie, but more of a stick-to-the-roof-of-your-mouth yet crumbly number.  It definitely had possibilities, and I wanted to give tahini another go.

After some online research I decided on "Chocolate Tahini Sablés", a recipe I found on the site "one hundred eggs".  I've developed a taste for coriander and wondered how that might fit into the flavor profile.

Off I went to my trusty "Flavor Bible", a book that was strongly recommended to me by my former chef at Gracie's, Joe Hafner.  One can find almost any ingredient accompanied by a list of all of the things that might go well with it.  I was surprised that "tahini paste", as such, was not included in the book, but, upon checking out sesame seeds, I found that coriander was indeed one of the possibilities.  Hmmmm, now there's an idea.


the sesame seed (white) list

Interestingly, this recipe calls for a hard boiled egg yolk, which brought back memories of making Italian canestrelli cookies while in school in Florence.  It seems that the "hard boiled egg" type of cookie is common in Germany, Poland, Slovenia and Italy (and probably many others).  The yolk contributes to the light, crumbly nature of this class of sablés.

First I boiled a couple of eggs (so I would have plenty to make myself an egg salad sandwich for lunch!), cooled them down in ice water and extracted one of the yolks for the recipe.

I assembled my ingredients, replacing a teaspoon of instant espresso powder with ground espresso, adding 1/2 teaspoon of coriander to the mix, and planning a mini-chocolate-chip stir-in at the end.


Here goes:  In a separate bowl whisk together 195 gm flour, 28 gm cocoa powder (I prefer Dutch process), 1 teaspoon of ground espresso and about 1/2 teaspoon ground coriander.

dry ingredients

Push the egg yolk through a fine strainer, then add 140 gm room temperature butter, 140 gm well stirred tahini (see side note below), 42 gm granulated sugar, 42 gm brown sugar (I used dark) and 1 teaspoon of salt.


pouring the tahini in

Blend all these in a mixer and cream for about 4 minutes till lightened and smooth.


nicely creamed

Side note - the online recipe calls for one cup/5 oz of tahini; I found that when weighing the 5 oz or 140 gm, it was actually closer to 2/3 cup.

Add the flour/cocoa mixture and blend just until combined.


Stir in 100 gm mini chocolate chips  . . .

ready to shape
and divide dough into 4.

Another side note:  I prefer to work with smaller amounts of dough when shaping logs, so, whereas the online recipe suggests dividing the dough in two, I divided it in 4.


logs ready for the fridge
I shaped 2 square, 1 triangle and 1 round.

This dough is soft, so it's important that it has a proper chill after forming the logs, before slicing and baking.

I like to bake my shortbread "low and slow" so I heated the oven to 300º, coated my shortbread log in raw sugar, sliced 1/4 inch slices and popped them in the freezer before baking.

ready for the oven
I baked them approximately 20-25 minutes until set and looking dry.


Boy oh boy, are these crumbly with a lovely, melt-in-your-mouth texture.  And the espresso and saltiness comes through very nicely.  Whether the presence of coriander is detectable is unclear, but the overall flavor is definitely a thumbs up!

Since I'm known to crave shortbread with my morning cappuccino or my afternoon tea, I popped these chocolate tahini sablés into the fridge with some salted caramel that I had baked the other day.

I'm set.


yes sirree!