A trio of chocolate teacakes
/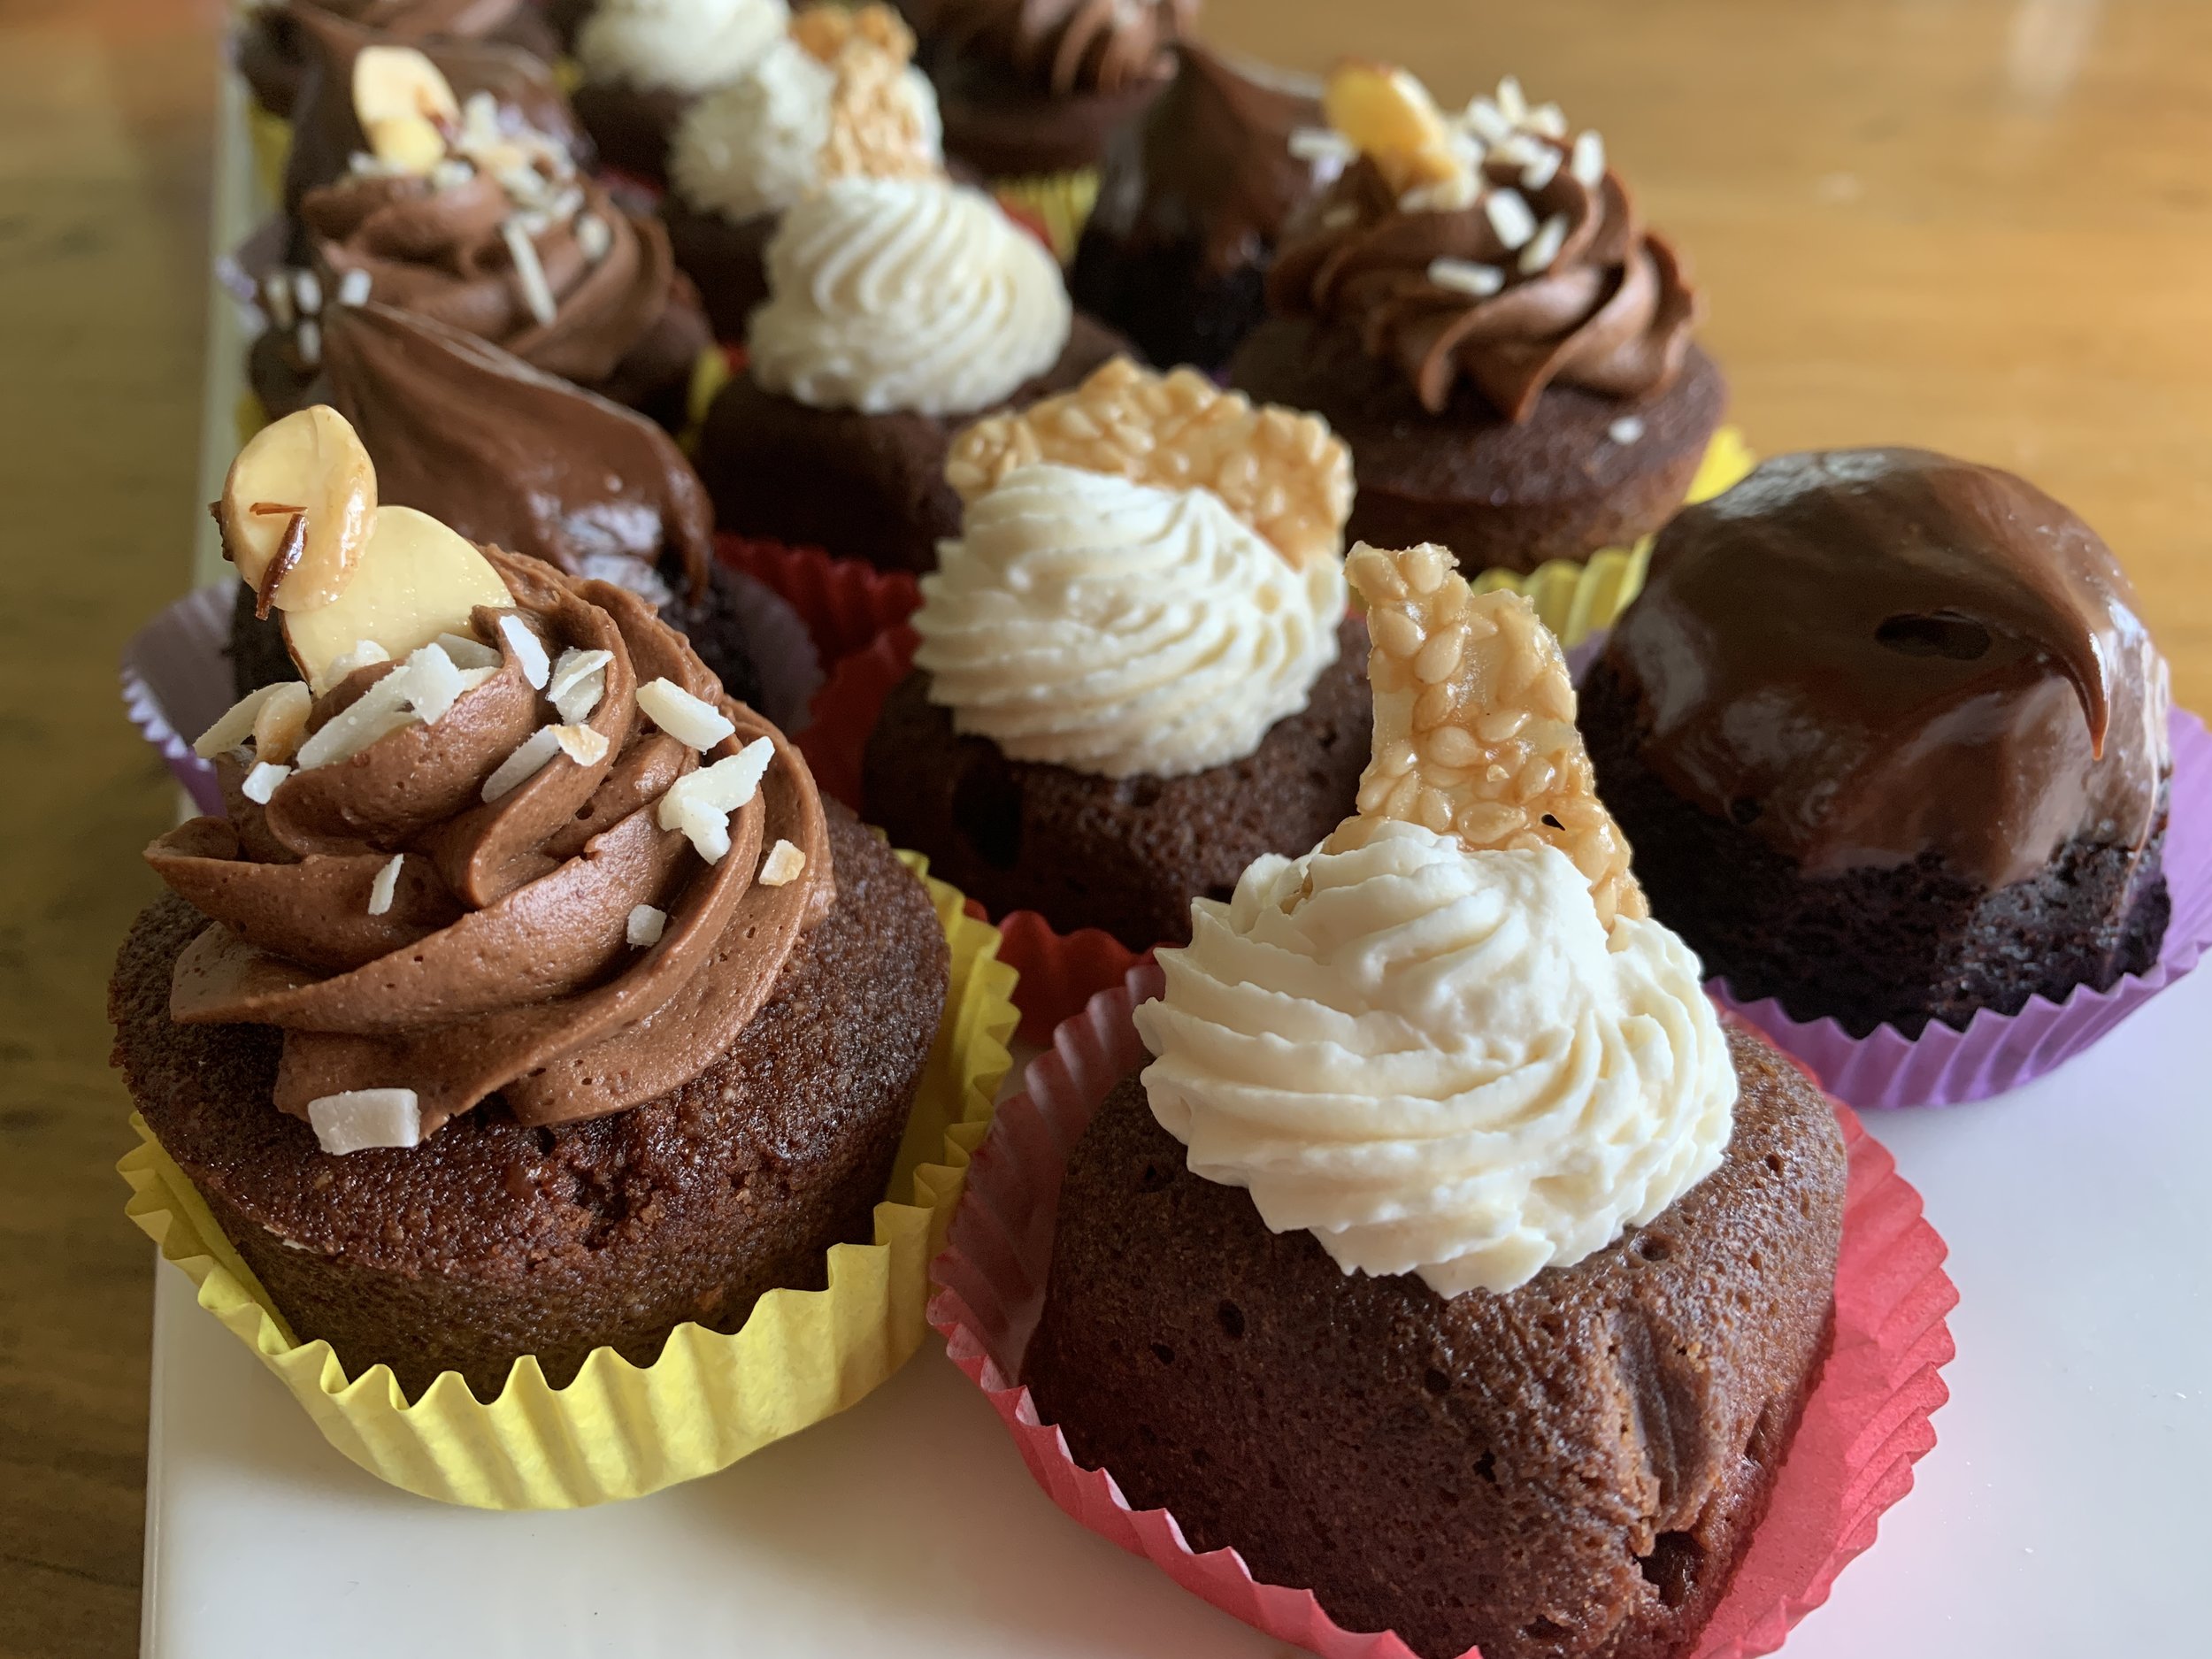
Spring is here and chocolate is still on the table. What better way to enjoy it than with three delicious cakes topped with equally delicious garnishes. You can’t go wrong.
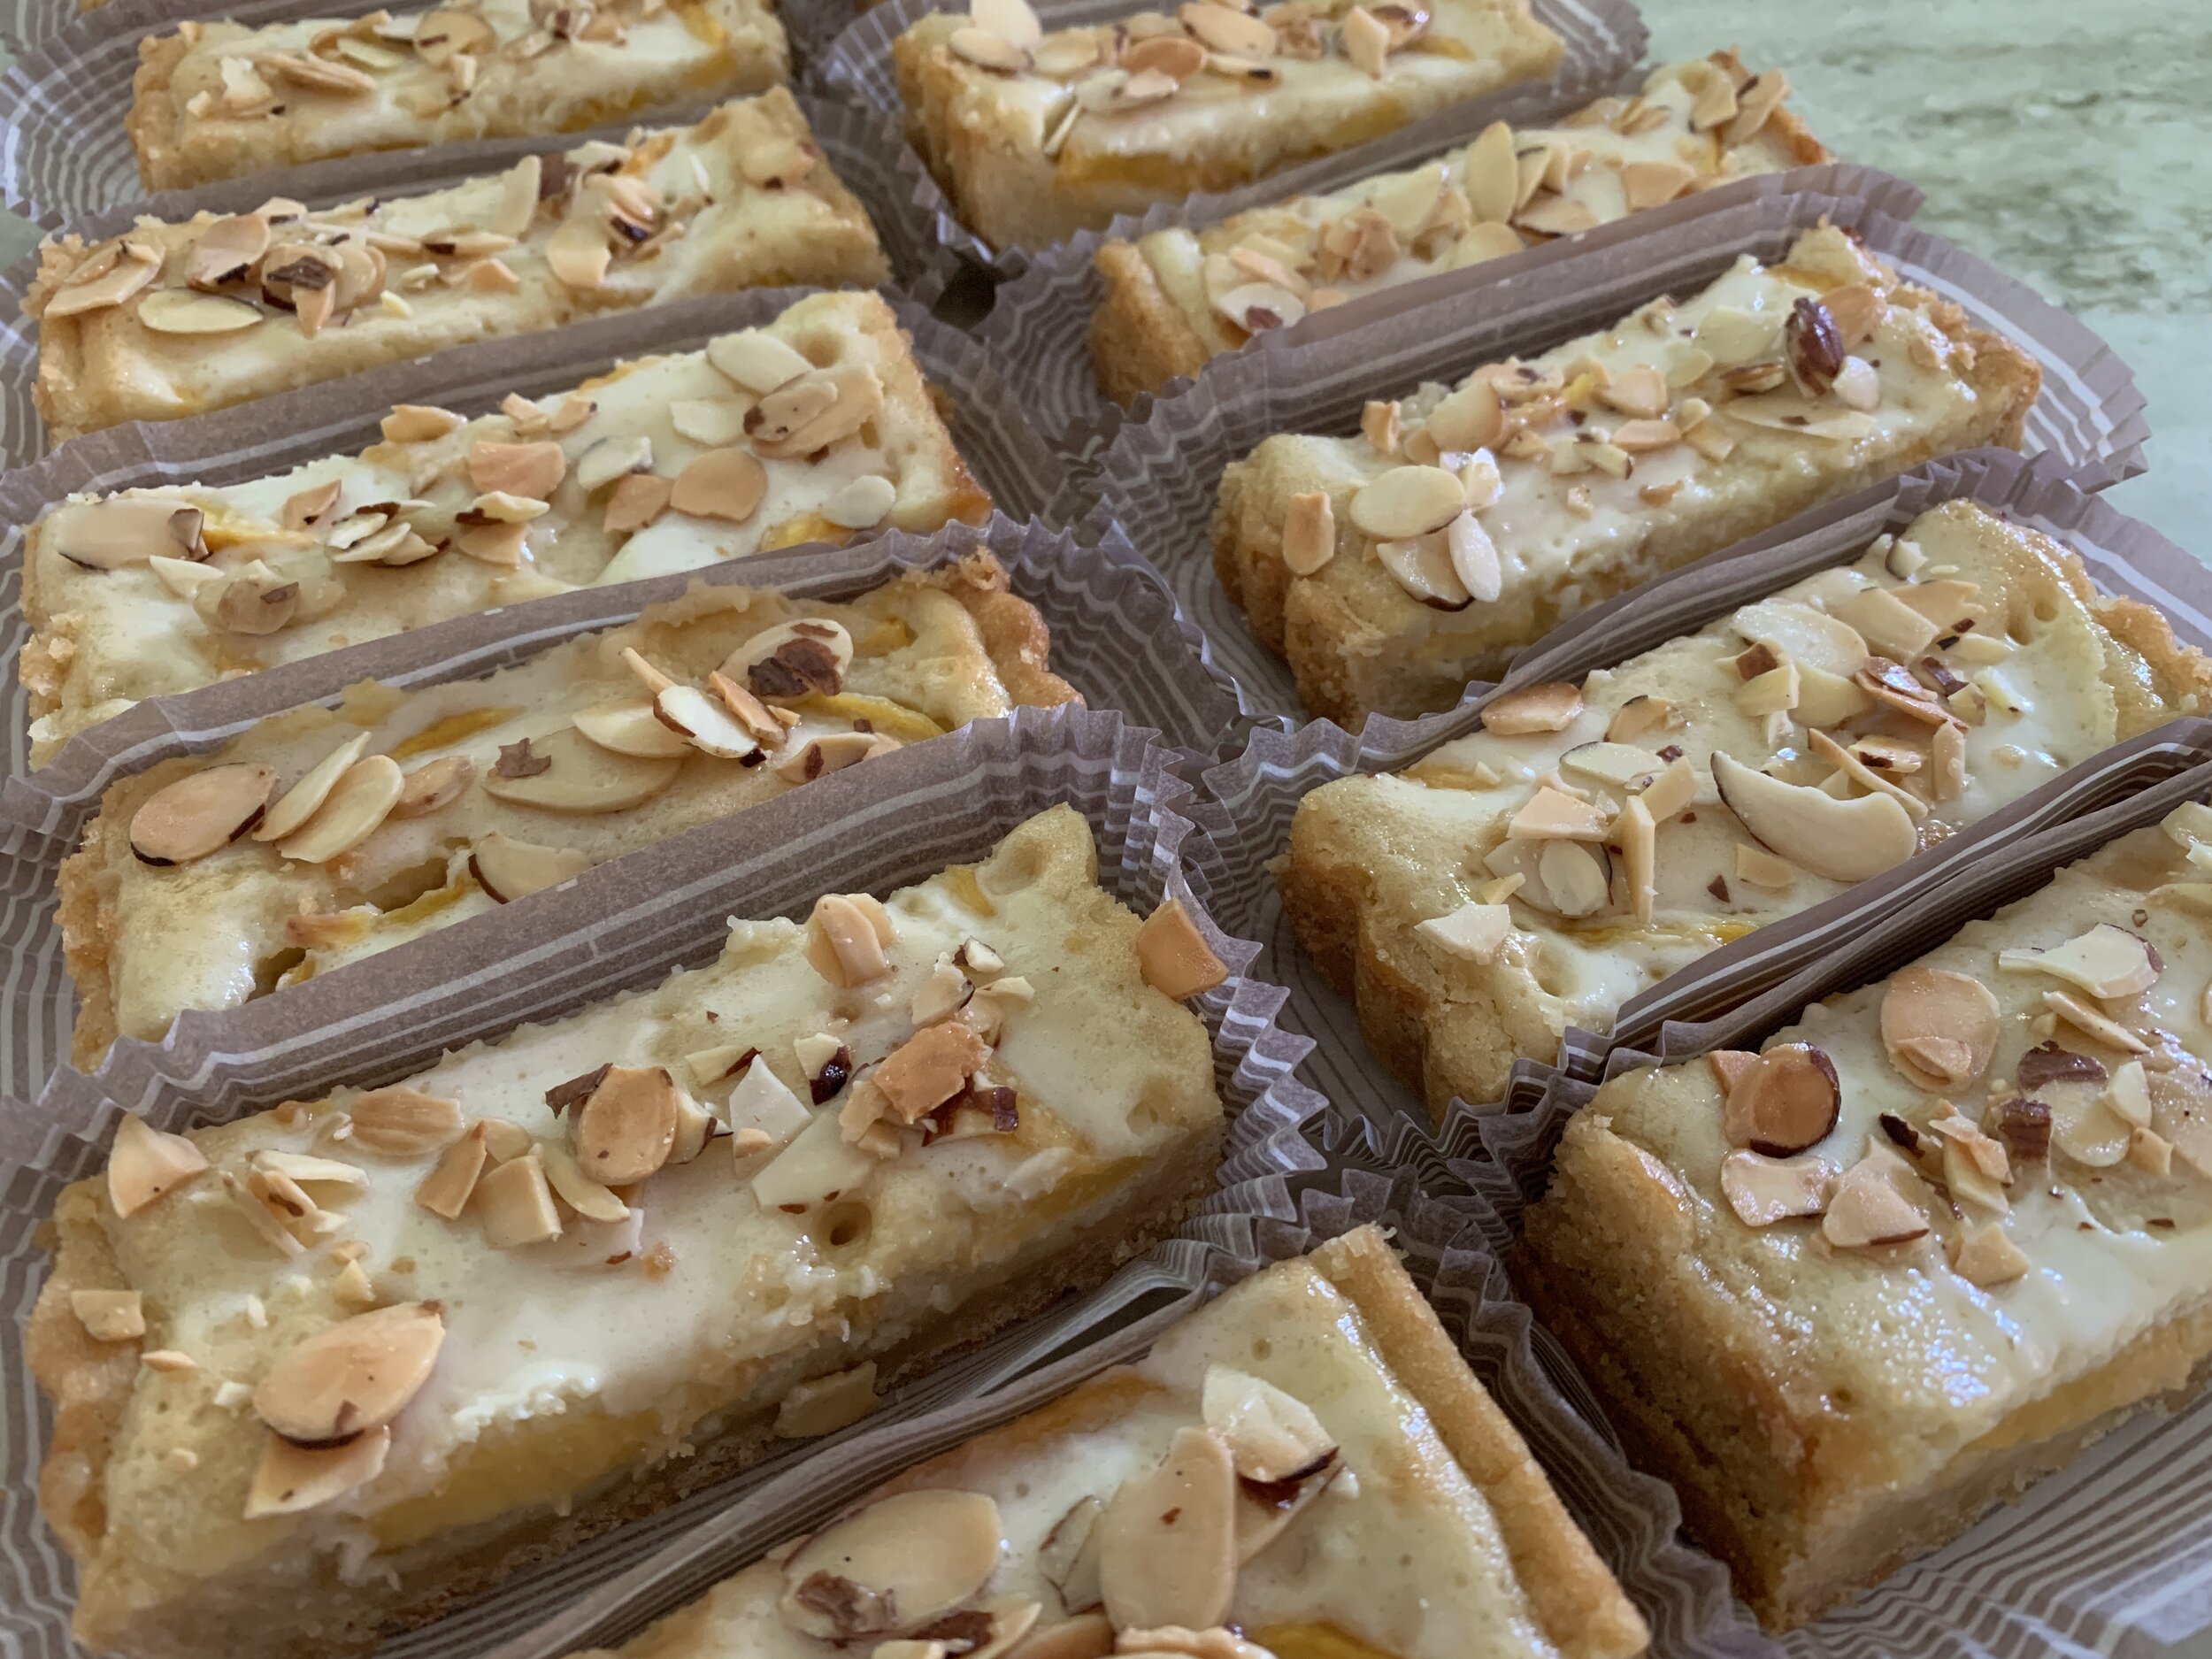
Using two favorite cake bases that have been in my repertoire for some time now, plus a new-for-me chocolate olive oil cake thanks to Melissa Clark, I created this trio for a spring family gathering. Each cake’s topping has its own flavor profile and involves ganache in some way.
I admit this is a lengthy post so here are the links to the recipe PDFs so you can go directly to them if you’d rather not scan through all the steps and photos of preparation: Chocolate olive oil cake; chocolate financier; Easter cake.
Mister Steve made a great observation in that regard - I include all this information not only for you but also for my own records. How cool to go back over the years and see how I described and carried out various baking projects.
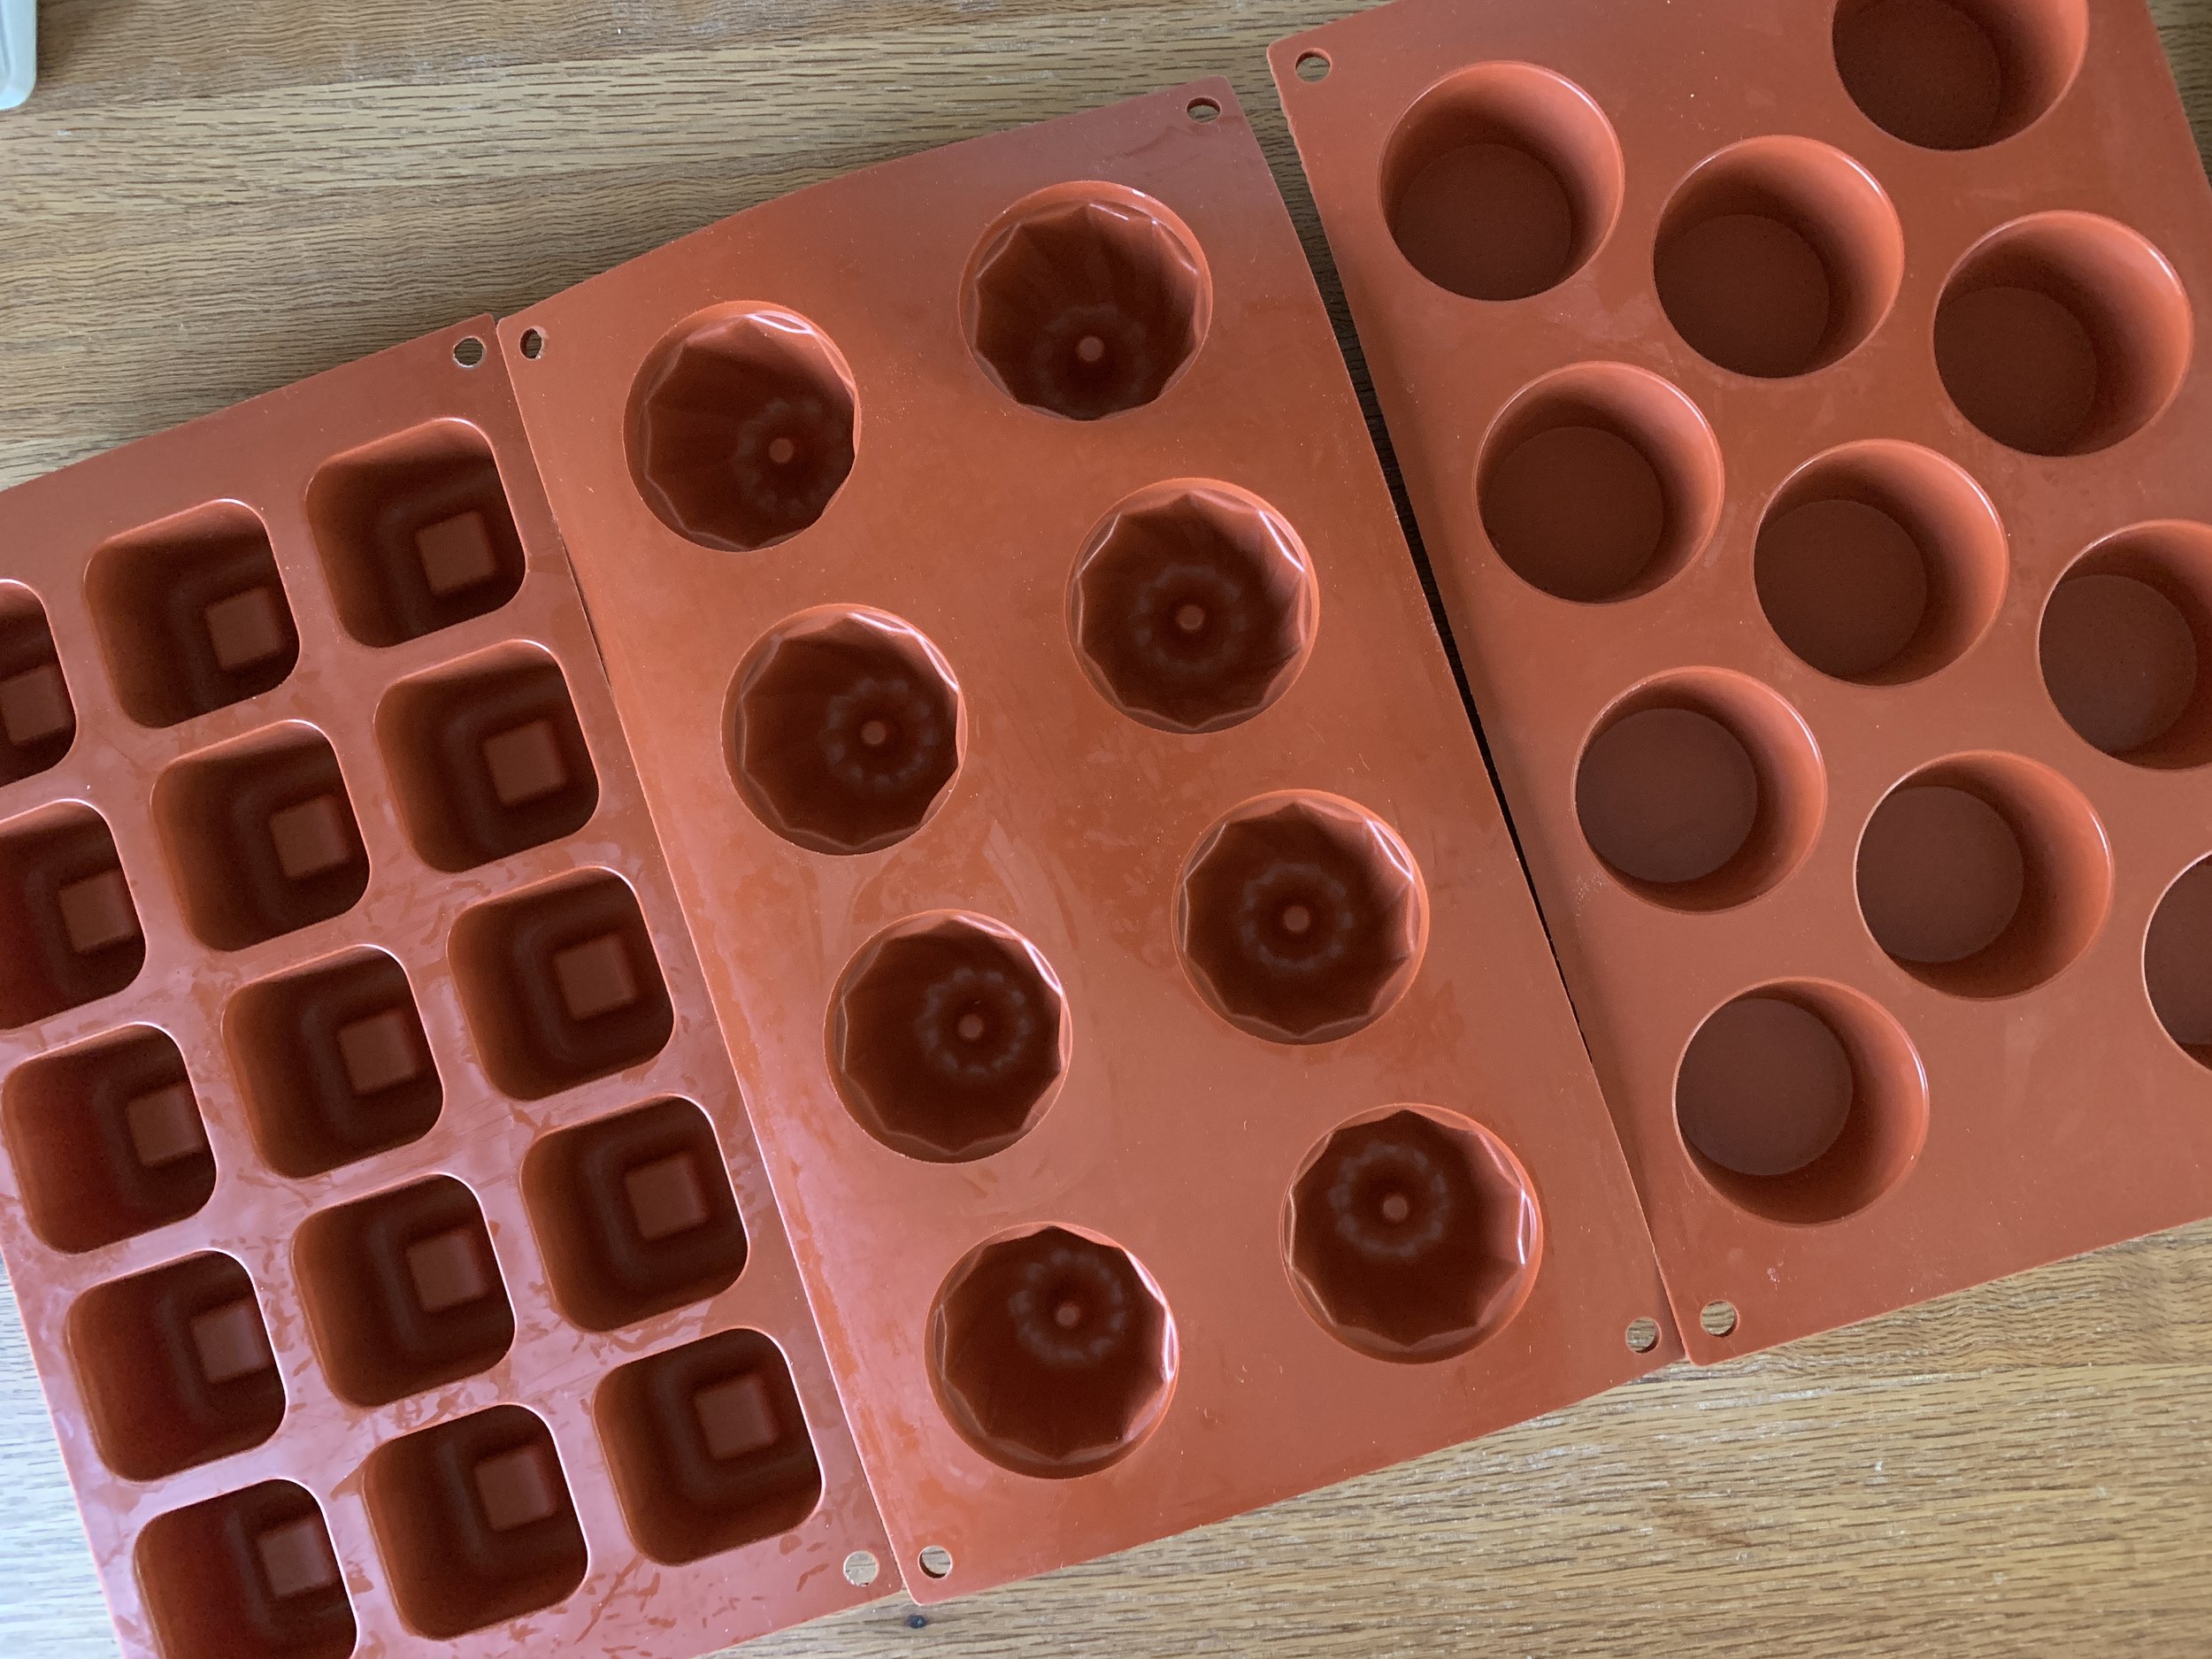
I baked each recipe in a different silicone flexi-mold for a nice variation of shapes and looks - square savarin, mini-Kugelhopf and simple round mini-muffin. My chocolate of choice is Guittard’s 61% lever du soleil discs. When cocoa powder is called for I use Bensdorp Dutch process. Delicious stuff.
First up: chocolate financiers in the simple round muffin molds. Let me tell you there are tons of financier recipes out there. As a matter of fact, the one I used for years was the one we learned at Le Cordon Bleu Paris, always delicious, tried and true. As the years have gone by I’ve adjusted the ratios of ingredients and reduced the sugar content. The basics are butter, egg whites, almond flour, all purpose flour, cocoa powder for this chocolate version and sugar. You’ll see choices for granulated or confectioner’s from recipe to recipe - I typically go with confectioner’s.
The big difference in this chocolate recipe is melting the butter, not browning it, as is true for classic financiers.
In a medium-large bowl whisk confectioner’s sugar, almond flour, all purpose or whole wheat pastry flour and unsweetened cocoa powder together; in a smaller bowl lightly whisk the egg whites until frothing a bit; melt butter and let cool slightly.

Blend the whites into the dry ingredients in two additions then blend in the butter. Contact cover and fridge for a few hours or a couple of days.

When ready to bake, heat the oven to 375ºF and fill your chosen wells about 3/4 full.
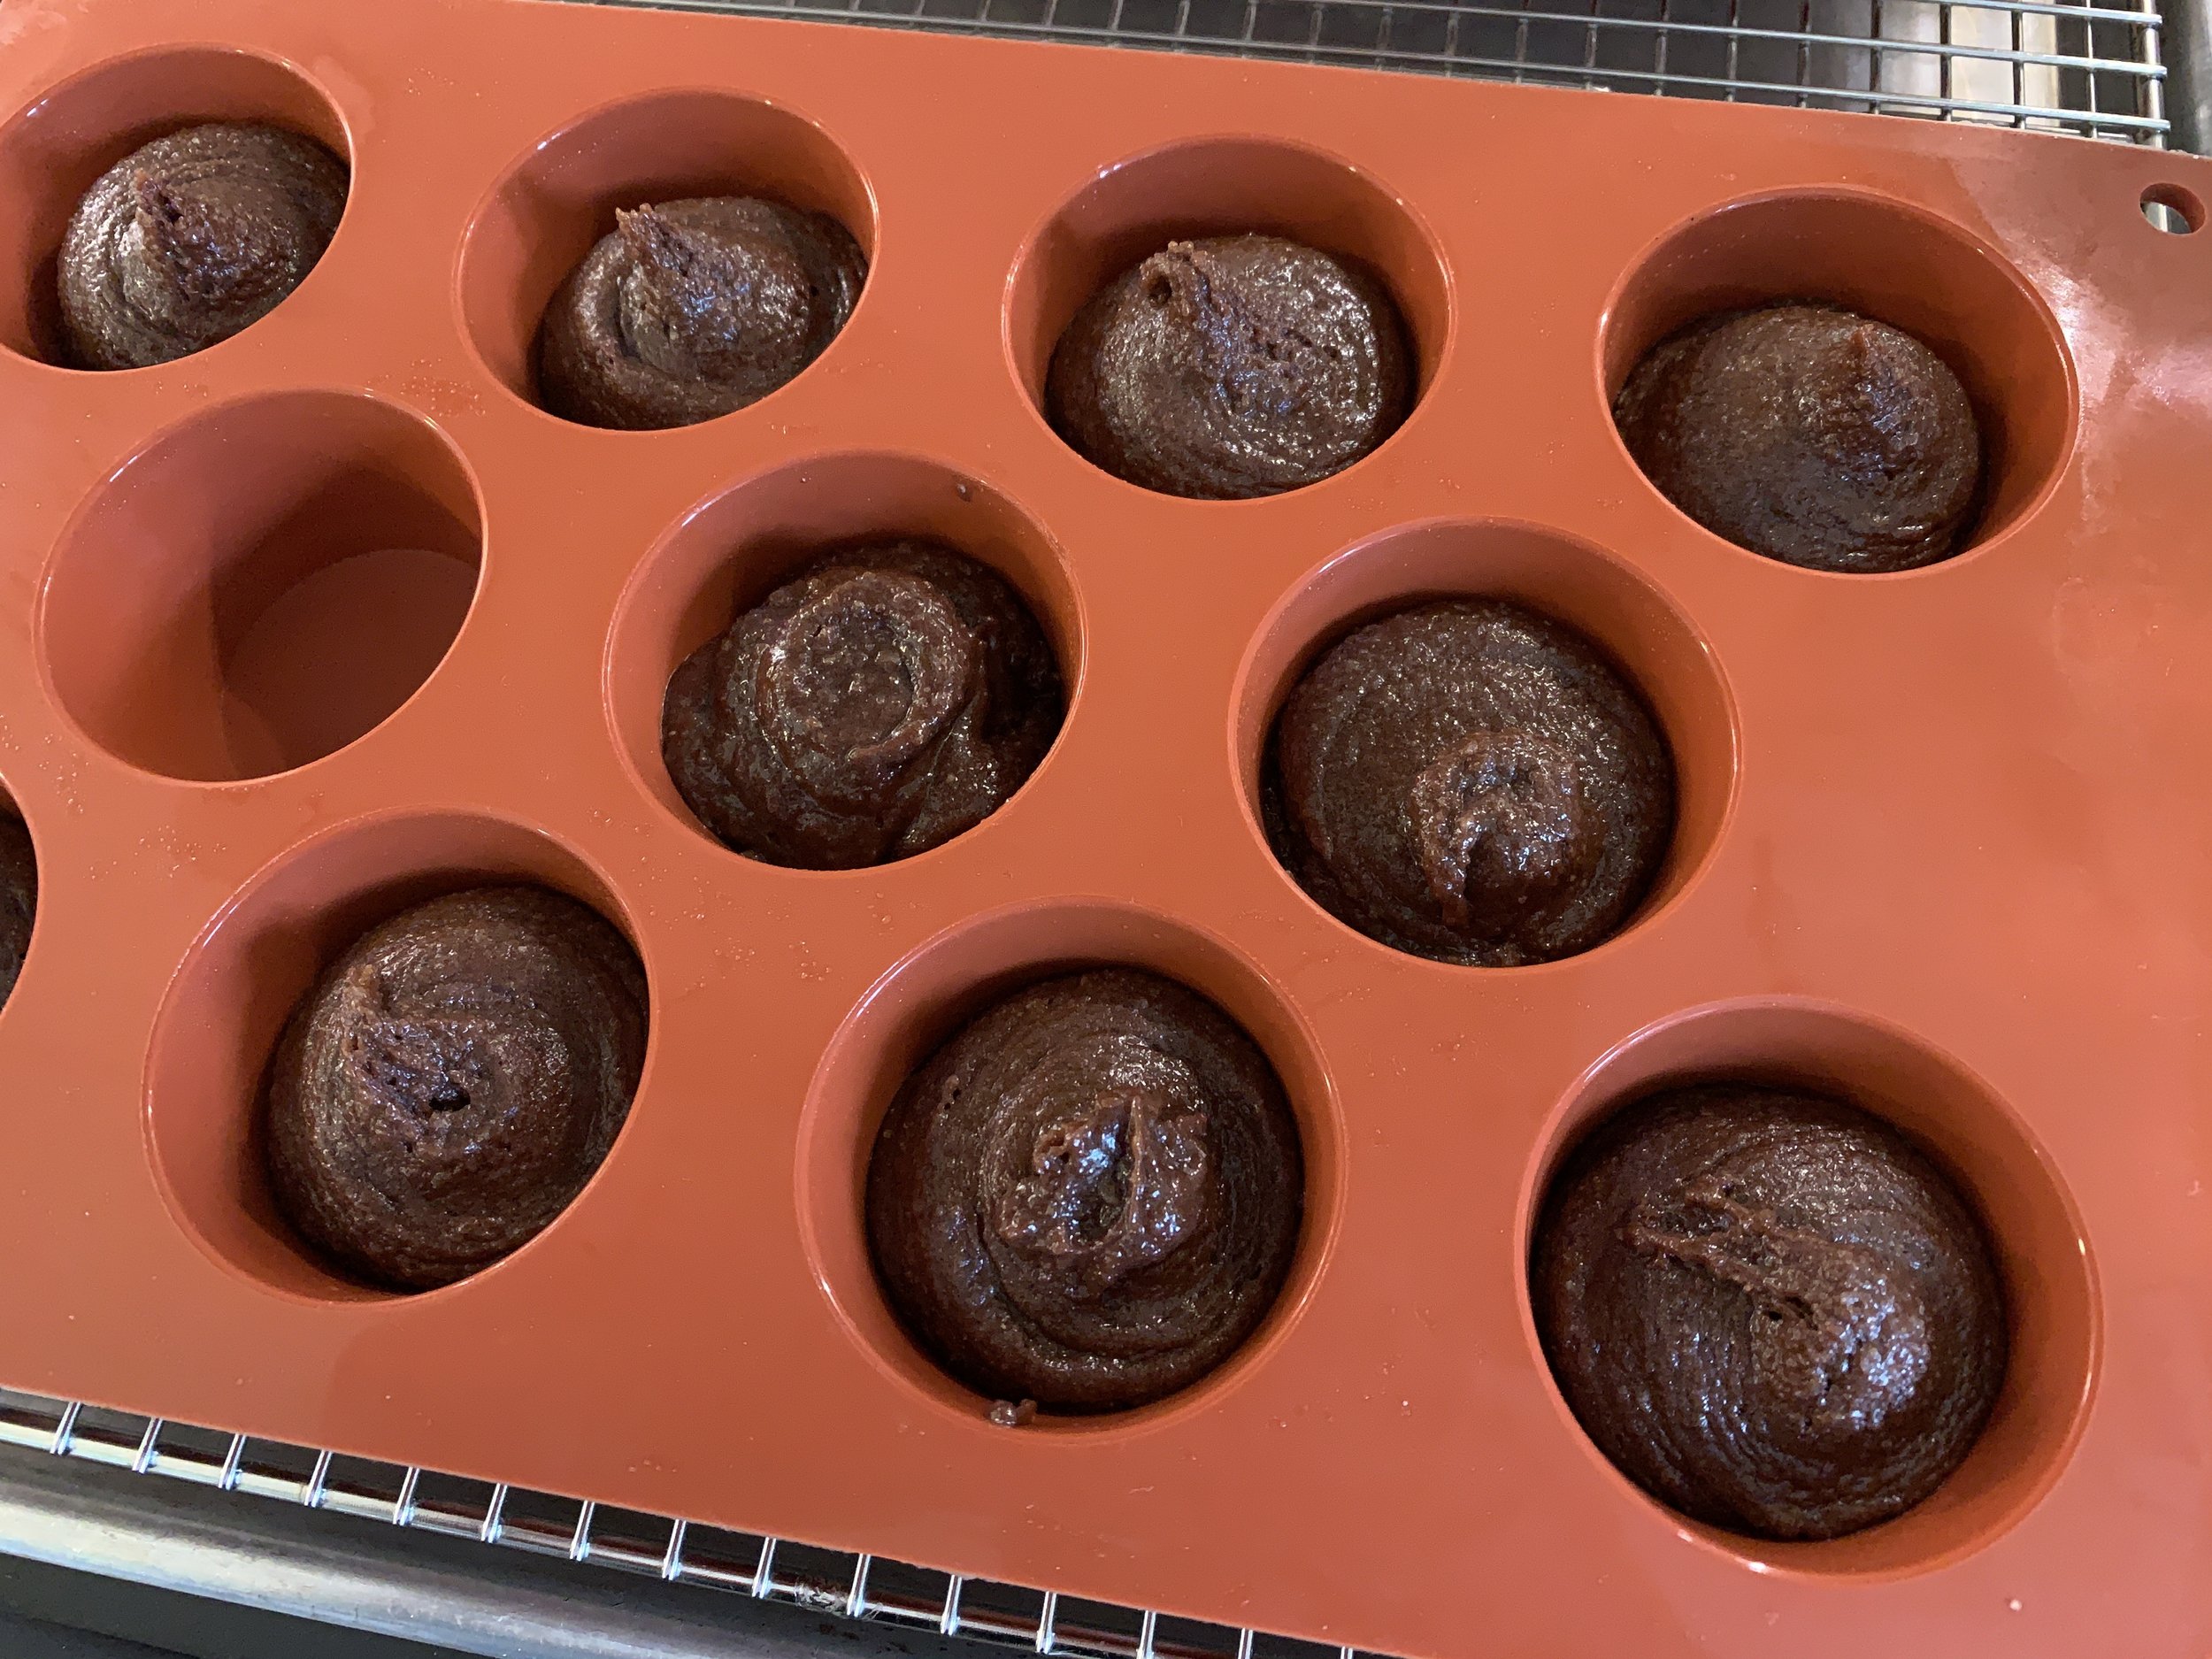
Bake about 15 minutes, check for doneness (no center goo; set). Bake an additional 5 minutes if needed.

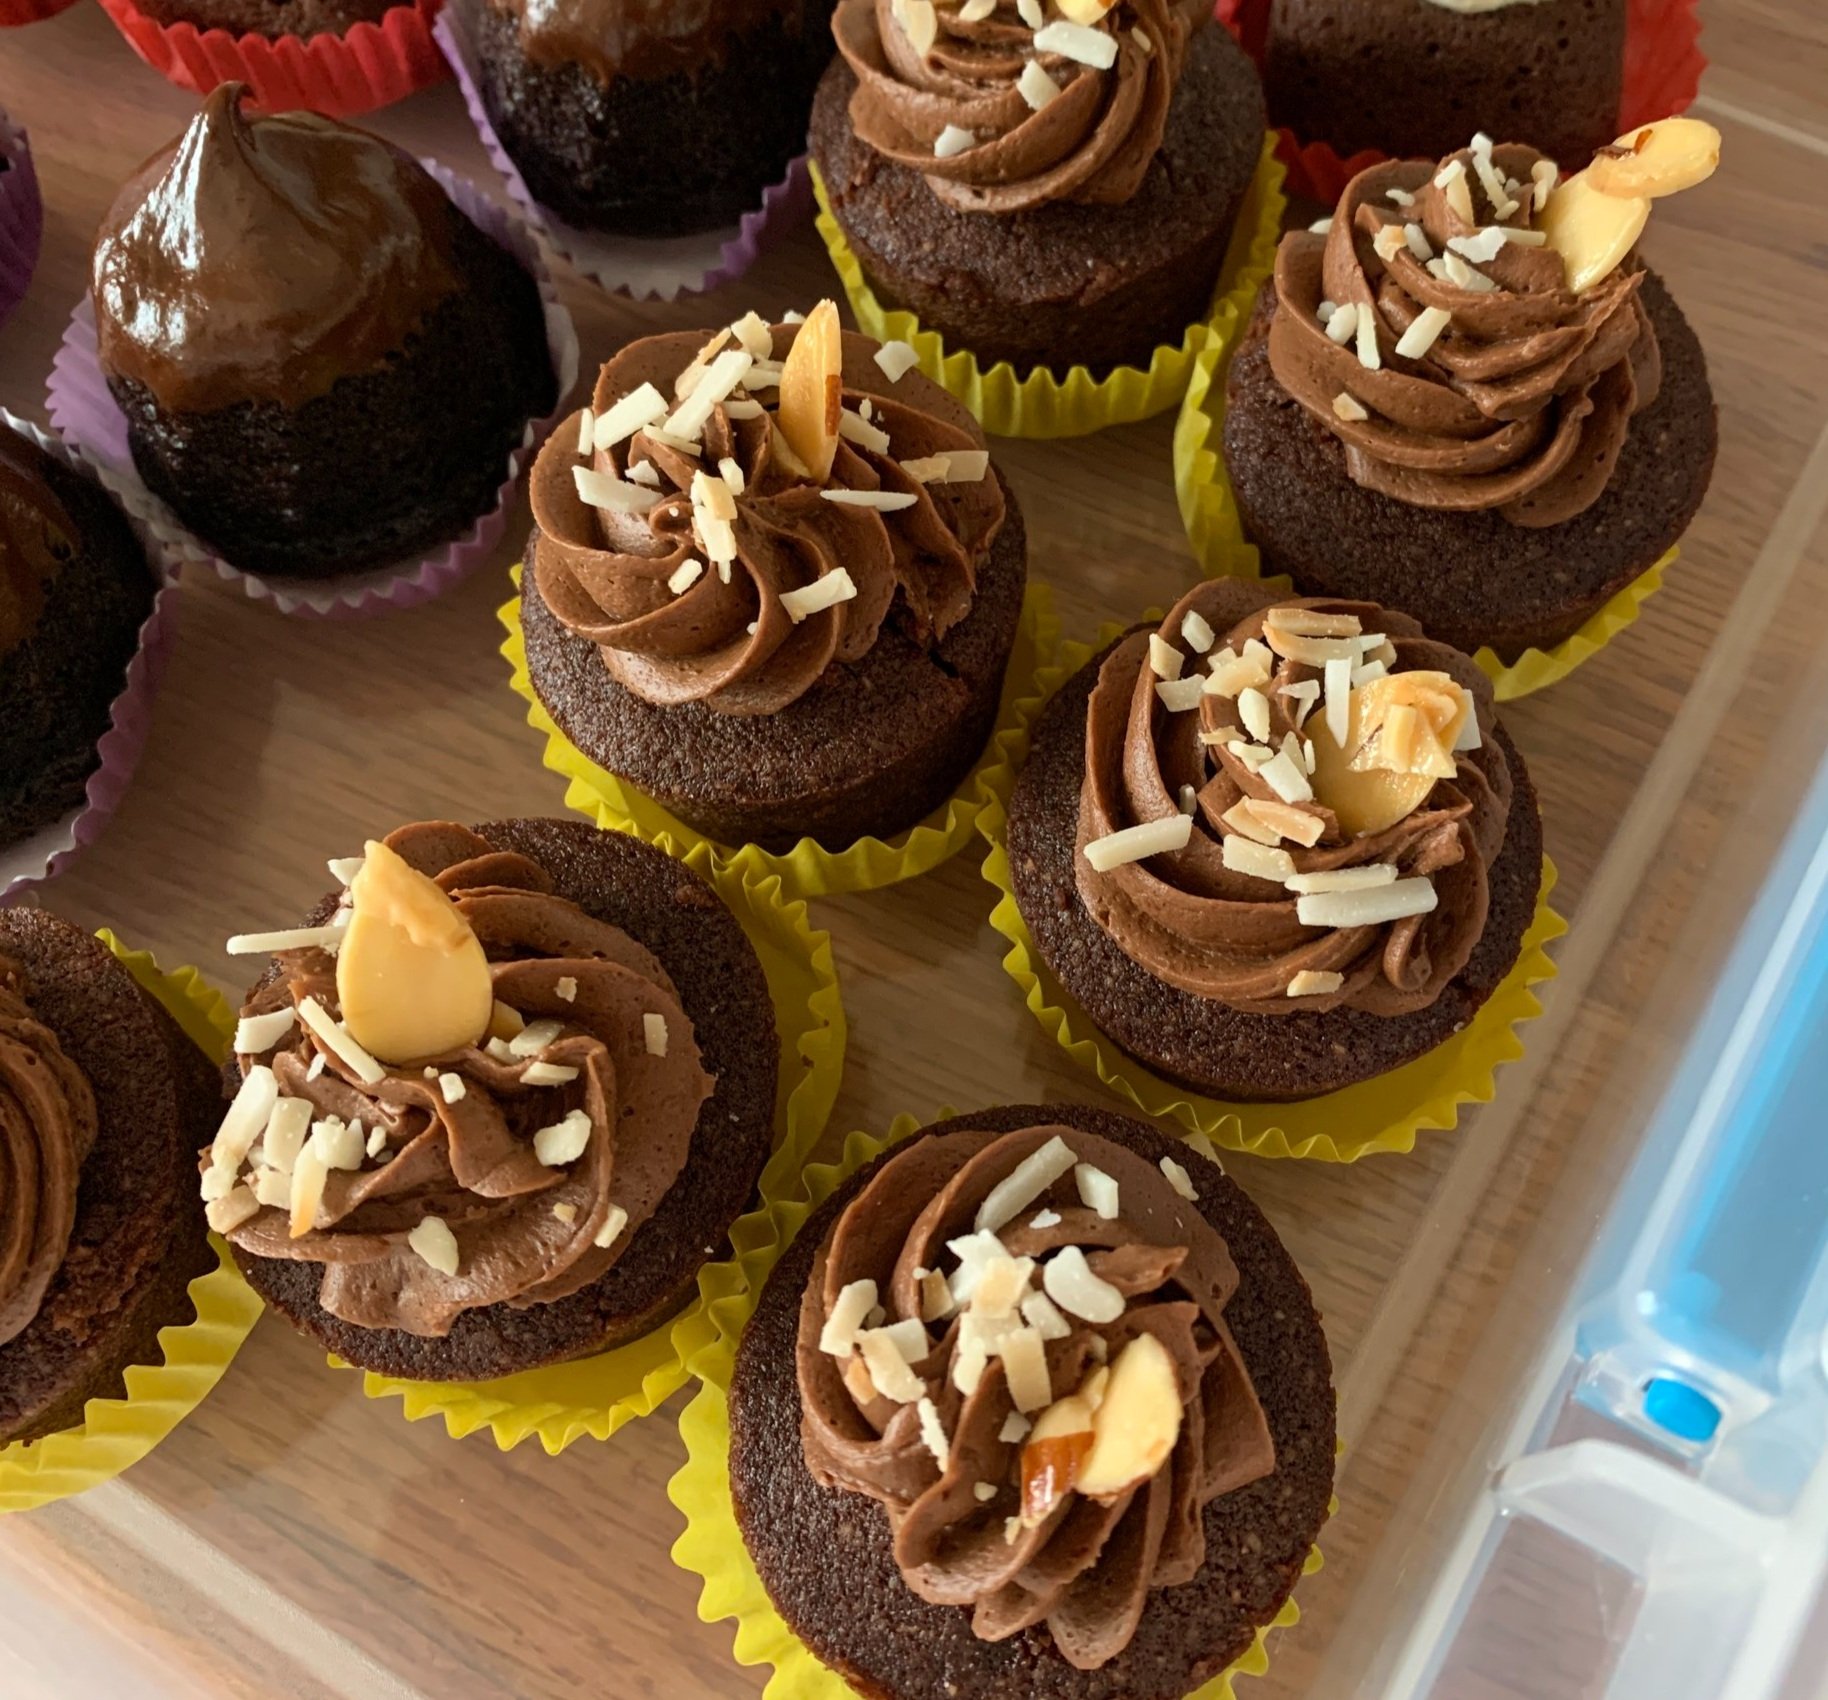
After a 10 minute cool down pop them out of the molds and set aside until ready to garnish. For these I used a small melon baller, scooped out the top center and filled that with a 1:1 ganache. A sprinkle of toasted coconut gave them the “almond joy” sense I was looking for.

Then a swirl of chocolate almond butter Swiss meringue buttercream, an additional sprinkle of toasted coconut and some candied sliced almonds - voila! NOTE: for 2/3 of the base SMBC recipe I added 227 g /8 oz dark chocolate, melted and cooled but still liquid and 1/2 cup of almond butter. So tasty!
The next cake is from a recipe I’ve had for many years but, for the life of me, I can’t recall where exactly I found it. It’s a gateau de Pâques or Easter cake, made with the basics - chocolate, butter, egg, sugar and flour.
The fussiest part is separating the yolks and whites, the whites being whipped separately to be gently folded in at the end. Remember - eggs separate best when cold!

Over a bain-marie melt the butter and chocolate gently - once things get melty, turn off the heat and let the melt continue over the still warm water. Chocolate loves that.
Separate the yolks and whites then whisk the yolks with the sugar for several minutes until thickened, pale and ribbon-y.

Blend in the chocolate butter mixture then sift the flour in and blend.

In a separate clean bowl whip the egg whites to soft peaks . . . . .

then blend them into the batter in three additions, folding gently.

Fill your chosen molds 3/4 full and bake at 325º about 20-25 minutes.

You want them set but note that a slightly shorter bake will give a more fudge-y result.

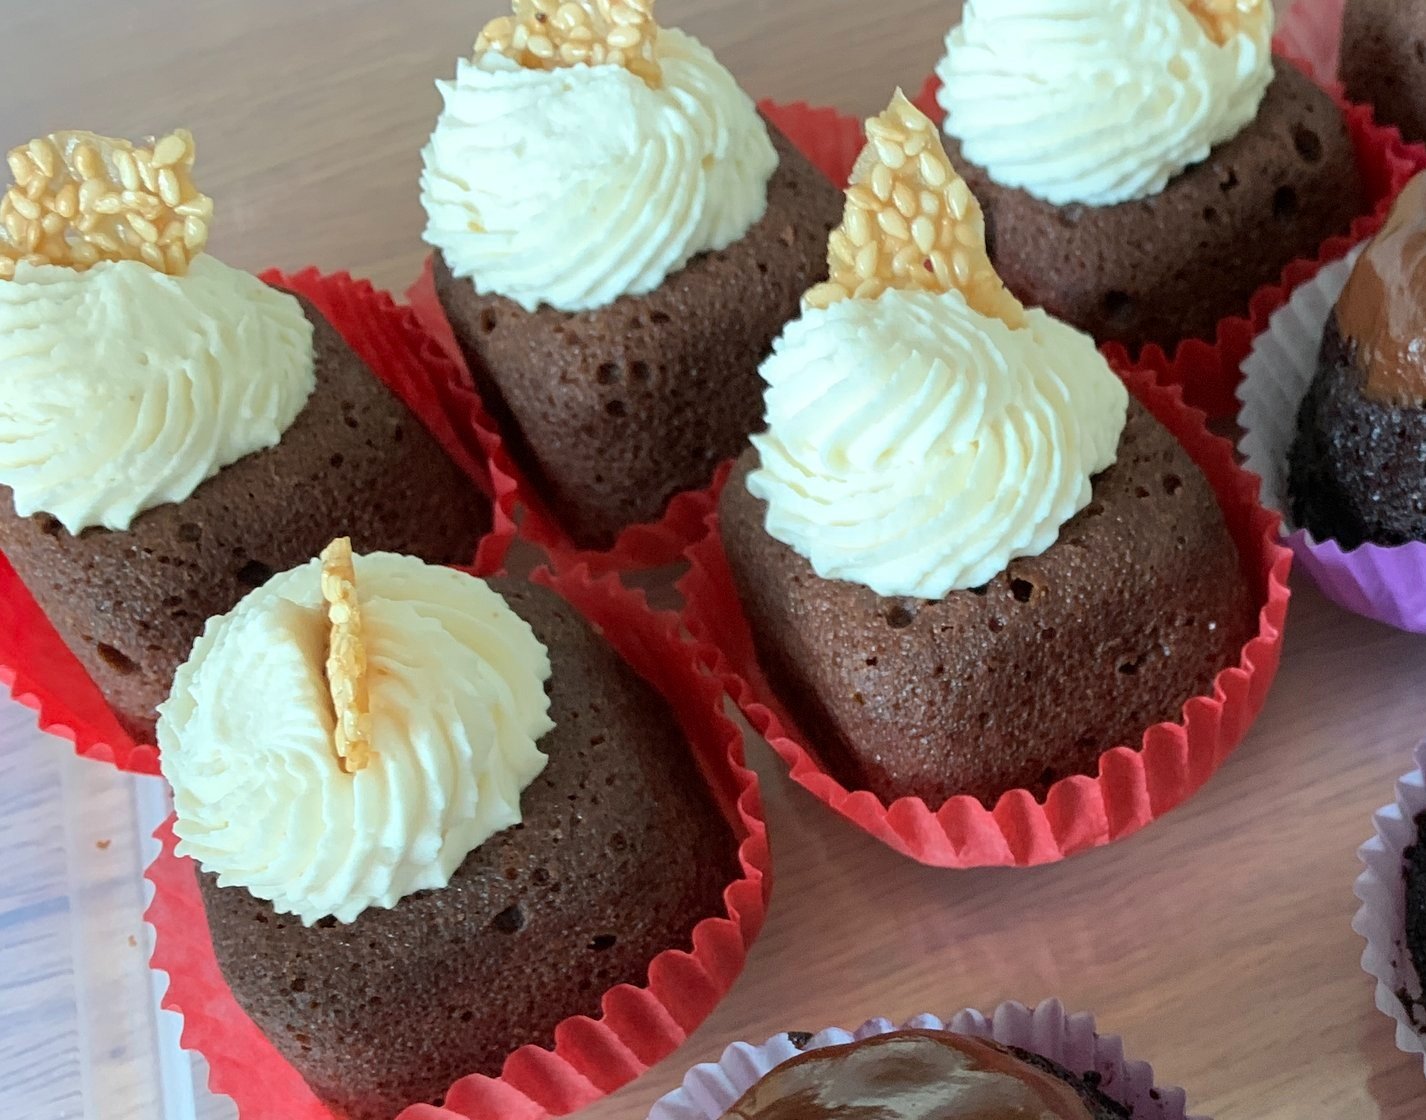
For the finish I filled the wells with a basic 1:1 ganache, let it set and then topped ‘em off with a swirl of caramel mascarpone cream and some sesame brittle. Yum.
Cake number three is a chocolate olive oil cake from Melissa Clark written for a 9” round cake. Oh so moist. I made this one twice, each time making 2/3 recipe using Earl Grey tea as the liquid. Liquid options include coffee, red wine, orange juice or water.
You create a paste by bringing already brewed tea to boil in a small saucepan, turn the heat off and whisk in Dutch-process cocoa powder, spices of choice (I used a mix of cinnamon, coriander and ginger) and salt. Let it cool.
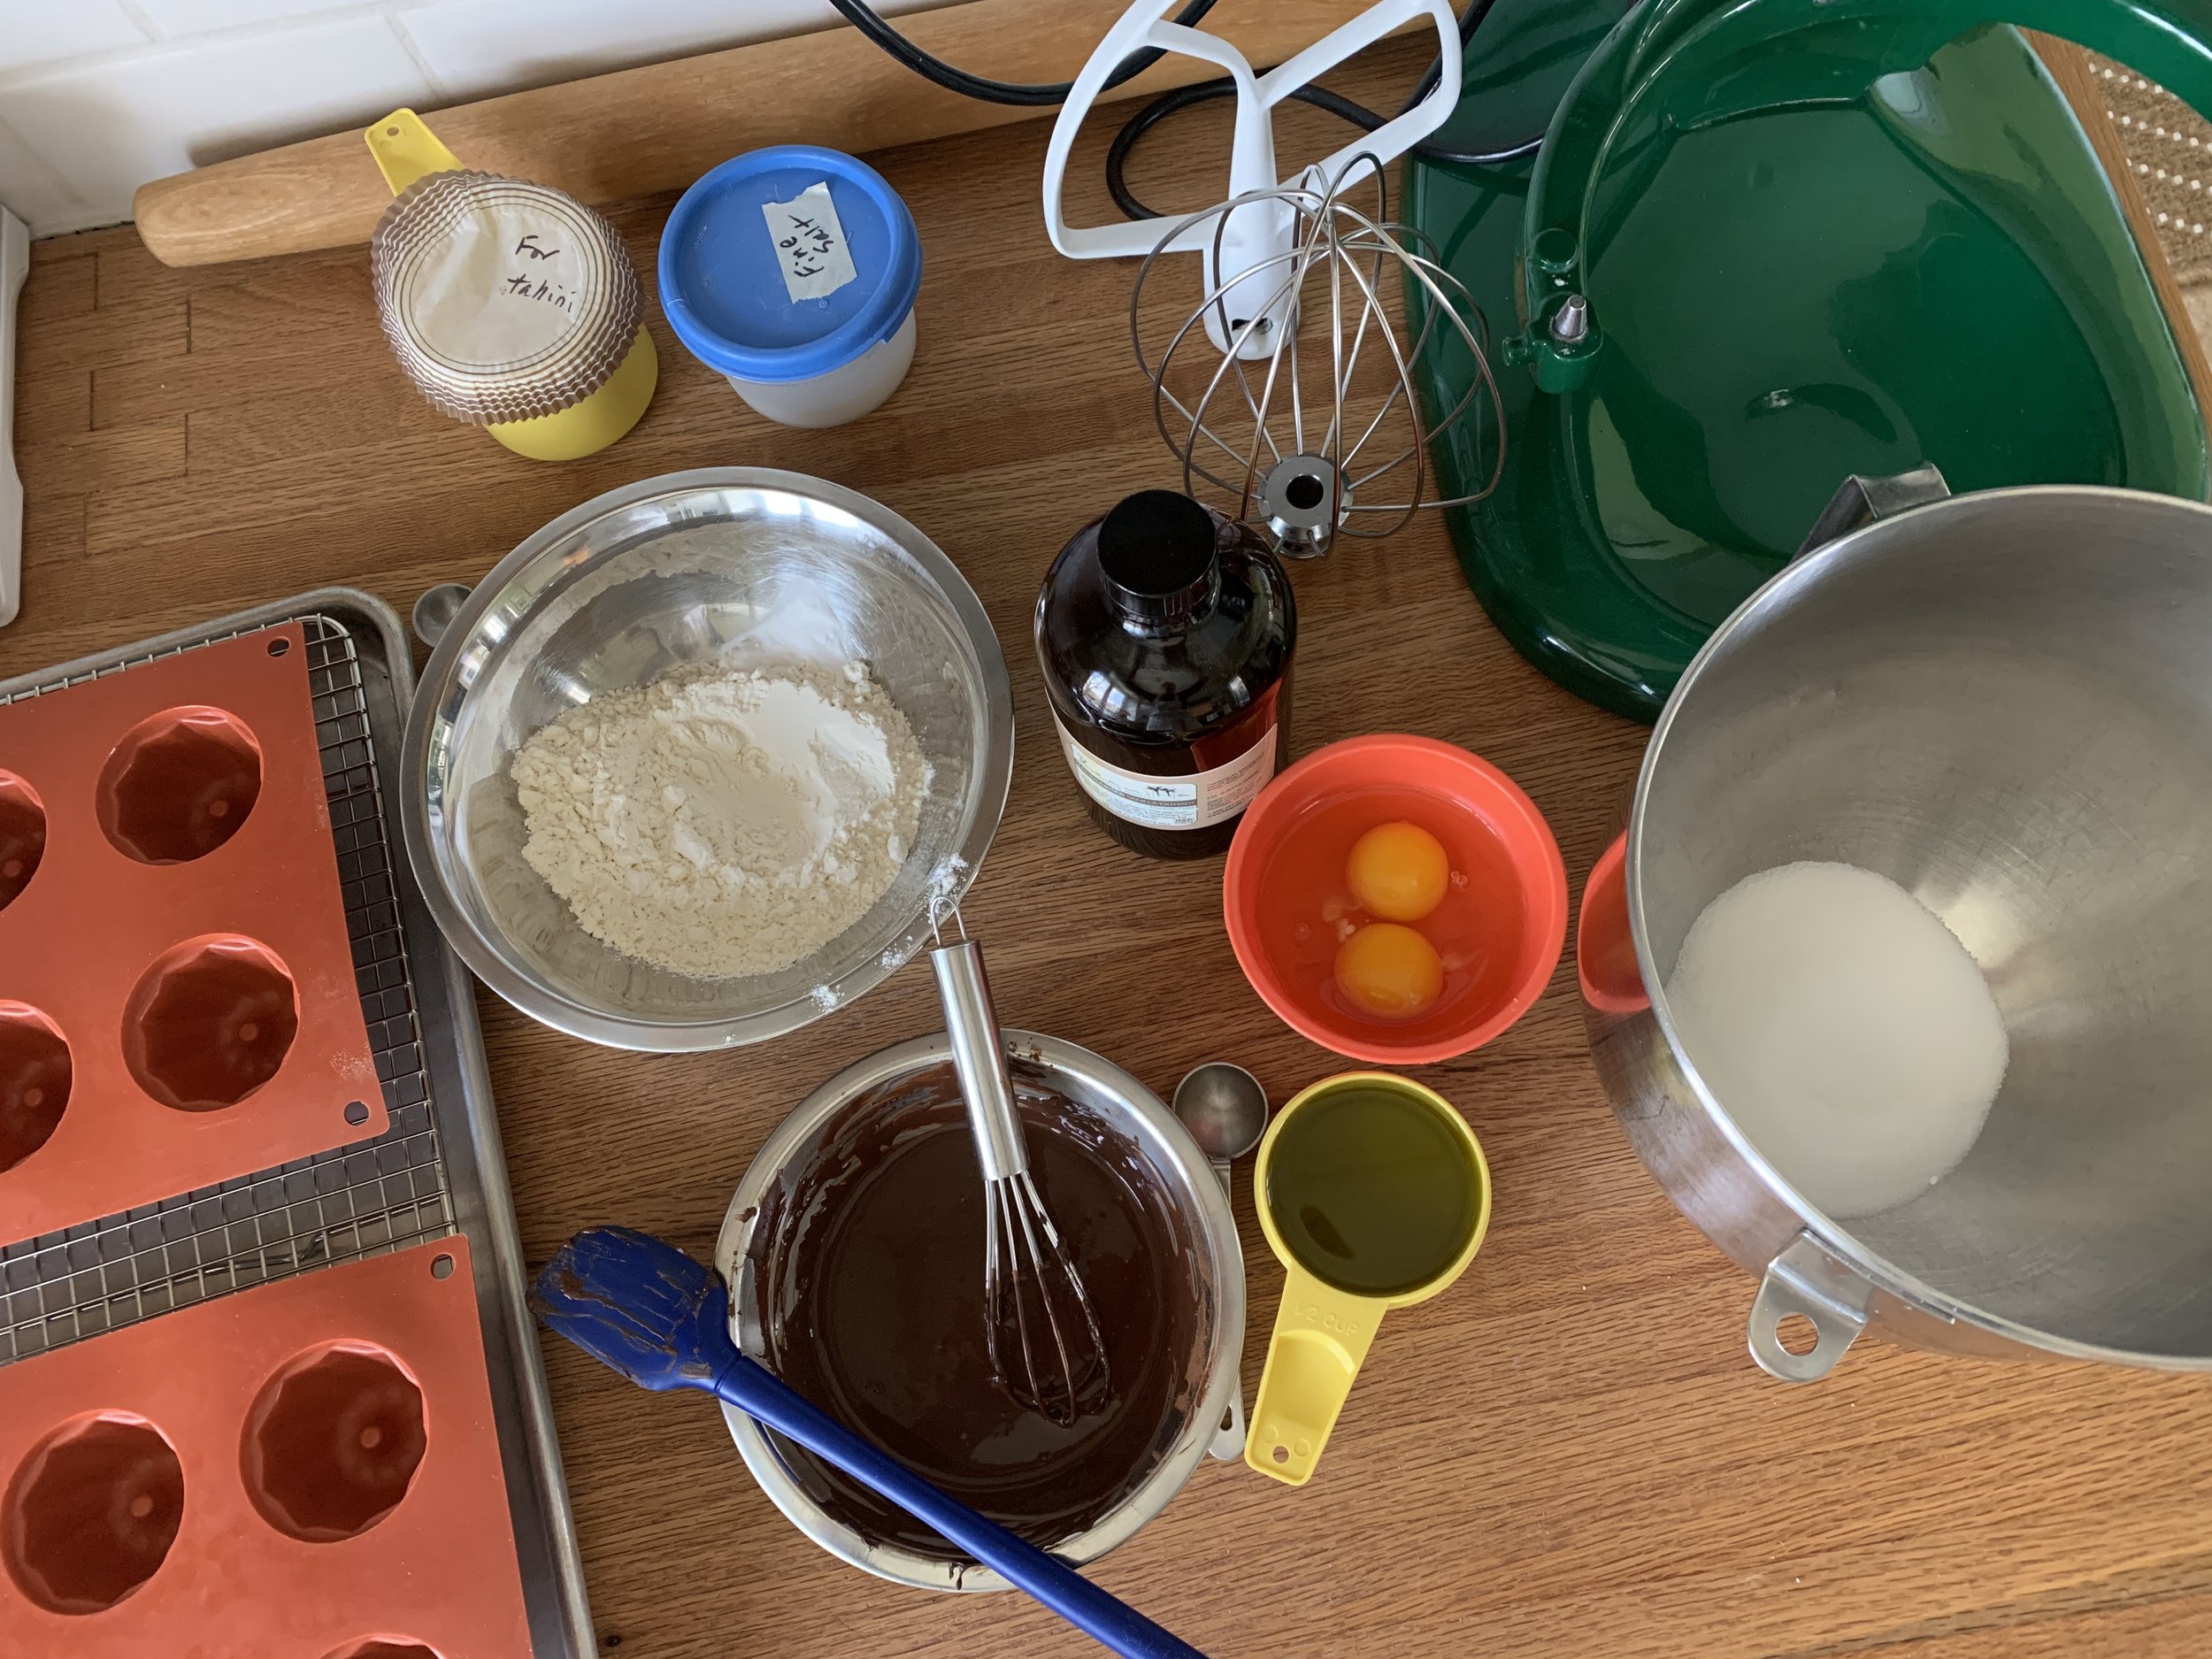
Once the paste is made, the steps are basic cake simple - beat sugar, olive oil, eggs and vanilla for a few minutes, then add the tea-cocoa mixture followed by flour and baking soda.
Fill your chosen molds about 3/4 full and bake at 325ºF for about 20 minutes. My yield using 2/3 recipe was 19 lovely Kugelhopf treats.

These baked 8 minutes, rotated, another 8 minutes then an additional 4 to be sure they were set with a tester holding a scant few crumbs.

Let sit 10 minutes or so then gently turn out of the molds. Once cool, I filled the little top cavity with basic ganache and let that set.
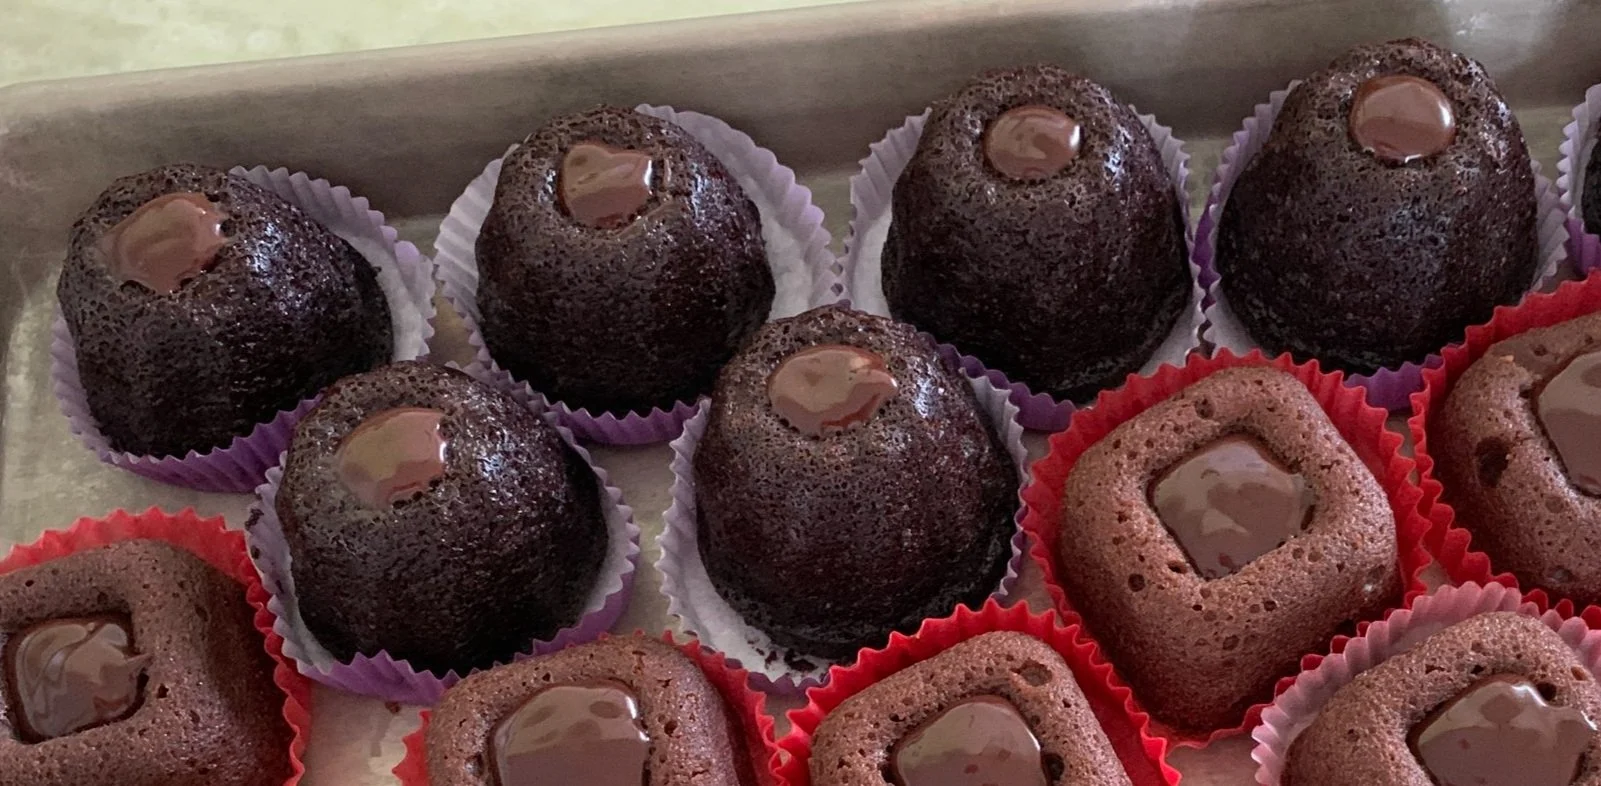
These received a top dunk in Earl Grey lavender ganache which I had allowed to set enough so the ganache would coat nicely with some holding power on the top.
It’s made by infusing 3 teaspoons of loose Earl Grey tea plus 1/4 teaspoon dried culinary lavender buds in 160 g / 2/3 cup heavy cream then straining the infused cream into 130 g / 4.6 ounces melted chocolate. Blend it up until smooth, then blend in 18 g / 4 teaspoons unsalted butter. There you go.
This cake is deelish, so moist and delectable with the perfect hint of spice. I’m intrigued by the red wine or orange juice options for next time. Hmmmmm.
As for the ganache, the taste of lavender has never really grabbed me, but I’ll admit this Earl Grey ganache grew on me. I adore versions of herbes de provence that have lavender in the mix (not all do), but have always shied away from using lavender on its own.
A brief review reminded me that lavender is actually part of the mint family and I could sense that light minty floral flavor which was not at all overbearing. I much prefer my flavors on the mellow side. Just ask Steve.

Wow! That seemed to go on forever. I hope you give these three cakes a try and create your own garnishes and flavors.

Happy spring!