Summer fruits galette/spelt pâte brisée

IMG_1249.JPG

This time of year when the farmer’s markets are teeming with fresh fruits and produce, a rustic galette is just the ticket for a delicious summer dessert. Think cherries, peaches, plums, berries (red, blue and black), and currants too! Steve and I love our local Fulton Farmers Market and make at least a weekly visit for our favorite seasonal goods.

IMG_1251.JPG
IMG_1253.jpg

Even though our socializing has been curtailed and we’ve been at home for the majority of our time in the last five months, every now and then we get out to Clear Lake to see cousin Jen and her family. What a beautiful spot to enjoy an outdoor meal and of course each other’s company. We provided grilled chicken, fresh green beans and corn while Jen had some deelish nibbles, crusty rolls, followed by vanilla ice cream to accompany the fruit galette. Yum indeed. Thanks Jen, Scott and Claire!

IMG_1238.jpg

In France a fruit galette (crostata in Italia) is a rustic tart - no tart pan or ring, just a rolled out round of dough topped with a mound of fresh fruit then baked to golden crust perfection. I’ve written about galettes before but it’s always fun to revisit an old friend.

Planning ahead, you can certainly make your dough days or even weeks before, wrap it well and freeze it until you need it. Think about that when, before you know it, the fall and winter holidays will be upon us. What better way to be prepared for the pies or tarts you hope to serve for Thanksgiving dinner or holiday suppers/gatherings than to have your dough already made. Yippee!

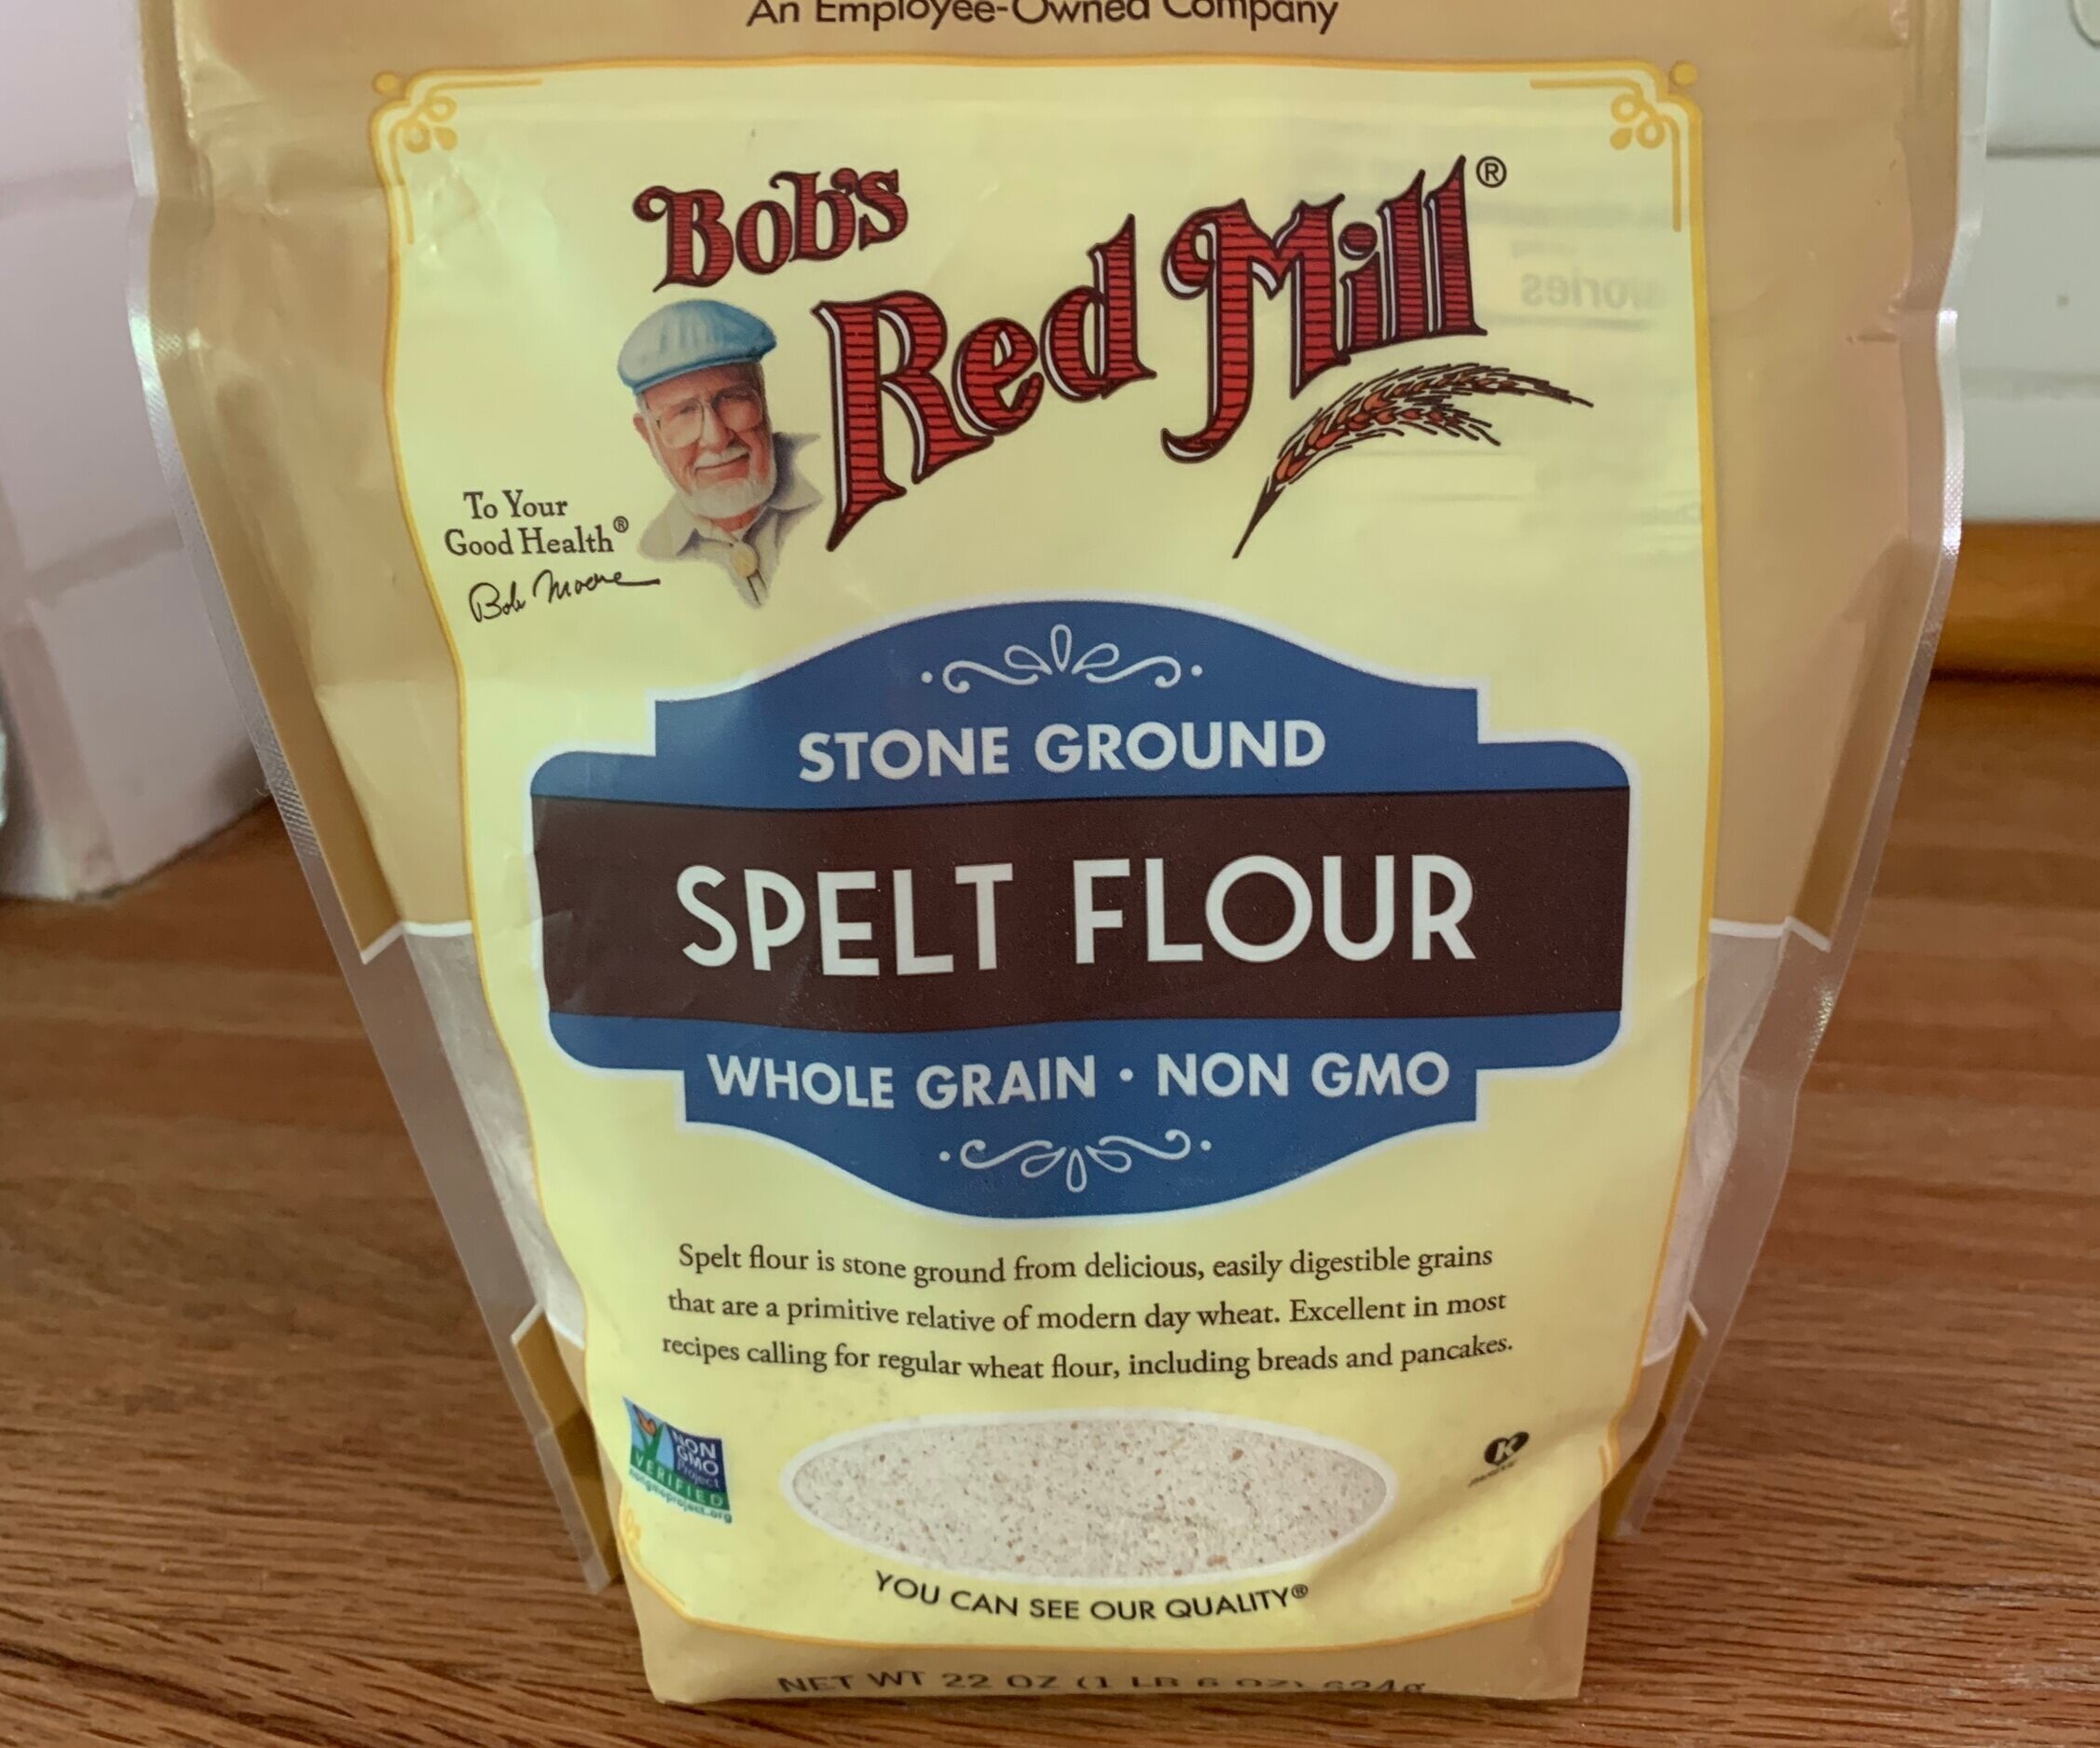
For this one I used my favorite pâte brisée recipe but substituted 60 g of spelt flour for 60 g of all purpose flour. What a buttery, flaky, edge-of-nuttiness and melt-in-your mouth dough this is!

I’m a big fan of Bob’s Red Mill specialty flours. While I use King Arthur flour for my all purpose, bread and general whole wheat needs, the wonderful array of BRM’s offerings available on my local grocery store shelves allows me easy access to some of my faves like whole wheat pastry flour (sadly hard to find during this pandemic!), spelt, and semolina, plus non-wheat options like rye, cornmeal, rice and oat flour, potato and tapioca starch just to name a few.

IMG_1256.jpg

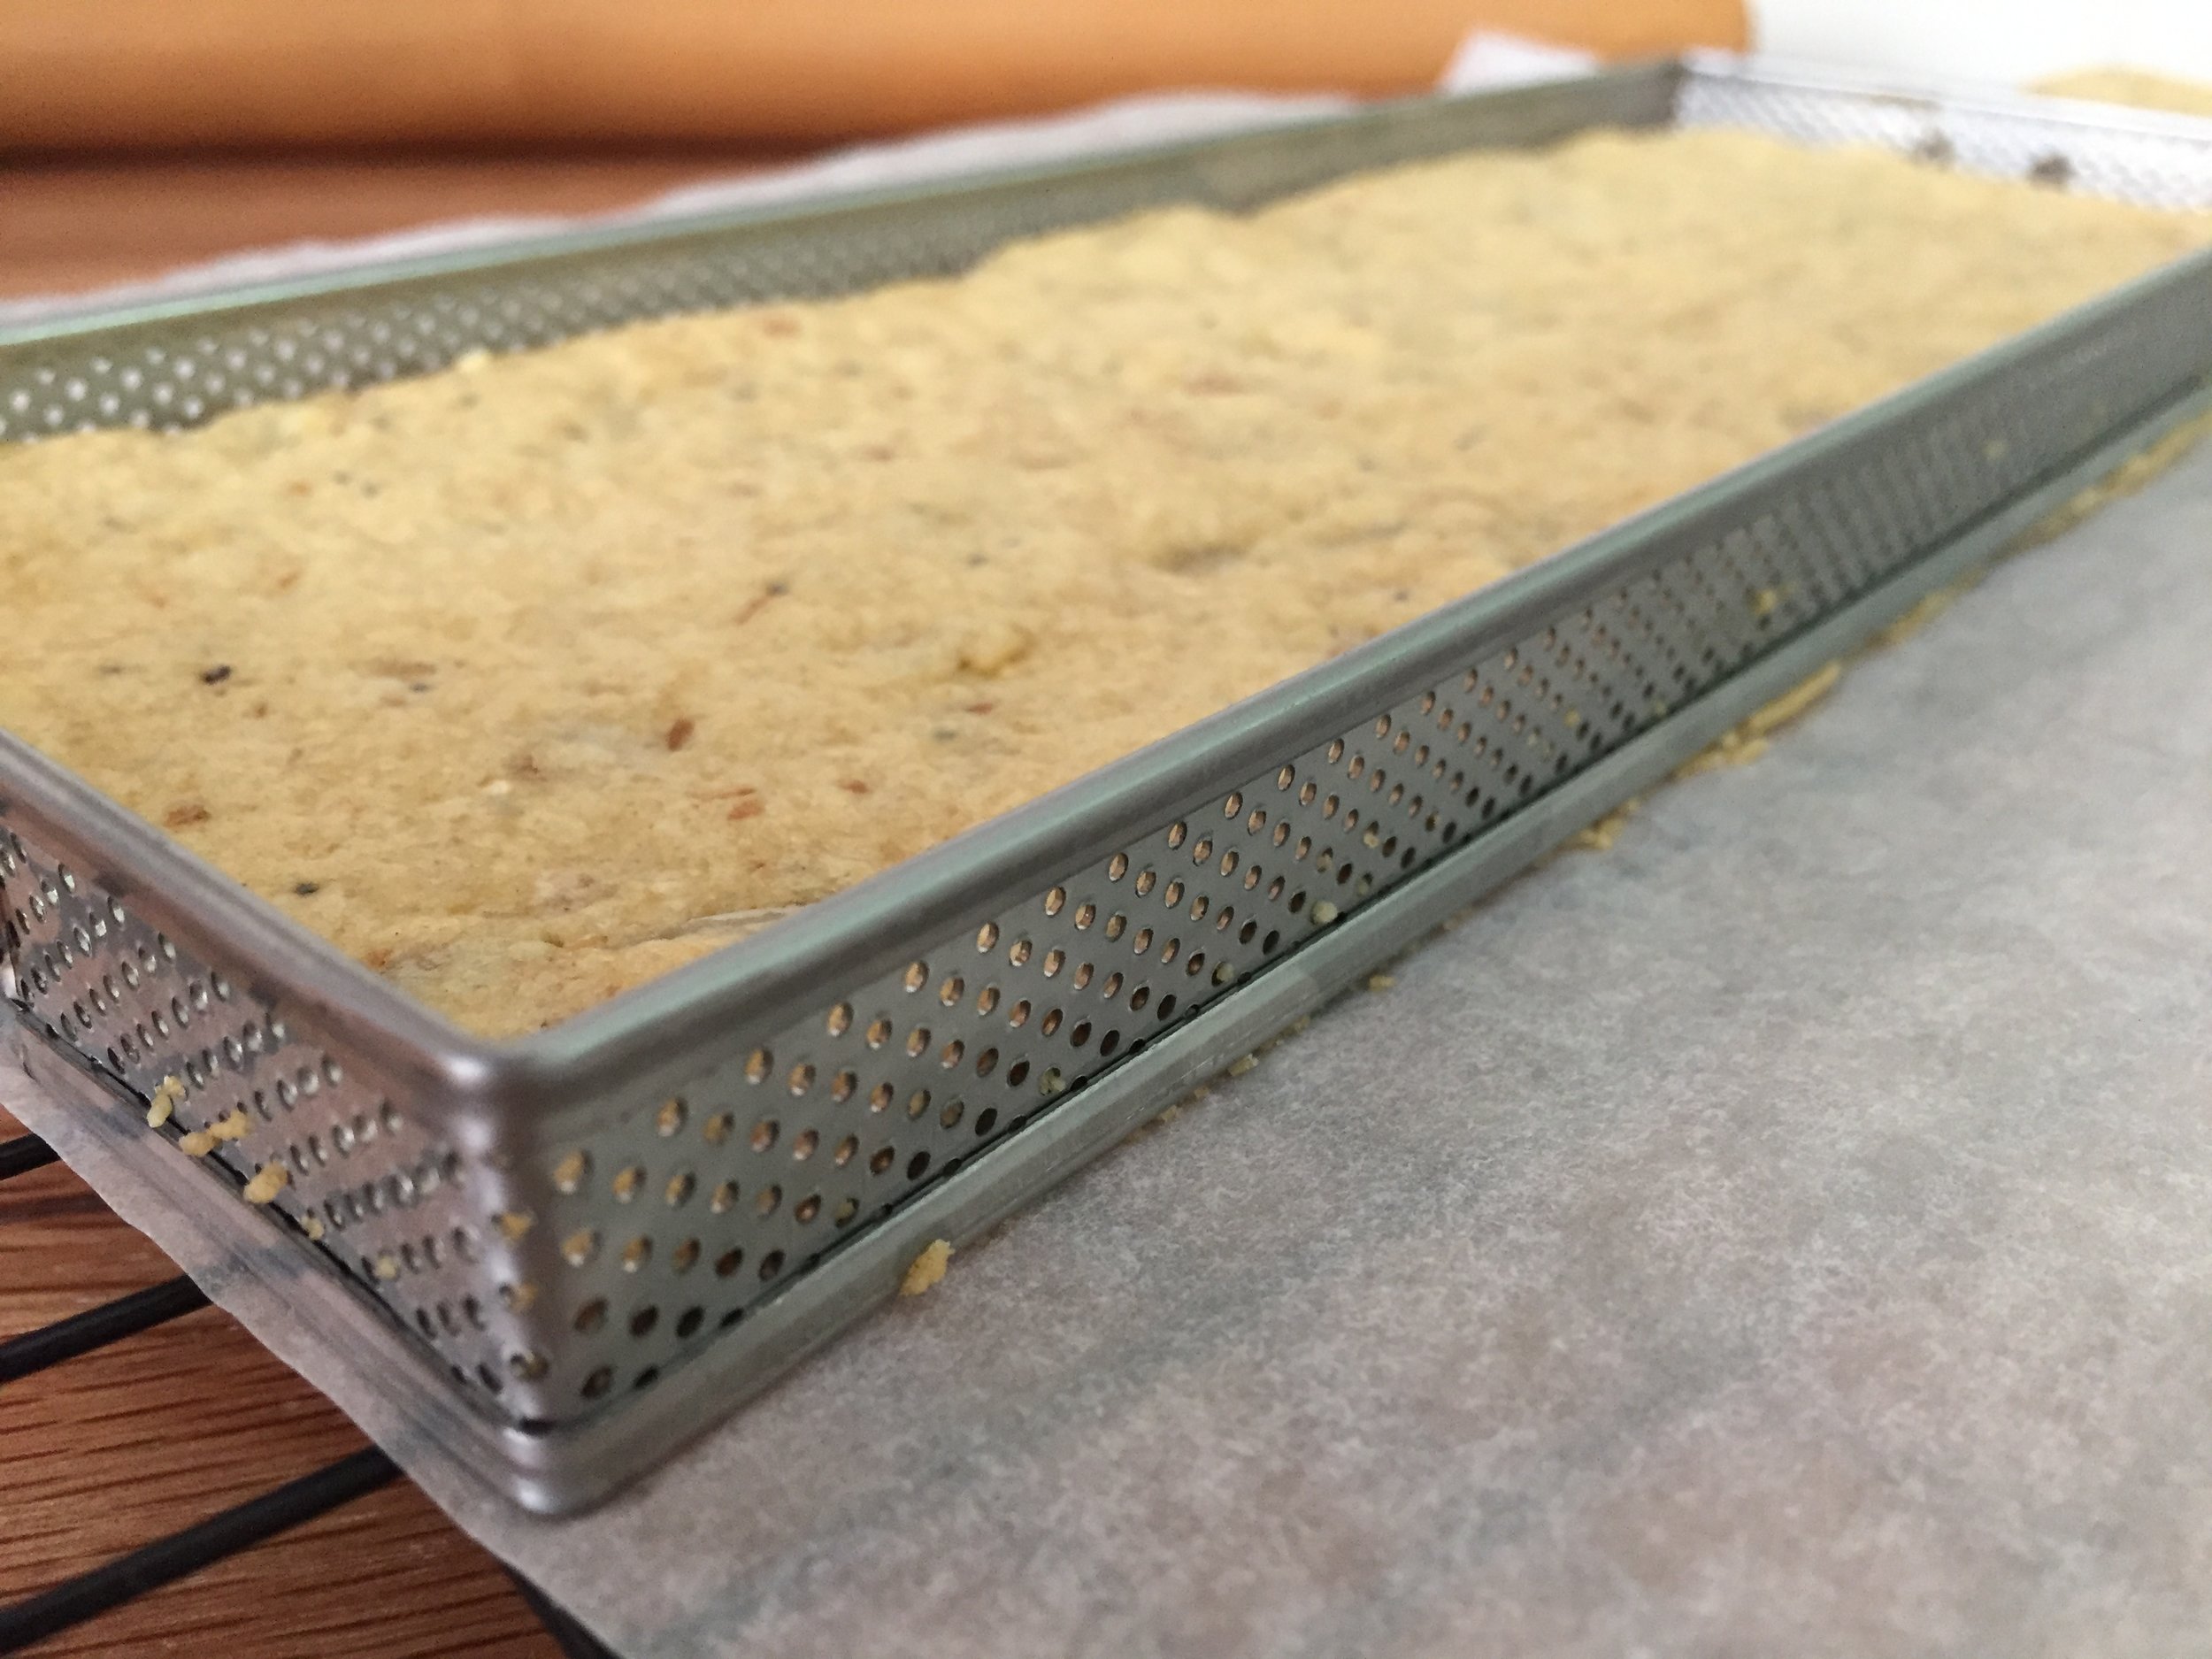
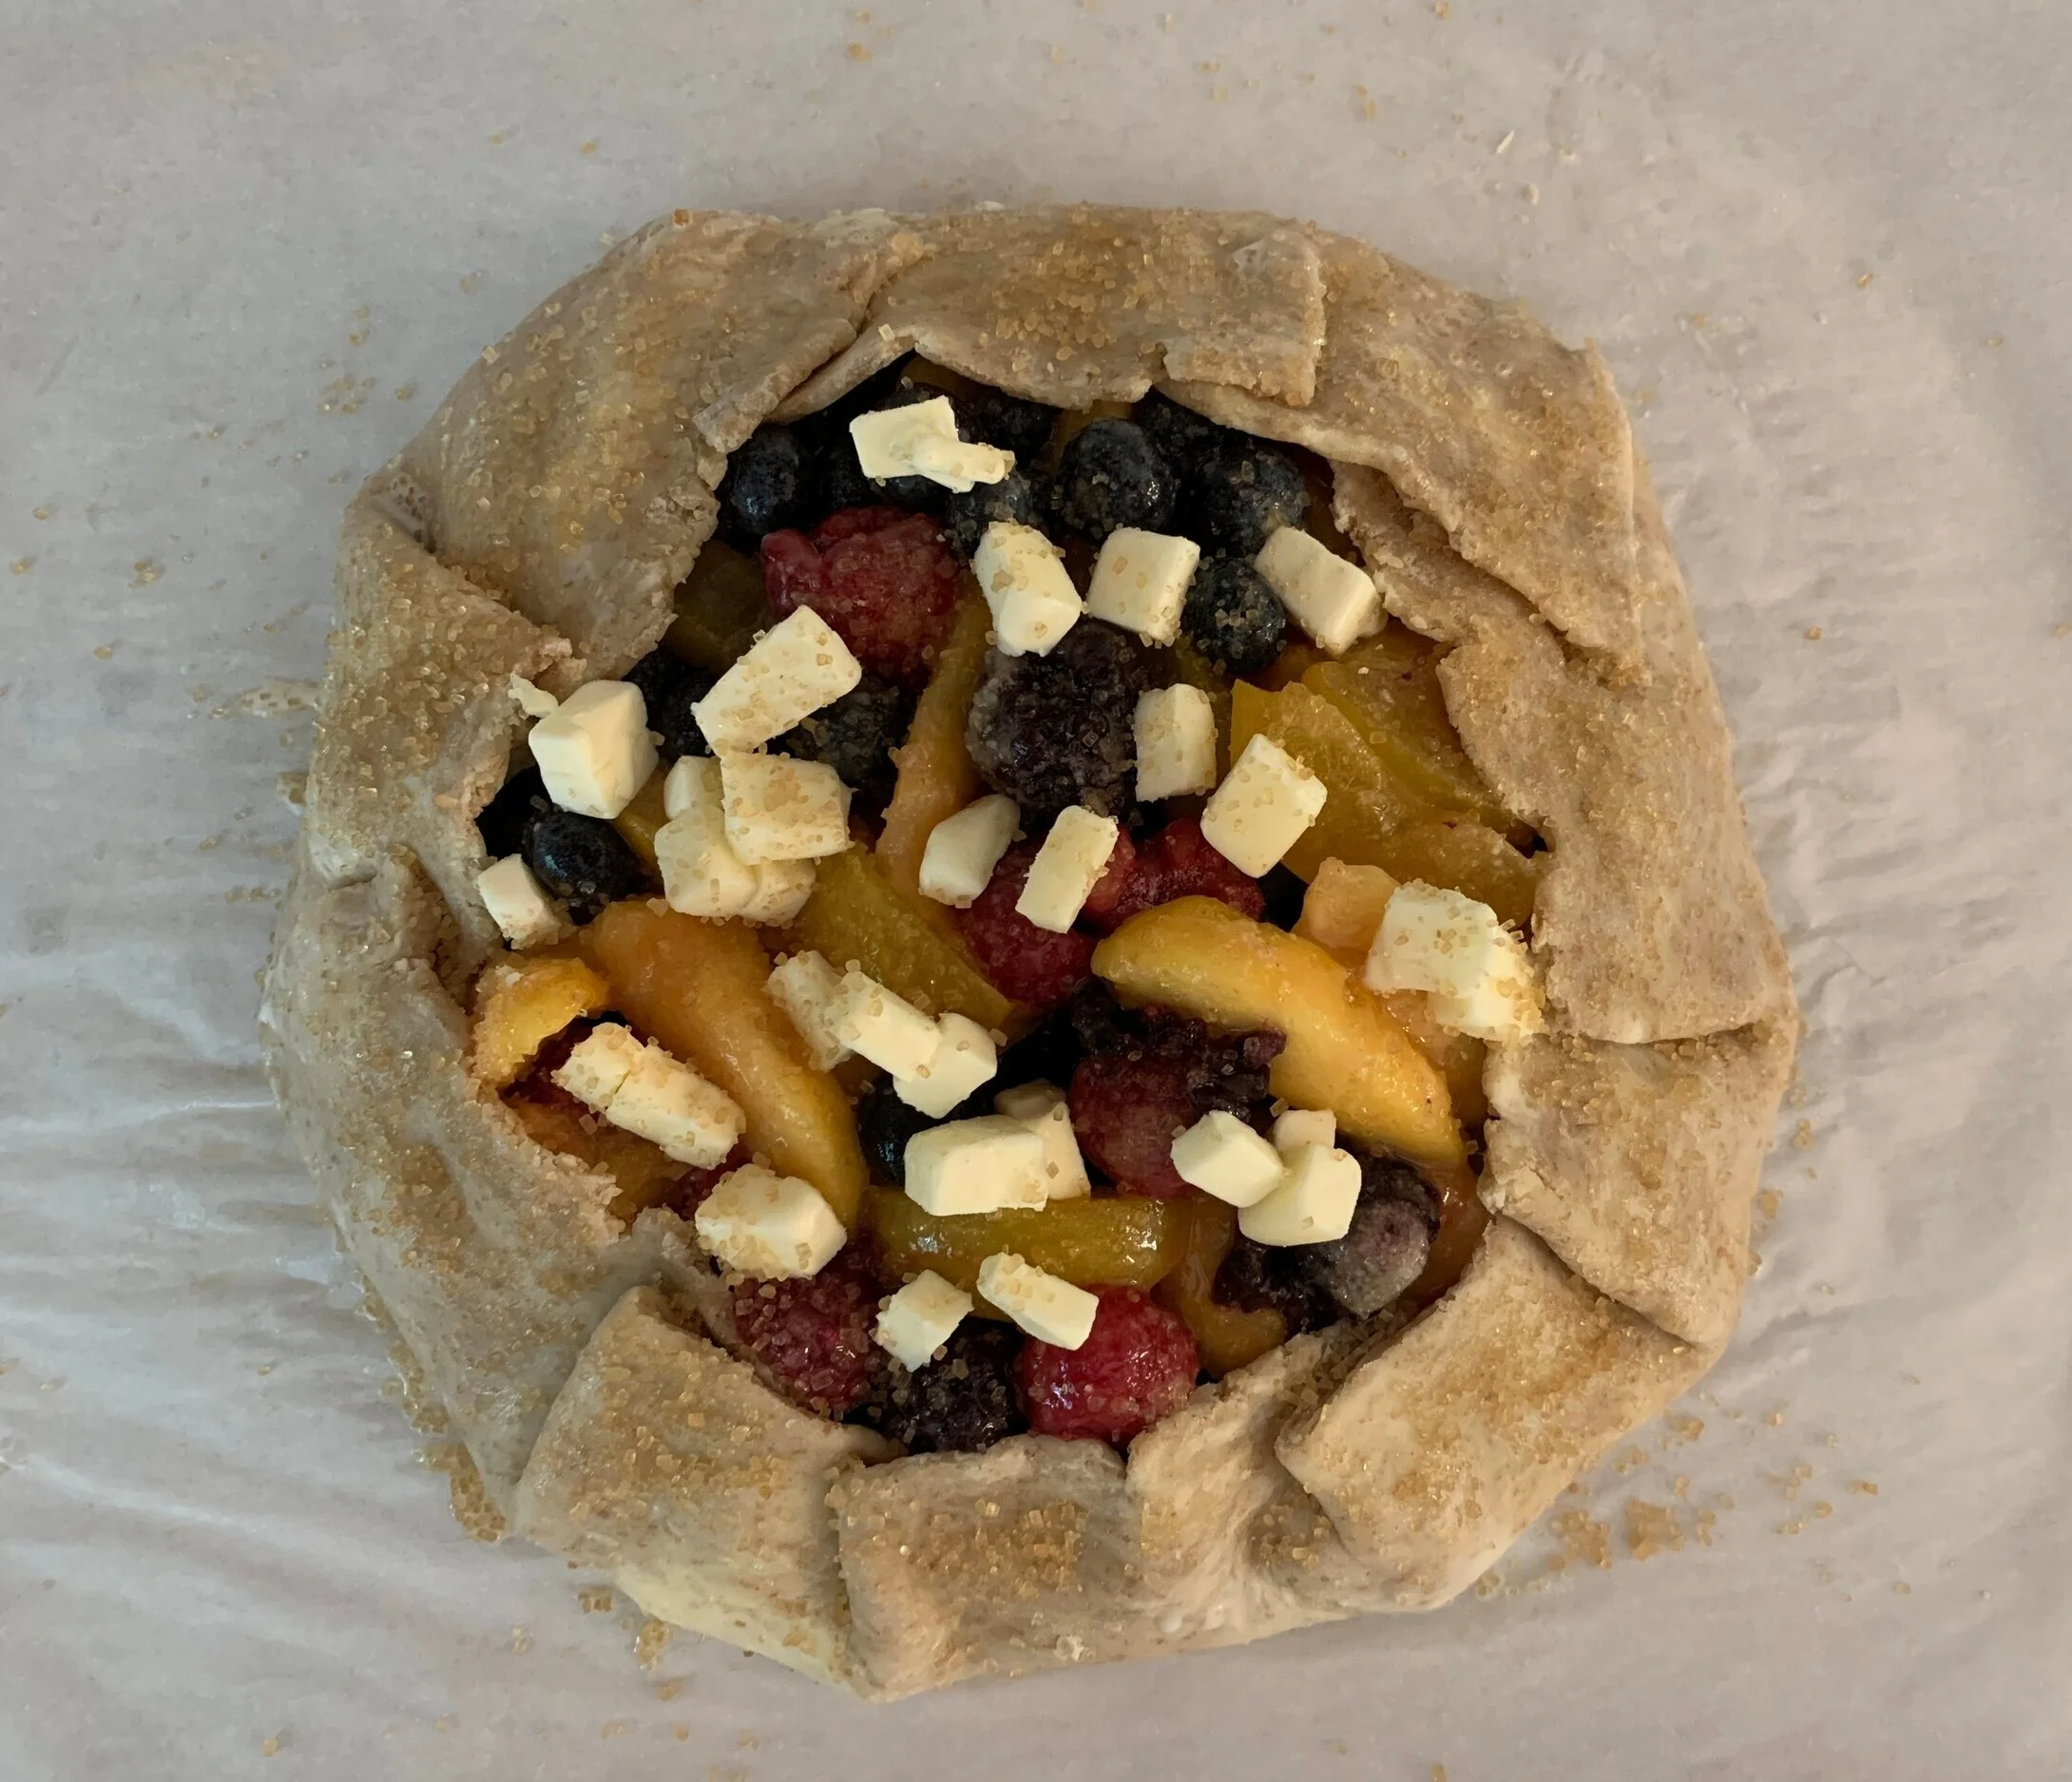
For this galette I used about 300 g of dough for a finished size of about 9 inches. On a lightly floured surface roll the dough into a rough ~ 12-inch round about 1/8 inch thick. Check out the butter marbled throughout and the speckling of spelt in the photo below - I love that.

Remember to work with your dough cool - if it becomes warm and the butter squishy, it’s time to pop it into the fridge or freezer for 10-15 minutes to firm things up. You’ll be happy you did. Once your dough is rolled out to your satisfaction, place it on a parchment lined sheet pan and hold it in the fridge while prepping your fruit.

Heat the oven to 425ºF.

IMG_1231.JPG

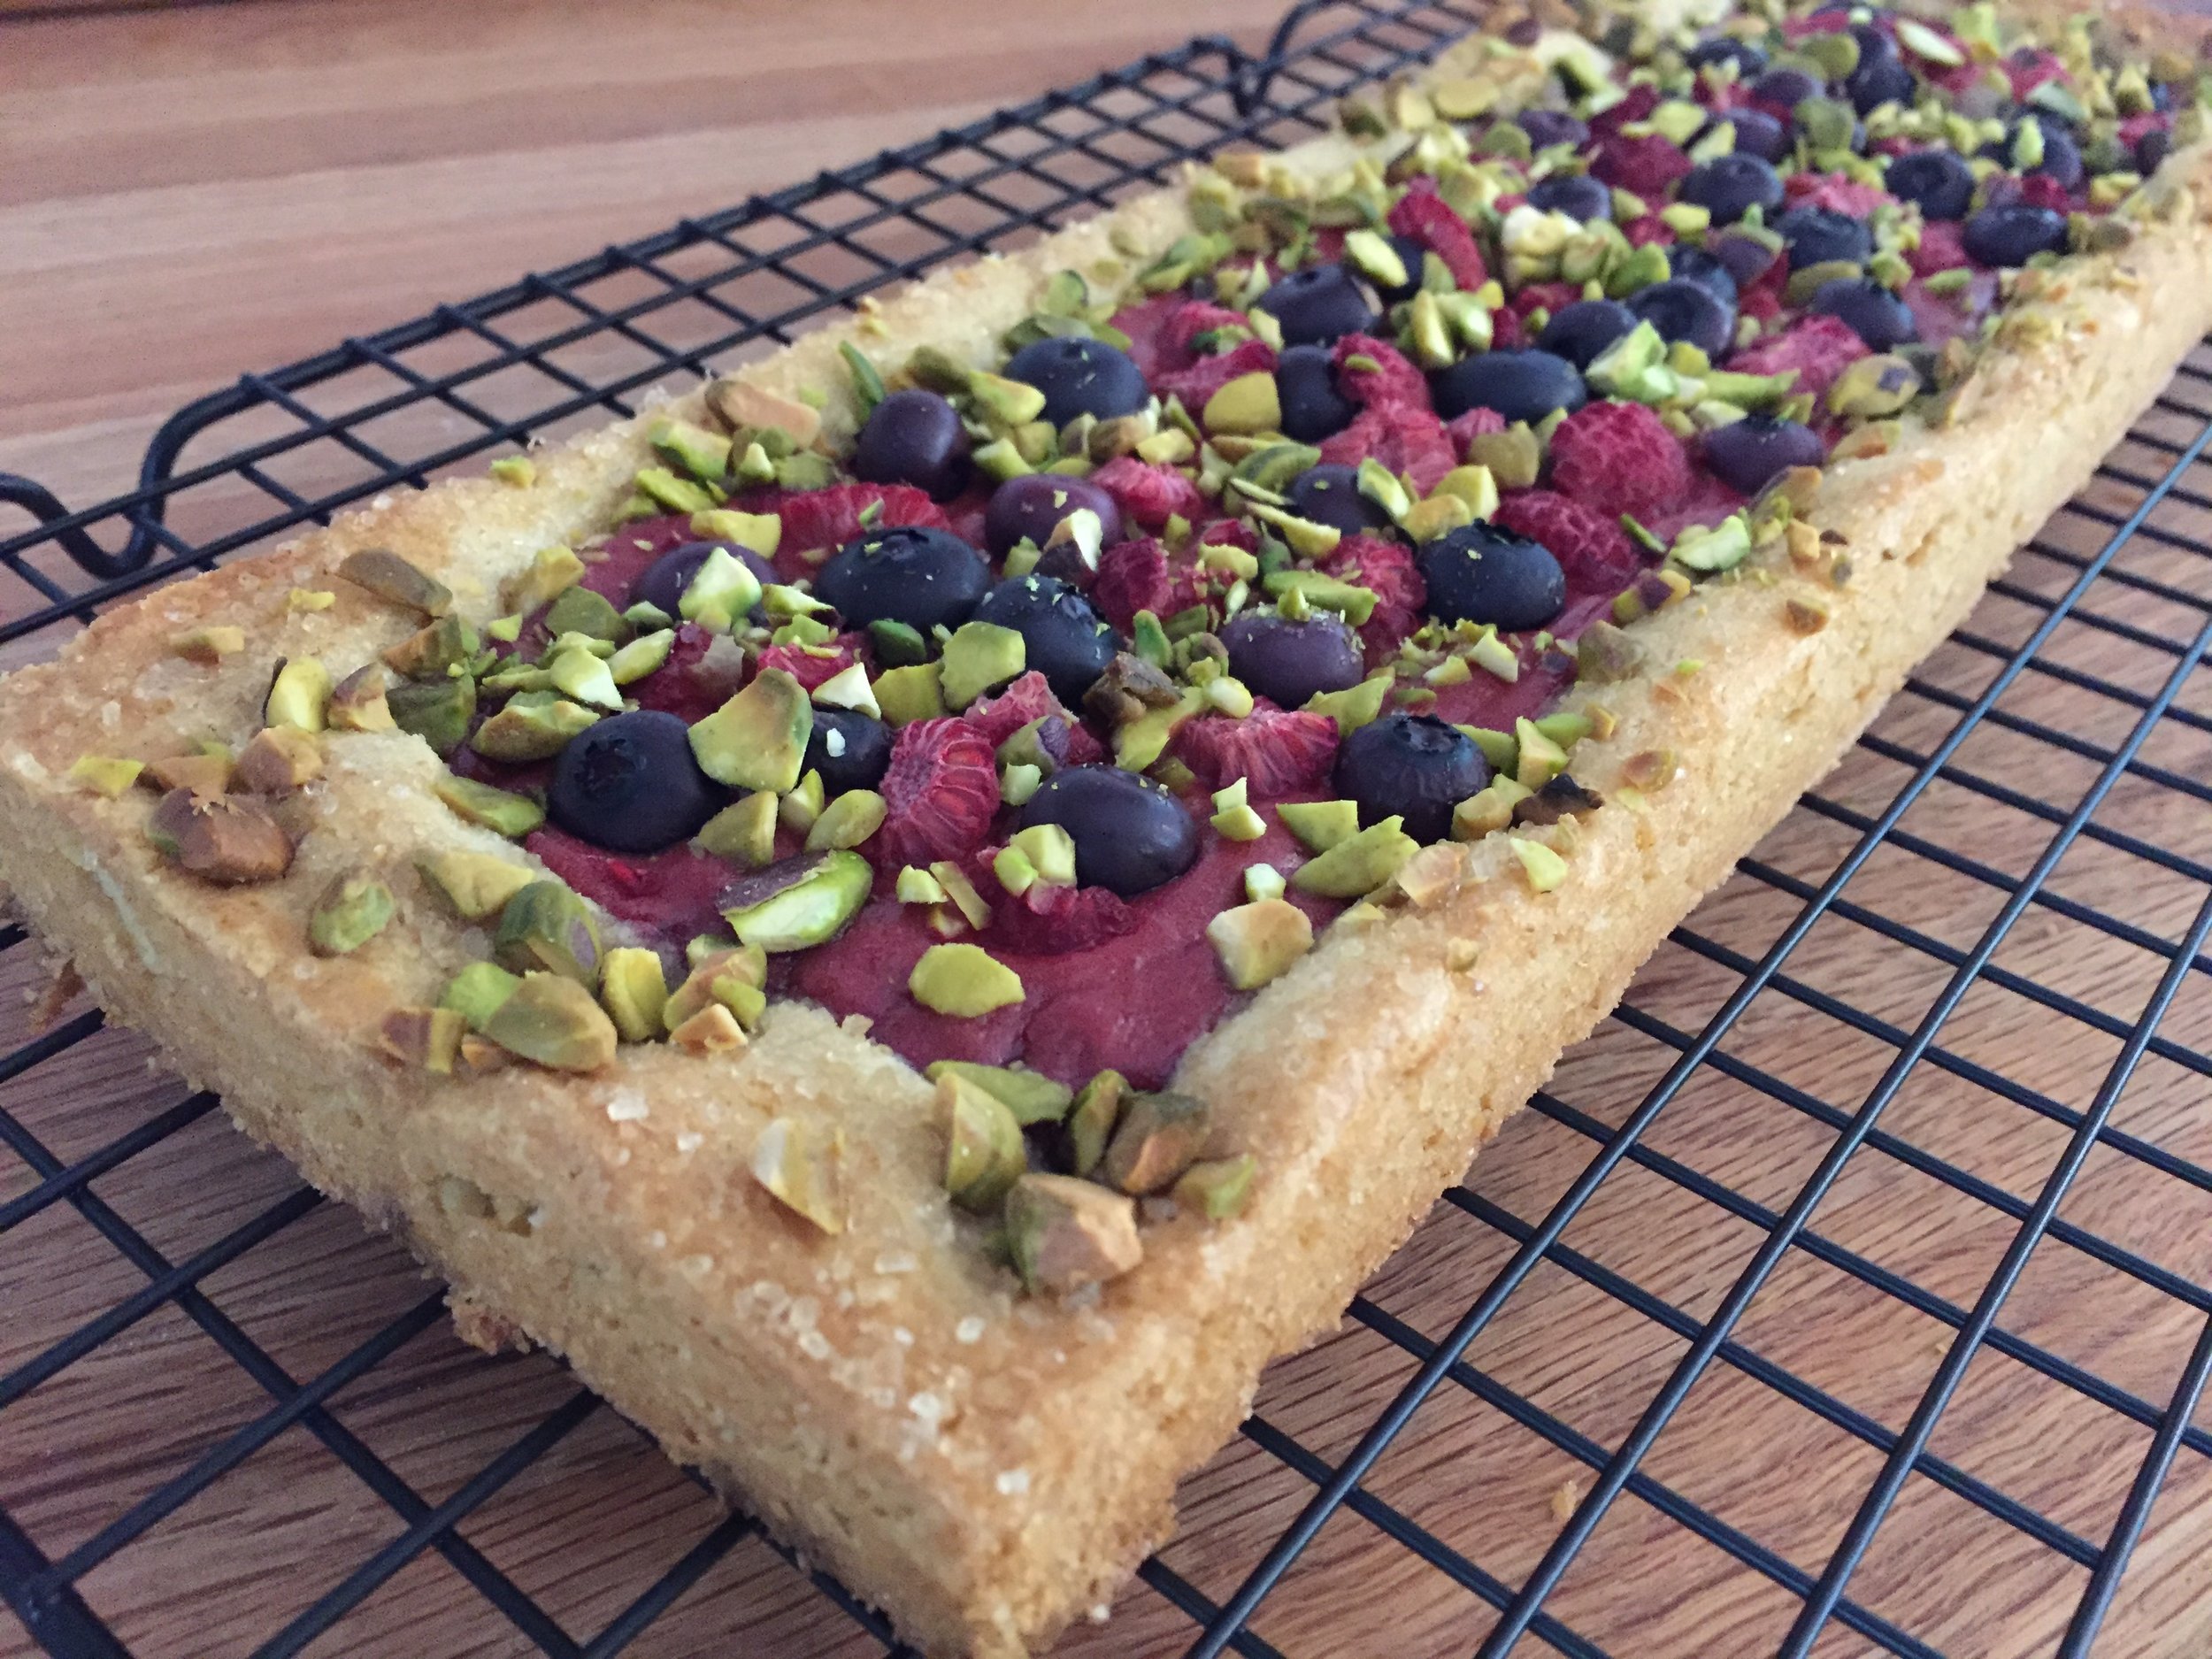
I used a total of 5 cups of fruit including sliced peaches and yellow bubblegum plums, blue/red/blackberries tossed with about 1/3 cup sugar, 2 to 2.5 tablespoons flour, a squeeze of fresh lemon juice and a pinch of salt. I follow that ASAP with assembly so my fruit mixture doesn’t get too juicy.

To provide a bit of anti-soggy protection to the crust I blend a tablespoon or so each of either all purpose or almond flour and sugar. Sprinkle that over the crust, leaving about a 2-inch border. Have at the ready a couple tablespoons unsalted, diced butter to dot on top of the fruit and some milk or cream and raw sugar for the edges.

IMG_1232.jpg

Now mound that pile of fruit in the center, again leaving about a 2-inch border. Notice I’m doing my assembly ON the parchment lined sheet pan rather than my work counter so as to avoid having to lift the filled/shaped galette onto the sheet pan. Yup, it’s all in the details folks.

IMG_1233.jpg

Pleat the dough up over the fruit and, once you’ve made it all the way around, cup your hands around the edges and give everything a firm squeeze to set your dough in place. Dot with butter, brush milk on the dough edges and sprinkle with raw sugar.

Pop the whole pan into the freezer for 10-15 minutes to firm up the butter and set the dough even more.

IMG_1234.jpg

Bake on the bottom rack for 10 minutes, turn the oven down to 400ºF and give it another 10 minutes. Move the sheet pan up to the middle rack, decrease the oven temp to 375ºF and bake another 15 minutes, periodically checking for the degree of browning. You want to see the fruit bubbly and the edges golden brown. If needed, go another 5-10 minutes. All in all I usually plan on a total baking time of 40-45 minutes for this size galette. Remember - in your oven it may be a bit more or less.

IMG_1236.JPG

Have fun creating your own mixture of fresh fruity goodness for a delicious summer fruits galette - you can do it. Absolutely!


Savory cheesy quick bread

IMG_0314.JPG

This one is thanks to my French teacher here in Grand Rapids, Rita Selles. Even though I have’t taken classes for awhile now, I certainly enjoyed our group sessions, learned a lot and still do my best to practice speaking en Français with myself when I’m out for my daily walks.

A few years back, at the end of our fall session of classes, we all brought something to eat as a mini holiday celebration. Rita provided this savory cake (is it bread or cake?), and I immediately asked her for the recipe. It’s one that you can suit to your own tastes using different veggies and cheese.

I opted for Rita’s suggestion of diced, sautéed zucchini, a vegetable I don’t often use. Truth be told Steve and I are avid broccoli/cauliflower fans pretty much all year long but also rejoice at the fresh green beans, juicy tomatoes and succulent sweet corn that we’re able to acquire at our local Fulton Farmer’s Market each summer.

For my loaf pan I used my mom’s longer/narrower aluminum Mirro brand pan that she’s had for beaucoup years (click the link for Wikipedia’s interesting history of the company, now defunct). I love the shape compared to a standard, wider 8 or 9 inch loaf pan - it reminds me of what might be called a “tea loaf” pan. Now that she’s living in her lovely apartment at Pilgrim Manor, her meals are provided and her baking days are a fond memory for all of us. Those blueberry and apple pies - man oh man! But I digress.

Lightly butter the loaf pan, line with parchment then lightly grease the paper as well. Heat the oven to 400ºF.

For your mise en place weigh/portion out 250 g / scant 2 cups all purpose flour; 8 g / ~1 tablespoon baking powder; 120 ml / 1/2 cup heavy cream; 60 ml / 1/4 cup milk (whole, 2% or !% all work) OR, as in my case, I used whole milk ricotta instead; 3 large eggs; 140 g / 5 ounces cave aged gruyère; one medium zucchini; 1 teaspoon herbes de provence (or herb of choice); pinch of sweet paprika; salt and pepper to taste.

IMG_0290.JPG

Grate the gruyère and set aside. Dice up the zucchini, heat a bit of olive oil in a sauté pan and stir fry it for several minutes to soften and brown it a bit. Let cool.

IMG_0292.jpg
IMG_0296.JPG

Mix the flour, baking powder, paprika, salt, pepper and herbes de provence in a medium bowl. Add the eggs, cream, ricotta and blend then stir in the cheese and zucchini. Pretty straight forward.

IMG_0298.JPG

Transfer the thick batter into the prepared loaf pan and smooth. I grated some extra cheese on top too.

IMG_0300.JPG

Bake for 30-40 minutes until the top is golden and a toothpick comes out clean. Ooooh -eee look at that cheese!

IMG_0303.JPG

I let it cool for 10-15 minutes, then turned it out of the pan onto a wire rack to finish that process.

Once cooled, Steve and I did our requisite taste test - yup it’s good all right!

We enjoyed a few slices with a hearty, bean-y chili that evening. For another meal Steve toasted a couple of slices up, put ‘em in the bottom of a shallow bowl and topped them with another tomato bean concoction with some pieces of grilled pork. Perhaps you don’t know this, but he is THE leftover king of the house!

The bread kept well wrapped for 2-3 days as we nibbled our way through it. Warmed a bit with a schmear of ricotta and some chopped roasted tomatoes for lunch wasn’t too shabby either.

As Rita suggests, try your own version with different sautéed or roasted veggies, add some chopped black olives, take it up a notch with some crisp bacon bits or sub in your favorite grating cheese. How about some toasted and chopped nuts like pecans or pistachios? I’m liking this. I hope you will too.

IMG_0316.JPG

As usual during these times in which we find ourselves, stay safe, be well and enjoy the simple things. And remember - spring is coming!

IMG_0415.JPG

Caprese gougères

IMG_3064.JPG

Tomatoes and basil here we come!! It's sum-sum-sum-sum-sum-sum-summertime, and we're deep into it. I've been dreaming of a caprese salad and now's the time.

Another visit to The Cheese Lady was in order to score some fresh mozzarella and a tasty grating cheese for some delicious gougères, essentially a cheesy version of profiteroles.

IMG_3049.JPG

Gruyère is the cheese that's often used in savory gougères but one can certainly waver and choose something equally as tasty. Since I was filling them with mozzarella, tomato and basil, I thought some mozzarella or similar cheese would be a decent addition to the pâte à choux, but I didn't really want a run-of-the-mill grated mozz from the supermarket.

The Cheese Lady to the rescue! A pecorino Toscano was suggested as a good stand in for mozzarella, so that's what I chose for my choux paste. Wanting a little something to grate on the choux tops, I went with a Comté.

You might notice on the package above that the label reads gruyère de Comté, prompting one to ask "What's the diff between that and gruyère, eh? From my very brief research, I learned that a classic gruyère is produced in Switzerland, while a gruyère de Comté comes from the Franche-Comté region (newly re-formed as Bourgogne-Franche-Comté in early 2016) of France on the Swiss border. And, just to add to the confusion, I'll throw one more name in there - the similar Emmental which is also produced in Switzerland but has holes, unlike gruyère. They're all good if you ask me.

So let's make some gougères already.

IMG_3050.JPG

Basic pâte à choux is made with milk, water, butter, a bit of salt and sugar, flour and egg. For a savory version like this I delete the sugar, add in some black pepper and mustard powder, as well as grated cheese. You could also add herbs if desired, like some dried thyme or basil. Just click here for the full recipe.

Once you've completed the process, just pipe or scoop 'em out onto parchment lined sheet pans. 

IMG_3051.JPG

In this case I topped them with some grated Comté before popping them in the 400ºF oven.

IMG_3053.JPG

It's generally recommended that you leave the oven door closed for the first 10 minutes of baking, otherwise the puffs can fall. I usually turn the temp down to 375ºF at that point and give them another 15-20 minutes to finish. Remember to pay attention to what's going on in there!

Ooooh - nice and browned and just begging to be filled and tasted.

IMG_3059.JPG

On of the beauties of making choux puffs is you can freeze them for later, either unbaked or baked. Cool! Just add 5 minutes or so to the baking time if baking right out of the freezer or, if using already baked puffs that have been frozen, re-crisp them in a 350º oven for 10 minutes or so before filling. The perfect do-ahead treat.

Time to make the caprese salad.

IMG_3074.JPG

Fresh mozzarella balls from The Cheese Lady plus fresh basil and campari tomatoes from the Fulton Farmer's Market are ready to be chopped and combined with a little olive oil, salt and pepper.

For around 40 puffs I used 8 ounces mozz, a generous cup of seeded and chopped tomatoes, about 1/2 cup chopped, packed fresh basil and 3 tablespoons extra virgin olive oil. Salt and pepper to taste.

IMG_3055.JPG

Et voilà!

IMG_3062.JPG

The puffs were crispy outside and creamy-cheesy inside with just the right amount of moisture for my liking.

Since I was making these for an afternoon event, I waited as long as possible before filling the puffs so as to avoid sogginess. I lit upon an idea and lightly toasted up some panko bread crumbs, stashing a few in the bottom of each puff. What genius!

IMG_3063.JPG
IMG_3065.JPG

Once they were all filled, I boxed them up and hit the road! Of course, I had made extras so I could sample a couple. Not bad at all, folks, although I did hanker for a more upfront cheesiness to the gougère and decided the pecorino Toscano was too mild. So next time - gruyère or Comté here we come!

IMG_3066.JPG

Raspberry-currant cream berry tart

IMG_2925.JPG

Planning a dessert for the recent Bastille Day celebration with the local GR chapter of L'Alliance Française, my thoughts turned to tarts (of course!). I had fresh raspberries, blueberries and even currants from the Fulton Farmer's Market, and it was definitely time to incorporate those goodies into a delicious tart.

I've previously written about Breton dough (one of my faves), the most recent post being in early July using a céréales version to support some fresh pastry cream and strawberries. Besides the flavor and delicious texture of Breton dough, on the more practical side, it calls for egg yolks which I always see as the perfect opportunity to accumulate egg whites for financier batter or meringues. Love it.

My Breton dough was already made and in the fridge, as was a batch of raspberry currant cream that I had used the previous day for some petite fresh berry tartlettes. The plan - layers.

First I rolled the dough out to 1/4" thickness, trimmed the edges as needed and pressed it into my lightly buttered 4"x11" rectangular tart form. (Side note: this is the one tart dough I use that I butter the tart ring or form - otherwise it sticks). I wanted to build up an edge that would bake up around the filling and fruit, so I cut narrow strips of additional dough and placed them around the periphery. Then I spread a thin layer of raspberry jam on the dough within the borders. 

IMG_2908.JPG

Next up - a layer of raspberry currant cream. Now here is just one of the wonderful things about pastry cream - you can replace 75-80% of the whole milk in your favorite pastry cream recipe with fruit purée(s), proceed with the usual preparation and voilà - fruit cream! For this one I used equal weights of fresh raspberry and fresh red currant purées made with some of my farmers's market booty. So tart yet creamy and delicious.

I found it easiest to pipe thin stripes of the cream over the raspberry jam, so as not to mess it up by trying to gently spread it. Piping makes things so neat, doesn't it? 

IMG_2909.JPG

Then comes a nice sprinkle of berries - in my case raspberries and blueberries. Another cool trick is if you freeze your raspberries a few hours ahead, you can easily break them up into halves or smaller pieces while still frozen to distribute them over the cream. You try that with fresh raspberries and you'll have a juicy mess! And you can pop the tart right into the oven - no need to wait for thawing, just go for it.

IMG_2910.JPG

For the final touch I brushed the dough edges with a bit of cream, sprinkled on some raw sugar and added chopped pistachios over the whole kit-n-kaboodle, not only to provide a wonderful color contrast but also some added crunch for the tasting portion of the program.

IMG_2911.JPG

This one baked at 325ºF (convection) for about 25 minutes. I always check things half way through, rotate my sheet pan to provide even browning (yes, even in a convection oven!). You want the crust to be nicely browned and the cream to be set.

IMG_2918.JPG

Let it cool for 15-20 minutes, gently slide a knife or offset spatula around the edges to loosen the tart form and lift it right off.

IMG_2932.JPG

Part of a dessert buffet for the Bastille Day L'Alliance gathering, I sliced it into strips and added a dollop of lightly sweetened whipped cream to each portion. Oh my, I love this dough sooooo much! Light, buttery and a wonderful complement to the tart, fruity cream and berries. And, to top it all off, I had some extra components to make another petite blueberry tart for Steve and myself to enjoy the next day. Scrumptious.

IMG_2935.JPG

Sablé Breton au céréales avec fraises et crème

IMG_2886.JPG

Multigrain Breton shortbread, smooth luscious pastry cream and fresh strawberries. Yup. That's it.

Summer is upon us with a vengeance, with heat and humidity spending time with us for some days to come. Great for those who are spending the July 4th week at the beach or campground, but not ideal for the bakers of the world. There are some mornings when one gets up that simply announce themselves as baking days but, alas, not right now.

The good news is that strawberry season is in full swing here in west Michigan, and in fact is already starting to wane. What a delicious, albeit short, time of year, making it so important to take advantage of it while we can. 

freshstrawb.JPG

I had made some sablé Breton dough the other day, adding a mixture of seeds and grains to it for a change of pace. The base recipe is a favorite of mine, kind of a cross between a tart dough and a buttery dense, yet light and airy cake. Bake it on the thin side and it's a crispy texture, but on the thicker side it's kind of like a soft-ish, chewy cookie. You just have to taste it to know what I mean.

IMG_2871.JPG

It's a straight forward preparation and can be accomplished by hand or with a mixer. First you whisk 3 large egg yolks with 140 g sugar for several minutes to blanch and thicken it. Then blend in 150 g soft, unsalted butter until homogeneous. Sift in 200 g flour (I used half whole wheat pastry flour and half all purpose flour) along with one teaspoon baking powder, add in 1/2 teaspoon fine sea salt and 70 g almond flour and mix it all together. Finally blend in 80 g mixed grains, wrap the dough in plastic wrap and chill one hour. (See my previous post about Breton dough here and the full recipe here).

All mixed up

All mixed up

For the grains I decided on King Arthur Flour's Harvest Grain Blend, a combo of oat groats, wheat flakes, rye flakes, sunflower seeds, sesame seeds, flaxseed, poppy seeds and hulled millet. I've already used this mix in a simple wheat sandwich bread as well as in my favorite buttermilk scone recipe - wonderful toothsome chew and crunch going on. I'm definitely in.

IMG_2885.JPG

On our recent spring time trip to Paris I visited Mora, that wonderful all-things-pastry shop near the Etienne Marcel line 4 metro stop. There I purchased my first perforated tart form, a relatively new iteration that comes in all shapes and sizes for the avid and/or professional tart maker. The idea is to expose more of the dough to the heat of the oven for even better browning. I like that.

IMG_2879.JPG

For this Breton dough project I wanted a simple flat base, no edges, so I just had to roll and shape a piece of dough about 1/4 inch thick to fit my form. Easy. The quantity of dough needed is up to you, something you have to gauge based on size of the form or pan you are using and thickness desired. Remember - thicker is softer and chewier while thinner is crisper.

In spite of the heat I proceeded to bake the dough during the earlier morning hours while the temps were still on the coolish side. This one baked at 325ºF, convection, for about 20 minutes (look for golden brown and a lovely aroma). 

I had already been imagining the pastry cream/strawberry garnish, so my pastry cream was made and chillin' in the fridge. I just had to gently wash, pat dry, hull and slice my fresh local strawberries from the Fulton Farmer's Market.

IMG_2884.JPG

I sliced my Breton base into strips, piped on simple rounds of crème pâtissiére and topped with the fresh berries. The result was a delightful combo of creamy, fruity and that nutty, seedy chewiness of the Breton dough. Not bad at all. 

I can imagine this multigrain Breton option as a lovely biscuit on a cheese board. Hmmmm. . . . now there's an idea.

IMG_2891.JPG

In the meantime have a wonderful Fourth of July week and stay cool everyone!