Swirly whirly Viennese butter cookies

IMG_2897.JPG

Creating a varied menu and testing out the possible goods for an afternoon tea or special occasion brunch, lunch or what-have-you is an ongoing project of mine (Yes, I'm getting there). As I research recipes and ideas, I invariably come across something I haven't made for a long time. This cookie is one of them.

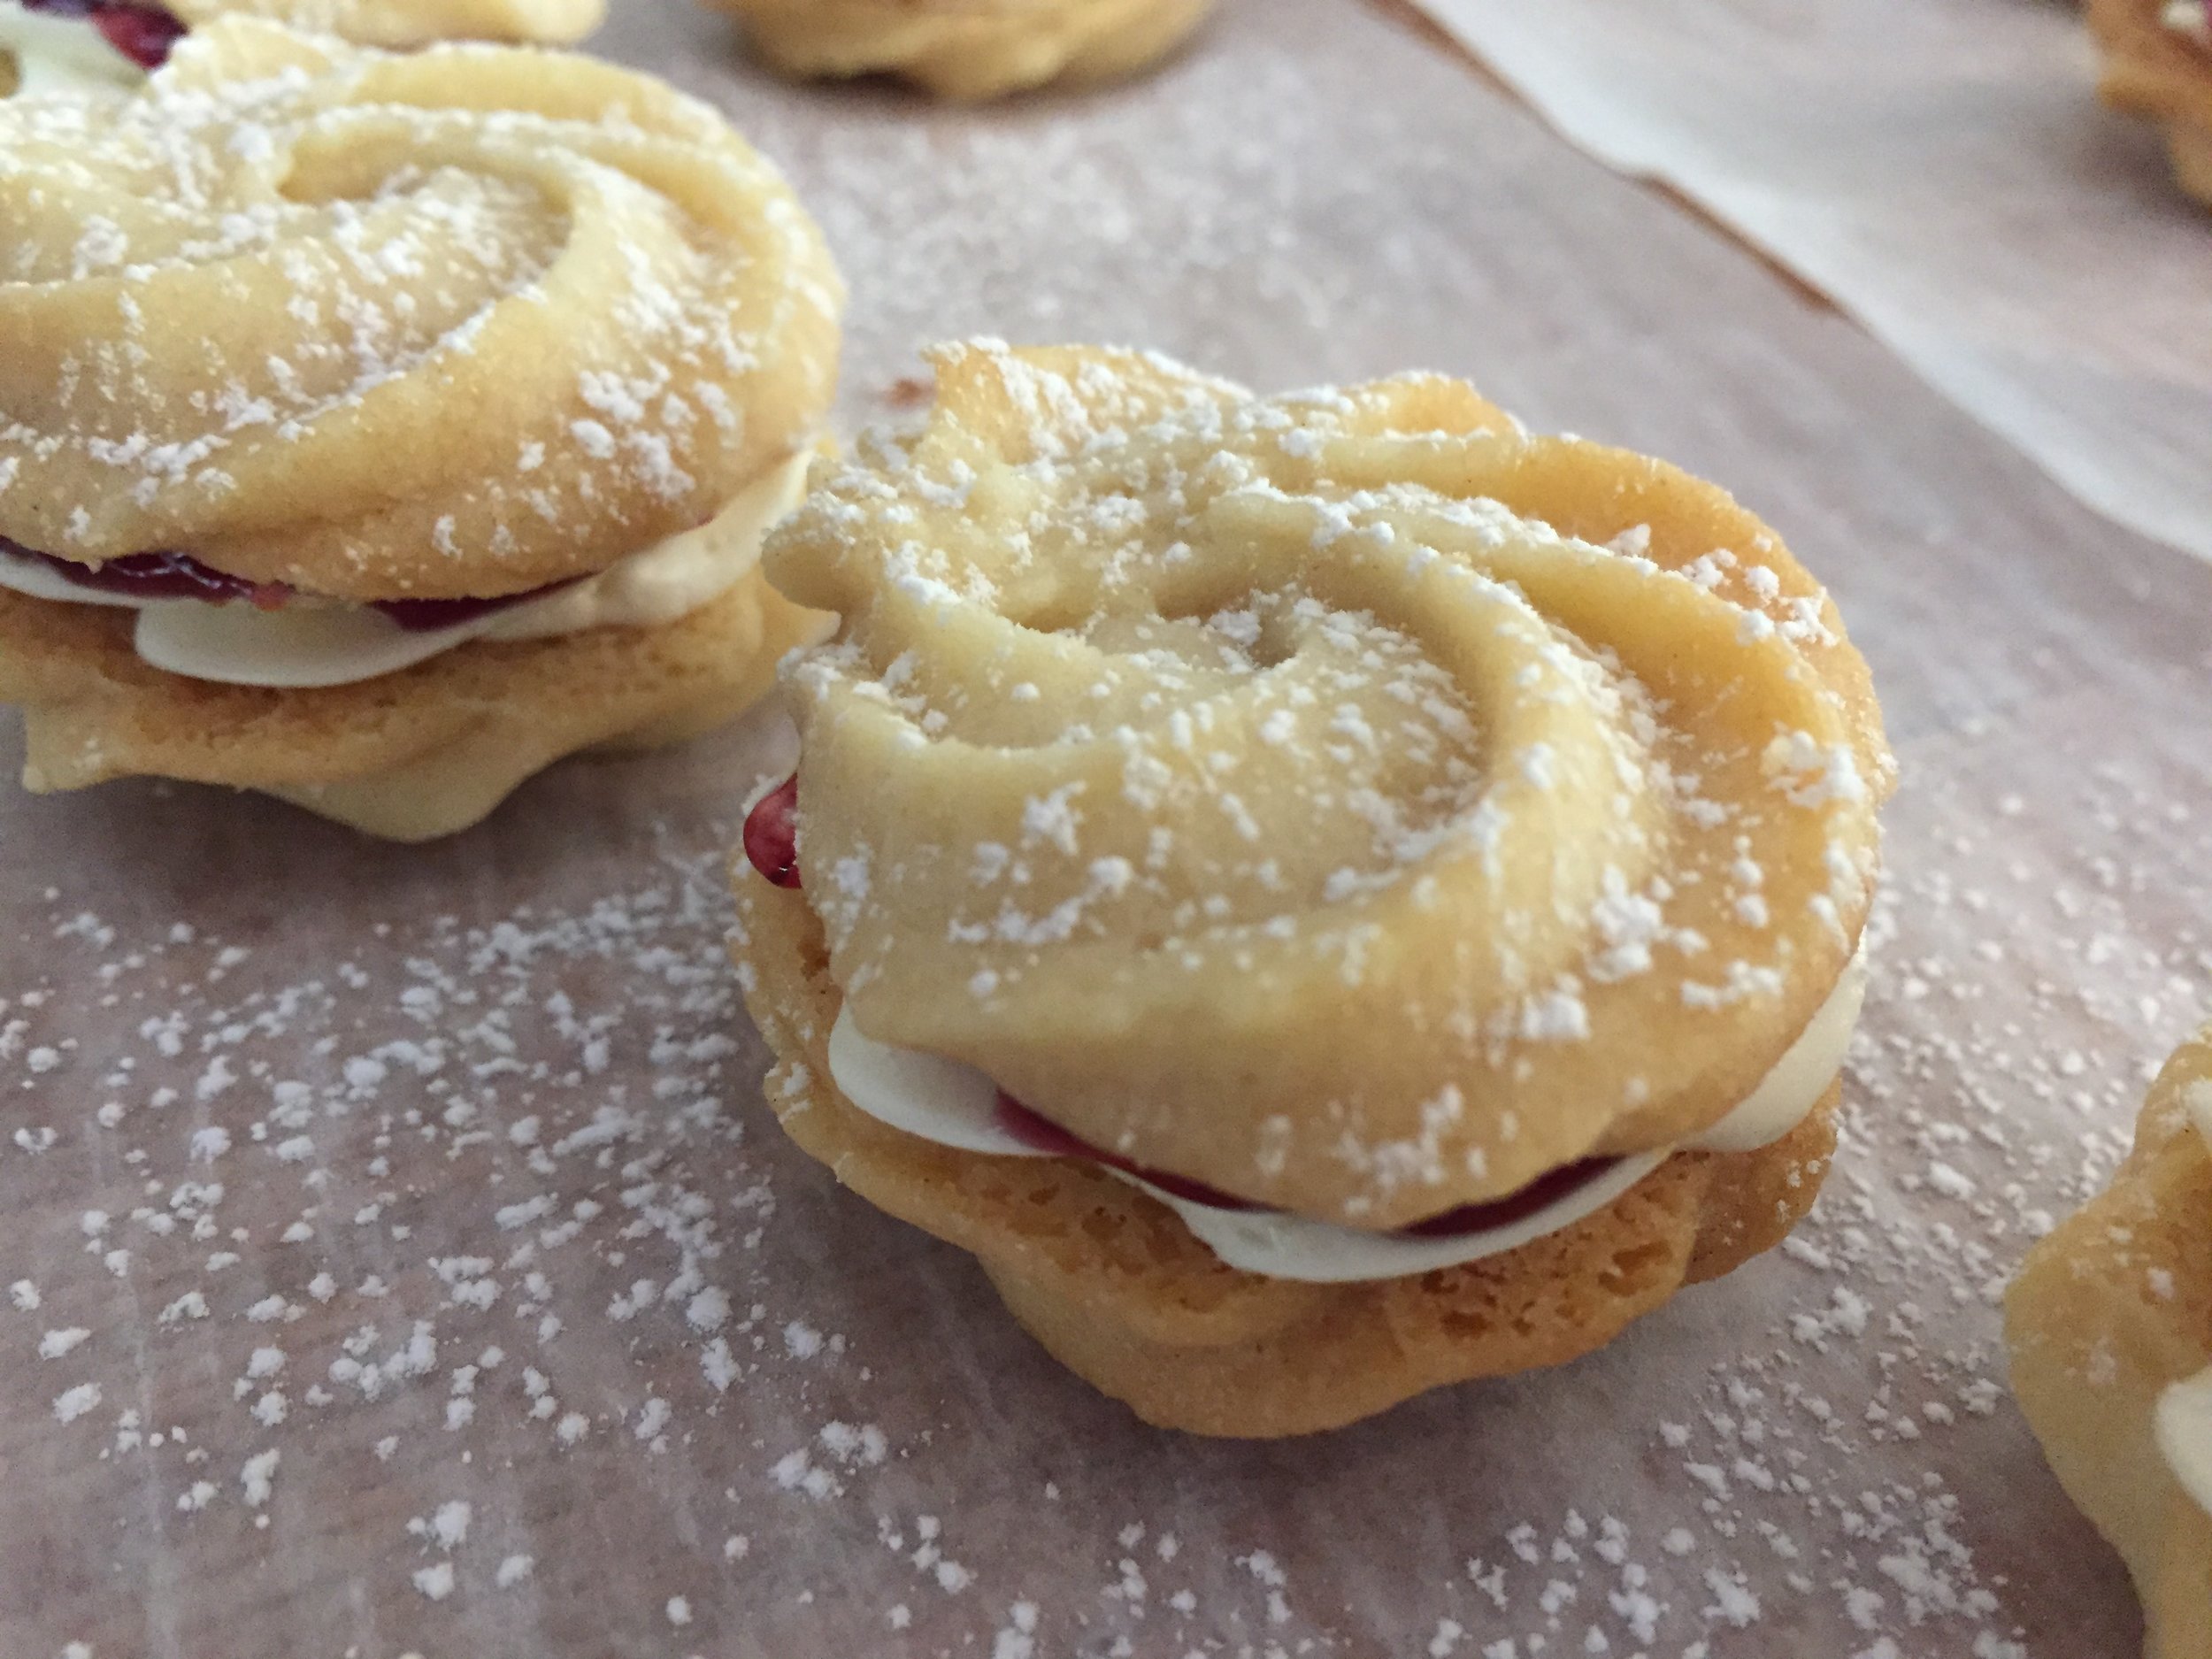
Years ago I had a cookie press with the various discs that allowed one to create butter cookies in different shapes or designs, including a simple swirl . I've since moved on from the cookie press, but these whirled Viennese cookies remind me of those days of yore. It's a classic butter cookie made even more enticing by sandwiching with raspberry jam and buttercream.

Most of the recipes I've seen call for equal (or nearly so) weights of butter and flour along with some confectioner's sugar, cornstarch (or cornflour, as the Brits call it), vanilla and maybe a bit of baking powder and salt. As is the case with pretty much all recipes, the quantities of each ingredient vary a bit from recipe to recipe. They're all good if you ask me! 

I opted to use white rice flour instead of cornstarch, being curious about the final texture (Spoiler alert - good!).

IMG_2844.JPG

Here's the recipe I used for these:

  • 200 g / 1 stick plus 6 tablespoons butter, softened
  • 50 g / 1/2 cup confectioner's sugar
  • 1 teaspoon vanilla
  • 200 g / 1 1/2 cups all purpose flour
  • 30 g / 3 tablespoons white rice flour
  • 1/2 teaspoon baking powder
  • pinch salt
  • 1-2 tablespoons whole milk
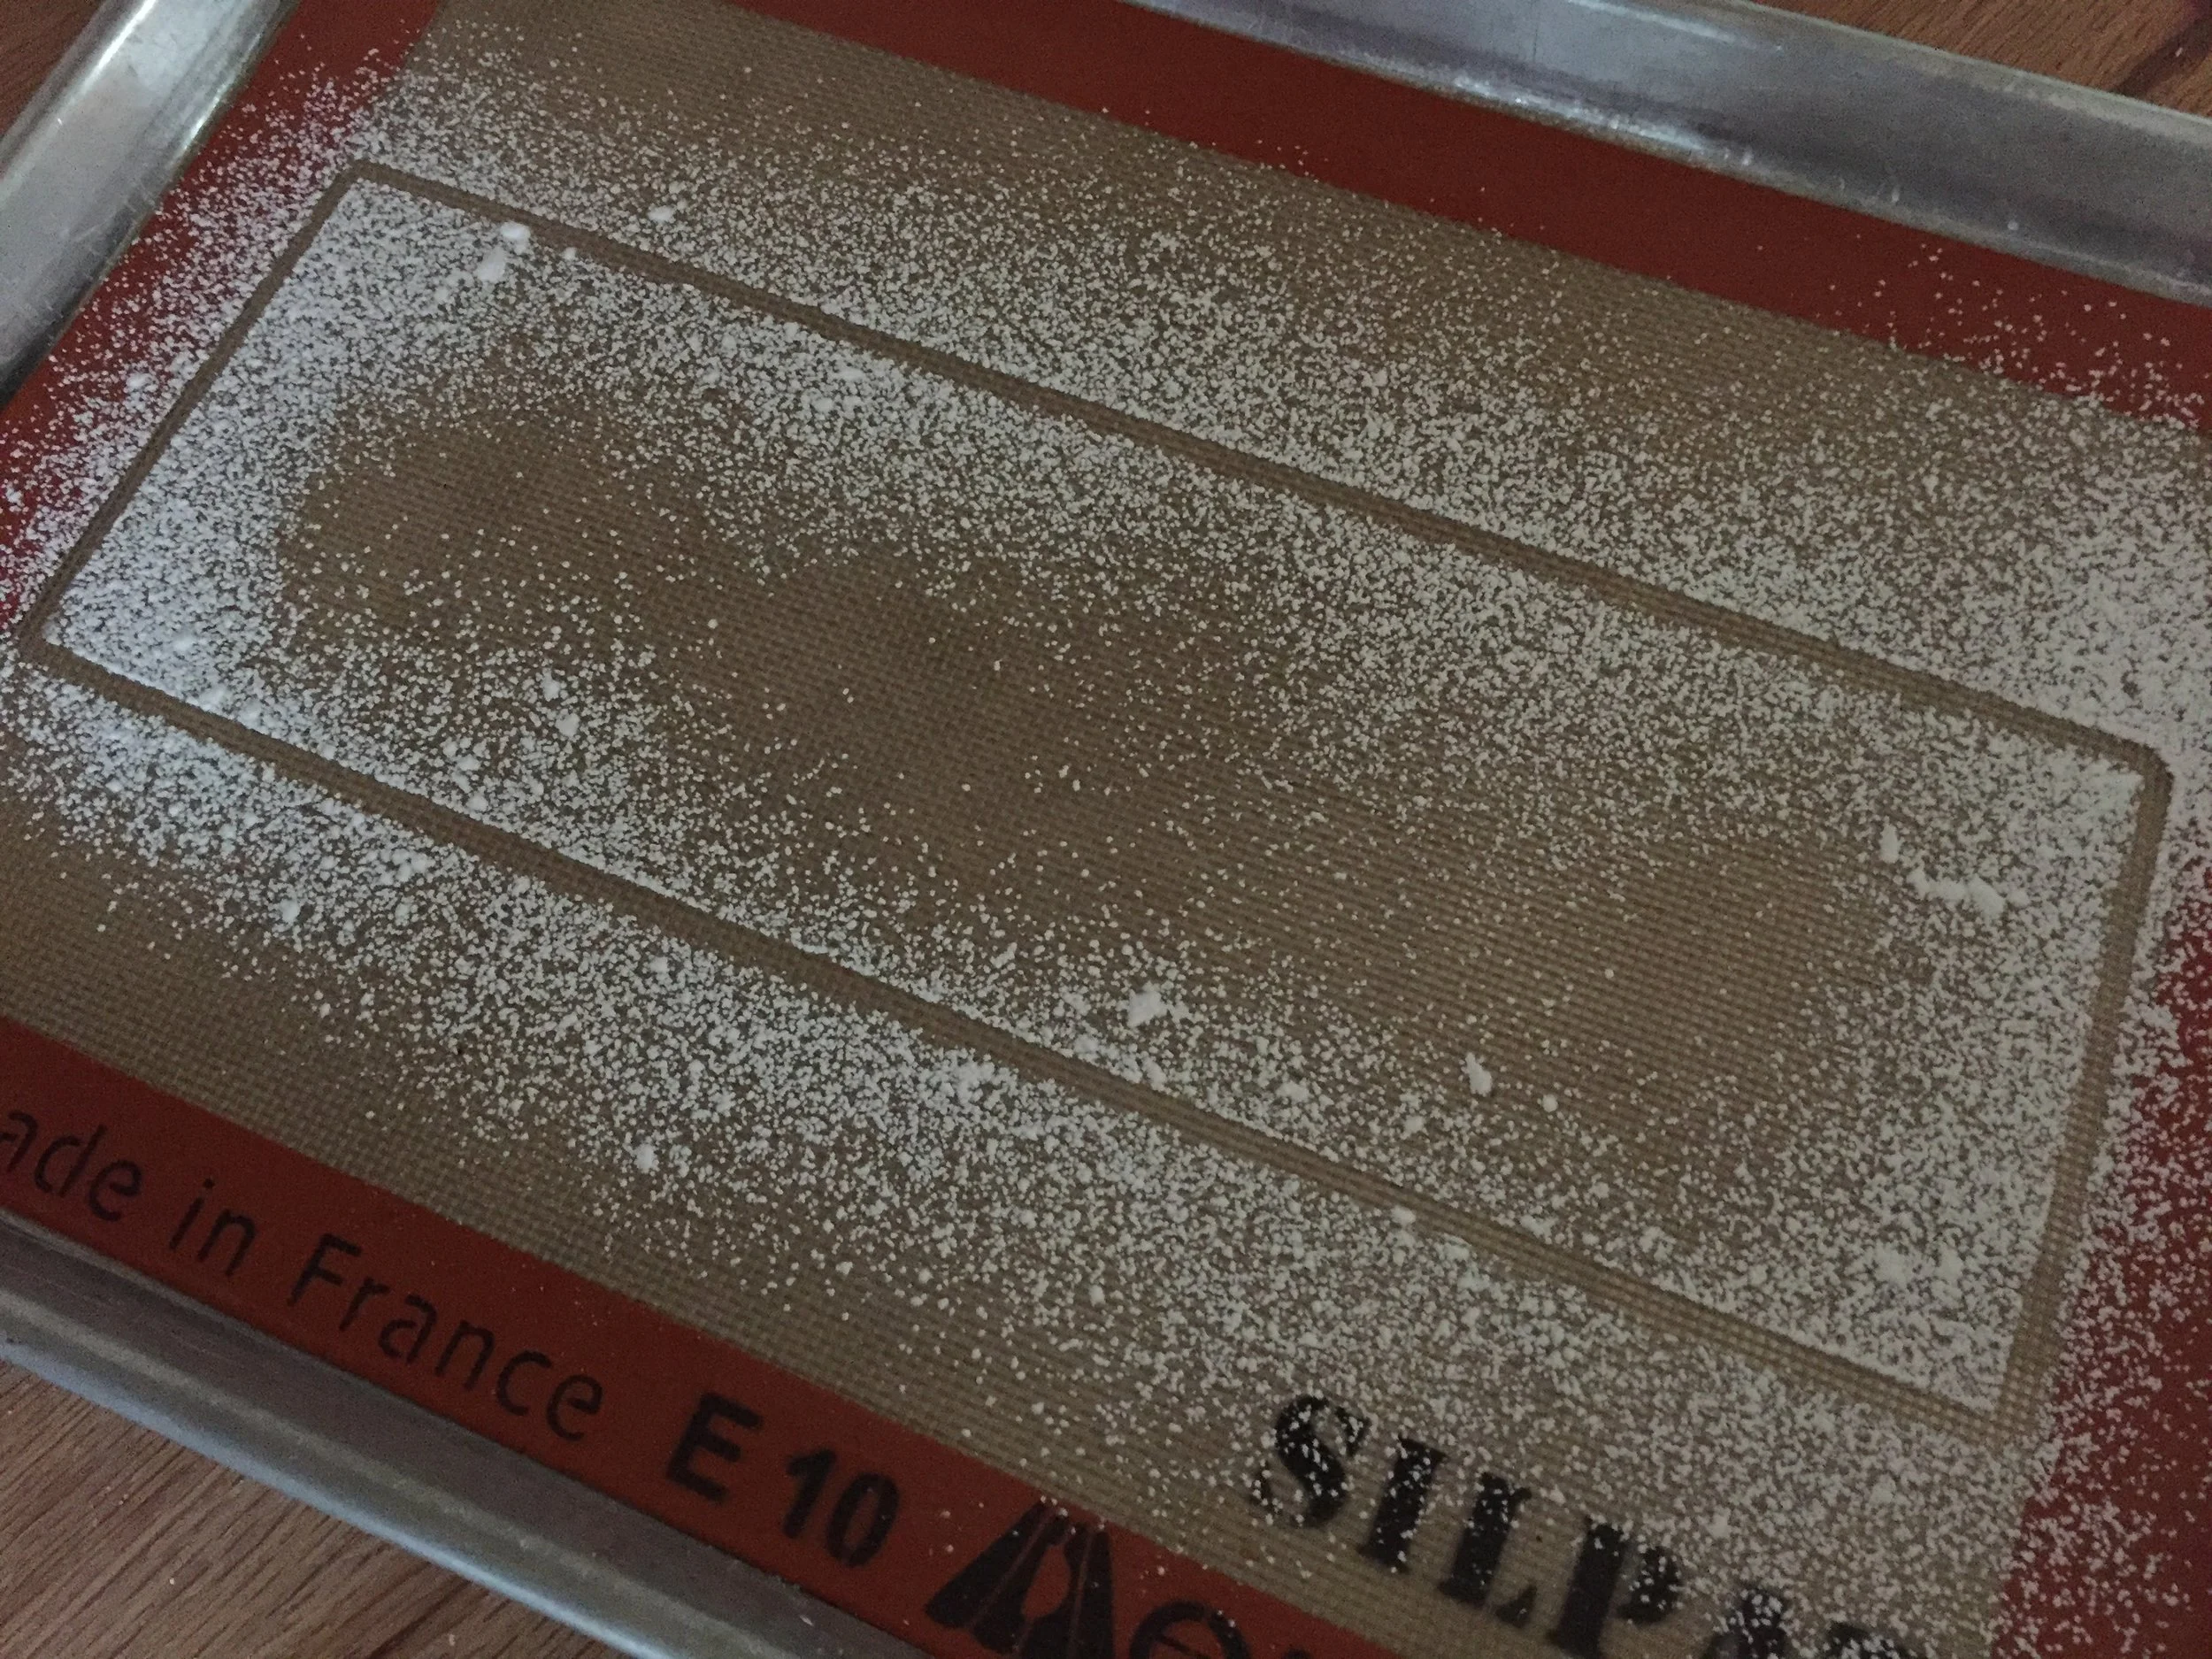
  1. Heat the oven to 325ºF. Line two half sheet pans with parchment paper.
  2. Cream the soft butter and confectioner's sugar with the paddle on medium-high for several minutes until pale and light.
  3. Add the vanilla extract and blend in.
  4. Sift the flour, rice flour, baking powder and salt into the bowl; add 1 tablespoon milk and blend until smooth and well combined.
  5. Add the additional tablespoon of milk only if the mixture seems a bit stiff.
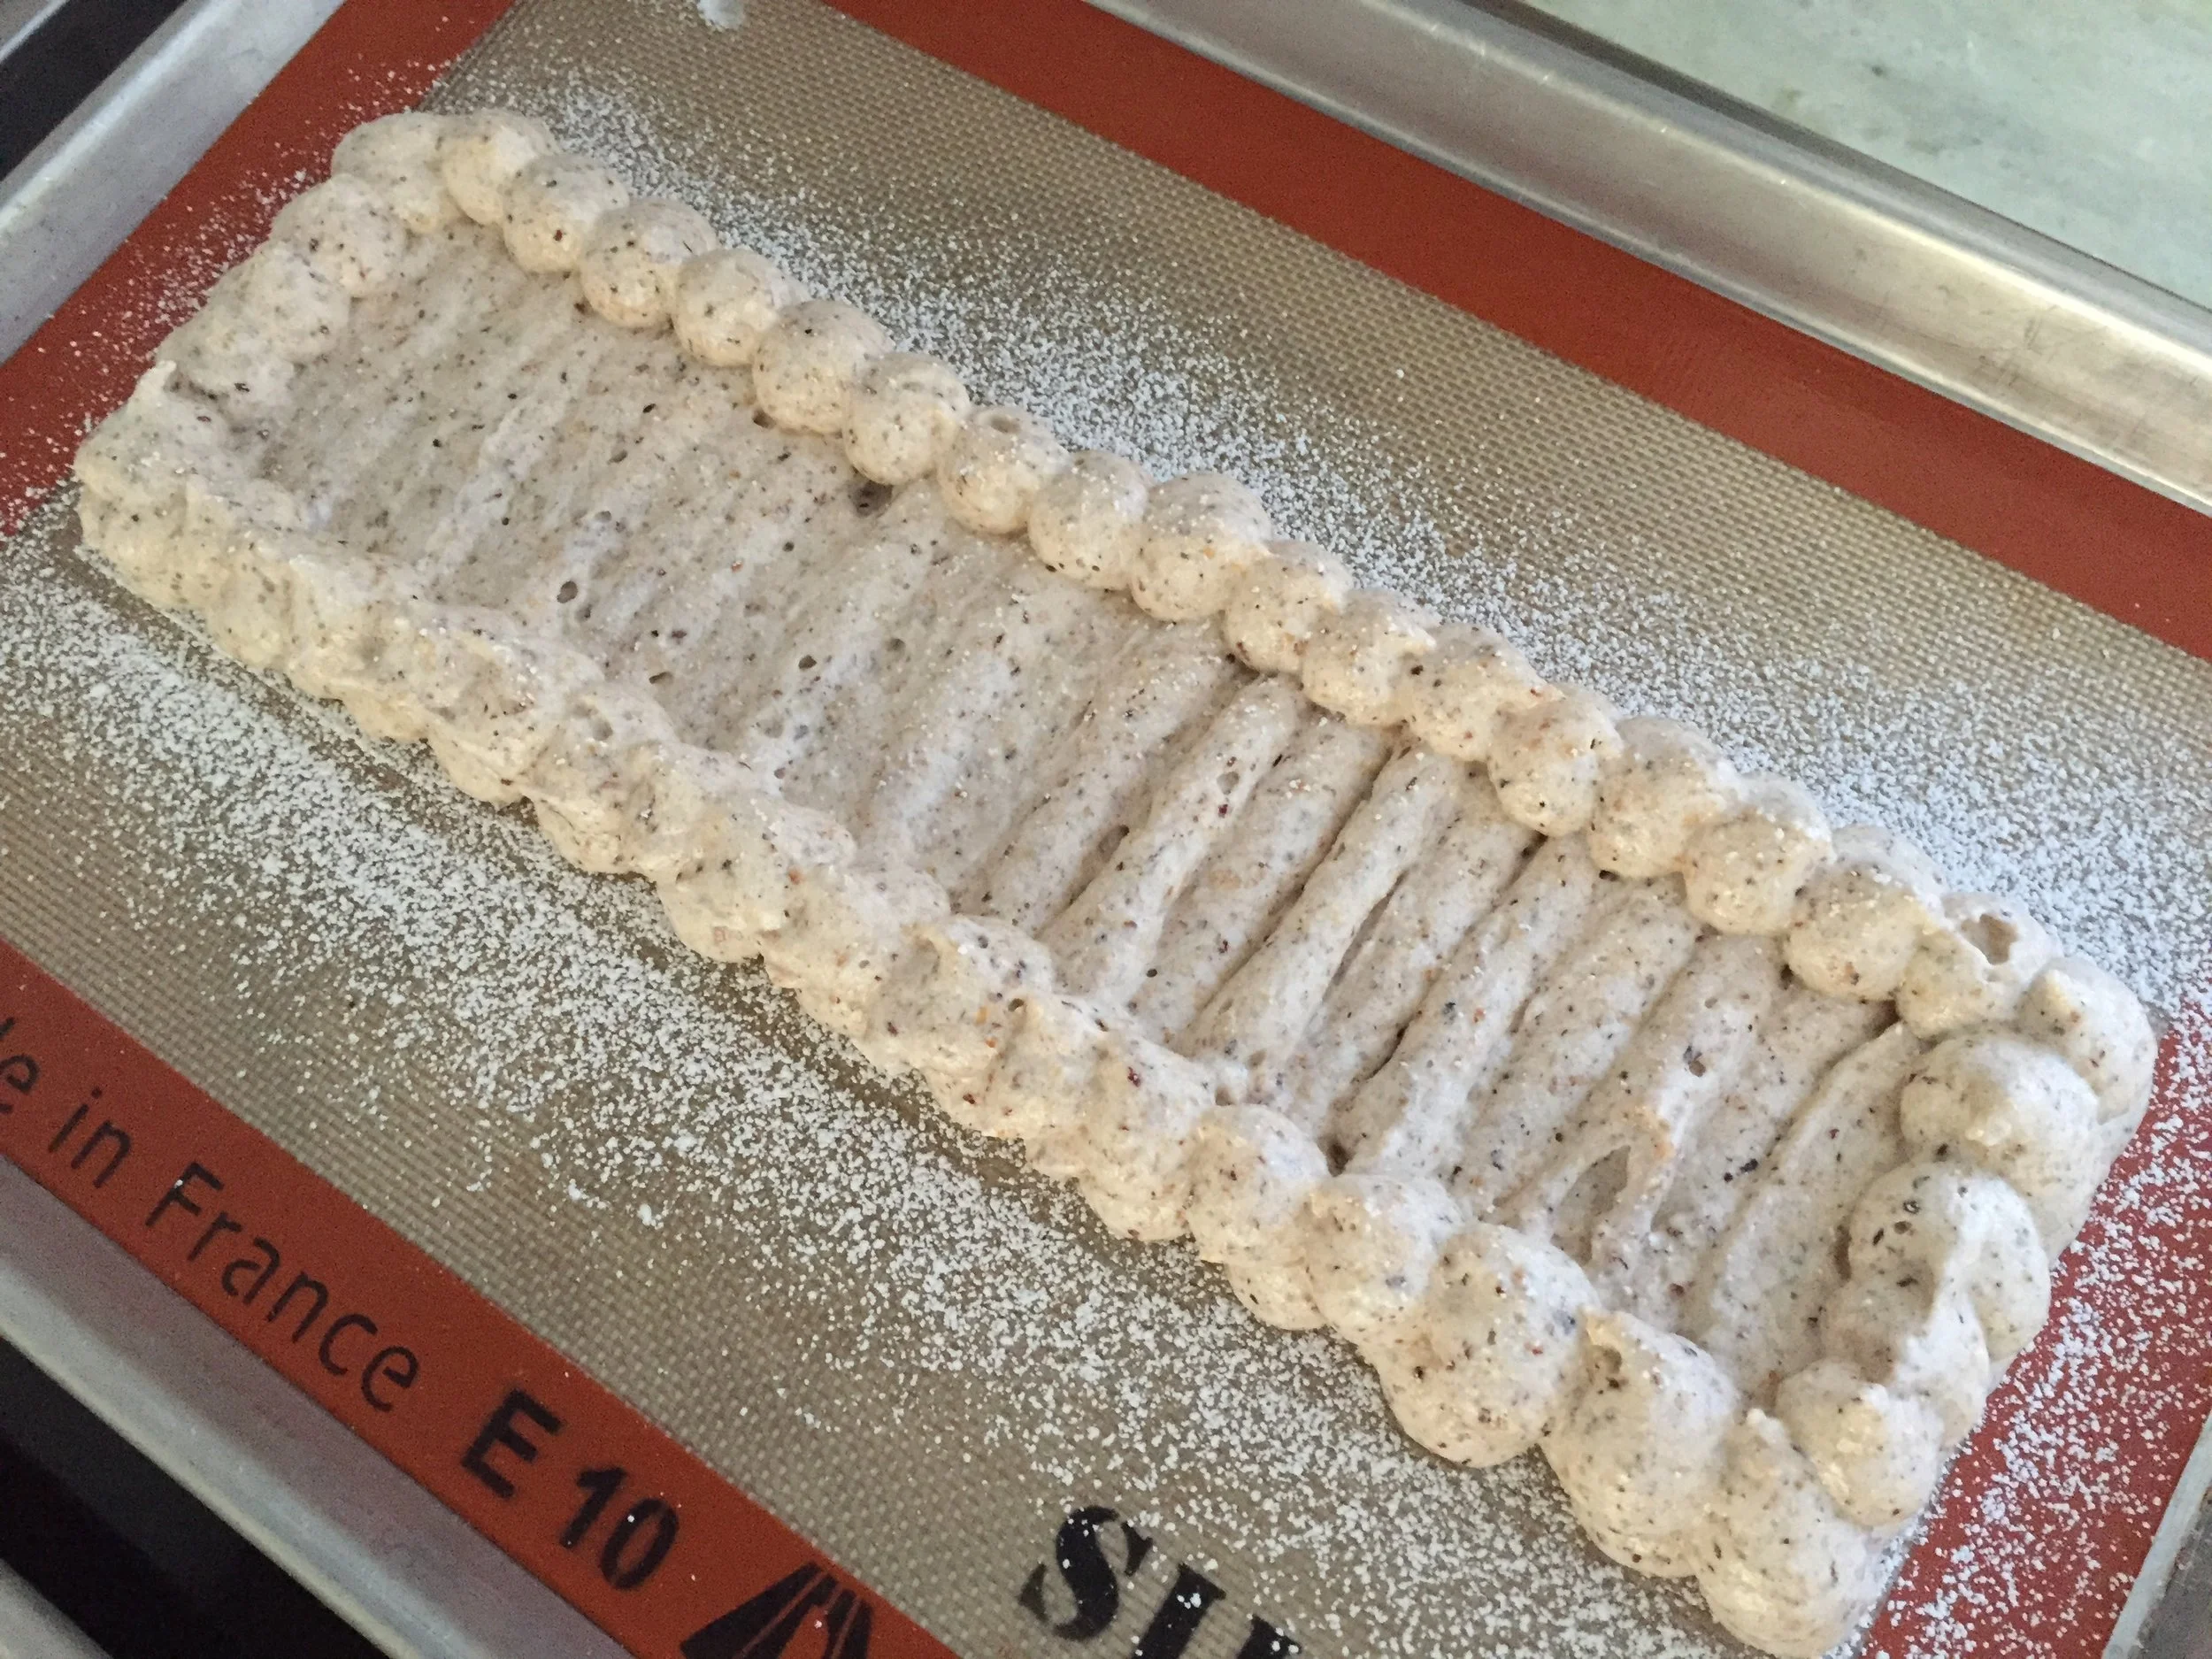
  6. Spoon the dough into a piping bag fitted with a large star tip and pipe whirls onto parchment lined baking sheets. Leave some space to allow for spreading, although in my experience they don't spread too much.
  7. Place in the freezer for 20-30 minutes before baking. This step sets the dough and makes it more likely your cookies will hold their shape nicely.
  8. Bake for about 10-12 minutes until the edges start becoming golden brown. Cool on wire racks.

Once cooled, pair up the cookies, overturn them, pipe a swirl of your favorite buttercream on one side and a smear of raspberry jam on the other. Sandwich 'em together and c'est fini!

IMG_2894.JPG

A little dust of powdered sugar before serving gives them just the right elegant touch.

IMG_2896.JPG

I find the powdered sugar/butter version of buttercream (which is found all too often on cupcakes, in layer cakes, on cookies) to be too sweet for my taste, so I prefer to make a Swiss meringue buttercream which is lighter and less sweet. It's a little more work, but, once you've done it, the next time will go so smoothly. It's worth the effort for me.

For this project I made my orange honey buttercream as follows:

  • 3 large egg whites
  • 140 g / scant 3/4 cup cane sugar
  • 185 g / 1 stick plus 5 tablespoons unsalted butter, cubed and at room temperature
  • 84 g / 4 tablespoons honey
  • pinch sea salt
  • zest of one orange
  1. Have a stand mixer with whisk attachment at the ready.
  2. Place an inch or so of water in a medium saucepan and bring to a boil.
  3. Have a thermometer on hand (a digital probe type works well or a standard candy type thermometer).
  4. Meanwhile, place the egg whites and sugar in a medium bowl that sits nicely in the top of your saucepan and whisk them together. Reduce the heat to a simmer and whisk until the sugar is dissolved, the mixture starts to thicken and whiten and the temperature reaches 150-155º F.
  5. Transfer the meringue directly to the bowl of the stand mixer and whisk on high until cooled and thickened to nice shiny stiff peaks.
  6. Gradually add the room temperature butter, a few pieces at a time, until incorporated and the buttercream is smooth and creamy.
  7. Blend in the honey, sea salt and orange zest. I usually do that with a hand held spatula and make sure everything is blended nicely. 
  8. Pipe or spread as desired. This keeps well in the fridge for several days and can also be frozen. Once chilled or frozen the cream should be brought to room temperature and may need a bit of rewhipping to soften and smooth it out again for use.

And how did these taste, you might ask? Delicious. Melt in your mouth cookie with a delightful texture from the rice flour, along with the hint-of-orange-creamy and tang-of-raspberry-fruity. These keep very nicely in the fridge for several days and can also be frozen.

Feel free to create your own combos of buttercream and jam for something just a little different. I know I will and why not, eh?

IMG_2895.JPG

Sablé Breton au céréales avec fraises et crème

IMG_2886.JPG

Multigrain Breton shortbread, smooth luscious pastry cream and fresh strawberries. Yup. That's it.

Summer is upon us with a vengeance, with heat and humidity spending time with us for some days to come. Great for those who are spending the July 4th week at the beach or campground, but not ideal for the bakers of the world. There are some mornings when one gets up that simply announce themselves as baking days but, alas, not right now.

The good news is that strawberry season is in full swing here in west Michigan, and in fact is already starting to wane. What a delicious, albeit short, time of year, making it so important to take advantage of it while we can. 

freshstrawb.JPG

I had made some sablé Breton dough the other day, adding a mixture of seeds and grains to it for a change of pace. The base recipe is a favorite of mine, kind of a cross between a tart dough and a buttery dense, yet light and airy cake. Bake it on the thin side and it's a crispy texture, but on the thicker side it's kind of like a soft-ish, chewy cookie. You just have to taste it to know what I mean.

IMG_2871.JPG

It's a straight forward preparation and can be accomplished by hand or with a mixer. First you whisk 3 large egg yolks with 140 g sugar for several minutes to blanch and thicken it. Then blend in 150 g soft, unsalted butter until homogeneous. Sift in 200 g flour (I used half whole wheat pastry flour and half all purpose flour) along with one teaspoon baking powder, add in 1/2 teaspoon fine sea salt and 70 g almond flour and mix it all together. Finally blend in 80 g mixed grains, wrap the dough in plastic wrap and chill one hour. (See my previous post about Breton dough here and the full recipe here).

All mixed up

All mixed up

For the grains I decided on King Arthur Flour's Harvest Grain Blend, a combo of oat groats, wheat flakes, rye flakes, sunflower seeds, sesame seeds, flaxseed, poppy seeds and hulled millet. I've already used this mix in a simple wheat sandwich bread as well as in my favorite buttermilk scone recipe - wonderful toothsome chew and crunch going on. I'm definitely in.

IMG_2885.JPG

On our recent spring time trip to Paris I visited Mora, that wonderful all-things-pastry shop near the Etienne Marcel line 4 metro stop. There I purchased my first perforated tart form, a relatively new iteration that comes in all shapes and sizes for the avid and/or professional tart maker. The idea is to expose more of the dough to the heat of the oven for even better browning. I like that.

IMG_2879.JPG

For this Breton dough project I wanted a simple flat base, no edges, so I just had to roll and shape a piece of dough about 1/4 inch thick to fit my form. Easy. The quantity of dough needed is up to you, something you have to gauge based on size of the form or pan you are using and thickness desired. Remember - thicker is softer and chewier while thinner is crisper.

In spite of the heat I proceeded to bake the dough during the earlier morning hours while the temps were still on the coolish side. This one baked at 325ºF, convection, for about 20 minutes (look for golden brown and a lovely aroma). 

I had already been imagining the pastry cream/strawberry garnish, so my pastry cream was made and chillin' in the fridge. I just had to gently wash, pat dry, hull and slice my fresh local strawberries from the Fulton Farmer's Market.

IMG_2884.JPG

I sliced my Breton base into strips, piped on simple rounds of crème pâtissiére and topped with the fresh berries. The result was a delightful combo of creamy, fruity and that nutty, seedy chewiness of the Breton dough. Not bad at all. 

I can imagine this multigrain Breton option as a lovely biscuit on a cheese board. Hmmmm. . . . now there's an idea.

IMG_2891.JPG

In the meantime have a wonderful Fourth of July week and stay cool everyone!

Baking with Michigan fruits the French way

strawberries2.png

Having just finished a presentation at the Gaines Township Branch, the FIRST in a series of NINE (count 'em - 9!) presentations offered through the Kent District Library (KDL) system, I'm here to promote the beauty of West Michigan fruit. Tis the season!

Summer in Michigan is something you simply have to experience. The lakes, the BIG lake, the orchards, the farmer's markets, the U-pick farms and the delicious bounty available to us here is amazing.

My KDL presentations offer a look into how one might use the bounty of Michigan's fruits in the French manner. I've enjoyed preparing for this and look forward to completing the series which will go through mid-August. It's fun!

I'm currently focusing on strawberries (now in season!) and cherries (coming soon!) and providing the attendees with a couple of sample treats to enjoy.

Strawberry tartelettes with lime cream

Strawberry tartelettes with lime cream

cherries.jpeg
Cherry financiers

Cherry financiers

I'll change things up a bit as the summer moves forward. Needless to say, it's all about understanding the classic bases of pastry and how you can use them to create your own delicious summer fruit-ful desserts and pastries! Sign up is required so check out your own local KDL branch and put it on your schedule!

Here's the upcoming schedule.
Saturday, June 23, 2018 - 2:00pm to 3:00pm, Grandville Branch
Saturday, June 30, 2018 - 10:00am to 11:00am, Krause Memorial Branch (Rockford)
Saturday, July 14, 2018 - 10:00am to 11:00am, Walker Branch
Saturday, July 28, 2018 - 2:00pm to 3:00pm, Comstock Park Branch
Saturday, August 4, 2018 - 10:00am to 11:00am, Kentwood (Richard L. Root) Branch
Tuesday, August 7, 2018 - 6:00pm to 7:00pm, Tyrone Township Branch (Kent City)
Saturday, August 11, 2018 - 10:00am to 11:00am, Byron Township Branch
Tuesday, August 14, 2018 - 2:00pm to 3:00pm, East Grand Rapids Branch

I look forward to seeing you soon!


Ficelle (a.k.a. skinny baguette)

IMG_2822.JPG

I thought I'd take a few moments on this cloudy, off again-on again rainy afternoon and share my latest bread baking adventure, compliments of Weekend Bakery.  I discovered the website some months ago while reviewing croissant methods (and theirs is right on par with mine - yes!!). Written by a couple in the Netherlands who bake at home during the weekends, it is a plethora of bread baking tips, techniques, recipes, videos and overall great information for all of you avid bread bakers out there. You can choose English or Dutch and you should definitely check it out!

Since I was preparing to teach my own bread baking class to Lisa and Jerry (AVID bread bakers for sure), I was perusing various posts and recipes and decided I needed a little test project to get me in the mood. Ficelle here we come.

The word is literally translated as string, and the bread is basically a thinner version of a baguette. This one happens to be made with a combo of bread flour and semolina, an ingredient I enjoy immensely in my pizza dough. Must be good, right?

The WB version is a sourdough ficelle using the so called hybrid method with a sourdough poolish which is then incorporated into the final dough which contains added instant yeast.  They are thoughtful in giving one the option to use all instant yeast, which is especially helpful for those of us who have yet to jump on the natural starter band wagon - maybe one of these days folks.

A poolish is a starter dough made with equal weights flour and water plus a small amount of yeast (or sourdough starter if you're going that route). For this recipe mix 200 g bread flour with 200 g water plus 1/4 teaspoon instant yeast OR 30 g active sourdough culture.

Below is the starter just after it's mixed. Generally the poolish is allowed to sit, covered, for some hours, either at room temperature or in the fridge depending on the time frame of your recipe. This one is a six hour, room temp wait, so it's easy to plan to accomplish it in one day.

IMG_2809.JPG

Here it is after a six hour preferment. Nice and light and bubbly. And you know what? It smells good too!

IMG_2810.JPG

For the final dough, in the bowl of your stand mixture fitted with the dough hook, combine the above poolish with 200 g bread flour, 100 g semolina, 110 g water, 8 g sea salt and 5 g instant yeast. Knead on low speed (2 on a Kitchenaid) for 7 minutes then cover it and let it rest for 30 minutes.

Turn the dough out onto a lightly floured work surface, do a full stretch and fold (top down, bottom up, right side over, left side over and ball it up) and let the dough rest another 30 minutes.

Rested and ready to divide

Rested and ready to divide

Heat your oven to 465ºF with a baking stone in place, or, if you're like me, place a half sheet pan in the oven during the pre-heat (that will serve as the hot surface on which I place my sheet pan containing my risen ficelle).

Divide the dough in four pieces, shape each one into a rough rectangle then cover and let 'em rest for about 10 minutes.

IMG_2812.JPG

Now shape each piece into a log as seen below. Please accept my apologies for the somewhat fuzzy images, but at least you can visualize the steps (I hope!). I attempted a short video of the shaping, but, not being quite up to snuff, that will have to wait for another time. It's all about learning, even the techno side!

Elongate the rectangle, fold over the top third, pressing along the edge of the dough with the heel of the palm. Turn the dough 180º.

IMG_2813.JPG

Fold over the top third toward the middle, again pressing along the edge of dough with the heel of the palm.

IMG_2814.JPG

Now fold the dough over itself to form a rough log, pinching the seam with the heel of the palm.

IMG_2815.JPG

Place your overlapping hands in the middle of the log and start rolling with gentle pressure, gradually elongating the dough as you move your hands outward toward each end. You should have a nice thin log with pointy ends.

IMG_2816.JPG

Once all four logs are shaped, arrange them on a sheet pan lined with parchment paper, cover with plastic wrap and let rest for 20 minutes.

IMG_2820.JPG

I scored these right down the center along the length of the bread then popped them into the heated oven onto my already heated sheet pan. I gave them a burst of steam by pouring hot water into the steam tray in my Kitchenaid oven.

These baked about 20 minutes and developed a nice golden brown crust. Yeah.

IMG_2823.JPG

Once cooled it was time for a taste. A lovely dense crumb and creamy interior with a nice crunch to the crust. Time well spent I'd say. This one is literally all in a day's work. You can do it too, especially with the help of Weekend Bakery.com!

IMG_2824.JPG

Fun with afternoon tea

IMG_2769.JPG

Having returned from our France/Netherlands trip about a week and a half ago, we're slowly getting back into the swing of things here in Grand Rapids, MI. It took awhile for our colds to finally say adieu, and I must say it's a wonderful feeling to have some energy back in one's step.

Before we left on our voyage, I was already planning the goodies for another afternoon tea event at Heron Woods/Heron Manor , an independent/assisted living facility just down the street from our home.

Kim, the activities director, is a powerhouse of ideas for fun events and gatherings for the residents there. This time the tea was to follow an interesting presentation on how women dressed in Victorian times. Kim and her volunteer assistant, Dave, had the tables set just so with nosegays of pink roses, a beautiful assortment of teacups provided by one of the residents, as well as napkins folded to resemble roses.

Kim set out 26 (one for each letter of the alphabet) different decorated and hand written cards, one at each place, that included an interesting tidbit about or having something to do with tea. My favorite was a quote from Eleanor Roosevelt -"women are like tea bags - they don't know their strength until they get into hot water". Hmmmm.

IMG_2762.JPG

The menu consisted of two savories and three sweets. I had a pretty clear idea in my head of how I wanted to execute the prep. It's great to have plenty of time to plan/prep/bake/garnish for an event like this, and, fortunately, my days were wide open leading up to the actual day.

Cheddar pecan financier

Cheddar pecan financier

The financier process was très facile: make my usual financier base batter a couple of days ahead, fridge it until ready to use, then fold in grated sharp cheddar cheese and chopped toasted pecans just before baking. I used my favorite square savarin flexi-molds and, after baking, filled the top well with a bit of grated cheese, a dollop of apricot jam and a shard of toasted pecan to give it that je ne sais quoi. Yum.

Cucumber crème fraiche éclairs

Cucumber crème fraiche éclairs

The éclairs were a blast to make. I used my favorite pâte à choux base, added in a bit of salt and pepper and a skosh of ground mustard, piped 'em out, topped 'em with a grated aged cheddar-like Dutch cheese we found at Kingma's market here in GR and baked these little cuties. So satisfying. And the beauty is they can be baked several days ahead, frozen, then crisped back up for about 10 minutes in a 325ºF oven before cooling and filling. How great is that!

Below you can see the assembly process. It's all about being organized. For these I made my own crème fraiche (1 cup heavy cream plus 2 tablespoons buttermilk, let sit at room temp for 8-24 hours until thickened, stir and refrigerate), added a bit of salt and pepper plus lemon zest/juice and finely chopped chives. It didn't thicken as much as I expected, BUT I whipped it up and it was fantastic. Pipe-able and easy to fill les petits choux.

IMG_2745.JPG

I sandwiched them with the crème fraiche, a cucumber slice and julienned carrots and topped 'em off with a spurt of crème and a sliver of chive.

IMG_2746.JPG
 
IMG_2747.JPG

Now for the sweets. First up - a new chocolate cake recipe that I brought home from Paris. Our friend Val gave it to me and attributes it to Hélène Darroze, the Michelin starred French chef with restaurants in Paris, London and Moscow. It's a definite keeper.

Here it is in a nutshell: melt 250 g chopped bittersweet chocolate (I like 62-64%) with 250 g unsalted butter; whisk in 250 g cane sugar and 70 g sifted all purpose flour; add 4 large eggs beaten en omelette. The recipe calls for a buttered and floured 9" cake pan, but, as is my wont, I love to bake cakes in petite flexi-molds. And, wouldn't you know it? I purchased a couple of mini-kouglof Silikomart flexis at Mora in Paris and was so ready to give them a spin. Perfect is the word. These baked about 18-20 minutes at 325ºF convection - just until looking dry and a bit cracked on the top. So fudge-y and delicious.

And guess what?! They can be baked ahead and frozen. Just pull them the night before you need them and let them thaw in the fridge over night. Now you're ready to garnish.

IMG_2753.JPG

I posted recently about another petite chocolate cake with whipped white chocolate ganache and sesame crunch - I added the same garnish to these babies. Go with a good thing I always say.

IMG_2757.JPG

Next up - strawberry mascarpone tartelette - pâte sucrée crust, whipped/lime zested mascarpone cream topped with fresh strawberries tossed in a bit of raspberry jam and, for the piéce de resistance, a sprinkling of pomegranate seeds for crunch and a bit of tang.

And here we go again - the shells can be blind baked and frozen several days ahead. Thaw overnight in the fridge and fill when ready. Love that planning and prepping!

IMG_2750.JPG
 
IMG_2752.JPG
 
IMG_2765.JPG

And last but not least - orange vanilla ricotta custards on an orange cornmeal shortbread base.

IMG_2758.JPG

The shortbread can be baked several days ahead and kept in a sealed container in the fridge or freezer. The custards can be baked in your favorite flexi-mold shape, cooled and then frozen until you're ready to pop them out of the molds and settle them onto the shortbread base. Add a dollop of caramel or jam on the cookie to hold the custard in place.

If you do the assembly just a couple of hours ahead of serving, they'll hold and thaw very nicely in the fridge and are the perfect creamy texture when it comes time to eat. Yeah, works for me!

I topped them with a small dollop of orange marmalade for just a bit of color.

IMG_2761.JPG

Everyone enjoyed the menu as well as the time to sit and chat with friends on a beautiful summer-like afternoon. 

If you're interested in goodies for your own afternoon tea, don't hesitate to hop on over to the contact page and send me a note. We can put our heads together to create just the right assortment for you!

Since this post is more about planning/prepping/assembling and not specifically about individual recipes, in addition to some links I’ve included in the text above, you can find most recipes on my recipe page.

Now go out there, have a delicious Memorial Day weekend and offer up a hearty welcome to summer!!

IMG_2763.JPG

A few classic French treats

IMG_2733.JPG

Yes, you guessed it - millefeuille! Caramelized puff pastry layered with vanilla crème pâtissiére, Americans refer to this particular delight as Napoleon. I did a brief internet search and couldn't find a quick answer as to WHY we refer to this as Napoleon, cuz the French don't. Oh well, it's good no matter what you call it!

Having just returned from a wonderful trip to France and the Netherlands, I wanted to share with you some of the goodies in which I indulged during our stay. I tried to make a point of tasting some of the classic French pastries to be had, whether in Paris, Lille or pretty much any large city or small village in the country. If there's a pâtisserie or salon de thè nearby, you should be good to go.

Although Steve and I were in Paris for almost two weeks, my most memorable classics were enjoyed in Lille, right near the Belgian border. The millefeuille you see above was at the Meert salon de thè, just down the street from niece Christina and her family's apartment in the heart of vieux-Lille.

I joined Christina and her children, Kiera and Liam, for a memorable mid-morning chocolat chaud et millefeuille. Christina had the millefeuille as well, along with the signature "M" inscribed cappucino, while Kiera went for her favorite religuese caramel and Liam devoured L'impérial, a layered chocolate hazelnut number topped with a gilded hazelnut (hey - it's France!).

IMG_2730.JPG
IMG_2732.JPG
IMG_2731.JPG

Later that same day Steve and I joined Christina and her husband Glen for dinner at a lovely restaurant on the ramparts of vieux-Lille. Delicious food, good company and lovely surroundings sums it up.

For dessert Glen had his "usual" dining out treat, the café gourmand. Basically coffee with a medley of small desserts, the selection here was quite the assortment!

IMG_2737.JPG

Christina and I went with the strawberry-pistachio tart served with a vin jaune sorbet - delicious! The crust was so crisp, the pistachio filling just right and the cool sorbet the perfect complement to the fresh berries.

IMG_2739.JPG

You might be wondering what the Steve-meister had? He went with dessert wine which is often his answer to restaurant desserts. From a guy who loves pastries? Go figure! He claims he won't eat any dessert that his wife hasn't made. How sweet is that!

How about we end on a more savory note, OK?. In northern France one of the specialties is the planche, a board of charcuterie, cheeses, olives, etc served with bread. For a couple of our lunches at G&C's apartment, they provided us with that particular repast. Nothing like fresh baguette, a medley of cheeses, some saucisson, fresh veggies and hummus, nuts - and let's not forget the wine. Yum!

IMG_2734.JPG
IMG_2736.JPG
IMG_2735.JPG

Thanks for everything Glen and Christina! And Kiera and Liam too!!

Baking bread in Paris

IMG_2677.JPG

Baking in Paris is always a treat, and this trip included a four day bread class for me at Le Cordon Bleu's new facility on Quai André Citroën. When I did the pastry diploma program in 2006, the school was located on rue Léon Delhomme not far from the line 12 Vaugirard metro stop. 

blogger-image--1618611748.jpg

A couple of years ago LCB moved to their new location, still in the 15th arr., and it's, in a word, impressive. Back in the fall of 2016 during our last trip to Paris, I visited the school and had a short tour of the place. This time I got a much closer look, at least of the kitchen we were using.

Boulangerie kitchen

Boulangerie kitchen

Our instructor for this four day extravaganza of bread production was Vincent Somoza, a knowledgeable and amiable teacher. Each day we arrived, the big white board on the wall contained all of the necessary info about the breads that were to be worked on that day like kneading times (pétrissage), first rise (pointage), dough weights for division, second rise (apprêt) and so on. You get the idea. 

IMG_2666.JPG

Our group of 14 was international, with bread enthusiasts, bakers and chefs hailing from Russia, Saudi Arabia, Kuwait, Lebanon, Japan, Taiwan, Paris and, last but not least, the USA (I being the sole American aside from our traductrice Grace, second from left below).

IMG_2708.JPG

There is simply too much information to try and share here, so I'll simply give a short pictorial of some of les pains we produced. Chef Vincent stashed the extra loaves in the freezer each day so they could be pulled out for the above grand finale photo on day 4.

To top it off, we could take home everything we made every day (usually at least two of everything)! Wow. Many of us chose to leave some behind for the staff, since it was more than most could handle, either to eat or to store for the short term.

Kougelhof

Kougelhof

For day 1, three of our bread doughs had been made for us the day before, one for kougelhof, the classic Alsatian brioche-like treat, and two for our country style bread/pain de campagne sur pâte fermentée and whole wheat bread/pain complet.

It's typical to make brioche type dough the day before, wrap it and give it a rest in the fridge overnight before shaping it the next morning. Since it's a buttery/eggy dough, the rest allows the butter to firm up and makes working with the dough easier. Our job was to divide our allotted 600 g of kougelhof dough into two 300 g pieces, ball them up, push a hole through the center and place them in well-buttered molds with almonds placed in the bottom. After a 1.5 hour rise and an hour bake, they were finished!

IMG_2667.JPG

Once cooled and un-molded, these beauties were given a dunk in clarified butter followed by simple syrup. To finish, a dusting of powdered sugar et voilà.

IMG_2669.JPG

The country style and whole wheat breads were made with fermented dough/pâte fermentée which had been made ahead for the class. This is a starter made with flour, water, salt and commercial type yeast, meant to enhance the flavor of the bread. (NOTE: French boulangers typically use fresh cake yeast, as we did for this class). 

Boulangeries usually have leftover dough scraps and will simply save those for the next day's incorporation into their final dough. In addition, the final dough is given a long, cool rise in the fridge overnight which allows for even more flavor development in the end.

For our fourth bread that day, we all mixed a straight (no pre-ferment, no long cool rise) baguette dough by hand and proceeded to knead it with the aggressive slap-and-fold technique. Lots of noise going on in that session! Once kneaded this dough received a much deserved 20 minute rest before we divided it in two and shaped our baguettes for a one hour proof and final 20 minute bake.

Day one breads: country style, whole wheat, kougelhof, baguette

Day one breads: country style, whole wheat, kougelhof, baguette

A couple of other preparations were begun for breads to be made over the next several days. Chef Vincent began the multi-day process of making a liquid levain (natural starter) that would go into several different breads, as well as a poolish (commercial yeast based starter) for baguette tradition destined for baking on day 3. He also started another poolish which involved soaking seeds and grains for pain nutritionnel aux graines for day 2. Lots going on!

The tone was set: dough preparation for each or subsequent days, dividing and shaping various doughs, feeding of the levain and, of course, proofing and baking lots of bread. We all worked on our boule et batârd shaping techniques and the different ways to score our loaves (so many designs, so little time!)

Day 2 breads: Rye, grain, milk bread baguette and more!

Day 2 breads: Rye, grain, milk bread baguette and more!

At the end of each day we also had a tasting of our breads, accompanied by fresh French beurre et confiture. As the French say miam, miam!

Day 2 tasting

Day 2 tasting

As were proceeded through each day, my primary disappointment was the fact that we weren't given the opportunity to actually scale or small batch mixer knead any of the dough. No "normal size" stand mixers that might be shared among two or three people were available. Being able to perform the entire process, assessing the dough more directly at each stage, would certainly have given us a greater learning experience.  

Even so, the kitchen was perfectly outfitted with state of the art steam ovens, multi-shelved fridge/freezers, proofing cabinets, lots of speed racks for product placement before and after baking, two large mixers, one a flat bottom meant specifically for bread dough and one a standard large rounded bowl, multi-function planetary mixer. Everything a boulangerie might need.

day 3 cheese bread

day 3 cheese bread

Day 3 brought us cheese bread, brioche Nanterre, baguette tradition and walnut-raisin milk bread, in addition to a round pain de mie style brioche log that was to become bostock (don't worry, I'll explain).

brioche for bostock

brioche for bostock

day 3 breads: walnut raisin, cheese, baguette tradition

day 3 breads: walnut raisin, cheese, baguette tradition

Another day 3 project was to make the détrempe for our croissant et pain au chocolat for the final day. Chef kneaded a LARGE batch in the mixer, after which it was divided into portions, wrapped and refrigerated for the next day.

détrempe, like stepping stones, for day 4

détrempe, like stepping stones, for day 4

On our final day we were all given our portion of détrempe along with le beurre for the beurrage. We proceeded through the steps, giving our dough 2 double turns, a rest in the freezer, then the final rolling and cutting of the triangles and rectangles. The dough felt wonderful, was easy to work with and the laminations superb. After a 2.5 hour proof, into the oven they went.

croissant

croissant

pain au chocolat

pain au chocolat

We assembled our bostock by slicing our logs into ~1.5" rounds, dunking them in orange syrup then topping with almond cream, dipping in sliced almonds and baking until the almond cream became nicely browned. Very much like my favorite croissant aux amandes but with brioche dough instead. A great way to use up leftover brioche!

bostock out of the oven

bostock out of the oven

On our last day we also made an interesting striped bread using a "milk" dough similar to previous days. Squid ink (messy!!) was mixed into half of the dough, then the light and dark doughs twisted together to give a zebra stripe look.

pain de mie zébré

pain de mie zébré

The zebra bread is usually used as a base for some type of seafood sandwich or appetizer, since the squid ink gives a hint of a taste of the sea. We were told it wasn't really meant for flavor but for creating the stripe effect. Hmmm - what other colors might one create? I'll have to think about that one.

Day 4 also brought pain de campagne sur levain naturel, a rustic bread made with a stiff levain that the prep team had started even before our first class. The dough was kneaded, and we divided and shaped the dough on day 3 so it could develop in the fridge overnight for baking on day 4. What a process! But delicious and well worth it. It's all about planning after all.

pain de campagne sur levain naturel

pain de campagne sur levain naturel

day 4: bostock, pain de mie zébré, croissant, pain au chocolat, pain de campagne

day 4: bostock, pain de mie zébré, croissant, pain au chocolat, pain de campagne

My favorite breads from the class were the rustic pain de campagne, the multigrain bread and the cheese bread - chunks of gruyère, oh my! Of course, good croissants are a given, and I continue to find it fascinating that everyone, no matter their country, is infatuated with that particular viennoiserie! The oohs and aahs that abound as these gems bake and are then devoured span all borders.

Next time around, if we're so lucky to return to Paris some day, I'll search out a class that offers more comprehensive hands-on experience. Particularly with bread dough, that's truly important. It was a great review for me in regards to the steps/timing involved in bread baking, using natural starters and, bien sür, the many delicious things one can create from flour, water, salt and yeast. Oh yeah!

All in all, a grand time, wonderful textures and aromas, lots of cool stuff, many interesting people from all over, plus I was able to practice my French! Not bad at all.

Petits gâteaux part 2 - toasted coconut lime

IMG_2642.JPG

Welcome to part 2 of petits gâteaux!

This toasted coconut cake is based on a pound cake recipe I've had for many years, even before pastry school days. I tweaked it in a few places to create a delightful, dense and flavorful cake made with ricotta, lime zest, diced dried pineapple, toasted coconut, a bit of whole wheat pastry flour plus the usual butter, eggs, sugar etc.

I baked these babies in another of my favorite flexi-molds from Silikomart - a rectangular ingot shape that just speaks to me.

Ready for the oven

Ready for the oven

All baked up and glazed

All baked up and glazed

Just out of the oven I brushed on a lime glaze then popped them back in for a few minutes to set the glaze.

Once cooled, I garnished the cakes with a basic cream cheese frosting, zinged with some lime zest, plus a sprinkle of toasted coconut and a julienned piece of dried pineapple.

IMG_2639.JPG

Time for the recipes!

TOASTED COCONUT LIME CAKE: makes one standard Bundt cake OR two medium loaf pans or multiple small cakes. I made a half recipe which yielded 19 "ingots". Components include cake, glaze and frosting plus garnishes.

  1. Get a few things ready: toast 70 g (plus a bit more for garnish) unsweetened shredded coconut and set aside. Zest three limes, reserving the zest of two for the cake and one for the frosting, then juice the limes to yield 45 ml juice (you can do a combo of pineapple and lime juices if you'd like) for the cake plus 30 ml juice for a glaze at the end. Finely chop about 1/4 cup dried sweet pineapple (I found mine at Trader Joe's) and cut a bit more in strips to use as top garnish.
  2. Heat the oven to 325 ºF. If using a Bundt pan or loaf pans, do the butter and flour thing. No need for that with silicone molds.
  3. In a medium bowl whisk together 272 g all purpose flour, 88 g whole wheat pastry flour and 1/4 teaspoon salt.
  4. In the bowl of a stand mixer fitted with the paddle attachment, cream 227 g unsalted butter with 170 g whole milk ricotta until smooth; add in 480 g granulated sugar and the two lime zests, then cream until light and fluffy. NOTE: I like to rub the lime zest into the sugar as I do my mise en place then just add the zested sugar when ready.
  5. Add 5 large eggs, one at a time, beating well and scraping the bowl after each addition.
  6. Blend in 1 teaspoon vanilla extract.
  7. Add lime juice alternating with the dry ingredients just until blended.
  8. Blend in the toasted coconut and diced dried pineapple.
  9. Fill prepared pan(s) or molds and bake. Bundt will take up to 1.25 hours, loaves more like 50-60 minutes and small cakes perhaps 20-25 minutes. Watch what's going on in there! A skewer inserted in the center should come out clean. Remove from the oven.
  10. While your cakes are baking, make a GLAZE by whisking together 3/4 cup powdered sugar and 2 tablespoons lime (or pineapple) juice. You want it thin for just that oh-so right light coating. Once the cakes are out of the oven, brush the glaze on the surface and pop them back in for a few minutes to set the glaze.
  11. Let cool in the pan or molds, then remove.

LIME CREAM CHEESE FROSTING: makes about 2 cups, plenty for your needs (I made a half recipe for my half cake recipe).

  1. Soften 227 g cream cheese and 113 g unsalted butter on low in the microwave. I you prefer not to use a microwave, place the cream cheese and butter in a bowl and place that in a second larger bowl with warm water - you want them soft, not melted.
  2. Add 170 g powdered sugar, 1/2 teaspoon vanilla, a splash of lime juice and the zest of 1 lime.
  3. Blend all until smooth. Spread or pipe as you desire on the top(s) of the cake(s).

For the pièce de résistance, sprinkle some toasted coconut on top along with a piece of slivered dried pineapple. Et voilà. You've done it!!

IMG_2642.JPG

Petits gâteaux part one - sesame crunch gâteau de Pâques

IMG_2641.JPG

For our recent Easter dinner at cousin Jennifer's lovely home in the woods on Clear Bottom Lake, I created a couple of bite size gâteaux for the occasion. I've been on a sesame kick lately, having discovered a terrific way to create sesame brittle, compliments of Yotam Ottolenghi and Helen Goh. More about that in a bit.

IMG_2614.JPG

Rather than cramming a lot of recipe info into one post, I'm doing a two-parter, one part for each little cake.

First up is gateau de Pâques, a classic chocolate biscuit for Easter that I've made a number of times and have never found wanting.

The French word biscuit generally refers to a cake in the sponge family that's made with eggs that are first separated, then the yolks and whites are beaten separately before combining various components at the end to make a light and tasty cake.  On the other hand, biscuit sec usually refers to a cookie.

In English the word biscuit has a completely different connotation. While the Brits call cookies biscuits (as the French do biscuit sec), we Americans think of shortcake à la buttermilk biscuits or biscuits and gravy. Language is so cool and fun to figure out, don't you think?!

IMG_2626.JPG

For this fun little cake I used one of my favorite square savarin fleximolds from Silikomart, which allows me to fill the "dent" with something good before garnishing with a swirl of another something good.

IMG_2633.JPG

And then adding another something even better!

IMG_2635.JPG

That sesame brittle is oh-so addicting - just ask Steve.

Let's do the recipes!

First the sesame brittle, so you'll have it ready to go for the garnish. And it keeps for a number of days.

IMG_2356.JPG

Sesame brittle (makes plenty!)

The beauty of this brittle method is you don't have to use a candy thermometer or worry about reaching a certain temperature. I LOVE that!

  1.  Toast 125 g sesame seeds (mix of 1/3 black and 2/3 white or all white like I did) either in the oven at 325ºF for about 10 minutes until nicely brown, stirring occasionally, or in a skillet on medium-low on the stove top. Do what you're most comfortable with. Set aside. Increase the oven temp to 350ºF.

  2. Have two half sheet pans and four pieces of parchment at the ready. 

  3. In a medium saucepan put 100 g granulated sugar, 100 g light corn syrup, 50 g unsalted butter and 1/8 teaspoon salt. Stirring constantly on high heat, blend the mixture and bring to a boil. Remove from the heat and stir in the toasted sesame seeds.

  4. Put two pieces of parchment (or Silpat!) on a heat proof surface (I used two overturned half sheet pans) and pour half of the sesame mixture on each. Cover with the other parchment pieces and roll with a rolling pin until about 1/8 inch thick. 

  5. Slide the paper with the sesame caramel onto half sheet pans and remove the top layer of parchment. Peel it back gently and push down any caramel that might stick. Bake for about 20 minutes until nicely browned. Remove from oven, cool and break into shards.

  6. Stores nicely in single layers between pieces of parchment or waxed paper in a well sealed container. The first batch I made lasted a couple of weeks and served as garnish for a number of goodies!

IMG_2616.JPG

Gateau de Pâques (for one 8-9" cake or multiple small cakes) - find recipe PDF here

  1. Heat your oven to 350ºF and have your molds of choice at the ready. Butter and flour a 8-9" cake or springform pan OR you can use any shape multi-well silicone flexi-mold (no butter/flour needed) or mini-muffin tins lined with decorative papers. You decide.

  2. Melt 200 g dark chocolate (I used 61%) and 200 g unsalted butter gently over a bain marie. I like to do this over very low heat and once the melting has begun, I turn the heat off and let the residual warmth finish the melting process. Stir the mixture every once in awhile as it melts.

  3. Once you have that going, separate 4 cold eggs. NOTE: Eggs separate best when cold so do that at the beginning of your prep. The whites will be beaten separately and whip best when warm so it's all part of planning ahead!!

  4. In a large bowl whisk the 4 yolks with 150 g sugar until thickened and more pale. Blend in the melted chocolate/butter mixture.

  5. Blend in 100 g all purpose flour.

  6. In a clean bowl beat the 4 egg whites with a pinch of salt to soft peaks. Gently fold the whites into the the above mixture.

  7.  Pipe or scoop the mixture into your chosen molds and bake. Your baking time will vary depending on the size of your molds. An 8" cake may take about 30 minutes, whereas mini cakes may take about 10. Look for a more dry appearance to the surface of the batter without gooey centers. 

  8. Let cool and unmold. Garnish with ganache or whatever you'd like! I made a basic 1:1 dark chocolate ganache to fill the wells, then piped a swirl of whipped white chocolate ganache (1:1 cream to chocolate, chilled then whipped) on top and added some shards of sesame brittle. Whew!

IMG_2634.JPG

The texture of these cakes is light and oh so smooth. And the whipped white chocolate ganache and sesame brittle finished 'em off so deliciously. You gotta try these, I'm telling you now.

Stay tuned for Part 2: toasted coconut lime cakes!

Nutty rosemary and lemon/pistachio/sesame shortbread

IMG_2610.JPG

I LOVE shortbread! I think back to those childhood days of eating Lorna Doone cookies and how much I enjoyed their crumbly butteriness (was there really butter in those babies??). I've come a long way down the shortbread trail since then. Yes, I know I've gone on about this topic in the past, but good things deserve a little review every now and then, right?

Depending on what part of the world you hang out in, these cookies can be referred to as biscuits (thanks to the Brits), shortbread (more Scottish - think Walkers) or sablés (thanks to the French).

My approach follows the traditional Scottish method - a simple combo of sugar/butter/flour, and you're good to go. Typically along the lines of 1-2-3 dough, you weigh out 1 part sugar to 2 parts butter to 3 parts flour and mix 'em up. You can play around with the ratios (decrease the sugar and increase the butter a bit) to yield an even more buttery cookie.

I have two base recipes that I use regularly. One uses granulated cane sugar and one confectioner's sugar (gives 'em a slightly more tender texture?). You can play around with different sugars on your own and decide which gives you the texture you most enjoy.

And why do I use two different bases you might ask? Because I can and so can you!

Add in your favorite citrus zest, spices, chopped nuts, chopped chocolate, dried fruit - the possibilities go on and on.

There are two mixing methods: sanding and what I like to call blending (I think of this one as just short of creaming - you're not trying to aerate the dough, just blending everything together).

The first involves weighing your sugar and flour into a mixing bowl, dicing cold butter and sanding it into the dry ingredients to coarse crumbs. At that point you just press into a pan and bake it. You can take the mixing a step further, going past the coarse crumbs until the dough holds together, then wrap, chill and roll out later, cutting into any shape that suits your fancy.

Both methods result in a lovely crumbly/crispy/buttery cookie, although, with the sanding and press in method, the texture is a bit more crumbly and melt-in-your-mouth. I make mine both ways and enjoy them equally.

If you look at LOTS of shortbread cookies recipes, you may notice that many of the French sablés add egg (whole or yolk) to the dough as a binder. They're delicious too! 

Periodically I enjoy changing up my flavor offerings. This time I had pecans in the freezer and sesame seeds in the cupboard.

First up - rosemary pecan.

IMG_2492.JPG

Over the years I occasionally make rosemary roasted nuts, usually walnuts or pecans, that are absolutely delicious as an appetizer along with a cheese or two. For a savory cookie, I chop some of the already rosemary-ied nuts and add them into my dough. Yum. So delicious.

IMG_2609.JPG

Next - lemon pistachio sesame.

IMG_2545.JPG

This one adds in some toasted sesame seeds, lemon zest/juice and chopped unsalted raw pistachios. Once baked, I brush them with honey and pop them back into the oven for a few minutes to set the honey. Oh man are they good!

IMG_2538.JPG
IMG_2611.JPG

On to the base recipes (plus additions!)

Rosemary pecan:

  1. In a stand mixer with the paddle attachment blend 75 g granulated cane sugar with 200 g diced, room temperature unsalted butter. 
  2. Add 250 g all purpose flour and blend in just until the dough comes together. Note/tip: I've started replacing about 1/5 of my all purpose flour with white whole wheat for some added whole grain goodness. 
  3. For the rosemary pecan version, chop 75 g rosemary roasted pecans (recipe below) and add them into the dough. Wrap, chill for at least an hour before rolling out and cutting desired shapes.

How easy is that??!

Lemon pistachio sesame:

  1. In a stand mixer with the paddle attachment blend 75 g confectioner's sugar with 227 g diced, room temperature, unsalted butter (notice a slight bump in the butter content here).
  2. Add 1 teaspoon vanilla extract, the zest of two lemons plus 2 teaspoons freshly squeezed lemon juice and blend in.
  3. Add 260 g all purpose flour (or sub 1/5 of that as white whole wheat flour) and 1/2 teaspoon salt and mix just until it comes together.

Blend in 50 g toasted sesame seeds and 50 g chopped raw pistachios. Wrap and chill for an hour or so before rolling out and cutting desired shapes.

I bake my shortbread at 325ºF (convection) for about 15 minutes or until gently browned (watch what's happening in there!!). Don't forget - it's your job to learn your own oven. 

Now how about those roasted rosemary pecans, you might ask? Here's the recipe (you'll have PLENTY of nuts for your shortbread dough - feel free to halve the recipe OR, even better, make the full batch and have plenty for apps and snacks):

  1.  Heat oven to 325º F.
  2. In a microwave safe bowl melt 2 tablespoons unsalted butter. Add 2 tablespoons olive oil, 1/3 cup chopped fresh rosemary (or 2 tablespoons crumbled dried), 2 teaspoons kosher salt, 1 teaspoon paprika and 1/8 teaspoon cayenne.
  3. Place 4 cups nuts (walnuts, pecans or a mixture of the two) in a bowl and toss with the above mixture, coating the nuts evenly.
  4. Spread onto a 1/2 sheet pan and bake 15-20 minutes, stirring every 5 minutes or so, until browned and fragrant.
  5. Drain on paper towels, cool and serve at room temperature (or chop some up for your shortbread - yay!!).
  6. Store leftovers in an airtight container and enjoy for many days.
IMG_2493.JPG

Now get in that kitchen of yours and create your own version of delicious, crumbly, buttery shortbread. You can do it!

Tarte à l'orange et tarte au citron meringuée

orangetart

As winter closes its doors and spring is invited in, the taste of citrus is still very enticing to me. Lemons, limes, oranges (naval, blood, tangerine, mandarin, Valencia) and grapefruit remain quite abundant in the local supermarkets, just calling out to be used in so many different ways.

IMG_2515.JPG

Tarts are one of the mainstays of my baking (why do you think they call me The French Tarte, after all??), and there is nothing like a perfect citrus tart. Not only did I have a new version of a chocolate tart crust I wanted to try, complemented with an orange curd filling, but I was itching to do a slightly different version of the classic tarte au citron with some kind of meringue garnish - think lemon meringue pie but NOT!

The result of my plan: orange curd baked in a chocolate crust . . . .

IMG_2530.JPG

and my favorite lemon tart with crumbled crunchy raspberry white chocolate meringue as garnish.

IMG_2601.JPG

Let's start with the orange version, OK?

IMG_2558.JPG

The chocolate short dough for the tarte à l'orange is a variation on the one I've been using for years now. It has the addition of instant espresso powder to ramp up the chocolate taste, plus a slightly higher ratio of butter and cocoa powder compared to the flour.

Here's the process: in a medium bowl sift together 248 g all purpose flour, 42 g Dutch process cocoa powder and 1/2 teaspoon instant espresso powder. In a mixer bowl using the paddle attachment blend 179 g unsalted butter, 44 g light brown sugar, 44 g granulated sugar and 1/4 teaspoon vanilla extract. Add 43 g egg and 1 teaspoon heavy cream and blend in. Mix in the dry ingredients on low speed just until blended. Wrap and chill for an hour before rolling out or, if not using right away, freeze for up to 3 months. NOTE: makes plenty for 2 full size 9-10" tarts.

I blind baked the crust, let it cool and then spread a thin layer of melted chocolate over the bottom. That's just one of the ways to protect the bottom crust from "sogging" under the filling, particularly if held refrigerated over a day or three. Hmmm - looking pretty good!

IMG_2526.JPG

The orange curd is a pretty basic version made with the usual suspects - citrus juice and zest, eggs/yolks, sugar and butter. For this recipe, in a medium bowl whisk together 3 large egg yolks and 3 large eggs. In a medium saucepan bring to a simmer 3/4 cup (180 ml) orange juice (could be tangerine, Cara-Cara, navel), 1/4 cup (60 ml) lemon juice, grated zest of one orange and one lemon, 125 g sugar, 1/8 teaspoon salt and 170 g unsalted butter. Have 1/2 teaspoon vanilla extract and the zests of one more orange and one more lemon waiting on the side.

Temper the eggs with the juice/sugar/butter mixture then return the whole shebang to the pot and cook over medium heat, while whisking constantly, just until you see tiny bubbles developing around the edges of the pan, steam begins rising off and it begins to thicken. Now strain into a clean bowl and add in the vanilla and reserved zests.

Pour the warm curd into the prepared crust and bake in a 325º oven for about 10-15 minutes until the filling is just set and you see a hint of a jiggle in the center. Let cool on a wire rack. Carefully remove from the tart pan and serve, or cover and refrigerate for 1-2 days. NOTE: always BEST the day of!!

Side note: we noticed the second day that the citrus flavor was not nearly as bright and fresh - orange doesn't seem to hold up nearly as well as lemon.

IMG_2529.JPG

The crust had just the right chocolate flavor, the filling a lovely sense of citrus-osity and the combination was deelish served with lightly sweetened Chantilly cream (my go-to garnish) and chocolate shortbread crumbs. Yup.

And guess what!? Steve liked it!! Yippee.

IMG_2556.JPG

Next up - the lemon version. Since I've written about the tarte au citron à la Jacques Genin in a previous post, I'll simply focus on the meringue garnish that I opted for this time around.

IMG_2602.JPG

I went with a basic French meringue (2 parts sugar to 1 part egg whites by weight, a pinch of cream of tartar) whipped to medium stiff peaks. I then folded in some crushed freeze dried raspberries and some finely chopped white chocolate (use your judgement on how much you'd like to add). I doled out blobs of the meringue onto silpat lined sheet pans and baked them at 200ºF for about an hour and a half to dry and crisp them up. Once cool they crumbled very nicely into just the right shards to top my tarte au citron.

Destined for a family dinner while sister Mary and niece Mallory were visiting, I served slices with a sprinkle of fresh raspberries. I've gotta tell ya - this tart held up extremely well in the fridge over several days. It served as our dessert for two days in a row and did not disappoint. Of course I LOVE the tartness and bright, fresh flavor of this one, and the crunchy meringue bits on top of the cool luscious curd gave it that special something.

Everyone enjoyed their slice, and, even though Steve tends to be a chocolate kind 'a guy, he gave this one an A+. Two for two - not too shabby.

IMG_2604.JPG
 
IMG_2605.JPG

Happy spring and happy baking!

Maple pecan brioche spirals

IMG_2575.JPG

These babies were really fun to make, particularly if you enjoy the whole laminated dough experience (as I certainly do!). 

IMG_2535.JPG

On my regular walks I pass a small woods near the Lincoln School here in Grand Rapids, Michigan and recently noticed they had put out the sap buckets for maple syrup. I have no idea how much sap/syrup they get from this late winter project, but it's cool nonetheless. It reminds me of our days of living in Vermont when it was tree-tapping-sap-running time and the sugar shacks were in full swing. Oh the memories.

Since we just happened to have a jug of Michigan maple syrup in the fridge, the maple pecan version of a laminated brioche roll was born.

IMG_2495.JPG

This post isn't so much about the process of making laminated brioche dough (which I wrote about here), but about the variety of goodies one can make with the same base dough.

Think pain au raisin, which is one of the classics for sale in many French pâtisseries. Typically made with croissant or brioche dough,  the dough is spread with pastry cream and sprinkled with rum soaked raisins, rolled up into a log, sliced, proofed and baked. This maple pecan version is simply another take on a delicious buttery dough, spread with an even greater filling. Yeah!

I made my brioche base dough, completed the beurrage and four 3-folds then wrapped it up to chill in the fridge overnight.

Going through the folds

Going through the folds

I had chosen pecans for my project, but you can certainly substitute your favorite nut instead. Toast up about 250 g pecan halves and let cool. I divided those into 150 g to coarsely chop and 100 g to grind into a meal for the filling.  The filling was inspired by a recipe in the French book Viennoiseries & brioches by Parisian pâtissier/chocolatier Laurent Duchêne who has been awarded the coveted MOF title (Meilleur Ouvrier de France) and has his own pâtisserie in the 13th arr.

After the dough's overnight rest in the fridge I rolled it out into an approximately 25 cm/10" by 50 cm/20" rectangle and spread the filling in a thin layer all over. The filling is made very simply by combining 85 g egg whites, 100 g ground toasted pecans, 85 g sugar and 30 g maple syrup. Then I sprinkled 150 g of toasted and coarsely chopped pecans over the filling and rolled it all up into a neat log.

IMG_2506.JPG
 
IMG_2507.JPG
 
IMG_2508.JPG

When I do this sort of log/slice/proof/bake approach, I typically pop the log into the freezer for 15 or 20 minutes to firm things up. It's a bit easier to slice without having the filling ooze out as much as it might otherwise.

IMG_2510.JPG

I sliced my spirals about an inch thick and, after trimming the irregular ends, had a yield of 16 slices.

IMG_2511.JPG
 
IMG_2514.JPG

Then it's on to a proof of about an hour under cover of lightly buttered film wrap, heating the oven to 350ºF and baking for about 25 minutes until nicely browned.

IMG_2518.JPG

I must admit I feared they might be a tad dry, so I brushed on a mix made with 4 tablespoons melted butter and 4 tablespoon maple syrup right when they came out of the oven.

Once cooled, Steve and I did a taste test. Our diagnosis: something is missing! And so, back to the drawing board. This time I made a glaze with confectioner's sugar mixed with maple syrup and a bit of milk to a thin enough consistency that I could brush on a nice coating. Then back into the oven for a few minutes to set the glaze and voilà. It was the perfect solution!

IMG_2573.JPG

These spirals did not disappoint. Not too sweet, just the right hint of maple, a pleasant nutty crunch and a lovely texture to the dough all made for a delicious treat. Steve gave them a thumbs up, particularly with that last glaze addition.

IMG_2581.JPG

Now it's time for you to choose your favorite brioche dough and make your own version of spirals. How about a spread of lemon curd and a sprinkle of candied pistachios? Or a raspberry version of pastry cream along with mixed berries and some chopped white chocolate? Or crème d'amande with chopped candied orange peels and toasted sliced almonds? So many choices!

Whatever you decide, have fun. That's what counts.


Pear almond cake

pearalmond


This cake is inspired by a recipe in Ottolenghi and Goh's book "Sweet" - an apricot almond cake that I decided to change up to a pear version.

Although I usually think of pears as a fall/winter fruit, their flavor and usefulness in desserts still speaks to me now, with hints of spring in the air. This pear almond cake is dense, moist and oh so delicious! Truth be told, I baked this one in late January and am just getting around to writing about it now. Oh, how time flies.

Bartlett, Bosc or D'Anjou are my usual pear choices, although I must say I usually end up veering toward the Bosc end of the pear spectrum. I simply enjoy their flavor and texture.

I generally prefer to poach my own pears, especially since those that one buys in the grocery store are generally rock hard and need days to ripen appropriately. Poaching helps to coax out that ripened texture and allows them to be used sooner than you would if waiting for them to ripen naturally.

I create a poaching liquid using 2 parts water to 1 or 1.5 parts sugar, giving me a light-ish syrup. I like to add in some lemon zest, a grate or two of nutmeg and perhaps a pinch of ginger and a few pieces of star anise. Nice and lightly spiced. I peel, core and halve my pears. 

The key with poaching is low and slow. The most helpful thing for me is the cartouche -  essentially a round of parchment paper with a small hole created in the center to allow steam to escape, placed cozily over the pears to keep them submerged. It prevents sides or ends of pears from sticking out of the poaching liquid and developing an unsightly brown tinge. We simply can't have that, now can we?

pearpoach

I let them go until I see a change from a dense whitish color to a more translucent, buttery color. I then stick a fork in to see if the tines go in easily. We're done!

See the translucence!

See the translucence!

The cake is made with your basic ingredients - butter, sugar, egg, flour, a bit of salt, lemon zest, vanilla and almond extracts and some sour cream. A sprinkle of almond flour and the pears are nestled on top of the batter and then covered with an intriguing topping concoction made with butter, sugar, spices, salt and egg. Hmmm - this should be interesting.

Batter in!

Batter in!

Almond Flour sprinkled!

Almond Flour sprinkled!

Pears and topping on! ready to go into the oven

Pears and topping on! ready to go into the oven

Here it is just out of the oven. Looks good!

Here it is just out of the oven. Looks good!

pearalmondcake

Let's do the recipe! I outline the steps/ingredients below but you can click here for a PDF of the recipe.

1. Butter a 9" springform pan and line the bottom with parchment. Heat the oven to 375ºF.
2. Drain and blot dry your poached pears, then slice each half into quarters. You'll need a couple of pears total (more or less, depending on how you like to arrange your slices).
2. Make the topping: in a medium microwave safe bowl, melt 56 g (4 tablespoons) unsalted butter; stir in 100 g/1/2 cup granulated sugar, 1/2 teaspoon ground coriander, a pinch of ground ginger, a large pinch of salt; cool for a few minutes then stir in two large lightly beaten eggs and set aside.
3. For the cake, put 84 g/6 tablespoons unsalted, room temperature butter with 200 g/1 cup granulated sugar in your mixer bowl with the paddle attachment and beat on medium-high for a couple of minutes; add 2 large eggs, one at a time, blending each one in and scraping down the sides of the bowl a couple of times; blend in the zest of one lemon, a teaspoon of vanilla extract and 1/4 teaspoon almond extract.
4. In a separate bowl sift 220 g/1 3/4 cups all purpose flour with 10 g baking powder and 1/2 teaspoon salt; have 2/3 cup sour cream standing by as well.
5. With the mixer on low add the flour mixture to the butter/sugar/egg mixture alternating with the sour cream, beginning and ending with the flour.
6. Scrape the batter into the prepared pan, smooth the top with an offset spatula. Sprinkle 35 g/1/3 cup almond flour over the batter, then arrange your pear slices in a design of your liking.
7. Now spoon/pour the topping mixture over the whole shebang!
8. Bake this baby for about an hour until a tester into the middle comes out clean. Always watch what's going on in there folks!. Cool in the pan for about 20 minutes before unmolding. 
9. Serve warm or at room temperature.

I chose to top it with some lightly sweetened whipped cream (although my cream seemed to have lost some of it's whip!).

This was absolutely delicious! And Steve liked it too. Yay!!!

IMG_2410.JPG

Quick puff pastry adventures

quickpuff

For several years now my standard approach to puff pastry making has been the reverse approach, or, as the French call it, pâte feuilletée inversée. It comes out so wonderfully flaky and light, buttery and delicious. Check out my post about the process here.

Chausson aux pommes (apple turnovers) are perhaps my favorite goodie to make with puff - the marriage of tart apples sautéed in vanilla sugar, butter and a generous squirt or two of my caramel sauce and then encased in the buttery goodness of puff is a marriage made in heaven.

As I continue to incorporate more whole wheat into my baking, I decided to give a spelt version of quick puff pastry a try. Spelt is considered one of the "ancient grains" descended from wheat. It has a mild, nutty flavor and, although it contains gluten, it has less than whole wheat or white flour. Substituting spelt flour for white flour may make baked goods more tolerable and enjoyable for people with gluten sensitivity. 

Spelt quick puff in progress

Spelt quick puff in progress

As usual, I compared various recipes for classic puff, reverse puff and quick or "rough-puff" versions. Generally the flour to butter ratio is close to 1:1 in puff recipes. The other ingredients are water and salt and, while those quantities vary a bit, the water can range from 0.3 to 0.5 of the flour by weight (it's generally lower in quick puff than in classic puff).

IMG_2428.JPG

The process with quick or rough puff pastry is simply to cube up the butter, "sand" it into the flour and salt, add the water and then turn it out onto a work surface to form it into a rough, crumbly rectangle. It eliminates the steps required in classic puff pastry of creating the butter block and enveloping it in the dètrempe before proceeding with the folds.

You put the crumbly rectangle through three 3-folds, during which it starts becoming a cohesive dough. Let it rest wrapped in the fridge for 30 minutes or so and repeat three more 3-folds. Give it an hour rest in the fridge and you're ready to go.

My plan was to make a half recipe and analyze the result. I went with a version using a higher ratio of butter to flour, along with a little less water than a classic puff.

My half recipe called for 320 g cold unsalted butter, 140 g all purpose flour, 145 g spelt flour, 1 teaspoon salt and 120 ml cold water. So, as a conscientious pastry chef will do, I weighed everything out, cubed up my butter and prepared to make my dough.

Into the mixer bowl go the flours, salt and cubed butter which are mixed until the butter begins to break up into smaller pieces. Add the water and mix briefly to incorporate with a resulting crumbly concoction.

OH NO!! Too much water. In my attempts at weighing precision, I neglected to reduce the water in the full recipe by half and in went the FULL amount. As soon as I added it, I realized what I had done. What was supposed to be a crumbly mixture was wet indeed. What to do? Regroup, of course.

I weighed out an additional 140 g all purpose and 145 g spelt flour, blended it in to my wet mixture and turned out the now crumbly dough onto my work surface, forming a rough rectangle. Essentially I moved up from my intended half recipe to a full one. 

I then cubed up another 320 g butter, started the first 3-fold, putting a portion of the butter on a third of my rectangle which I then enclosed by finishing the fold. Are you confused yet? 

speltquickpuff

After the first 3-fold was completed I distributed the remaining butter on top of it. 

IMG_2430.JPG

I pressed the butter into the dough then rolled it out and did my second 3-fold. I think this is going to work! Crumbly but OK.

fullsizeoutput_1a0.jpeg

You don't need to see every step, but, the good news is this dough came together very nicely with the ensuing folds. Amazing how dough can be transformed, isn't it?

IMG_2435.JPG

I divided the finished dough into three pieces, wrapped them well and popped them into the freezer until I was ready to give the quick spelt puff a try.

My first practice session with this dough involved chausson aux pommes and a simple blind baked tartlet shell, just to see how it would behave.

chausson
quickpuff
quickpuff

As you can see there's pretty good puffing going on here. The tartlet shell was really puffed up in the center, even though I pricked it all over with a fork and weighted it for most of the baking time. Once I removed the weights and finished the bake, it kept on a'puffing! What you see above is after I had pushed down the center layers to make room for a filling.

Although the chausson puffed up very nicely, I do have to admit that chausson made with reverse puff bake up oh so loverly, as the Brits would say. Witness that very thing in the photo below.

Isn't that just beautiful??

Isn't that just beautiful??

I truly enjoyed the flavor of the quick spelt puff - a bit more nutty and wheat-y than puff made with traditional all purpose flour. It's all about experimenting, eh?

The bottom line? Making mistakes is a great way to learn, and weighing ingredients is very helpful when having to correct those mistakes. Yes indeedy.

Quick puff is fun to make and has a very useful place in the pastry kitchen, particularly for things like tarts (both sweet and savory), quiches, turnovers and even cheese straws and palmiers. Go for it!

Here's the basic quick puff recipe (the FULL one!).

640 g cold, unsalted butter in 1/2 inch cubes
280 g all purpose flour
290 g spelt flour
2 teaspoons salt
240 ml cold water

1. Place the flours and salt in the bowl of a stand mixer with the paddle attachement
2. Add the butter and mix on low speed until the butter is coated and starting to break up into smaller pieces
3. Add the water and mix briefly to incorporate. The dough will be crumbly.
4. Turn the dough out onto a lightly floured work surface and form into a rectangle about an inch thick.
5. Use that wonderful bench scraper of yours to assist in performing a three-fold. Turn the dough 90 degrees and press it again into a one inch thick rectangle. Do another three fold, then repeat the steps one more time, giving you a dough with 3 three folds. As you go, it should start holding together more and more.
6. Wrap the dough in plastic wrap and chill for an hour.
7.  Now with the help of your favorite rolling pin, roll the dough into a rectangle about 1/2" thick, do a three-fold, turn 90 degrees and repeat another one. Turn 90 degrees again and do the last three-fold. You'll now have a finished dough with a total of 6 three-folds.
8. Wrap in plastic wrap and chill an hour before using. You may also wrap and freeze it for later use.

Now get into that kitchen of yours and play!

IMG_2456.JPG


Nutty apricot tea cakes

apricotcake

Some of you may realize by now that I'm always reading baking and pastry books and lately have been thinking of ways to increase my use of nuts, seeds and whole grains in my baking endeavors. Often my projects come about as a way of using up ingredients I happen to have in my fridge or cupboard. What's not to like about that, eh?

This time I was intent on some apricot purée that's been in my freezer for a few months - time to make something tasty! And, to top it off, I had some buttermilk in the fridge that simply HAD to go into something hearty, healthy and delicious.

apricotteacake

This is my take on a pretty basic tea cake recipe that turns out deliciously moist with a bit of crunch from nuts and pumpkin seeds. It actually reminds me of both date nut and Boston brown bread that we used to eat when we were kids - hard to describe the fruity side of those, but if you've eaten those particular goodies, you know what I'm talkin 'bout.

For this project I used both whole wheat pastry and all purpose flours, along with some of my favorite spices, coriander and ginger, plus a dash of cinnamon. I generally tone down or don't use cinnamon at all in my baking, since the Steve-meister holds an odd aversion to that particular spice.

It's a straight forward cake process - whisk together the dry ingredients in a separate bowl, cream the butter and sugars, add the fruit puree, add the eggs, then alternate the addition of the dry ingredients and buttermilk. Pretty basic. With this one, some of the chopped walnuts, pecans and pumpkin seeds are added to the dry ingredients and a small portion are set aside for garnish before baking.

Two of my favorite straight-sided Silikomart flexi-molds were given the honor for the baking process - one smaller/taller and one wider/shorter - both muffin style and shapes I find just so right for tea cakes.

Ready for the oven

Ready for the oven

All baked up

All baked up

These babies baked up moist and dense from the presence of the apricot purée, and the nuts and pumpkin seeds added just the right crunch.

nuttyapricot

Here's the recipe which makes two 9"x5" loaves or many small cakes, depending on the size mold you choose. Ingredients coming right up!

  • Approximately 45 g (1/2 cup) each walnuts and pecans (or choose your own nuts)

  • 85 g (scant 3/4 cup) pumpkin seeds

  • 290 g (2 1/4 cup) all purpose flour

  • 150 g (1 1/4 cup) whole wheat pastry flour

  • 2 teaspoons baking soda

  • 2 teaspoons baking powder

  • 1 1/2 teaspoons salt

  • 1 teaspoon ground coriander

  • 1/4 teaspoon ground ginger

  • several fresh grates of nutmeg (you decide - I prefer my nutmeg on the subtle side)

  • a pinch of cinnamon (or more to your taste)

  • 227 g (8 ounces) unsalted butter, room temperature

  • 185 g (scant well packed cup) brown sugar (I used light but try dark if you'd prefer)

  • 200 g (1 cup) granulated sugar

  • Approximately 350 g (~12 ounces) apricot puree (or try pear or pumpkin!)

  • 4 large eggs, room temperature

  • 180 ml (3/4 cup) buttermilk, room temperature

1. Heat the oven to 350ºF.
2. Spread walnuts, pecans and pumpkin seeds on a sheet pan. Toast for about 10 minutes until fragrant. Once cooled, do a medium-fine chop.
3. Reduce the oven to 325ºF. Have your silicone molds at the ready (no buttering necessary), or, if using two 9"x5" loaf pans, butter and flour them.
4. In a separate bowl whisk together the two flours, baking soda, baking powder, salt and spices.  Stir in the chopped nuts and seeds but reserve a few tablespoons for garnish.
5. In the bowl of a stand mixer fitted with the paddle attachment, combine butter and sugars and mix on medium high until will blended. Scrape down the sides of the bowl.
6. Add apricot purée and mix for a couple of minutes until incorporated. Add in eggs, one at a time, mixing each until blended before adding the next.
7. Now add the flour/spice mixture alternating with buttermilk, beginning and ending with the flour. Mix until just combined and finish off by hand with a spatula.
8. Pour the batter into your chosen molds or pans, smooth tops, sprinkle reserved nuts/seeds on top and pop into the oven.
9. Bake small cakes around 20 minutes - remember - it's your job to keep an eye on things! You're looking for a tester inserted in the center to come out clean. Large loaves bake 50-60 minutes.
10. Let your cakes cool on a wire rack for 15-20 minutes before unmolding, then let cool completely before storing in an airtight container. These will keep at room temp for several days, or wrap and freeze them for up to two months.

Enjoy!

nuttyapricot

Cran-oat-almond shortbread

Before we jump in, don't forget to check out this month's specialties - Valentine's goodies and my favorite chocolate ganache tart!

cranoat

Recently inspired by Yotam Ottolenghi and Helen Goh's book "Sweet", I put together these absolutely wonderful shortbread cookies (or biscuits as the Brits would say) full of cranberries, oats and almonds. You can choose whether you'd like a white chocolate garnish or prefer them au naturel. Either way they are SO GOOD.

cranoat

Some of the ingredients require a bit of prep before putting the final dough together - chop cranberries and soak them in OJ; toast, cool and chop almonds; have butter at room temp - that kind of stuff. Simple but requires some planning on your part. It comes back to that important and well worn advice - always read the recipe through at least twice before you begin.

cranoat

I tweaked the recipe, which calls for both all purpose and whole wheat flour, to create my own version using white whole wheat flour and whole wheat pastry flour. As I continue to experiment with different whole grain flours, it's fun to learn about the various nuances of each.

White whole wheat flour is ground from hard white whole wheat, whereas whole wheat pastry flour comes from whole grain soft white wheat. Each contains all the nutrients that come from the whole grain, including the outer bran full of fiber, B vitamins and trace minerals and the small central germ containing antioxidants, vitamin E, B vitamins and healthy fats.

Whole wheat pastry flour is softer and thus lends itself well to things like scones, biscuits, flaky pie and tart crusts and fluffy pancakes. I'll be playing around with different combos and variations as time goes on. Cool. Always so much to learn.

cranoat

Now for my version of the recipe and many thanks to Yotam and Helen!

1. Heat your oven to 350ºF. Have a couple of 1/2 sheet pans lined with parchment at the ready.
2. Chop 125 g dried cranberries in half (unless they're already chopped), place them in a microwave safe bowl in 25 ml of orange juice and zap for about 10 seconds. Let them soak while you're getting other things ready. 
3. Place 150 g natural raw skin-on almonds on a baking sheet and toast for 10 minutes. Let cool, rough chop and place in a large bowl.
4. Add 175 g white whole wheat flour, 50 g whole wheat pastry flour, 150 g old fashioned oats and 1/4 teaspoon salt to the bowl with the almonds. Set aside.
5. Put 227 g room temperature unsalted butter, 100 g granulated sugar into which you've rubbed the zest of one or two large oranges (use two for that extra citrus zip!) into a mixer bowl with the paddle attachment. Beat on medium about 2 minutes until blended and light.
6. Add the nut-oat-flour mixture and beat on low to bring it together.
7. Add in the cranberries along with the orange juice and combine on low to mix in.
8. Turn the dough out onto a lightly floured work surface, bring it into a ball and divide in half. Roll each half to about 1/4 thick. I find it works well, particularly with a slightly sticky dough, to roll between two pieces of film wrap - keeps things neat!
9. Chill the dough for an hour or so before cutting out. Choose whatever shape and size you'd like, cut and place on the parchment lined sheets. As you can see I tried some different versions.
10. Bake about 18 minutes until lightly browned. Cool completely.

cranoat

If you choose to garnish your cookies with white chocolate, either drizzled, edge-dipped or spread in a layer, I found it worked best for me to microwave my Guittard wafers at half power for 30-45 second bursts, stirring until melted. My results are rustic for sure, but I. LOVE. THESE. COOKIES.

cranoat

Multi-grains and seeds bread

multigrain

It's the new year and wouldn't you know it's time to bake bread again? The wonderful news is that Steve and I just purchased our tickets to Paris for April!! Yippee yo-kiyay my friends. And to top it off I've signed up for a 4 day bread class at Le Cordon Bleu, my alma mater. Yessirree.

This bread is chock full of seeds, grains, cranberries and walnuts and is thanks to a recipe on King Arthur Flour's website. As I continue to focus on adding more whole grains into my baking, I often turn to KAF for suggestions and products. Thus I am now the proud owner of a couple of their different grain blends. 

One is a whole grain flour blend containing all sorts of goodies.

wholegrain

Here's a closer look at the ingredients. What's not to like, eh?

flourblend

The other is their Harvest Grain Blend full of good stuff.

harvestgrain
harvestgrain

The recipe makes two typical loaves, baked in standard loaf pans. It has a fair amount of molasses in it, giving it a dark, hearty appearance.

wholegrain

I made some adjustments in the recipe to tailor it to the ingredients I had on hand. It's a straight forward direct dough method of mixing, rising, etc.

Once everything is mixed together, the dough can be kneaded either by hand or in a stand mixer with the dough hook for 7-10 minutes to achieve a springy yet sticky dough. This step is always the most challenging for me - knowing just when a wet/sticky dough is at the right stage. Gotta just keep on doing it over and over and over!

The dough goes into a lightly oiled bowl, covered, and allowed to rise for a couple of hours "until noticeably expanded". Recognizing THAT stage is another step that comes with lots of practice!

Before the first rise

Before the first rise

I hope you can appreciate the expansion of the dough - it may be subtle, but not as much of the bowl is visible now.

After the first rise

After the first rise

Deflate the dough, divide and shape into two logs. Place them in lightly oiled loaf pans.

multigrain

Cover the pans and let rise 1-2 hours until the center of the loaves is about an inch above the rim of the pans. I'd say these babies have poofed up nicely.

multigrain

Toward the end of the second rise, heat your oven to 350ºF. Bake 40-50 minutes, tenting with foil about half way through to prevent over browning (it's that molasses, don't ya know!). The internal temperature should be 200ºF.

Take the loaves out of the oven and turn them out of the pans onto a cooling rack.

multigrain

Waiting for freshly baked bread to cool is sooooo hard! But wait I did. I enjoyed my first slice just plain . . . .

multigrain

 but the second received a well deserved thin layer of butter. Yum.

multigrain

And a nice slice of cheddar cheese ain't bad either.

This is definitely worth a repeat. I gave a loaf to friend Margaret for her birthday and we both agreed that the molasses was a bit over the top. Buuuuuttt . . .  otherwise it's a hearty, crunchy, full of goodness loaf. Next time I'll replace a portion of the molasses with honey and see where it takes me. The adventure is always good.

Here's my version of the recipe.

1. Whisk together 454 g tepid water, 1 large egg and 170 g molasses in a large bowl (your stand mixer bowl if kneading that way).
2. Add 16 g Kosher salt, 13 g instant yeast, 113 g softened butter, 142 g Harvest Grains Blend and 340 g Whole Grain Flour Blend. Stir to combine.
3. Stir in 113 g finely chopped walnuts and 128 g dried cranberries. Add 454 g bread flour and mix until it comes together.
4. Knead for 7-10 minutes until springy but still quite sticky.
5. Place dough in a lightly oiled bowl, cover and let rise about 2 hours until noticeably expanded.
6. Deflate the dough, divide in two and shape each half into a log. Place each log in a lightly oiled pan.
7. Cover and let rise 1-2 hours until the center of the dough has risen about 1" above the pan rim.
8. Heat oven to 350ºF. Bake for 40-50 minutes, tenting with foil about half way through. The internal temperature should be 200ºF.
9. Remove the loaves from the oven, turn out of the pans onto a cooling rack.
10. Let cool , slice and enjoy!


Hazelnut dacquoise tarte

hazelmeringue

This little project came about as a way of creating a dessert for another recent family dinner at cousin Jen's house. Steve, as usual, requested something with chocolate, and since I wanted to keep it on the lighter side, I decided on a nutty meringue base (known as dacquoise) as the launch for what was to come. Cue in chocolate ganache, chocolate crunchy crumbs and fresh berries. Not a bad way to go.

I used my rectangular tart form to outline the shape in which I wanted to pipe my meringue. The pics below give you a nifty technique with which to create the area you'd like to fill.

Place your desired form/shape on your lined sheet pan (I'm using silpat here since it's my fave for baking meringues), dust around the edges with powdered sugar . . . 

tartform

then simply lift off the form and your outline is staring you right in the face. How cool is that?!

tartform

Now pipe away!! The powdered sugar won't hurt a thing since the meringue receives a dusting anyway before going in the oven.

All piped out

All piped out

The meringue bakes at 350ºF for about 20 minutes until nicely browned.

dacq

The beauty of meringue is its make-ahead-ability. Do it several days ahead and freeze it or, if doing it the day before, just lightly wrap it at room temperature until you're ready for the next step.

Time to assemble. For this one I poured a thin layer of a standard 1:1 ganache made with 61% Guittard chocolate over the base, inside the raised edge. I let it set a bit.

dacq

Then a light layer of chocolate shortbread crunchy crumbs . . .

dacq

and to finish off a whipped chocolate ganache made with the same Guittard chocolate in a 3:1 cream to chocolate ratio, more crunchies and some lovely fresh berries.

hazelmeringue

And just to show you another version, here's a small round base I made with the same hazelnut meringue. This one got a sprinkle of chopped hazelnuts too. Create your own and top it with whatever your little heart desires!

dacq

Here's the PDF of the recipe for the hazelnut meringue, also listed below. It makes just the right amount to create both the 11"x4" rectangle and the 6"-ish/16 cm round forms you see here. Play around with your own shapes and sizes.

  • 198 g egg whites (about 6 large) at room temperature

  • 50 g cane sugar (many use superfine sugar for meringues - sometimes I do, sometimes I don't)

  • 198 g hazelnut flour or meal

  • 150 g powdered sugar

  1. Heat the oven to 350ºF (or 325º convection)

  2. Whisk the hazelnut flour and powdered sugar together in a medium bowl.

  3. Place the egg whites in the bowl of a stand mixer fitted with the whisk attachment. Whisk on low for several minutes until a nice foam starts developing, then shower in the granulated sugar on medium-low speed until it's all added.

  4. Up the speed to high and whisk to medium stiff peaks.

  5. Fold in half of the hazelnut mixture, then add the second half and fold until nicely combined.

  6. Pipe or spread your meringue in the shape of your choice.

  7. Bake about 20 minutes until nicely browned. Pay attention to what's going on in that oven!!

Once your base is cool proceed with your choice of filling. The sky's the limit. And remember you can sub in pretty much any nut flour for the hazelnut in the meringue recipe. Even do half-and-half of two different nuts. Yes!

Here are just a few filling ideas: a simple lightly sweetened Chantilly cream topped with fresh berries; a tangy citrus curd lightened with whipped cream and topped with tropical fruits and maybe even a little toasted coconut; any whipped ganache using white, milk or dark chocolate topped with your own version of shortbread crumbs - how about chai or ginger - and your favorite nut, seed or sesame brittle; a standard pastry cream topped with lightly poached pear slices, some candied nuts and a drizzle of caramel.

It's up to you!

Looking back, looking ahead

Shortbread assortment

Shortbread assortment

As 2017 comes to a close, it's always fun to look back over the year and remember some of the goodies that came out of The French Tarte's kitchen.

As we contemplate the new year ahead, here are a few images for you, some from posts actually written and some from just playing around in the kitchen, trying a new thing or two.

Enjoy and Happy New Year!

Beer bread

Beer bread

Apricot croissant bites

Apricot croissant bites

Matcha raspberry hearts

Matcha raspberry hearts

Chocolate pecan babka

Chocolate pecan babka

Ganache brownie bites

Ganache brownie bites

Cherry blueberry yogurt cake

Cherry blueberry yogurt cake

Cheesy asparagus tomato pizza 

Cheesy asparagus tomato pizza 

Classic dinner rolls

Classic dinner rolls

Peach blueberry galette

Peach blueberry galette

Ice cream quartet

Ice cream quartet

Peach apricot jalousie

Peach apricot jalousie

Petite almond croissant

Petite almond croissant

Caramel pear apple tart

Caramel pear apple tart

Autumn shortbread gift boxes

Autumn shortbread gift boxes

Chocolate cherry pecan clusters

Chocolate cherry pecan clusters

Cheesy knot rolls

Cheesy knot rolls

And last but not least, my latest in shortbread trials. Chock full of cran-chewy, almond-chunky, oat goodness with a lovely complement of subtle smooth white chocolate. I think I like these! 

Cranberry almond white chocolate shortbread

Cranberry almond white chocolate shortbread

Here's to a year of health, contentment, good times with family and friends and, of course many new adventures in baking. Cheers!

Buckwheat cranberry cake

buckwheatcrancake

These little babies came about as a result of a number of on-hand ingredients that helped bring the project together: a few packages of dried cranberries in the cupboard that were originally intended for another use; leftover dark and white chocolate ganaches from a couple of different projects; buckwheat flour on hand and a can of pumpkin purée on the shelf.

I know, I know. My Thanksgiving post was a pumpkin related theme but what the heck - let's do something just a little different.

I recently gave a presentation for OLLI (Osher Lifelong Learning Institute) at Aquinas College here in Grand Rapids on flours, grains and seeds. This only served to fuel my desire to bake more with healthier-for-you whole grains and flours, be they wheat/gluten based or gluten free. In this case buckwheat flour is the star (yes - it's gluten free) and gives these moist-with-hints-of-spice gems an earthy, not too sweet quality.

buckwheatcran

As I've mentioned in the past, I adore silicone flexi-molds for baking cakes. This time I used my individual 15-well canelé (sometimes spelled cannelé) mold - LOVE that shape. And it worked out quite nicely when it came time to do the ganache garnishing.

buckwheatcran
Bull's eye!

Bull's eye!

The recipe is my version of Alice Medrich's "dark and spicy pumpkin loaf" from her book Flavor Flours, of which I've become a huge fan. As the name implies, the base recipe is baked in a standard loaf pan, but, being a fan of les petits gâteaux, given the choice, I go small.

The recipe is straight forward and the batter very easy to put together.

  • Heat the oven to 350ºF. The flexi-molds need no preparation - COOL! Although if you decided to bake a loaf you should line the bottom and sides of an 8 1/2" x 4 1/2" loaf pan with parchment paper. 
  • Combine 113 g (1 stick) unsalted melted butter, 190 g (scant 1 cup) sugar and 2 large eggs in the bowl of a stand mixer fitted with the paddle attachment. Beat on medium about 2 minutes until lighter in color.
  • Add 120 g (3/4 cup) white rice flour, 40 g (1/3 cup) buckwheat flour, 1/2 teaspoon baking soda, 1 teaspoon baking powder, 1 teaspoon cinnamon, 1/2 teaspoon ground nutmeg, 1/4 teaspoon salt, 170g (3/4 cup) pumpkin purée and 70 g (1/2 cup) dried cranberries (or raisins or currants or what-have-you) and blend on low speed until smooth. I had considered also adding some chopped toasted pecans but I forgot!!
  • Scoop or pipe the batter into the flexi-molds, filling about 2/3 full.
  • Bake about 20 minutes (or 45-50 minutes if baking a loaf) until a tester inserted in the center comes out clean. Remember to pay attention to what's happening in your oven! Do I say that often?  Mais, oui!
  • Cool in the flexi-molds on a rack for a good 30 minutes (or two hours for a loaf) then gently un-mold.
  • Enjoy soon or, once cooled, freeze well wrapped and enjoy later. They'll also keep in the fridge well wrapped for about 5 days.

I opted to coat my cooled cakes with dark chocolate ganache. Once that had cooled a bit I filled the center with white chocolate ganache. Not bad, eh? Another option is to blend 4 oz  cream cheese (or mascarpone) with 1/4 cup Greek yogurt and 1 tablespoon honey and spread a schmear on your mini-cake or your slice if you've gone the loaf route. You decide.

buckwheatcran

I find these cakes very pleasing - a moist and tender crumb, hints of spice, nuggets of cranberry, rustic buckwheat, a sense of pumpkin without being overwhelming (although Steve, the pumpkin disliker, might argue that point) and a flavorful marriage of chocolates. I like 'em.